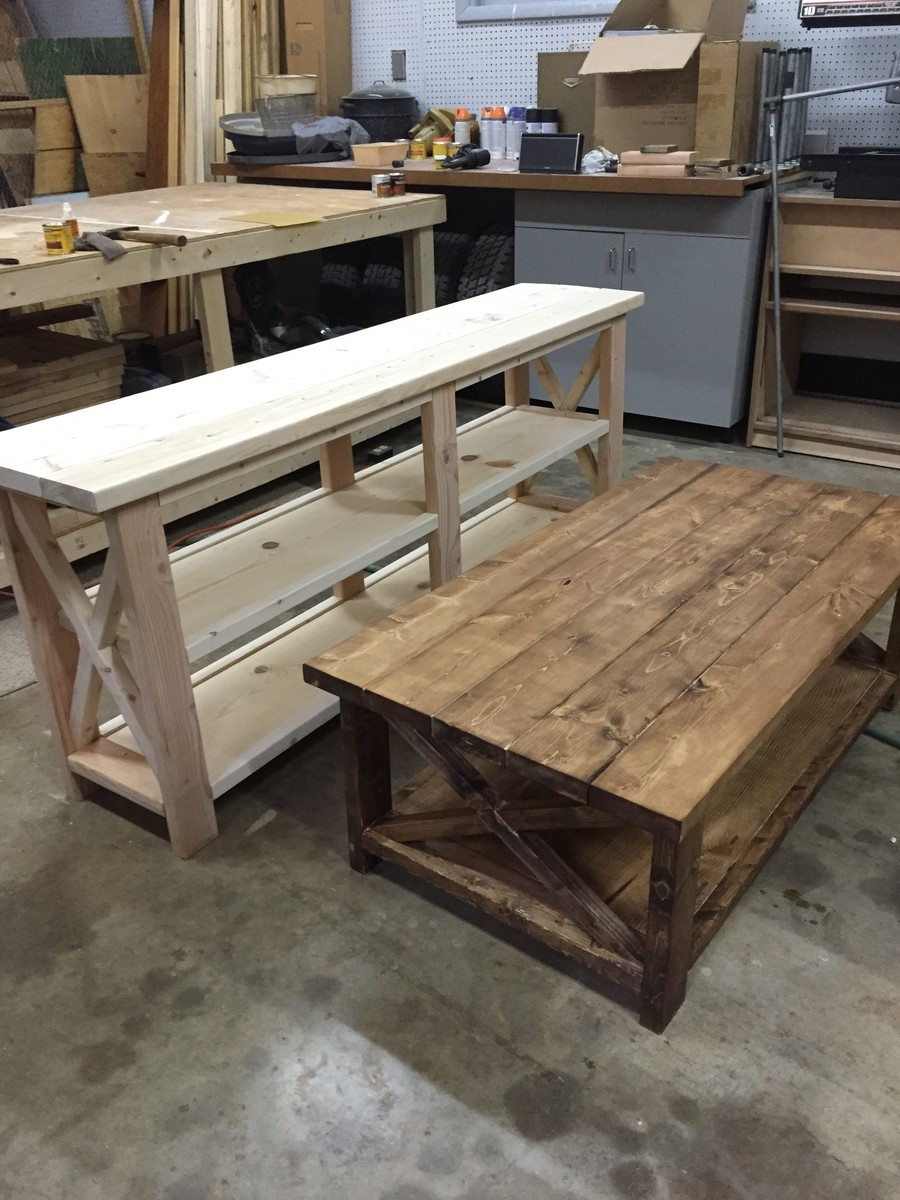
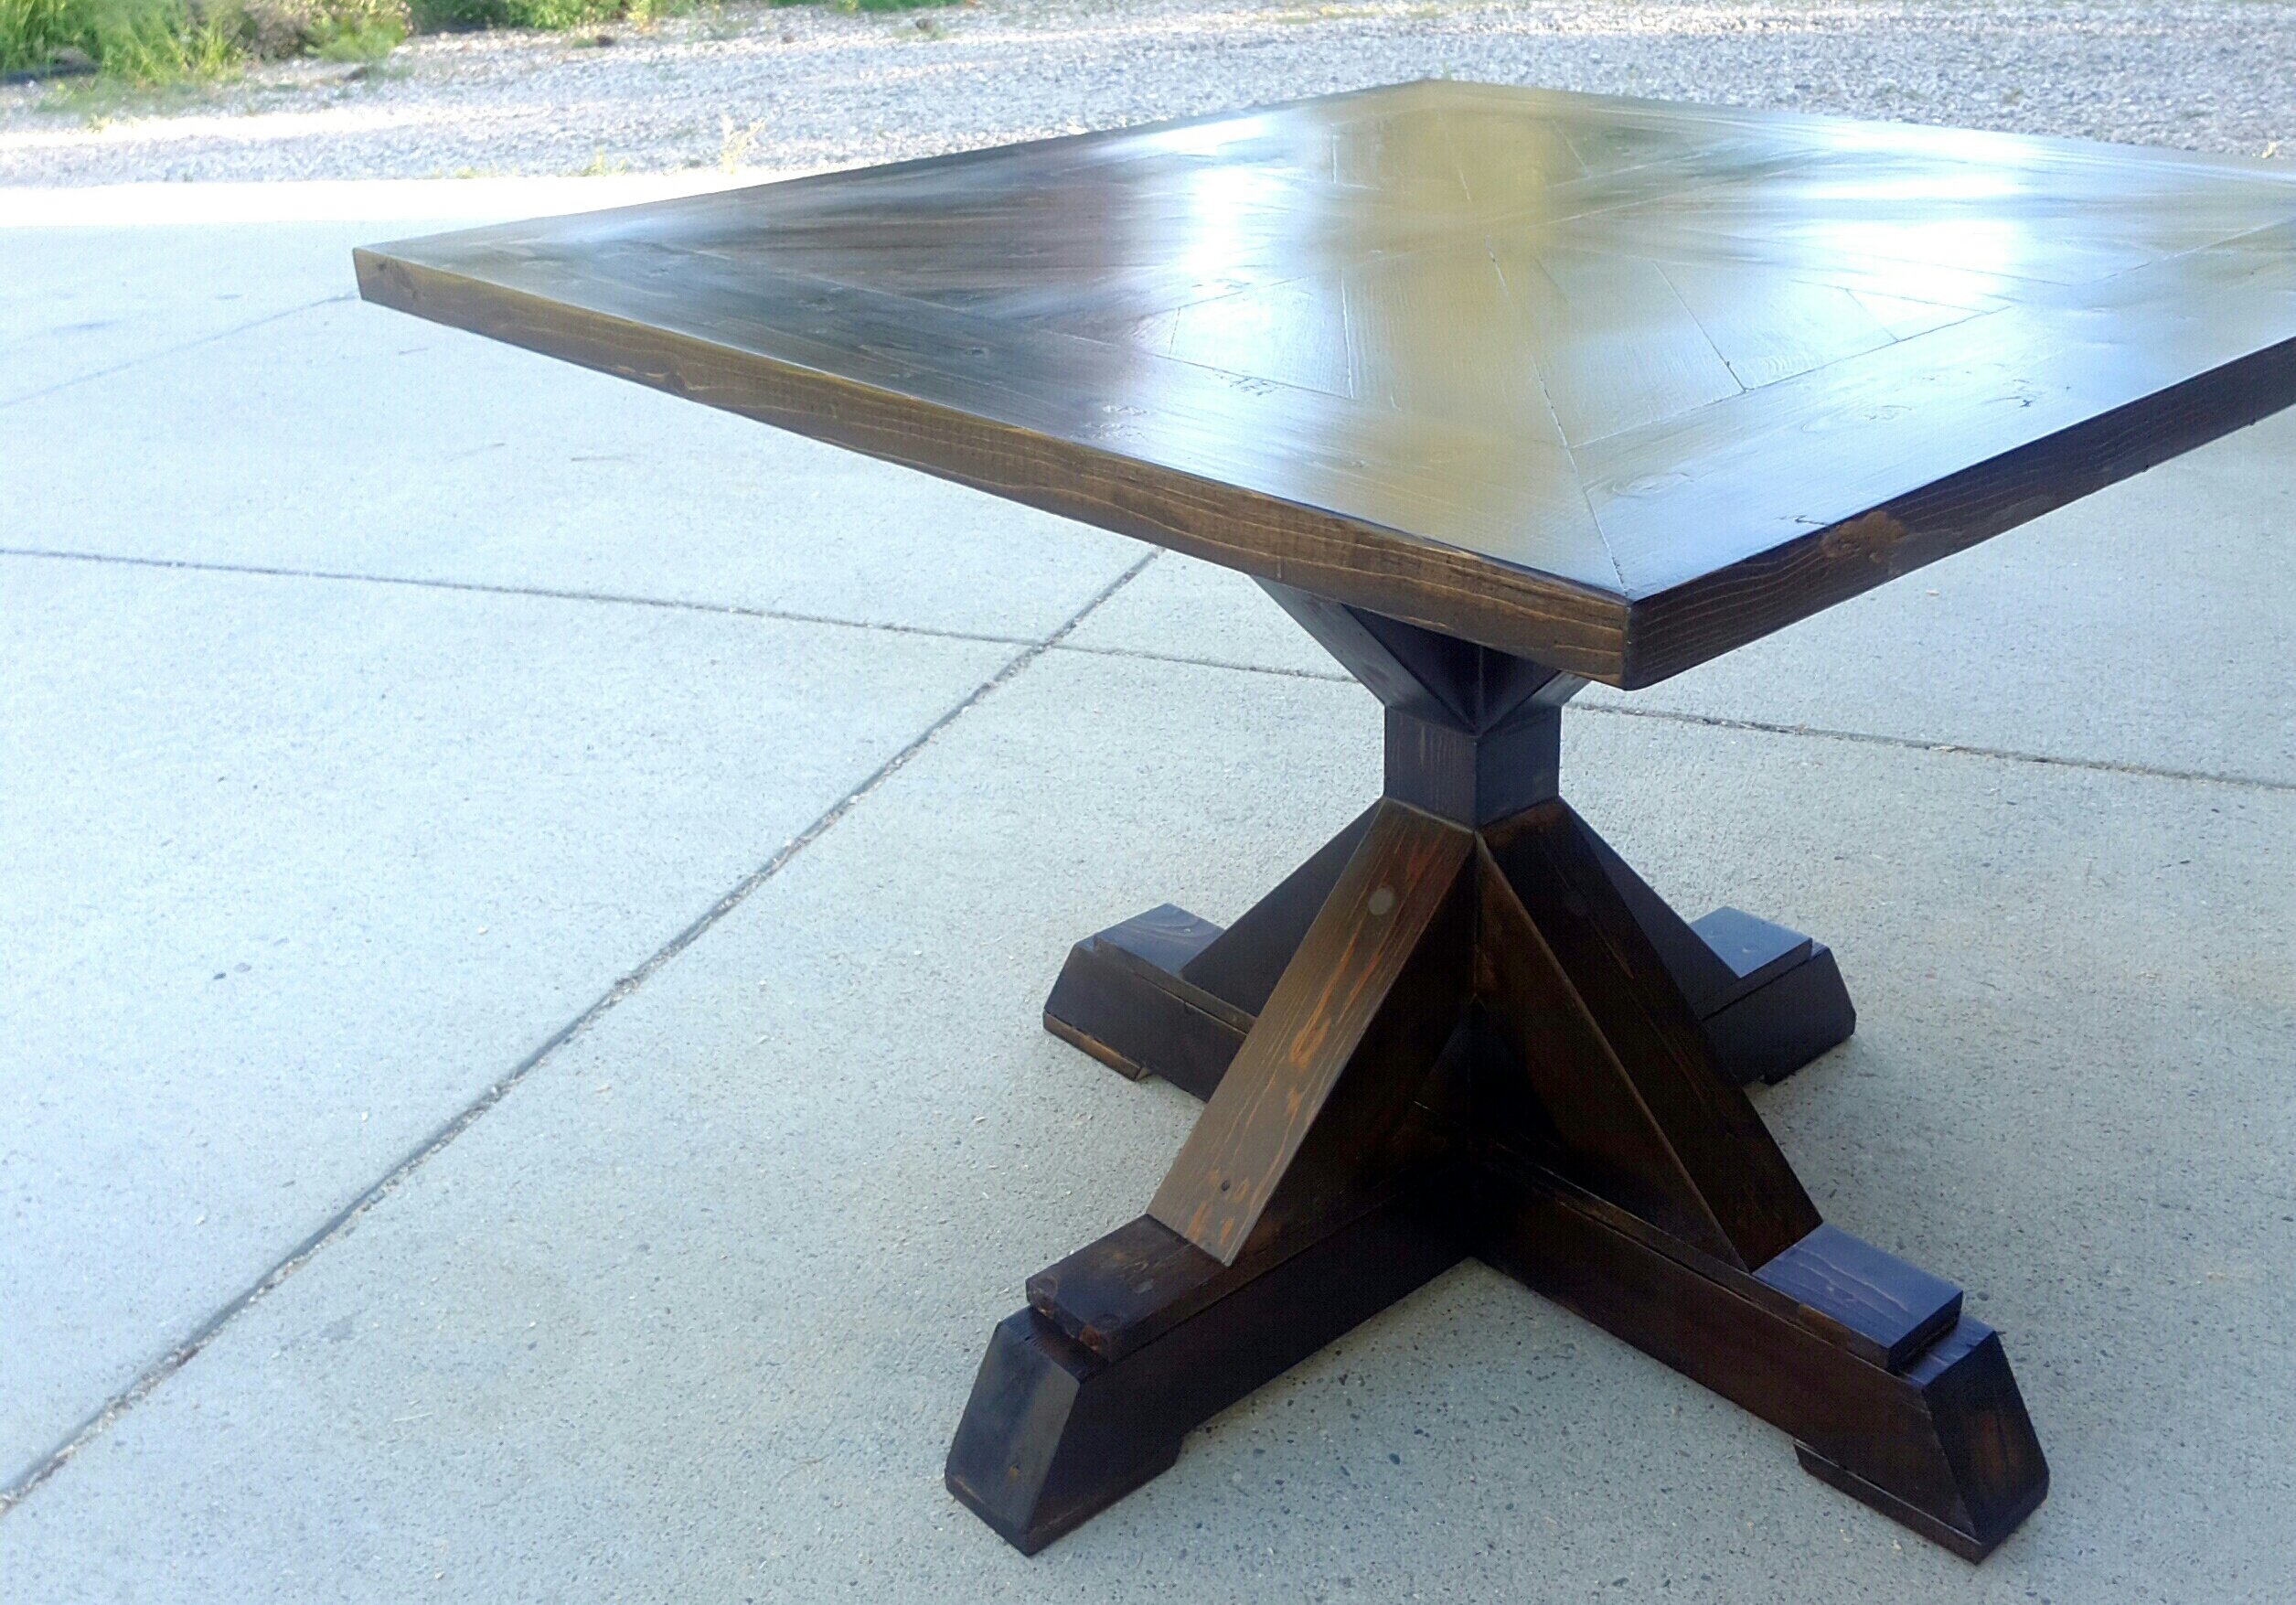
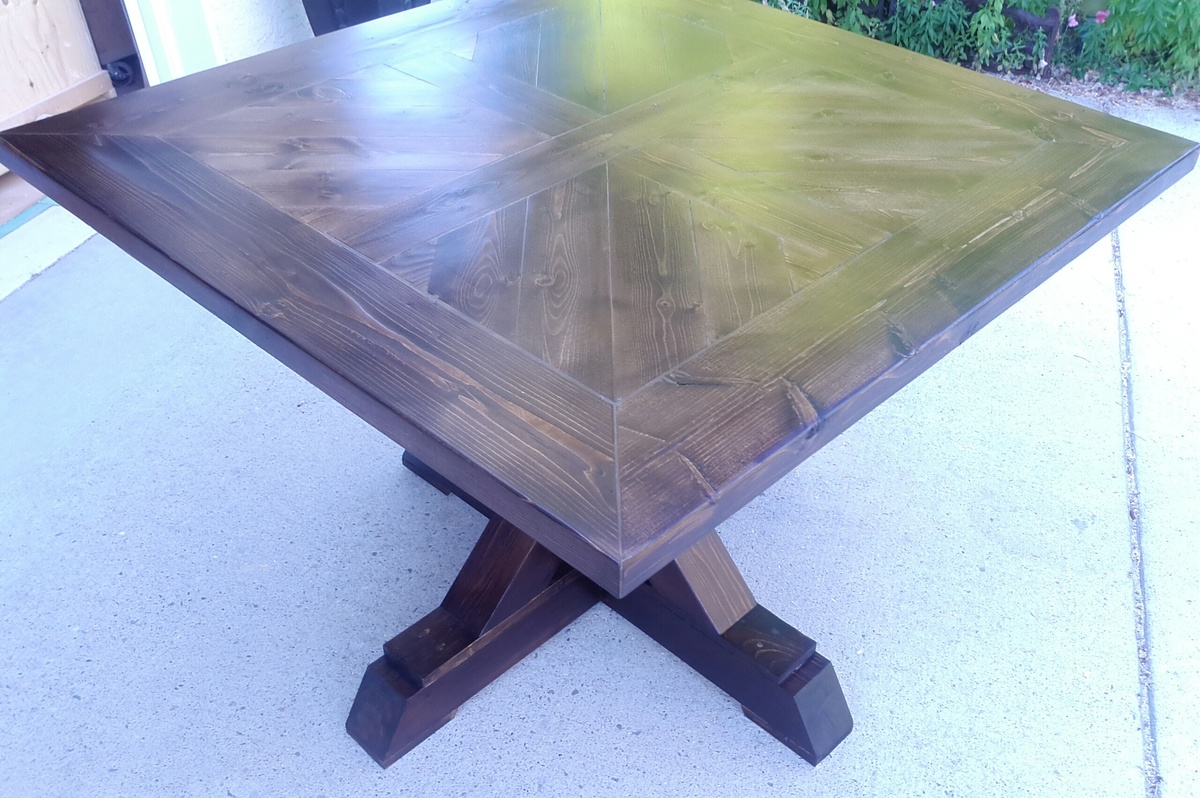
X console table and X coffee table
The plans were easy to follow and the results were great. These pieces are Christmas gifts for my sister
Built from Plan(s)
Recommended Skill Level
Beginner
The plans were easy to follow and the results were great. These pieces are Christmas gifts for my sister
Made out of spruce to keep the cost under fifty dollars.
This was my first AW Buid and I loved it! I am a beginner and the video was so easy to follow. The only thing I needed (and still need) is how to do the off cut angles. I've made several since this one. Love the modern design too. Thank you Ana!
Mik da Builder
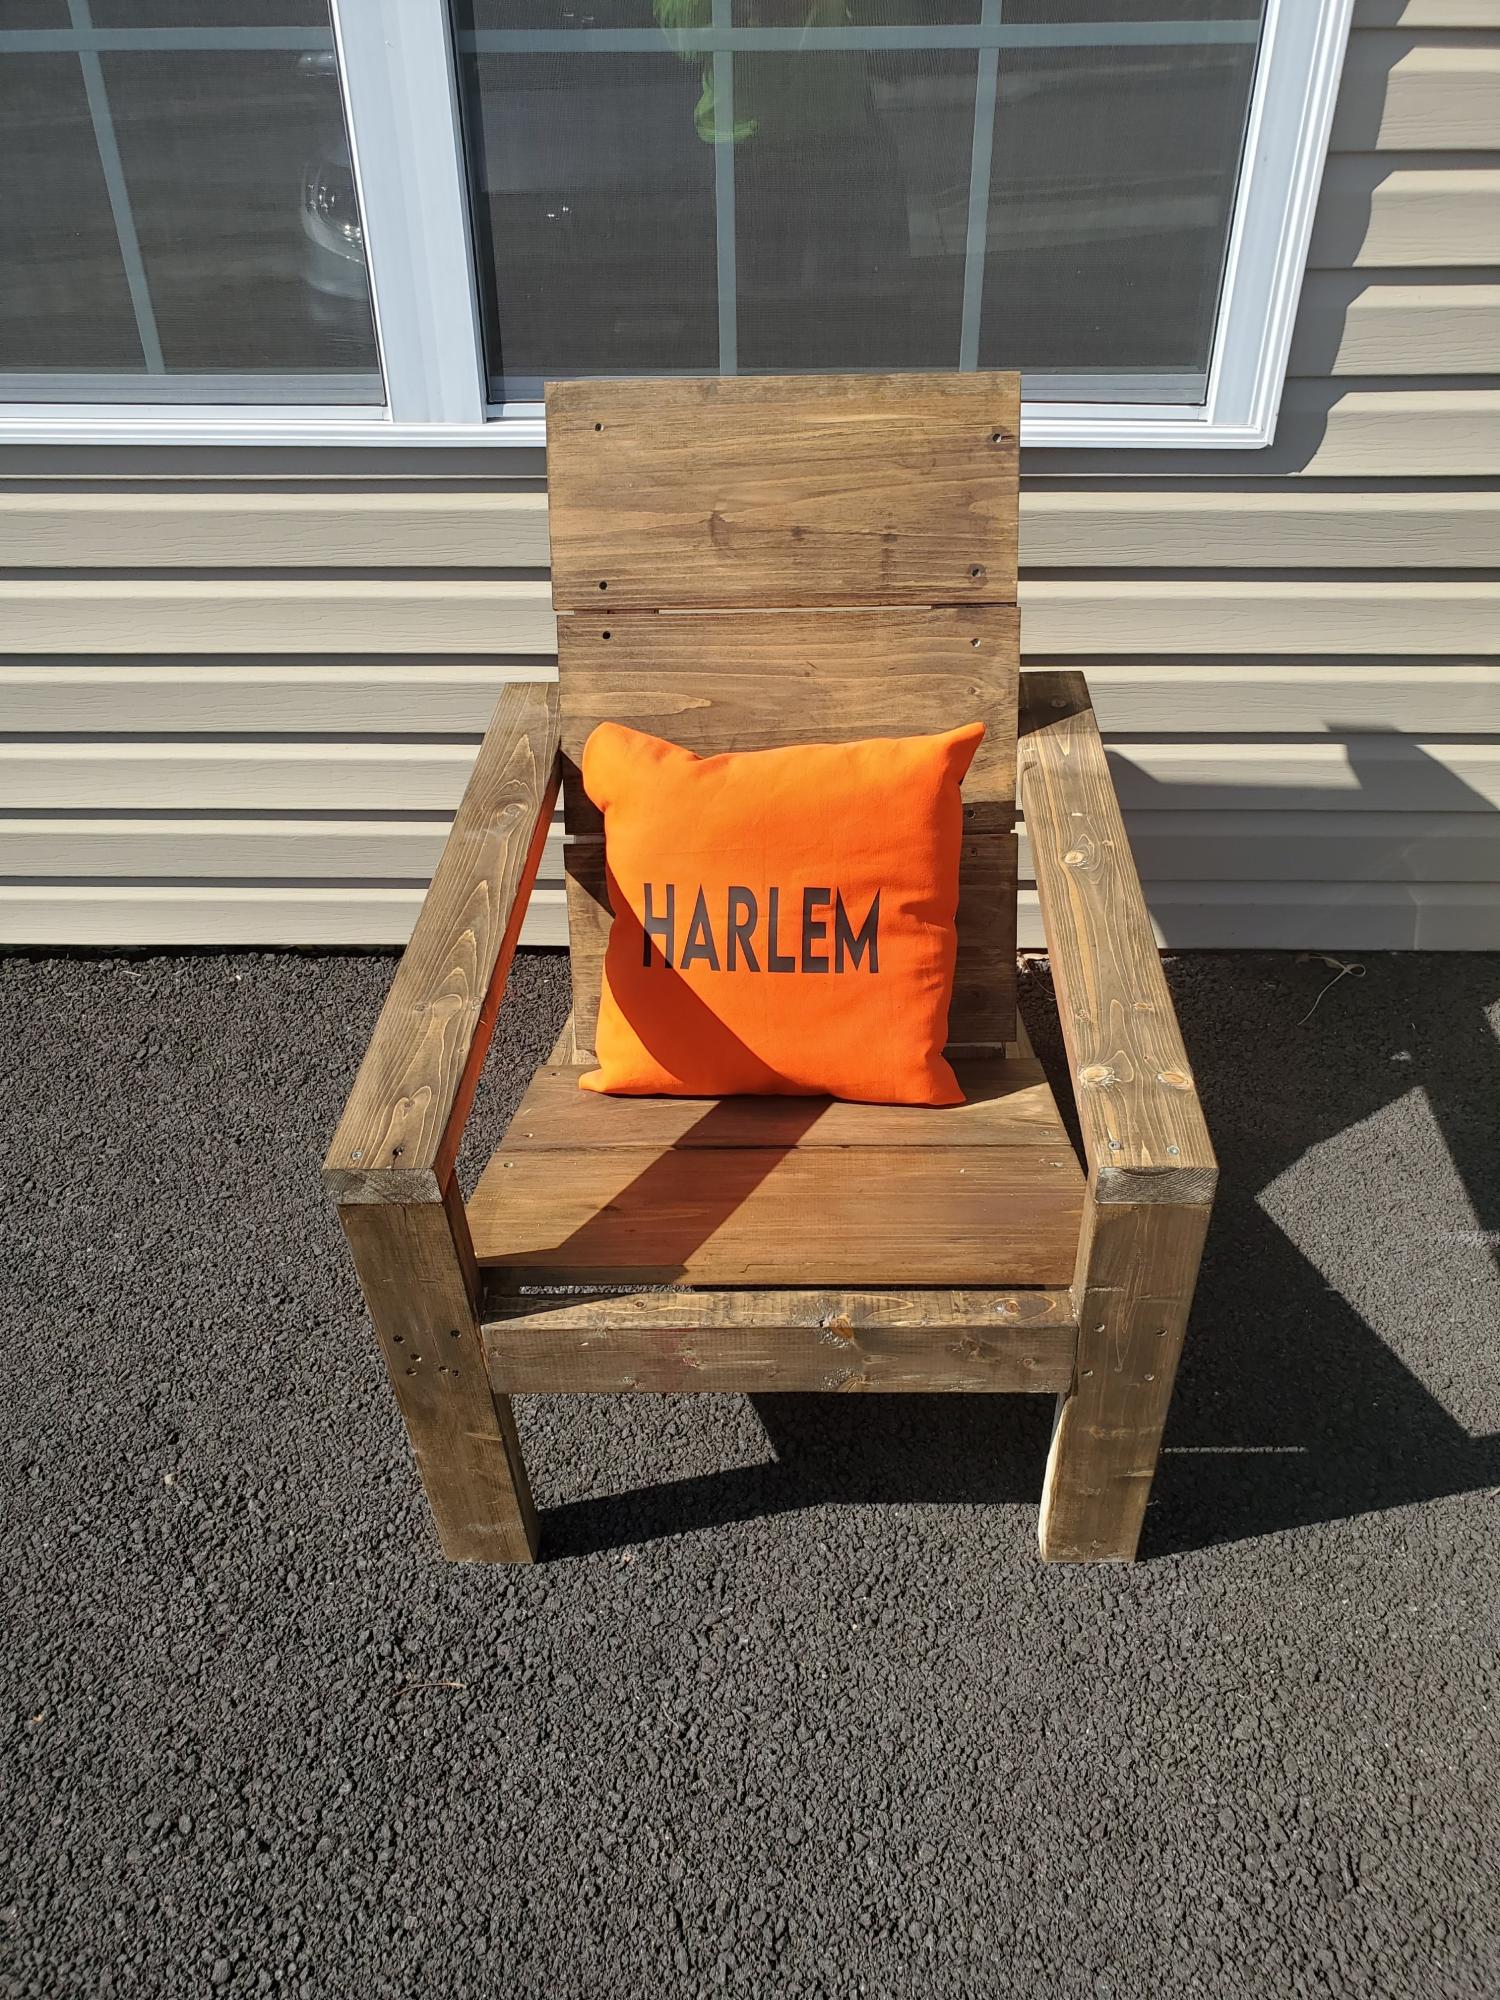
@harlemcrafted

Thu, 04/21/2022 - 12:01
Thank you so much for sending in a photo! I'm so glad to hear the chair plans worked out well for you. This is one of our most favorite chairs too!

First Project. Finished it all except the hardware just in time for my Mother-in-laws birthday party. Pictures are from my phone decorated for the party w/o the hardware, and then after, finally complete with the hardware.
Thu, 06/23/2011 - 11:34
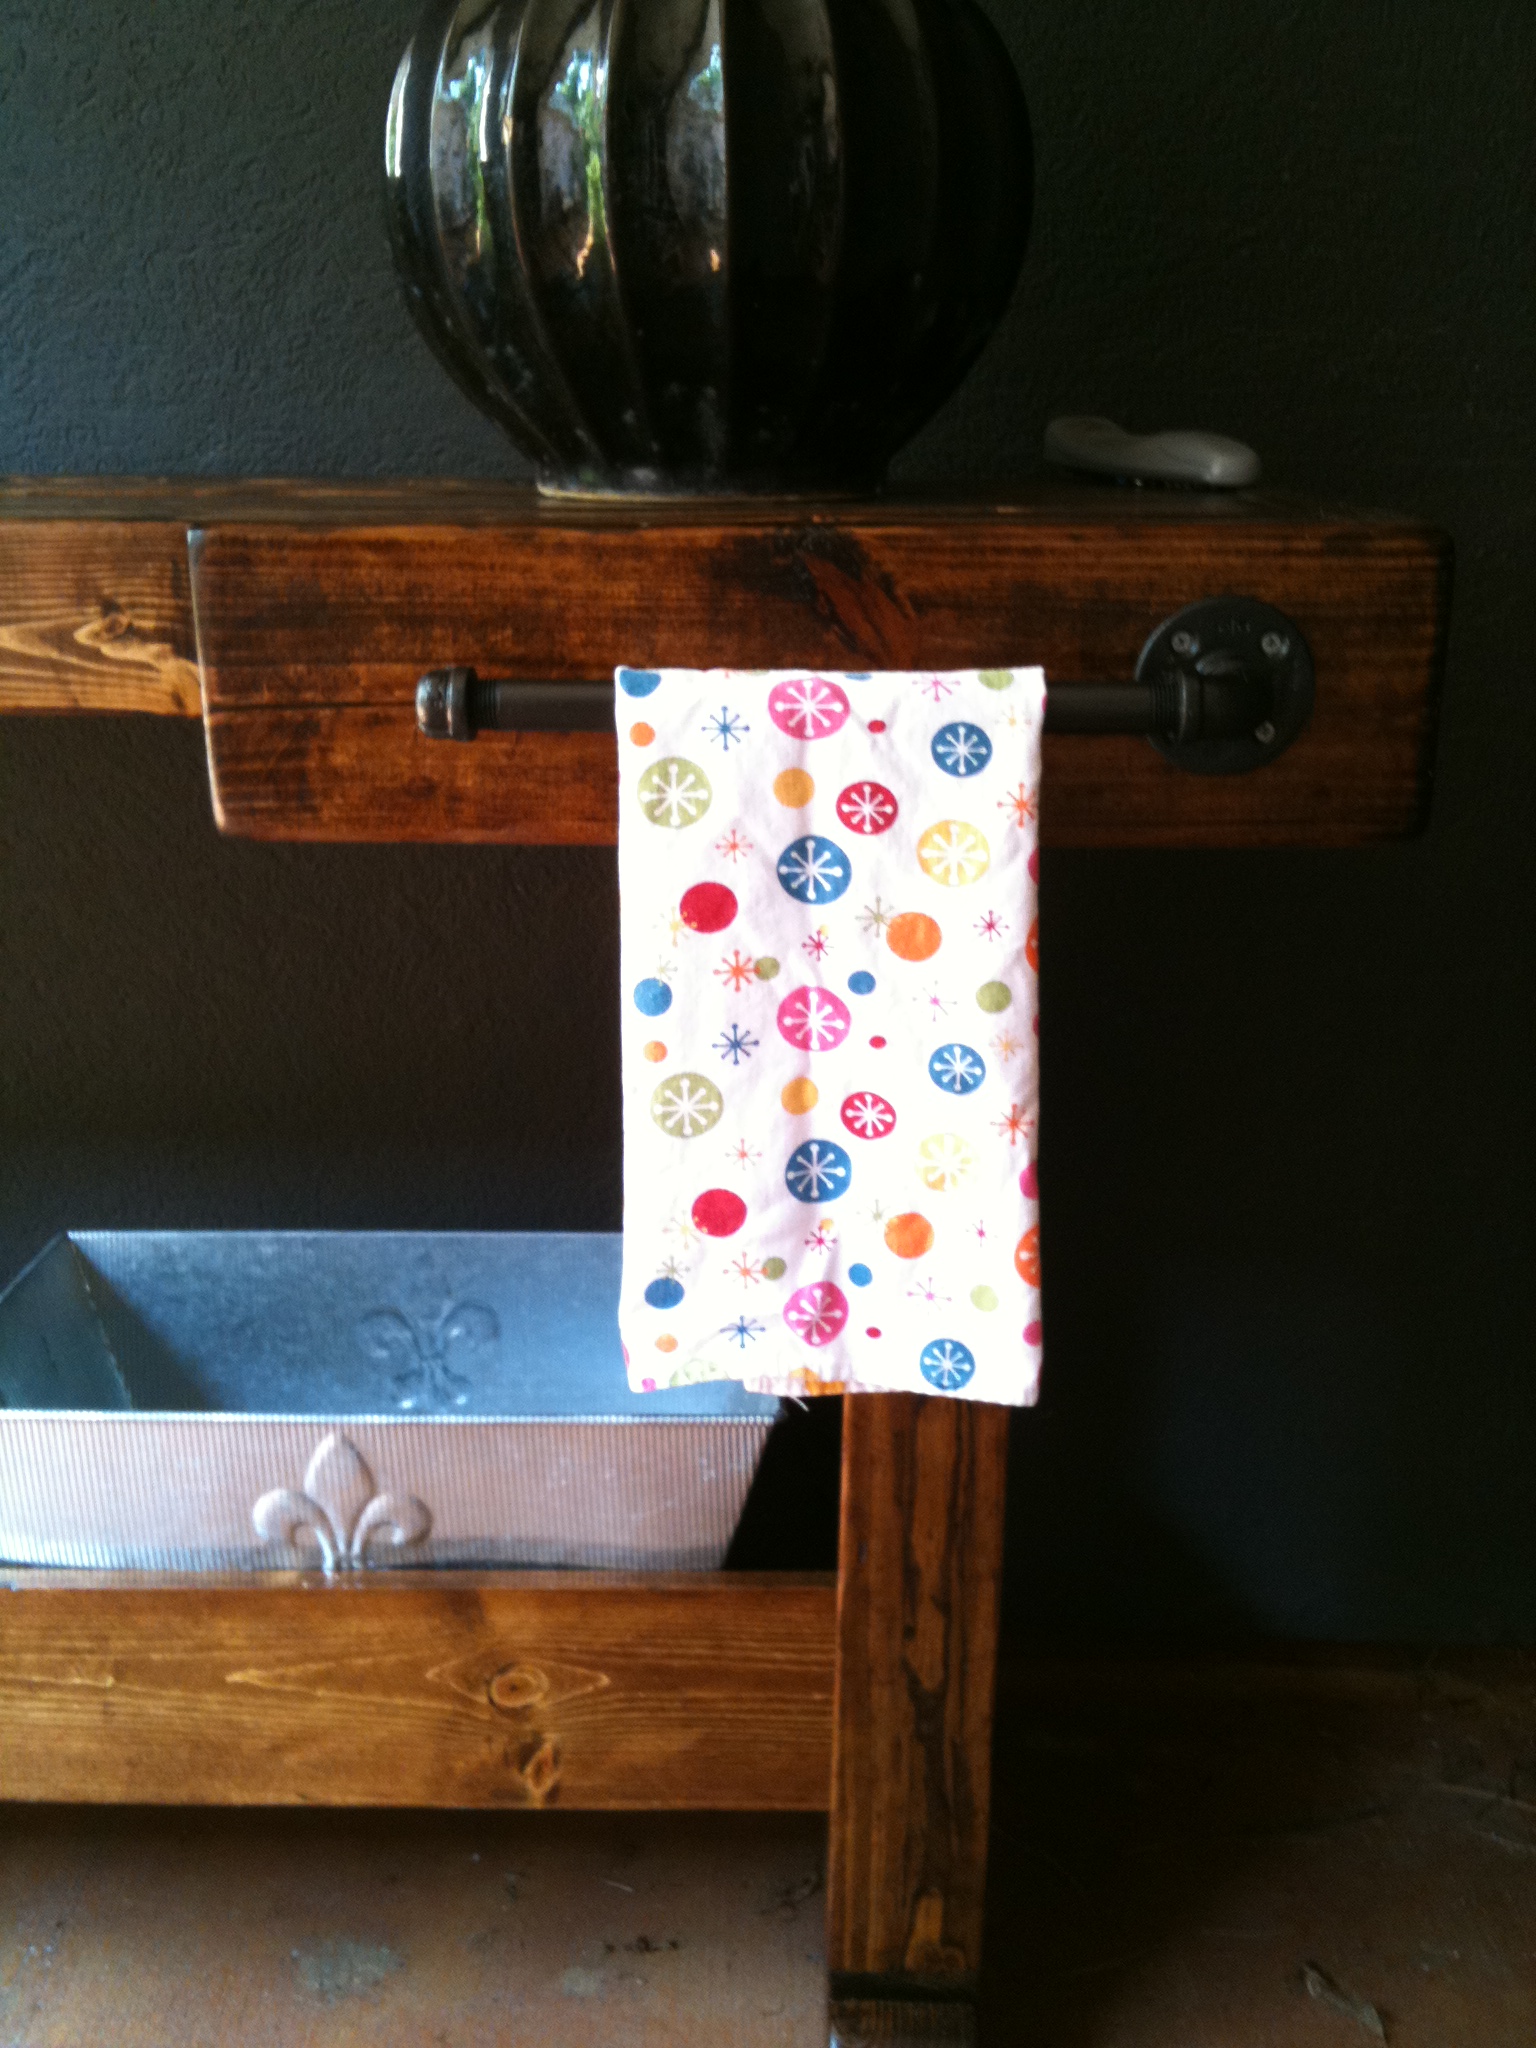
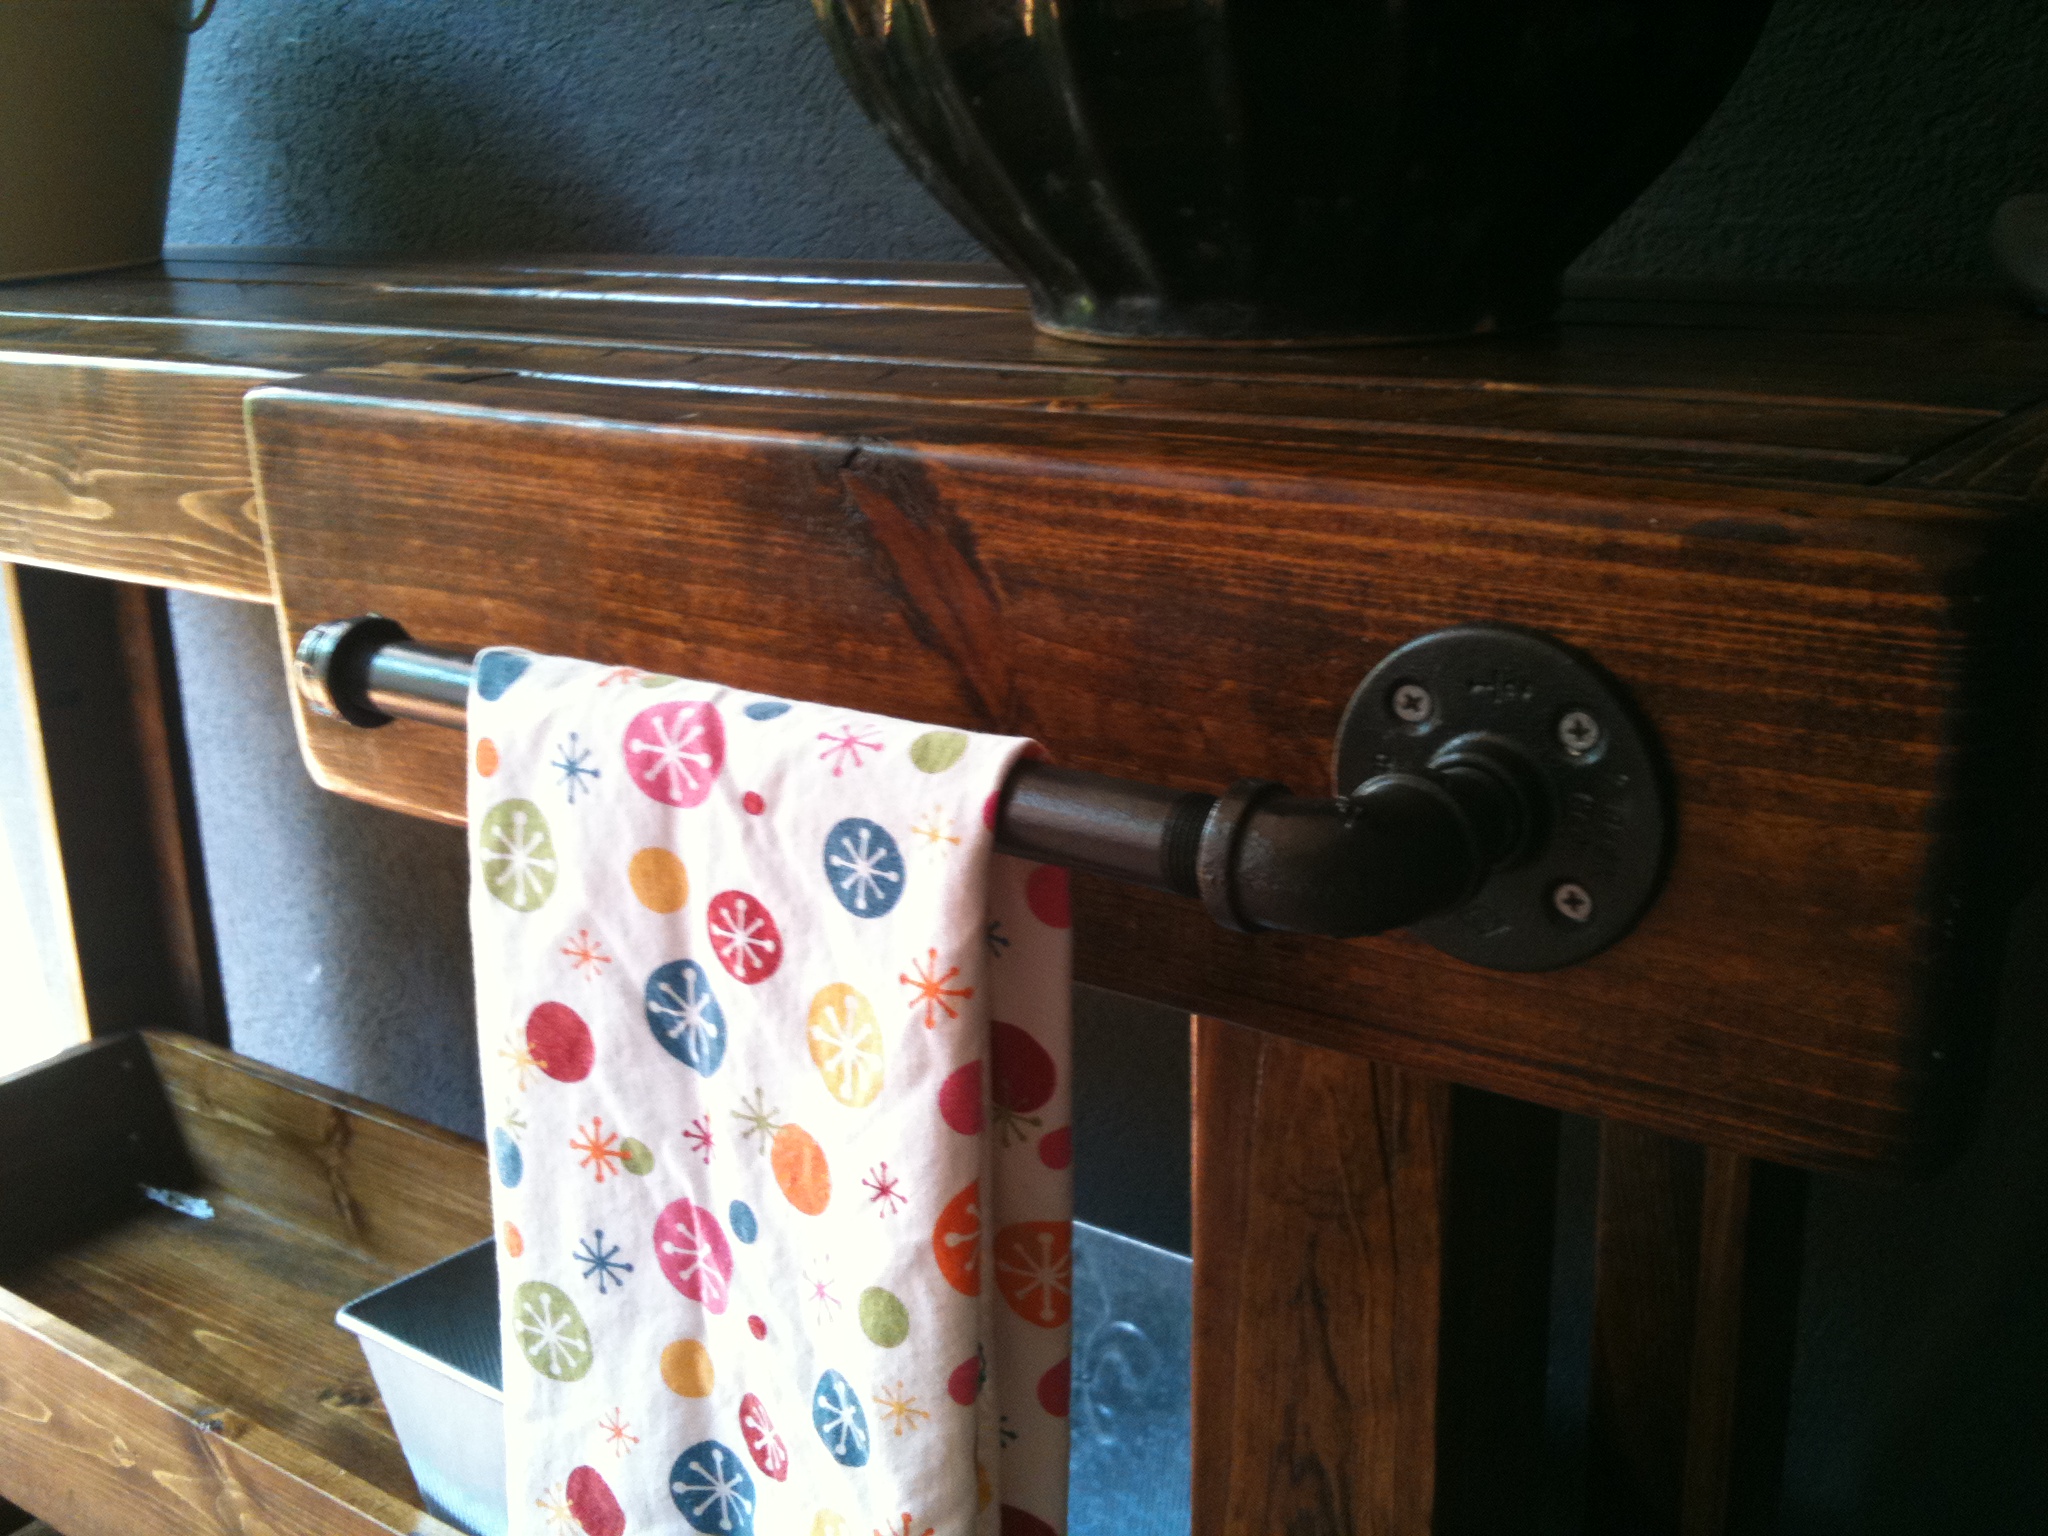
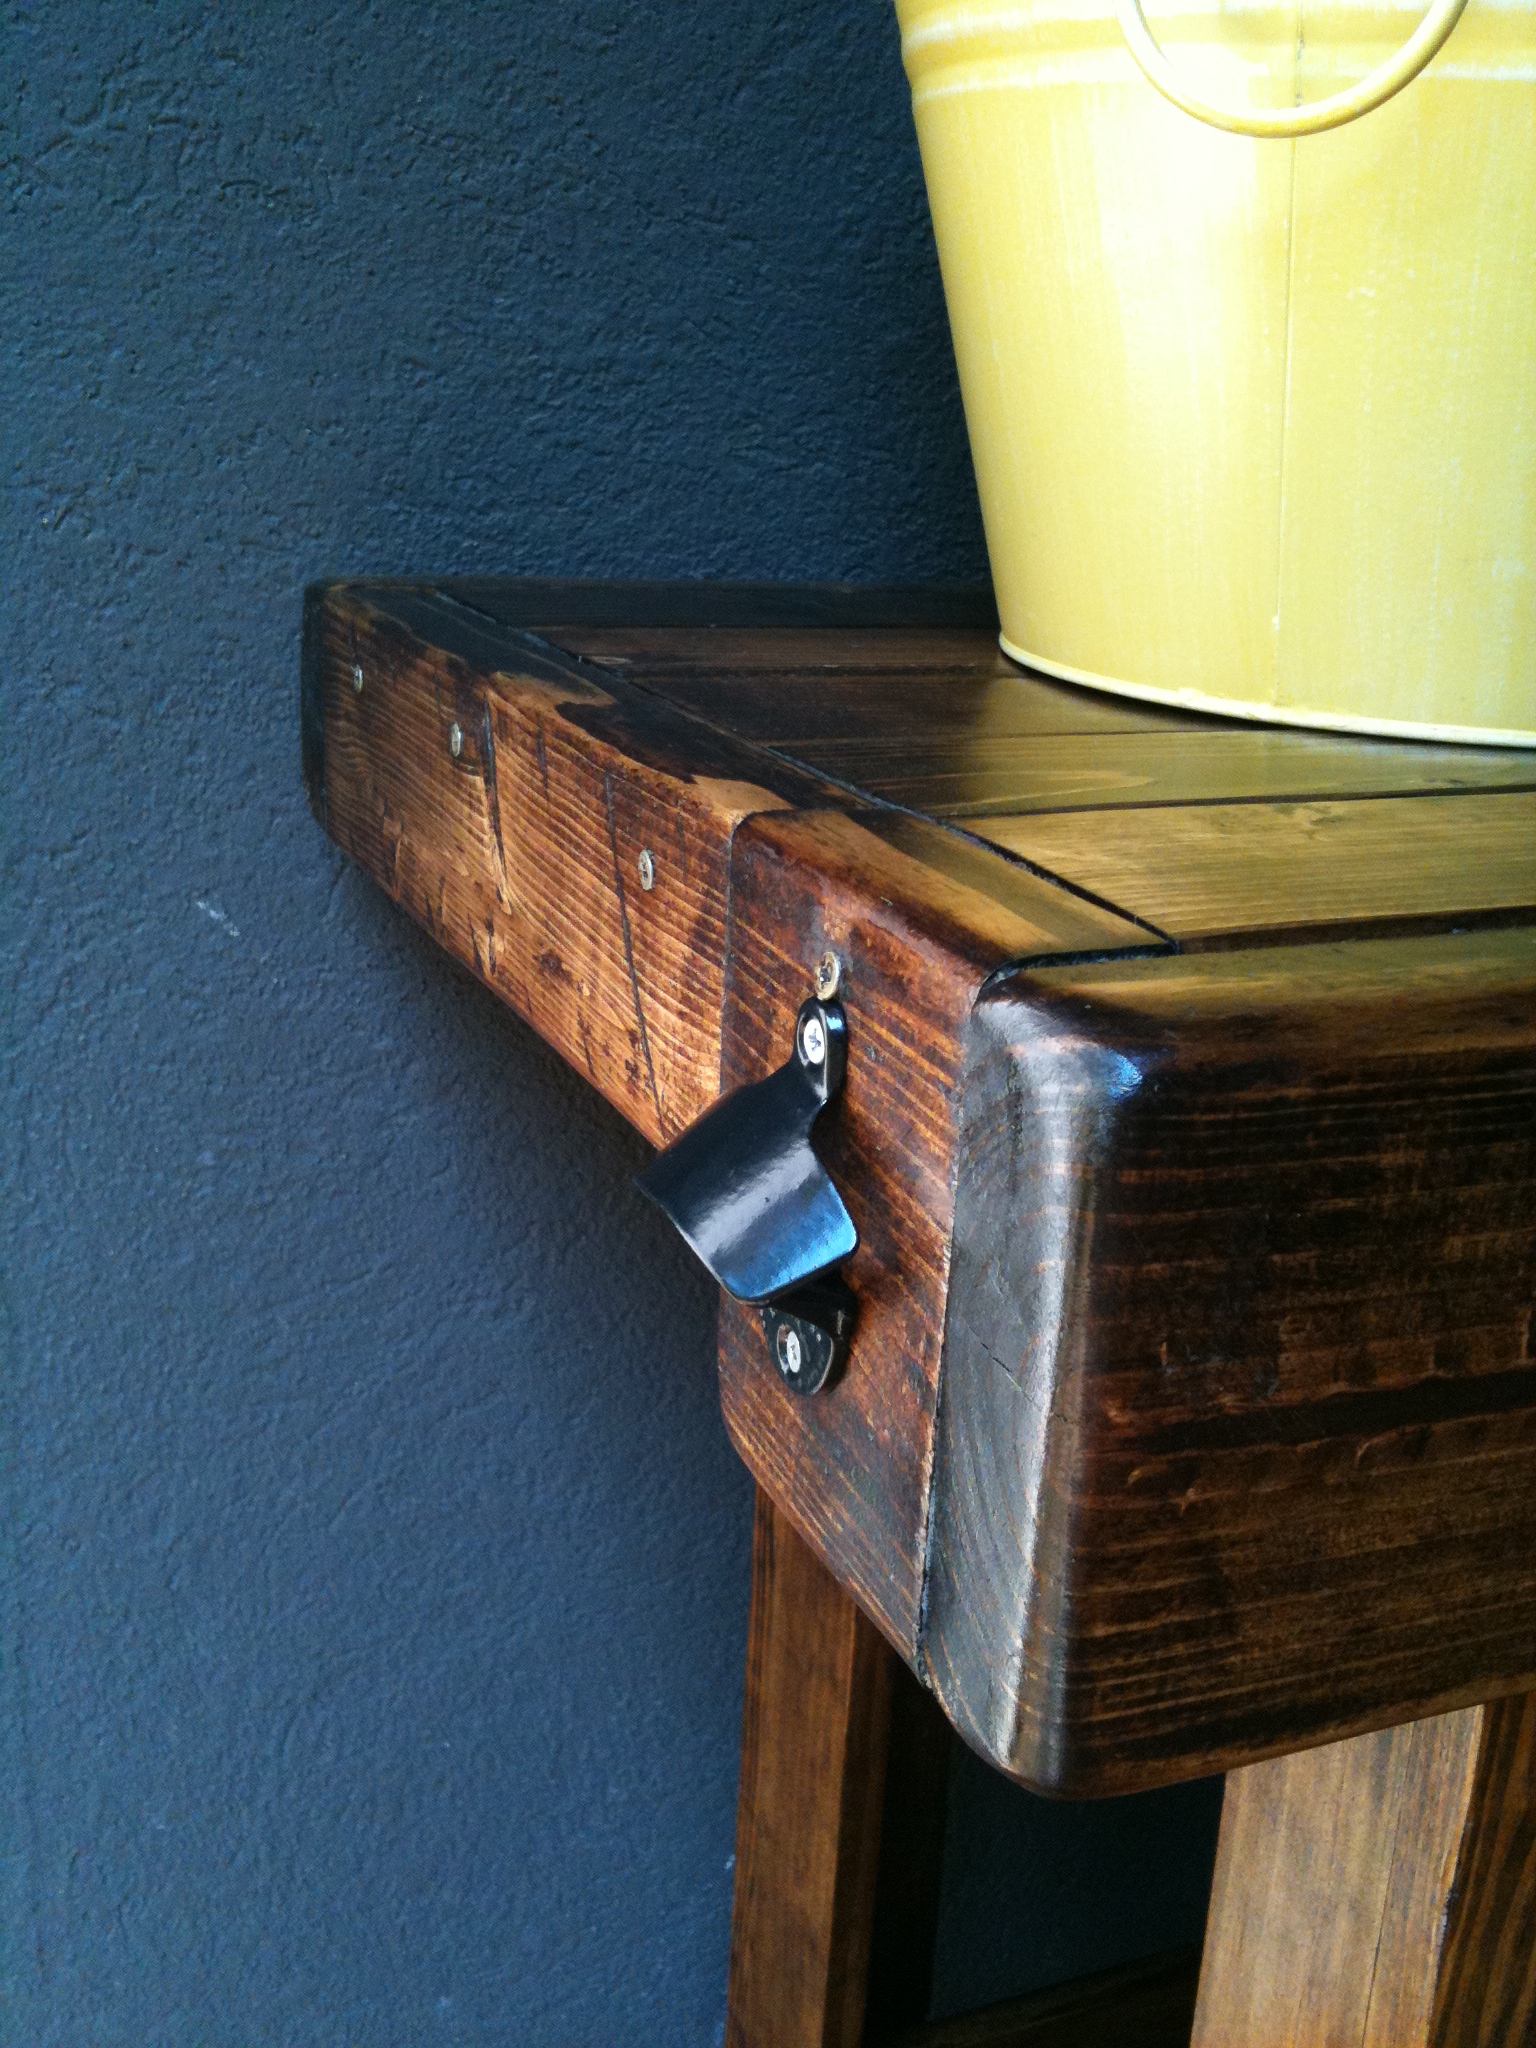
Your workbench looks amazing! Can I ask where you got the towel bar and bottle opener? I just love them!
Sat, 01/14/2012 - 11:48
My guess is it's attached to the piece using something like this
http://www.homedepot.com/h_d1/N-5yc1v/R-100129872/h_d2/ProductDisplay?l…
then an right angle piece, length of pipe and an end cap, painted to match.
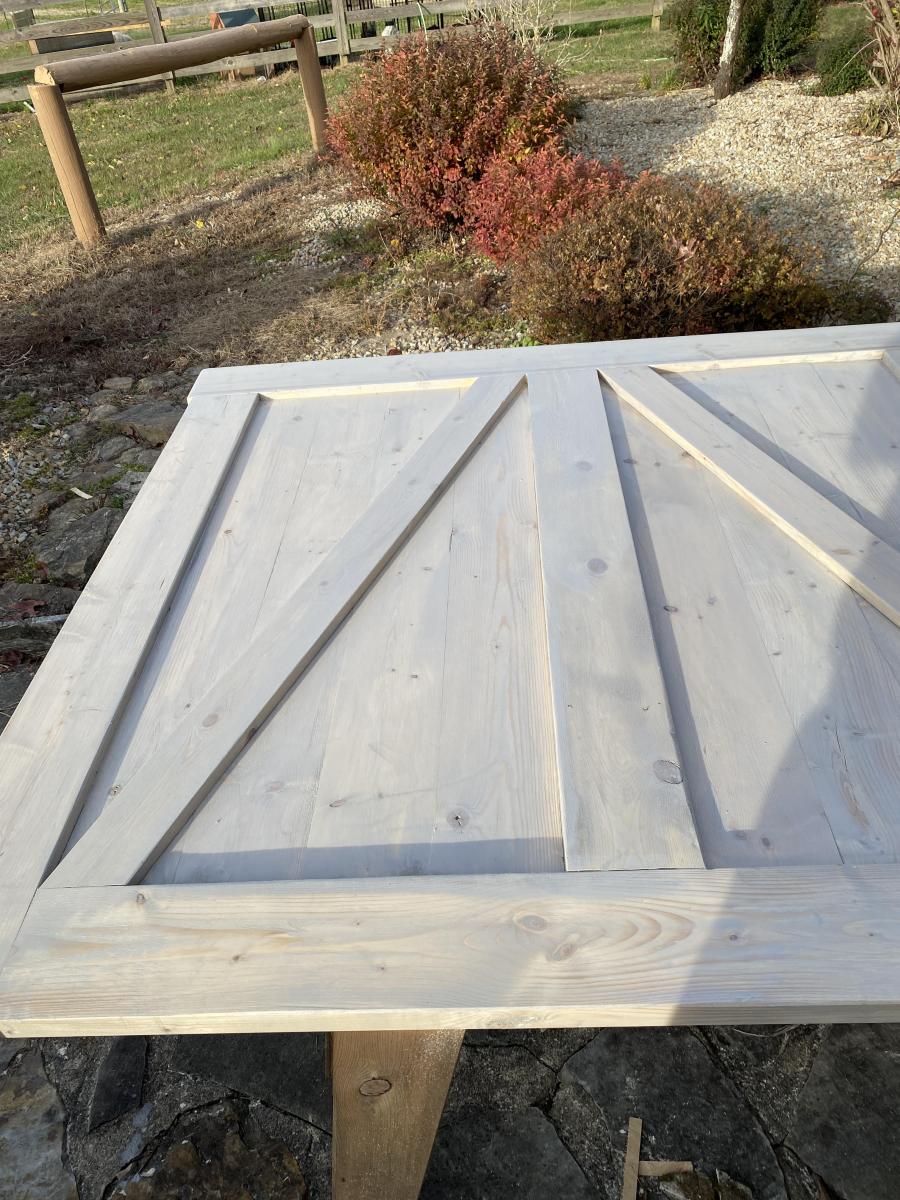
Needed a small table for our new house so I decided to build one, I followed the design fairly close. The only creative difference and I'm going to pretend I meant to do it was that I rotated the squares 90 degrees.
A few tips / things to look out for:
- The angled legs are tricky to line up/attach but you can use alot of woodfiller there to fill in the gaps and you can barely notice it once it is all together.
- When attaching the slats to create the squares for the top, add 5 pocket hole screws to each side, when you go to attach them you will thank me, 3 on each side of them doesn't hold as tight as you need it too.
- on the underside of the top I also added some scrap squares of 1x4 under the small triangles to stop them flexing, attached to the 2x6 with pockethole screws.
- Palm Sander - should be listed as required tool, to level out the top after assembly I went through a pack of 120 grit discs.
- There is not much room for error if you only have 2 8 foot 2x6's so cut them a couple blade widths bigger than you measure and sand them down to exact size.
as I used SPF for the table top I think I am going to get a piece of tempered glass cut for the top to protect the soft wood and give me an easy surface to clean.

Thu, 07/25/2013 - 11:15
I am definitely bookmarking this! Very nice job. It's beautiful.
Thu, 07/25/2013 - 16:04
I have a hard time getting a finish that is that dark and rich looking. Good job!
Wed, 10/09/2013 - 08:25
NICKFMC
On the table top did you fill in the seems where the boards meet with wood filler? It looks like there may be something between them and it has a very smooth appearance. I don't really want the gaps to show on mine and was wondering how you got yours to look so smooth.
Great job on the table! and thanks for any help you can give me!
Paul
Wed, 01/29/2014 - 11:57
I really liked how the inner squares are turned 90 degrees. The table looks less rustic, a bit more polished. I believe your extensive sanding contributed to the finished look.
One bit of advice. You may want to start with a more aggressive sandpaper to make edges flush. You can start with a 60 or 80 grit and then work your way up to 120 or 150.
Sun, 11/20/2016 - 16:42
Hi all,
I made a table almost identical to this with the top being more farmhouse style. My problem is that a friend of mine offered to buy one of these if I make one for him. I never know what to price things at when asked to make for friends. I always let my feelings of friendship cheapen the cost. I would greatly appreciate some help in what price point to set a table like this at. Thank you in advance for any help.
This project was well worth the time and money invested. It is very sturdy. I expect that it will last for many years.
Live edge Christmas tree shelf.
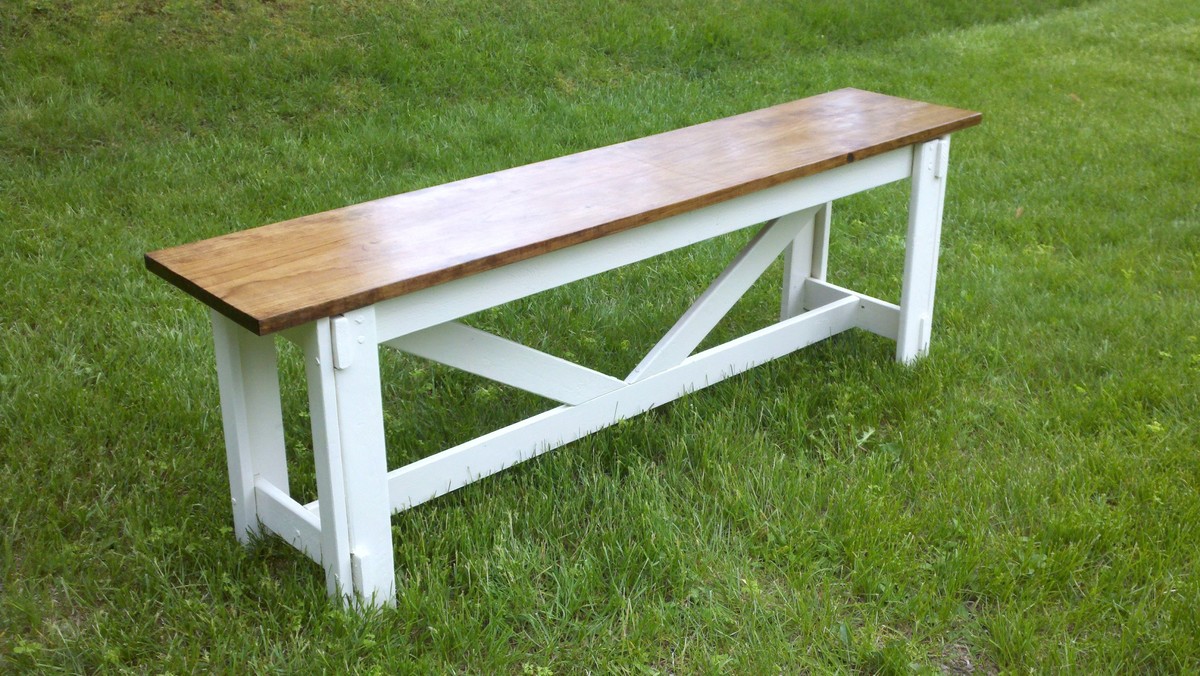
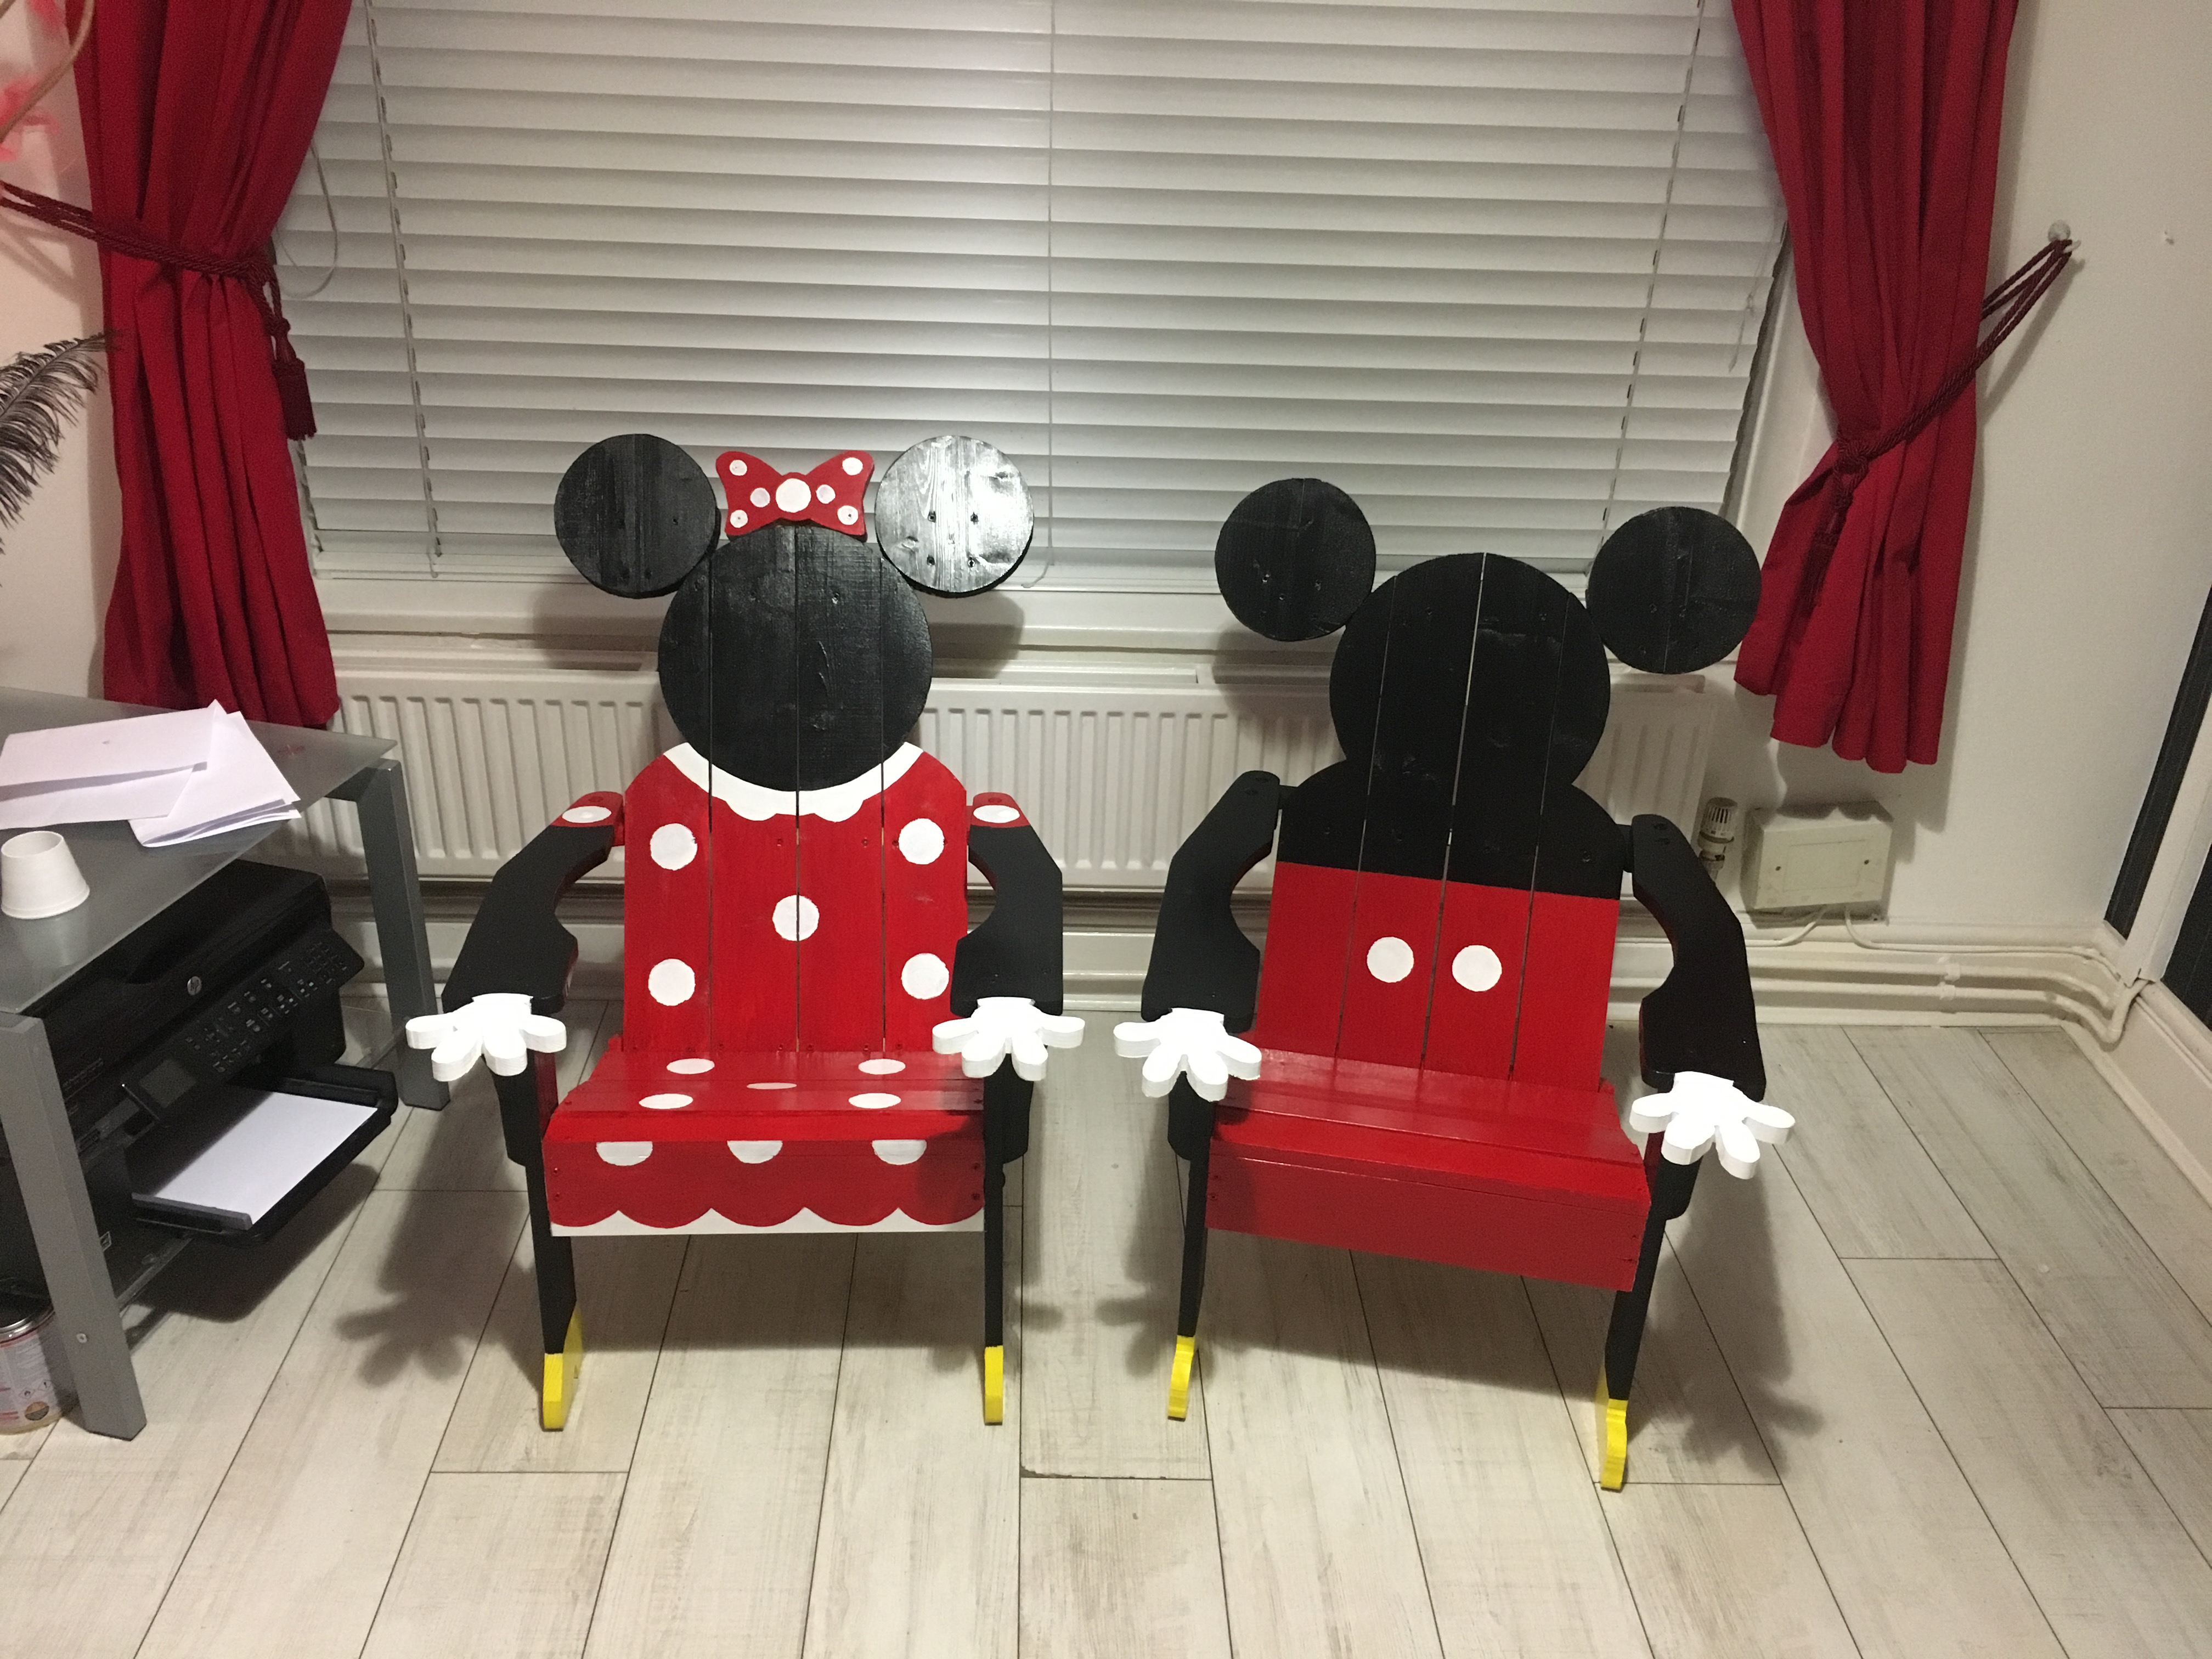
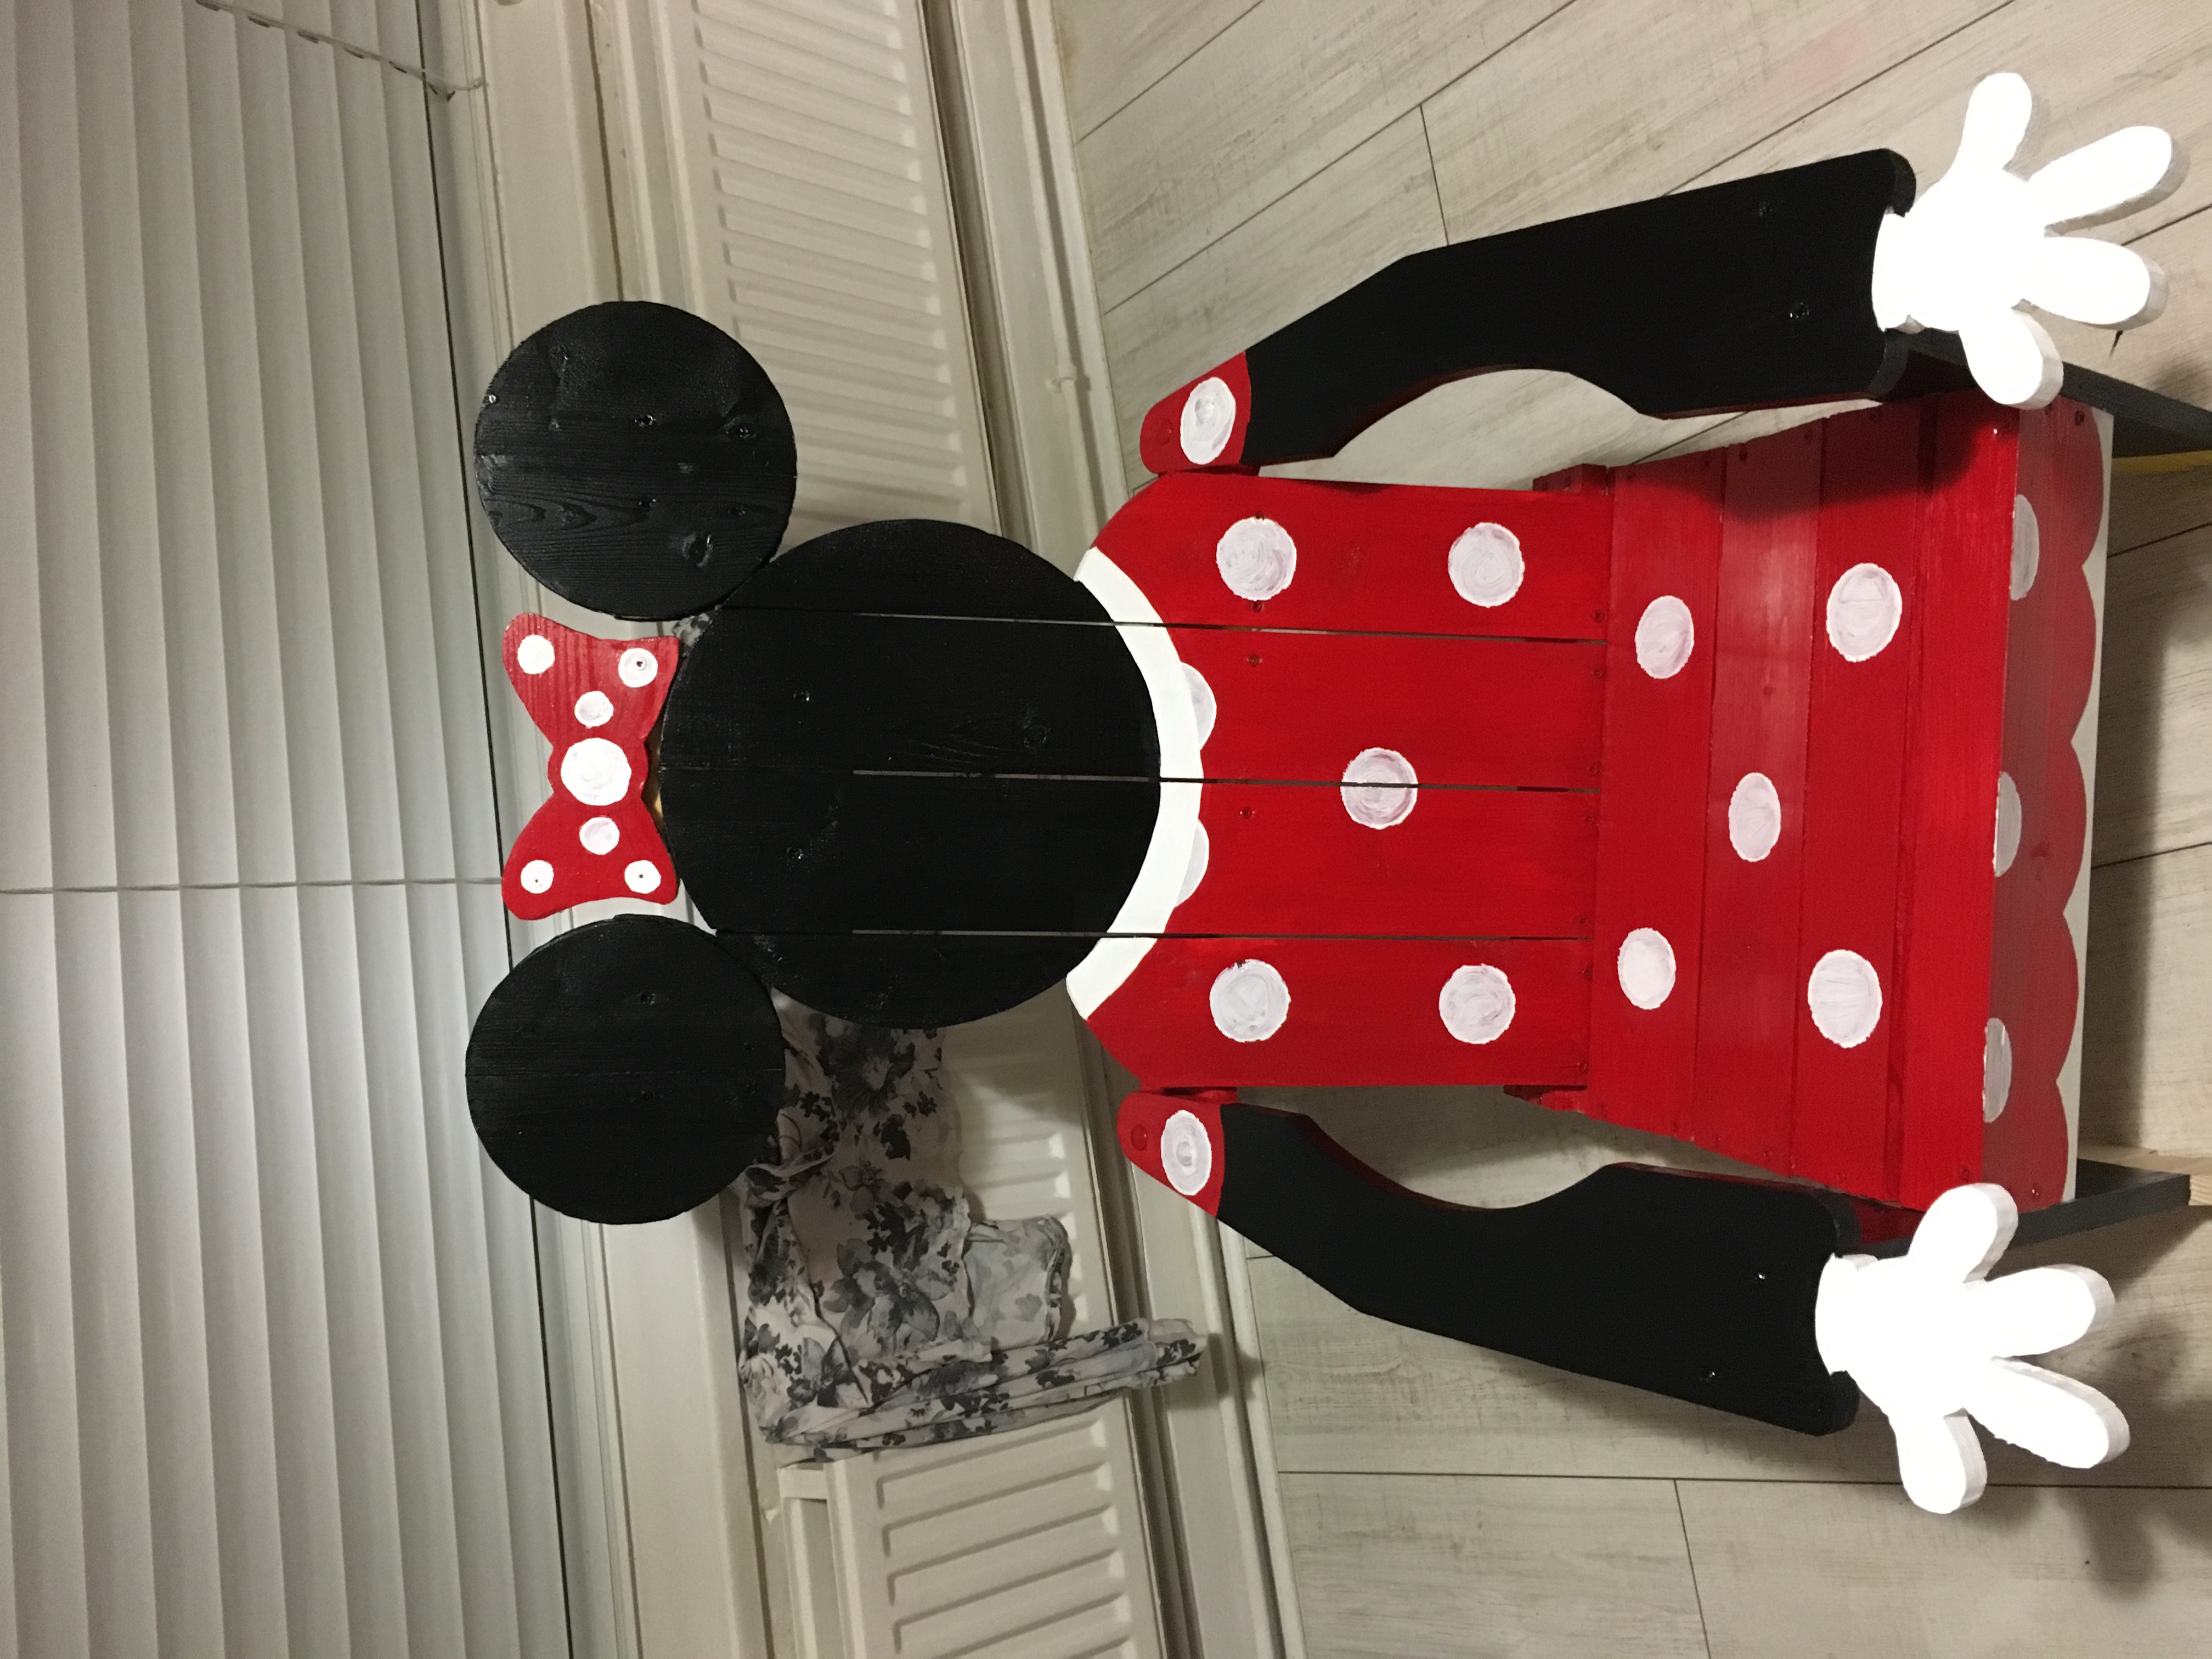
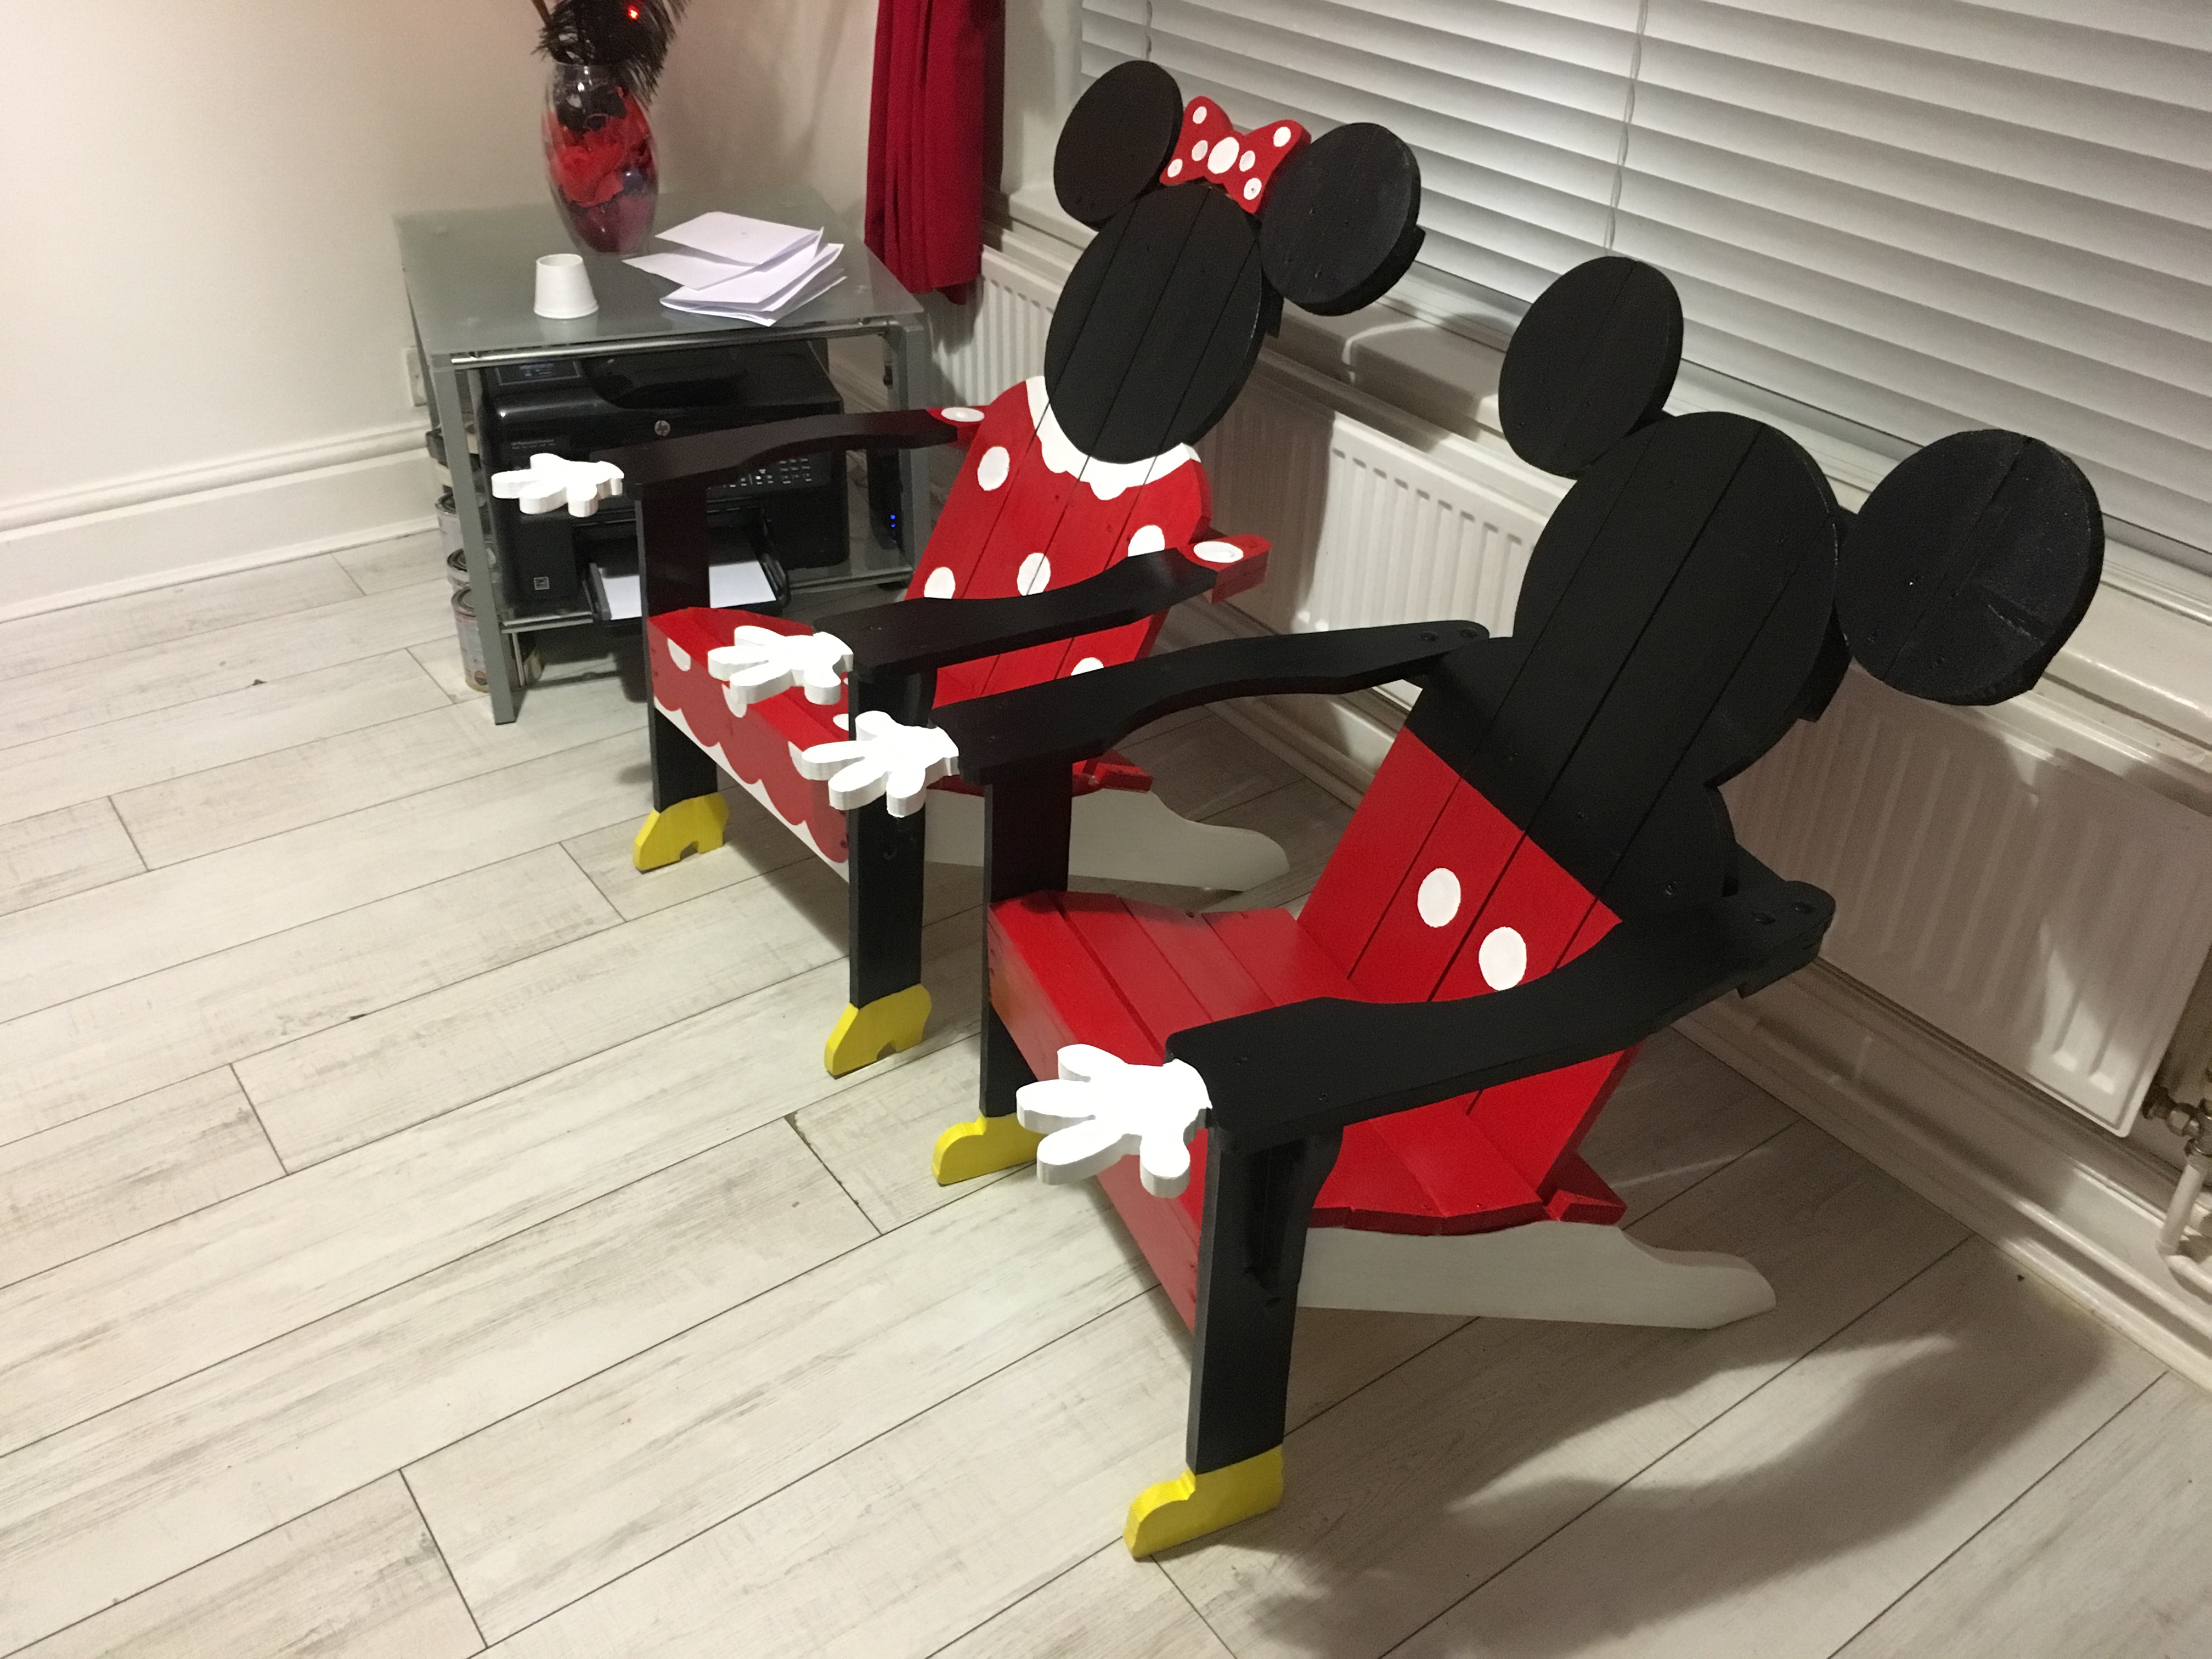
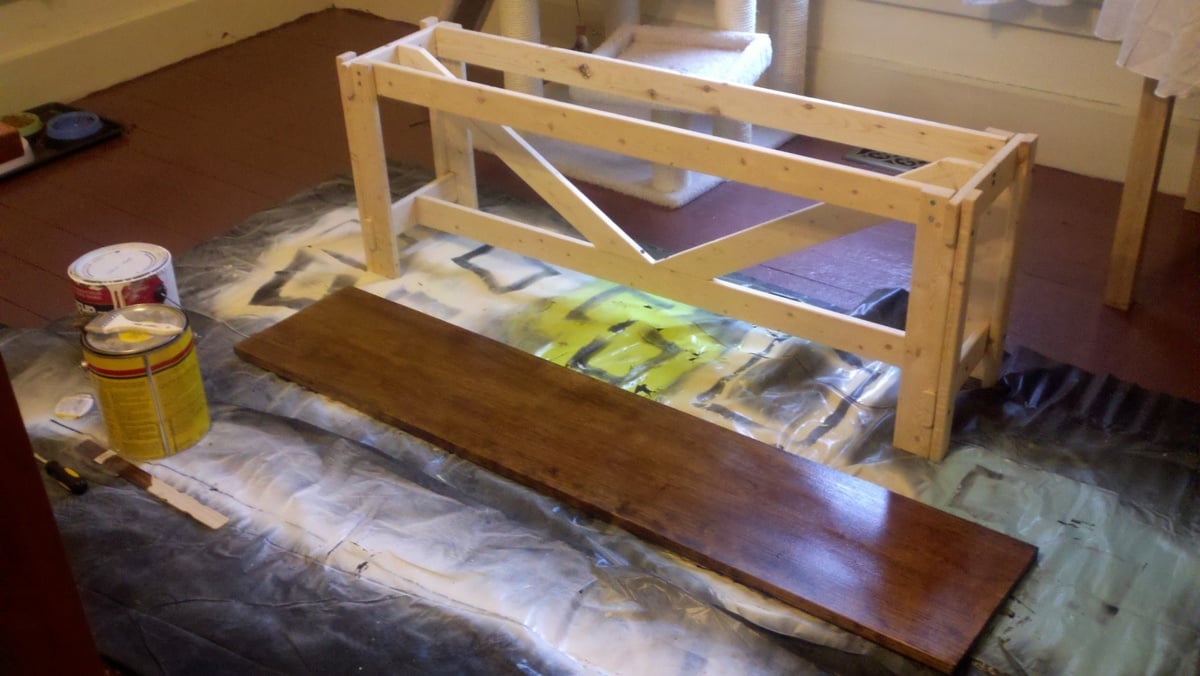
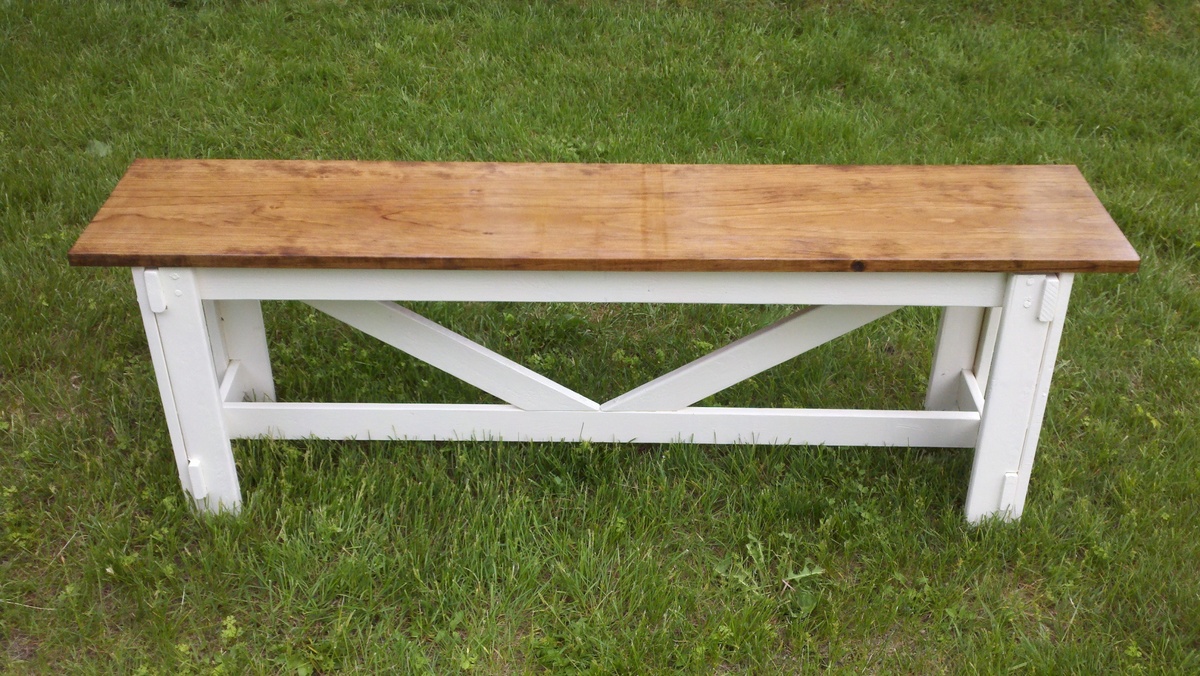
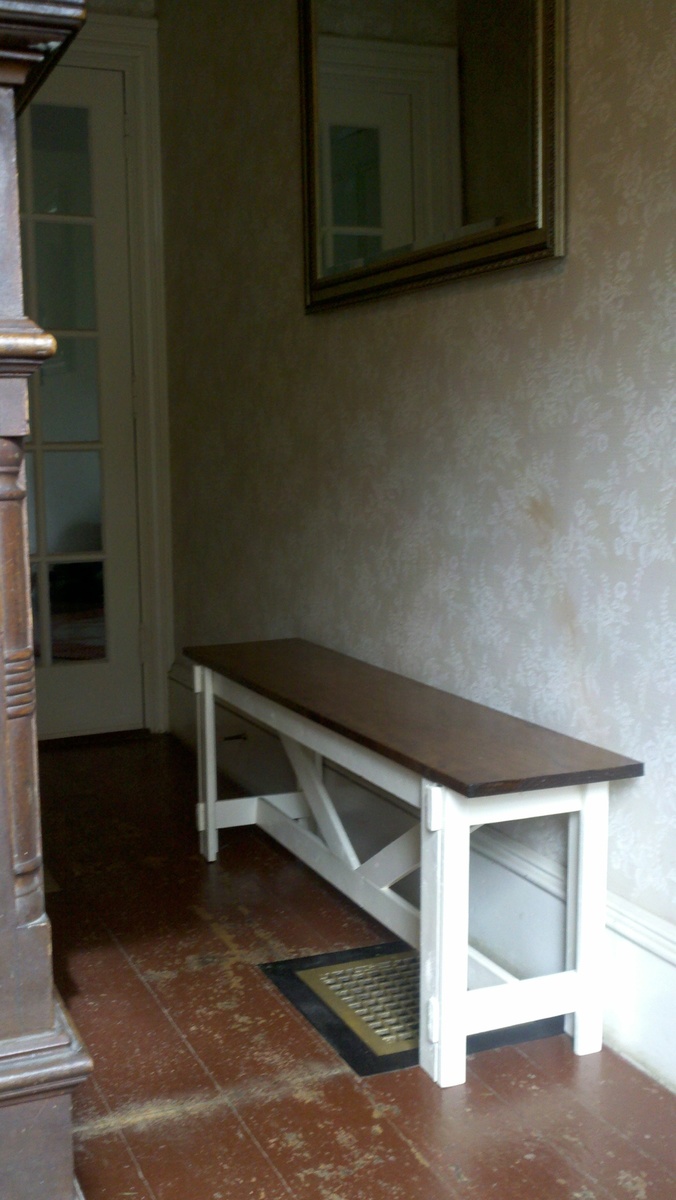
For my second project I wanted to build something a little more difficult than a shelf. The hubby showed me how to use our power tools and I was unstoppable. I chose this great bench because it fit the feel of our house and I wanted an entryway spot to sit while putting on shoes.
The finishing took much longer than it actually took to build the bench. I thought it would be more difficult to get the precise angle measurements to make the supports under the bench, but it was not bad at all. I can 't believe I built this pretty bench! I have the building fever now!
Mon, 06/13/2011 - 13:18
Loving the price and build! Good job on this! looks perfect where it is too!

In reply to Looks Great! by mandylynn523
Thu, 08/18/2011 - 04:33
Hello. My hubby and I are in the process of building this bench. Basically just have to put the top on and finish the staining/painting. We are doing a black bottom and stained top. I have a hard time w/angles so my husband tackled that but I have to say, he had a hard time with it as well. Glad you had an easy time of it! Can I ask how you attached the top?
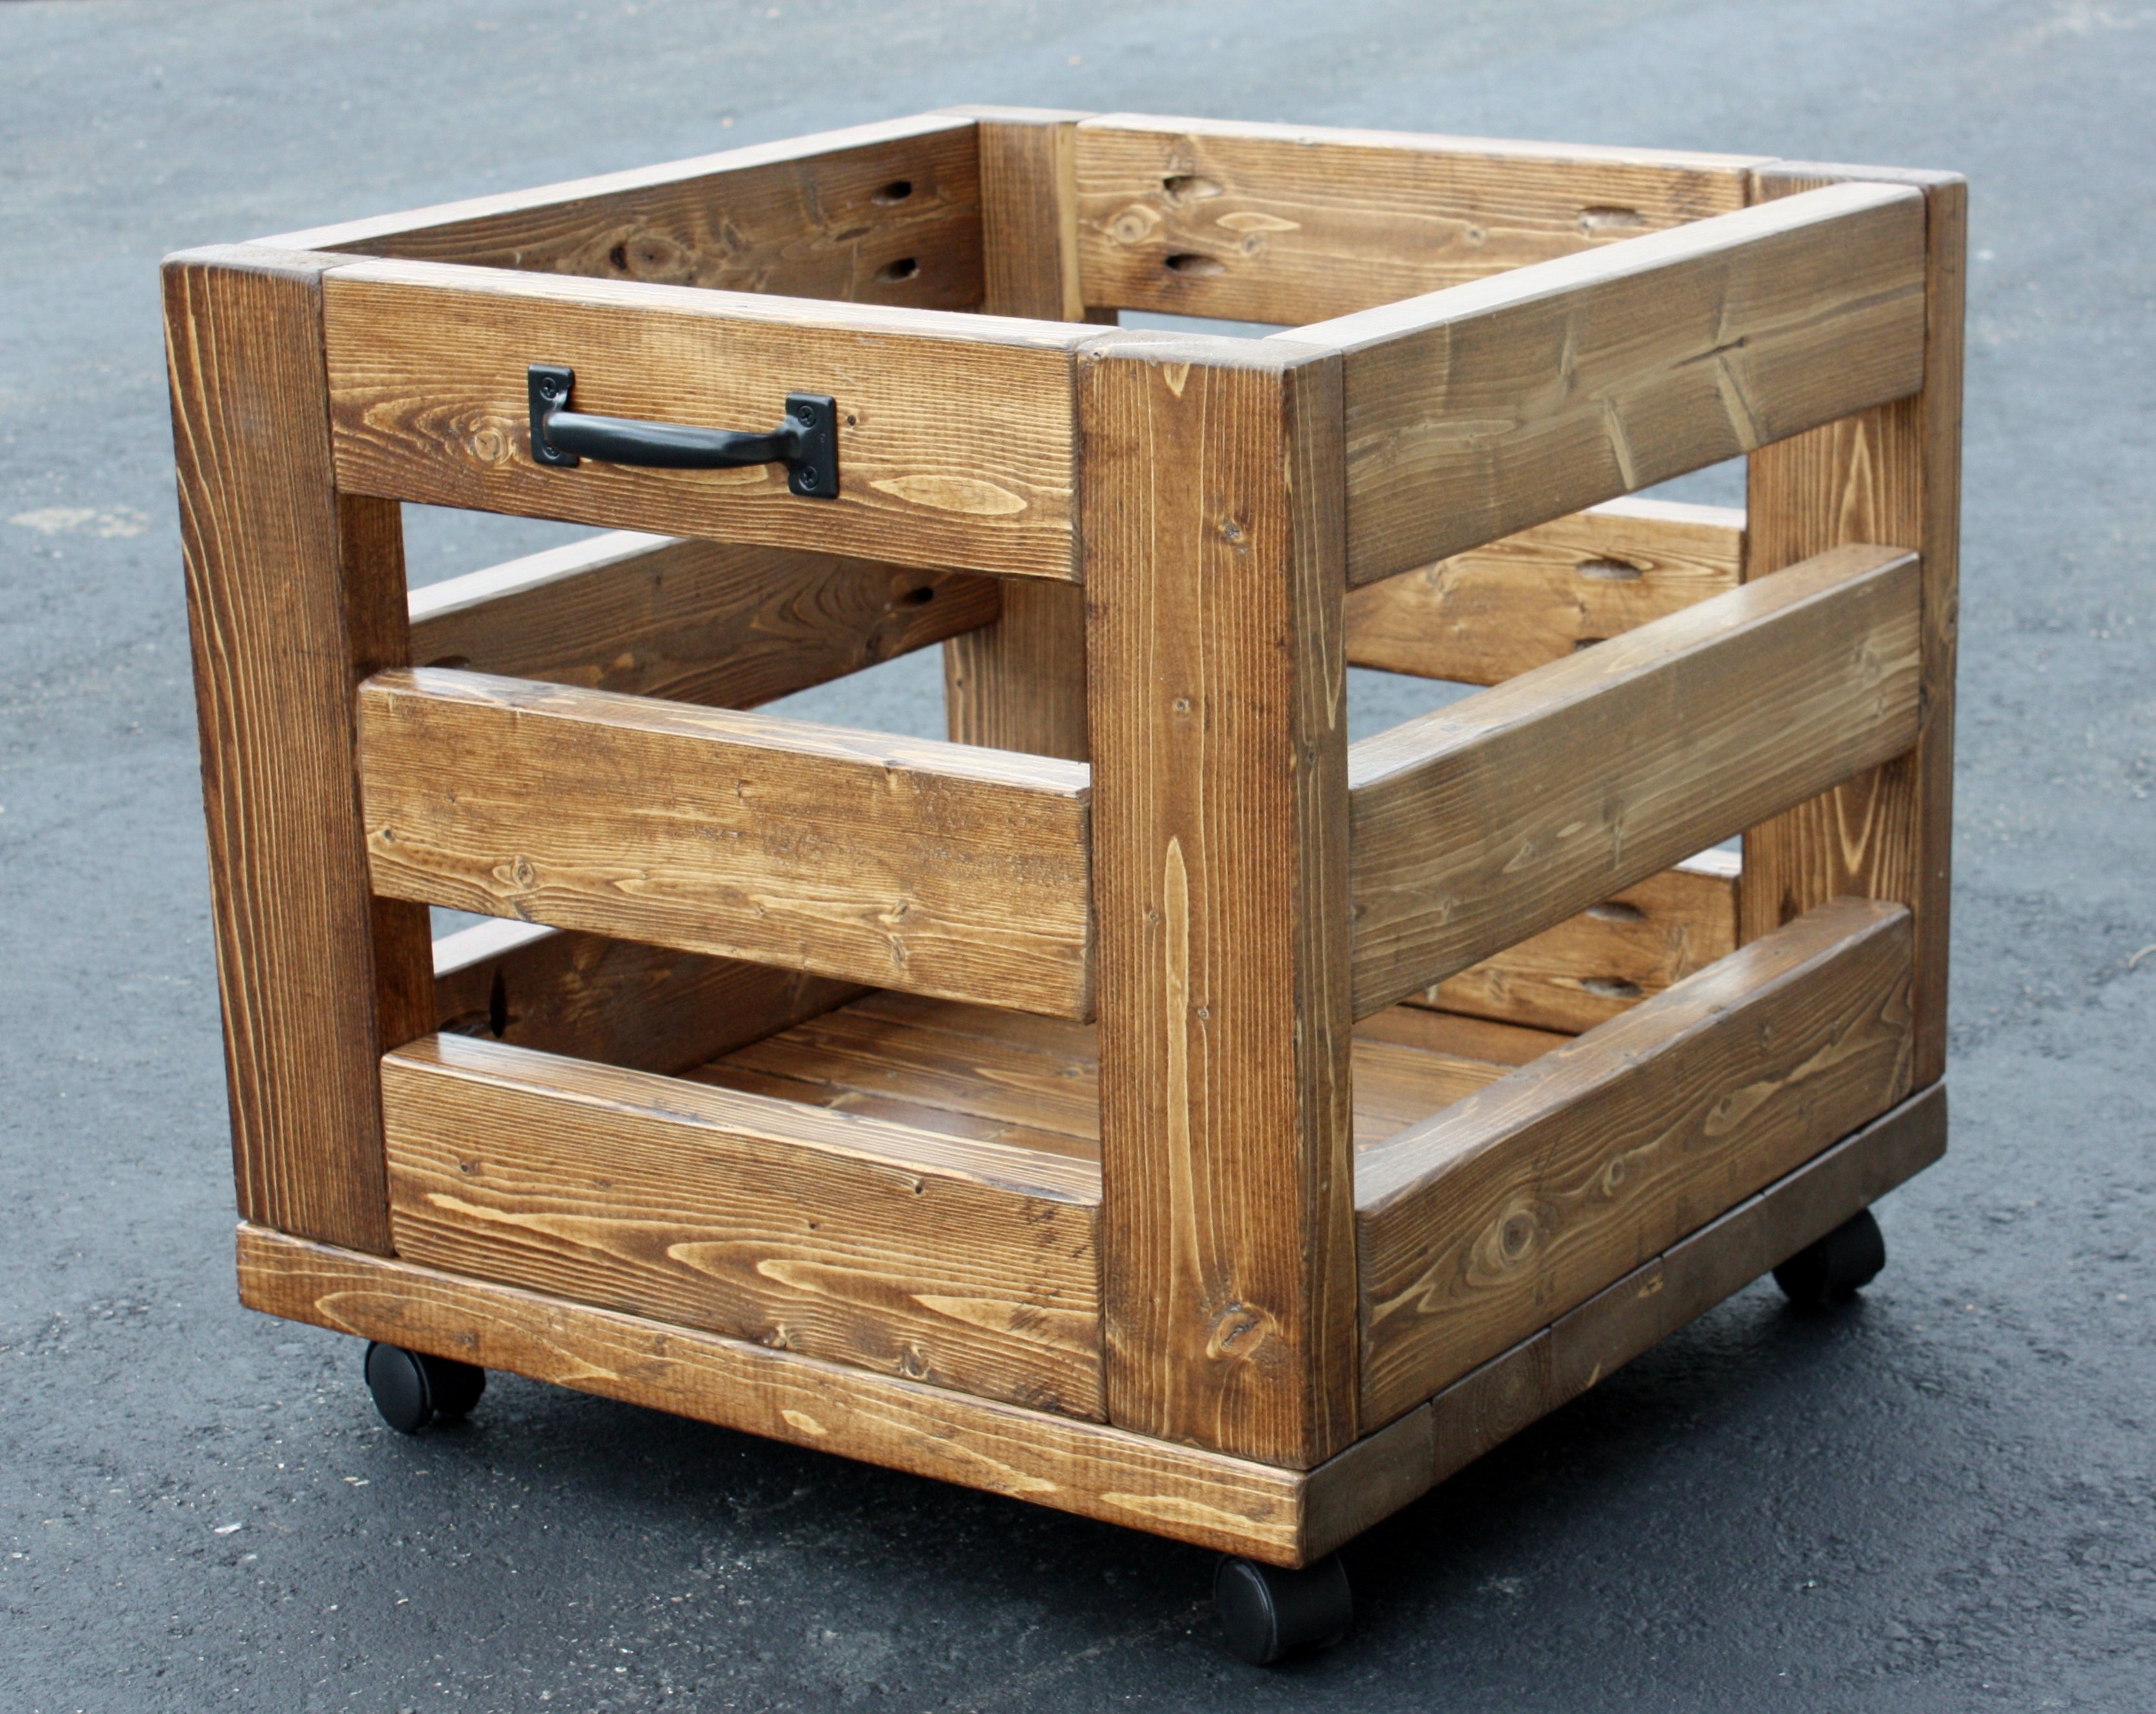
I love this storage bin from plans at morelikehome.net, and it was easy to build, too! It's nice and big, about 21"W x 21"D x 18"H. I selected 3-6 hours as the time spent, but to say closer to six would be about right. I need a large work surface in my sewing room (I'll be building the storage table as well),and a place to store my "stuff".This should be a pretty good start!
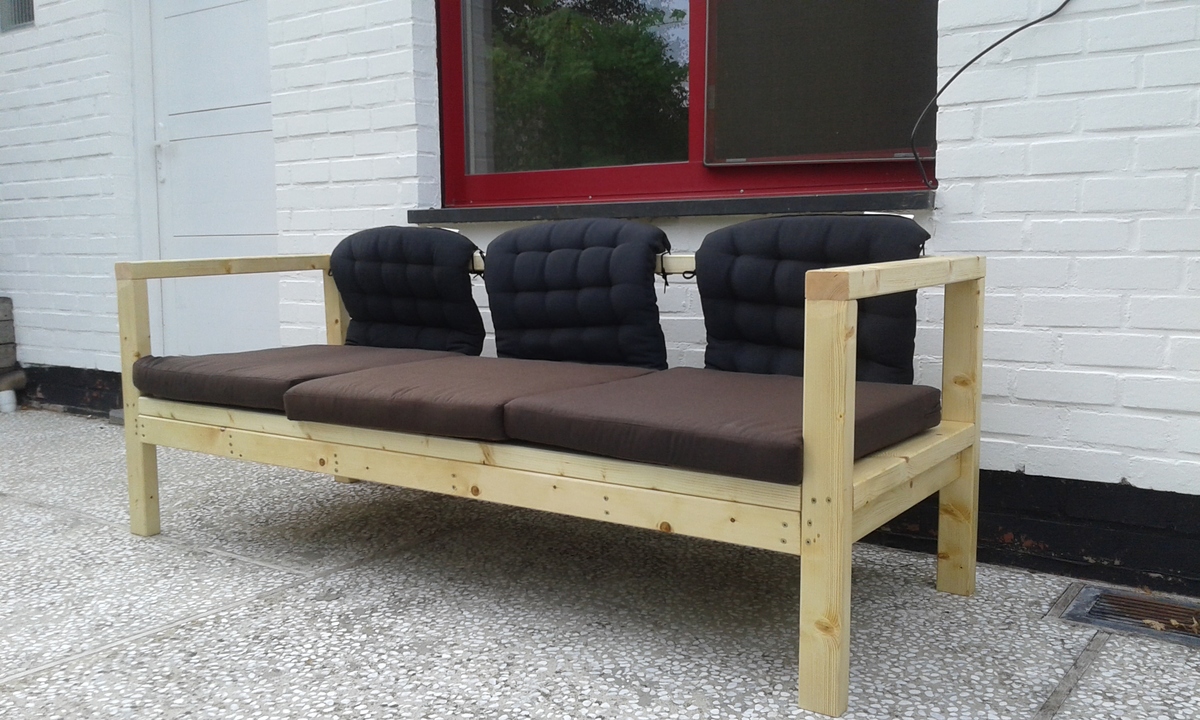
sofa
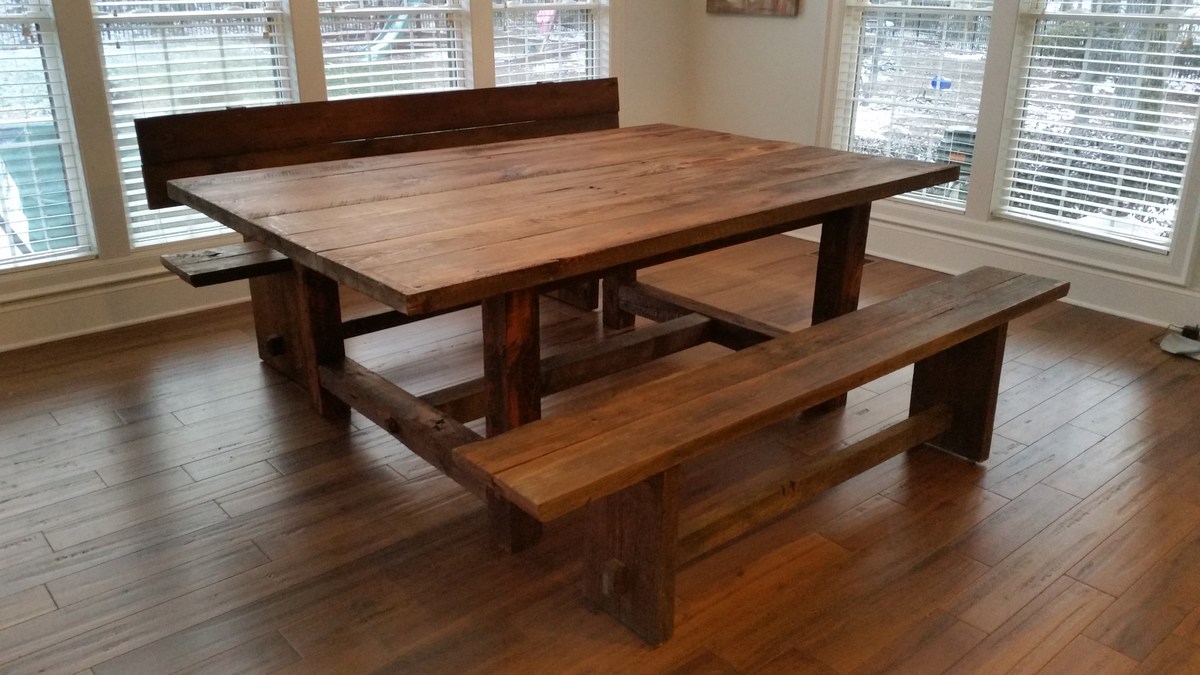
This oversized reclaimed barn wood dining table measures a whopping 96″ by 54″ – that’s quite a dining room table, with seating options to easily fit ten people. You can comfortably sit three adults on each side of the table, while also accommodating two adults on each end. In a pinch, you could actually fit four adults on each side of this table while having the two still sit at the ends; having four kids on the sides would not be a problem at all.
This table top was constructed from 2×6 and 2×8 beams, while the base was built out of 4×6 and 4×4 posts. I believe “behemoth” may be a proper word to describe it, as I even had to deliver the top in multiple pieces and assemble it on site. The benches were also constructed mostly from 2×6 beams harvested from the same barn as the material used in the table itself. We added a light coat of Provinicial stain to help bring out some uniformity in the color, and finished with a few coats of liquid wax to help protect the table. We informed the client of the trade offs of using a wax instead of a polyurethane, but they really preferred the “softness” of the wax finish and understood that they will have to reapply every year.
More pictures are available on our blog: http://famousartisan.com/oversized-reclaimed-barnwood-dining-room-table/

This was the first project I tackled by myself. I think I spent about $70 and used pine.
Sat, 09/17/2011 - 08:05
You are amazing!I want to make so much so little time:-)
Wed, 05/02/2012 - 06:00
Hello,
You are AMAZING! and it's a very nice table. Saw one at Pottery, but couldn't
afford the price tag and all other charges. Are you willing to share your plans or
do you have one already?
Thank you.
Wed, 05/02/2012 - 06:03
Hello,
Don't know if the first email was sent.
Just want to say you're AWESOME and the table is beautiful.
Saw one at Pottery, but couldn't afford the price and all other charges.
Do you have a plan that you're willing to share or post?
Thank you.

In reply to Plans for Balin Console Table by chanice (not verified)
Thu, 05/10/2012 - 06:52
I used Ana's plans! Here is the link:
http://ana-white.com/2009/12/plan-balin-console-table.html
Good luck! :)
Sun, 09/28/2014 - 14:22
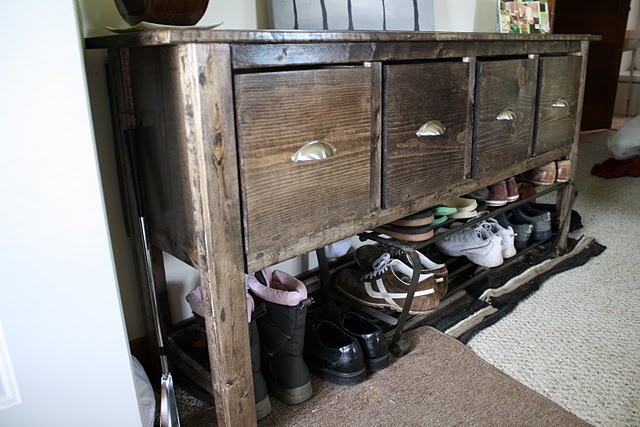
Can someone please be more specific on the drawers, I made the cuts exactly as it says and i have a gap on top??? Or are their any pictures like there was for the rest of the table??? I'm so close and I love the look but these drawers are going to be the end of me lol

Sun, 09/28/2014 - 15:25
Hi StaceyMc,
First of all you made your drawers correctly. Here is a old furniture maker trick to solve your drawer problems.
Looking at the plans they ask for a 1/8" gap all around. The problem with that is that a drawer sits in the opening with the bottom of the drawer tight to the bottom of the opening it sits in. When the drawer does that it makes the gap at the top a 1/4". ...Much to wide compared to the other sides....
The solution is to raise the drawer up in the "opening". Use two thumb tacks on the "bottom rails" of the console ...where the drawer sides slide in and out. Do this for each drawer. If that isn't high enough you could put a small washer under the tack to raise it higher.
Now if that isn't high enough I do have other ideas to make your drawer work. Just let me know.
Then only after you have put the finish on your master piece. Apply wax or a candle works, to the bottom edge of the drawer side to make it glide in and out easer. Just rub the wax back and forth quickly, "to make heat" and it will adhere to the wood.
I hope you enjoy your adventures in woodworking! :)
Thu, 09/30/2021 - 20:10
Thank you so much for adding this tip about the drawers!! You’re awesome!

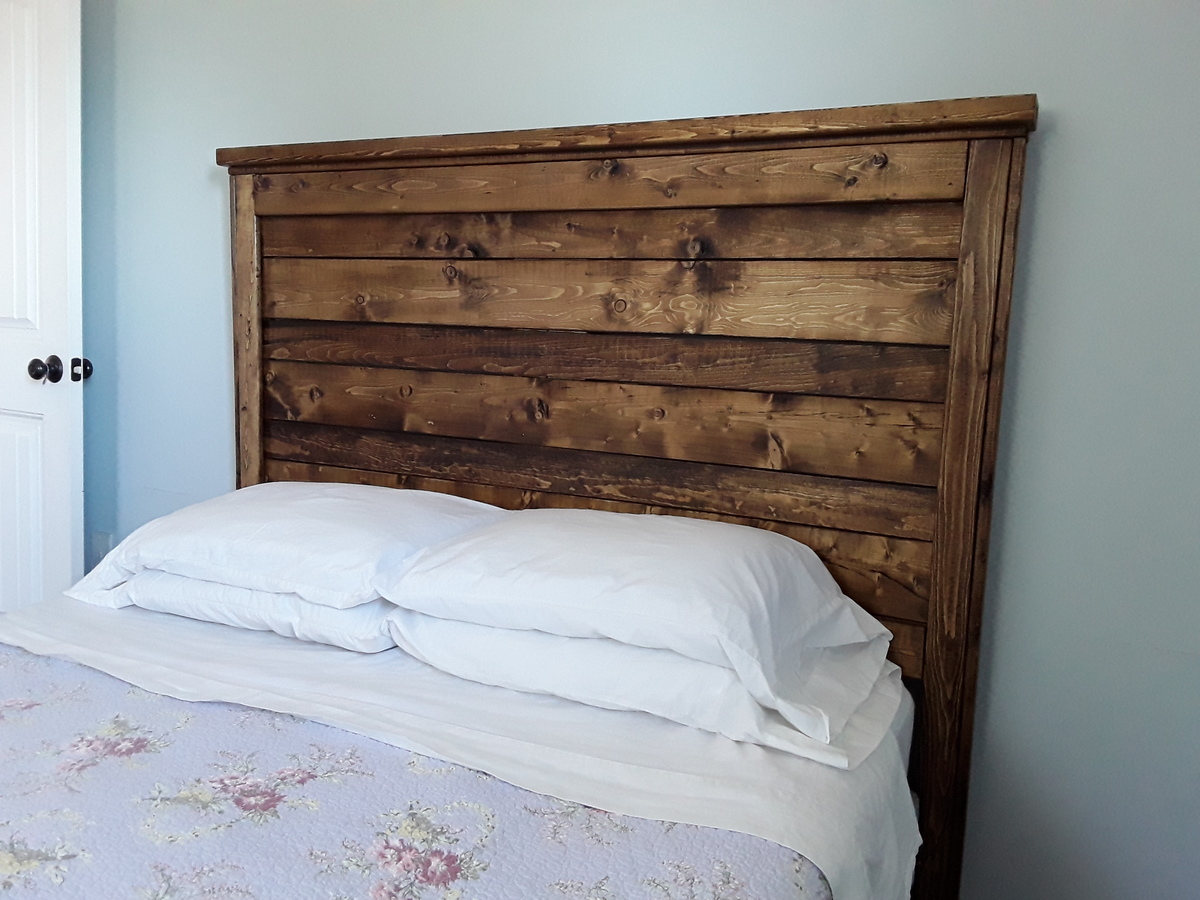
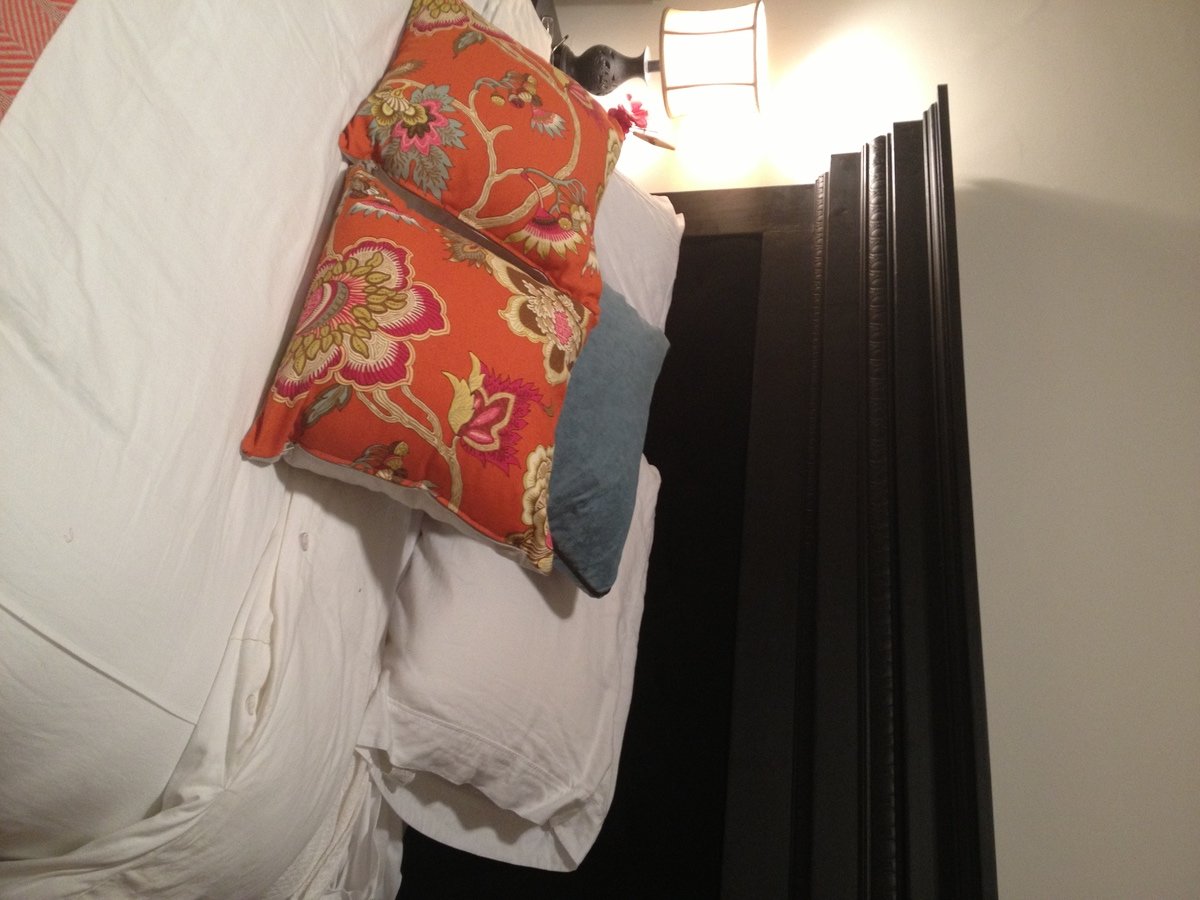
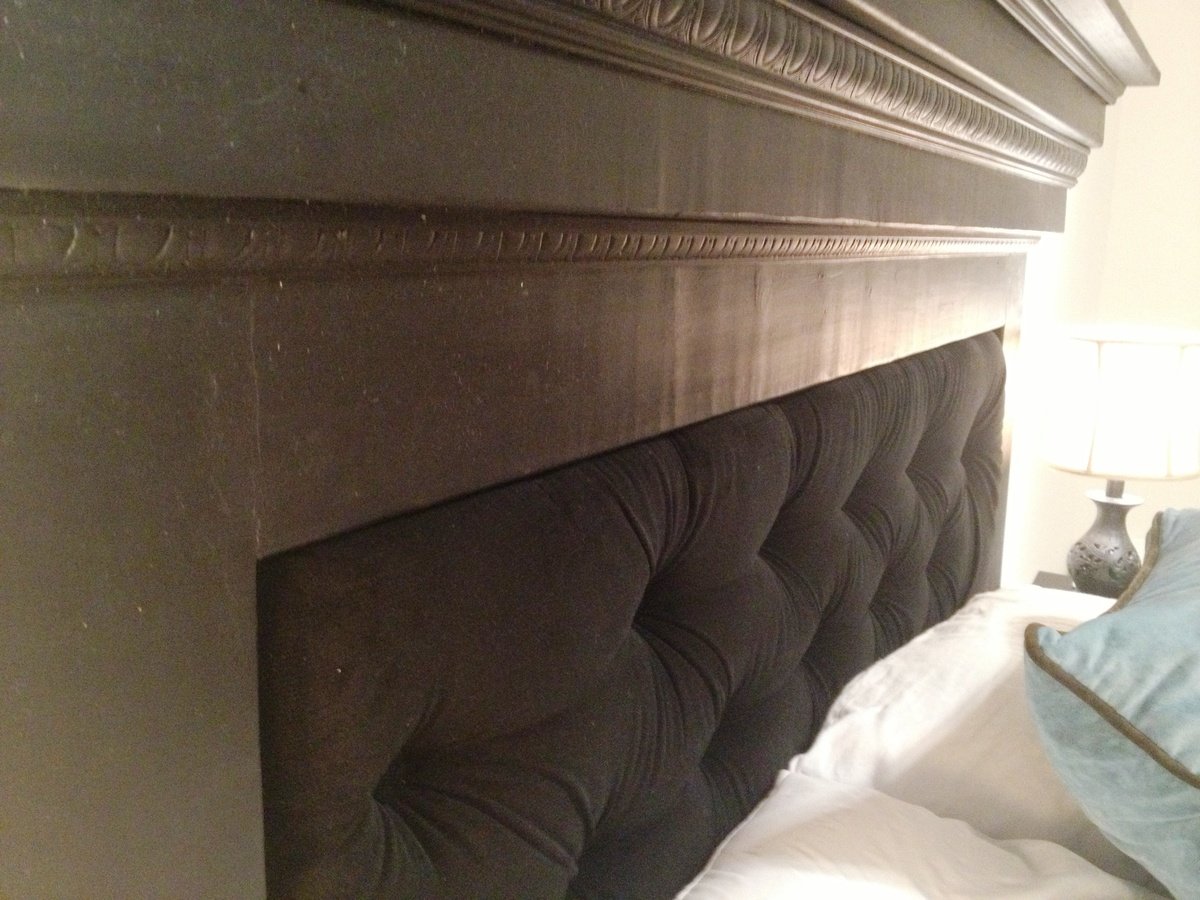
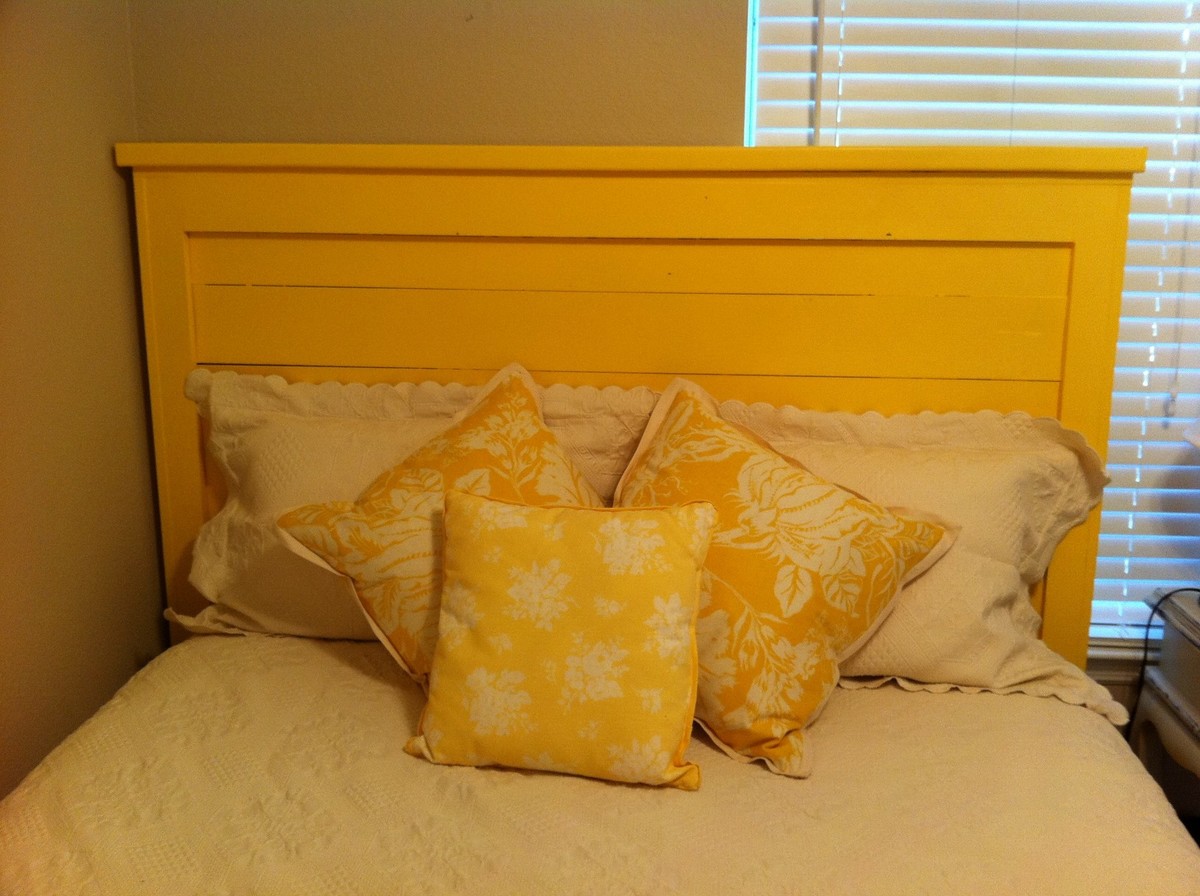
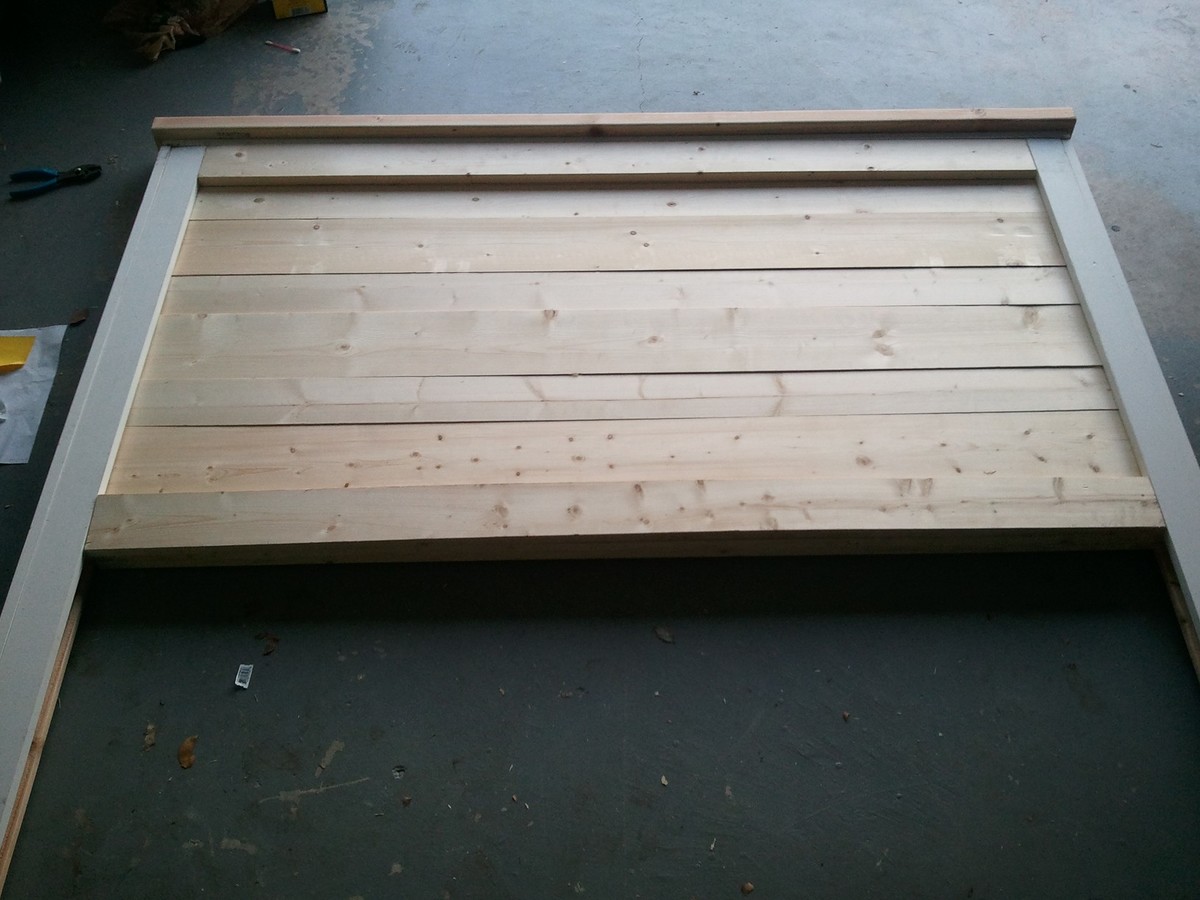
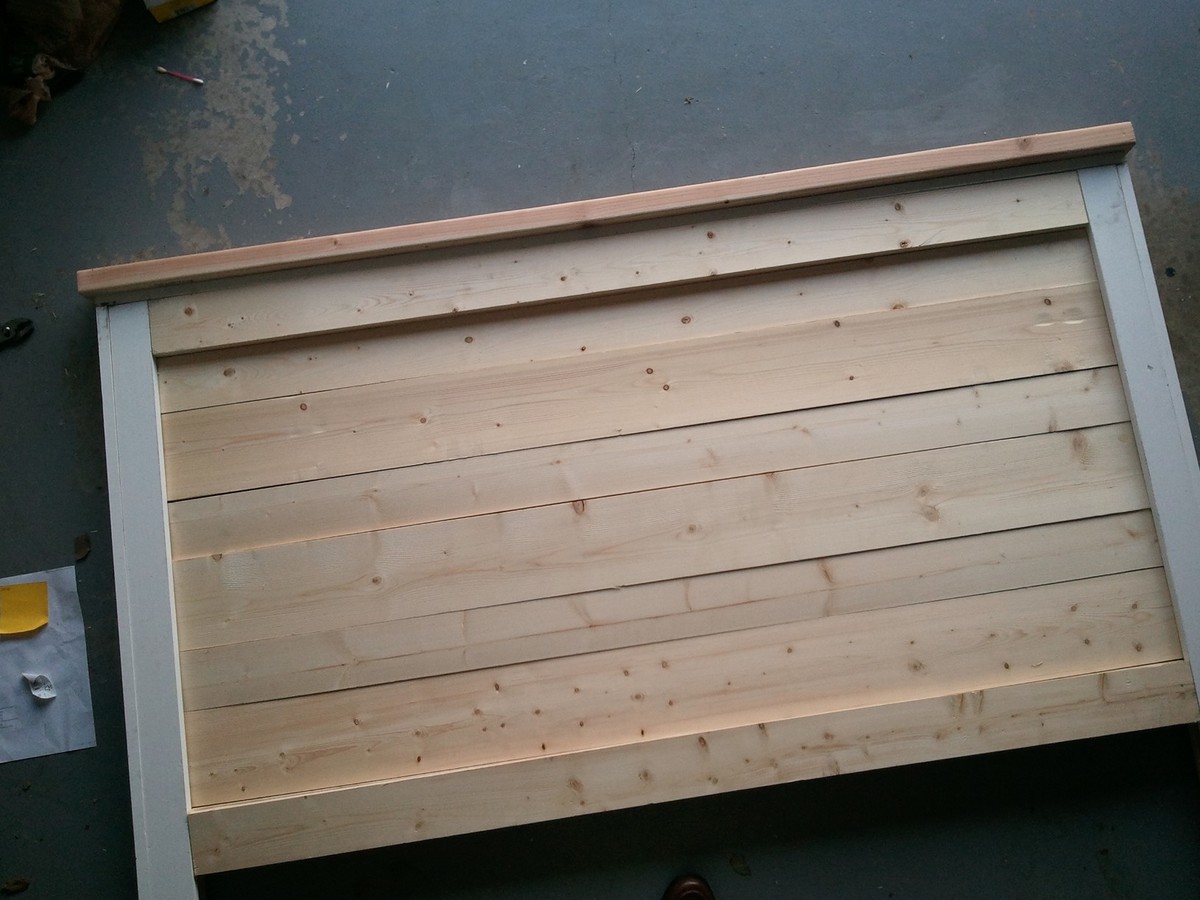
I love this headboard :)
We finally completed the tufting portion of the mantel headboard tonight and it looks great! Anna's design was easy to follow and the tufting part was easier than I thought...I followed http://www.cape27blog.com/2013/03/tufted-headboard-tutorial/ for the tufting portion.
Can't wait for the next project!
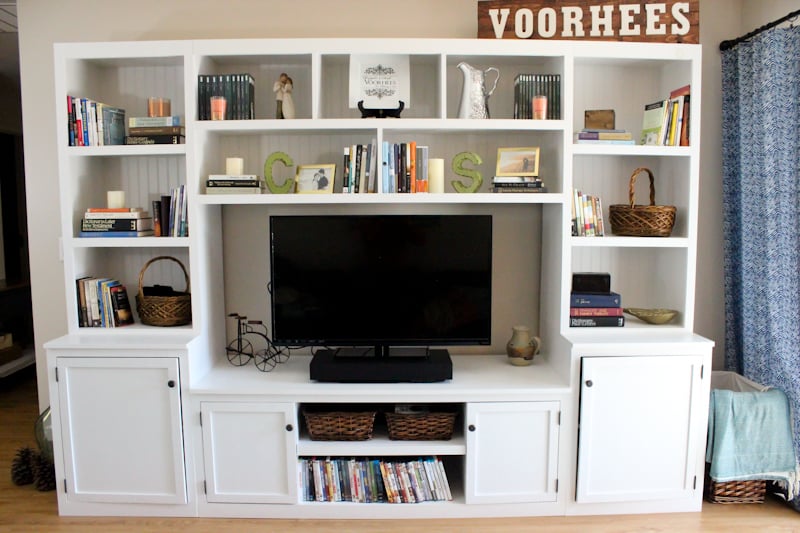
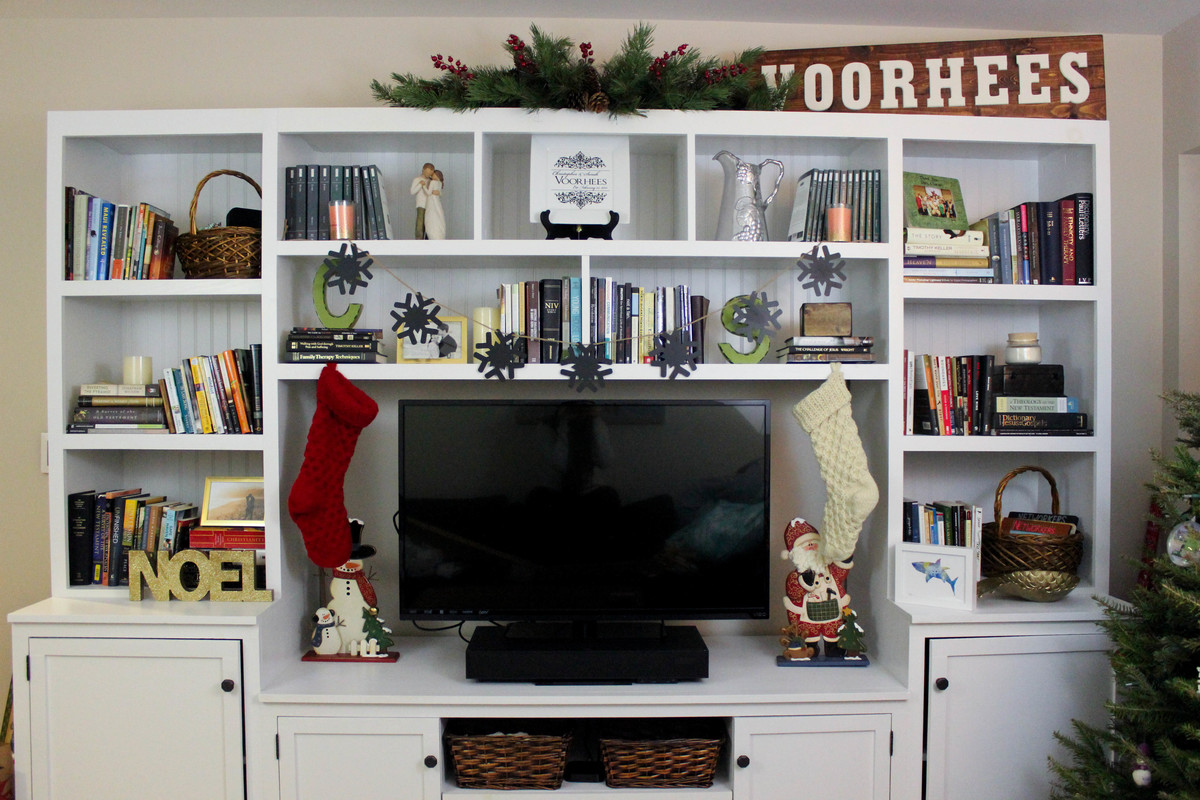
Hello everyone! I built the Logan entertainment center for our apartment and it is amazing! I used Ana's plans with a few modifications. This was the first projected I finished and while it's not perfect, I love it and I learned a lot in the process. Because I was learning to build as I went, it might have taken me longer than someone who has more experience. I built this project over several months and it took a long time, but it was totally worth it. Check out more details about my experience over at my blog.
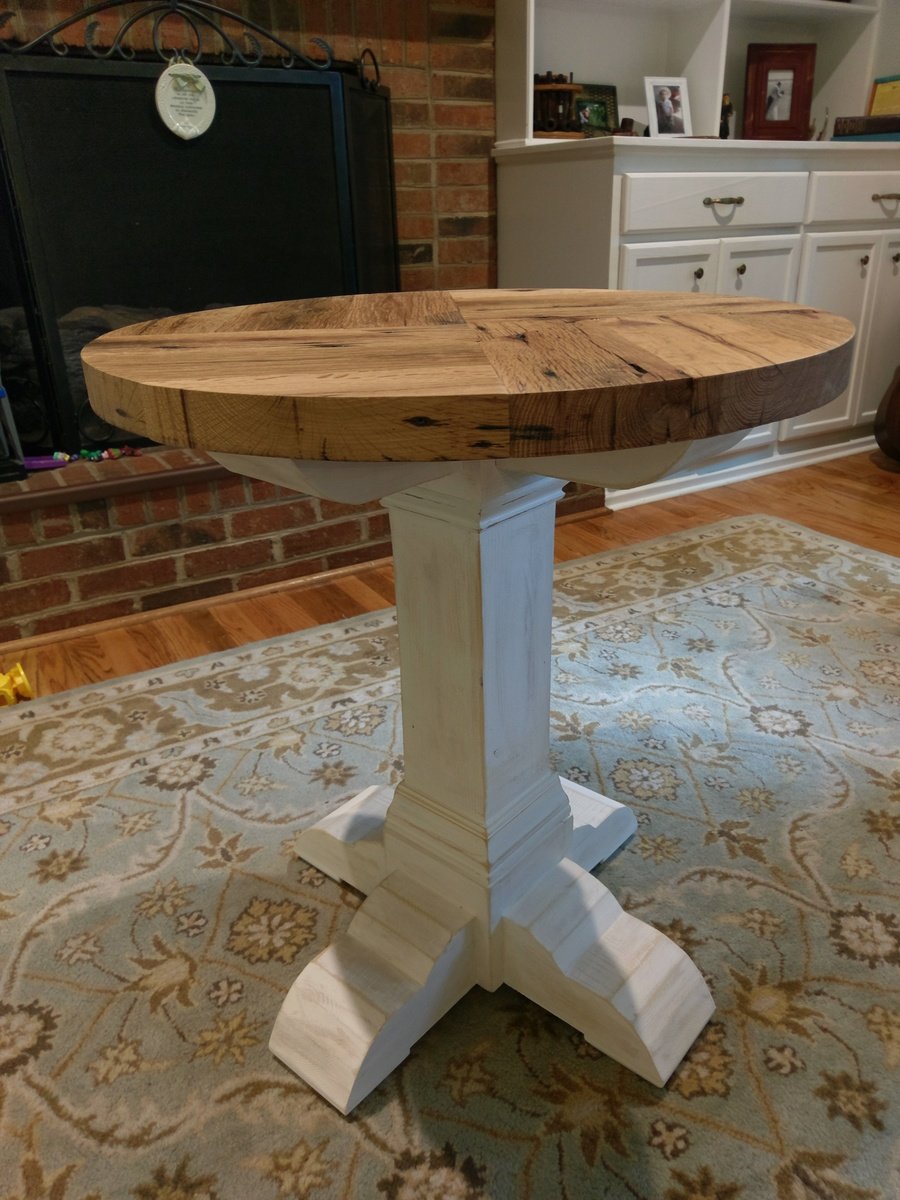
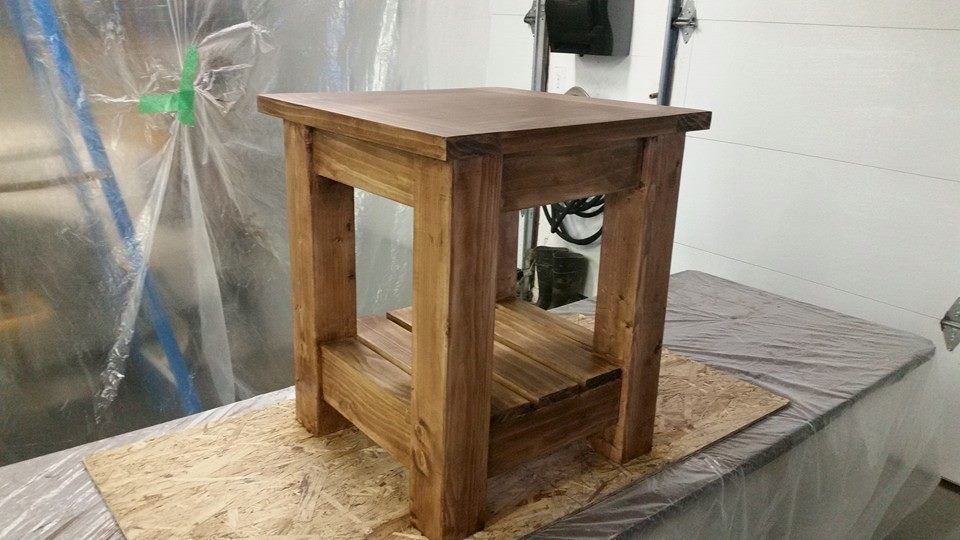
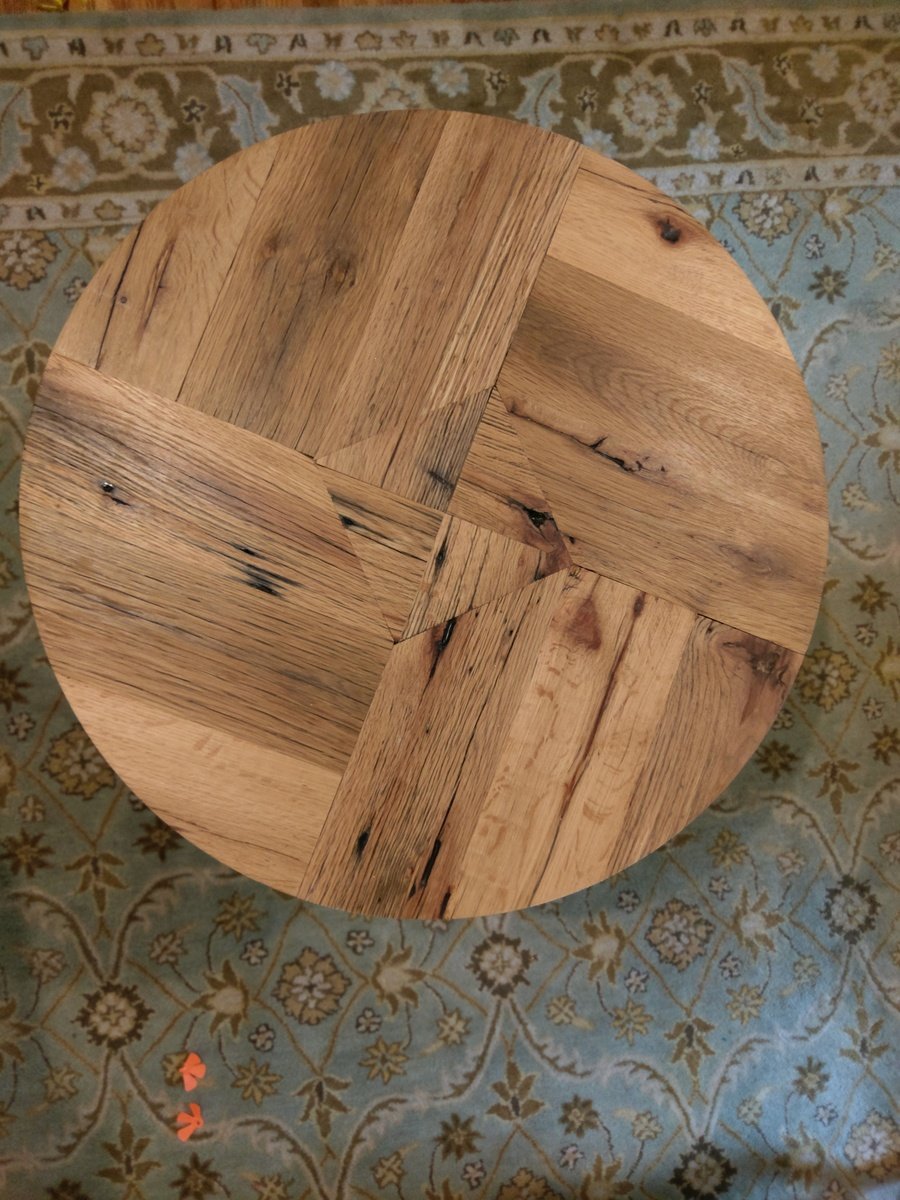
Here's a round top side table I built. The top is made from reclaimed red oak barn wood, sourced from a barn right here in Charlotte, NC. The base is made from standard 2x6s and trim.
More pictures and information is available on my site at http://famousartisan.com/reclaimed-red-oak-barn-wood-side-table/
My first woodworking project. Found the instructions very easy to follow. Took me a couple weeks because I only had a few minutes to work on it at a time. Biggest issue was I happened to have picked up a few warped boards.
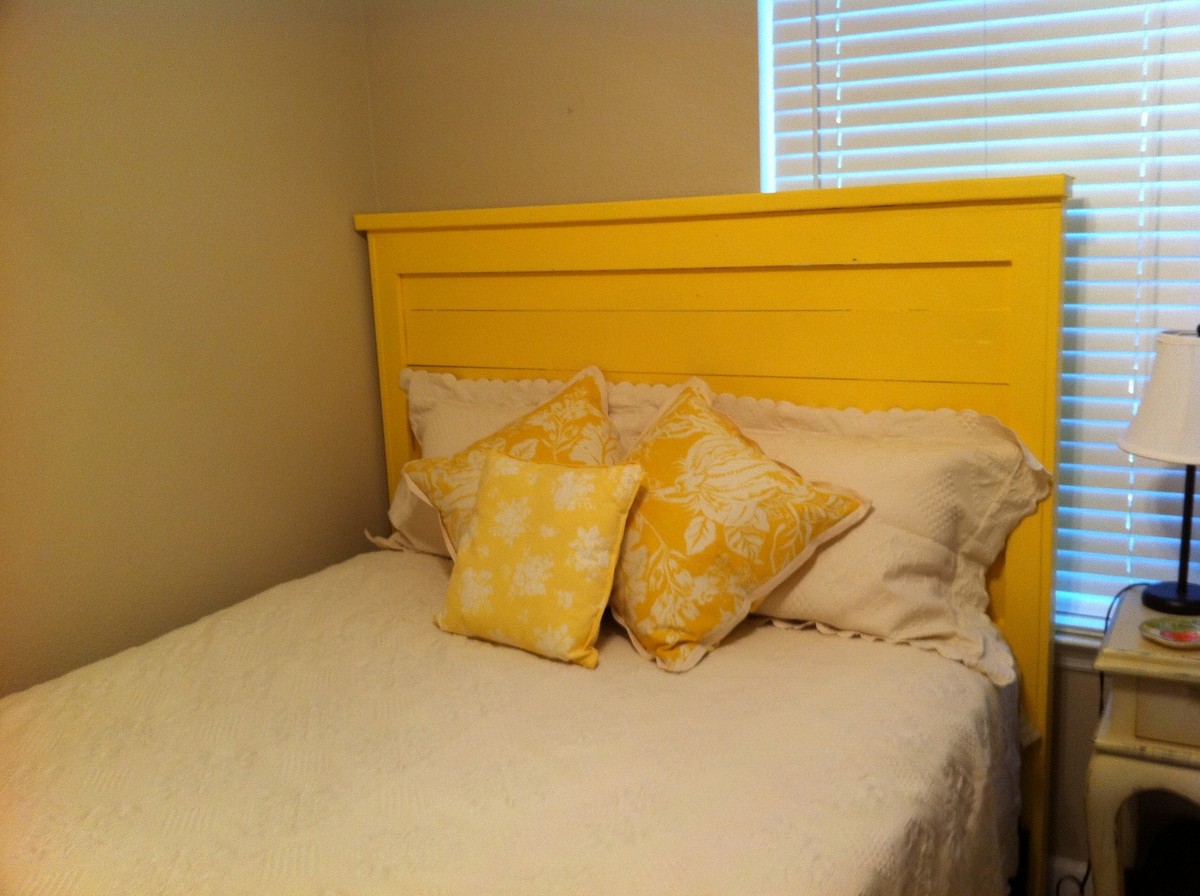

Thu, 06/23/2011 - 07:12
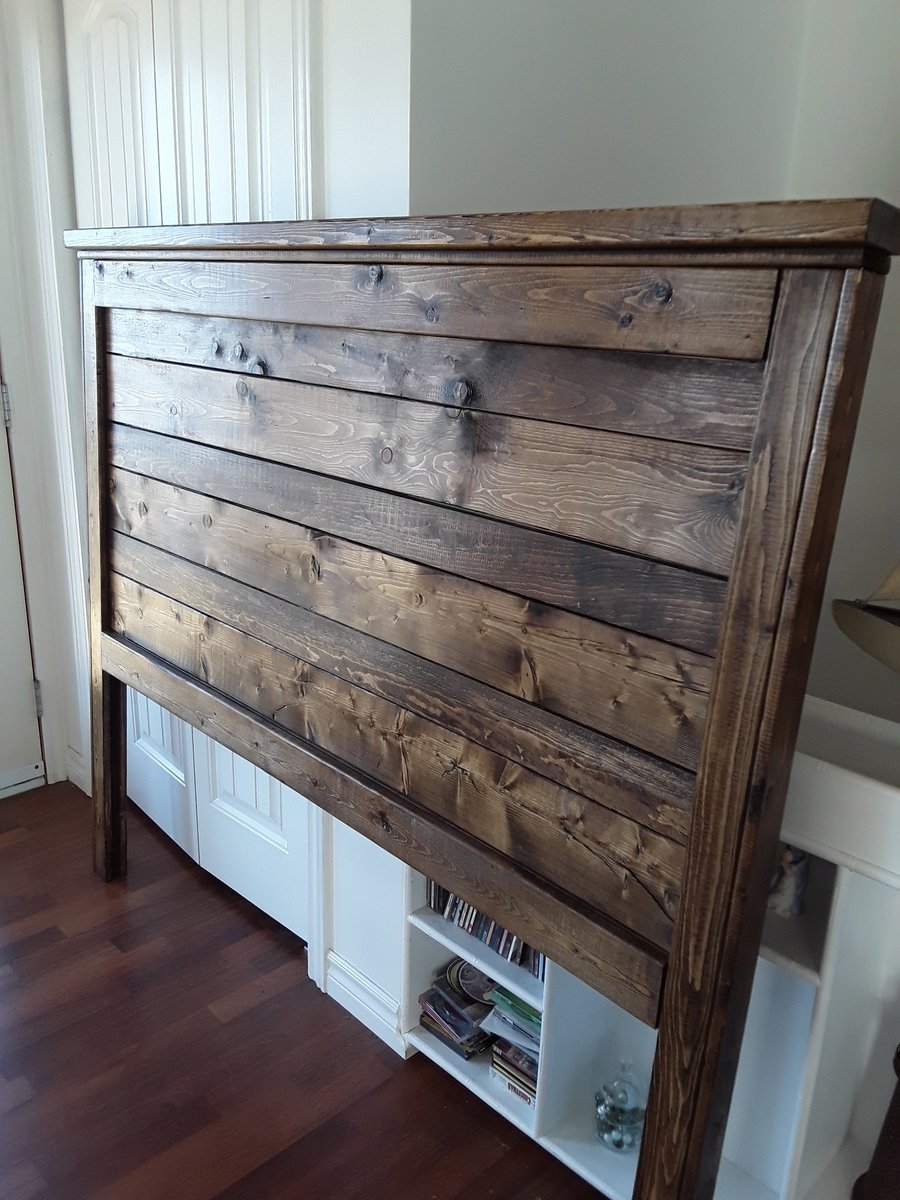
Looks great! Love the yellow! I just finished making this headboard as well. Need to take a picture and get it up on here. :)
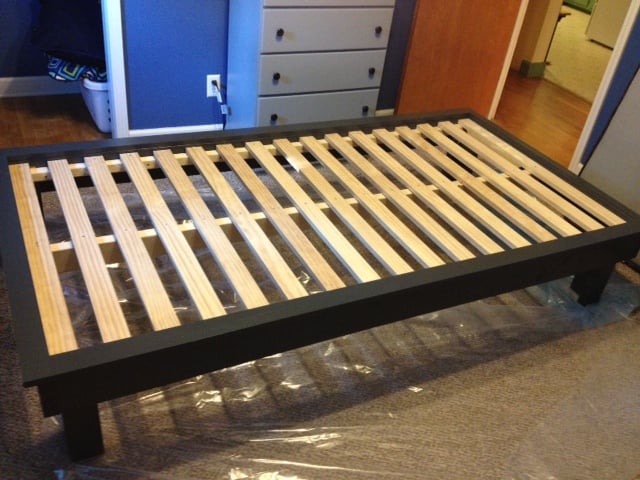
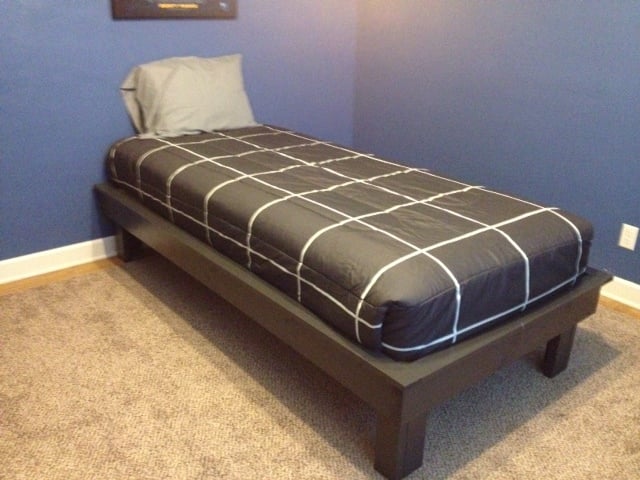
We needed a twin XL for our 17 year old grandson. This platform bed was perfect. It didn't take much to change the plans for the XL since it's the same length as a queen bed. We added the center support simply for added strength and changed the legs to make them longer so I can put wheeled drawers underneath the bed for added storage.
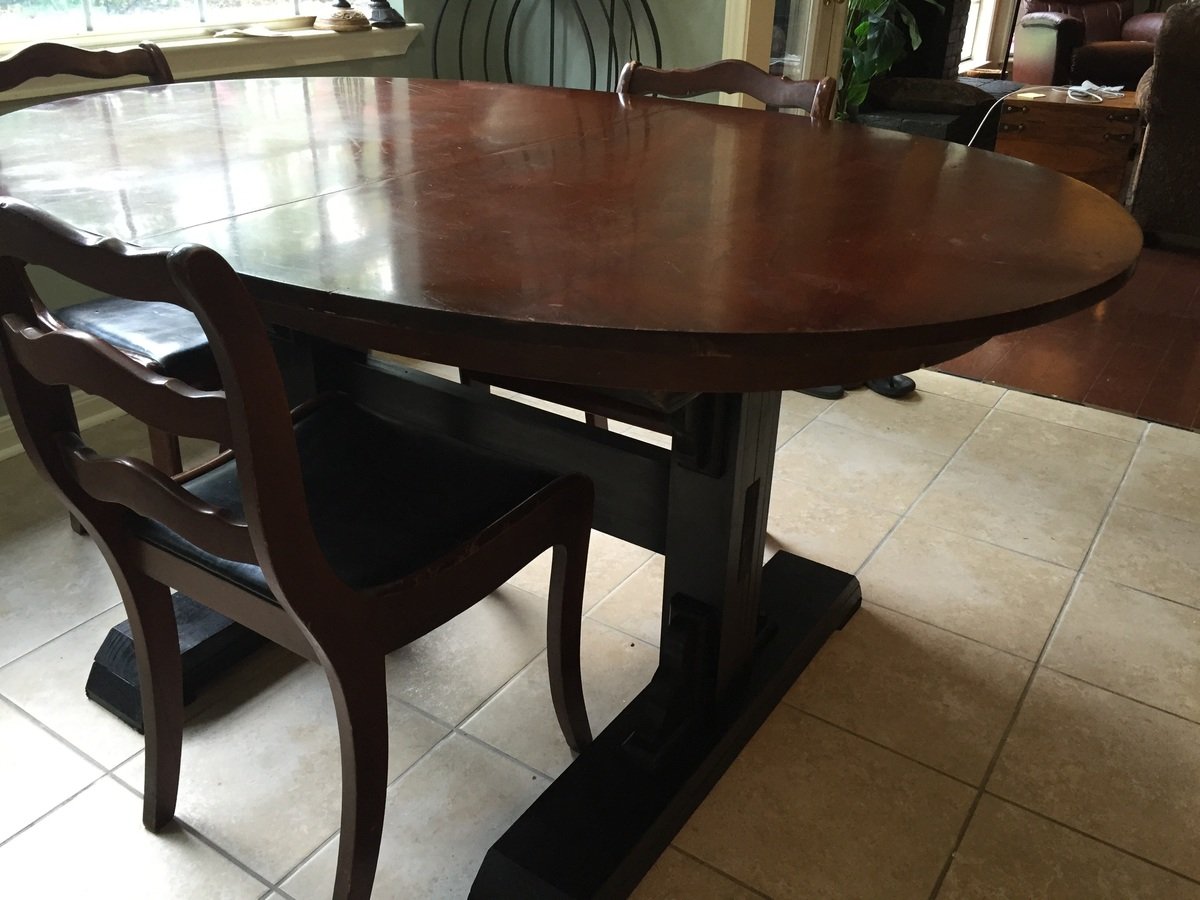
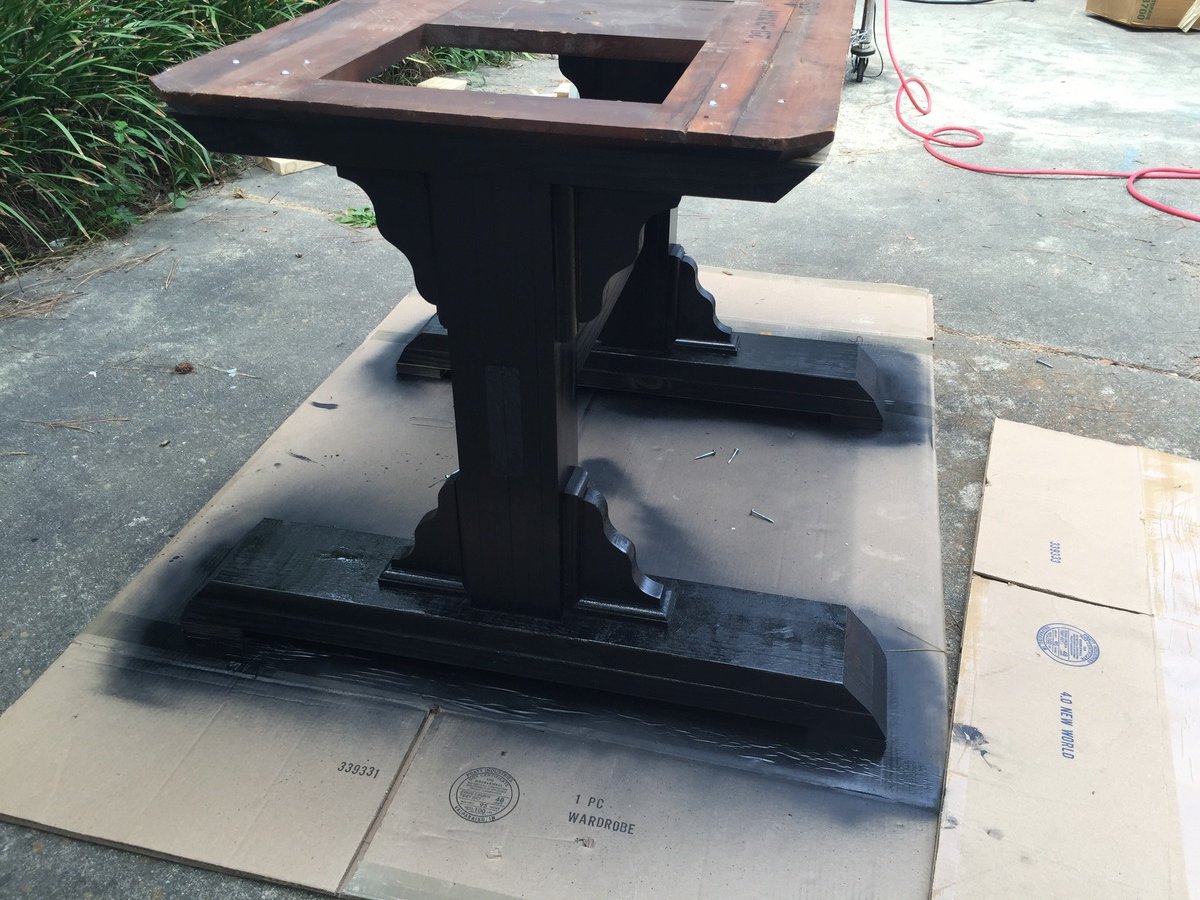
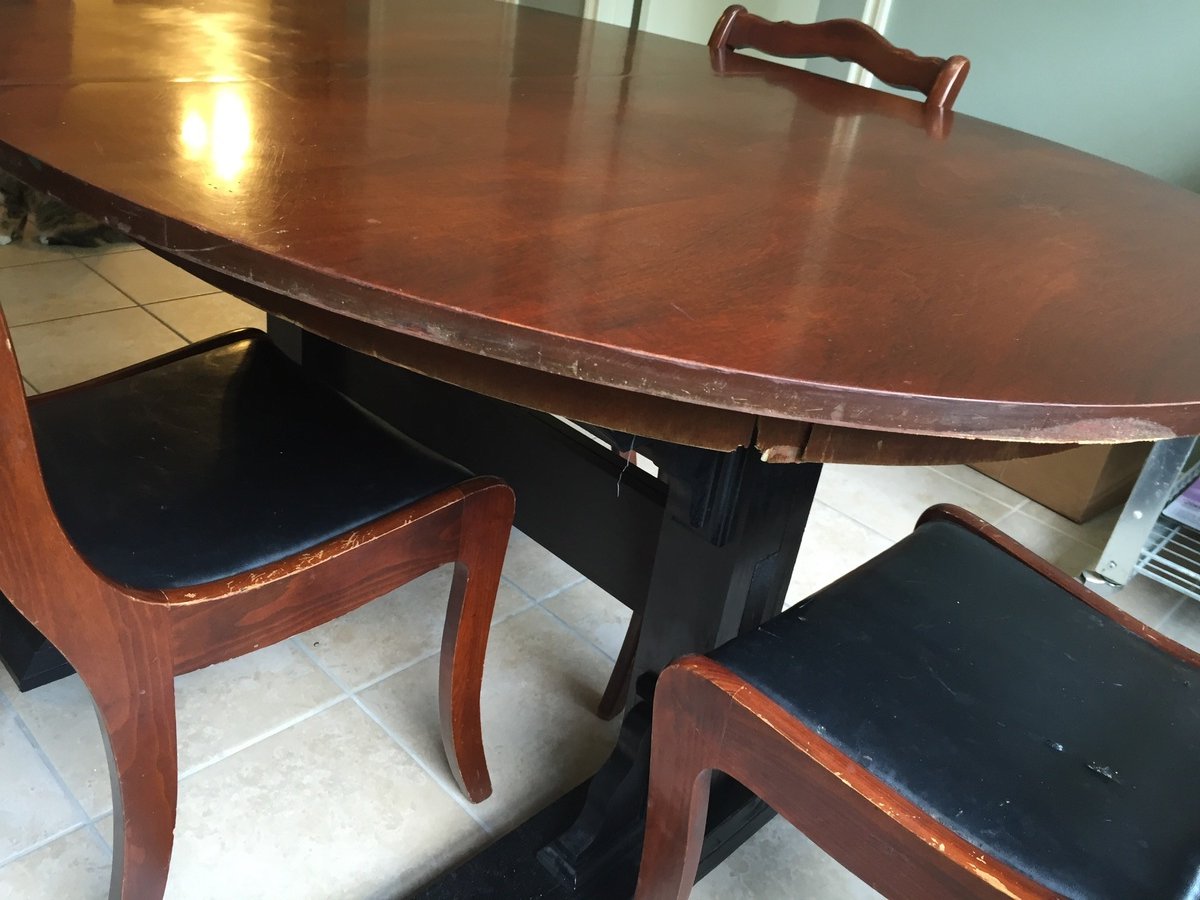
We needed a smaller breakfast area table and I found this mid century Drexel oval table top resting in my garage. Variations include - used 1x4 select pine instead of 2x4's for a tighter more finished fit. Used 5x7 pre-made shelf brackets for supports. Nice elegant trim pieces and saved much time rather than shaping 2x8's.
Very happy with with the results. Thanks Ana for the plans.