Community Brag Posts
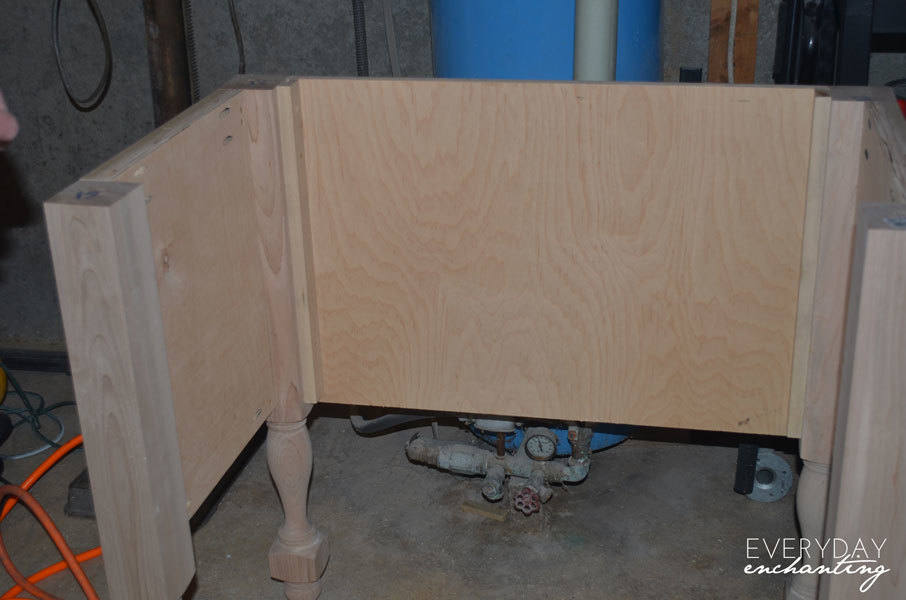
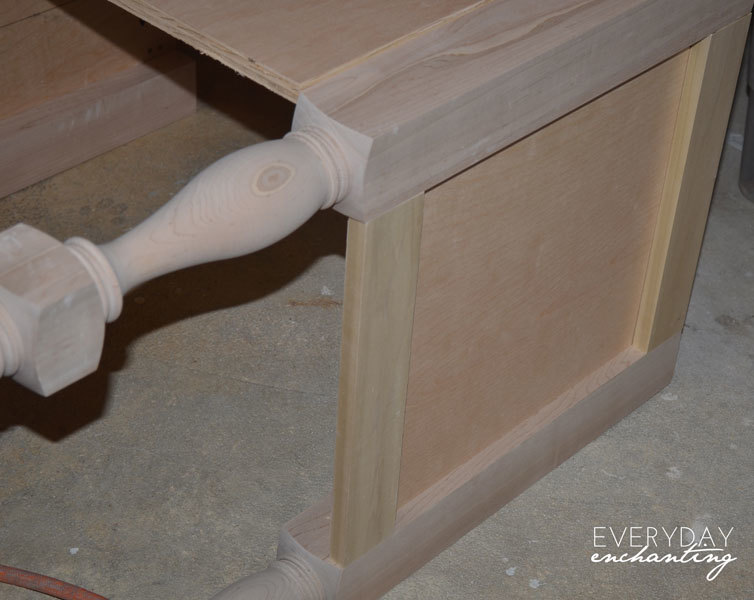
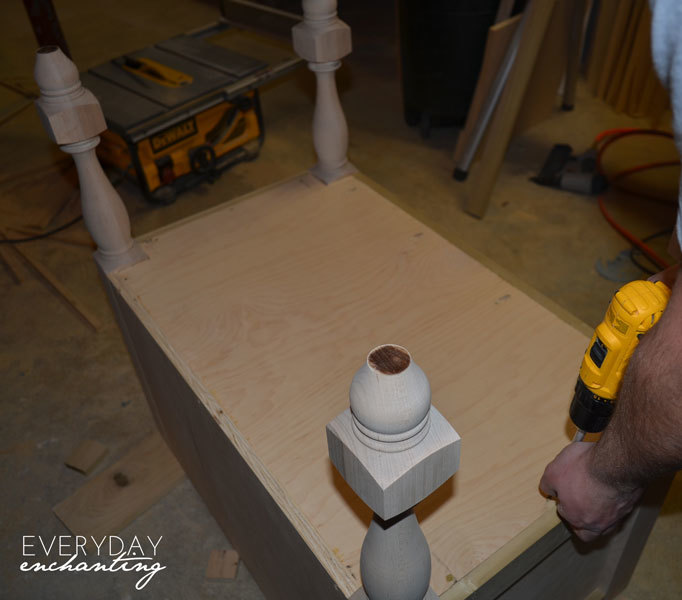
Modified Turned Leg Vanity
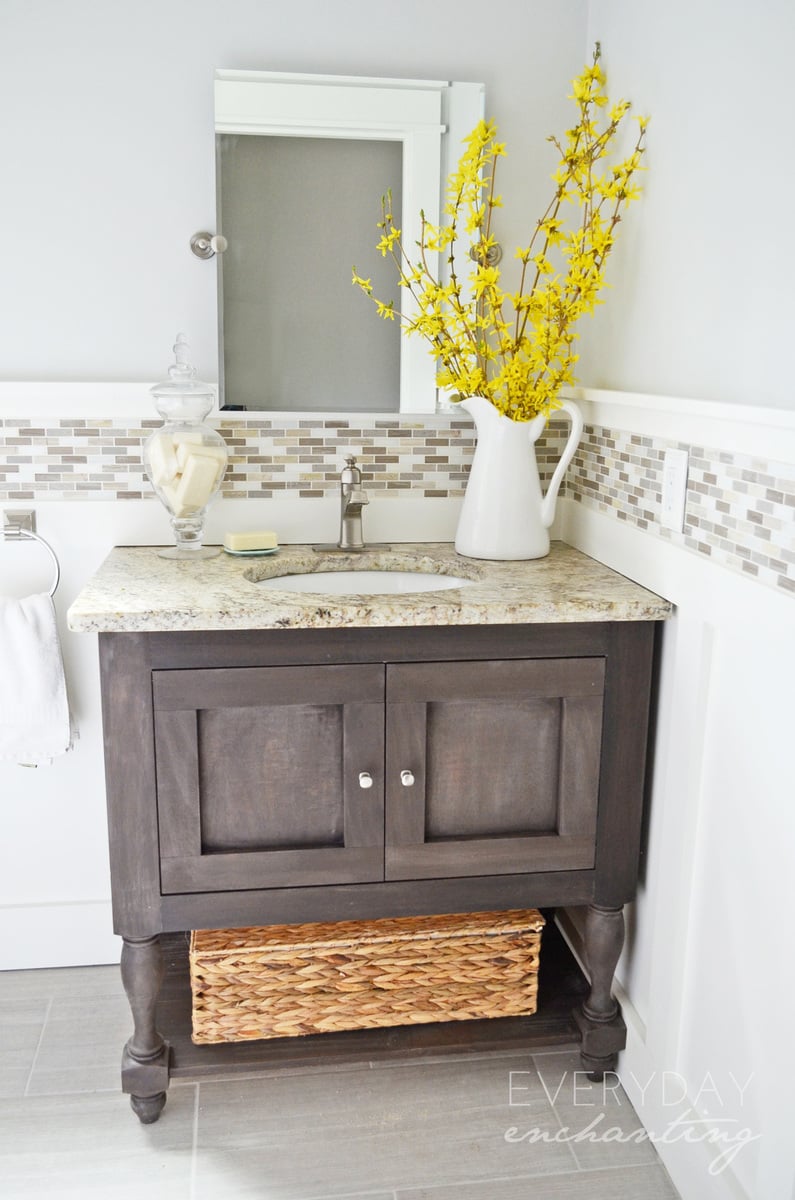
After falling in love with the Newport Vanity from Pottery Barn, I knew we would have to DIY it, since the original was not in our budget. I came across the plans from Ana, and off we went! We modified the plans a bit to fit our existing granite countertop- we didn't have space for the drawers, unfortunately. However, we used our Kreg Jig whenever possible, and it made the project very easy!
http://www.everydayenchanting.com/diy-pottery-barn-inspired-sink-consol…
Built from Plan(s)
Estimated Cost
$100
Estimated Time Investment
Afternoon Project (3-6 Hours)
Finish Used
Minwax Waterbased Wood Stain White Base (tinted Slate at the paint counter) wiped away quickly- a coat of Kona by Rustoleum applied while the slate stain was still wet. Kona was allowed to sit longer.
Recommended Skill Level
Intermediate
Comments


Wed, 11/08/2017 - 05:25
Fair question. Especially
Fair question. Especially when it costs over $25 for Osborne to ship the legs to me via UPS ground.
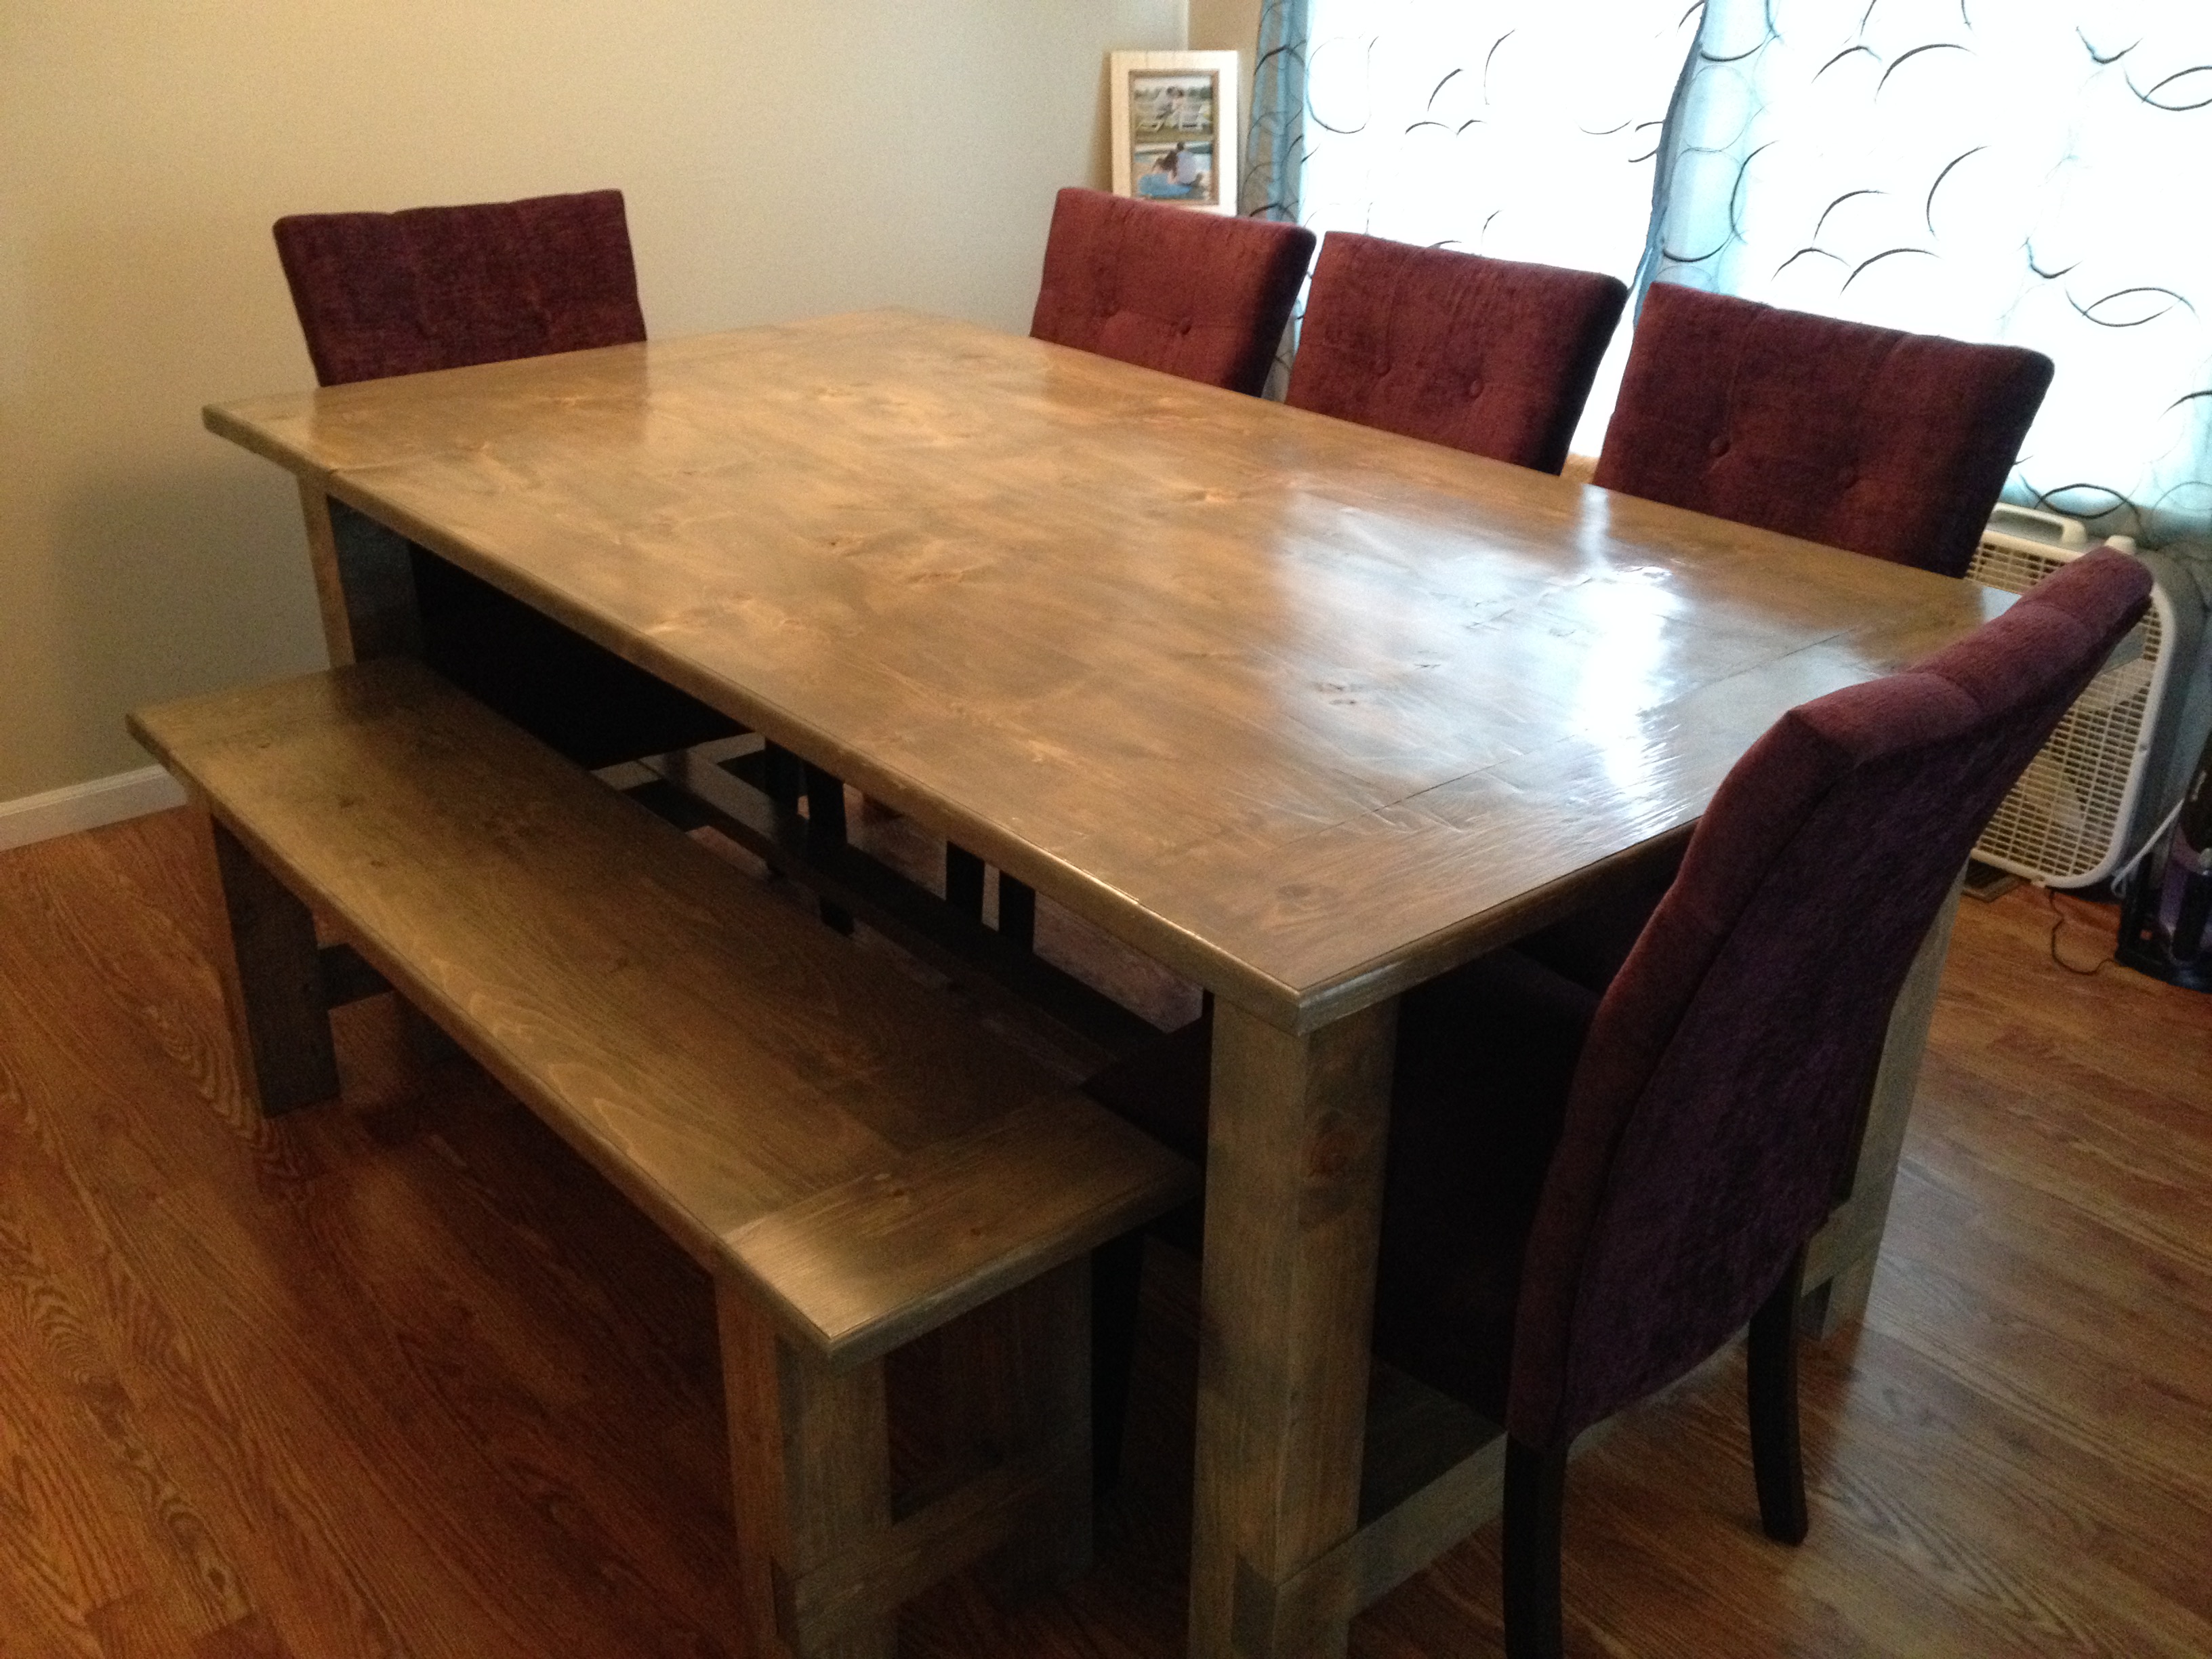
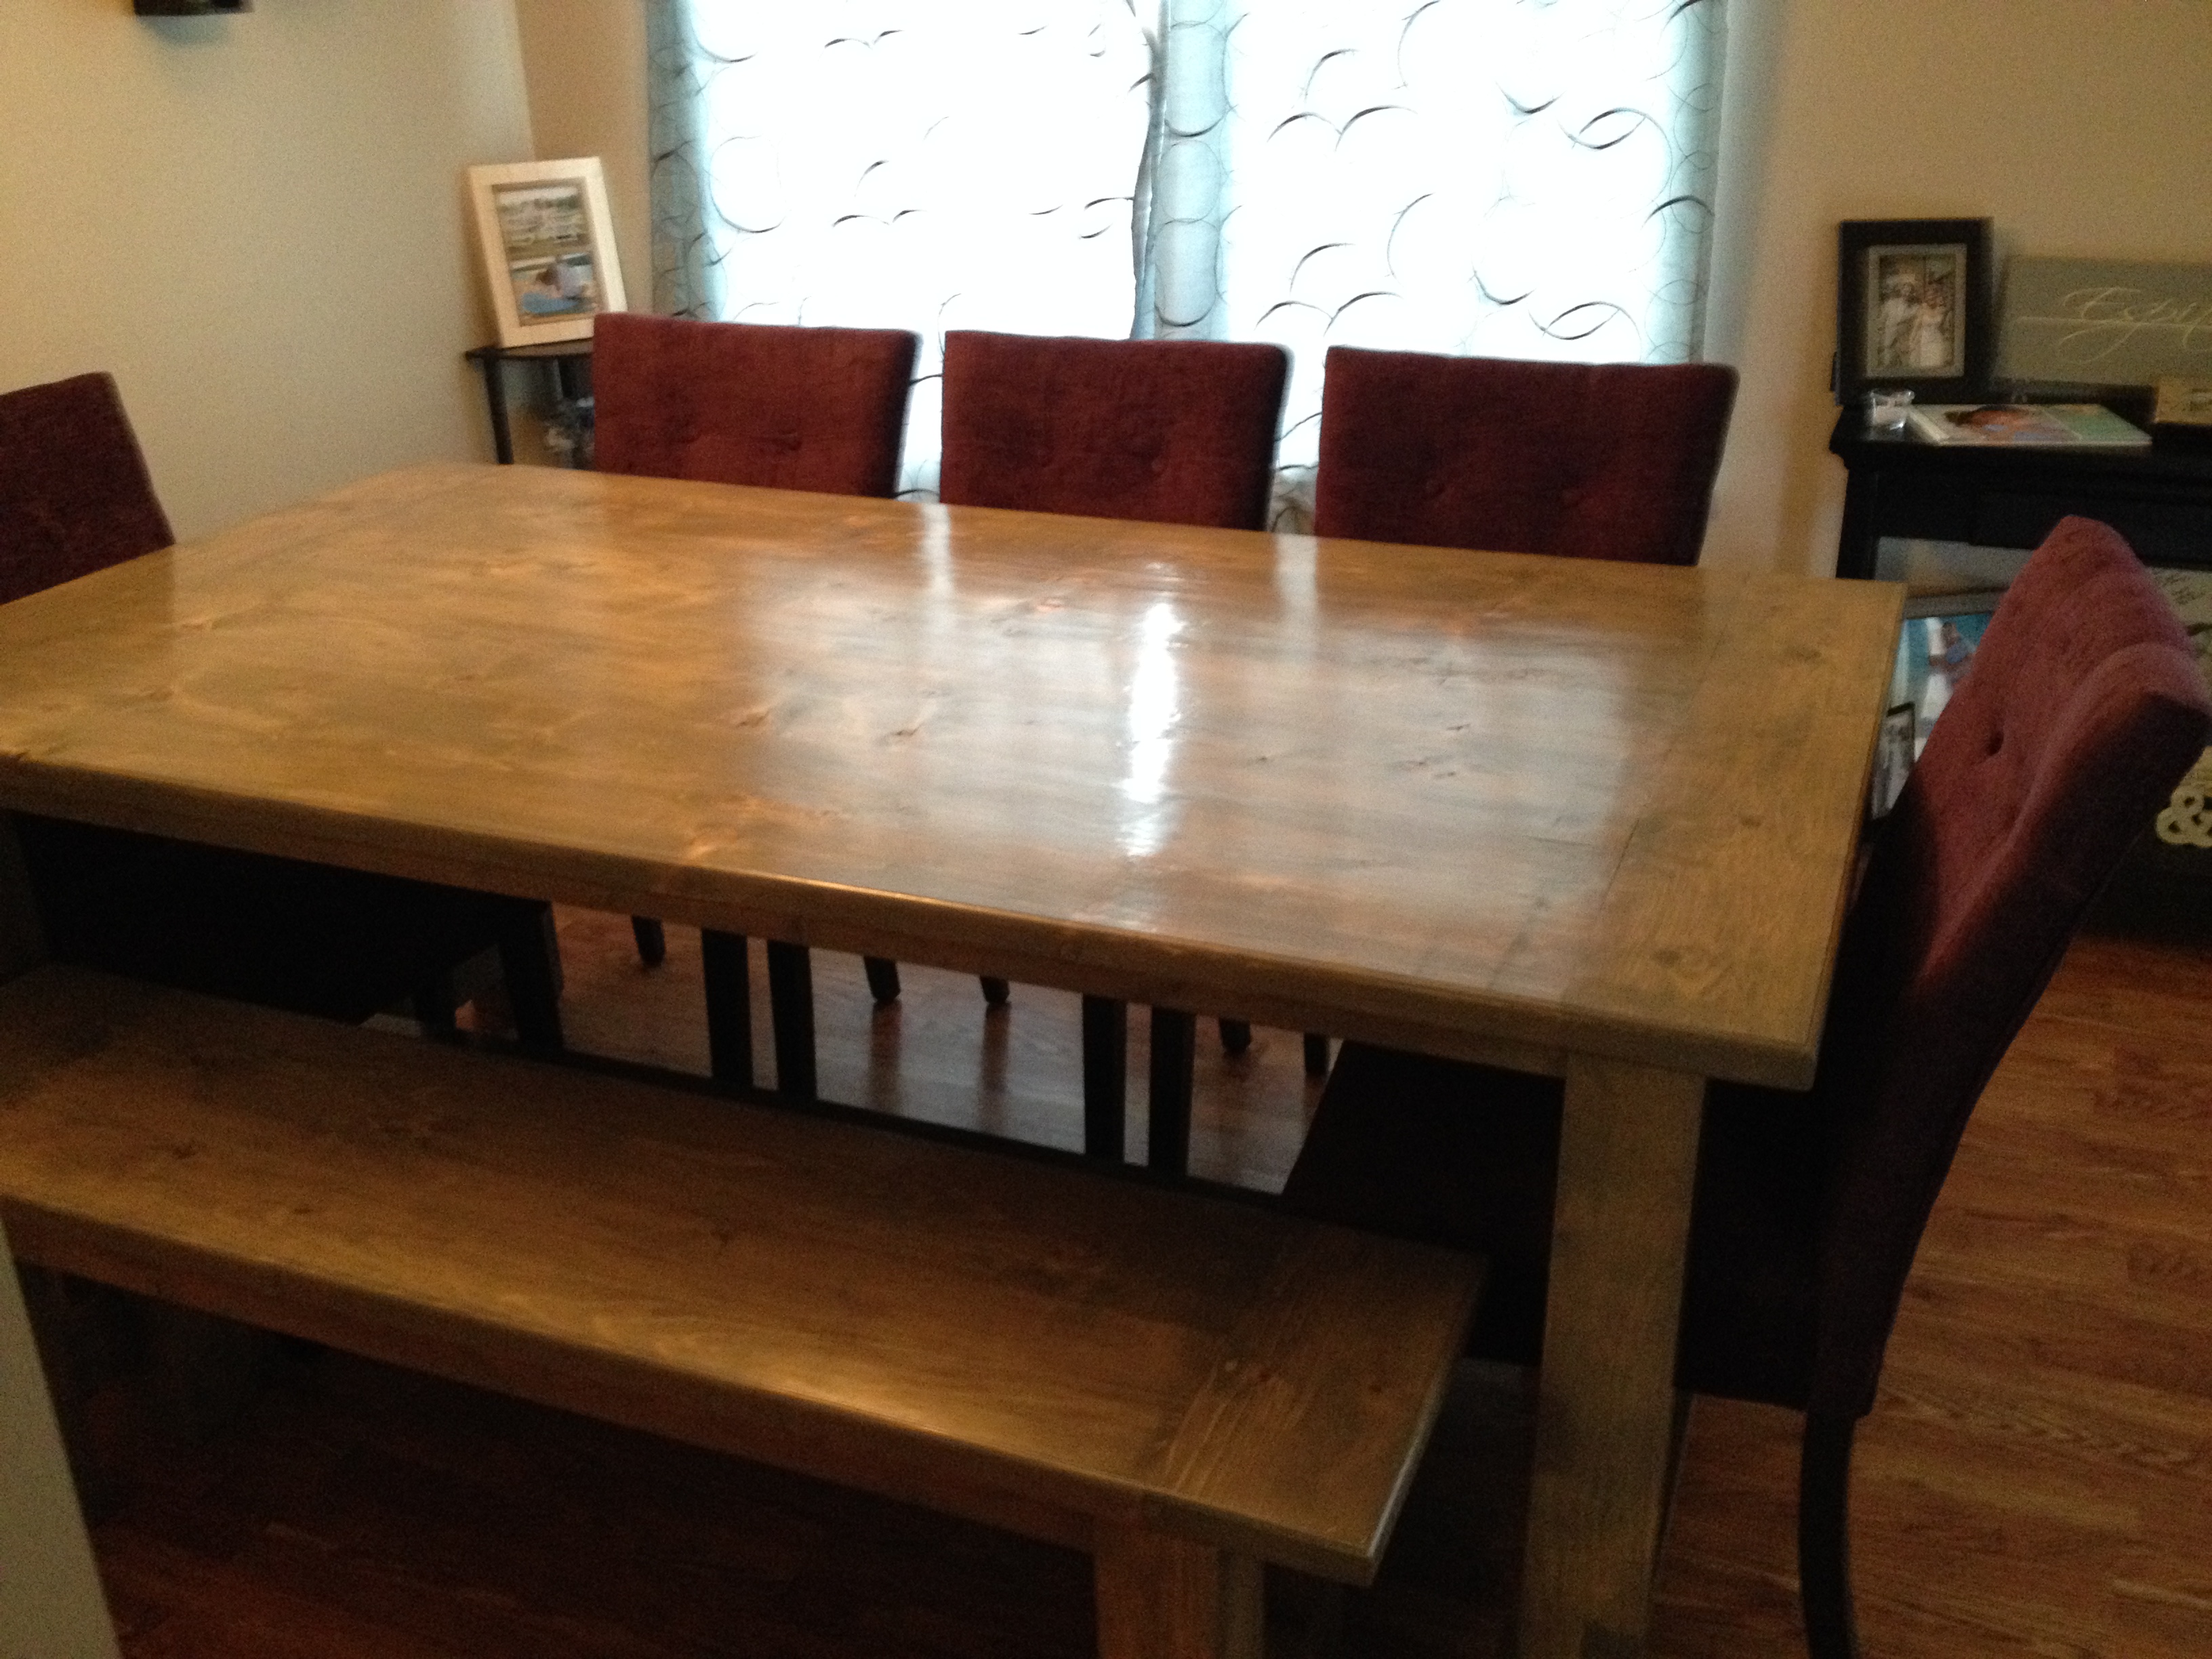
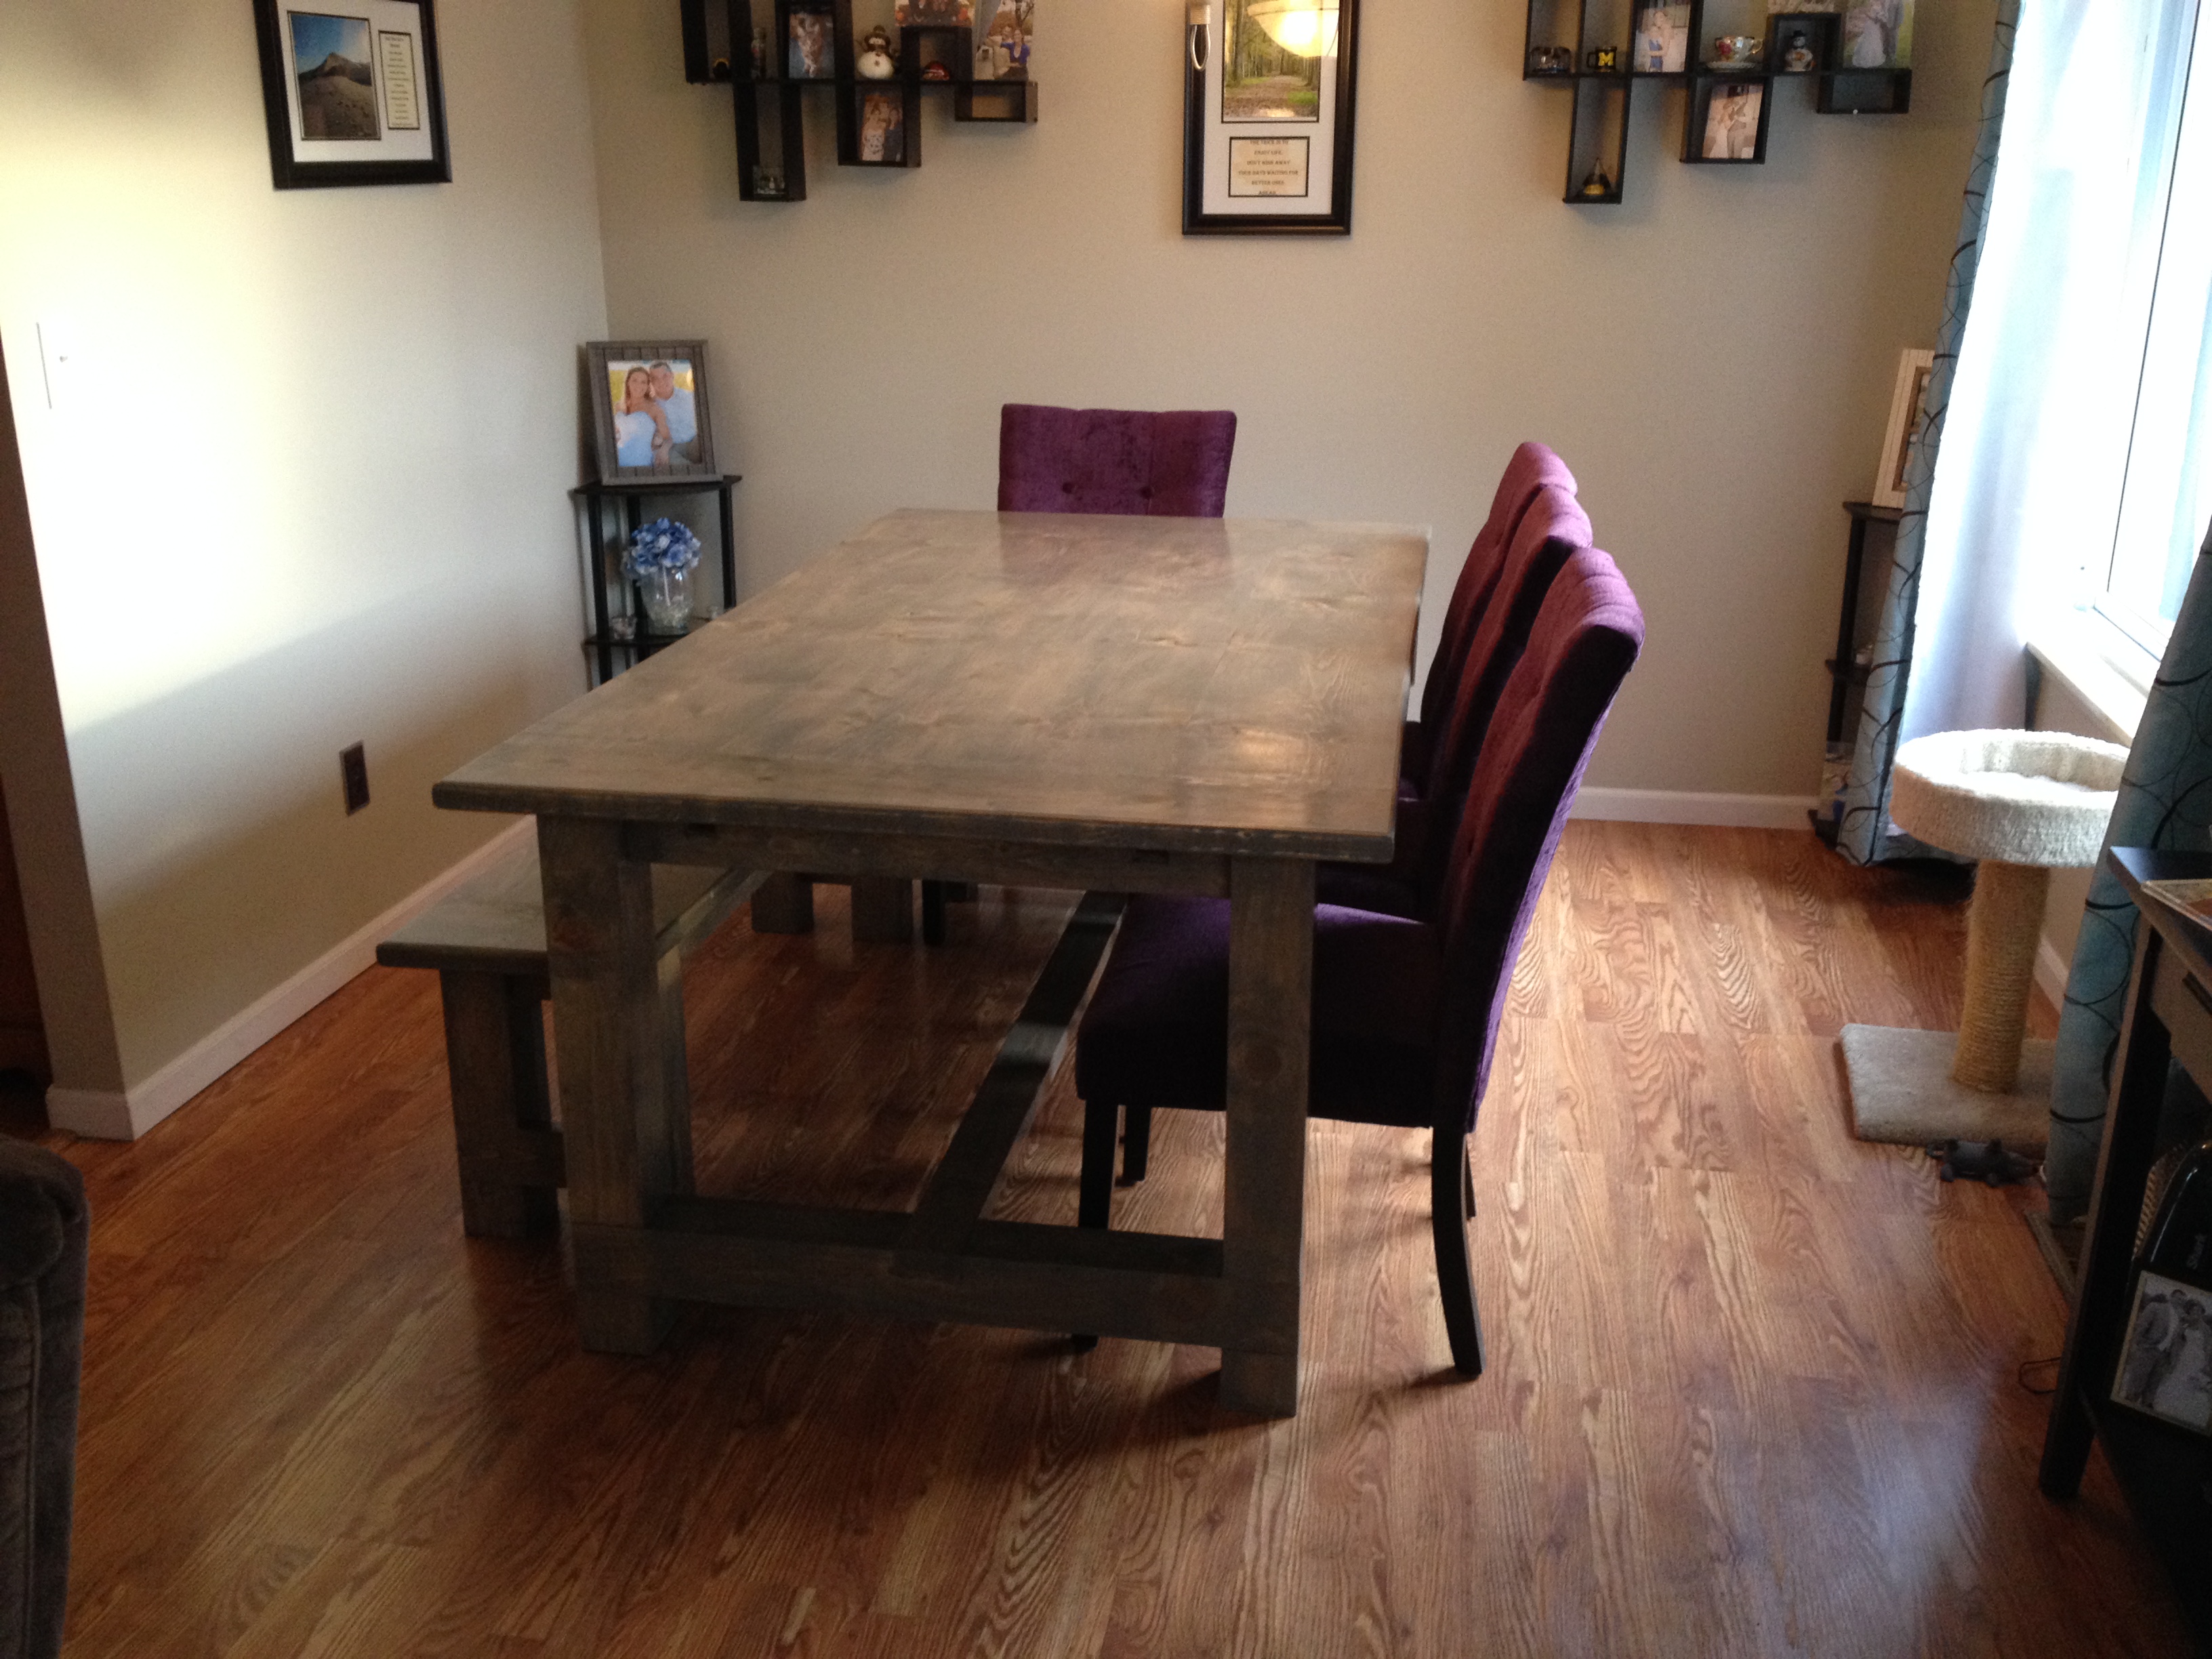
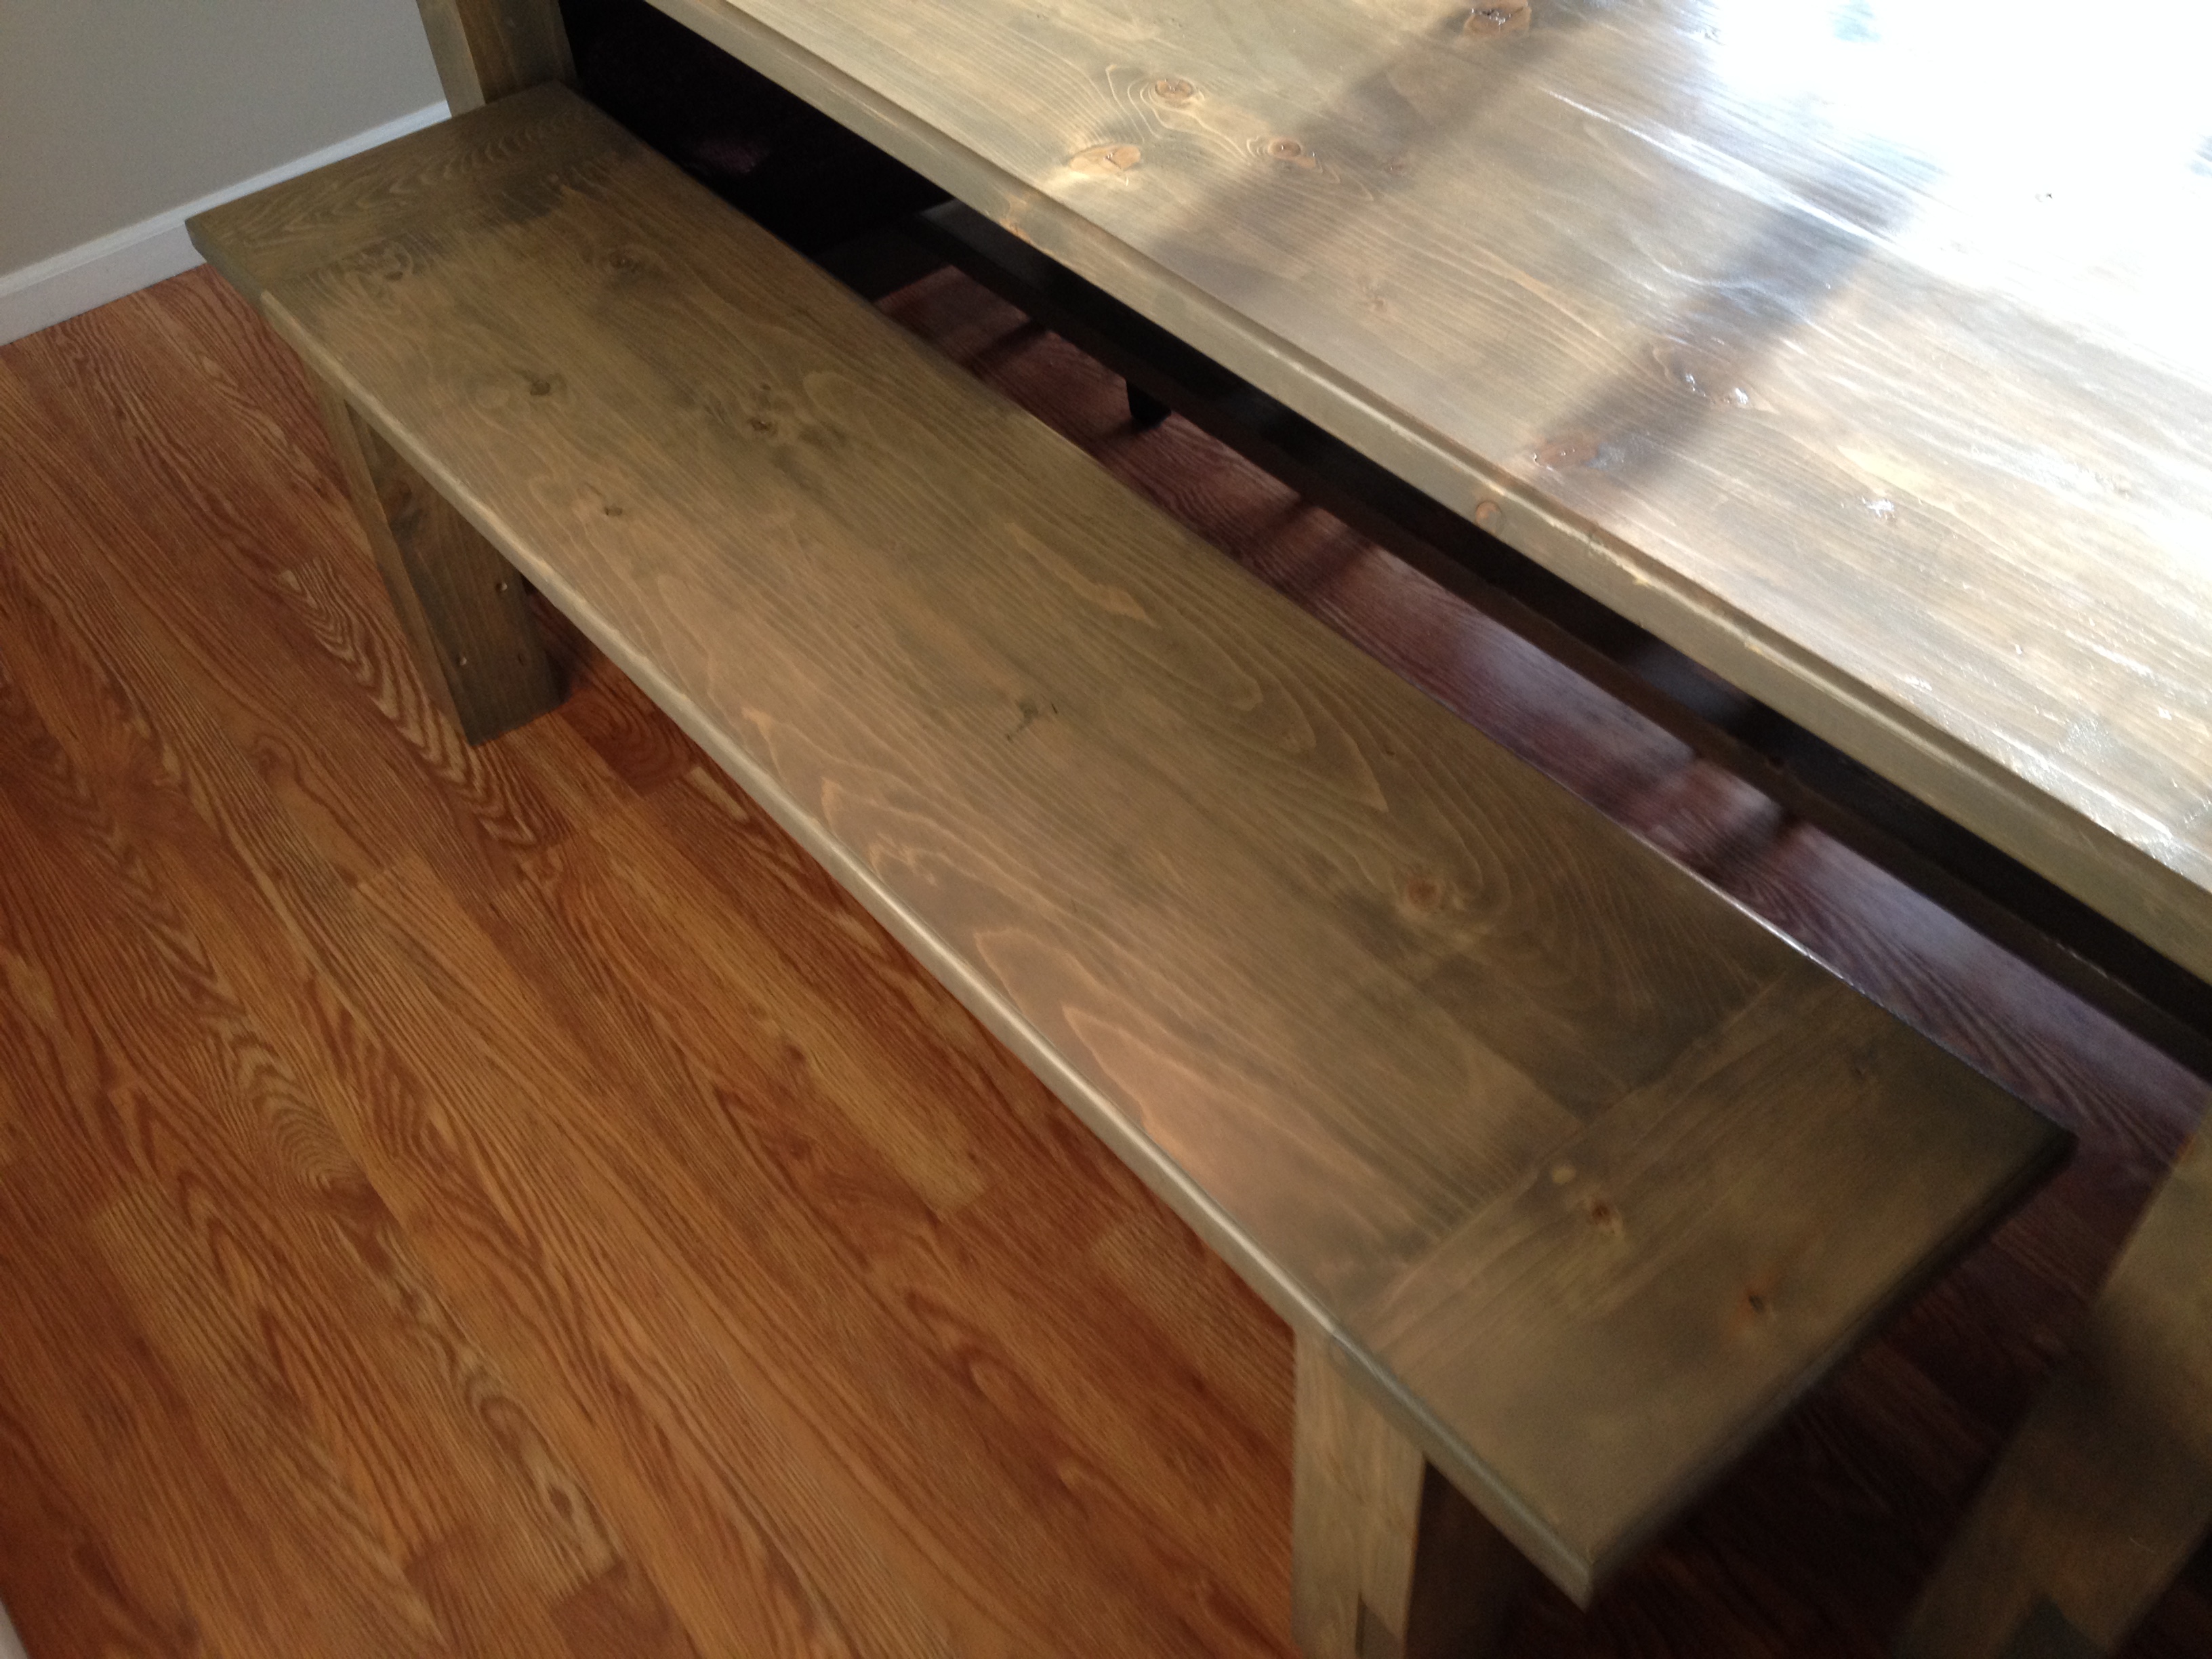
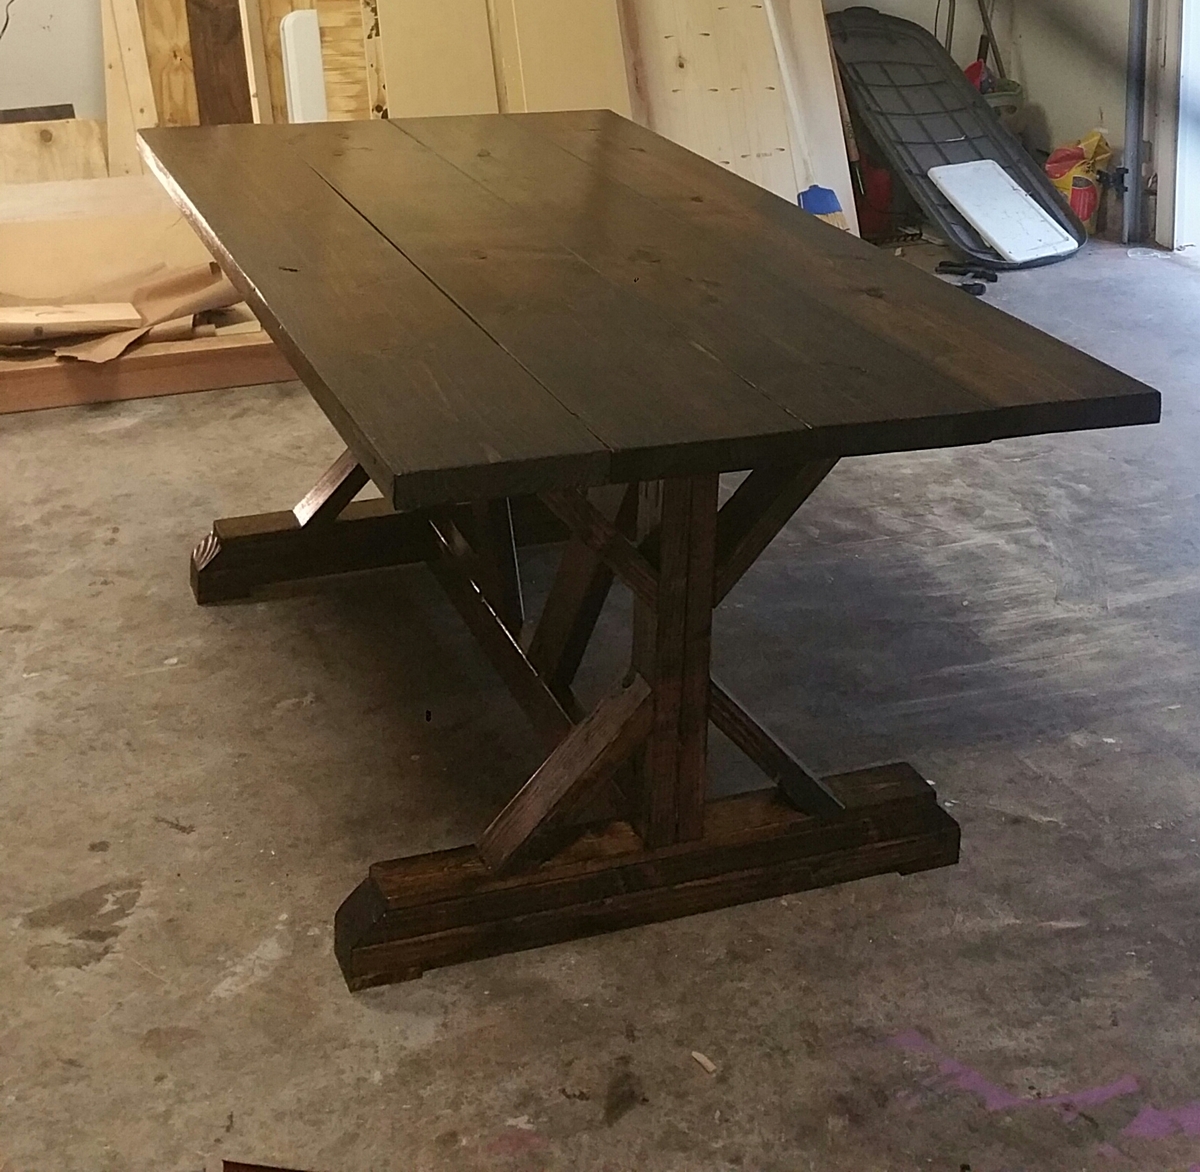
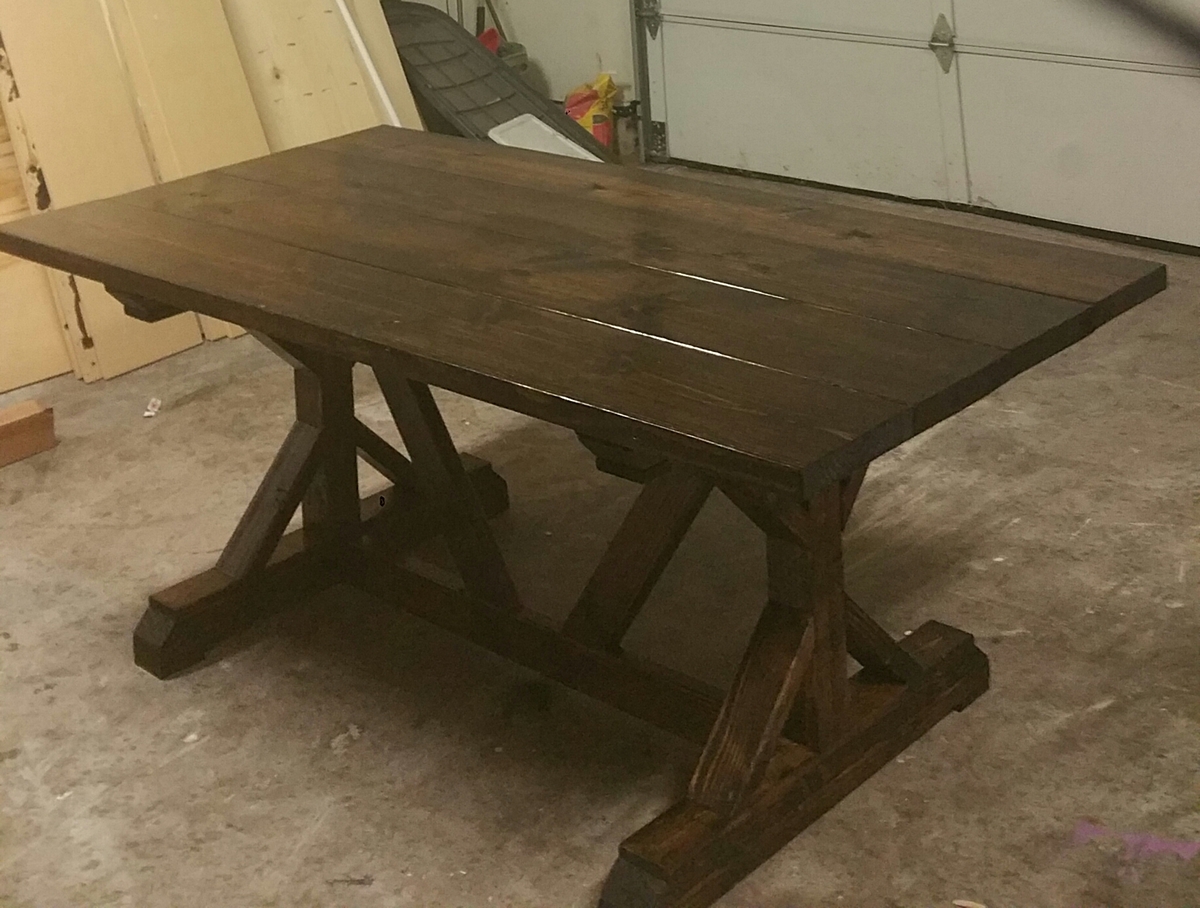
Farmhouse table, table extension, and bench
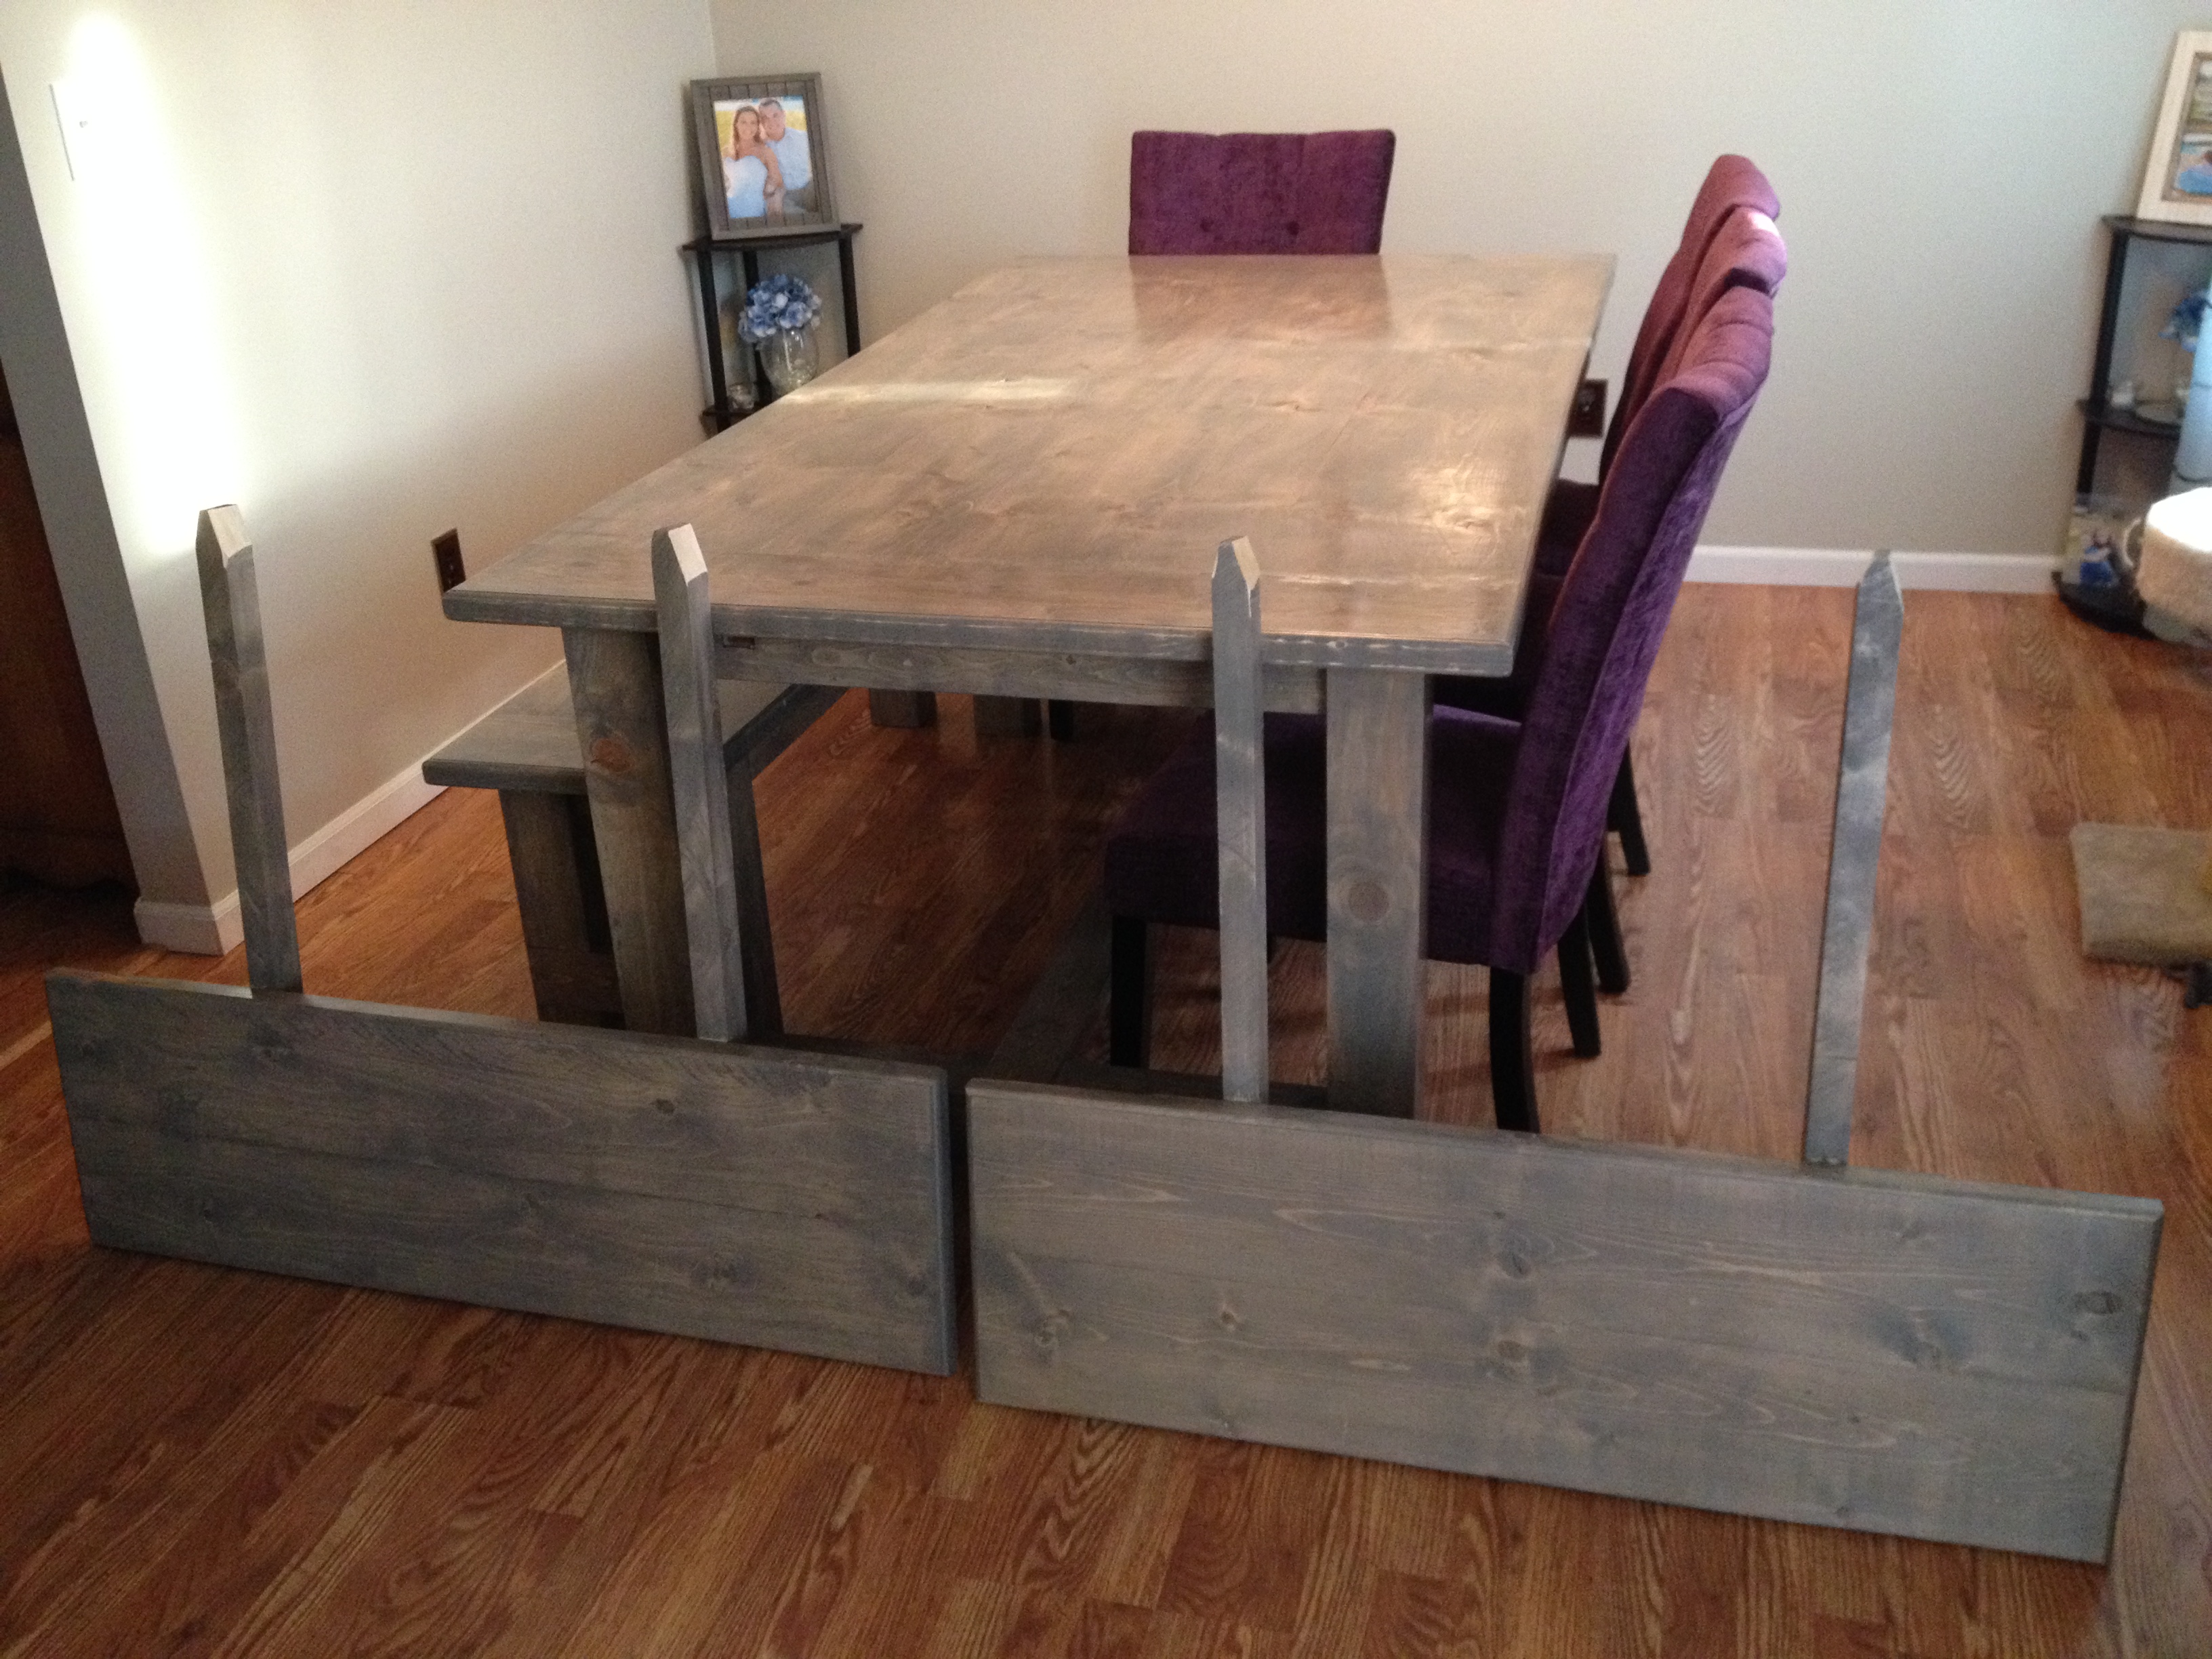
My wife and I recently built this farmhouse table with her grandpa. It was a lot of fun and we are really happy with how it turned out. The table is 80 inches long, 43 1/2 inches wide, and 31 inches tall. The extensions are 15 inches long and 43/1/2 inches wide, and the bench is 61 inches long, 15 inches wide, and 19 1/2 inches tall.
It tooks us about 4 weekends (around 32 hours) to finish the project and the included rebuilding the base of the table after our first one cracked.
We modified the plans a bit. We used 4x4s instead of glued together 2x4s for the legs on the table and bench.
We also used the plans on this blog (http://tommyandellie.com/?p=2582) as a guide.
This was the first time my wife and I have tired a DIY project and we had a ton of fun. Her grandpa had some experience with wood working and had all of the tools we needed but you can certainly do this without any extensive wood working experience.
Sorry for the duplicate post. This is my first time on the website and the first time I posted it came across as 'guest'

Built from Plan(s)
Estimated Cost
$350
Estimated Time Investment
Week Long Project (20 Hours or More)
Finish Used
We put on one coat of minwax pre-stain wood conditioner. Then we added two coats of stain of a custom mixed stain from Sherman Williams. We started with the Wood Classic Rustic Gray. The store then tinted the stain until we found the color that we liked. Note - the table looks grayer in person than it does in some of the photos. Finally we applied 3 coats of minwax water based oil modified semi-gloss polyurethane.
Recommended Skill Level
Starter Project
Comments
Tue, 08/16/2016 - 13:34
A few things I forgot...
I forgot to mention that with the extensions the table expands to 110 inches.
My Outdoor Bar Table
This is my first project, based on your outdoor bar table plan. Great design. I changed the top a little, still needs a little work.
Built from Plan(s)
Estimated Cost
$150
Estimated Time Investment
Weekend Project (10-20 Hours)
Finish Used
Painted with the Limousine Black in the plans.
Recommended Skill Level
Beginner
Sports Cards Sorting & Storage Cabinet
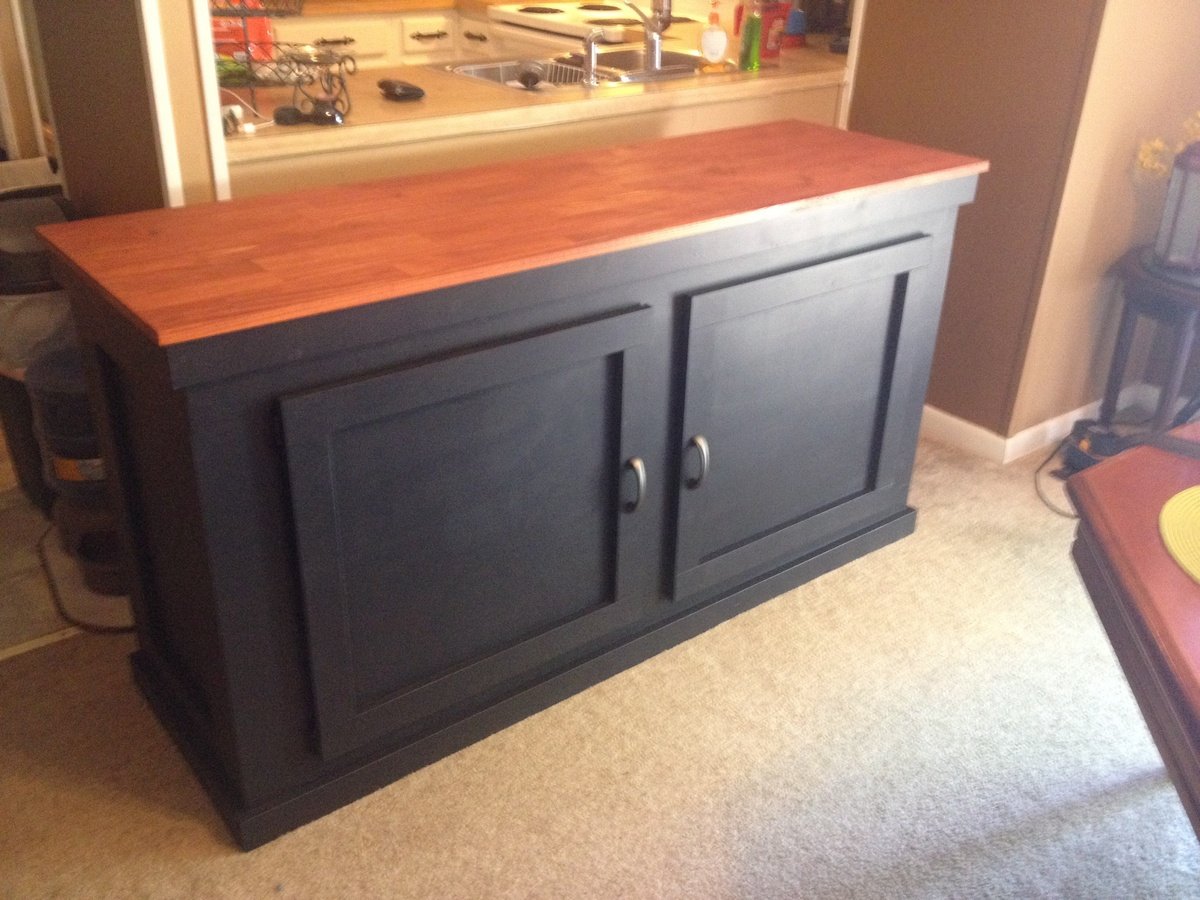
So... I am a pretty dedicated baseball card collector as well as a new found hobbiest in wood building. It's been an ongoing issue in my household with my baseball cards and boxes cluttering up our dining room. I decided to resolve the issue while still being able to keep my cards in the same room with even easier access without being an eye sore! This just might have saved my marriage! I searched for months for plans for some sort of baseball card cabinet but they just did not exist. The closest I could find for what I was looking for was a storage bench plan here on Ana White. I liked the idea of a top opening for hidden storage. It was too small for what I needed. I then came across plans on another site for an aquarium stand cabinet. I figured the combination of these two projects was what I was looking for. After a week of planing and drafting and 3 weeks of construction/finishing in the little spare time I have, I created what you see. People in the card collecting forums I'm a member of are begging for plans or for me to build them one! Problem is, this is the first thing I have built following my own design and plans. I could pass these on but no one in their right mind would be able to follow my scratches on paper but myself! I'm extremely proud of the outcome but am looking for a way to come up with plans I can share! Hope you all like, and if I can come up with a way to make follow able plans I will share! This was all assembled using the kreg jig system, wood filler to hide the knots and lines where the wood joined and lots of sanding!
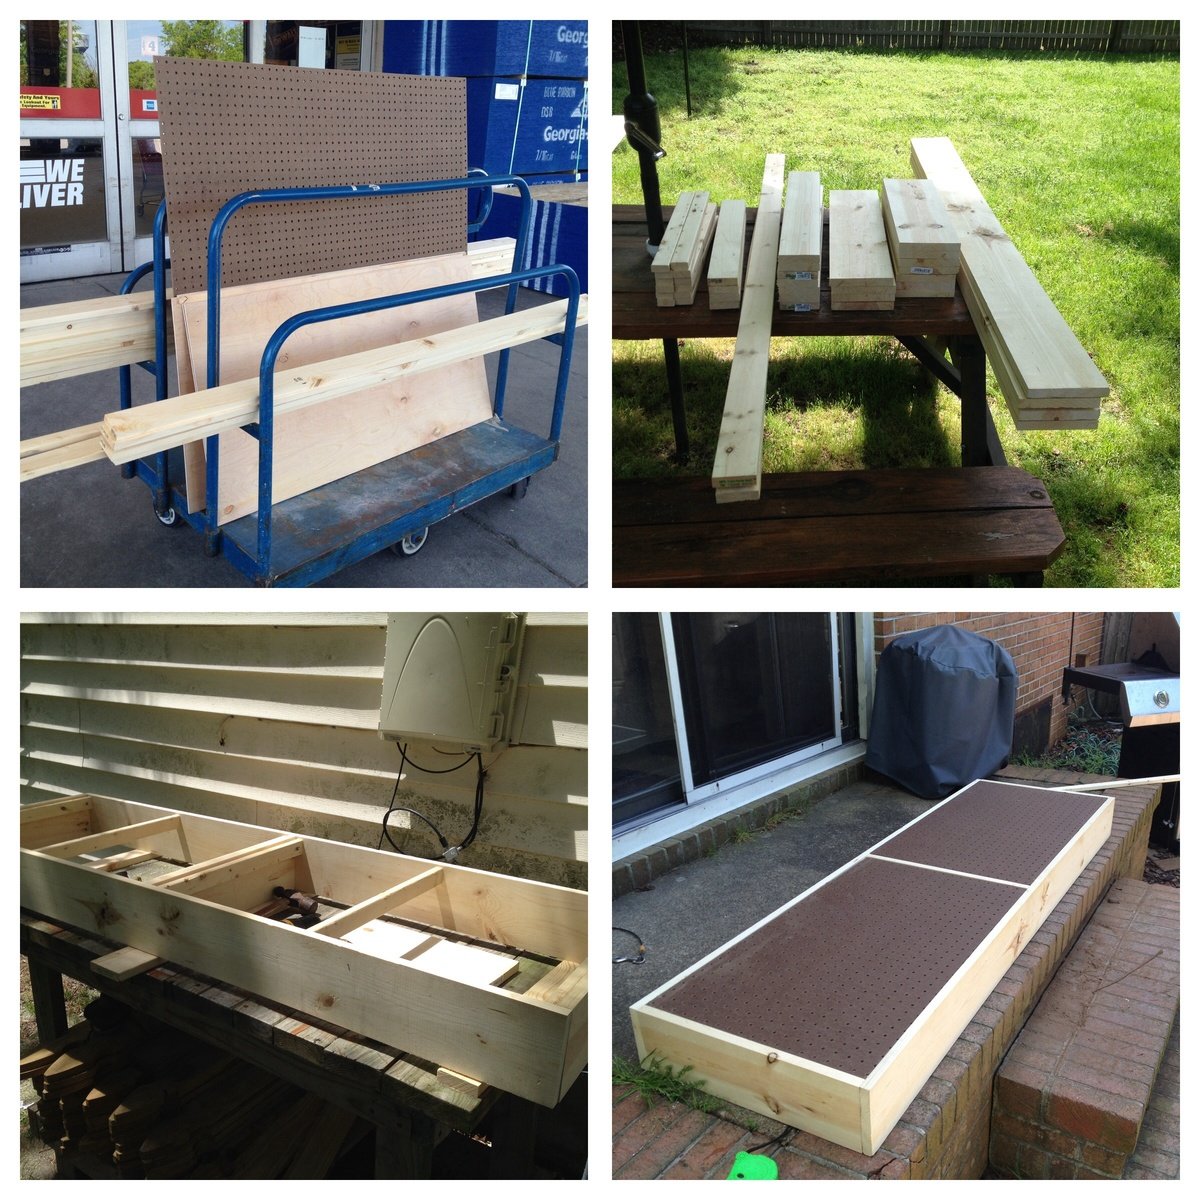
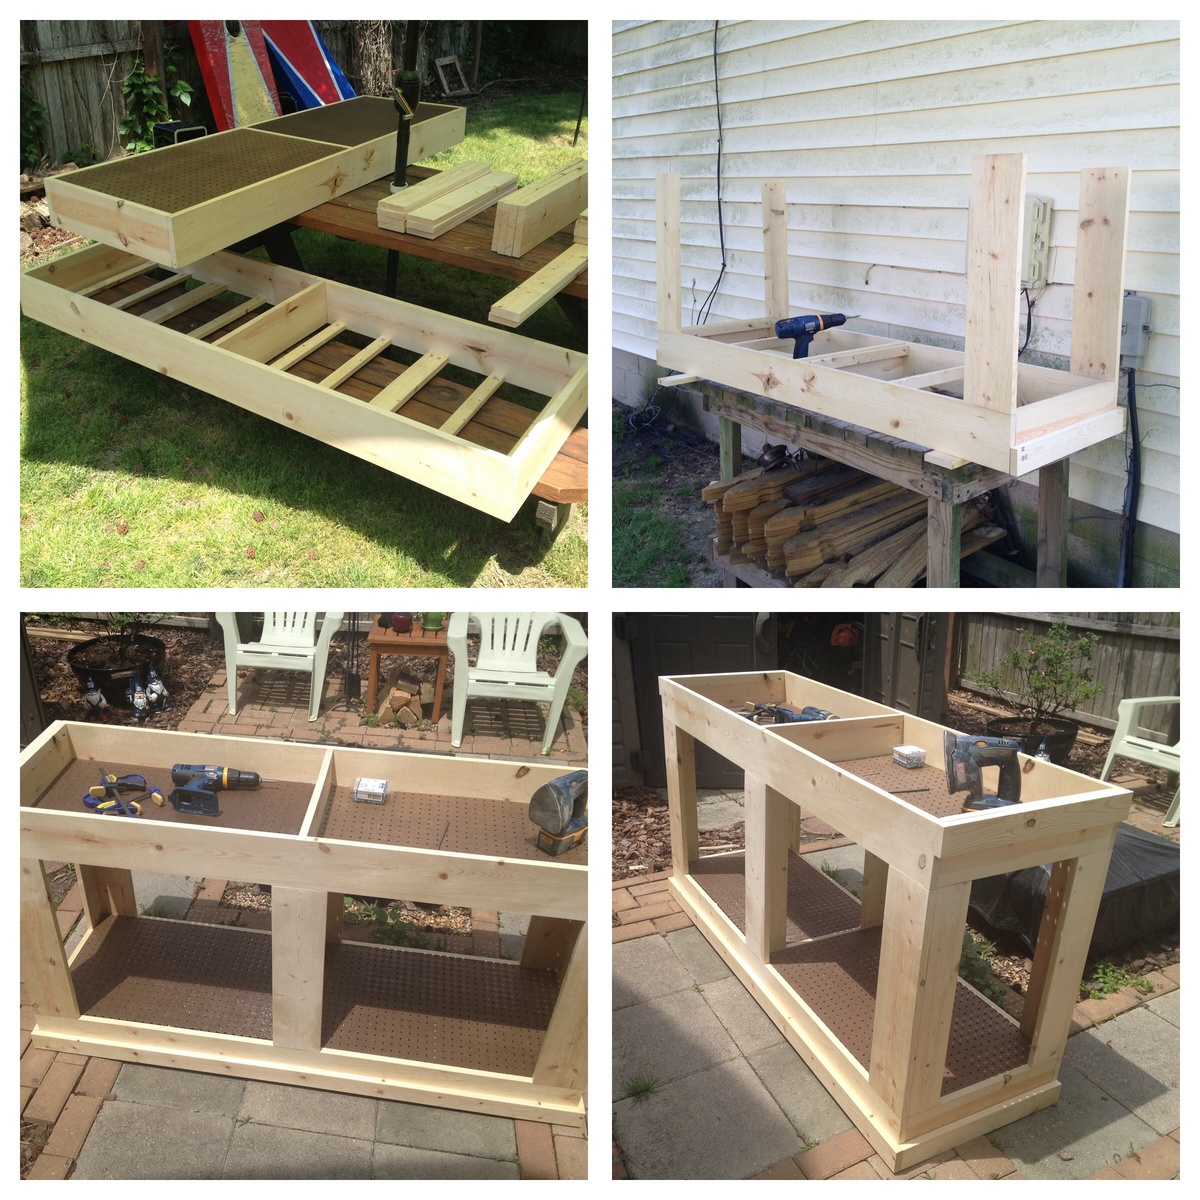
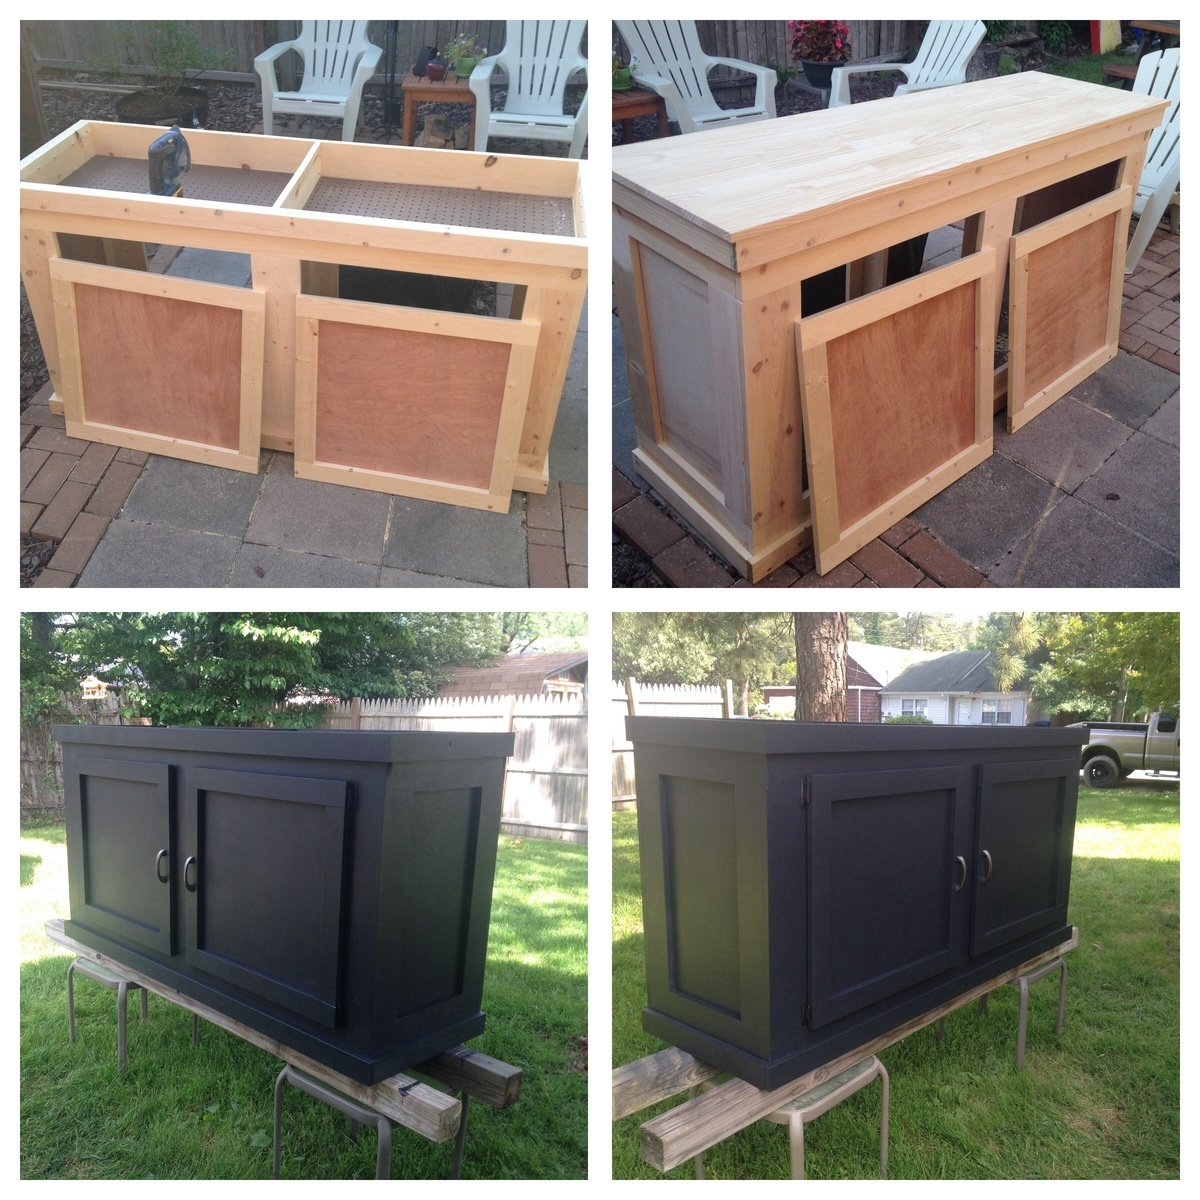
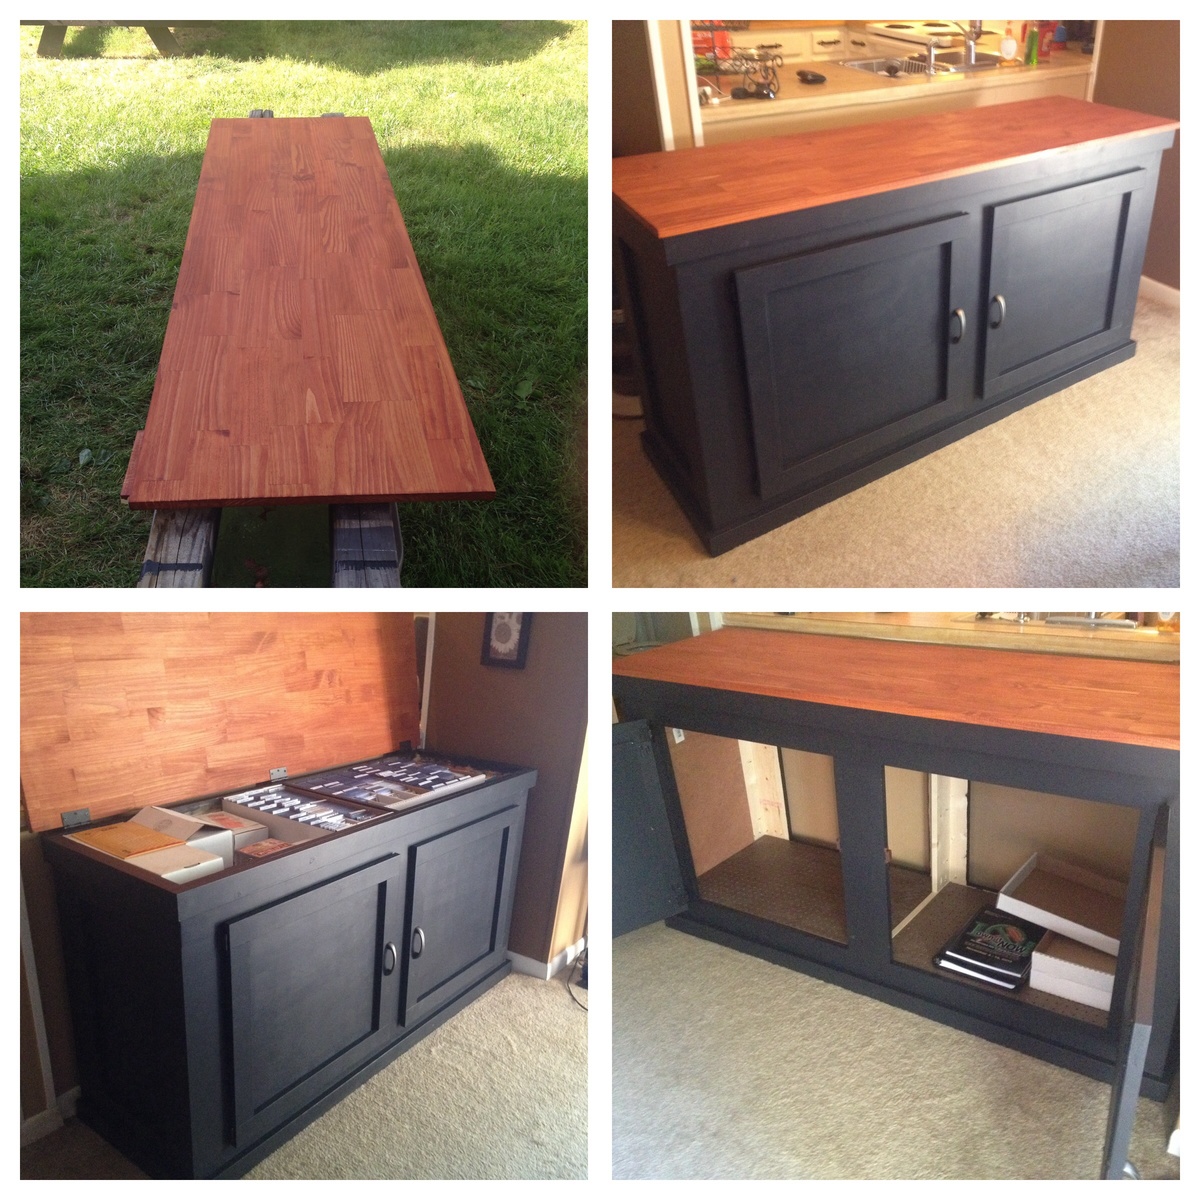
Estimated Cost
$300
Estimated Time Investment
Week Long Project (20 Hours or More)
Finish Used
Valspar Black satin interior high def paint, wood conditioner & gunstock color stain
Recommended Skill Level
Intermediate
Comments
Mon, 05/26/2014 - 22:12
Designing plans
If anyone knows of helpful software to design plans in let me know!

Tue, 05/27/2014 - 08:38
How did you do the top?
Nicely done! How did you make the top? Is that a project board? It's very smooth.
I believe Ana uses "Sketchup" which is a google program to do her designs.
Mon, 10/12/2015 - 17:19
Measurements
Would you be willing to share some basic dimensions such overall size width, depth, and height and door measurements to get an idea?
Banquette Bench Used as Hall Tree Bench

A nice bench with storage!
Built by Sylvie
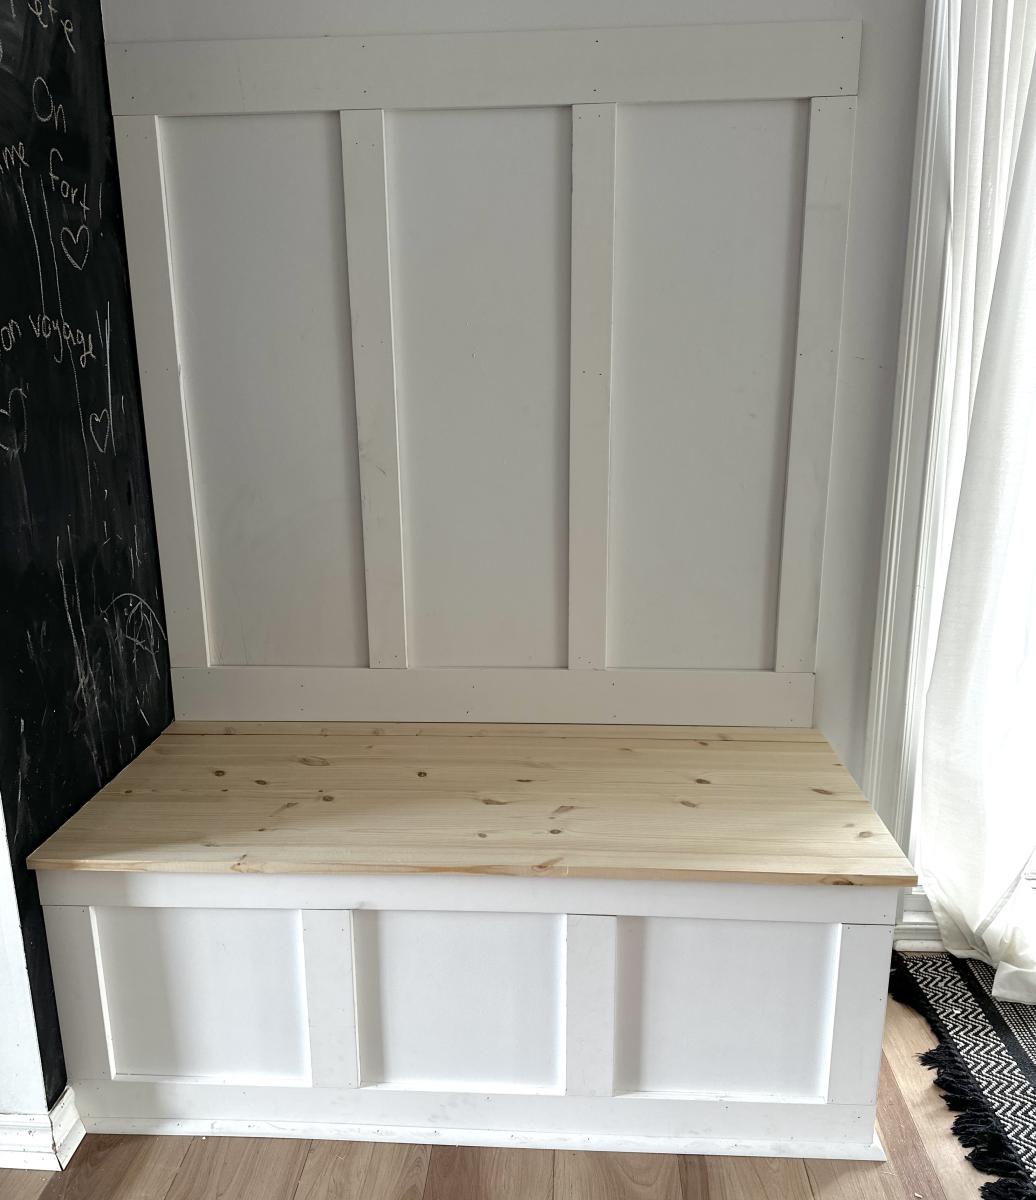
Built from Plan(s)
Bathroom Door Organizer
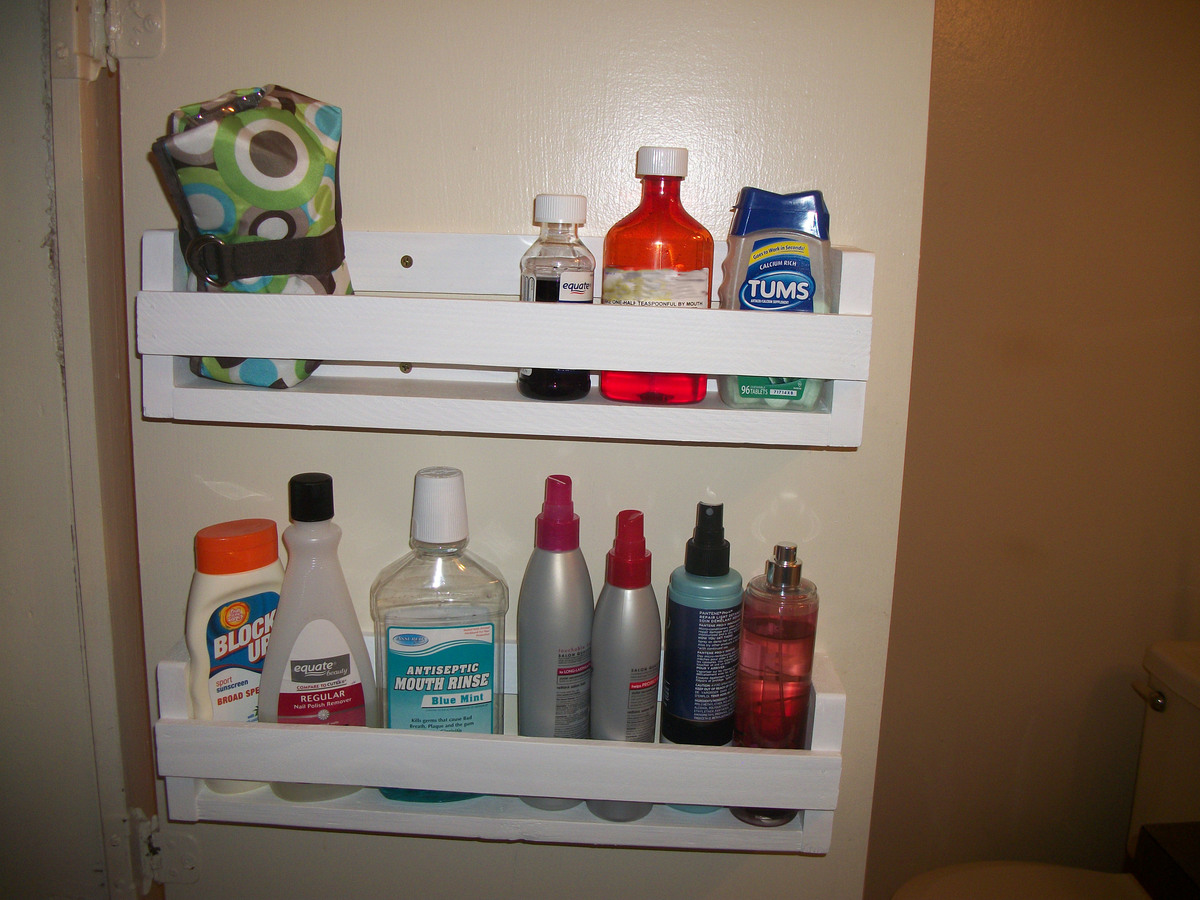
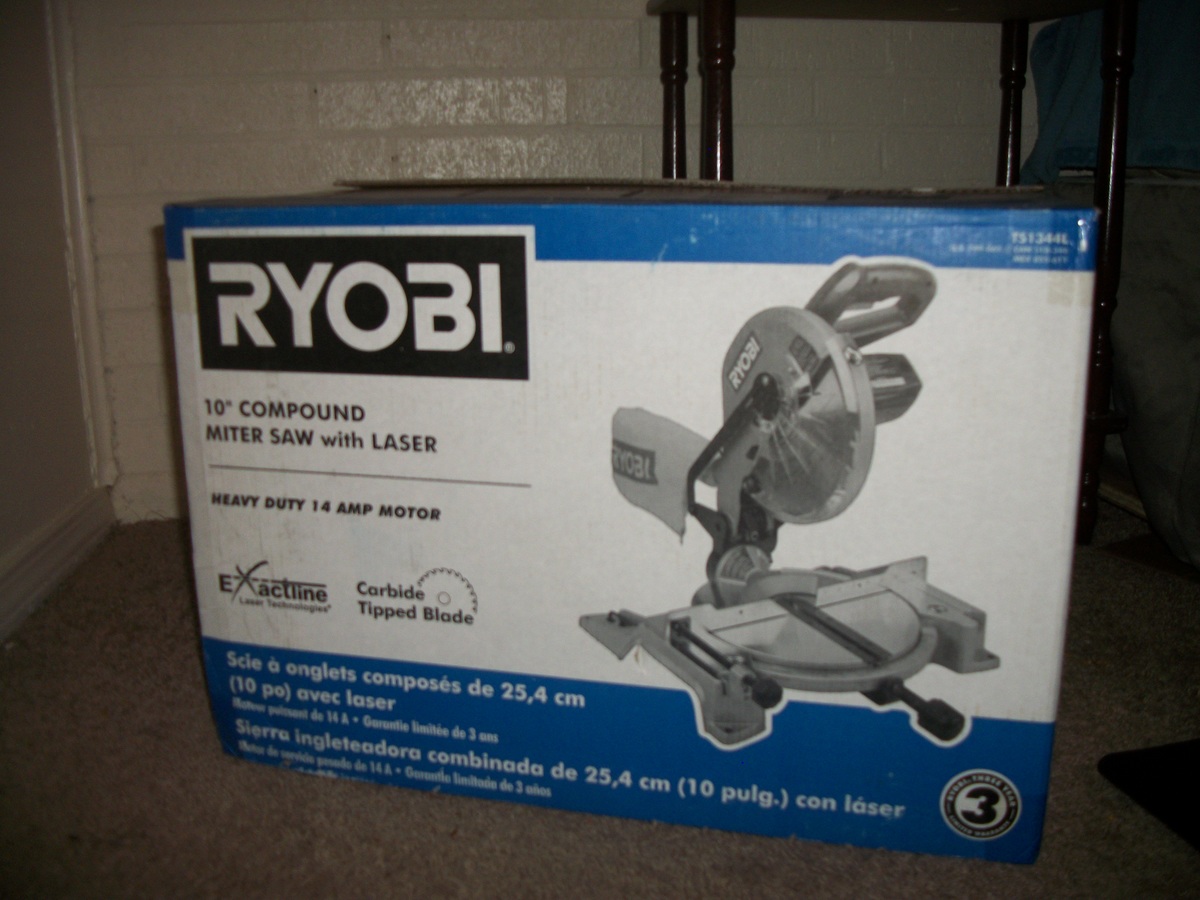
I got a miter saw for mother's day this year! This is the first project I made with it. We needed some accessible storage in the bathroom and this works out perfect
I loosely based them on the flat wall bookshelves and made them the right width to fit on the door. I used scrap wood and lathe that we had laying around to make both shelves.
Built from Plan(s)
Estimated Cost
Free (I used scrap wood, if you had to buy the wood, it would be less than $10)
Estimated Time Investment
An Hour or Two (0-2 Hours)
Finish Used
Krylon interior paint - white
Helmsman Spar Urethane - Semi-gloss
I figured it's going in the bathroom might as well make it as waterproof as possible... and it was what we had on hand.
Helmsman Spar Urethane - Semi-gloss
I figured it's going in the bathroom might as well make it as waterproof as possible... and it was what we had on hand.
Recommended Skill Level
Starter Project
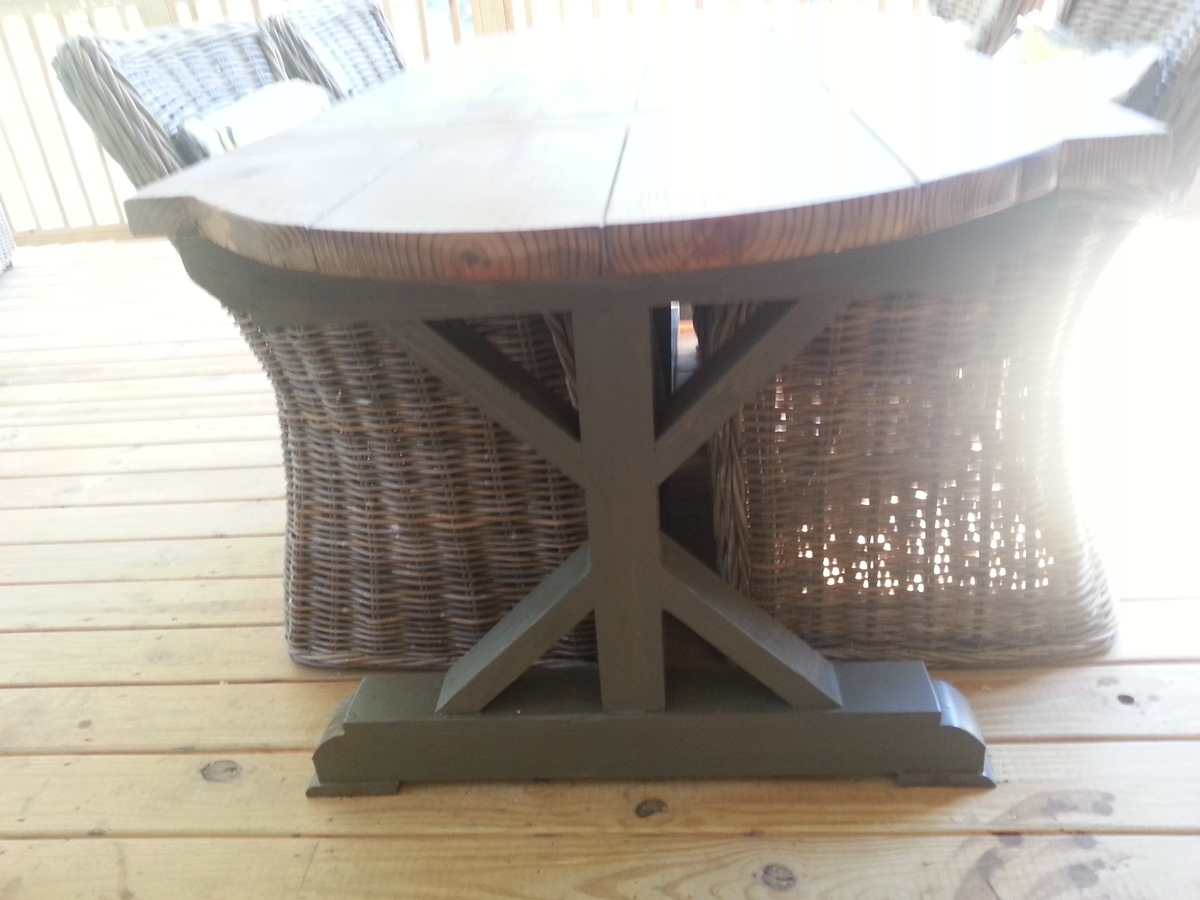
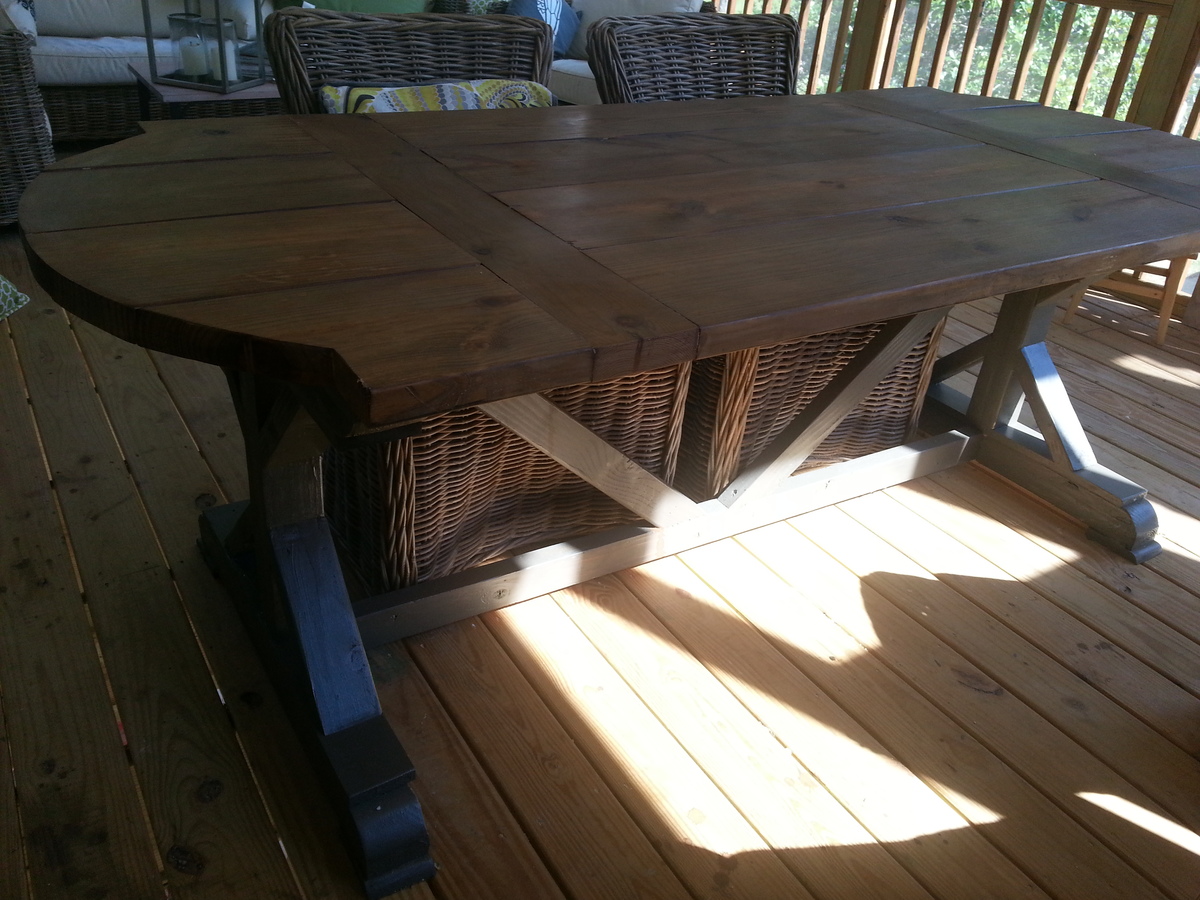
New Table for the Screen Porch
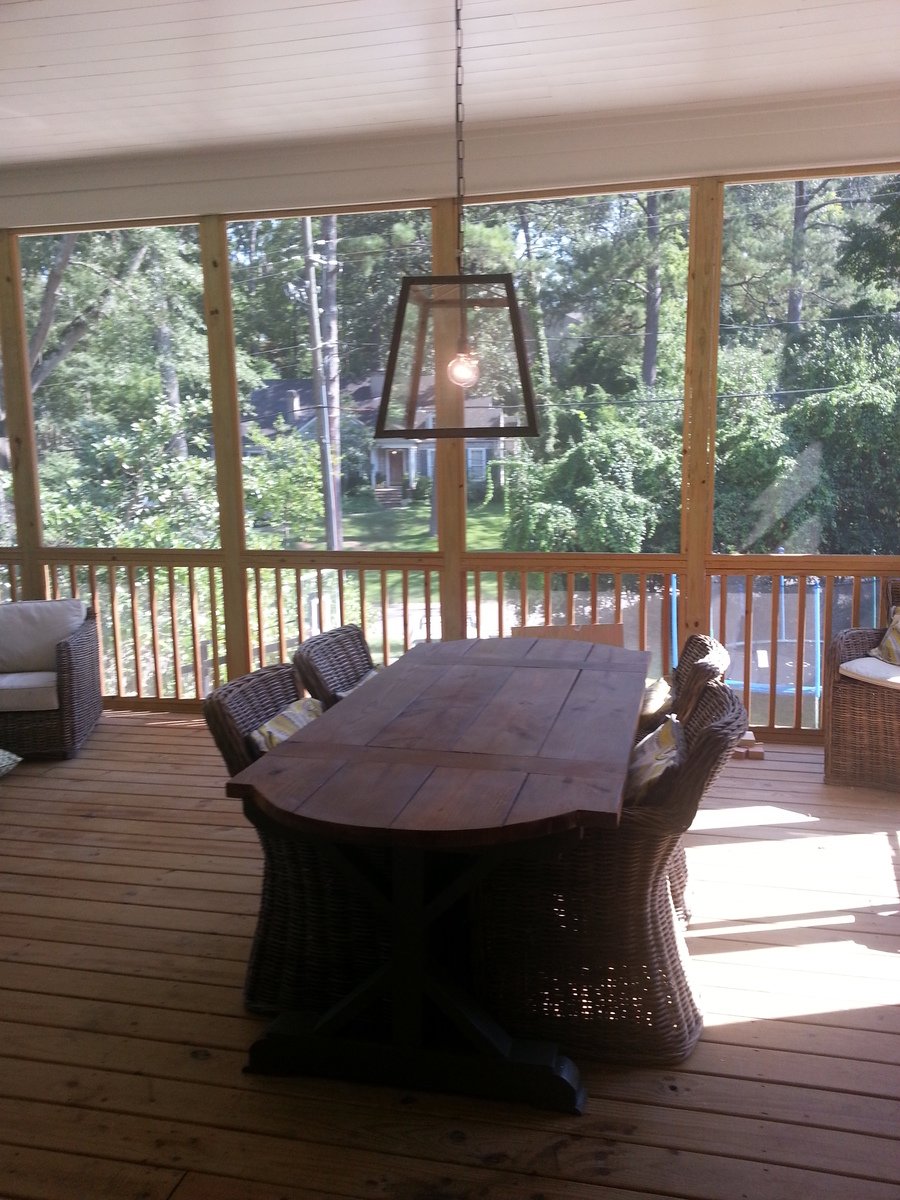
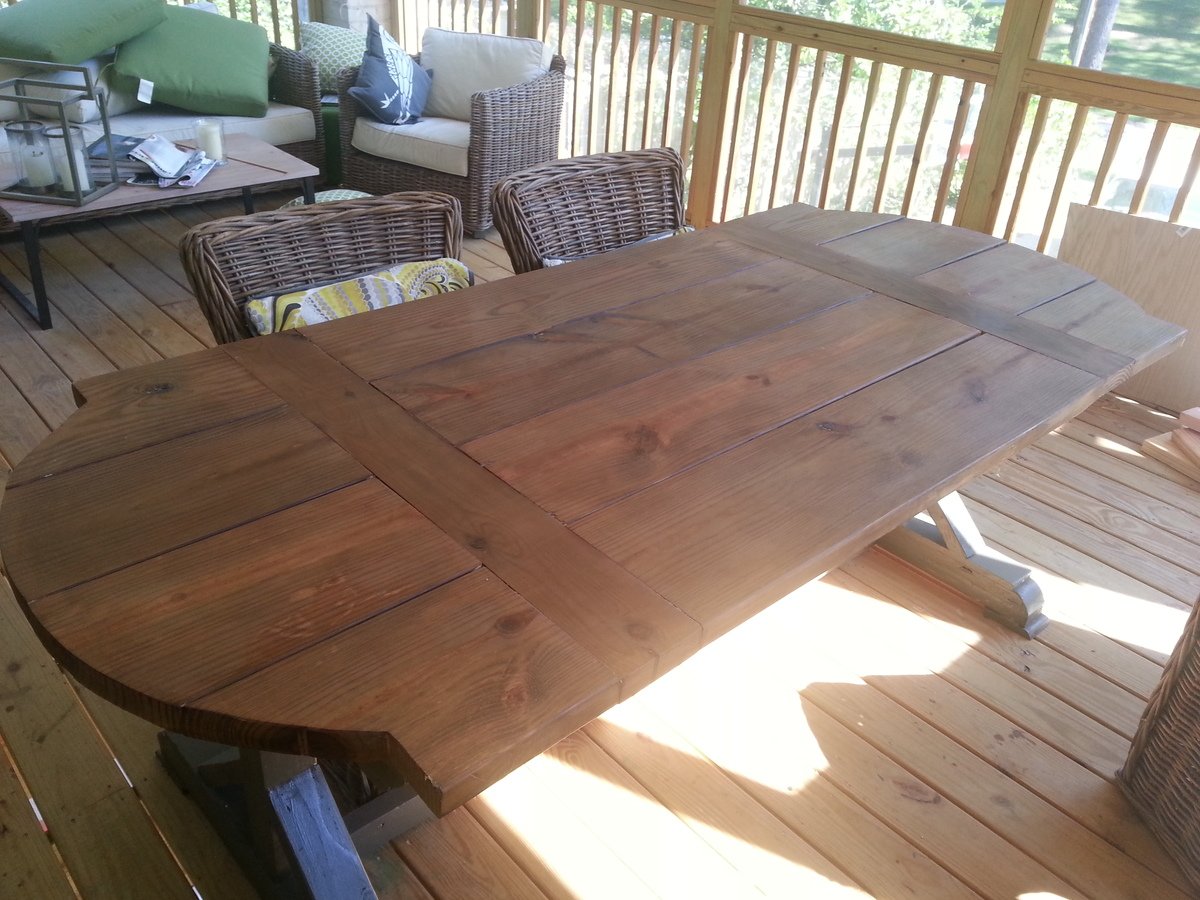
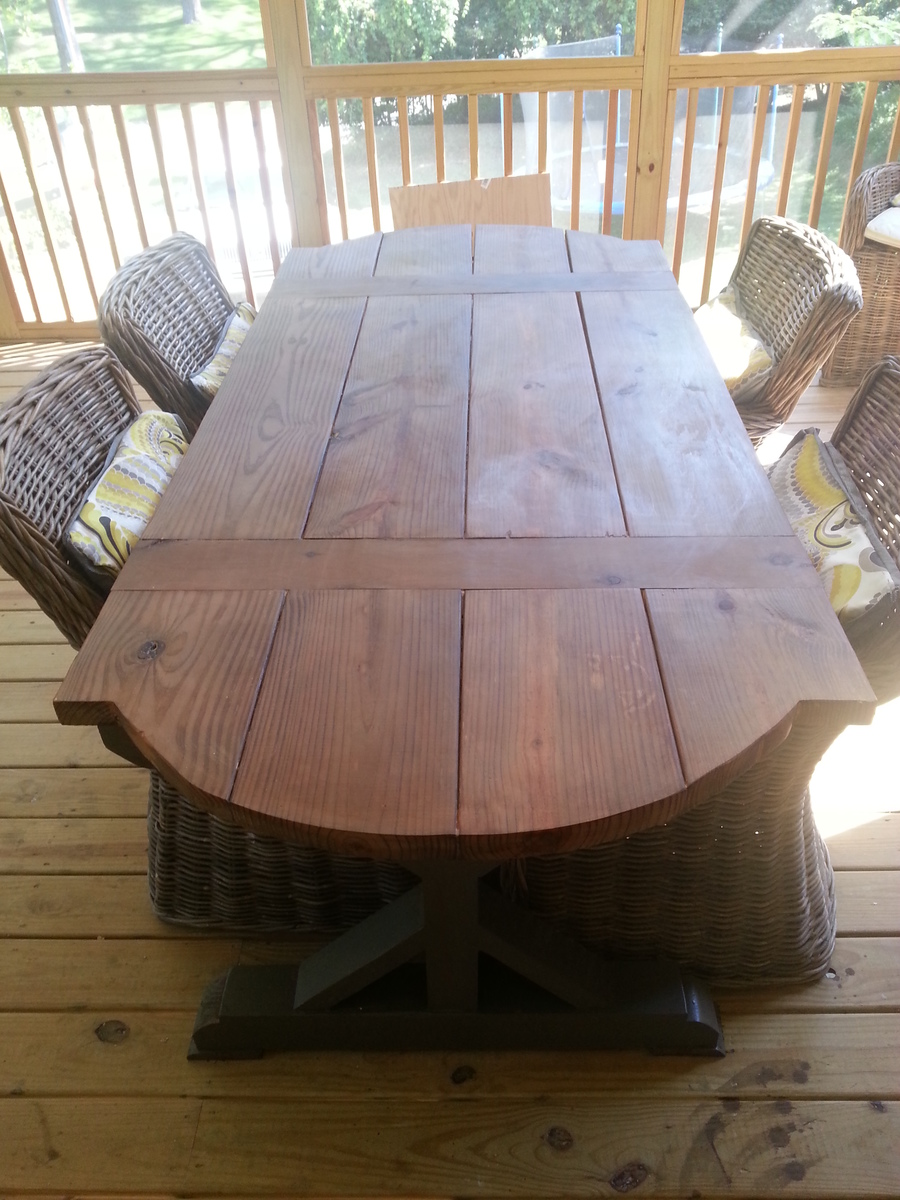
I'm so excited about my farmhouse table! I used mostly scrap wood that I had lying around, and I adjusted the length of the table to fit my space (it is 62" long). I cut the table ends in a curve pattern just for a little more interest. I used the steel wool/vinegar solution to darken and age the top, with a paste wax finish on top to give it a more aged patina. I painted the base with the paint leftover from my outdoor sectional that I built from Ana's plans. The actual table didn't take long to put together, but it took me a month to get around to the finish.
Sorry for the photos - I used my cell phone camera and the light was bad!
Built from Plan(s)
Estimated Cost
$50 (Used mostly scrap wood - probably about $150 if I bought all the wood/supplies)
Estimated Time Investment
Day Project (6-9 Hours)
Finish Used
Top: vinegar/steel wool solution with paste wax finish
Base: Custom color exterior paint
Base: Custom color exterior paint
Recommended Skill Level
Intermediate
Comments
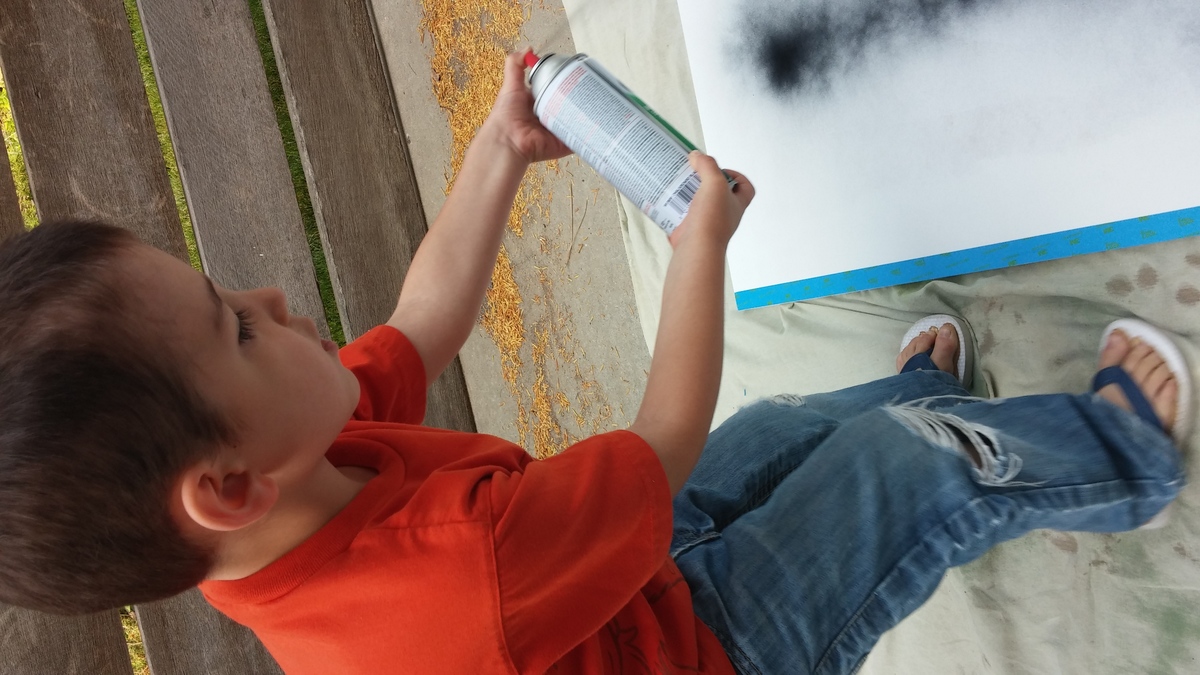
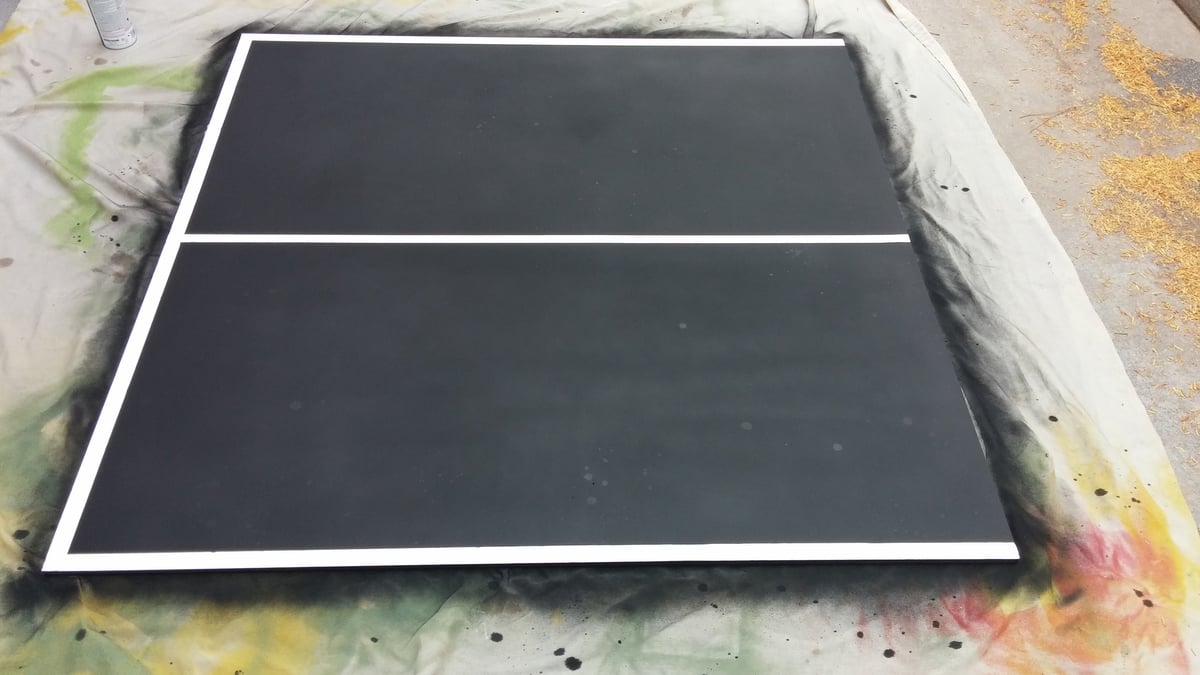
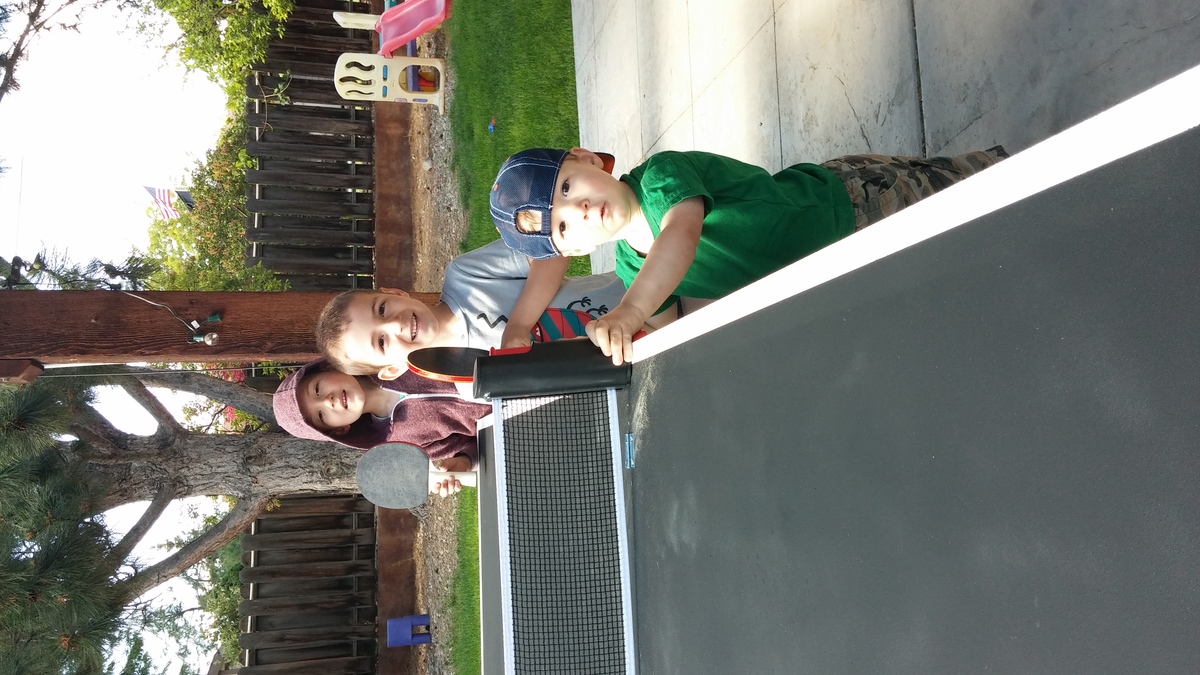
$40 Ping Pong table top game

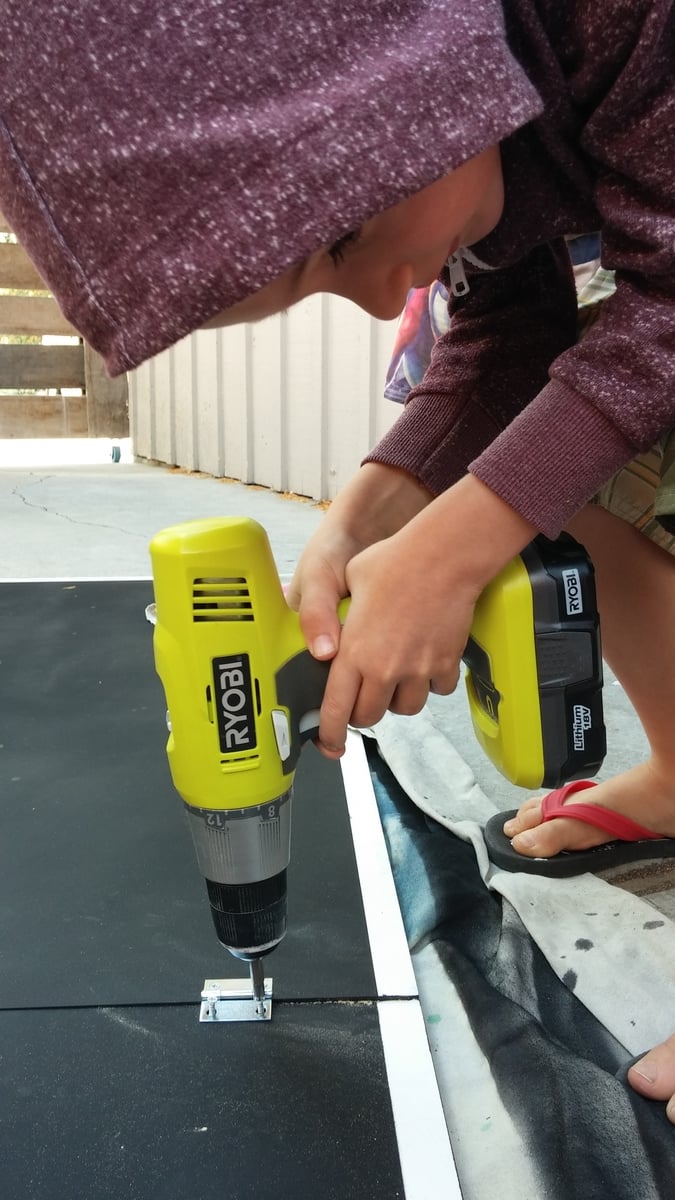
With Father's Day rolling in, my sons and I needed a gift, stat! My husband thinks that Table Tennis is the quintessential father-son activity, so that was an obvious choice.
We needed something easy to make, easy to store, and budget friendly. With a 6, 4, and 2 year old helping out, I made a foldable mdf ping pong table that could easily be placed on our picnic table outside.
We had home depot cut the mdf in half, primed it, taped off some lines, spray painted it with chalkboard paint (bonus, you can keep score!), and screwed 4 small hinges to attach the 2 halves. We added a removable table tennis net, some paddles and balls, and have played nearly every day!
Estimated Cost
$40
Estimated Time Investment
Afternoon Project (3-6 Hours)
Finish Used
Chalkboard spray paint
Recommended Skill Level
Starter Project
Comments
Comfy Outdoor Chair with Deep Seat Cushions
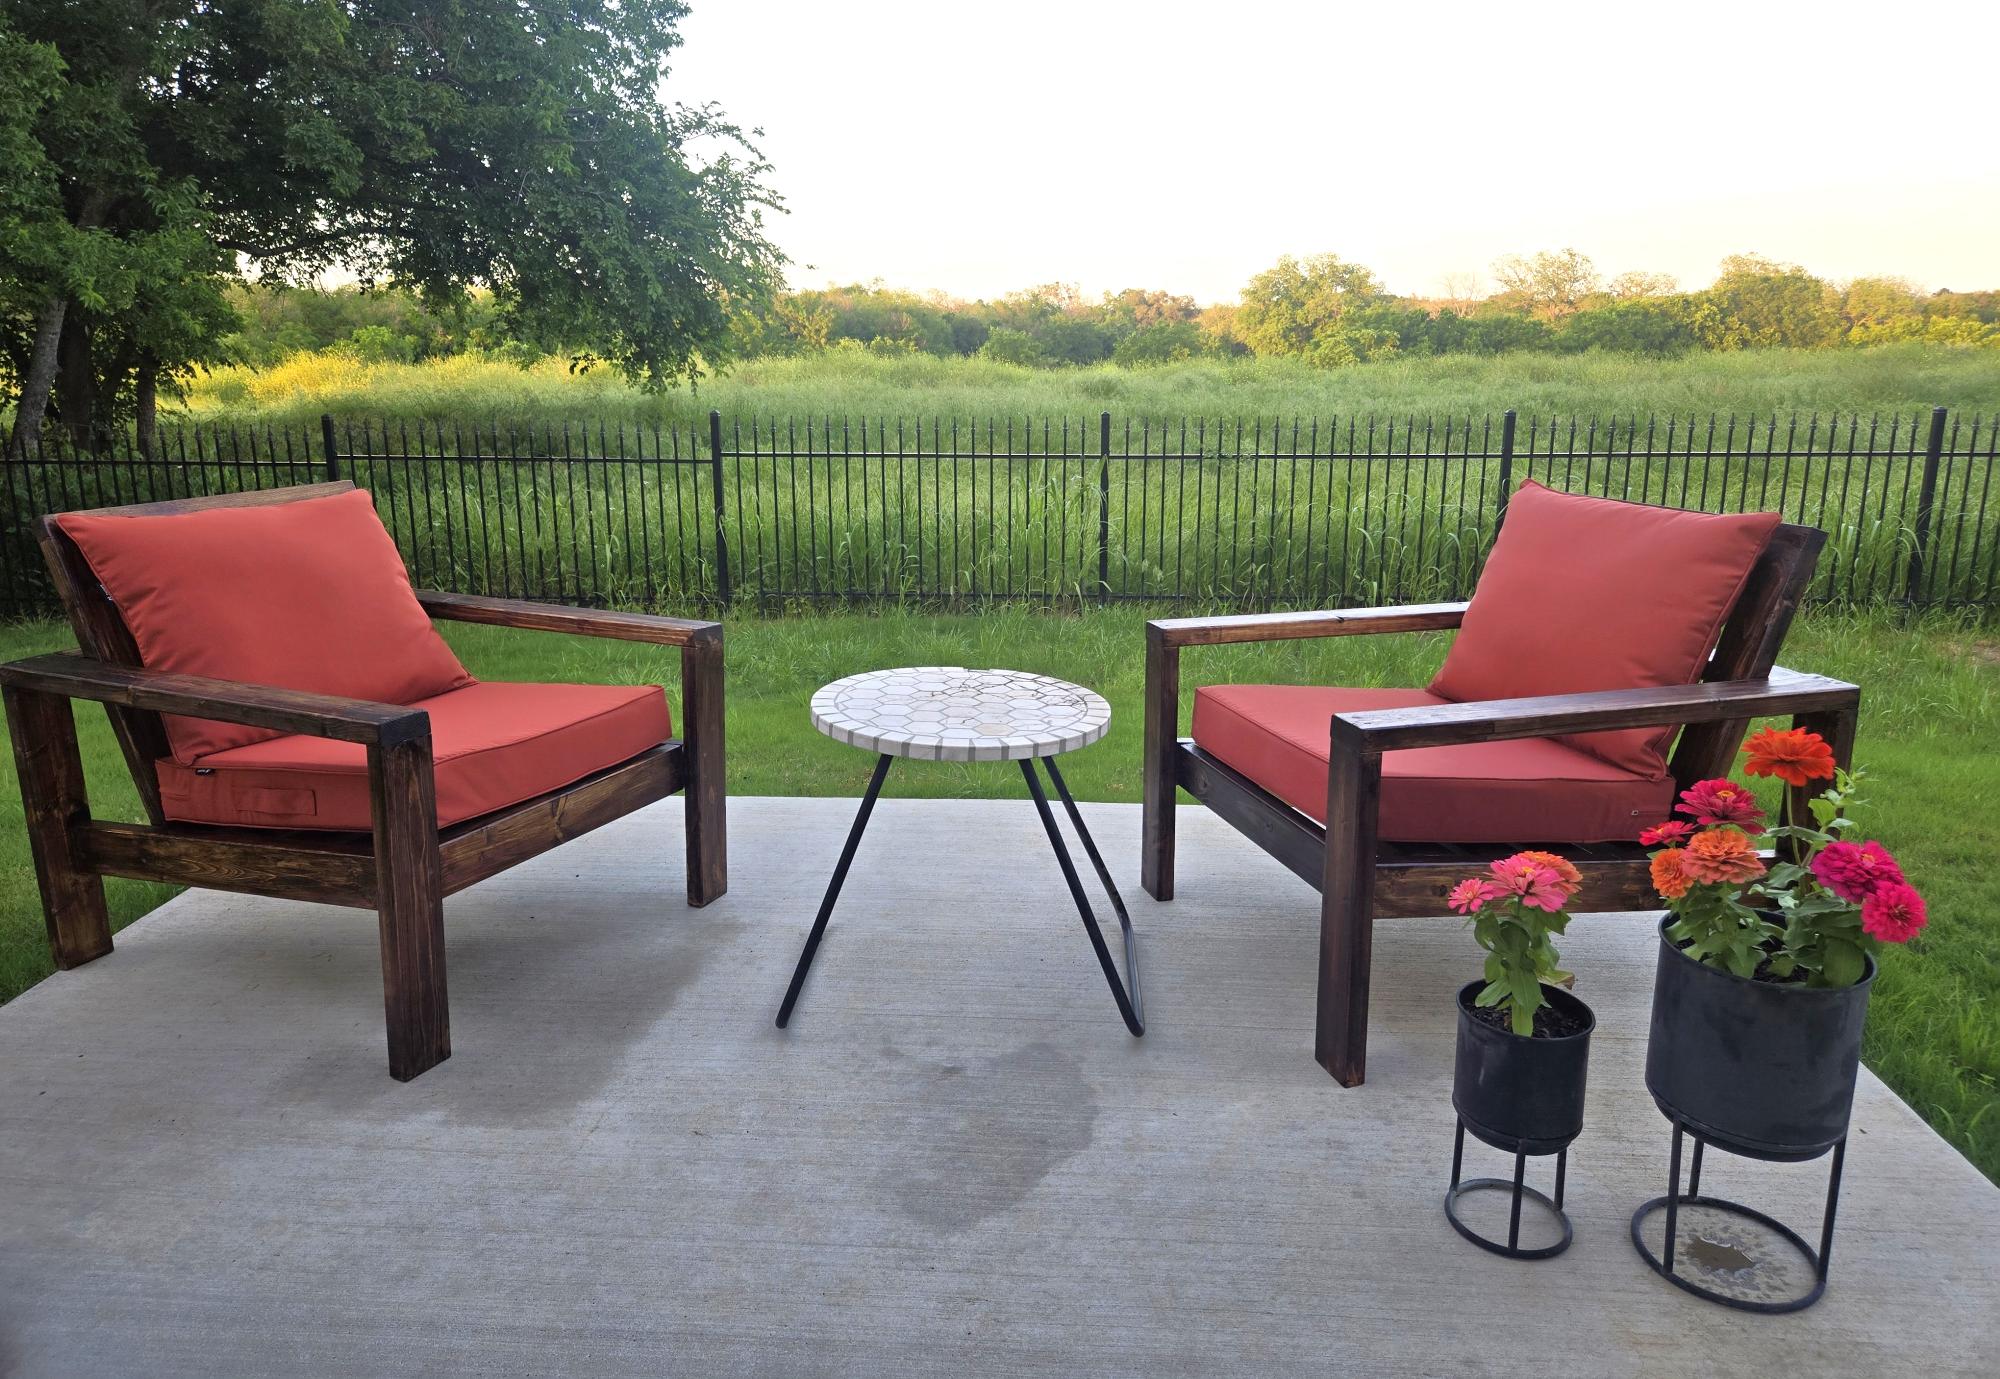
DIY Outdoor Wood Chairs
by Tara
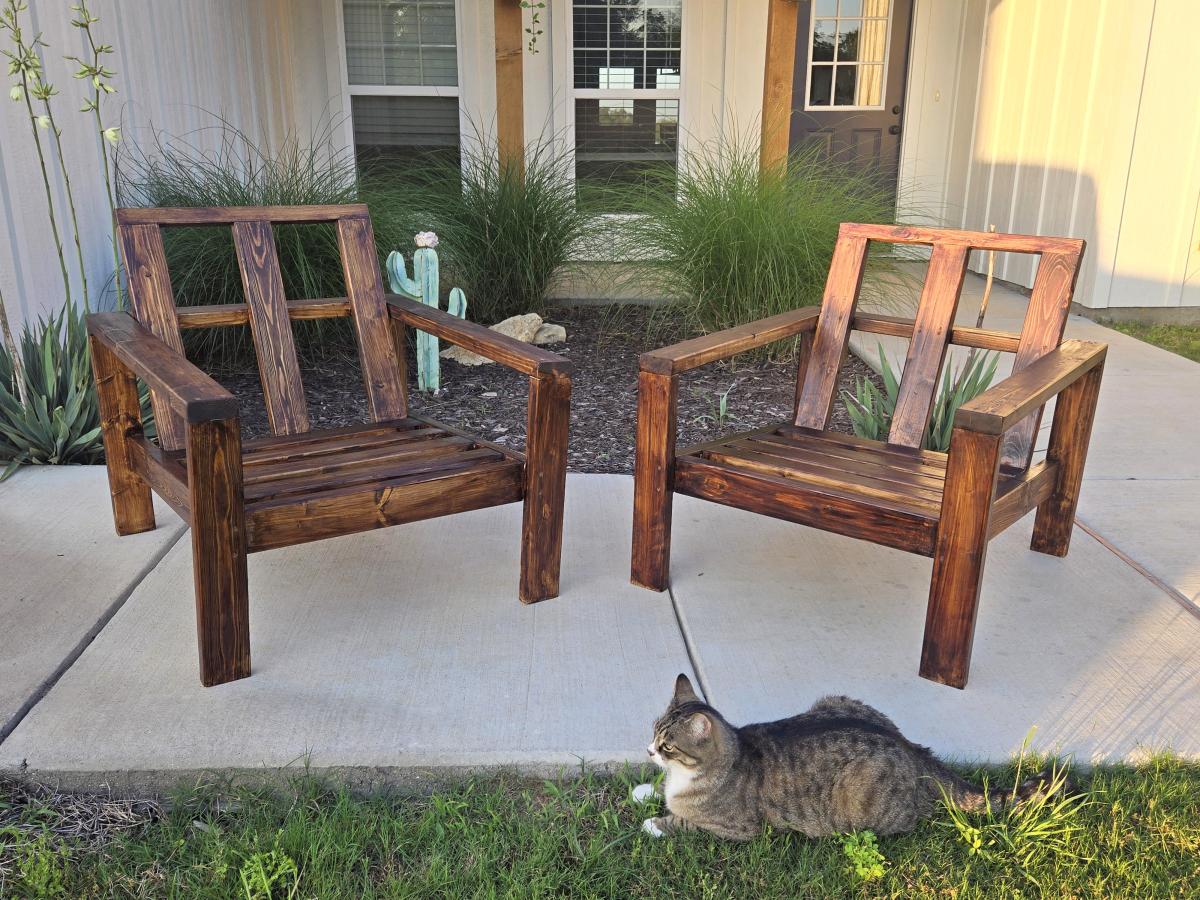
Built from Plan(s)
Narrow Cottage End Tables
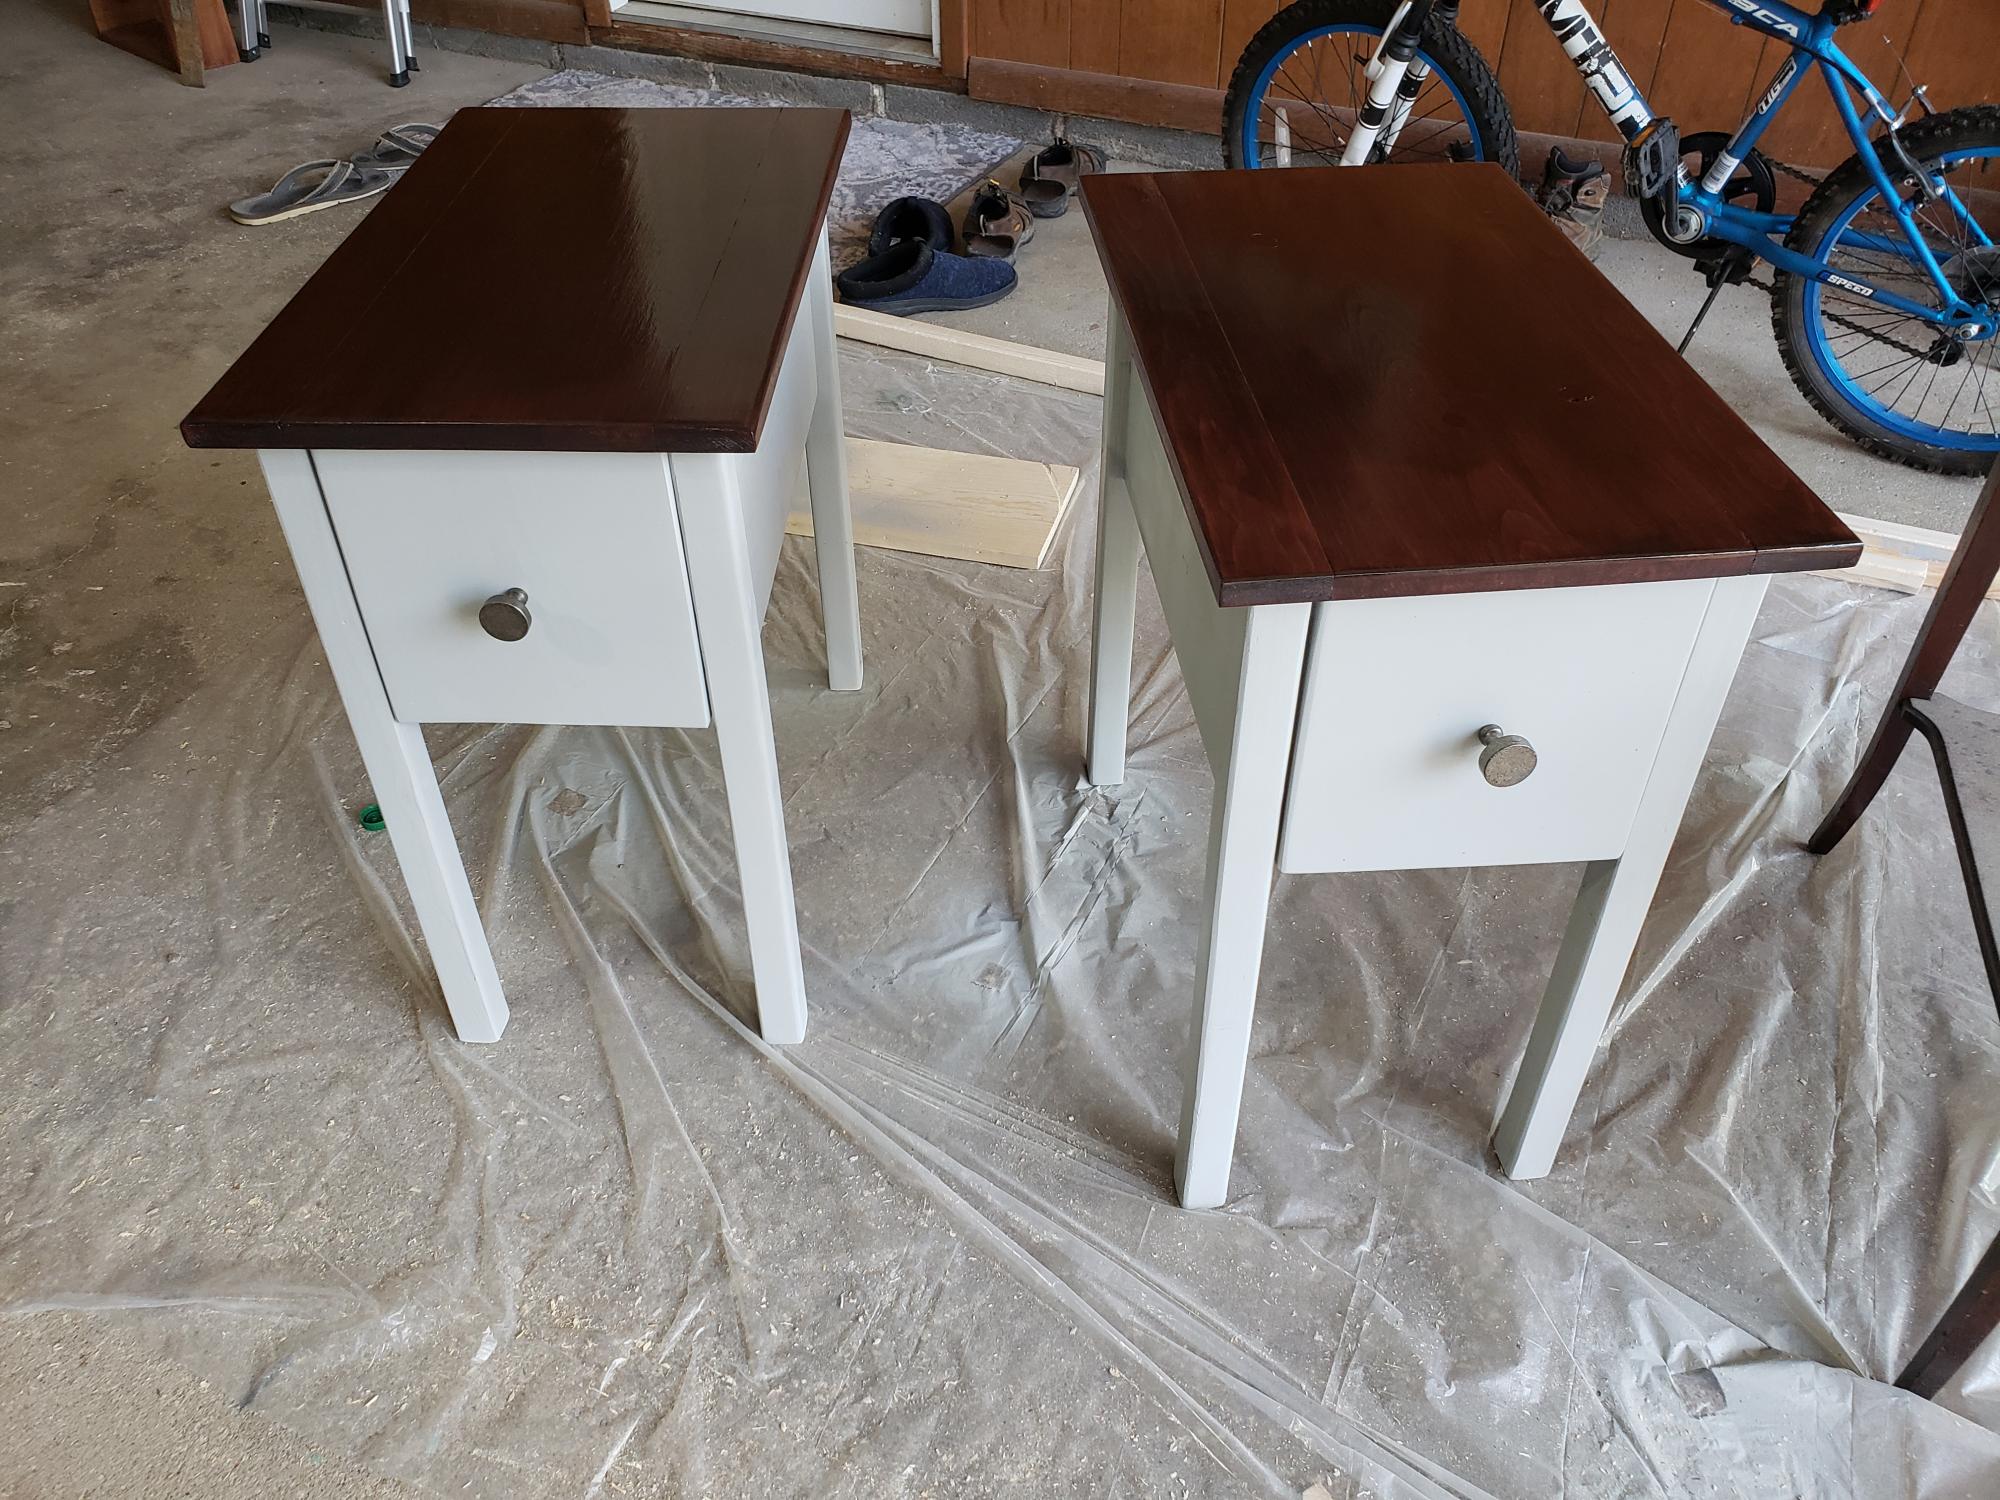
Perfect for for my living room
Built from Plan(s)
Estimated Time Investment
Weekend Project (10-20 Hours)
Recommended Skill Level
Intermediate
Compact Utensil Organizer
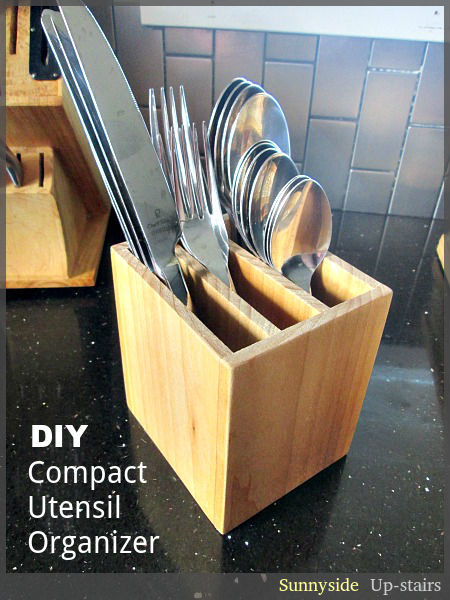
I made a counter top utensil organizer for our little kitchen and love how it solved a few utensil difficulties for us. I wish I could post plans, but all I can offer for now are photos and a brief explanation on my little blog: http://sunnysideup-stairs.blogspot.com/2014/07/compact-utensil-organize…
Estimated Time Investment
An Hour or Two (0-2 Hours)
Finish Used
Cutting Board Conditioner (beeswax, carnauba wax, oil blend)
Recommended Skill Level
Starter Project
Farmhouse Table
I built this table shorter than the plans. Its 72in long.
Built from Plan(s)
Estimated Time Investment
Day Project (6-9 Hours)
Finish Used
Dark Walnut
Recommended Skill Level
Beginner
Farmhouse coffee table
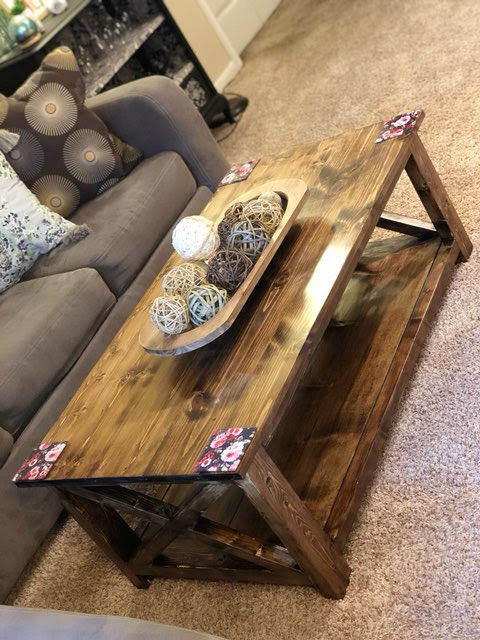
I built this for my daughter. I had to alter the plans just a little, but all of Ana's plans are so well done, that it is easy to change them a little and make them personal. Thank you Ana.
Built from Plan(s)
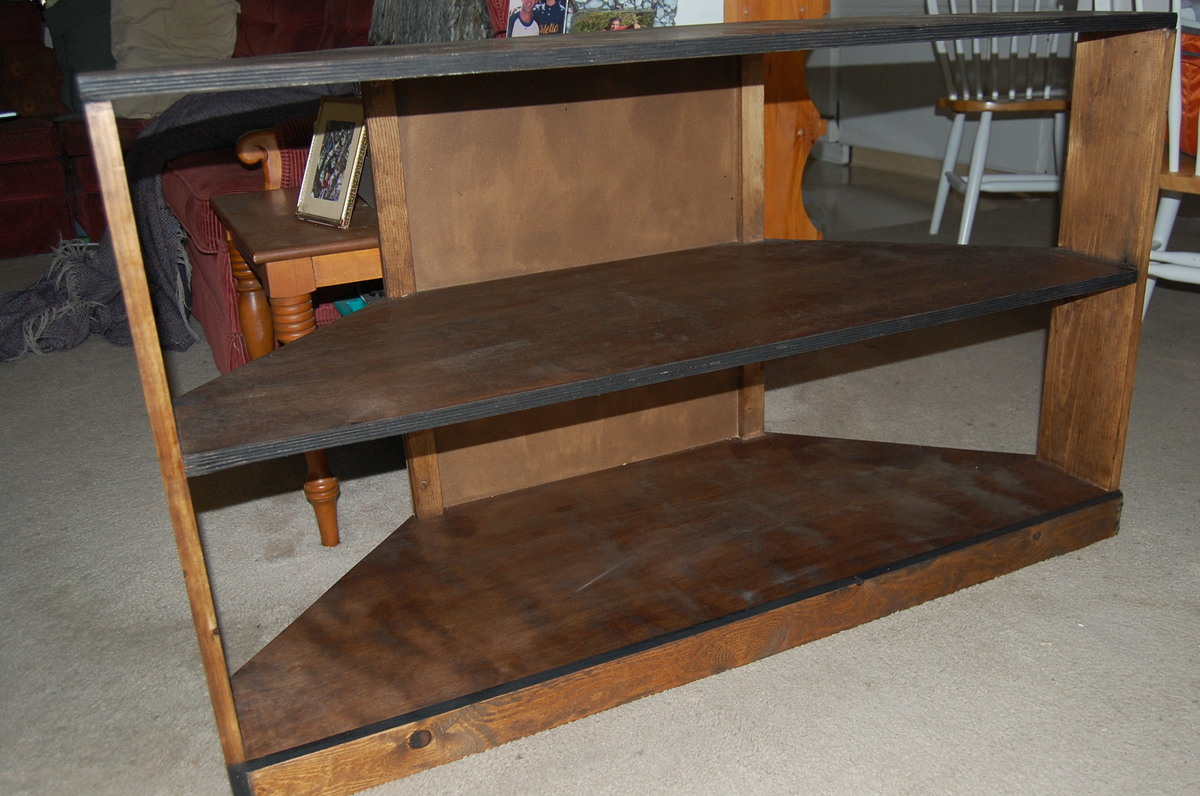
Modified Corner Media Stand
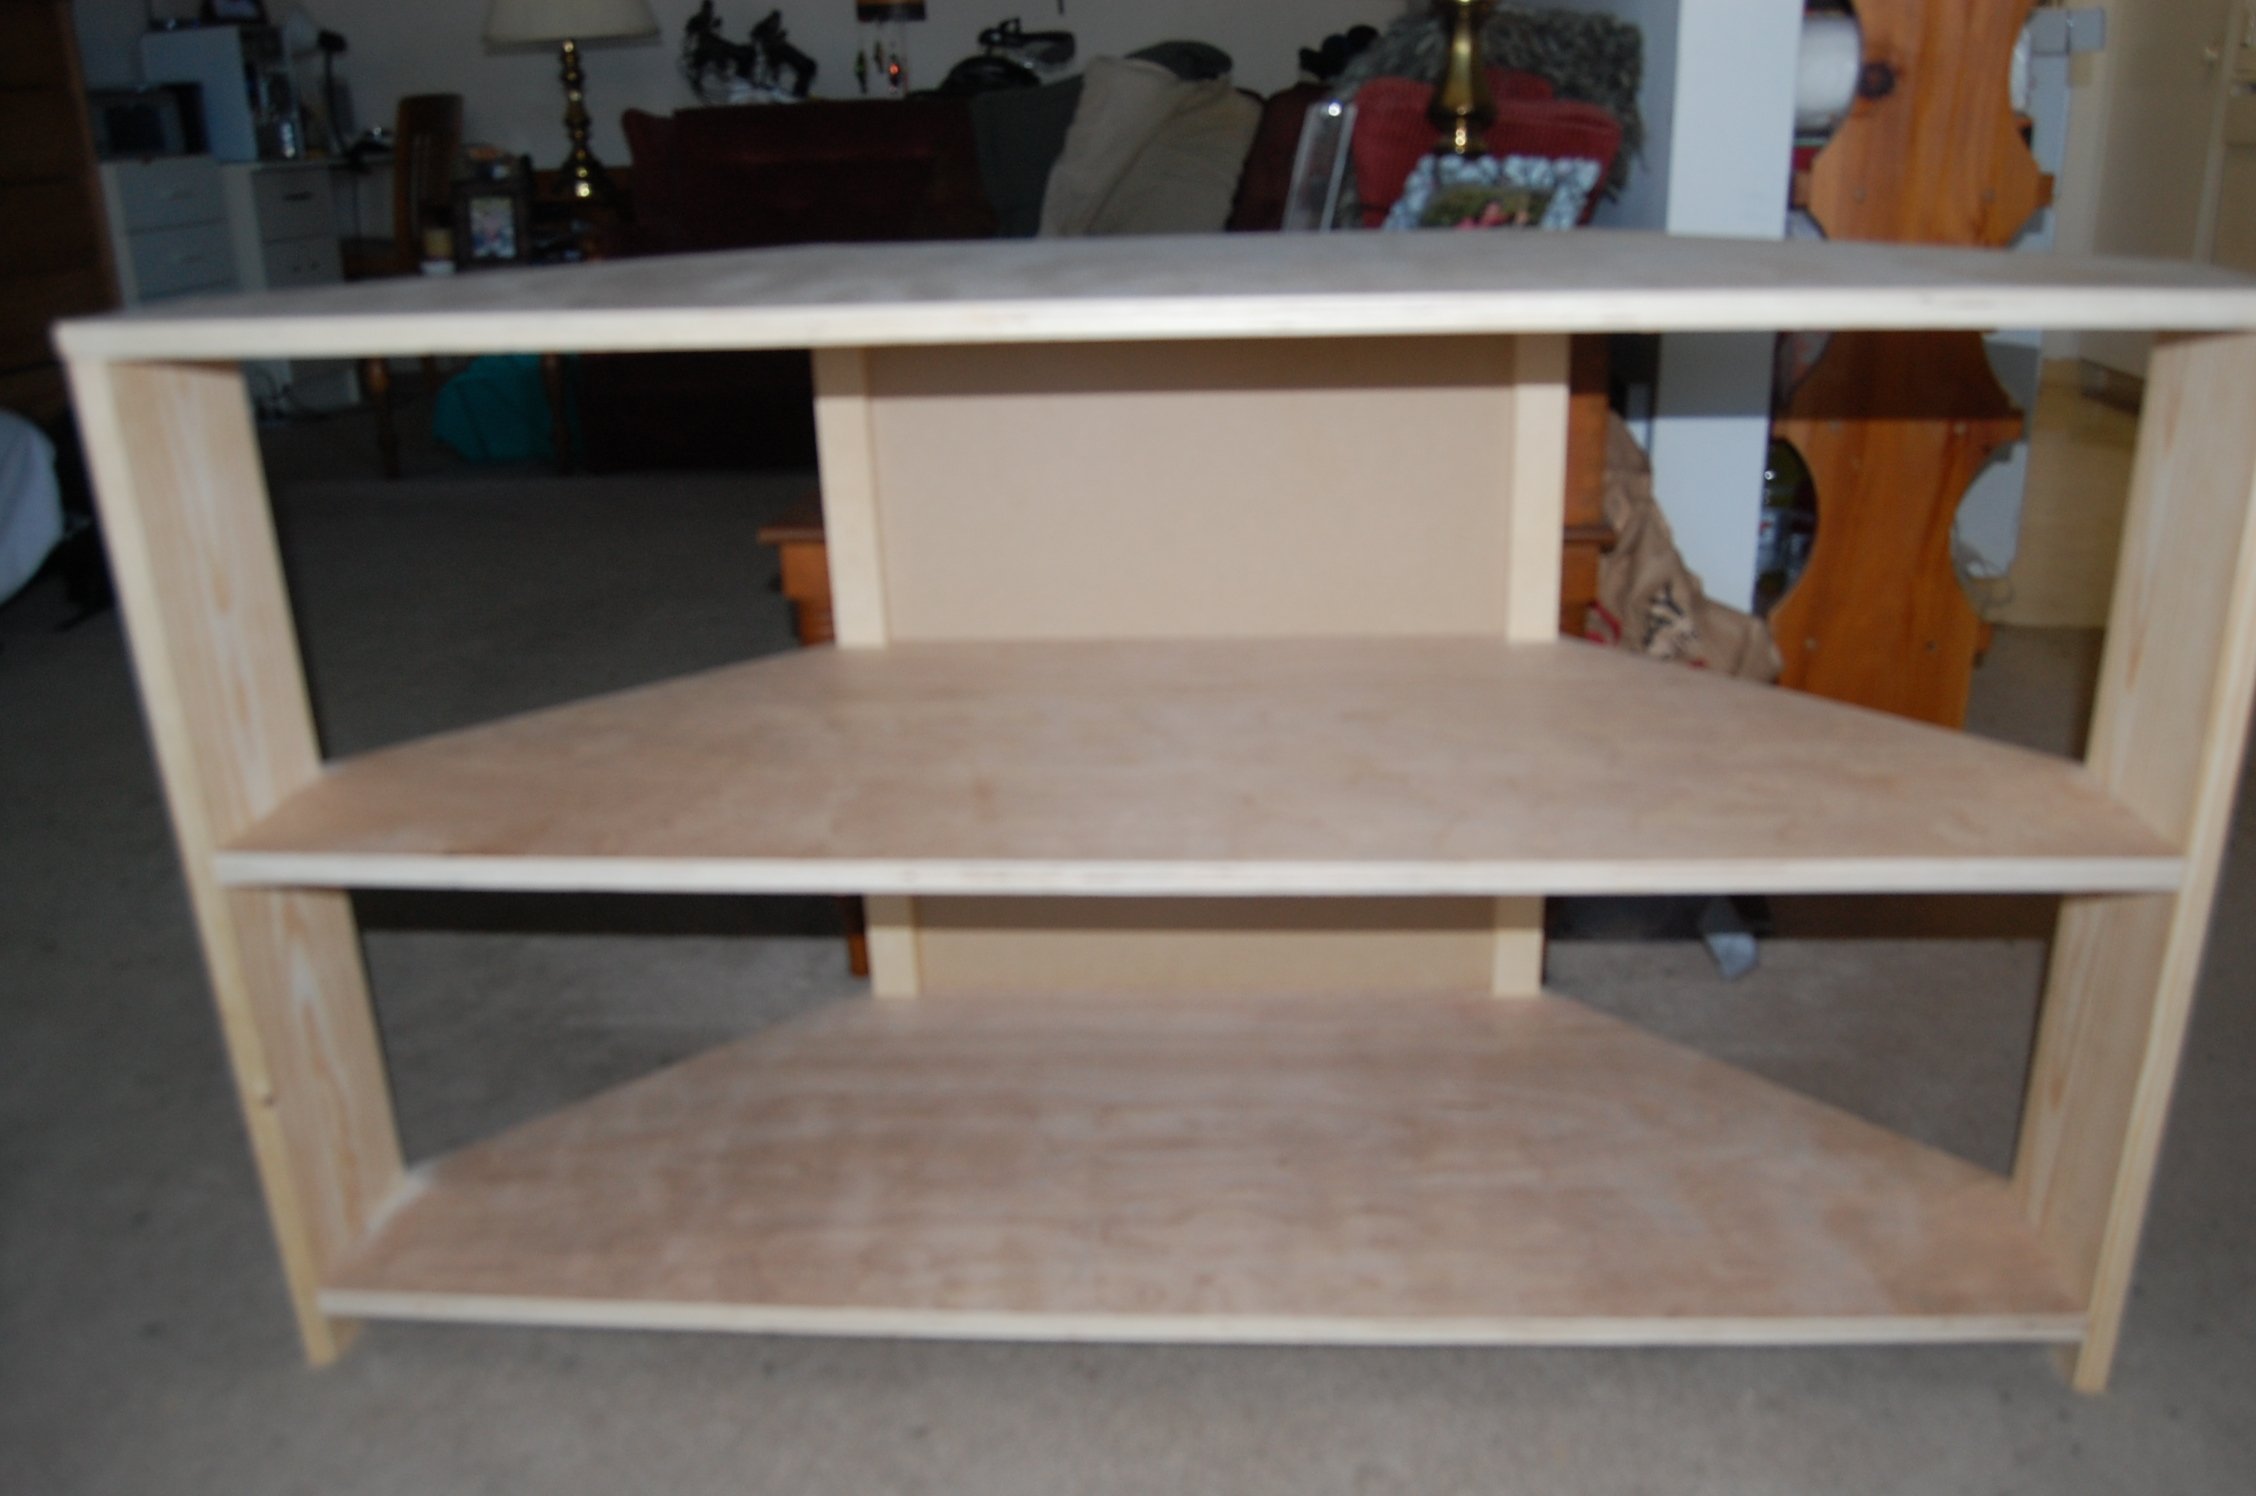
I used the Tall Corner Media Stand plans as inspiration for this, but I didn't actually need it top be very tall, so I took off one of the shelves, and decided not to add the extra section for the cable box and what not.
I also liked the simplicity to it without all the trim, so I decided to leave the sides and top slats off and just stain it and add a 1x3 at the bottom for aesthetic purposes.
Built from Plan(s)
Estimated Cost
$85 (for lumber and stain. Already had screws/glue,etc.)
Estimated Time Investment
Afternoon Project (3-6 Hours)
Finish Used
MinwaX'S full collection: Pre-stain wood conditioner, English Chestnut stain, and clear coat
Recommended Skill Level
Intermediate
Comments

Sat, 04/16/2016 - 23:01
Measurements
Any possibility you could have an option for metric measurements on your projects. I assume that there would be many more metric speaking nationalities besides me that would find this helpful. Your country, and a smattering of others, are among the only countries that still use the old Imperial system.
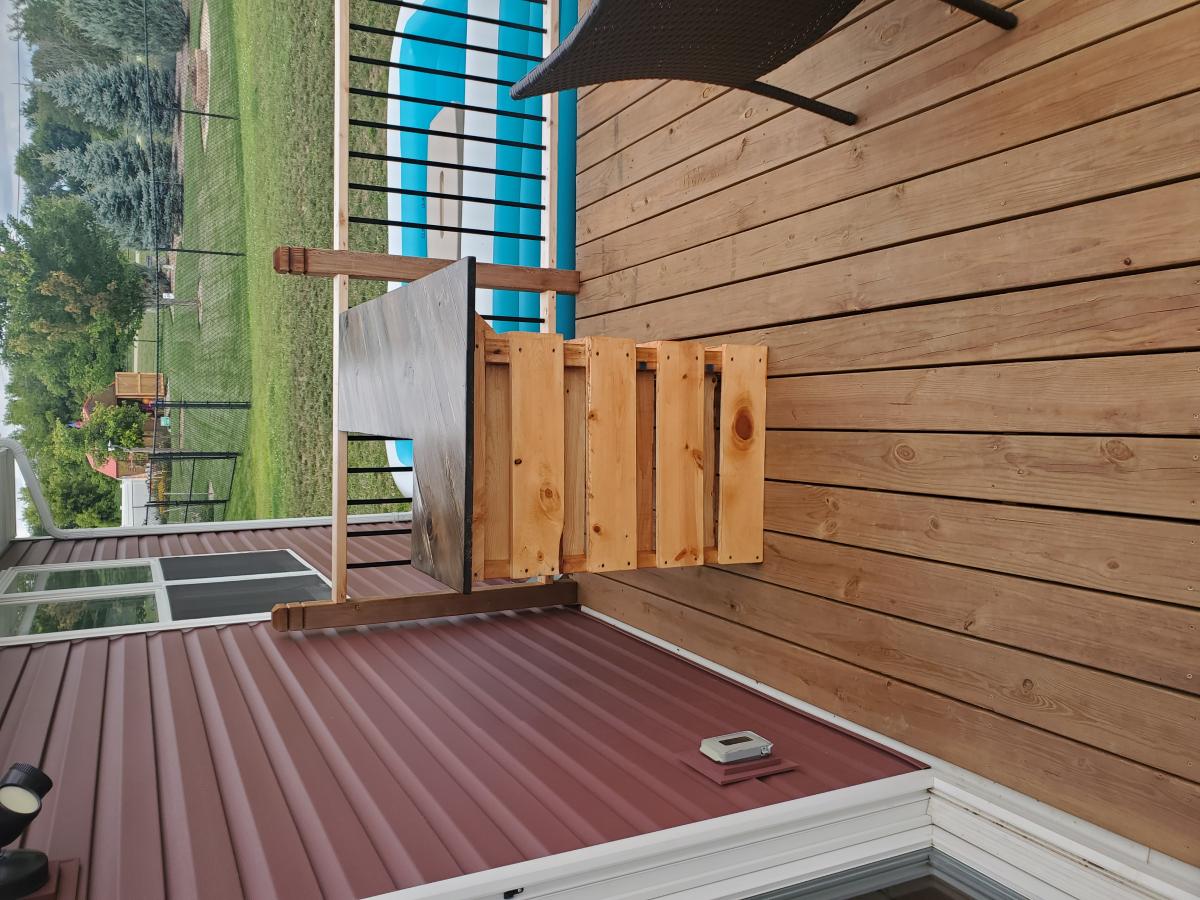
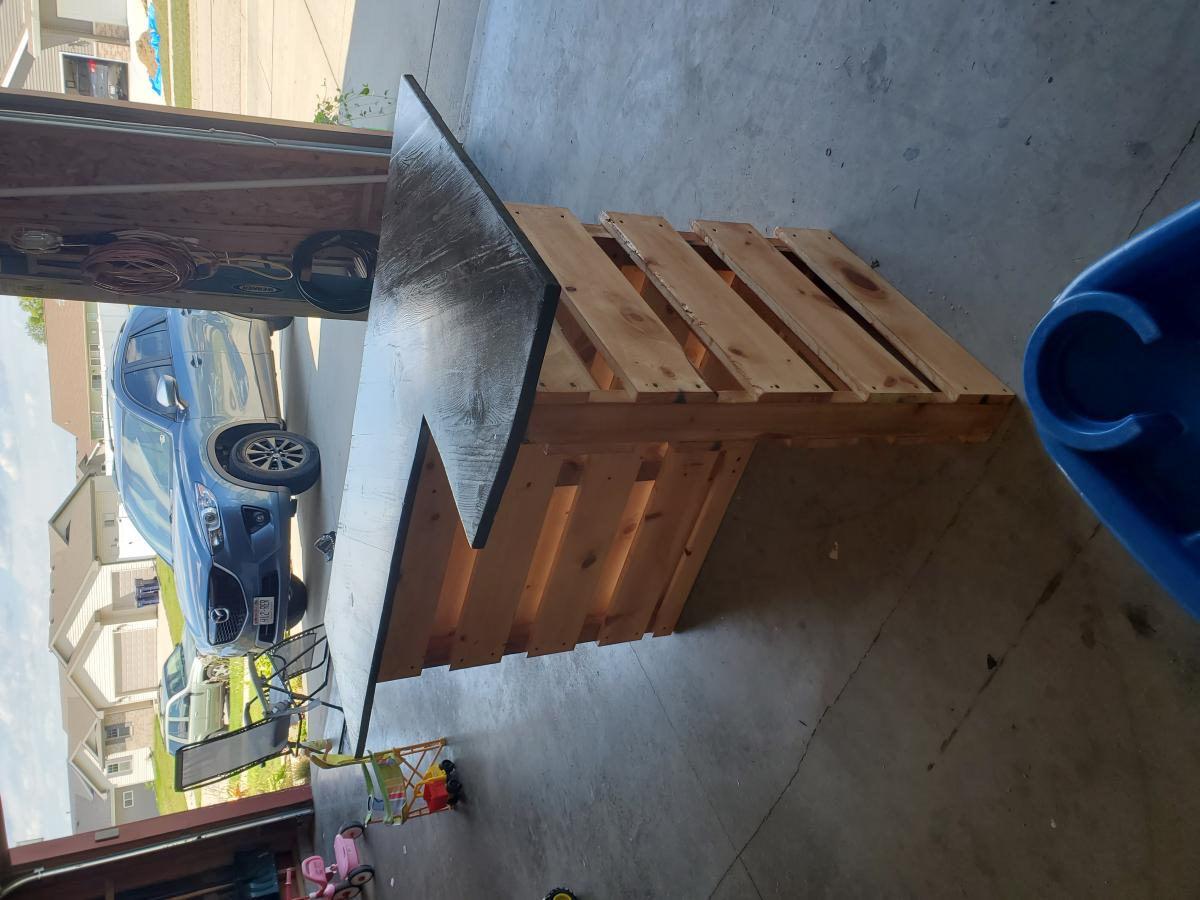
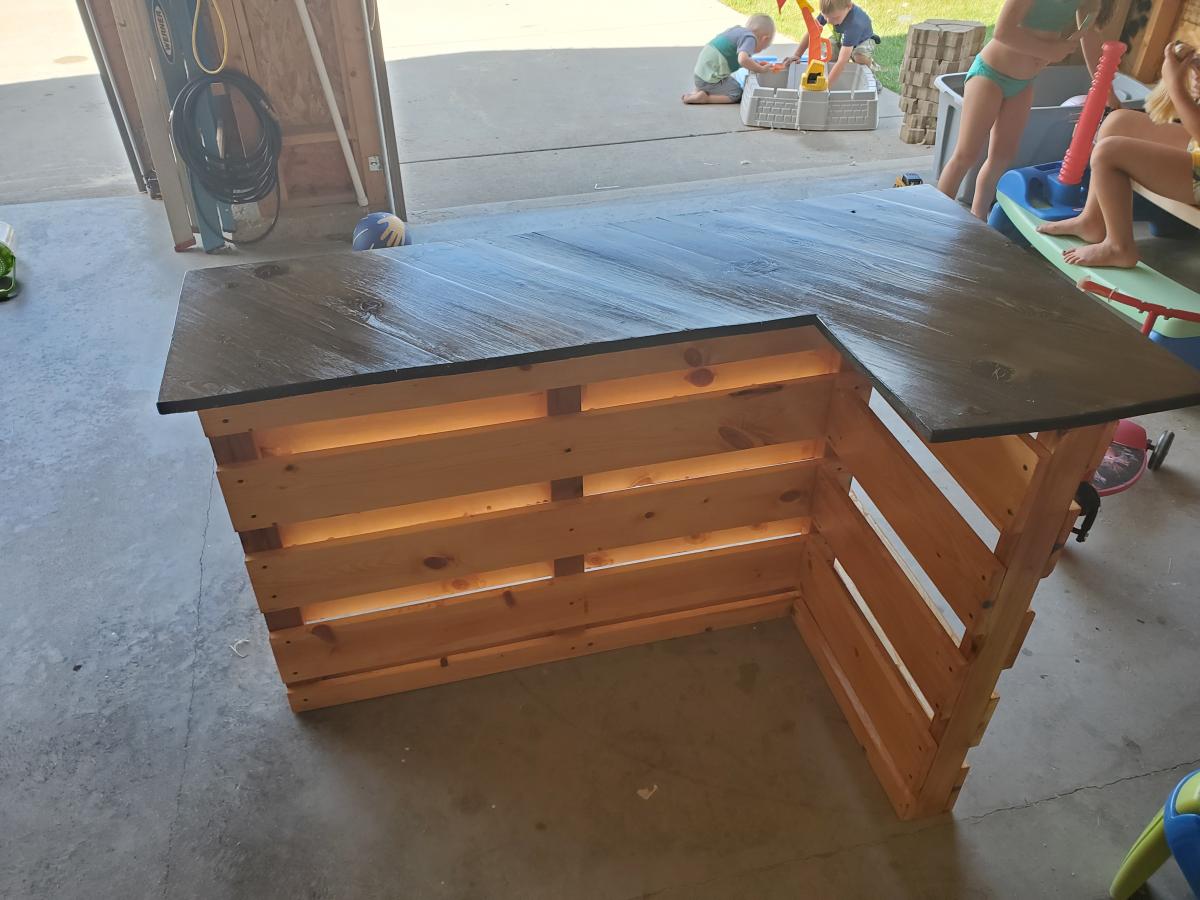
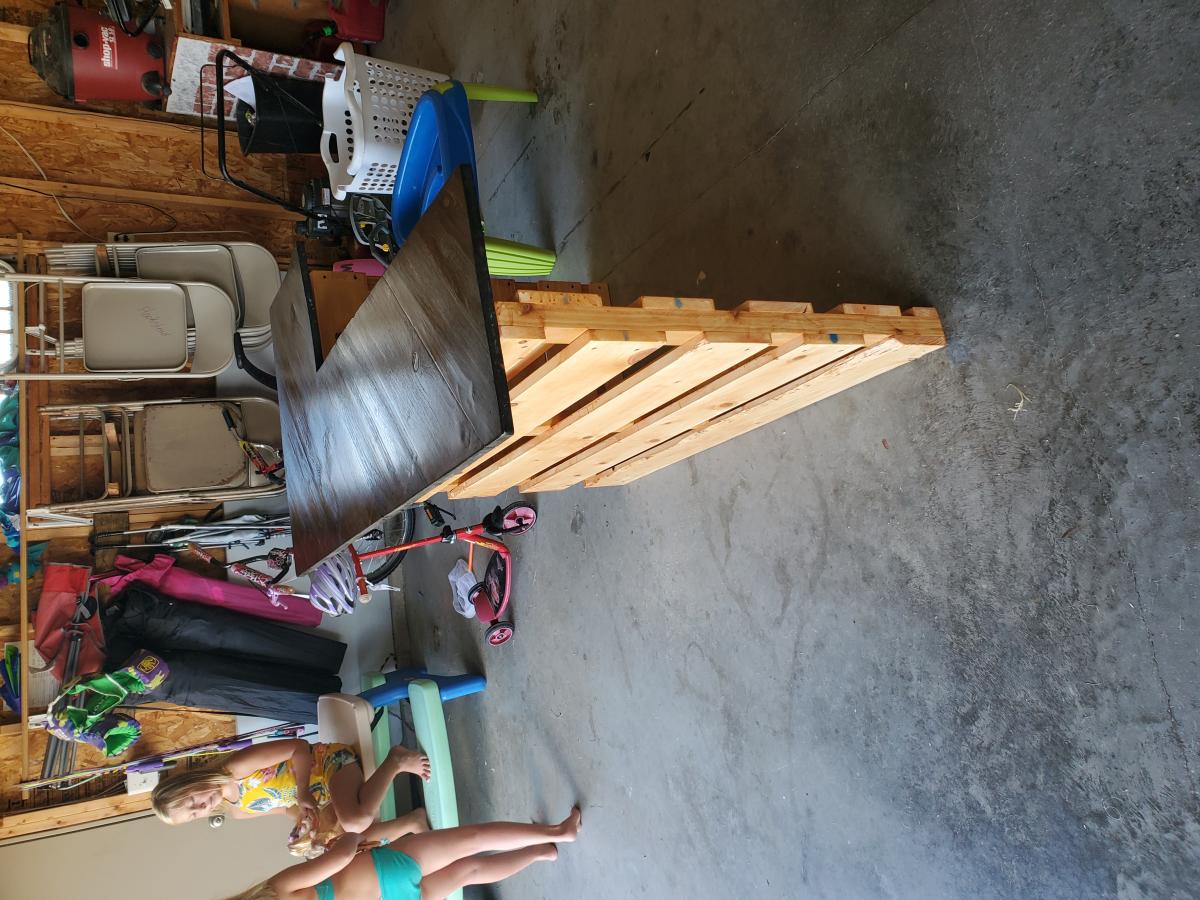
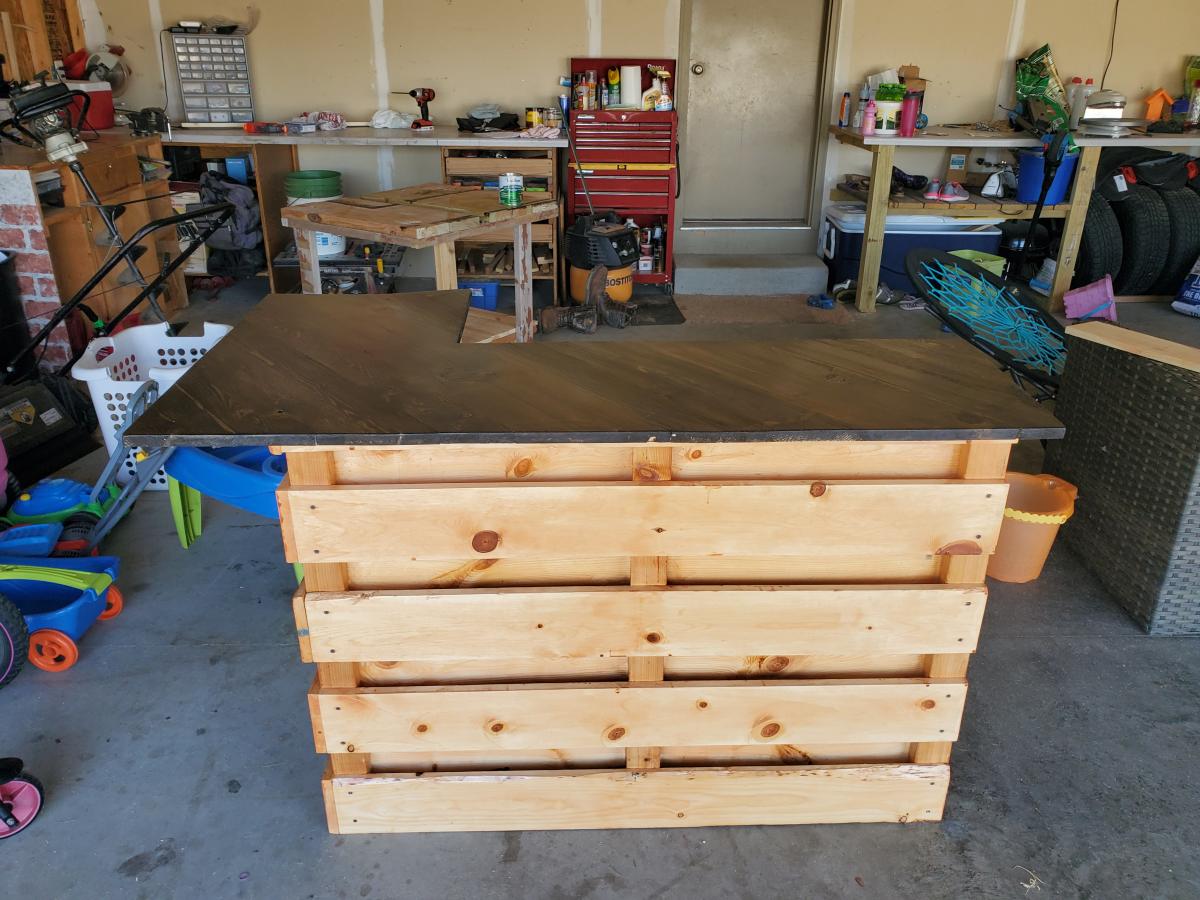
Back Deck Bar
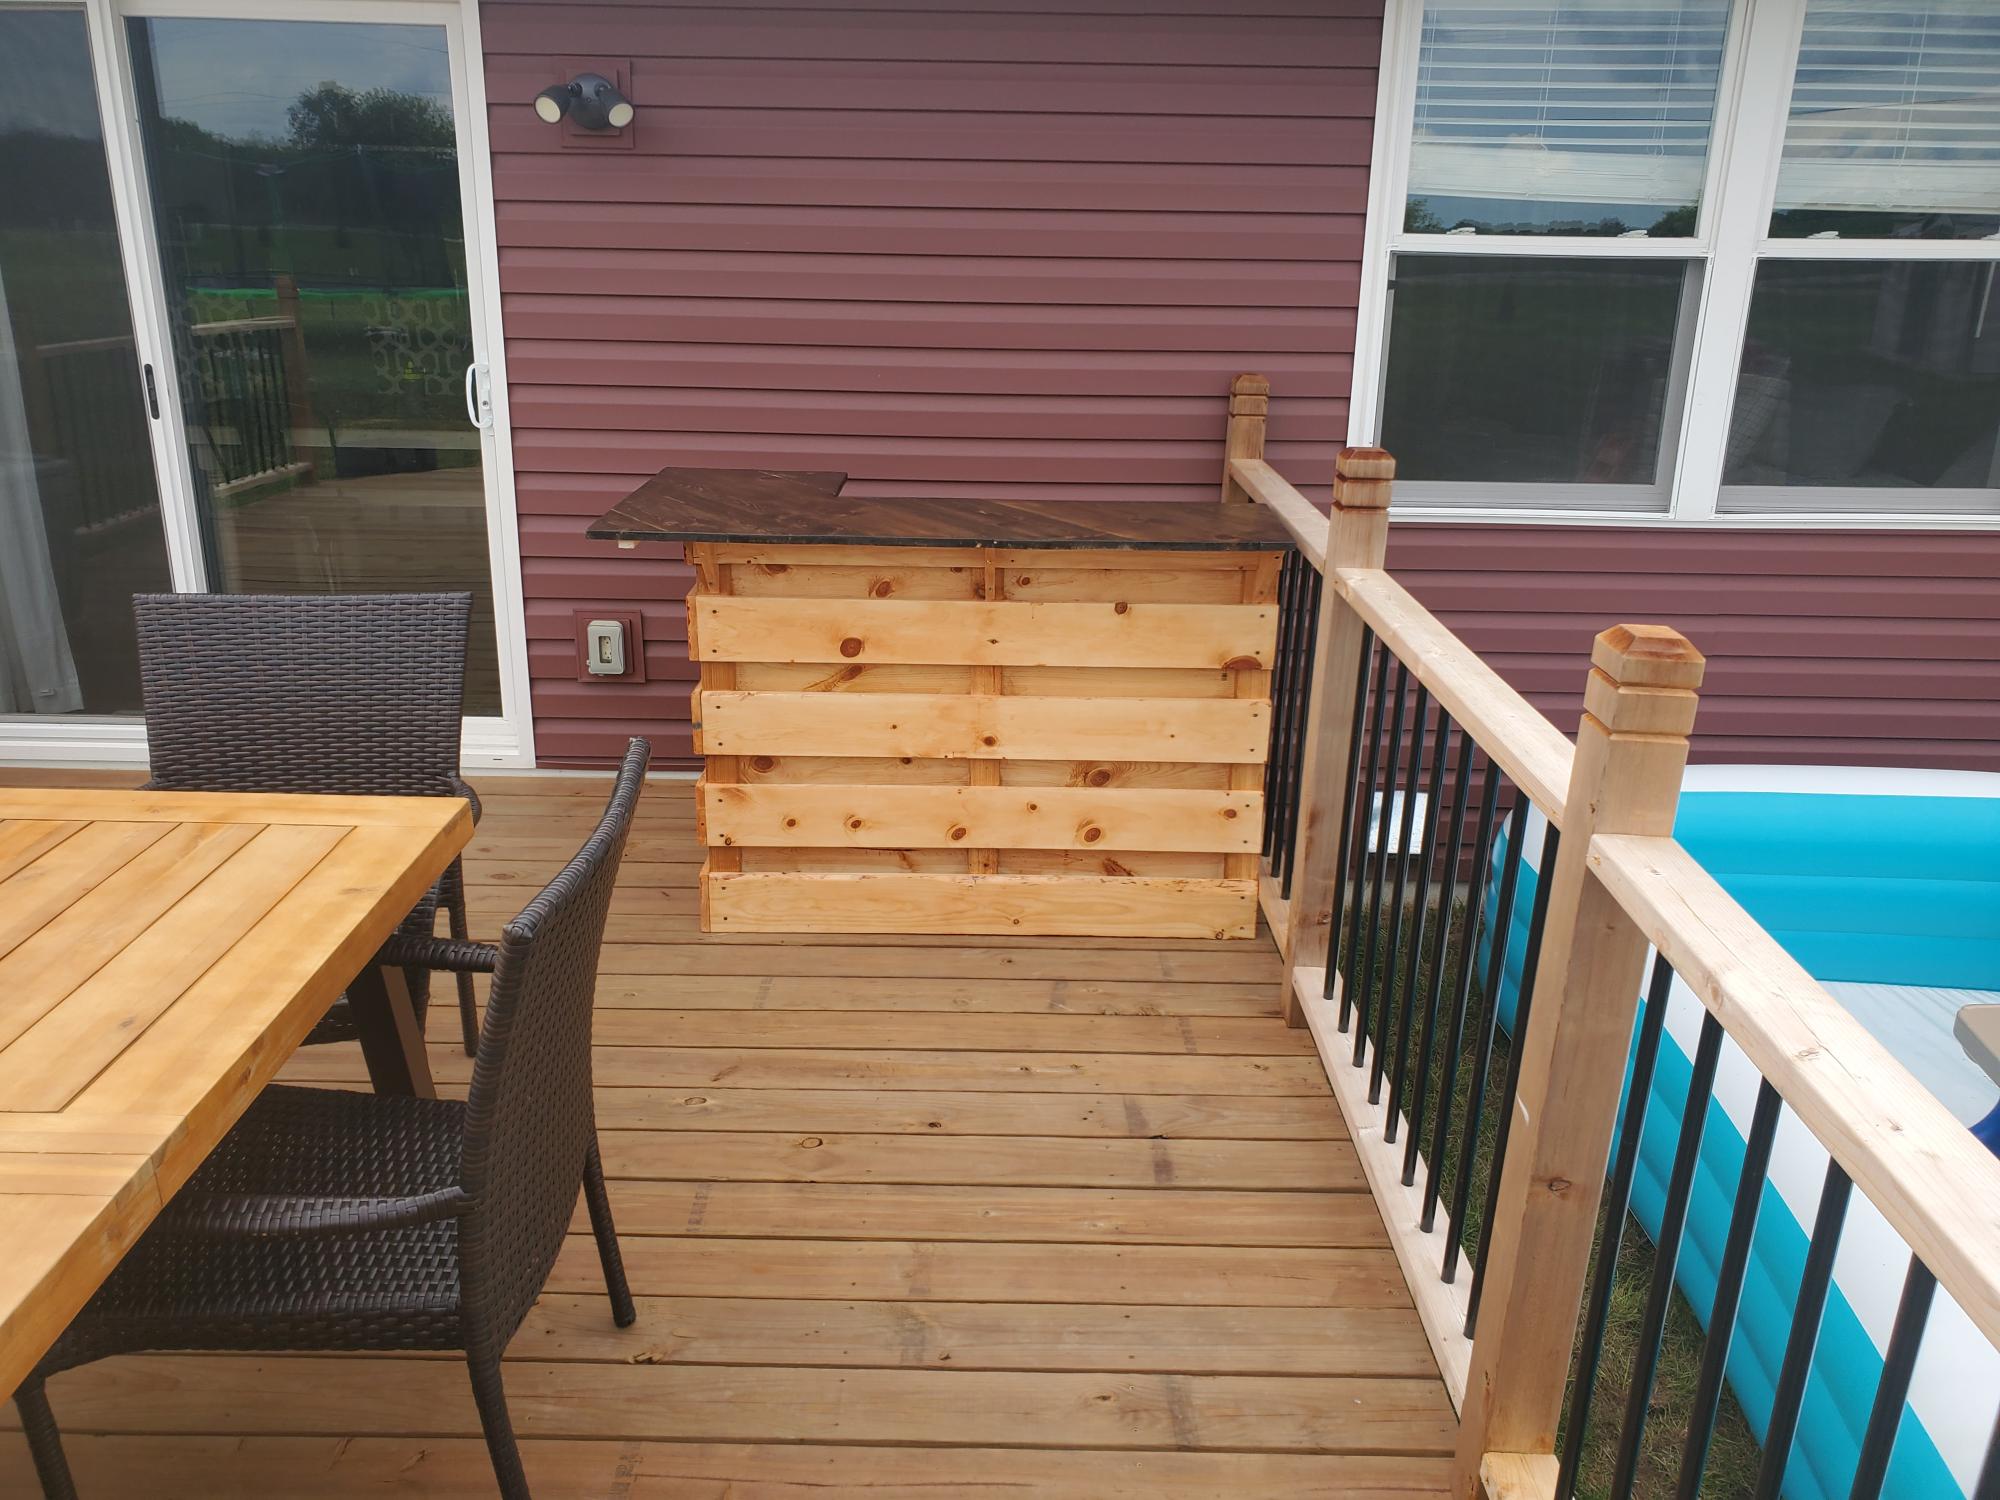
i have aqesome neighbors that just built a deck but was missing something. She like the pallet look bars but did not have any pallets. I did have a bunch of 1 x so made my own pallets.
Estimated Cost
30
Estimated Time Investment
Week Long Project (20 Hours or More)
Recommended Skill Level
Beginner
small pantry
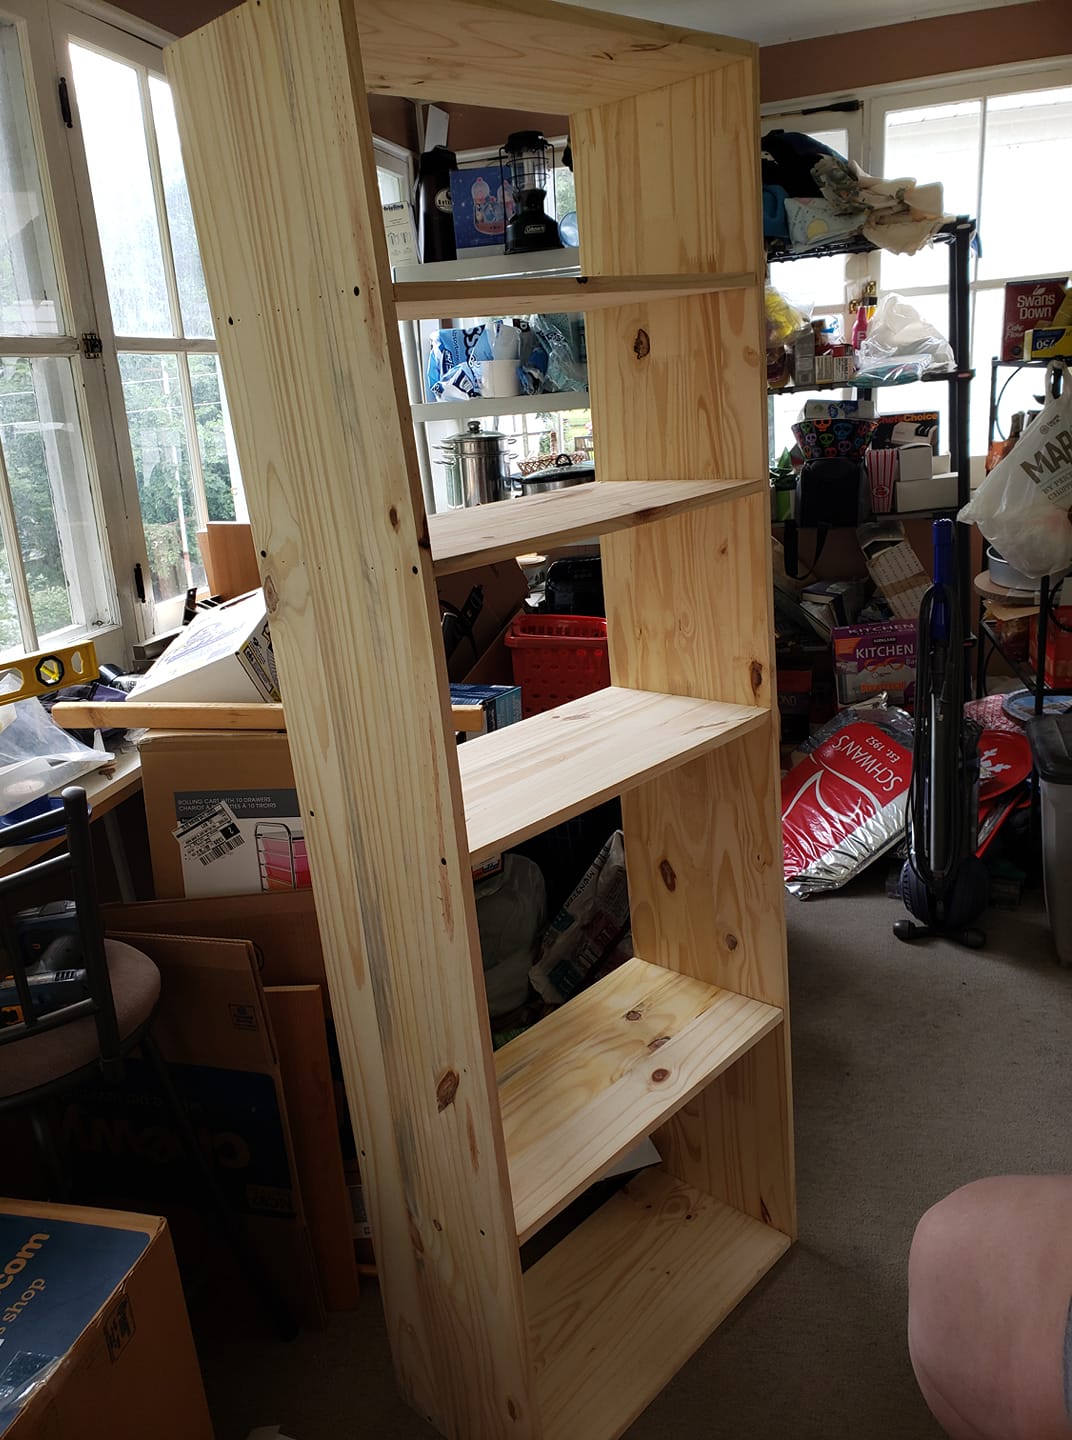
A quick pantry idea using 4 - 1x12x6'. 2 for sides 2 cut into 24" shelves. Start with basic box and then fill in shelves where you need them. Used 4" 2x4 scraps for feet. Put together with screws and nails will eventually add back panels to keep it square.
Estimated Cost
$75
Estimated Time Investment
Weekend Project (10-20 Hours)
Finish Used
painted with semi-gloss , went in kitchen
Recommended Skill Level
Beginner
Kid's room makeover

My kids we're spending the summer at their Dad's, so I wanted to surprise them by redoing their room. I've never built anything before, but I've found that I really love it!
I decided to take the advice of another builder and reduce the width by 1/2 in in order to get 2 toy boxes out of one 4x8 sheet of plywood. I also added a lid.
I tried to replicate a driftwood type paint finish by making a stain out of steel wool, and apple cider vinegar. After it was dry, I did a paint wash with a charcoal colored paint, then added a bit of cream paint to lighten it a bit, and dry brushed it on, I did this one more time making it even lighter, then wiped and blended. After the piece was dry, I waxed it using a dark wax made from Howards was paste and Minwax jacobean stain.
The inside is ombre painted too!
I really love the way they turned out!
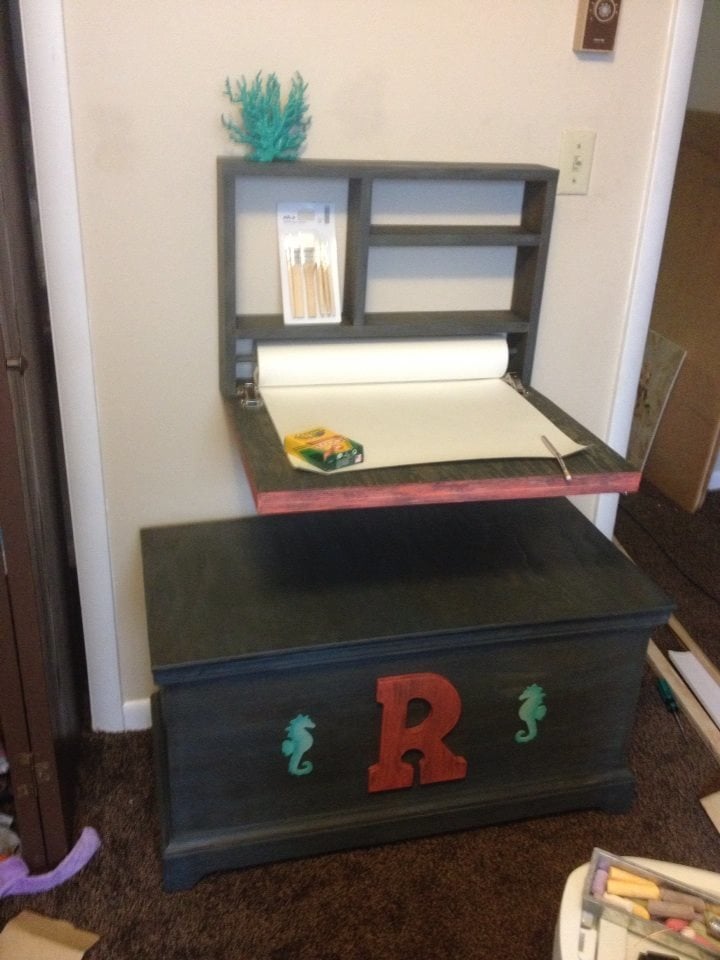
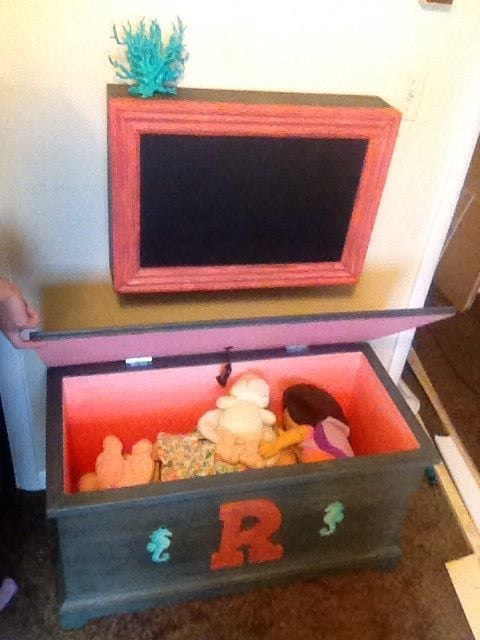
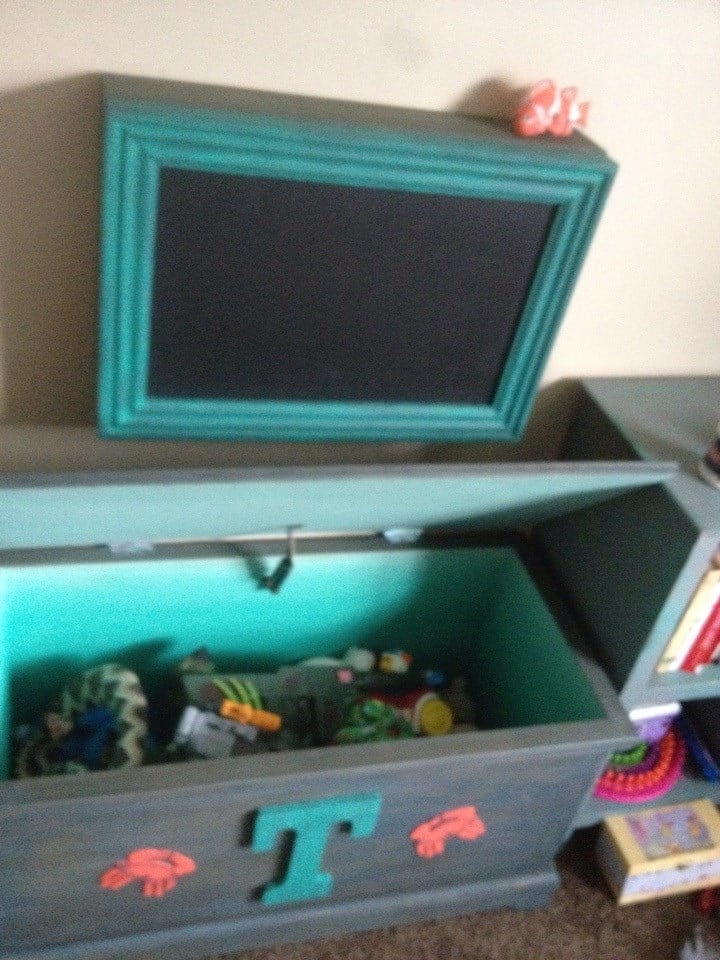
Built from Plan(s)
Estimated Cost
$40 each
Estimated Time Investment
Weekend Project (10-20 Hours)
Finish Used
Homemade apple-cider/Steel wool stain, valspar paint matched to Sherwin Williams- Iron Ore, vanilla craft paint, & homemade dark wax made from Howards paste wax and Minwax Jacobean stain.
Recommended Skill Level
Beginner
Rustic X Desk - My 1st Gen Build
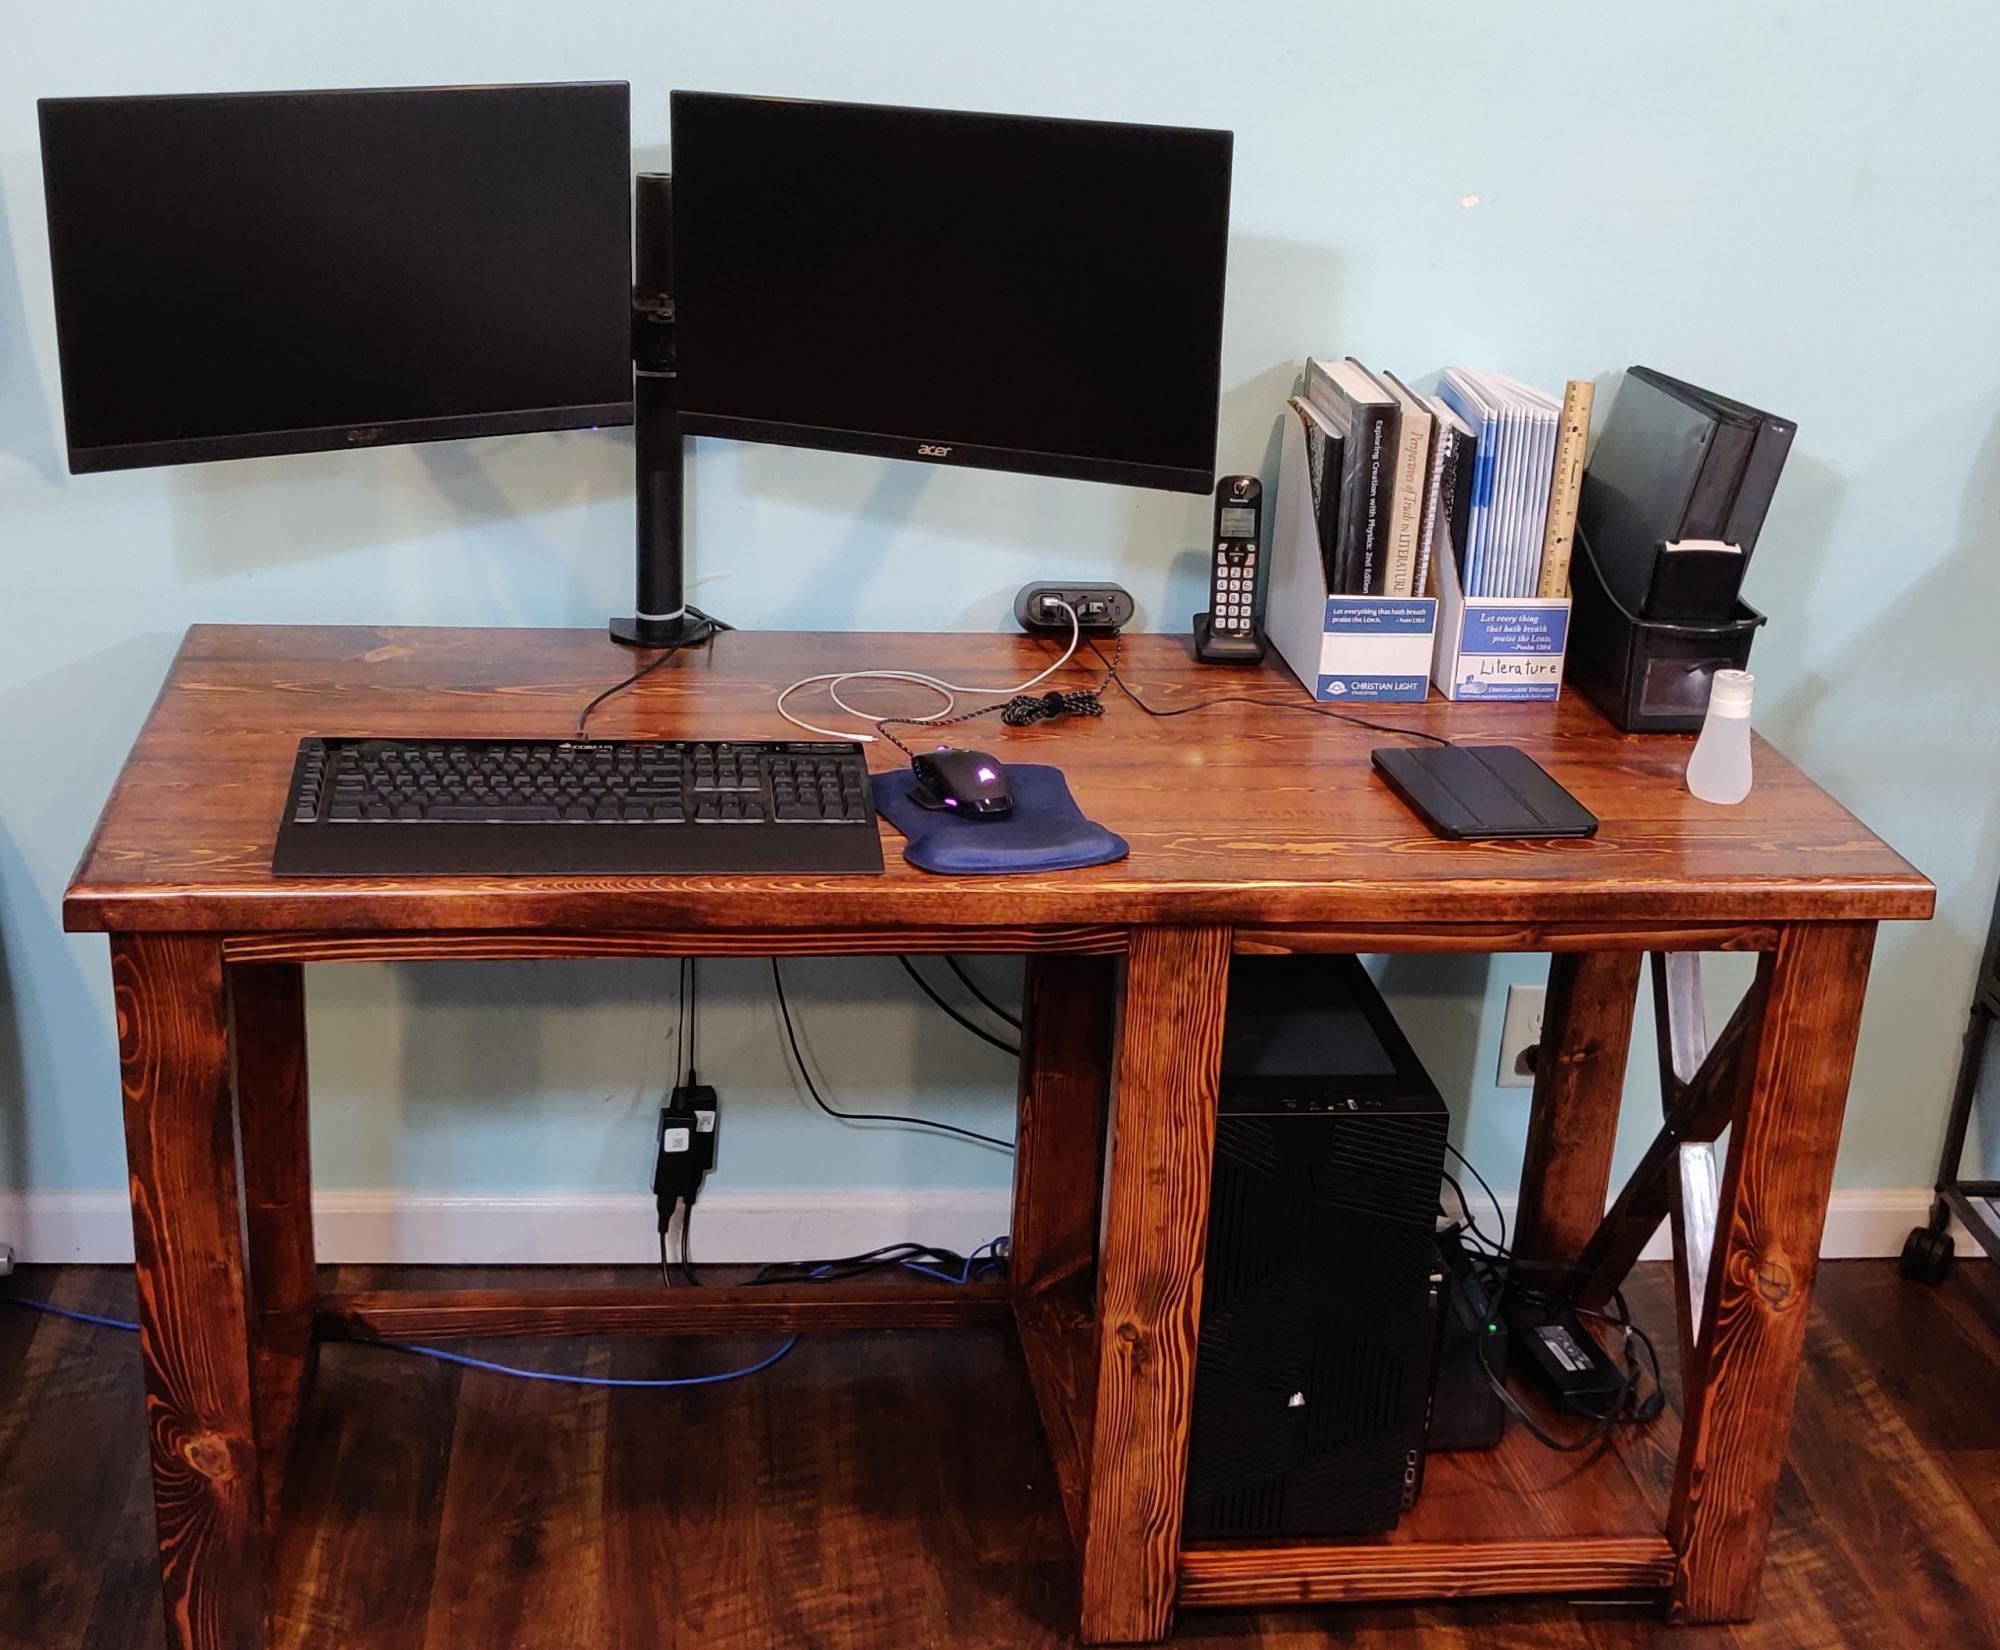
I built this iteration for my second son to give him a spacious workspace for his schoolwork, dual-enrollment activities, and for the occasional moments of kicking back and enjoying a bit of PC gaming.
We stained it with Minwax #215 Red Oak and used Minwax Satin polyurethane to finish ours.
I stuck to the Rustic X Desk plan for the most part and made the following modifications:
1) I used five 2x6 planks instead of four, to give it a 27.5-inch depth.
2) I used a 3/4-inch roundover bit to round off the tabletop to give it a smooth feel.
3) I left out the "middle" X, so my son could have easy access to the "guts" of his computer
4) I left out the middle shelf so my son could stow his PC tower "below deck"
5) Not really a modification; I used a 3/4" straight router bit to cut notches into the 2x2's used for the X detail so they would sort of lock together because I wasn't happy with the way the angles and all were coming out with the two half-leg parts of the X detail.
6) I hated the selection of furring strips at the local big box home improvement store and didn't want to travel all the way across town to see if the "lumber stores" had anything better, so I ended up milling my own on my table saw from cherry-picked 2x4 lumber. It was cheaper than buying the premium pine to boot, since a 2x4 would give me a pair of 2x2s and leftover 1/4x2 that I'll be able to run through a planer and turn into something useful. Not a modification, just more of a "if you're plagued with lousy selection, try this instead" idea.
7) Installed a Wiremold WMC220BK convenience 120V/USB power center to make it easy to plug in a desk lamp, charge a cell phone, etc. without making a cable mess. (https://smile.amazon.com/dp/B0768R2JDG)
8) Added felt pads under the feet to make it slide easily on wood/vinyl flooring
9) I set the bottom of the leg assemblies 1-1/2 inches above the floor instead of 3 inches, so our indentured robotic servant "Mo" won't get trapped underneath any of them. He isn't the sharpest tool in the shed but at least earns his keep. Mo is a late-model Roomba 675, if any are curious to know.
Between the "custom" milling and the fact that I should have run all this 2x4 and 2x6 through a planer to cut down on all the sanding and resurfacing needed, this ended up taking a lot longer than the initial couple weekends to build plus the staining and finishing time. I'm in the middle of building a second one of these with some slight modifications since the need/use case is a bit different. I'm also planning a third revision and build that will include some "geek-friendly" customizations, namely integrated cable management and will have two shelf bays instead of one, just half as wide (a single 1x10 on the left/bottom and another 1x10 on the right/bottom, with the seating area in the center). The third "generation" will be a Christmas present for a computer science student (who consequently also graduates at the end of this fall semester).
Built from Plan(s)
Estimated Cost
80
Estimated Time Investment
Week Long Project (20 Hours or More)
Finish Used
Minwax #215 Red Oak stain and three coats of Minwax Satin Polyurethane
Comments
Ken C
Mon, 04/26/2021 - 07:34
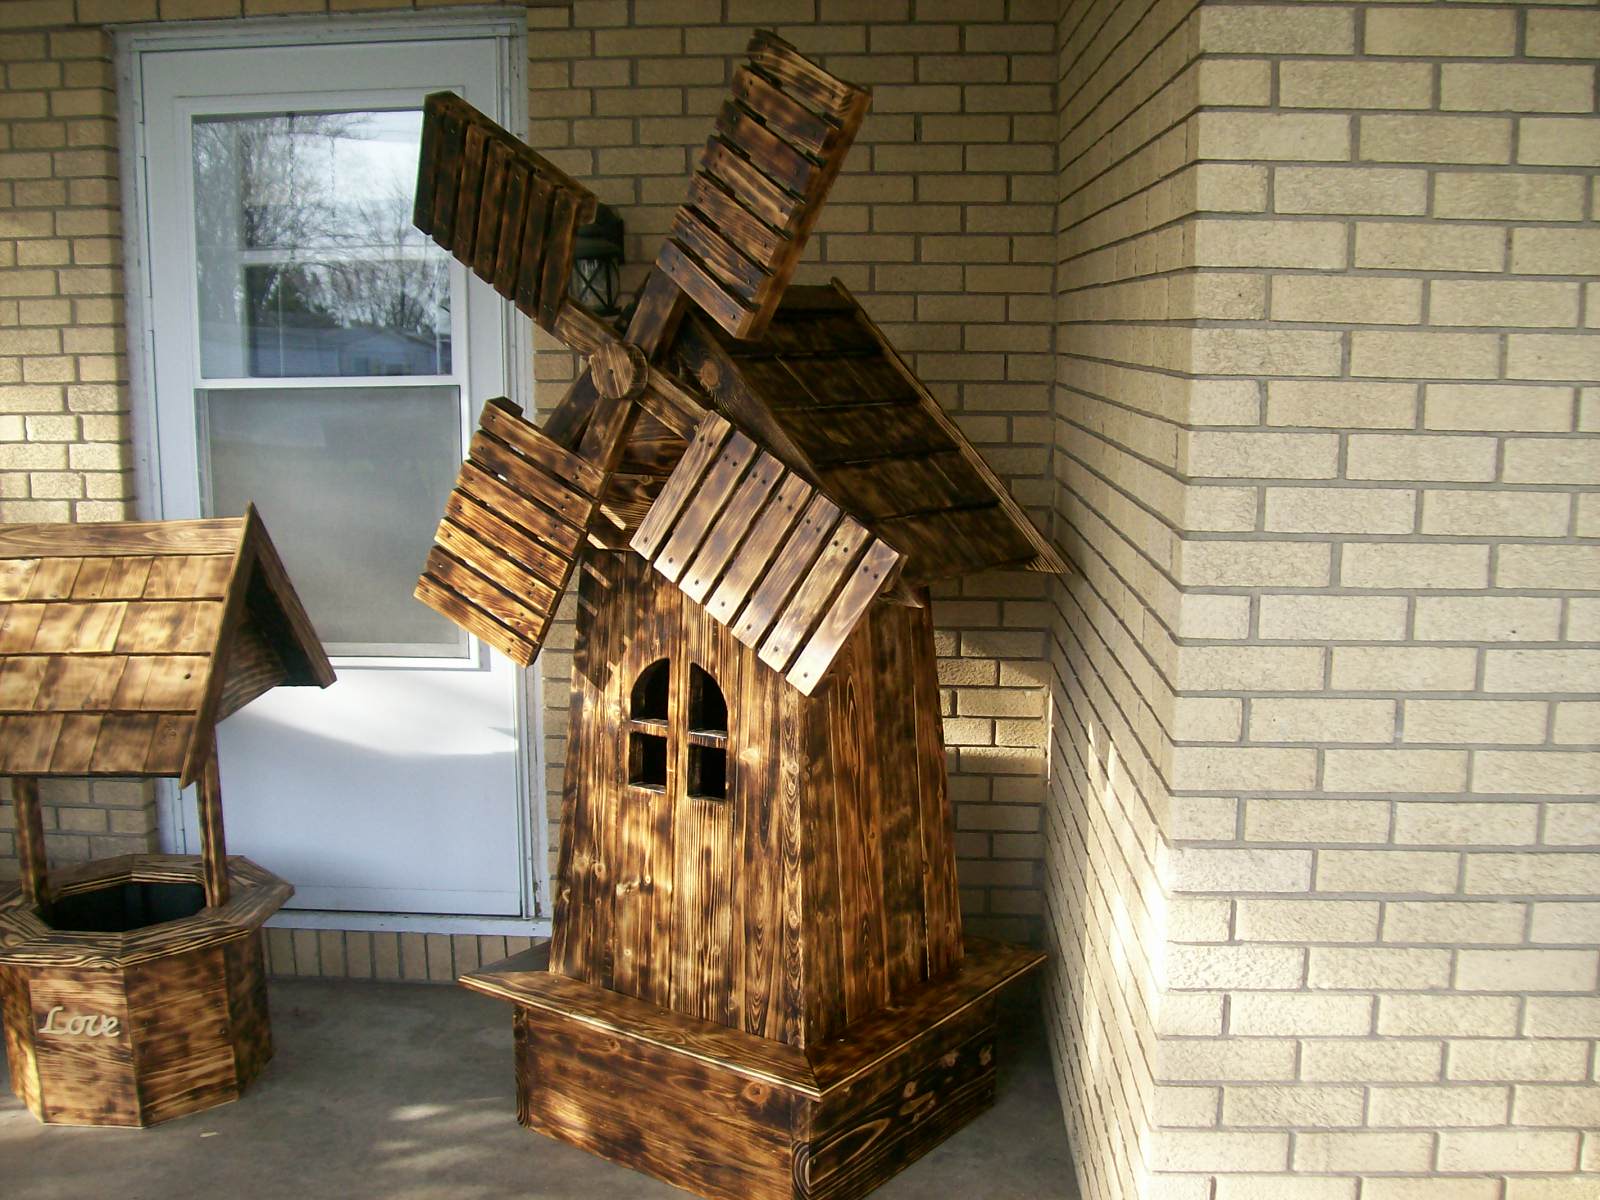
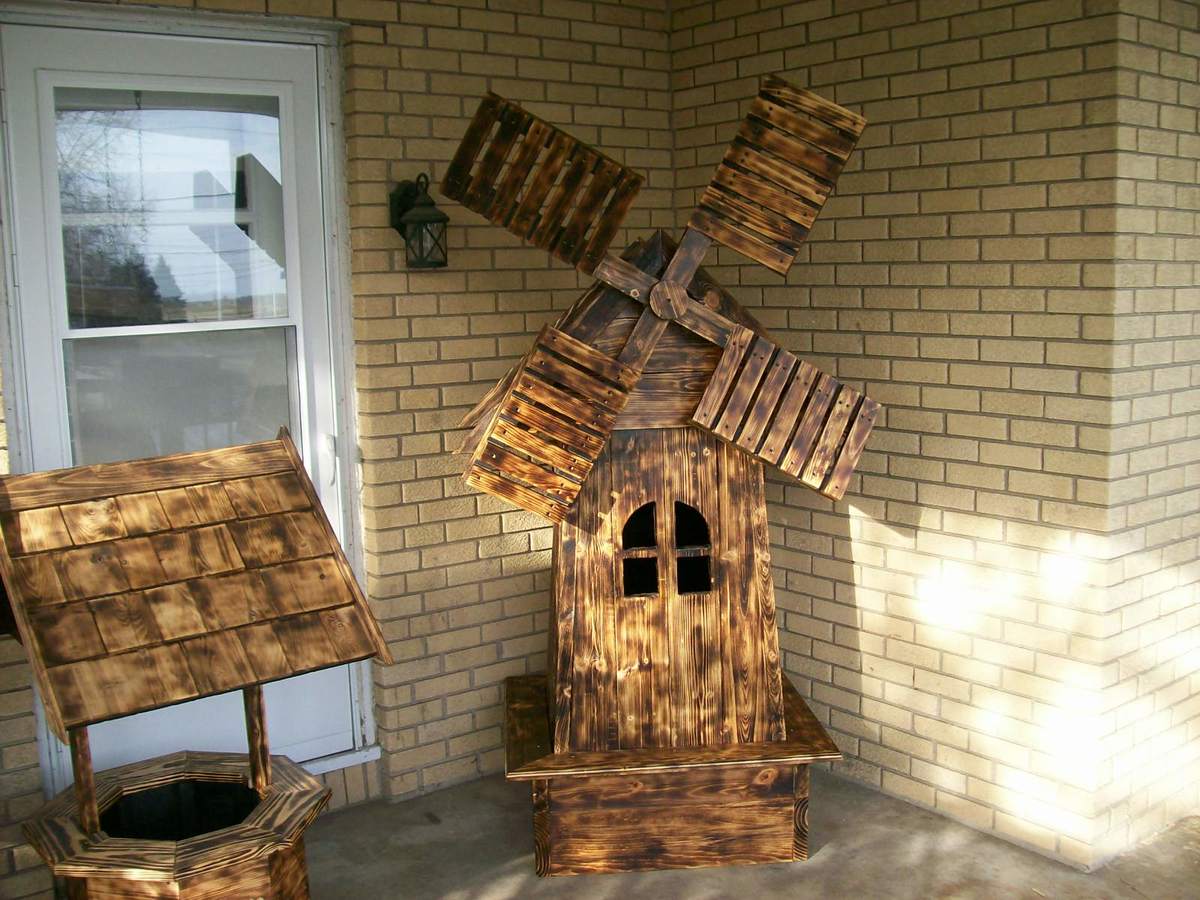
Windmill plans
I really like the way this windmill looks and would love to make one. Are there plans somewhere?