Community Brag Posts

Barn Door Console with Drawers

Submitted by Anonymous (not verified) on Mon, 05/06/2024 - 13:27

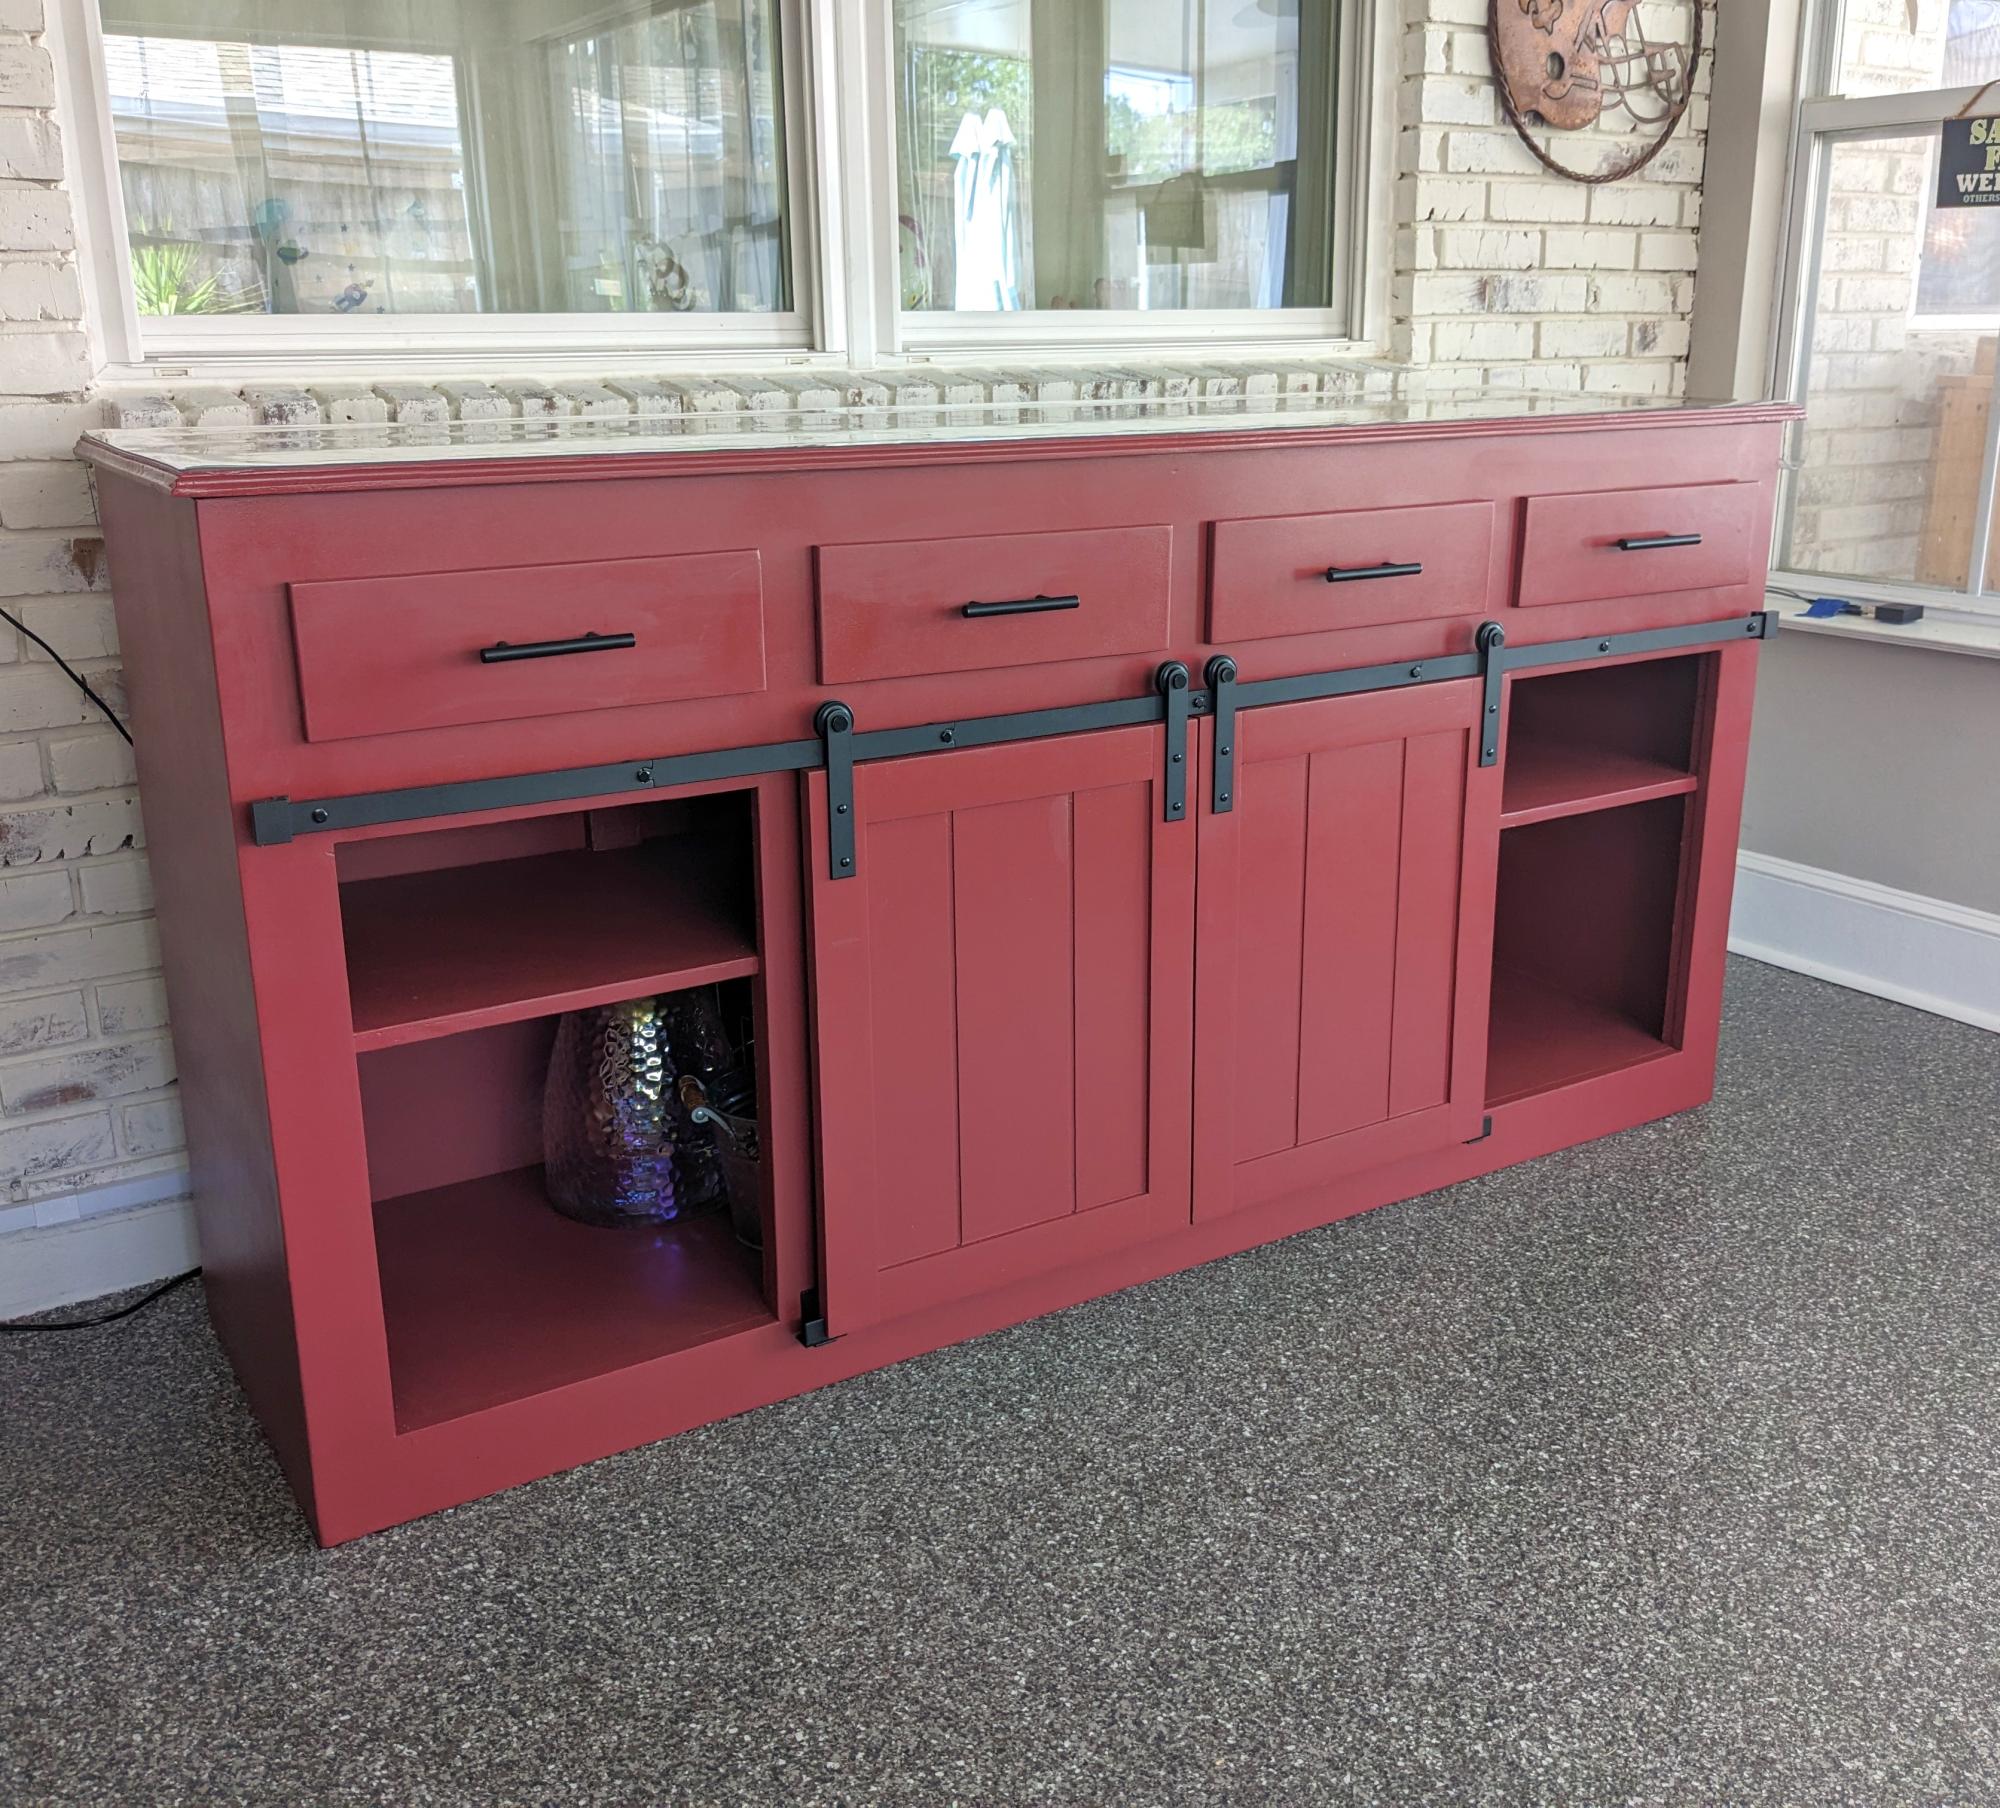
Being a newby to woodworking, I wasn't sure if I could tackle this build. I saw pictures on your website and decided to give it a try. However, my wife wanted drawers so I made the doors a little shorter in order to add the 4 drawers but keep the height at 36". Thanks for your inspiration. I'm getting more comfortable everyday.
 

Louis Villarrubia


Cedar Spa Bathroom Step Stool

Submitted by Tea Granny on Mon, 06/30/2014 - 20:44

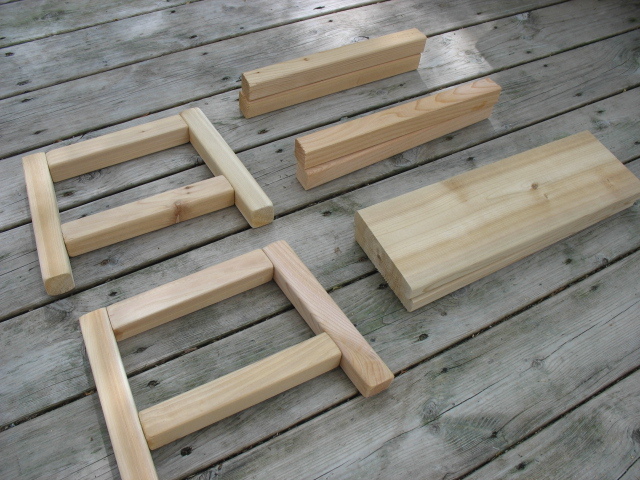
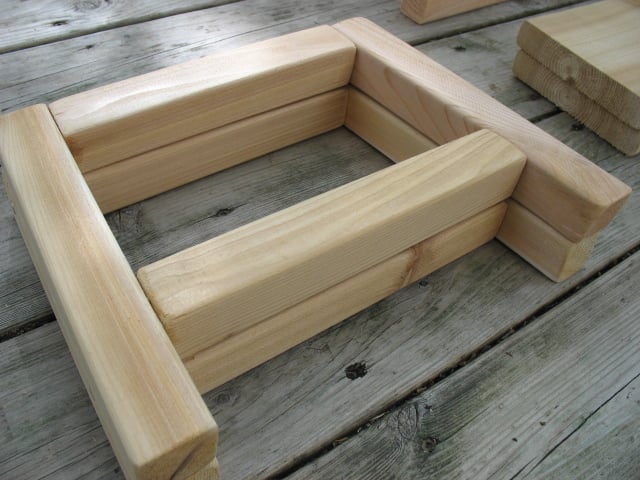
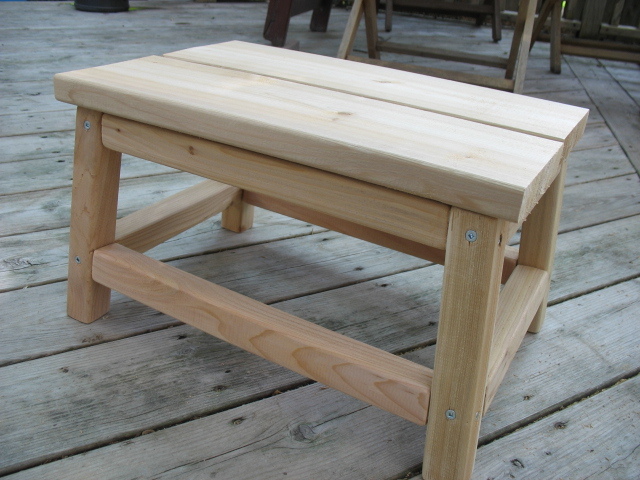
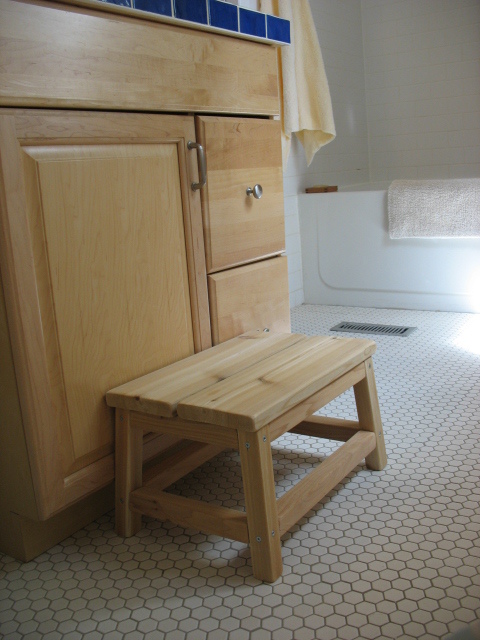
After searching the town high and low for a 10" high wooden stool, I decided to make one. Ana had the perfect stool pattern to modify for our needs - A little shorter, a little wider.....et Voila!

It's the perfect height for little ones to reach the taps in the bathroom, as well as helping out in the kitchen from time to time. And, the cedar smells wonderful.

Finished height: 10"
Top measures: 11.25" x 16.5" (2 boards, cut 16.5" long + a space in the middle)
Footprint: 12.375" x 17.375"

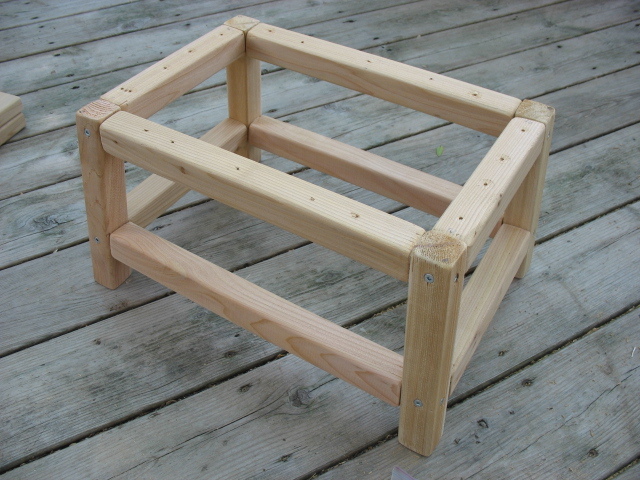
I also lined up the rails (instead of staggering them), similar to the Harriet Higher Chair plans. The joint will be weaker, but I prefer the cleaner lines on such a short step stool.

Thanks Ana for the great plans!

Estimated Cost
less than $15 (cedar)
Estimated Time Investment
Afternoon Project (3-6 Hours)
Finish Used
No finish added, exposed screws.
Recommended Skill Level
Beginner

Outdoor Modern Sofa

Submitted by Anonymous (not verified) on Sat, 08/08/2020 - 07:31

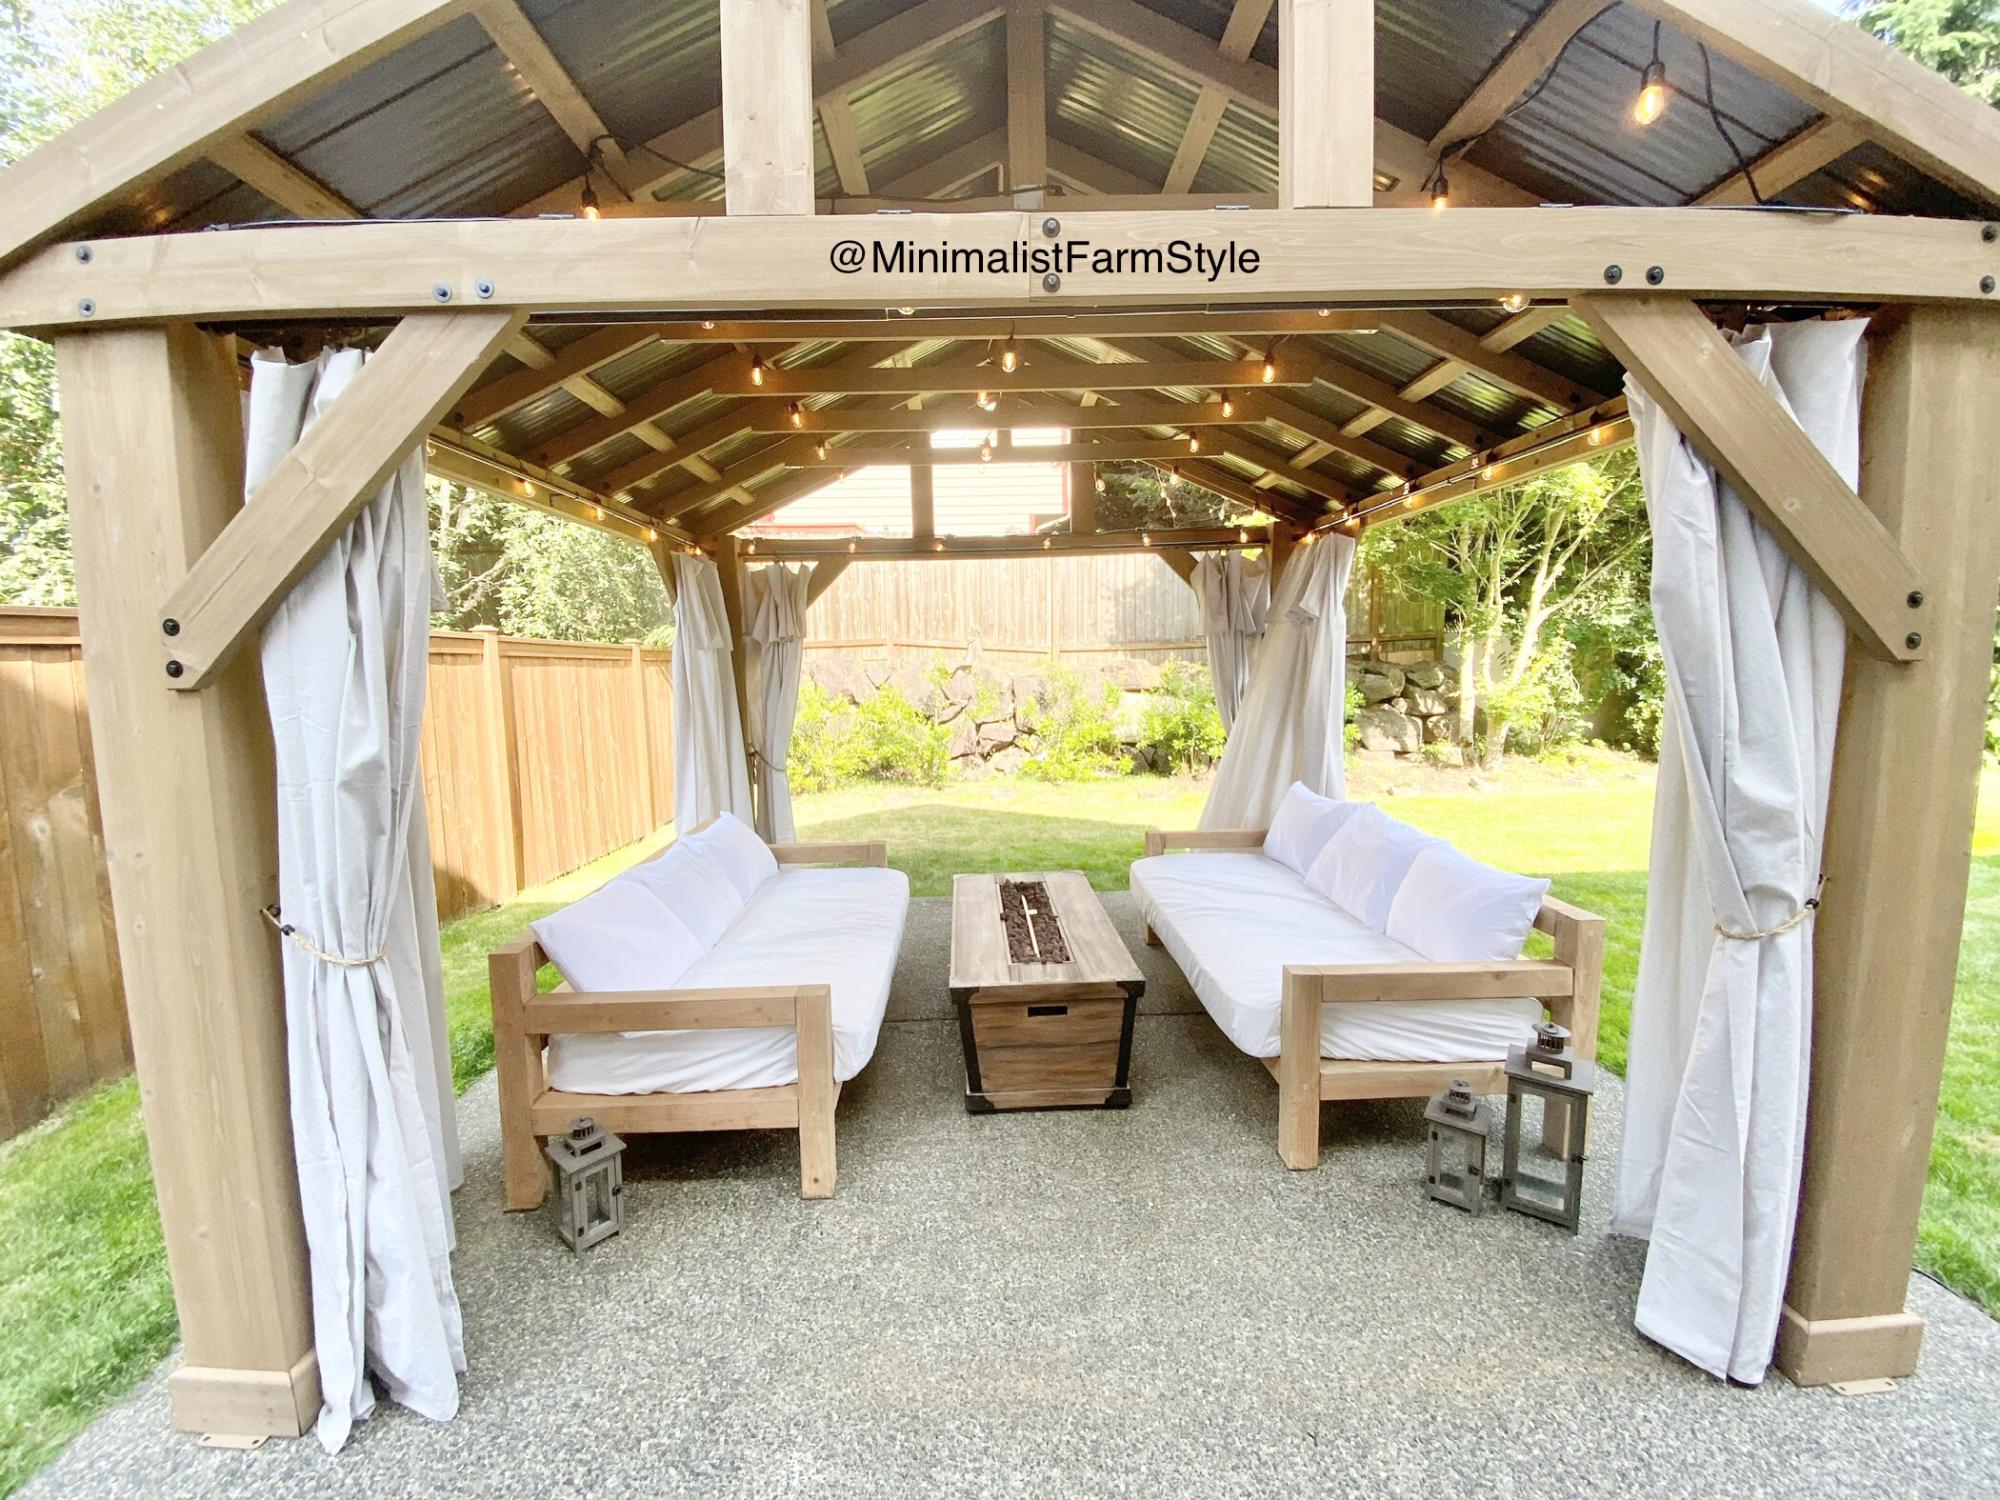
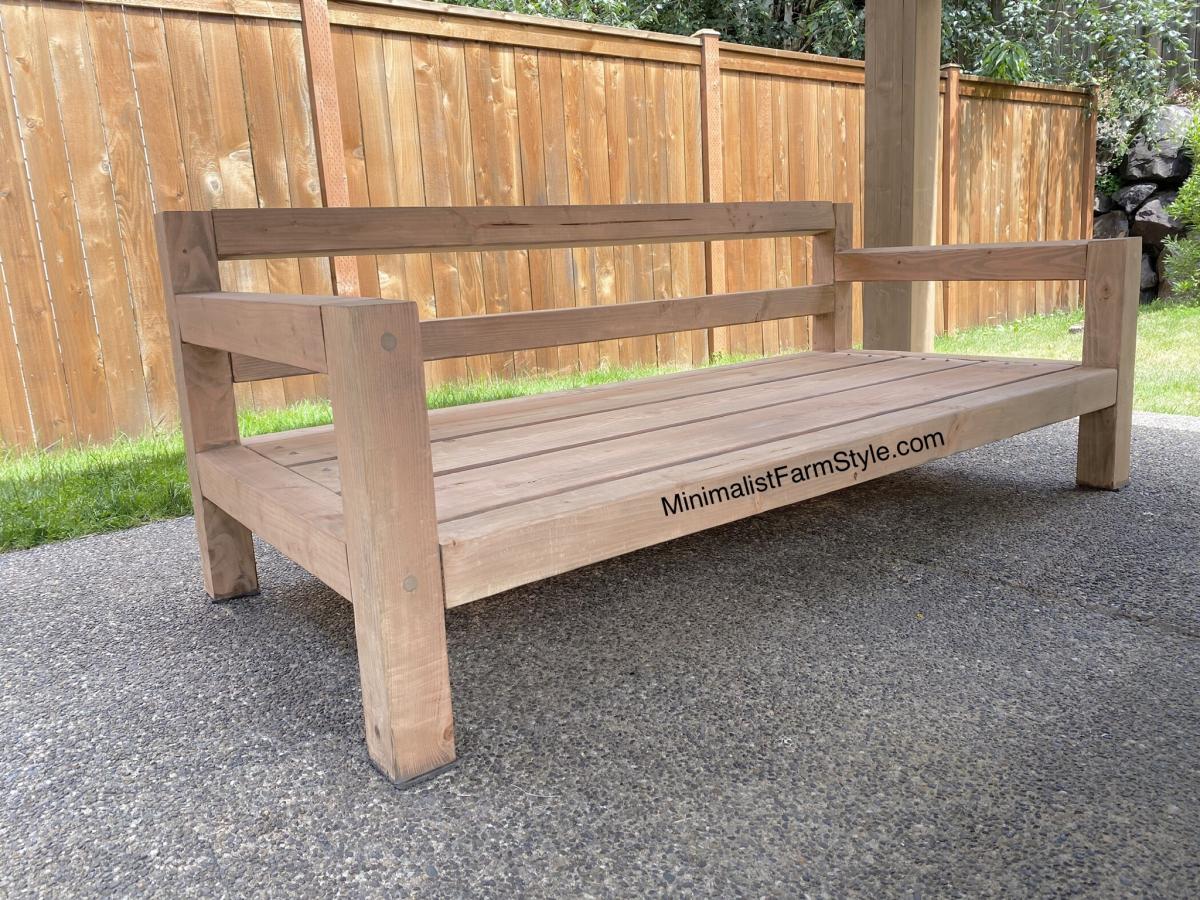
This was my first time DIYing furniture, so I definitely came up with a very easy design!

The dimensions for this sofa are modern as it sits low to the ground and has a squarish appearance.

Free detailed plan on Blog: www.MinimalistFarmStyle.com

Estimated Cost
$100
Estimated Time Investment
Day Project (6-9 Hours)
Finish Used
Watered down Varathane Water-based Java Bean.
Recommended Skill Level
Beginner

Daybed with Storage Drawers on Caster Wheels

Submitted by Nate on Tue, 08/13/2019 - 10:38

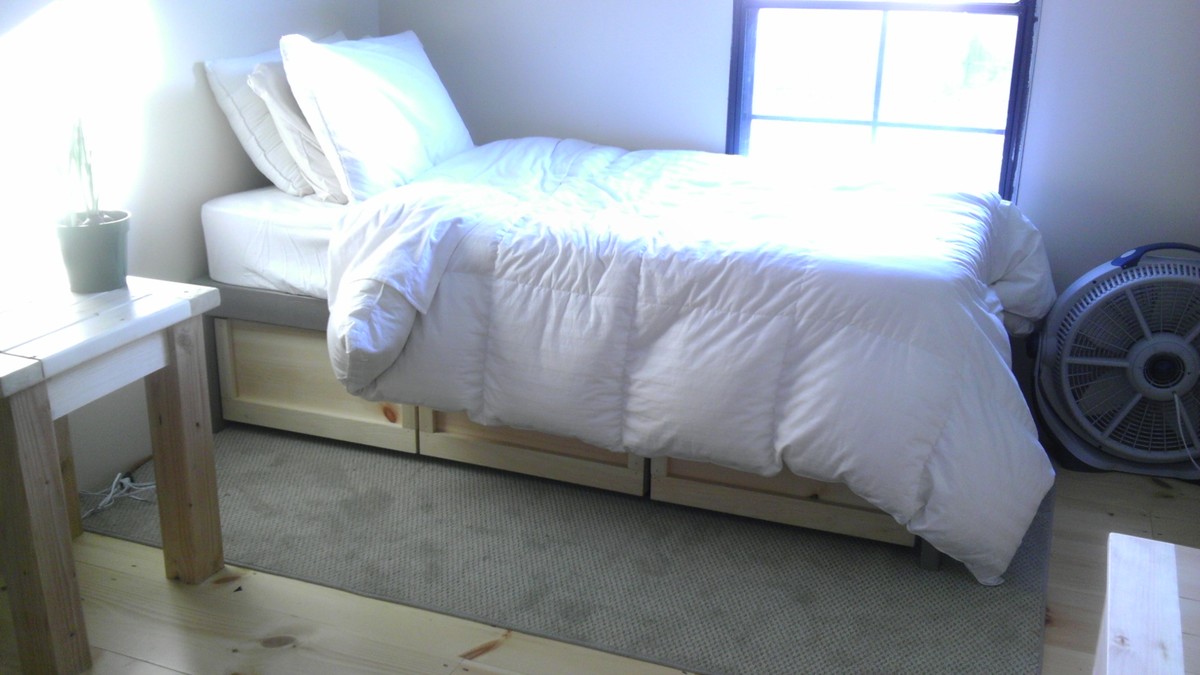
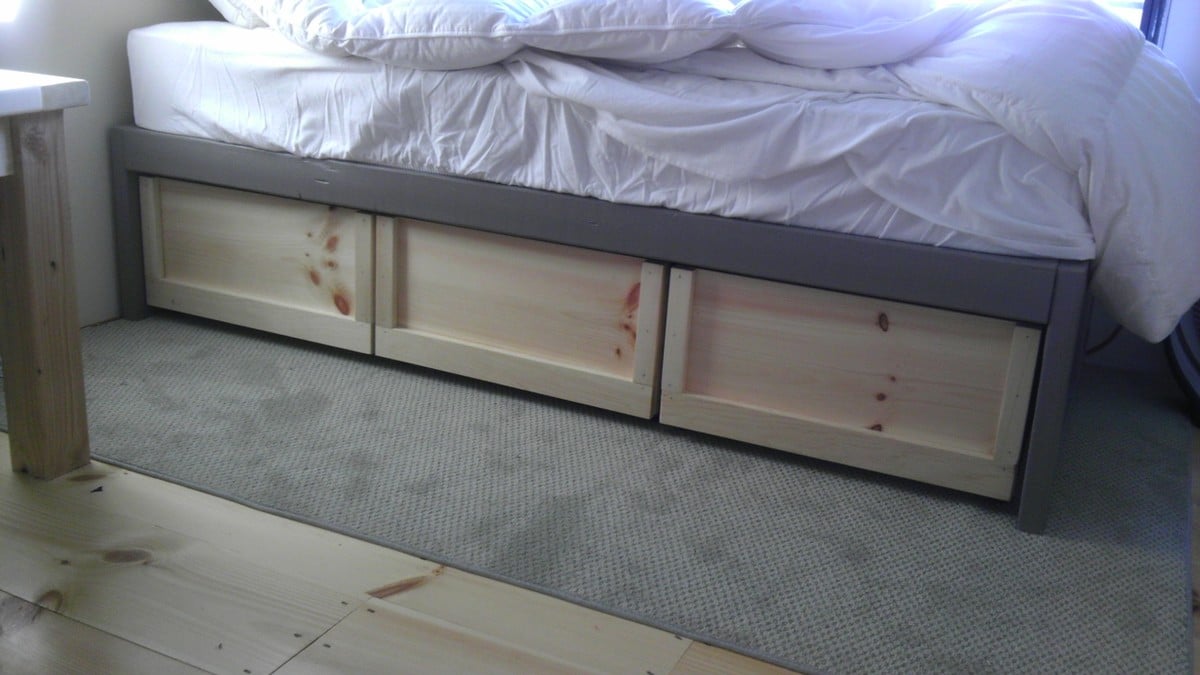
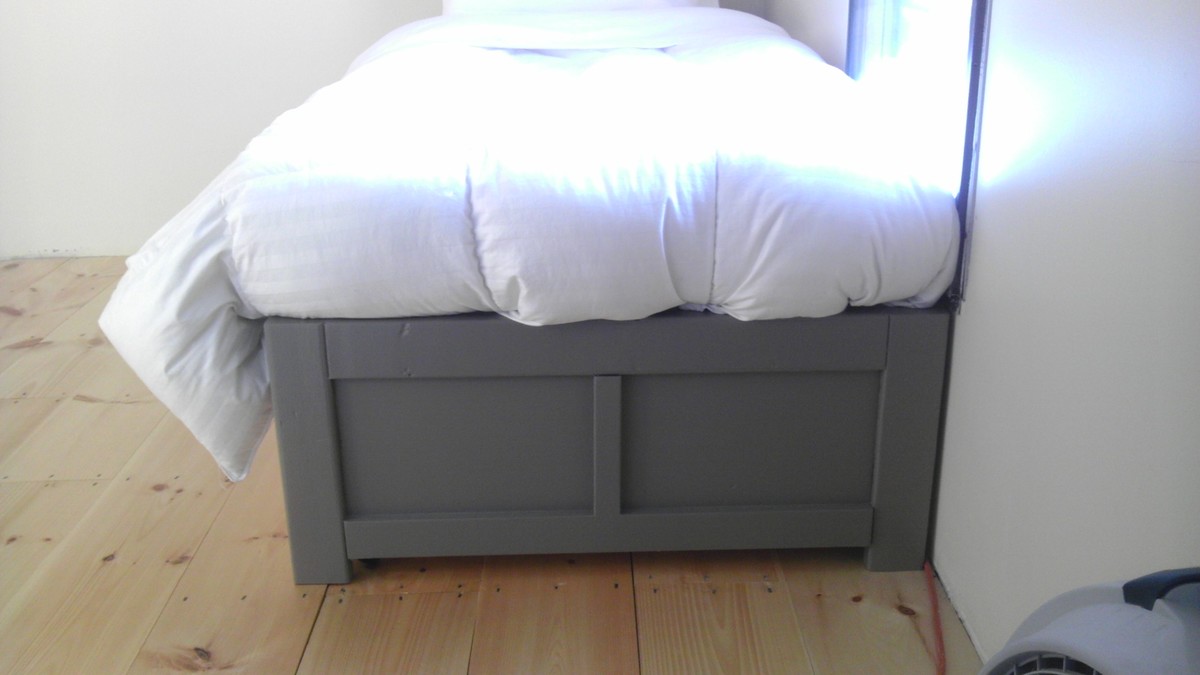
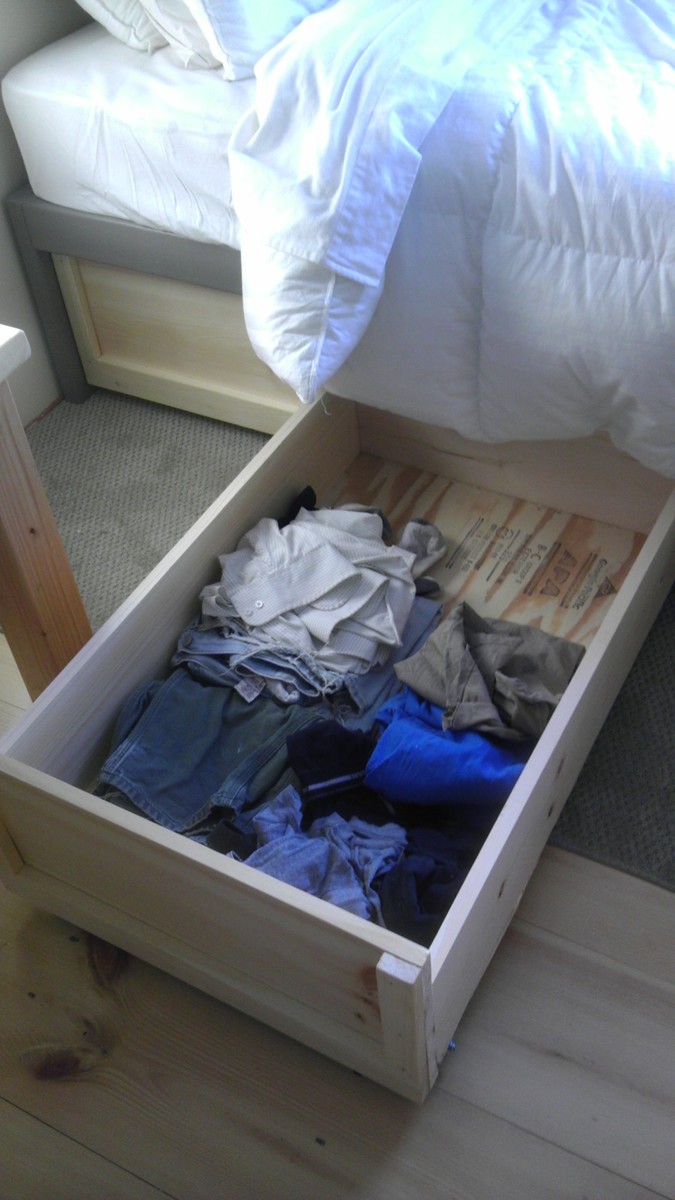
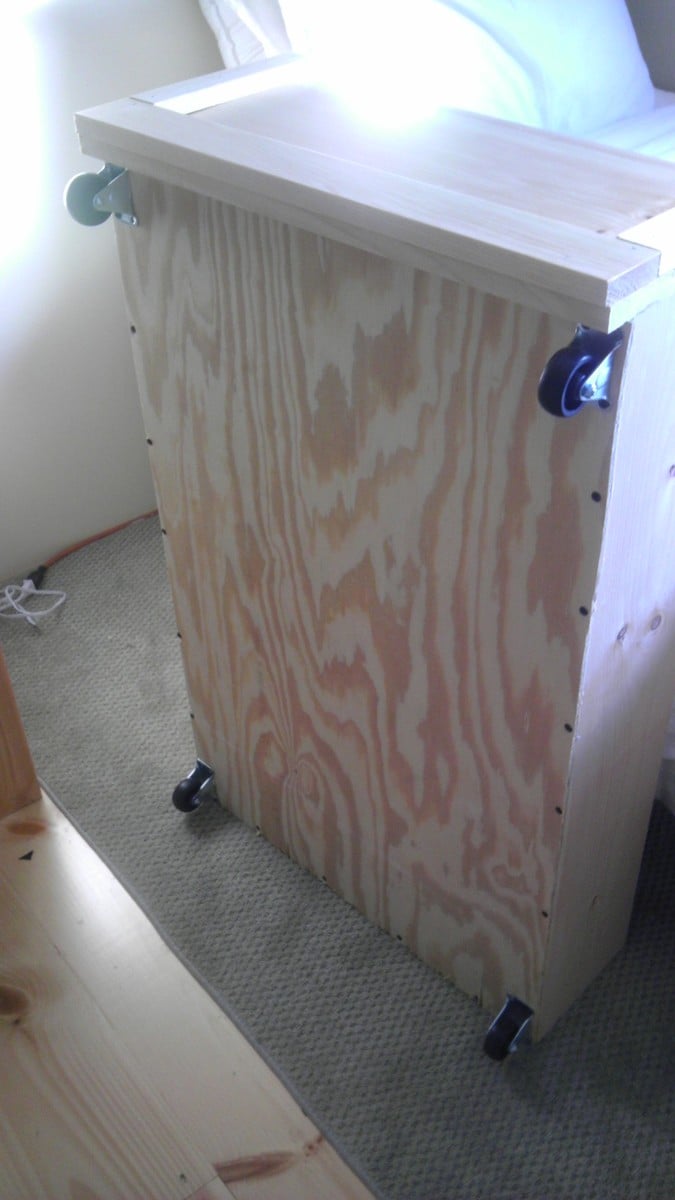
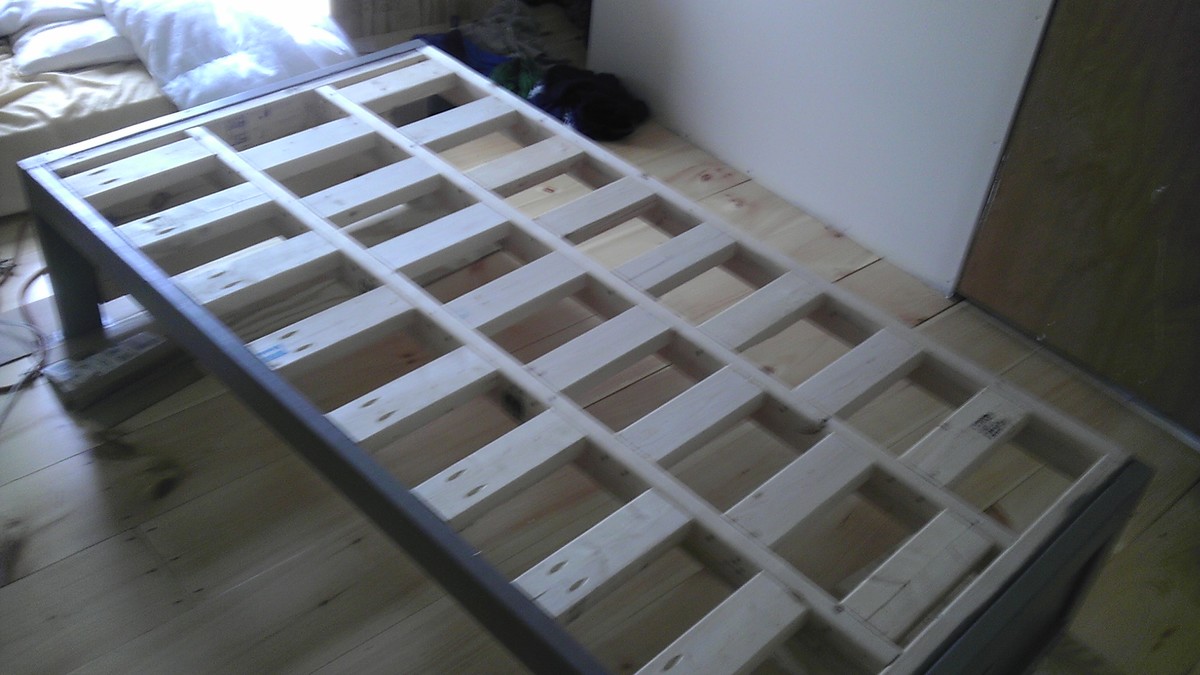
This was one of the first projects I've ever built, so I would put it at a beginner level. It's a great, sturdy bed, very simple. The drawers are huge, which is surprising, since you don't realize how much space you gain when you add the drawers until you see how much they store. Thought I'd fill in details that worked for me that I had to figure out. As the plan says, the drawers are on caster wheels and slide directly on the floor, so make sure you have an area rug down if it's going to be on bare wood (especially pine, like this one is on). As another reviewer said, use 2" caster wheels, 12 total. This gives it the right height on a wood floor. You can get those in bulk at a home improvement store. I would recommend a slat system and not just a piece of plywood for under the mattress, as I was warned bacteria and mold can grow when the mattress is not given a way to vent. You can see in the picture, I had a bunch of 2x4 scraps and simply made a slat system out of that. I pocket holed the slats into the front of the bed, so no screws would be showing. I only finished the sides that would ever show, so the entire back of the drawers and bed itself are unfinished. I like the look of the drawers without handles, and they are just as easy to pull out without them. The drawers can get off track easily when being pulled in and out, so be careful when you use them. Otherwise, no problems with the drawers. I used wood glue and cheap drywall screws to attach the drawer bottoms (plywood) to the drawers. If you want to put anything of any serious weight in these drawers, really consider supporting the middle of the drawers on the bottom with some 1x2s or 1x3s, as it is a bit weak in the middle of the drawers. One more thing: I noticed standard dimensions vary slightly between finishing wood (1x12s, 1x2s, etc) and structural wood (2x4 studs), so keep that into account. Things were not flush because the finish wood was scaled larger than the structural wood. This bed is all about the storage underneath, which is great.
Estimated Time Investment
Weekend Project (10-20 Hours)
Finish Used
I used an oil-based primer, let it dry (it takes days to dry), then added latex-based paint on top. The drawers have one coat of polyurethane.
Recommended Skill Level
Beginner

Comments

Camp Loft Bed with Stairs, Slide and Fort

Submitted by bmas99 on Wed, 12/26/2012 - 14:35

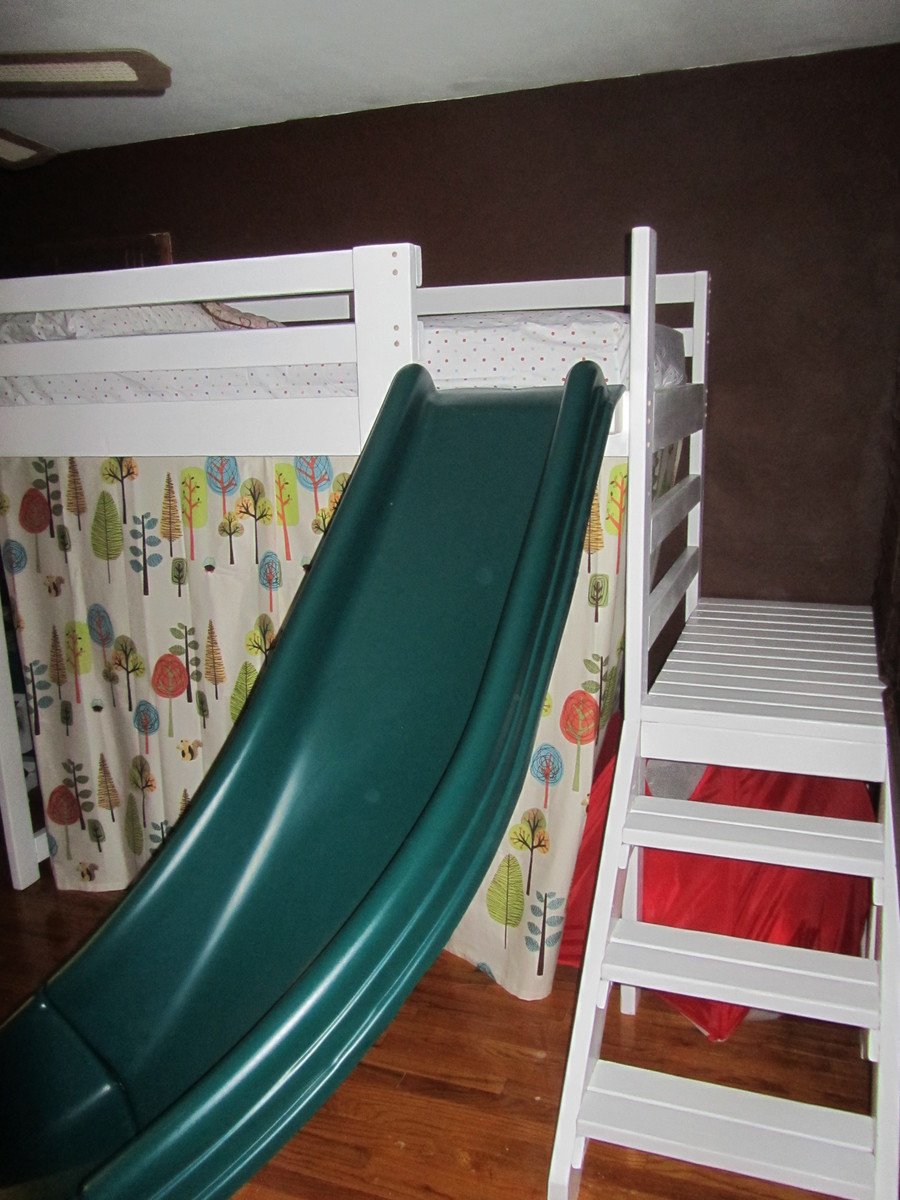
I'm a beginner at this, so for the most part I followed Ana's plans to building the Camp Loft Bed with Stairs. I made a few tweaks, including adding a slide to the front, putting the stairs on the other side, raising it by 7" (since there is a toddler bed underneath), and using hemmed shower curtain to create a fort underneath.
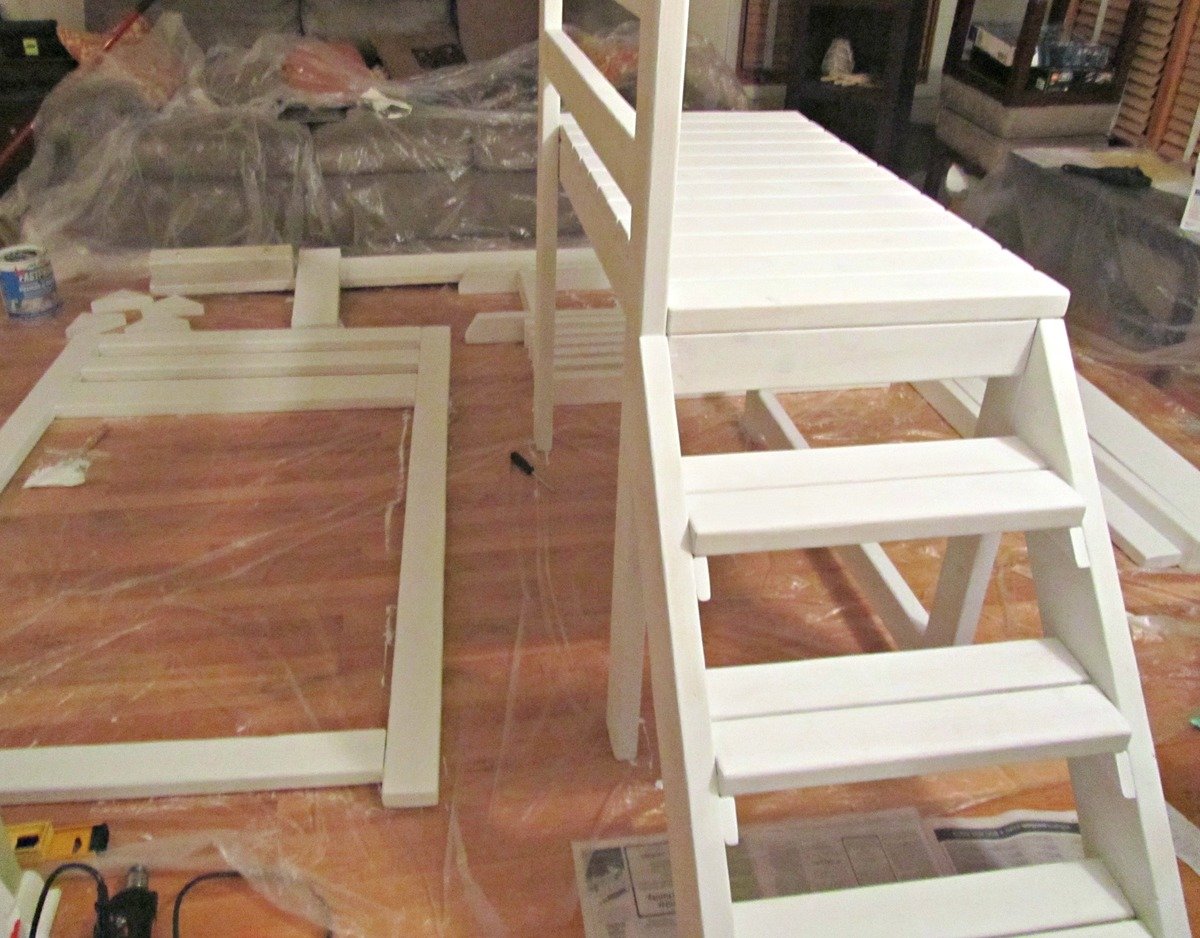
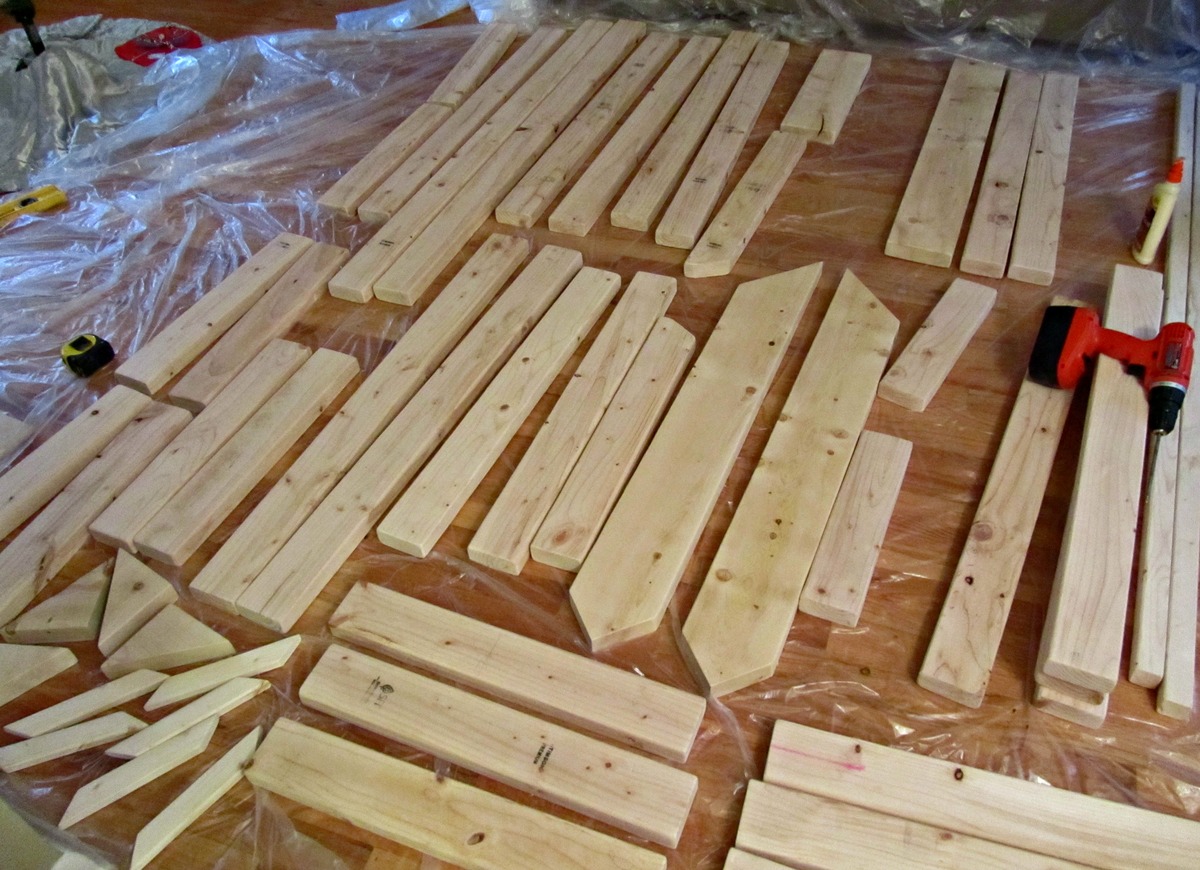
I made all the cuts with a miter saw and sanded all the wood down. I then glued and screwed the stairs, platform, and end pieces together. All the wood then got 1 coat of primer and paint. Then on Christmas Eve the bed was assembled in the kids' room. The sanding, priming, and painting took the longest. Cutting it and putting it together didn't take long.
For the railings, I did all screws from the outside to give a stronger hold than the pocket holes, and used 3 3/4" screws for the weigh bearing pieces. I counter sunk all the screws and added buttons to cover them (not yet painted in the photos). I also mounted the 45 degree 2x6 cuts in the 4 weight bearing corners to add extra bracing (not pictured). To brace the slide, I glued and bolted a 4x4 on the front of the bed. The curtains are just 2 off the shelf shower curtains that got hemmed to the correct height, and then were mounted using small teacup hooks. I plan to add an eyehole to each side, so they can be pulled back and hooked open.

Estimated Cost
$150 (all material except slide and curtains)
Estimated Time Investment
Weekend Project (10-20 Hours)
Finish Used
Primer and 1 coat of ultra white semi-gloss paint. For the most part it was painted prior to being fully assembled. Only the parts that were glued were put together before being painted.
Recommended Skill Level
Beginner

Comments

dcostillo

Mon, 05/27/2013 - 13:35

Bmas, this is AMAZING! As we get ready to move to a new home, it's a great excuse to build the new kids bed and kitchen table I've had on the back burner.... Where did you get your slide if we wanted to go the same route?

Thanks,
David

dcostillo

Mon, 05/27/2013 - 13:36

Bmas, this is AMAZING! As we get ready to move to a new home, it's a great excuse to build the new kids bed and kitchen table I've had on the back burner.... Where did you get your slide if we wanted to go the same route?

Thanks,
David

Shoe Dresser

I had this space in my mudroom that was a perfect spot to make a custom shoe dresser. I adjusted the plans I found on this website to custom make storage for shoes. Now this weird little space is functional.

Built from Plan(s)
Estimated Cost
80
Estimated Time Investment
Day Project (6-9 Hours)
Finish Used
Rustoleum chalk paint Serenity Blue, classic grey and special walnut Minwax
Recommended Skill Level
Intermediate

Comments

Modern Farmhouse Bed Frame

Submitted by Anonymous (not verified) on Fri, 10/23/2020 - 06:26

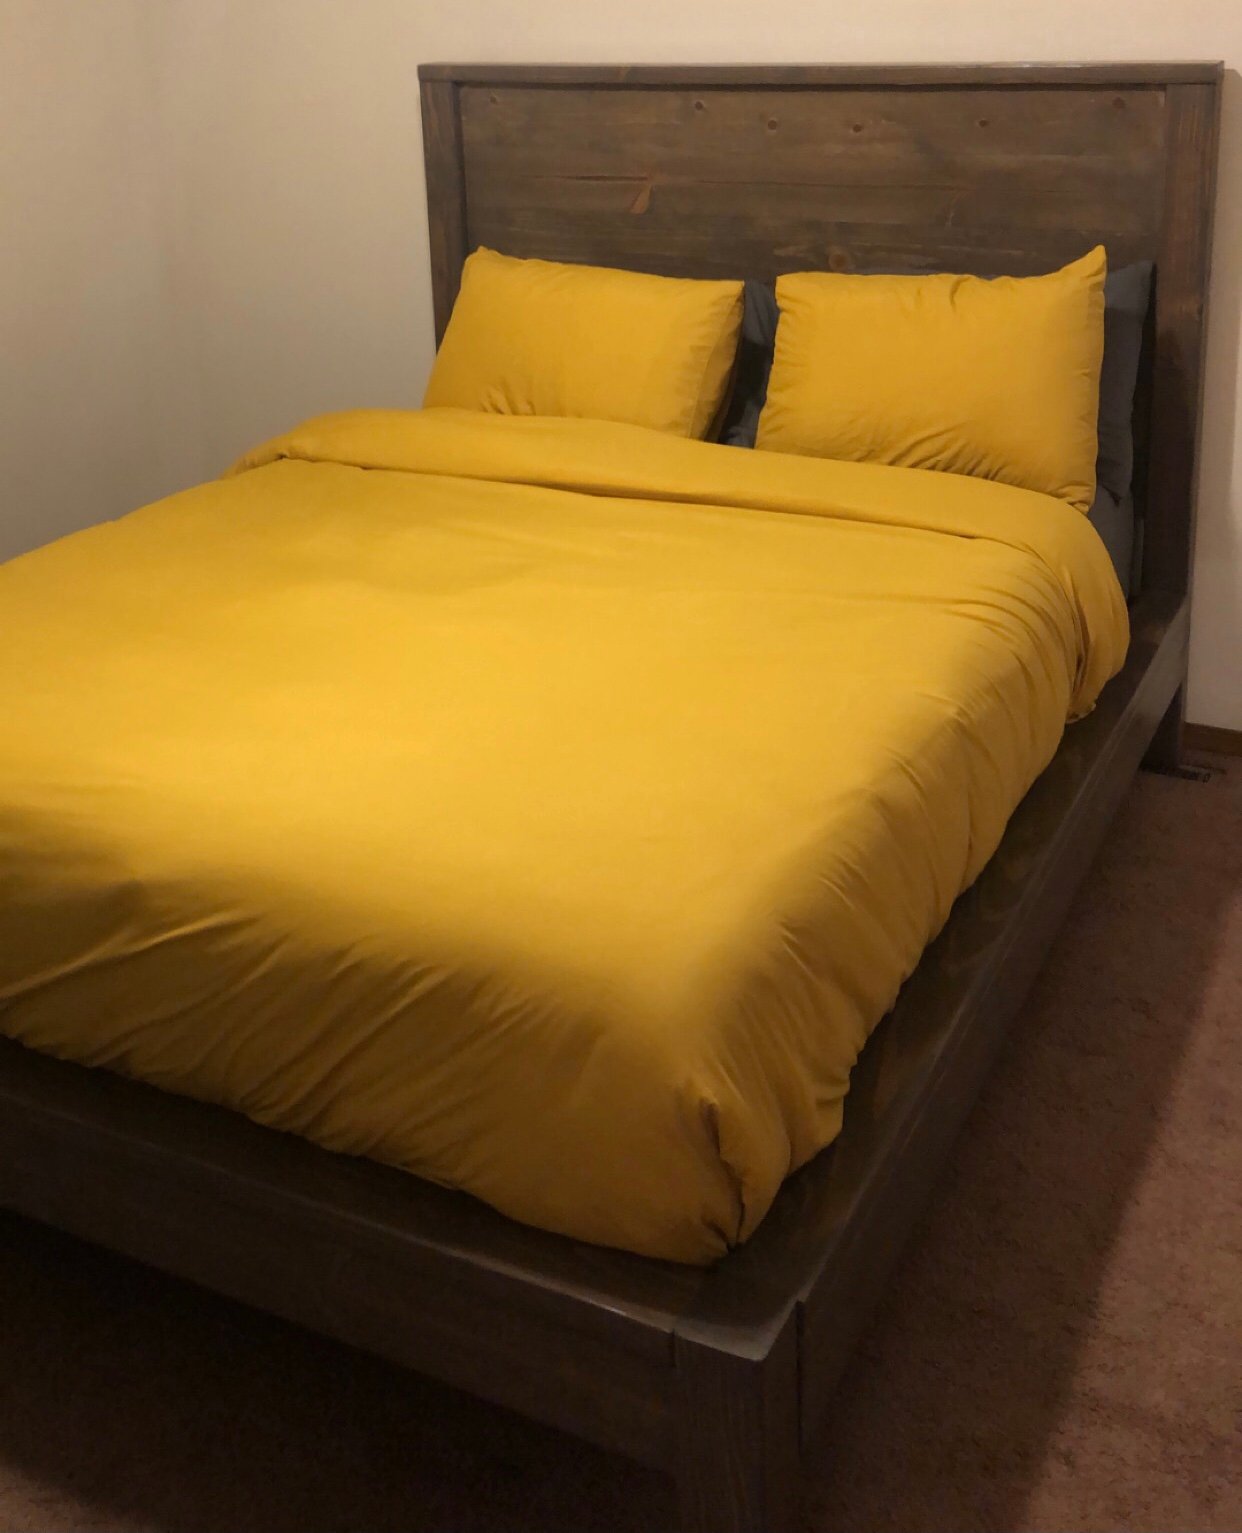
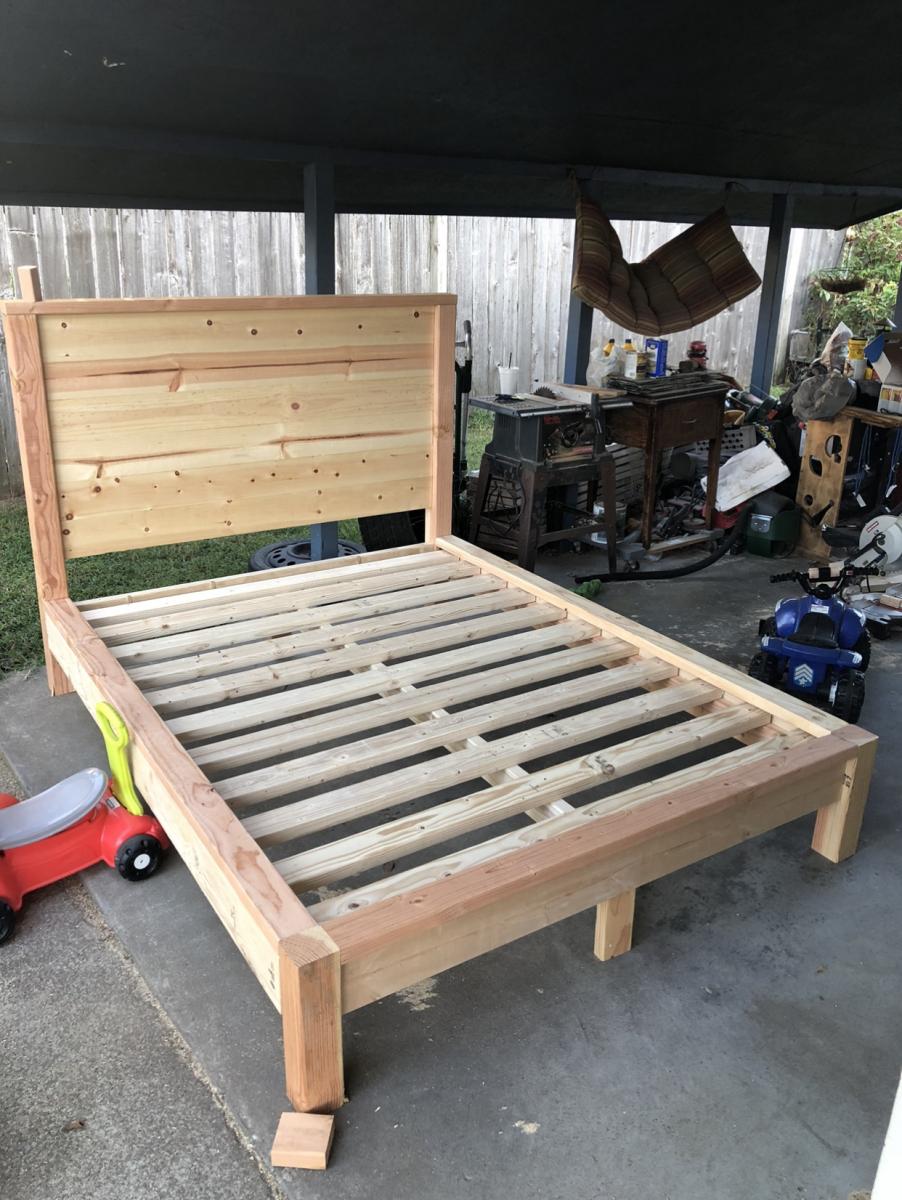
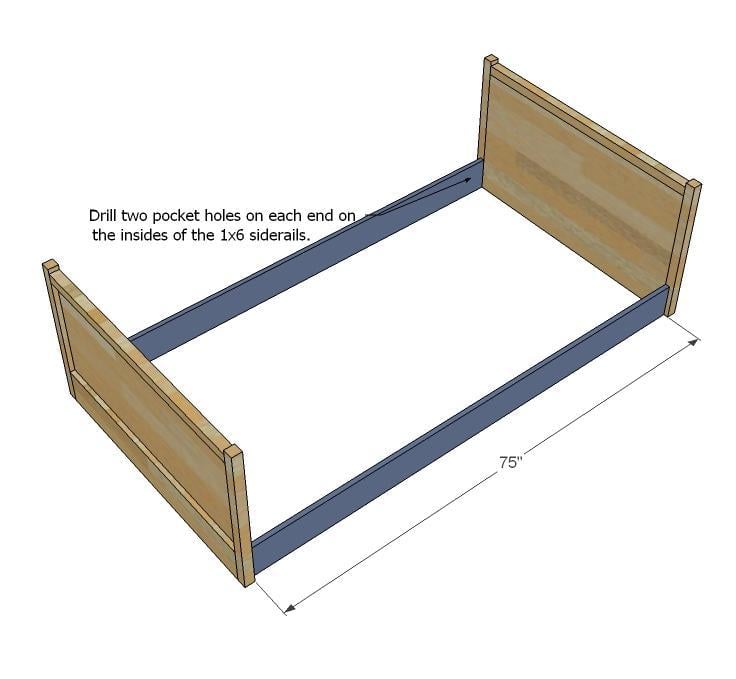
My dad and I built this bed together as our first wood working project. We worked on it off and on for about three weeks before it was finished and in my room. We used brackets instead of pocket holes/screws to attach the side rails. Next up will be matching nightstands and a dresser!

Built from Plan(s)
Estimated Cost
300
Estimated Time Investment
Weekend Project (10-20 Hours)
Finish Used
Varathane Briarsmoke Premium Fast Dry Interior Wood Stain
Recommended Skill Level
Beginner

Farm House Table

Submitted by Anonymous (not verified) on Mon, 02/13/2017 - 13:42

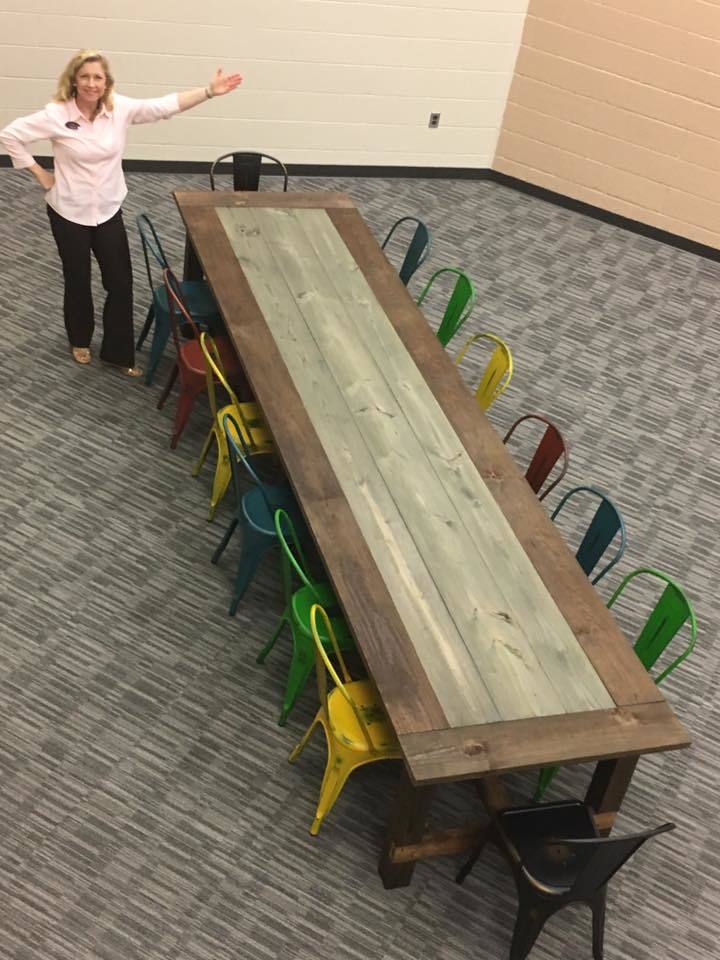
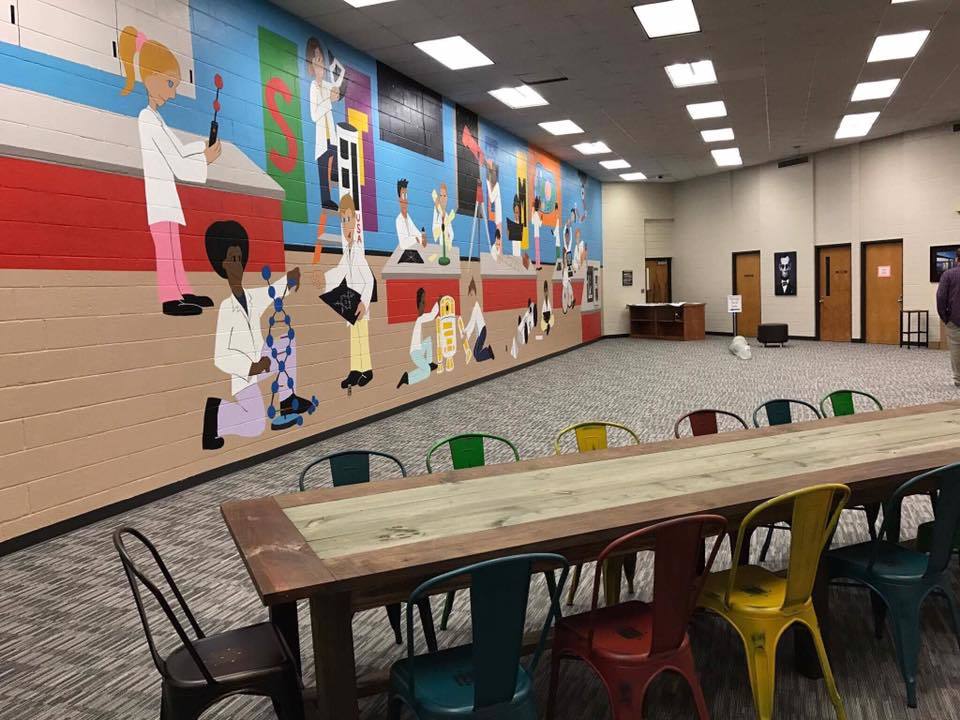
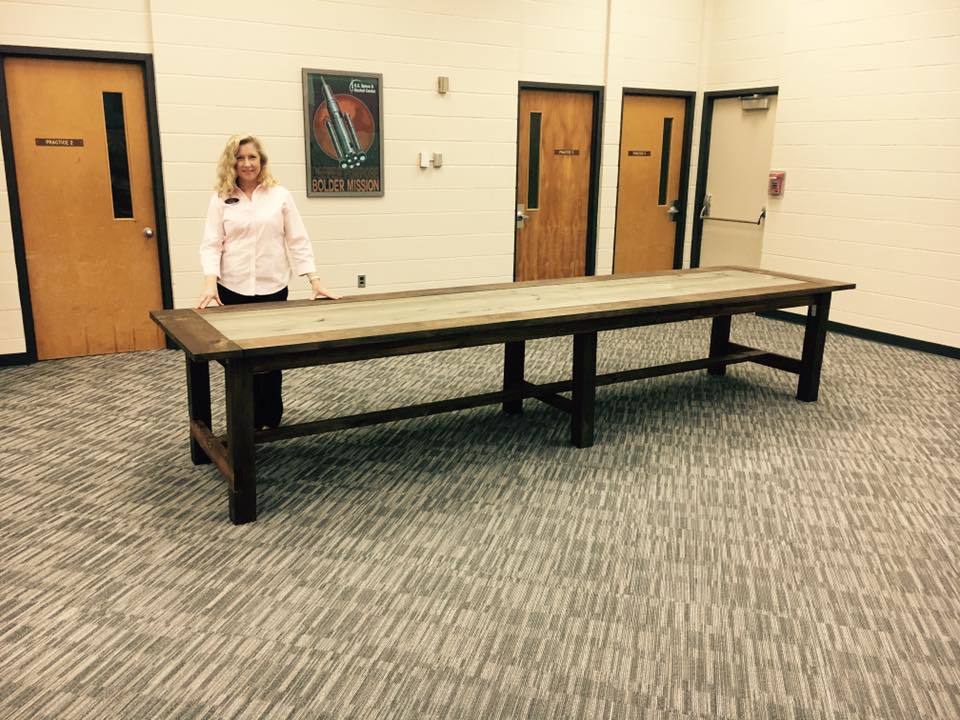
I am not a carpenter, I do not even have a tape measure. I got tasked by my leadership dothan class to build a farmhouse table for the academic dream room which is part of the Bright Key Program. Which is being renovated at Honeysuckle Middle School. Found your plans and got inspired. One glitch they wanted this table to be able to sit fourteen chairs. So I had to make a few adjustments like increasing the main boards to twelve foot. Because of your plans, many urban middle schoolers will have a place to get tutored considering cafeteria tables are so expensive. I am a believer of your plans. The positive feedback I received was well worth my time and would not of been a sucess without your plans. I did mine with pocket holes as well. 

Estimated Cost
146.37
Estimated Time Investment
Weekend Project (10-20 Hours)
Finish Used
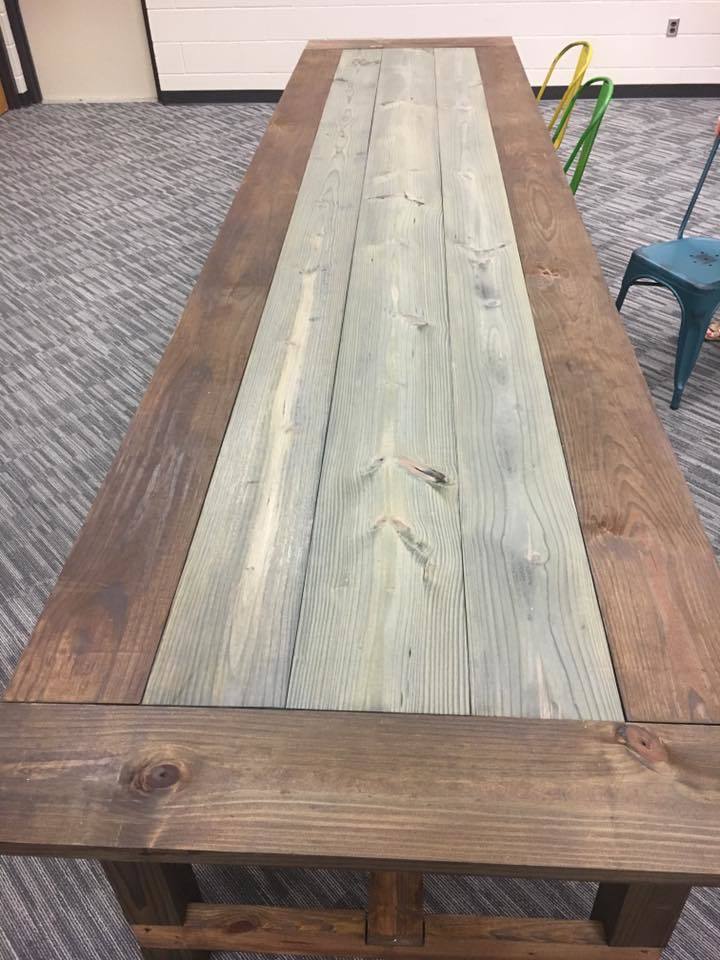
American 230 and the middle a bluish grey.

Spent an hour picking out lumber. All boards are not the same length. Ran through a planer and I found it eliminates the need to sand. But remember not to plane them to different heights. Pocket holes are great but I found some really nice table joints at Lowes that looked classy with the kreg screws.
Recommended Skill Level
Beginner

Comments

Ugly Furnace Panel~ Chalkboard Cover

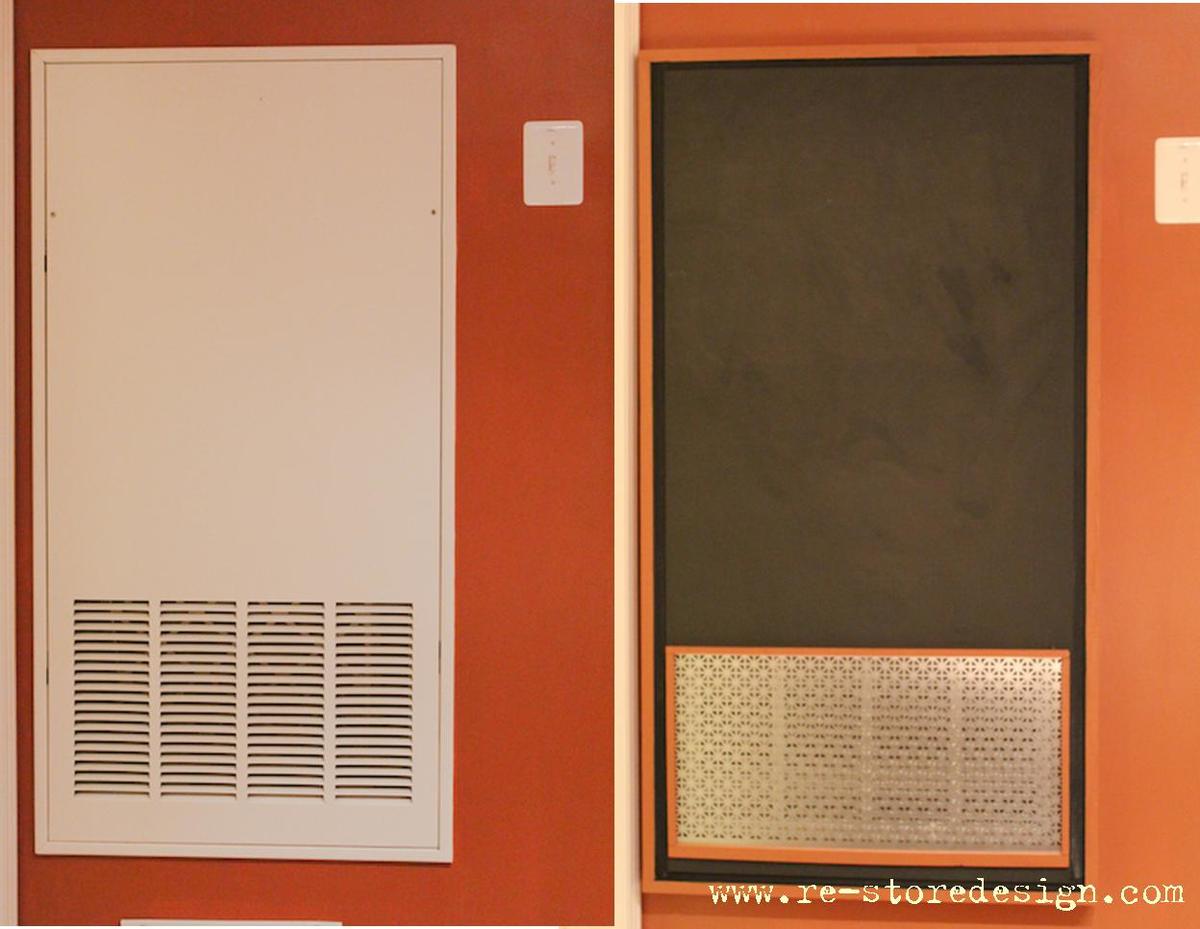
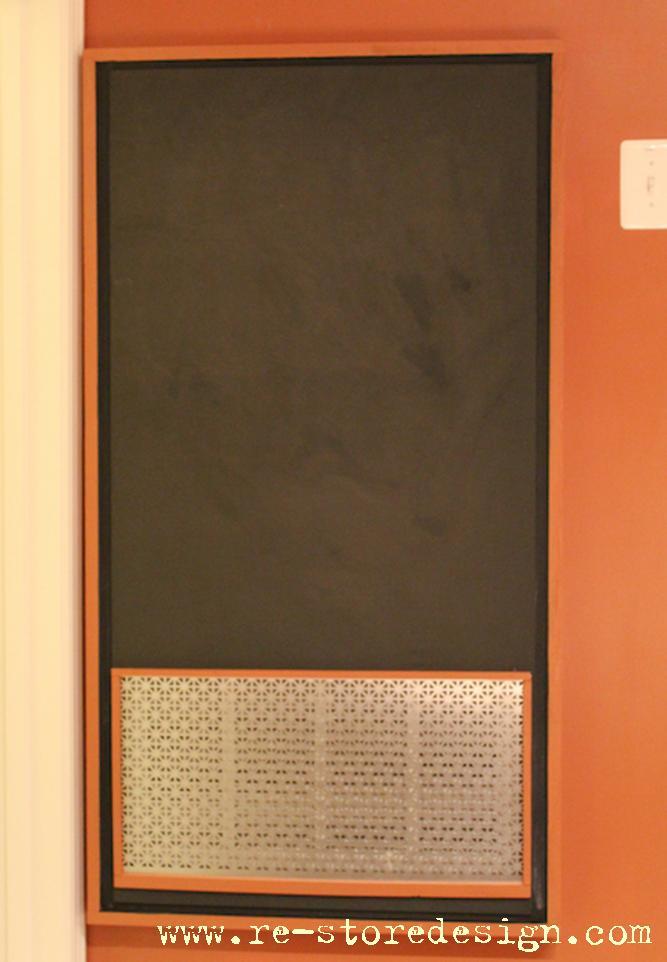
We have a 2′x4′ metal furnace cover that takes up a big portion of our dining room wall. To say it is an eye sore would be an understatement! We both love chalkboards, so I decided to make a cover out of chalkboard. Since it still needs to function as a furnace I made a cutout where the vent is. I covered that portion with a tin sheet. It looks so much better!

Learn how to make your own chalkboard paint in any color!

Estimated Cost
$15
Estimated Time Investment
Afternoon Project (3-6 Hours)
Finish Used
DIY Chalkboard paint
Recommended Skill Level
Starter Project

Classic Bunk Beds Re-Imagined With Stairs

Submitted by edeboode on Mon, 04/03/2017 - 07:57

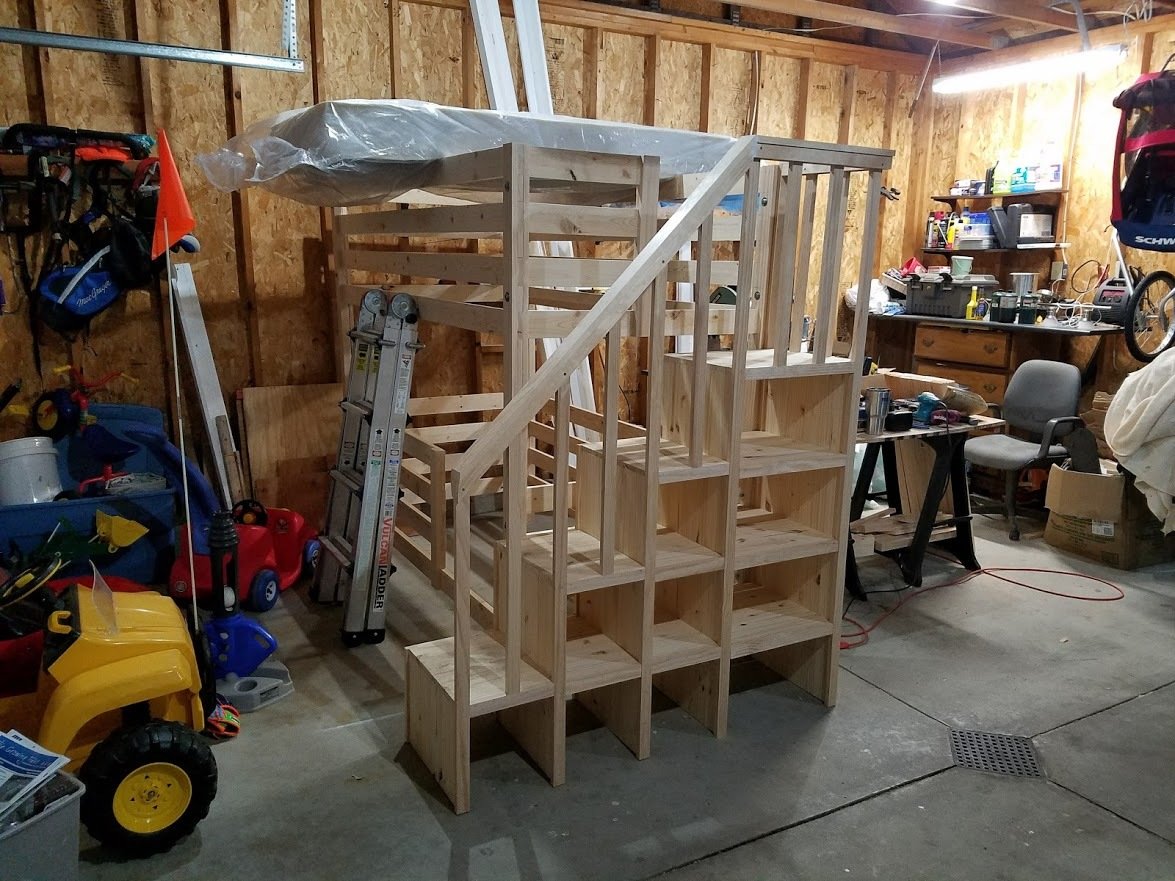
I modified the plans for the Classic Bunk beds by making them 74" tall instead of 63" and added a fourth slat all the way around to add more protection from potential falls.  I created one opening in the front for my youngest to get into the bottom bunk, and built slats about 2/3's across the front to act as a gaurd rail. I created another opening on the side for my oldest to get into the top bunk with stairs instead of ladders to again prevent falls.  I had to modify the Sweet Pea stairs to accomodate for the extra height in the bunk beds, simplified the railings, and I created each cubby to be big enough to use cloth storage totes that were 11x11x11.  Sanded the whole bed and stairs so the corners and edges were all rounded and smooth, and put two coats of white Deck and Porch paint to stand up to the the boys running up and down.  I used brackets to secure the stairs to the bed, and sixteen 3" bolts to bind the bed together.  Precut and drilled 17 slats for each bed seperated them 2" apart.  Spent a few hours every night during the week measuring, cutting, glueing, drilling and assembling the bed and stairs.  Spent an entire weekend sanding and painting.  Very happy with the way these beds turned out.  Overall cost of the project including the paint was around $400.  

Estimated Cost
$400
Estimated Time Investment
Week Long Project (20 Hours or More)
Finish Used
Porch and Deck Paint
Recommended Skill Level
Beginner

Comments

Homeschool contained

Submitted by lmflerlage on Mon, 02/22/2021 - 12:06

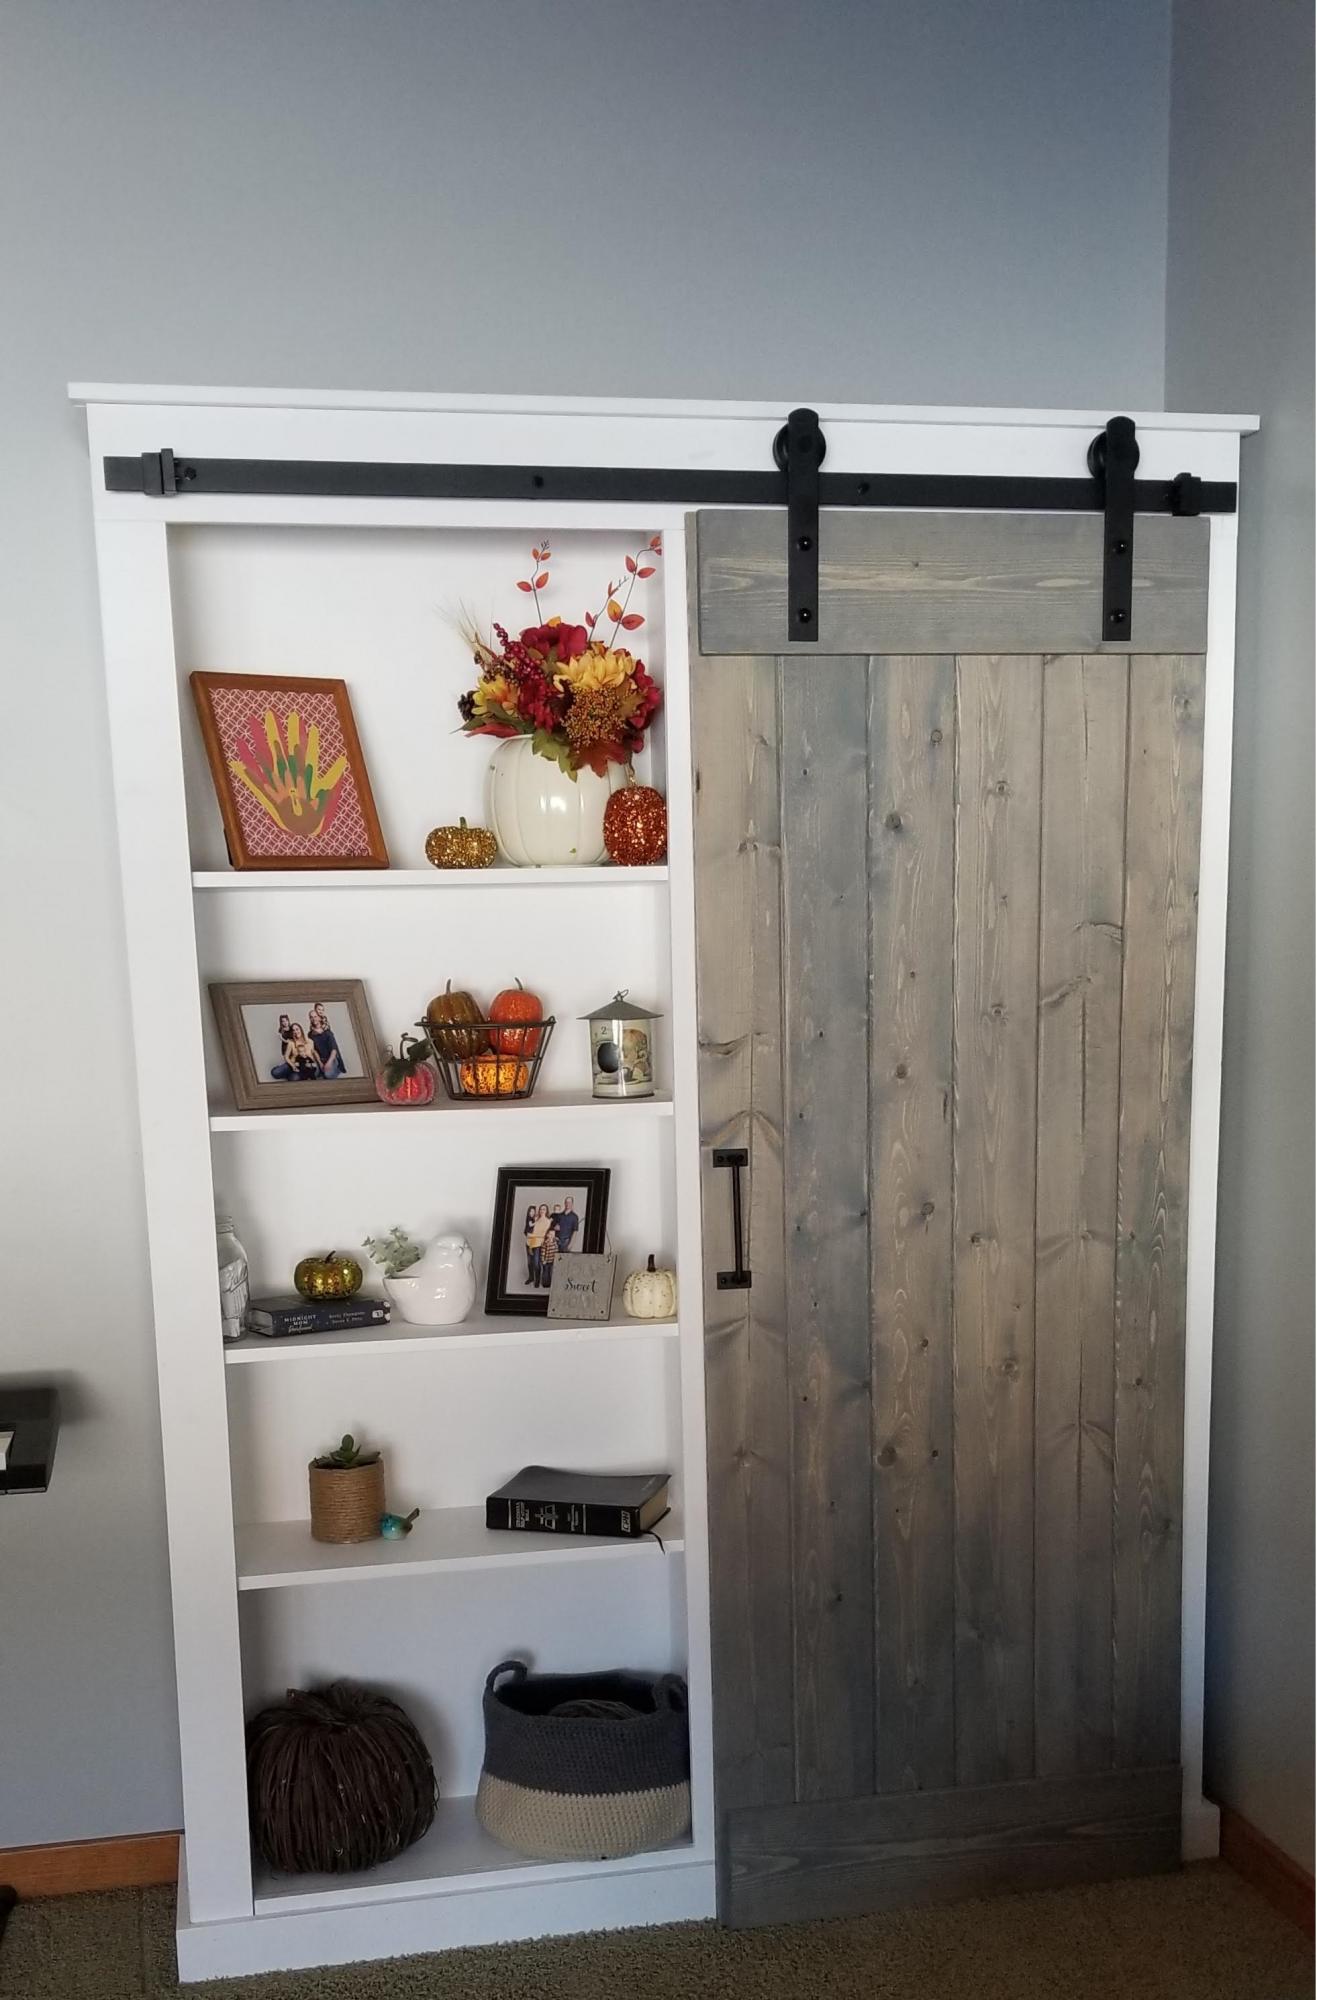
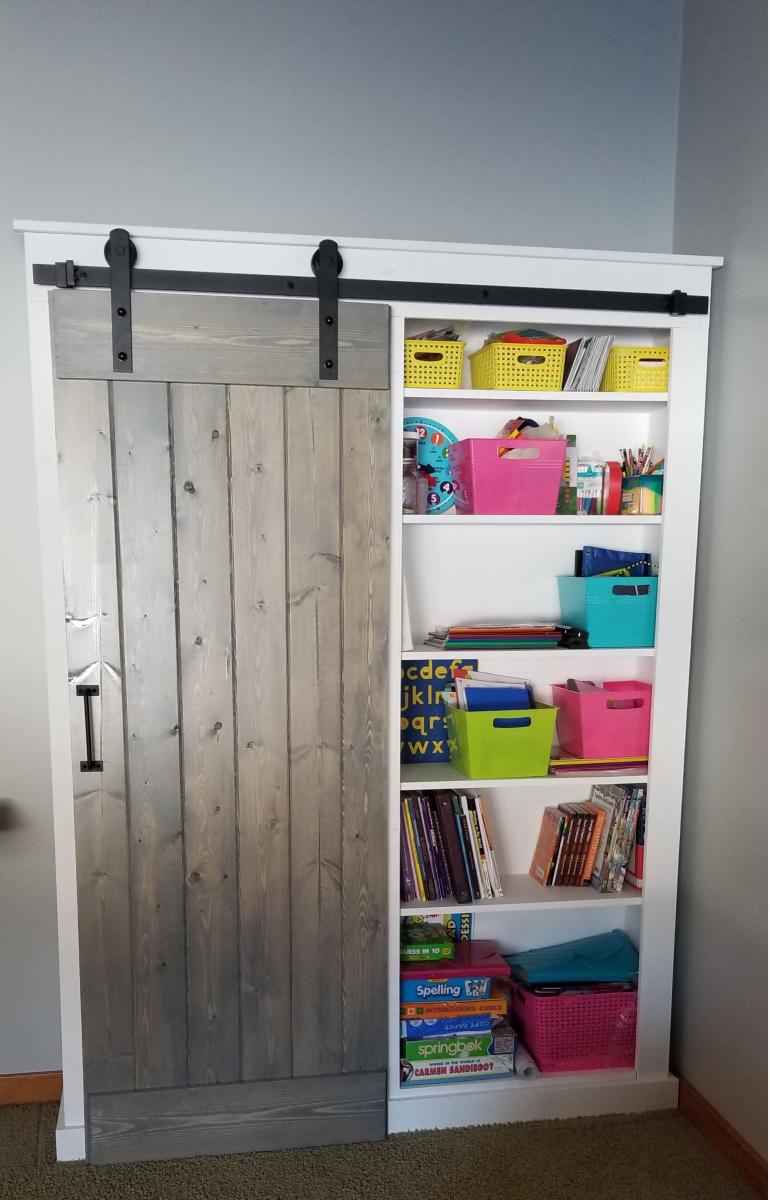
I needed a cabinet to contain and conceal our homeschool supplies, especially since this it is located in our main floor living room. This Barn Door Cabinet plan- modified to fit our space did the trick. I absolutely love it.

Built from Plan(s)
Estimated Cost
400
Estimated Time Investment
Week Long Project (20 Hours or More)
Finish Used
Rust-oleum Weathered Gray for the door
Recommended Skill Level
Intermediate

Comments

Seasonal And Holiday

Laundry Pedestal

Submitted by shellyward on Thu, 01/22/2015 - 10:03

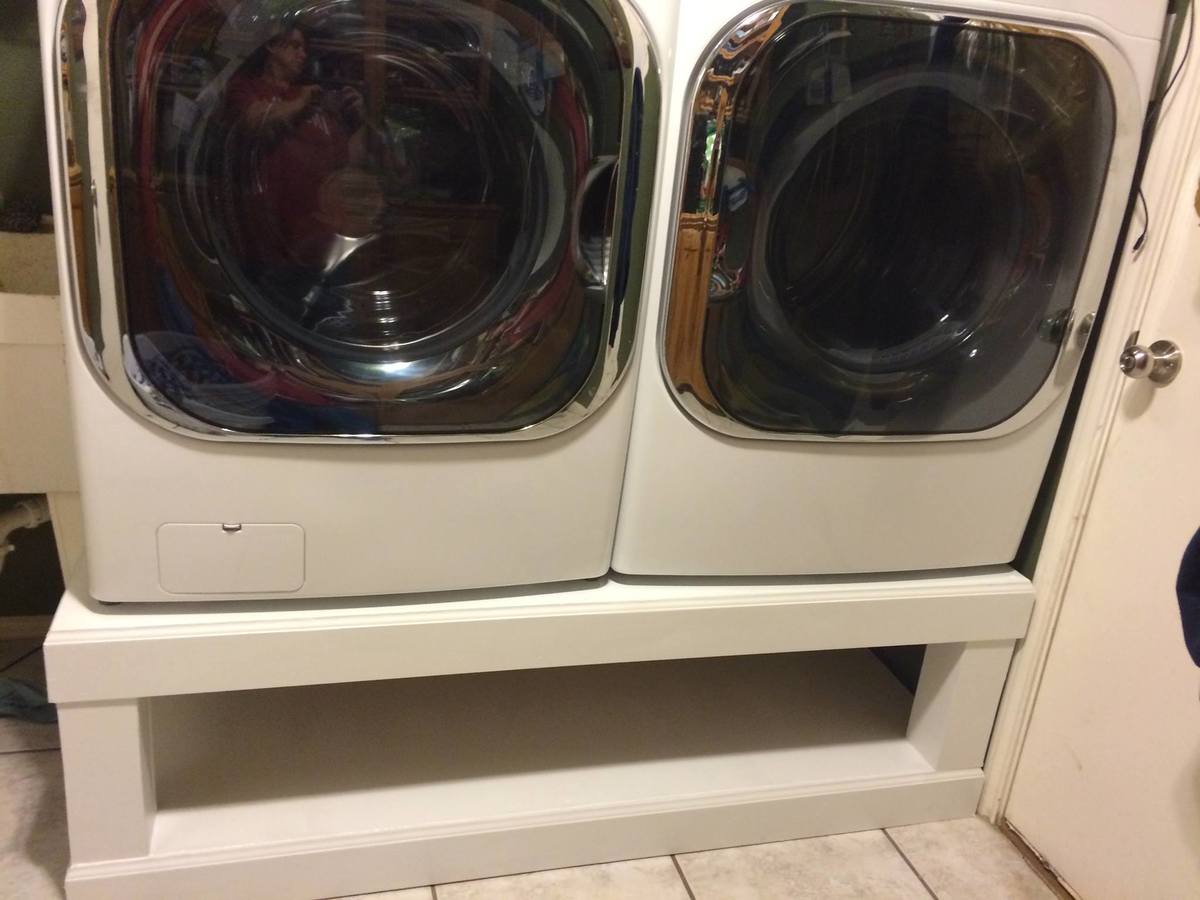
Had to buy a new washer and dryer several months ago and wanted the front loaders.  I was unwilling to pay $600 for the pedestals at the hardware store so I had been dealing with them on the floor until I found this plan.  Built these and absolutely LOVE them.  No more killing my back getting laundry done.  These sit higher than the ones from the hardware store so even better!!! I keep 3 laundry baskets underneath.

Estimated Cost
$100
Estimated Time Investment
Day Project (6-9 Hours)
Finish Used
white paint
Recommended Skill Level
Beginner

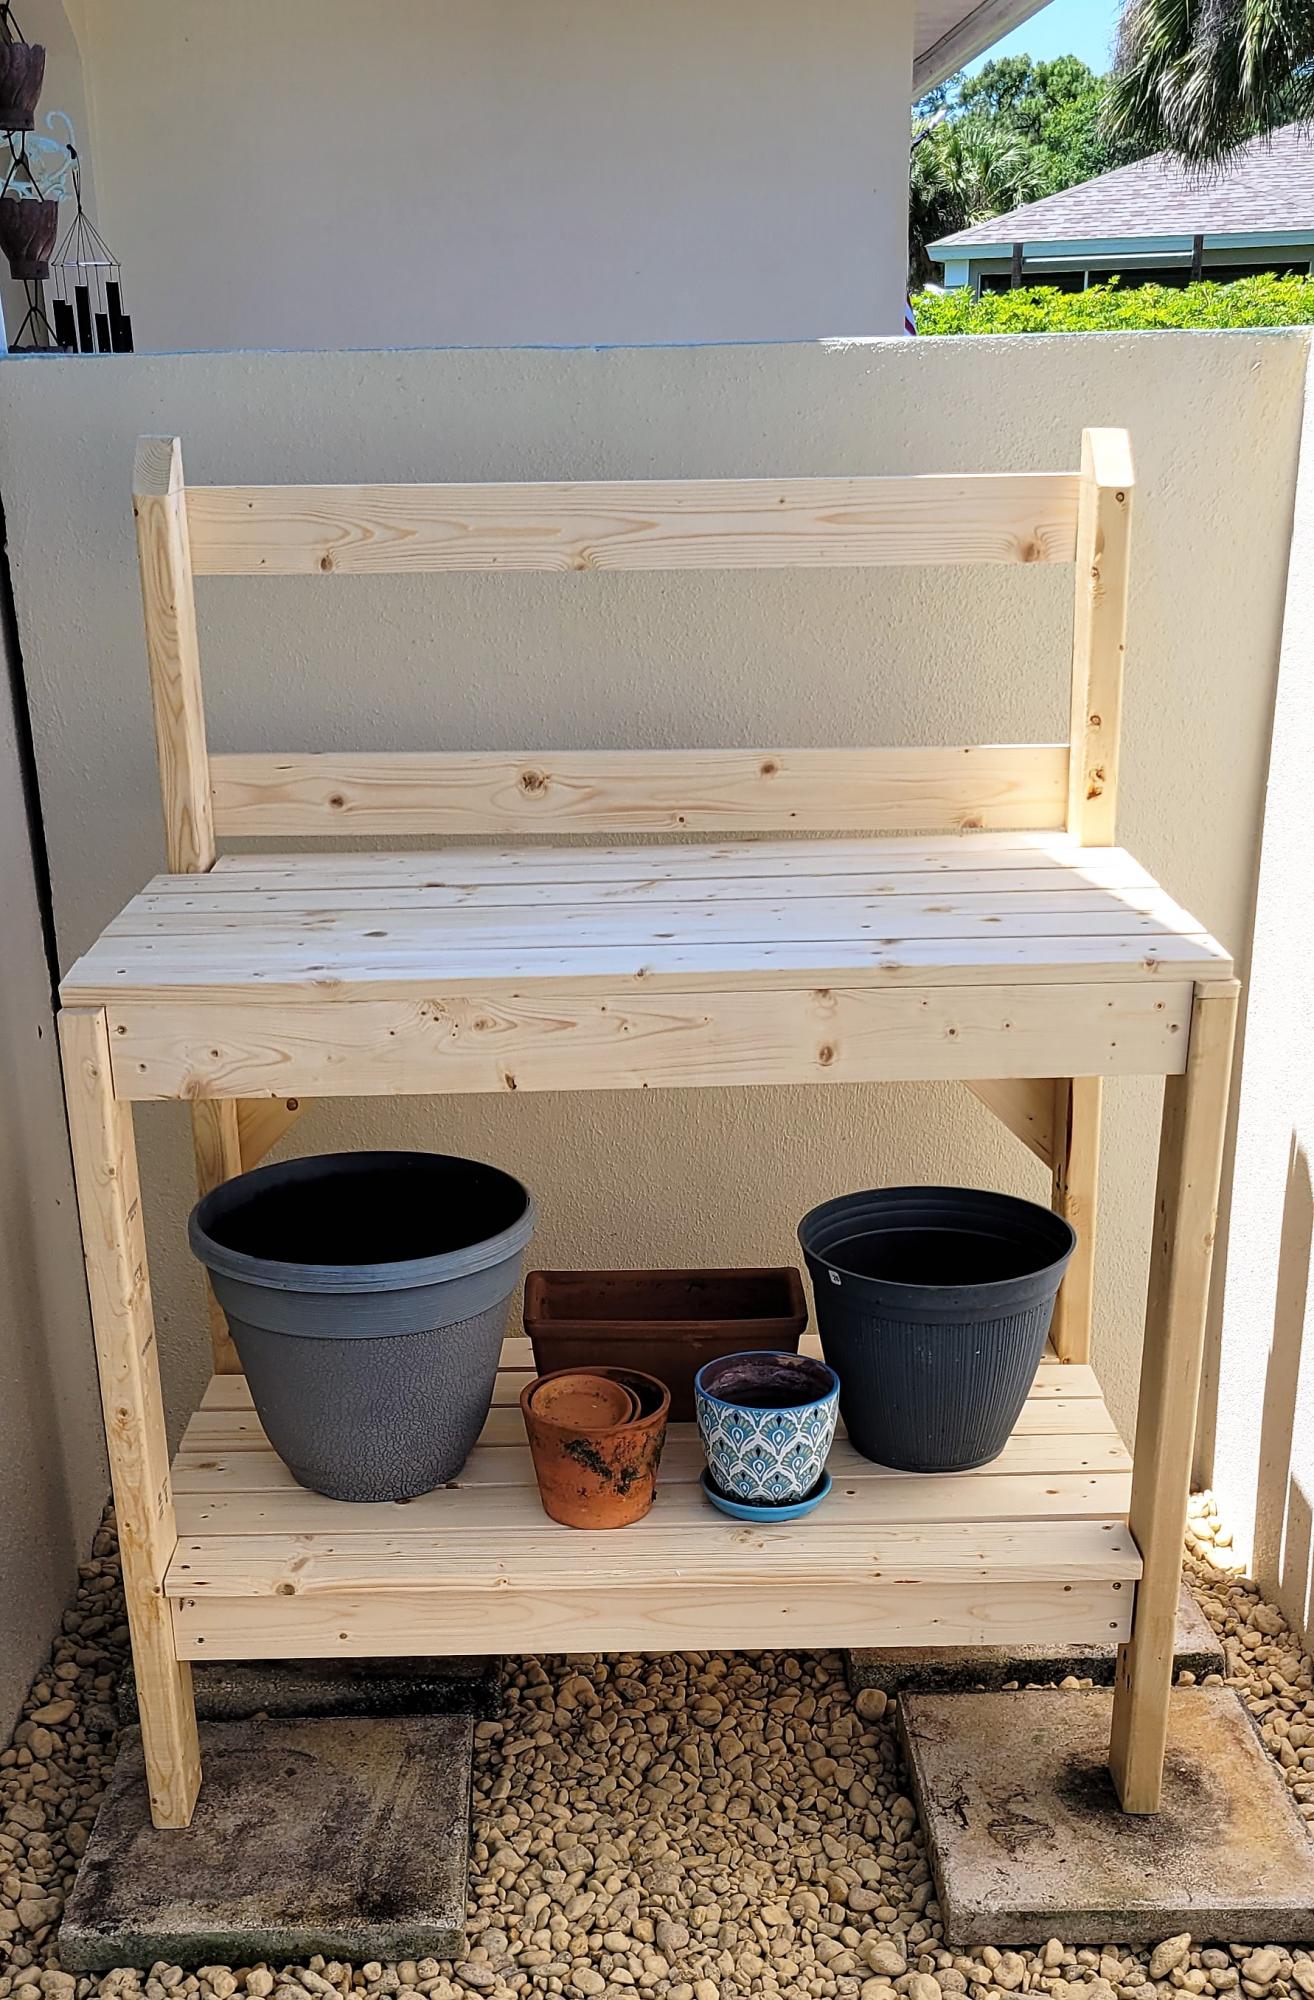
Potting Bench Project

Submitted by Anonymous (not verified) on Wed, 04/14/2021 - 10:50

Fun project indeed! Just make sure its all square every step of the way.
Thanks, I look forward to perusing some more projects!!

Estimated Cost
$50
Estimated Time Investment
Day Project (6-9 Hours)
Finish Used
Thompson's Clear Wood Sealer, two coats
Recommended Skill Level
Beginner

Comments

Dog Crate with a twist...

Submitted by AlexO on Mon, 05/08/2017 - 19:08

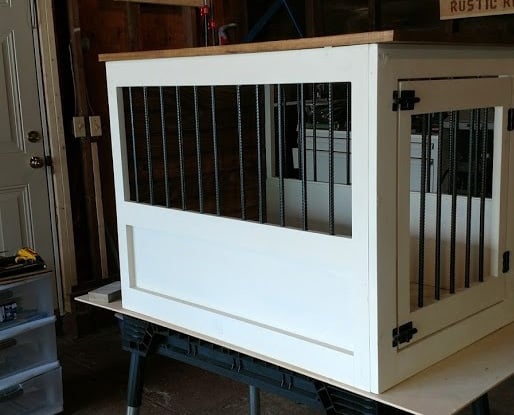
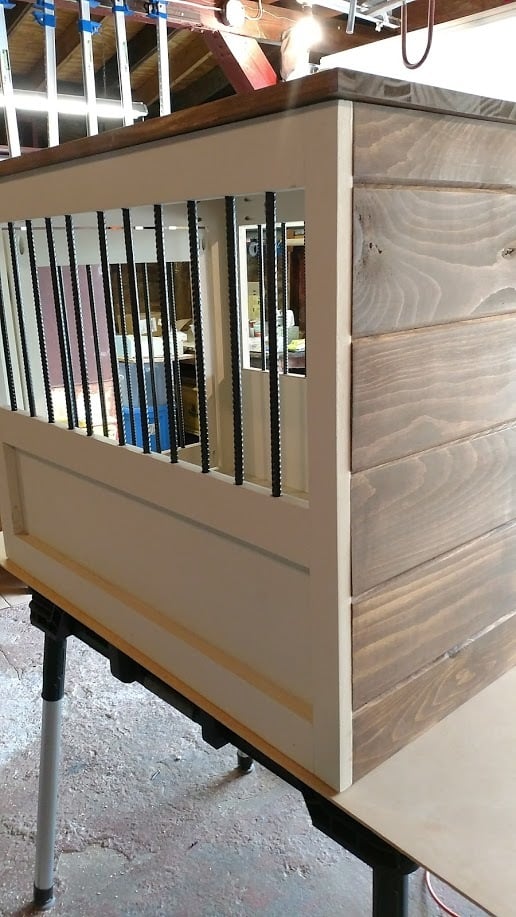
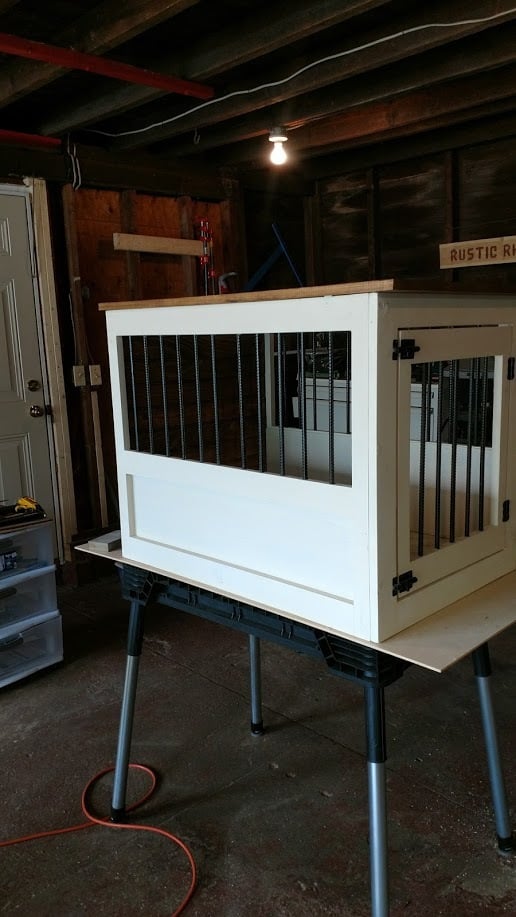
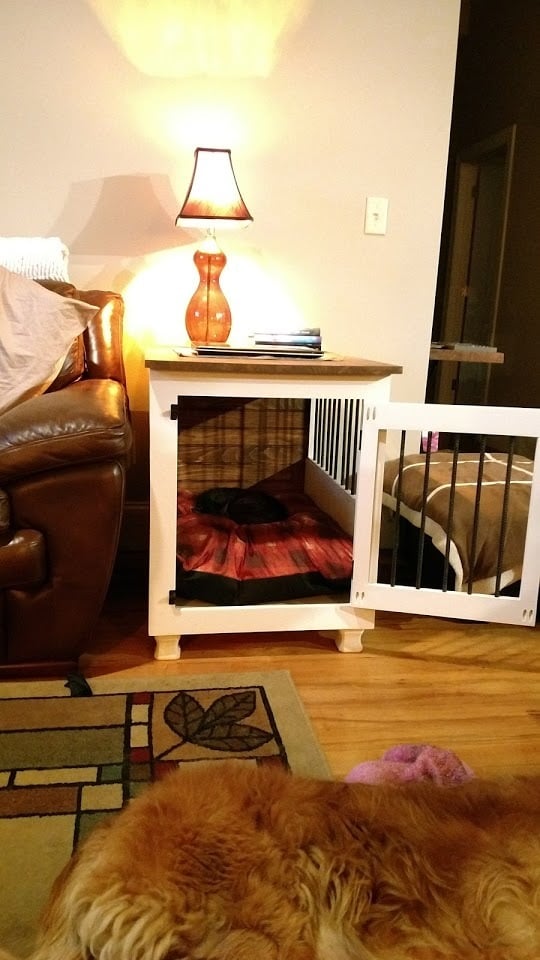
I really liked the Large Wooden Dog crate but wanted the sides to be lower and wanted to make sure there was no easy chew escape.  Not sure if you can see from the photo but the cats have taken over... Will need to make a larger one for the dog!

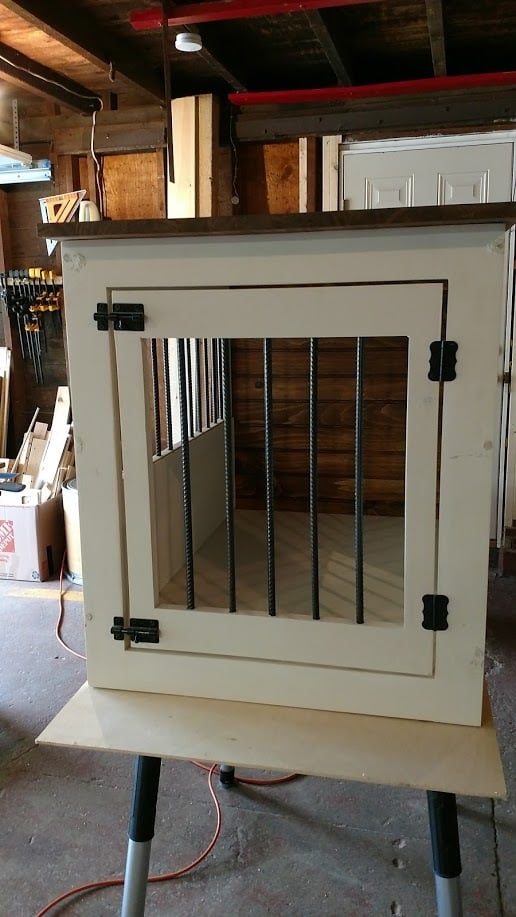
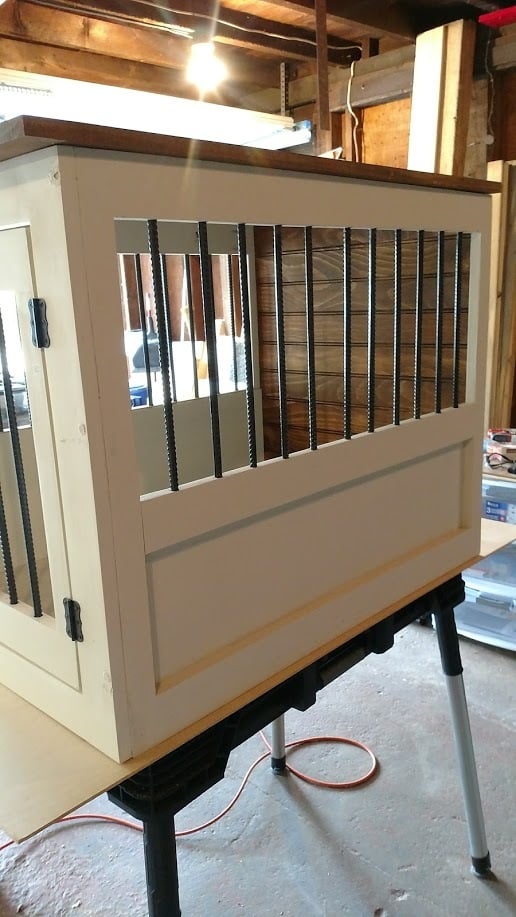
I followed the plan pretty much other than lowering the panel on the side and replacing the wooden bars with rebar.  The rebar was a bit of a learning curve getting the holes lined up perfectly but I figured it out and I think it came out pretty good!

Used all pine 1x3 and 1x2s.  Picked up a pine panel for the top and the bottom is a 3/4 plywood. Made our own chalk paint for the finish and sealed it with wax.

Oh, forgot, added tongue and groove pine for the back and finished it and the top with Antiguing wax.

Lots of fun and I think I will make a double one next!

Built from Plan(s)
Estimated Cost
Around $100 if you don't count all the practice pieces for the rebar!
Estimated Time Investment
Week Long Project (20 Hours or More)
Finish Used
Chalk paint and antiquing wax
Recommended Skill Level
Intermediate

West Elm Rectangles Daybed

Submitted by xniamhx on Wed, 04/03/2013 - 11:18

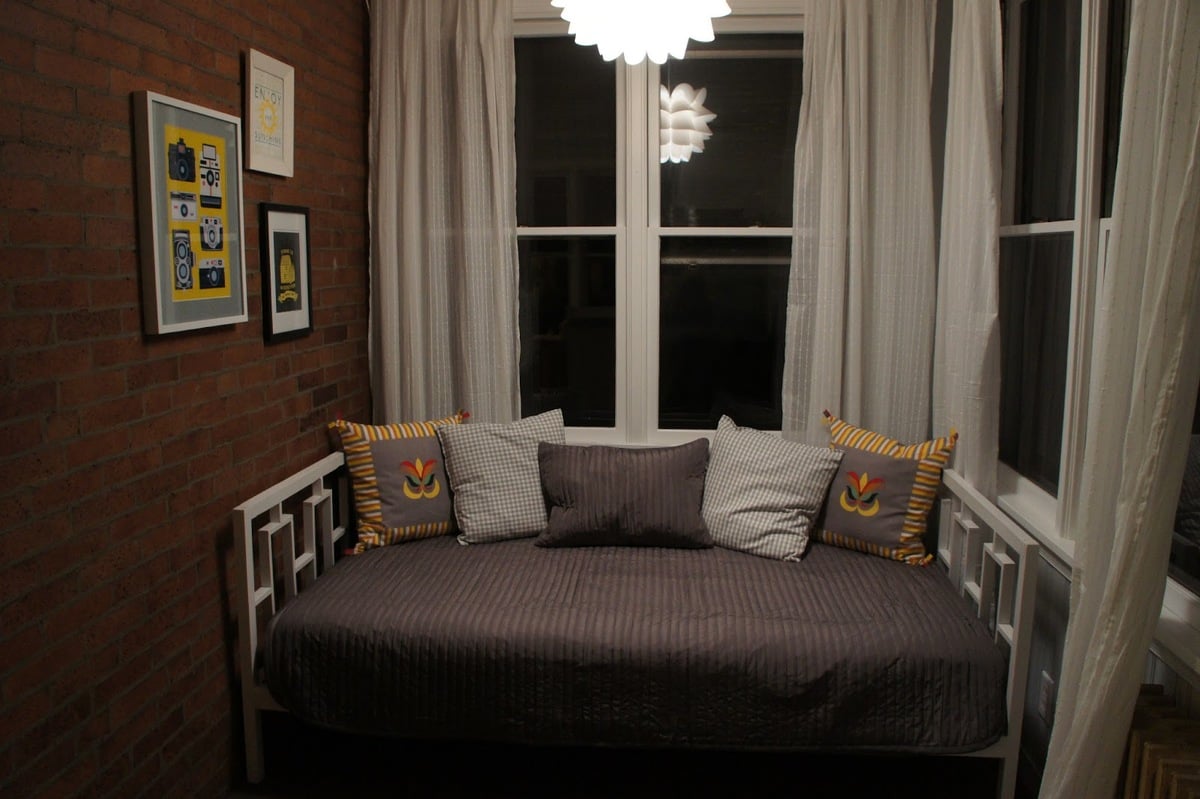
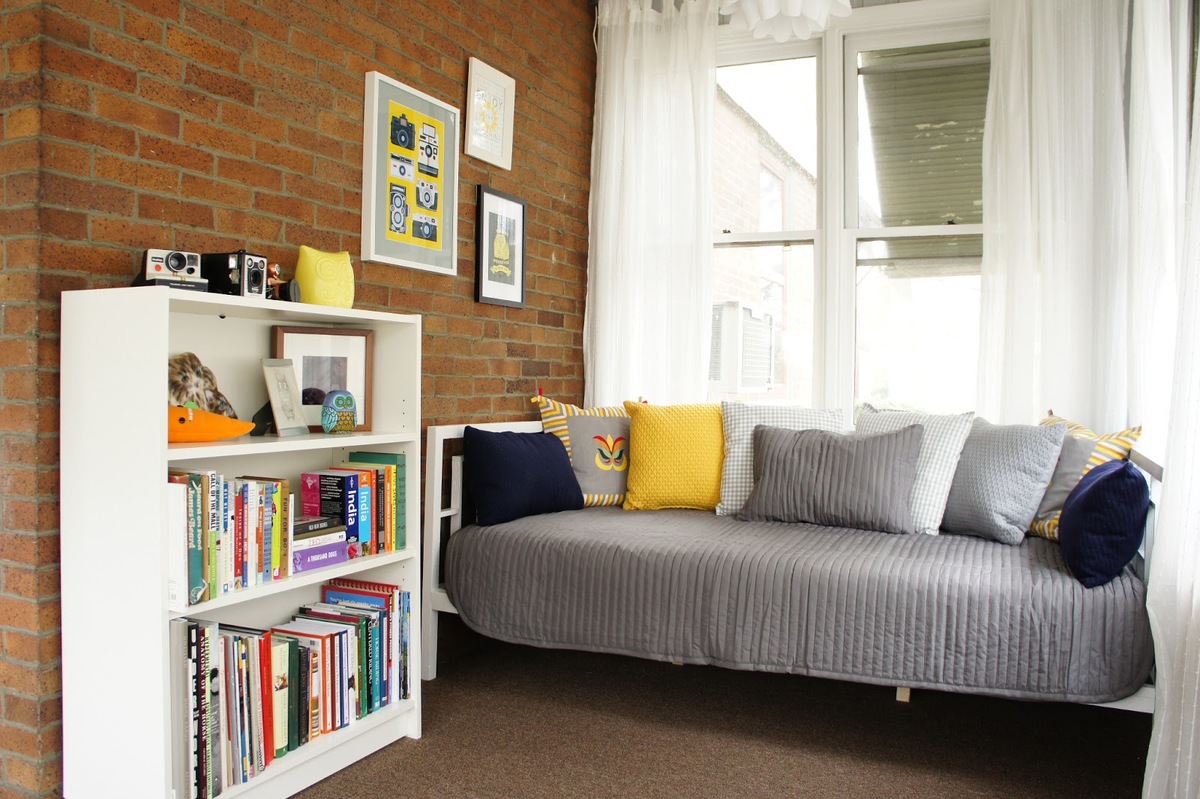
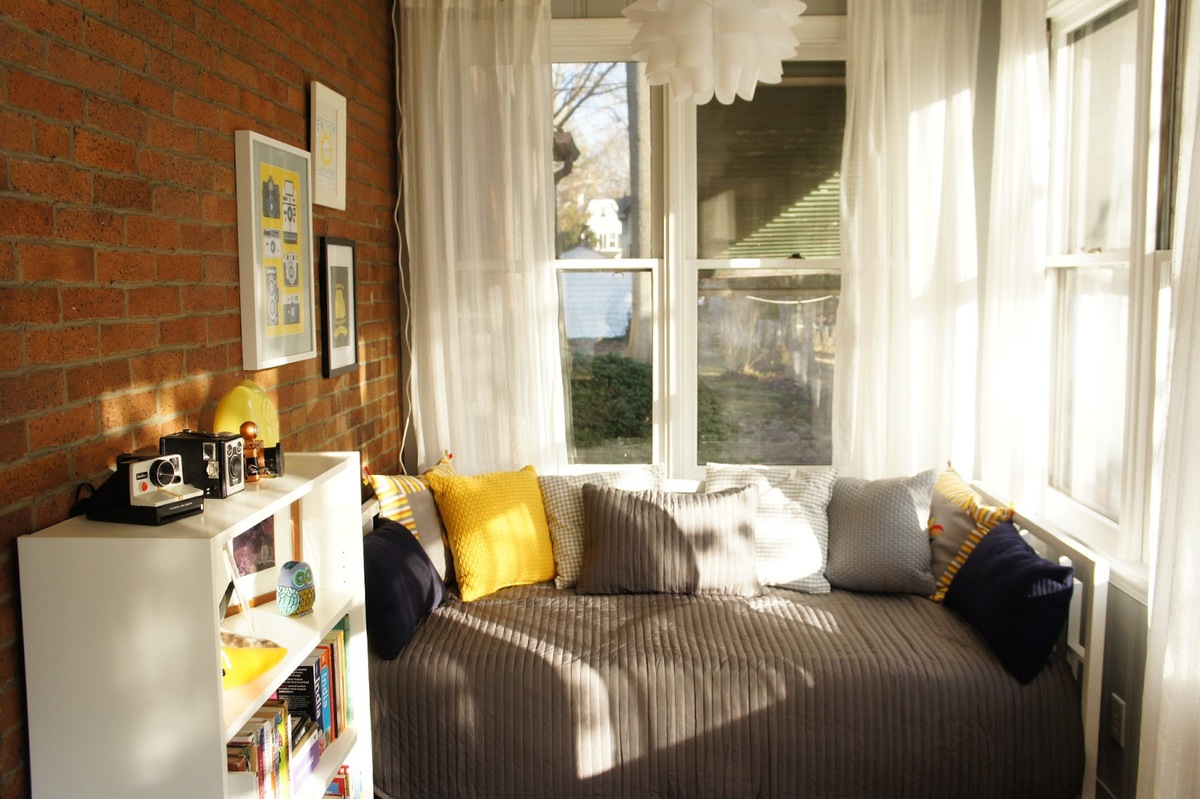
We decided to build a daybed after we discovered that the space we needed to fill was a bit of an odd size and nothing we saw was going to work. We fell in love with West Elm's rectangles daybed but it was very much out of our budget as we are getting married in June. We recently acquired a kregjig and this was the perfect project to really test it's worth. Once all the cuts were made and the pocket holes drilled, putting this together was quite easy. We were lucky that it fit through our front door, and we attached the support beams after it was in place. We opted for spray paint to finish it off, but we didn't sand everything down beforehand so we may pull it back outside at a later date and smooth things out a bit. We are really impressed with how sturdy this daybed is and EVERYONE compliments us on it. This is our second Ana White plan we've used and only the second major woodworking project we've completed. We bought the ready to use slats at IKEA along with a twin mattress.

You can see the whole project here: http://nearlydomesticated.blogspot.com/2013/03/here-comes-sun.html

Built from Plan(s)
Estimated Cost
Not including the mattress and slats, we spent roughly $100 on materials, including pocket hole screws, lumber, and paint.
Estimated Time Investment
Weekend Project (10-20 Hours)
Finish Used
We simply spray painted the final project -- I highly recommend Rustoleom's paint that comes in cans that have triggers, saves your fingers for sure!
Recommended Skill Level
Beginner

Patio Table w/Built in Beer/Wine Cooler

Submitted by RoyBoy on Sat, 05/18/2013 - 06:58

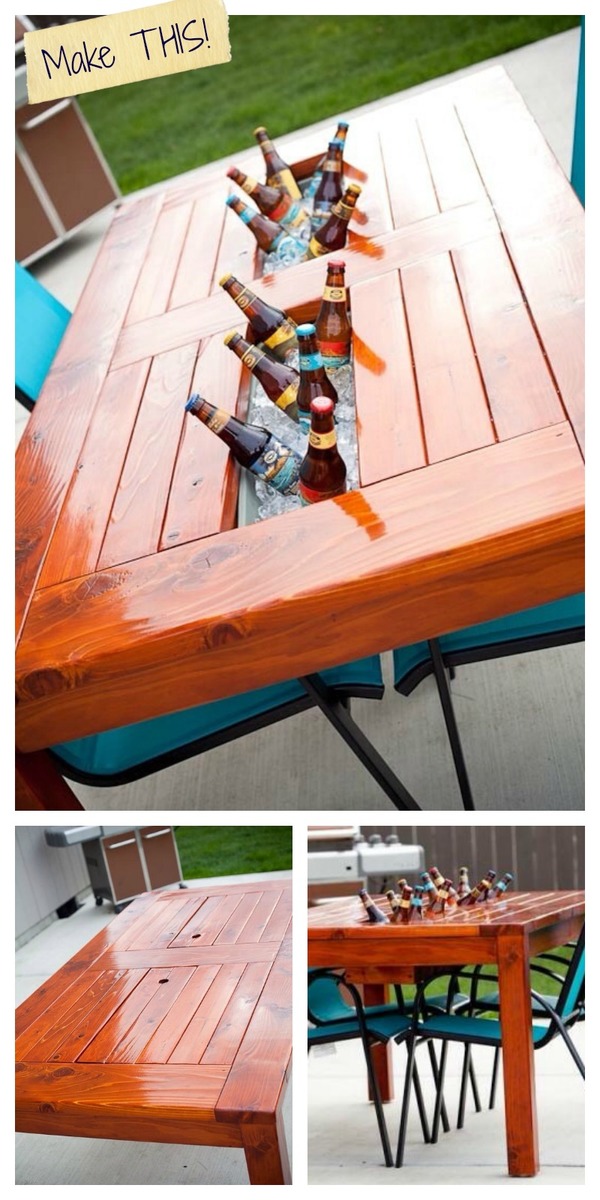
After seeing the patio table with beer/wine cooler, I wanted to build this for my brother and wife who recently bought a house. I asked them if they were interested and of course they said yes. I modified the original plans by adding a 2x4 on each side of the cooler to make the table wider. I also made the legs out of 4x4 vs the 2x4s that were originally called for. I used redwood and then stained it and used a varnish for the final coating. I probably wouldn't use the varnish again for an outdoor table, because it looks like it should be an indoor table vs outdoor. Overall, I'm pleased with the results and the best part about it, I get to enjoy it every time I go over for a BBQ.

Estimated Cost
$225-250
Estimated Time Investment
Week Long Project (20 Hours or More)
Finish Used
Olympic Redwood Naturaltone Toner Exterior Stain
Cabot Spar Varnish Semi-Gloss
Recommended Skill Level
Beginner

Comments

Msharp1211

Wed, 07/03/2013 - 13:04

Awesome table, do you happen to have the measurements you used. I'd like to make the same table but I need the lumber yard to make the cuts.

Cedar Raised Garden Planter

Submitted by Tamila on Wed, 03/09/2011 - 21:48

This was my first building project ever! It was so easy to do...the only problem was that we didn't have enough room for all the veggies we wanted to plant in our garden because we only built two! The plan is to build at least two more this summer!

Estimated Time Investment
An Hour or Two (0-2 Hours)
Recommended Skill Level
Starter Project

Rory's House

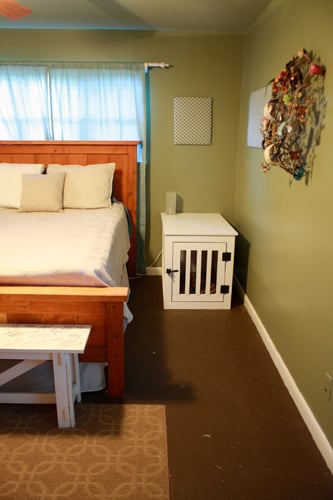
In need of a replacement for my hideous (but large!) wire kennel, I was ecstatic when Ana posted plans for an end table kennel, just like the fancy ones in Sky Mall magazines! Once I got out of my first trimester of pregnancy, I enlisted a friend to help me out with the build. I spent a little too much on lumber (I accidentally purchased the good whitewood, as opposed to furring strips) but I'm chalking that up to pregnancy brain. After a million Kreg Jig holes, the assembly was maybe an hour or less to put all four sides together. We decided to paint the interior prior to assembly, and that was a good choice! I put the sides together with L-brackets, and honestly did a pretty poor job of it. But the main reason was to easily disassemble it should it need to be moved at some point. I splurged on the hinges and gate closure, and love love LOVE the finished product! These were great, well-laid out plans!

Built from Plan(s)
Estimated Cost
70
Estimated Time Investment
Afternoon Project (3-6 Hours)
Finish Used
I sanded it with 100, then 150. I gave the MDF edges a quick coat of DAP to smooth things out, then sanded with 220. It's painted with 4 coats of semigloss white.
Recommended Skill Level
Intermediate

Shoe Dresser

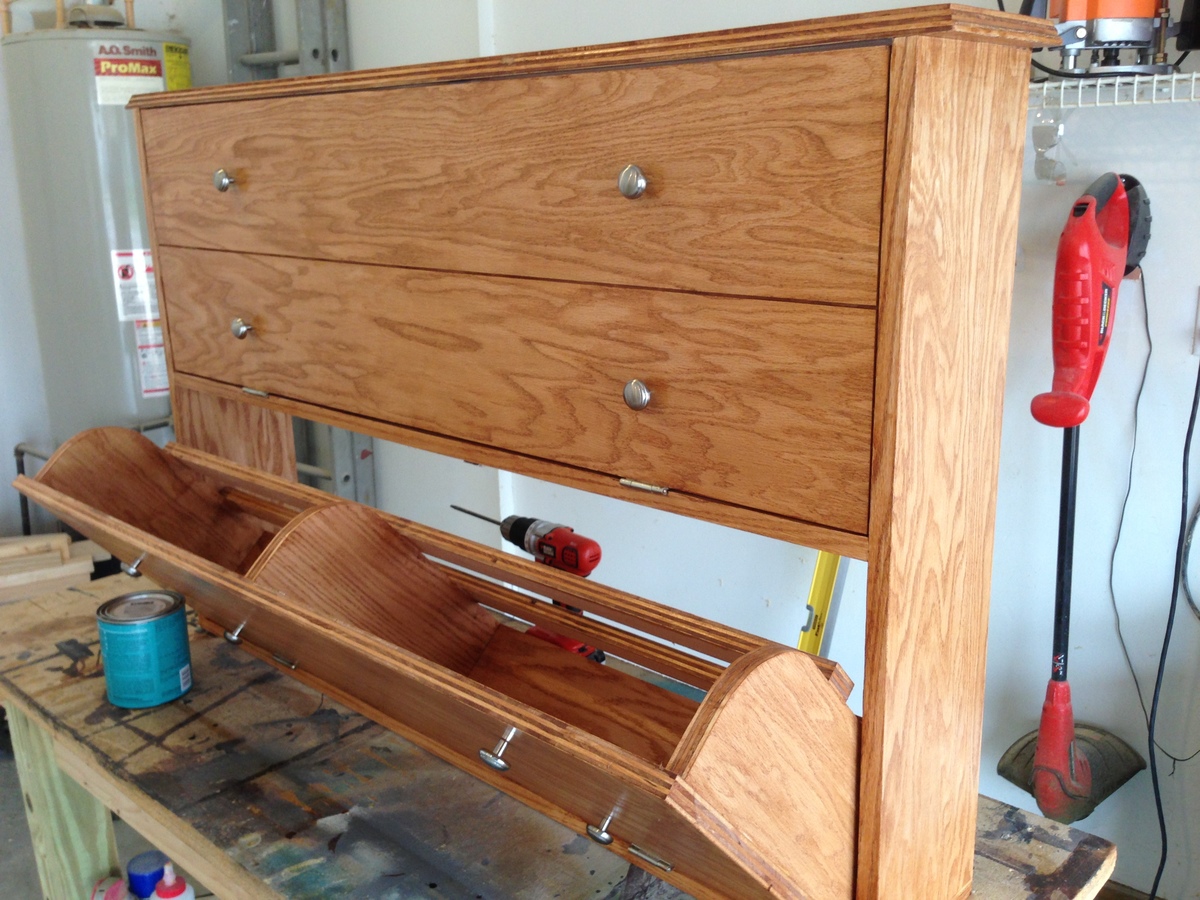
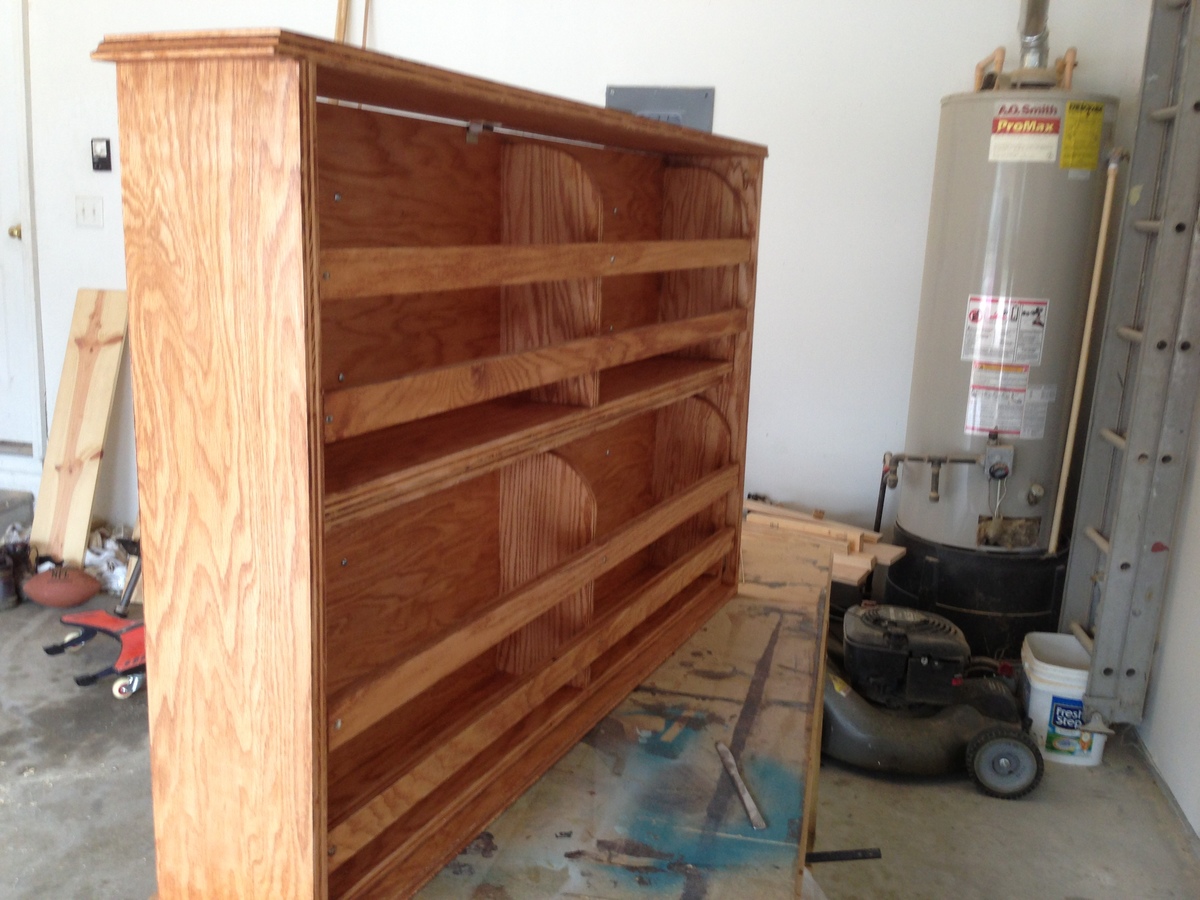
I used a 4'x8' sheet of oak plywood. The only thing that I had to cut back on was the center shelf. I made it a 1x6 so that I would have enough wood. I used veneer for the front pieces and amber stain with polycrylic.

Estimated Cost
$75.00
Estimated Time Investment
Day Project (6-9 Hours)
Finish Used
Amber Stain with polyurethane
Recommended Skill Level
Intermediate

Comments

FlygirlTRE

Sat, 06/08/2013 - 17:23

This is really cool! How many pairs of shoes can you fit in there and what types?

Tryed Coffee Table and End Table

Submitted by mike5287 on Wed, 10/27/2021 - 12:00

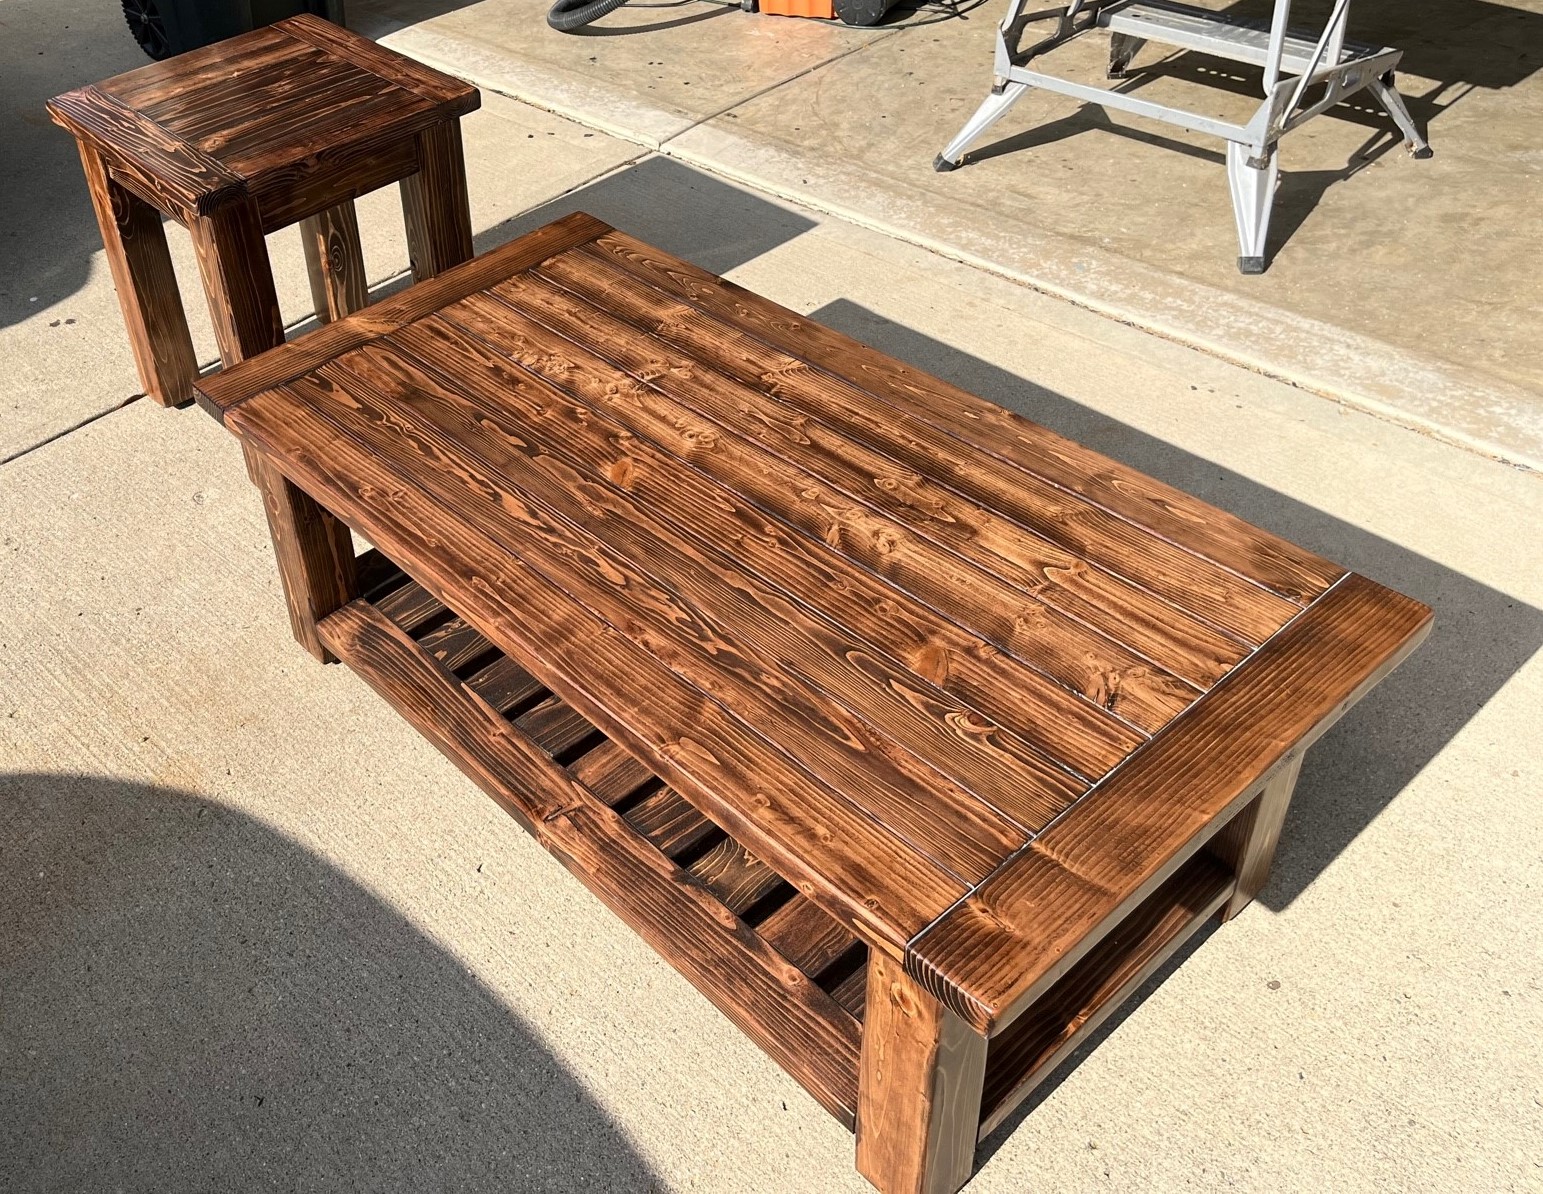
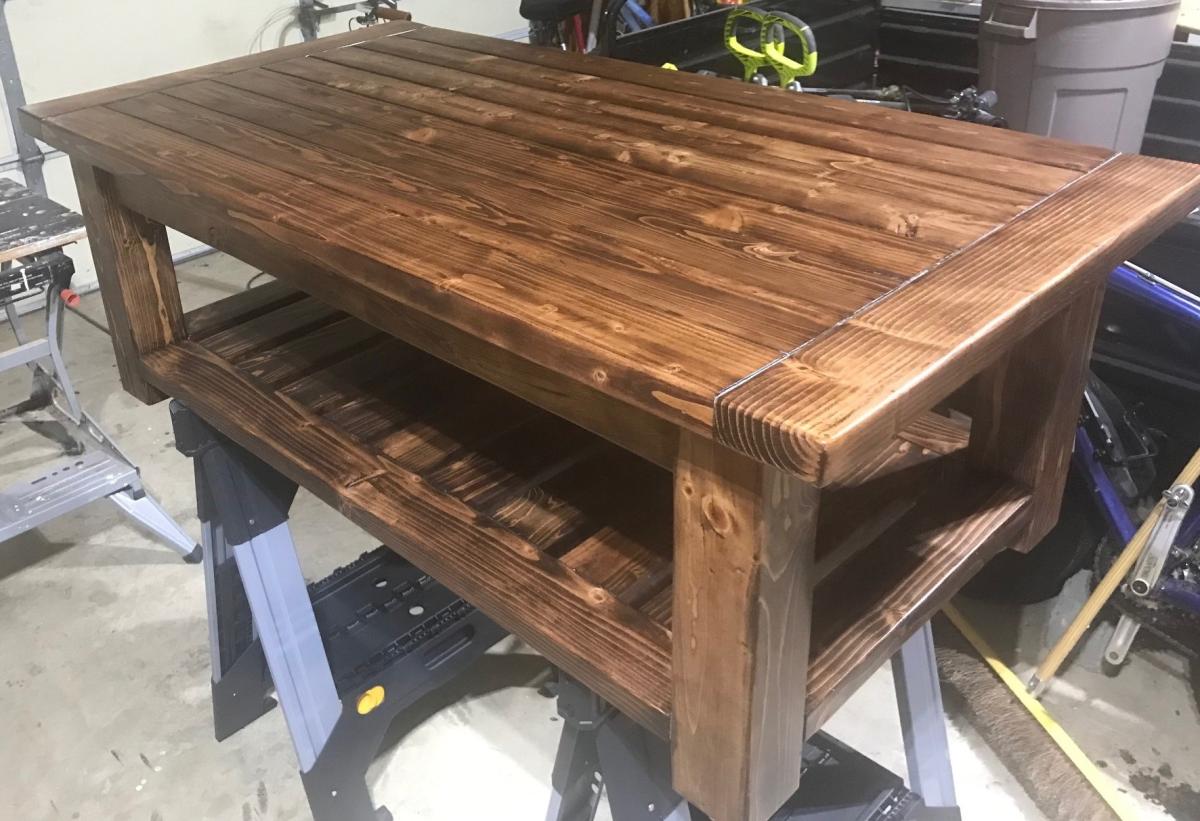
Oldest is moving out into their own apartment so thought I would help them save some money and built a Tryed/Tryde Coffee & End Table, although both are slightly modified:

- Coffee table I added the lower section
- End Table I did with pocket holes vs how the plans had it laid out.

For the end table , which I started after the coffee table, I "jointed" the table top pieces on the table saw - very slightly as I wanted to keep the more rustic looking individual boards. This worked really well and I wish I had done it on the coffee table too.

For the finish, which to me always starts with lots and lots of sanding (started at 60 grit down to 400 grit), I used a mix of Varithane Red Mahogany (4 parts) and Dark Walnut (1 Part), then several coats of Clear Satin Polyurethane. For some reason the end table was VERY glossy so had to use some 0000 steel wool to reduce the gloss.

So hooked on the pocket holes now going to upgrade my Kreg jig to the 720 :)

Comments

Back