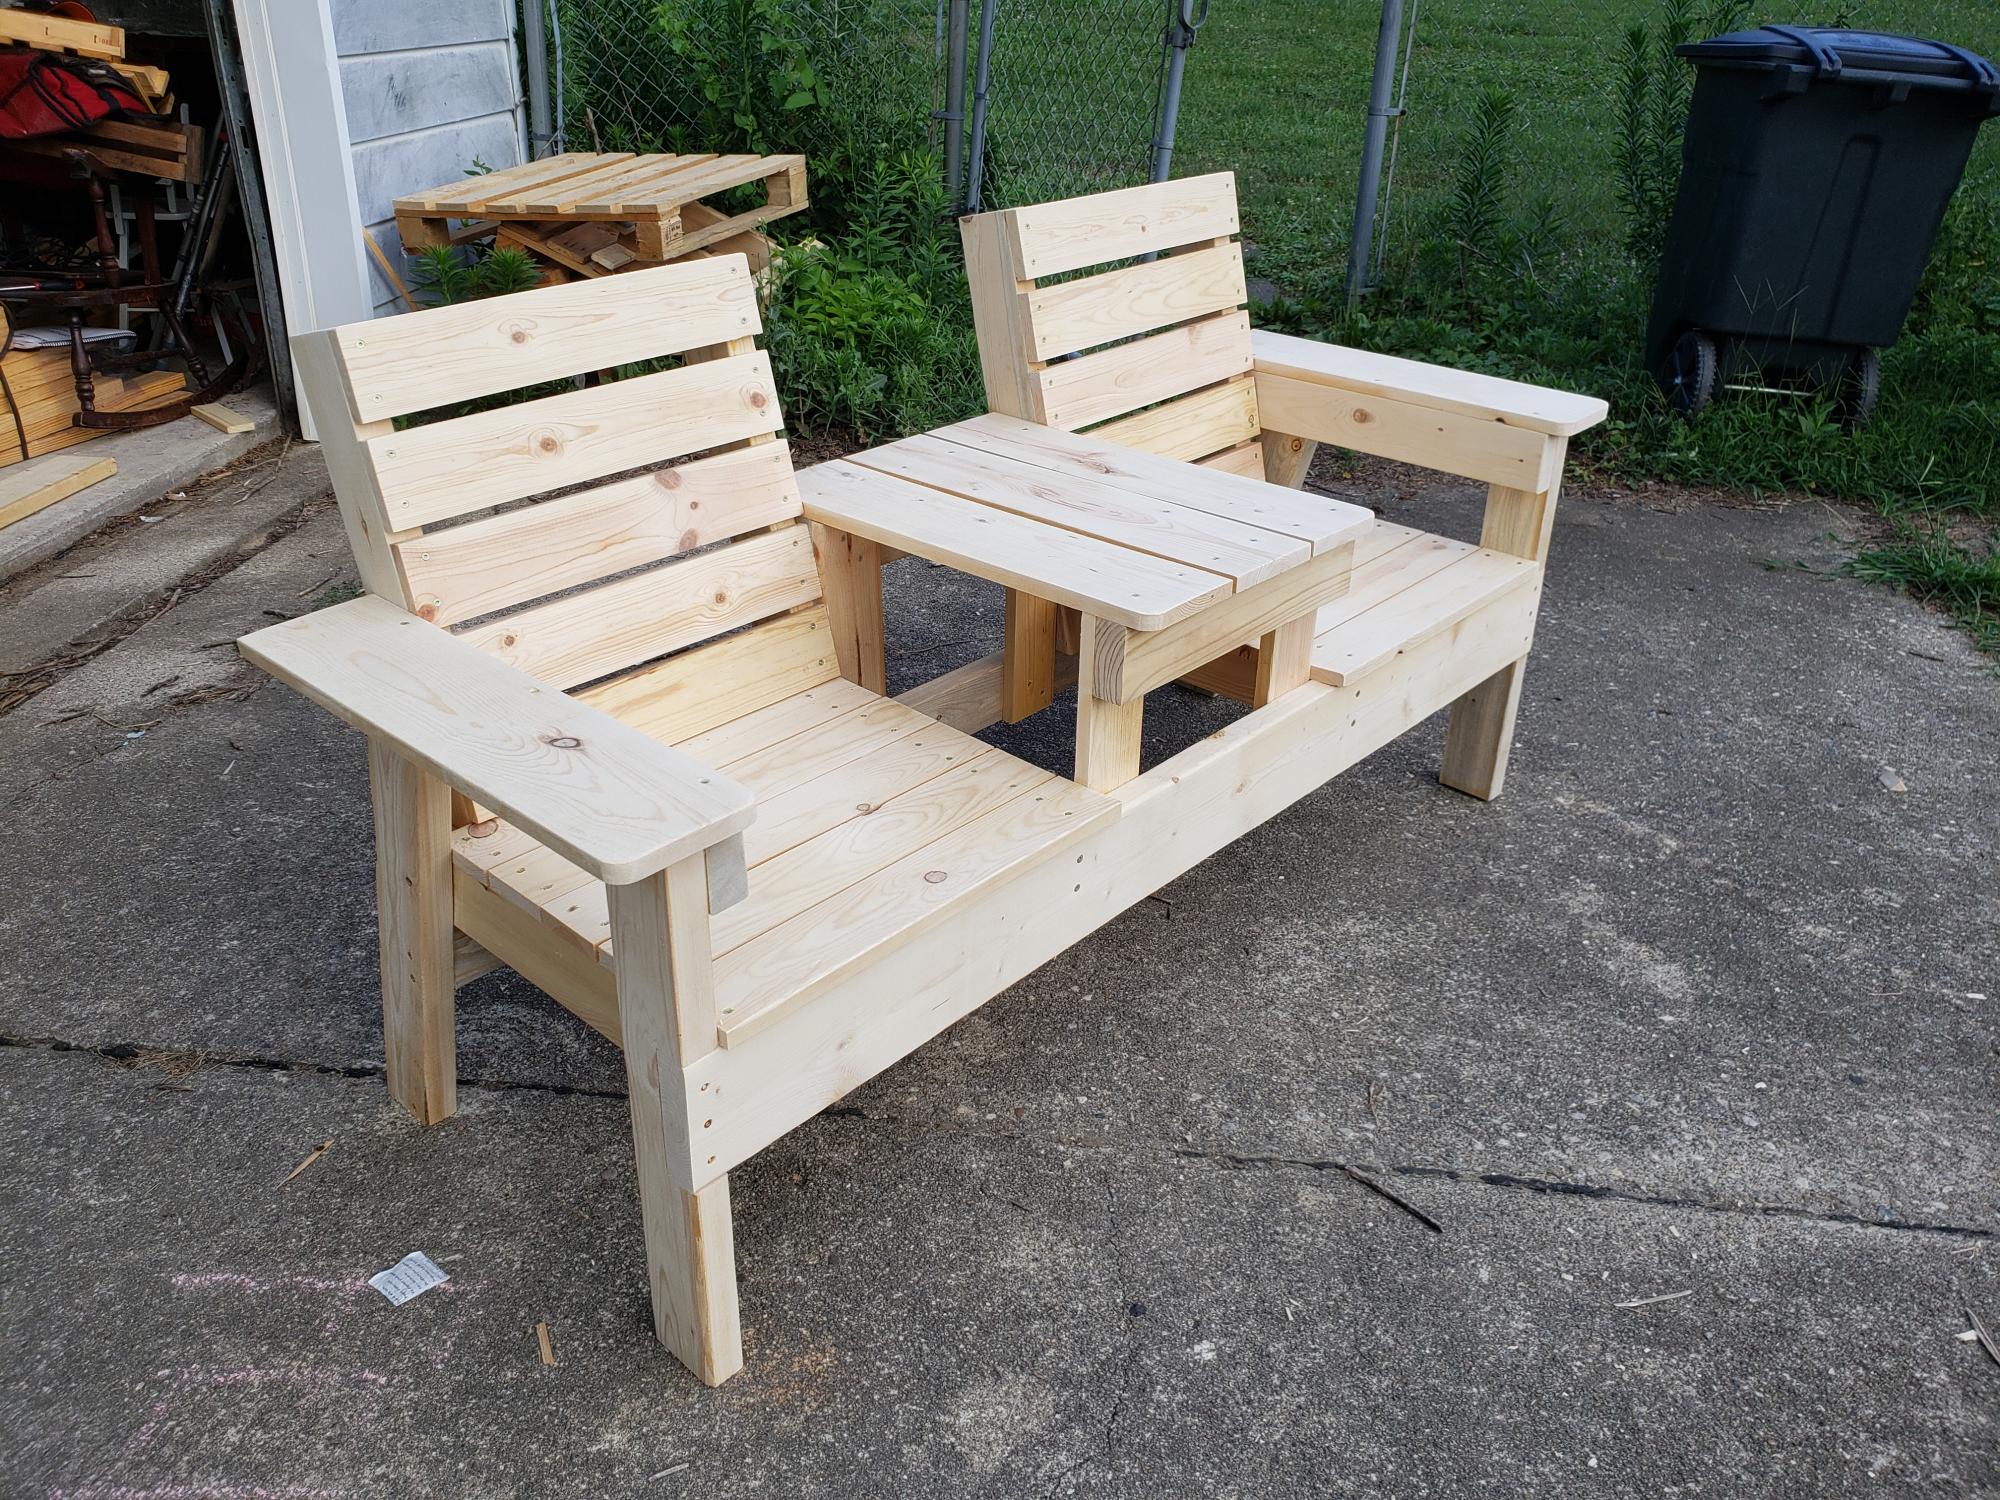
Picnic Table and Benches
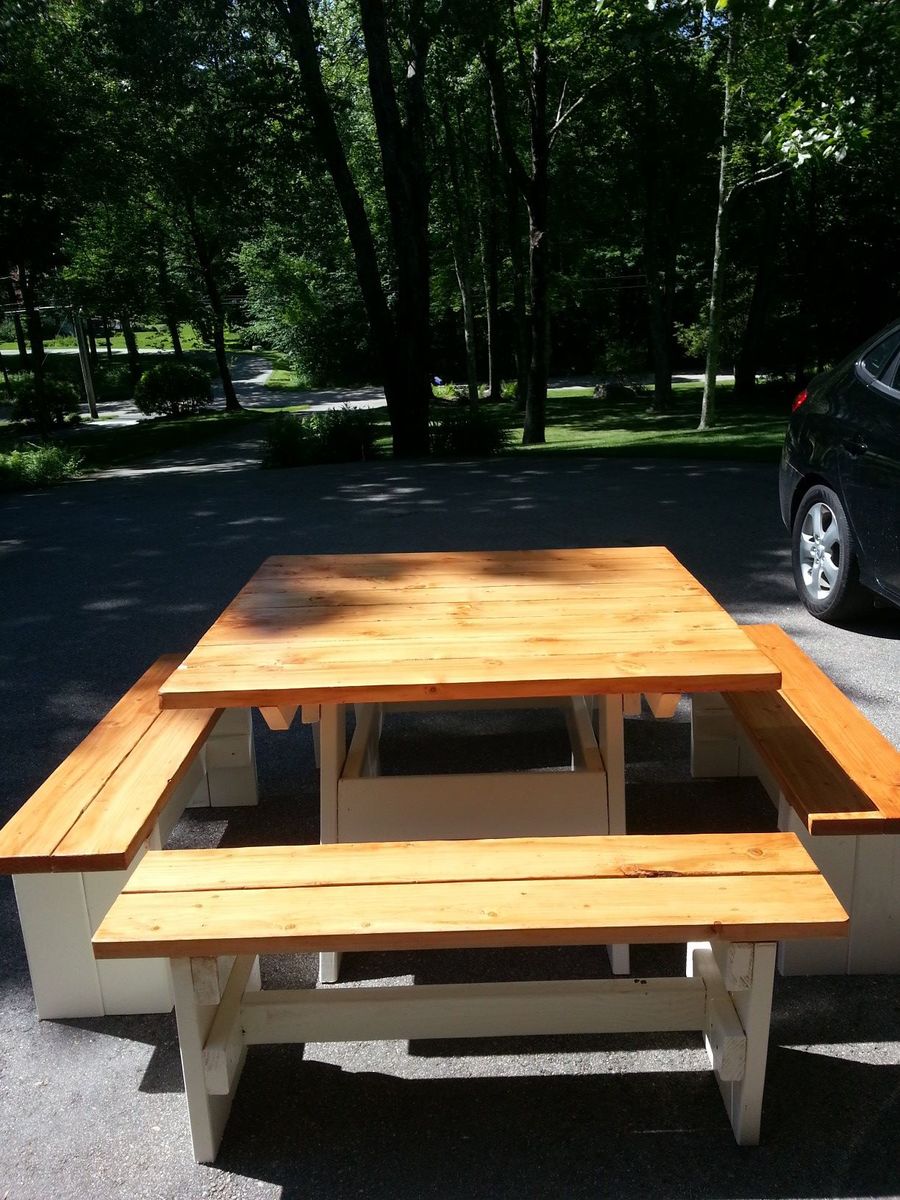
Picnic table and benches from an original (as far as I know) design I copied from my father-in-law. It is roughly 4'x4' and can comfortably seat 8 people, and is very sturdy.
Thanks for the great plan!
I decided for my patio a love seat/sofa combo would work better than the sectional. It was easy to make both and modify the plans to have arms at both ends of the pieces.
Getting inexpensive cushions was a challenge. I ended up getting IKEA HÅLLÖ cushions. I added more foam to the back cushions as was suggested in another post since the IKEA cushions were a little flimsy and tend to fall through the back of the sofa. I might add some bigger cushions at some point
Wed, 07/10/2019 - 17:06
I want to try this as soon as we get into our house.
Made from reclaimed Douglas Fir wood I saved from a historical renovation in Northern Vermont. Knob and tube insulators from original electric service are well suited for drawer knobs.
With the extra wood from some earlier projects I was able to make this tiny nightstand. Ive got limited space between my bed and wall and there was no way to find a suitable solution, so I built one.
Did not follow a plan, but used some of the design features from some of the benches on here.
I modified the Rolling C Cart Plan to build this center console for my home theater. My dimensions are a bit different than Ana's. 24" long and 19" high. In order to keep the center of gravity back I doubled the center splines to give it a bit more heft aft of the cup holders. It was made from 1x10's as to not be too wide. I skipped the rolling wheels as it isn't going to be moved once in place. I used 2 coats primer, 3 coats semi-gloss black, and 3 coats of Minwax PolyCrylic to finish it off. All with light sanding with 240 grit paper on my Bosch Oscillating tools to smooth out each layer. It took about 4 days with all the painting, sanding, and drying time involved. I love this build and plan to build 2 more for the back row of theatre seats.
Simple bed built by Jill and shared on our Facebook page
My daughter loves "cooking" so we made her this play kitchen for Christmas. I had so much fun making it that it was worth it even if she never plays with it. Of course, she's been playing with it since yesterday morning.
Mon, 12/26/2011 - 10:22
I ALMOST did the exact same thing to my daughter's fridge doors! I thought about it a lot, but just didn't have the resources or the time to get it by Christmas to do the doors....maybe I will now though :) I love the addition you did to the stove it is adorable and awesome! I also love the little knobs you have on the front of the stove - what did you use for them? Would love to see a picture of the top of the stove as well as the actual sink. I like to see how others do theirs so if I want to make another one for a friend I can have other ideas :)
Fantastic job!
Mon, 12/26/2011 - 11:00
It looks amazing and I am sure your daughter loves it! I was thinking of doing the magnetic paint on my daughter's fridge and now wish I had after seeing your kitchen. I think we got the same pulls :)
Mon, 12/26/2011 - 11:31
You did a fantastic job! I am sure your daughter will love it for years to come!
Fri, 08/16/2013 - 21:00
I love the personal touches you created! Did you scale the pieces up or use original dimensions? And I HAVE to know how you did the extension of counter space on the oven with the shelves! That is exactly what I have been looking for. A girl can't have to much counter space at any age!
Inspired by Dwell Studio's Mid Century Dresser, I built a smaller version for my daughter's small room. Working on showing photos of the building process on my little blog this weekend. =D
Fri, 11/15/2013 - 19:00
This looks fab! It's beautifully done and finished. I like it better than the inspiration piece! A perfect dresser for a little girl's room. :)
In reply to Gorgeous dresser! by JoanneS
Sat, 11/16/2013 - 08:45
I am pleased with how it turned out and I learned new techniques making it! Your support and tips along the way helped me immensely!
It took a while to come together and made several modifications but it is a great coop and was a major selling point of the house when we were relocated. I had added a main tray under the roosts and a door to srape the poop out. This made keeping the coop clean very easy.
Plans by DIY with Pete
Our family uses the dining table for homework and work with laptops. I have drawers in a window seat, so I added the stick on dividers to create laptop storage in the drawer. This was super quick and easy.
I used ripped 1/2” thick plywood pieces.
loved the results! So easy and exactly what I needed!
Thanks to this site my wife found this headboard design. I modified the plan to suit our king size bed. We chose popular with a java stain.
Sat, 12/31/2011 - 04:30
Love, love, love it! Just love the modern look of it and great job!
Fri, 08/10/2012 - 07:30
Any chance you still have the demensions? Im making this bed this weekend and would greatly appreciate the help with what dimensions you used for the king sized bed.....:)
Fri, 08/10/2012 - 07:29
king size plans, I see you altered the plans for your king sized bed. Any chance you can provide the dimensions, making it this weekend.
Thanks! :)
I built this desk by combining a modified Julia nightstand and the schoolhouse desk. I added a little ribbon and some upholstery tacks around the upper edge. I rescued the chair from Goodwill and added the zebra cover. I also made the mirror using the barnwood frame plan.
It was time to upgrade our daughter's bed to something bigger. I have always loved the idea of platform beds and went searching the Ana White site for ideas. Needless to say, I made several modifications to allow for a huge amount of storage. The bed is designed to fit up to a queen mattress, but we went with full size since her room is a bit tight. Each drawer is 24"x24"x12" deep and mounted on 100 lbs. full extension slides. This allowed us to eliminate both dressers in her bedroom plus the hamper since one of the drawers is now for dirty clothes. I built this as two 80" cabinets and used a 3/4" plywood spacer to bridge the gap. What you can't see is the six 24"x24"x12" cubbies on the far side of the bed which allowed us to remove her bookcase and toy box. Once in place, I measured and built the footboard panel with 1x4 dimensional pine and beadboard and it is attached with screws from inside the cabinet. The headboard was last as I wanted to give her a shelf for her chargers, remote, phine, ipad, etc. This allowed us to remove her nightstand. Her small bedroom feels much larger now that this is the only piece of furniture she needs once I get her tv mounted on the wall.
Wed, 04/12/2017 - 07:16
I want to make double the storage as you have done but am curious how tall your bed is from floor to mattress?
My very good friend was down sizing, and now her girls would be sharing a room. Since these girls are a little older I made the over all height 10” taller. We also had to modify the platform size to accommodate the space, and just have to paint the platform frame... but the girls love it. We even had the girls help assemble, sand and paint! They learned so much, and appreciate the beds that much more!
Used sturdy workbench plans with 2x6 cedar top for outdoor sink. Turned out much better than I expected!!
Tue, 05/02/2023 - 07:09
Way to go, it is beautiful and functional! Thanks for sharing.
My daughter needed a custom sized shelf to display her retail products in her busy day spa. The shelf needed to be narrow to not block walk around access to the massage table. It needed to be functional without looking like a book shelf. Ana's plan for the General Store Cubbies was just what I was looking for. I sized it down to fit the space and it turned out great.
I recently discovered your blog and got really inspired. After building a couple of beginner projects following your plans, i started to think about making something that can be used as medicine cabinet and does not take much space. Came up with the idea for this over the toilet storage rack.
My goal was to recycle/reuse some of the stuff that was sitting in my garage.
Started with building a frame using 1x6s (24 inch for shelves and 72 inch height). Used plastic table mats were used as sliding windows. Found a PVC trim (8 ft) for $2 at lowes that has been used as the rails/track for the windows. The back is piece of cardbord that was scrap from an old broken ikea bookshelf.
I am pretty happy that i recycled some stuff and made this in less than $15.
Tue, 12/01/2020 - 14:20
Did you do anything to the bottoms of the legs to prevent wet floors from wicking into the wood? I am wanting to build something similar to replace a particle board cabinet-in-a-box because the particle board did soak up water and get ruined. What I'd REALLY like are metal end caps with an adjustable foot (like you put at the bottom of a table leg) but I can't find a combination of the two anywhere.