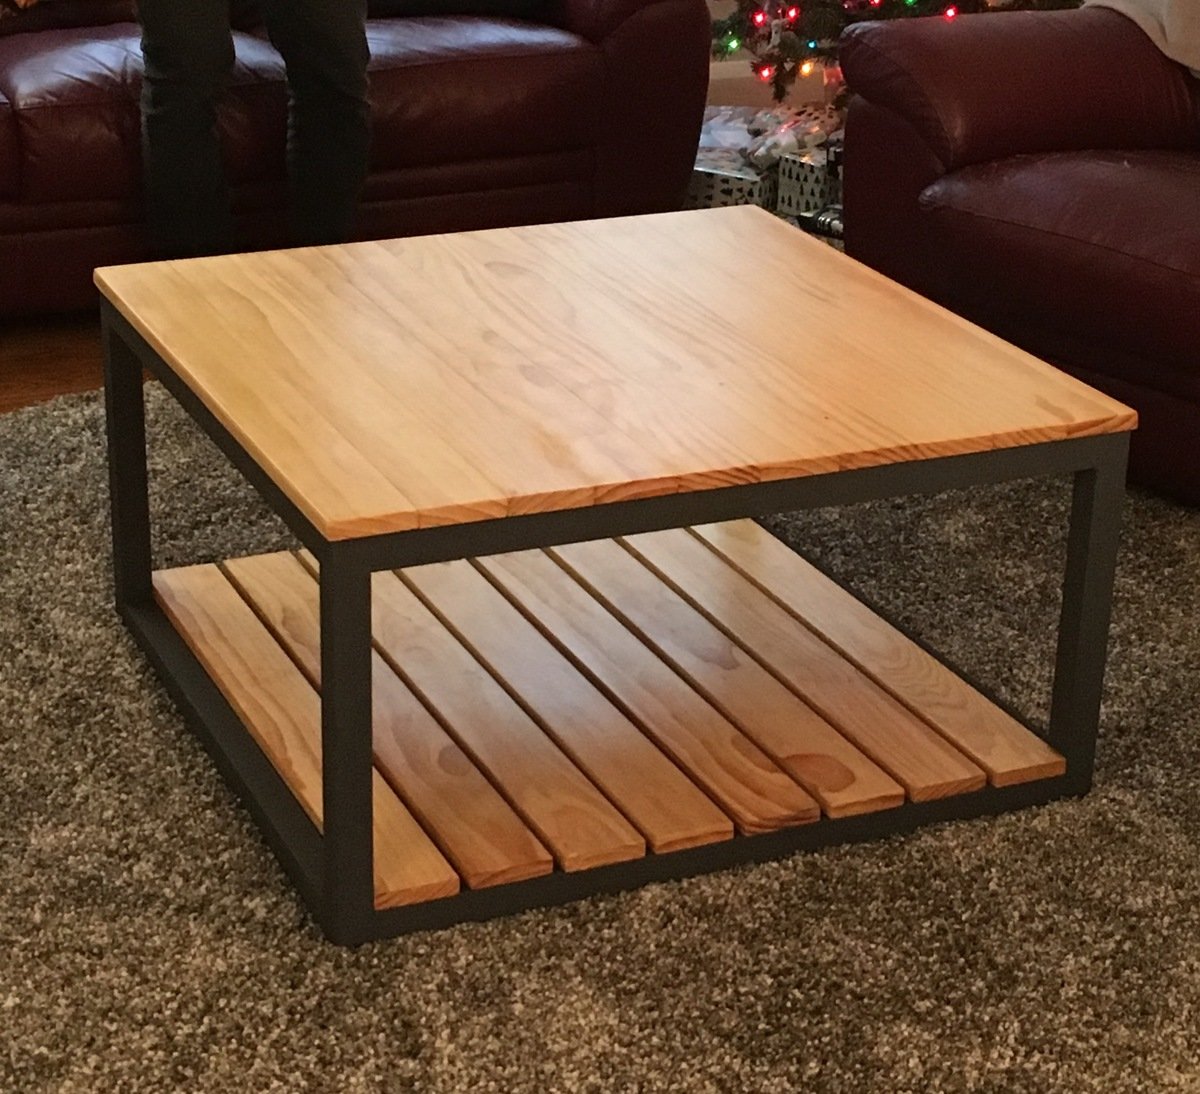
Hard Maple Waterfall Coffee Table
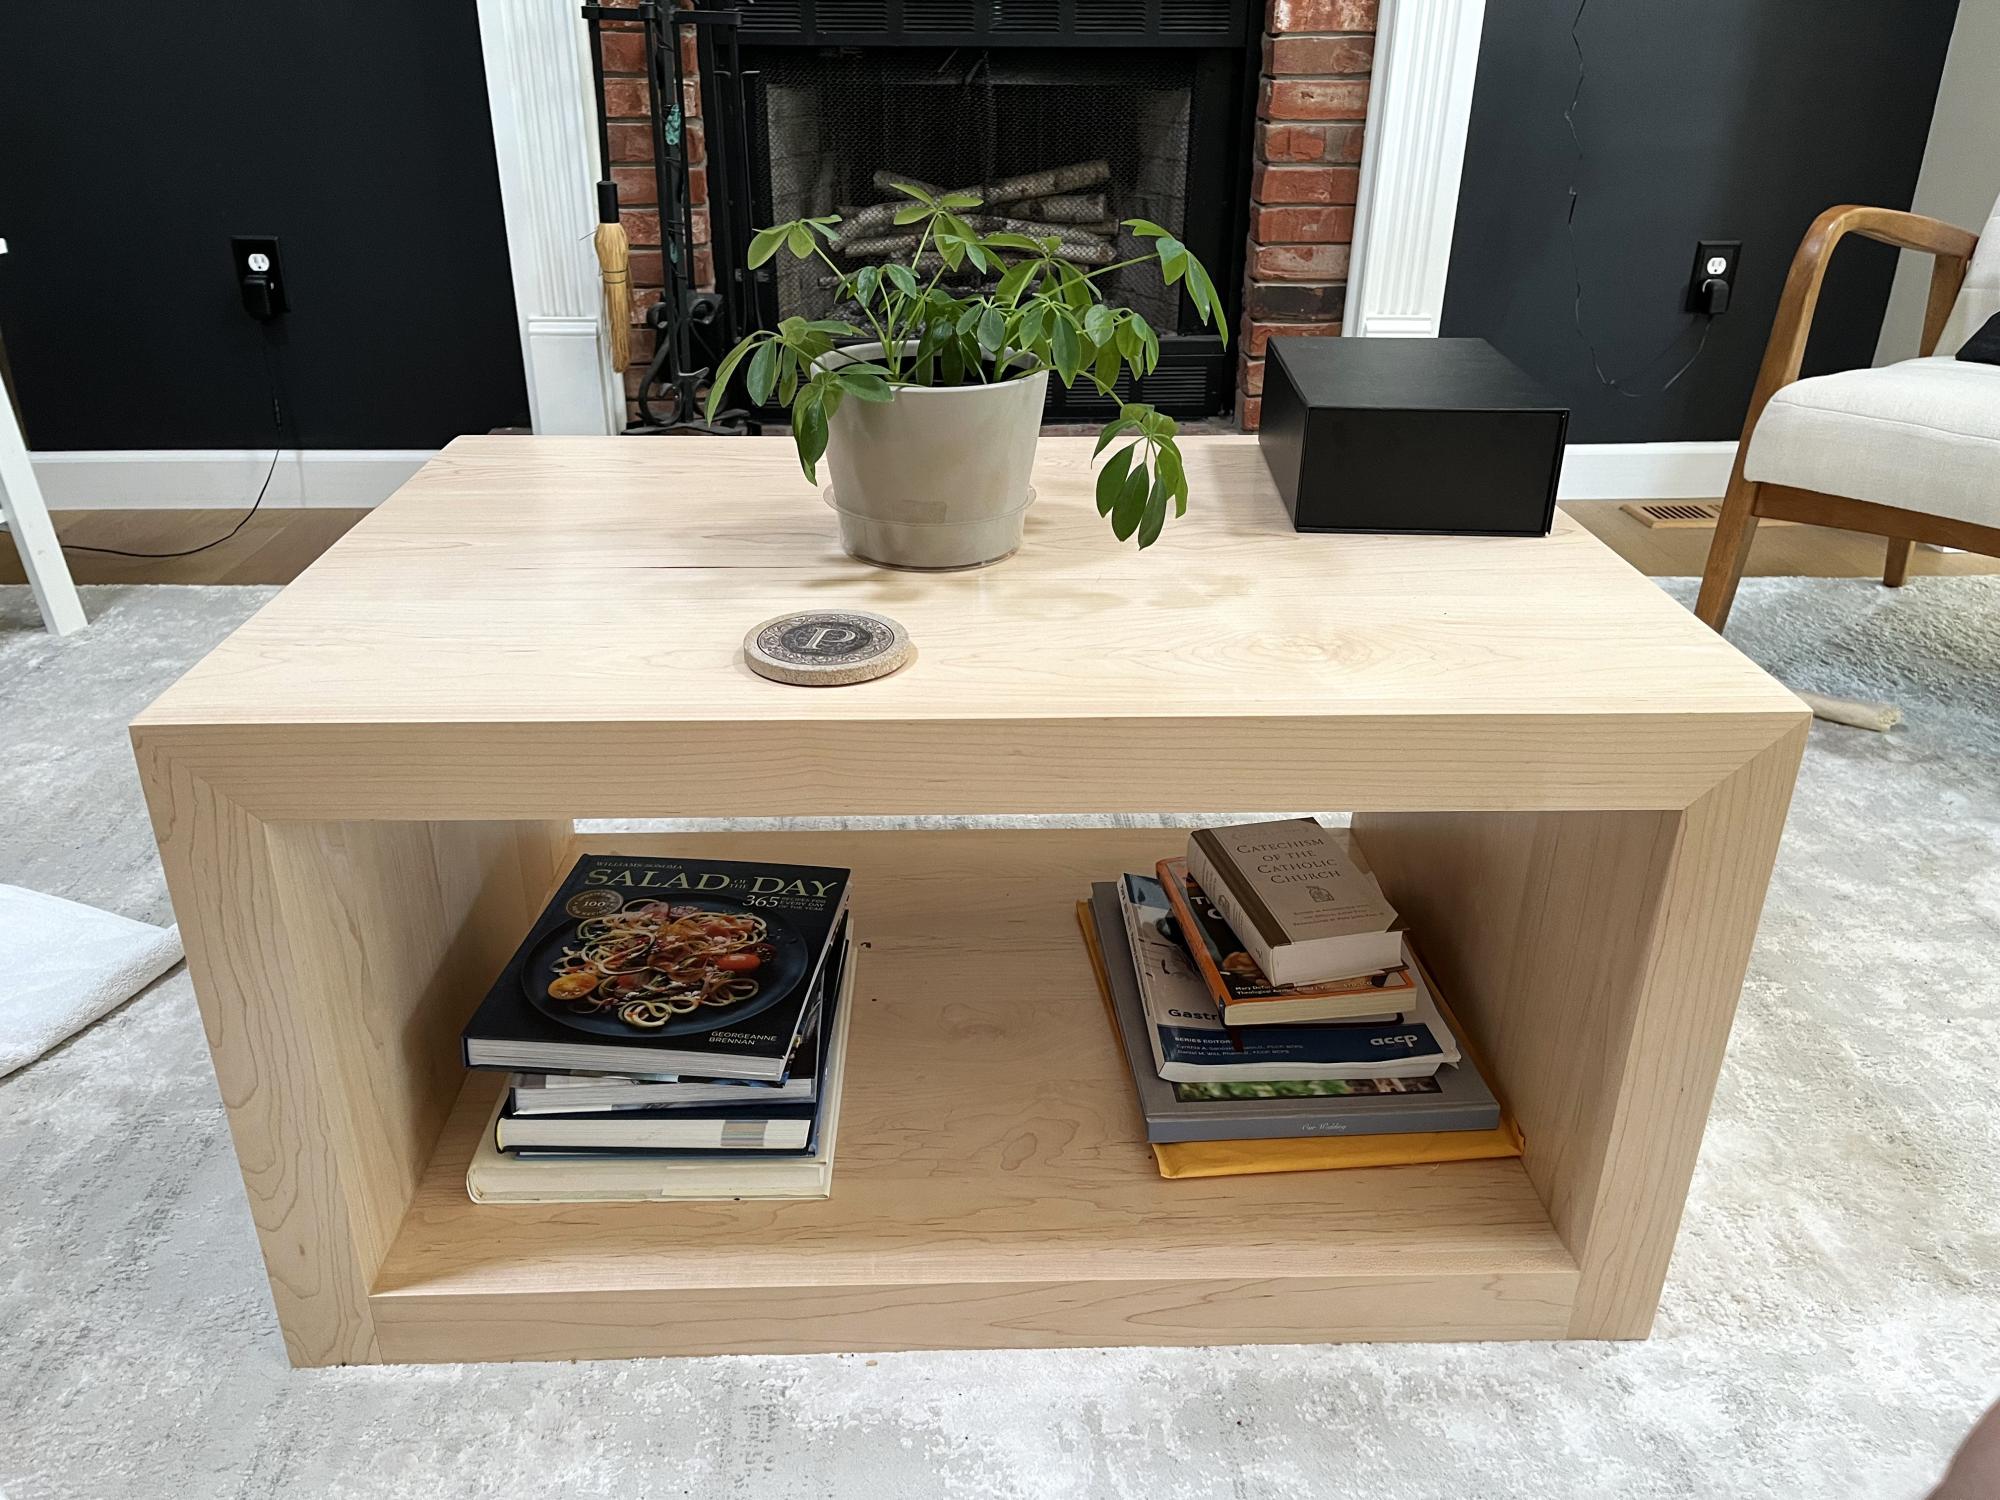
Hard maple waterfall coffee table.
Scott
Built from Plan(s)
Hard maple waterfall coffee table.
Scott
We didn't paint it, but I think it turned out well. We followed the plan almost exactly and it came out great!
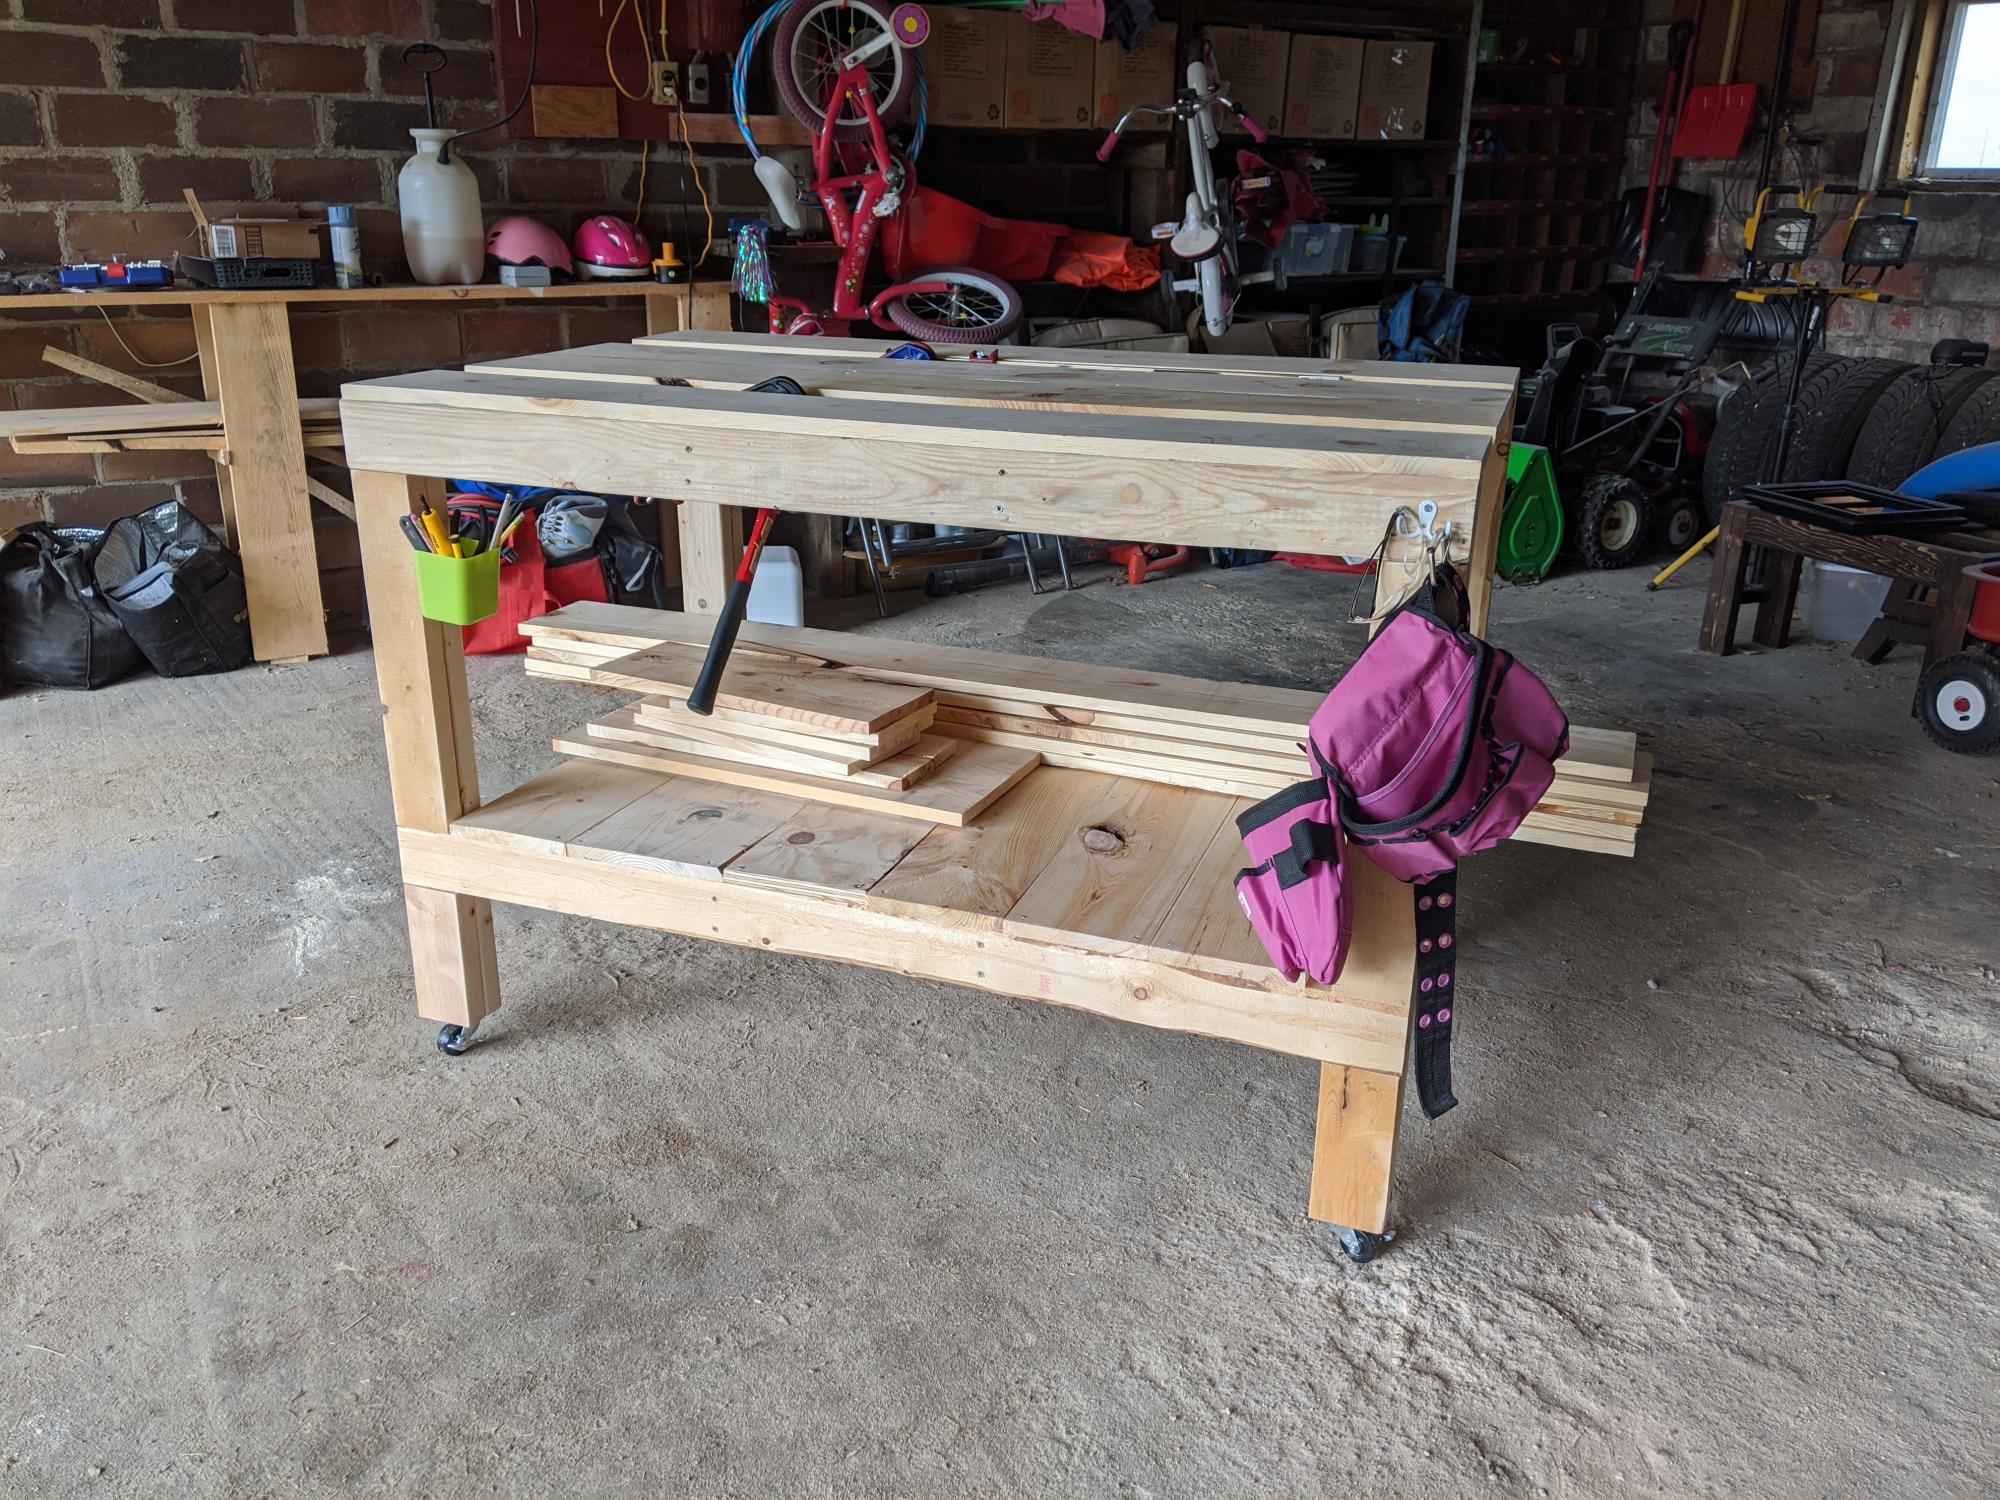
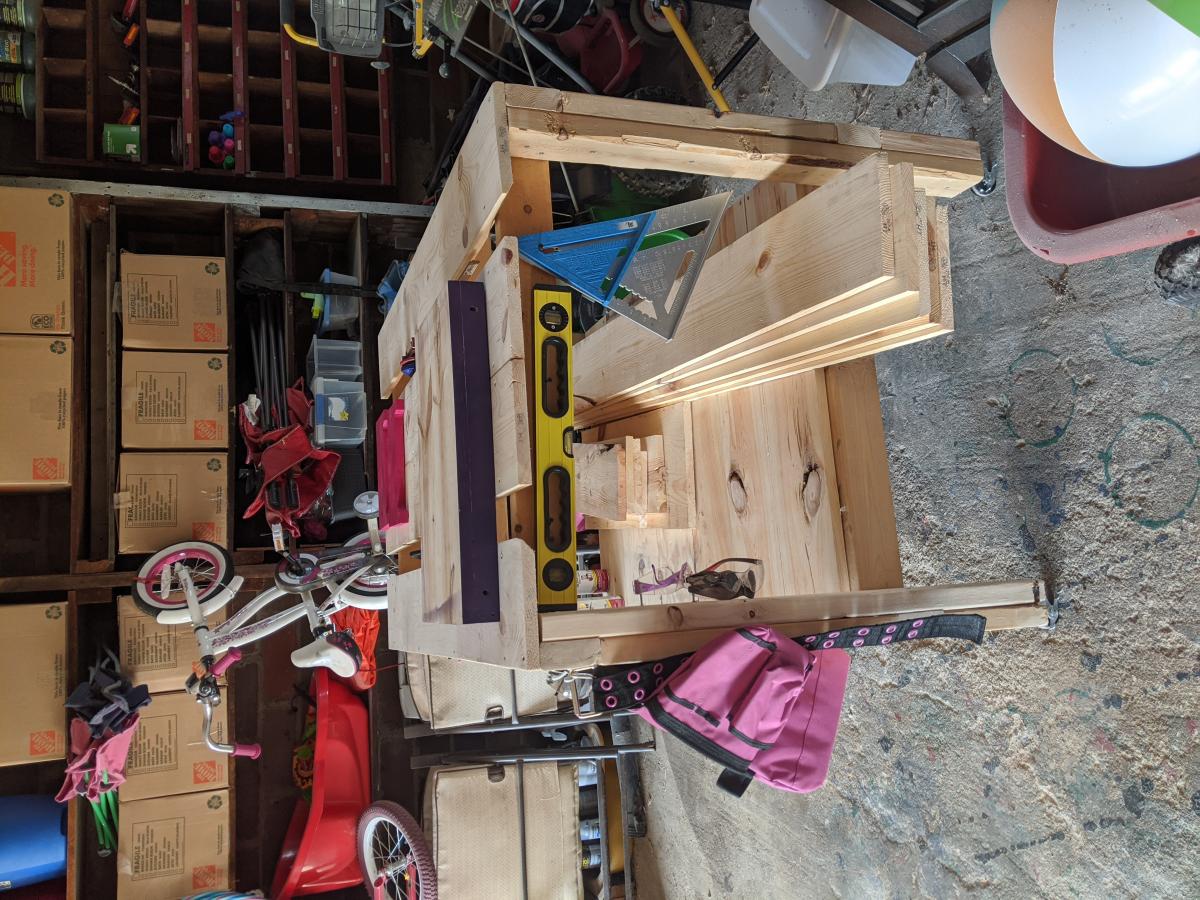
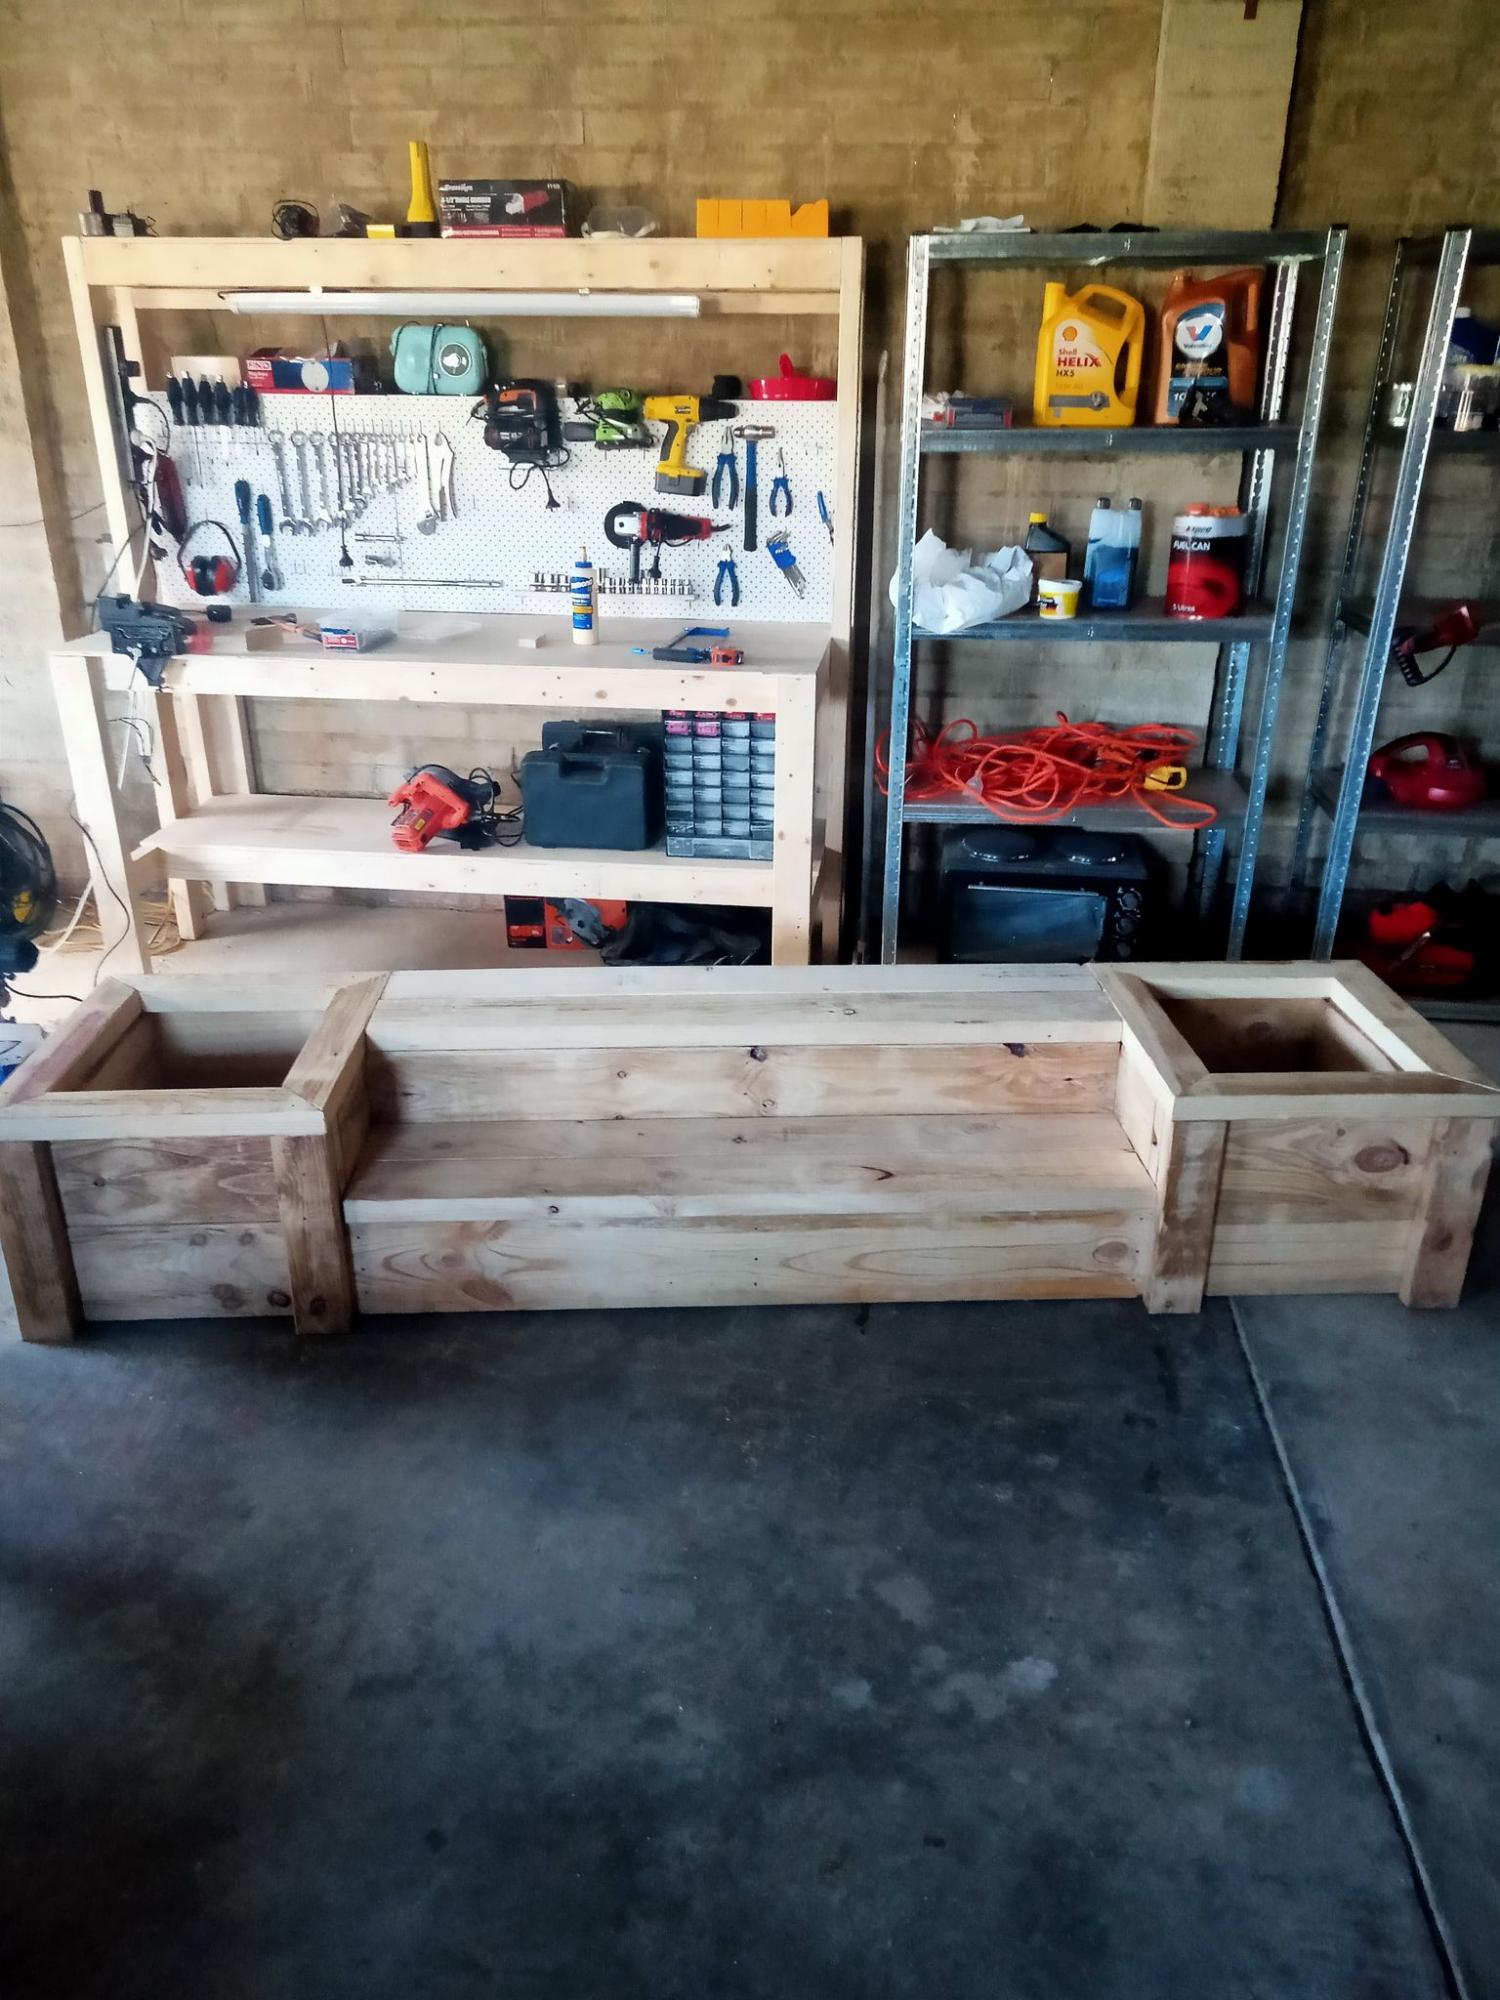
I needed a legit workbench and I had a bunch of wood to use up. I got a bunch of 1x8x6s from my local hardware store's scrap pile. There's a reason they were free... But I couldn't just toss them. I used all scrap, from the hardware store, my garage, and my brother-in-law's farm, except 3 2x4s that I bought new.
For this workbench, I used slats on the top and the bottom shelf. The frame is 2x4s. I had some idea I could use the space in between the slats to cut wood, but after adding 2in casters, it appears it might be a bit too tall. Even still, the spaces in between the slats make for excellent clamp storage.
And now I finally have a legit, mobile workbench to keep all my chaos somewhat contained.
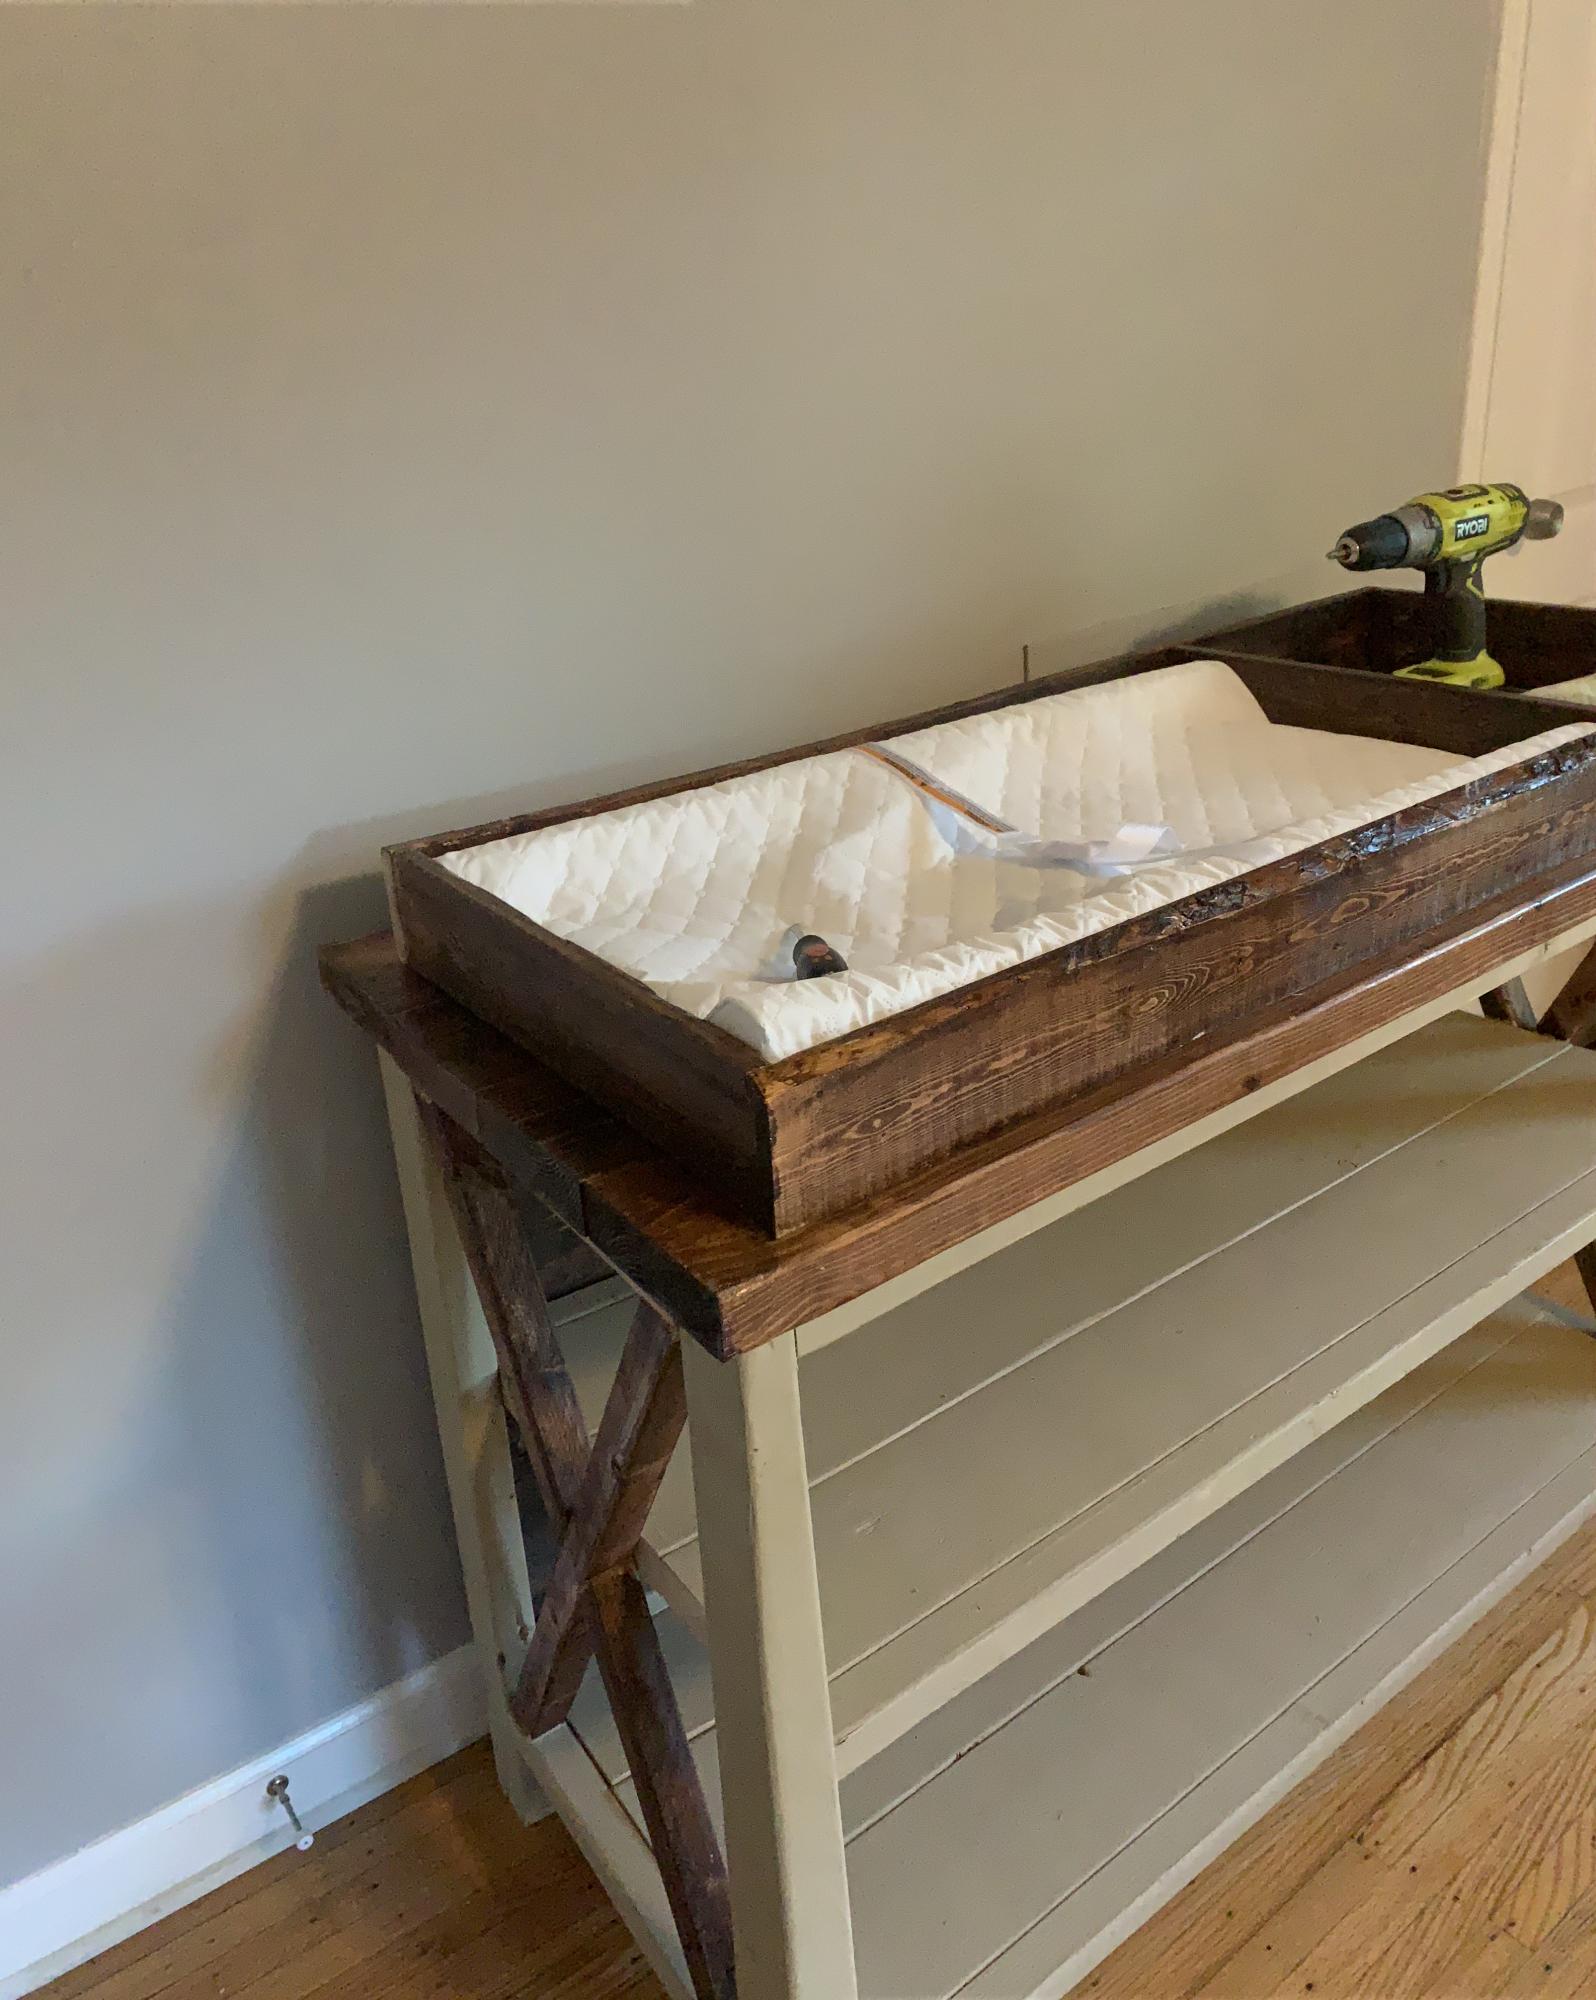
Followed the DIY changing table plan!
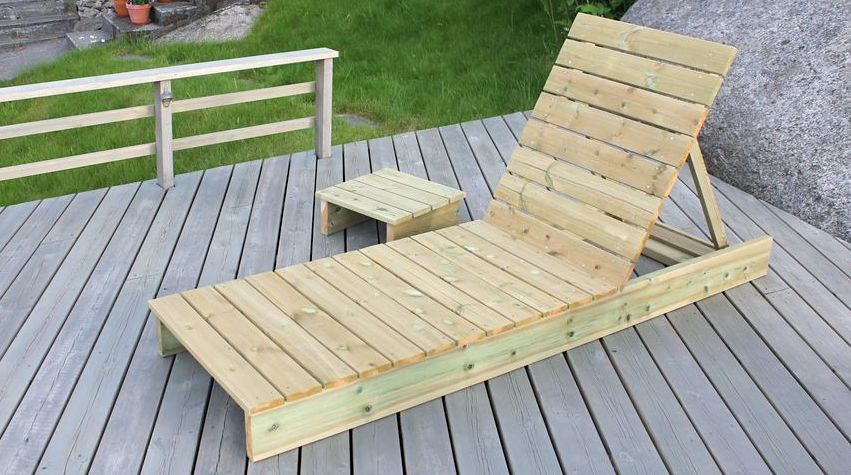
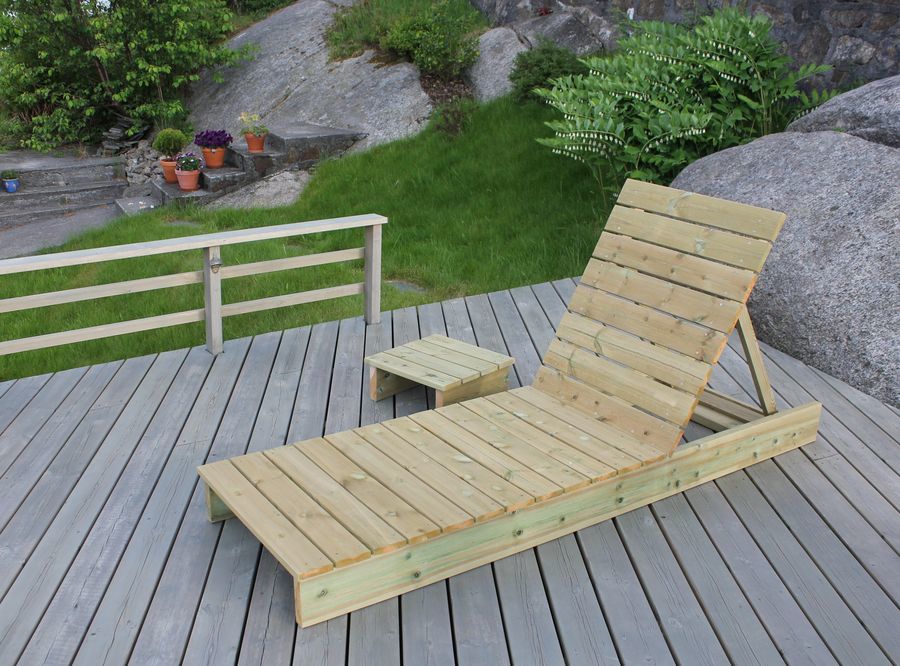
Solid garden lounger and side table to match our garden chairs and table.
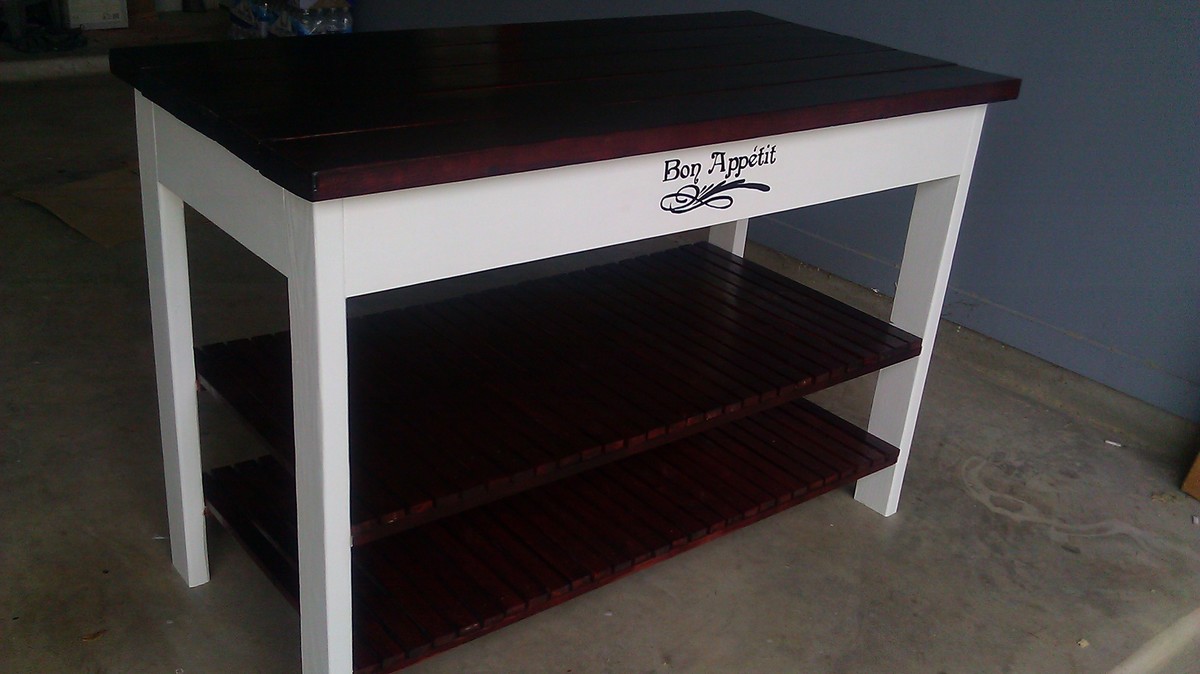
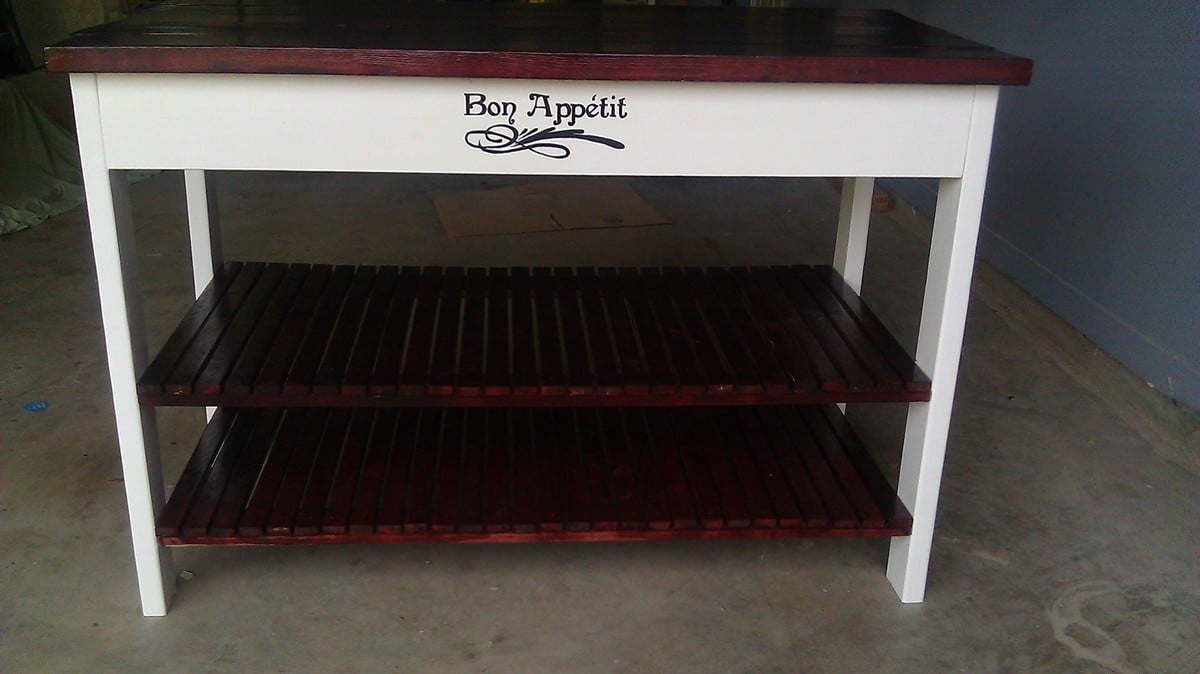
Here is the Easy Kitchen Island all finished. I learned to use my k-reg with this project. To attach the top I instead used corner blocks in each corner of the bottom unit and screwed the top in place. I found this made the piece more sturdy. for the 1x2's I used furring strips which are not very nice however I painstakingly picked through a large pile till I found ones that were straight and without knots. I then had to sand them like crazy. Saved a ton of money but worked very hard. This project actually took 19 - 1x2's rather than what the plan called for. When complete this piece was very heavy...I love it and have found the perfect home for it.
Thanks again Ana!
Janet

Our first project!
We used the "Industrial Style Coffee Table as seen on DIY Network" plans and simply added a bottom shelf. This required an extra 2x2 bracer (same cut as top bracer) and 8 more 1x4s, cut slightly smaller than the top 1x4s in order to have them sit flush with the bottom 2x2s. The table is all pine.
We spaced the bottom shelf boards roughly a half inch apart (give or take - it's "rustic"!) and screwed in from the bottom just like the top boards.
On the top shelf, we used 3 coats of Minwax Natural stain, and followed up with 3 coats of Minwax Satin Poly. We sanded these after attaching to the frame in order to achieve a level surface. We started with 80 grit, then 120, then 150. We then used 220 in between coats of poly. The result is a smooth, but not store-bought smooth surface, which we think works well.
We didn't spend as much time on the bottom shelf since they'll be mostly storing items, giving them just a quick 150 sand prior to 2 coats of stain and 2 coats of poly. Finally, we nailed in some plastic feet to keep it about a half inch off the floor.
All in all, being our first project, and going beyond what the original plans called for, it took us a few weeks to complete, working on it mostly on weekends and here and there in the evenings after work. We love the finished project and it works really well in our living room!
-Dan and Beth
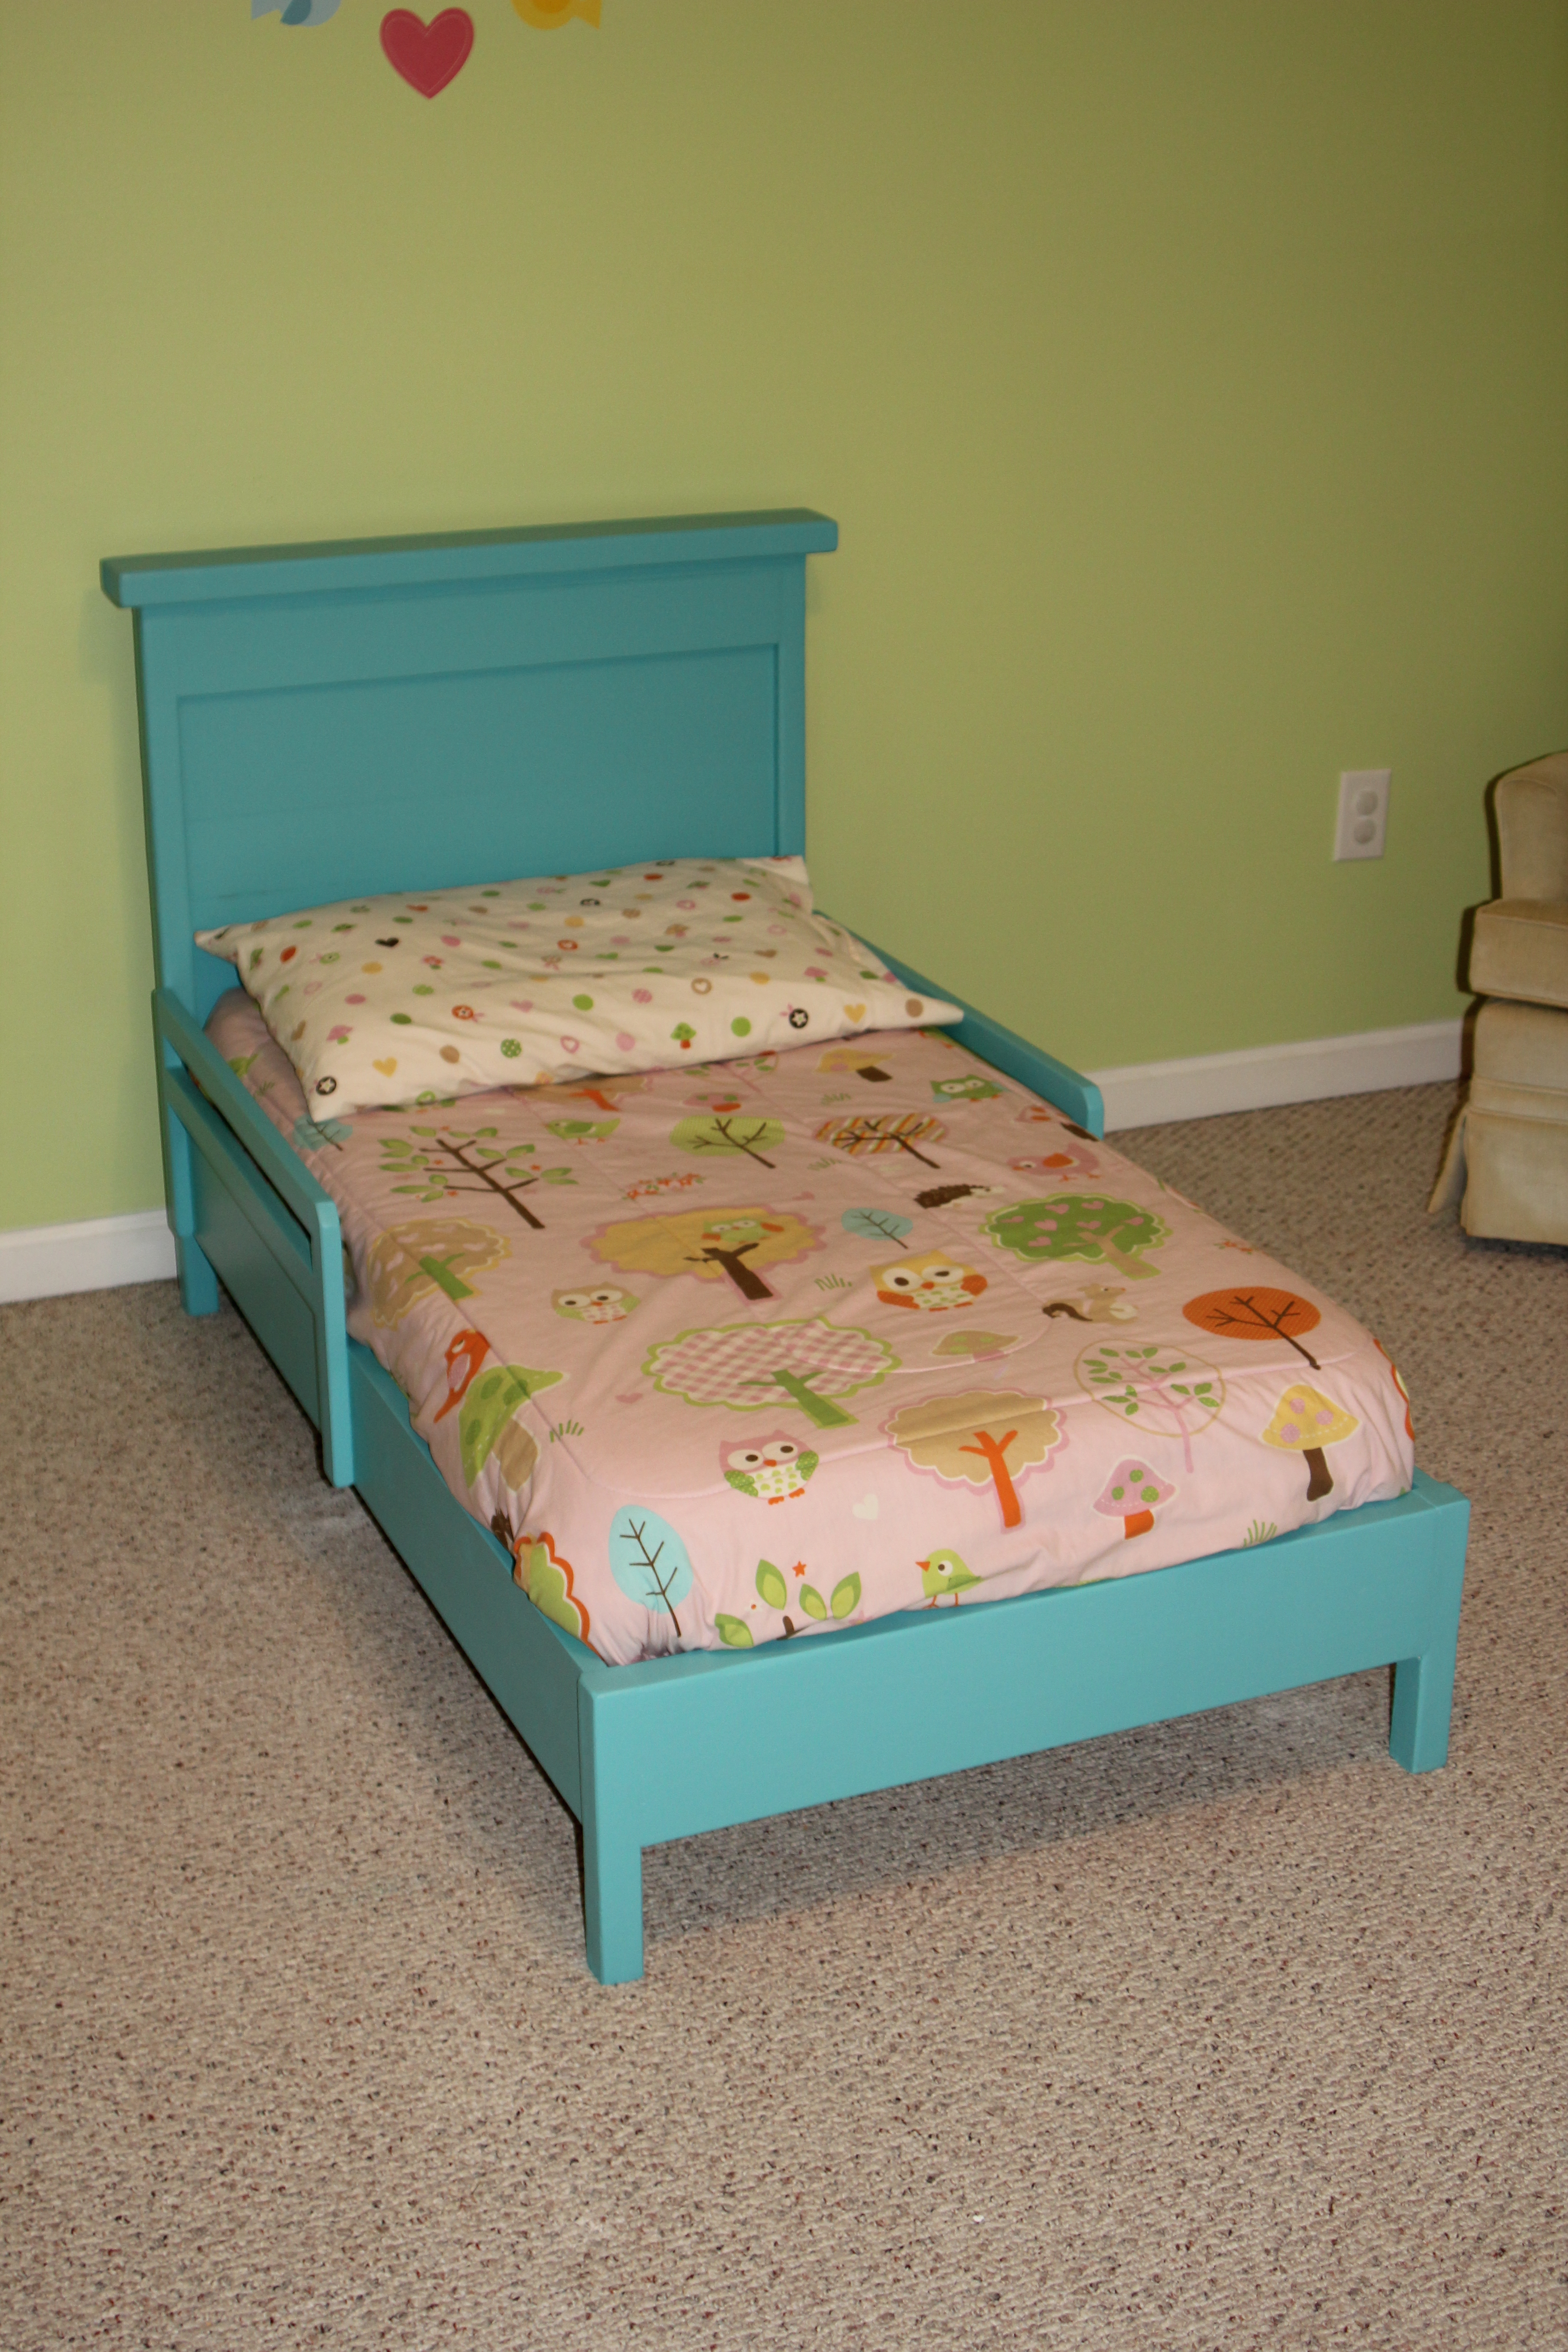
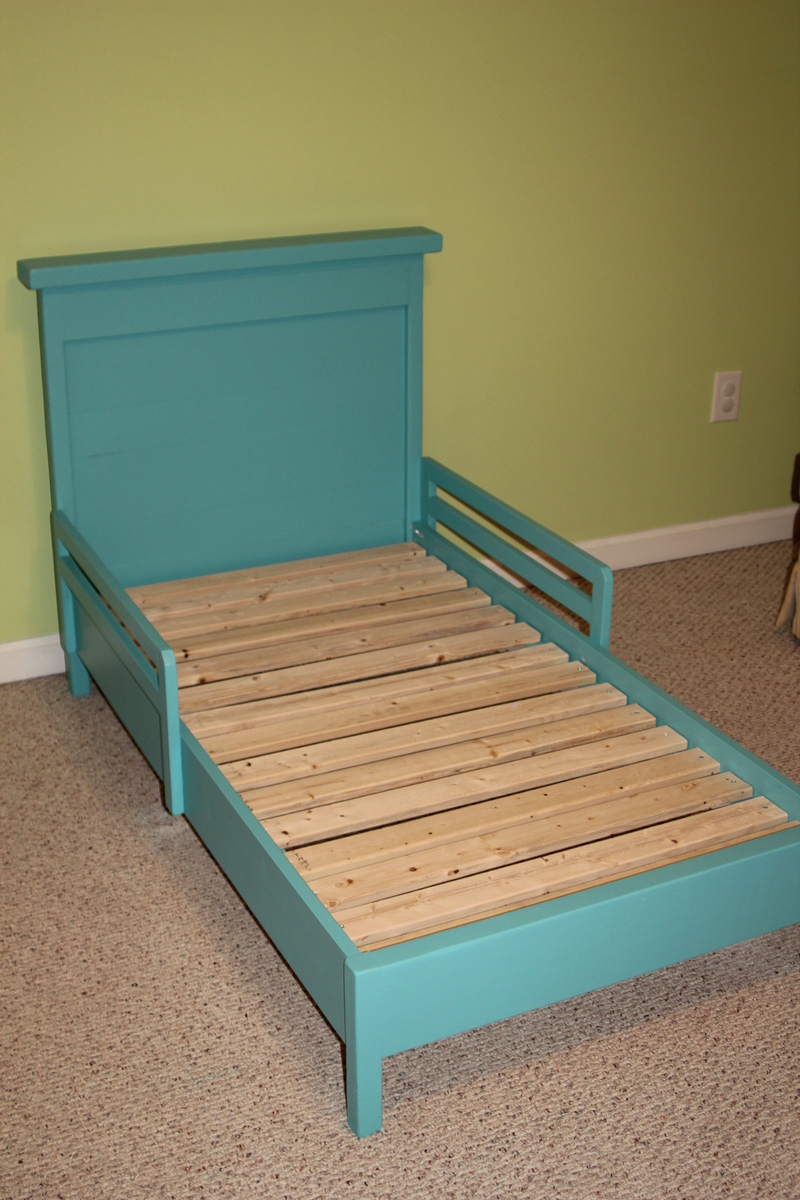
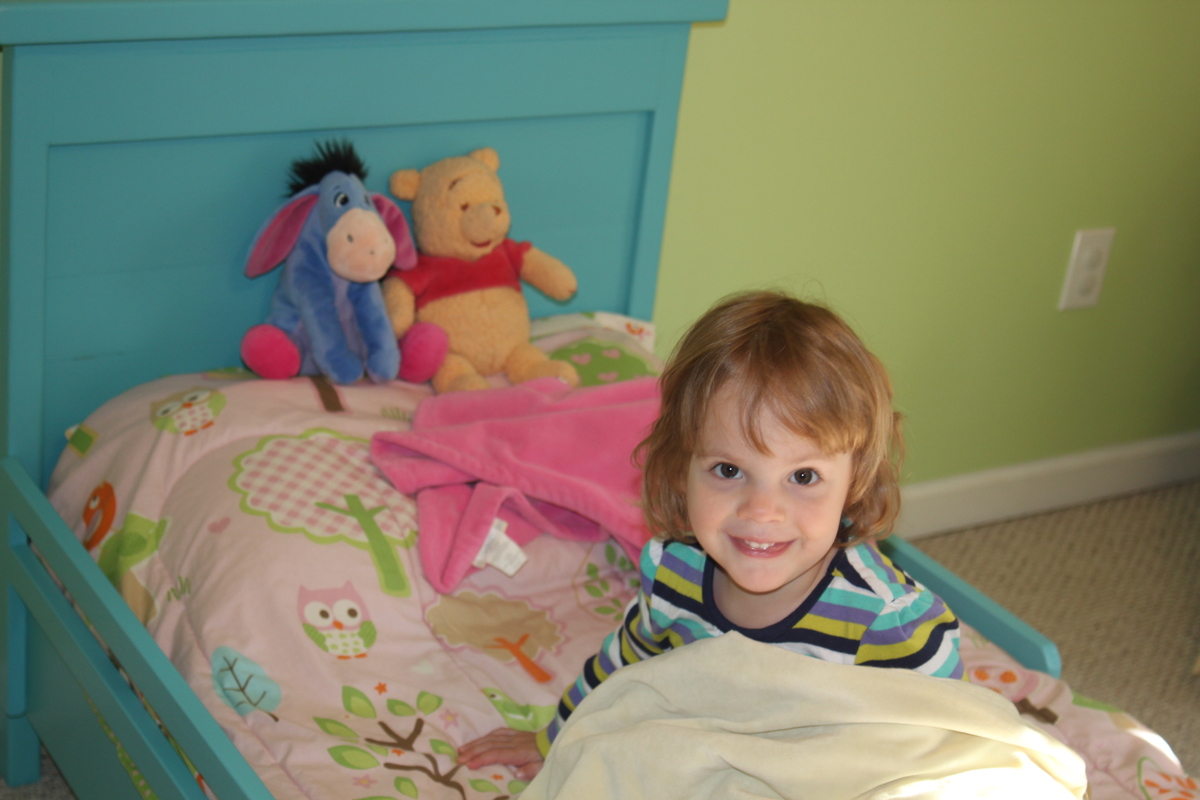
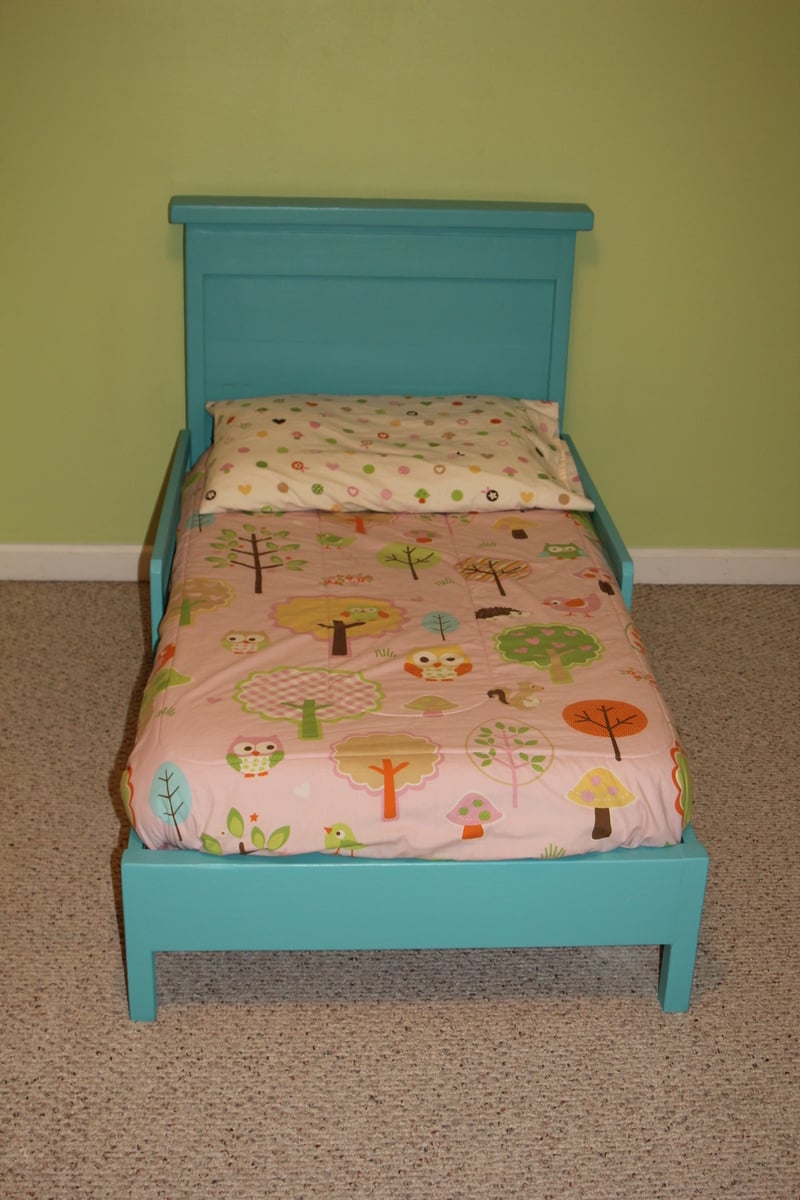
After my daughter started escaping from her crib I knew it was time to build her a new bed. I didn't think she was quite ready for a full size yet so I thought a toddler size would work for at least the next year.
I started with the Traditional Toddler Bed plans and scaled down the size of the Rustic Headboard and incorporated that. The biggest thing I learned in the process was to measure your mattress first! I don't think I realized the size variation in crib mattresses and ended up having to recut my slats and rails to accommodate my larger mattress. Also, our mattress is 5 inches deep, which means that the safety rails only extend about an inch over the top of the bed. This seems to be fine for my daughter and she hasn't fallen out - yet - but I think if you have a very restless sleeper or just want to play it safe, you might want to add an extra inch or two to the height of the guardrails.
I also used a 2 x 6 for the foot rail as this allowed the legs to be inset further and gave it a more solid look on the bottom.

A very enjoyable project. I'm relatively new to diy woodworking projects but these plans make it so much easier.
Thanks.

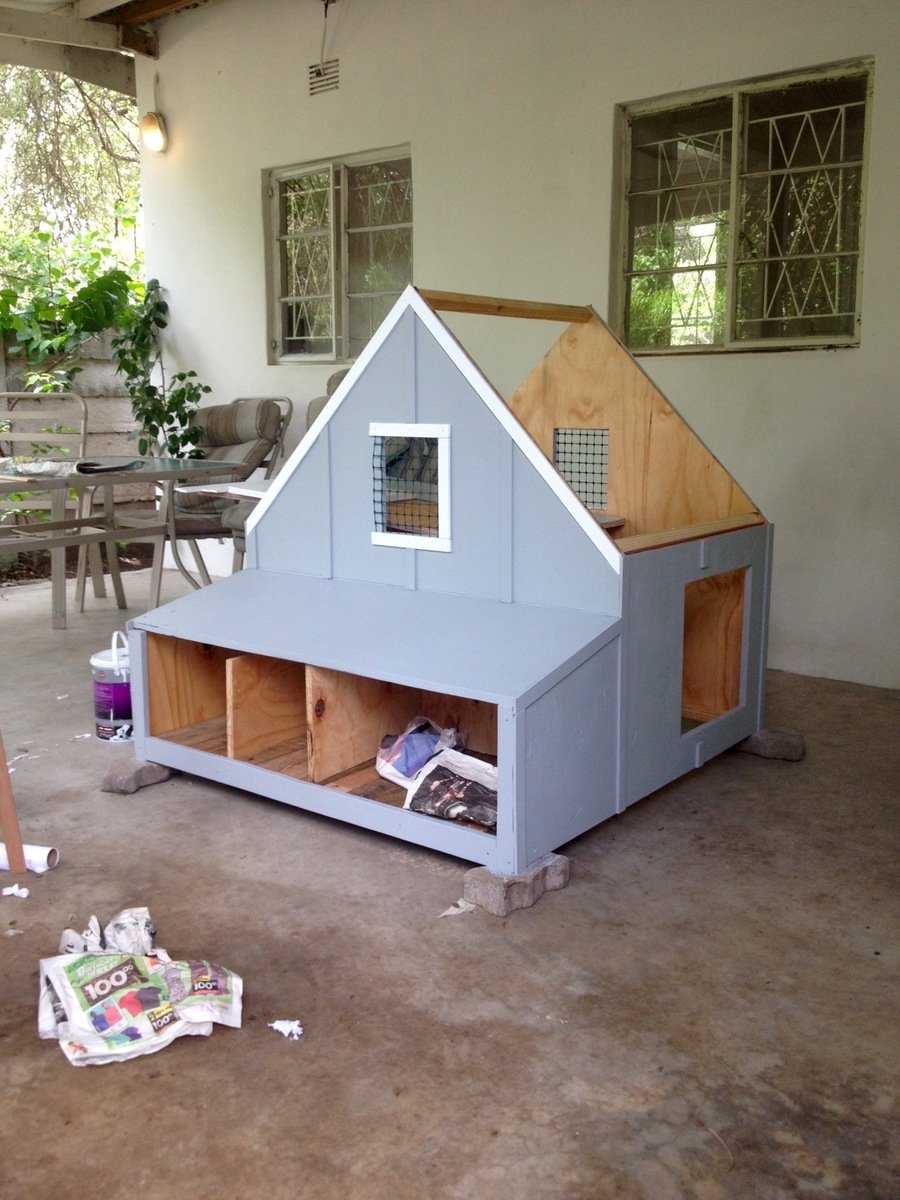
We live in a termite infested area and as such were nervous about putting wood in contact with the ground. We modified these plans to sit on top of a welded bar frame that is moveable and stands a meter high. The measurements are custom to our welded frame but the shape was based on these plans as was the construction process followed. We dont have a worry about predators so have used a design that doen not have a closed floor - our girls can simply fly or walk up the ladder to the roost and are able to leave the coop when ready in the morning without us opening doors. We are also in a warm environment thus an enclosed coop is not needed.
So far they are happy and are happily laying in the two egg boxes (We left the remaining space closed internally so that we can use it for storage) and as there is no bottom to the coop they poop straight into the run and onto the sand floor.
They are not free ranging yet as we are nervous of our dogs chasing them but once we are happy to let them free range we will use the gate built into the welded run.
Thank you Ana and lady goats for this design - I spent hours (and hours) researching and reading and looking at coop designs before deciding that this cute number was the one we wanted.
From me and my happy hens, thanks again!
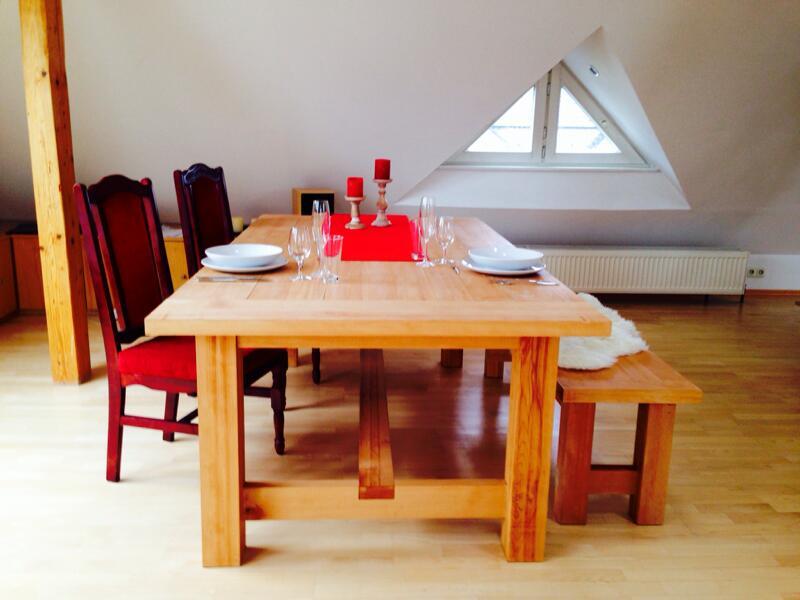
When I first saw the original plan on ana-white.com, I knew that this table and the bench would fit perfectly into my place. Since in europe we measure mostly in meters, I adapted the plan to a table top of 1,0 x 2,10 meters (or for 8 persons) and made the bench fit between the table legs. Luckily, a friend (he is a carpenter) could get me solid beech wood and helped me to get it into the right size (it took a weekend, since we started from raw tree trunks). Assembly was done in two days and I stained it twice afterwards (3 days, with rest ;) ).
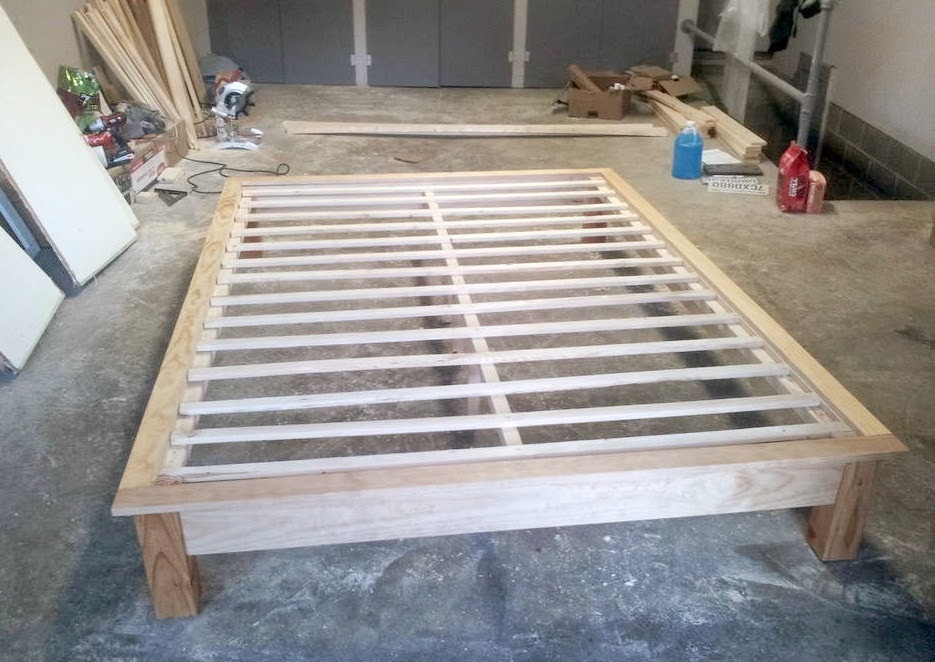
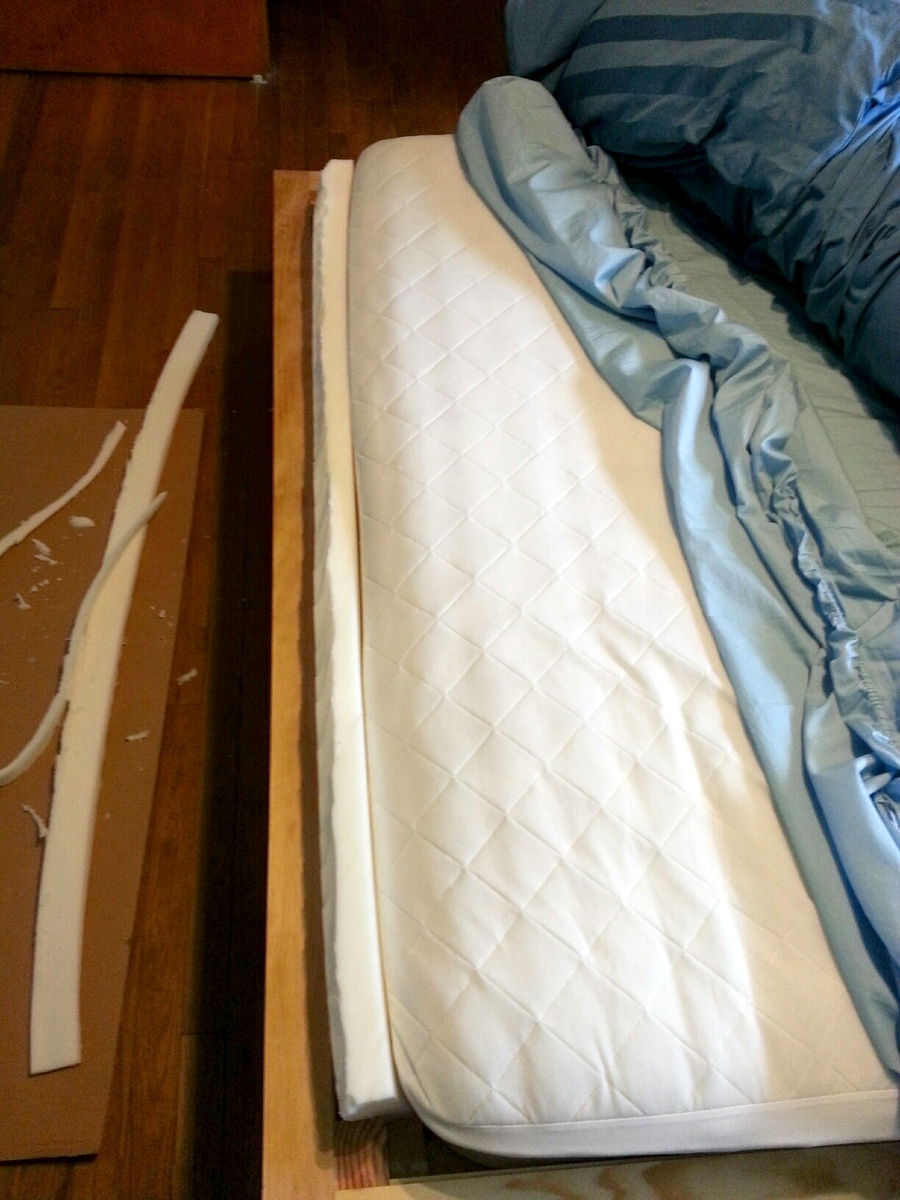
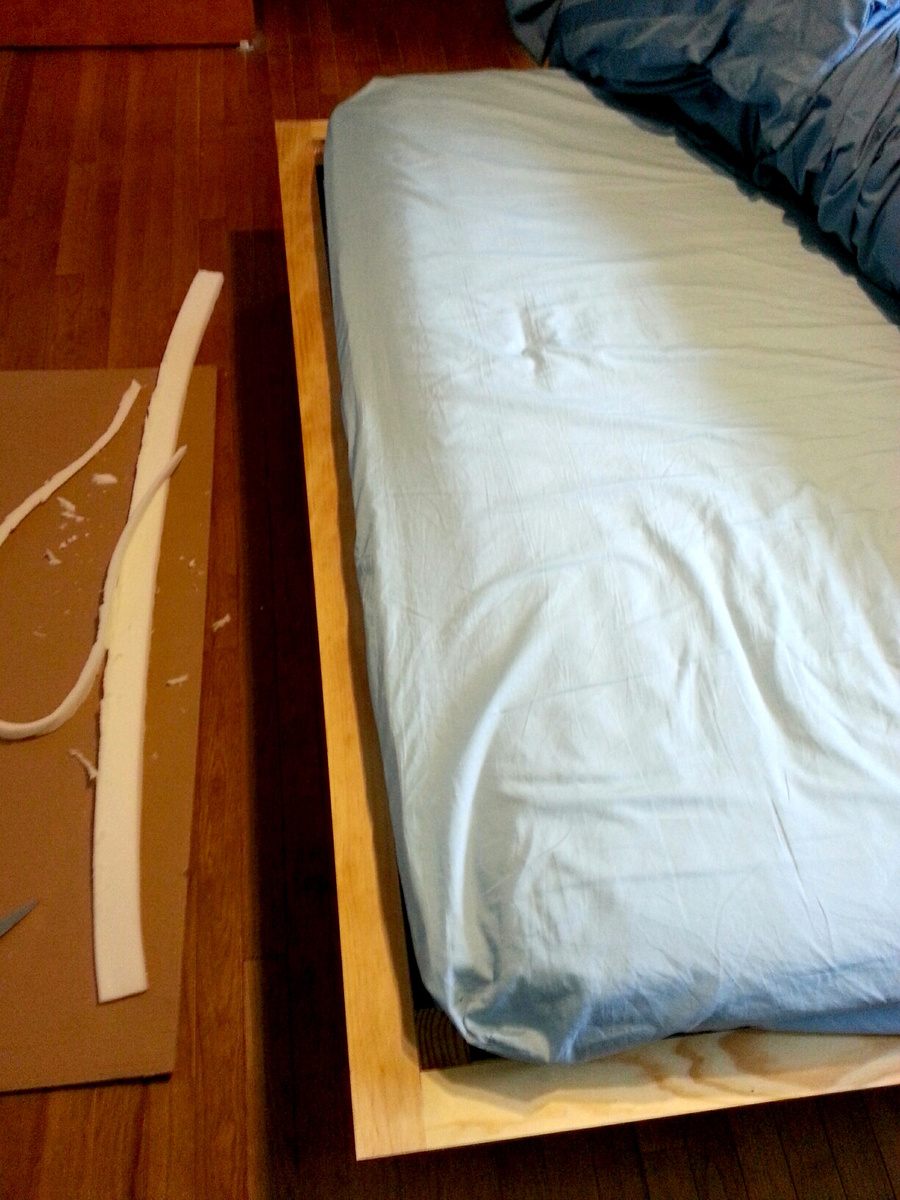
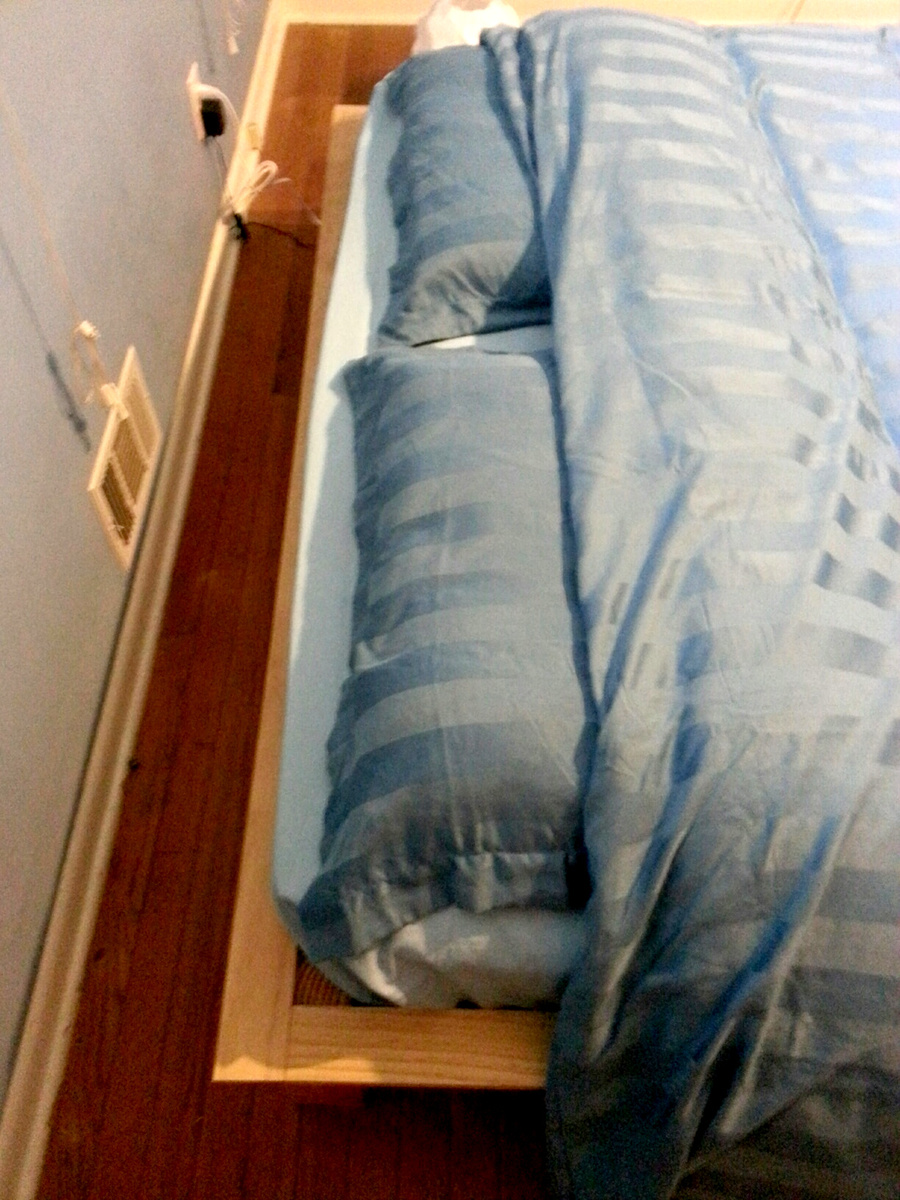
My hubby is 6'5'' tall. Since most matresses are 80 inches long, he mostly ends up with his feet hanging out of the bed (since you don't lay your head down at the very beginning of the mattress, right?). So I tried to solve this problem by making the bed 4'' longer than the plans suggested. I added 2'' of foam on each end of the bed, so now its 84'' long and my hubby fits perfectly!
Thanks for the great plans, I had a blast building my own bed!
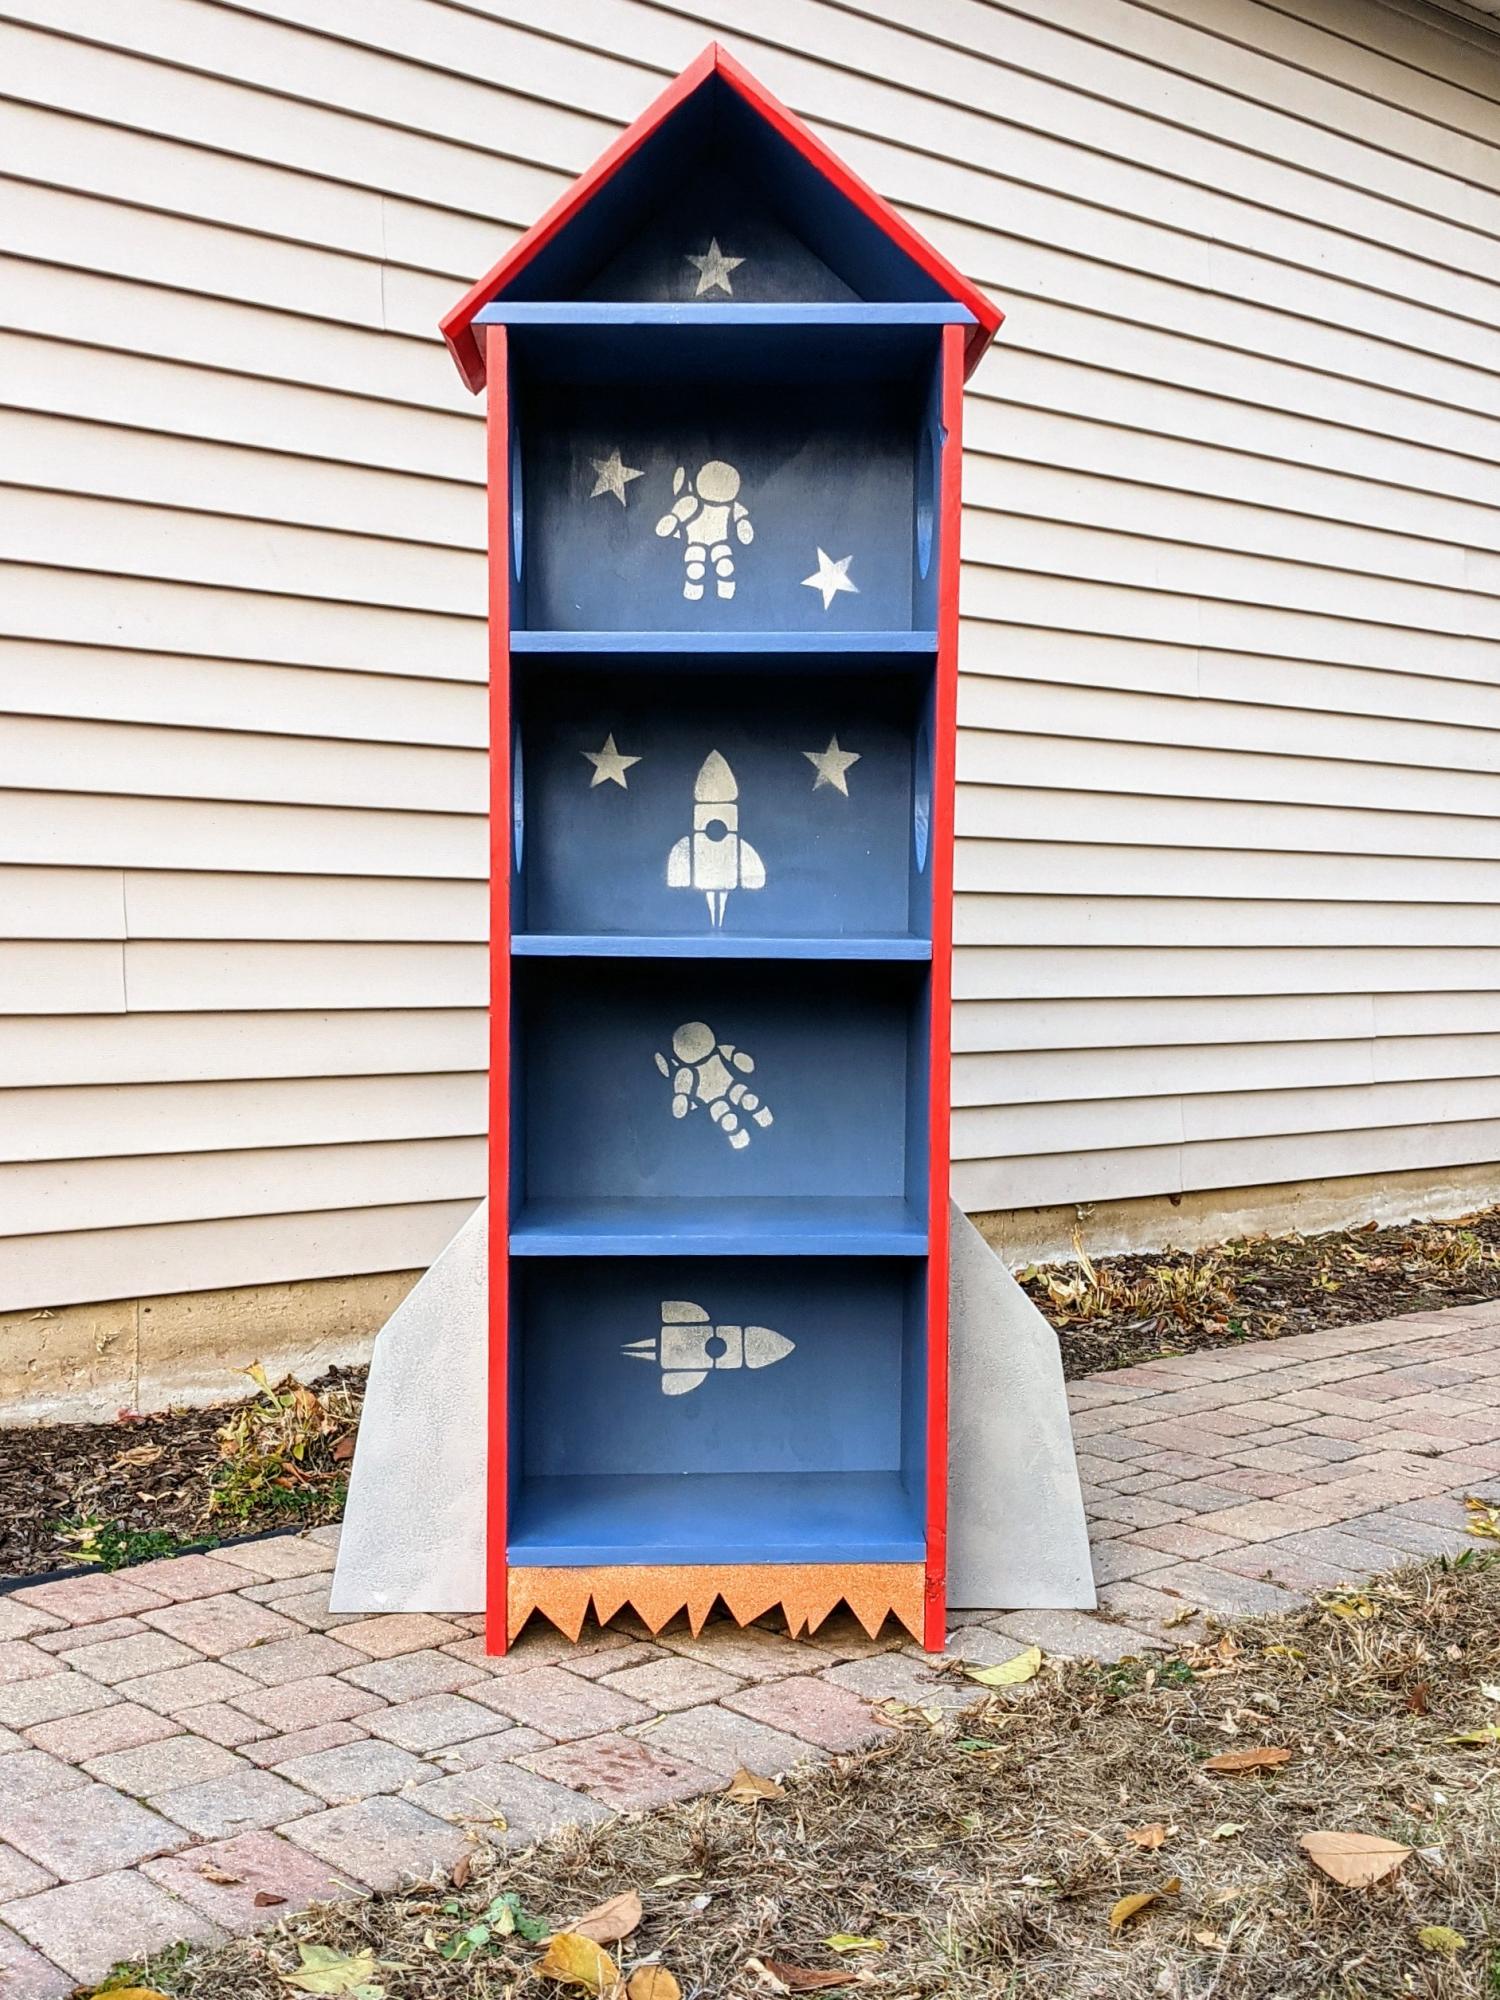
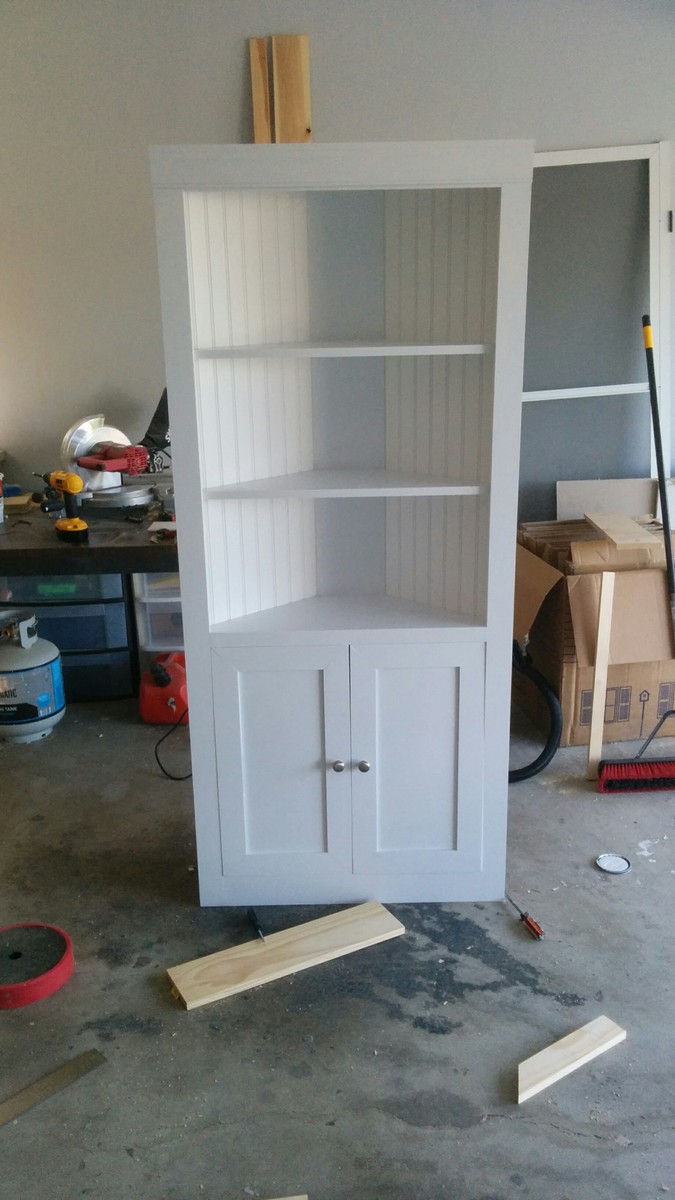
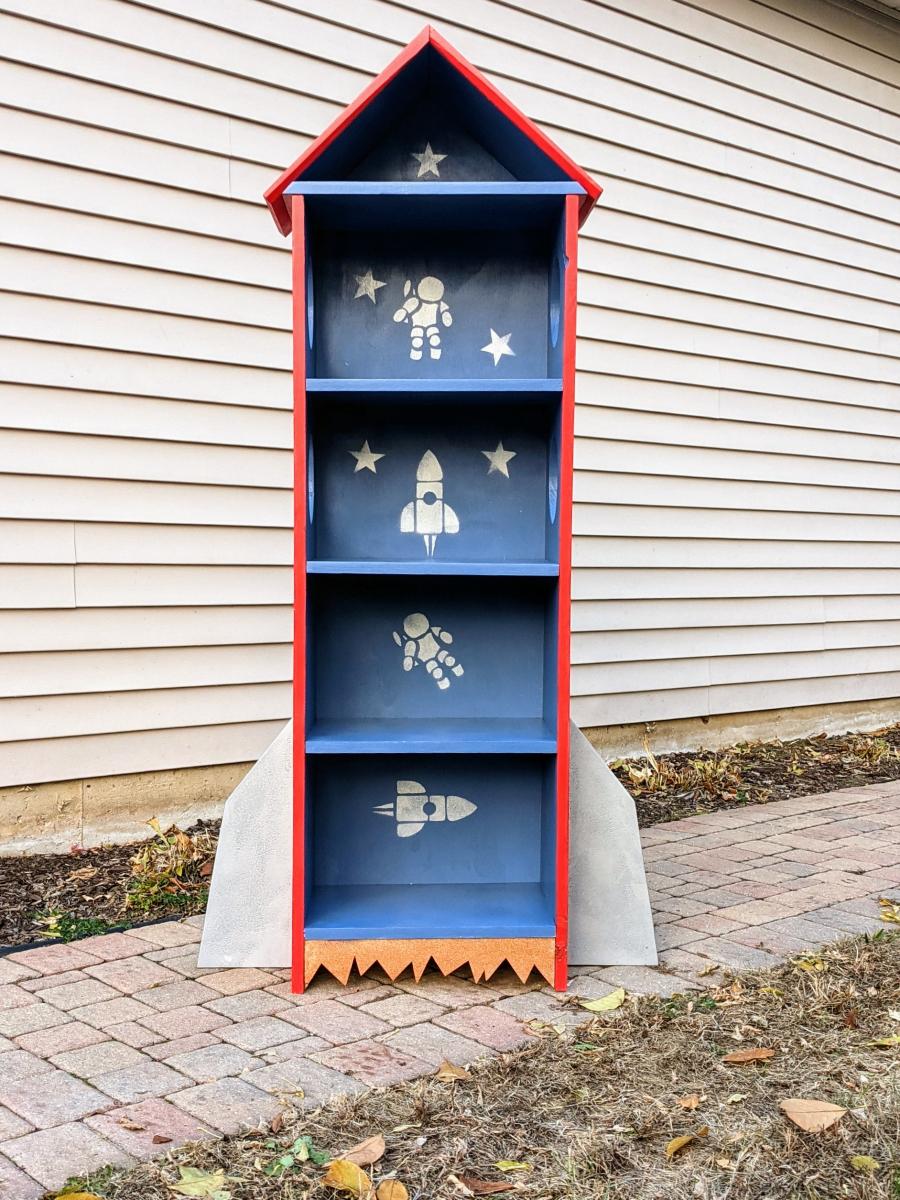
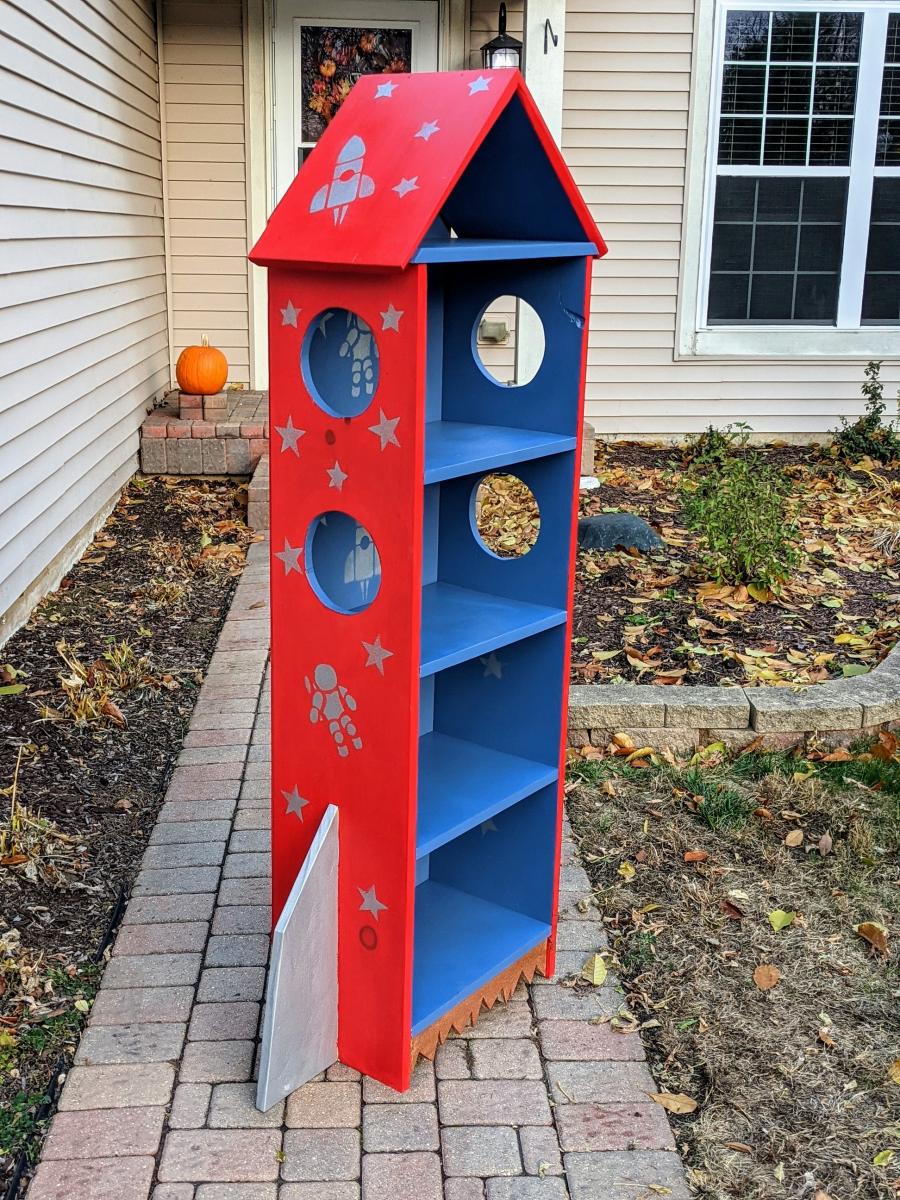
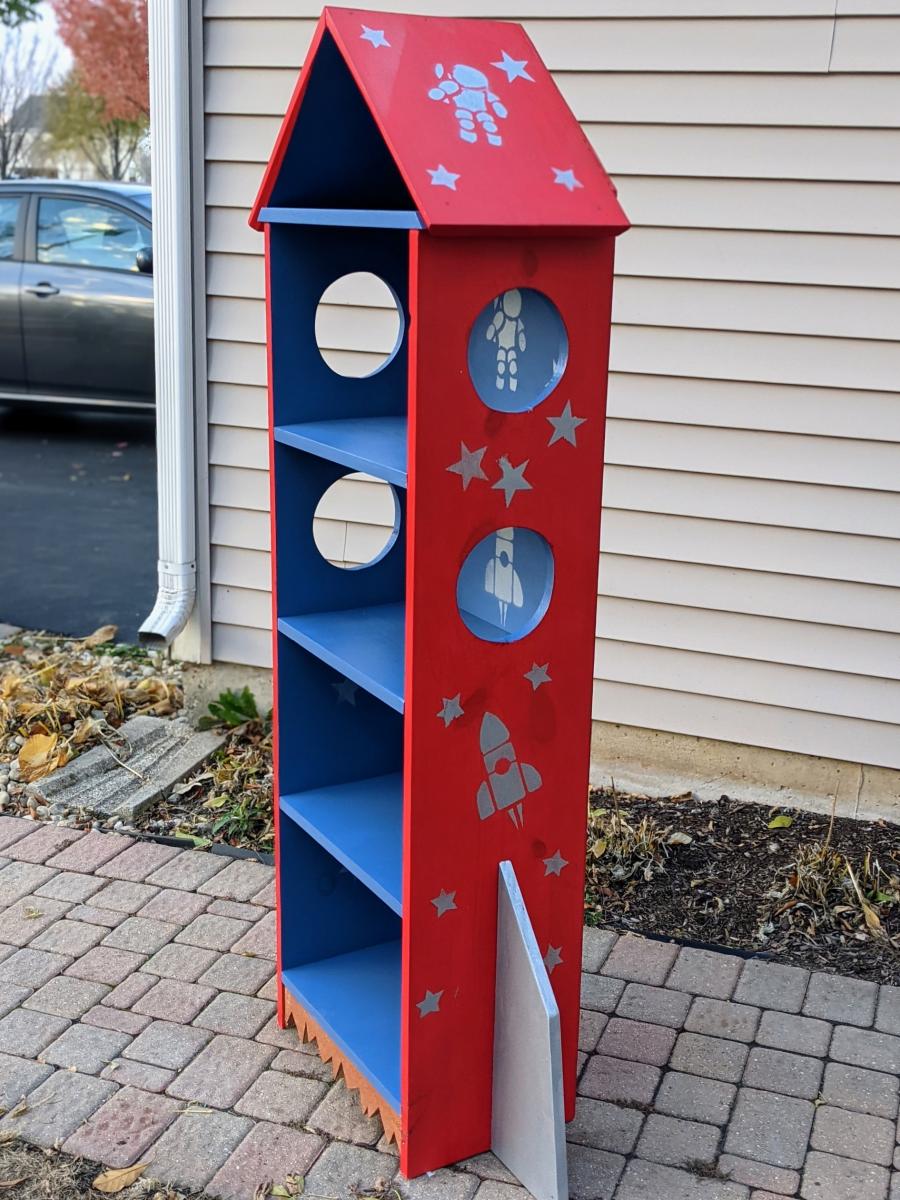
Pretty much followed the steps as outlined in the rocket bookcase plans. Googled astronaut and spaceship stencils and free hand drew those on construction paper. This bookcase is heading to my 3 year old son's room and he's pretty excited to fill it with toys and books.
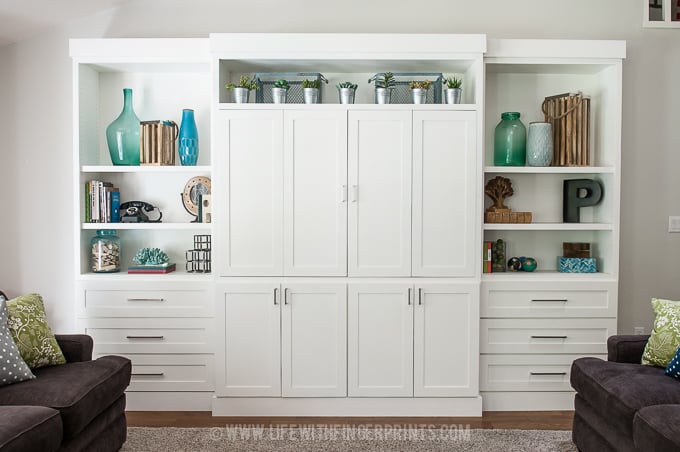
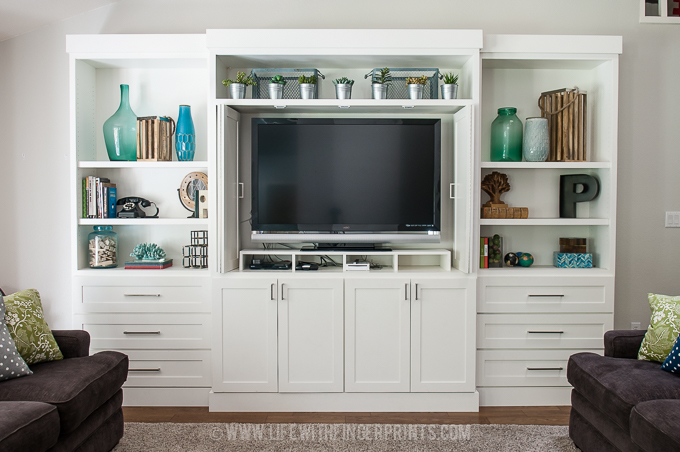
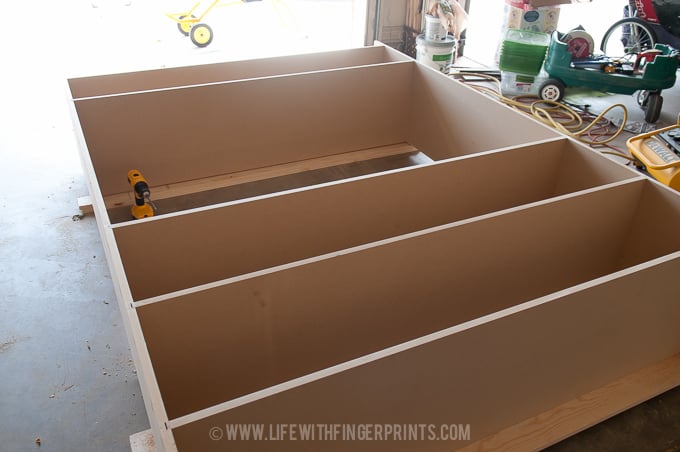
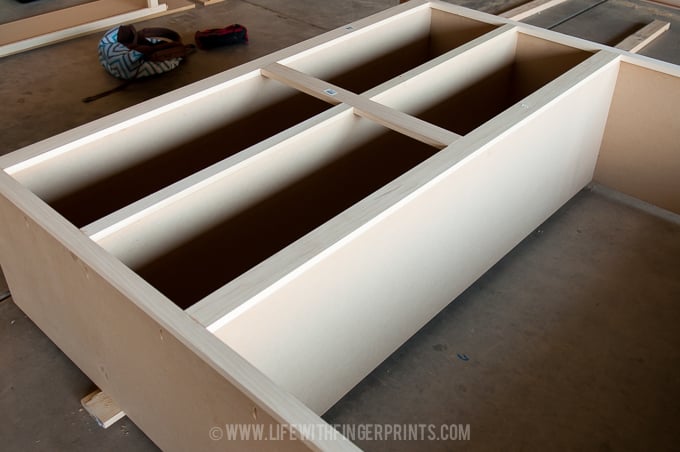
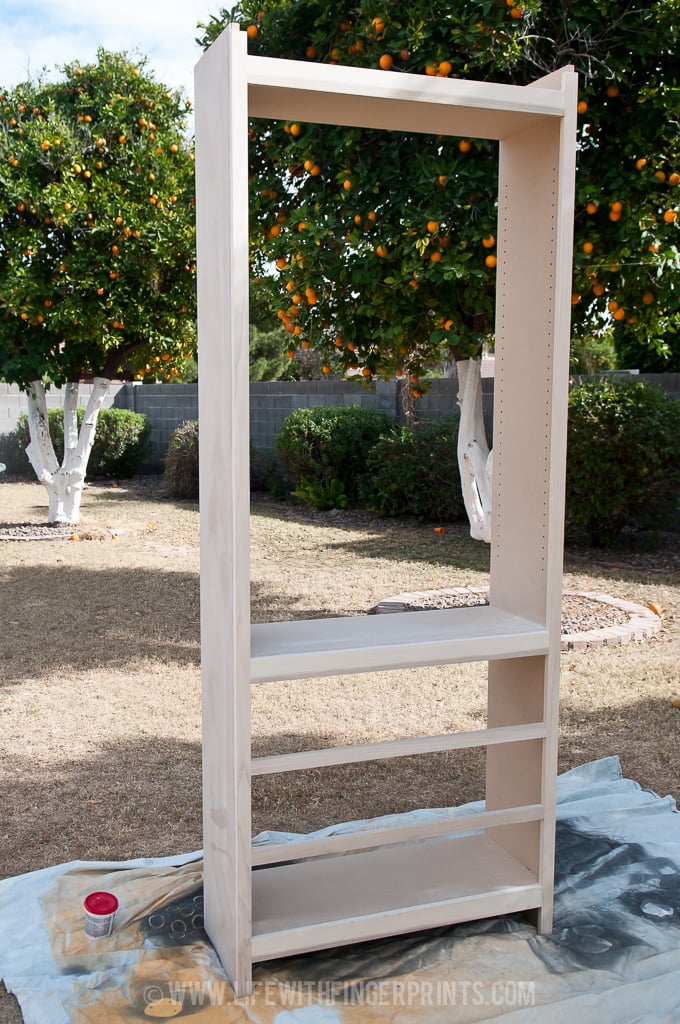
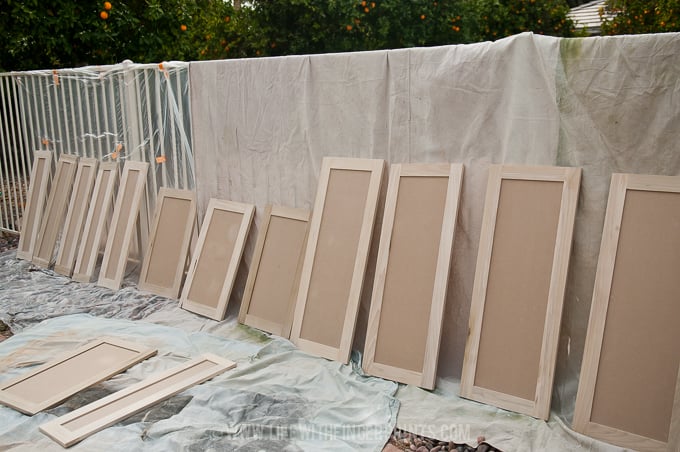
Get behind the scenes on this entire project broken down step by step on my blog; http://www.lifewithfingerprints.com/2014/10/the-entertainment-center.html
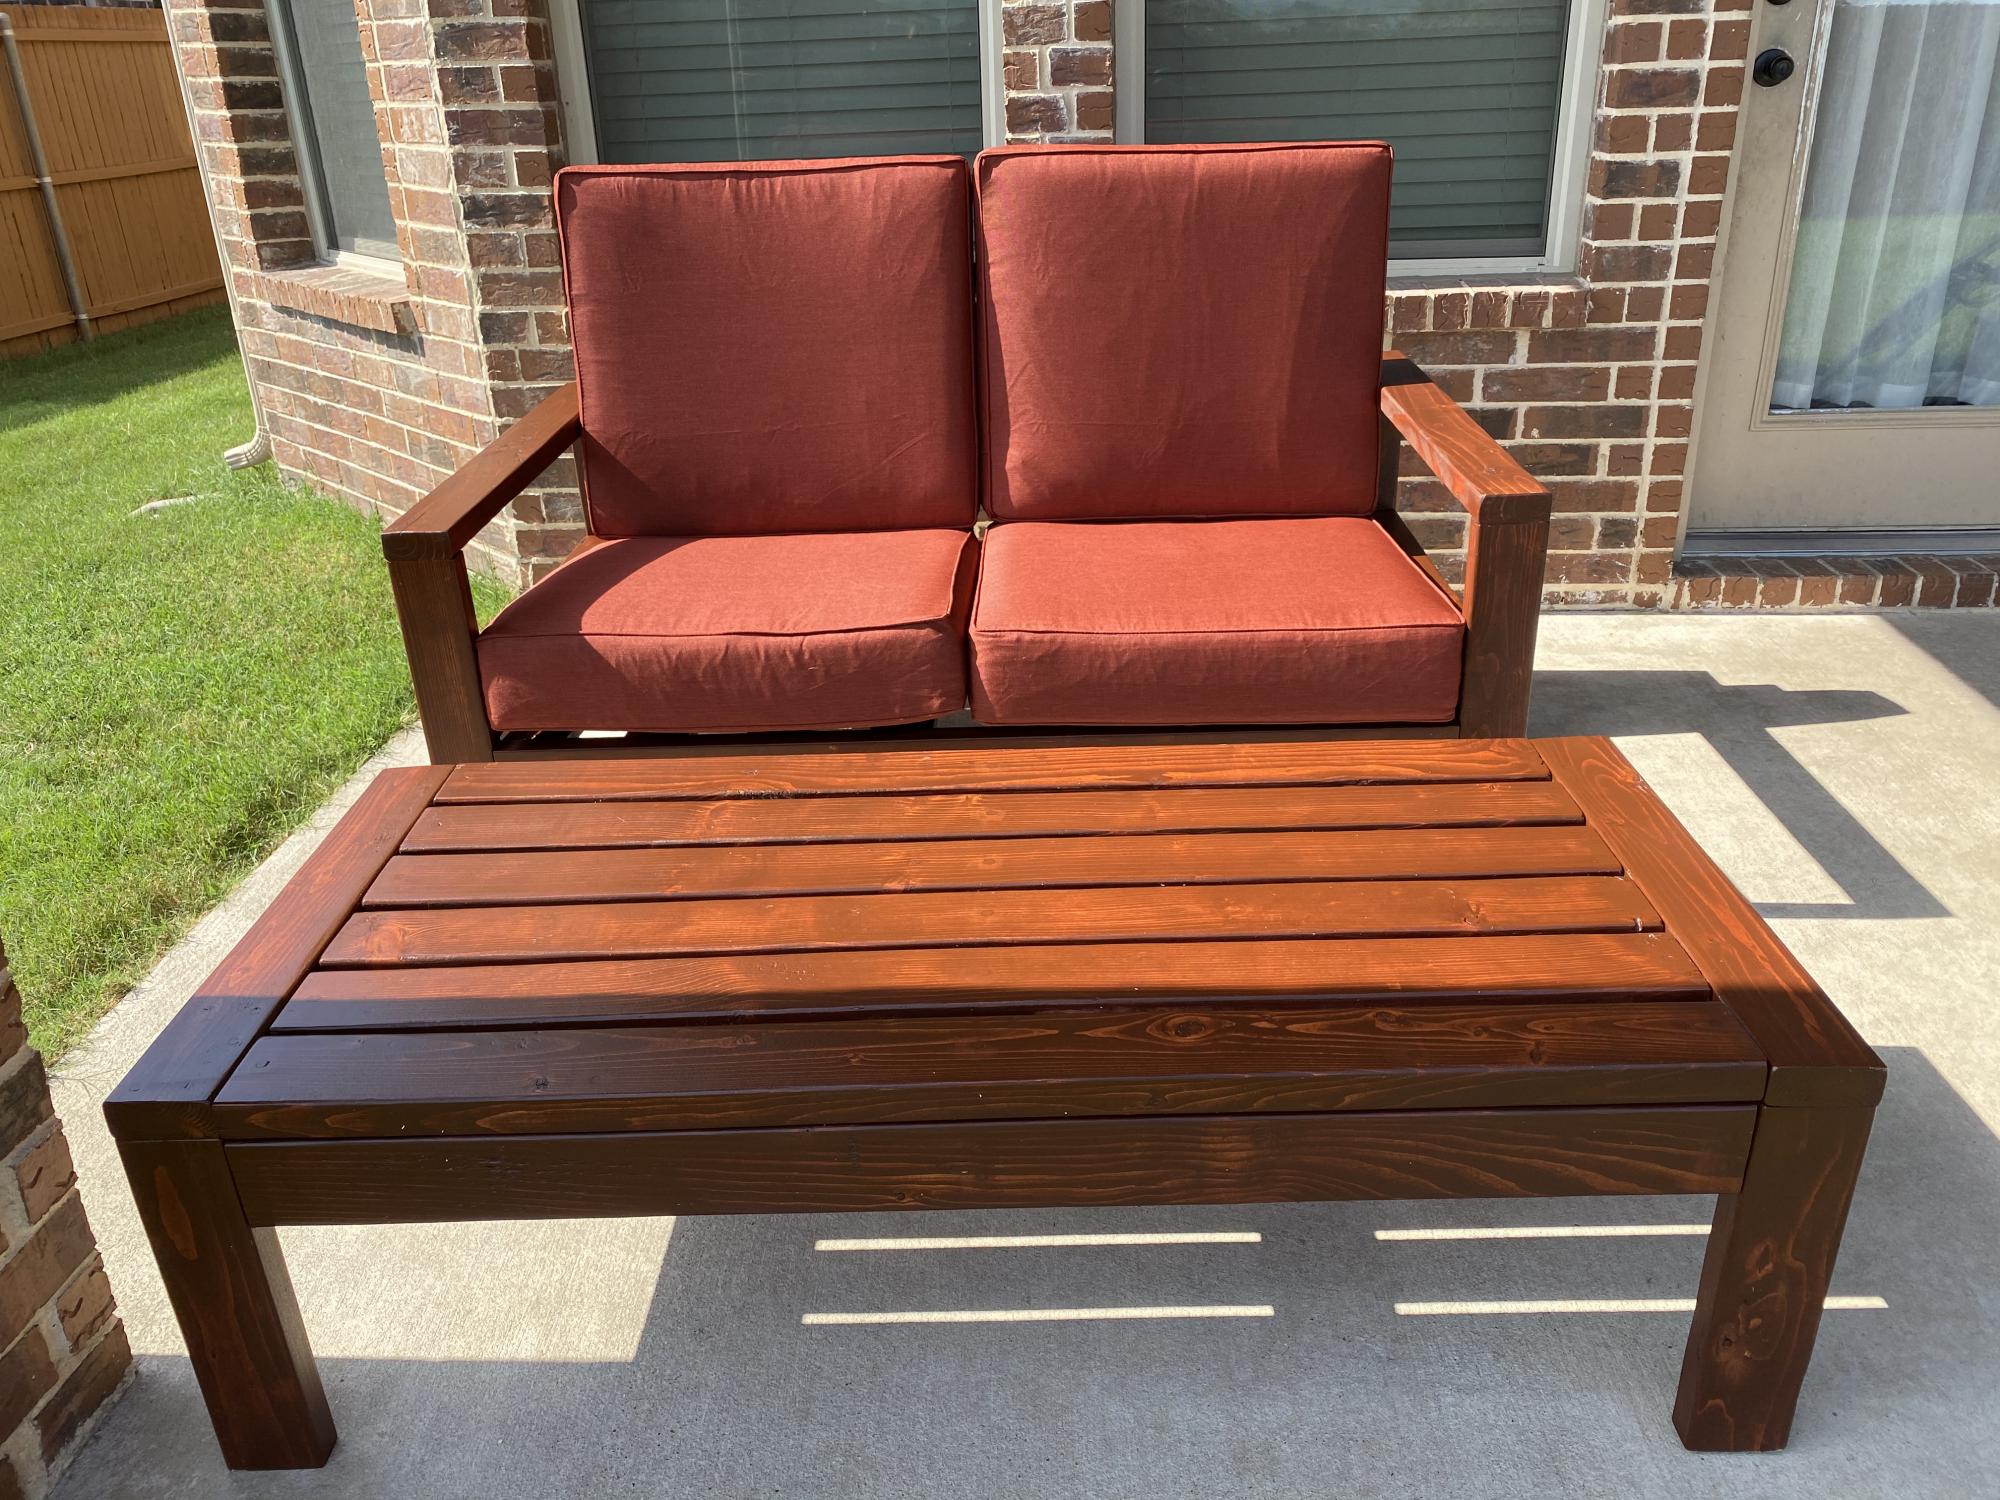
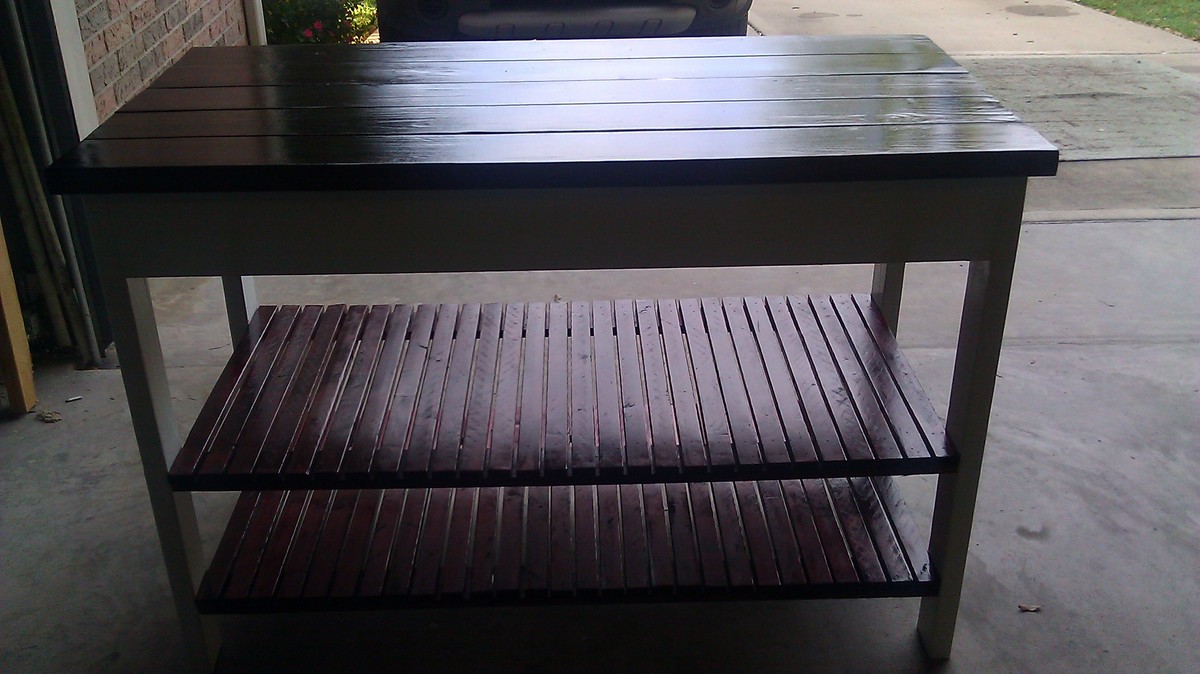
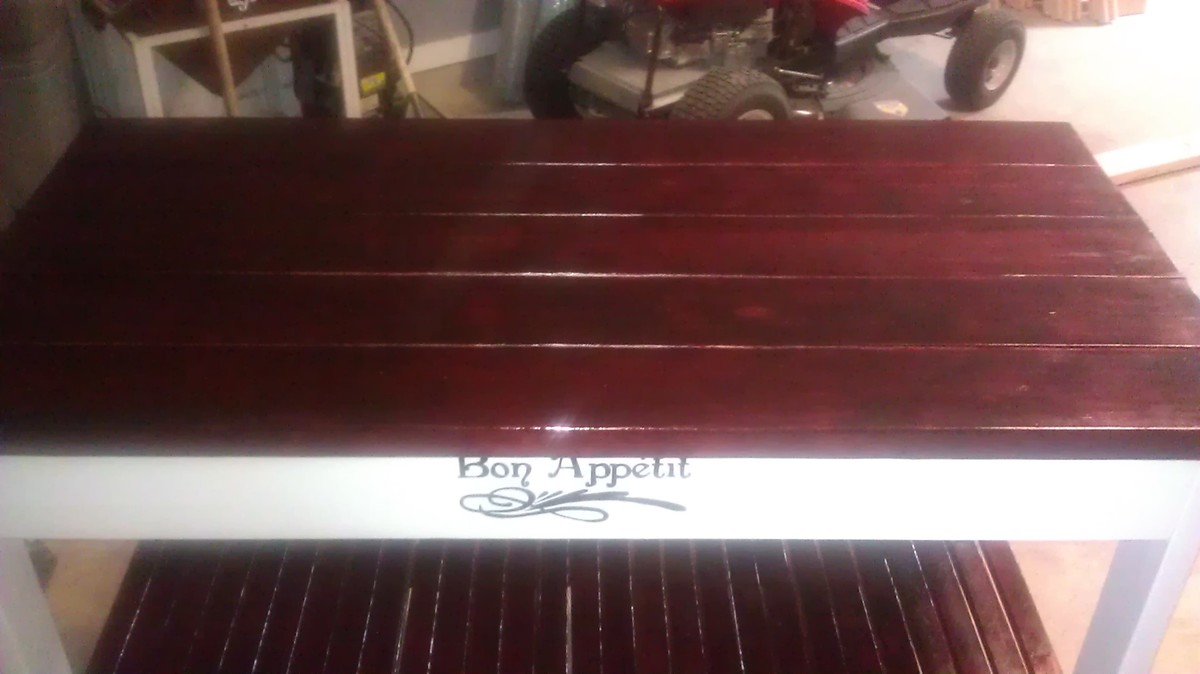
Tired of cheap store bought chair getting blown around in the Texas winds. If these piece get blown off the patio I’ll be looking for the Wizard of Oz.
This was my first project that I've built and I feel really great about how it turned out!


Thu, 01/24/2013 - 14:25
Great job! Your bookshelf looks solid and the color is crisp against the darker wall. Love the frames too!
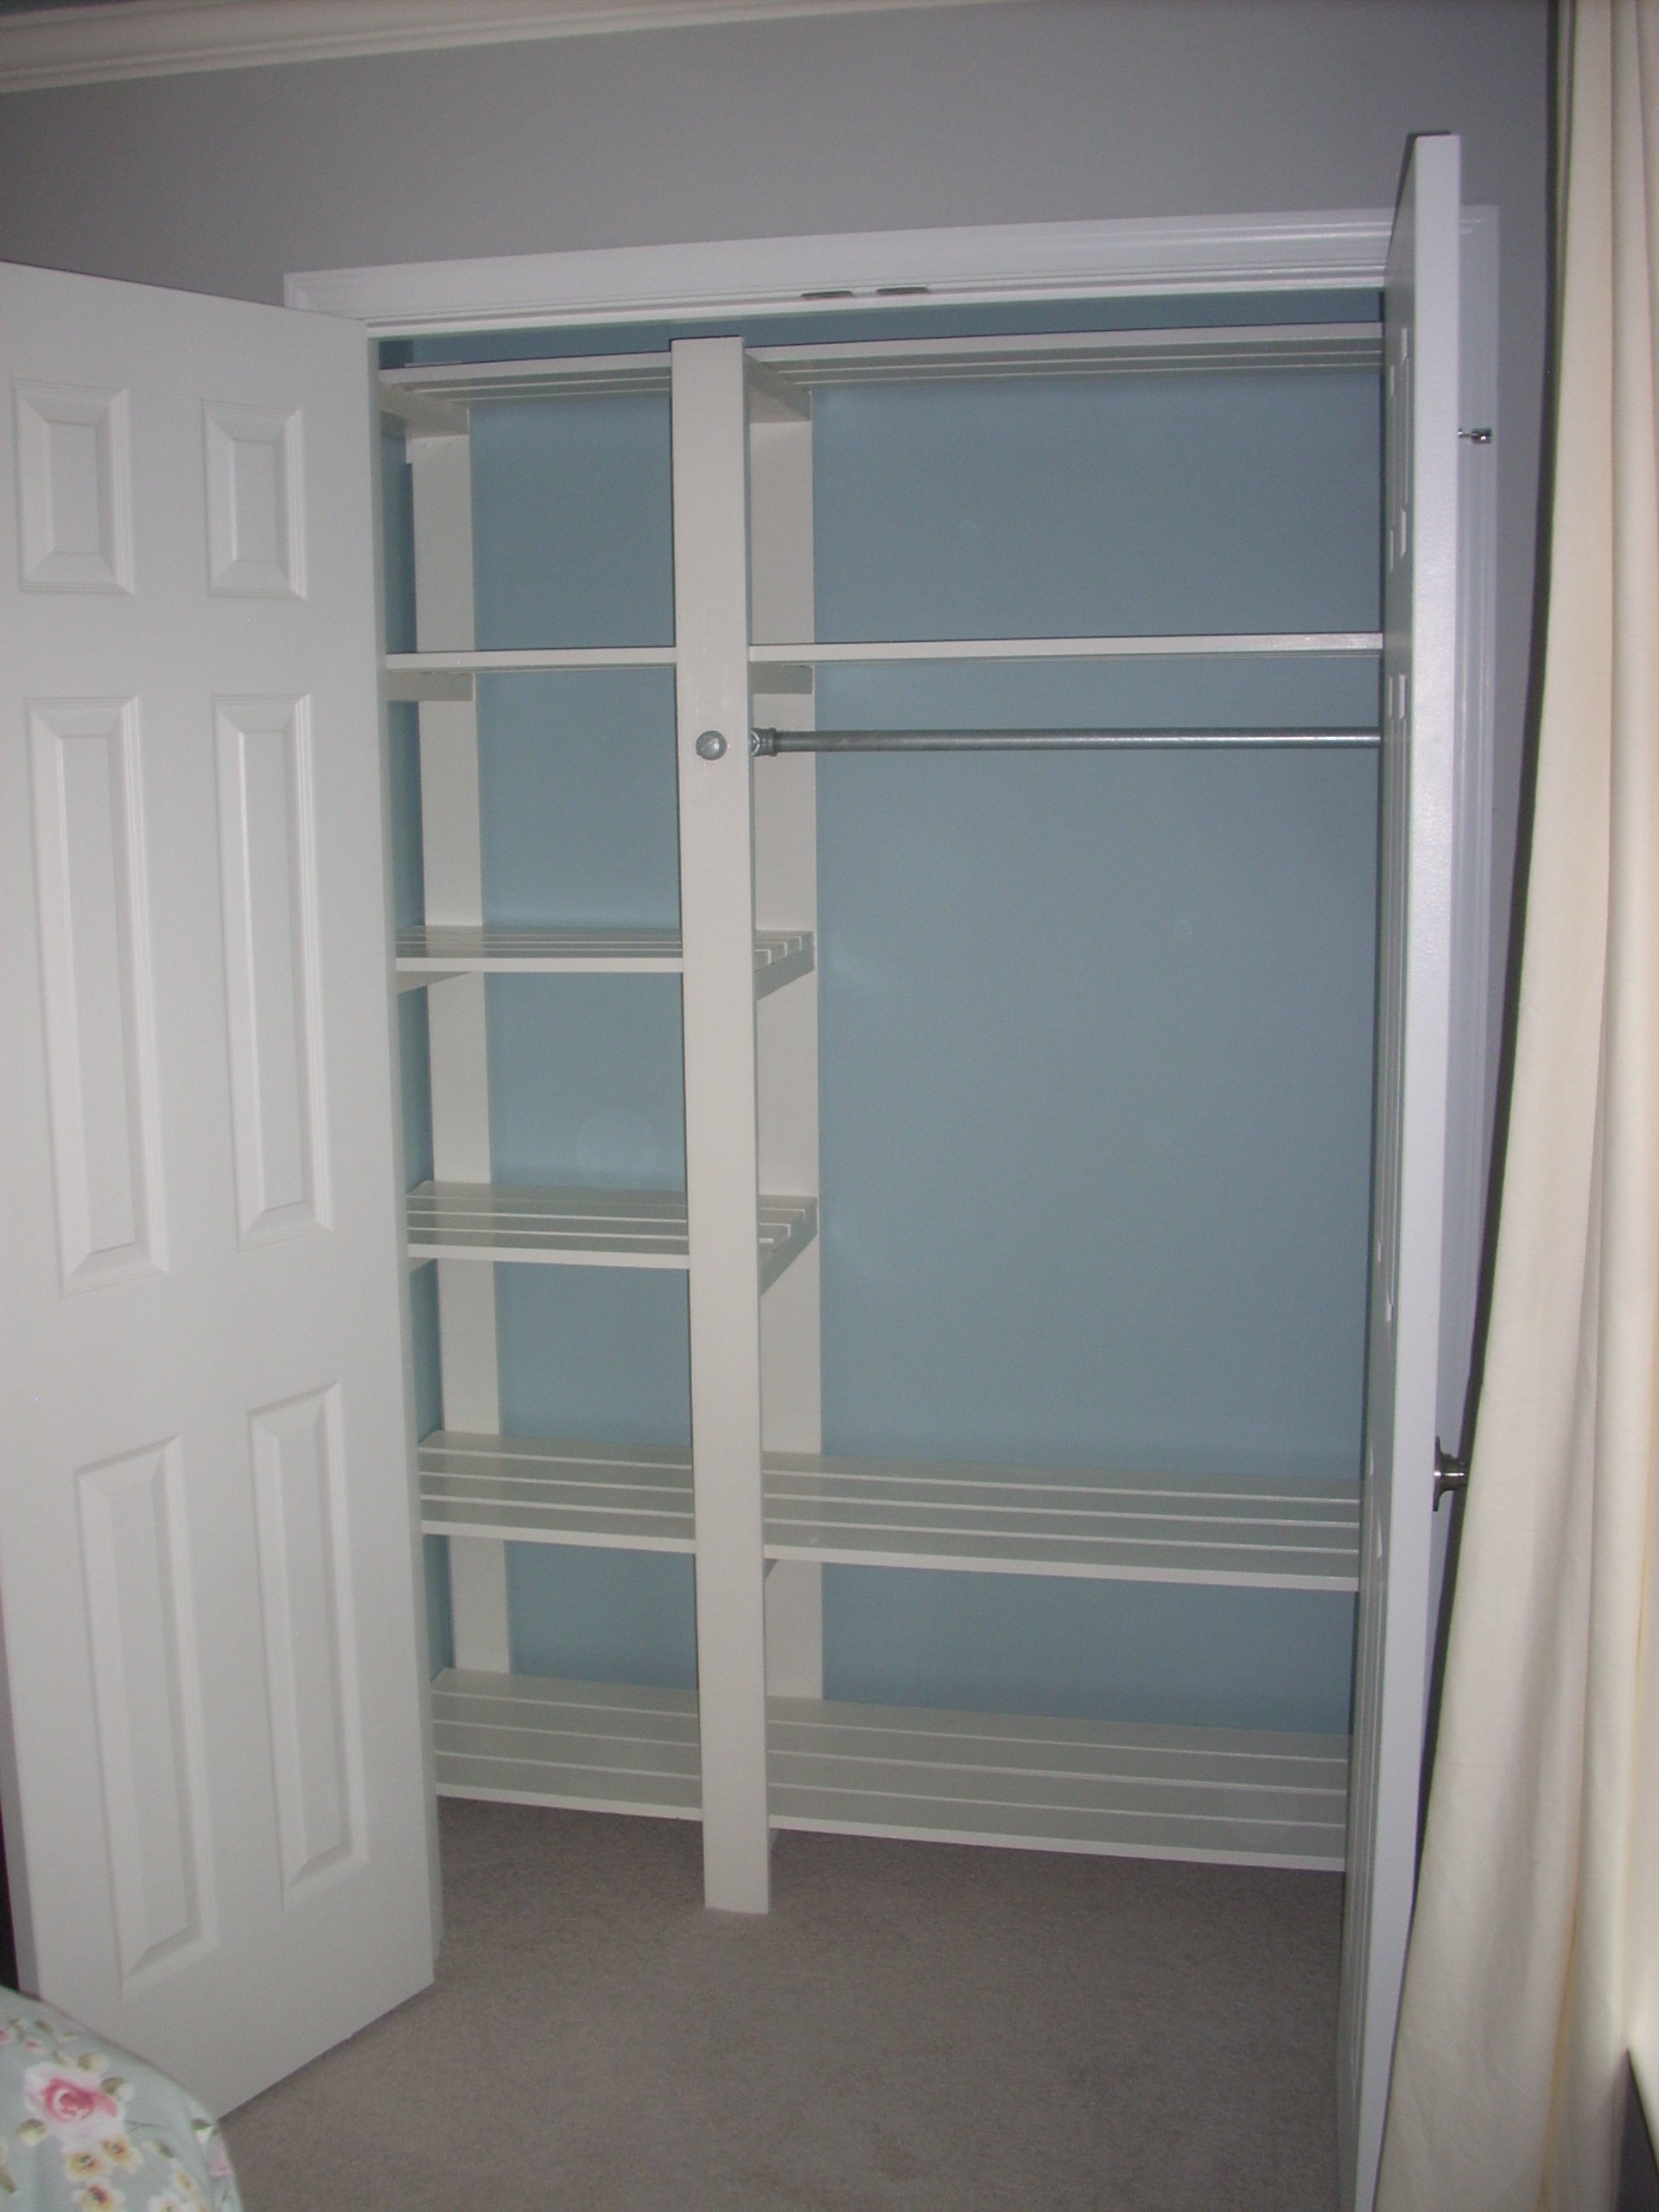
Modified width to fit the closet. Prep work of sanding and painting took longer than we thought it would; assembly inside the closet was simple but definitely a challenge in the small space. At 81", the top shelf was higher than intended so had to remove front slat in order to be able to use it - will make the next one slightly shorter. But love the final product and am now on a mission to get all the cheap wire shelving out of the house!
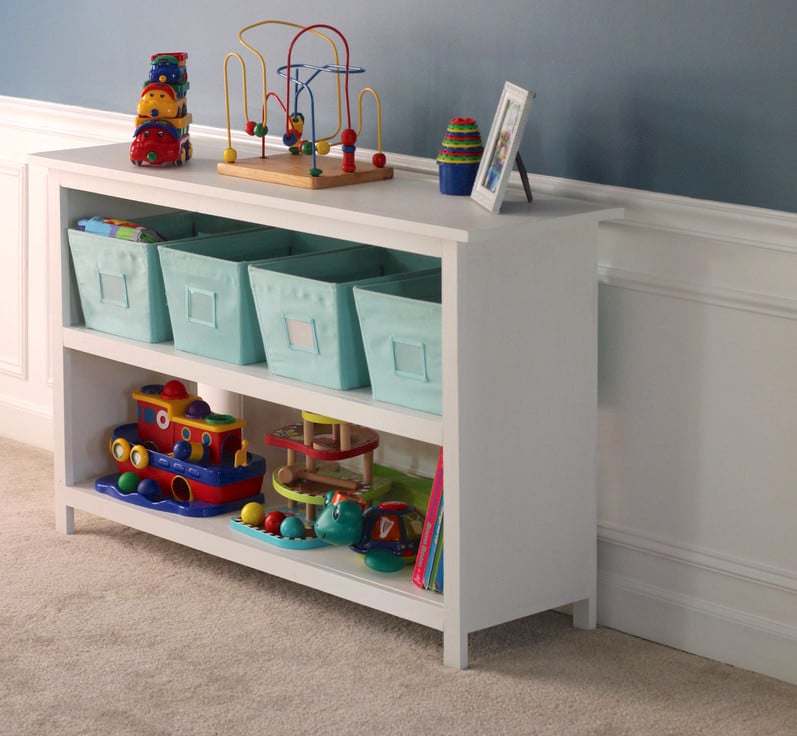
This is the first project I have ever built. It was super satisfying to make.

Mon, 12/14/2020 - 09:53
Awesome space, thank you for sharing your first project, love the finish!
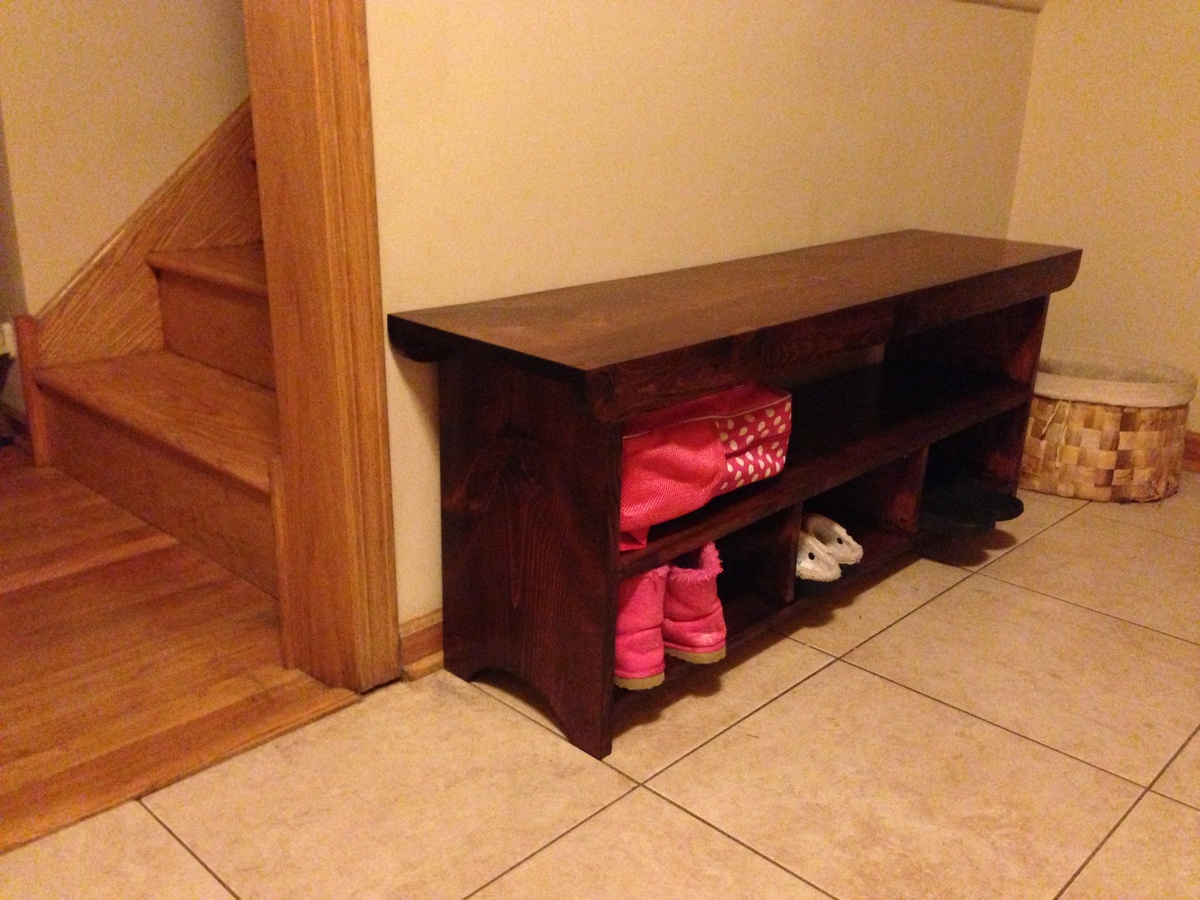
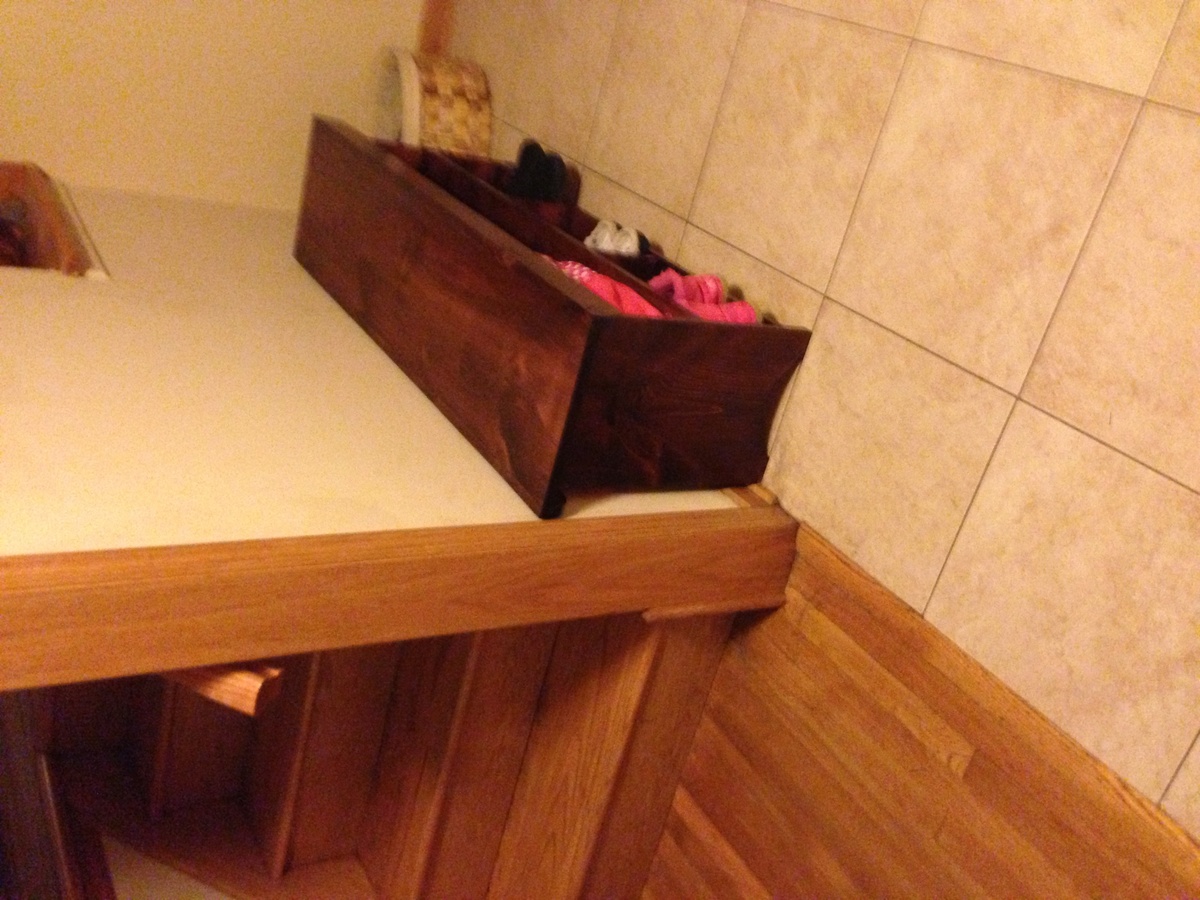
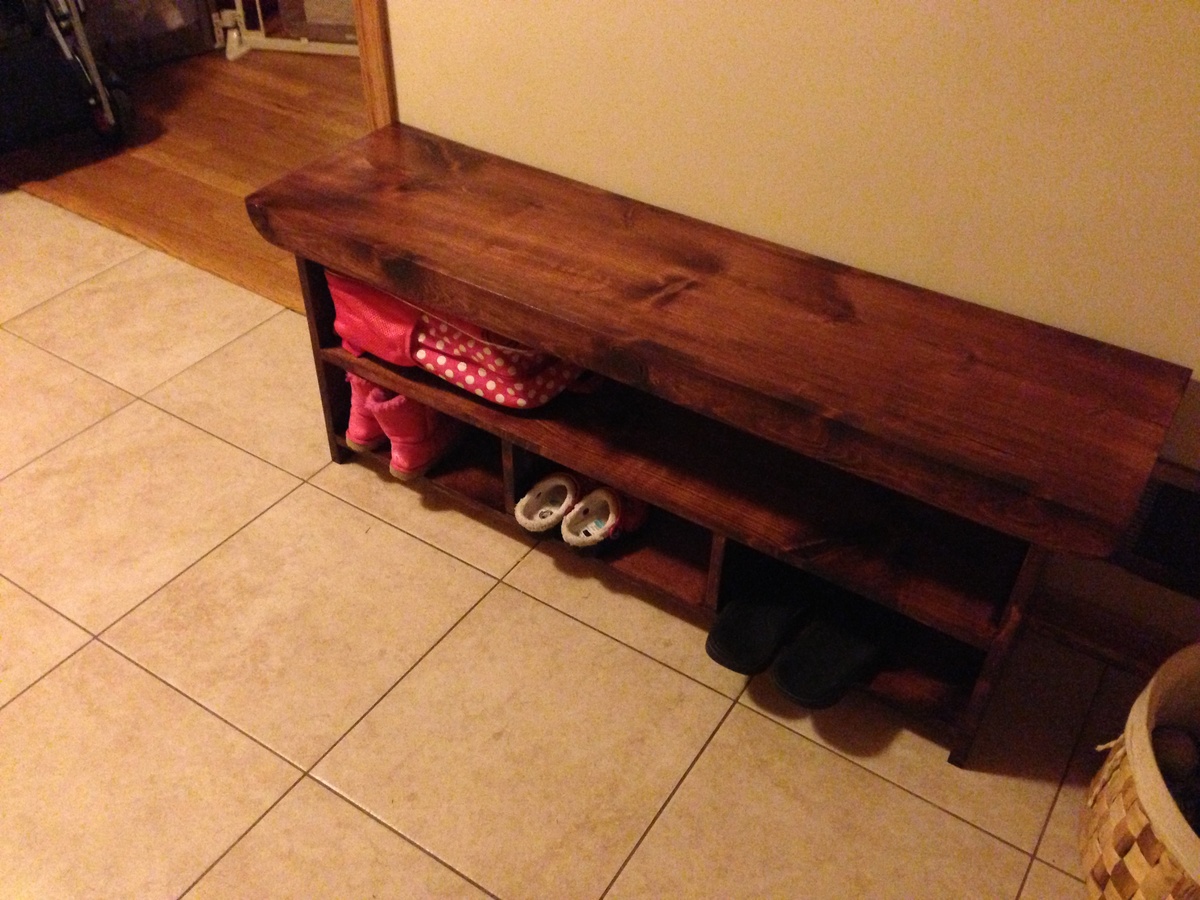
We needed a bench to hold shoes and bags on the foyer, and this plan fit the bill. I stretched the bench one foot so 3 kids could sit on it and to add one more cubby. I used pocket holes everywhere I could, so I had to modify the assembly order. We're excited to start using our new bench!

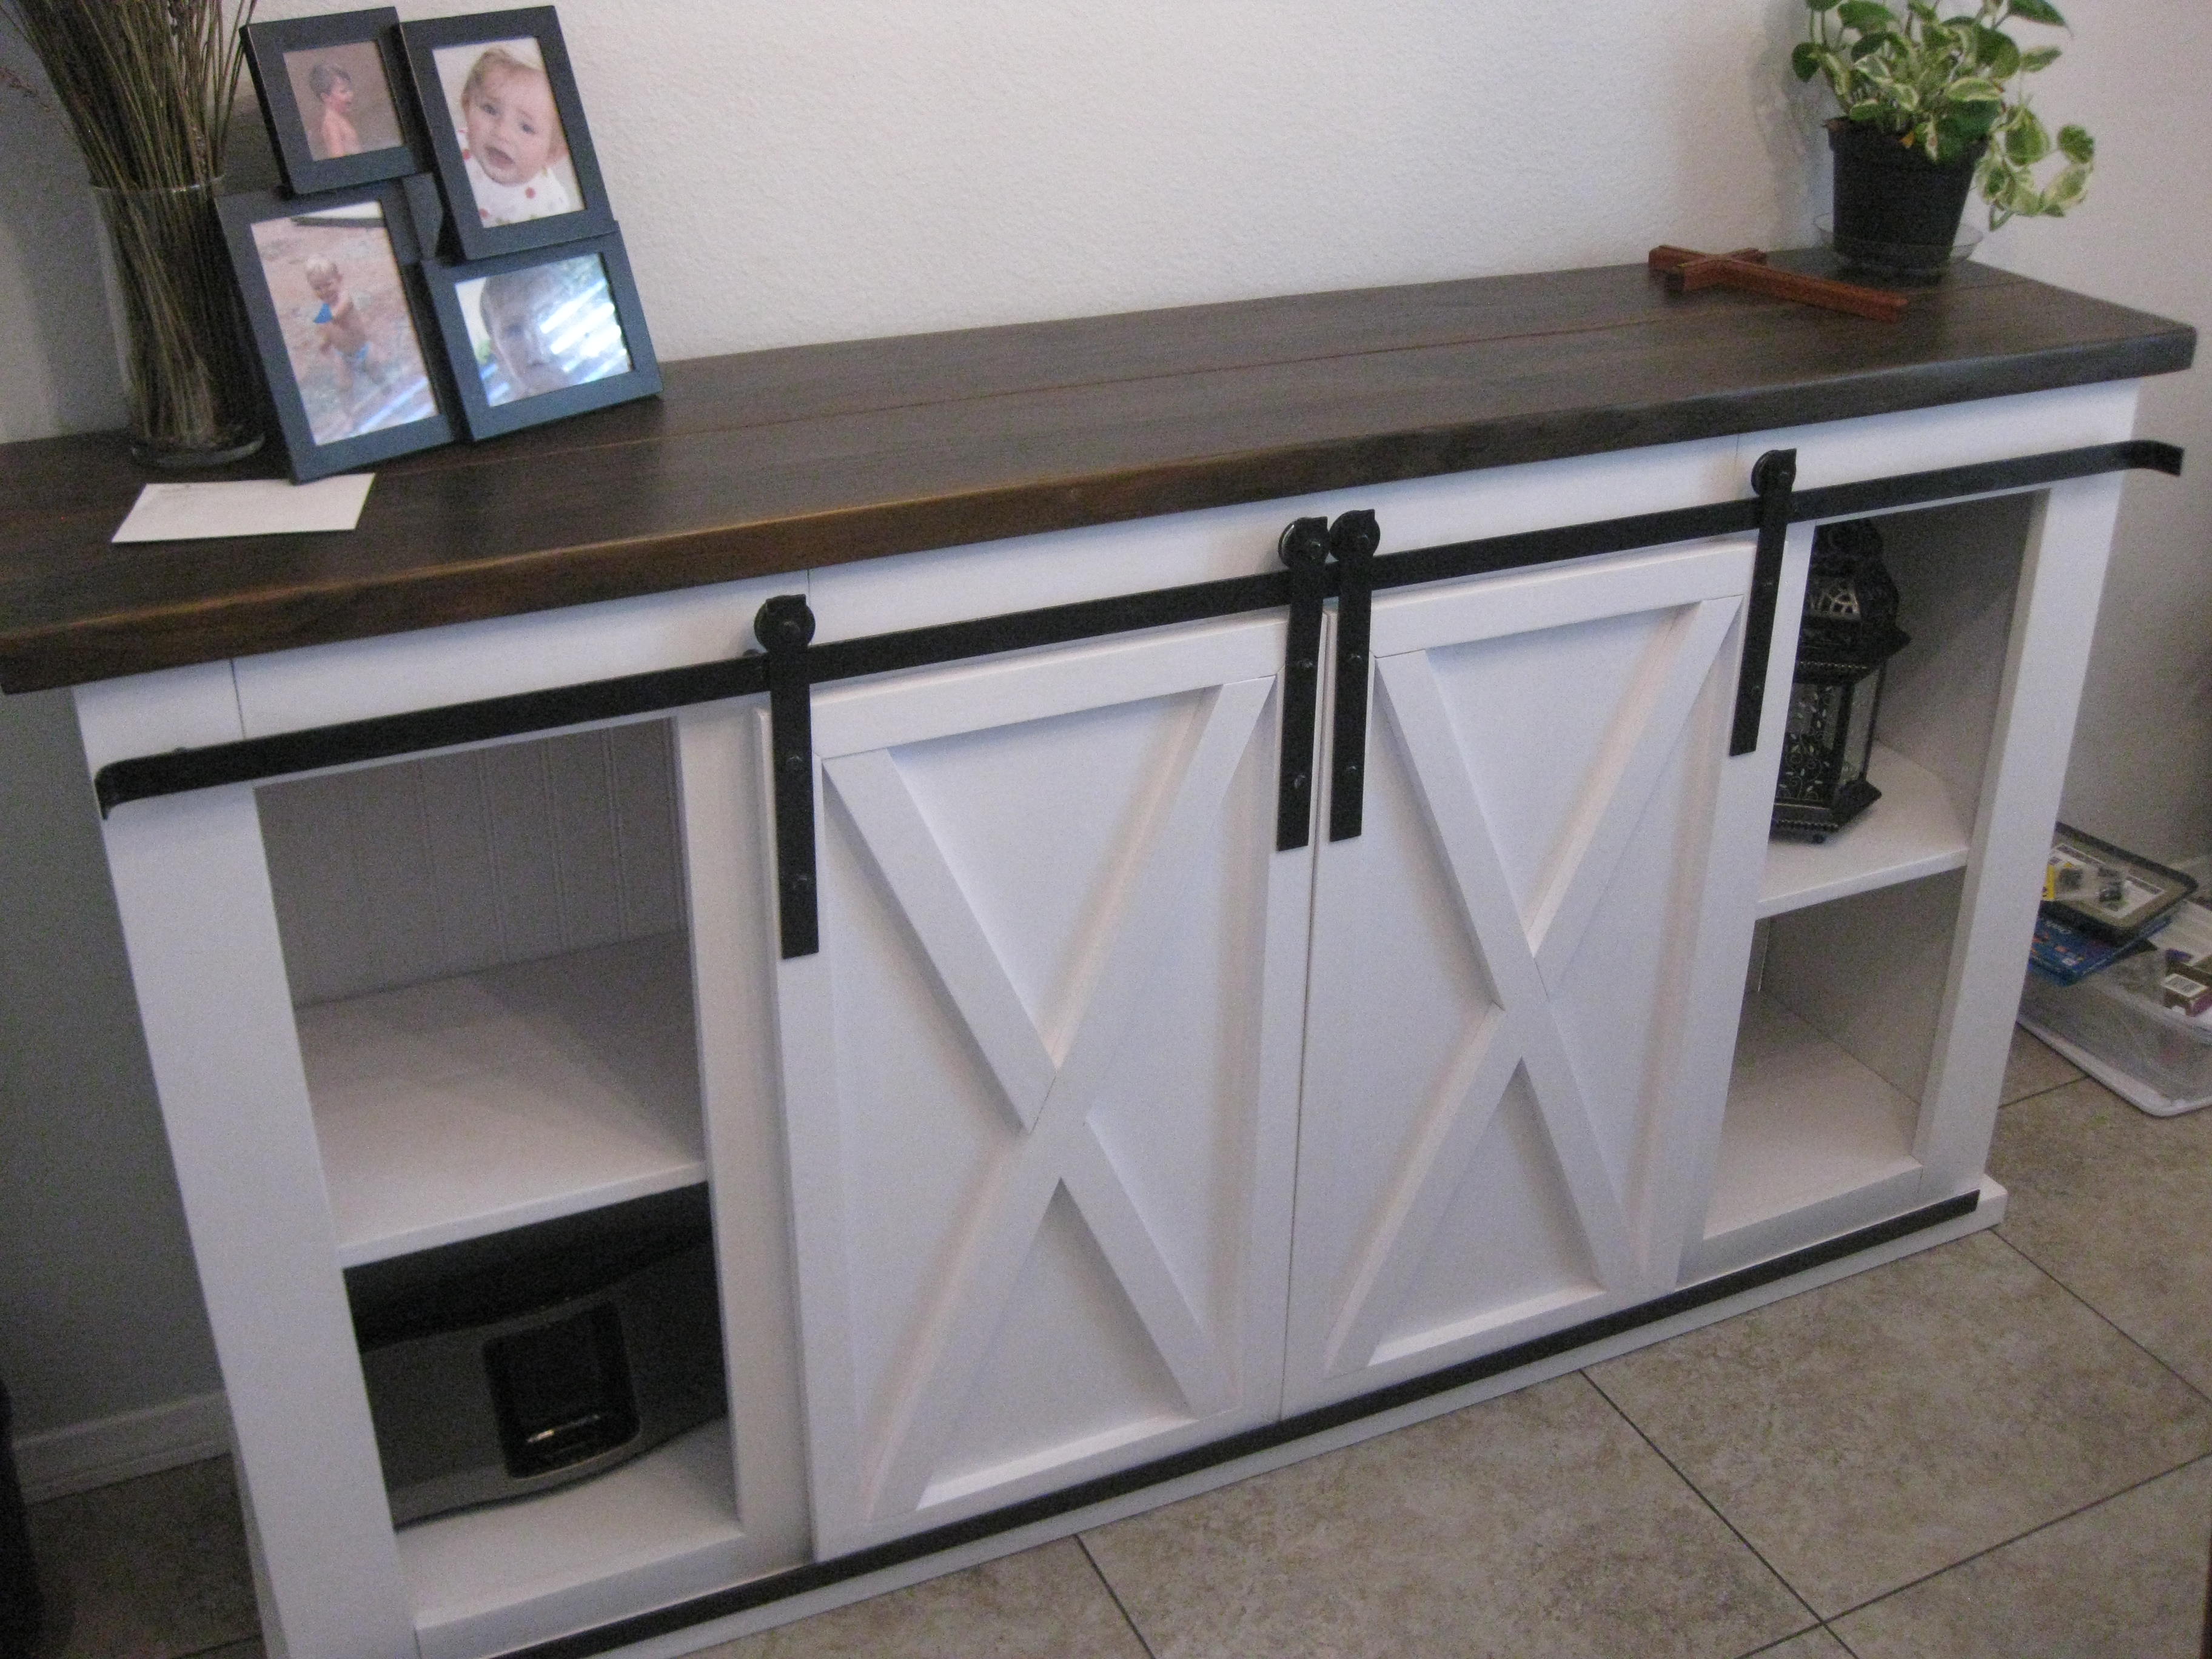
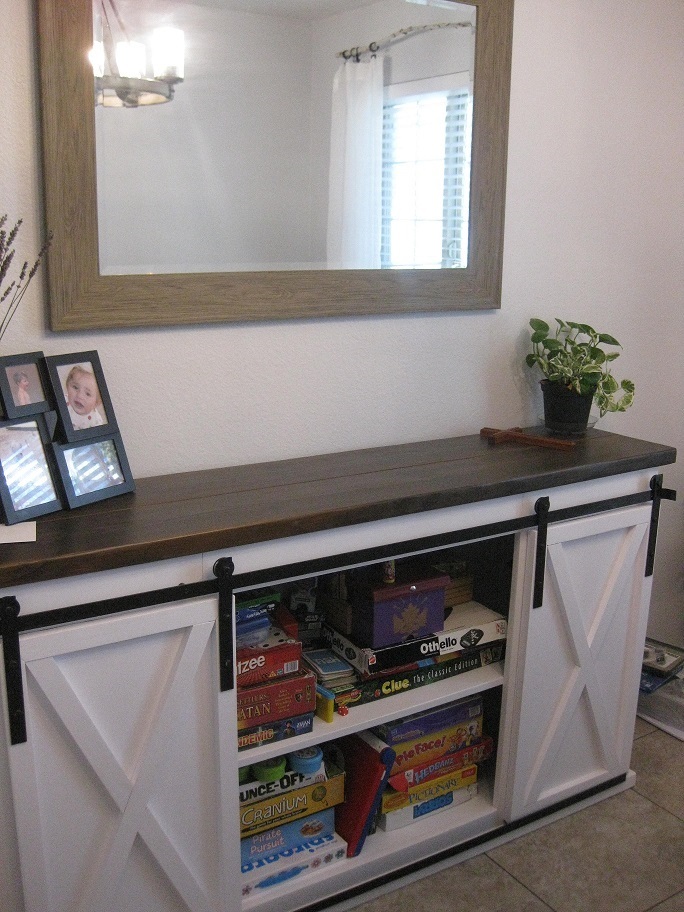
We have very little storage in our house and wanted someplace to store board games. This works great in the dining room. I made the hardware using patio door rollers and used my jigsaw to cut steel and aluminum bars to fit. I hammered the ends of the track in a curve and put a track on the bottom of the cabinet to keep the doors more flush against the cabinet. I spray-painted all the metal and bolts to match. It is 36" high, 13" deep and 63" long. I didn't use the center board in the front because I wanted to accomodate for larger games.