Community Brag Posts

Crib for Ella

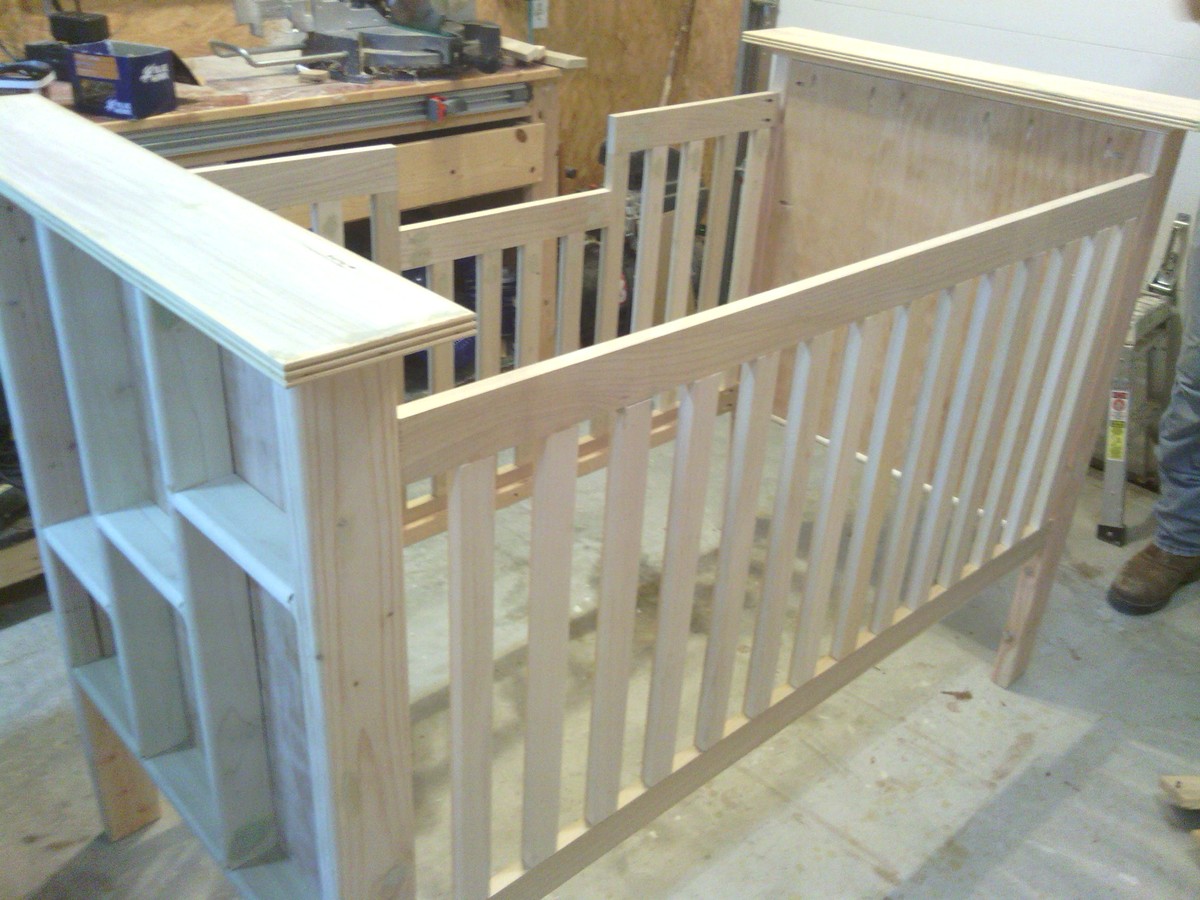
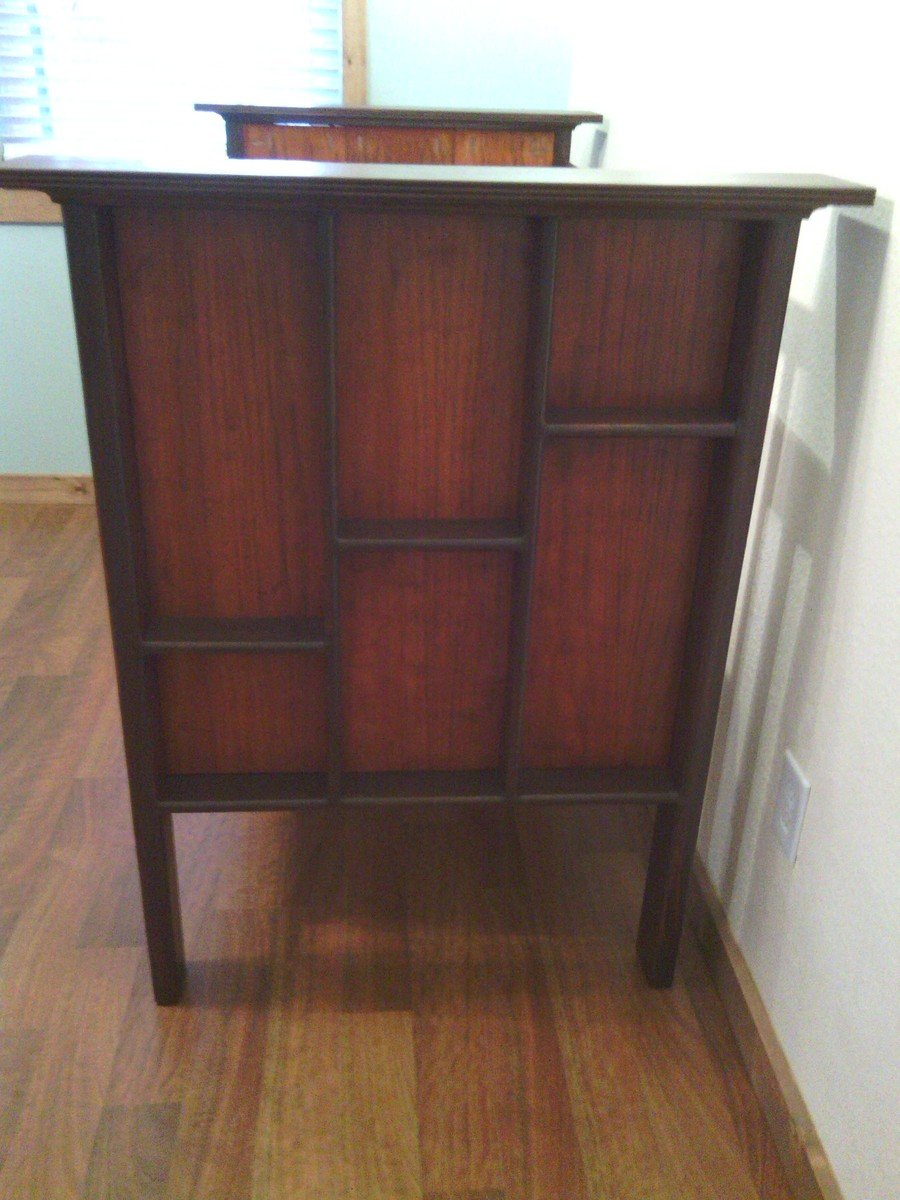
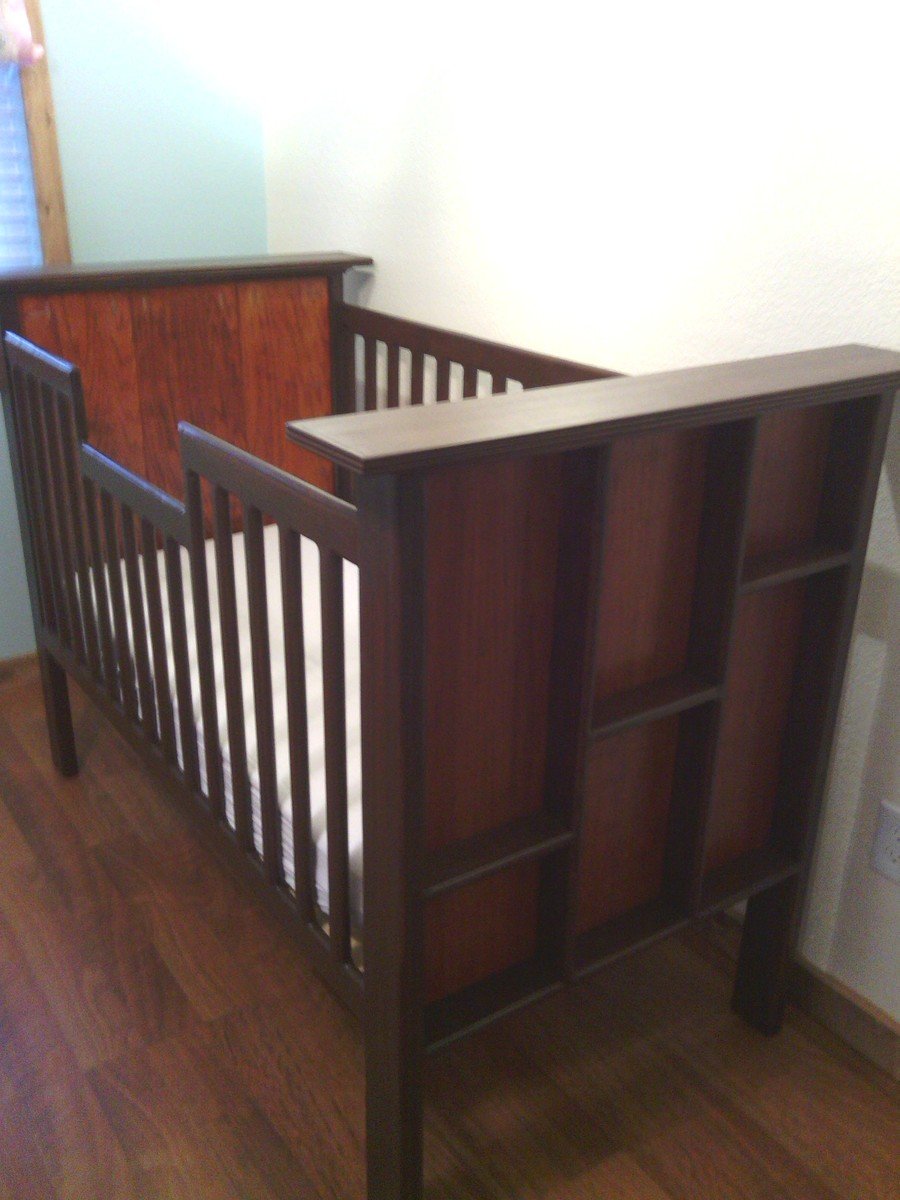
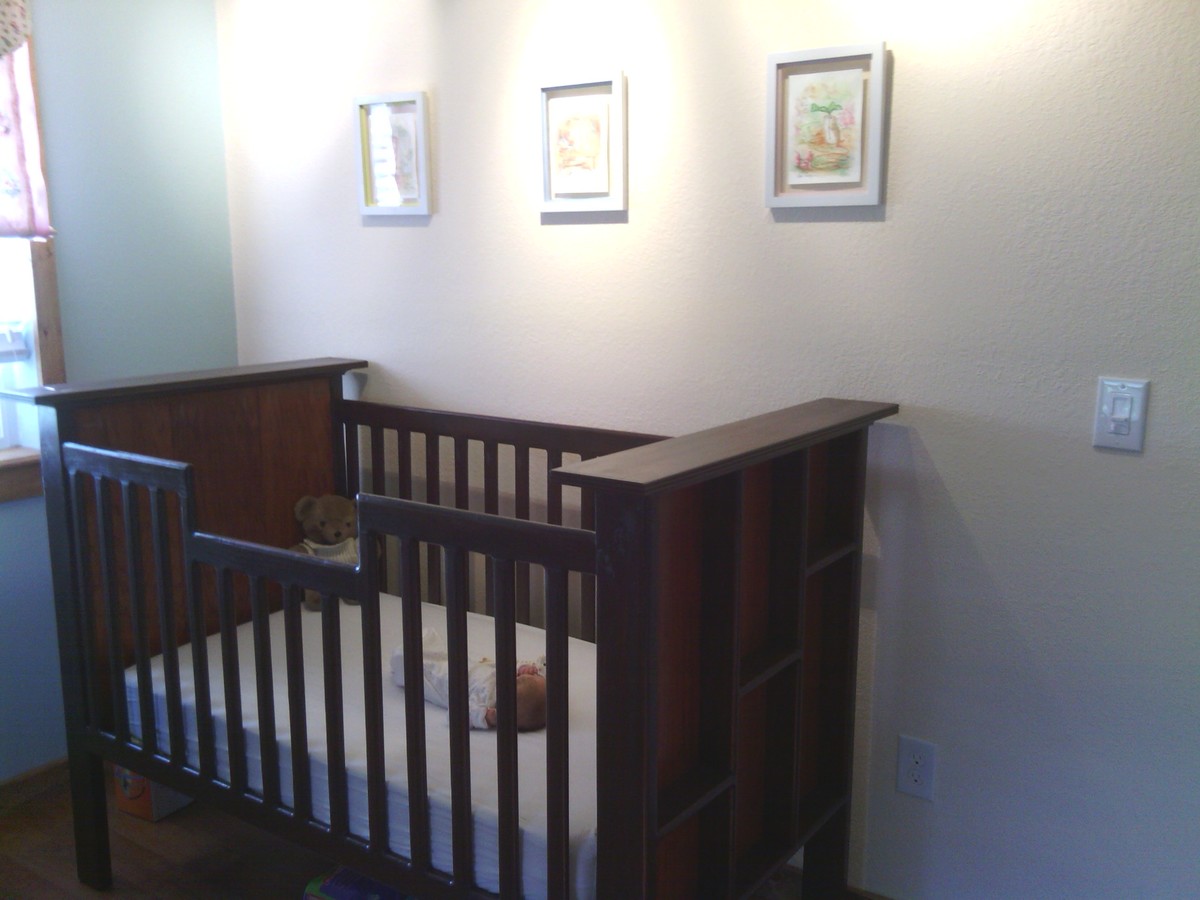
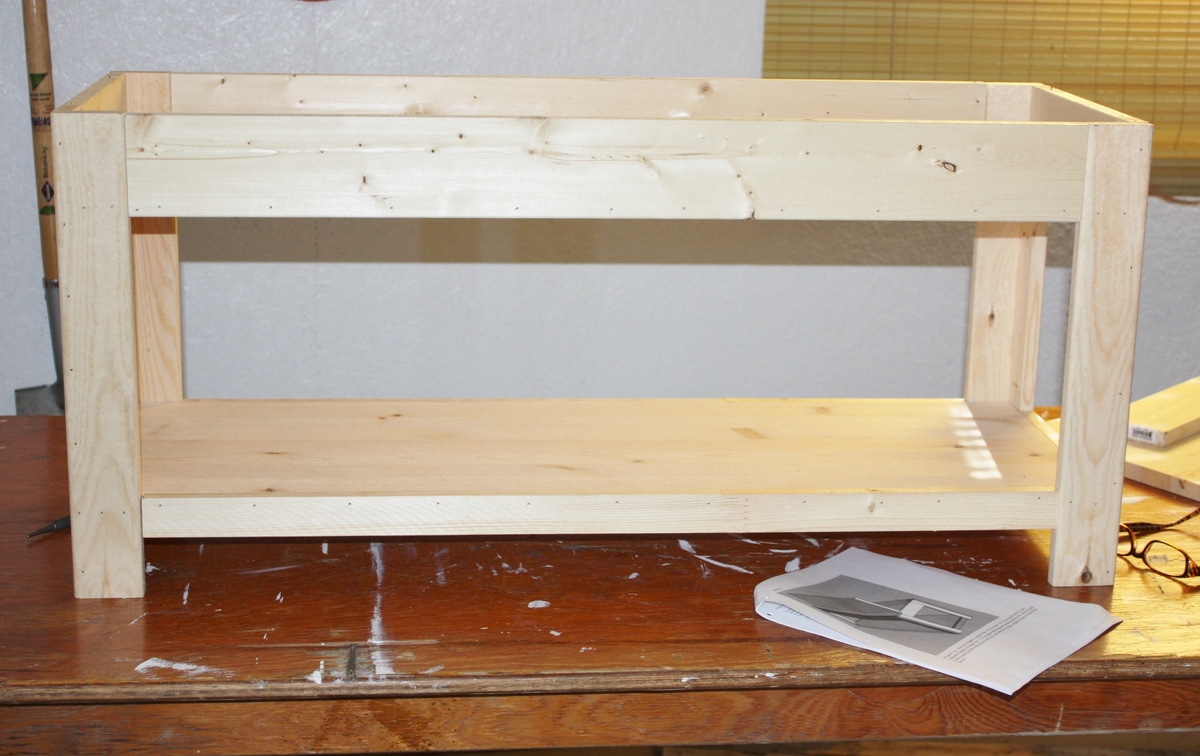
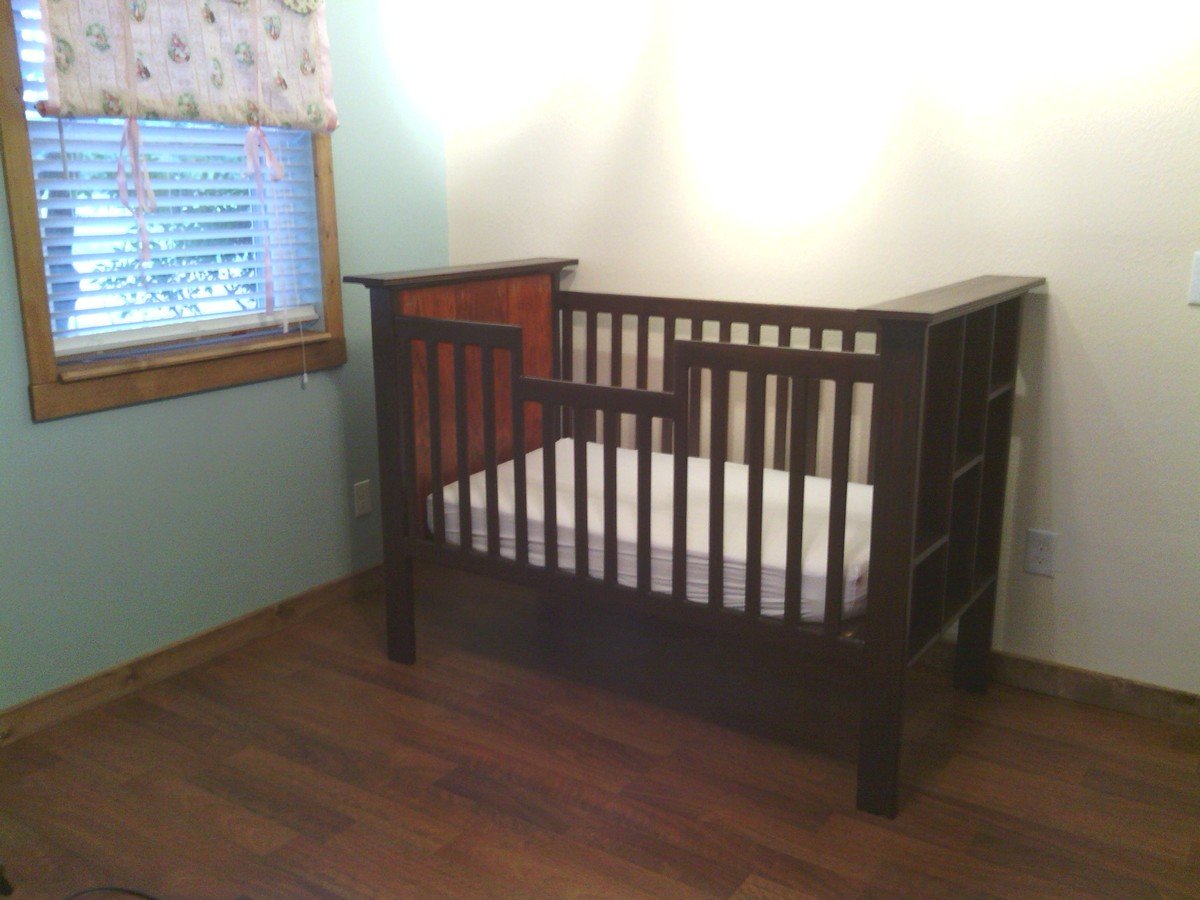
My husband recently designed and built our daughter's crib. After looking online and measuring another crib to make sure he had the rail spacing just right he came up with a plan and built it over a few weekends. He also built the changing station and will later build an armoire for her room as well.

Built from Plan(s)
Estimated Cost
$250
Estimated Time Investment
Week Long Project (20 Hours or More)
Finish Used
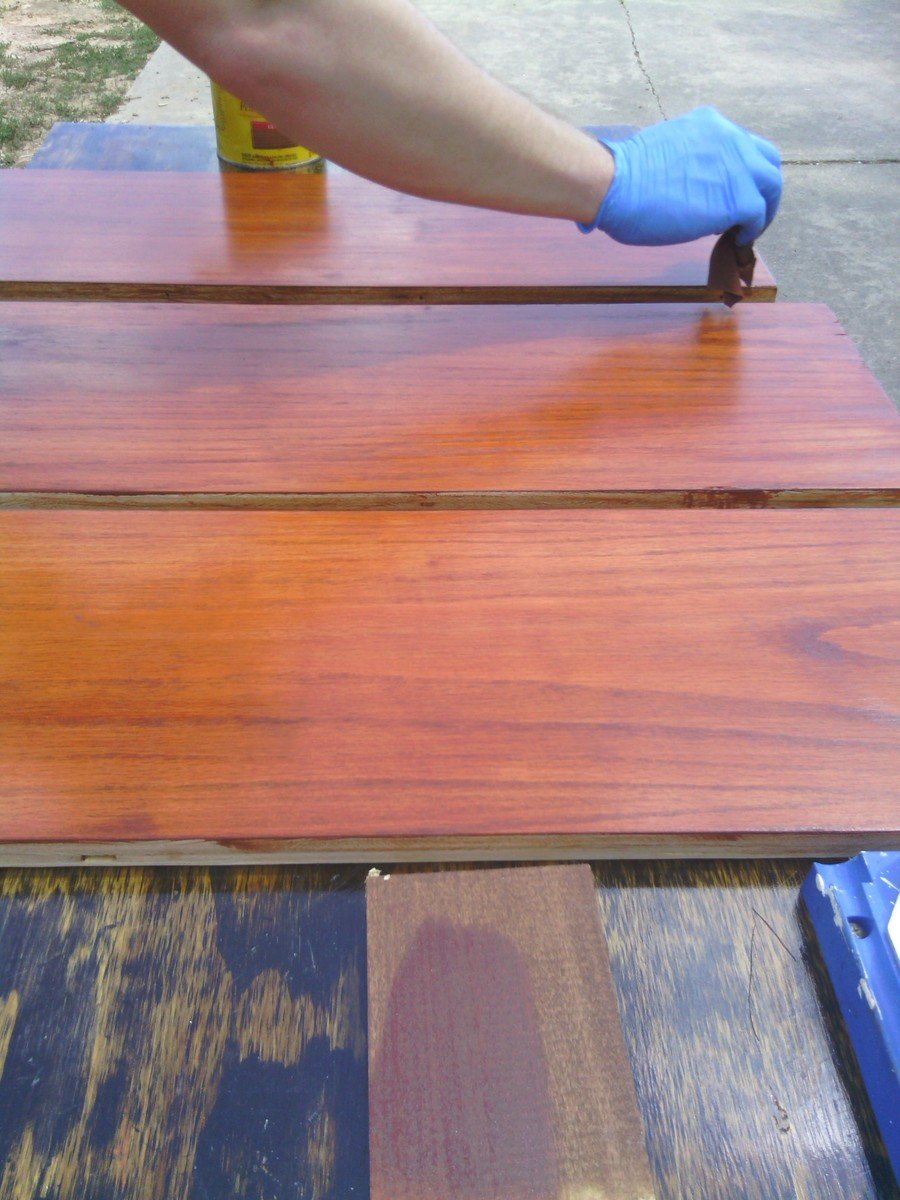
Rustoleum American Walnut on rails and frame
Minwax Gunstock on oak plywood (head and foot)

Recommended Skill Level
Intermediate

Comments

Pabs

Tue, 07/30/2013 - 18:53

Beautiful!, I've been searching the web for plans to build a crib and haven't found any, would you mind sharing yours?, I think it looks amazing!

Modern Rustic Outdoor Sofa Inspired by RH Merida

Submitted by susanshamp on Sun, 04/01/2018 - 14:19

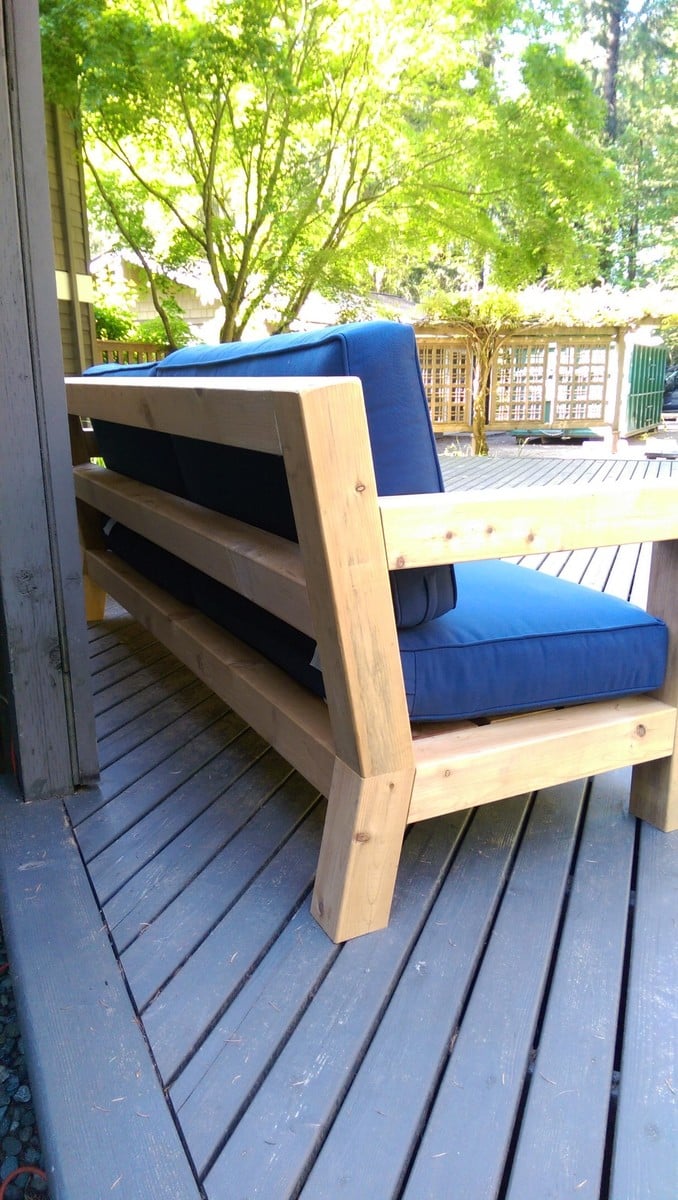
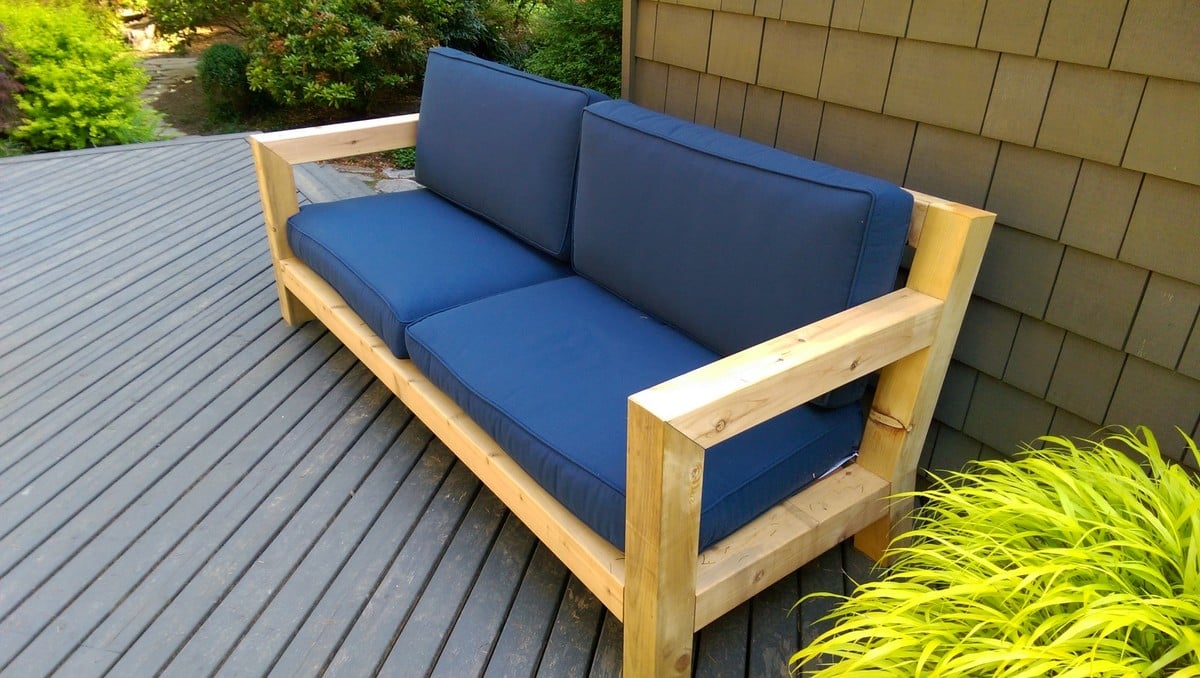
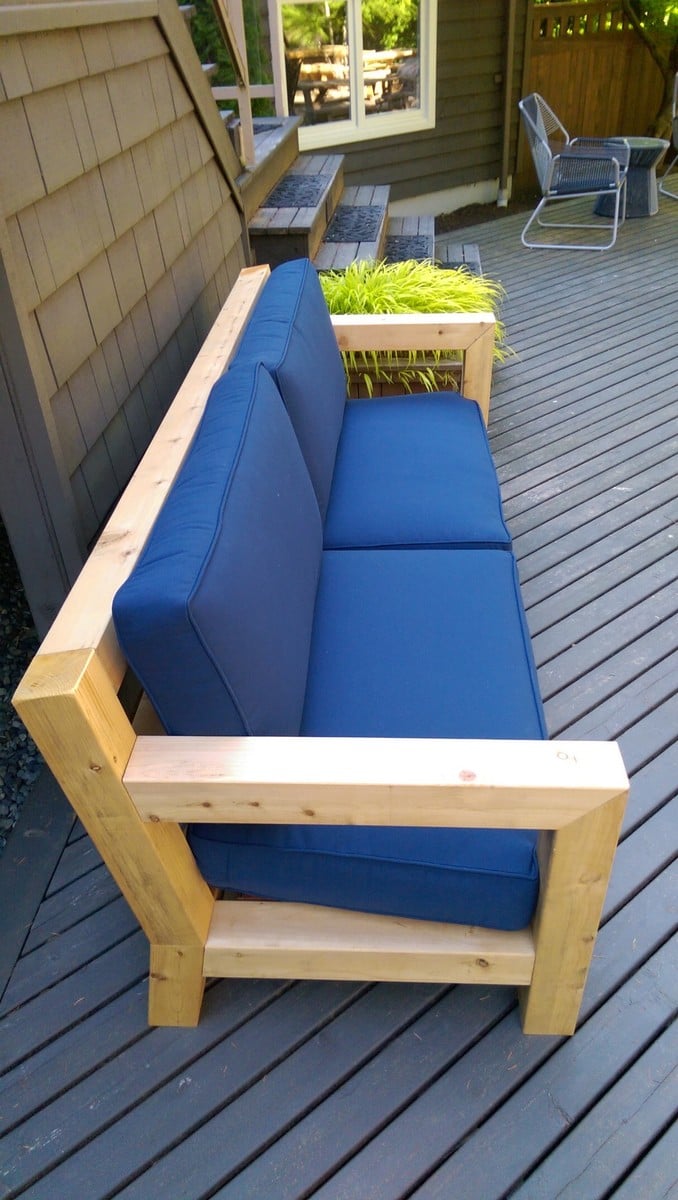
I was in love with the RH Merida set because of its clean lines and modern style. Also, the plan seemed simple enough that I could re-create it without a pattern. The only thing that I did not like about it is the lack of arms. I really like to have a place to put my arm or my beverage :) - so I added arms to the design.

Estimated Cost
$150
Estimated Time Investment
Day Project (6-9 Hours)
Finish Used
Natural
Recommended Skill Level
Intermediate

Comments

bogle

Wed, 05/20/2020 - 10:45

This is Awesome. I'm halfway in the middle as i thought I could complete without plans. Do you have any plans could share. Please....

Simple Teenager Desk

Submitted by vendo on Thu, 08/04/2022 - 20:33

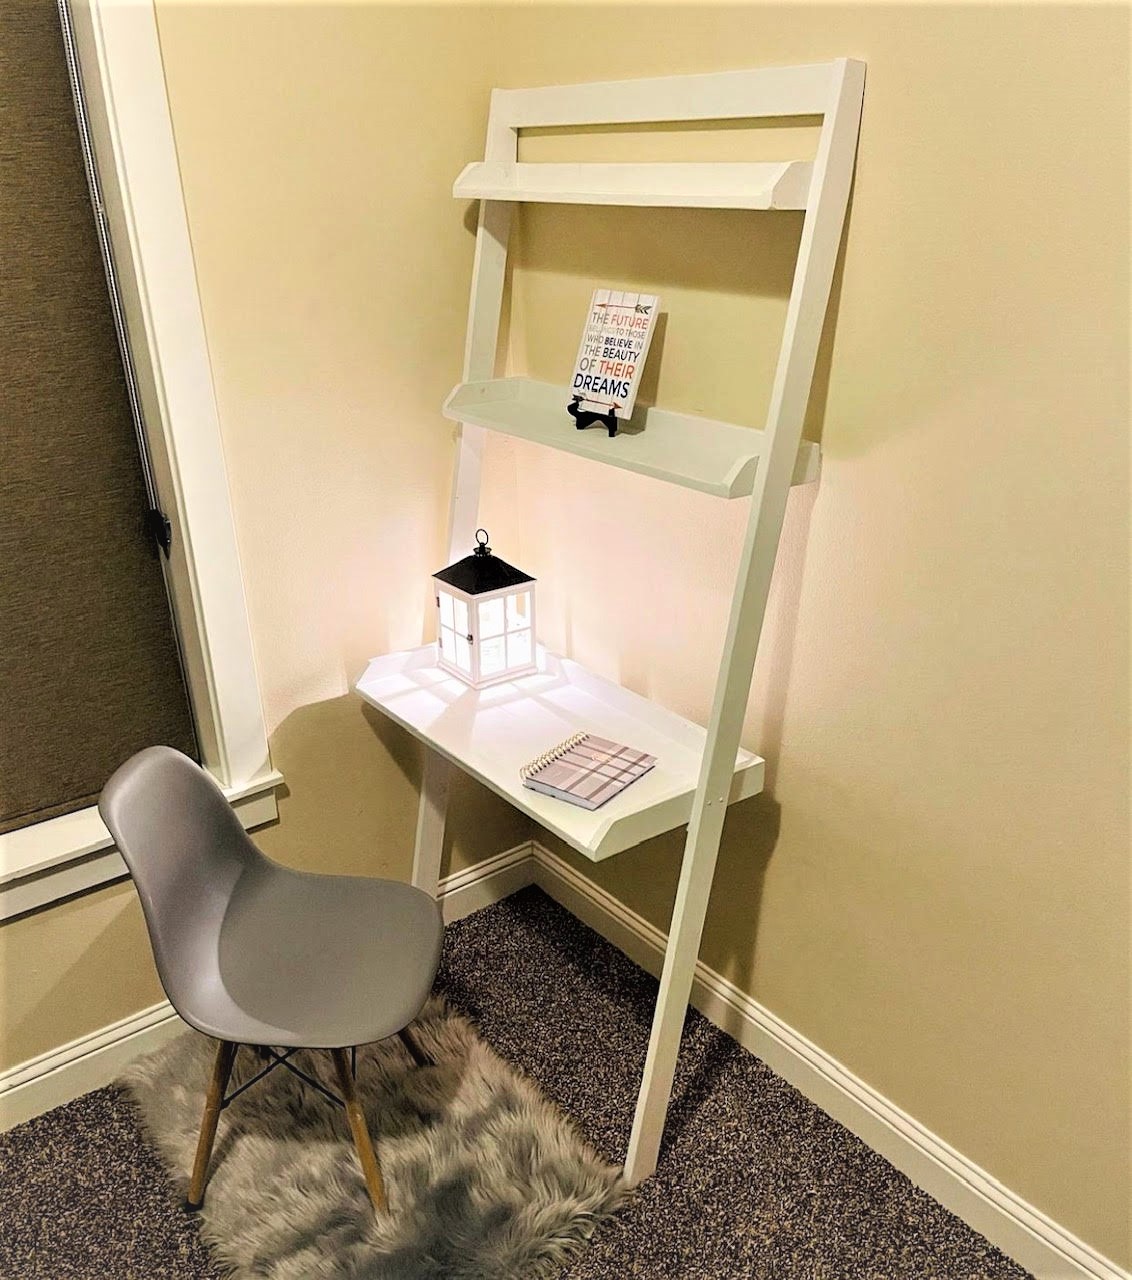
Loved this simple desk project for my teenage daughter. She has spent many hours here with her school work. My favorite part is that it only took a couple of hours to build, is lightweight and doesn't take up much room. I think it would be perfect for a dorm room or small space. Thanks for the great plans Ana!

Built from Plan(s)

Bigger, Stronger, Kitchen Floating Shelves

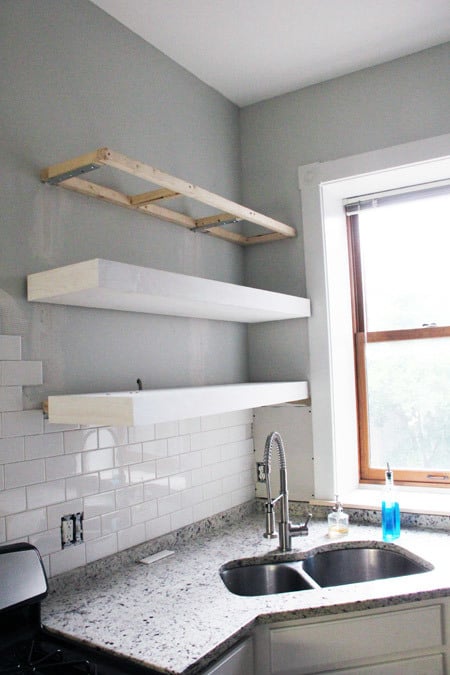
When we recently bought our 150+ year old house, we were pretty happy with just about everything (not stopping us from coming up with projects!) except the kitchen. This kitchen hadn't been updated in about 15 years, had dark brown walls, boring square white tiles with white grout, and TONS of cabinets. Everywhere. I felt like the walls were closing in!

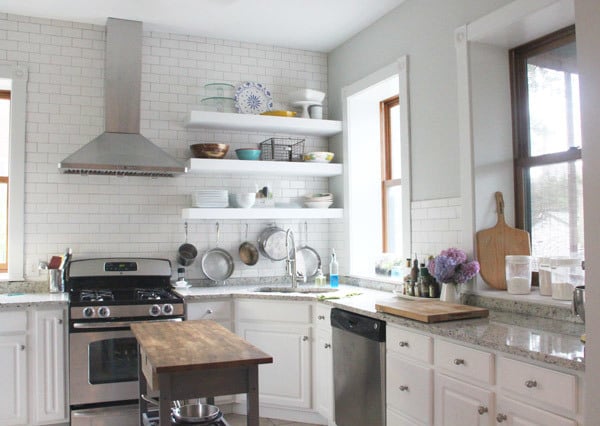
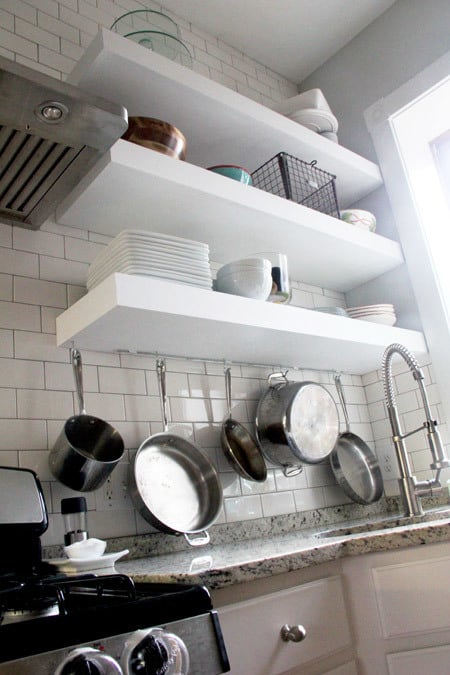
So before we ever signed a piece of paper I had a vision of open shelving. Wide, white floating shelves to put our every day items at arms reach and display the few items we rarely use but think are beautiful.

I loved Ana's plans, but I needed these shelves to hold 12 dinner plates, 12 bowls, 12 salad plates, 4 pasta bowls, and...well, right there that about 40 pounds of stuff. And the basic plans just didn't seem heavy-duty enough.

Enter our contractor, John, who I asked for help because, while they were my vision, they were his handy-work. My husband and I didn’t even attempt to build them on our own. John is a perfectionist and we knew he’d make this plan work…perfectly.

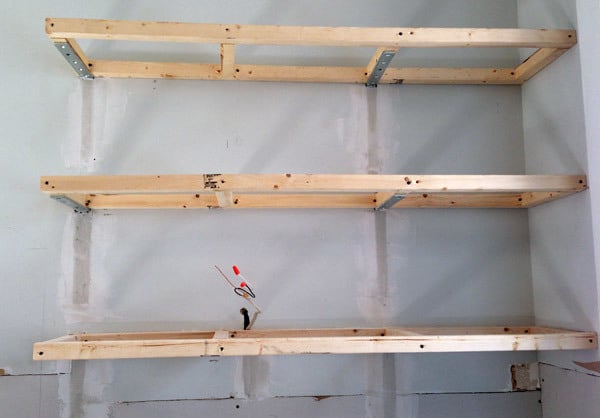
As usual, this was no sweat for John. To build the frames he used 2 x 2′s and secured them with 10 x 1 1/4″ angle brackets. During assembly, John made sure to position the center supports to match the wall studs in front of which the frame would hang. Once assembled, he removed some dry wall and attached the brackets directly to the studs.

We could store baby elephants on these shelfs, they wouldn’t budge.

Since I knew what needed to be stored on that first shelf (our every day items), we used the measurements to equally distance the three shelves (not including the first shelf of course—it needed more space above the counter top). Then we sealed up the dry wall. Another help with support was butting the shelves right up to the corner, putting another screw in another stud.

We moved the lighting electric up for new under cabinet lighting—so easy pre-tiling.

For the actual shelves—I like to think of them as “sleeves”—John used 3/4″ sanded plywood for the tops and bottoms of each shelf, then 1 x 6 clear pine ripped down to desired thickness for the fronts and one side (the other side is against the wall, so was left open). The primed sleeves spent a few days on the screened in porch while I tiled around the frames, they were pretty heavy and very solid.

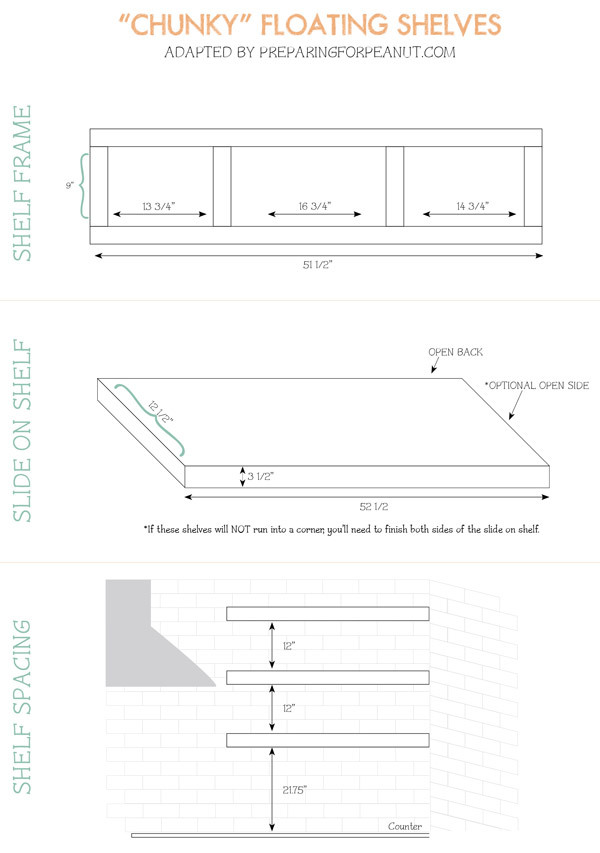
I’ve made an attempt to lay out the measurements involving our floating shelf project. These are to scale and give a good idea of how our plans differed from Ana’s.

We LOVE our shelves and get so so many compliments. The seemingly small and simple changes (tile, shelves, new window trim, paint, and soon flooring) made a HUGE impact and not that huge of a cost. And we don't miss the upper cabinets at all.

Thanks for the head-start and inspiration Ana!
Built from Plan(s)
Estimated Time Investment
Weekend Project (10-20 Hours)
Finish Used
Primer and white paint
Recommended Skill Level
Advanced

Comments

claydowling

Mon, 10/21/2013 - 08:41

I'm not sure where to get big angle brackets like that, but you might want to try a local lumberyard instead of a home center. Even when they don't have a product they often know who does. The angle brackets embedded in the drywall is a clever idea I never thought of using.

Melissa015

Tue, 11/25/2014 - 20:08

What city was this work done in?  I live in Seattle and I am looking for a contractor.

Flip Top Storage Bench

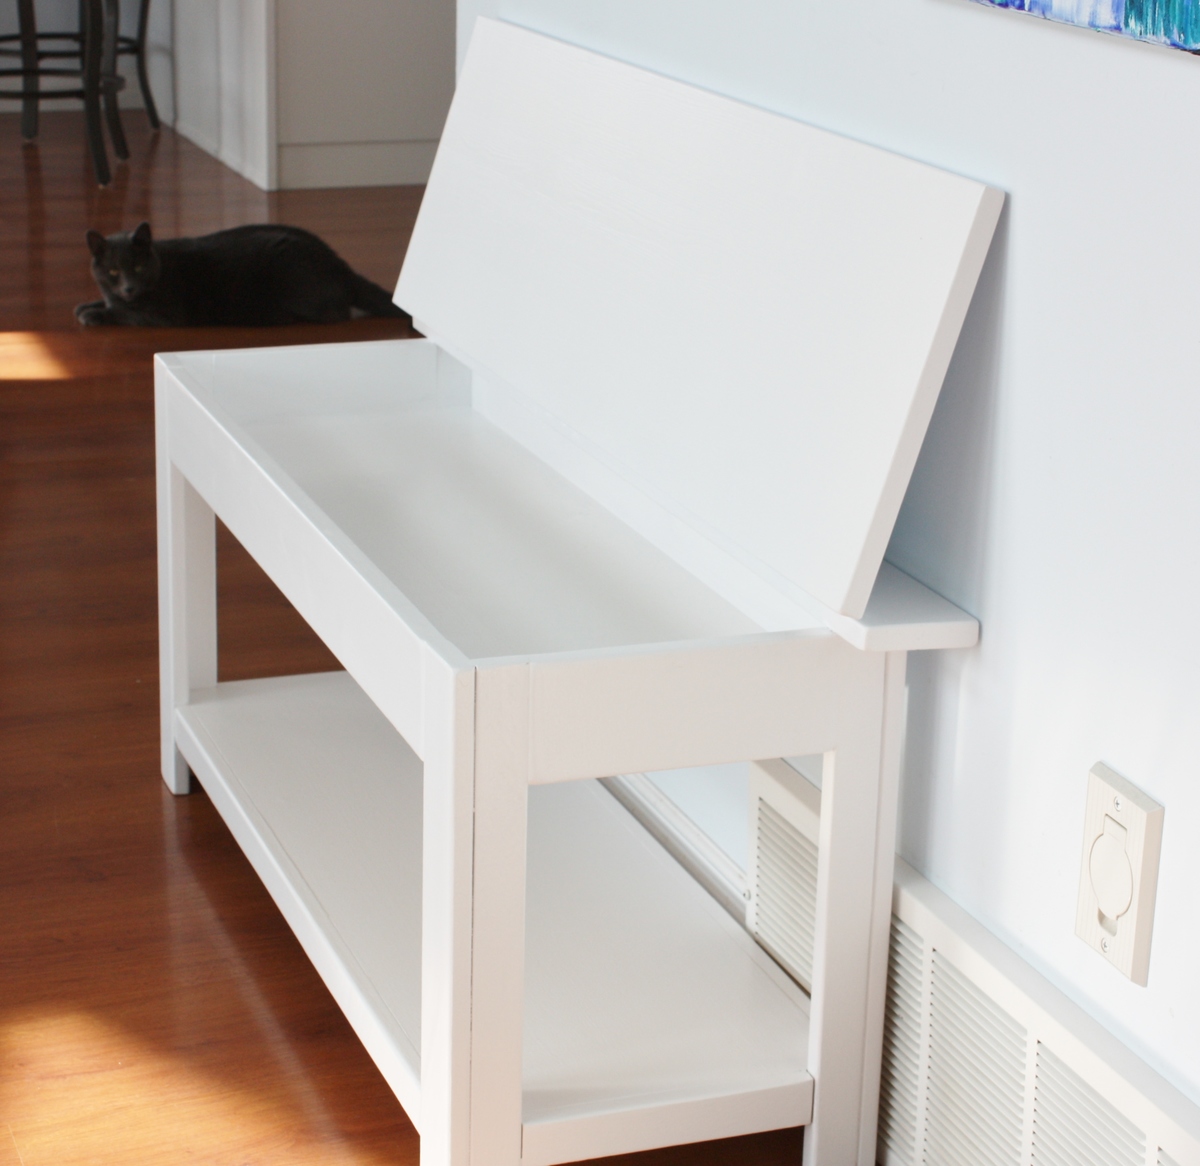
This bench was so easy to build! It's the first project that I've built completely with the nail gun. Wow does that speed up the process! Thanks again for the great plans, Ana!
Estimated Cost
About $40
Estimated Time Investment
Afternoon Project (3-6 Hours)
Finish Used
One coat CIL Anywhere Primer and one coat CIL Trim and Door Paint in Semi-Gloss
Recommended Skill Level
Beginner

Reclaimed TV console

Submitted by Anonymous (not verified) on Thu, 01/21/2016 - 10:24

Built this TV console from reclaimed pallet wood. Added some tiny hairpin legs for more of an industrial look.

Estimated Cost
$150.00
Estimated Time Investment
Weekend Project (10-20 Hours)
Finish Used
Hand rubbed clear wax
Recommended Skill Level
Advanced

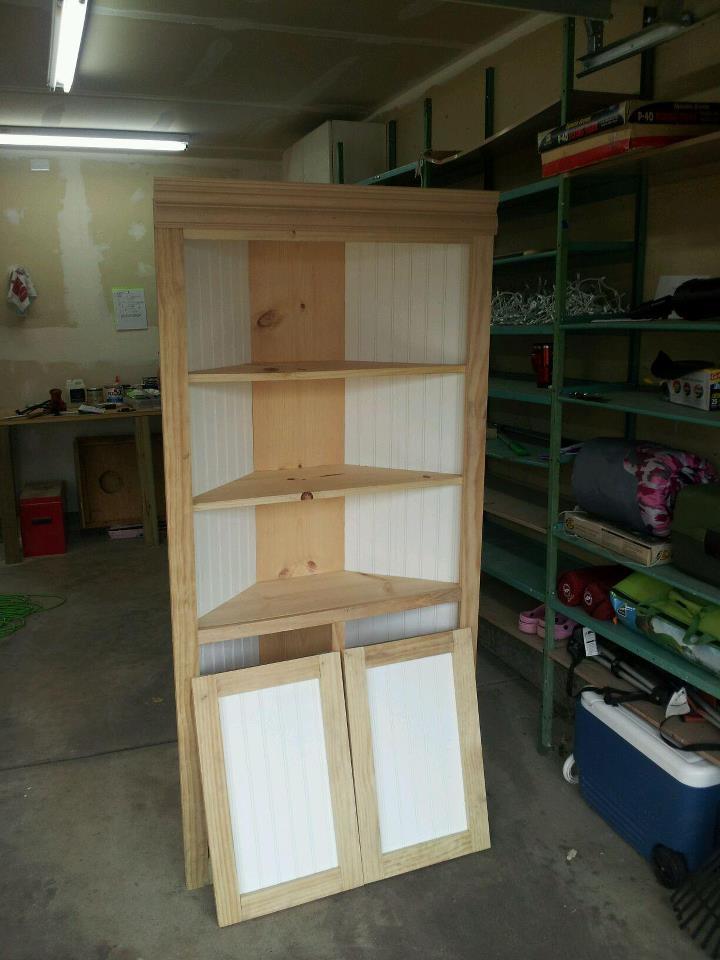
My own weathered corner hutch :)

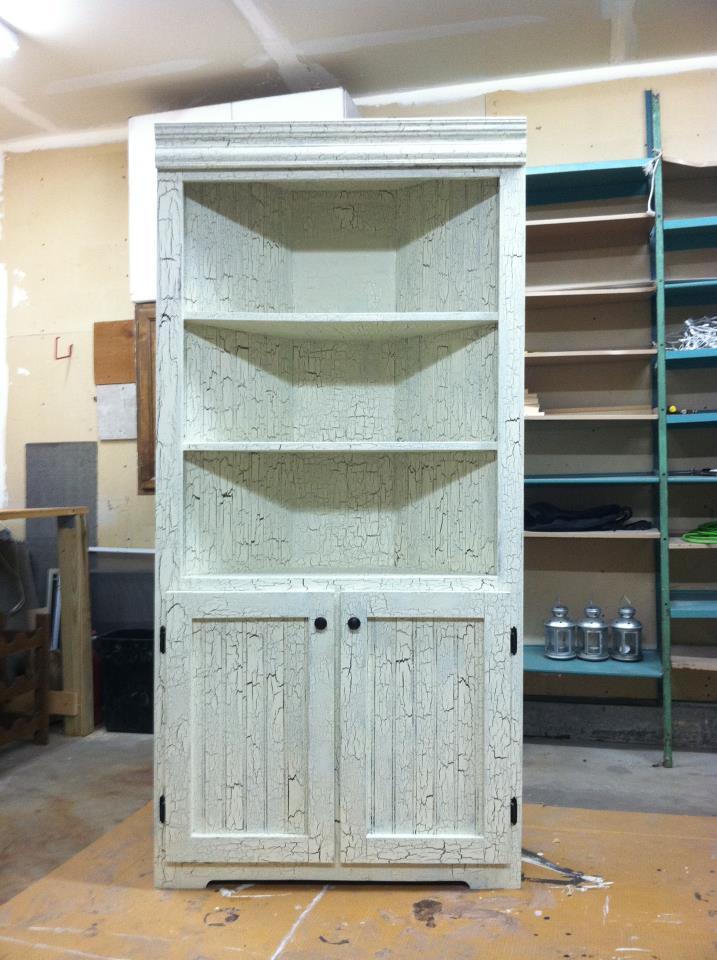
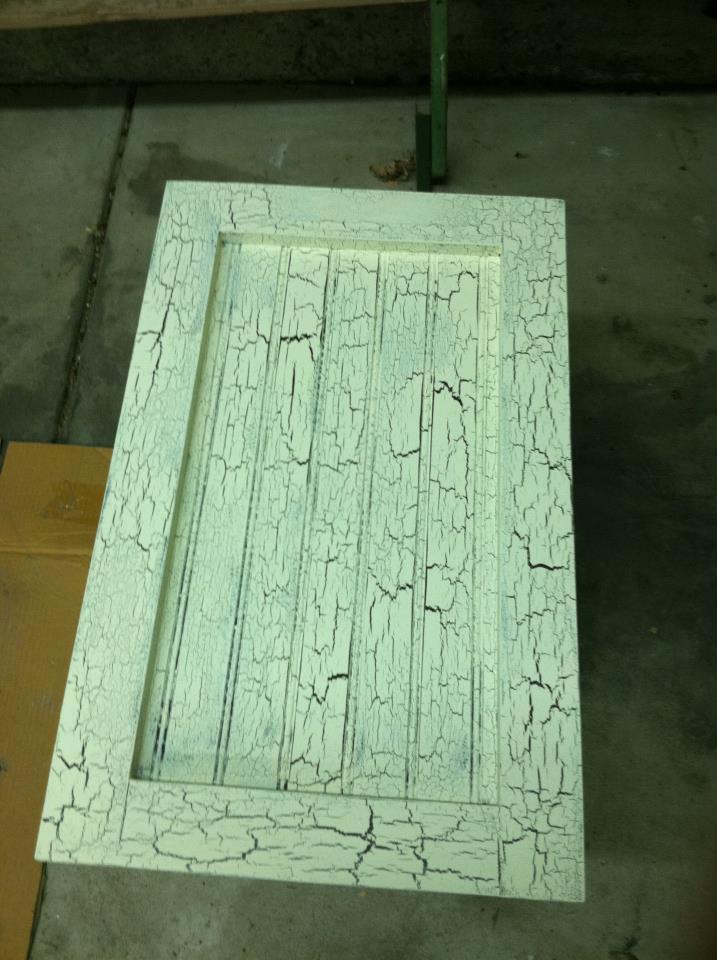
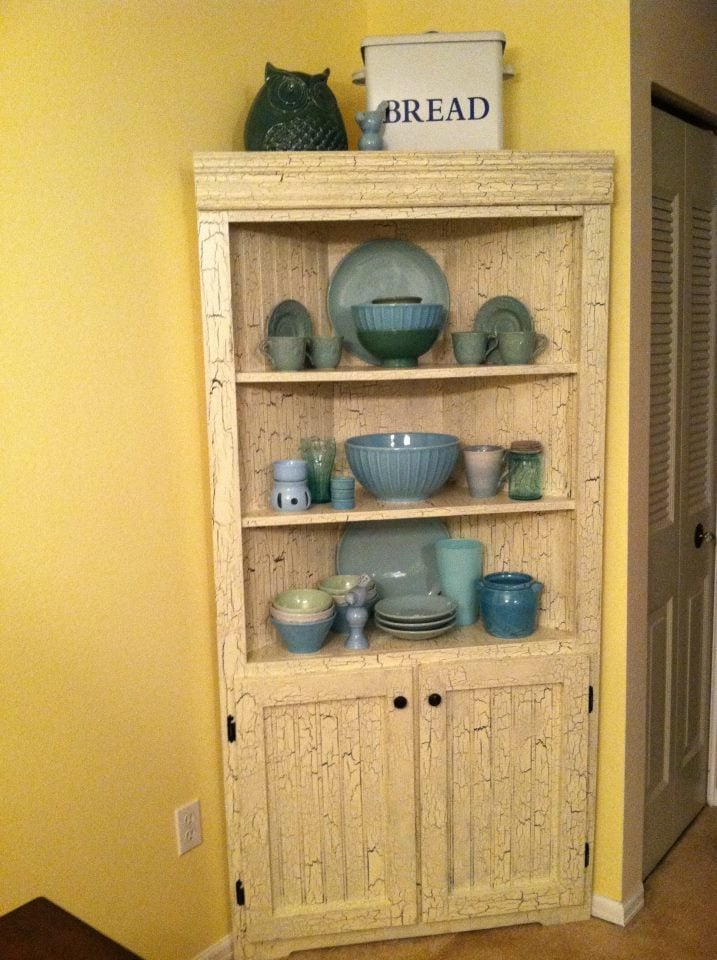
This was my first project. It took me a weekend to build and prime. Since I chose to use a crackle finish, waiting time between coats extended the total time to one full week. My husband and I were supposed to make this hutch together, but I became obsessed and did most of it alone! I adjusted the size a bit to make it larger, so I could fit big pieces on shelves and in cabinets. Thanks for the plan Ana!!

Built from Plan(s)
Estimated Time Investment
Week Long Project (20 Hours or More)
Finish Used
Weathered Crackle Finish done as follows:
1. Killz2 latex primer (highly recommended)
2. Valspar interior satin finish, "Frontier Road" (this is the color that shows in the cracks)
3. Valspar weathered crackle glaze (a suggested substitute that costs less is Elmer's glue)
4. Valspar interior flat finish, "Churchill Hotel Lace" (must be a flat paint, this is the dominant color of your piece)
5. Valspar clear protector (also highly recommended to protect the finish you worked very hard to create, when you paint the same piece of furniture 5 times in one week your sanity will agree!)
Recommended Skill Level
Starter Project

Comments

JoanneS

Fri, 04/13/2012 - 14:47

Wow, this is sooo beautiful! The finish is just awesome. My Hubby hates to paint, and he saw this multi-step finish and said you must have the patience of a saint! :) Congrats on such a stunning first project!

kmsdance (not verified)

Mon, 10/01/2012 - 23:33

Very Nice! What did you do to make it "bigger"...did you make it deeper or wider? Just curious, because I would like to try and make a bigger version as well. Did you still cut the shelves on each side at a 45 degree angle? Thanks!

Cedar Raised Garden Bed

Submitted by Malka on Wed, 05/18/2016 - 00:34

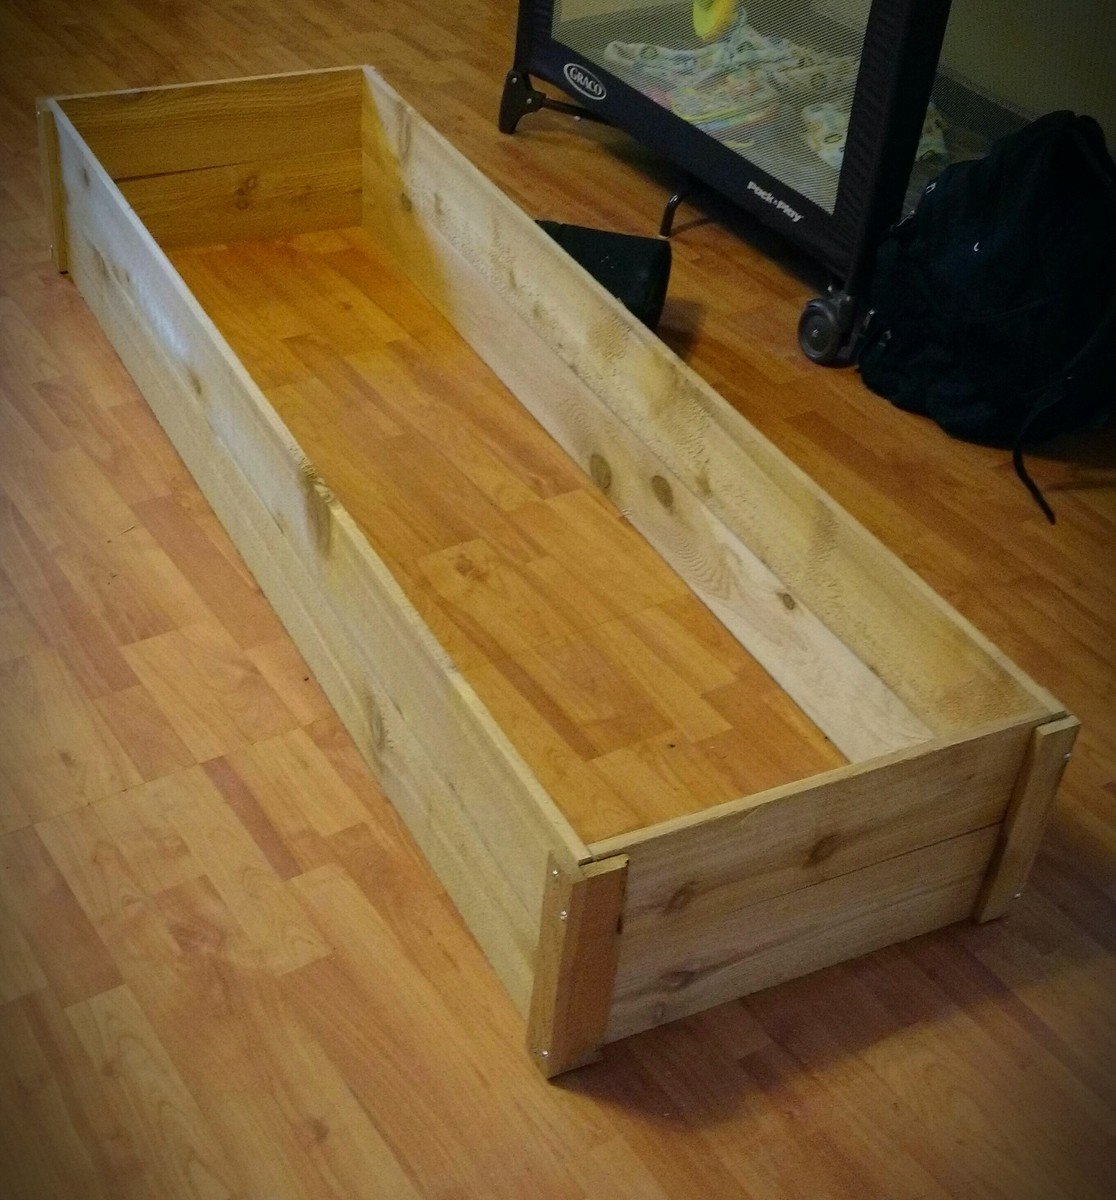
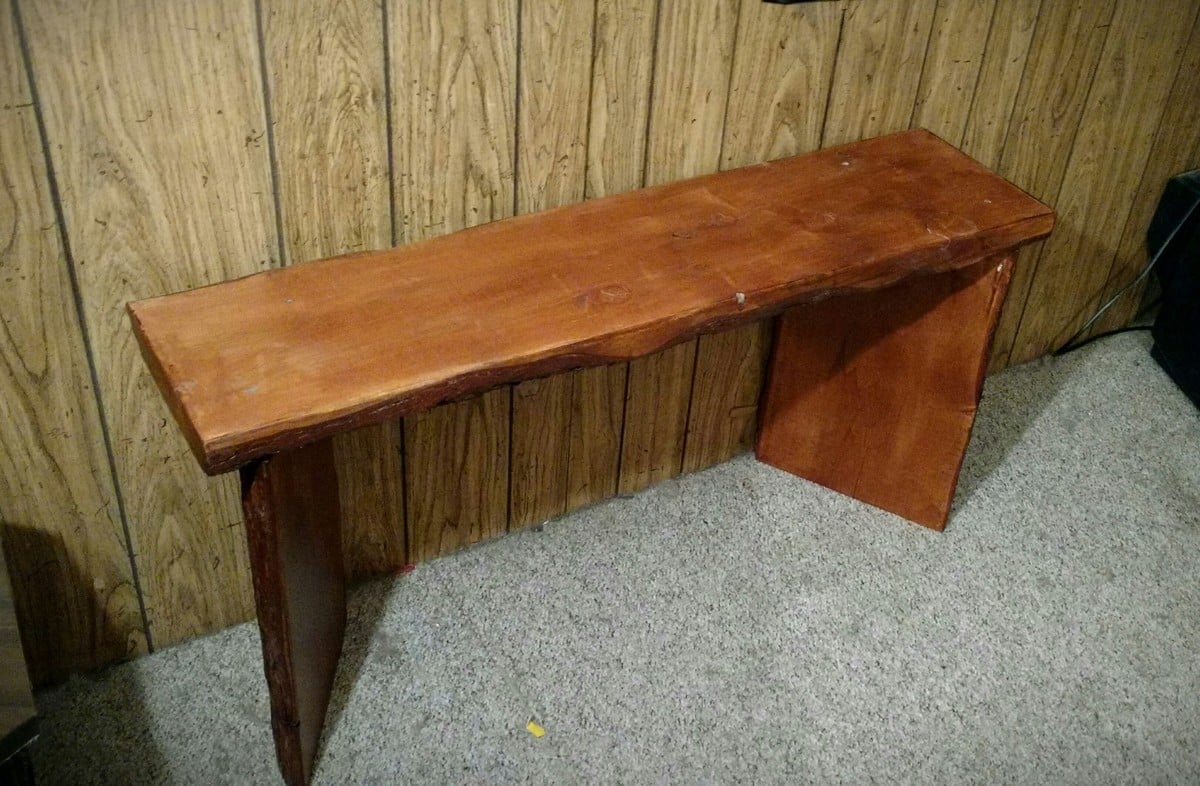
My little sister is building her first garden this year, and had asked about a garden bed and bench. I found this plan on the Ana White site, and waited until the local Home Depot had cedar fence pickets on sale for $2.34 each. Once these were purchased, the 3 garden beds were put together easily with screws and some Titebond II, and then sprayed with spar urethane on the outside for further protection. I also took some live edge fir slabs I'd gotten for free from a lumbermills scrap pile, and cut, sanded, and stained them to put together a live edge bench. I assembled the bench using rabbet and tenon, and then further braced the legs with small L brackets that cant be seen from the front and some 3" screws from bench top to legs. After assembly, I spar-urethaned the bench with 4 coats for protection. My sister loved both the bench and her boxes. Thanks for the plan!

Estimated Cost
$80 for Cedar, screws, stain, and glue for boxes and bench.
Estimated Time Investment
Weekend Project (10-20 Hours)
Finish Used
Minwax Spar-Urethane
Mixwax Antique Walnut
Recommended Skill Level
Beginner

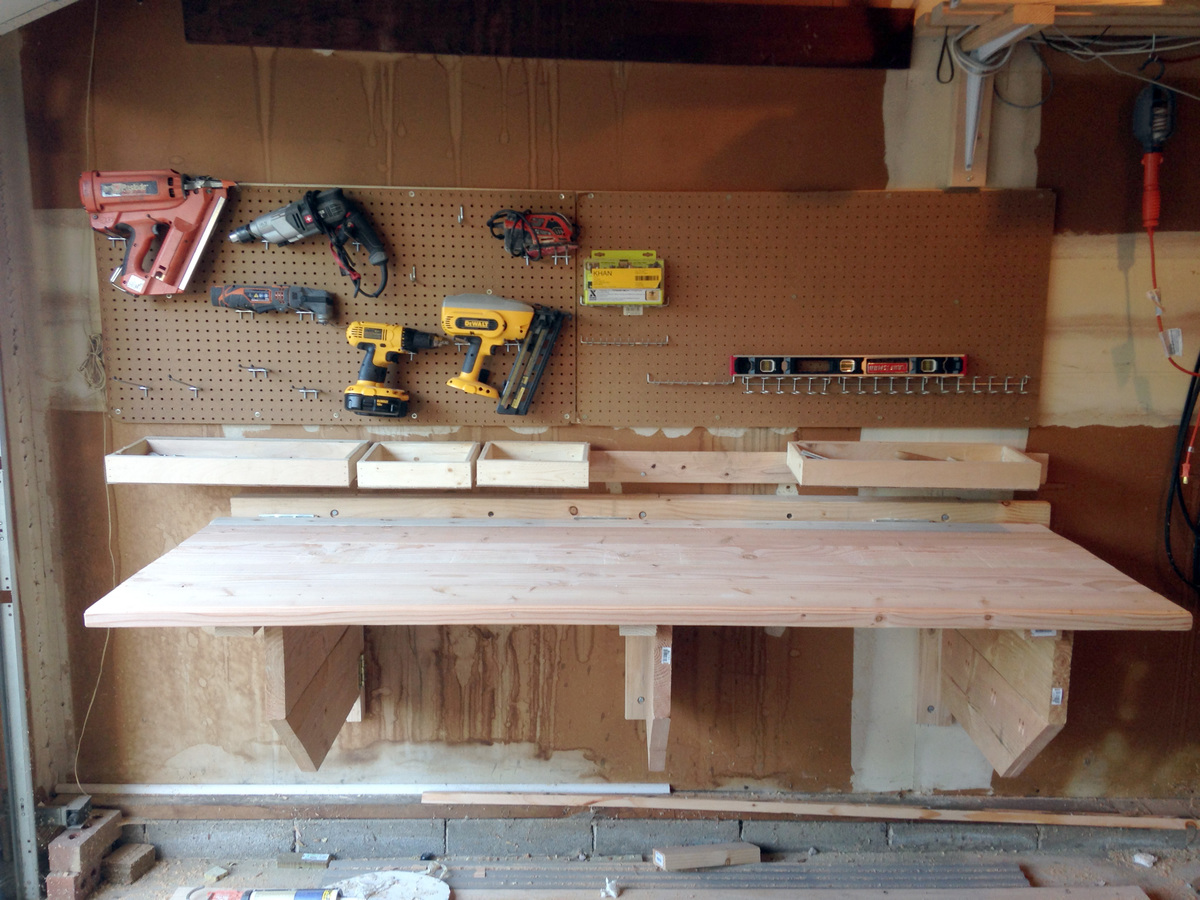
Folding Workbench with Storage

Submitted by lookitsash on Fri, 08/19/2016 - 13:15

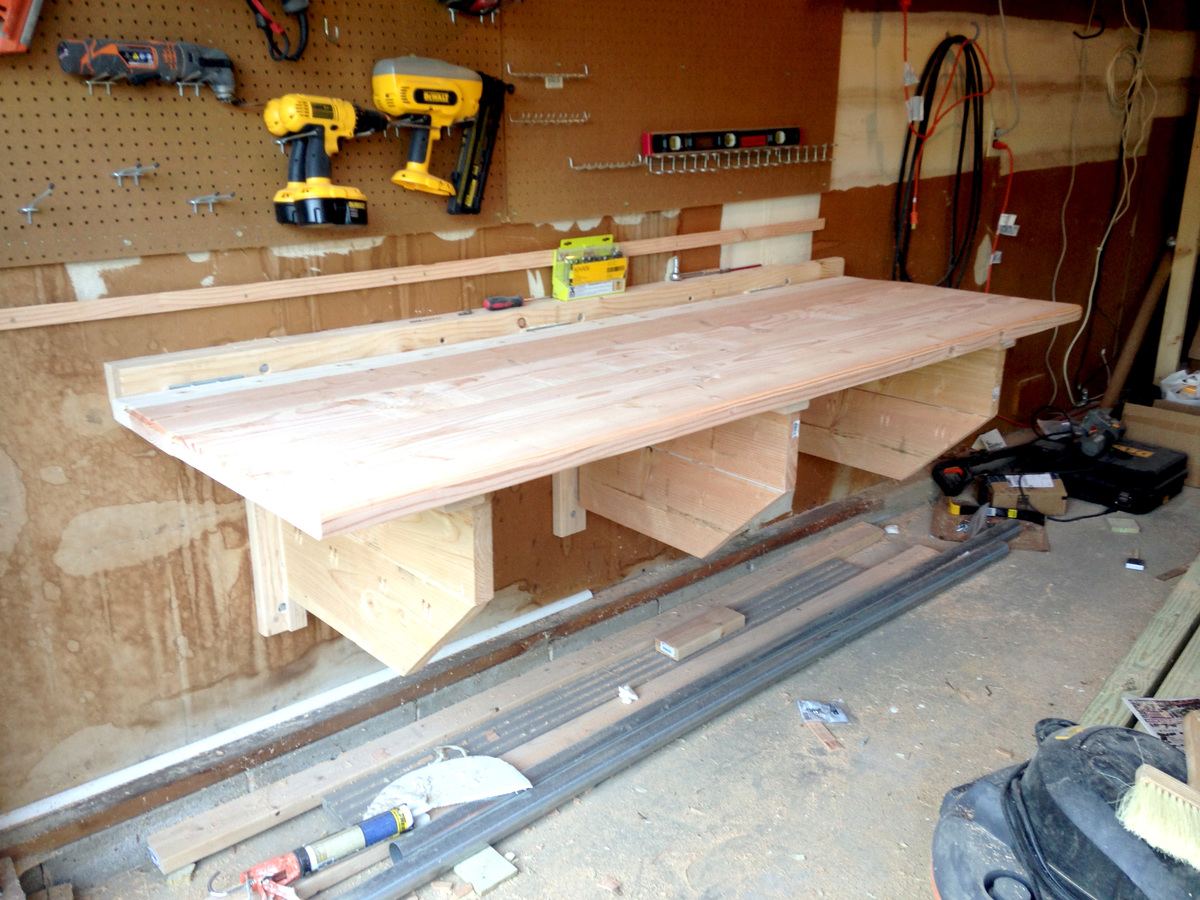
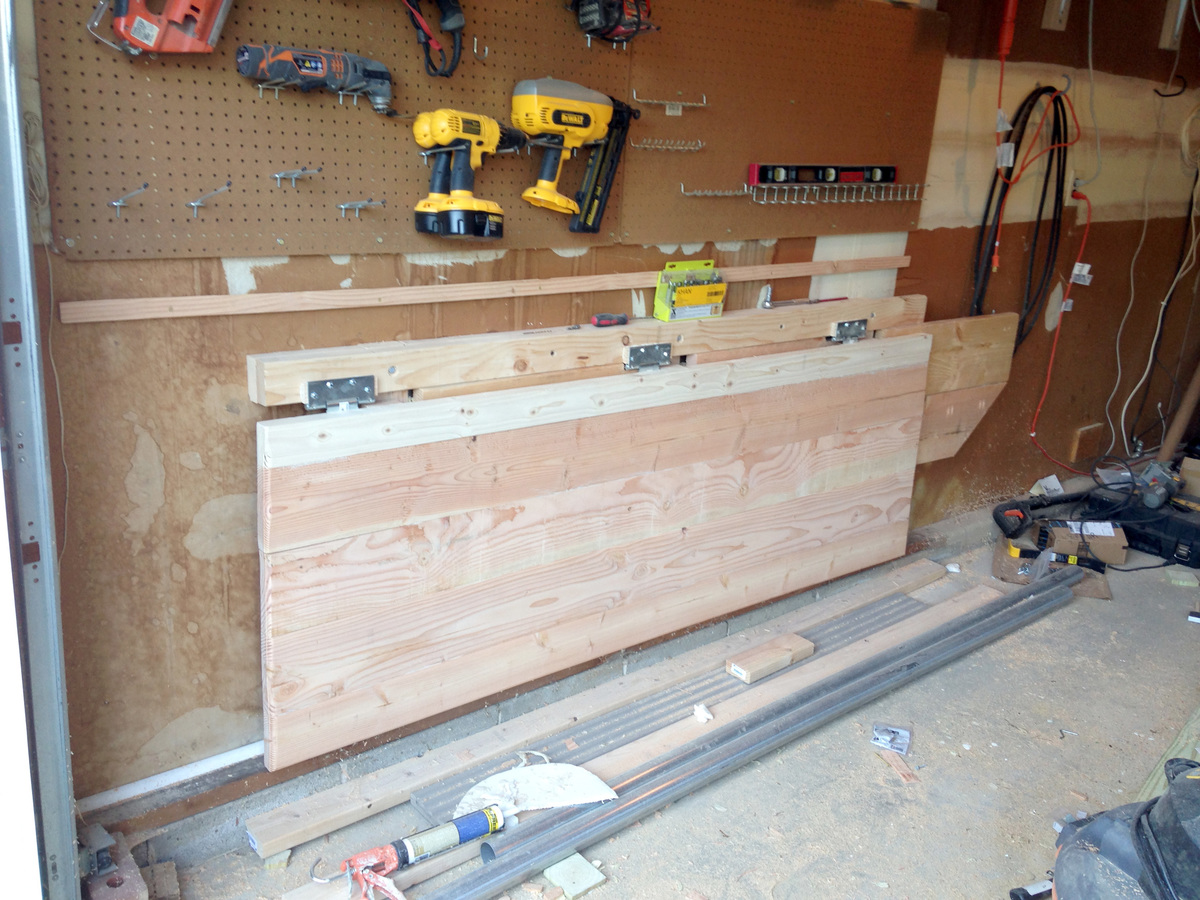
Digging through my scrap wood collection, I came across some pieces of pegboard from our previous home that I had forgotten about. I had just relocated a lot of garden tools to the shed, and there was an empty wall in the garage that would now be perfect for the pegboard. After mounting the pegboard and hanging up some tools, the wall still looked a little empty. I had a vision of mounting a heavy duty folding workbench to the wall. This was the perfect location, and if the workbench folded, we could still fit the car in the garage.  You can read all the details about my folding workbench on my blog at:


http://www.justmeasuringup.com/blog/building-a-folding-workbench-with-french-cleats


The workbench is a perfect addition to my garage, and its used every day.  Best of all, I just fold it down when I need to park the car!

Estimated Cost
Around $150
Estimated Time Investment
Weekend Project (10-20 Hours)
Finish Used
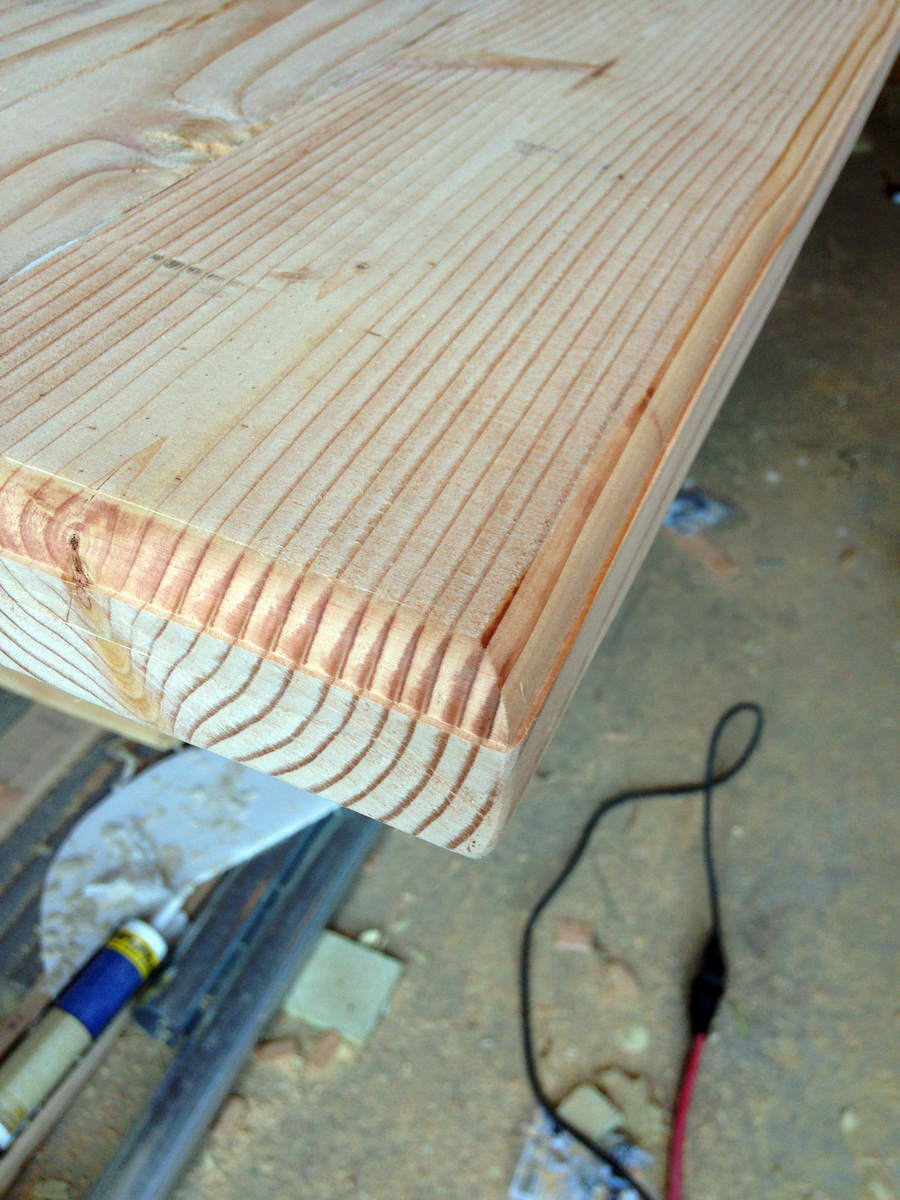
No paint or stain, but I did route the edges of the table with a roundover bit to give it a professional finish
Recommended Skill Level
Intermediate

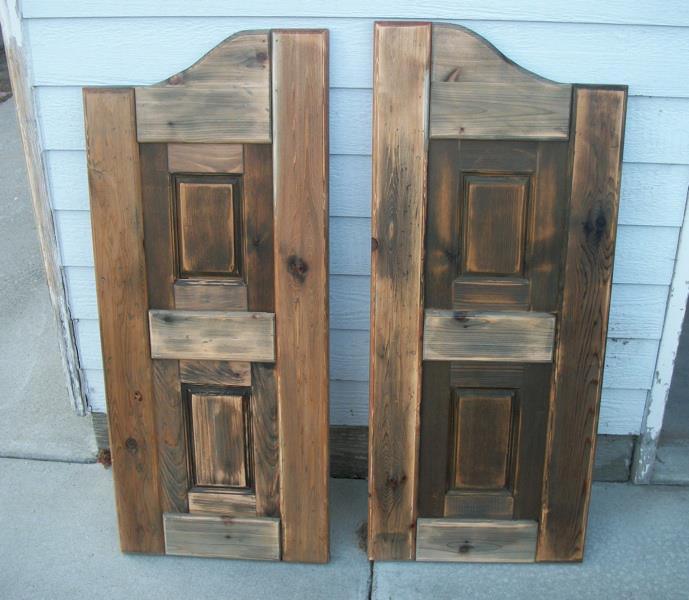
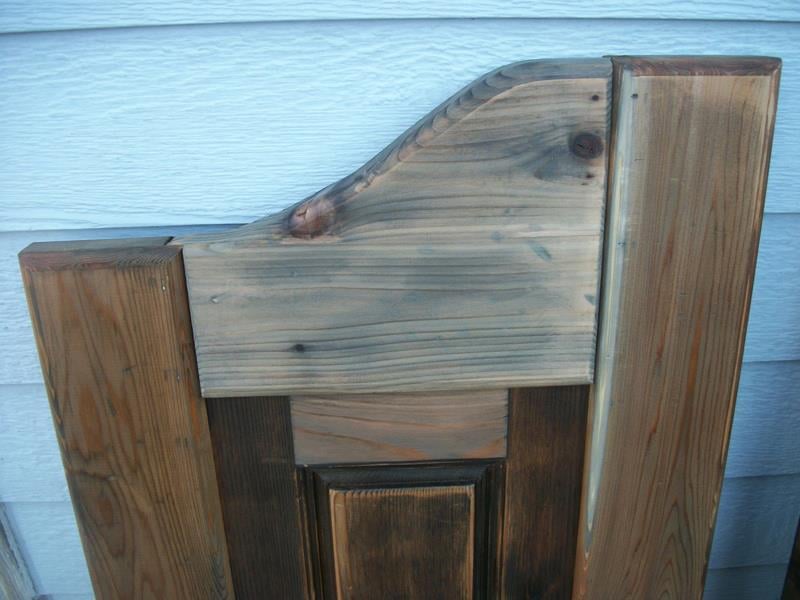
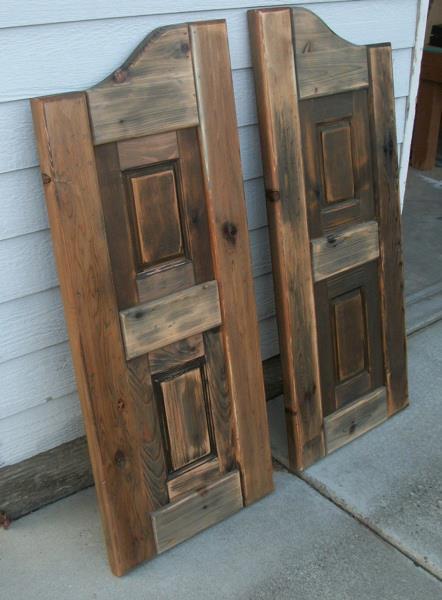
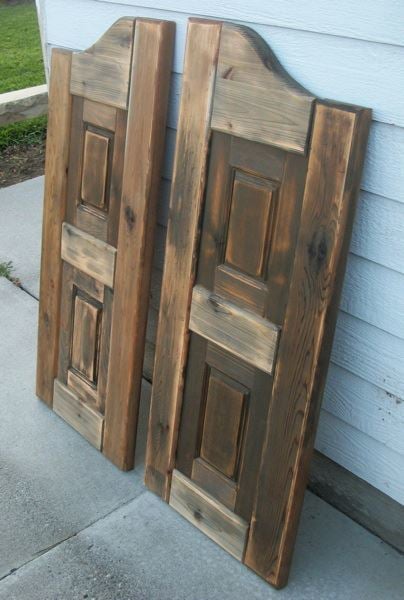
Western Saloon doors

Submitted by tracysmith on Thu, 08/02/2012 - 00:44

I built these doors for a very good friend of mine who actually helped me get started turning my new love for building (after finding Ana's site) into a way for our family to make some extra money.

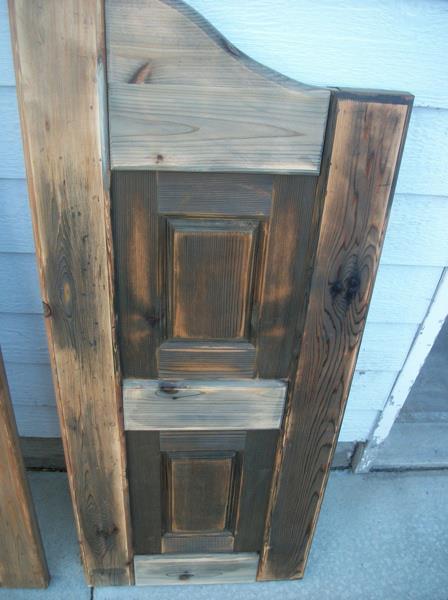
It took me a little while to wrap my brain around building something without using my Kreg Jig. I used a router table set up with some raised panels bits and put the whole thing together with glue and nails! Wonderful experience!

For the finish, I used a vinegar solution to give the cedar wood an old barn look. I think the final result turned out great and the final step was a clear coat sprayed on out of a rattle can.

Estimated Cost
Lumber cost was about $80
Estimated Time Investment
Week Long Project (20 Hours or More)
Finish Used
Vinegar solution and a clear coat put on.
Recommended Skill Level
Advanced

Comments

birdsandsoap

Thu, 08/02/2012 - 10:51

These turned out great! I haven't seen this style of door in forever! They used to be really popular, I remember my Aunt and Uncle having these in the entry to their kitchen. They were the coolest thing ever when I was a kid! Maybe they are a making a comeback?
I'm really impressed with your routing skills, that's a task I have yet to tackle, but I've got the bits laying around waiting.

Nice job!

tracysmith

Thu, 08/02/2012 - 21:10

Thanks a bunch! My friend is replacing an old set of louvered doors that went into her laundry room. Her family are farmers and rodeo people so the western decor really fits in their house. Great western stuff there. They made a chandelier out of a wagon wheel! Really cool!

This was my first attempt at routing so I really appreciate your compliment! It's really simple if you can get the basics of it. I'm sure you'll do just fine when you get to that point. If I can do it, anyone can do it! Thanks again!!

laneal1987

Mon, 01/23/2017 - 09:32

I really want to try and build this for a closet.  Are there any instructions for this?  This is the first door of this style that I have come across that I absolutely love.

Cluckingham Cottage

Cluckingham Cottage wasn’t built in a day, but it WAS built by a DAME!
A-frame instructions were pretty helpful considering the builder knows nothing about construction. I made a few modifications to accommodate my 5 chooks + 2 bantams . Sturdy and tight structure.

Estimated Cost
Under $400
Estimated Time Investment
Weekend Project (10-20 Hours)

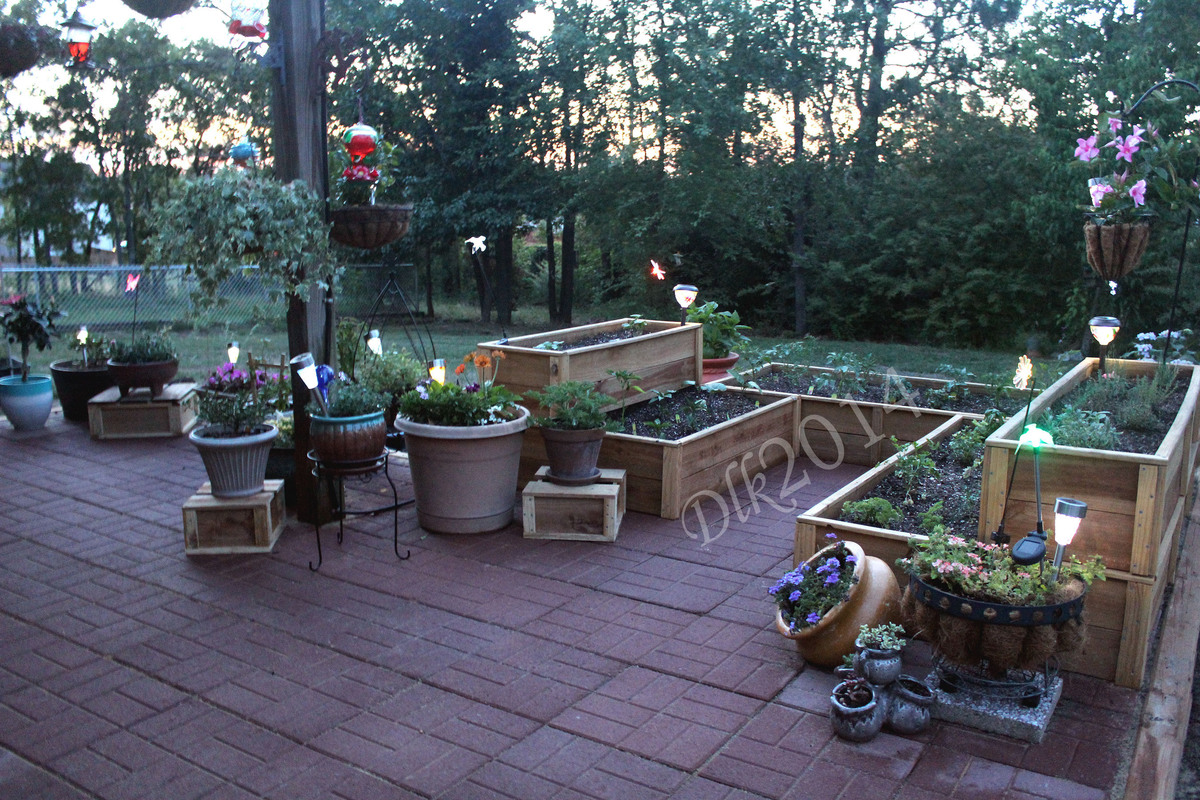
Raised Garden Beds

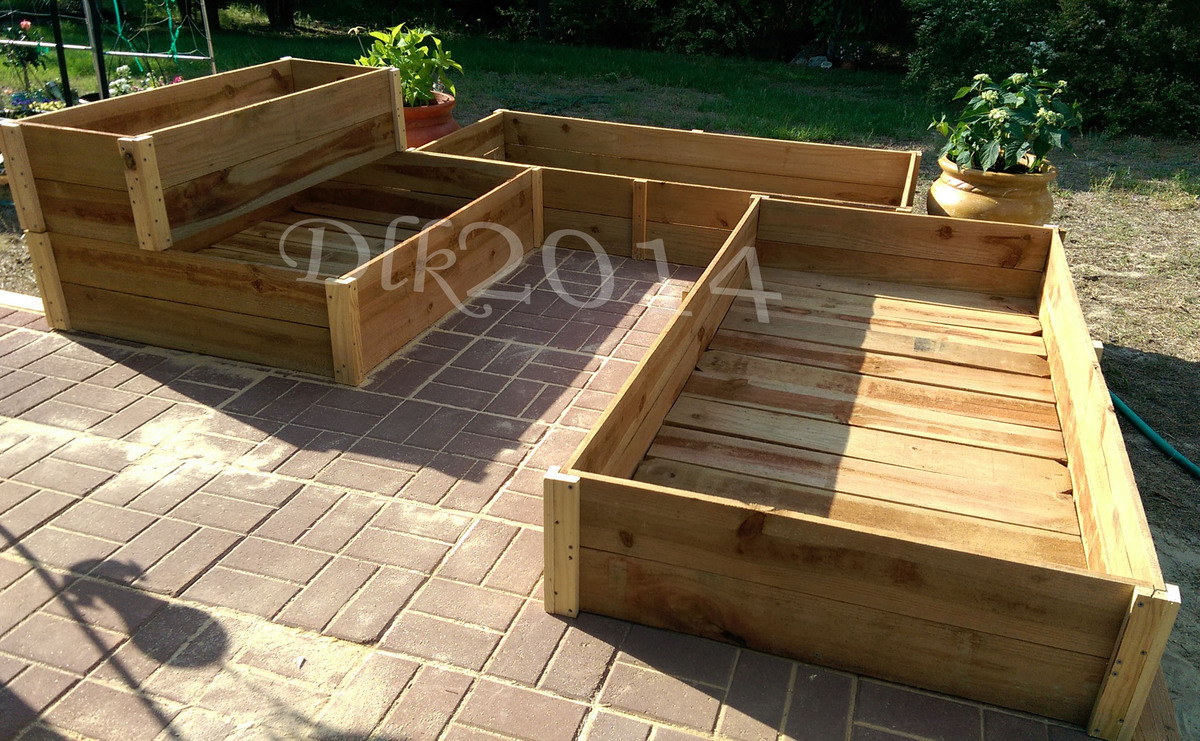
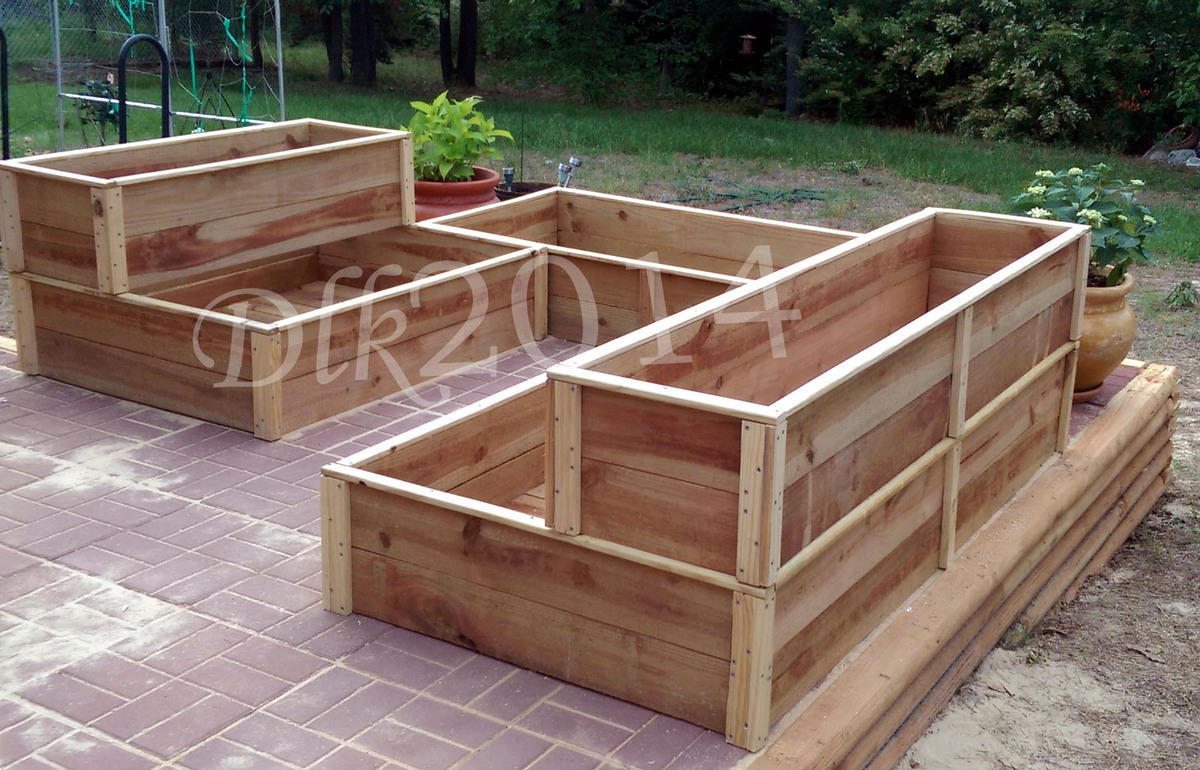
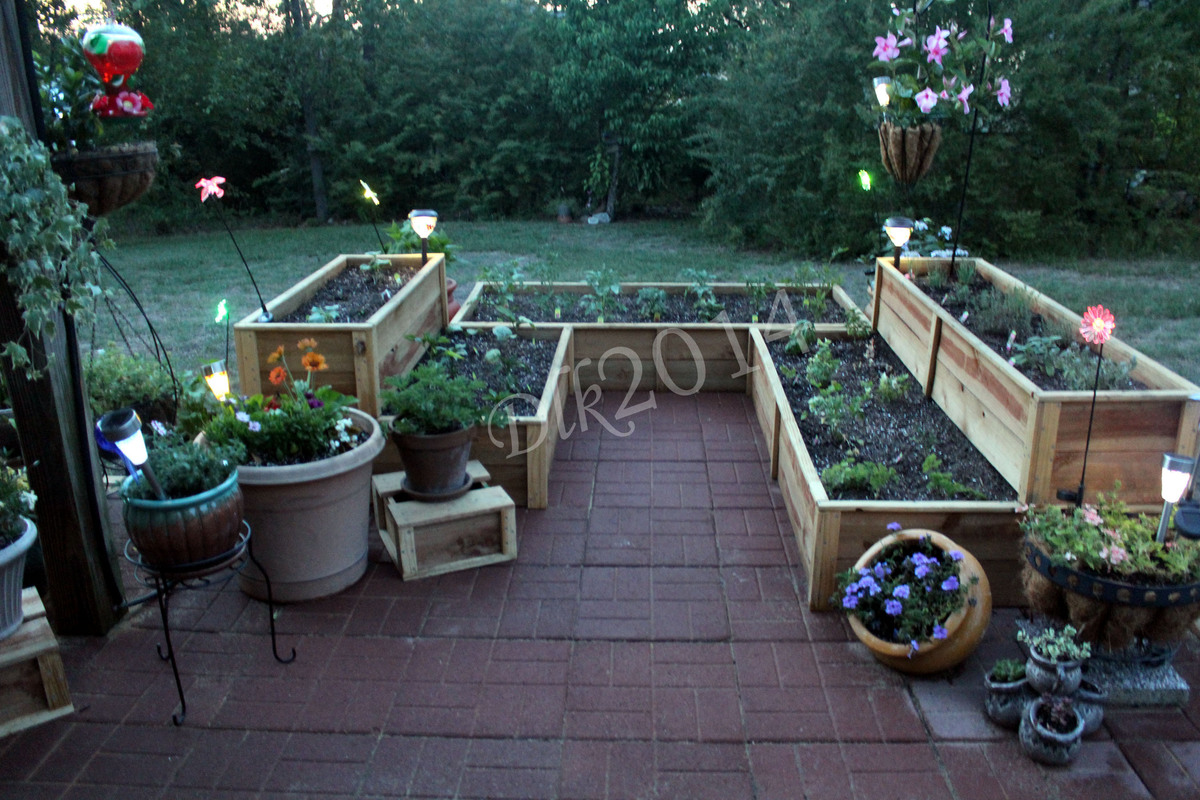
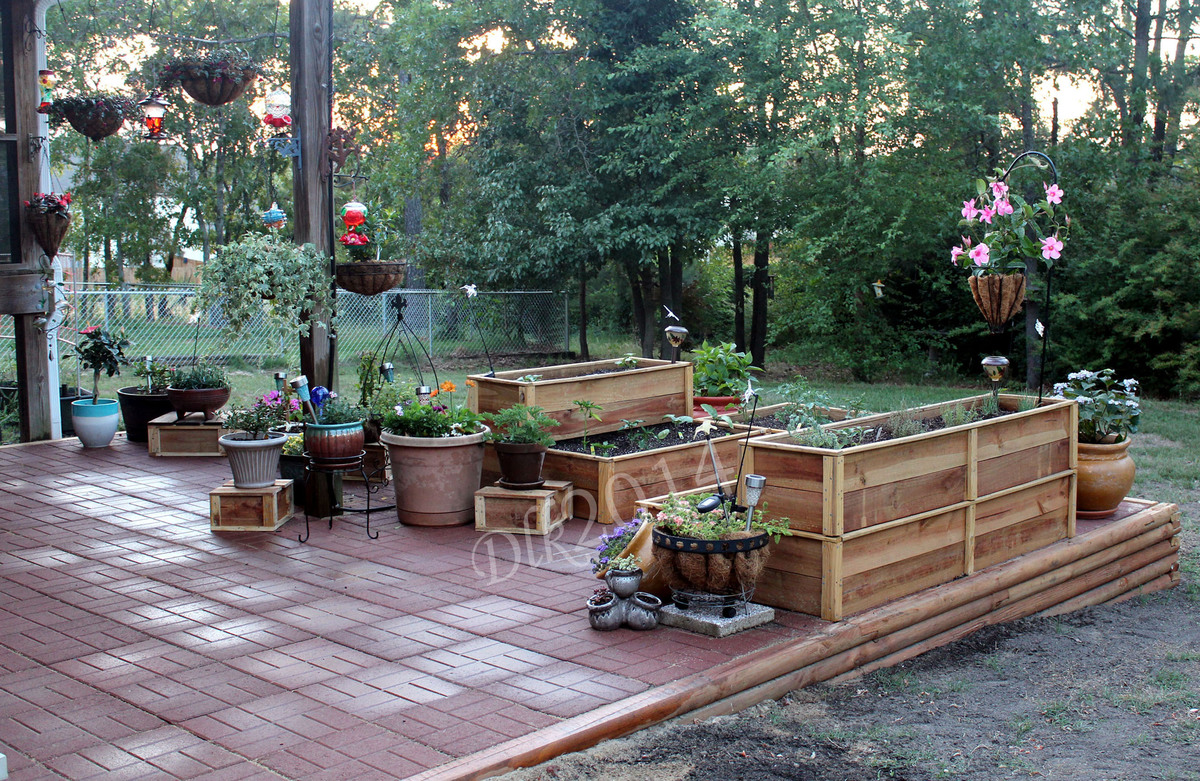
Submitted by Deekra on Sat, 06/07/2014 - 16:31

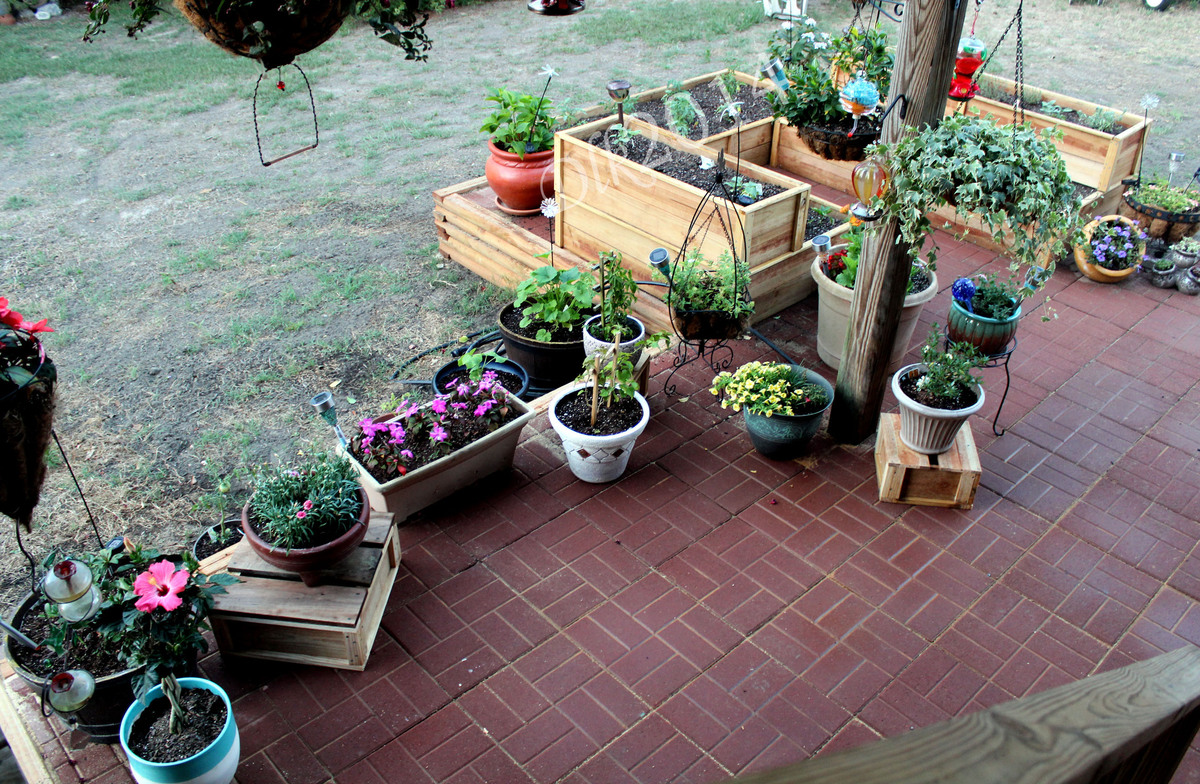
I used the basic Raised cedar garden bed plans with a few alterations. I made them different sizes, stacked one on top of the other for some dimension in my garden and secured them together from in inside.

Estimated Time Investment
Week Long Project (20 Hours or More)
Recommended Skill Level
Intermediate

Comments

Flip Up Storage Desk/Table

Submitted by Anonymous (not verified) on Fri, 04/19/2024 - 09:33

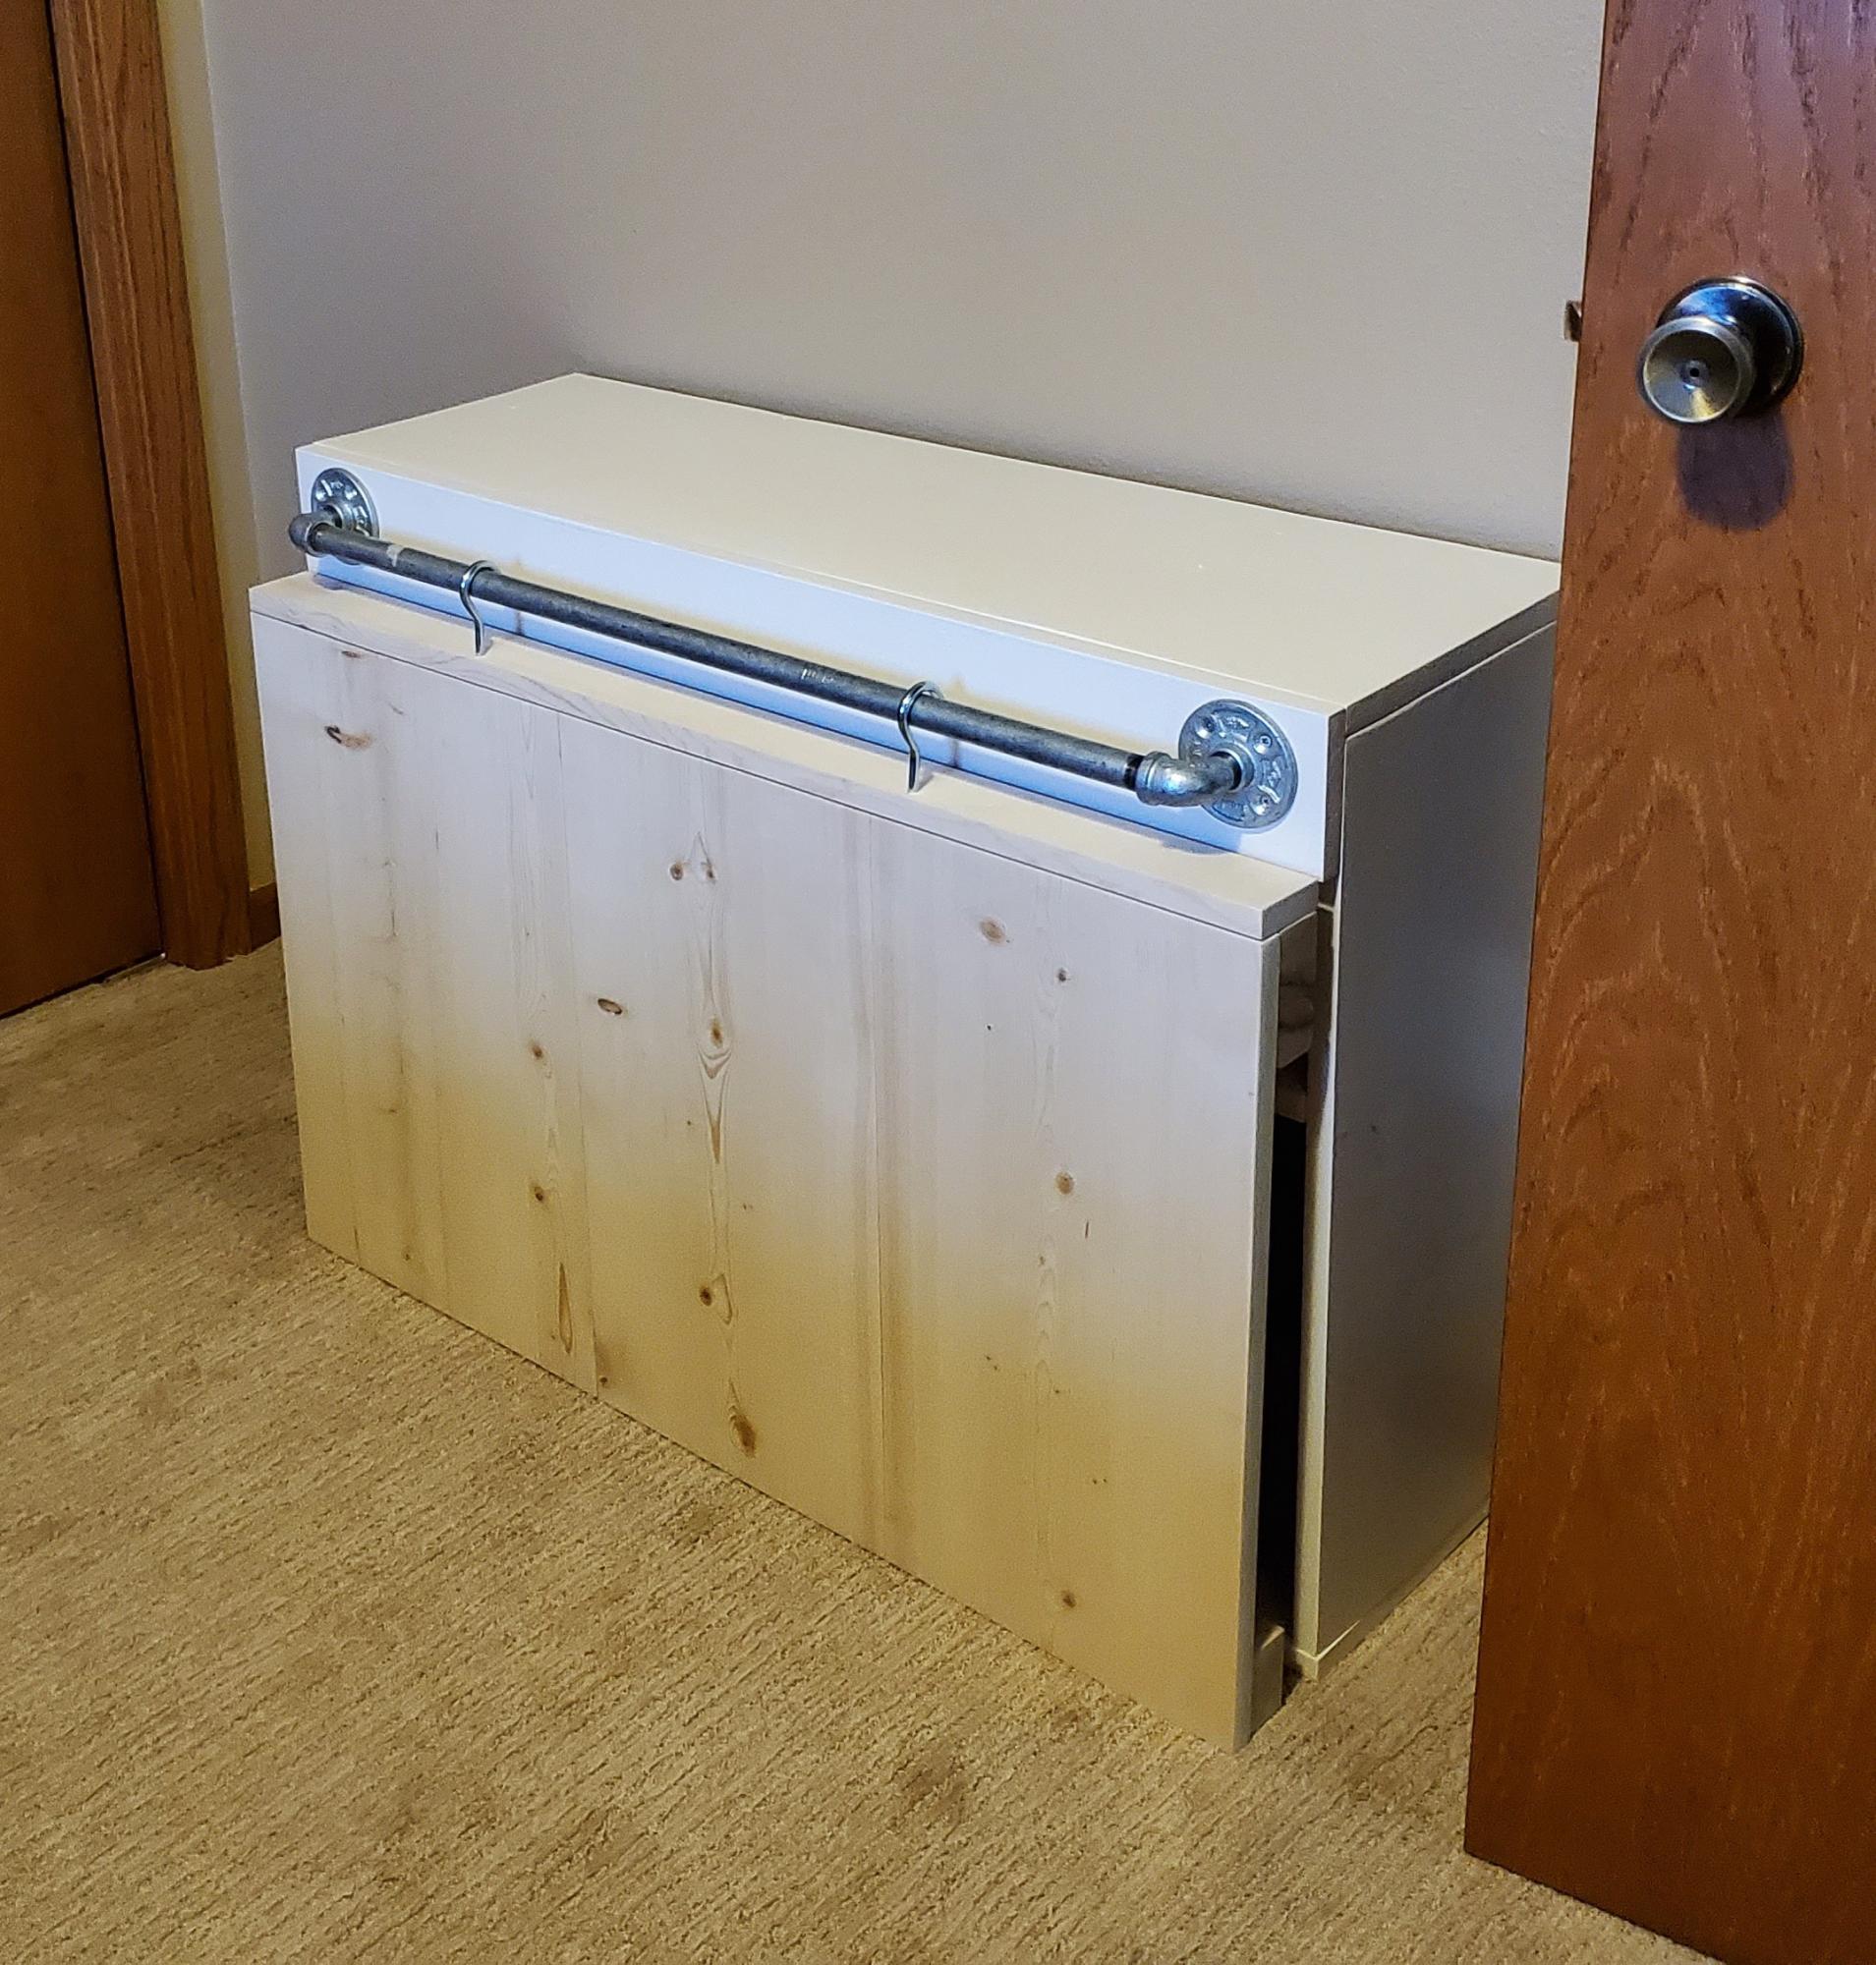
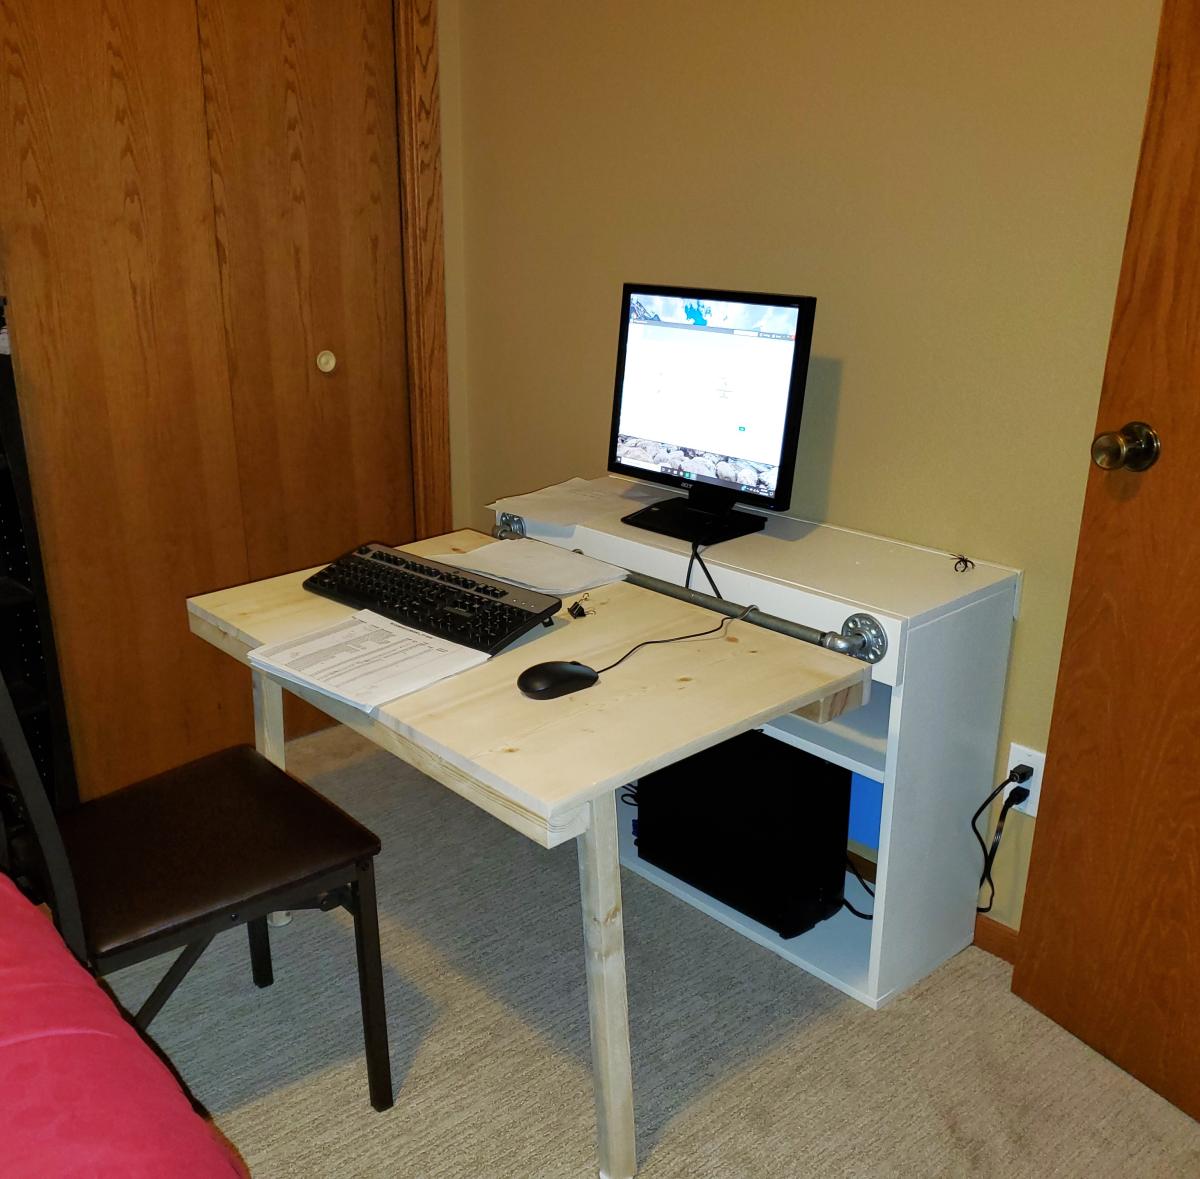
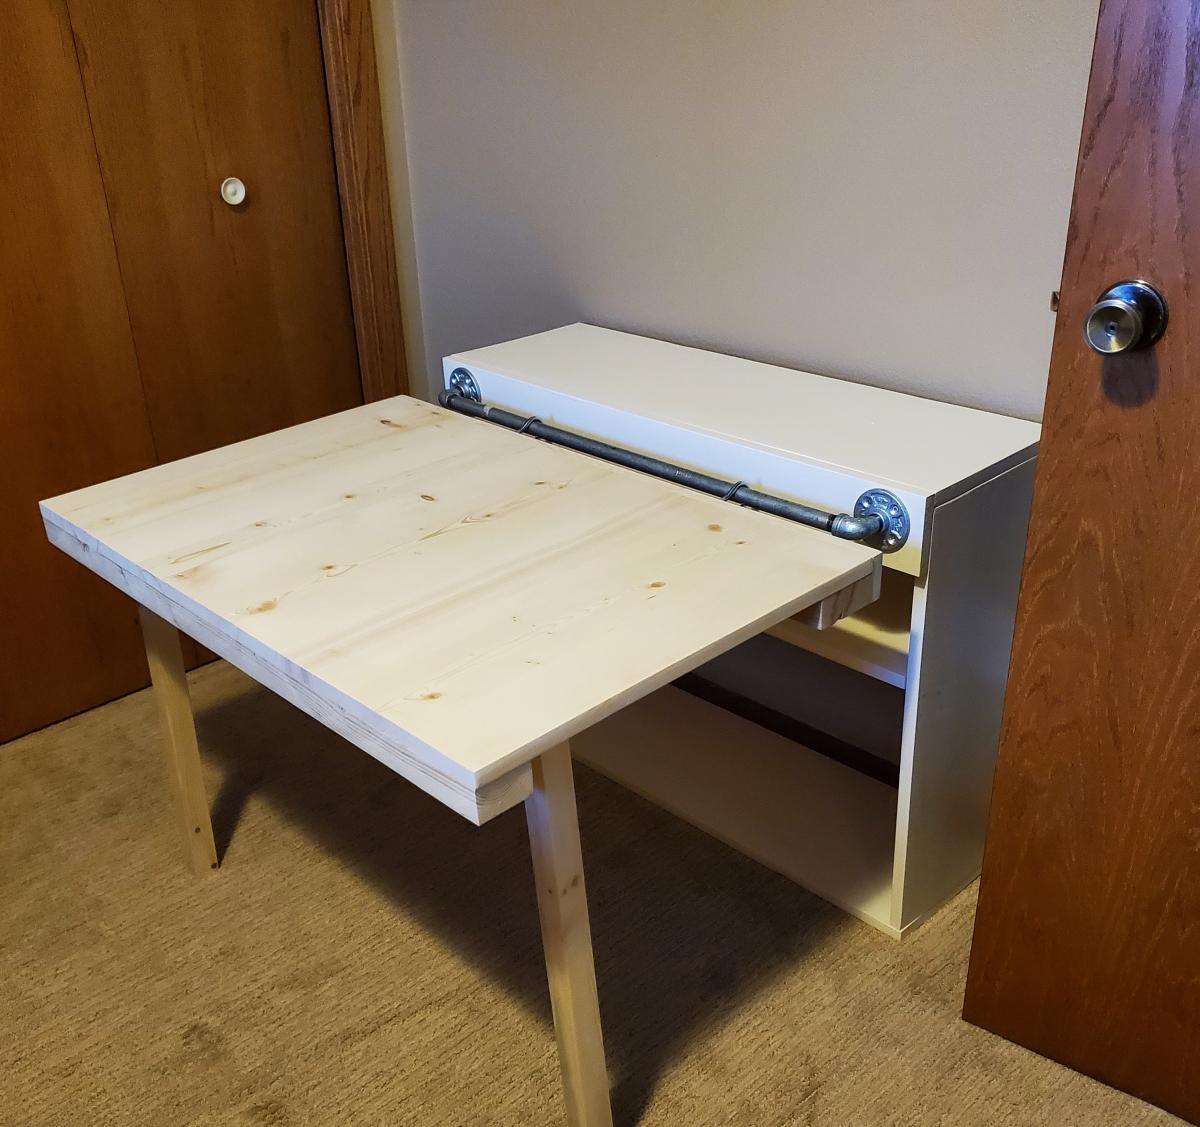
Folding desk based on Ana's Sliding Door Console with Folding Tables. I needed a desk that could collapse when the room was needed for guests. I liked that there was storage built in. I based my depth on my printer. There is a french cleat on the wall to help counter balance when opening and closing the work space.

Mystiy

Lounge Chairs

Submitted by rhn0489 on Mon, 07/06/2020 - 11:50

This is a realtively easy build. Simply follow the instructions and it will come together beautifully. I have down a couple of these so far and this one was actually narrower than the plans called for. The lady I built them for wanted the center section to match her cushion width as closely as possible so I simply used one less cedar 1x4. It turned our perfectly.

I have found most of the plans I have built from this site are pretty simple and most of my time has been spent on the finish.

Estimated Cost
$270
Estimated Time Investment
Weekend Project (10-20 Hours)
Finish Used
Helmsman Clear Gloss.
Recommended Skill Level
Intermediate

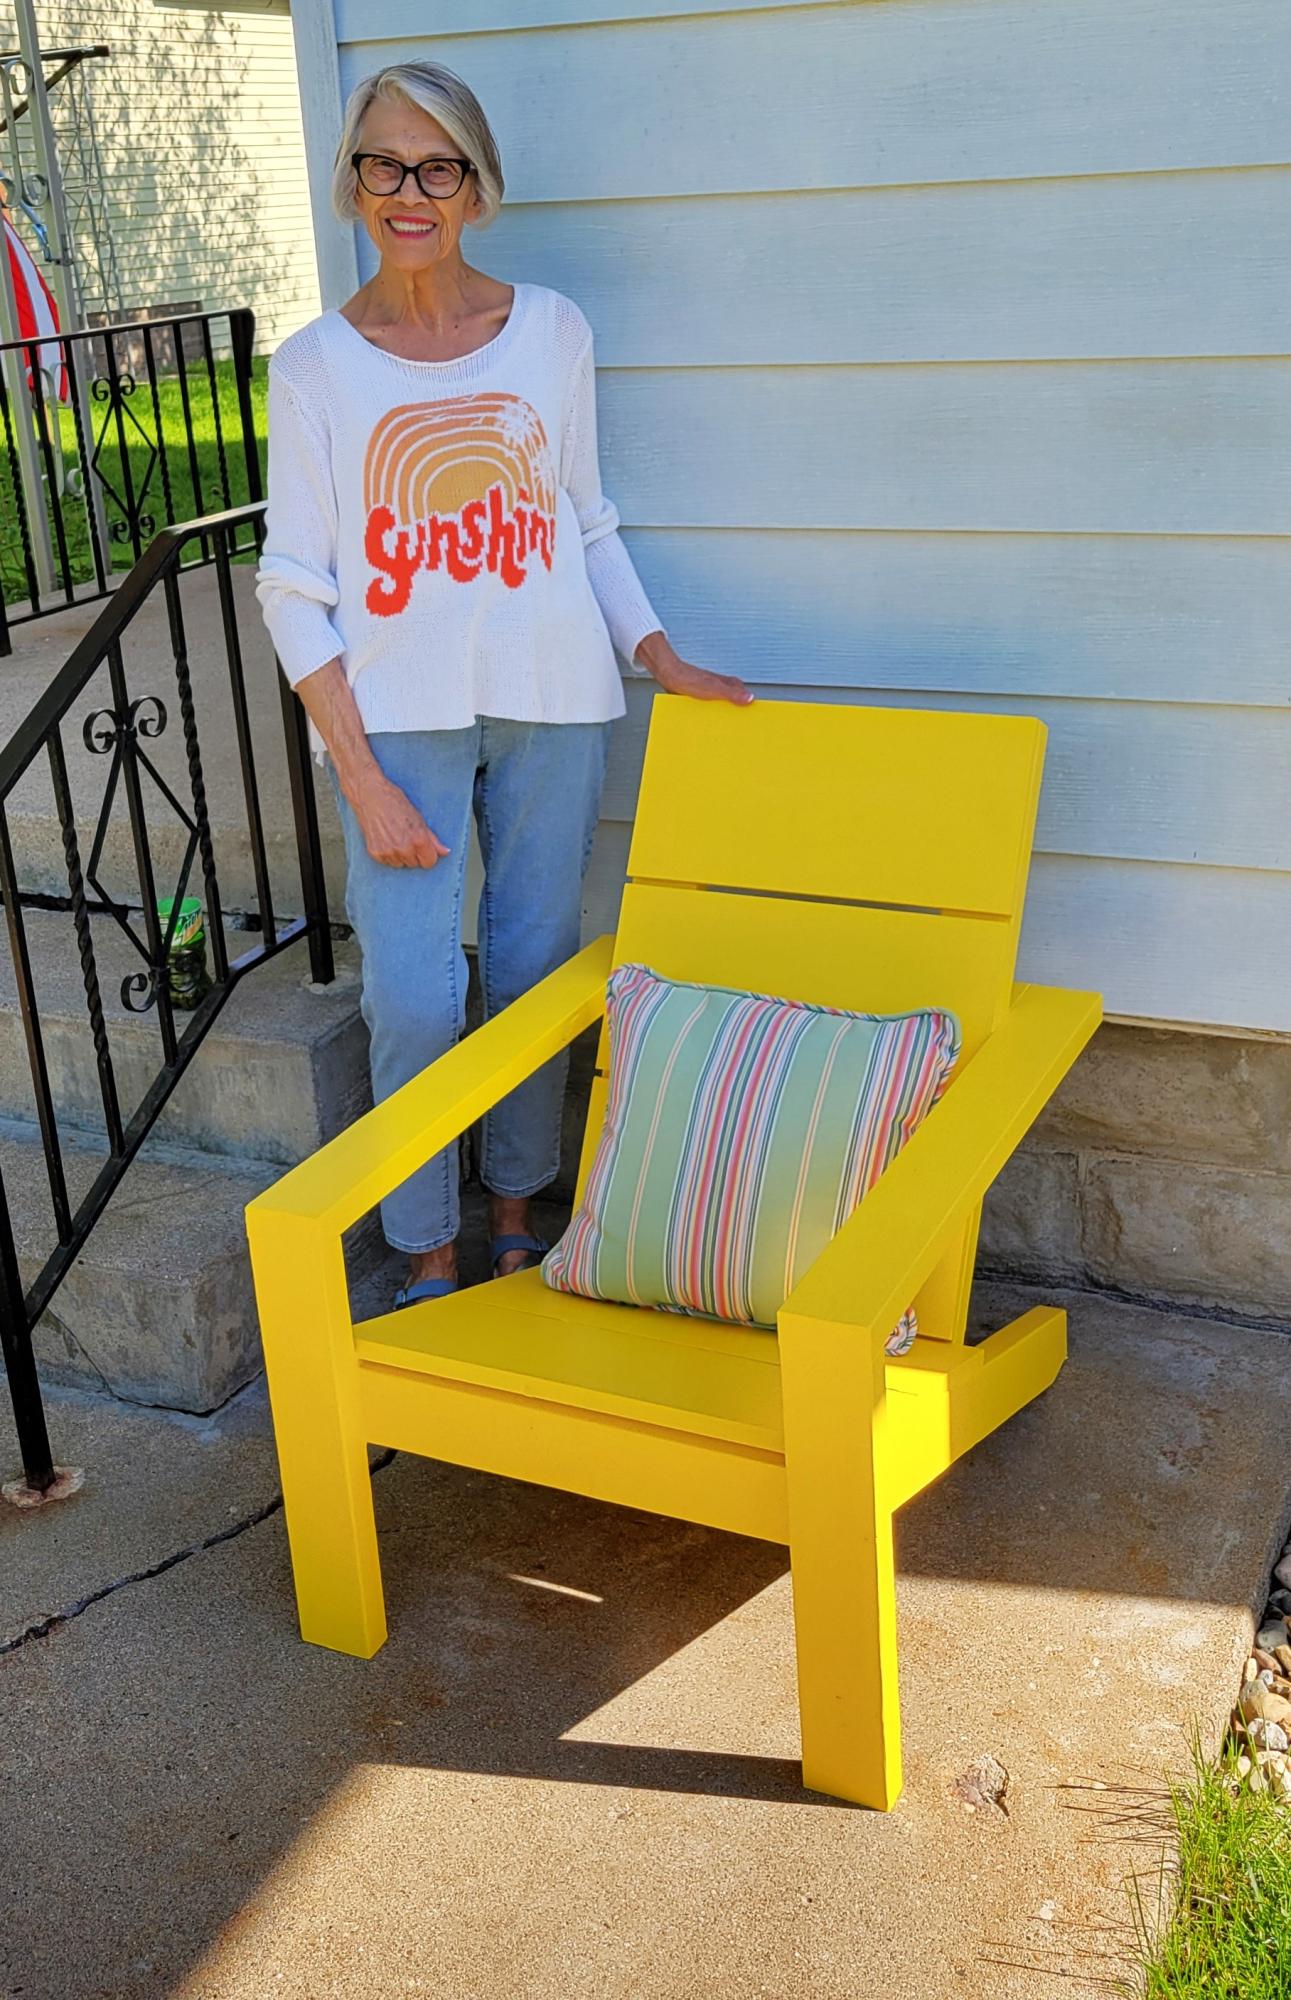
Bright and Cheery Adirondack Chair

Submitted by Anonymous (not verified) on Mon, 05/13/2024 - 07:51

I made this chair for my mom on mothers day. She loves it and I was able to use some lumber from my dad's garage stash, who passed over Thanksgiving. So there was a special link for her to this chair. Loved the easy to follow plans, thank you.

cgauley.cg

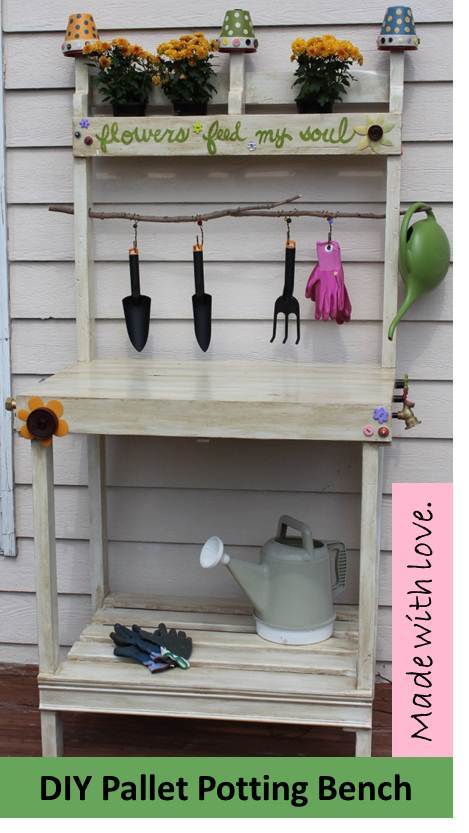
Cute DIY Pallet Potting Bench

Submitted by shampbel on Wed, 09/12/2012 - 20:33

Made from 2 pallets, 2 x 6 x 8, leftover trim from my house, wood branch from my backyard. Attached shelf with pocket holes.

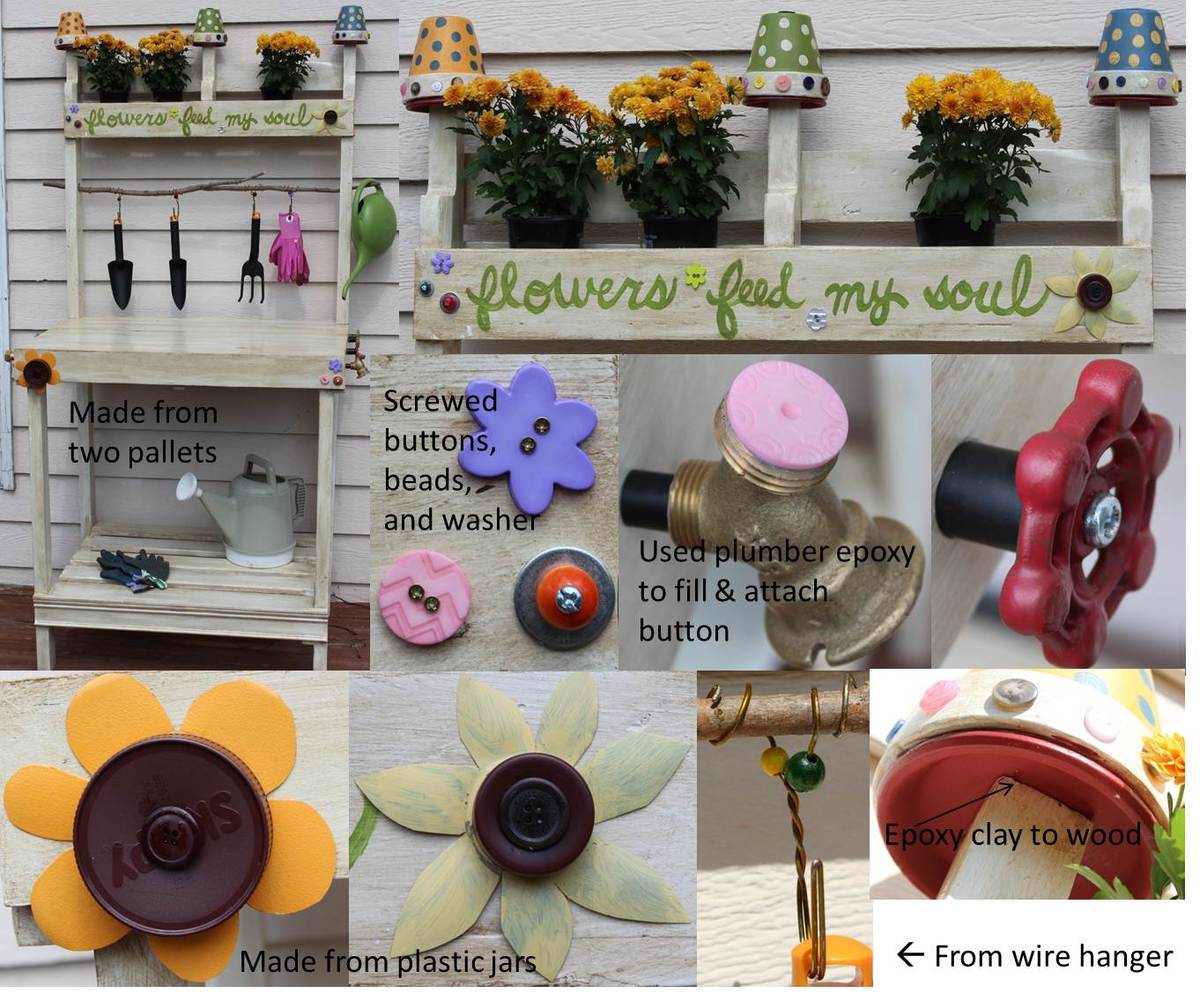
Accents:
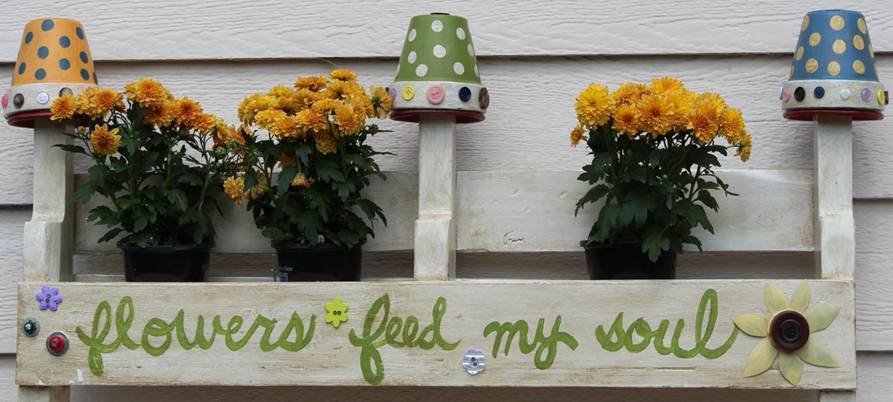
-Handpainted lettering; painted prior to glazing entire piece
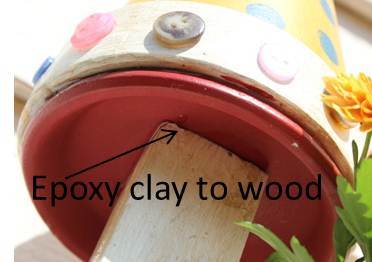
-Finials made from 4.25 inch spray painted and glazed clay pots and saucers coated with Valspar clear finish and attached together with epoxy; buttons attached to pots with E6000 adhesive
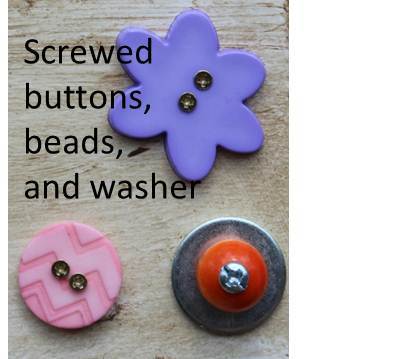
-Buttons attached mostly with small screws; a few with holes too small for screws were attached with epoxy
-Plastic flowers made from mayo and water bottles and lids; sanded, primed, spray painted, coated with Valspar clear coating; attached with screws
-Faucet knobs sanded, spray painted, glazed and attached with screws
-Plumbing pipe filled with plumber epoxy puttty; insert screw into putty before it hardened, then screwed into wood
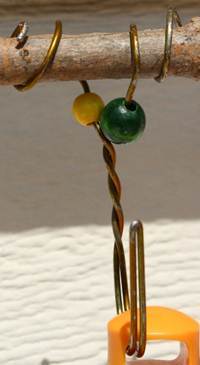
-Gardening tool hooks made from pant wire hangers with a few beads attached; wire simply wrapped around tree branch

Not sure that I will use pallet wood again since difficult to pull apart pallets, uneven and some split boards could not be used, and required tons of sanding for those boards that could be used. I think I paid more for orbital sanding pads than the cost of buying new wood. Will use pallet wood for other non-furniture projects not requiring a perfect finish.

Estimated Cost
$40.00
Estimated Time Investment
Week Long Project (20 Hours or More)
Finish Used
Kids distressed with hammers, sanded with 80 grit, Kilz Primer (1 coat), Sherwin Williams Exterior White Latex Paint (1 coat), Behr Glaze tinted with Brown Latex, Spar Urethane (3 coats)
Recommended Skill Level
Beginner

Great plans

Submitted by Anonymous (not verified) on Sun, 10/30/2016 - 17:31

These plans are easy to build. Built it in about a day. It was around $100 plus paint. 

Estimated Cost
$100
Estimated Time Investment
Day Project (6-9 Hours)
Finish Used
Antique white paint.
Recommended Skill Level
Beginner

Kids Home School Desk and Chair

Submitted by Anonymous (not verified) on Thu, 08/27/2020 - 12:42

We have the covid home school season in effect here in Texas. I built this for my grandson who is in kindergarten. He really likes it and I enjoyed building it. The table is made from pine primarily 2"x 3" boards and a 2' x 4' panel desktop. It is 25" high and 24"W x 48"L. I used the Ana White X Design for the frame.
The chair is 30" high with the seat being 15" high. It is 12" wide by 14 1/2 long. I made the rear legs from a 2" x 6" boarded ripped at 2 1/2 inch wide and the back rest angle at 6 degrees off center. The front legs from 2'' x 2".
I installed adjustable threaded glide felt pads to both the chair and table legs.
I painted and distressed for the older used look.

Estimated Cost
$40 with my 10% military discount for material.
Estimated Time Investment
Weekend Project (10-20 Hours)
Finish Used
Sanded 120 grit and used Glidden white for frame that I had from an old job. Dark wax tabletop.
Recommended Skill Level
Beginner

Small Cedar Shed

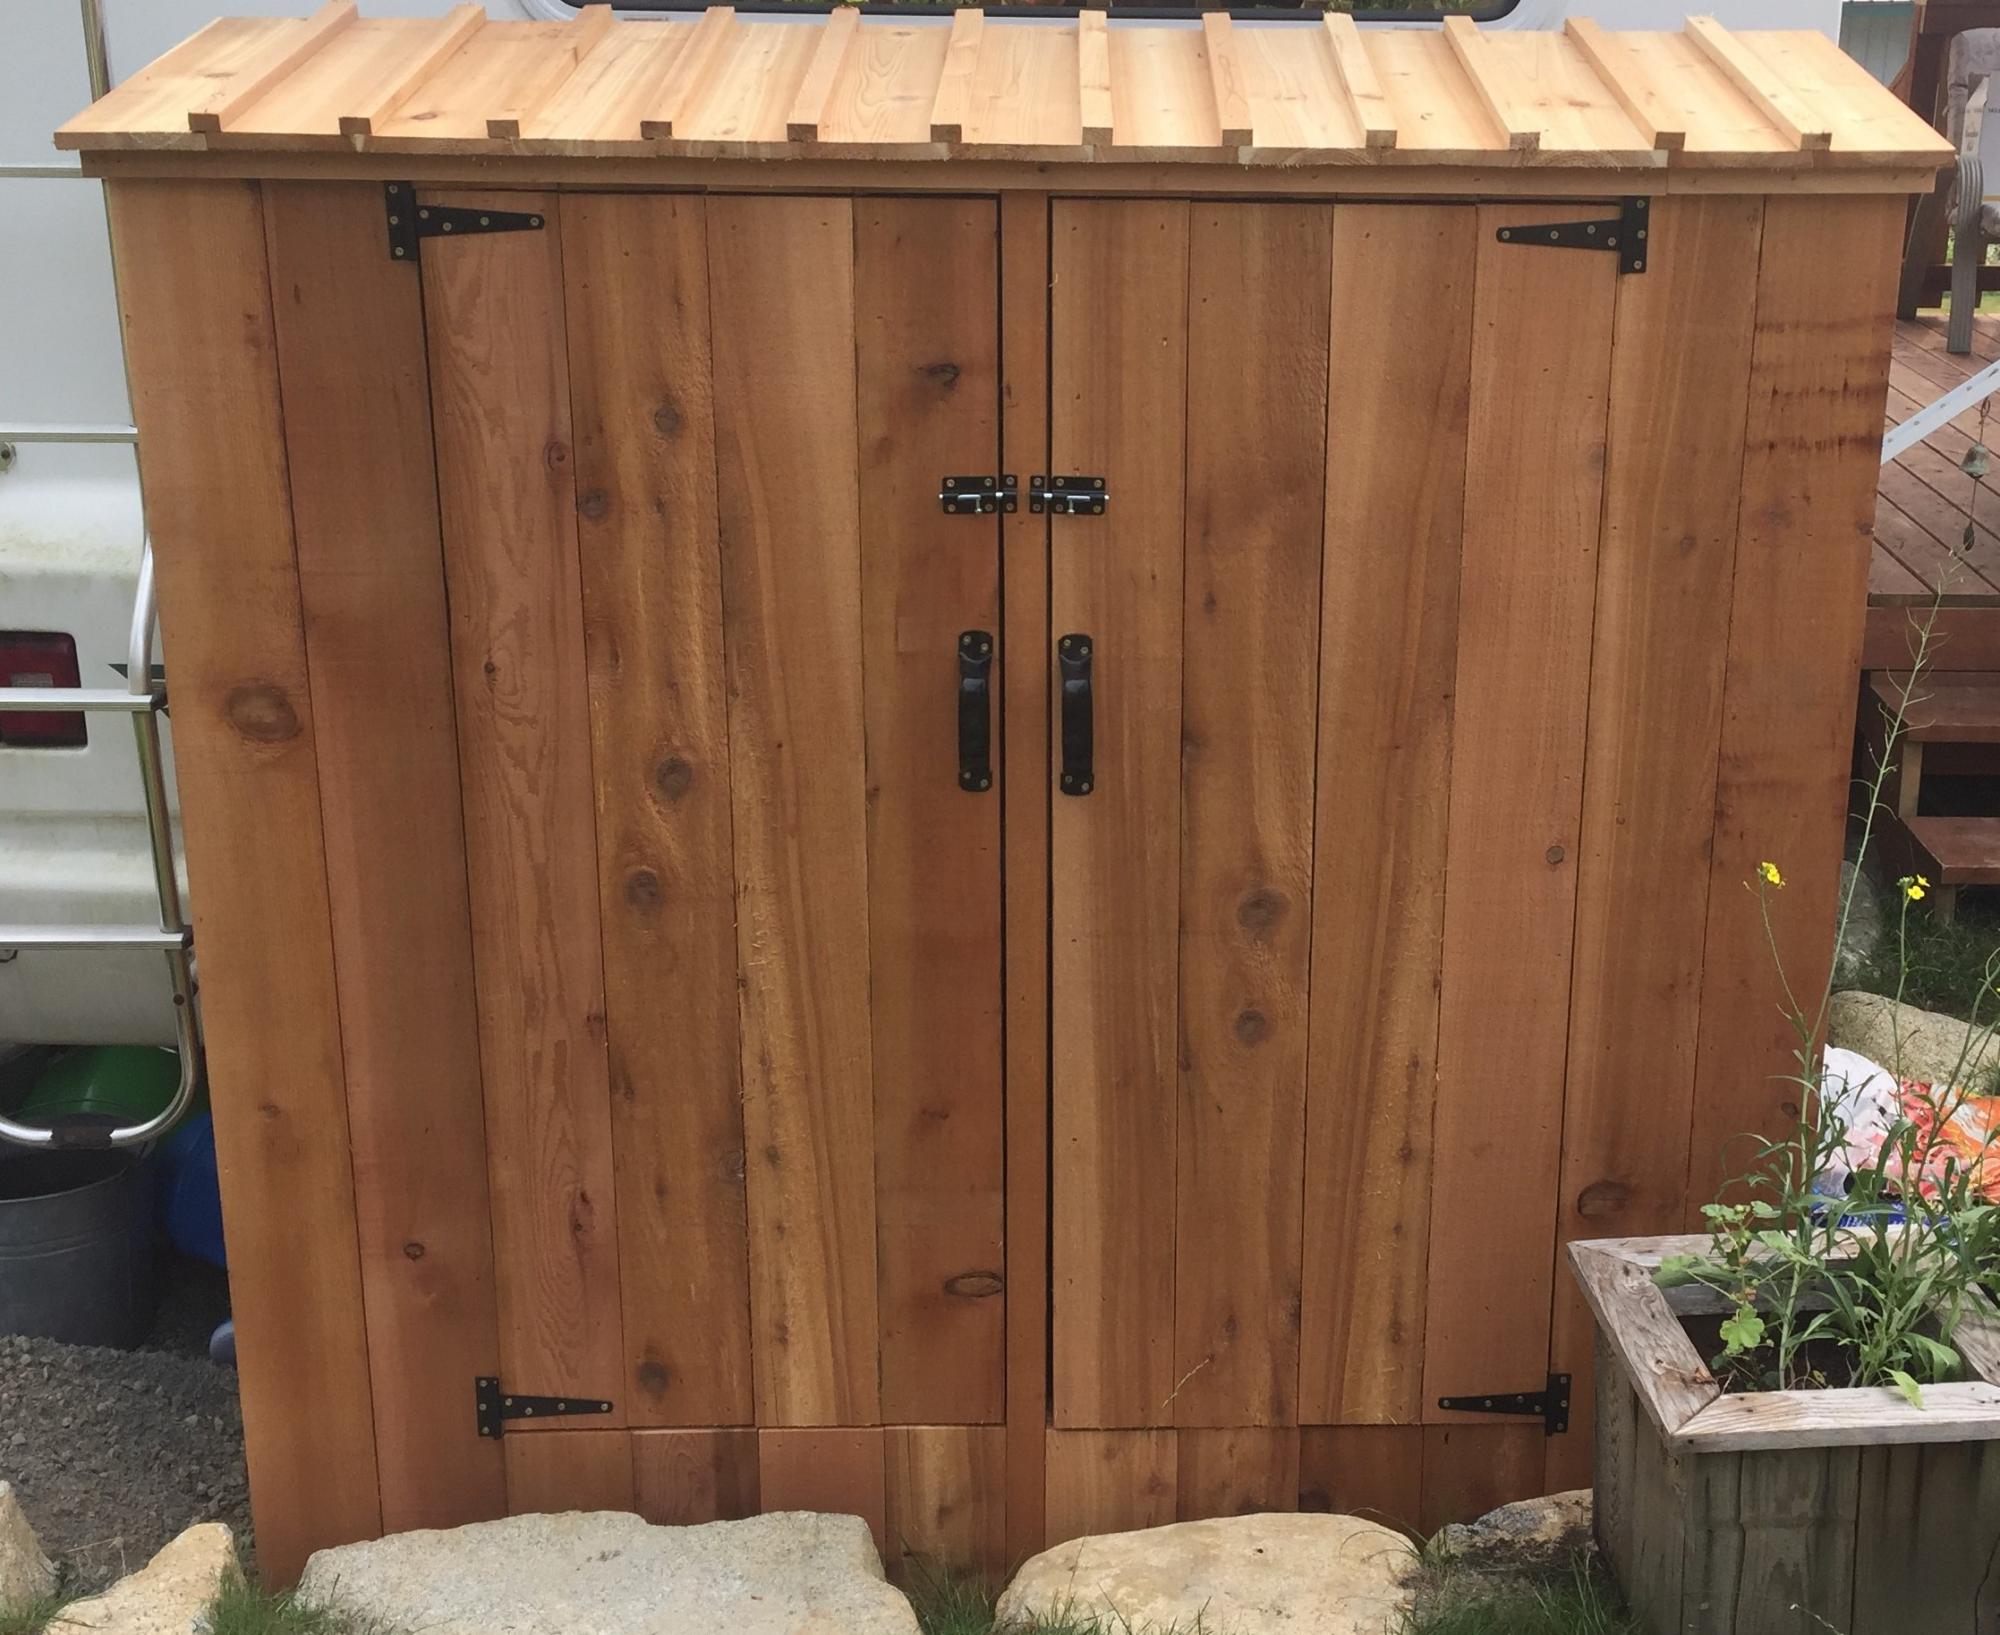
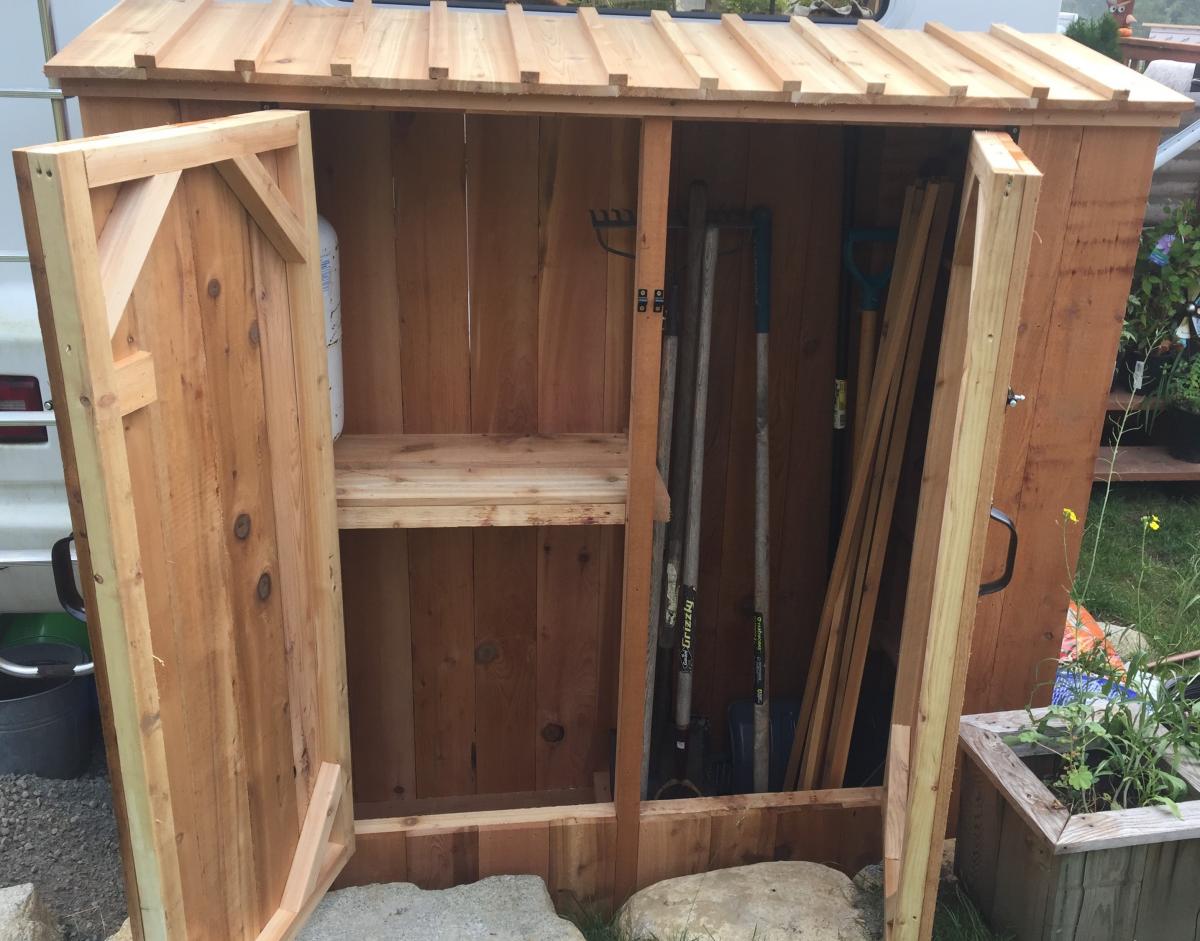
Here is our version of the small cedar shed. Had to raise the door up a bit to clear the rocks. All built from cedar fence boards and a few 2x4's

Built from Plan(s)
Estimated Time Investment
Afternoon Project (3-6 Hours)
Finish Used
None - age naturally
Recommended Skill Level
Intermediate

Comments

Ana White Admin

Fri, 11/06/2020 - 08:18

Love that you used all cedar fence boards, do you have an estimated cost for this project? Thanks for sharing!

Frosty Garden Greenhouse

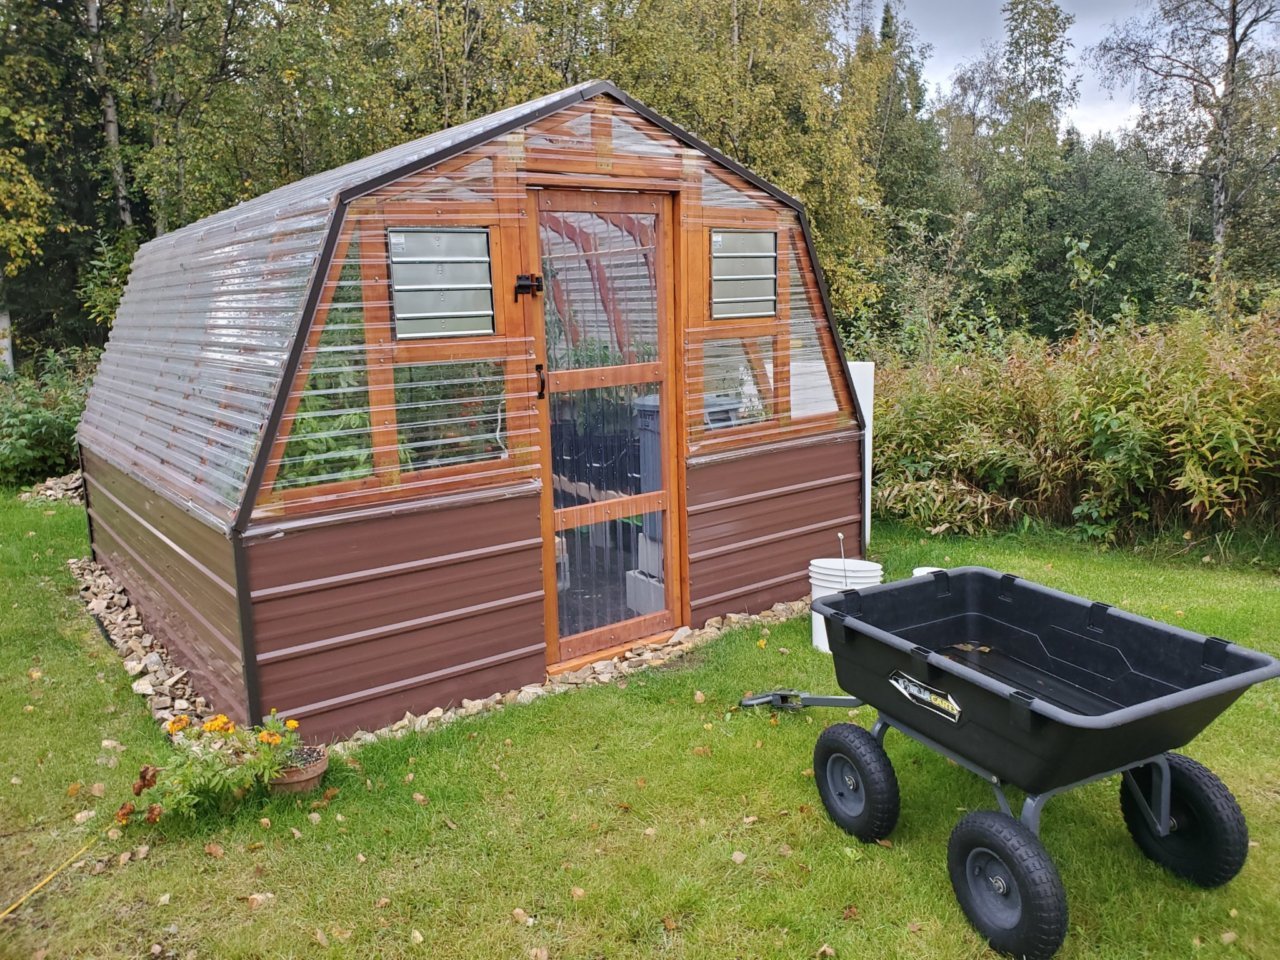
It was truly great for us to find a greenhouse design from a fellow Interior Alaskan blogger. We kept coming back to this design, enough times to where we decided to actually build it.

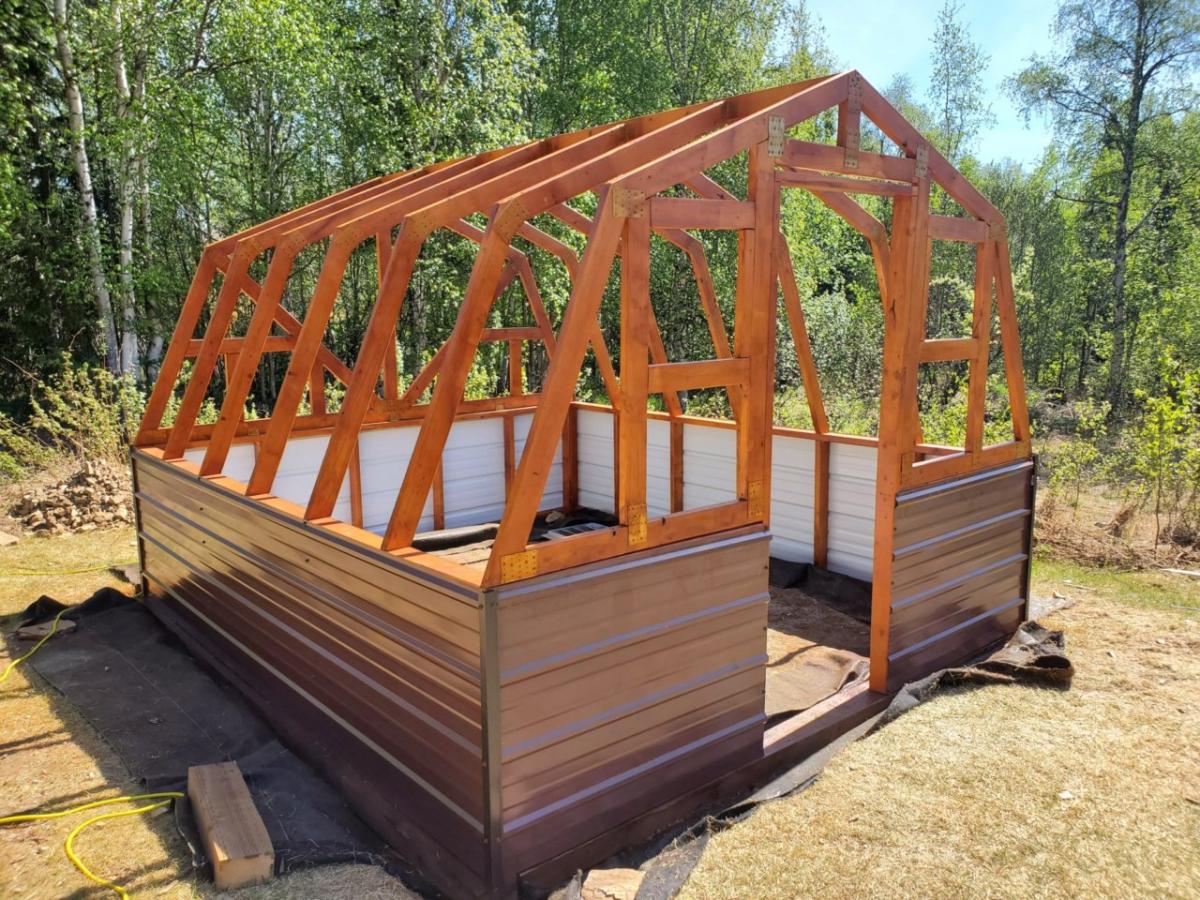
We would be the first to admit that tackling a gambrel style building was slightly intimidating and not what we had in mind for our very first self-built building! But, we faithfully followed the cut lists and directions. It turned out beautifully! If you're in the same boat, have confidence that you can build this too!

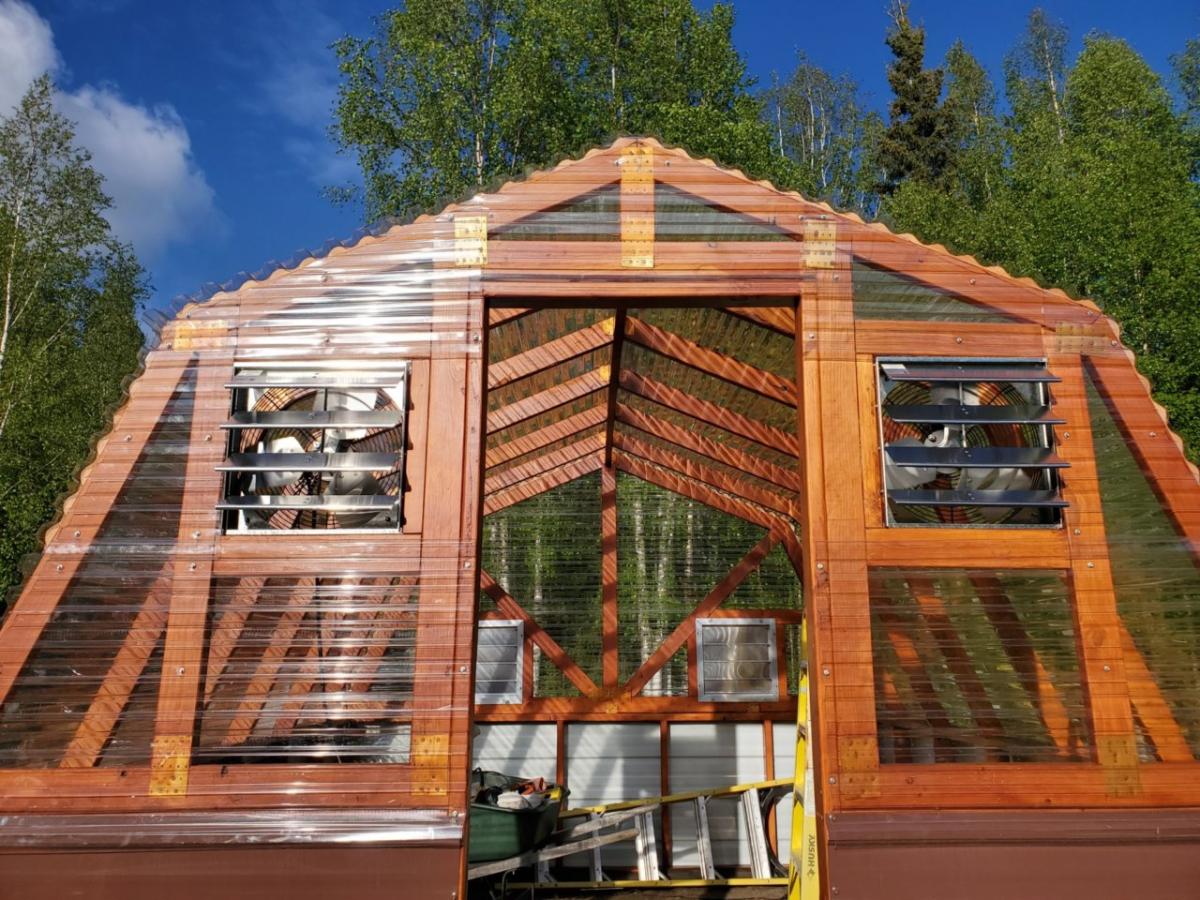
We love the options available for making it your own. We decided to stain the greenhouse lumber of ours to match our cedar sided home. We also built a semi frost-resistant foundation, since we're a little north of Ana at 65 degrees and sometimes experience frost heaving. We also added full climate controls to ours, adding both fans and louvers that keep our greenhouse at perfect temperatures.

The performance has been great! Building this greenhouse has been the single greatest thing we have done in our years of subarctic gardening. We might even consider building a second greenhouse down the road. No matter how big your greenhouse is, it's never quite enough!

Thanks for the great plans, Ana! We appreciate your work!
Built from Plan(s)
Estimated Cost
$2400
Estimated Time Investment
Week Long Project (20 Hours or More)
Finish Used
Transparent cedar stain
Recommended Skill Level
Intermediate

Comments

Back