Community Brag Posts

Pergola

Pergola is 10x12 made of all cedar except posts.  Posts were 6x6 brown wood then covered in 1x6 cedar. Slats on top were attached using L brackets. Stained the same year.

Estimated Time Investment
Week Long Project (20 Hours or More)
Finish Used
Cabot in Natural finish
Recommended Skill Level
Intermediate

Pet Stairs

Submitted by alli2410 on Tue, 03/13/2018 - 06:26

I needed sturdy stairs for my 2 60lb dogs.  My bed is 33 inches from floor to top of mattress.  So, this is my very first project completed by myself!  Custom size pet stairs 24inx24inx24

Estimated Cost
$40-50
Estimated Time Investment
Afternoon Project (3-6 Hours)
Finish Used
Minwax polyshades Espresso gloss (3 coats)
Recommended Skill Level
Starter Project

Comments

Miter Saw Cart

Submitted by Nermell on Wed, 07/31/2013 - 16:51

As a complete beginner in wood working (unless you count a year of woodshop over a decade ago), I decided that building a cart for the miter saw I just bought would be a great first project. So what did I do with that brand new miter saw? I left it in the box and made all of the cuts with a circular saw. Not sure what I was thinking there...

I mostly followed the excellent plan provided here but used wooden arms to prop up the wings in order to save on cost. I got the idea from the folding sling chair plan. It took quite a few screw ups and adjustments of the lower support bar before getting one of the wings level but I got it eventually.

Update 8/20/13: The miter saw has been a joy to use with the cart and the big flip up wings provide a ton of really convenient work space in addition to stabilizing 8 ft boards for cutting. I added a sliding drawer and some utility hooks for additional storage.

Built from Plan(s)
Estimated Cost
$70-80
Estimated Time Investment
Weekend Project (10-20 Hours)
Finish Used
none
Recommended Skill Level
Starter Project

Comments

davidmauer15

Thu, 08/01/2013 - 08:10

I originally just had a 2x2 and two blocks to hold up the wings on the cart. They kept falling out, so I replaced them with hinged arms, which were a pain to fit and install, but they work well. Your approach has the same advantage of hinging the support arms: the wood can't fall out and it looks way simpler to install than my system.

One hint if you try Nermell's approach: Flip the cart upside down when you fit and install the support arms. I did all kinds of complex sketches and measurements, then realized it was just faster to lean the support bracket at roughly 45 degrees, then I installed the two block (one on the side, one on the wing) to hold the bracket in place. Flip the cart over, and your wing will sit at a perfect 90 degrees to the sides of the miter saw cart.

Pretty Wood Boxes!

Submitted by cassiet717 on Fri, 08/02/2013 - 18:42

My brother and his fiancee just bought their first house, and these sweet little boxes were the perfect housewarming gift! I used the recommended cedar picket, and found some old reins at a flea market for the handles. Piece of cake to build, super inexpensive, but absolutely adorable!

Estimated Cost
$3 per box (including handles)
Estimated Time Investment
An Hour or Two (0-2 Hours)
Finish Used
Minwax Pre-Stain Wood Conditioner, Minwax Stain in Walnut
Recommended Skill Level
Starter Project

Making a wooden game board

I made a wooden game board for The Duke from Catalyst Game Labs. The Duke is a 2 player abstract strategy game. In some ways, it is similar to chess. For more details about The Duke visit the official website for the game where you can find the rules and files for a Print & Play version of the game. (Unfortunately, at the time of writing this tutorial the physical copy of The Duke is out of print.)

The game board for The Duke is similar to a chess board. It uses a 6×6 grid instead of the 8×8 grid in chess.


Estimated Time Investment
Weekend Project (10-20 Hours)
Finish Used
Watco Danish Oil (Natural)
Recommended Skill Level
Intermediate

Square Farmhouse Table

Submitted by blawson972 on Wed, 08/21/2013 - 14:50

This was my first project! We just bought a house and have no furniture except a mattress on the floor! But soon, we will have a home full of custom built furniture :)

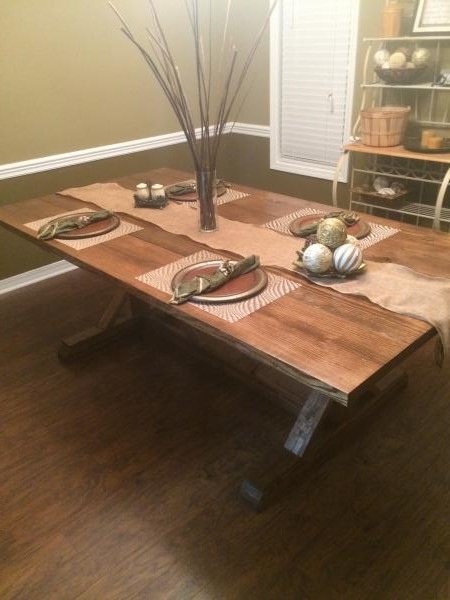
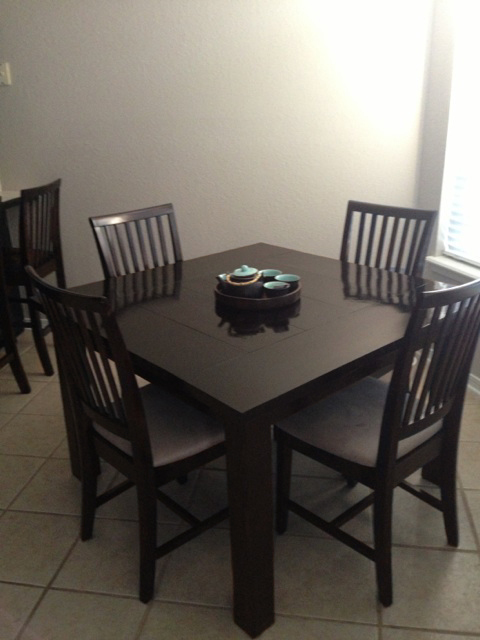
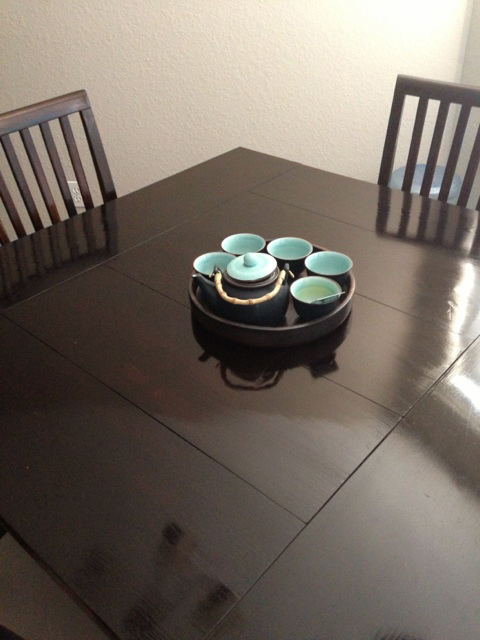
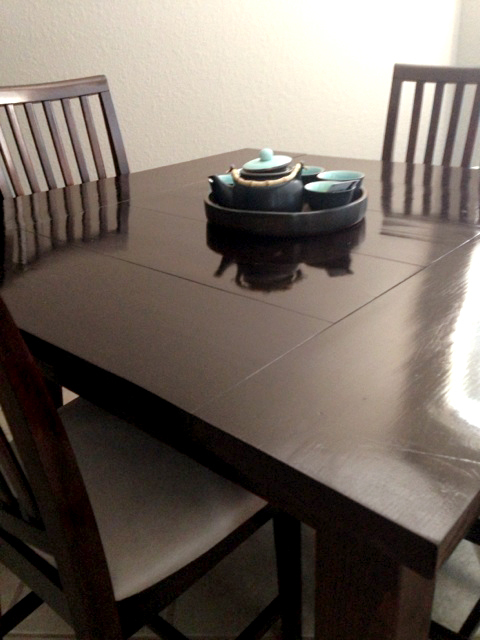
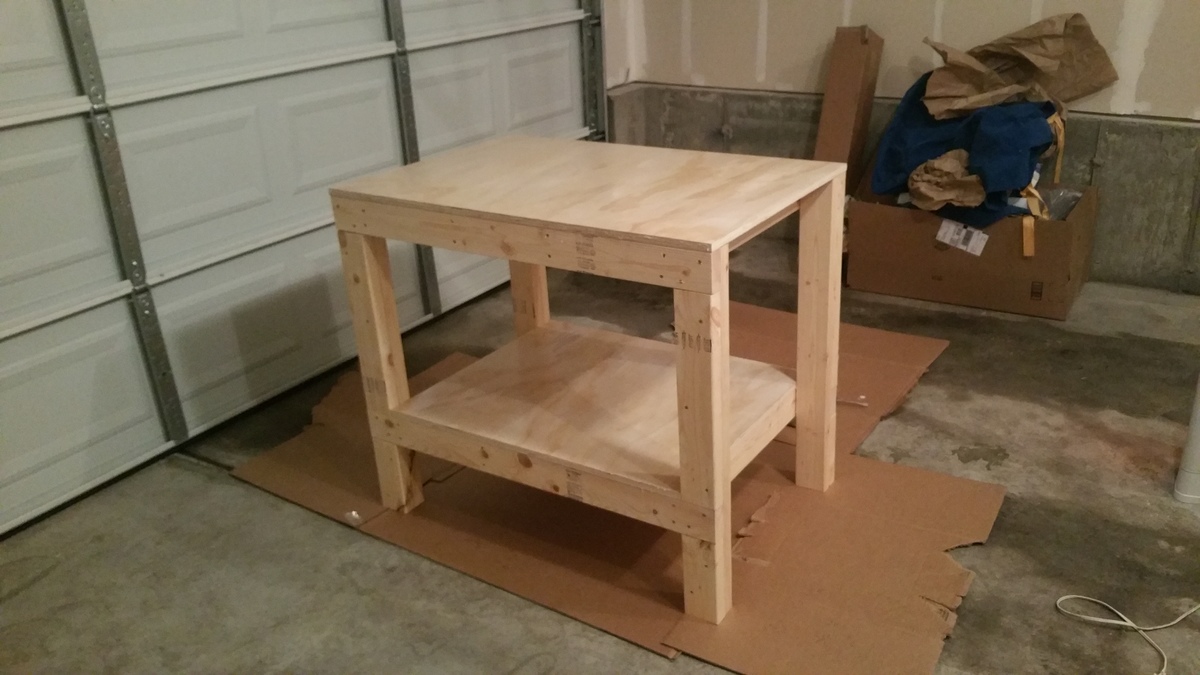
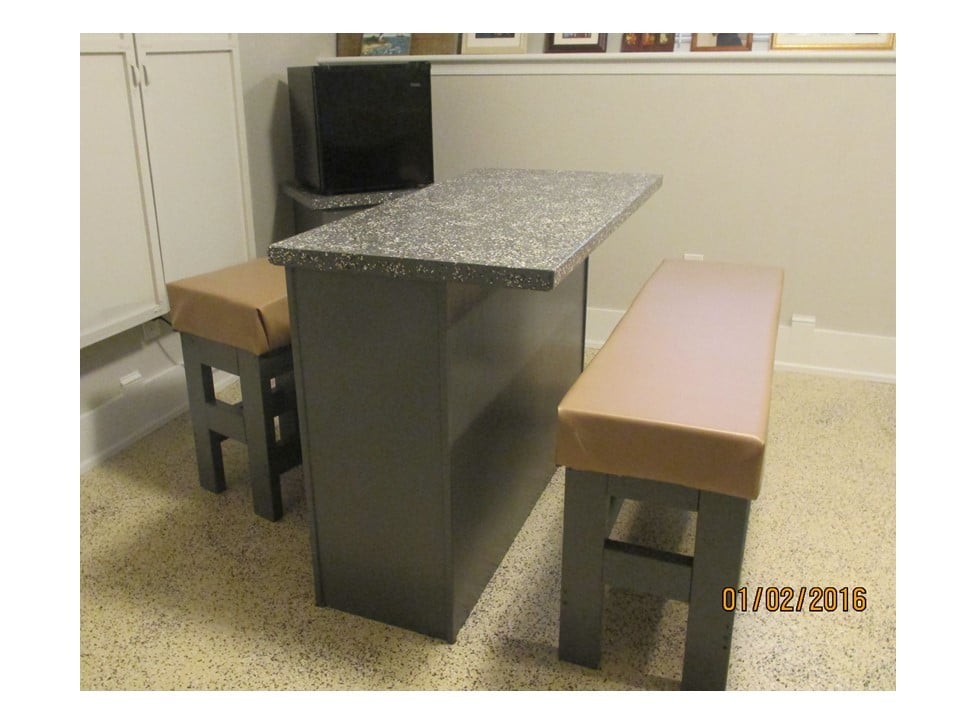
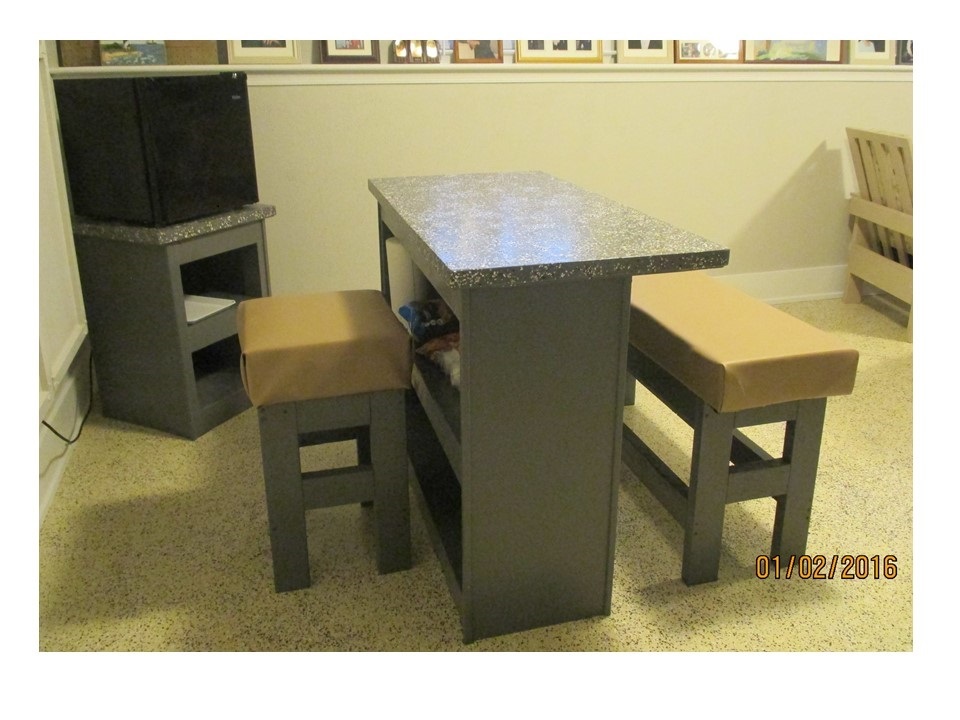
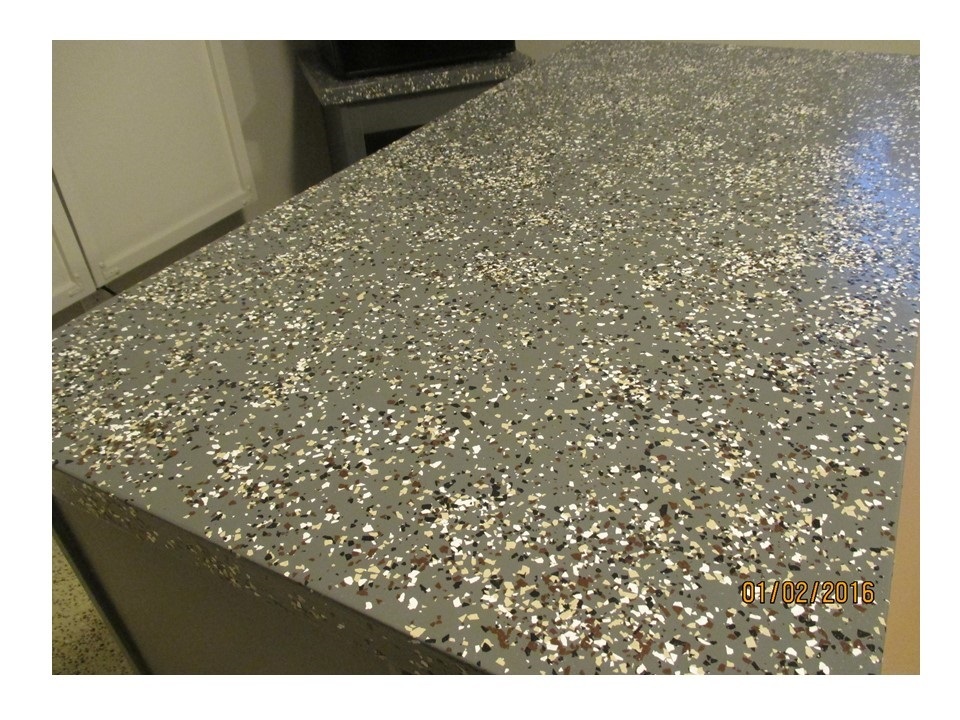
I modified this plan quite a bit so it would fit in my space better. My husband really wanted a square table, so I came up with this one based on the farmhouse table. I changed the table top pieces to 2x10’s simply because I like how they look. It took me quite a while because I wanted the top to be super smooth with minimal gaps between the boards, so I ran the boards through a planer quite a few times until they were perfectly flat. Also, since it is square and smaller, we didn’t need the support beam along the middle.

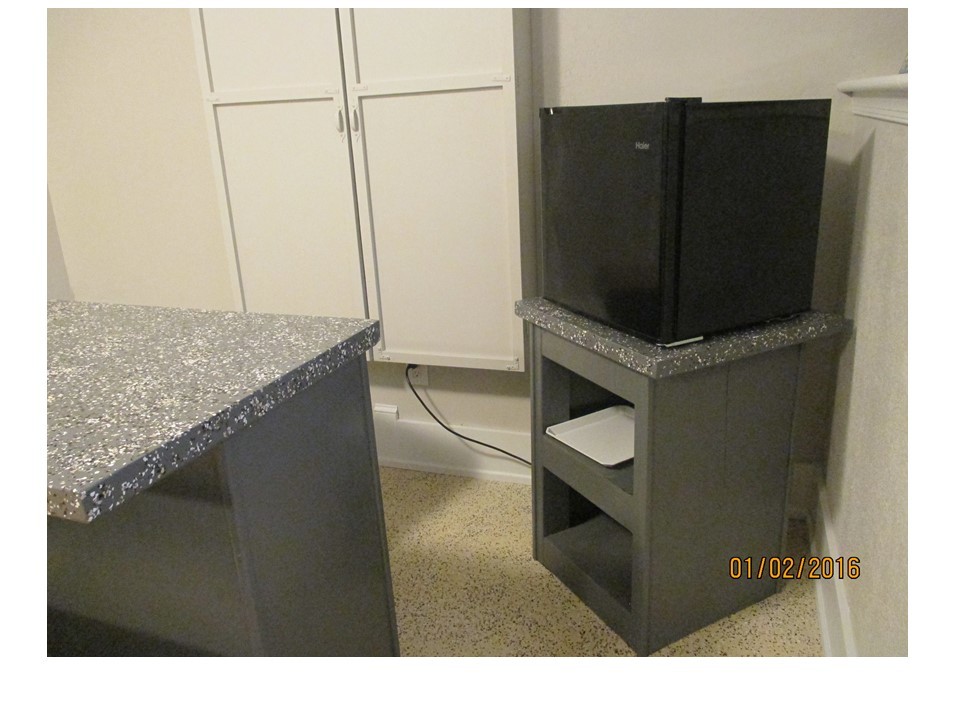
I really wanted chairs that matched the table, so I ordered chairs that were unfinished and stained them to match the table. This took FOREVER and they were a little expensive, but they turned out great! We also got 2 barstools that match.

Like any other project, the finishing took the longest. I sanded for what felt like 20 years, then stained and poly’d for another 10. I am pretty happy with it considering it was my first try!

Estimated Cost
$75.00 - table only
Estimated Time Investment
Week Long Project (20 Hours or More)
Finish Used
I used Minwax Dark Walnut oil based stain for everything and finished with 2-3 coats of Minwax polyurethane in satin. I really didn’t want the table to be so shiny, but oh well! Looking back, I probably would have used polycrylic. It doesn’t protect as well, but it is much less shiny!
Recommended Skill Level
Beginner

Comments

blawson972

Thu, 08/22/2013 - 11:21

I ordered them from a manufacturer in California called Maywood Shops, LLC. The chairs weren’t that expensive themselves because they are a wholesaler, but I had to pay around $175.00 to ship them!! After that, they were comparable to store-bought chairs.

Jewelry/Makeup Storage Cabinet

Thank you Anna for providing the template plans for this project. My wife had a mirror leaning on the wall in our bedroom that rarely got used and jewelry all over the dresser. So thanks to you I was able to turn this cheap mirror into useful storage and organize her jewelry.  Thanks! 

Estimated Cost
$80
Estimated Time Investment
Weekend Project (10-20 Hours)
Finish Used
Glossy spray paint
Recommended Skill Level
Beginner

Comments

Ana White

Wed, 10/07/2015 - 10:18

Thank you for building!!!  Your post just made my day, I'm so happy to see your build! I love the customization with the jewerly holders too!  Thank you so much for sharing!

Outdoor Tables and More - Thank You

Submitted by rhogle2000 on Thu, 08/04/2022 - 09:04

Thank you the inspiration!
I'm a retiree and beginner woodworker, through your videos I used leftover lumber and Trex decking from new deck to make two side tables, coffee table, and a bench.
Thank you so very much!

Built from Plan(s)

Comments

Recessed cabinet

Submitted by Anonymous (not verified) on Fri, 09/02/2022 - 14:14

My bathroom has very little storage space. So during our recent remodeling of the room, I decided to add this cabinet. Changed the plan a little to make it recessed in the wall. I love how it turned out!

Comments

Reading Nook turned Tent!

I made this for my boy who's turning four tomorrow! (Sep 1st) He loves building forts and I don't mind rearranging the furniture, but set up and clean up is so time consuming, we'd both rather spend more time playing. This is an indoor tent, but I took it outside for pictures. Aside from the obvious difference of adding doors and a back, the changes I made from the original plans are: using an 8 foot 1x3 so the tent is 4 feet deep instead of 3. Instead of stapling the fabric on the 1x3s at the bottom, I wrapped the fabric around and used velcro so I could remove it for washing. I sewed a tube of fabric and attached it at the top to make removal easier. Time Investment is so long because of the sewing involved for the tent. If you have an Ikea near you, they've got this stuff called glaze paint (more of a stain, I think) in all different colors - it doesn't need a top coat (unless you want it shiny), it's solvent free and, are you ready? $6 for 12.something ounces, MORE than enough for this project. To make it even easier if you're using fabric instead of curtains like me and you've got the room, cut a 8ft 1x3 in half so you've got two 4ft pieces. Most quilting cotton at fabric stores is 44-45 inches wide selvedge to selvedge (the ends that don't fray) and if you follow the plan according to where to drill for the top bolt, you'll need 4-4.25 yards of fabric, depending on whether you are going to use velcro or staple. I would use 4.25 if using velcro, the fabric can go right over the top bar and over the other side if you don't want to sew a tube like I did. If you don't want to sew at all, use iron-on hem tape on the cut edges and iron on velcro. Make sure of placement of the velcro before ironing on. More pictures on my blog =)

Built from Plan(s)
Estimated Cost
$50 - wood, bolts, stain, material for tent (everything)
Estimated Time Investment
Weekend Project (10-20 Hours)
Finish Used
Green Ikea glaze paint
Recommended Skill Level
Intermediate

Comments

Small Garage Workbench

Submitted by dmozer74 on Fri, 12/18/2015 - 21:17

Easy project. I needed this bench a bit smaller due to space constraints so this is 28" x 42". I kept the height the same and finished the surfaces with some thick polyurethane. It should be noted my cost was a bit higher due to buying a sanded plywood, coated self-tapping screws and a more expensive polyurethane. I also went a bit slow on this project and it took about 2.5 hours including application of the single coat of poly.

Estimated Cost
$75
Estimated Time Investment
An Hour or Two (0-2 Hours)
Finish Used
Satin polyurethane.
Recommended Skill Level
Beginner

Comments

Our Kitchen Plan Set

Submitted by Anonymous (not verified) on Mon, 12/28/2015 - 07:19

Plans were fantastic for this build and our kids love it! Thanks!

Estimated Time Investment
Weekend Project (10-20 Hours)
Recommended Skill Level
Beginner

Comments

Corner Desk Build

Submitted by eahodges on Mon, 02/06/2023 - 12:15

This was all my husband - he did a great job using the modular desk plans to customize (its a bit larger) this desk for our office. He finished it this past weekend so not much on it yet!

Comments

Reclaimed Wood Bar Ensemble

Submitted by JoanneS on Sun, 01/03/2016 - 06:03

This bar ensemble for our family room was made mostly from reclaimed materials. Inspired by Ana’s plans, and modified to fit spaces and materials available. The 36” tall bar and 30” tall fridge cabinet are made from frames of 2x4, with the tops/shelves/outsides covered in ¼” plywood, and outside edges covered with corner moulding. The bar and fridge cabinet tops are edged in lattice. The frames for the counter height bench and stool are from 2x4. The padded seat for the bench is the back from another bench, re-purposed. The foam for the bar stool is scraps pieced together. Reclaimed materials used (mostly from a room we disassembled): 2x4 – formerly studs ¼” Plywood – painted plywood was formerly used as wall paneling Lattice –was used as trim to cover the wall paneling “seams” Bar stool seat – ¾” plywood from the closet, foam scraps pieced together Bar bench seat – foam and vinyl covered plywood (re-purposed back from another bench)

Estimated Cost
Cost: The total ensemble was super inexpensive (only about $50 in total) since most of it is reclaimed materials. The corner moulding, 1 quart gloss gray paint, a box of screws, and vinyl for the stool were the only things purchased for this build. The first partial quart of gray paint was left over from another project. The paint flakes were left over from the floor project and the poly was left over from my holiday gift builds. Glue, filler, sandpaper and other fasteners were already on hand.
Estimated Time Investment
Weekend Project (10-20 Hours)
Finish Used
All pieces received 2 coats of Clark & Kensington paint + primer in Smooth Slate, gloss. The tops for the bar and fridge cabinet then received a coat of gloss polycrylic, and a sprinkling of some Behr paint flakes (brown mix) over the wet poly. After drying, the tops received 3 additional coats of gloss poly. The bar and cabinet corners and stool legs have some scraps of self-adhesive felt applied to the bottoms to protect the floor.
Recommended Skill Level
Beginner

Laundry Sorter

My laudry never looked so good!  I love these plans from shanty2chic and anawhite.  I spent a few days in the garage building, and now, my laundry can be hidden away in any room of my house.  


Thanks shanty2chic and anawhite for your excellent plans. 

http://www.shanty-2-chic.com/2014/08/diy-laundry-basket-dresser.html

http://www.ana-white.com/2011/04/wood-tilt-out-trash-or-recycling-cabin…

Estimated Cost
$200
Estimated Time Investment
Weekend Project (10-20 Hours)
Finish Used
Mix of paint and stain to create whitewashed look.
Recommended Skill Level
Intermediate

DIY Cedar Bird Feeder

Submitted by JamieLynn on Fri, 07/19/2019 - 12:48

Took some liberties on this one. Used paint stirrer sticks for the roof.

Built from Plan(s)
Estimated Cost
Used all scraps and paint that I had laying around
Estimated Time Investment
An Hour or Two (0-2 Hours)
Finish Used
Random paints
Recommended Skill Level
Starter Project
Seasonal And Holiday

Coffee Bar

Submitted by Anonymous (not verified) on Fri, 04/21/2023 - 10:41

Our wine fridge died, and we didn't really need to replace it. Since we can always use more storage space in the kitchen, the hubby made me this coffee bar as adapted from a coffee bar brag post that was adapted from Michela's Kitchen Island plan. He was able to make it with all 2x4s and created the 4x4 legs by gluing 2 boards together. Put it on some caster wheels and we have a perfect coffee bar!!

Built from Plan(s)

Comments

Joli bedroom project

Submitted by MaryMurray on Sat, 11/16/2013 - 09:58

I built all the furniture for this room using Anna's plans.

Built from Plan(s)
Estimated Time Investment
Week Long Project (20 Hours or More)
Recommended Skill Level
Intermediate

Comments

JoanneS

Sat, 11/16/2013 - 16:24

This room is just darling! You did a beautiful job, congratulations on an awesome room!

Sunroom chair

Submitted by Anonymous (not verified) on Fri, 04/28/2023 - 01:44

I saw your outdoor chairs so decided made 2 out of 2x4 from your plans. I put the 1 that is finished in my sun/ coffee room. I love it and ha e had many brags so I give them your info and a couple of friends are making them. Thank you

Comments

Grandy Barn Door Console Table

Submitted by Anonymous (not verified) on Wed, 10/02/2019 - 13:23

Tailored this to fit our space to provide us with more storage that is easy on the eyes 😍 took our time completing it and love how it turned out. First big woodworking project I’ve completed!! My furry assistant is featured in some of the pictures 🤩

Built from Plan(s)
Estimated Cost
250
Estimated Time Investment
Week Long Project (20 Hours or More)
Finish Used
White chalk paint with espresso stain top
Recommended Skill Level
Beginner

Comments