Community Brag Posts

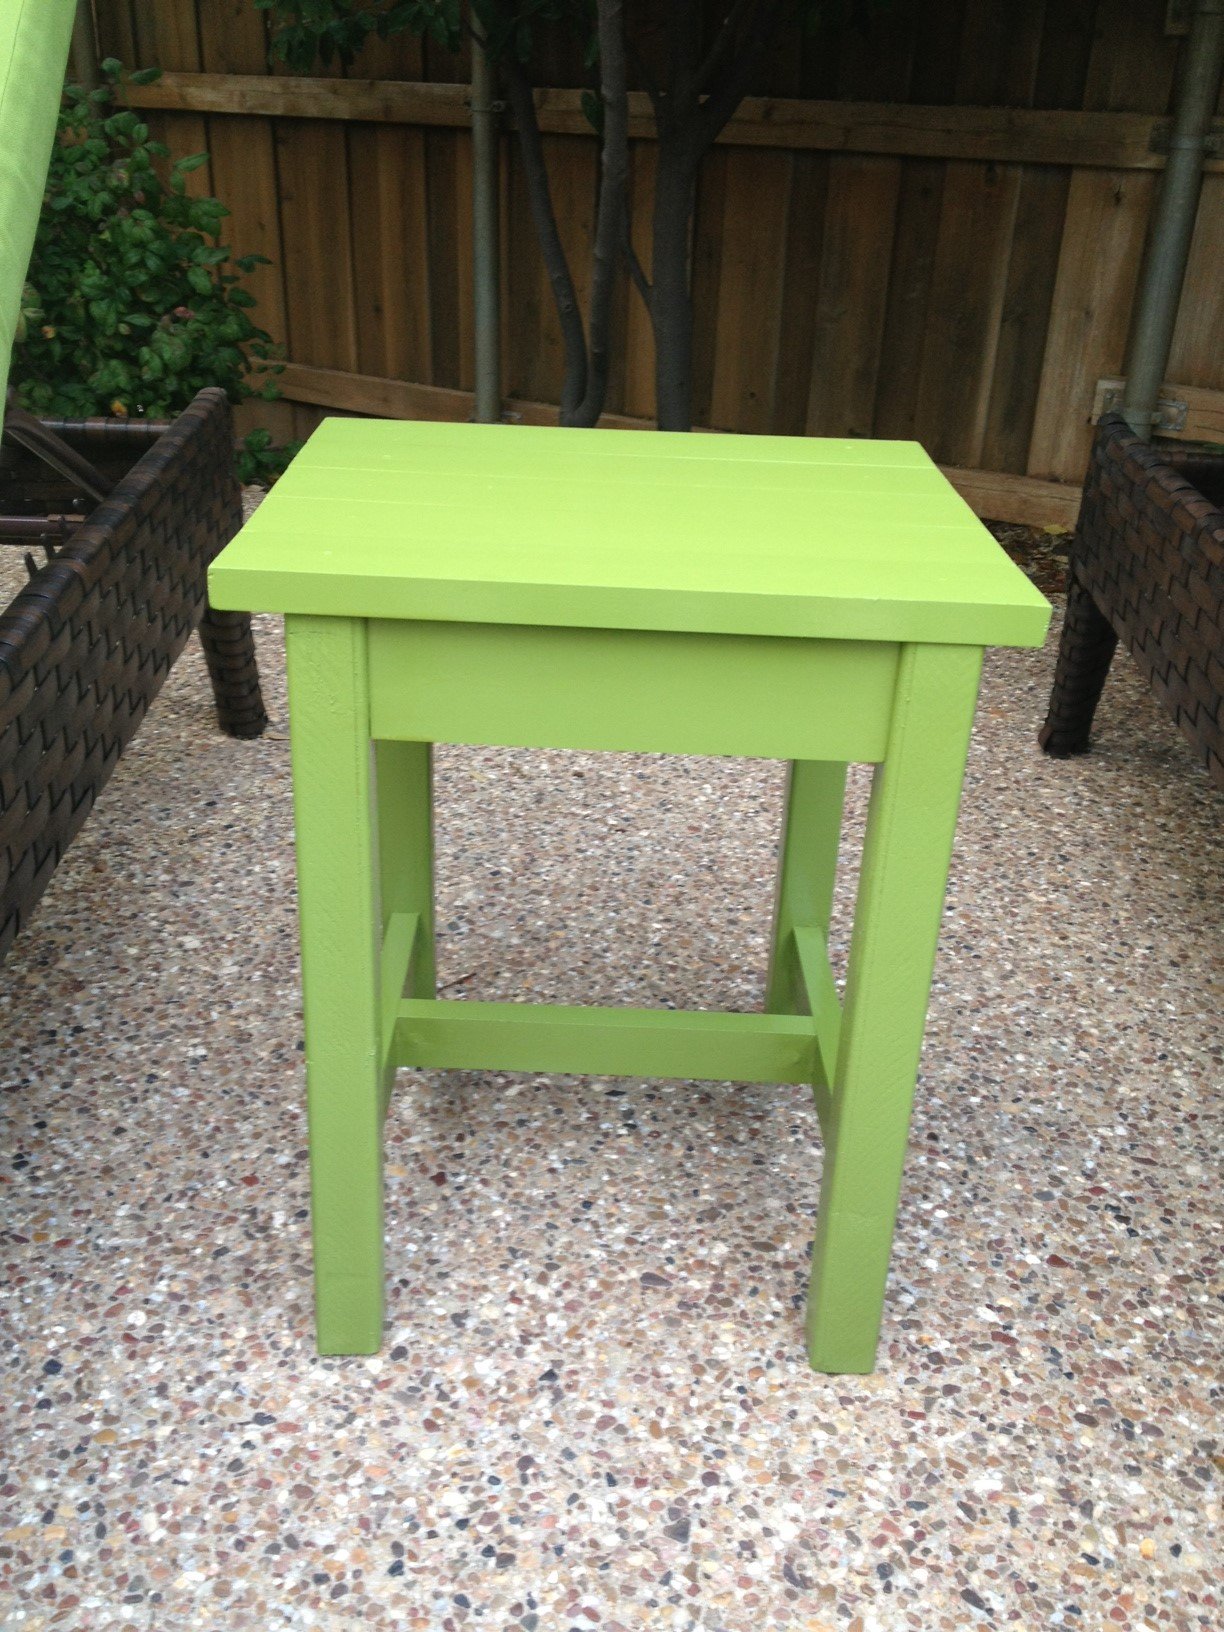
Not so "Rhyan" Nightstands

Submitted by Kimbers on Sun, 05/08/2011 - 19:05

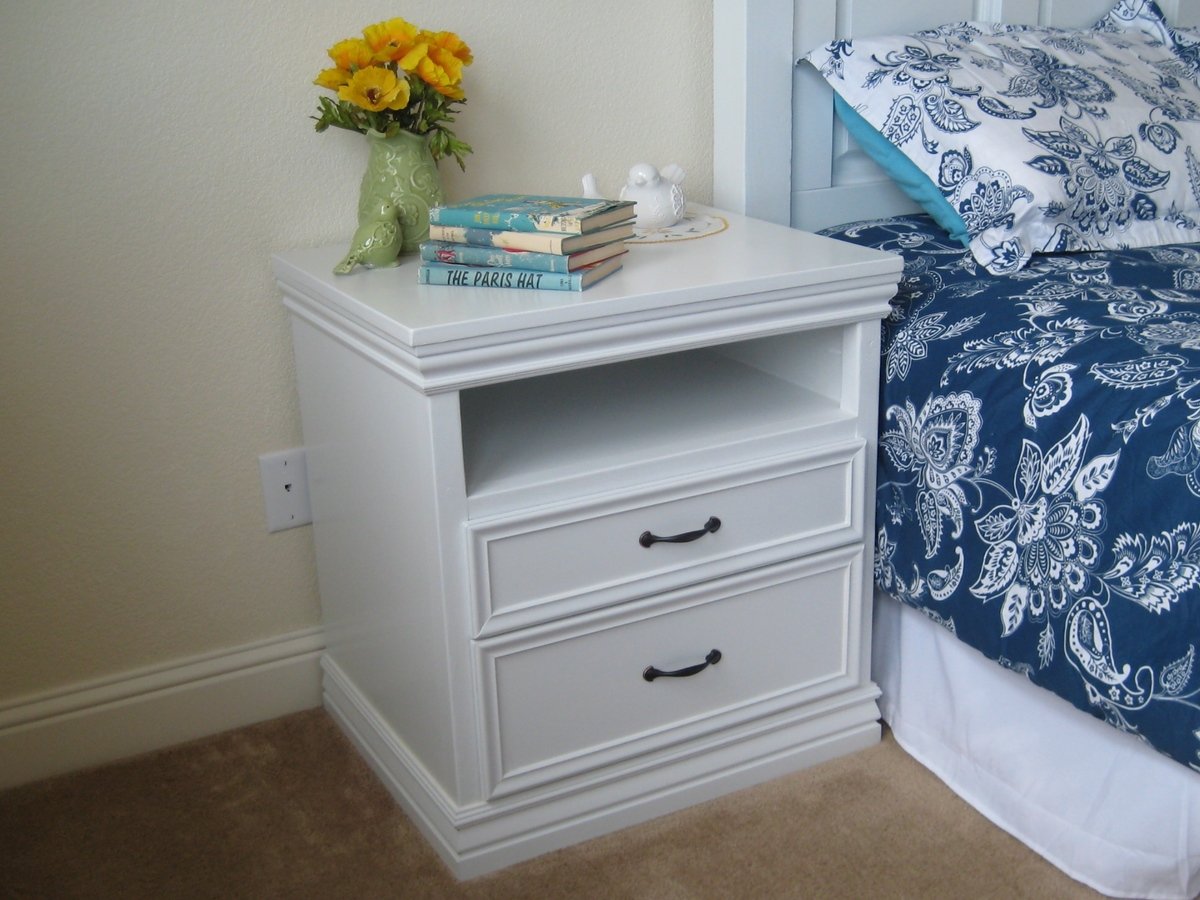
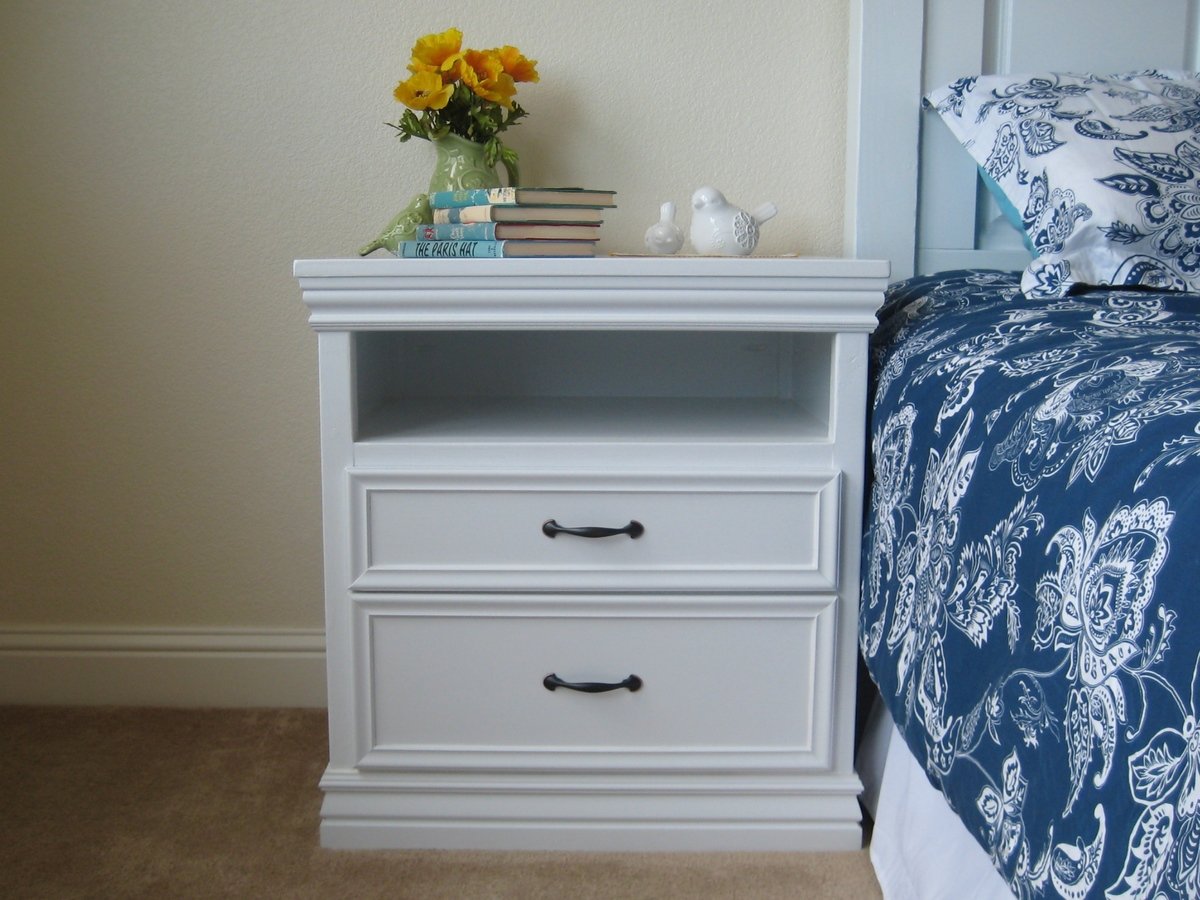
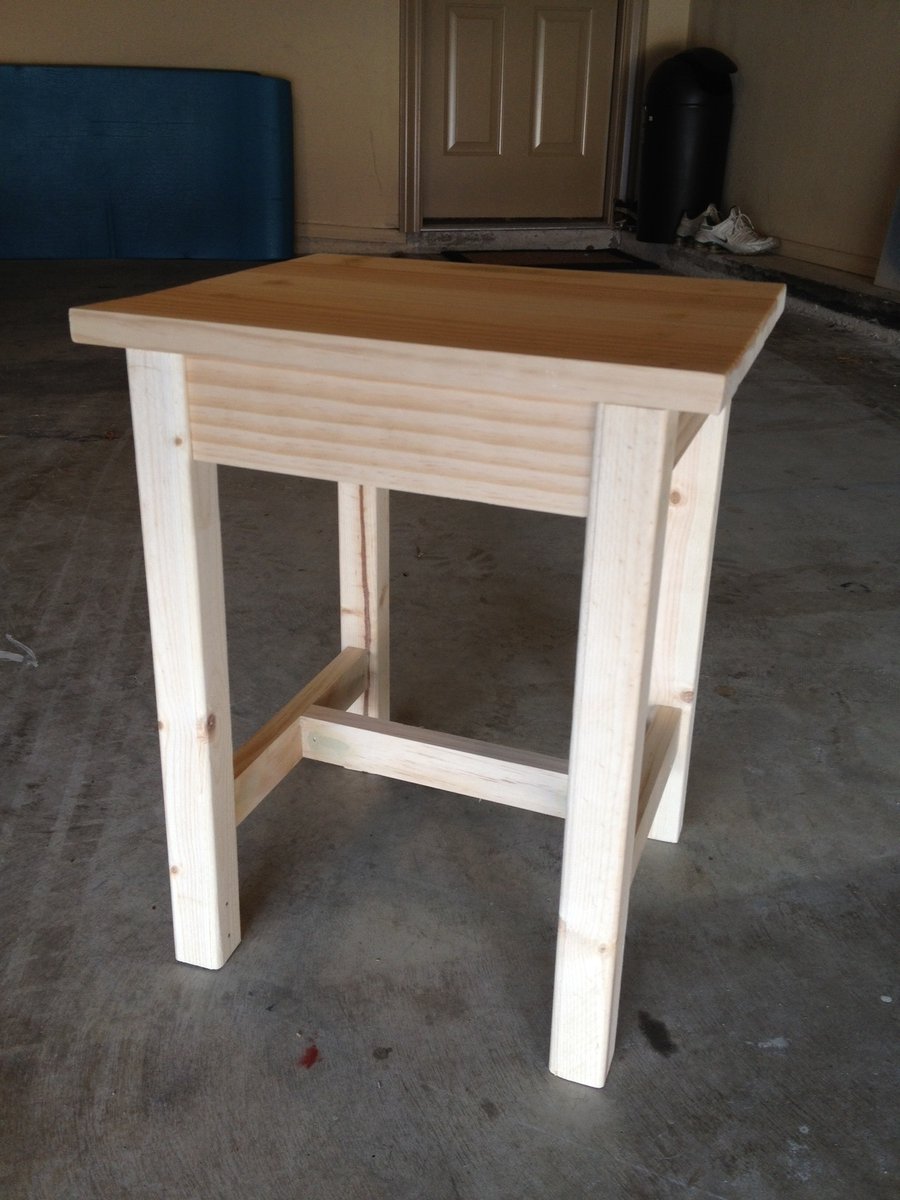
I used the Rhyan end table plan (with a few alterations) to make my nightstands. I changed the dimensions so mine turned out to be 20”D, 25”W, 27”H, I extended the side and back panels all the way to the top to close in the shelf and I made the bottom drawer larger. I decided to use under mount drawer slides but I think I will try out the side mount slides in the future though.

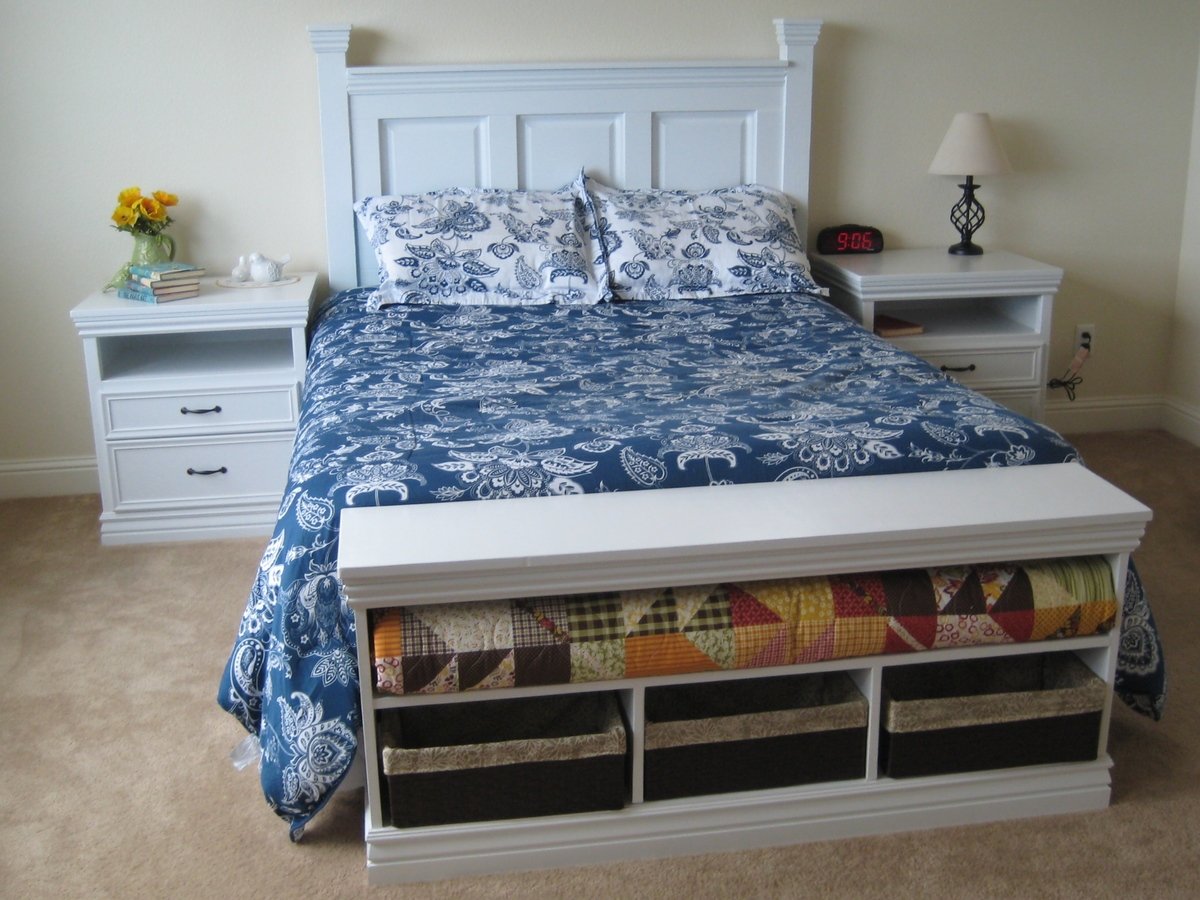
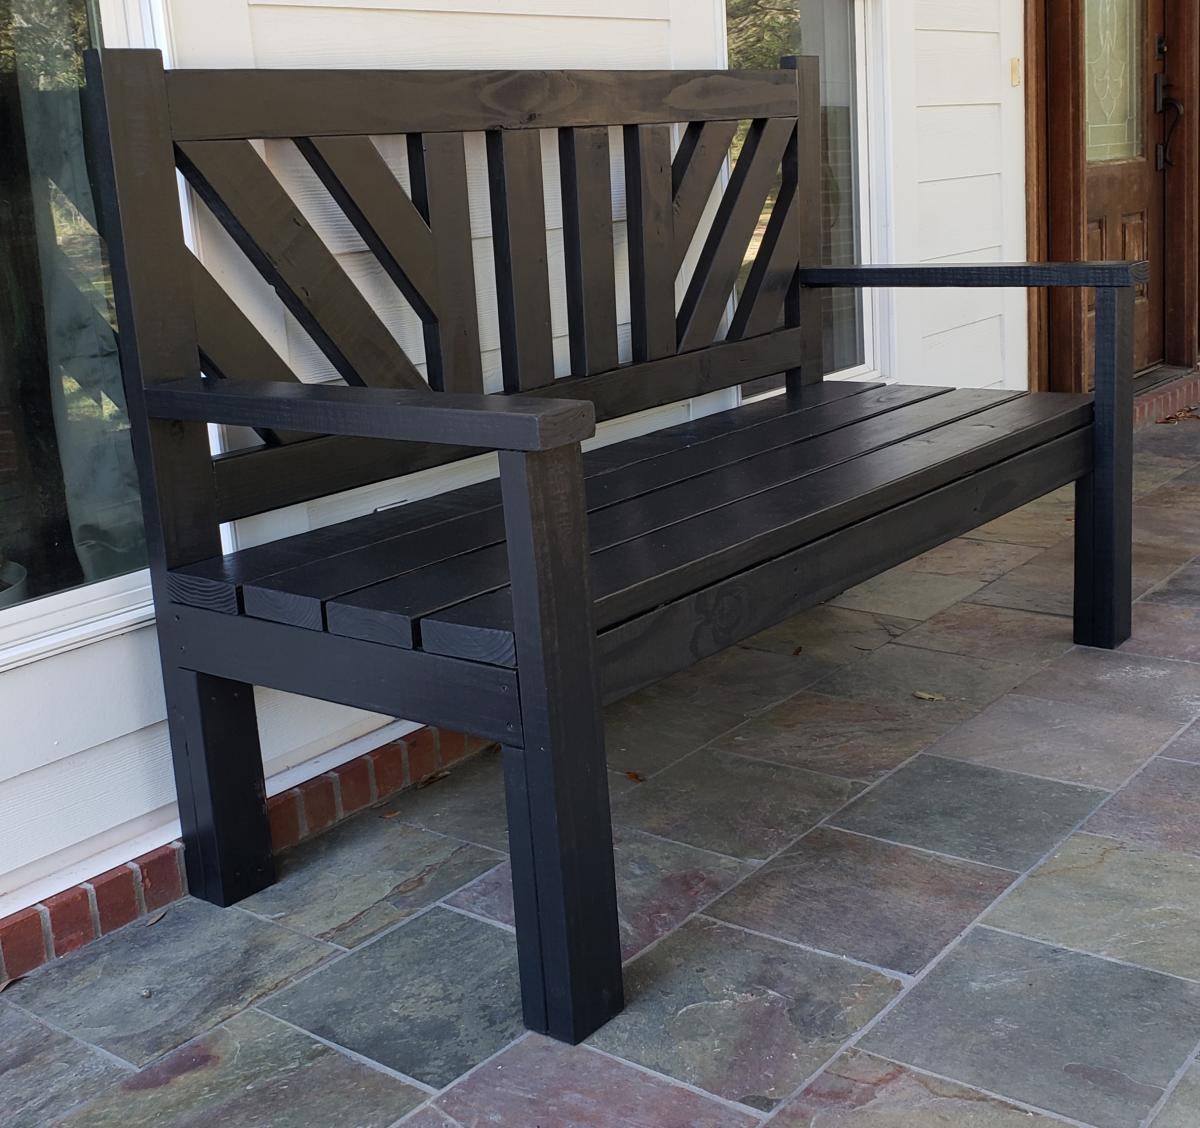
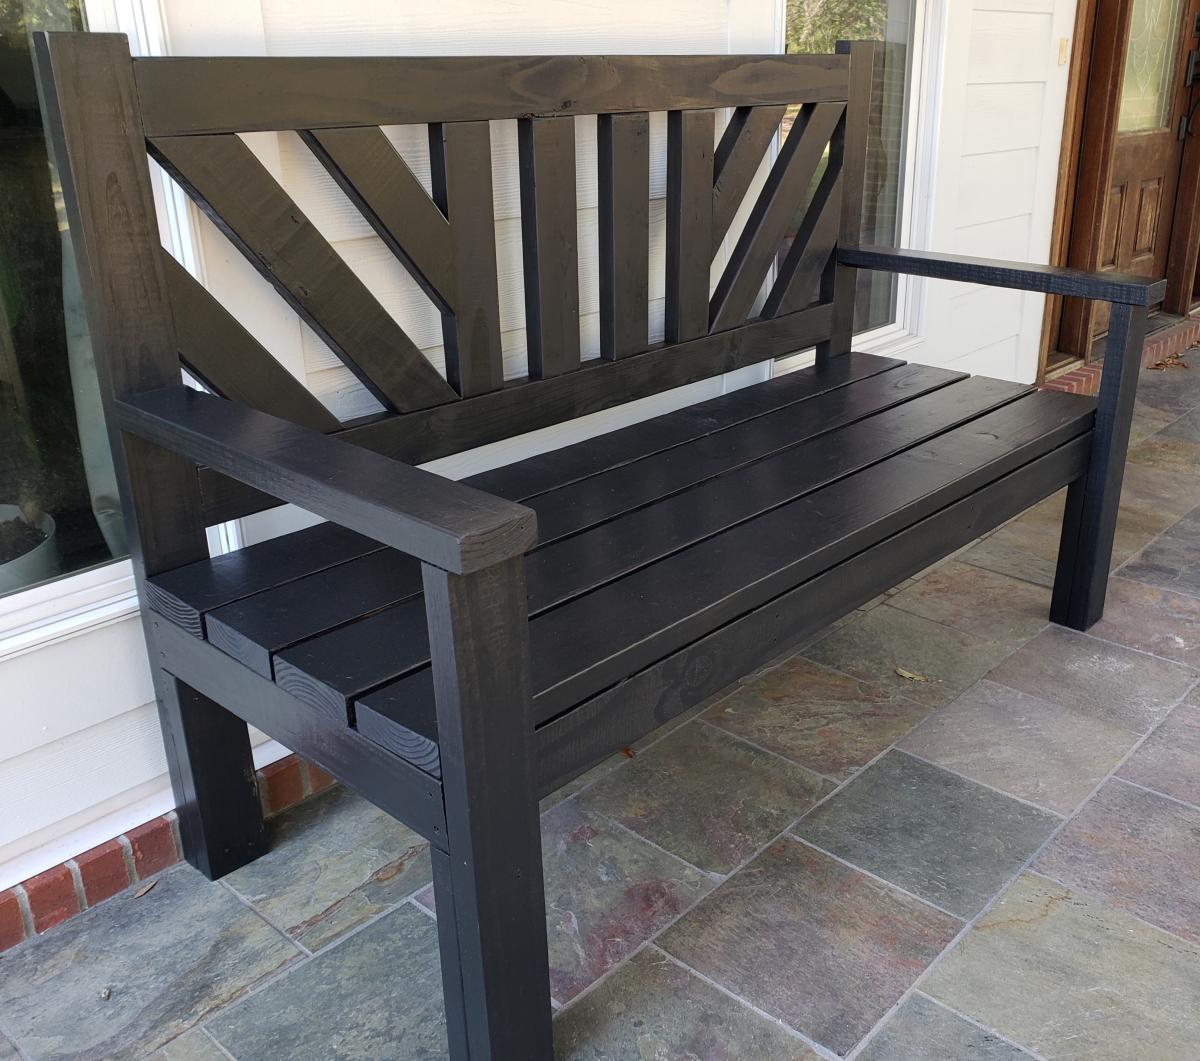
I wanted them to match the headboard and bench that I made for my bed so I added the same molding that I used on those pieces to finish it off.

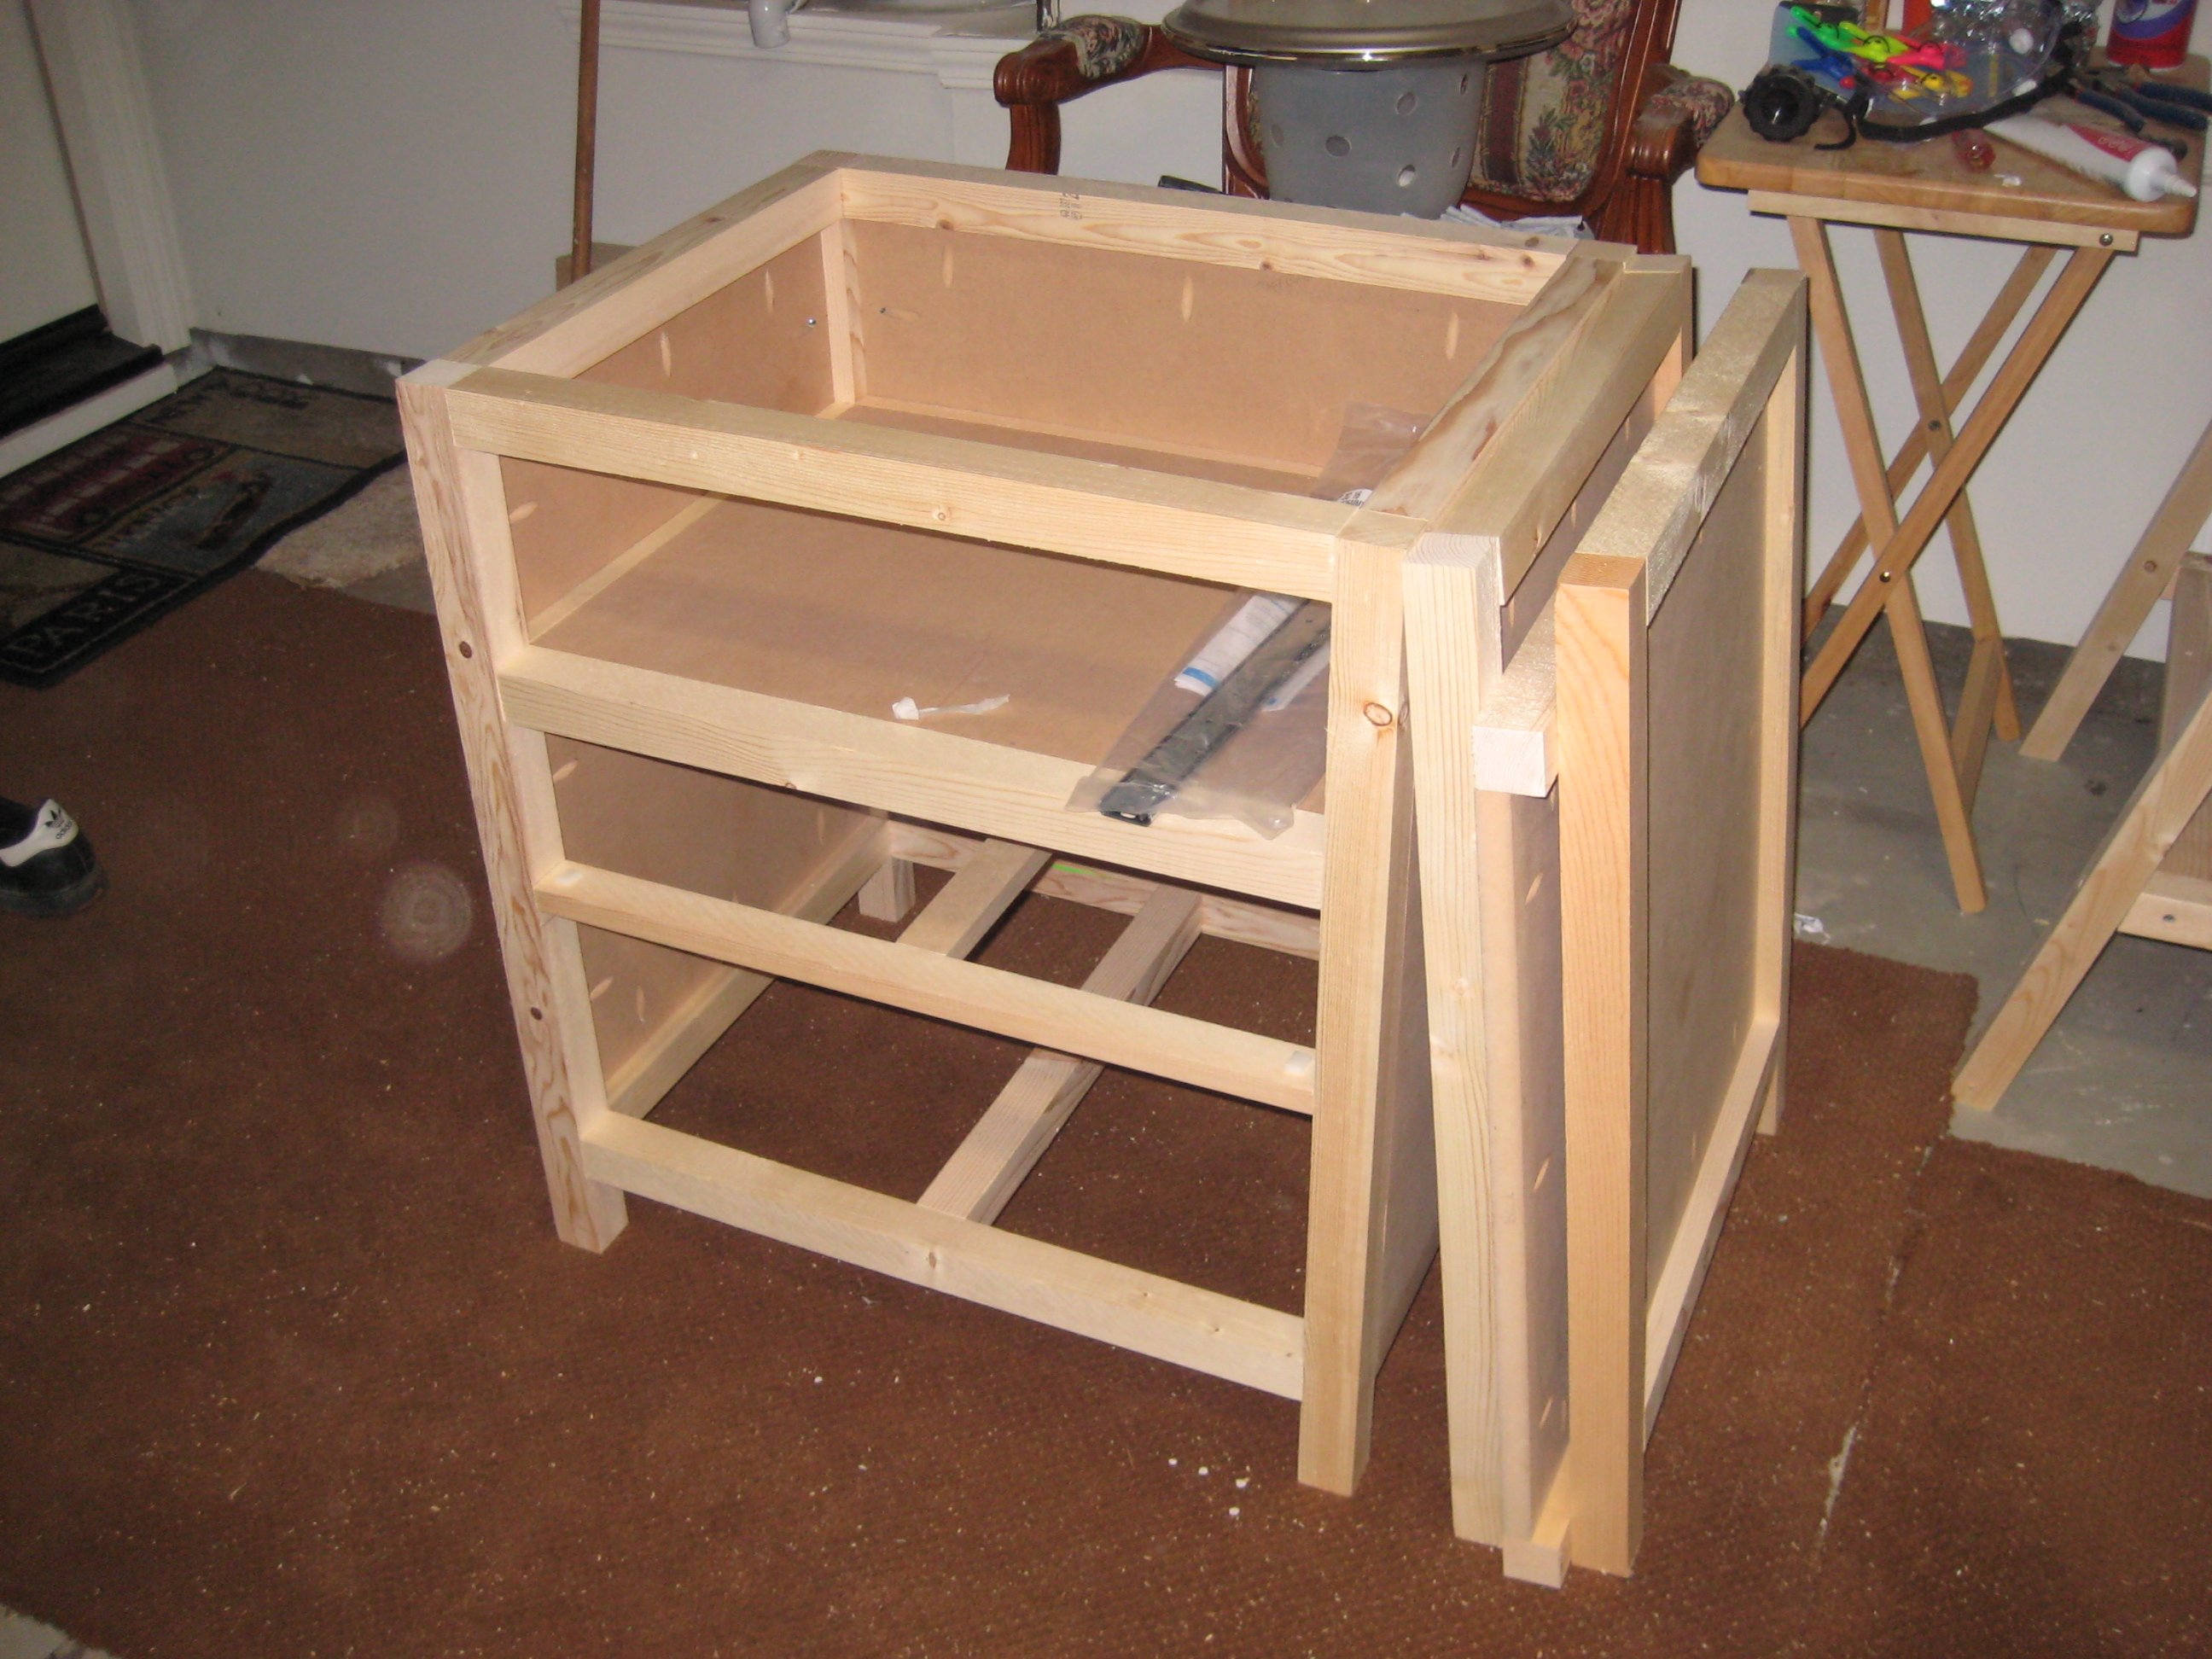
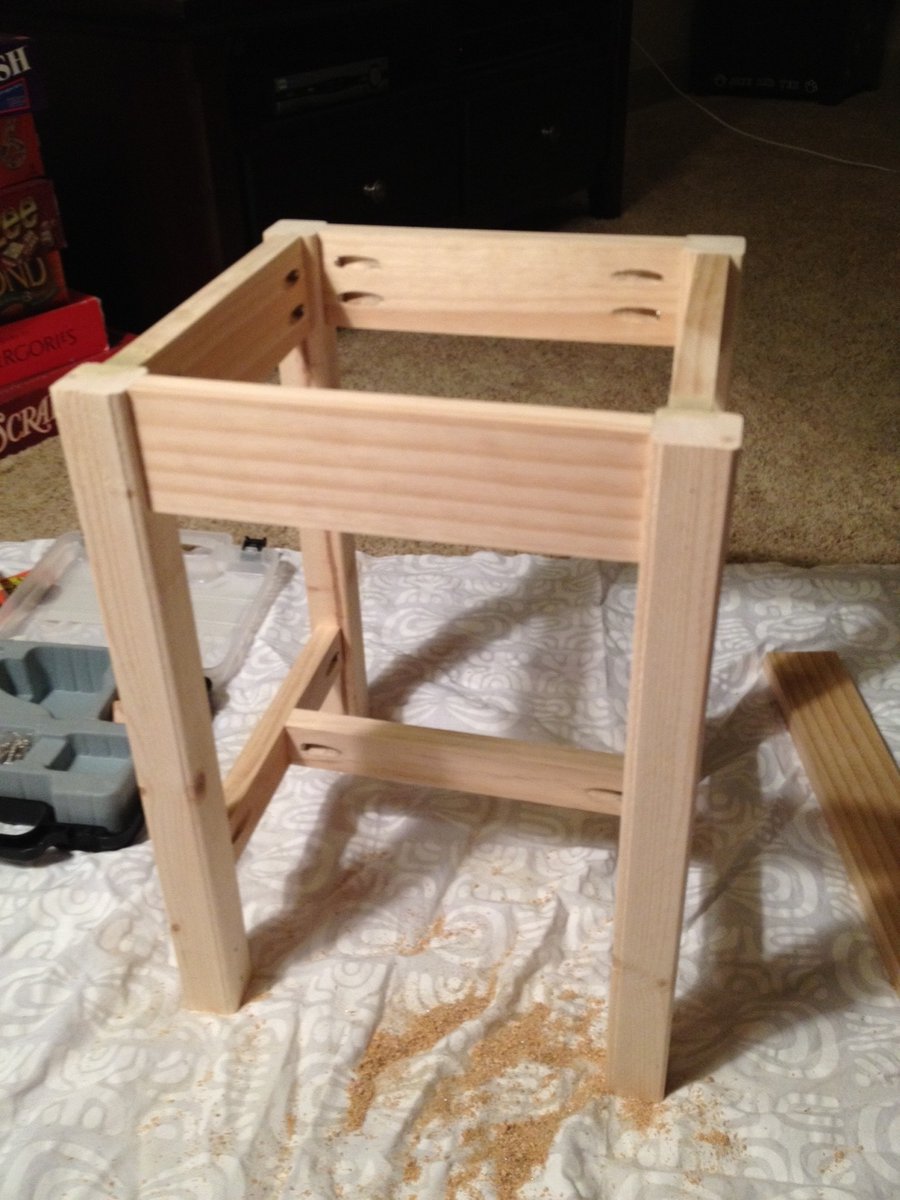
I pre cut every piece for the main body of the nightstand and predrilled all of the Kreg holes which made it a really quick piece to put together! I purchased the Mini Kreg jig for this project and am so glad I did. Totally worth the money!

Built from Plan(s)
Estimated Cost
About $80 For 2 Nightstands
Estimated Time Investment
Weekend Project (10-20 Hours)
Finish Used
I painted with Rust-oleum painters touch semi gloss white and then sprayed a few coats of polyacrylic on the top.
Recommended Skill Level
Beginner

Ana's ultimate workbench (Ryobi)

Submitted by CABANE on Fri, 01/12/2018 - 13:38

This is the perfect workbench for my needs.

I upgraded the casters to bigger ones as my shop's floor is in rough shape.

I also added storage under the two work surface next to the miter saw. This was just a matter of closing under the 2X4 frame and making the two sections on casters a little shorter. The only downside for that mod is that the plywood can bend a bit since it is not screwed to the frame. I don't mind since it falls flat as soon as there is weight on it. Also, this mod makes it hard to include fence system (it would need to be removable, like fixed with dowels only, no glue) and almost impossible to include a precise fence system since it would need to be removable. In my case, I do rough, non-repetitive cuts, so there is no need. 

TIP : Pay a little extra for smooth plywood. I lost a lot of time sanding mine :(

Estimated Cost
$150 CAD
Estimated Time Investment
Weekend Project (10-20 Hours)
Finish Used
Linseed oil
Recommended Skill Level
Beginner

Comments

groche

Tue, 02/04/2020 - 08:21

Awesome! Do you have pictures/info for the cart that has the Dewalt table saw? I have the same one and would love to build the cart for it.

2x4 Entryway System

Submitted by Anonymous (not verified) on Tue, 01/25/2022 - 14:31

Freestanding closet shelving modified to make a mudroom!! More details in link below. 

Comments

4x4 Truss Beam Table with Half Lap Joints

My take on Ana's table that I made with my son over Summer Break.

Built from Plan(s)
Estimated Time Investment
Week Long Project (20 Hours or More)
Recommended Skill Level
Intermediate

Comments

claire.whitis

Wed, 03/30/2016 - 01:07

I really like how you made half cuts so that the beams were more supported!

On the legs did you attached with pocket holes or where did you attach so that the screws were hidden?

Faux Fireplace

We bought a new house that didn't have a Fireplace and we didn't want an entertainment center, so I built this for the best of both worlds. Electric fireplace insert, side panels open for additional storage, and left the nook above the fireplace open for the wifi router and other decorations.

Comments

Seasonal And Holiday

Washer/Dryer Pedestal

This was an easy build and after 2 months I am still in LOVE with it:)

Estimated Cost
$80
Estimated Time Investment
Day Project (6-9 Hours)
Finish Used
Behr paint
Recommended Skill Level
Beginner

Comments

Guest (not verified)

Wed, 06/15/2011 - 05:30

This makes me feel so dumb for buying my pedestals for my washer and dryer... I spent $250 EACH!!! and my detergent and fabric softener don't fit in there!!

JSSB (not verified)

Fri, 12/16/2011 - 10:59

We have a HE front-loading washer and because of the power of the spin cycle, it vibrates/moves a lot. Anyone who has these pedestals have problems with that? I don't want a very expensive washer to take a tumble. :)

NB (not verified)

Fri, 01/20/2012 - 21:15

Not speaking from experience because I haven't built this YET, but... I believe I saw on someone's post that built these that they put some brackets on there to help keep the washer in place.

Farmhouse Table : Restoration Hardware Replica

Submitted by tsibiga on Mon, 06/20/2011 - 09:43

This is the first building project that I've tackled and it's all thanks to Ana-White. I did lots of things different than the building plan but it was definitely my inspiration and extremely useful. I loved the Restoration Hardware table and so I went to the local store to put my eyes on it for myself. Some of the things that I noticed, liked, and included in my design are; I used 4-2x12"s for the tabletop, I used 2x8"s as the breadboards, I used 4x4"s for the legs as well as the side stretcher, I used 2x4"s as the undertable supports, I built two 15" extensions using 2x8"s and 2x2"s, and I attempted to distress the wood yet stain it to match our dining room as best as I could.

www.tommyandellie.com

I've documented the build and you can check it out yourself at: http://tommyandellie.com/?p=14

I've revised the plans with even more details here; http://tommyandellie.com/index.php/2012/01/13/new-and-improved-farmhous…

Hope it helps.

Estimated Cost
$300
Estimated Time Investment
Week Long Project (20 Hours or More)
Finish Used
I banged up the wood using random things around the garage and then used a Dark Walnut Stain. Additionally, on the tabletop I did two coats of Briwax (light Brown) for a nice, shiny, and smooth eating surface.
Recommended Skill Level
Intermediate

Comments

niecey

Mon, 06/20/2011 - 15:06

This is stunning! I'm working on this table right now, but it's no where near as good as yours. I'm jealous. I love your extensions. I'd love to see a tutorial on adding extensions..

ispeakwhale

Tue, 06/21/2011 - 05:16

It looks beautiful. Did you attatch the 2x2 to the underside of the extensions and then notch out a place on the support for them to slide into? Can you please take a photo of the underside with the extensions on?

Tommy (not verified)

Tue, 06/21/2011 - 14:42

That's exactly right. Here's a link to the picture you asked for; http://www.tommyandellie.com/Site/Home/Entries/2011/6/10_Farmhouse_Tabl…

There's some more details and info specifically about the extensions on my blog at; http://www.tommyandellie.com/Site/Home/Entries/2011/6/10_Farmhouse_Tabl…

It's a super simple addition to the design and can take my table from 96" to 126"!!! Or take it from a 8-10 seat table to potentially 16 seats available for those Big thanksgiving meals.

Guest1 (not verified)

Wed, 06/29/2011 - 15:41

Hello,

I was just wondering that since your table is a bit wider than Ana's table, did you make the support for the stretcher wider? As in, did you increase the length at all (in addition to making it stick out a bit at the ends? If so, what did you extend it to? Thanks and gorgeous job!

tsibiga

Wed, 06/29/2011 - 18:49

Hello,

I followed Ana's example and allowed for a 1" overhang on both sides. So the tabletop is actually 44" wide and the stretchers are approximately 42". The long 2x4" stretcher is approximately 88".

Hope that helps. Thanks for the positive comments.

Guest (not verified)

Wed, 06/29/2011 - 20:28

I cant believe how good that looks. Great job! Out of curiosity, how did you make the notches (dados) for the 4x4 legs where they meet the table top? Really impressive table!

tsibiga

Thu, 06/30/2011 - 04:43

For the table legs, I set my table saw blade to a height of approximately 1.5". I then made a first cut at 3.5" from the bottom, then made a cut at 7", and then made several subsequent cuts in between those two cuts. After it was all slivered, I used a hammer to knock it all out, and then swirled the opening all around on the table saw (blade still at 1.5" tall) to smooth out all the cuts. I used the same technique for the stretcher as well.

Guest (not verified)

Sat, 08/06/2011 - 21:36

Hi Tommy, I tried clicking on your site and was told the site could not be found. Last week, I saw it fine and showed my hubby our next project, but now it's gone. Help!

Keri Beth (not verified)

Thu, 03/01/2012 - 07:17

What inspiring pictures! Apparently everyone agrees, because I just "pinned" one of these pictures to Pinterest and it was immediately repinned 27 times and counting. So nice work! I hope to make mine this weekend.

DES.II (not verified)

Sun, 04/29/2012 - 06:29

She and her boyfriend would like to build it using lumber i cut from my mill. They are thinking walnut, hickory or maybe ash but im not sure how that will work out with being distressed. And your extentions, do you have a 2x4 or two that slides out from under the table to help support them on each end ? Are there pics of the under side of the table as well? This is a great table and i think they will have fun as a family assemblimng and finishing it.
Thank you. DesII

Marci (not verified)

Thu, 10/11/2012 - 12:12

Where can I find the bench instructions??

James Groover

Tue, 04/14/2015 - 13:31

Hey Tommy, I saw the Farmhouse table design with extensions, I don't have Excel to open the cut list and need the buy list and cut list to complete the project, I am really short on time and need to start this project tomorrow. Please if you can, do you have a word document or a PDF that shows the page for those?

My first Ana White project!

This was my first Ana White project and I can't wait to start another. I love the bench and it was easy to follow the plans. You can find the entire story of this build on my website.

Estimated Cost
$50
Estimated Time Investment
Weekend Project (10-20 Hours)
Finish Used
Chalk Paint by Annie Sloan in Paris Grey
Recommended Skill Level
Beginner
Seasonal And Holiday

Kids table and chairs

Great little project. Finished just in time for Thanksgiving.

Andy

Estimated Cost
50
Estimated Time Investment
Day Project (6-9 Hours)
Finish Used
Mirrowax, polyurethane semi gloss
Recommended Skill Level
Beginner

Comments

JoanneS

Thu, 11/26/2015 - 07:14

You did a super job!  These are absolutely adorable!  Happy Thanksgiving!

Cedar Slat Top Bench

Submitted by Anonymous (not verified) on Tue, 01/15/2019 - 21:48

I really enjoy making this bench. I build them out of cedar and vary from 4’-6’. My customers love them. Simple prep work consisting of planing all boards to same dimensions can save a lot of time in sanding. Building 3 more this week. 

Estimated Time Investment
An Hour or Two (0-2 Hours)
Recommended Skill Level
Beginner

Comments

Simple Farm Table

My mom and o completed this weekend project together! It was so fun to complete! The table is customized to 7ft and the benches made smaller than the original plans so they slide under the table when we’re not using it. We made it for our homeschool room. The kids are excited for this space already and we all have the room we need to get our work done! Under $200 start to finish! I used a prestain to prep the wood and then stained with watco danish oil in a natural finish.

Comments

Large Porch Bench

Submitted by kwildman on Thu, 11/14/2019 - 18:55

I used untreated pine for this project and painted with benjamin moore exterior paint. 

I modified the back a little and I love how it turned out.  I also added an extra brace against the back of each leg that fits under the seat for more support. 

Very easy to build.  I love the plan.

Estimated Cost
75
Estimated Time Investment
Weekend Project (10-20 Hours)
Finish Used
Black exterior paint
Recommended Skill Level
Intermediate

Comments

Nursery Book Ledges

Submitted by Anonymous (not verified) on Tue, 08/15/2023 - 14:59

Nursery photo ledges. Shortened the shelf depth using a 1 x 2 instead of a 1 x 3.

Built from Plan(s)

Comments

nifof17547

Mon, 04/08/2024 - 01:07

I love the idea of book cornices for the nursery! Reducing the depth of the shelves is a smart modification that makes them more suitable for children's books. It is very important to customize the furniture so that it perfectly suits your needs. Using 1 x 2 instead of 1 x 3 will give you a more customized solution. Books are a storehouse of knowledge! Speaking of knowledge, for students looking to adapt their learning process, platforms like Edubirdie https://essays.edubirdie.com/assignment-help offer reliable assignment help services. Edubirdie can help you tailor your academic assignments to your specific requirements. It's all about finding the right option for your needs, whether it's organizing children's books or tackling academic assignments. Great job on the customization!

Outdoor adirondack side table

Submitted by Elishia82 on Thu, 03/29/2012 - 11:32

This was my very first furniture-building project. I was pleasantly surprised with how it turned out! It's definitely not perfect, but with some practice I plan to try bigger projects! It was a little more expensive than I would have liked because I had to buy a pocket hole kit that was $40, but hopefully I will be able to use the kit for future projects.

Built from Plan(s)
Estimated Time Investment
Afternoon Project (3-6 Hours)
Finish Used
Rustoleum white spray primer (1 can, 2 coats), Rustoleum satin eden spray paint (1 can, 2-3 coats), and Minwax helmsman spar urethane clear gloss spray (1 can, 2-3 coats)
Recommended Skill Level
Starter Project

Poker table with hiding beverage holder

Submitted by jasonr on Mon, 04/02/2012 - 12:48

*I did not have any plans to work from*
the cost really depends on how much you can get your wood for. I had a lot left over from previous projects, so $500 is only a low guess.

This is the second of 3 poker tables built.
Each side is 24"
the table measures 58" across
Some of the accompanying photos of the build were from my first table, but thought they might help.

I purchased a foam pad and "speed cloth" from a local poker supply store. The slide away bev. holders are kept in place with rare earth magnets

If you need any specifics, I'll try to help

Estimated Cost
500+
Estimated Time Investment
Week Long Project (20 Hours or More)
Finish Used
tung oil-
start with a 50/50 mix of turpentine and tung oil and rub into the wood. It will dry fast and absorb quickly. Wipe off excess after 15 minutes (if any). Allow 24 hours between coats. Sand with 220 grit and rub in tung oil with a few drops of japan drier. I add 1ml of japan drier to 40ml of tung oil. Allow oil to sit for 15-20 minutes before wiping off oil. Buff with cloth and allow another 24hrs. Sand with 0000 steel wool and repeat application process. Continue everyday until the desired finish achieved
Recommended Skill Level
Intermediate

Comments

carcreek

Tue, 02/25/2014 - 10:12

If you have plans for this poker table I would love to see them! Beautiful table.

Ultimate Workshop Workbench

Submitted by Anonymous (not verified) on Mon, 09/18/2023 - 15:38

My garage needed an overhaul and I wanted to start a hobby in woodworking.
I found my way to Ana's website and found some of the best ideas and decided to try my attempt at building the Ultimate Roll Away Workbench with Miter Saw Stand.
This helped inspire me to augment my garage and build that workbench and new french cleat wall.

Thank you Ana for having such an awesome website and offering up ideas for free!!

Comments

Three-Legged Stool

Submitted by Anonymous (not verified) on Mon, 05/09/2016 - 13:25

My 13-year-old daughter asked me about making a stool, with the main requirement being it had to have a round seat.  So I turned to this ana-white.com to see if I could find something that we could do and found the plans for the three-legged stool. The first one we made with the dimensions specified in the plans but she thought it was too short.  So we made another one with longer legs and a larger diameter seat.

Estimated Cost
$4. The lumber was scrap and the white paint was leftover. We only bought the blue paint.
Estimated Time Investment
Afternoon Project (3-6 Hours)
Finish Used
Rustoleum Painter's Touch
Recommended Skill Level
Beginner

Full Wall Shelving Unit DIY

Submitted by Anonymous (not verified) on Wed, 10/11/2023 - 10:54

Built this for a friend...I had to make some modifications to accommodate the door, but it turned out pretty well.

J Bye

Log Cabin Birdhouse

I enjoy making birdhouses and log cabin style is my favorite. I make the logs by setting my saw to rip 3/4 pine at 3/4 so I have 3/4 square strips. I then decide the size of my birdhouse and cut the logs accordingly. I also "wittle" on them a little to make it look more authentic. I simply then just stack, glue and nail one row at a time. You can use 1/4 poplar for the roof but I ripped pine at 1/16 and cut shakes with my utility knife and glue them on one at a time (there are 104 on this roof).

Estimated Cost
7.00
Estimated Time Investment
Afternoon Project (3-6 Hours)
Recommended Skill Level
Intermediate

Built in closet

Submitted by AndyH on Mon, 06/13/2016 - 19:14

Built in closet to replace builder grade wire wracking.  Closet is approximately 11 feet by 5 feet.  consists of two shoe racks with 7 shelves each.  6 large drawers and 4 small drawers.  Two hanger sections with storage  above them.  End wall has hanger for longer items and storage above and a cabinet with shelves.

Yet to finish the floor.

Estimated Cost
$1000
Estimated Time Investment
Week Long Project (20 Hours or More)
Finish Used
Sherwin Williams Extra White satin paint.
Recommended Skill Level
Intermediate
Back