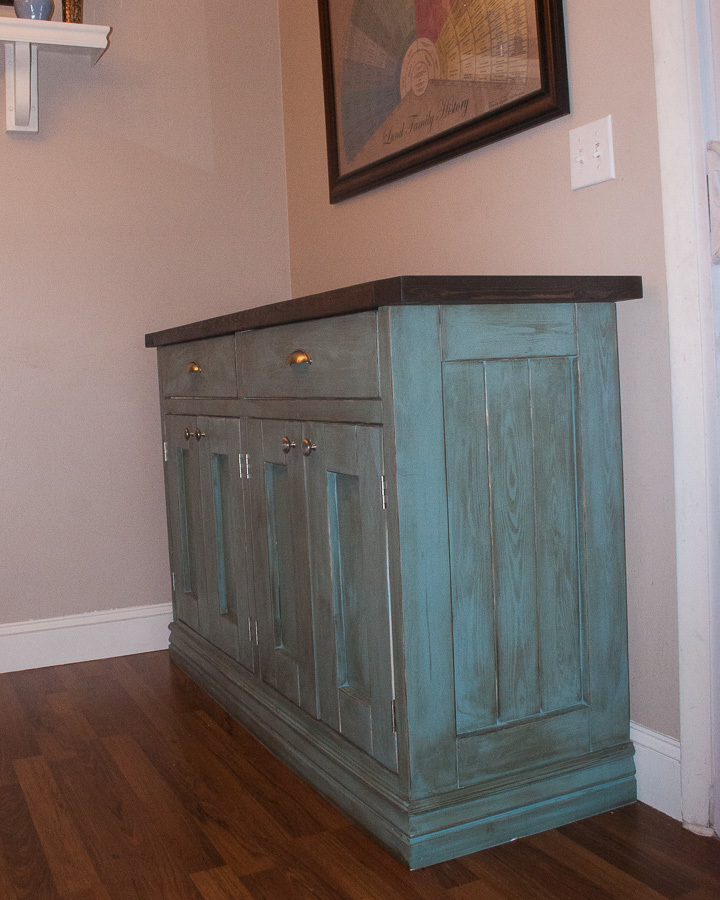
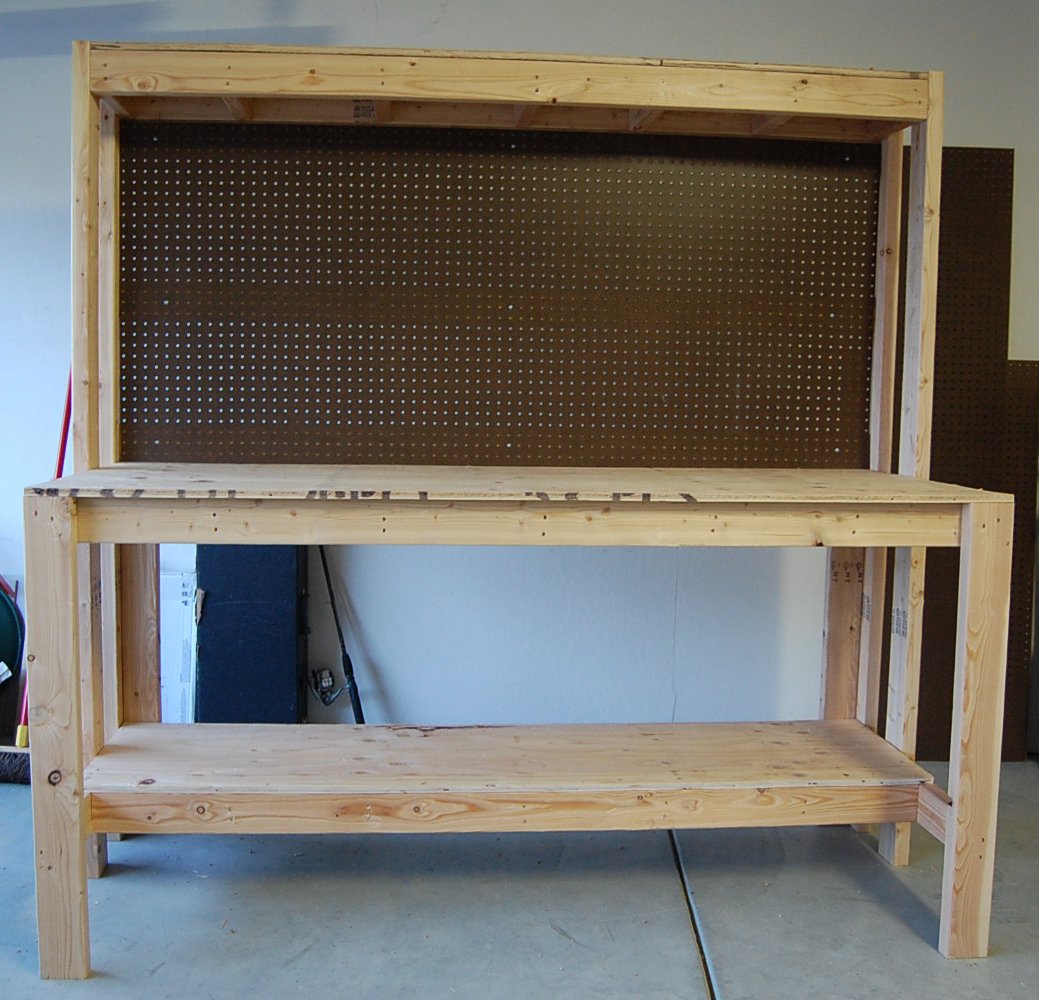
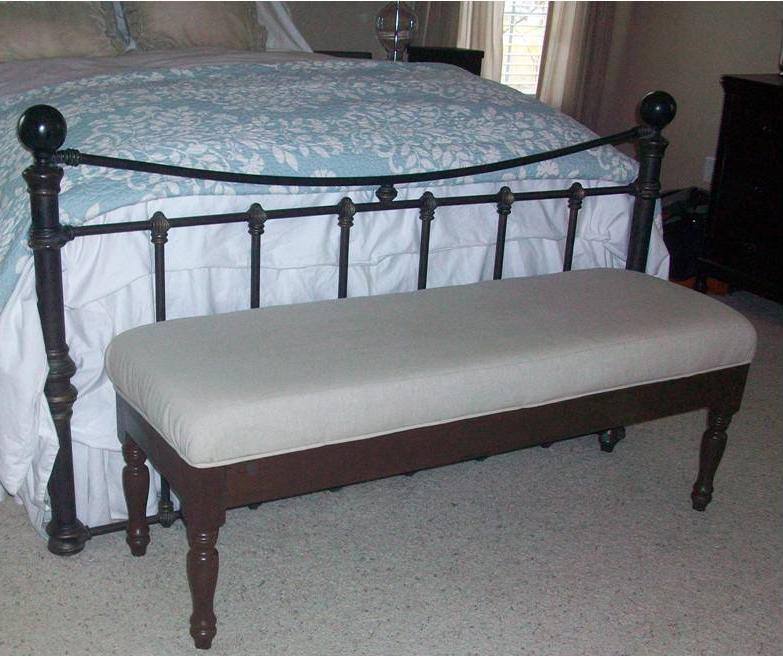
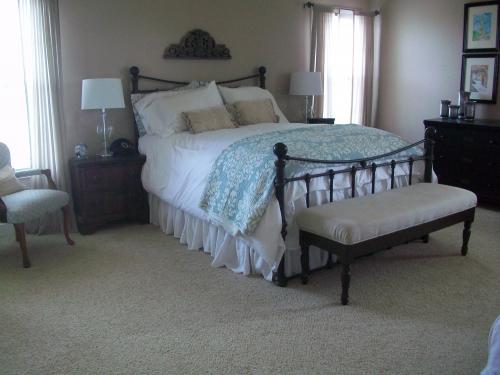
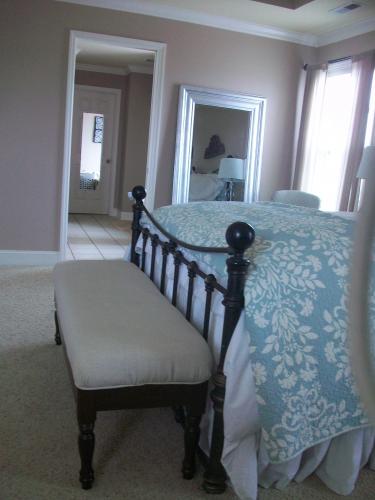
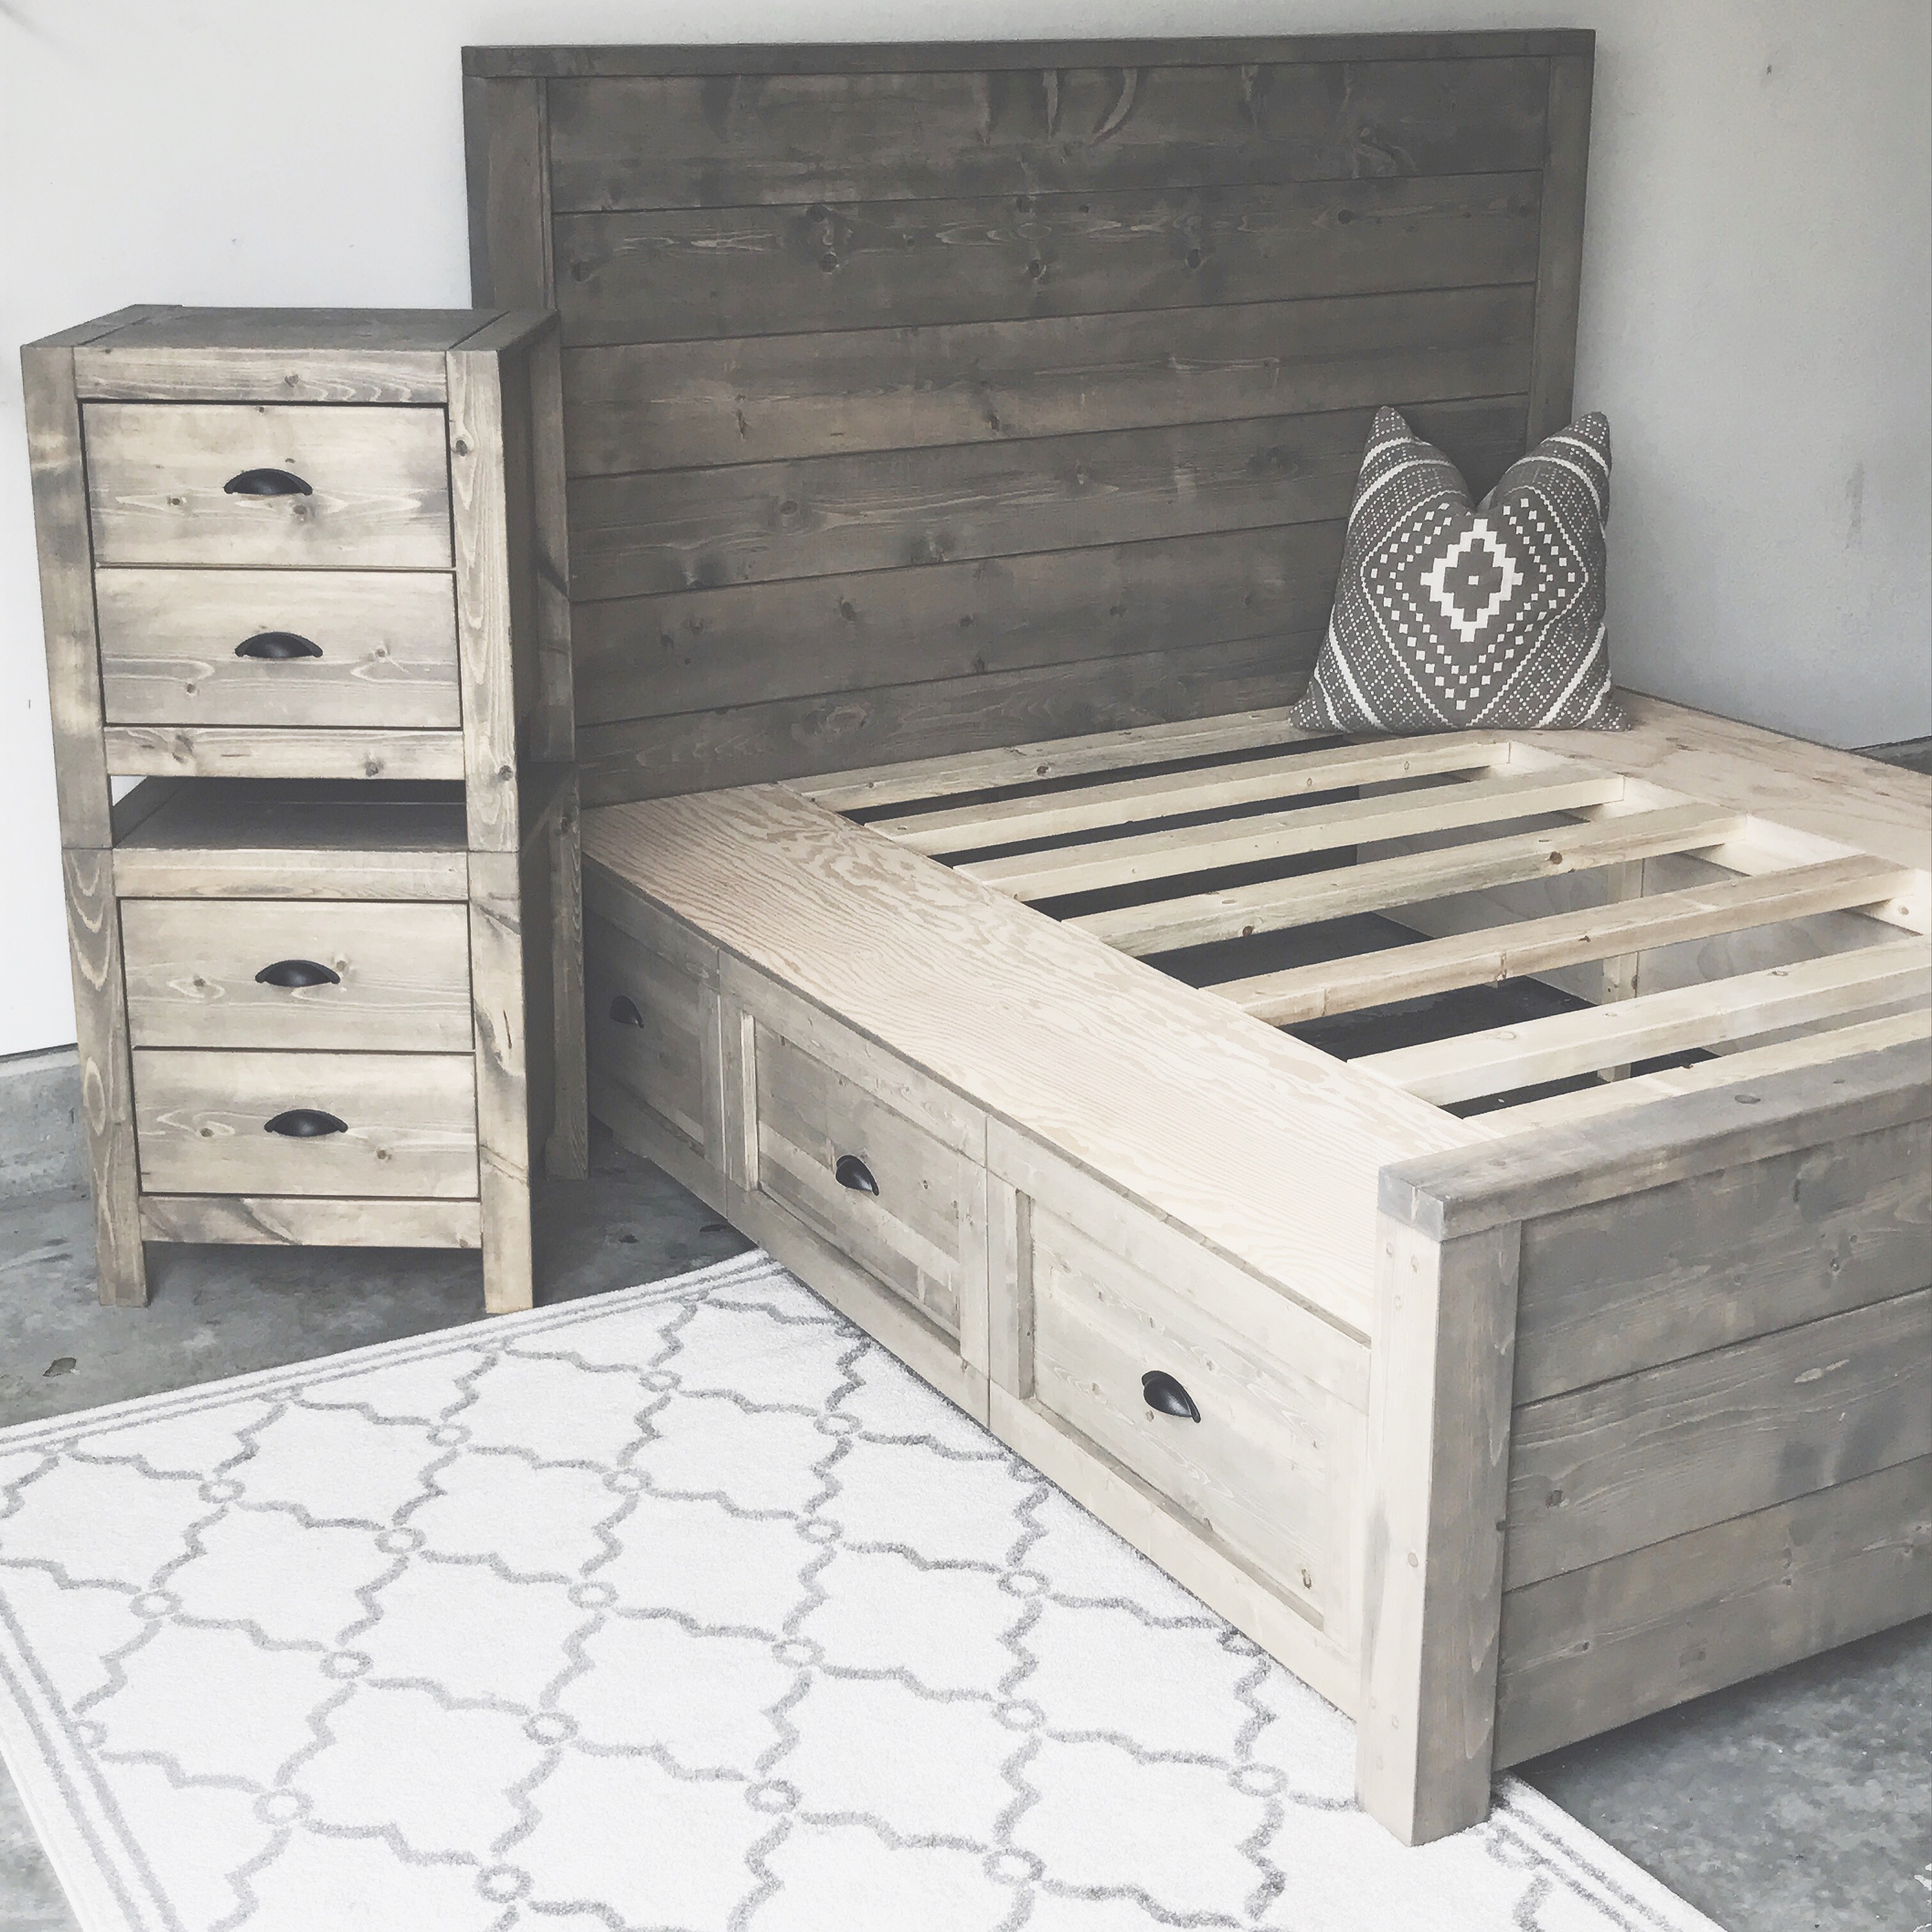
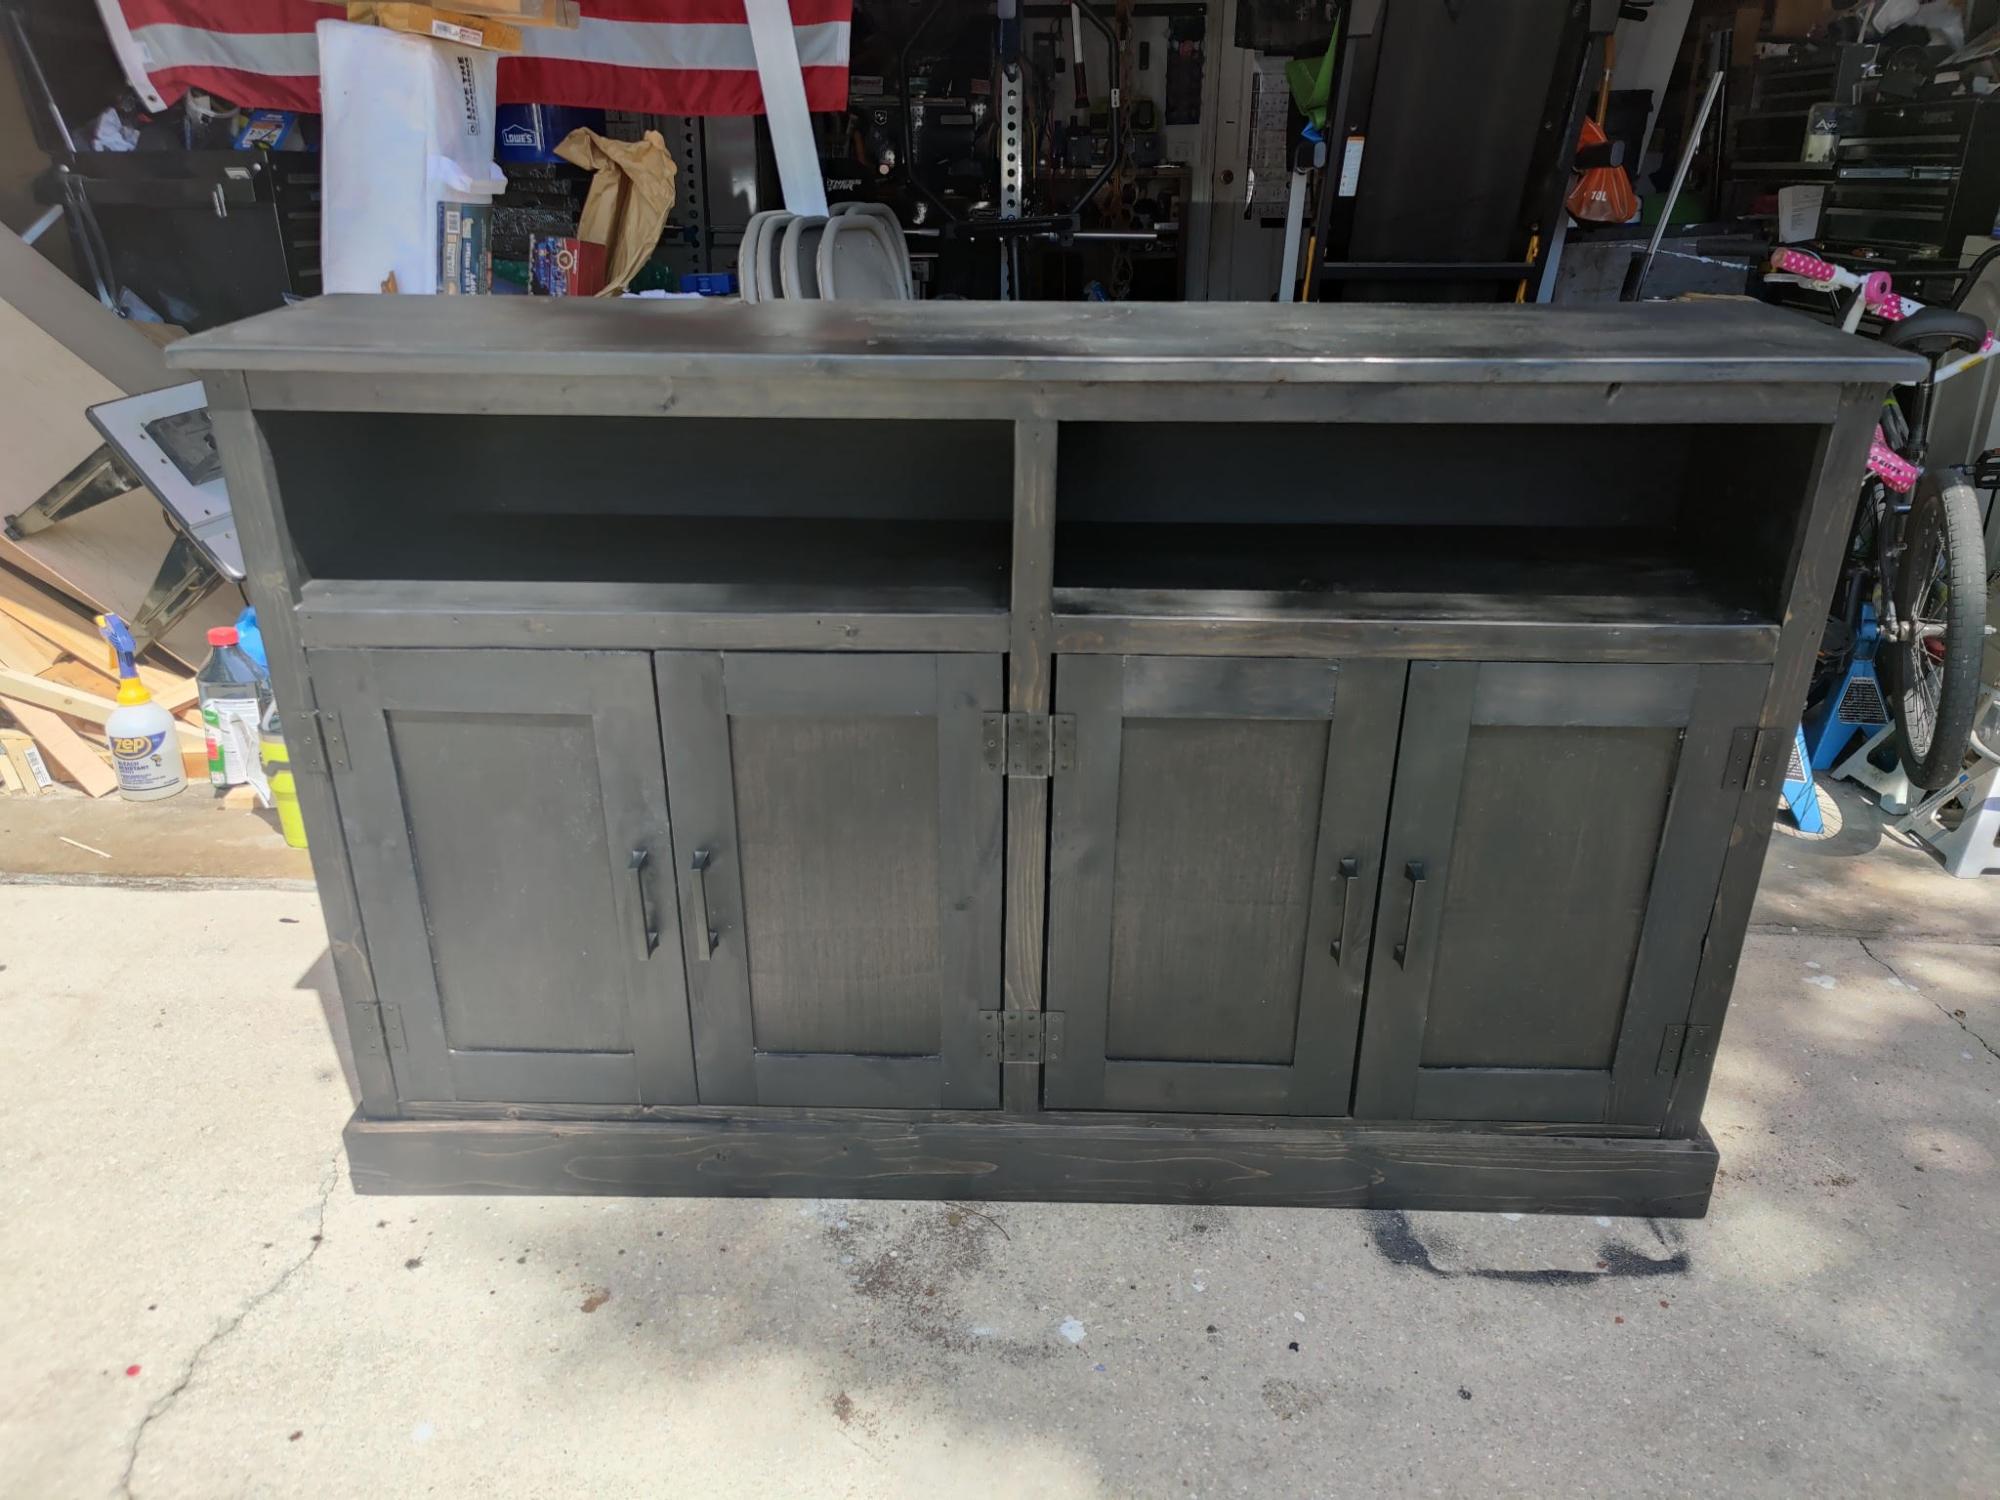
Community Brag Posts

Mudroom Bench

Submitted by BeingHome on Sat, 02/23/2013 - 22:26

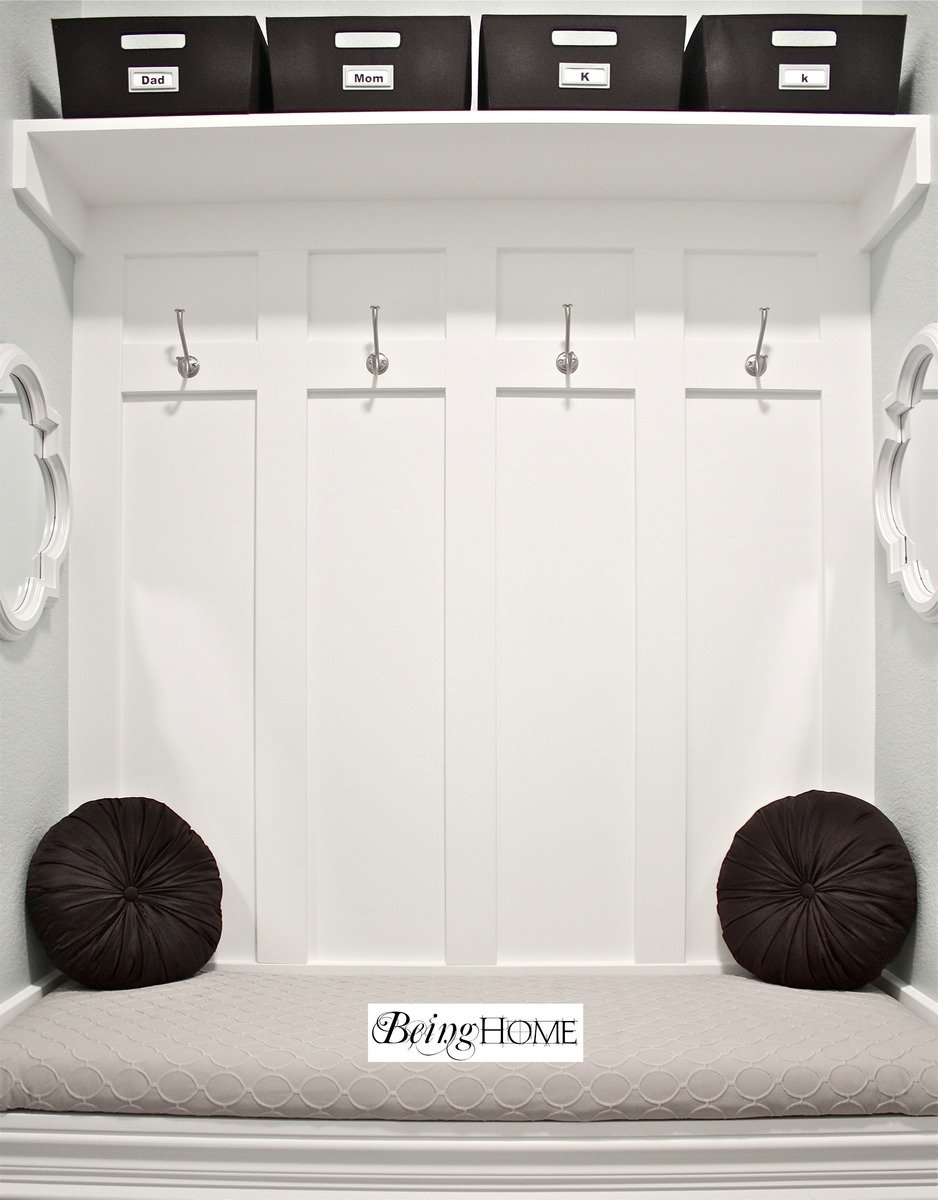
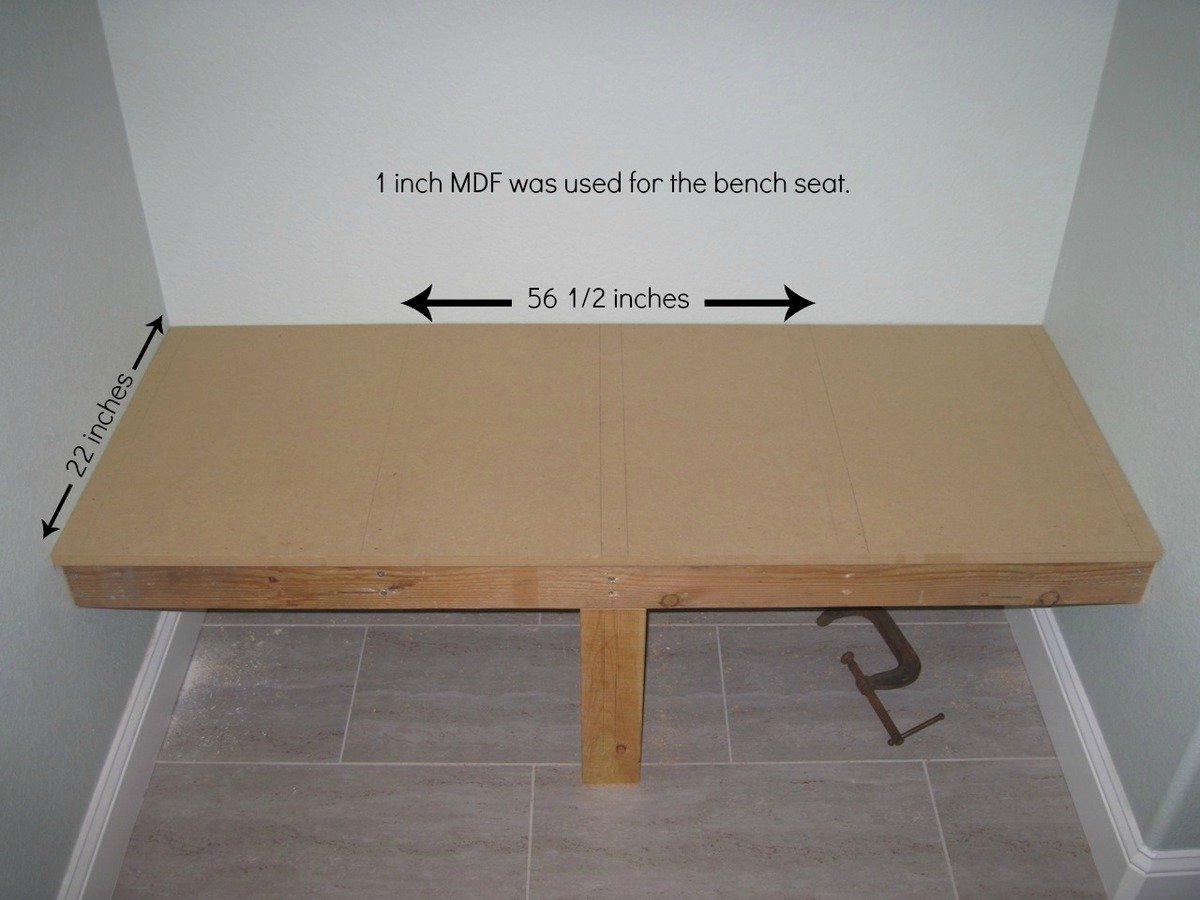
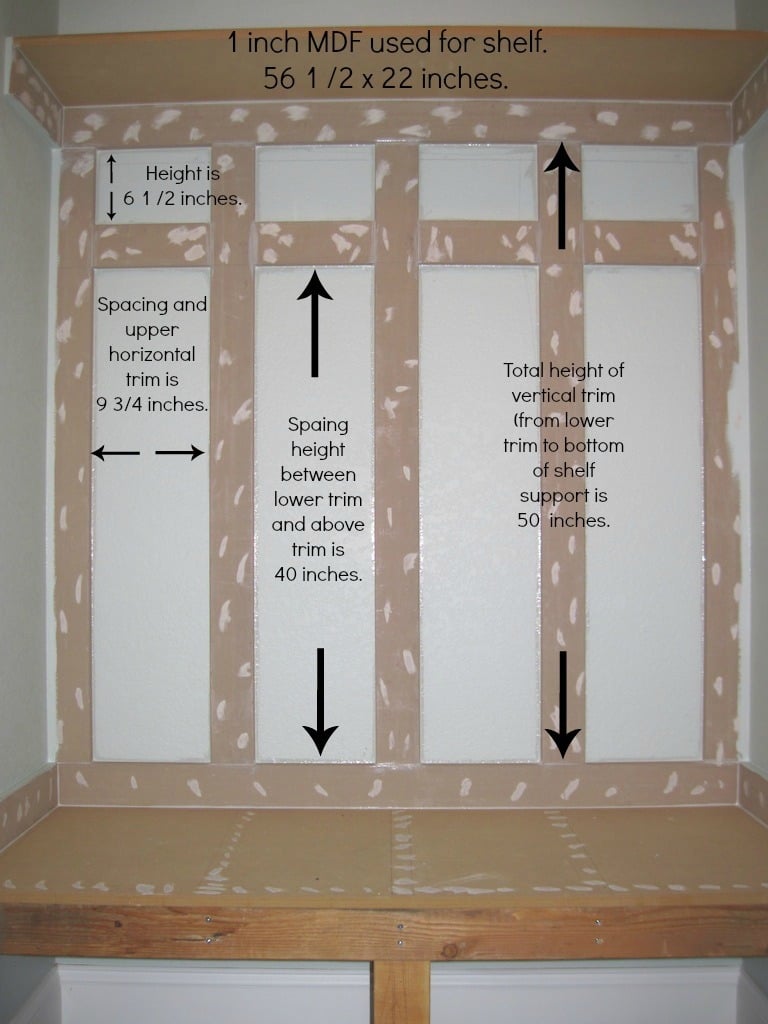
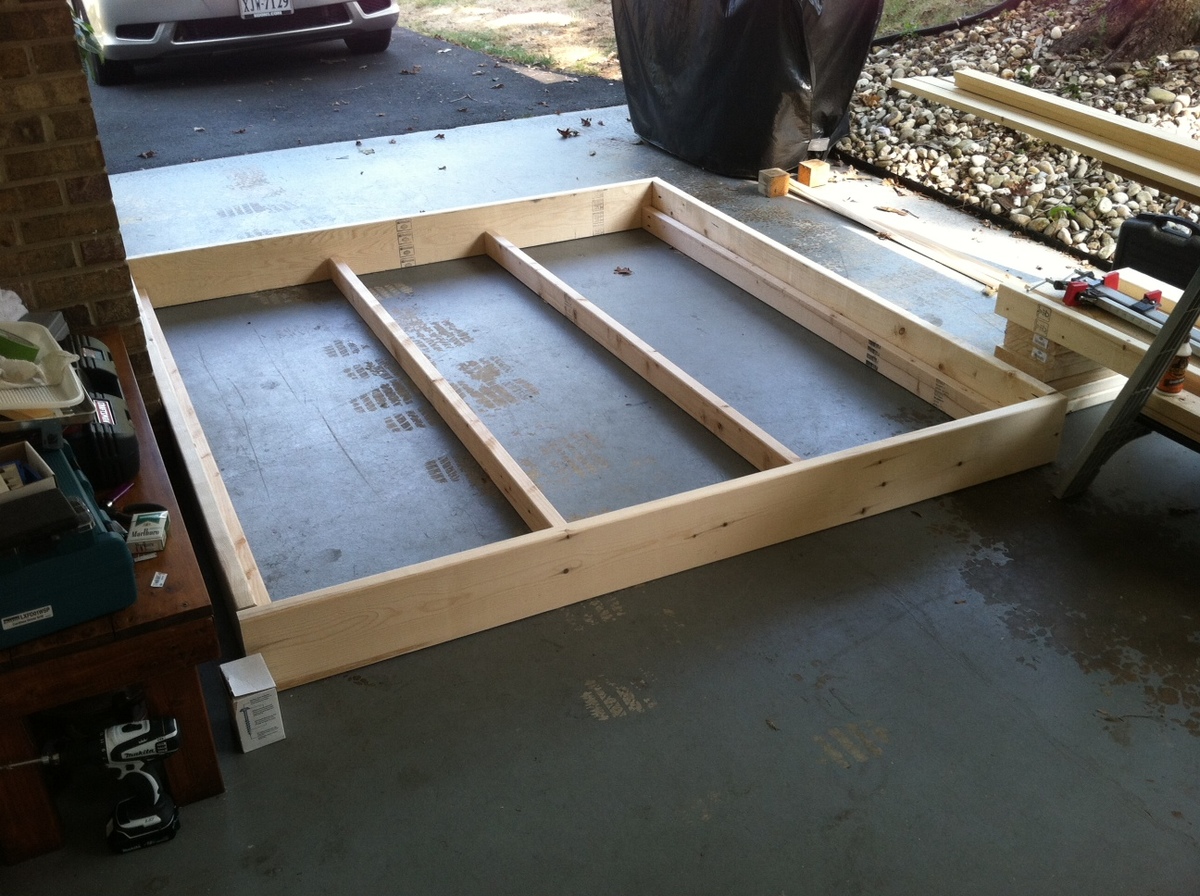
With much needed seating in the mudroom, an unused space (nook) was used to build a mudroom bench and shelf. No plans were used. I basically looked on-line and mentally drew up an idea of how I wanted the final product to look.  


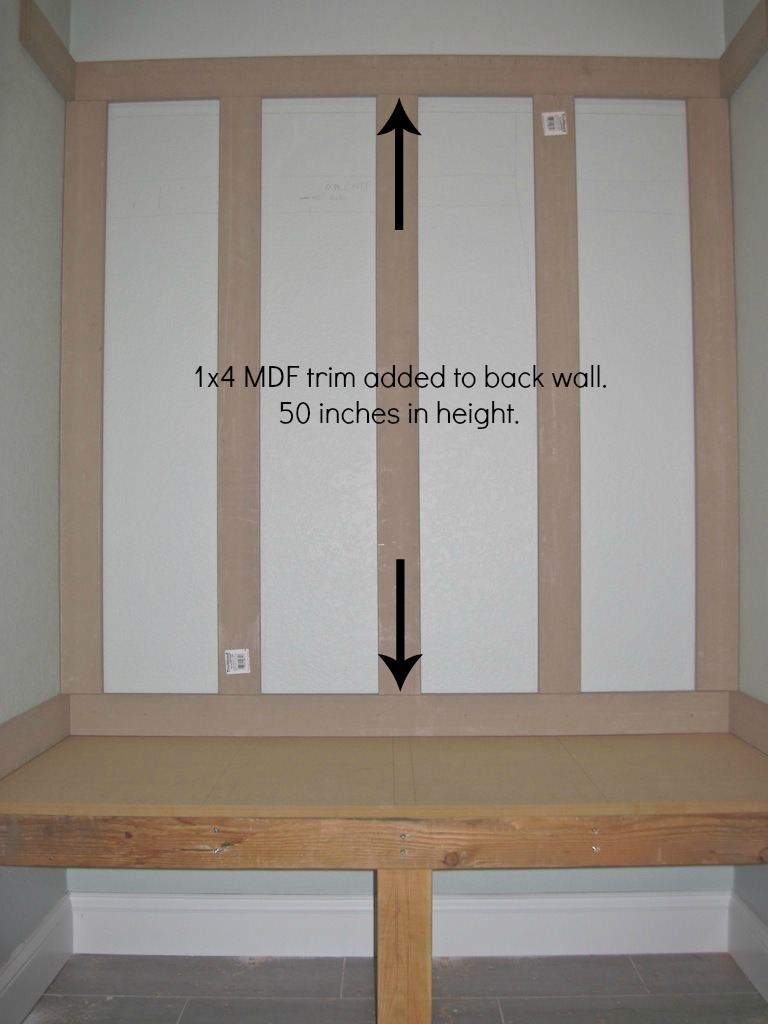
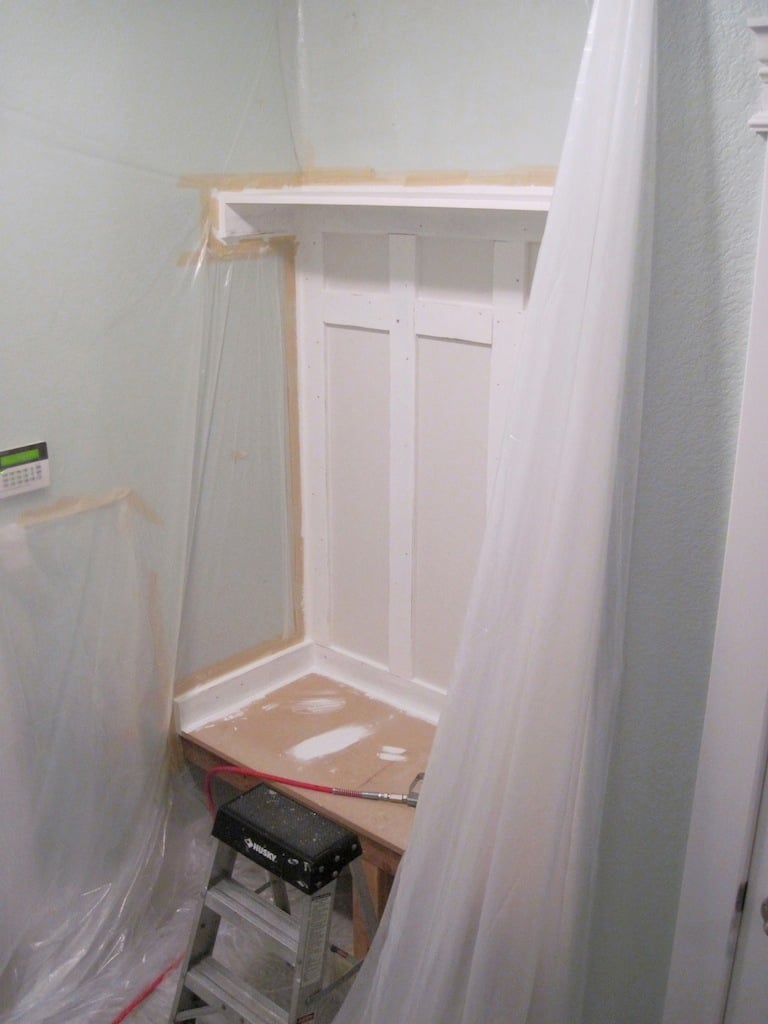
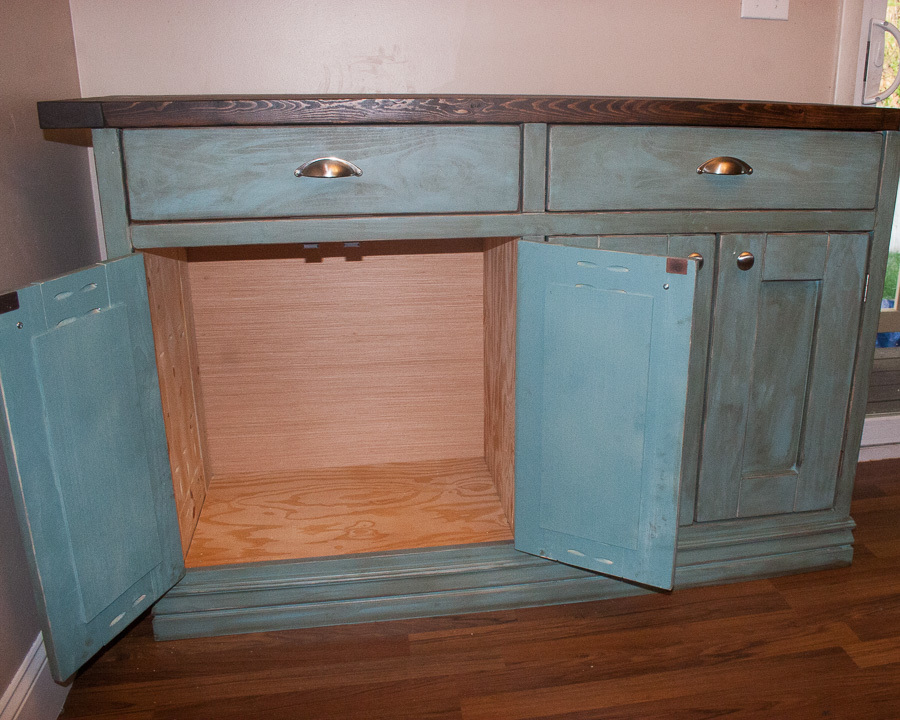
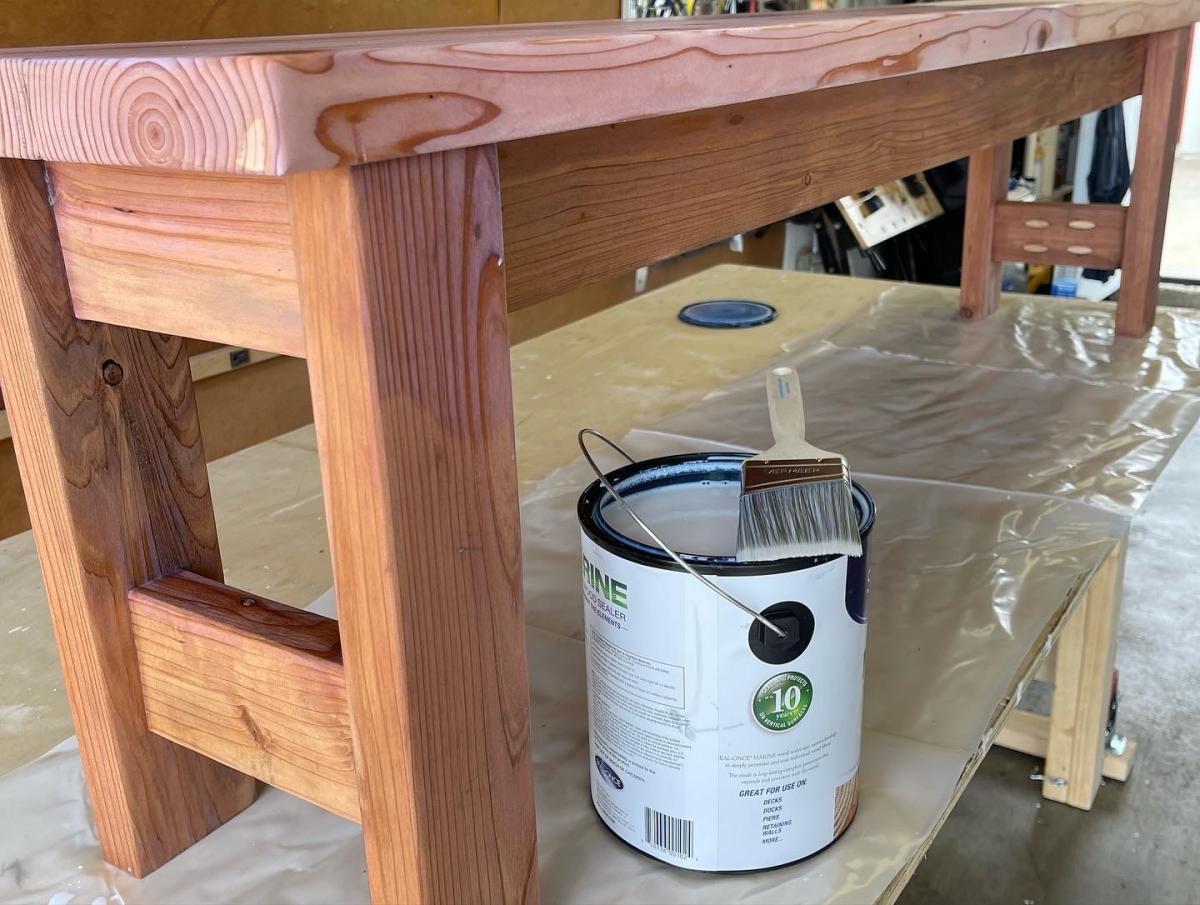
There were some setbacks such as not like the knock down textured walls (after partially painting the bench). I ended up covering the textured walls with hardboard and repainted.


A bench cushion was made for added comfort and style.


Complete tutorial for the bench is here and the bench cushion tutorial is here.


Thank you.


Julie

Estimated Time Investment
Weekend Project (10-20 Hours)
Finish Used
Behr Ultra (paint and primer in one) in ultra white finish.
Recommended Skill Level
Beginner

Comments

Cleverly6

Thu, 05/16/2013 - 13:48

Thank you so much for the idea and plan. I used it to turn an extra laundry room that we have off of our garage into a much needed mudroom. The most challenging project I have ever done before is hanging blinds. But with your help and some from the Home Depot employees, I did it! Our family is more than happy with it. Thanks!!!

BeingHome

Sun, 08/25/2013 - 22:28

Thank YOU so much! I would love to see a picture of your new mudroom area. :) I am happy the plans helped and of course Home Depot. ;)

Sorry for my delayed response. :(

BeingHome

Sun, 08/25/2013 - 22:28

Thank YOU so much! I would love to see a picture of your new mudroom area. :) I am happy the plans helped and of course Home Depot. ;)

Sorry for my delayed response. :(

Mini & Modified Planked Sideboard

Submitted by Anonymous (not verified) on Tue, 04/11/2017 - 17:03

My husband did the build and I did the finishing. This would have been much easier with the correct tools such as clamps and squares but he got by. We did have a Kreg jig that made the assembly much easier. This took about 15-20 hours over the course of a week long spring break.

Built from Plan(s)
Estimated Cost
About $325
Estimated Time Investment
Weekend Project (10-20 Hours)
Finish Used
Except for the stain I used spray paint which made the finishing process go much faster and made it easy to get into all the grooves.

For the top:
Two generous coats of Minwax Wood Finish Penetrating Stain in "Espresso 273" using a cloth to apply and then a clean cloth to wipe off the excess after allowing some time for the stain to soak in. Added two top coats of Minwax Fast-Drying Polyurethane in "Clear Satin".

For the base:
Primed with Valspar spray paint in white. Then added two coats of Valspar spray paint in "Secluded Garden" Satin finish. Sanded the edges a bit and then went over it and quickly wiped off with the same stain as the top. This soaks into the exposed wood on the edges and leaves a bit of residue on top of the paint itself. Sealed over the top with a coat of clear satin top coat. Also used just the clear spray seal on all the exposed wood on the inside of the base.
Recommended Skill Level
Intermediate

Backyard Patio Set

Submitted by Theavy on Tue, 05/04/2021 - 15:03

Used Ana's plan for chairs, coffee table, sofa and lounger. Stained and clear coated. Wife is happy. What can be better!

Estimated Time Investment
Week Long Project (20 Hours or More)
Finish Used
SPAR Urethane
Recommended Skill Level
Intermediate

Comments

Children's Bunk Bed

Over a year ago my wife Rebecca and I decided that our two oldest children would love to have bunk beds.  They are close in age and already share many toys, so sharing a room made sense.  Plus we had to make room for our third child that was on his way!

We searched for bunk beds and found that those within our budget were made of low quality plywood.  We were concerned about the safety of potential bunk beds and whether they could withstand our boys’ roughness.  Quality bunk beds, on the other hand, were easily above a thousand dollars which was way beyond our budget.  We were pretty bummed that we could not find our kids a suitable bunk bed within our expectations.

Then Rebecca suggested: “You could build them one.”

Hmmmmmm.  It was an interesting statement from my wife, perhaps even a challenge.  A challenge that I immediately immersed myself into.  Mission accepted!

What I did differently:

  • Added extra posts for a sturdier bunk bed.
  • Bunk bed is longer to fit twin mattresses, height increased.
  • Added rail slats and trim.
  • Added LED lights.
Built from Plan(s)
Estimated Cost
Approx $500
Estimated Time Investment
Weekend Project (10-20 Hours)
Finish Used
Rust-oleum Light Walnut = 3 coats, Polyurethane Satin Interior = 3 coats
Recommended Skill Level
Beginner

Comments

Junior height loft bed (modified)

Submitted by dinifam on Fri, 04/05/2013 - 12:47

This was my first real build!! I did it simultaneously with the elementary trestle desk, land of nod bookshelf, rolling cubbie stools and hanging bookshelf! My son wanted the ladder vs the steps and was thrilled with the hammock made out canvas drop cloths:) I made a simple bed box for chalk and cups of water at bedtime and just screwed it in to the top 2x4! the build was easy...however the assembly took my daughters help! It took me about 3 hours to build the bed and I stained it with general finishes java gel stain! It was so much fun and I am so addicted!! I will submit brag posts for the other builds soon!

Estimated Cost
60.00
Estimated Time Investment
Afternoon Project (3-6 Hours)
Finish Used
2 coats of java gel stain
Recommended Skill Level
Beginner

Comments

spiceylg

Fri, 04/05/2013 - 17:18

What a lucky guy. All the builds came out fantastic and I love the added touch of the hammock. The post-it: priceless!

Jason Paul

Tue, 03/04/2014 - 07:48

Does your bed wobble? I did not include the steps either but I am finding that the bed wobbles from the foot to the head board.

Workbench

Submitted by jaimej on Sun, 04/28/2013 - 18:38

This is our 2nd project - we liked building the bookshelf so much, we decided we're gonna keep going and need a good workbench. Got these plans from the Family Handyman Website (http://www.familyhandyman.com/DIY-Projects/Woodworking/Workbenches/how-…). They claim the cost to be $50, but it was closer to $80 for us - still a GREAT project and easy to put together with the nail gun.

Built from Plan(s)
Estimated Time Investment
Afternoon Project (3-6 Hours)
Finish Used
none
Recommended Skill Level
Beginner

Comments

Adirondack Chairs

Submitted by Anonymous (not verified) on Mon, 10/04/2021 - 12:57

The first is a modern adirondack chair mad3 of cedar and I added some vinyl stickers for my son's high school logo.

The second are a set I made using just pine and stained with cedartobe stain. They stay under the cover of the porch and are in excellent condition after 4 years.

Comments

Seasonal And Holiday

Variation on Easiest Upholstered Bench

Submitted by BuilderGal on Mon, 03/14/2011 - 10:42

I wanted an upholstered bench for the end of my bed but could not find one with the right measurements. So what to do when that happens, build your own. I used the easiest upholstered bench plans as my starting point, but incorporated turned legs from Home Depot and upholstered the cushion instead of making a slipcover for a more traditional look. I made the bench measurements one inch smaller in depth and one inch smaller in length than the plans to fit the end of my queen size bed. I used the pocket hole (Kreg ) jig to attach the legs to the 2x4s and pre-drilled holes in the base to eventually attache the upholstered top. I used stain applied very heavily as the grain on the legs was different than the 2x4s.After putting the frame together and staining it, I stapled fabric over 3 inch foam and a layer of batting to the unattached top MDF board. The best way to cut foam to size is with an electric carving knife. I then stapled fabric covered piping around the edge of the fabric. I finished it off by turning the whole thing upside down and attaching the finished upholstered top to the frame by screwing them together with the pre-drilled pocket holes. I love the way it finishes off our room and it looks very professional. As always, the hardest part of the project is not the building, but the staining and getting the upholstery just right.

Built from Plan(s)
Estimated Cost
$65 (for legs, 2x4's, and 3 inch foam)--used leftover MDF for top and fabric I had
Estimated Time Investment
Afternoon Project (3-6 Hours)
Finish Used
I used Minwax water based walnut stain and applied 2-3 coats very heavily and did not wipe it off. I also used 2 coats of polyurethane.
Recommended Skill Level
Beginner

DIY Folding Workbench

Submitted by suzeet305 on Mon, 10/18/2021 - 18:32

I'm a beginner DIYer and I knew one day I was going to have to make a workbench. I made mine 24x48 so I wanted a little more support to hold up the drop down leaf. I searched your site and found another plan with these gatelegs and knew this is what I wanted. I love the way it came out. What do you think?

Built from Plan(s)

Comments

Tryed Coffee Table and End Table

Submitted by mike5287 on Wed, 10/27/2021 - 12:00

Oldest is moving out into their own apartment so thought I would help them save some money and built a Tryed/Tryde Coffee & End Table, although both are slightly modified:

- Coffee table I added the lower section
- End Table I did with pocket holes vs how the plans had it laid out.

For the end table , which I started after the coffee table, I "jointed" the table top pieces on the table saw - very slightly as I wanted to keep the more rustic looking individual boards. This worked really well and I wish I had done it on the coffee table too.

For the finish, which to me always starts with lots and lots of sanding (started at 60 grit down to 400 grit), I used a mix of Varithane Red Mahogany (4 parts) and Dark Walnut (1 Part), then several coats of Clear Satin Polyurethane. For some reason the end table was VERY glossy so had to use some 0000 steel wool to reduce the gloss.

So hooked on the pocket holes now going to upgrade my Kreg jig to the 720 :)

Comments

King Farmhouse Bed

Submitted by boxermum on Wed, 04/13/2011 - 14:17

Classic king farmhouse bed build

Estimated Cost
$150
Estimated Time Investment
Day Project (6-9 Hours)
Finish Used
Antique White Finish:
*Primed with white primer
*Painted with Behr Silk Pillow - Satin finish
*Sanded edges to expose wood (rotary palm sander and palm block sander)
*Applied Minwax English Chestnut Stain over whole surface using foam brush being sure to saturate exposed wood areas
*Used old T-shirts to wipe away excess stain
*Sprayed with matte clear sealer (Krylon)
Recommended Skill Level
Beginner

Storage Bed

We used the plans for a six drawer storage bed to build this with a custom headboard and footboard. We used plywood to build these boxes but have since switched to using MDF. We use a pine laminate for the drawer faces.

Estimated Time Investment
Weekend Project (10-20 Hours)
Finish Used
Custom mix
Recommended Skill Level
Intermediate

Comments

leftysgirl

Sat, 09/26/2020 - 05:51

I absolutely love this style. I am trying to figure out your modifications.
What size pine planks are those for the foot and head board? 6”?

Thanks!

Pretty Wood Boxes!

Submitted by cassiet717 on Fri, 08/02/2013 - 18:42

My brother and his fiancee just bought their first house, and these sweet little boxes were the perfect housewarming gift! I used the recommended cedar picket, and found some old reins at a flea market for the handles. Piece of cake to build, super inexpensive, but absolutely adorable!

Estimated Cost
$3 per box (including handles)
Estimated Time Investment
An Hour or Two (0-2 Hours)
Finish Used
Minwax Pre-Stain Wood Conditioner, Minwax Stain in Walnut
Recommended Skill Level
Starter Project

Tweaked 6 cube Cubby and Bookshelf

Submitted by Ryan57ford on Sun, 09/09/2018 - 07:56

I used the 6 Cubby plans and just started tweaking.  First was the plan to just do 12 cubbies, then decided to just put in adjustable shelves for aethetic purposes and not having it look too "Boxy"  After that decided it would look better with doors too.


as for the shelf on top, I used the cubby bookshelf plans and just made it wider to match the width of the doors and then decided to also make it adjustable shelving as well.  (used the kreg shelf pin system.)


Overall turned out pretty good. I am making a even bigger one for my other room.

Estimated Cost
$250ish
Estimated Time Investment
Weekend Project (10-20 Hours)
Finish Used
Kona Stain
Recommended Skill Level
Intermediate

Jewelry/Makeup Storage Cabinet

Thank you Anna for providing the template plans for this project. My wife had a mirror leaning on the wall in our bedroom that rarely got used and jewelry all over the dresser. So thanks to you I was able to turn this cheap mirror into useful storage and organize her jewelry.  Thanks! 

Estimated Cost
$80
Estimated Time Investment
Weekend Project (10-20 Hours)
Finish Used
Glossy spray paint
Recommended Skill Level
Beginner

Comments

Ana White

Wed, 10/07/2015 - 10:18

Thank you for building!!!  Your post just made my day, I'm so happy to see your build! I love the customization with the jewerly holders too!  Thank you so much for sharing!

LARGE FARMHOUSE TABLE

Submitted by mdbennes on Mon, 11/23/2015 - 09:25

I used Ana's plans for this project, but had to deviate since I built it for a friend who needed a table for 14!!  This thing is huge, 12 feet long, and about 44 inches wide.  I made it out of pine, 2x8s for the top but stuck to the plans for the frame.  It weighs about 200lbs or more, and had to move it with 4 guys...used an enclosed trailer to move it from my house to theirs. They love it so that's all that counts!  Oh ya, in the picture, you will see Ana's rustic X console table too! 

Estimated Cost
$150
Estimated Time Investment
Weekend Project (10-20 Hours)
Finish Used
Minwax English Chestnut stain, then a GLOSS polyurethane
Recommended Skill Level
Beginner

Raised Pet Feeder - Small

Submitted by takahler on Wed, 08/31/2011 - 11:46

As soon as I heard my brother was going to get a puppy this month, I decided I was going to make this food and water dish holder. I LOVE IT! I am going to give it to him for Christmas. I made it with larger bowls for when the puppy becomes a full size Golden Retriever. She won't need it right away, so I've decided to wait until Christmas to wrap up and give to my brother. I had a lot of fun making this project. I need to make one now for our cockapoo.

Since I had to use larger bowls, I had to come up with my own measurements. I'm pretty proud of myself for tackling that all by myself. :-)

Coated it pretty heavy with the polyurethane to protect it from water spillage.

Built from Plan(s)
Estimated Cost
$9 for the bowls and about $6 in lumber--Total of $15
Estimated Time Investment
Afternoon Project (3-6 Hours)
Finish Used
Dark Walnut and polyurethane
Recommended Skill Level
Beginner

Comments

Farm benches

A set of beautiful farm benches for our outdoor table. I built these beauties with redwood wood using only pocket holes to avoid exposing any screws. The only place where I had to use pocket holes plugs was in the leg stretchers to avoid seeing the pocket holes.
I applied pre-stain wood conditioner and then stained them using Dark Brown transparent stain. I wanted the wood grain to be visible through the stain and this allowed me to do just that.

Chestwick Bed

Submitted by thairese on Sun, 10/20/2013 - 18:44

Changed the dimensions to fit a King size bed. Also lowered the 2x4 support studs so that they were flush with the bottom of the frame in order for the bed to sink in more. What should have took only a day was spread out over a week. I'm more Al Bundy than Tim Taylor. NFL break here, NFL break there.. two kids, etc etc. Anyways, I rushed the moulding part because it was Sunday and now I gotta go back and fill in gaps caused by rushed measurements. Still looks pretty good though. Thanks Ana!

-Thai

Estimated Cost
150
Estimated Time Investment
Weekend Project (10-20 Hours)
Finish Used
Martha Stewart Black paint from Home Depot
Recommended Skill Level
Beginner

Step Stool

Submitted by mbotica on Fri, 10/25/2013 - 20:58

Saw this project on here and immediately knew this was something I needed to build for my daughter who had been standing on toys to reach her light switch as she is now enjoying turning on and off the lights in her room. Took some creative license and made the treads out of multiple boards rather than the single 6" piece from the plan. Also use pocket hole joinery to add to the stability of the project. This is very sturdy and can hold well over 200lbs. Already have many orders from friends.

Built from Plan(s)
Estimated Cost
$25, cause of the poplar
Estimated Time Investment
Day Project (6-9 Hours)
Finish Used
Lowes Valspar paint and primer in one. used two coats and in some areas three coats. light sanding to create the aged look.
Recommended Skill Level
Beginner