Community Brag Posts

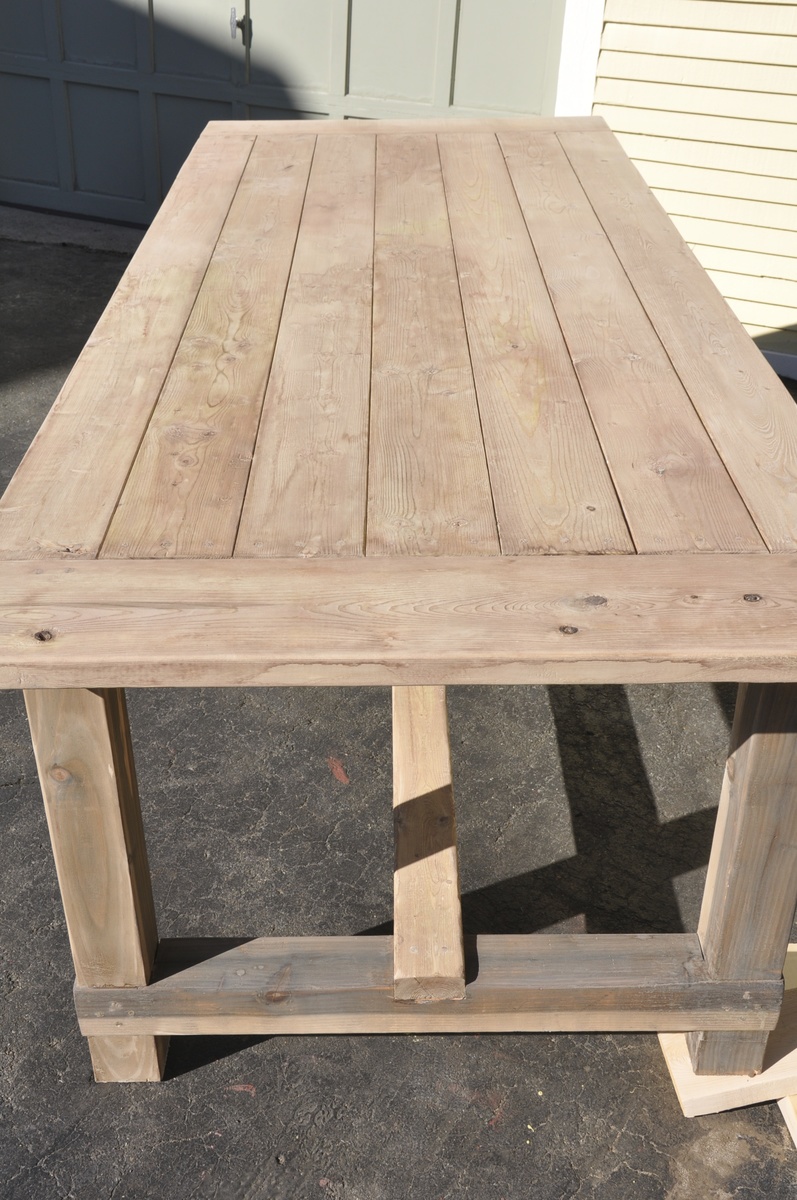
Farmhouse Table with Extensions
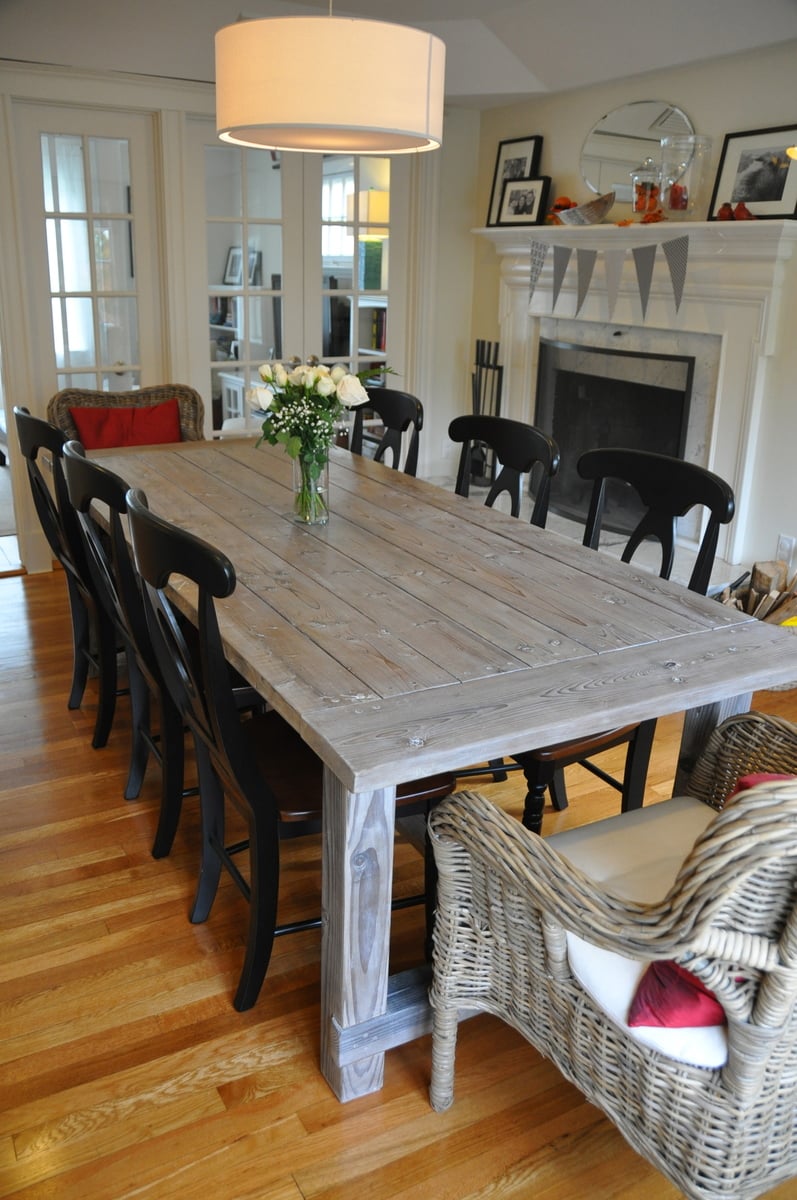
This was my first build and I learned A LOT and watched A LOT of youtube diy videos. The main take-away from this project is not to build in the freezing cold if the finished project is for inside. I finished this project in below freezing temperatures and I noticed that the wood expanded (increasing slightly the gap between the finished boards on the top) when it was brought inside.

I built this from the original farmhouse table plans with no kreg jig although I did buy and use a pocket kreg jig to make the extensions. The main modifications were using 4x4s such as were used in the Country Living magazine spread that inspired this build and also making modifications to allow the addition of 15" extensions at each end of the table's bread boards.

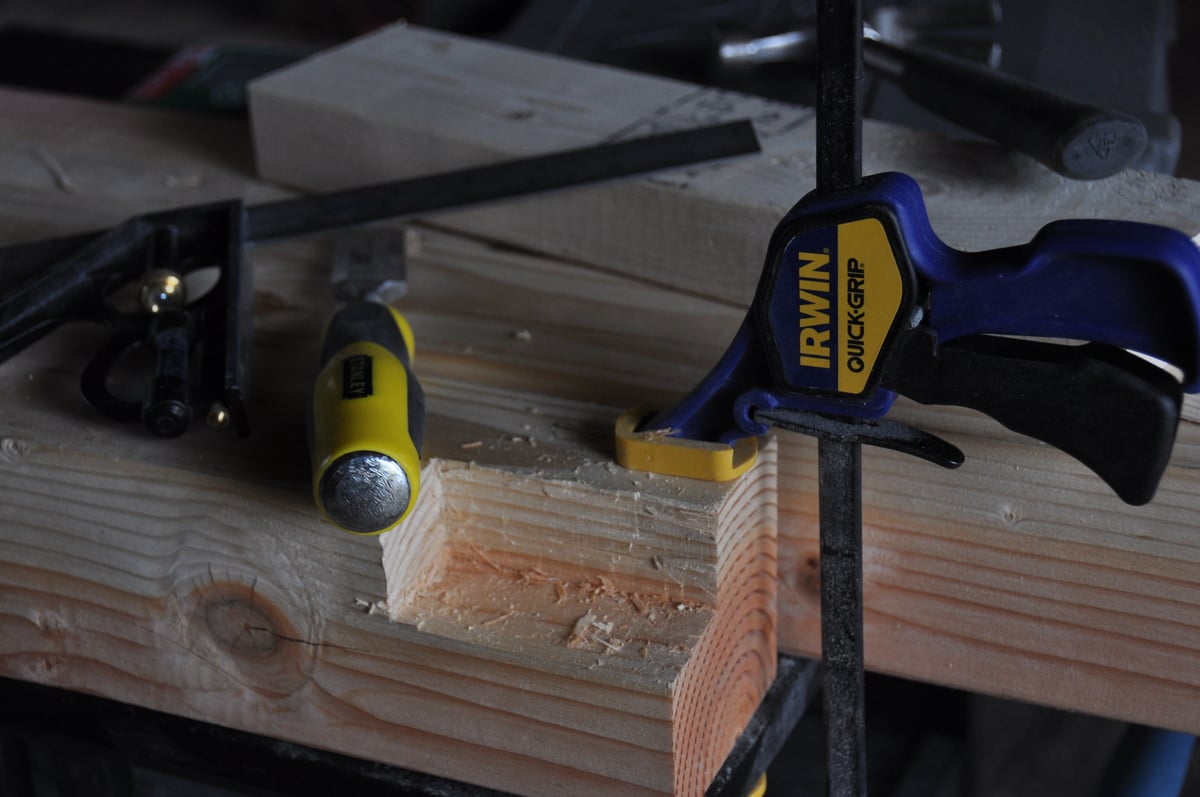
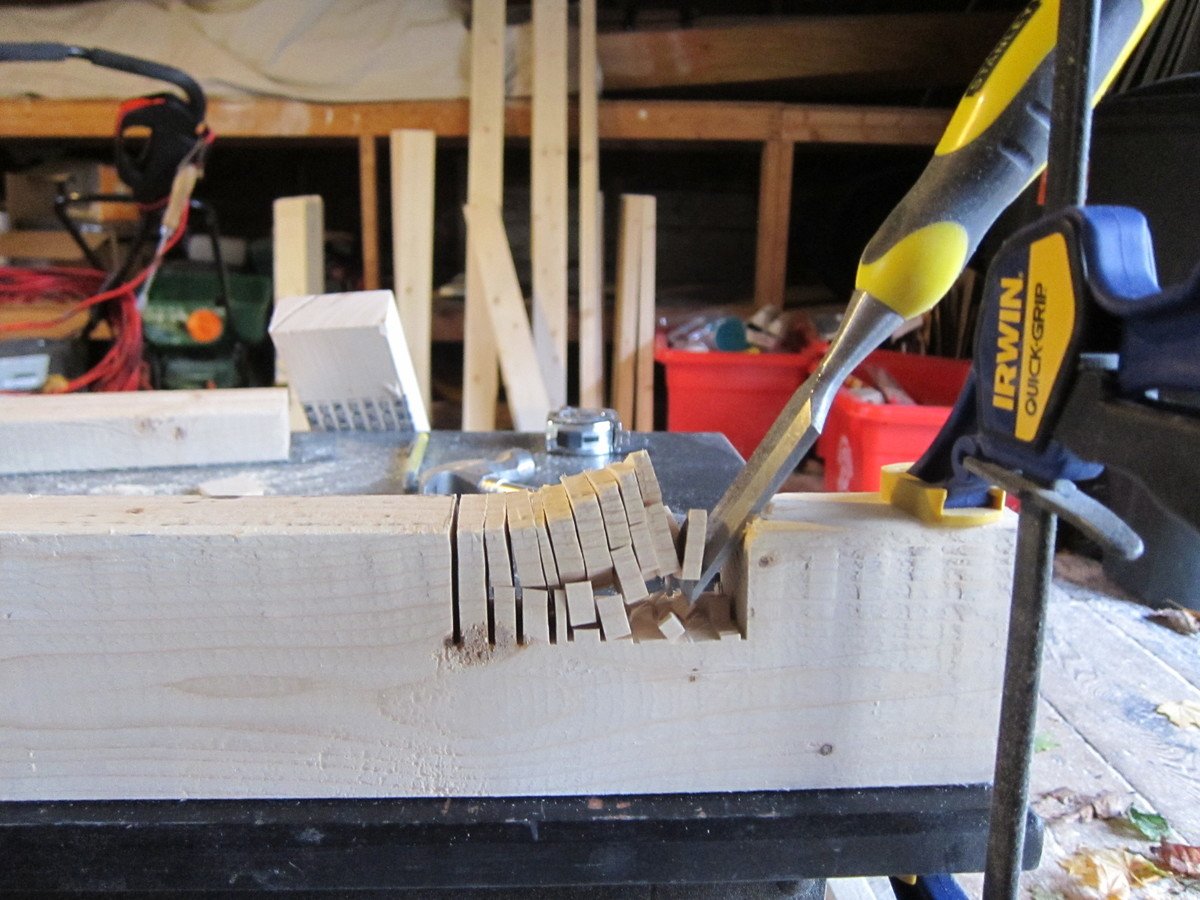
My first challenge was figuring out how to build with the 4x4 legs instead of the 2 2x4s screwed together. In order to accomplish this i had to use a chisel to create the corner lip that the table top frame would sit on. I added photos of this so I hope it will help someone. Chiseling these 4 corners (one on each post) only took an hour or two and was so worth it for the look of the 4x4s. Just measure carefully and work carefully with a sharp chisel. I actually removed half the wood by sawing off the corner at a 45 degree angle. Remember when cutting your boards for the table ends that a 4x4 has different dimensions than 2 2x4s screwed together. Compensate for this in your cuts.

Another challenge was hiding the screws on the table legs and table top. I was leaving the finish natural so didn't want to use wood fill. I accomplished this by getting a countersink bit and then buying wooden dowels the same diameter. For these screw holes, after finishing screwing, I put a dab of wood glue in the countersink hole, inserted the dowel as far as it would go, used a fine hand saw to cut off the dowel flush with the table and then used a hammer to make sure the dowel was in tight and flush.

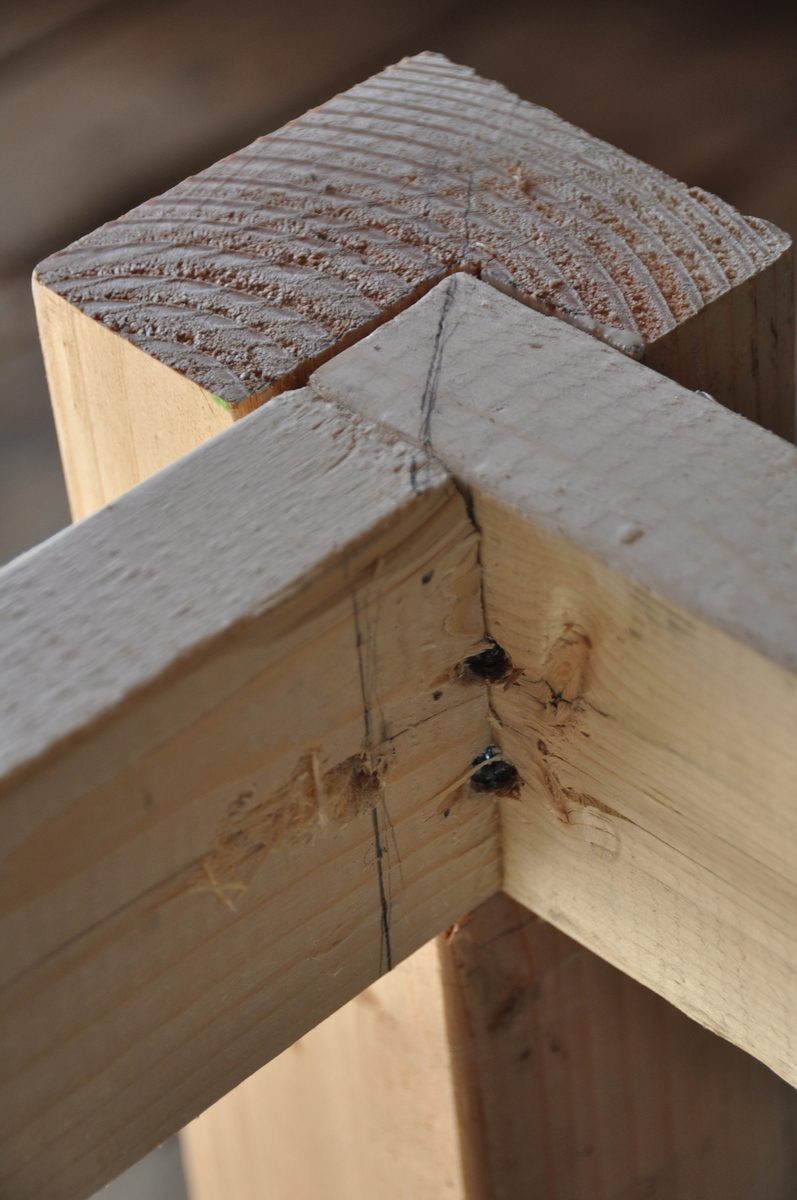
I had trouble figuring out how to attach the table top frame to the table legs with the long screws from the plans so I included a picture of this step. Its really easy but I was not able to use three screws as the plan calls for. I used two instead and it has been very solid. I used the long screws as proscribed.

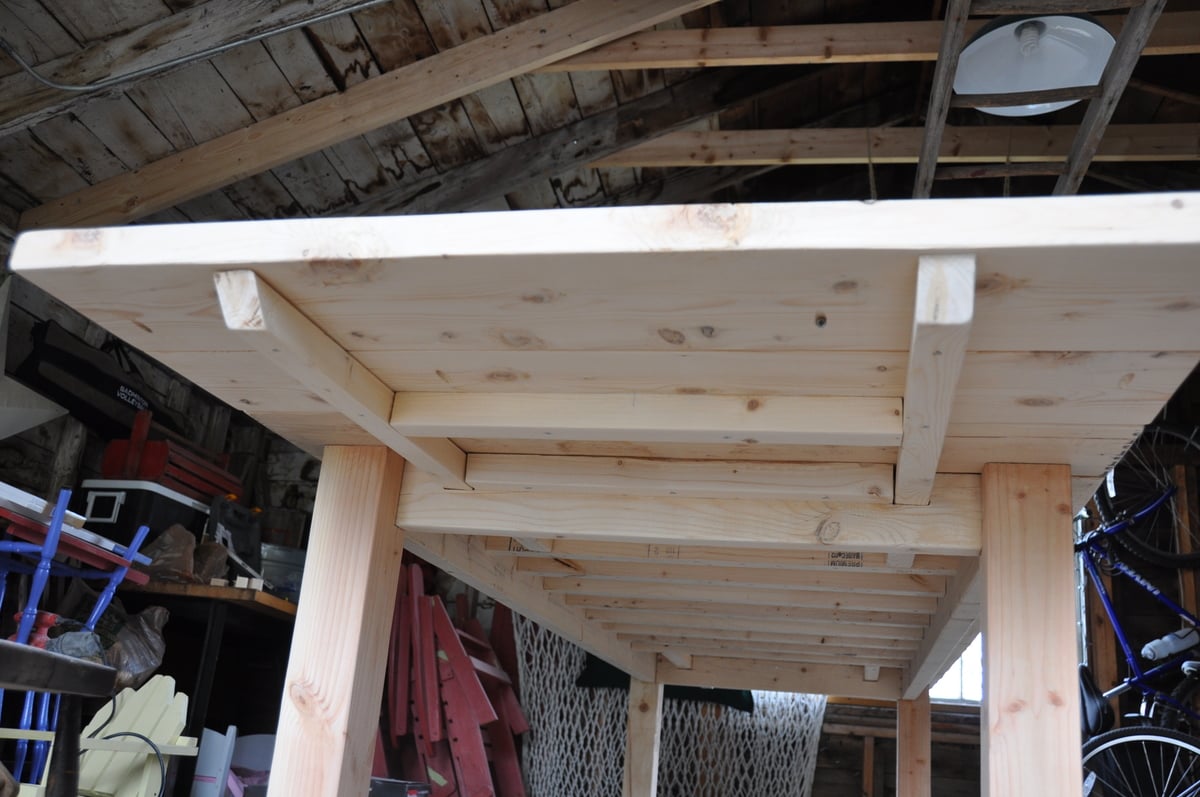
Finally, I wanted to build extensions (2 2x8 boards kreg jigged together) so I could increase seating up to a max. of 12 persons, so I needed to cut out 2x2 gaps on the table ends. I also included a picture of these in place. To make room for the 2 2x2s that extend under the bread boards and table top to brace the extensions, I left out one of the 2x2 cross beams at each end of the underside of the table (the boards that the table top boards screw into).

I hope this is helpful to you!
Estimated Cost
$250
Estimated Time Investment
Week Long Project (20 Hours or More)
Finish Used
Vinegar and Steel Wool Solution (soak steel wool for 24 hours in vinegar and be sure to test on a sample) to "age" the wood. Tung oil over this sealed the stain/wood. over this I applied a wax finish. First I used Briwax Liming Wax to enhance the gray finish and leave a slight white wash patina. This finish was enhanced because I had steel brushed with the grain to remove some soft wood so the liming wax would enhance the grain. I finished the project with clear briwax. We have been using this as our everyday table since February and there are no stains or problems with this finish.
Recommended Skill Level
Starter Project

Comments

dyemond47

Mon, 02/10/2014 - 11:55

Great job on the table! I love...I had visions of this table before I saw it. I wanted to use the 4x4's for the legs as well, the same finish. I am concerned now about the 4x4's because I am an amateur and I think that may throw too many wrenches into my plan. I started with the bench, finished in 3 hours I have patted myself on the back. Plotting on a Kreg jig right now.
epweigel92

Sun, 07/24/2016 - 09:57

Love the look of this table! Just to make sure I'm following correctly, the extensions are ones you can add and remove, not fixed? Do you have a pic of how they slide in or out?

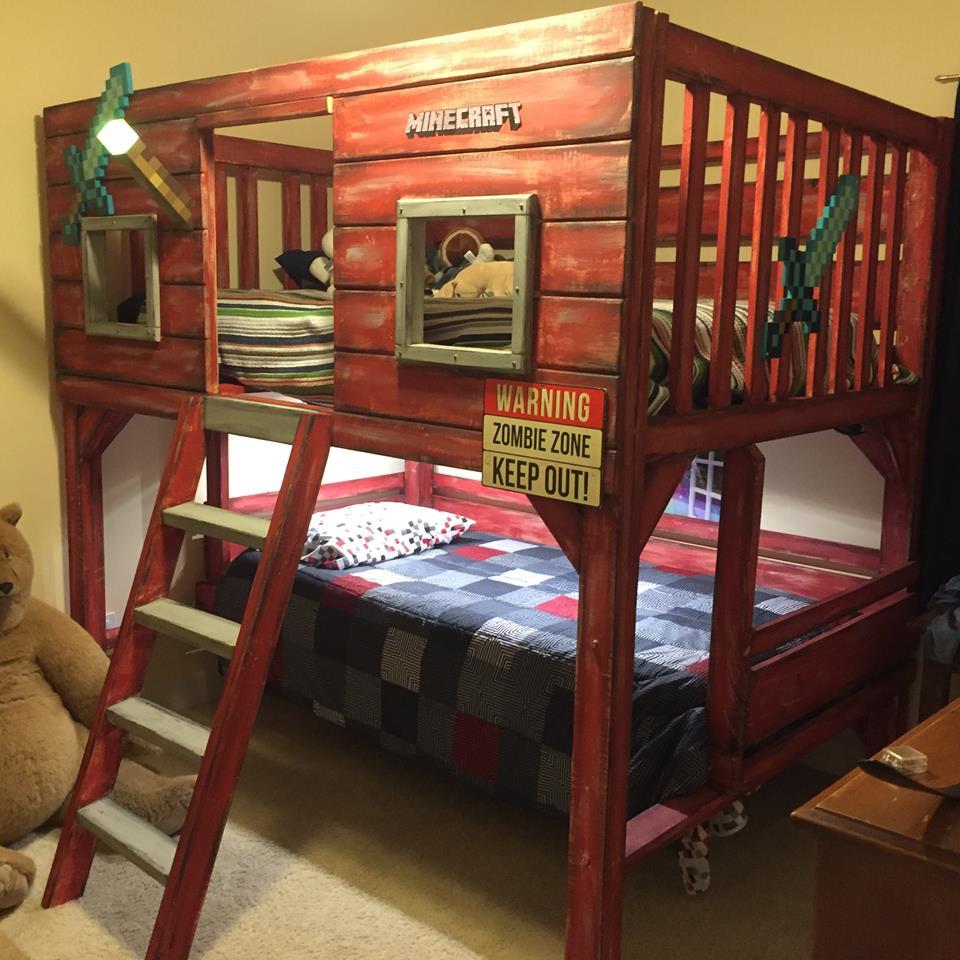
ClubHouse Minecraft

Submitted by MrDanDHN on Mon, 02/08/2016 - 20:02

Built this for my son that we adopted from foster care. He is into Minecraft and we need an extra bed for future foster. Thus the Full over Twin and the twin is removable for a play area underneath.

Built from Plan(s)
Estimated Time Investment
Week Long Project (20 Hours or More)
Finish Used
Chalk Paint with a brushed in accent
Recommended Skill Level
Intermediate

Comments

jasminemary

Sat, 03/05/2016 - 11:45

Can you take a picture or explain what you did for the bed support to make it a full? I fear without a board running down the middle to the head and foot, crossbars may not be enough. I love the full over twin idea. I want to make ours a full as well.

MrDanDHN

Tue, 04/26/2016 - 19:44

I did use a 2x4 support down the middle with Metal L brackets to ensure safety. I put this directly under the crossbars. After he has been in it about 9 month I think I would have put a solid piece of plywood to support the mattress better. We have had as many as 5 sleeping on the top bunk with no problems though.

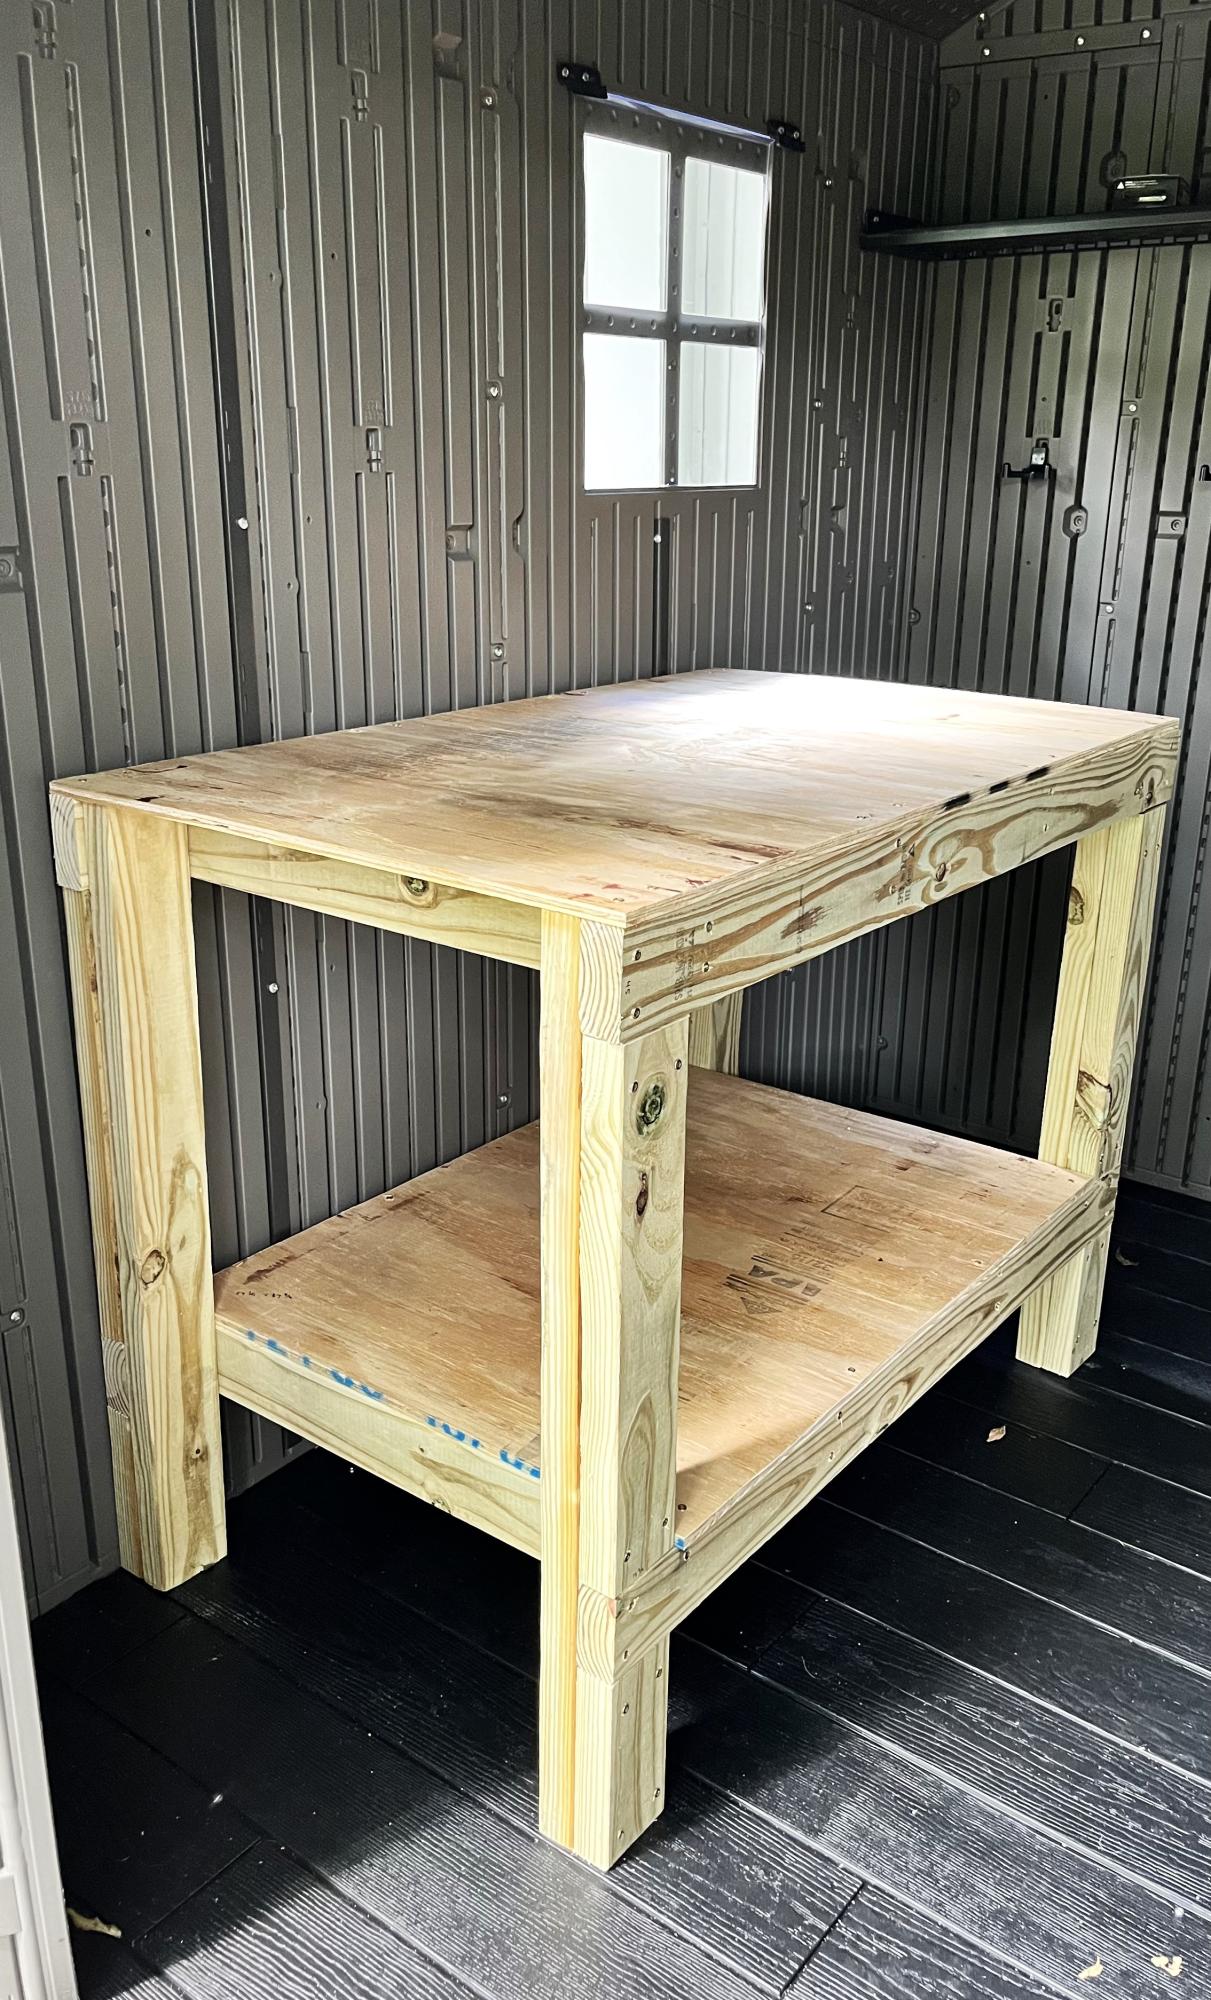
Easy to Build Workbench

Submitted by Anonymous (not verified) on Wed, 09/06/2023 - 09:09

I was wanting a work bench for my outside shed to work on occasionally and help keep organized. This is the first piece of furniture I have built totally on my own! The plan was easy. I sized it down a little with no problem. I'm a little off on a couple of the cuts but will practice more! Overall, thrilled and extremely proud of it!

Lori B

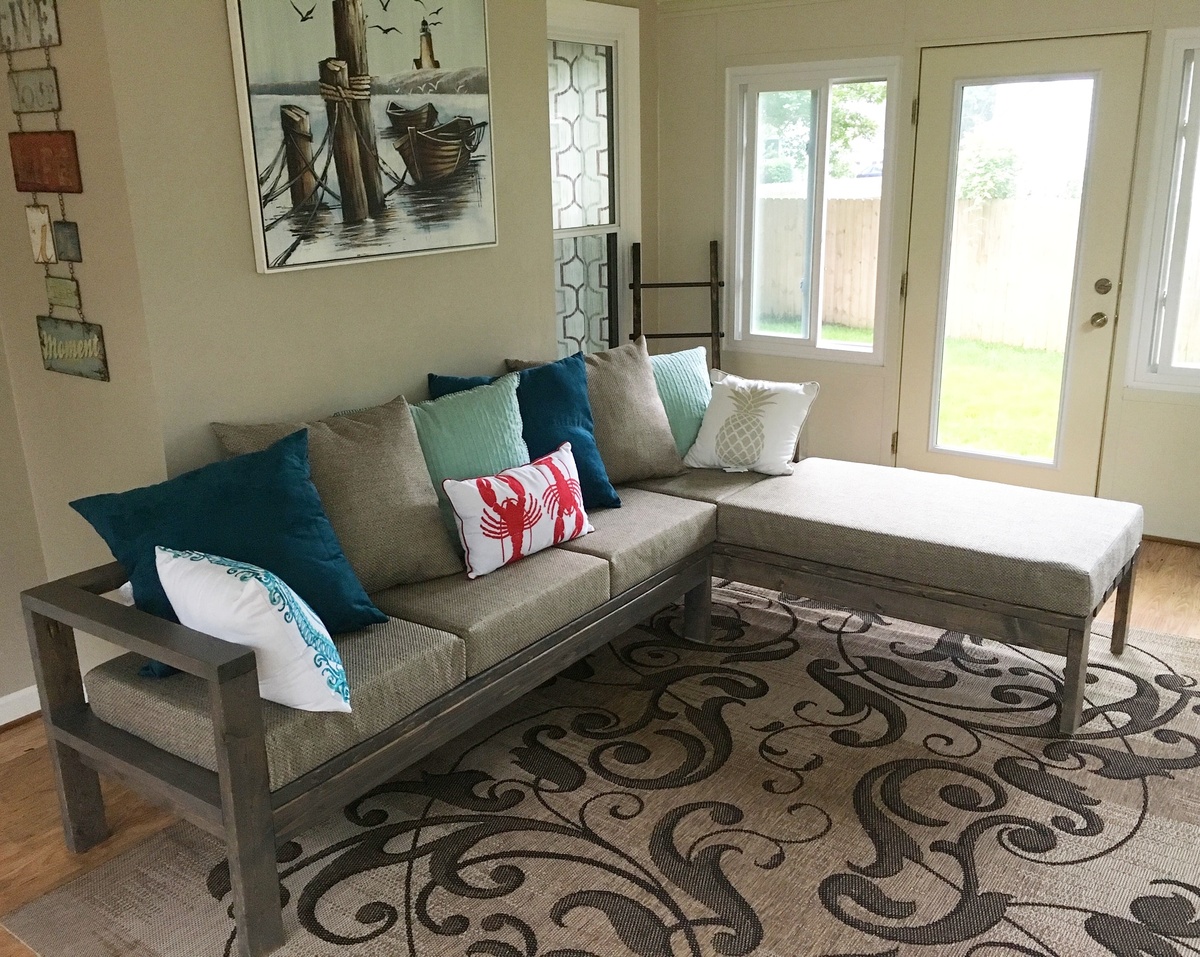
Modified Outdoor Sectional

Submitted by lisa2442 on Tue, 06/07/2016 - 11:40

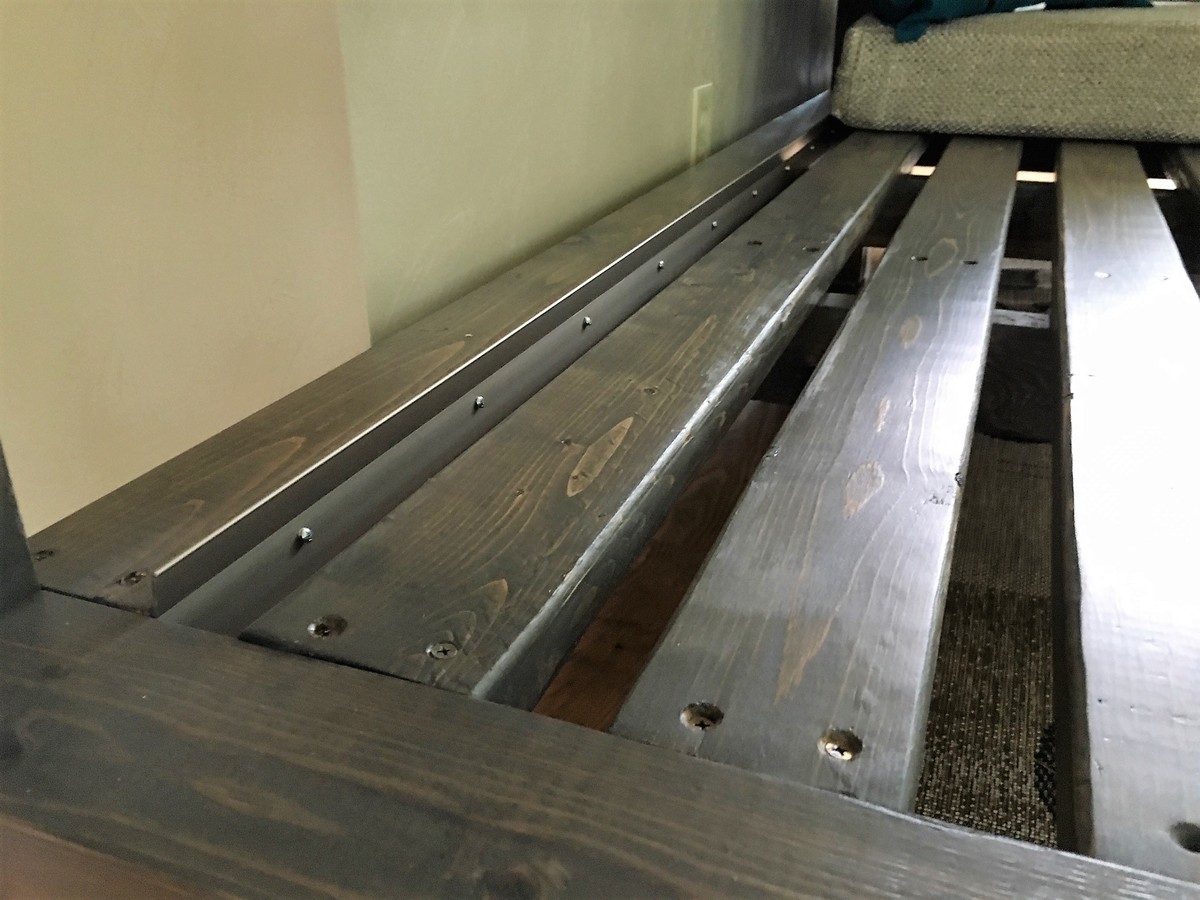
Modified one of the couch pieces so that the back rest only went as far as the depth of the adjacent couch; thereby making the rest of the couch a chaise. Cushions were custom made (walked into local fabric store and asked for a referral). Cushions were sliding out the back; but my build partner came up with a genius solution - used inexpensive metal threshold material and screwed it to the back seat slat. Works like a champ and looks nice too! 

Estimated Time Investment
Weekend Project (10-20 Hours)
Finish Used
Minwax pre-conditioner, 1 light coat Minwax Jacobean, 1 coat Minwax Classic Gray, 2 Coats Minwax Polycrylic.
Recommended Skill Level
Beginner

Comments

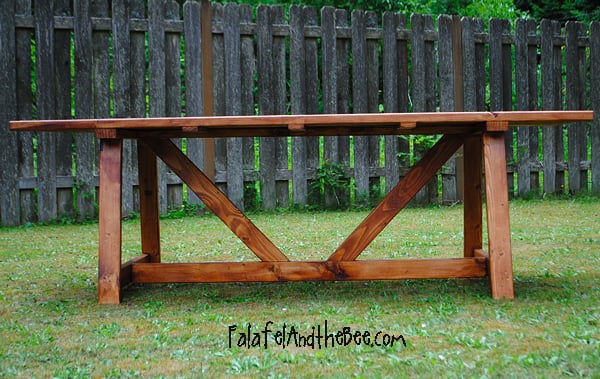
Providence Picnic Table by Falafel and the Bee

This is my second large wood project...and both from this blog! The plans were fabulously easy. This was the first time I used my miter saw, and it was a great way to break it in.


Estimated Cost
Under $120.00
Estimated Time Investment
Weekend Project (10-20 Hours)
Finish Used
Benjamin Moore Arborcoat Transparent Teak
Recommended Skill Level
Intermediate
Seasonal And Holiday

Dresser Bunk Built-in

Submitted by Anonymous (not verified) on Tue, 01/09/2024 - 08:32

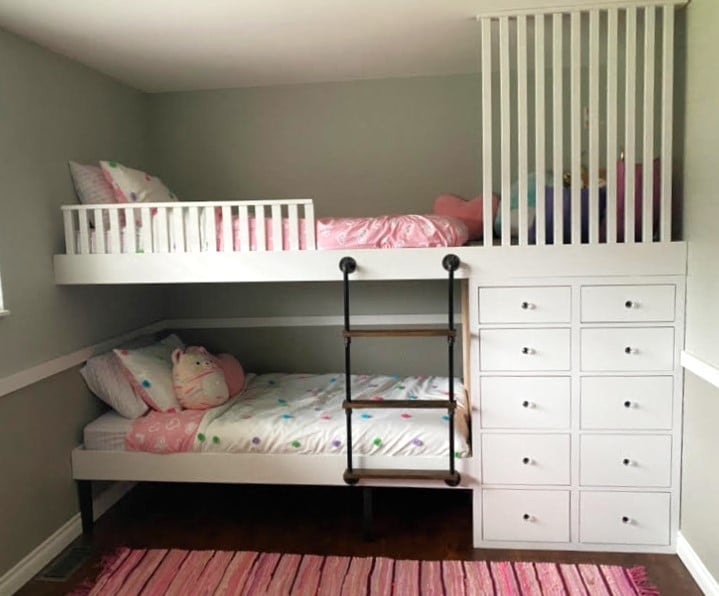
It started with the rustic rolling dresser. I wanted to try to build a dresser, but my girls needed a bunk bed. I modified the dresser to support a bunk bed. 2 little nooks for the girls, rock solid beds and a beautiful dresser.

HisAndHersOriginals

Built from Plan(s)

Comments

Farmhouse table

Submitted by gough4it on Thu, 04/24/2014 - 14:04

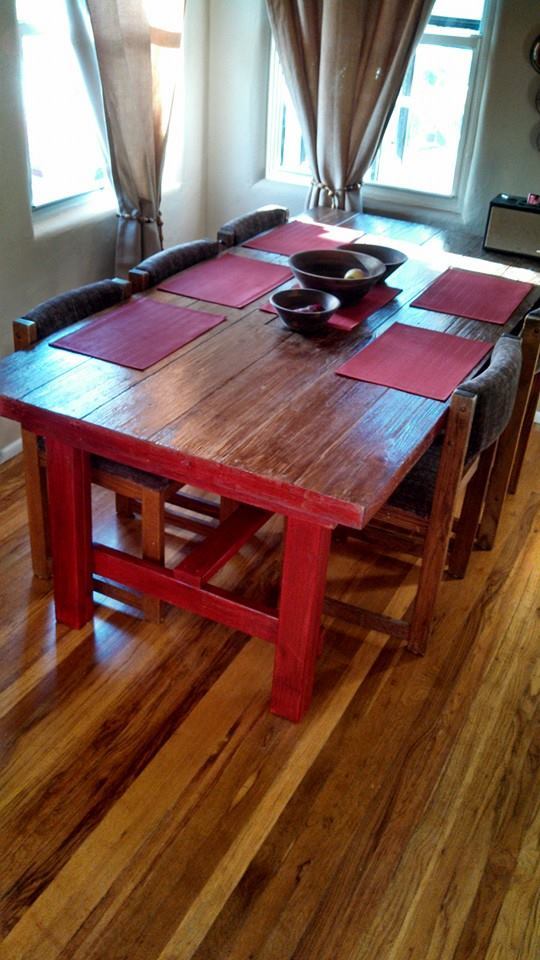
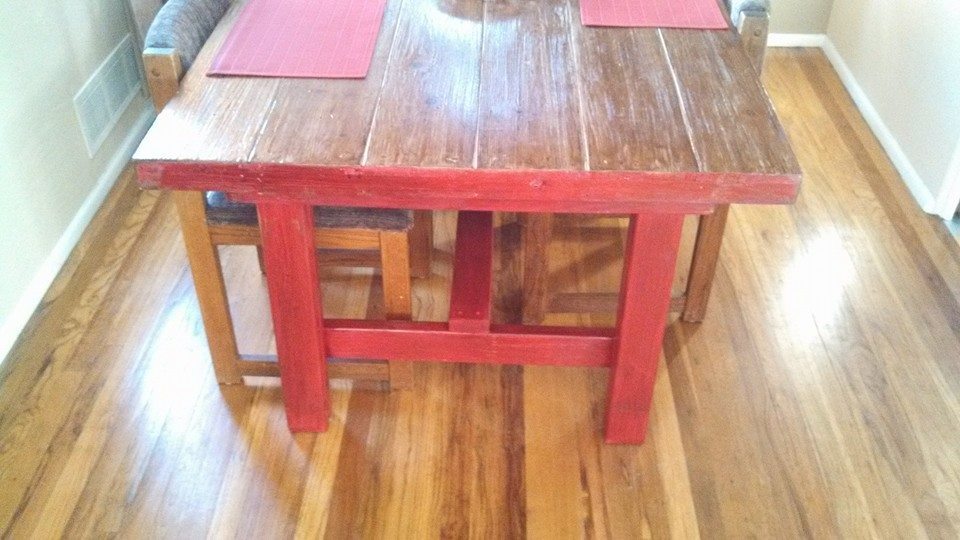
Loved the Farmhouse table project. I took it a step easier. A local door builder had clearance doors for a cheap cost. I found the door I wanted (42"x96"), cut off about a foot length wise, refinished the top and then added a modified farmhouse table apron and legs to it. Then used the distressed finish I found here on Ana-white.com to finish it with. I used a red paint and a dark walnut stain. All together it took about 4 hours of actual time. Though there was a overnight wait period after paint and another one after stain before I finished putting it together.

Estimated Time Investment
Afternoon Project (3-6 Hours)
Finish Used
I used the finish steps found here: http://ana-white.com/2011/08/reclaimed-wood-patchwork-multi-color
Recommended Skill Level
Beginner

Essential Adirondack chair

Submitted by str1523 on Mon, 05/25/2020 - 10:23

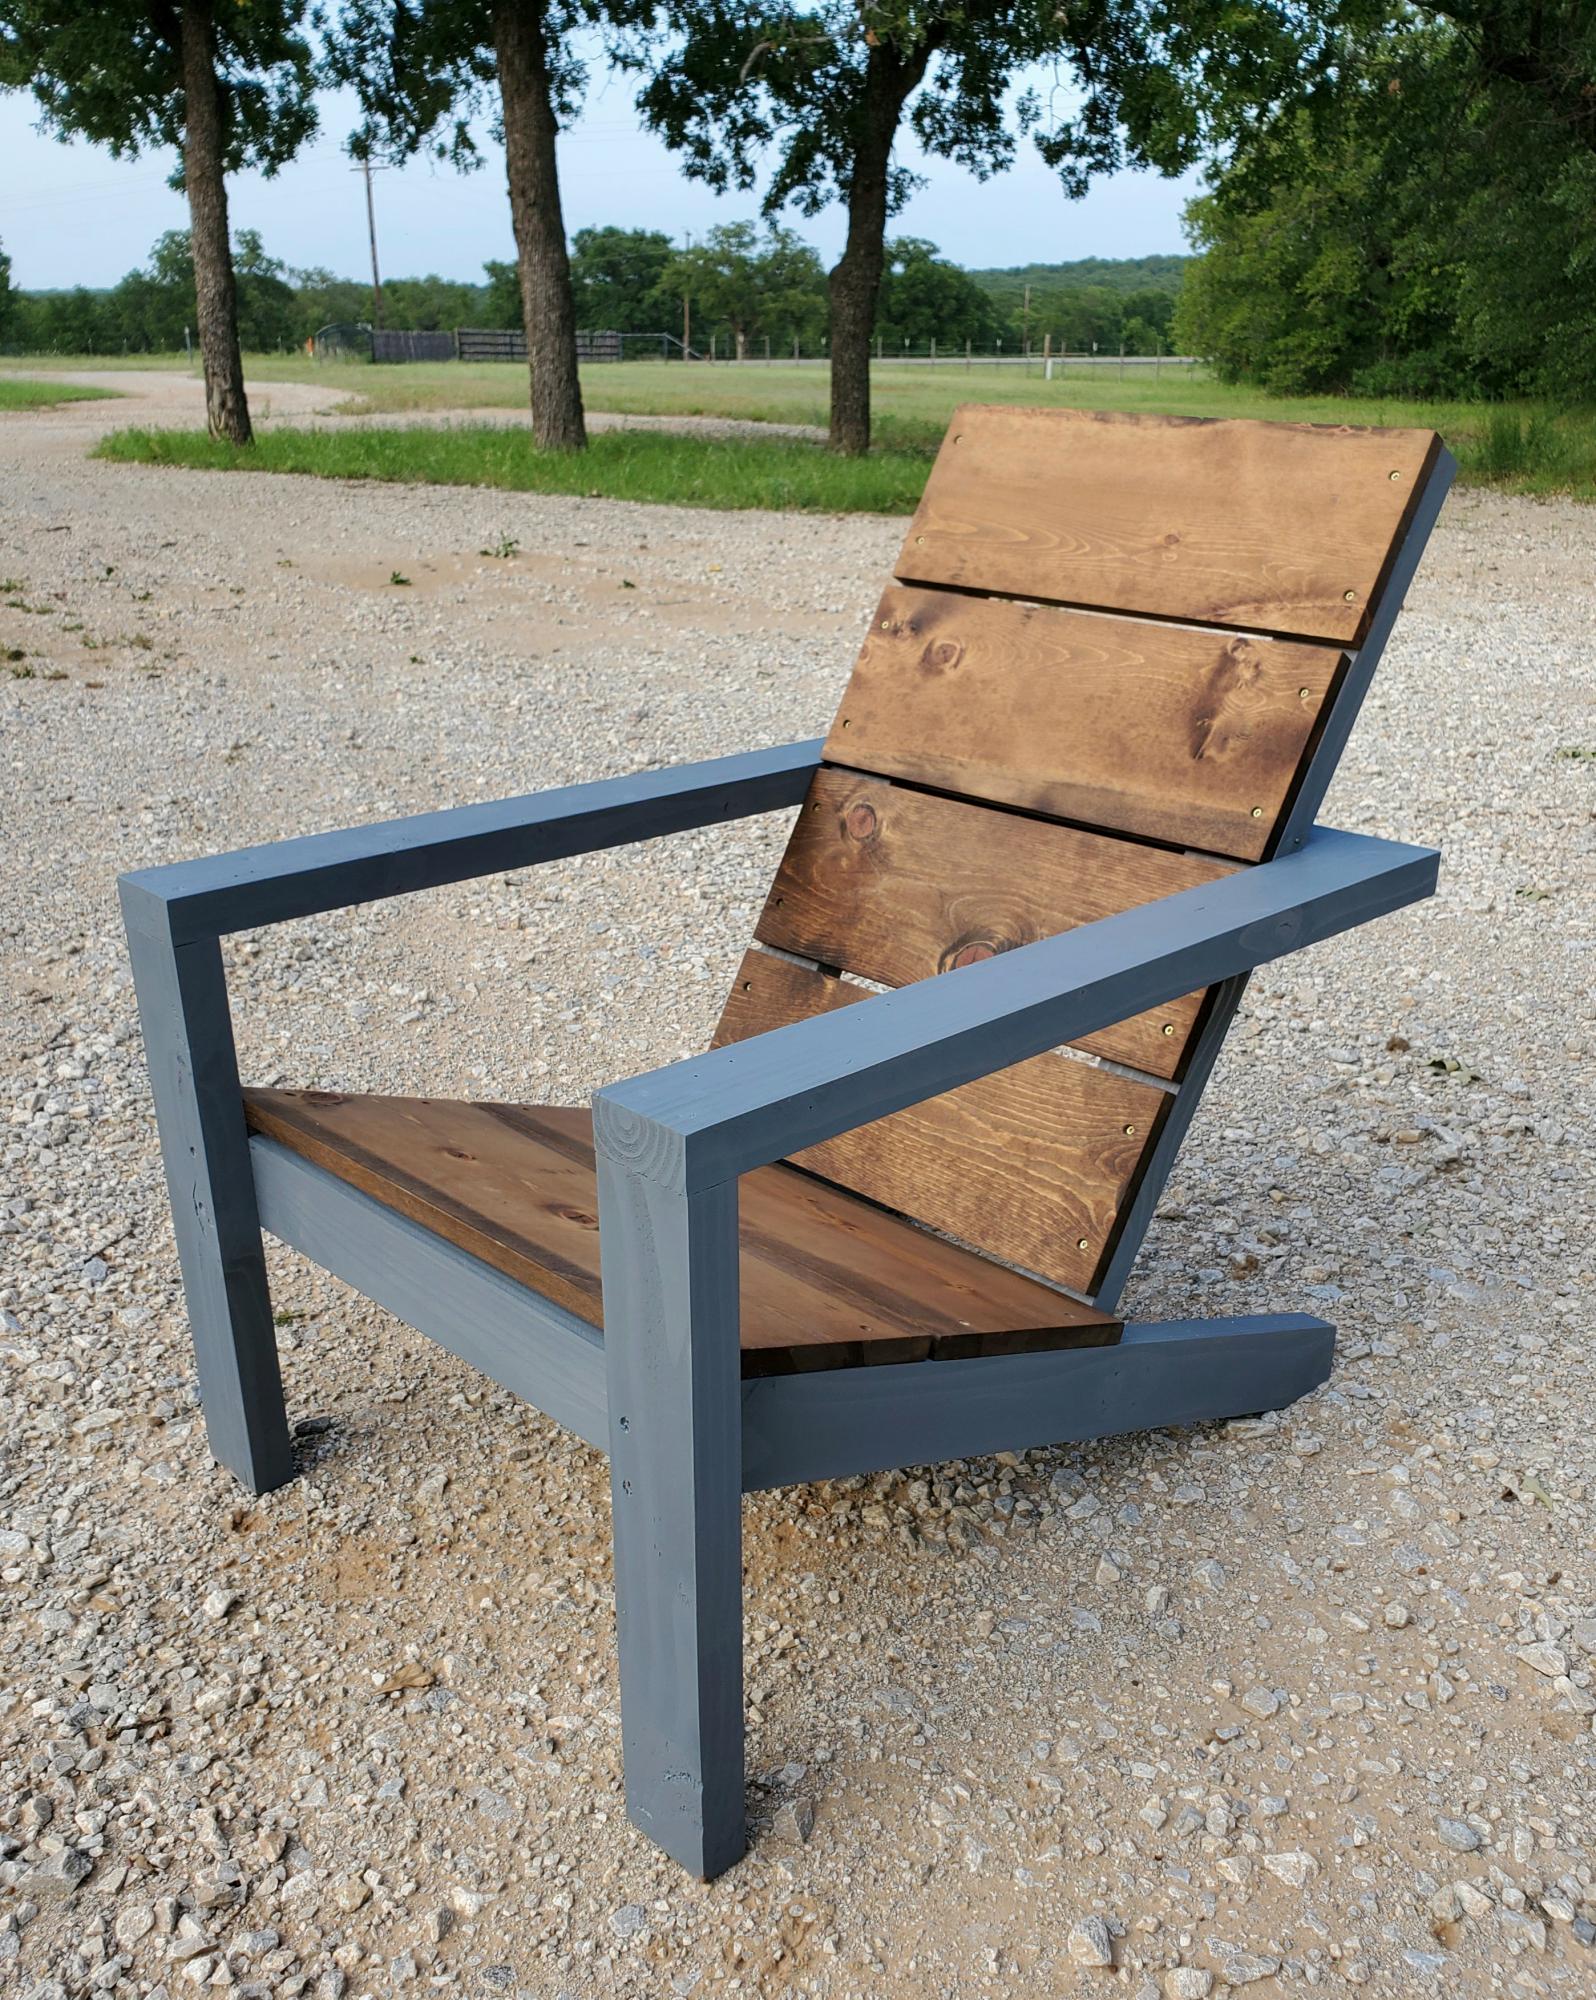
Like this chair! Changed the 3 1x10's on the back to 4 1x8's ripped down to 6 ¹⁵/¹⁶

Estimated Cost
40
Estimated Time Investment
An Hour or Two (0-2 Hours)

Comments

A dream come true!

Submitted by elizchube on Sat, 05/10/2014 - 14:35

After searching for many months to find the perfect potting bench, it was clear I would have to create it myself. We finally used my moms old photography sink, that was lonely in our shed, to good use. My hubby and I just adjusted the dimensions to drop in the sink. It turned out so much better than I could have ever expected.

Estimated Time Investment
Day Project (6-9 Hours)
Recommended Skill Level
Beginner

Comments

Dan's Jelly Cupboard

Submitted by LaserTech on Sun, 08/05/2012 - 05:39

This was my first project. I used wainscoting for the door backing. I was happy with it for a first project.

Built from Plan(s)
Estimated Cost
$100
Estimated Time Investment
Weekend Project (10-20 Hours)
Finish Used
primer and white paint
Recommended Skill Level
Beginner

5 foot picnic table with pocket holes

Submitted by milleall on Thu, 07/02/2020 - 08:56

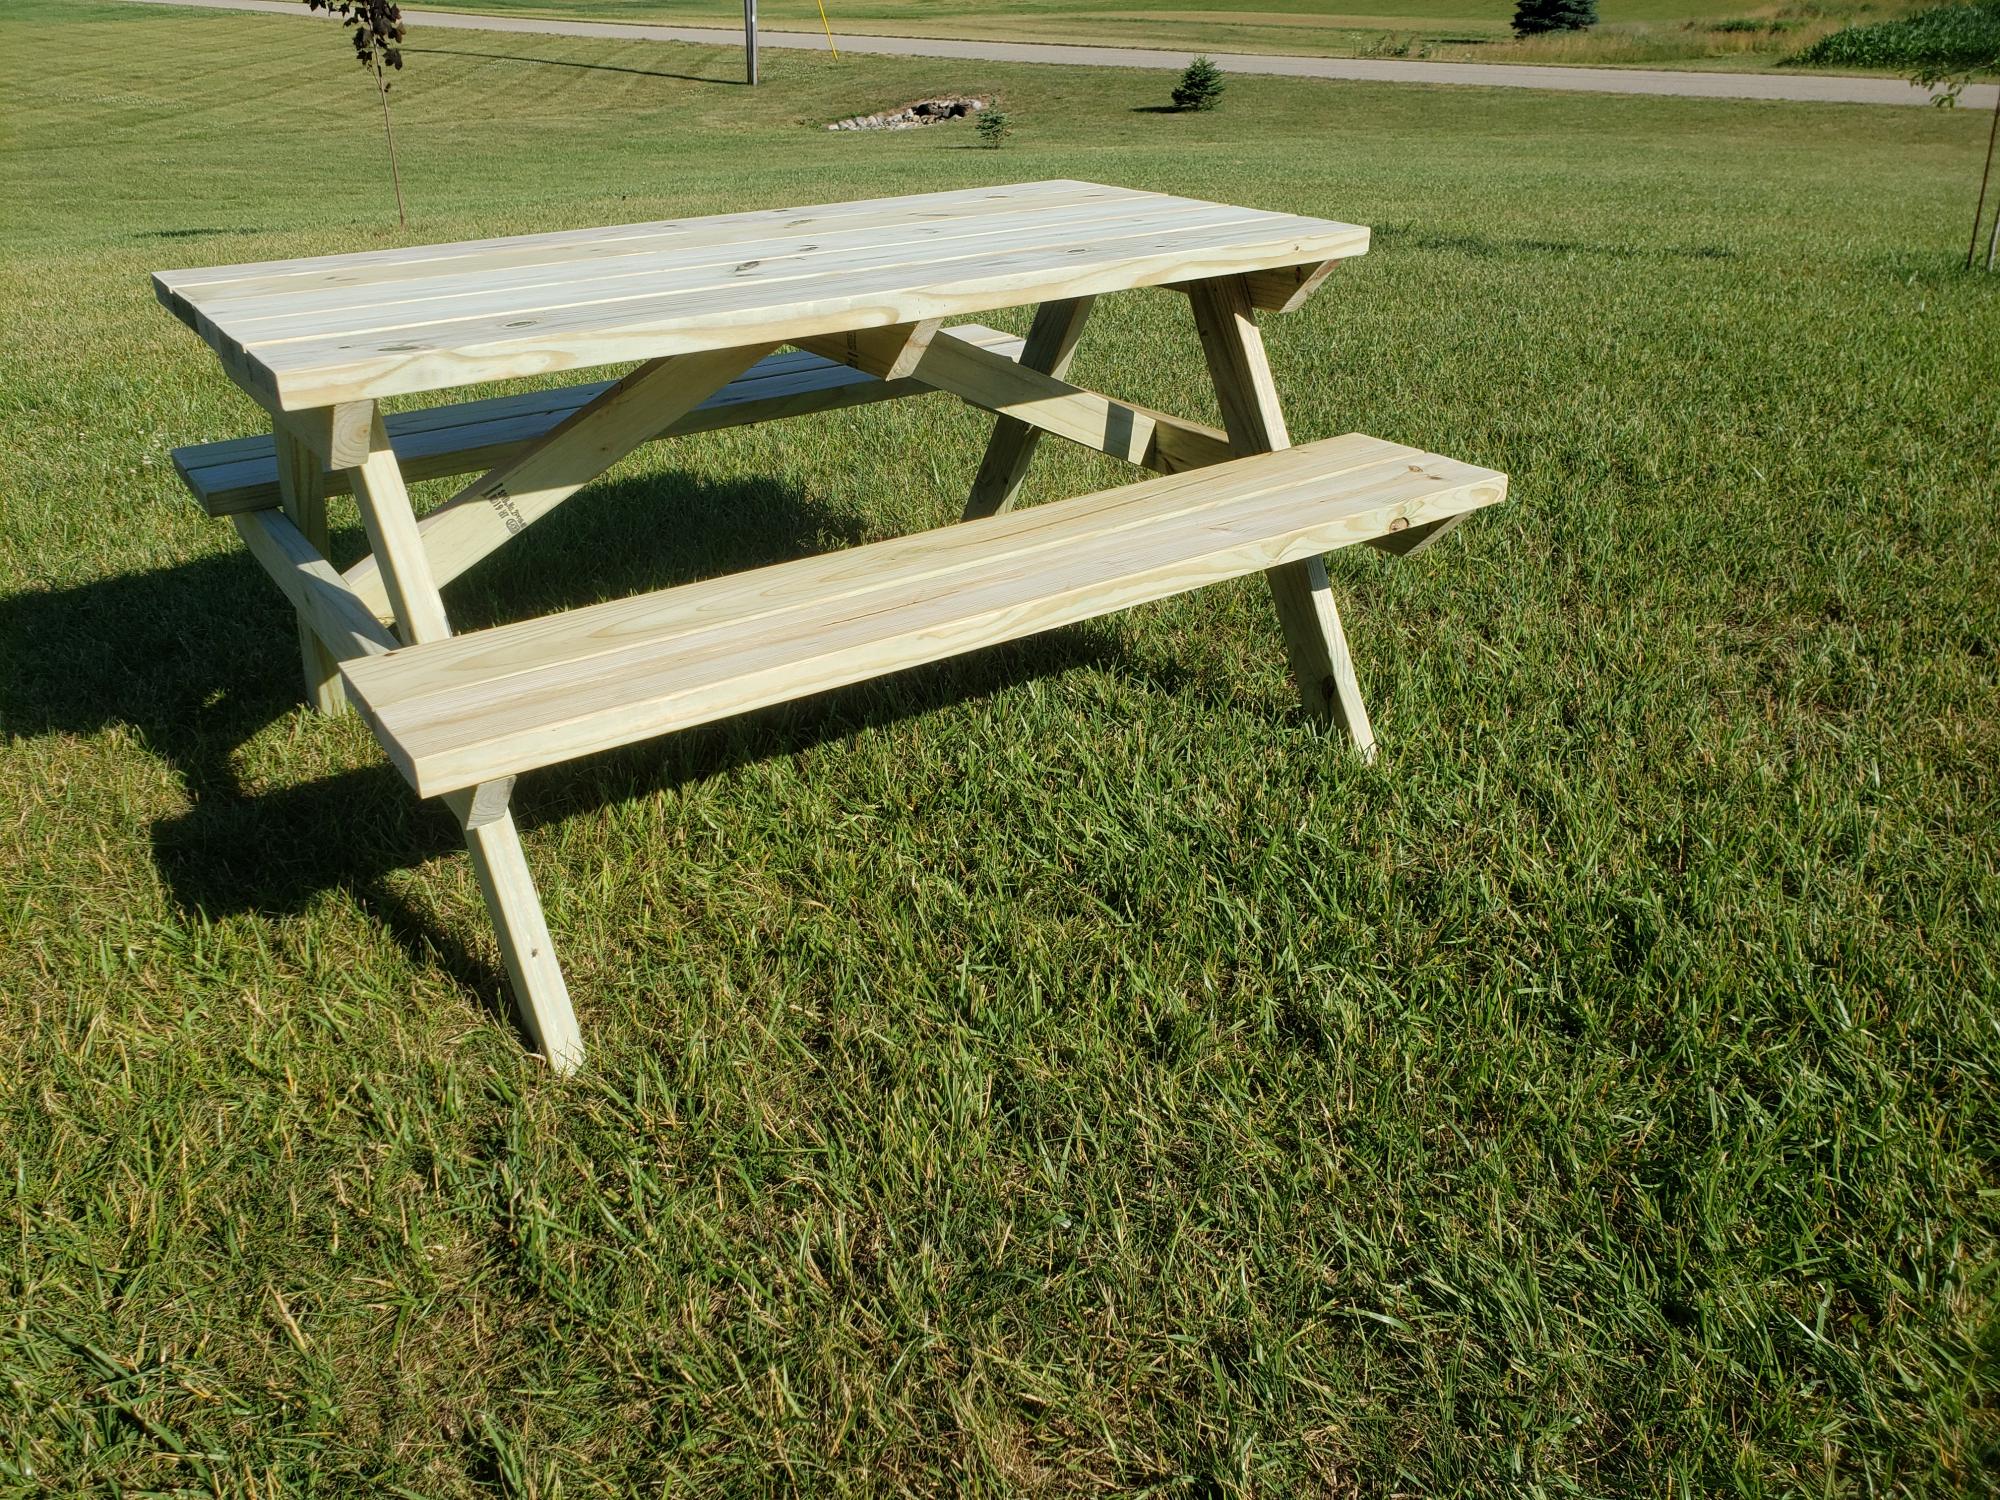
We built from the plan with green treated lumber. We also joined the top and the seat with pocket holes and outdoor blue Kreg screws so there are no screw holes exposed on the tops. Easy build. Great compact picnic table.

Estimated Cost
$90
Estimated Time Investment
Afternoon Project (3-6 Hours)
Finish Used
None
Recommended Skill Level
Beginner

Drop down murphy bar

Submitted by nick_h on Tue, 12/06/2016 - 10:54

My attempt at the murphy bar featured on this site. Still have to add the sash locks. Added pallet crossmembers at the back, an x in the leg, and a french cleat to mount to the wall. 

Estimated Cost
$45
Estimated Time Investment
Day Project (6-9 Hours)
Finish Used
Special Walnut Minwax on the bar top and shelves, crisp linen matte latex and dry brushed casual gray for accents/aging. 2 coats of polycrylic for protection. If built again would pre stain and base coat all the wood before build time, then assemble, add accent brushing and spray the polycrylic.
Recommended Skill Level
Beginner

Comments

zannej

Tue, 12/31/2019 - 11:49

This looks awesome! I want to help my friend build this for his kitchen. I've looked at the plans in the link & I'm wondering what modifications you made for the X pattern-- how much did it alter the material & cut list?

Would you please share your material & cut list for this?

Fancy Jewelry Box

Submitted by JoanneS on Sun, 11/11/2012 - 17:37

12/16/14 UPDATE:  Posted a plan for this project, linked in this brag post

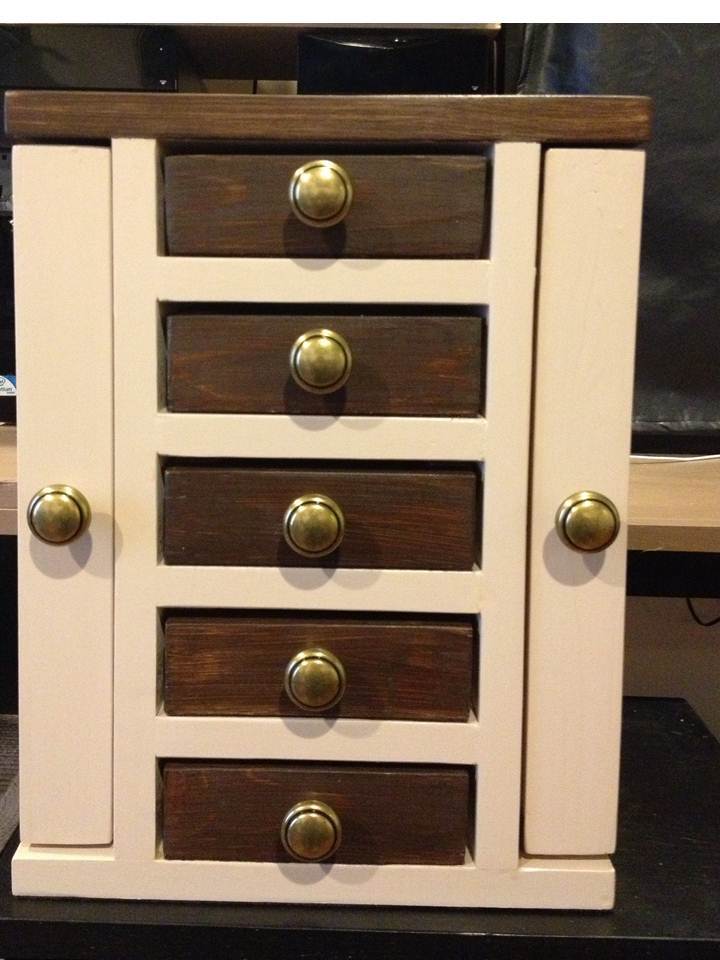
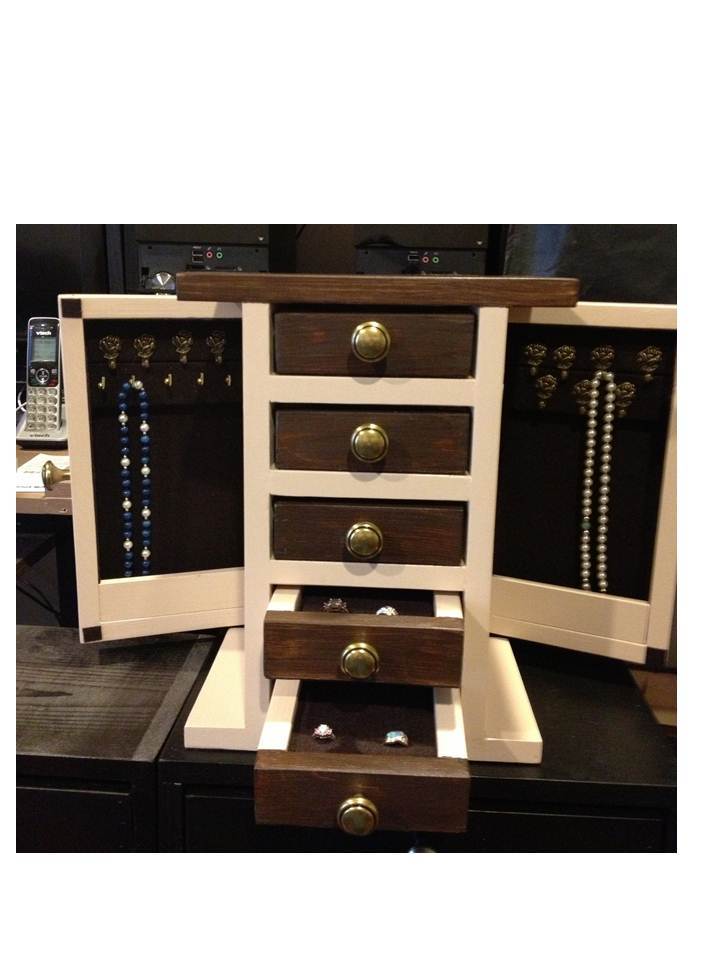
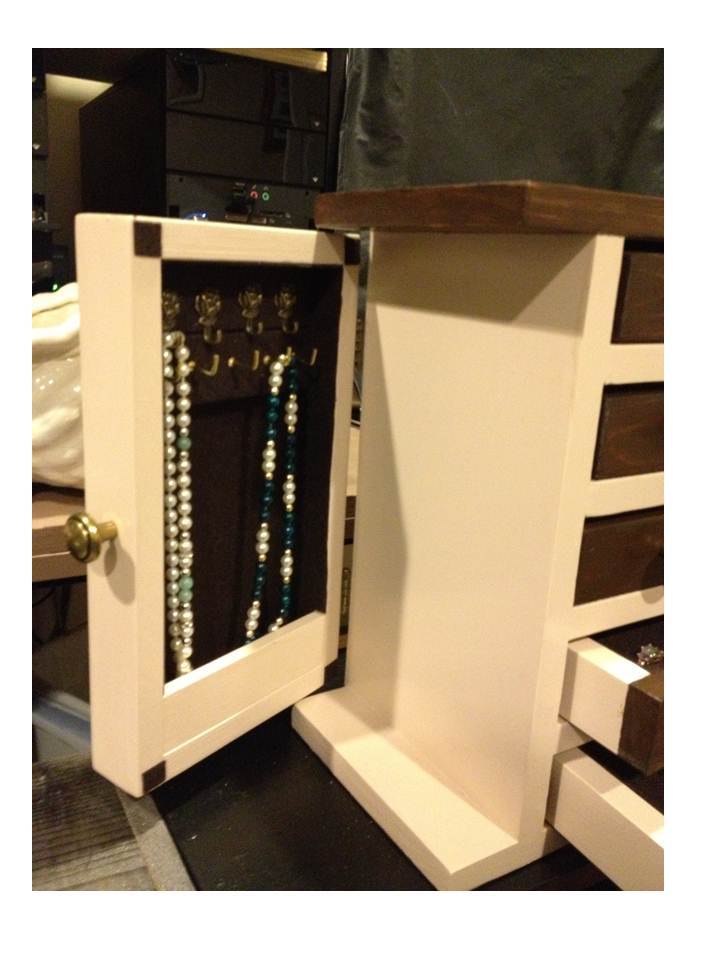
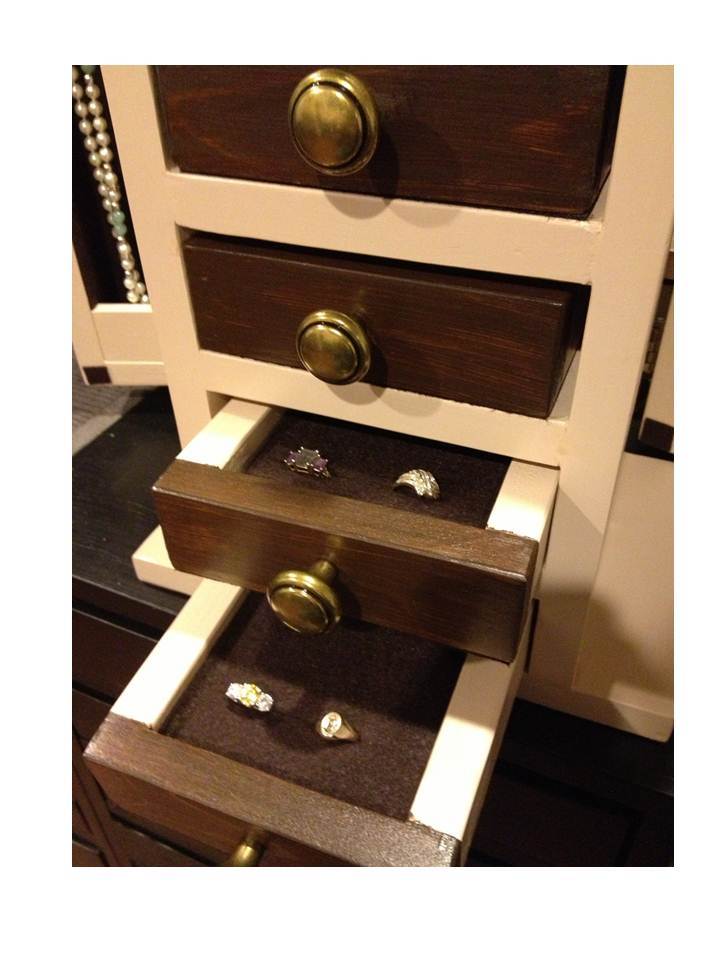
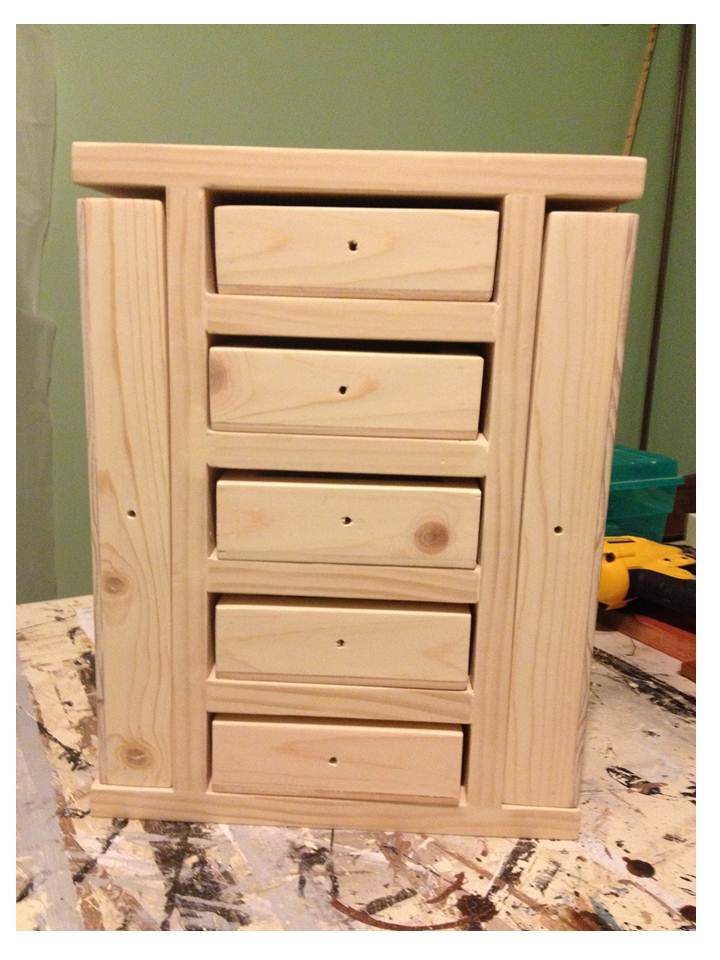
This is a variation of the Easy Jewelry Box plan. The completed measurement is 11” wide, 14 ½” high, and 7 ½” deep. This one has a center “tower” with 5 drawers 5 ½” wide, and a wide overhang on the top and bottom, which covers the 2 side doors that open out for hanging necklaces. The drawers are lined with embossed felt, and the drawer bottoms and insides of doors are covered with sticky-back felt. The 2 removable ring drawer inserts are some scraps of 1” foam, covered with scraps of the sticky-back felt, with slits cut into the foam with a utility knife (cut the slits into the felt first, attach it to the foam, then cut the slits into the foam). Cost breakdown: antique brass knobs: $28, sticky back & embossed felt: $14, hooks: $15, wood: $35, hinges: $7, paint: $5. (already on hand: finish nails, glue, sandpaper, left over stain & poly) . I worked on this a few hours a day over a long weekend, probably about 12 hours total. Finishing took most of this time, the build was actually only a couple of hours.

Built from Plan(s)
Estimated Cost
$104
Estimated Time Investment
Weekend Project (10-20 Hours)
Finish Used
Box and doors: 3 coats Benjamin Moore “Harmony”, sanded between coats, and 1 coat Minwax water based wipe on poly. Top and drawer fronts: 1 coat Minwax Express Color in Walnut, and 1 coat Minwax water based wipe on poly.
Recommended Skill Level
Beginner

Comments

jgg2006

Tue, 12/16/2014 - 00:43

Hello,

Can you please email these plans even if it is just a sketch up drawing

Farmhouse Console Inspired Design with Vinyl Floor Plank Top

Submitted by mowbratb on Mon, 10/19/2020 - 10:16

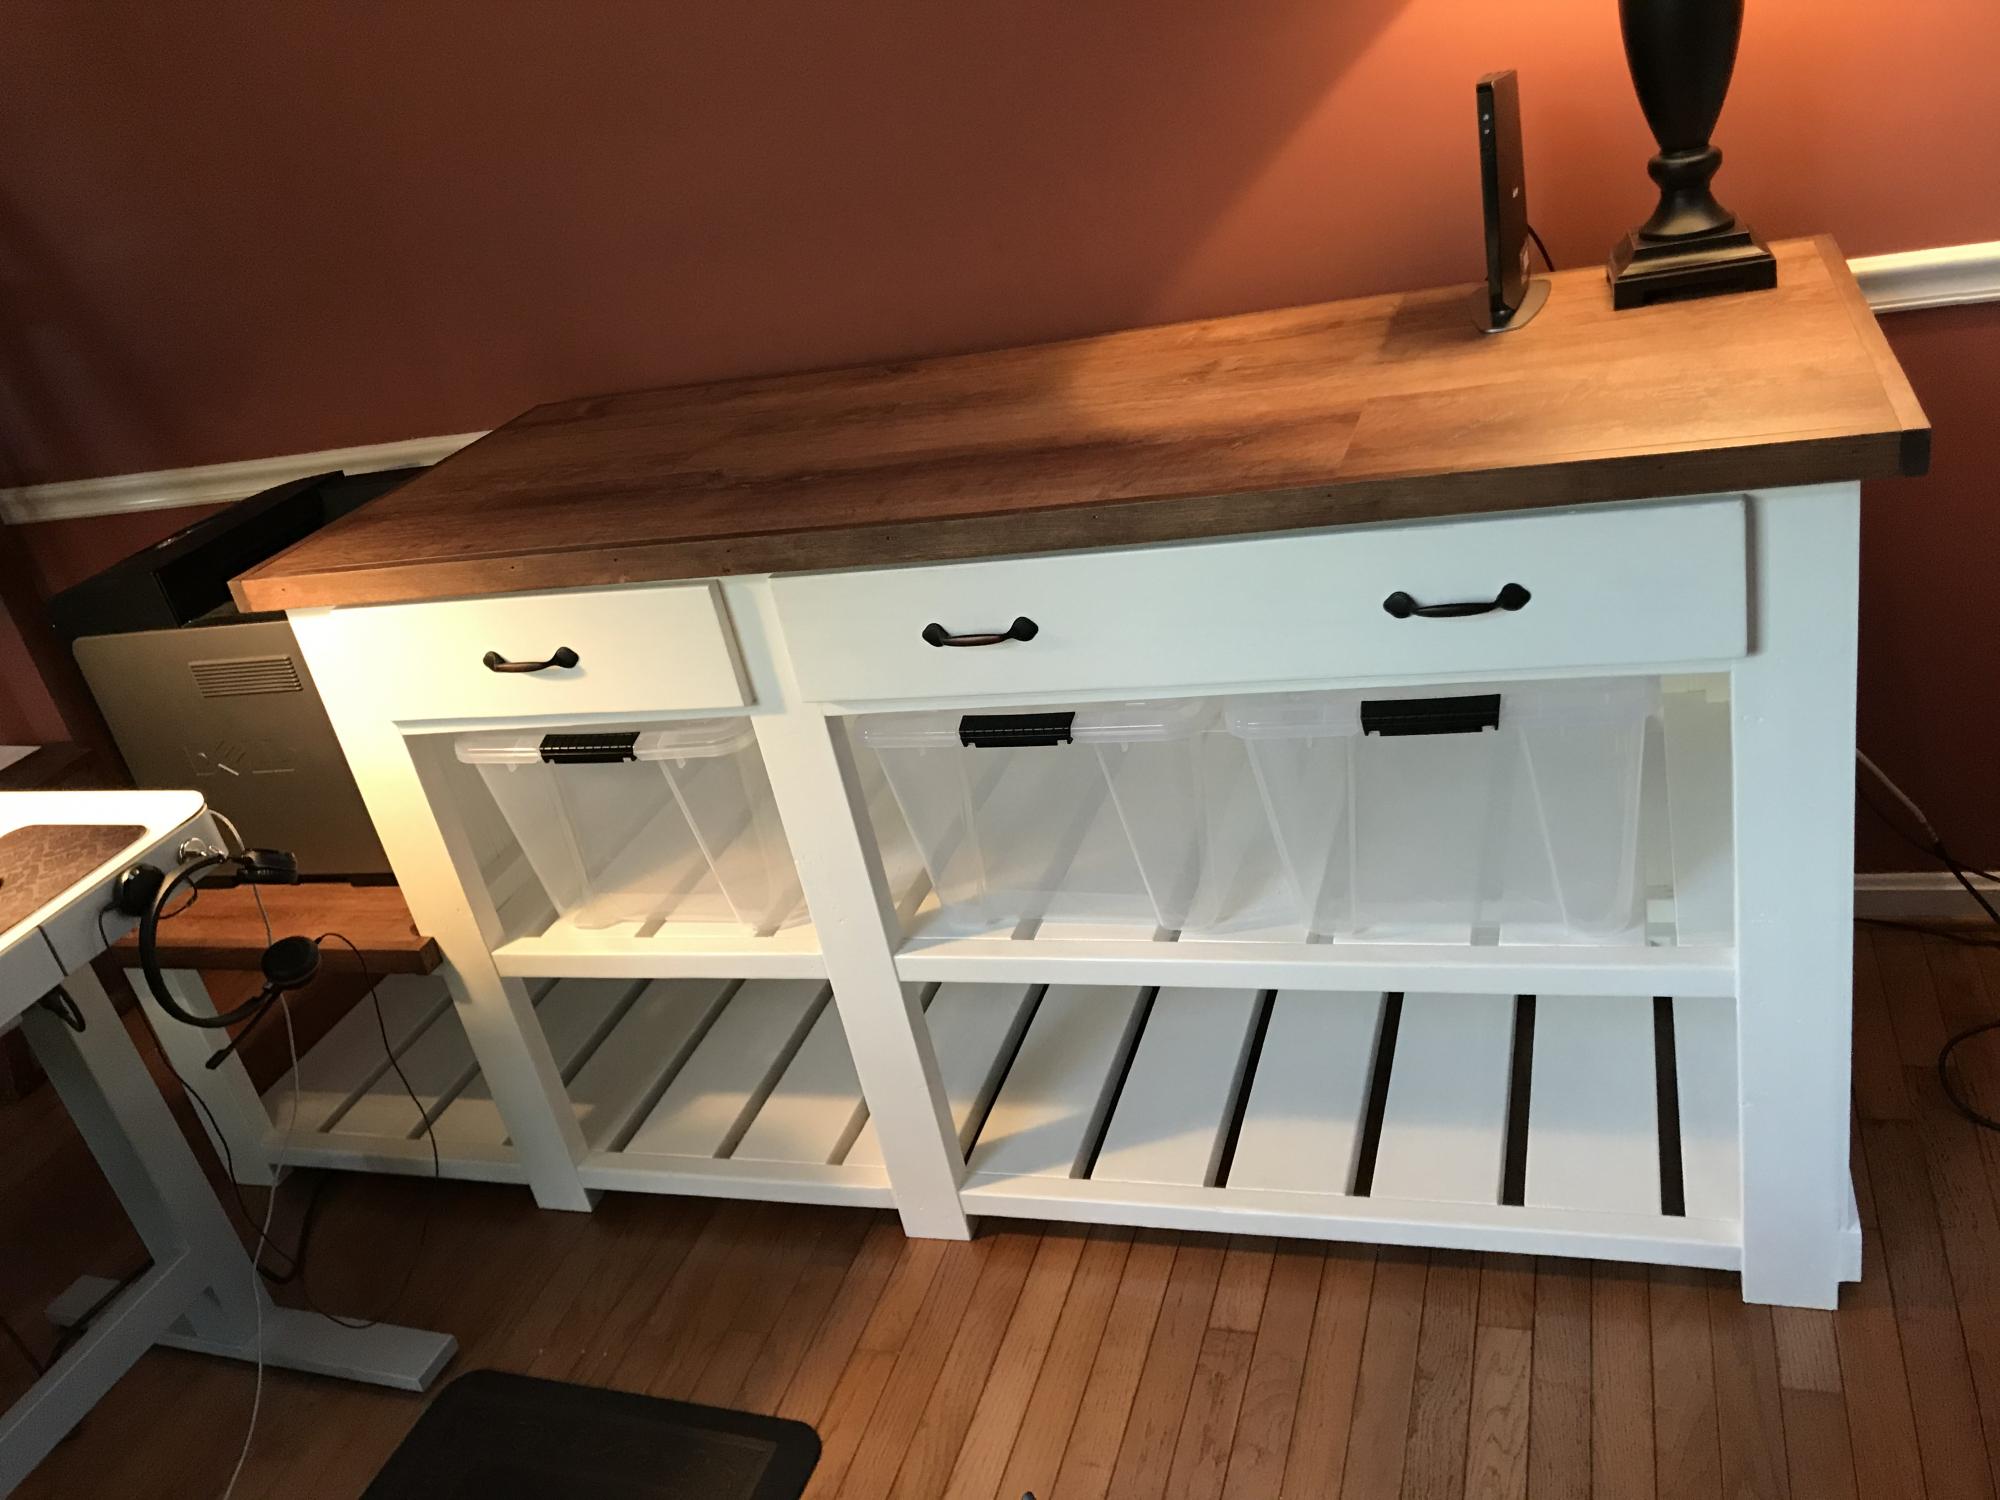
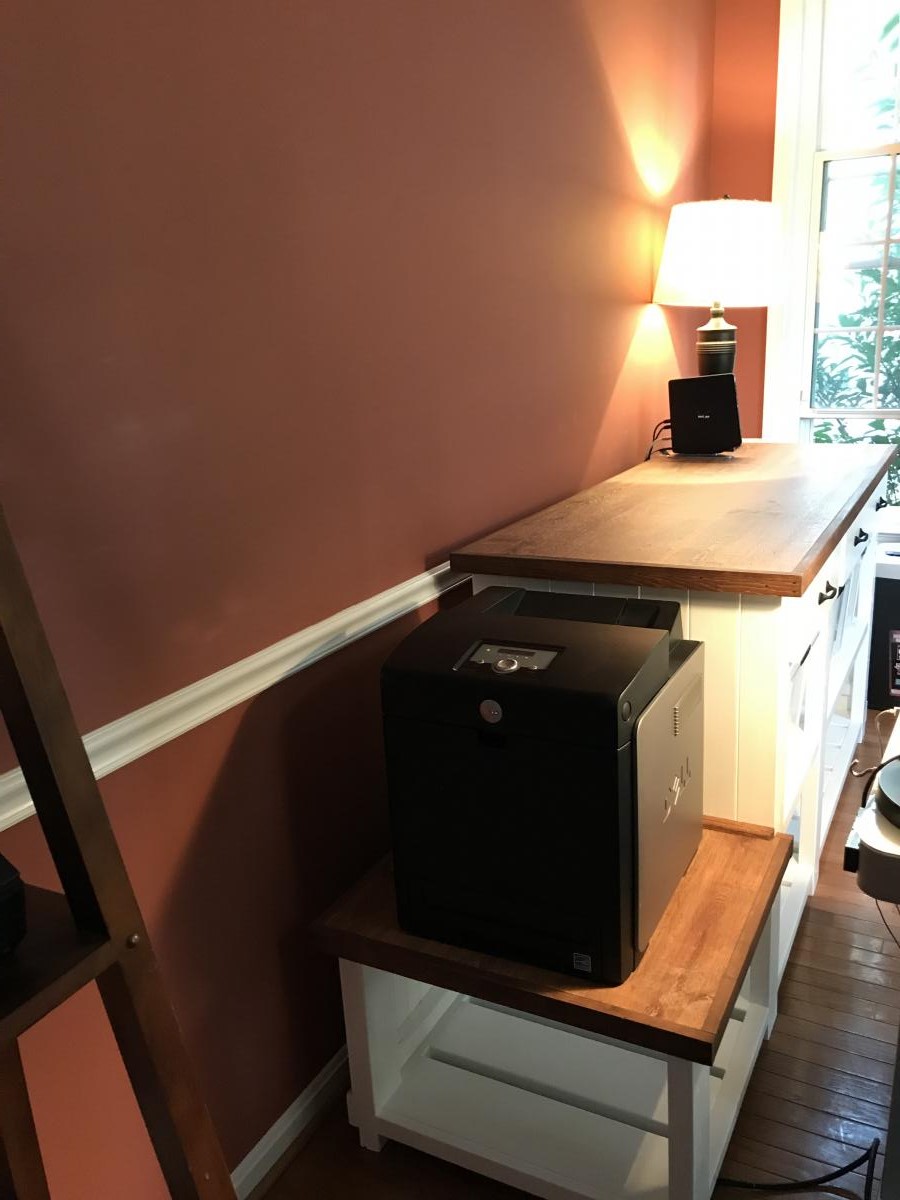
Started with the Farmhouse Console design and ended up modifying a bit but still wanted a similar look of the console. This was my first time building a piece of furniture so not too hard, just more time. Here are my changes: 37" height (12" height between shelves plus drawers and 1" top) 23" base width (wanted to use for storing clear bins) 25 3/4" top width 65 3/4" main top length 22 1/2" lower top length (wanted to a place for my printer with storage for paper below it) 88" (full top length) 34" interior width large section (2 bins for each shelf) 18" x 2 interior width for smaller sections (1 bin for upper and lower) 18" x 4 1/2" drawer opening 34" x 4 1/2" drawer opening 1 - 32 11/16" w x 21 1/4" drawer with 18" Everbilt full extension ball bearing slide set 1 - 16 11/16" w x 21 1/4" drawer with 18" Everbilt full extension ball bearing slide set Additional Notes: - Used Pine/Spruce Edge V planks (.25" thick, 3.5" width) for sides and back - Used 2x4 for drawers with 1/2 birch plywood for bottom and 1x6 face (19" and 35" long) - Assembled with pocket screws, GRK finishing screws and glue just like the farmhouse console instructions. - Had to modify the location of the 2x6 slats for the two center legs to account for the change in length to keep the 1" space between them. As noted in the title, I experimented by making the top using lifeproof vinyl "Trail Oak" floor planks glued on top of 3/4" birch plywood and trimmed it with 1 x 2 stained to match the vinyl flooring. I'm pretty happy with the turnout but was prepared to use 2/6's if it didn't look the way I envisioned.

Built from Plan(s)
Estimated Cost
~$350
Estimated Time Investment
Week Long Project (20 Hours or More)
Finish Used
1. White color, used Valspar Cabinet Furniture paint. Didn't prime underneath as the product says you don't need to but I wished I had. Took 2-3 coats to cover properly. https://www.valspar.com/en/products/interior-paints-primers/cabinet-furniture-oil-enriched-enamel
2. Top surface: Lifeproof 8.7 x 47.6 Trail Oak vinyl flooring planks, used 6 of the 7 planks from one box ($60)
3. Top Trim: Varathane (1 part Honey mixed with 2/3 part Dark Walnut) to match the vinyl planks
4. Applied brown caulking in cracks between vinyl floor planks and trim
Recommended Skill Level
Intermediate

Garden shed

Submitted by Anonymous (not verified) on Sat, 11/28/2020 - 13:19

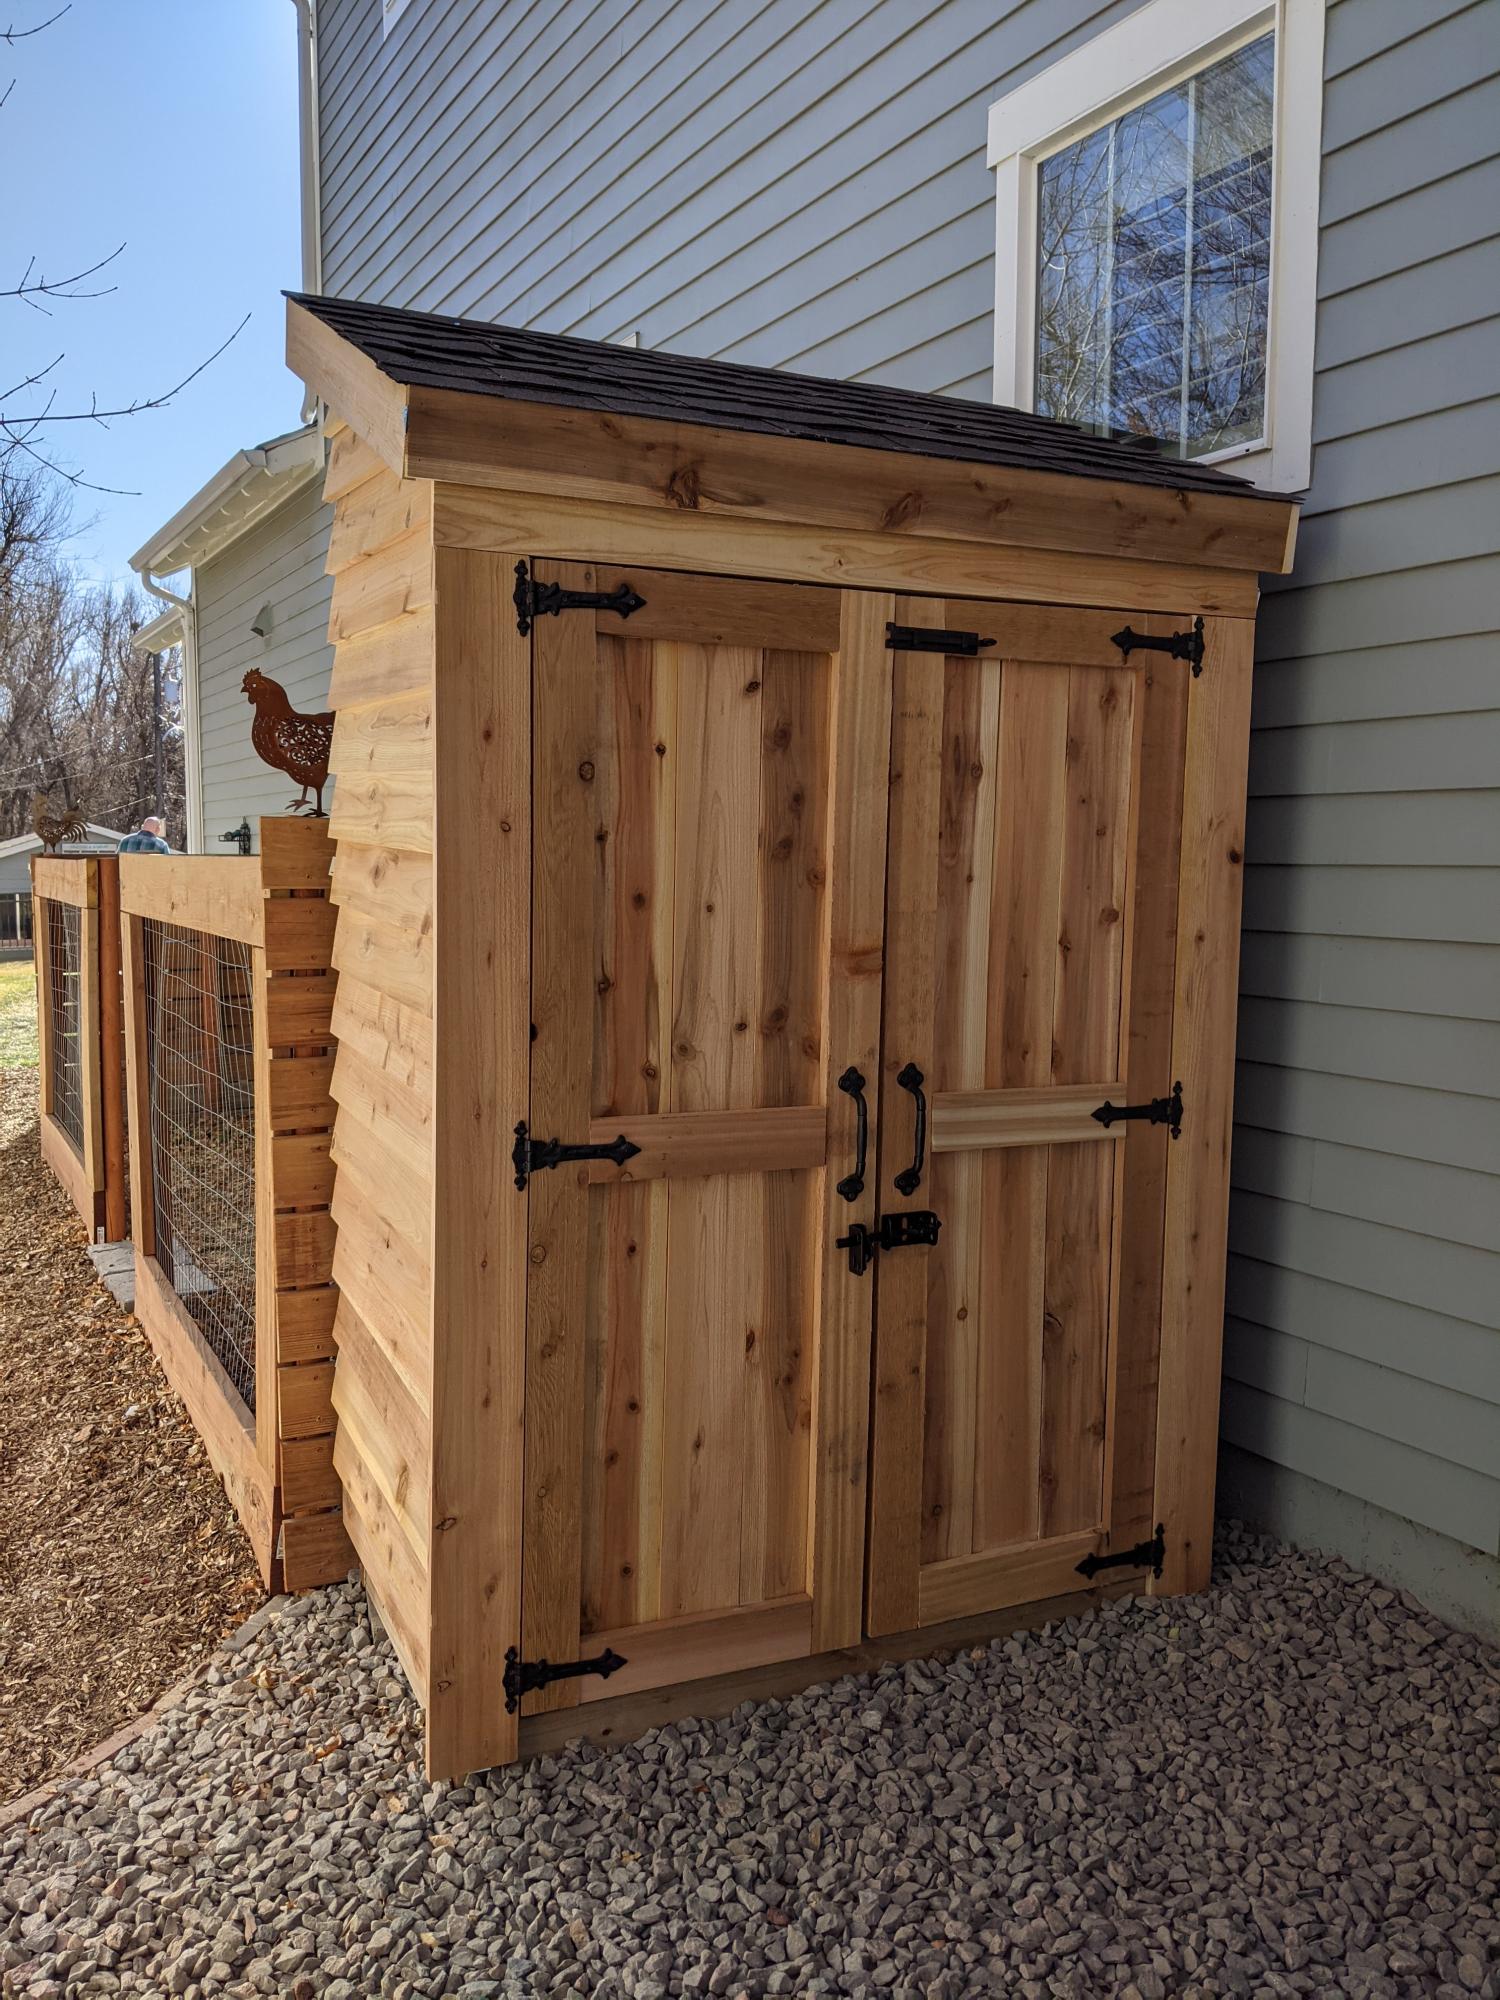
Our take on the small garden shed. Ours is 4 1/2 by 7 feet. We used cedar fence pickets and 2x4 construction. Left over shingles from when our house was built. We are definitely not roofers or framers, also chasing around a 3 year old didn't make things easier. Turned out beautiful for what we want it for. Just rustic enough. Great intermediate project.

Built from Plan(s)
Estimated Cost
$400
Estimated Time Investment
Weekend Project (10-20 Hours)
Finish Used
Thompson's clear water seal will be applied this summer.
Recommended Skill Level
Intermediate

Comments

Seasonal And Holiday

American girl 3 story doll house and furniture

For my daughters 8th birthday I decided I would make her a doll house for her American Girl dolls. Then I decided to make all the doll furniture too. Then I started thinking that I might as well sew all the bedding and cushions. She loves it!! 

Estimated Cost
$220-250
Estimated Time Investment
Week Long Project (20 Hours or More)
Finish Used
A lot easier with the alloy wheels.
Recommended Skill Level
Beginner

Comments

The Mail Boss

Submitted by jkjackson on Sun, 03/14/2021 - 10:35

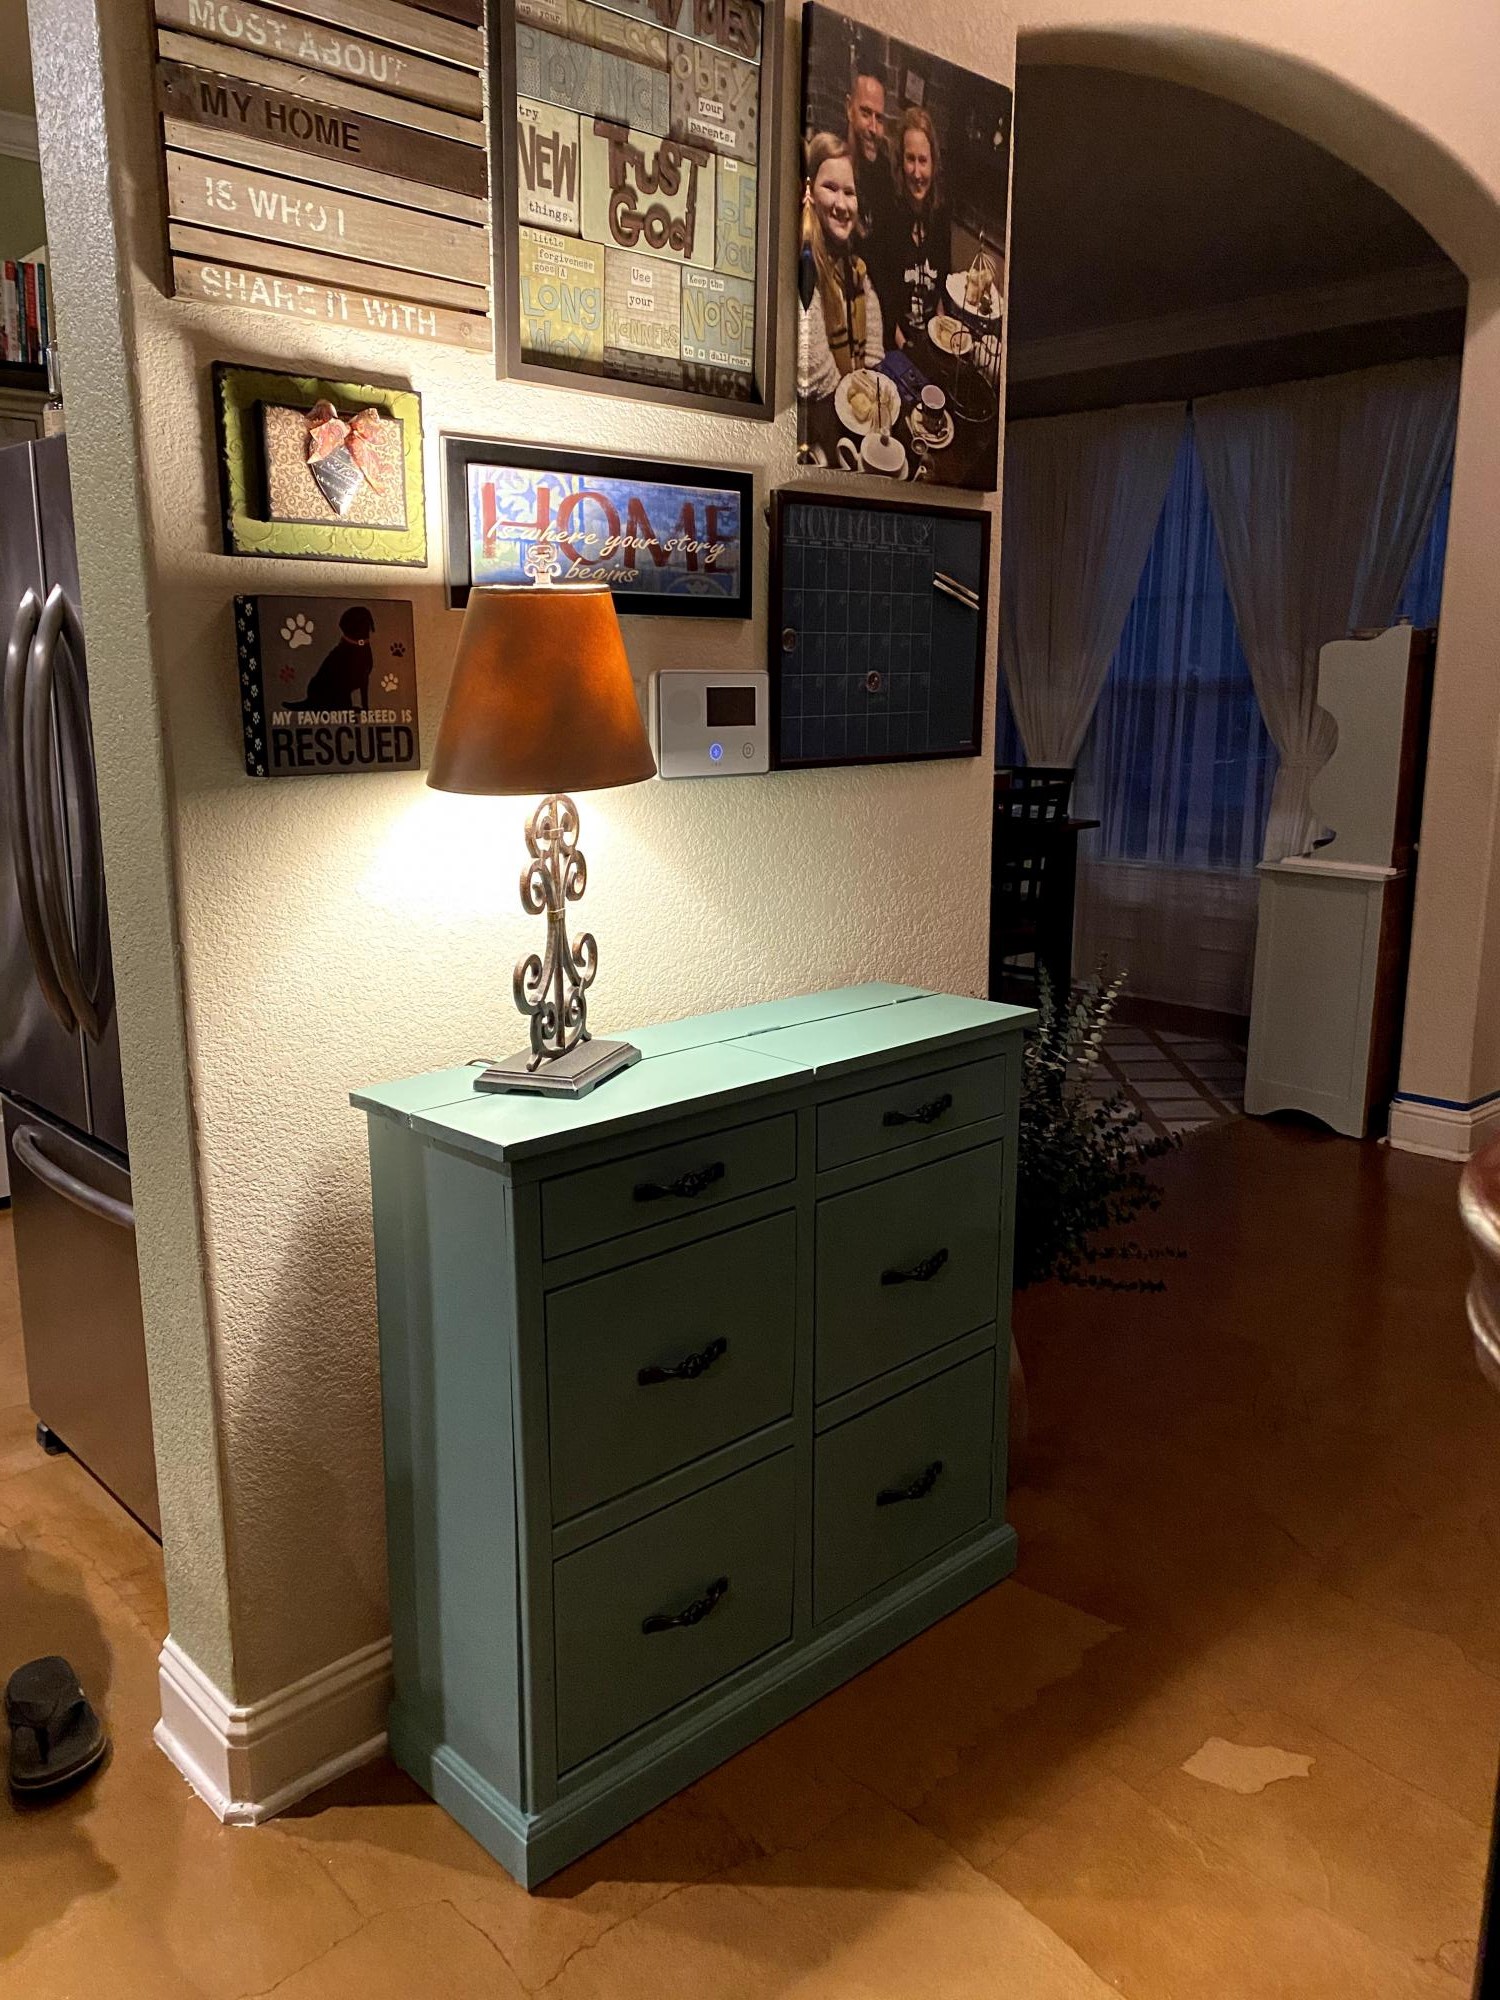
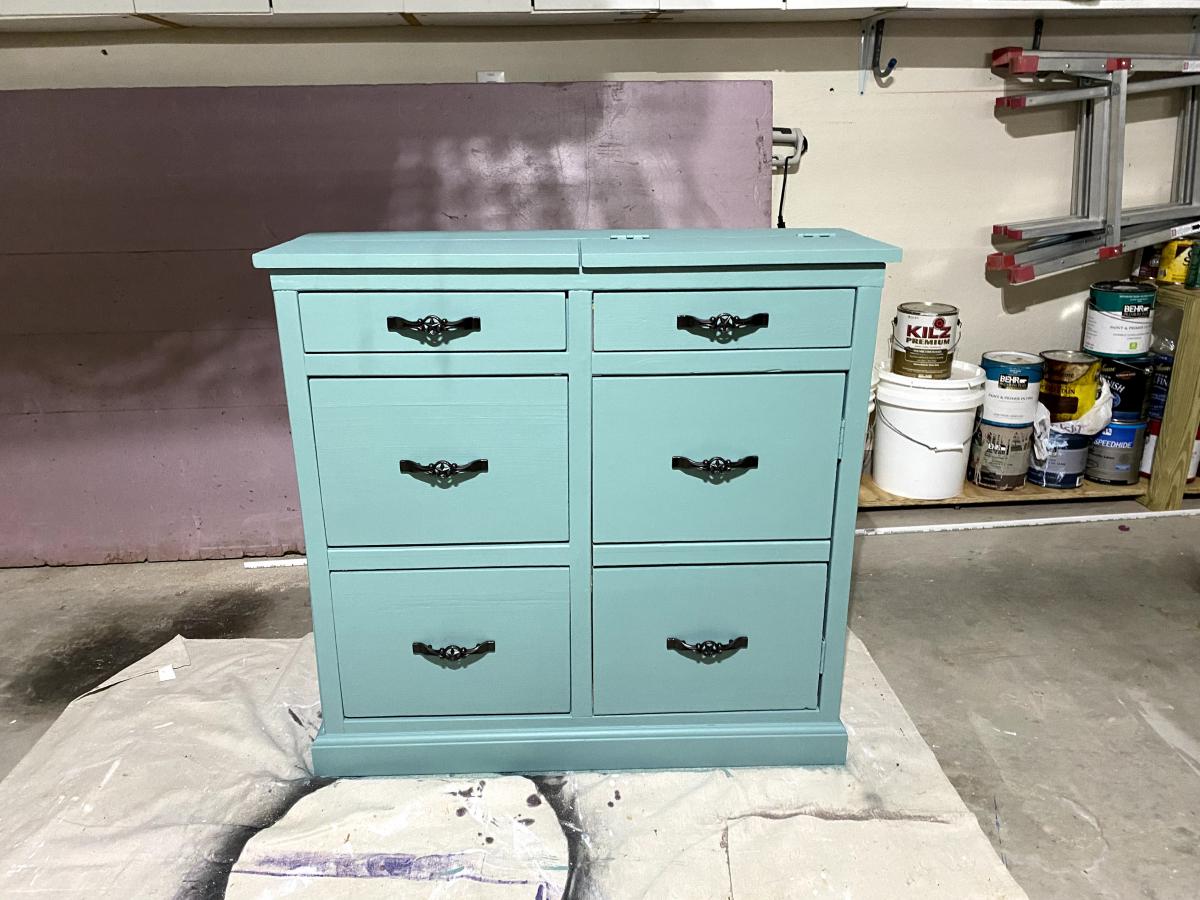
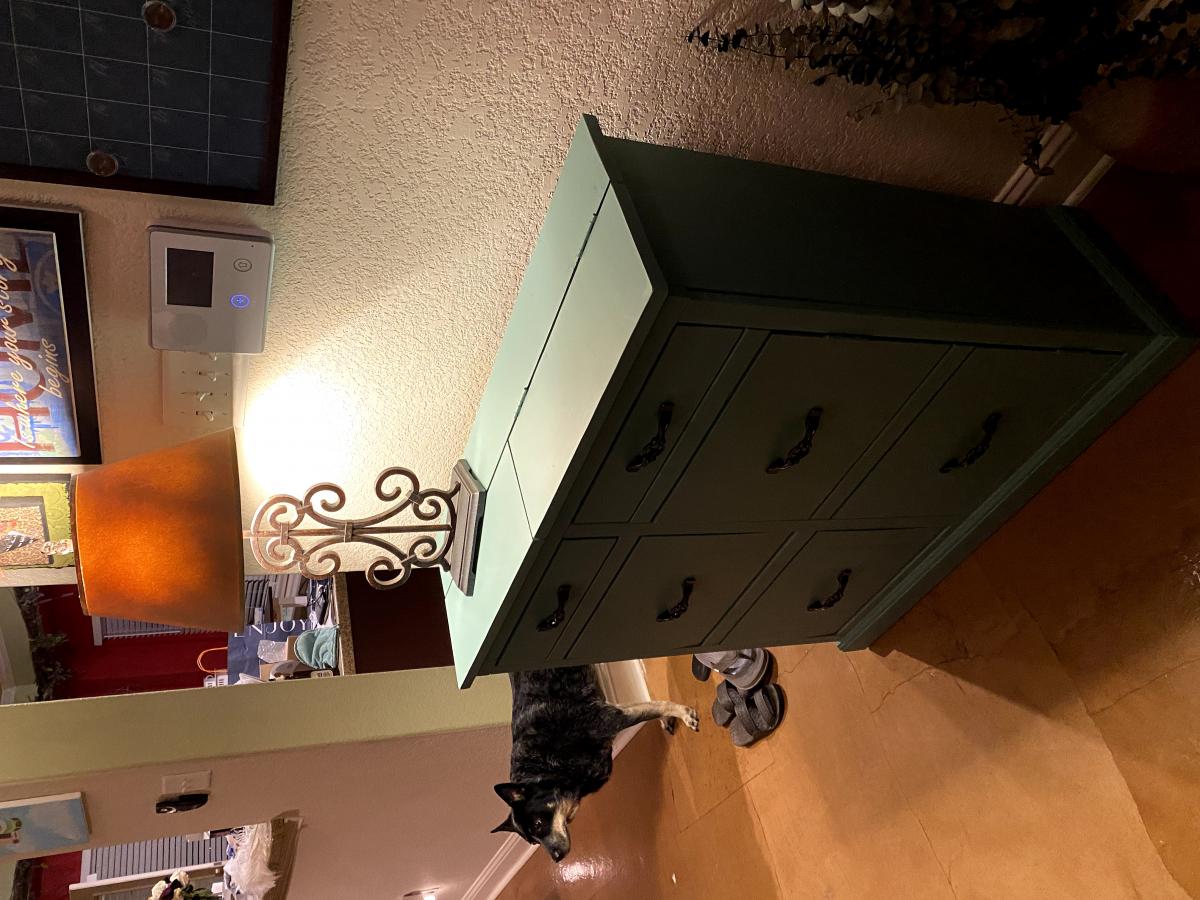
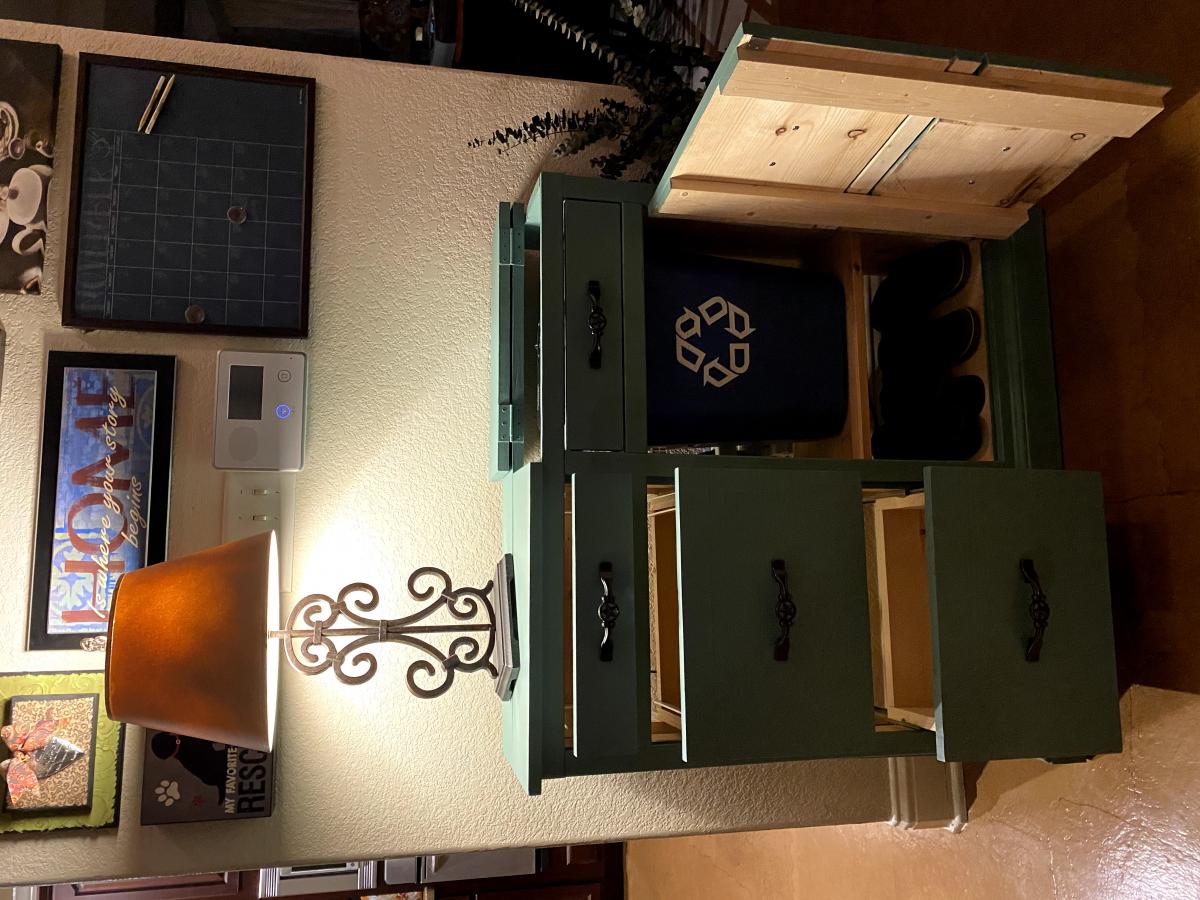
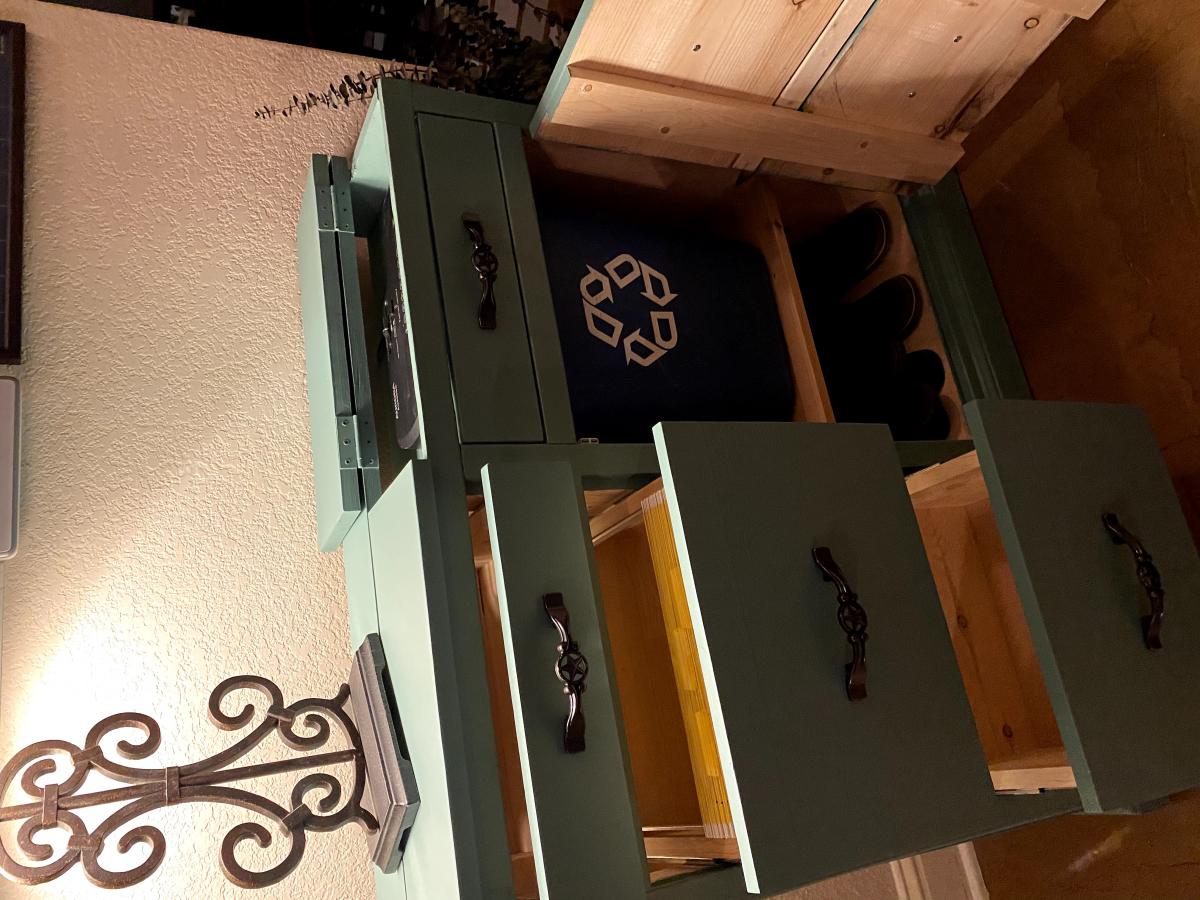
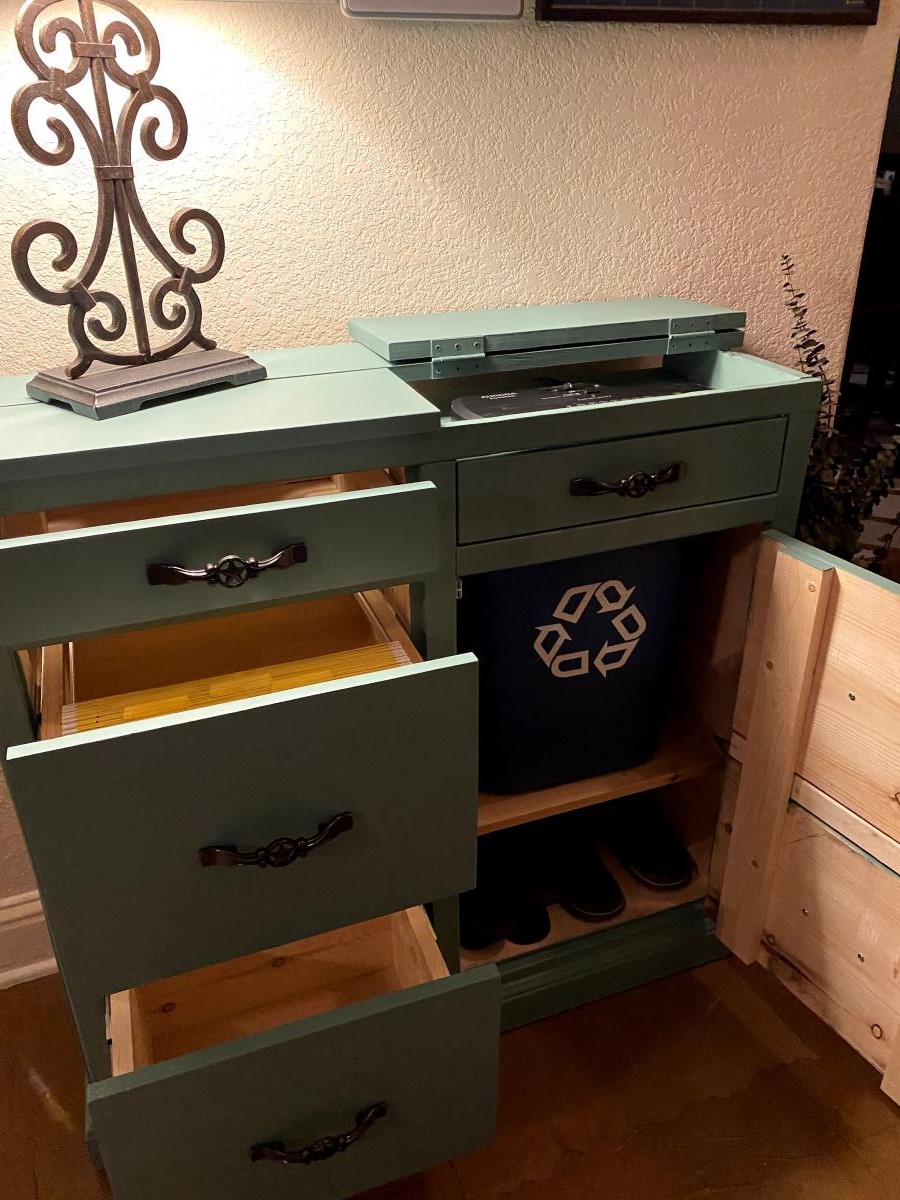
This is the most functional piece of furniture ever designed! I included a shelf on the shredder/recycle bin side to create a shoe cubby which, effectively, took care of the biggest clutter culprits in our entry.

Built from Plan(s)
Estimated Cost
$250
Estimated Time Investment
Week Long Project (20 Hours or More)
Finish Used
Behr paint from Home Depot
Recommended Skill Level
Advanced

Comments

Simple 2x4 Potting Bench modified with inset tote for potting soil or water

Submitted by SusanStory on Thu, 04/15/2021 - 10:10

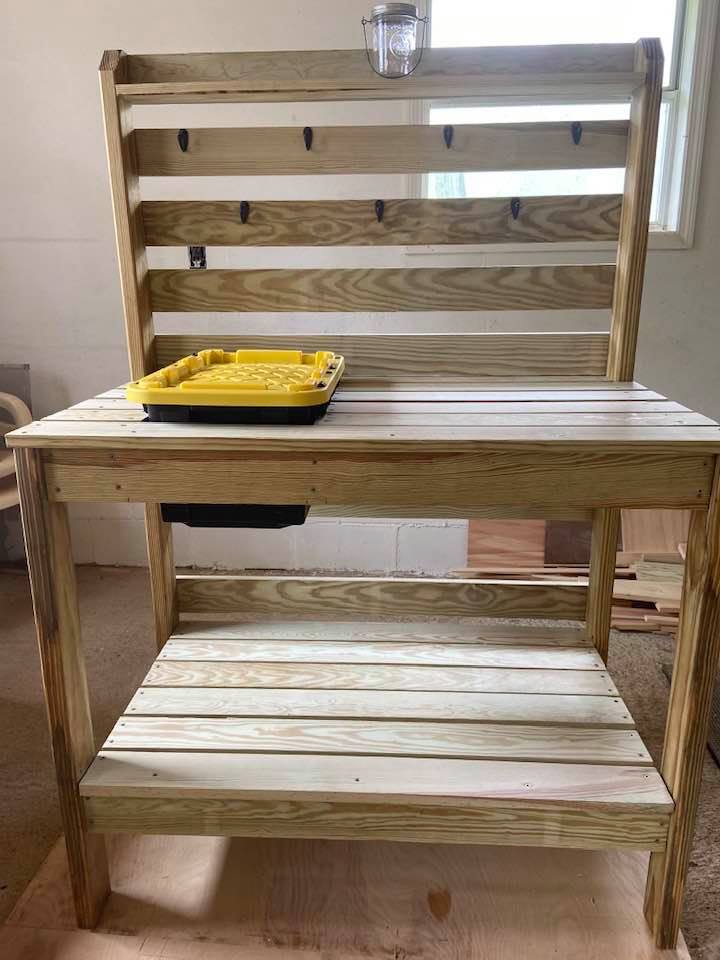
Made this for a friend who does cuttings of her plants for others. I used the Simple 2x4 potting bench plan and modified it to hold an inset 7 gal. Commander tote box with snapping lid with two 2x4 @ 22" braces to support the tote on each side attached to the front and back aprons. She wanted something that would hold a medium size bag of potting soil with a lid to keep snakes and other critters out since she lives in the country. There are plenty of hooks to hang tools and other items.

Estimated Cost
$224.00
Estimated Time Investment
Afternoon Project (3-6 Hours)
Finish Used
Thompson Water sealer
Recommended Skill Level
Beginner

Comments

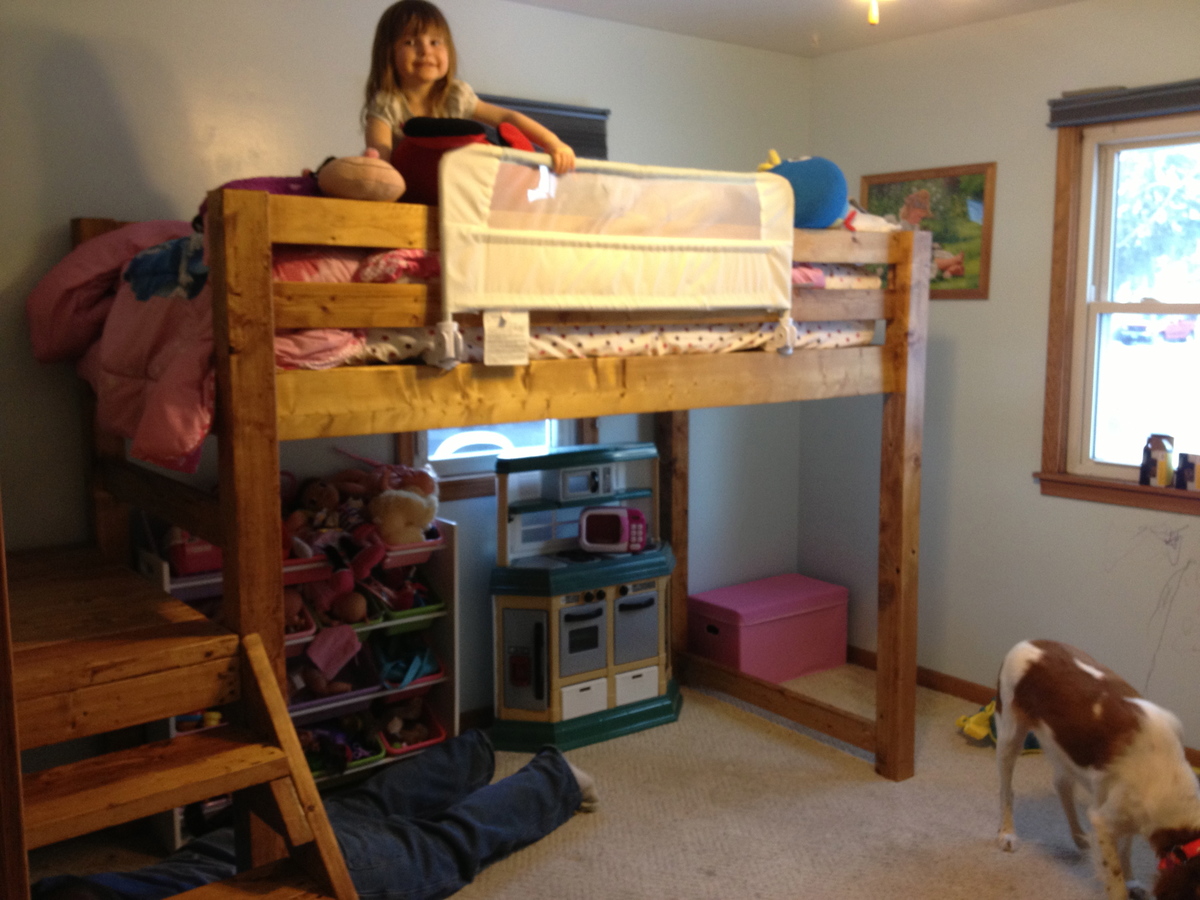
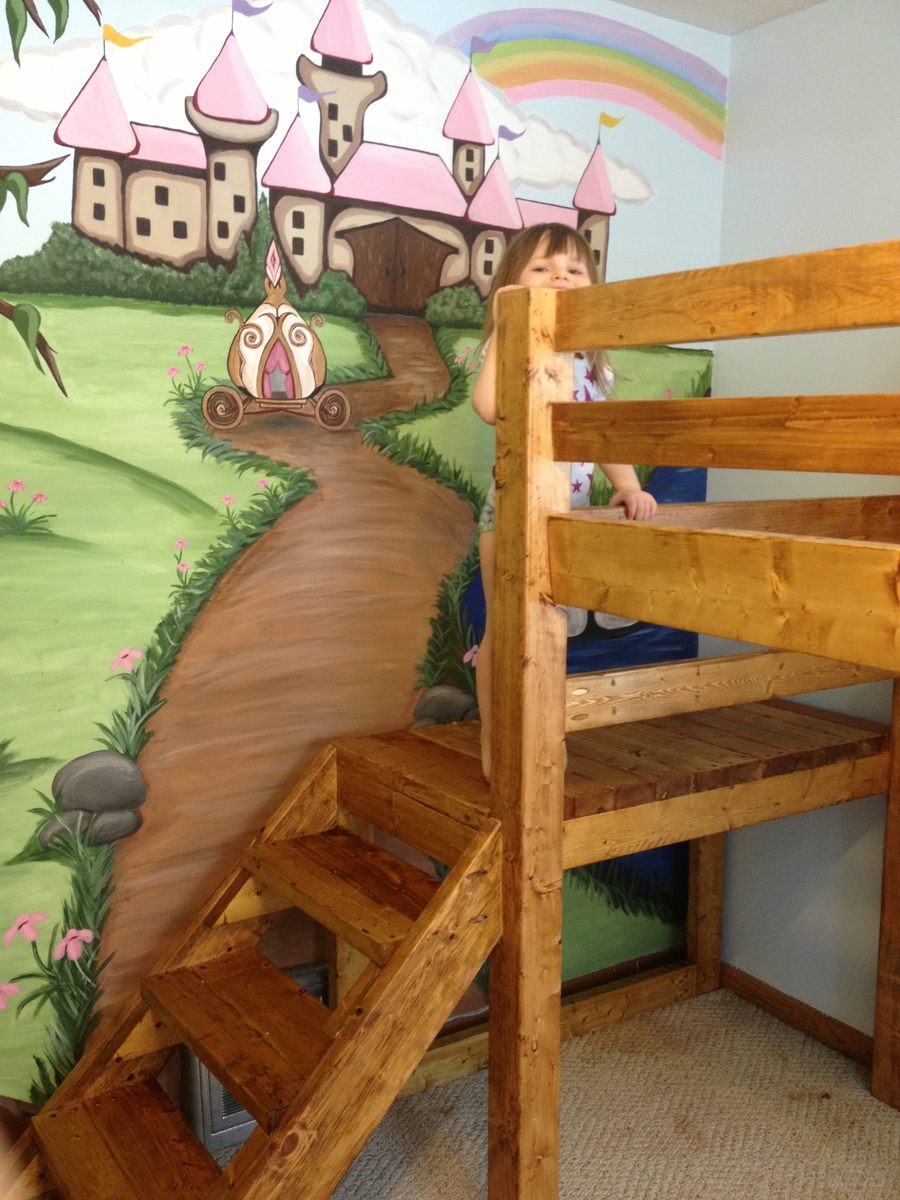
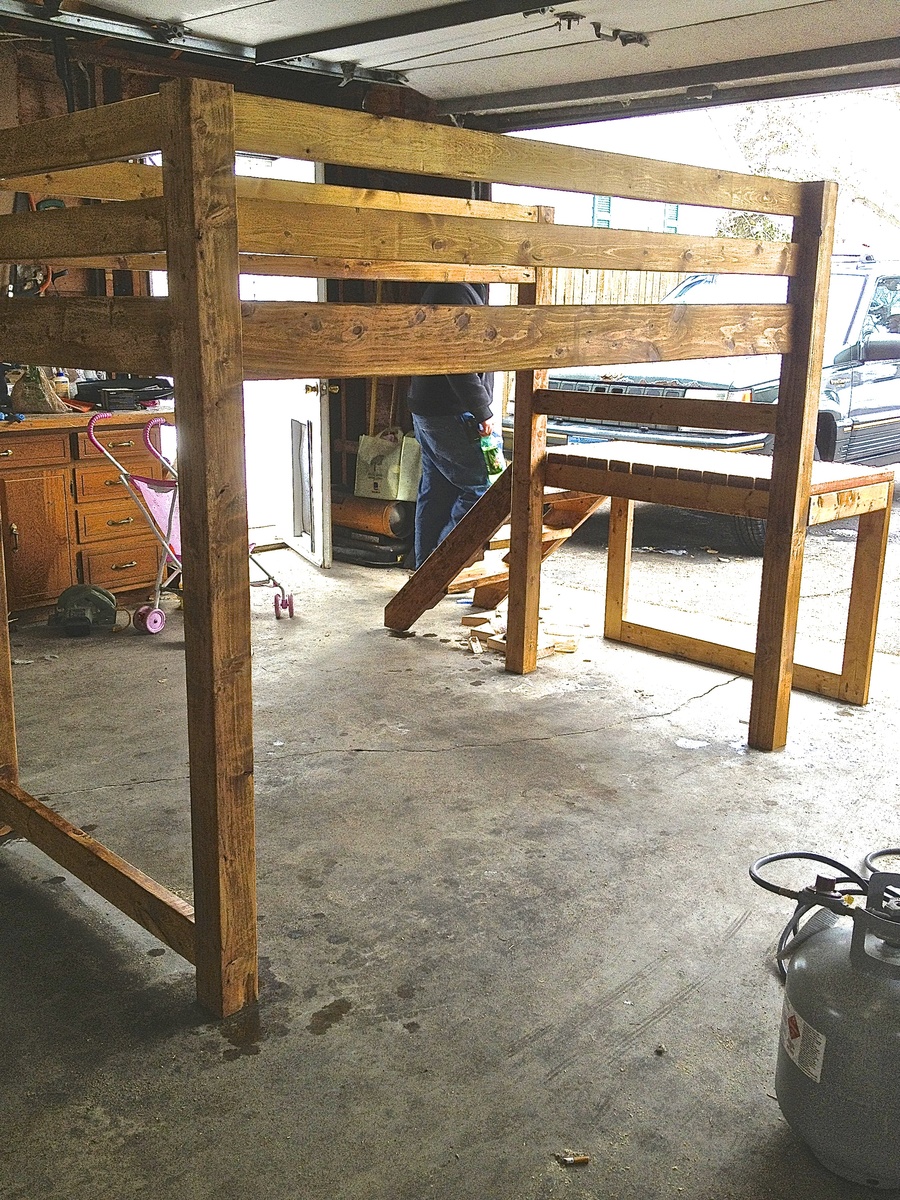
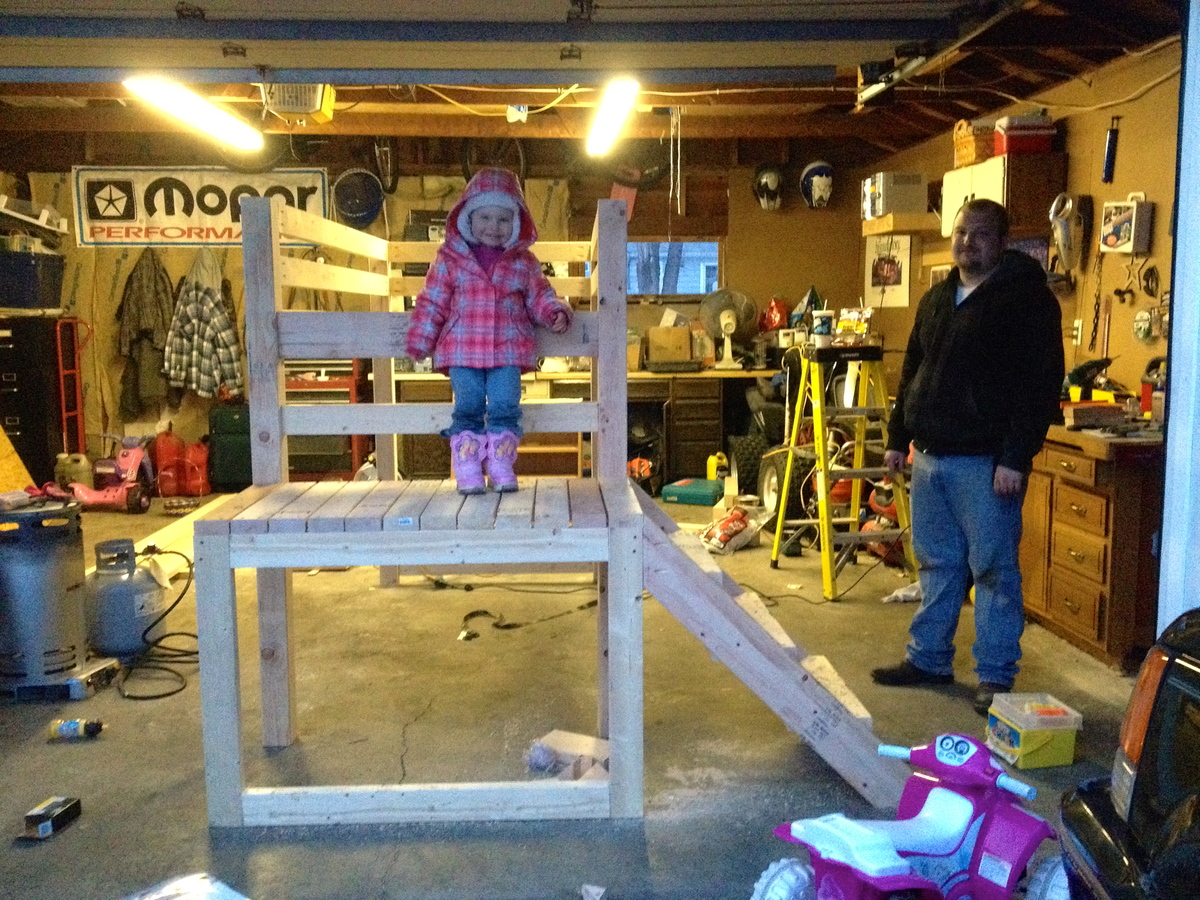
Camp Loft Bed with Steps and Landing

Submitted by amelia86mn on Tue, 03/26/2013 - 17:51

We built this bed for our daughter. We needed more space in her bedroom and she LOVES it! Thank you so much www.ana-white.com and Pinterest for the plans! Turned out awesome!

Estimated Cost
$90 + a new saw for my father-in-law after we knocked his over by accident.
Estimated Time Investment
Weekend Project (10-20 Hours)
Finish Used
Minwax Wood Finish Golden Oak
Recommended Skill Level
Intermediate

Comments

spiceylg

Wed, 03/27/2013 - 05:02

Great job and that mural is amazing!!! She looks like one happy girl!

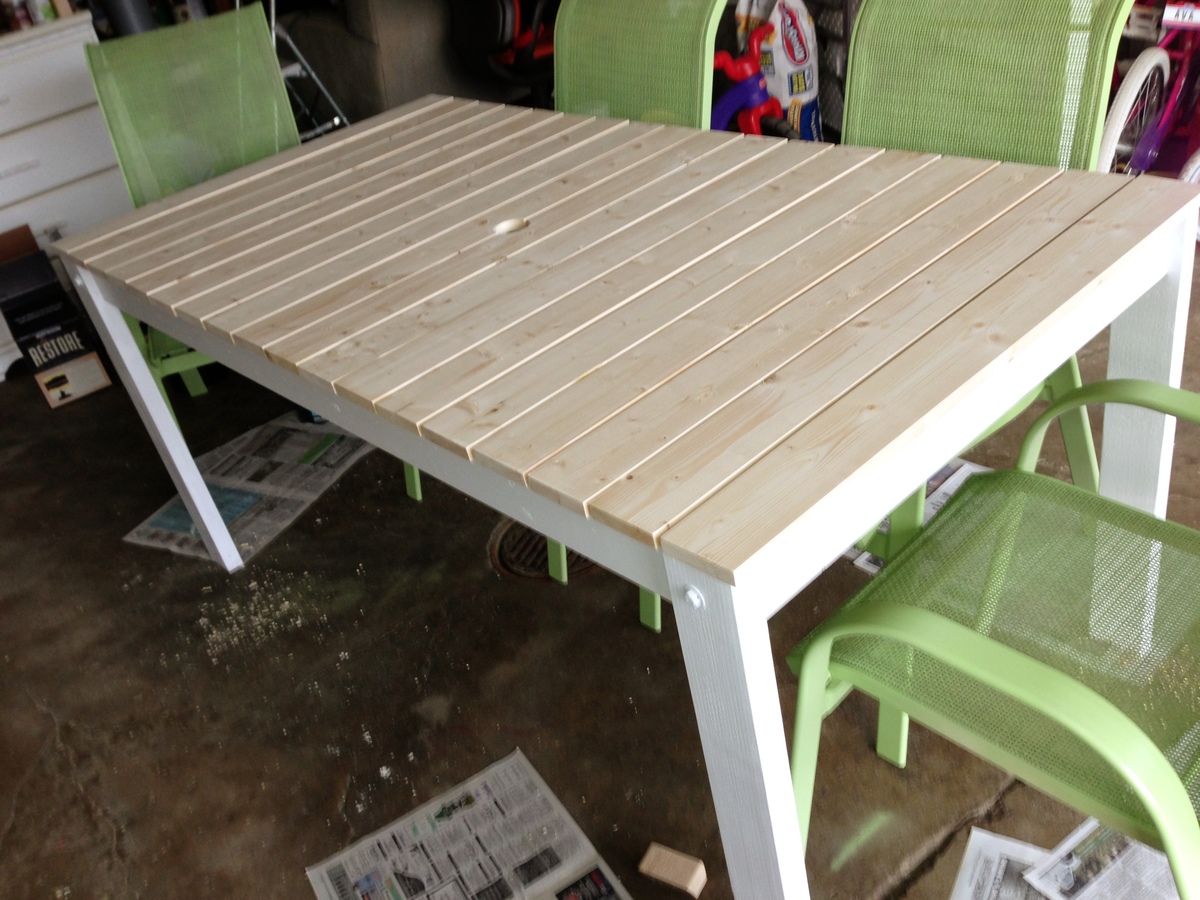
My Outdoor Table!!

This is my wonderful Outdoor Dining Table!!

My husband's first project and I couldn't be more pleased with the end result.

Thanks Anna White for your EASY to follow instructions!

Built from Plan(s)
Estimated Time Investment
Weekend Project (10-20 Hours)
Recommended Skill Level
Beginner
Back