Community Brag Posts

My coat rack

Submitted by atenney446 on Wed, 09/11/2013 - 17:41

Thank you for such a simple set of plans for such a useful and practical piece of furniture. I enjoyed making this.

Built from Plan(s)
Estimated Cost
$75
Estimated Time Investment
Weekend Project (10-20 Hours)
Finish Used
Semi gloss enamel paint
Recommended Skill Level
Intermediate

Comments

Desk

Submitted by Anonymous (not verified) on Fri, 01/04/2019 - 15:34

I absolutely love how this turned out! Thank you for plans! I was able to use aquired tools and wood from each of my grandparents Who have passed which makes it that Much more special to me

Built from Plan(s)
Estimated Time Investment
Weekend Project (10-20 Hours)
Finish Used
Antique white chalk paint and Kona stain
Recommended Skill Level
Intermediate

Brookstone queen headboard

We had an old heavy sleigh bed with headboard and footboard. It overwhelmed the room. We bought a basic metal bed frame. I made this headboard from Ana's plans, and my wife painted it. We really like this so much better.

Built from Plan(s)

Comments

My first project- we are loving our new bookcases

Submitted by MatiaP on Sun, 08/21/2011 - 22:33

This was my very first project. I had been on the hunt for two bookcases to put on either side of our fireplace. This plan was just right, but shorter than our space so I modified the plan and made the bookcases longer. I used the kreg jig every place I could find. Thanks so much Ana for your website. Finally we are furnishing our new house without breaking the bank. I never would have thought that I could build furniture, just the way we want it, all by myself. It's a wonderful feeling and I'm addicted.

Estimated Cost
$60 per bookcase
Estimated Time Investment
Day Project (6-9 Hours)
Recommended Skill Level
Starter Project

Media console

This is a tv stand I built for my mom, she had to get a new tv because her tube tv finally broke. Her old stand was a big particle board cabinet that wouldn't fit a new flat screen. I seen this plan on here and thought it would make a great stand for her she absolutely loves it.

Built from Plan(s)
Estimated Cost
$80
Estimated Time Investment
Weekend Project (10-20 Hours)
Finish Used
I used minwax dark walnut stain and minwax satin polyurethane spray.
Recommended Skill Level
Beginner

Comments

Rolling Cabinet

Submitted by Ovidiu on Fri, 11/20/2015 - 01:14

This is one of the projects I am most proud of, as it has a farmhouse look and it is also really useful around the house. I use it for my guitar amp, as well as to store other small items. The caster wheels make moving it very easily, so it can also be used as a kitchen island. 

Estimated Cost
100 $
Estimated Time Investment
Day Project (6-9 Hours)
Finish Used
Water based paint and Stain
Recommended Skill Level
Intermediate

Loft Bed

Submitted by Anonymous (not verified) on Tue, 01/08/2019 - 06:59

Built this for my son so he would have a fun play area in his room. 

Estimated Cost
Since I needed certain tools, the cost was under $200!
Estimated Time Investment
Weekend Project (10-20 Hours)
Finish Used
Just a dark/red stain.
Recommended Skill Level
Beginner

Comments

1st Tapered plant stand

Submitted by Anonymous (not verified) on Sat, 10/15/2022 - 18:18

I enjoyed this build looking forward to making more.

Built from Plan(s)

Comments

Kid's Storage Dining Table

Submitted by christy on Thu, 08/25/2011 - 17:01

My sister-in-law wanted a kid-sized dining table for all her nieces and nephews, so I made one for her by combining a couple of Ana's plans. The little seats are just a scaled down version of the Easiest Upholstered Bench plans. My kiddos love it so much, it looks like I'll be making another for us.

Estimated Cost
$100 - $150
Estimated Time Investment
Day Project (6-9 Hours)
Finish Used
The base is just gloss white paint. The top is stained using minwax special walnut. I finished the top with 3 coats of wipe-on poly, lightly sanding between each coat.
Recommended Skill Level
Beginner

Comments

Lady Goats

Thu, 09/08/2011 - 11:18

I'm looking for ideas for a round kid-table to go with a window seat I plan on making. This looks great! What're the dimensions of the table-top? It looks like it'd fit a lot of kiddos, well!

Lady Goats

Sat, 09/10/2011 - 07:59

When I looked at the 36", they just seemed too small. It's nice to have something to compare it to! :-)

Guest (not verified)

Mon, 03/26/2012 - 03:24

Hi, can you tell me the age of the kids in the picture? I'm hoping this size would fit my sons with plenty of room to grow. Age/size comparison would help a lot if you don't mind sharing! Your table looks amazing!

Guest (not verified)

Mon, 03/26/2012 - 08:10

They are 5 years and 2 years. The older one is pretty tall for her age...about 46 inches at the time the photo was taken.

Guest (not verified)

Mon, 03/26/2012 - 08:11

They are 2 years and 5 years. The older one is tall for her age...about 46 inches at the time the photo was taken.

spiceylg

Sat, 10/20/2012 - 10:32

Love it, beautiful job. Built this just from the kid's storage table plans. She references a 32" top but I don't believe they sell that size. Just wanted to make sure the 36" isn't top heavy?

Pink Twin Day Bed made for a Toddler

Simple Day Bed Modified with rail for toddler coming from a toddler size bed.

Estimated Time Investment
Afternoon Project (3-6 Hours)
Finish Used
Olympic in a light pink
Recommended Skill Level
Beginner

Comments

4x4 Truss Beam Table

Submitted by Anonymous (not verified) on Fri, 10/21/2022 - 10:42

This is our new dinning room table. We used the 4x4 truss beam table and refer to it as our farm to table table. It's made from red cedar that we harvested off of our land and milled into lumber. A natural stain with some clear coats and it turned out to be gorgeous. I wasn't a fan of the black base, at first, but think the finished table looks good. Pretty happy with my first table attempt.

Built from Plan(s)

Comments

Queen farmhouse bed frame with drawers.

Submitted by Anonymous (not verified) on Mon, 01/14/2019 - 20:57

Took several long days to get this thing done. Being stationed in Japan it made things a bit more difficult and quite a bit more expensive sourcing the materials for this project. I had to opt for 1/2" plywood as cost of lumber here in okinawa is nearly double that of what you would see in the states. I made a few other modifications to the plans here and there where I felt it would better fit my needs. I wanted more storage space so I made the drawer boxes 20" deep. Rather than nail and glue the drawer bottoms on I wanted a reassuring solid hold so I grooved out the drawers and inserted the bottom panel with glue to secure it in place. The drawer faces I chose to add a little more detail in the molding by using miter cuts and the router to add some texture. The headboard was actually a previous project that was requested by my wife so with some modification I was able to rebuild that and fit it into the build. The 4x4's were grooved out with a 3/4" straight bit to slide my headboard and footboard slats into place. All in all this project was a lot of fun, the bed is now a monster of a thing to move but solid as a rock we love it. Thanks for the plans! 

Estimated Cost
$500
Estimated Time Investment
Week Long Project (20 Hours or More)
Recommended Skill Level
Intermediate

Necklace and Earring Shelf

Submitted by vendo on Fri, 11/11/2022 - 13:15

I built this super easy shelf for my earrings, necklaces and bracelets. I love that I can see what I have, before they were stored away in a drawer and not easily accessible for daily wear. I also enjoy that this was super inexpensive and easy to build! Planning to build another one for my daughters.

Kiddo table and chair(s)

Submitted by fethiye on Wed, 08/31/2011 - 15:54

A nice and easy project for little people to enjoy getting in and out of chairs without worrying parents!

Used a router first time to soften the edges of the chairs and table. Also used a plug maker to fill up the counter sink holes. Love that stuff.

Didn't want to make all the chairs at once to figure out how I can improve on my process, and now I know that I should
1. Paint the slats prior to installing
2. Use router on the slats prior to installing
3. Use kreg jig to install the slats

Planning on making more chairs, or one more chair and 2 stools. Not sure yet.

As always, painting took the longest and I am not done yet. Will give a Minvax polycrylic gloss finish before putting into use.

Built from Plan(s)
Estimated Cost
$15
Estimated Time Investment
Day Project (6-9 Hours)
Finish Used
Oops paint from Home Depot :) Love those surprises and prices!

Recommended Skill Level
Starter Project

garden bench

Submitted by mr.cox on Sat, 09/21/2013 - 18:09

First project. Modified so that the seat is more narrow.

Built from Plan(s)
Estimated Cost
$37 for lumber
Estimated Time Investment
Afternoon Project (3-6 Hours)
Finish Used
brown paint
Recommended Skill Level
Starter Project

Reclaimed wood rustic X console

Submitted by Anonymous (not verified) on Mon, 01/21/2019 - 10:59

Modified to fit dimensions of some reclaimed lumber. Substituted some threaded steel rods instead of the wooden X.

Built from Plan(s)
Estimated Time Investment
Weekend Project (10-20 Hours)
Recommended Skill Level
Intermediate

Built-in bench with drawers, side cabinets and floating shelves

Submitted by Anonymous (not verified) on Sat, 11/26/2022 - 05:37

I have wanted a built-in window seat on this wall for a very long time. My hubby and I finally tackled this project. Definitely not perfect and lotsa challenges and mistakes made but we are happy with outcome.

Comments

Reclaimed Wood Farmhouse Bed

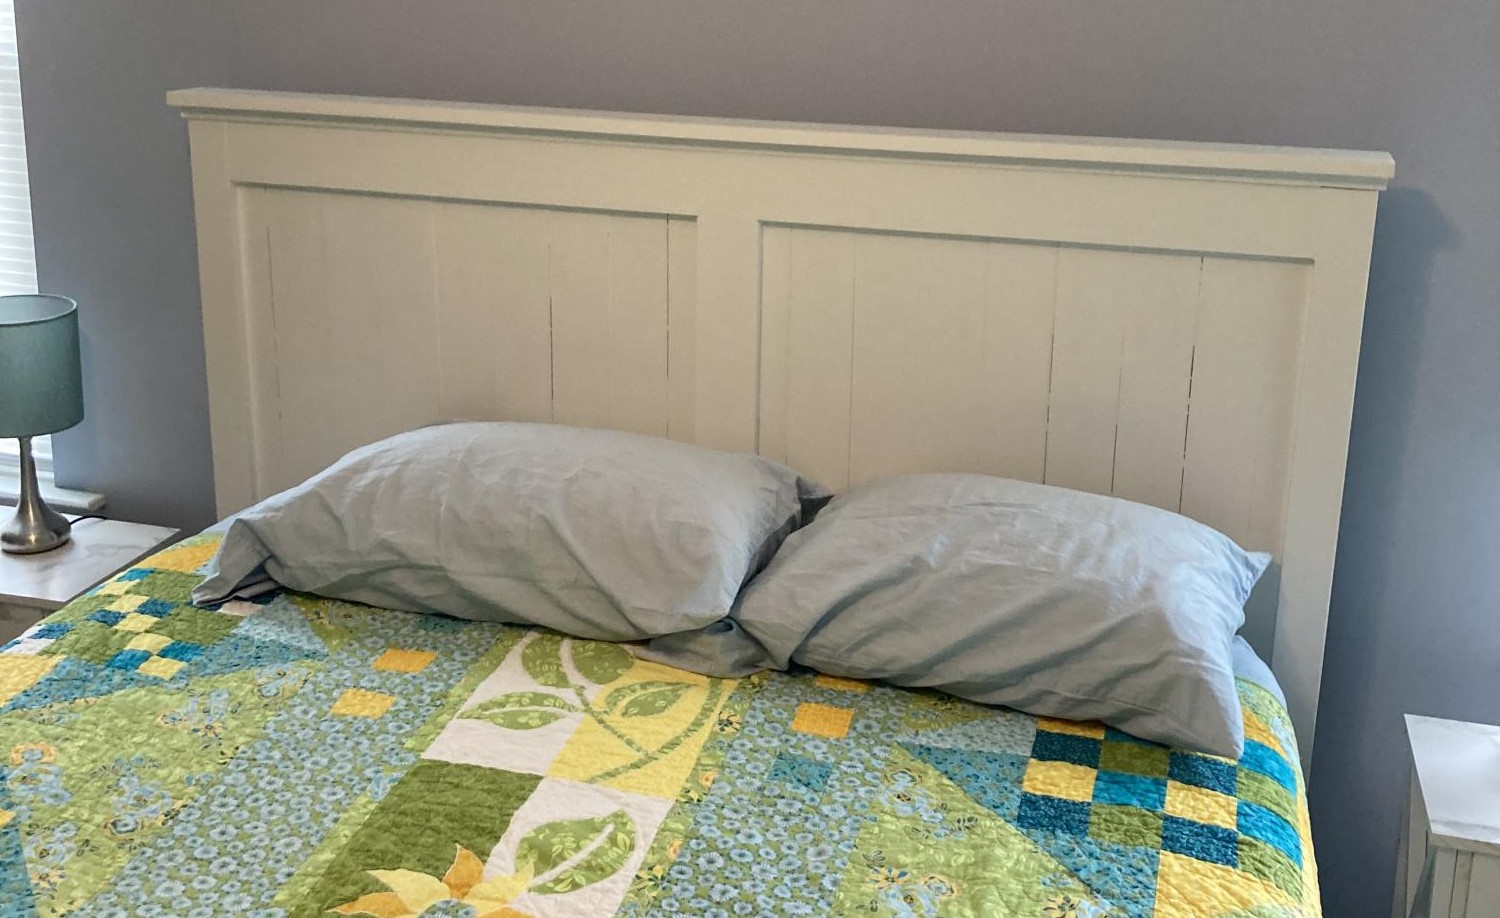
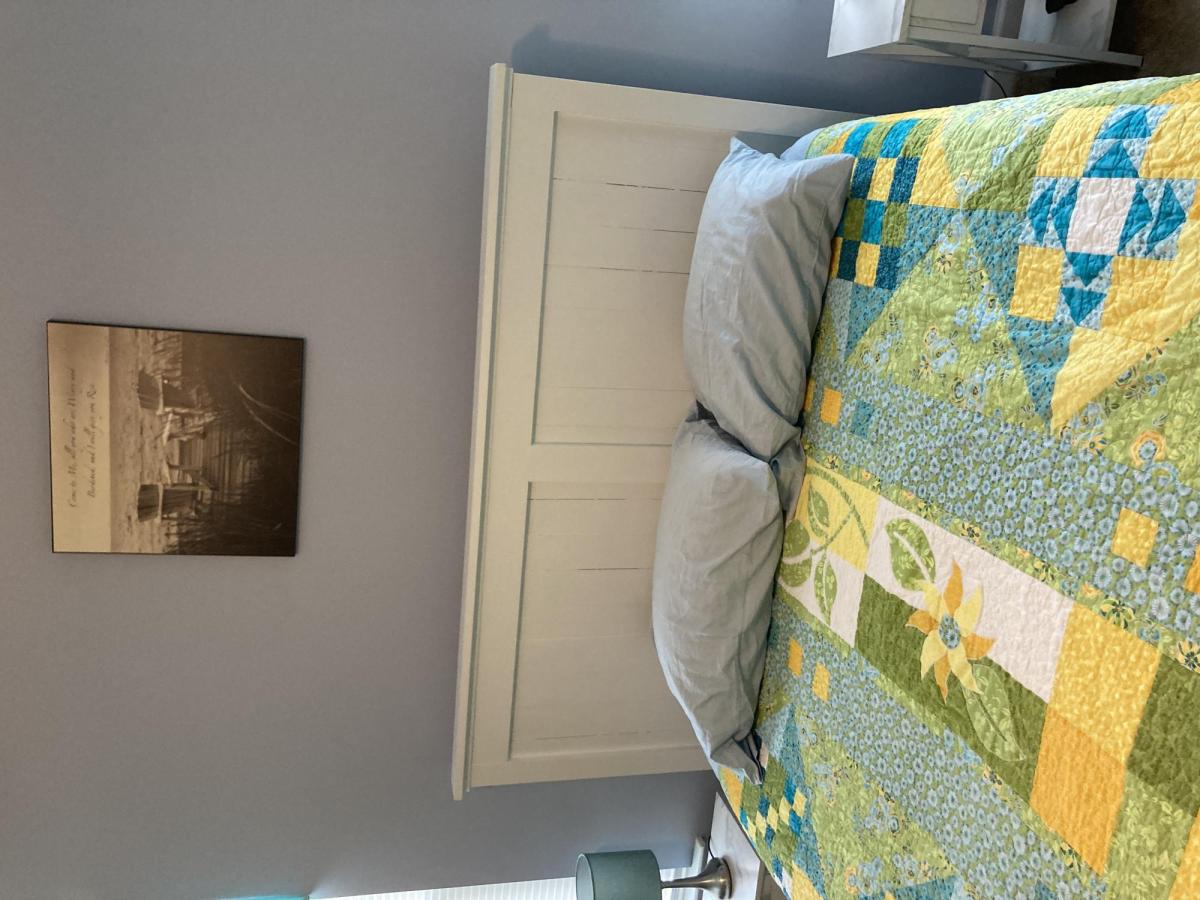
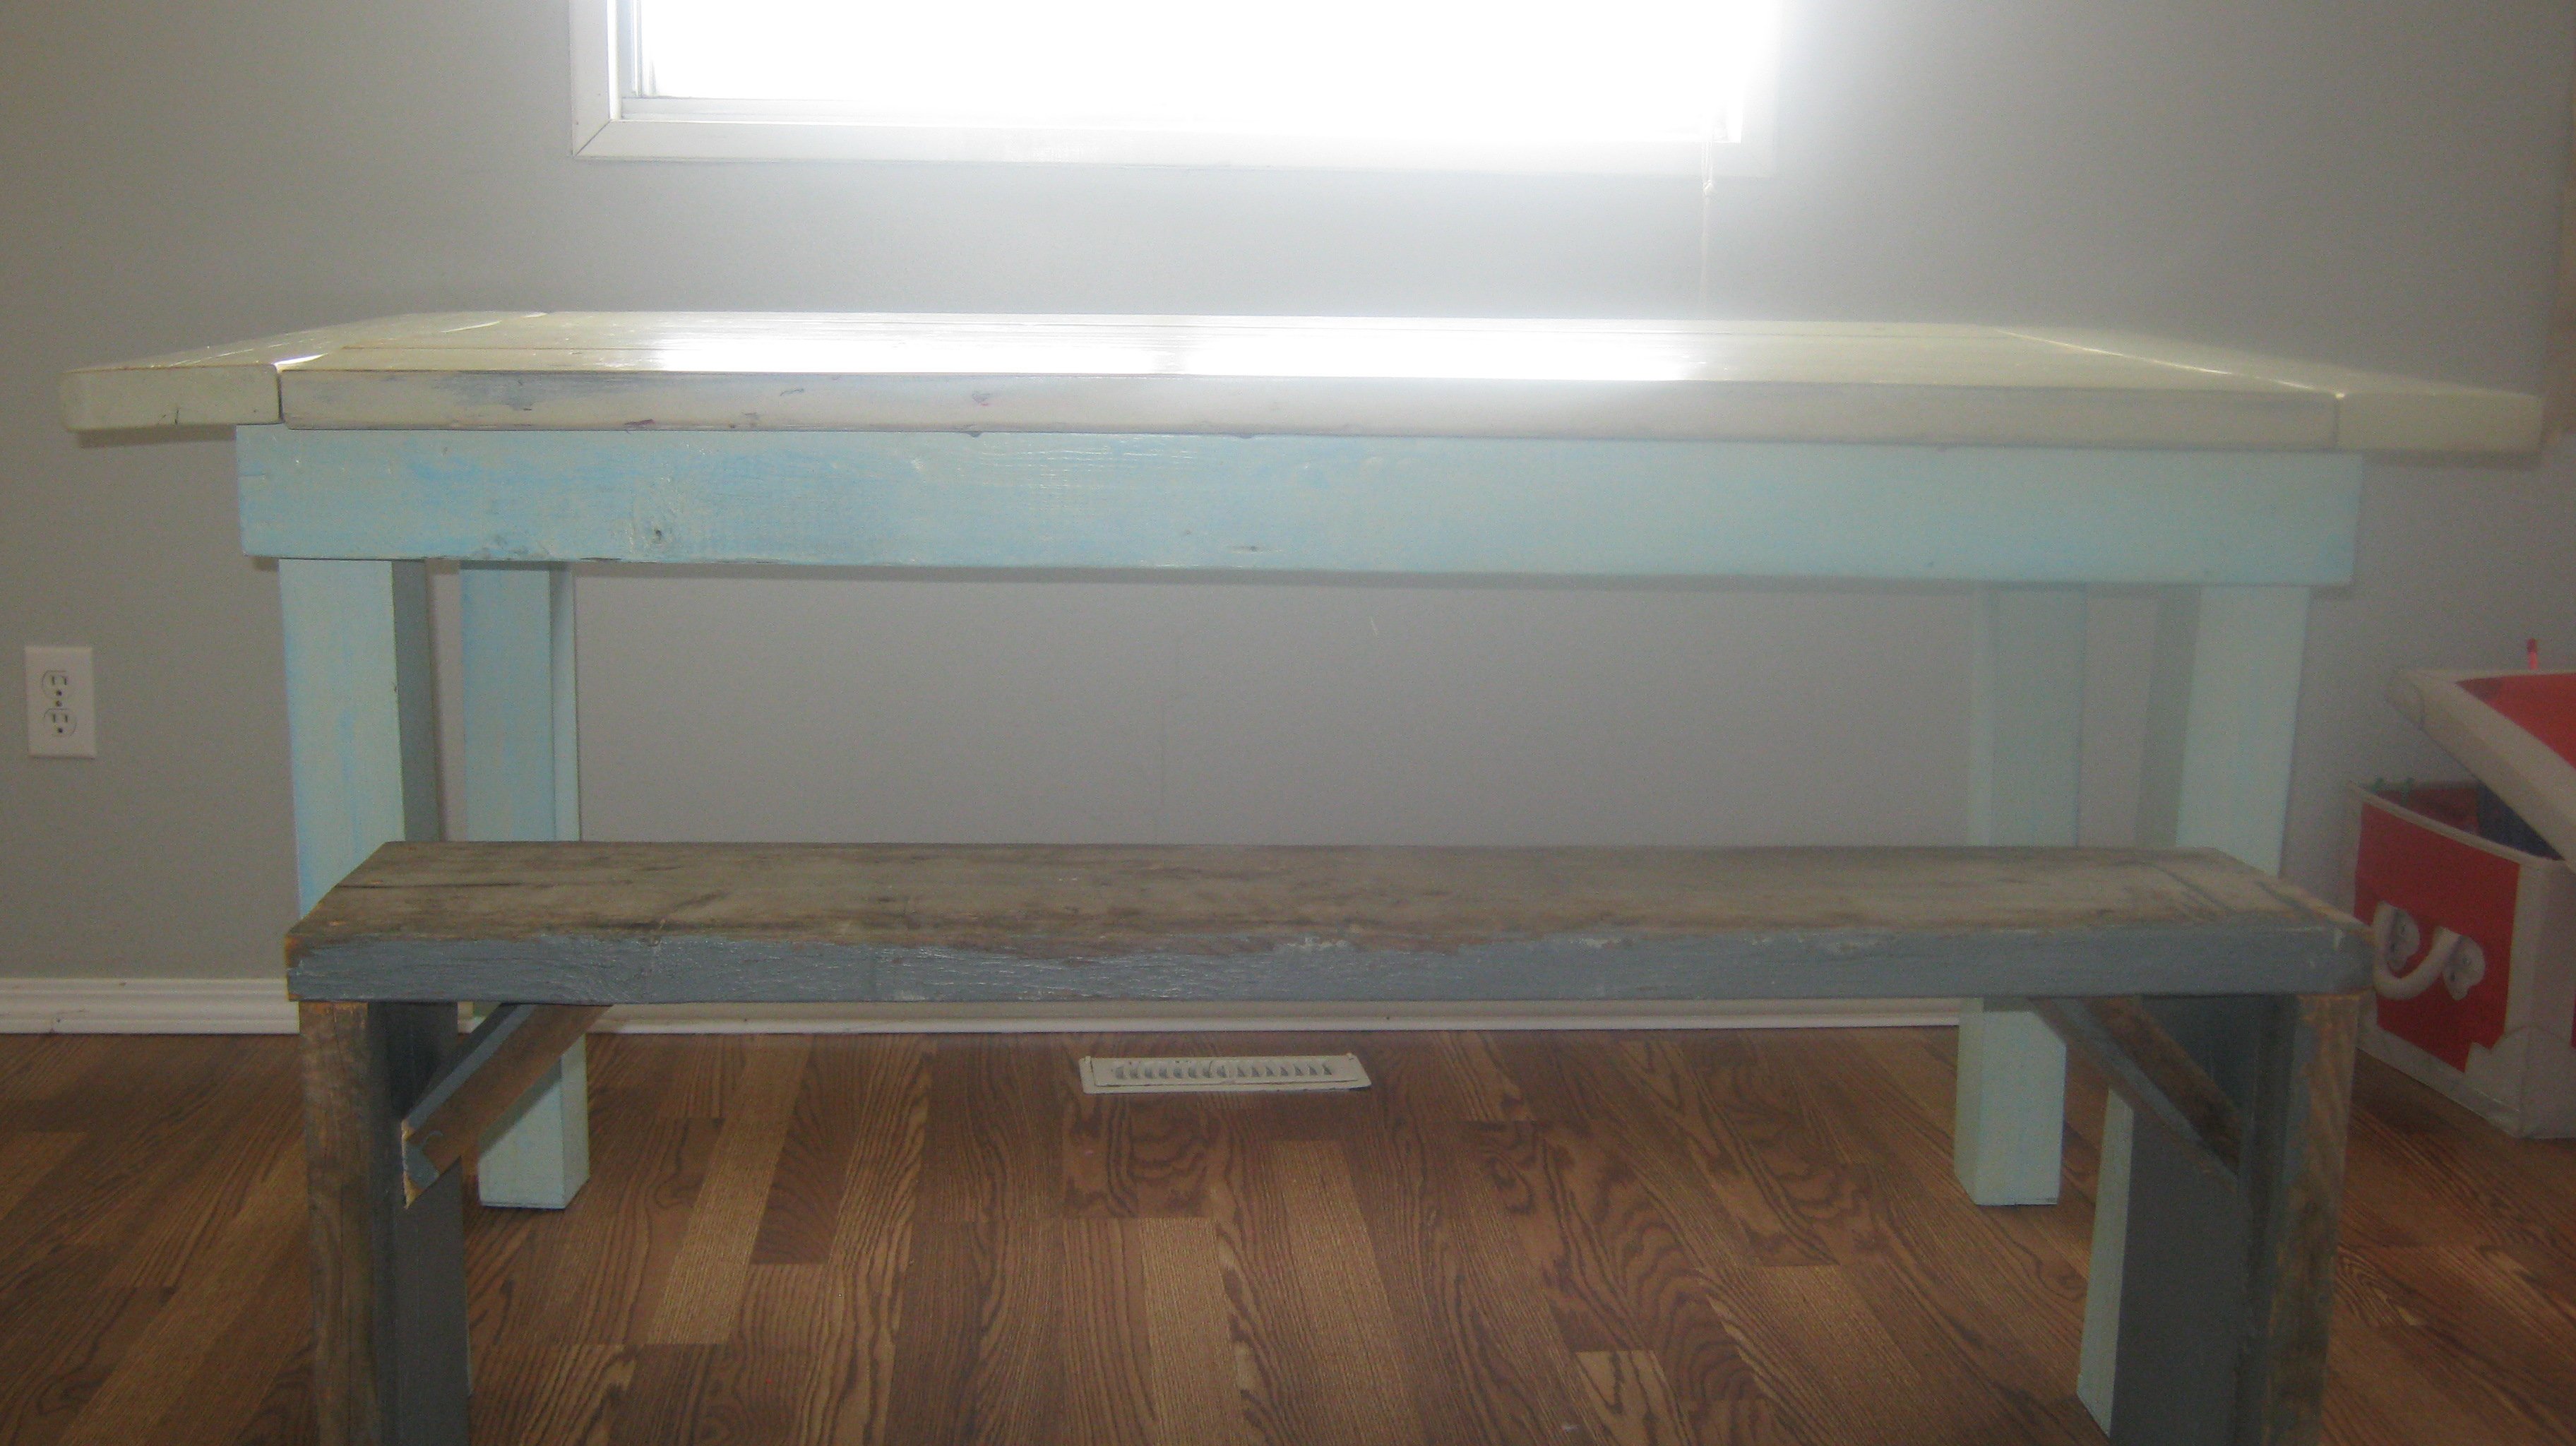
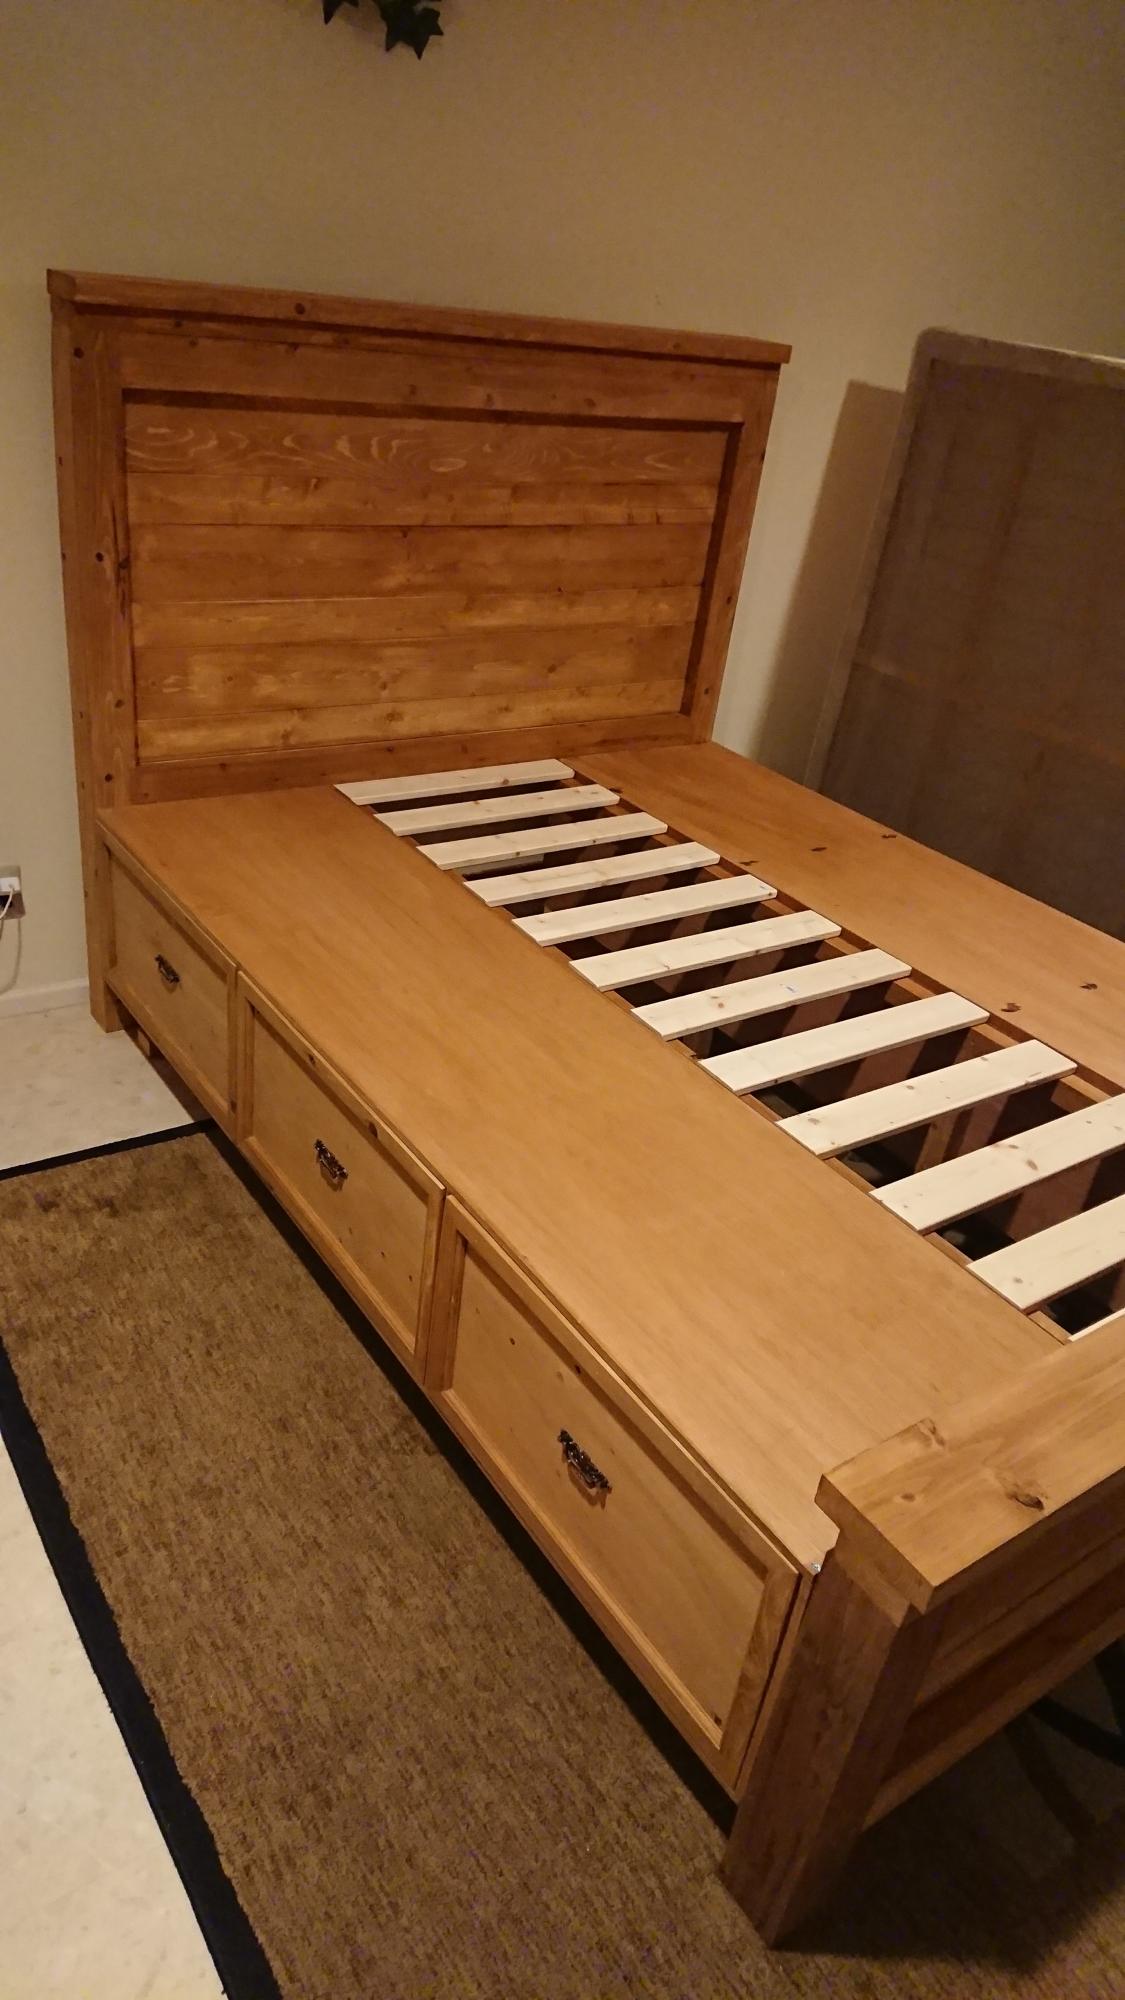
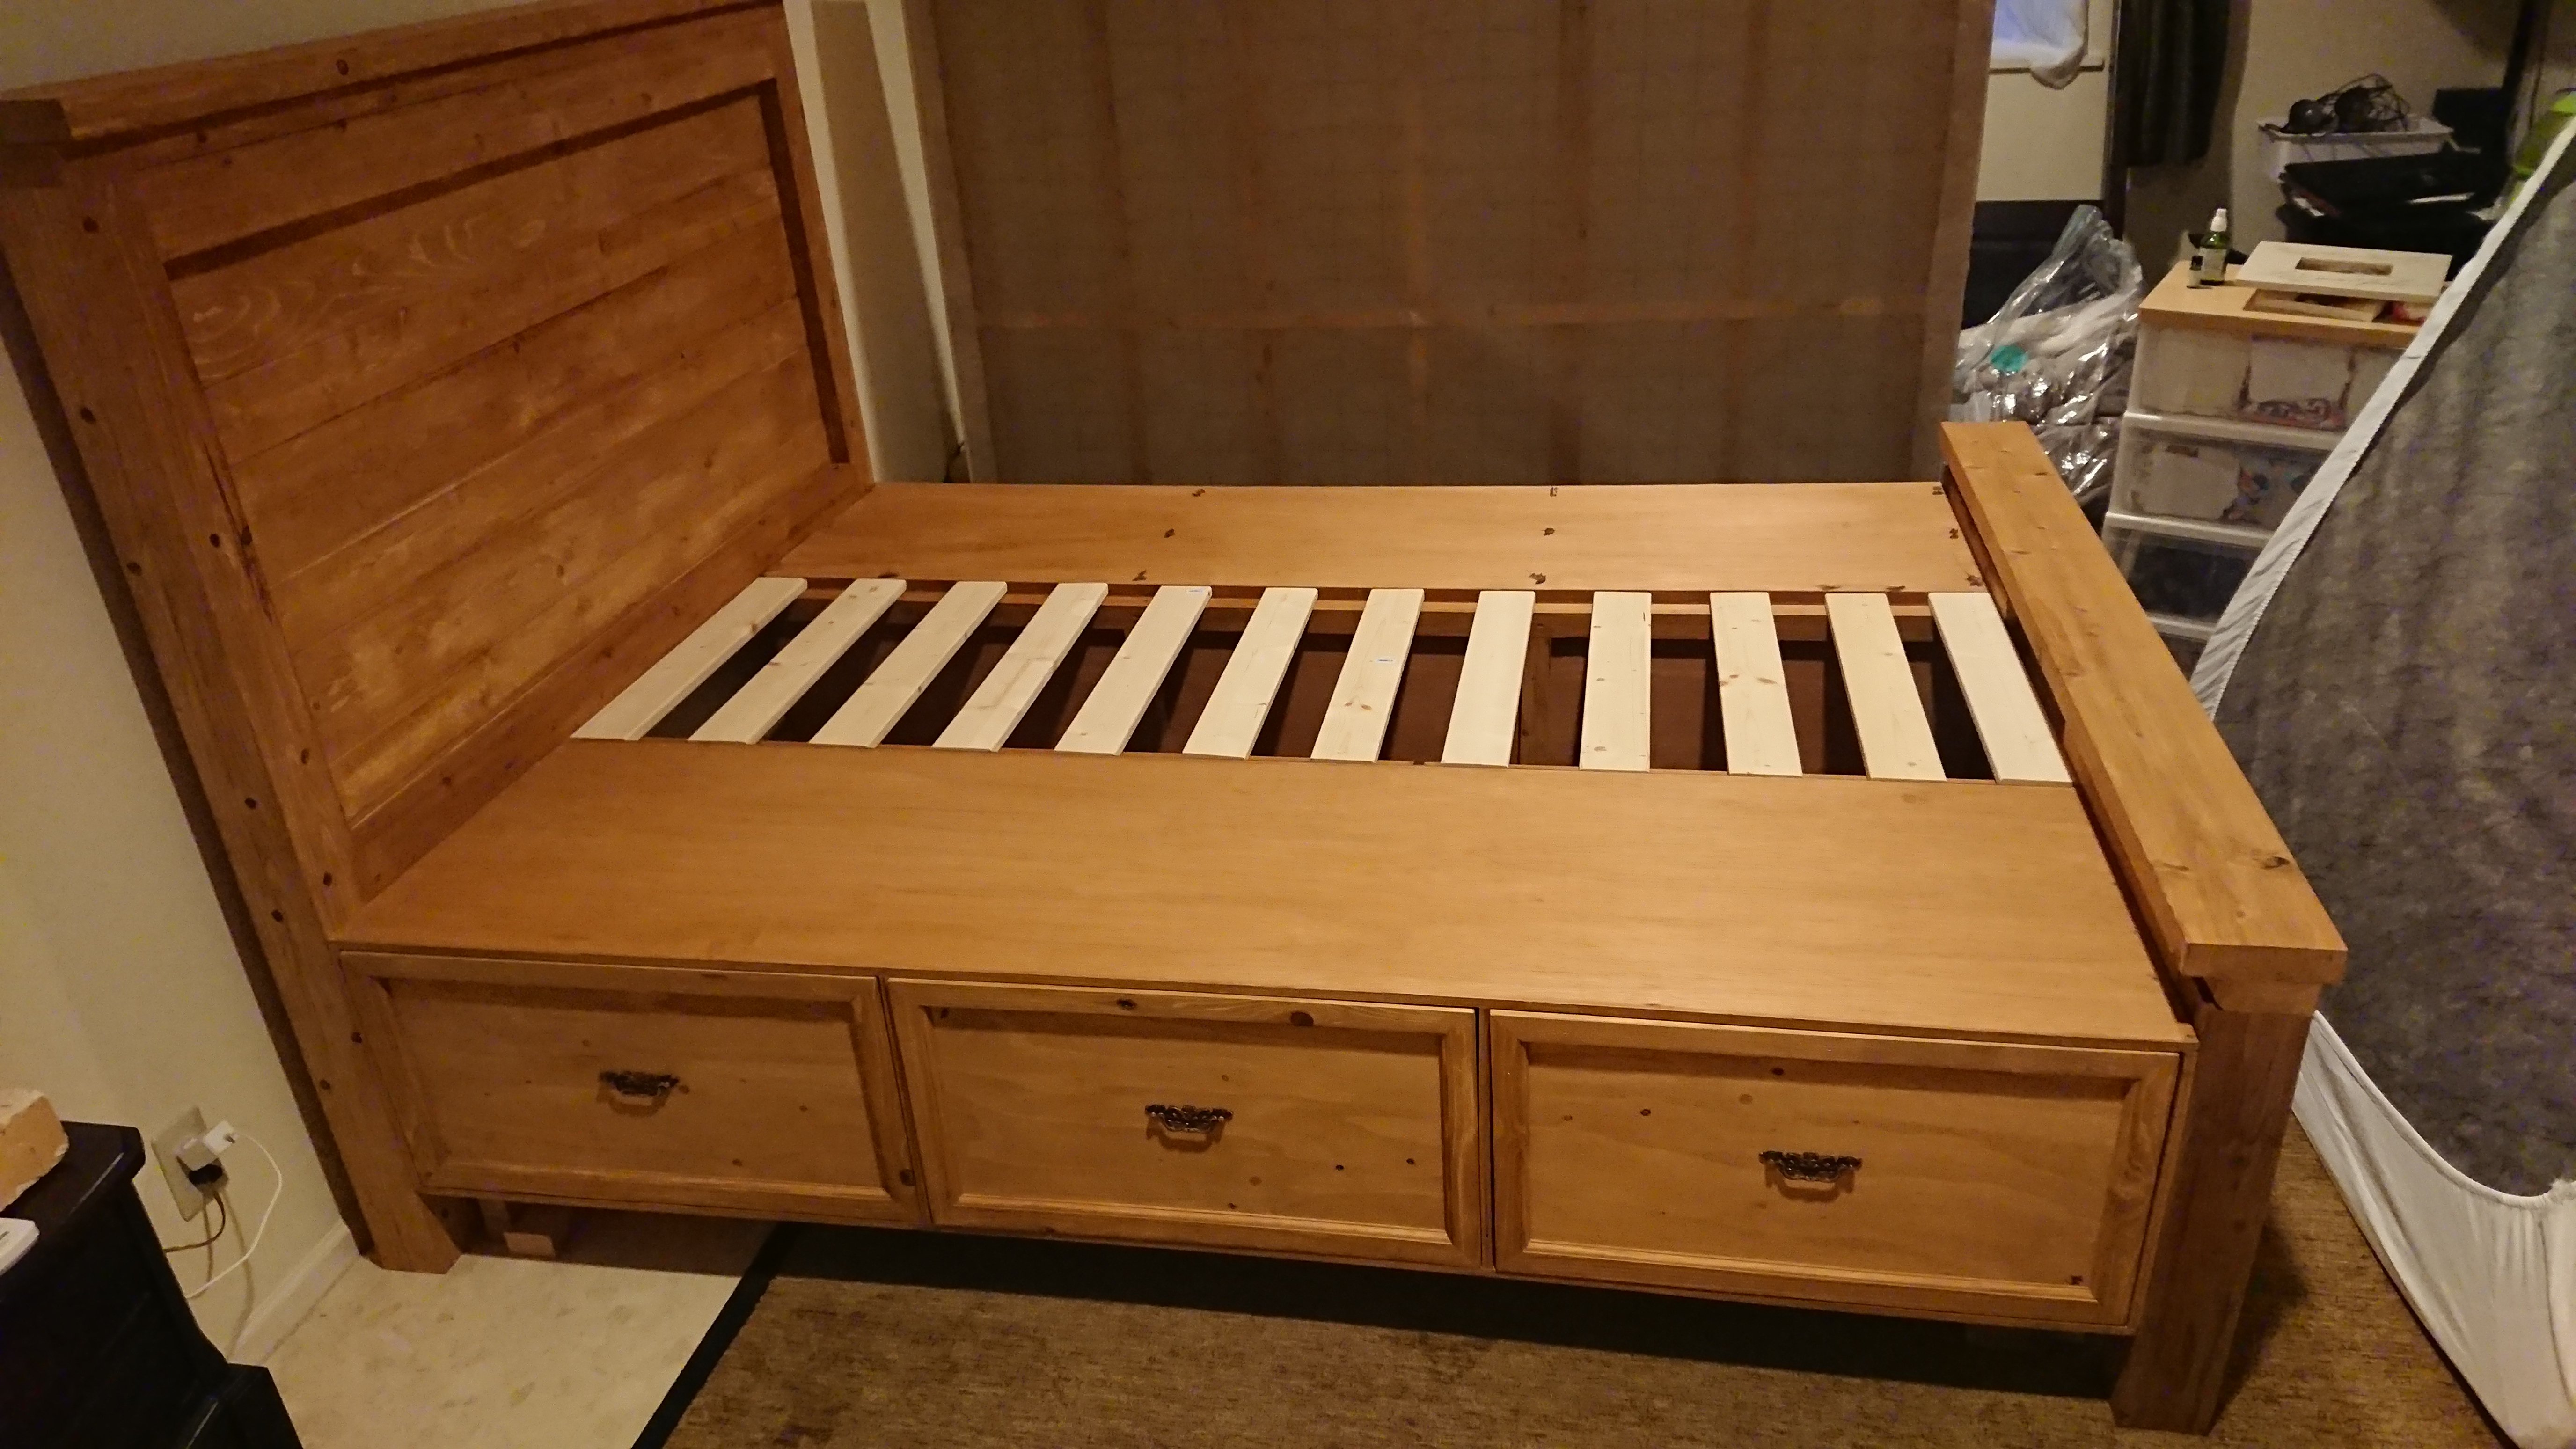
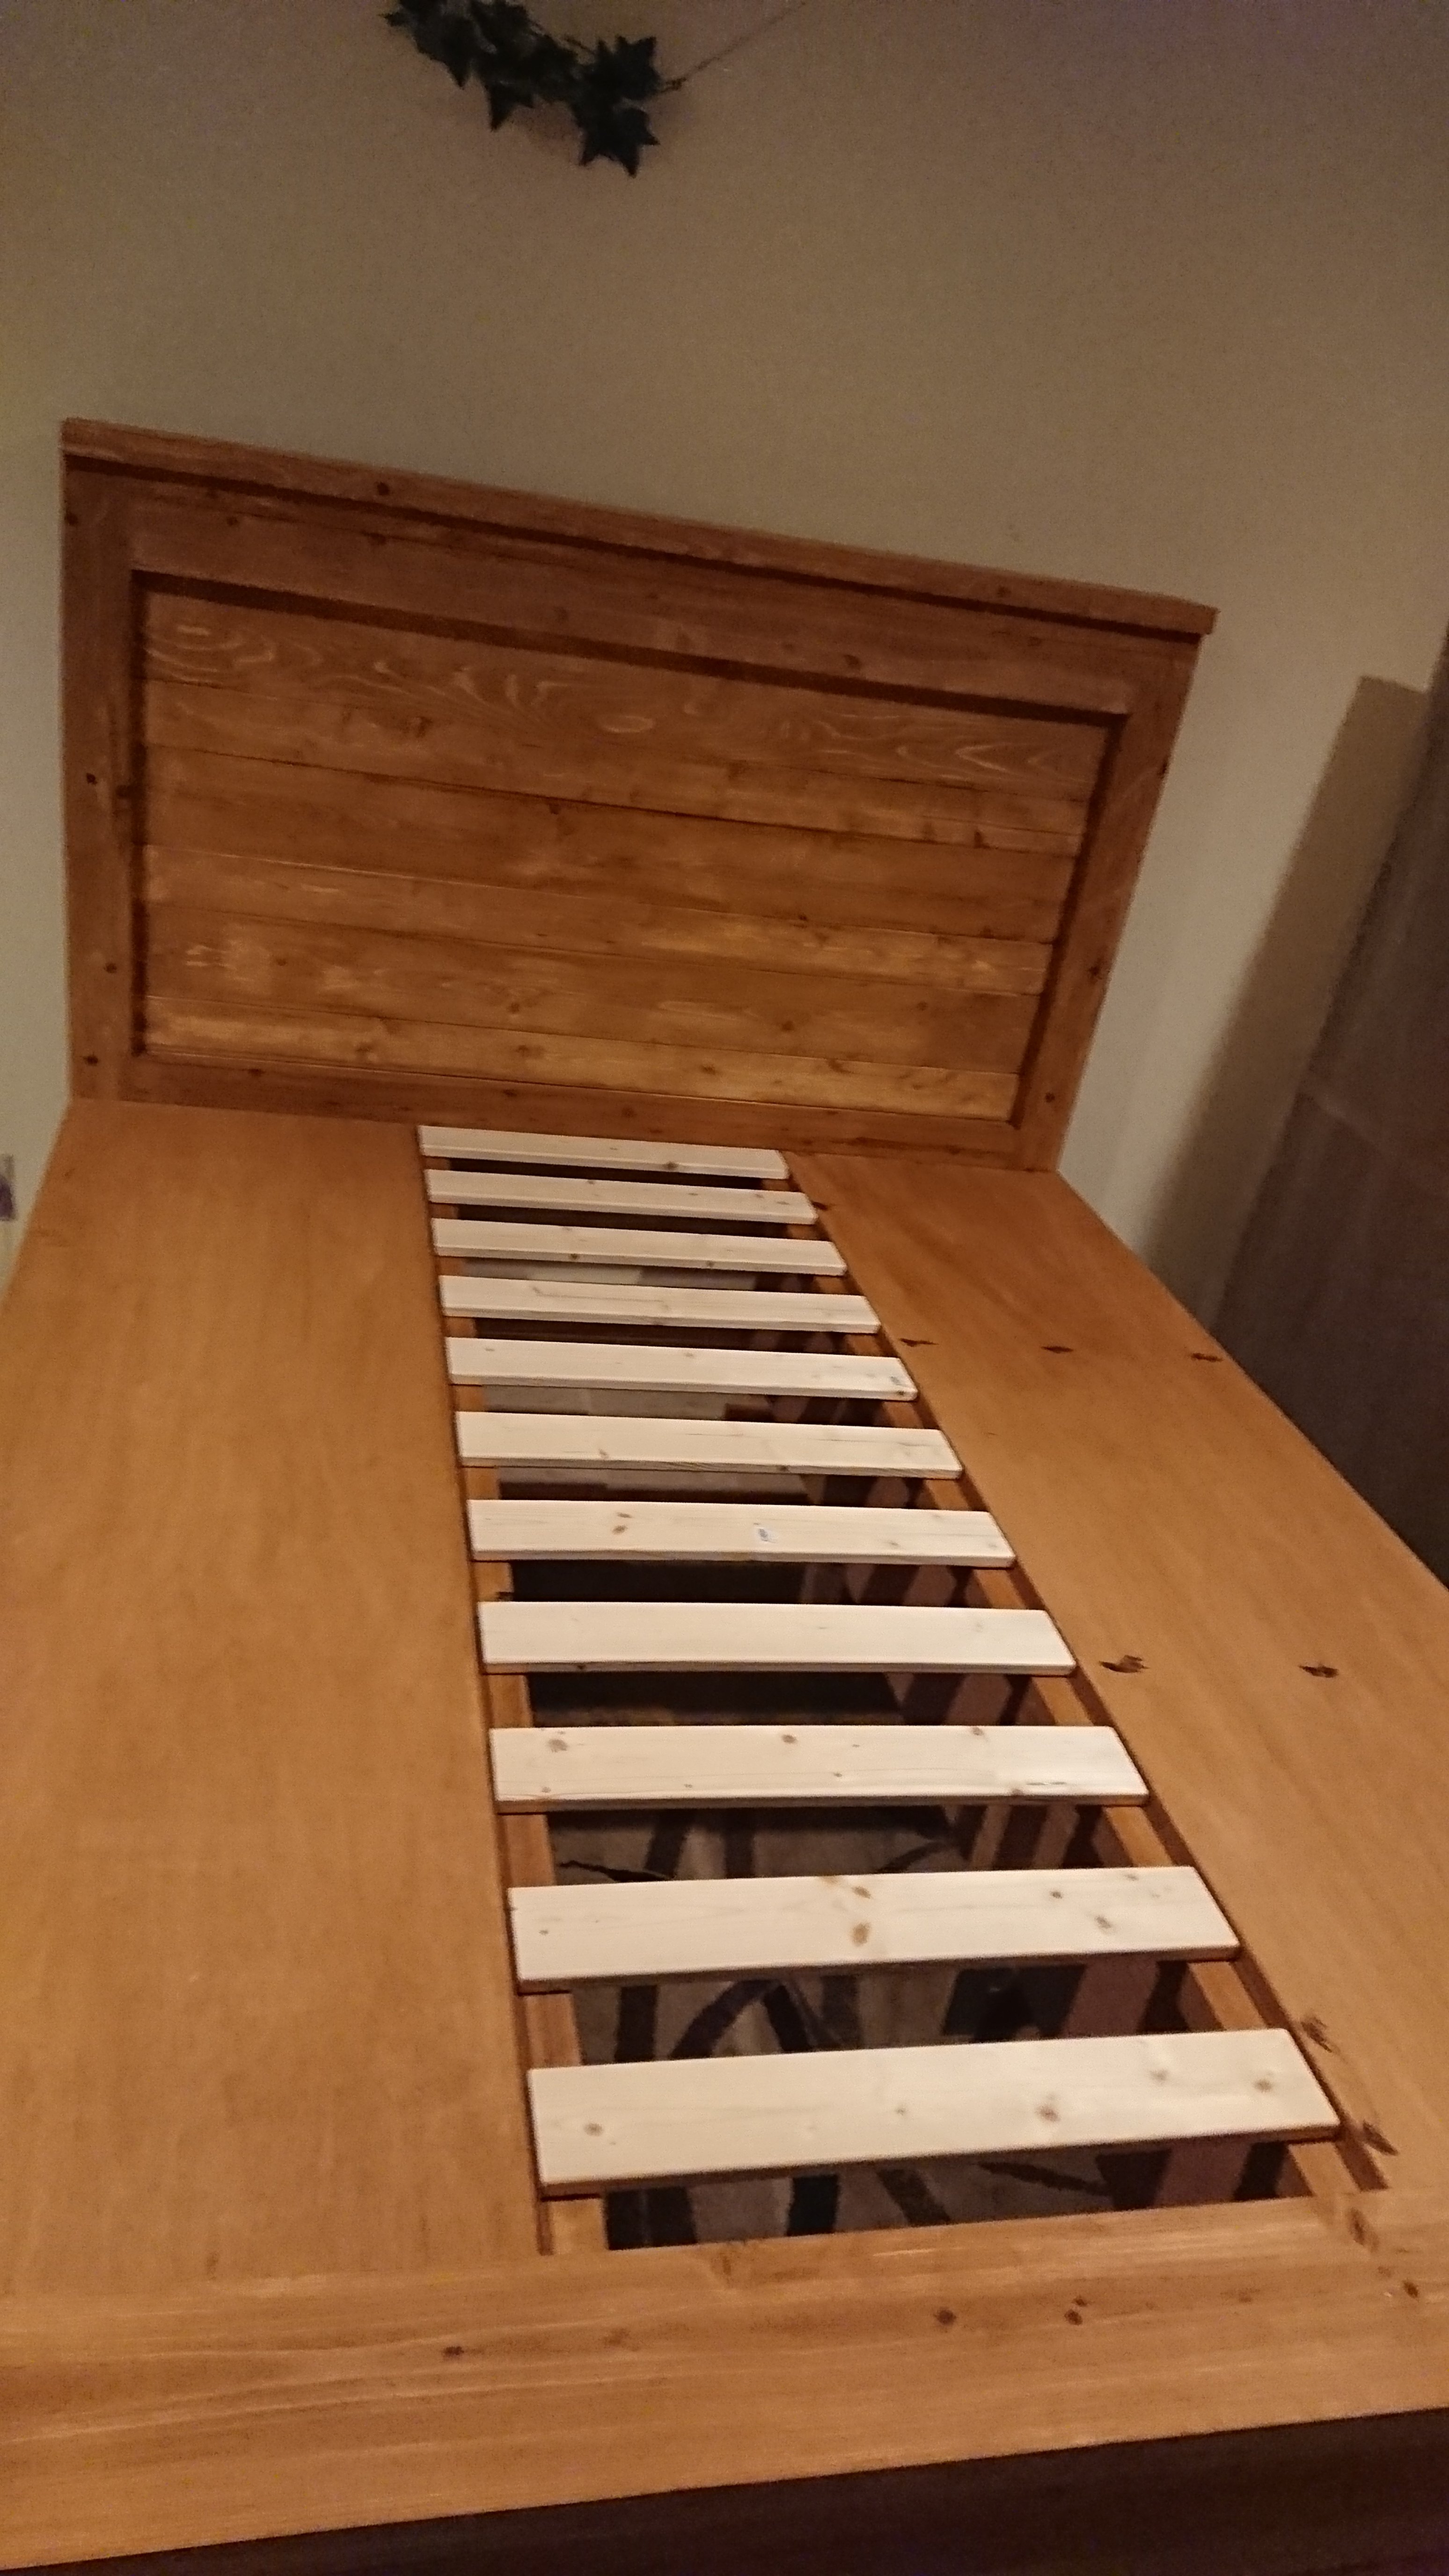
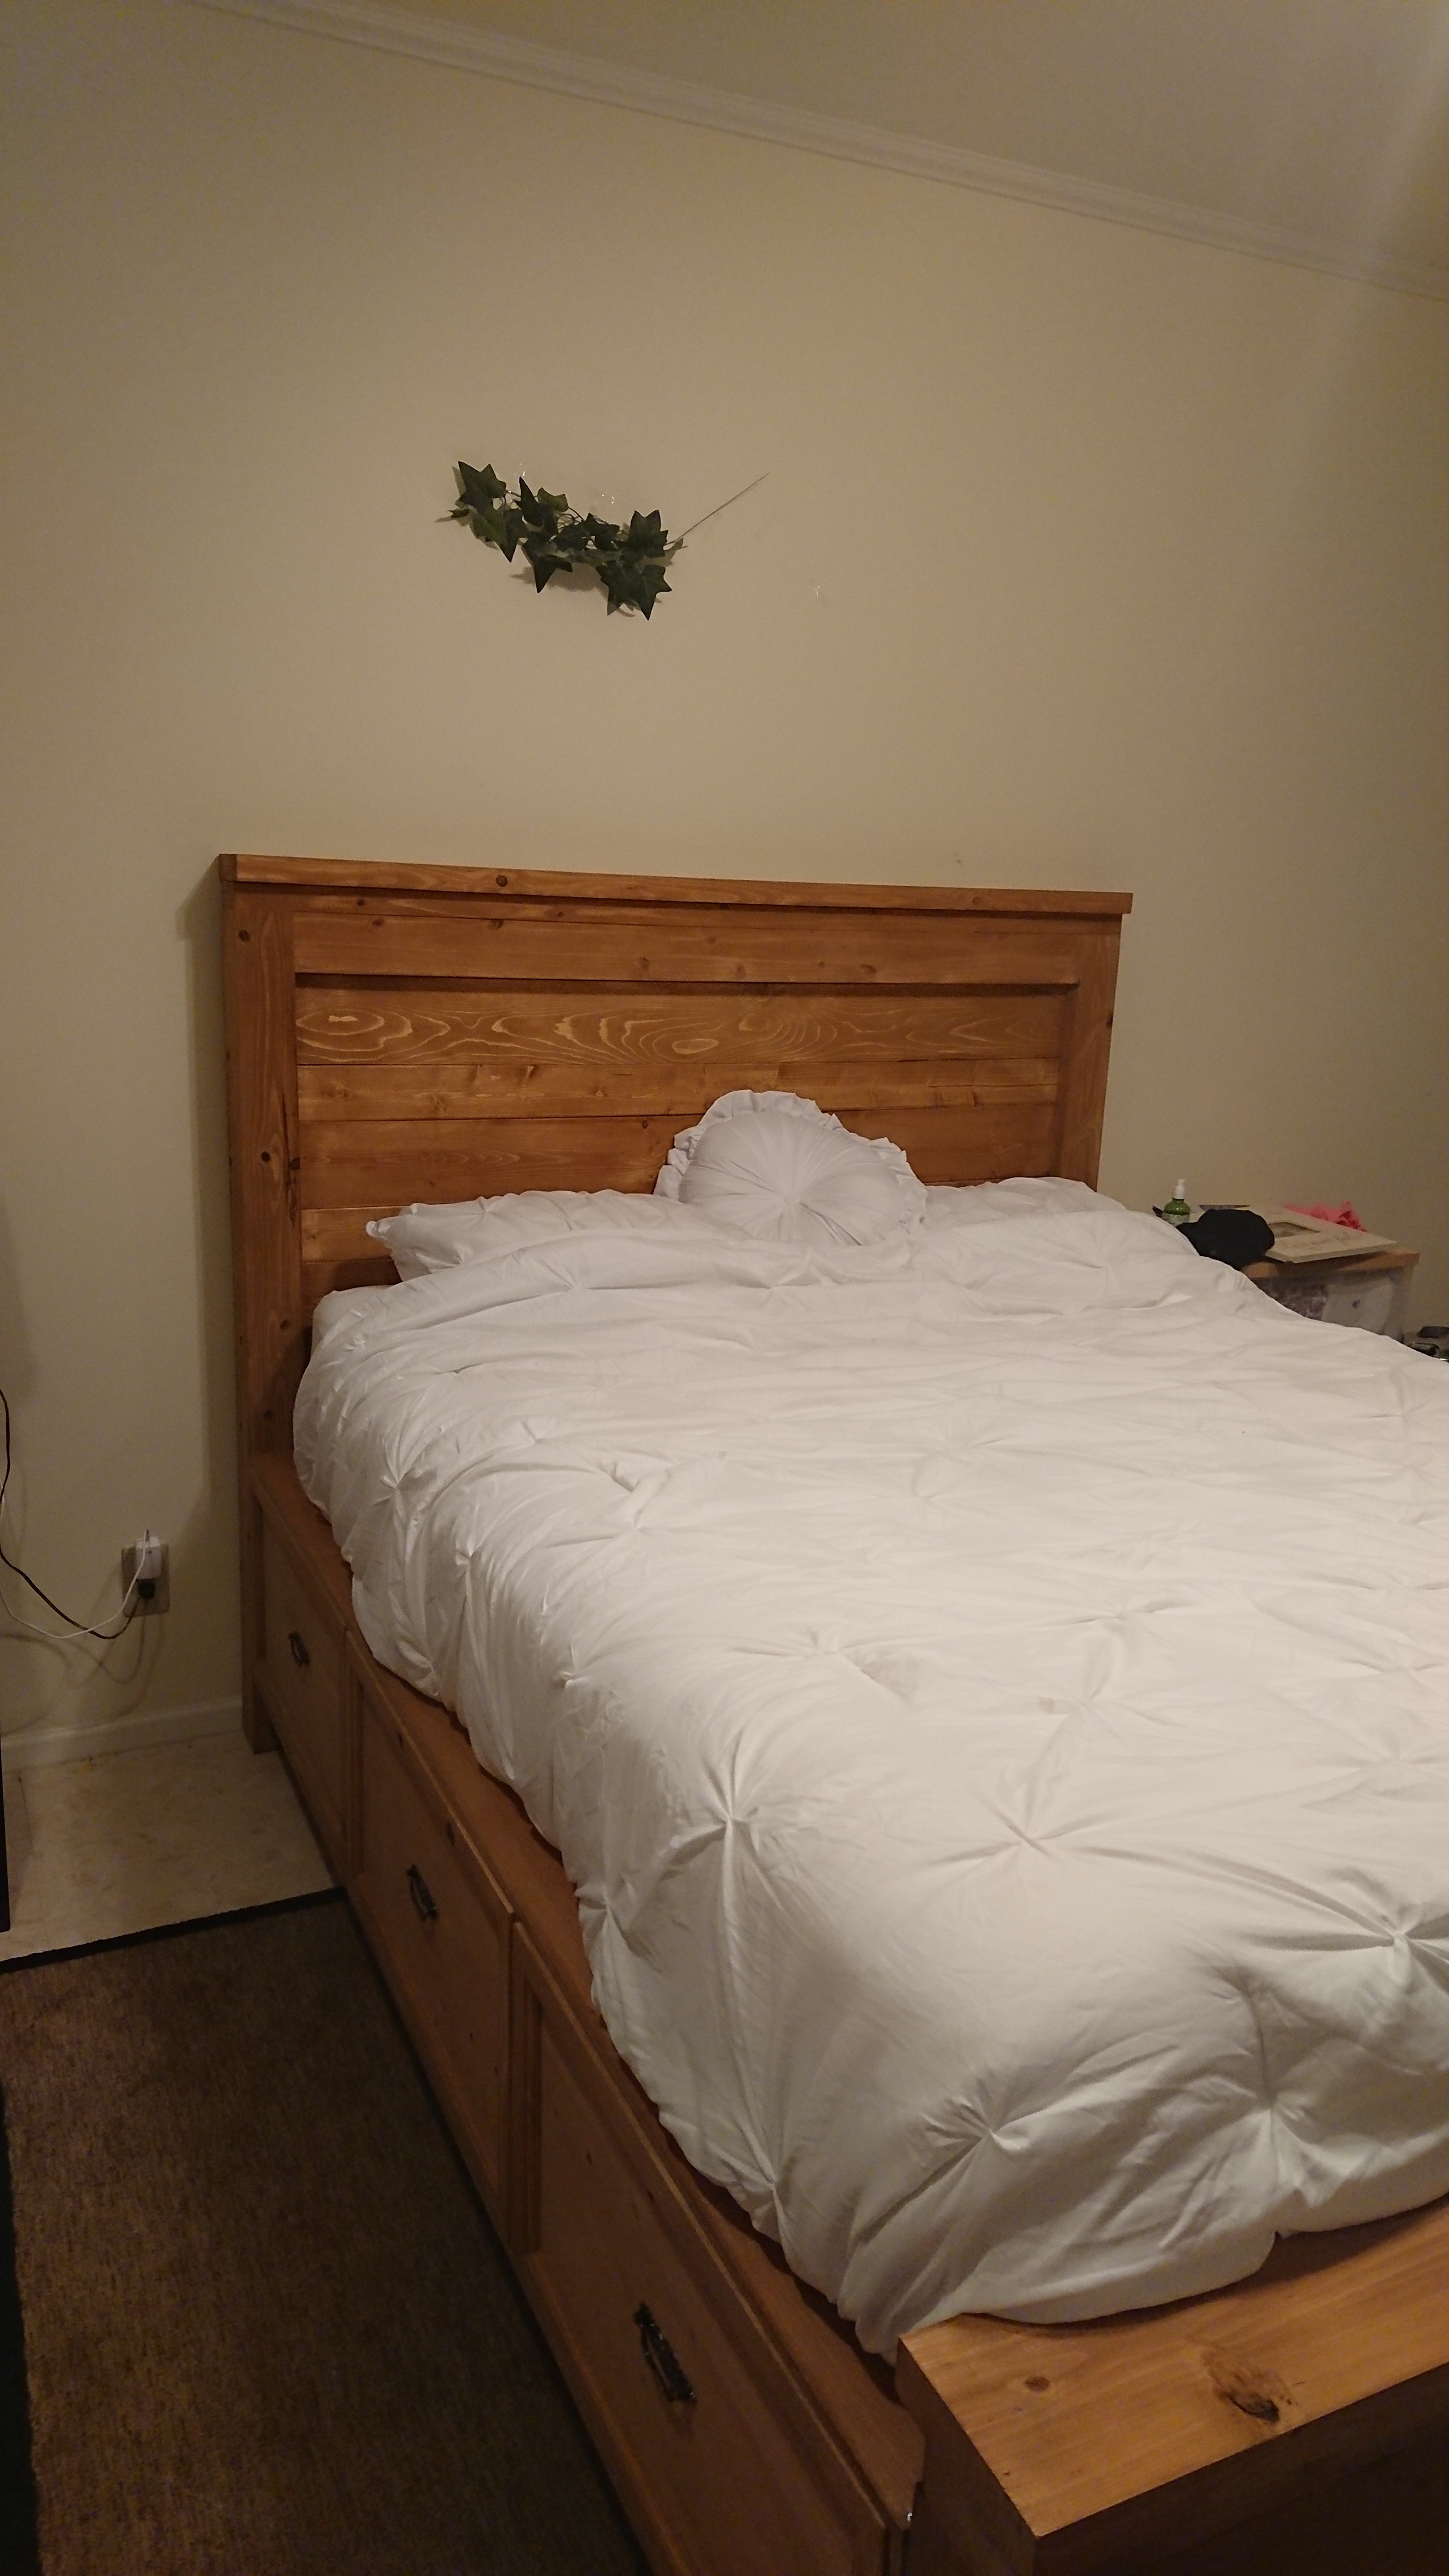
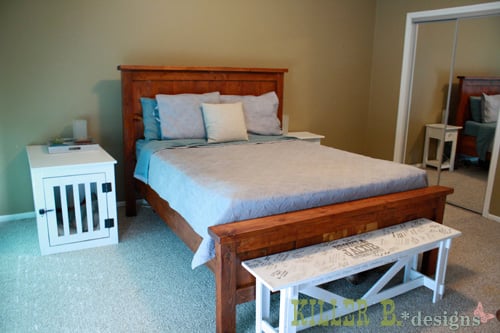
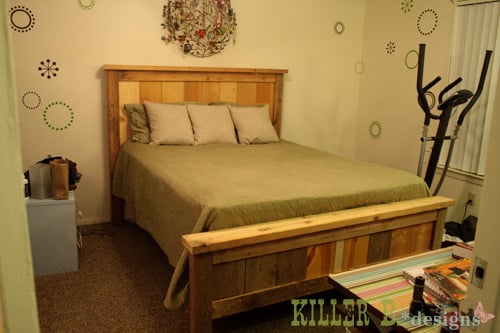
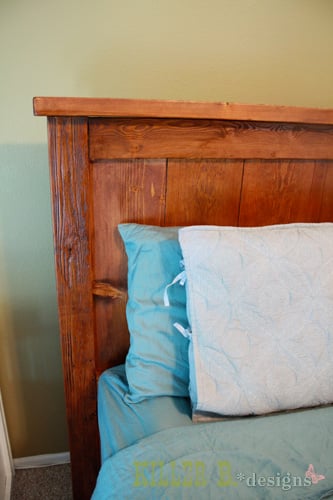
I was living in an apartment in Waco with my newly minted husband, and was gearing up for a move to Lake Jackson after his graduation from school. I had this horribly flimsy Walmart platform bed that was at the end of its life. After I read a post on a favorite blog mentioning my now hero, I checked out the projects on Knock Off Wood. “Hmmm,” I thought, “I think I can do that!” So, I found the perfect plans for the queen-sized Farmhouse Bed, and went to visit my parents. Print-out in hand, I showed my dad what I had in mind. He was totally on board, and said he even thought he had all the lumber we needed in his barn. And he did! We spent a Sunday afternoon shopping his barn, and then loaded it all up to drive over to his shop to do all the cutting.

Here’s the best part. I then loaded every single cut piece of lumber into my Honda Civic and drove it back to Waco. Yes, people. I didn’t even have an SUV, I had an economy size 4-door sedan. And I fit all that lumber in it! As soon as I got home, I was raring to go. Unfortunately, the Husbane was not. He was grumpy, and moaning about trying to put a bed together in an apartment. So I huffily said “Screw You!” and went on my merry way. Okay, that’s a total lie. I actually cried and shamed him with my words into helping me, because he was ruining this exciting new prospect with his bad attitude. Feeling like a horrible person, he apologized and took me to McCoy’s to get all the screws and hardware we needed to put this behemoth together. We put the headboard together as a team, and once I learned just how to use a power drill (it really was my first time ever!) I put the footboard together all by myself. I was so proud! Then we put on the side boards, figured out the rails and slats, and pushed the last screw in the next day. For just $16, a lot of free barnwood, and gallons of sweat and tears, we had our very first hand made bed. And I couldn’t be prouder.

Built from Plan(s)
Estimated Cost
$16
Estimated Time Investment
Weekend Project (10-20 Hours)
Finish Used
Minwax gunstock, Minwax Polyshades Walnut
Recommended Skill Level
Beginner

Comments

Folding Double sided Chalkboard.

Submitted by Bob C on Tue, 09/24/2013 - 10:16

This a Anna White.com Inspired Folding Chalkboard design. I just made a couple slight modification. Slightly larger, and tray to hold chalk and eraser.

This one was build for my two year old nephew as his birthday gift! I think Wyatt and his brother Marshall will get a lot of good use out of the gift.

Anna and John thank you for providing such a fantastic site!

Best Regards,

Bob C

"Remember Working SAFELY IS the most important thing you can do!"

Estimated Cost
$25.00
Estimated Time Investment
Weekend Project (10-20 Hours)
Finish Used
Golden Oak Stain and Polyurethane, Valspar Chalkboard Paint
Recommended Skill Level
Starter Project

Comments