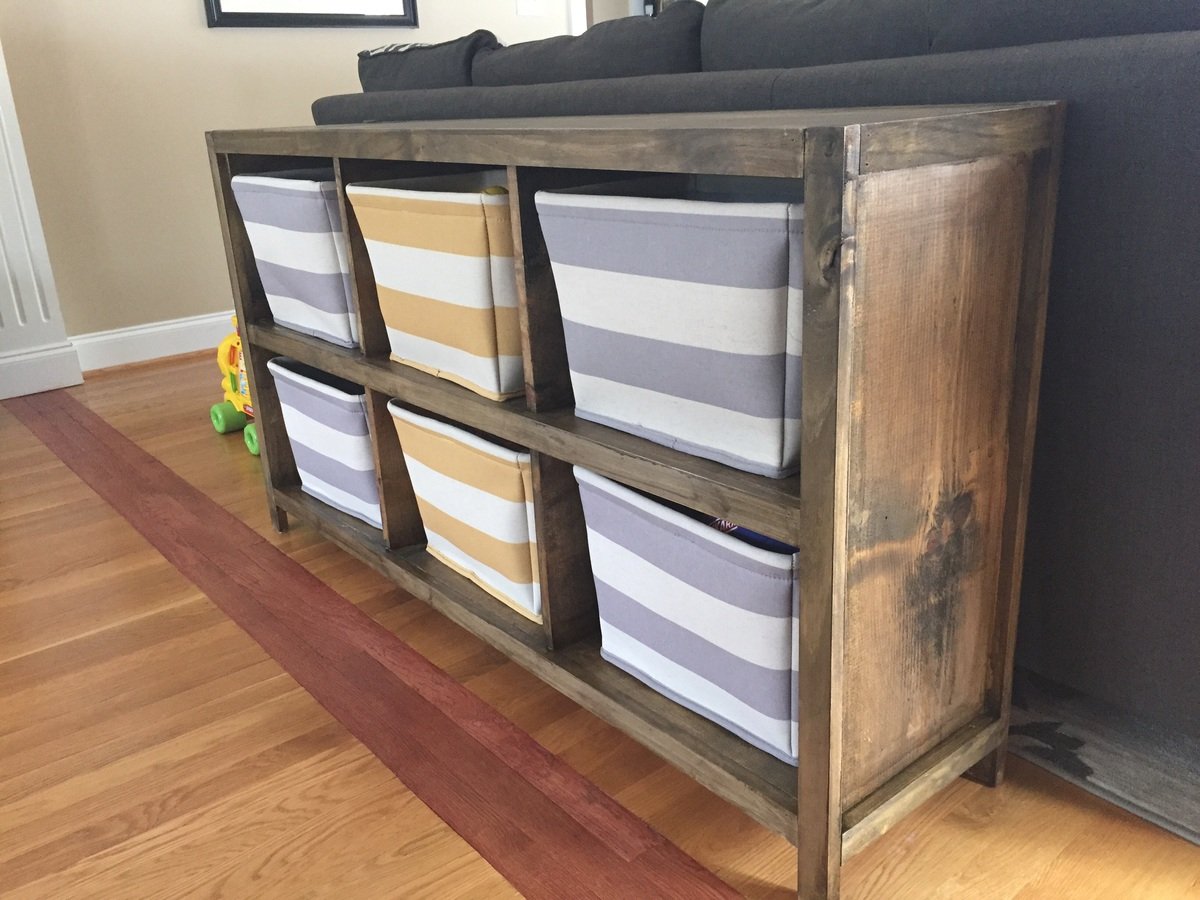
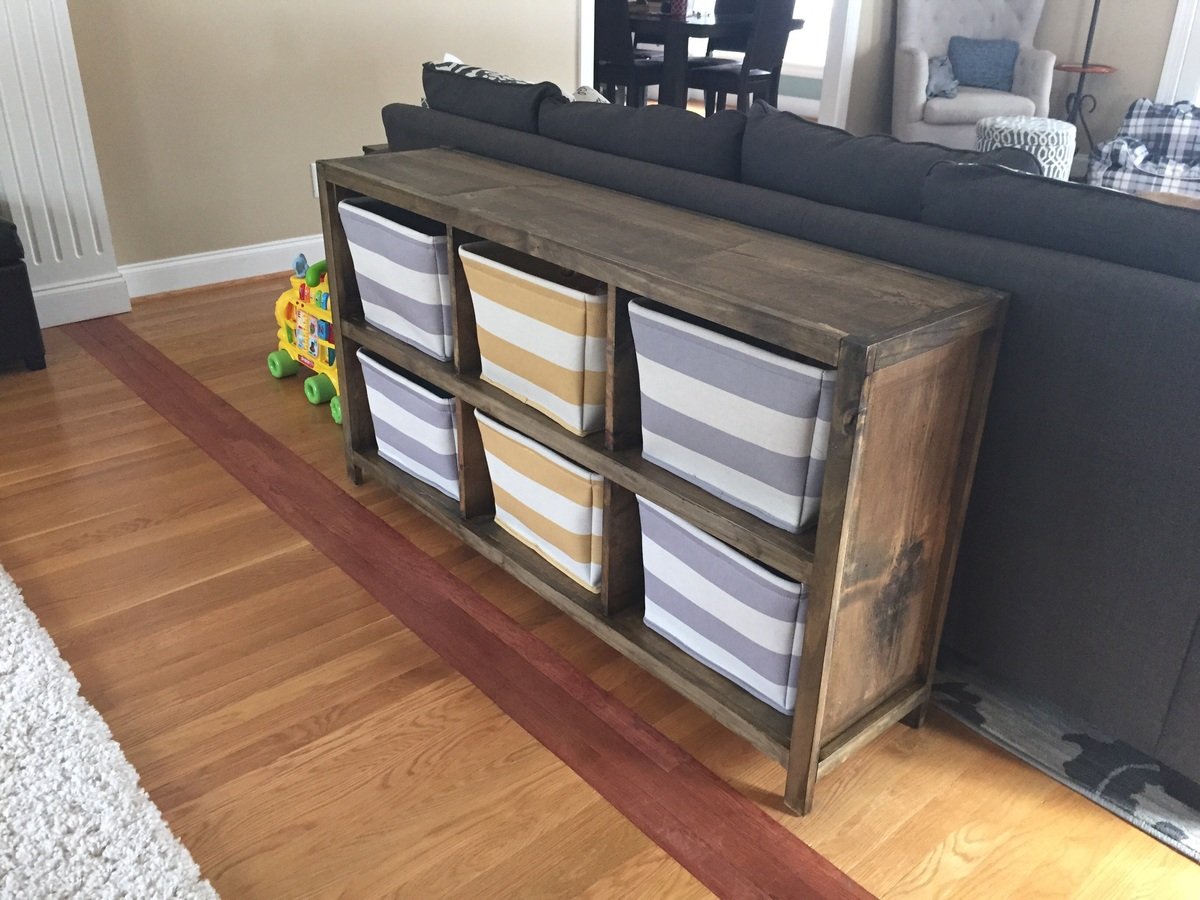
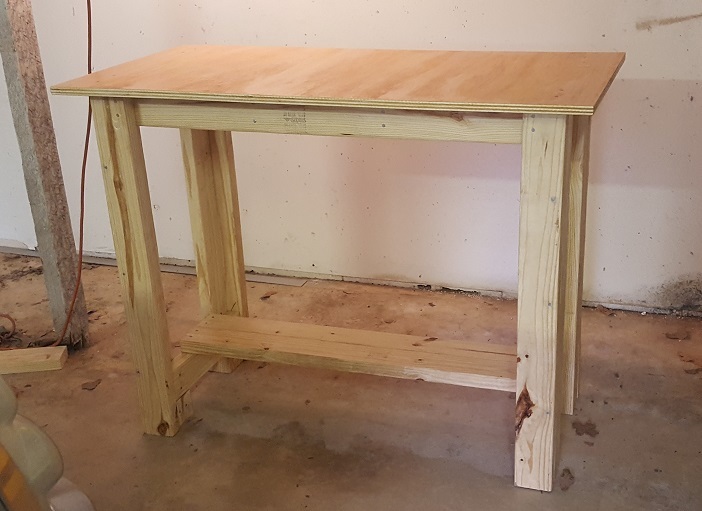
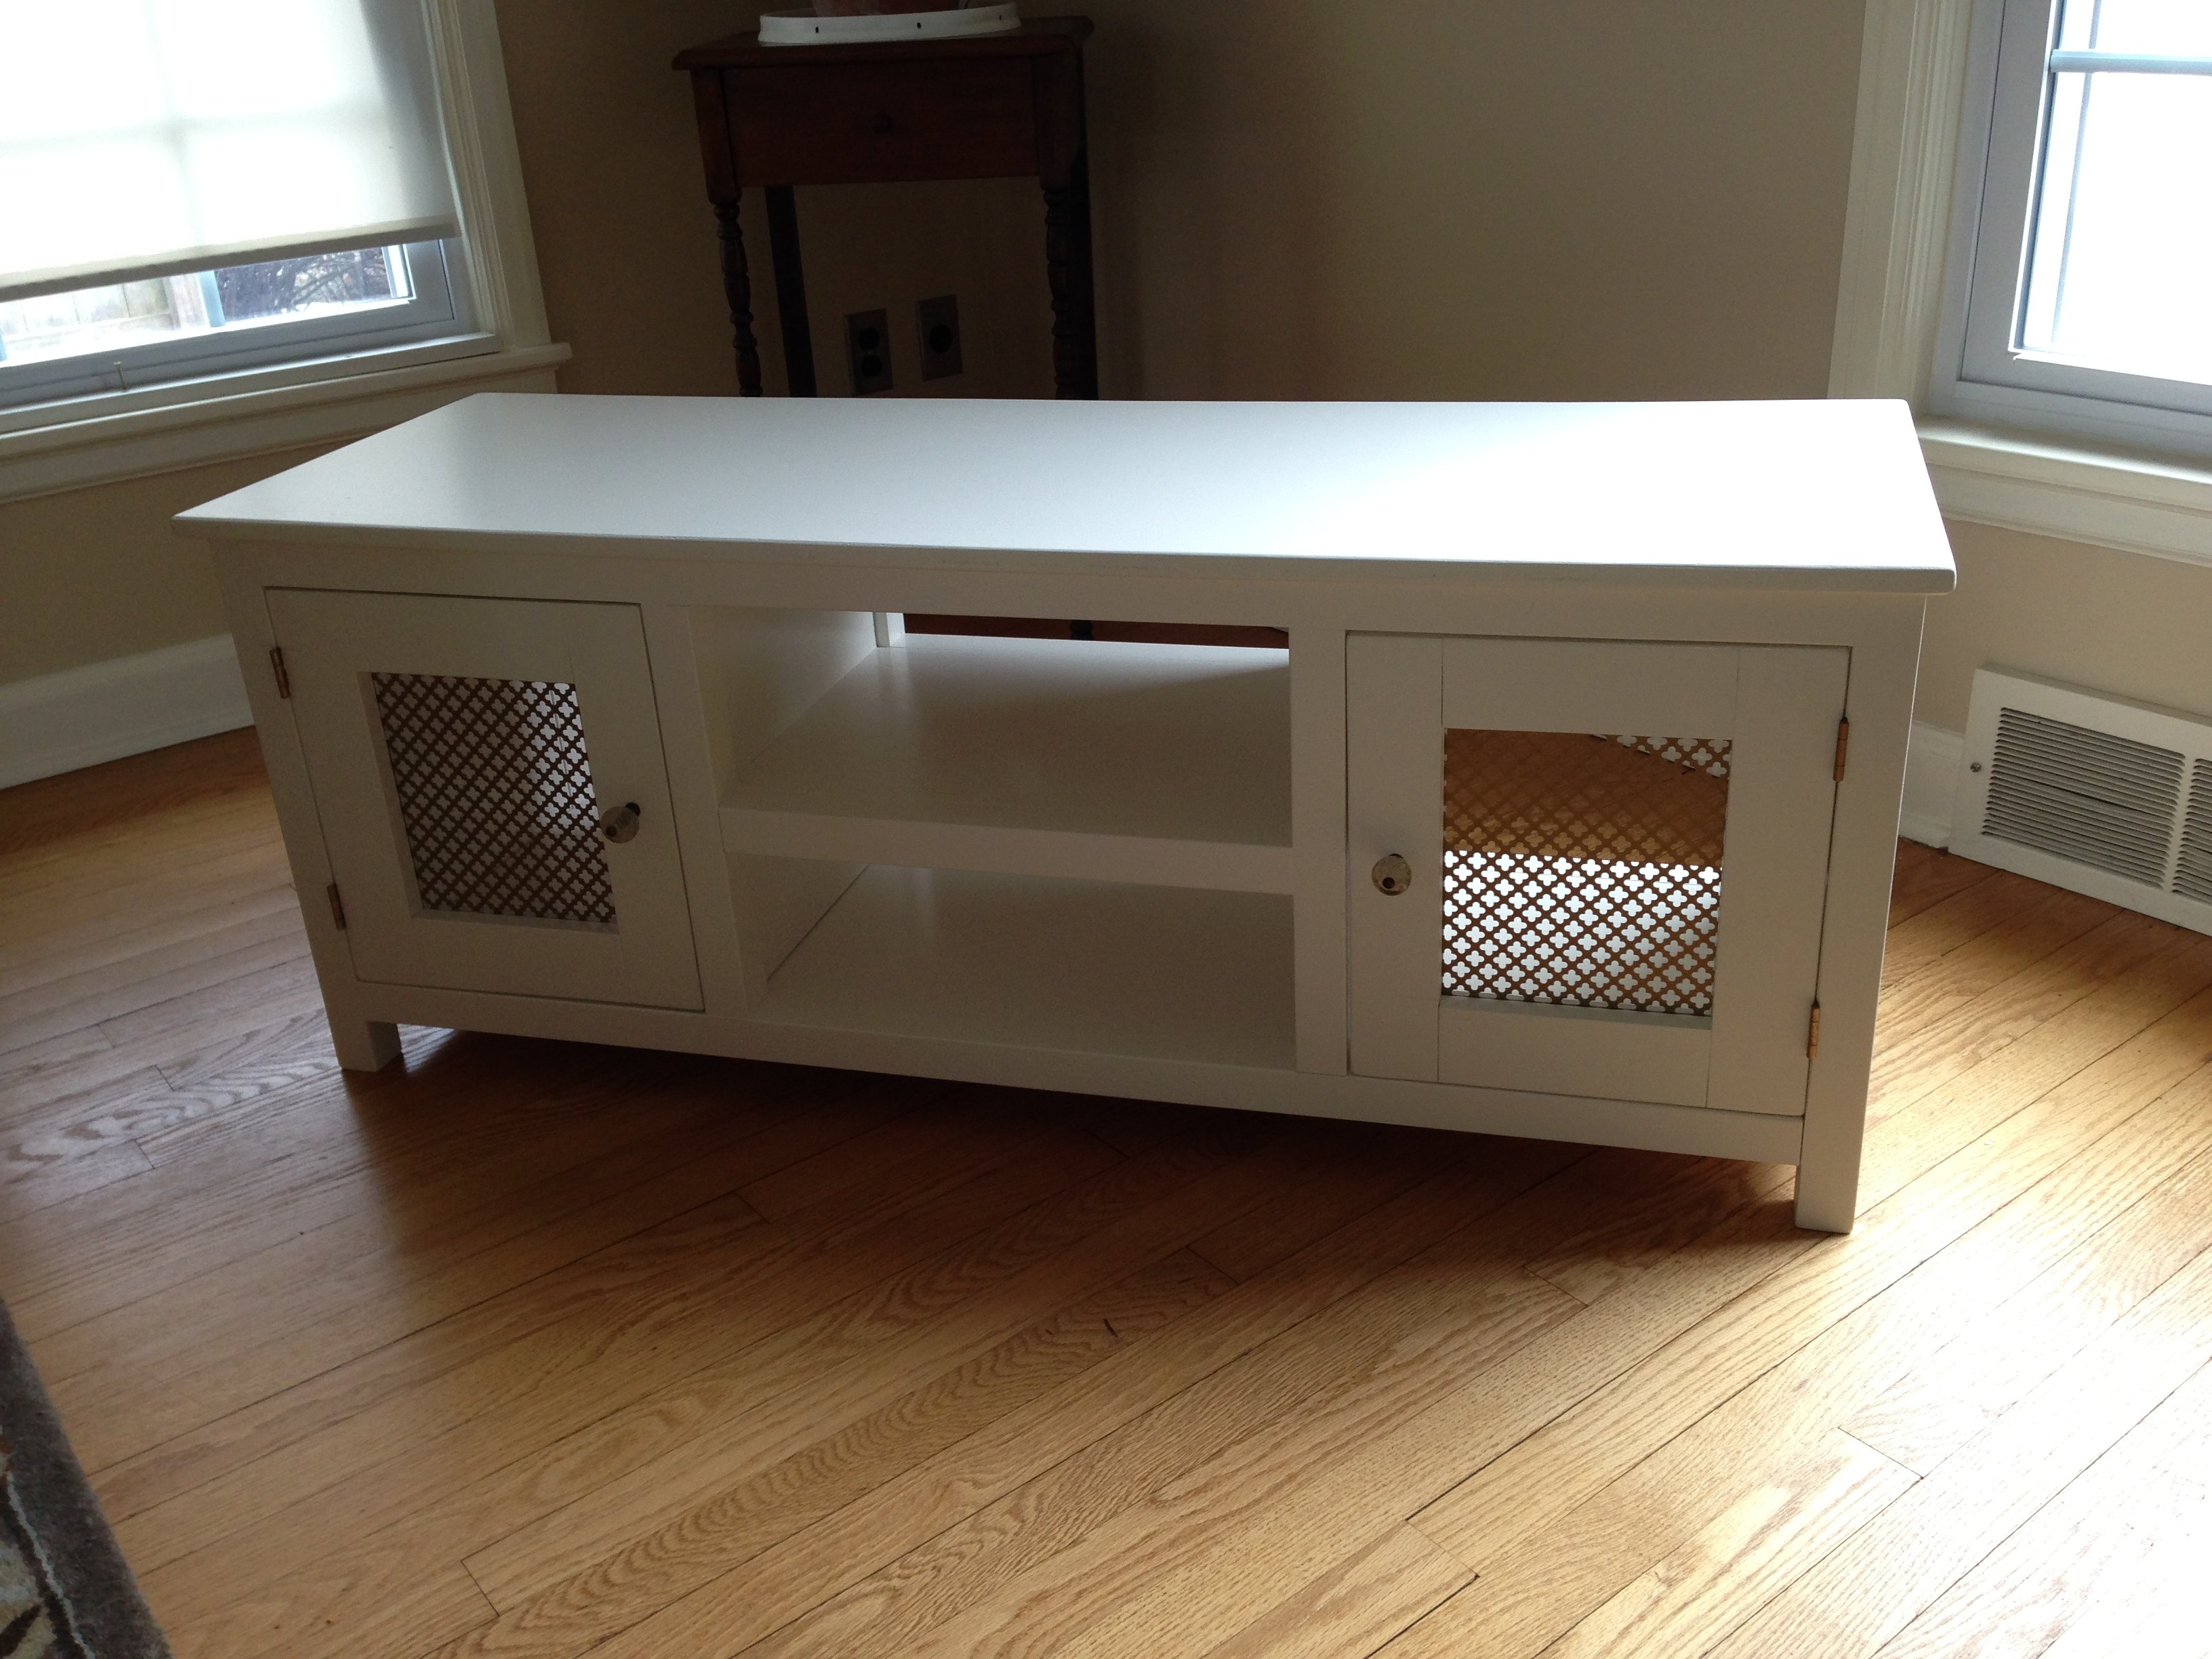
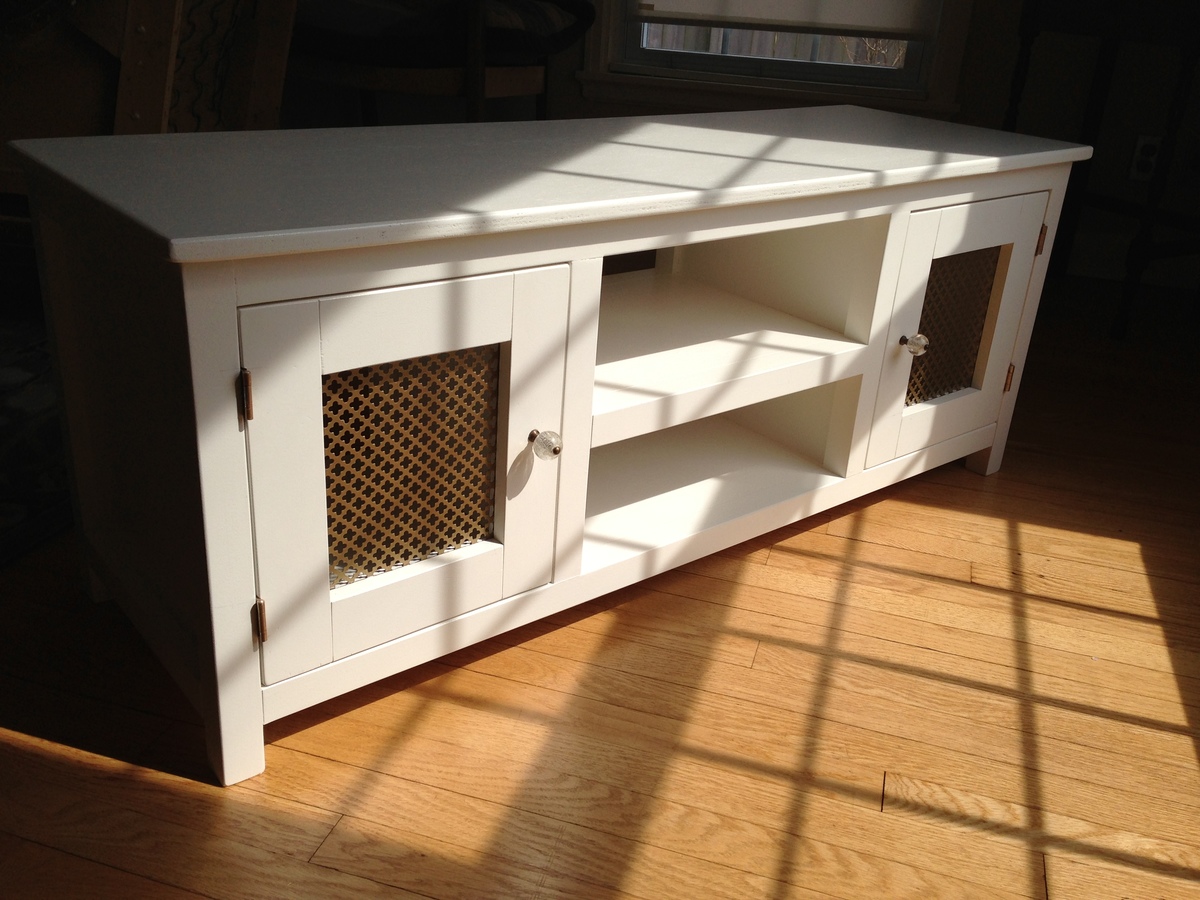
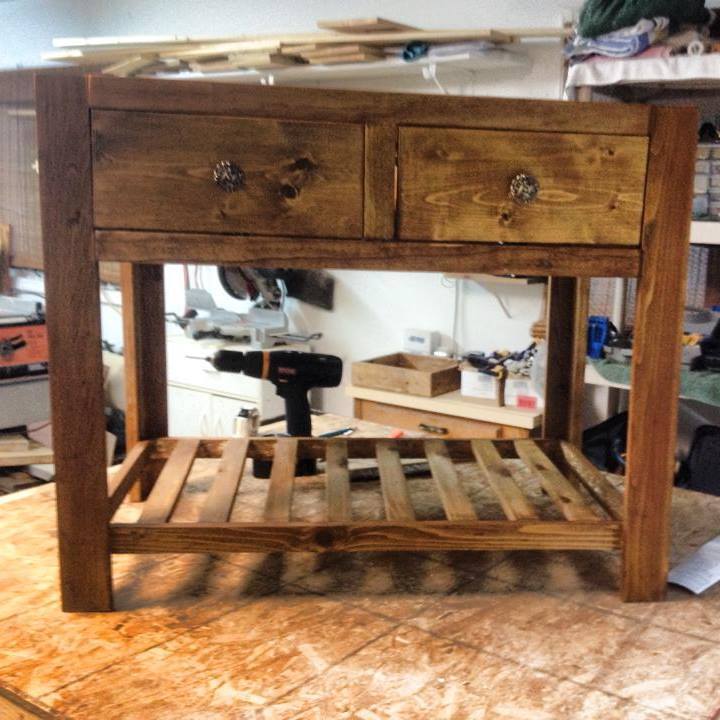
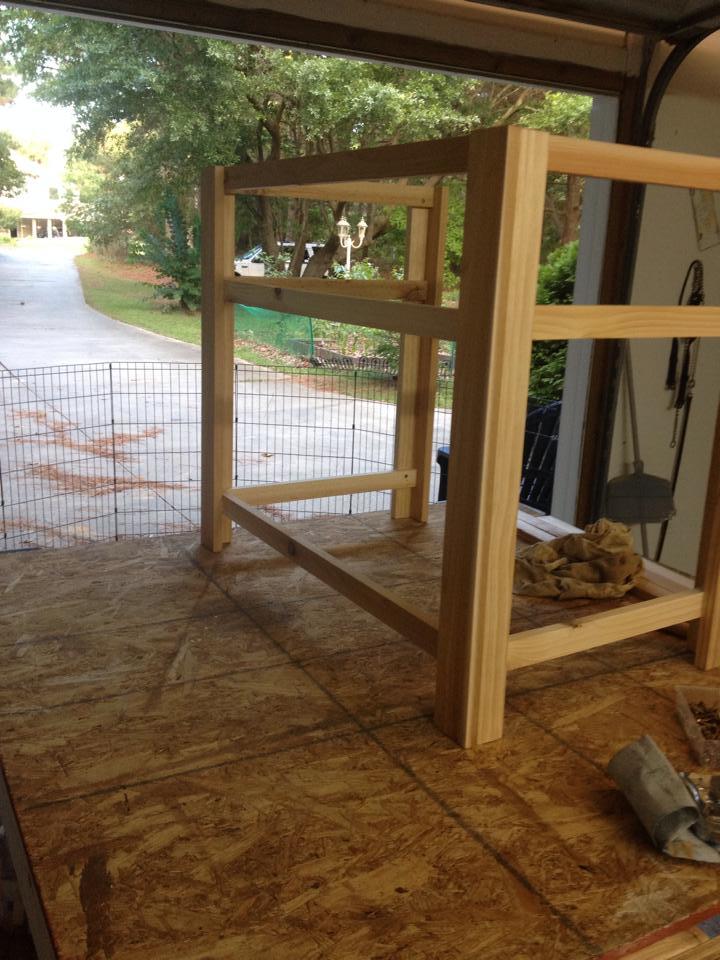
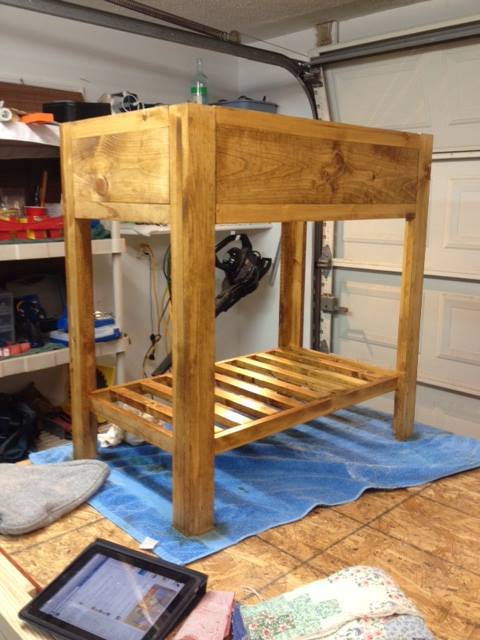
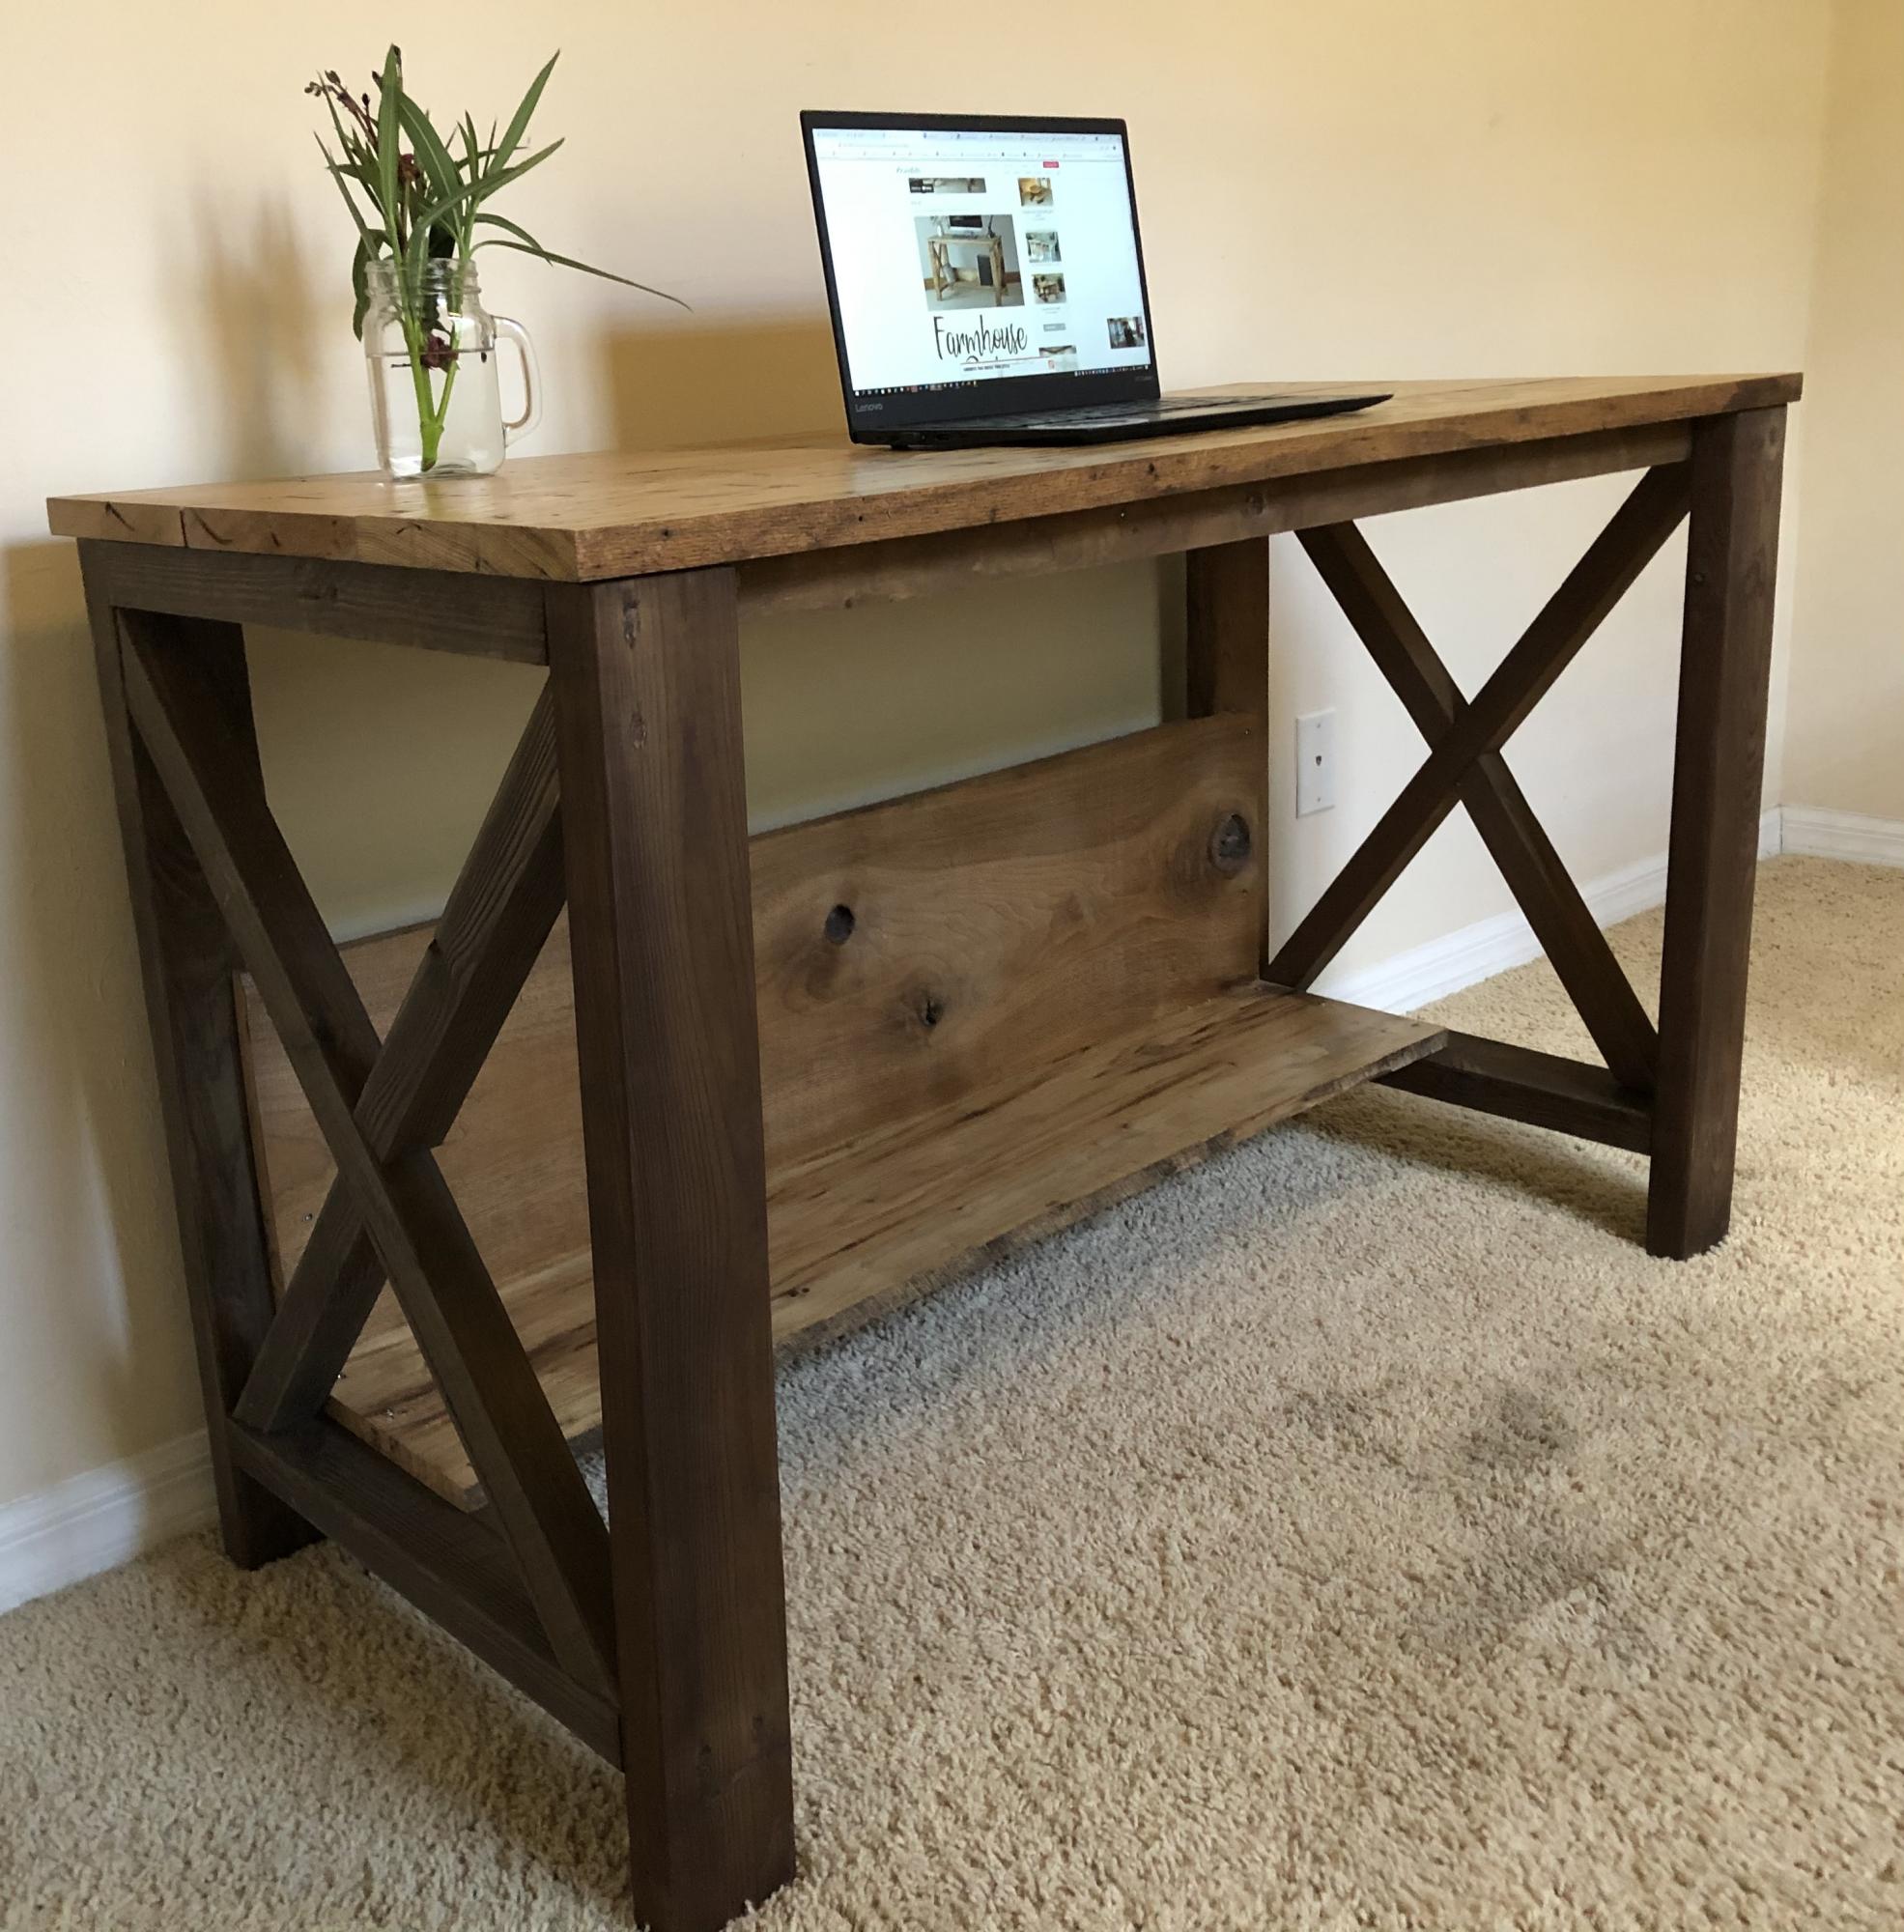
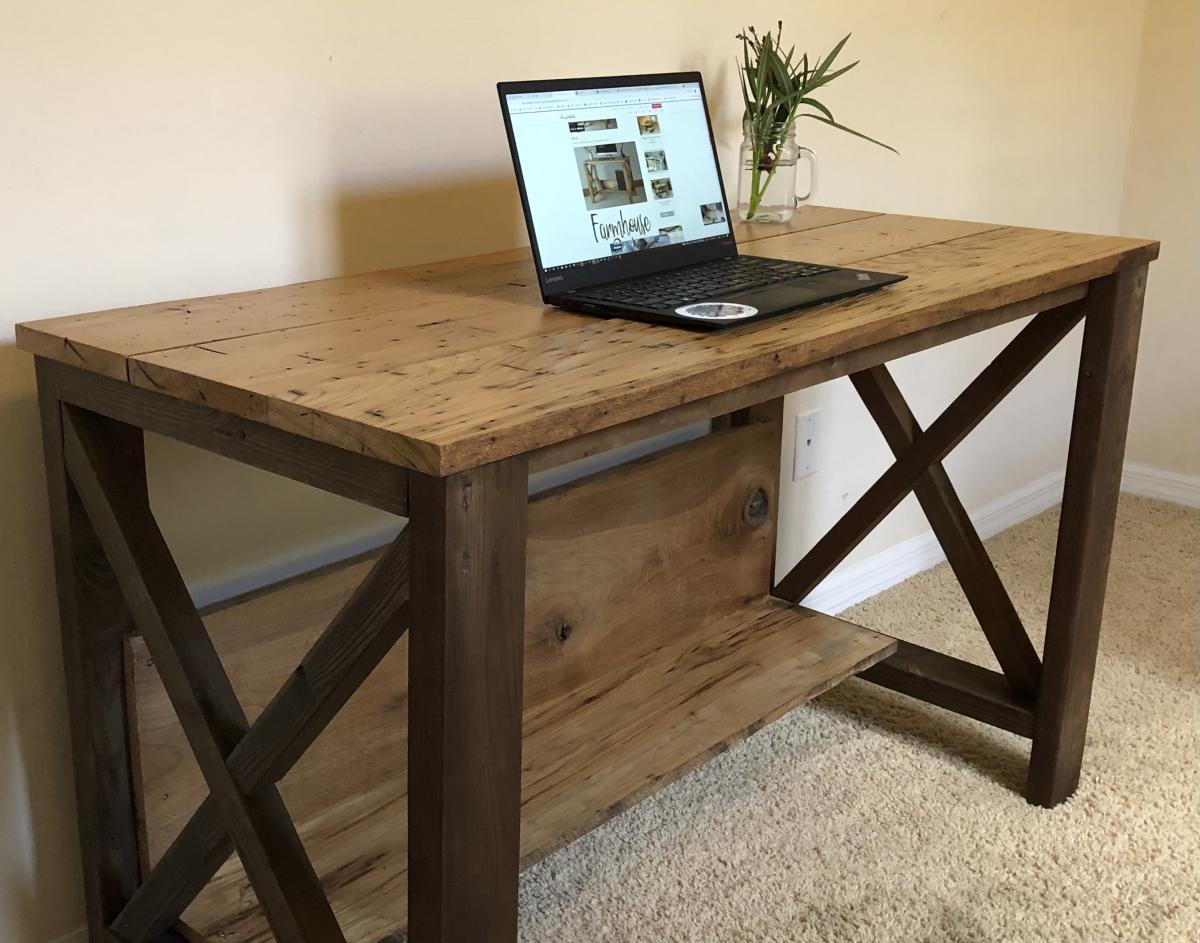
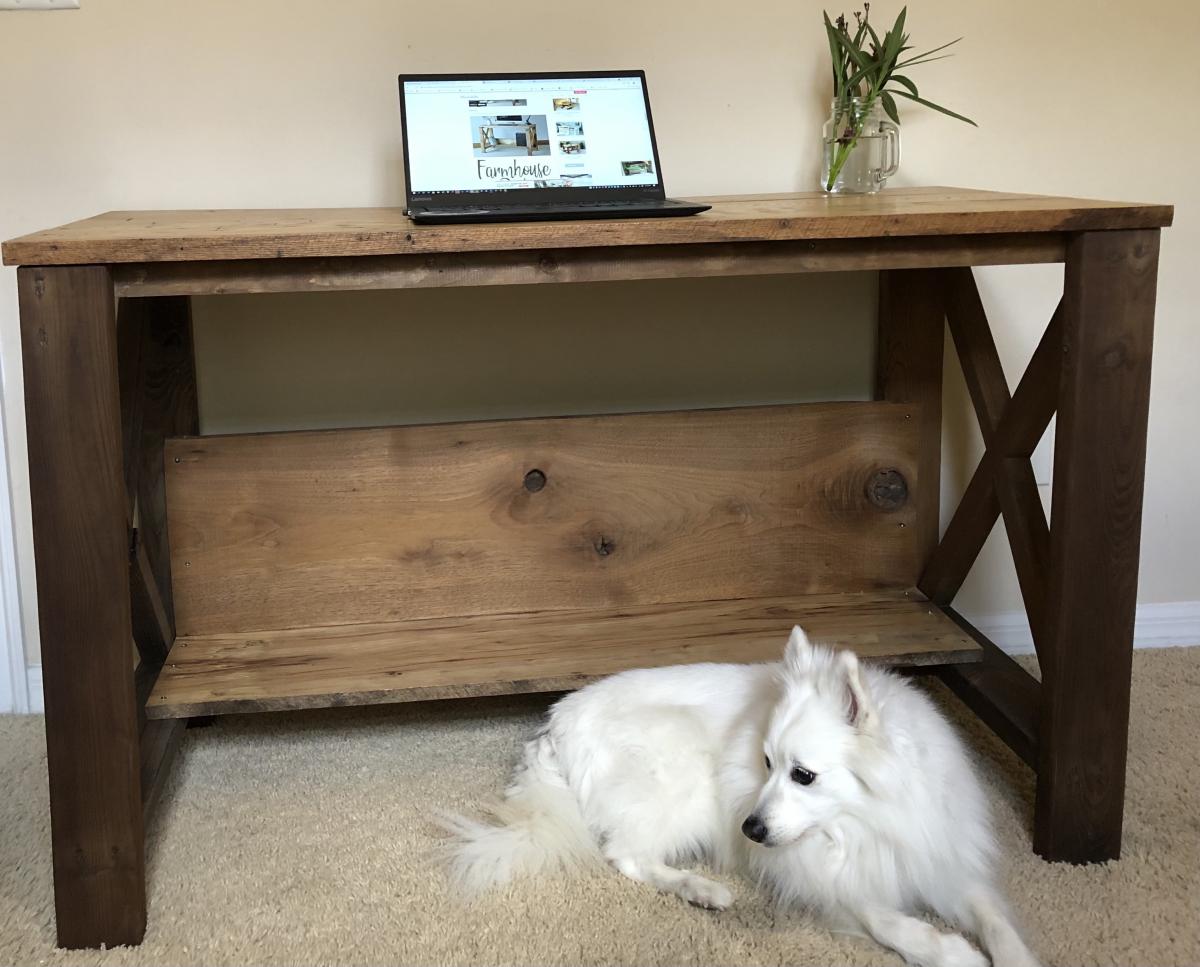
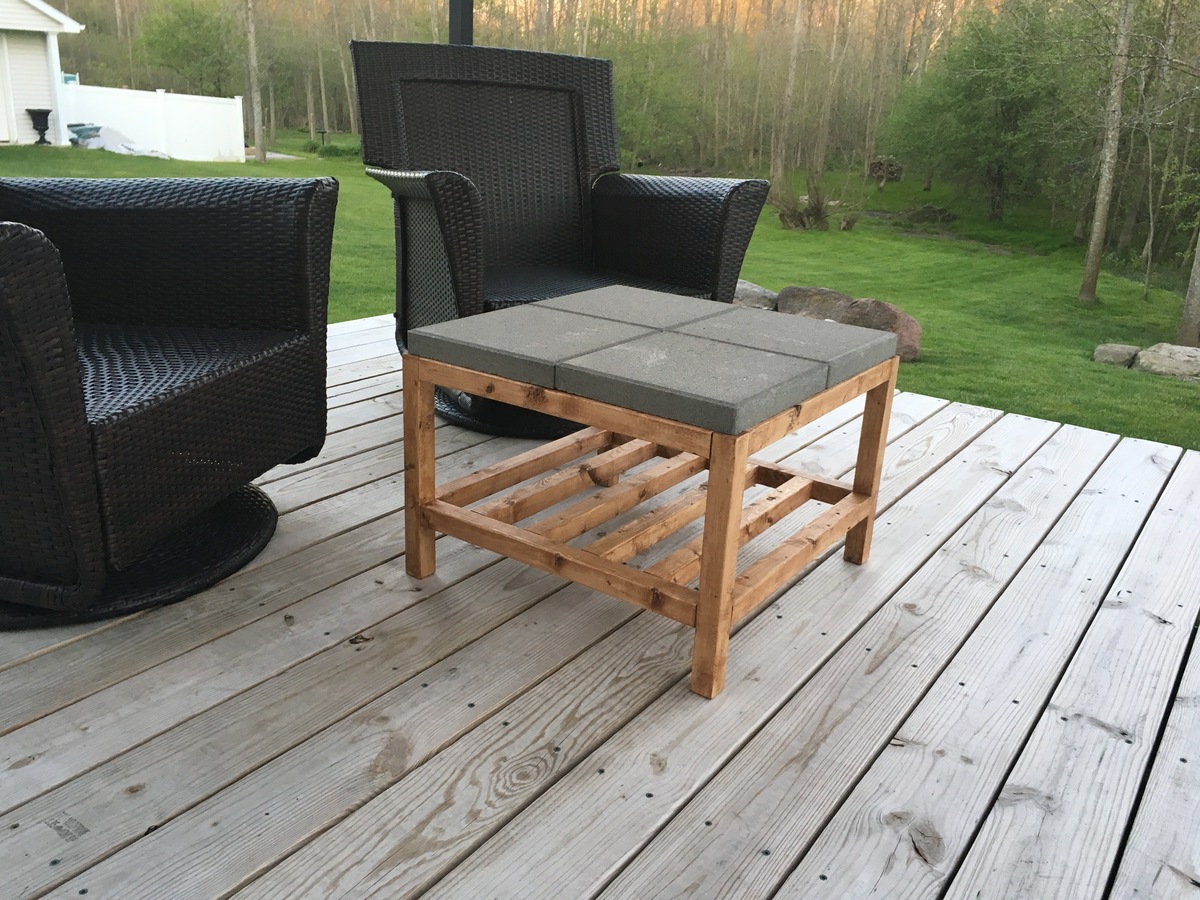
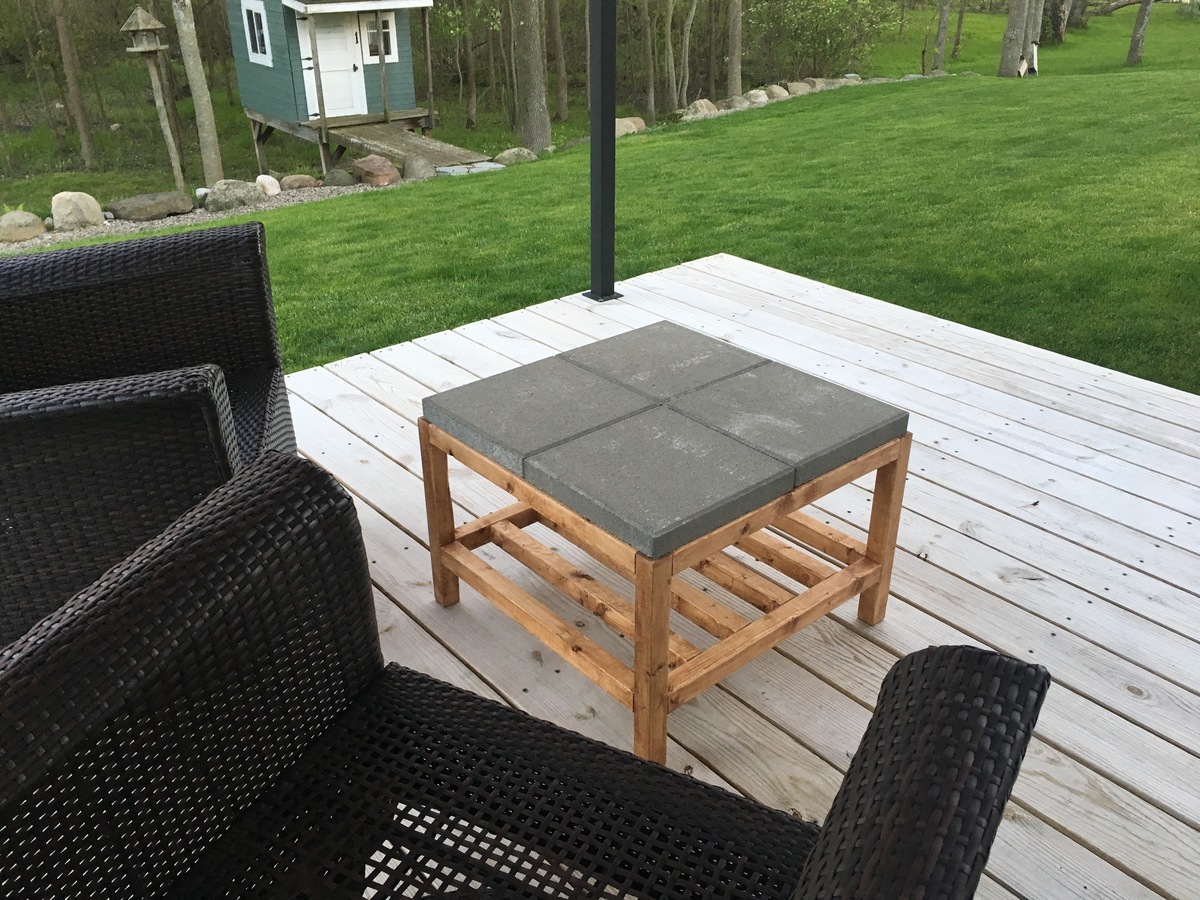
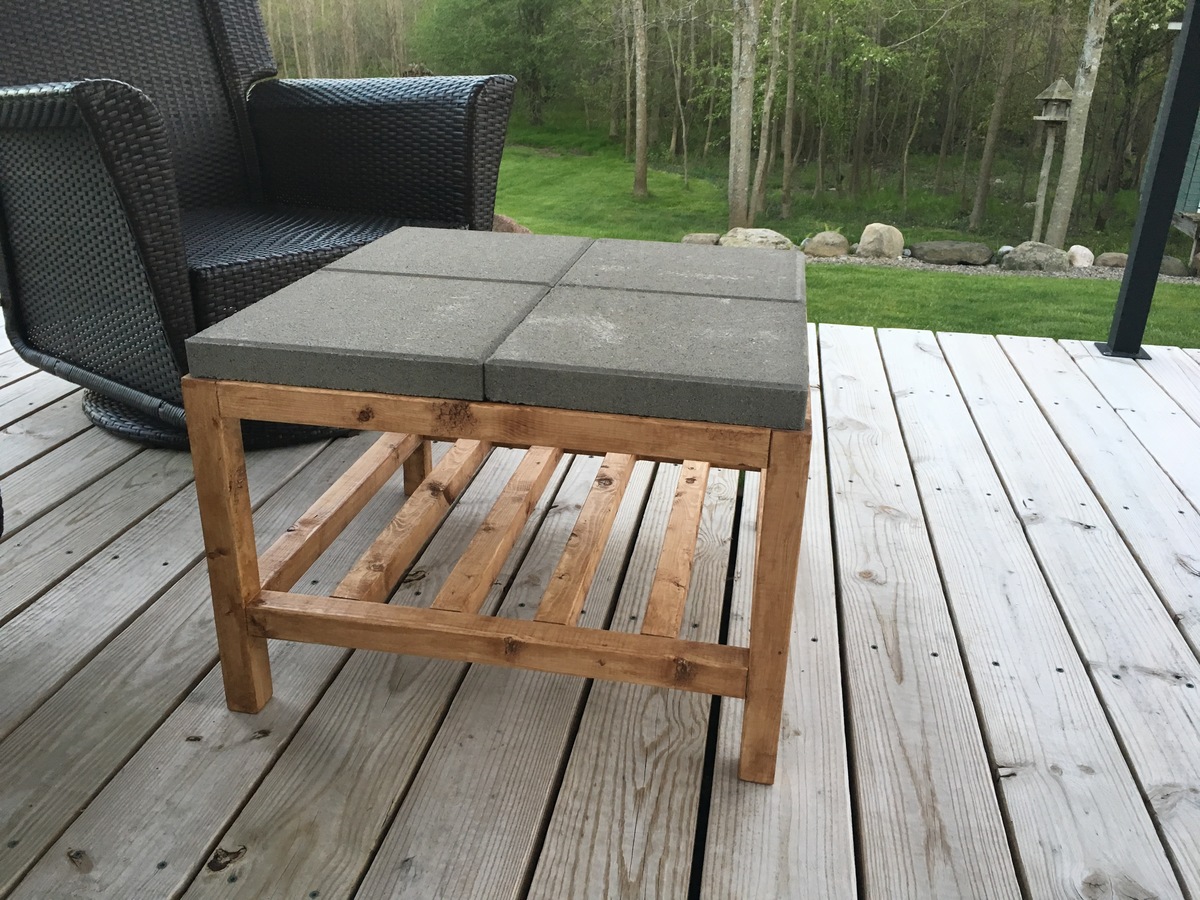
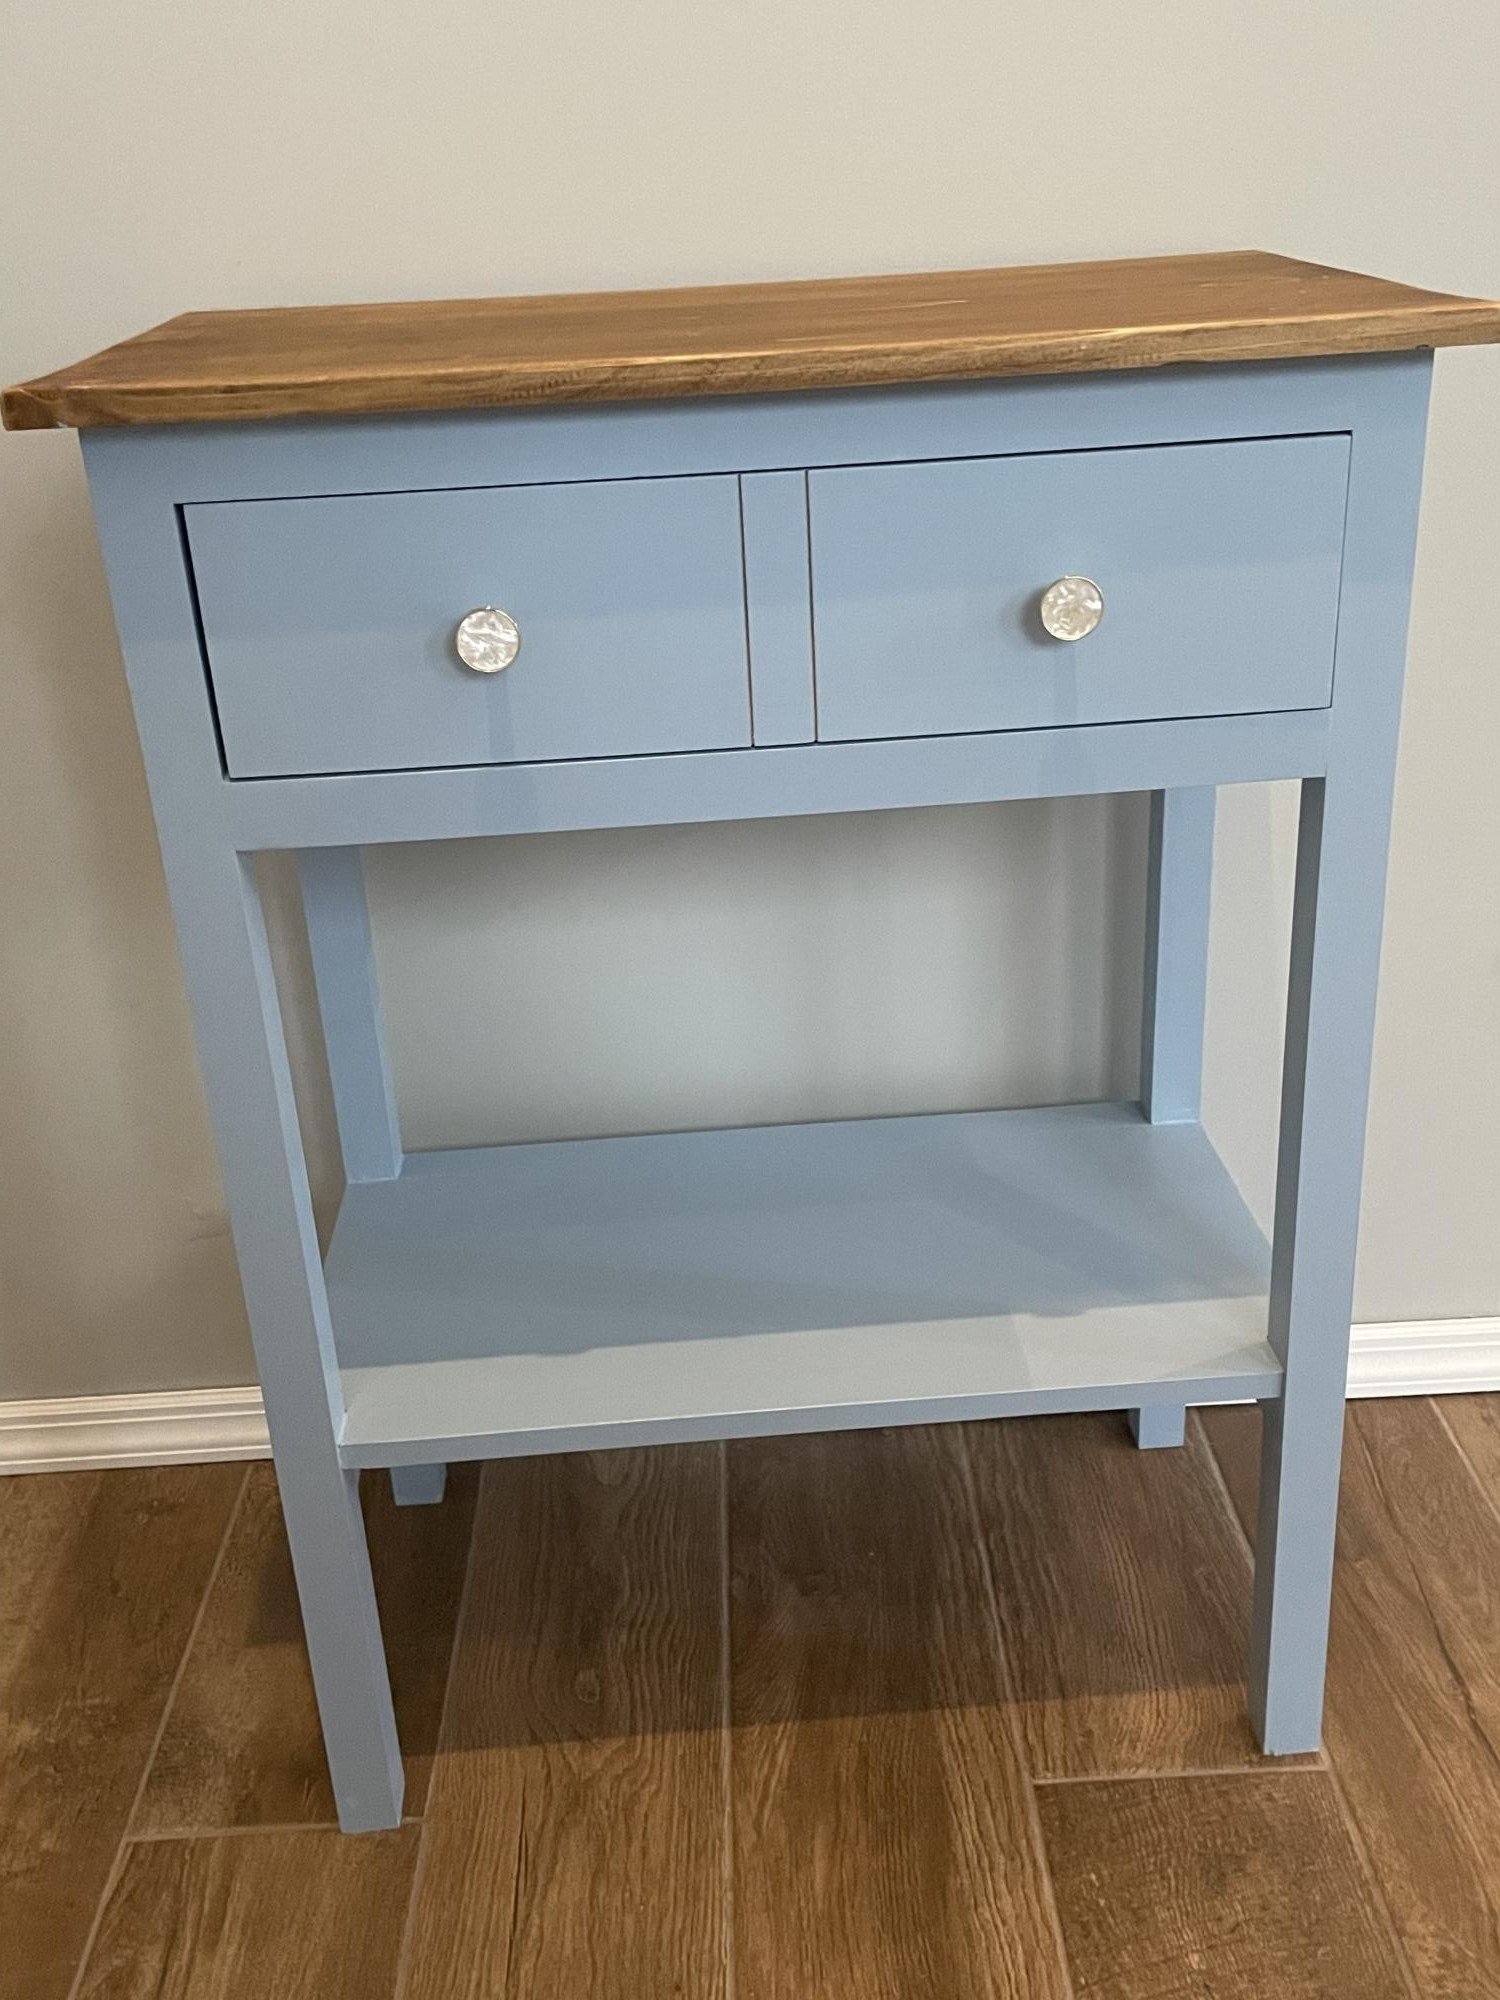
Community Brag Posts

Shirley Table

This is 2 different shirley console tables .  I did both out of pine boards and golden oak stain.  One I used wax on and the other poly.  

Built from Plan(s)
Estimated Time Investment
Weekend Project (10-20 Hours)
Finish Used
Golden Oak, Poly on one of them. Wax on the other.
Recommended Skill Level
Intermediate

Pub table

Submitted by Anonymous (not verified) on Sat, 05/13/2017 - 07:07

A full write up of this build, including photos & dimensions, is here: http://imgur.com/gallery/YyawW

Built from Plan(s)
Estimated Cost
The wood cost $40.
The Kreg K5 pocket hole jig cost ~$130.
The stain & polyurethane cost ~$15 total.
The lag bolts + washers + nuts cost ~$10 total.
Estimated Time Investment
Weekend Project (10-20 Hours)
Finish Used
1) Sand all individual pieces (prior to assembly) by hand. I believe I used only 60 grit sand paper, because I wanted to retain the look of lumber.
2) Varathane brand stain; color "Early American." Applied with a rag, not a brush.
3) Varathane brand Triple Thick Polyurethane; satin finish. Applied with a rag, not a brush. Polyurethane applied to the 2x6 table top surface boards only (i.e. I did not apply polyurethane to the table's skirt or to the table's legs).
4) Lightly sand the dried polyurethane by hand with 300 grit sand paper to obtain a smooth-to-the-touch surface finish.
Recommended Skill Level
Beginner

Farmhouse Desk with Wormy Chestnut

Submitted by csolanzo on Mon, 05/17/2021 - 10:37

I just completed my first build (#AnaWhiteFarmhouseDesk). It has a ton of mistakes, but they are my mistakes to learn from.
1. Measure twice cut once not measure once cuss twice.
2. Cutting 2x4s in half does not make a store bought 2x2. Which is really 1 1/2 x 1 1/2. Who determined that we would measure wood (used in carpentry which requires very precise measurements) and just round up? Awwe, they'll figure it out!
3. Steelwool & vinegar stain with a black tea conditioner provide a beautiful aged wood appearance, but when using different types of wood it is nearly impossible to match (maybe even store bought stains are like that, too.)
4. When your 95 yr old grandfather (how freakin' cool is it that I have a 95 yr old grandfather... With a planer no less) tells you to catch the "wormy Chestnut planks" on the other side (okay... I'm bragging about getting my hands on wormy Chestnut for my desk top) remember to bring you own PPE because at 95 he doesn't require ear protection and doesn't give a frog's fat a$# if sawdust shoots in your eyes & nose... What's the problem???? He never had a new pair of shoes until he was in the military serving in world war 2 so what's a little sawdust?
5. Sometimes you just need to ask for help from your trusty uncle! Thanks to my uncle Nathan (Lord do I love this man!) I finally, with his help, completed the build by assembling the desk top yesterday. I was so afraid of screwing up my gold desk top (aka wormy Chestnut)
6. Mistakes... Do not fear them, but rather embrace them because that is life's playground where learning happens.
7. Learn from others. Thank you Ana White, Woodworking for beginners members FB group and YouTube!

Built from Plan(s)
Finish Used
Steelwool & vinegar stain with a black tea conditioner provide a beautiful aged wood appearance for the body.

Desktop and shelf hardwoods were given a few layers of had rubbed poly.

Red Hen Home's Farmhouse Table and Bench

This is the third farmhouse table I built, although it is trifle smaller to fit in a smaller space. I think this one is just about 62” long. I also built a 48” bench to go along with this table, and I think they look so cute together!

Estimated Cost
100
Estimated Time Investment
Day Project (6-9 Hours)
Finish Used
Custom mix of Minwax Antique Walnut and Weathered Oak. Finished with hand-rubbed polyurethane, followed by paste wax.
Recommended Skill Level
Beginner

Comments

smitty22

Tue, 04/16/2013 - 08:59

I love your farmhouse tables! Did you make any changes to the plans when you took away the stretchers? I really want to make a table like this soon!

Shorted 4x4 Truss Beam Table

Submitted by ClayCox86 on Mon, 02/16/2015 - 13:19

Shorted this length of the table by 6 inches to fit the available space. Came out great. Tip: If using pine, after stain dries, gently sand again with high grade paper to remove raised ridges after wood has absorbed stain, but not hard enough to remove stain. This will help make the eating surface much smoother to the touch. 

Built from Plan(s)
Estimated Cost
$110 dollars in wood. $50 in new equipment, sandpaper, stain, and gloss.
Estimated Time Investment
Weekend Project (10-20 Hours)
Finish Used
1st coat: Steel Wool (grade 0) and vinegar (Let sit 3 plus days, the longer the better);
2nd coat: MinWax: 1-qt. PolyShades Antique Walnut Gloss Stain and Polyurethane in 1 Step;
Last coast: 2 coats of Rustoleum Ultimate Polyurethane in Matte
Recommended Skill Level
Intermediate

Comments

Simple Paver Coffee Table (patio)

Submitted by Anonymous (not verified) on Tue, 05/16/2017 - 09:15

Ana,

I was looking for a Mother's day project that I could build with my 14 year old son. When I saw your share on Pinterest, I figured this would be perfect.  There were a limited number of pieces (in terms of sizes/lengths) and the construction was pretty basic.

We purchased our pavers at Lowe's and found that they only sold 11 7/8" pavers (after our build).  However, the 1/4" reveal around the border of the pavers turned out to be a terrific little detail. You would think it was on purpose.

As always, keep up the great work and sharing. 

WoodworkCity

Estimated Cost
$20
Estimated Time Investment
Afternoon Project (3-6 Hours)
Finish Used
Polyshade
Recommended Skill Level
Beginner

Comments

slamarca

Wed, 09/13/2017 - 07:12

Hi Ana,

Could you please tell me if you sealed the pavers. 

Thanks so much for all the inspiration you have given me!!! I am going thru a very difficult time and don't see it getting better anytime soon, you helped me find myself and my passion. When I feel like I can't take another day, I go to your webisite and find one of your projects. Building gets my mind off of everything and a little break in all the worring.  I just can't thank you enough!

Thank you Ana,     Susan 

Farmhouse table

Submitted by lilh_18 on Thu, 05/27/2021 - 20:42

Adjust the height slightly. Easy to follow plans, quick project.

Built from Plan(s)
Estimated Time Investment
Weekend Project (10-20 Hours)
Recommended Skill Level
Beginner

Comments

Baseball bat headboard w/ farmhouse style footboard.

Submitted by jbayer80 on Sat, 04/06/2013 - 11:21

I found a baseball bat headboard that I wanted to make for my son...thankfully I found this website that has helped me so much. I BUILT every piece of furniture my in sons room, crazy!

I had a blast doing and have no plans on stopping.

Estimated Cost
$250 for everything
Estimated Time Investment
Week Long Project (20 Hours or More)
Finish Used
AS chalk paint. @ $36 a can, I will be making my own from this point forward.
Recommended Skill Level
Beginner

Comments

mrpaulperry

Wed, 07/31/2013 - 07:54

That looks awesome!

What site did you use to build the headboard?

Where did you get the wood bats? I'm struggling to find a cheap option for those.

Thanks

In reply to by mrpaulperry

jbayer80

Sat, 01/18/2014 - 20:52

There wasn't a plan for the headboard. I found a picture a few years back and knew I wanted to make it for my son. I can take measurements of everything and let you know but I got the bats then just did what looked best.

I searched high and low for bats in local stores and online. I ended up finding the best and cheapest online. I did my best to find old, used bats but couldn't find all the right sizes for what I wanted so I just got new bats.

kpmcmullin

Wed, 08/19/2015 - 14:50

Hi- do you have the plans and measurements you used to make this headboard and bed? Thanks!

Benchright Coffee Table

Submitted by jessem491 on Fri, 02/20/2015 - 15:01

I used Douglas Fir instead of pine, which increased the cost but I love the warmth of the wood in this piece.  The instructions were pretty easy to follow once I got going, and the longest part of it was the staining process.  I love this piece and I'm ready to do another one!

Estimated Time Investment
Weekend Project (10-20 Hours)
Finish Used
I used Cabot's Espresso with 3 coats to get the darker, warmer tint I was looking for. I like the Cabot Espresso because it's a water-based stain & sealer, and because it dries REALLY fast.
Recommended Skill Level
Advanced

Office Desk

Submitted by Anonymous (not verified) on Sun, 05/21/2017 - 08:24

Thank you Ana for all of your woodworking plans. I have made several now and this desk is my latest. I stuck with the plywood for the file cabinets and went with an ash top panel made from 8" wide boards in order to practice some jointing and planing. The stain is minwax honey finished with 7 coats of poly. Again, thank you.

Estimated Cost
$300
Estimated Time Investment
Week Long Project (20 Hours or More)
Recommended Skill Level
Intermediate

Easy Frame and Panel Doors

Submitted by skydogda on Tue, 02/24/2015 - 04:17

Needed to outfit an antique center island with some doors because our cookware was constantly getting dirty and having to wash before using. Followed the panel, rile and stile plans and ended up with some pretty decent cabinet doors. I would say that this style of creating doors while may seem easier due to not needing many tools (circular saw and kreg pocket set is about all you need), is actually intermediate because the panels have to be cut EXACTLY right or you will have gaps in your door. I remedied this with the help of my old friend wood putty, but this limits the doors since they must be painted. If your big box home improvement store has a COMPETENT worker (sometimes those are hard to find) you just might get some panels cut well enough, although I myself know how 1/8's of an inch add up crying
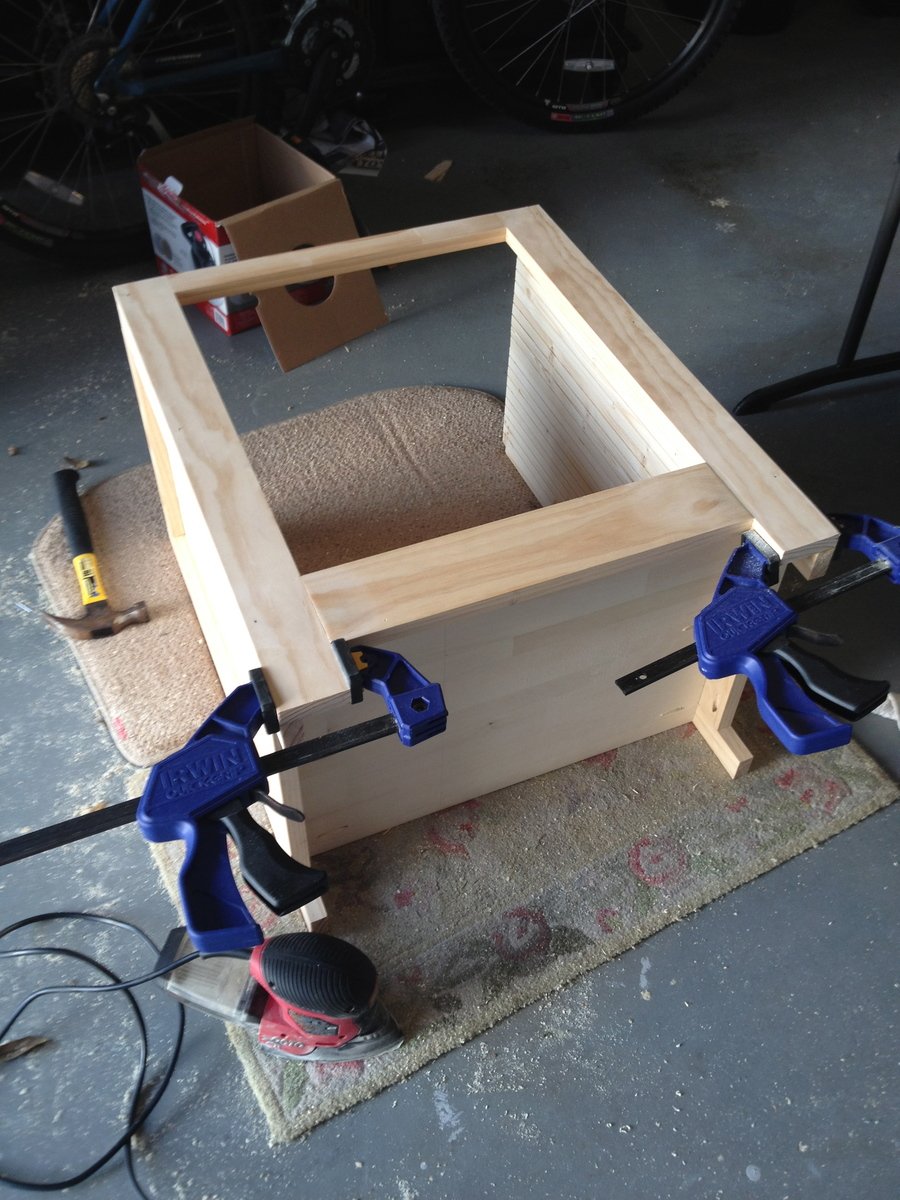
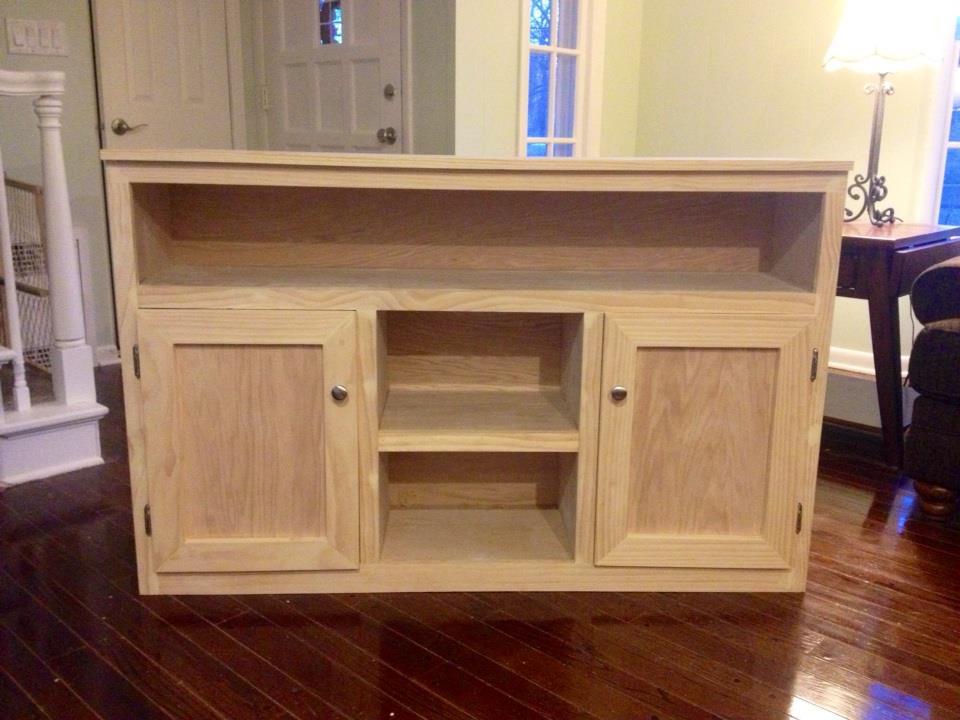
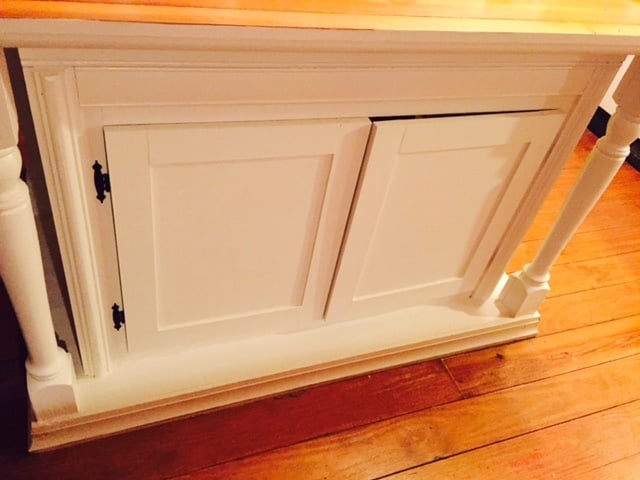
. If you do decide to get someone else to cut the panels bring your tape measure and verify the cuts are accurate.  Anyway I have created doors both the traditional rile and stiles with inset panels and this way and this way is definitely quicker!

NOTE: I haven't installed any catches or handles thats why the door is slightly open.

Great Way to Spruce Up Your Kitchen!


-Martin

Built from Plan(s)
Estimated Cost
$50 for 4 doors
Estimated Time Investment
Afternoon Project (3-6 Hours)
Finish Used
Semi-gloss Cappuccino White Valspar Ultra
Recommended Skill Level
Intermediate

Comments

Rustic Modern Platform Bed

Submitted by Anonymous (not verified) on Tue, 05/23/2017 - 12:48

We loved this bed much! And others loved it so much that the people who purchased our home requested to keep the bed frame as well. I guess we'll be building it again. We used a vinegar/steel wool solution to oxidize the wood and then sealed it with a natural finish (rubio-monocoat 'cotton white'). Thank you for these plans!

Finish Used
vinegar / steel wool + rubio monocoat cotton white,
Recommended Skill Level
Beginner

octagon lazy susan

1st time working in walnut, 1st time using my miter saw for more than 90 degree cuts!

Estimated Time Investment
Weekend Project (10-20 Hours)
Finish Used
Old Master's Gel Stain Dark Walnut, Waterlox

Comments

"Cube" storage unit

Submitted by kds199 on Fri, 10/14/2022 - 09:49

My wife and I wanted a nice way to hide more of our son's toys in the living room that didn't look tacky. We actually bought the cubby bins before even deciding what to make. (From target of course.) I made the bookcase out of wood shelving that already looked kind of beat up when I bought it knowing that the wood stain wood bring some character to it.

I only changed the plans slightly by making the legs flush with the inside so I could trim the ends and customizing the size of the cubby openings to fit the bins. (Mine aren't actually cubes.)

Built from Plan(s)
Estimated Cost
$60
Estimated Time Investment
Afternoon Project (3-6 Hours)
Finish Used
2 coats of stain...minimal sanding to keep the surface looking rough
Recommended Skill Level
Beginner

Handmade by Jungle Jim

Submitted by Anonymous (not verified) on Sat, 05/27/2017 - 15:11

Great plans, Ana. Very easy to build. A good project for someone like me who has no carpentry experience.

Built from Plan(s)
Estimated Cost
$25
Estimated Time Investment
Day Project (6-9 Hours)
Finish Used
Polycrilic
Recommended Skill Level
Beginner

Easy 8 ft shelves

Submitted by jeff.meyer on Wed, 06/16/2021 - 20:18

Easy picture frame shelves.

Built from Plan(s)
Estimated Cost
24.00
Estimated Time Investment
An Hour or Two (0-2 Hours)
Finish Used
white paint
Recommended Skill Level
Starter Project

Comments

Media Cabinet

Submitted by scidster on Sun, 04/14/2013 - 10:35

Modified the size to be 42" (w) x 16" (d) x 19" (h). Used radiator covering grate for door inserts and left shelves open for horizontal component storage.

Built from Plan(s)
Estimated Cost
130
Estimated Time Investment
Week Long Project (20 Hours or More)
Finish Used
Behr Swiss Coffee and minwax polycrylic top coat. Applied using Wagner HVLP sprayer (#518080). Pulls from Hobby Lobby.
Recommended Skill Level
Beginner

Storage daybed with bookshelf

Submitted by Quinnfire on Mon, 03/02/2015 - 14:18

I made 3 cubbies underneath and left off the doors. I'm still looking for fabric bins to go under there. Instead of doing the bottome arm, I made a bookshelf so there would be more storage space in this little room. I love how it turned out.

Estimated Cost
$150
Estimated Time Investment
Week Long Project (20 Hours or More)
Recommended Skill Level
Intermediate

Seesaw for my daughter Milica

Submitted by Anonymous (not verified) on Wed, 05/31/2017 - 01:25

Seesaw for my daughter Milica!
Thank you Ana for the idea.
Greetings from Serbia.

Built from Plan(s)
Estimated Cost
15€
Estimated Time Investment
Afternoon Project (3-6 Hours)
Finish Used
Belinka: Belles (for impregnation, 1 layer) + Toplasur UV Plus (3 layers) No.
Recommended Skill Level
Beginner

Comments

Seasonal And Holiday

Closet

Submitted by bpkliver on Sat, 06/26/2021 - 07:40

This was originated from an Ana closet build. There were bypass closet doors that I am still converting to hinged doors. I added the drawers in the center to eliminate the need for a dresser in the room. Doors should be ready in a couple weeks. I’m converting the bypass door to hinged, which is a project in itself!

Estimated Cost
$500
Estimated Time Investment
Week Long Project (20 Hours or More)

Comments