DIY Shed

8’ by 12’ shed with extra 15” of height. Thanks for the plans!
Built from Plan(s)
8’ by 12’ shed with extra 15” of height. Thanks for the plans!
Cedar wood Chaise Lounge Set
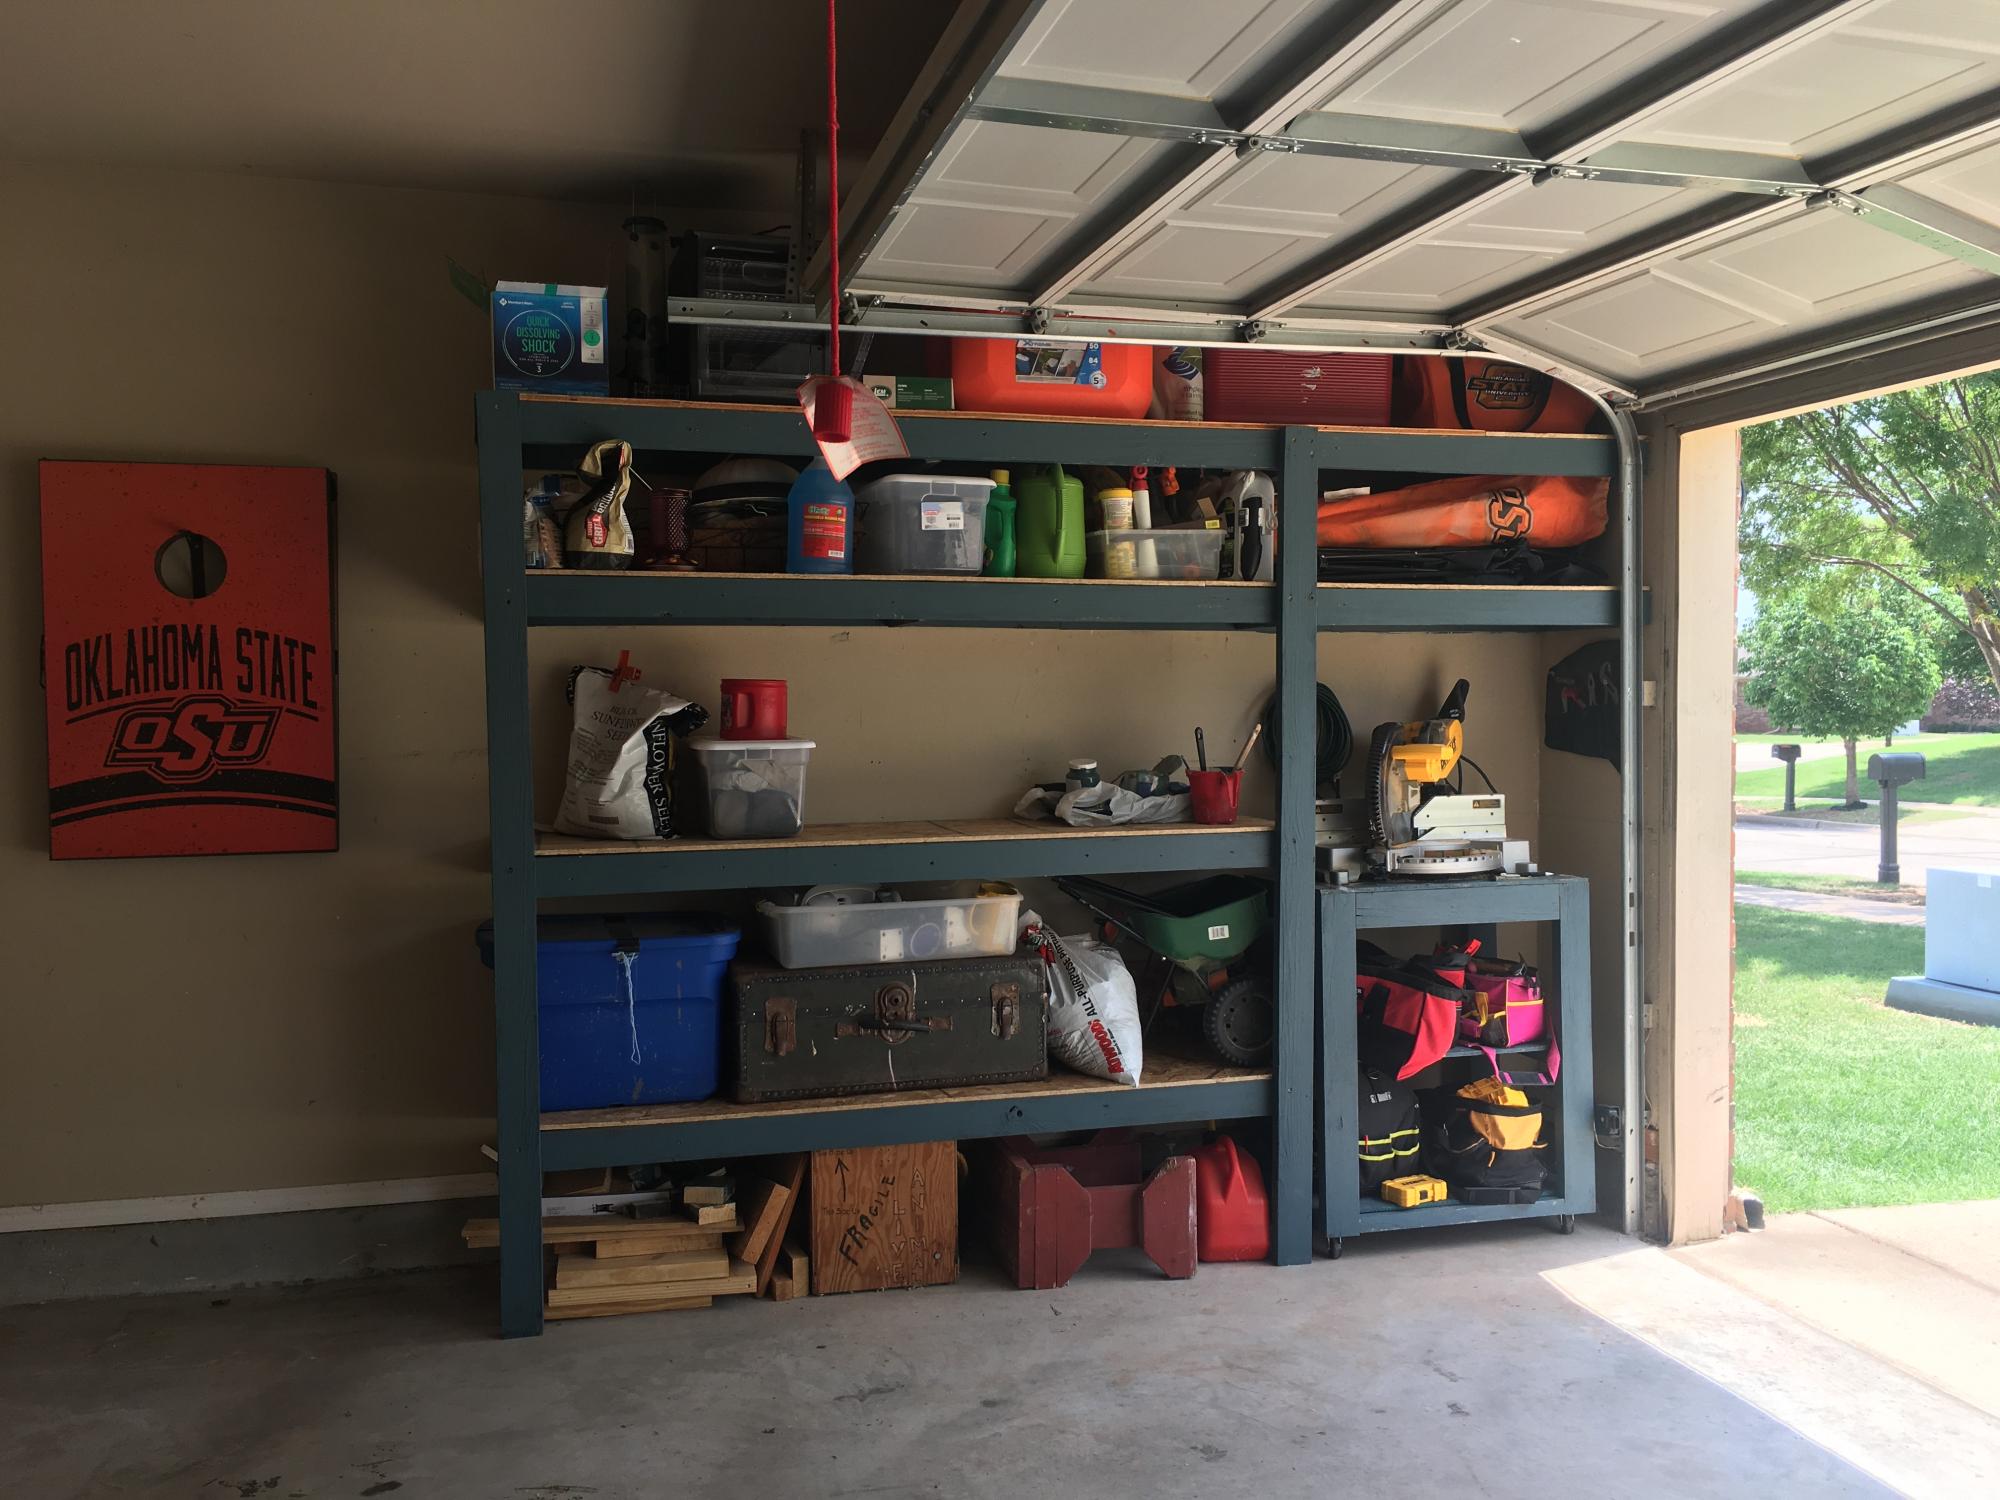
I based these plans off of the garage storage shelf plans and built a cart for my miter saw that is on wheels.
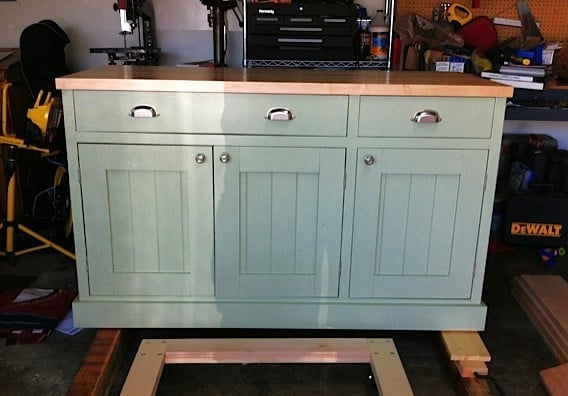
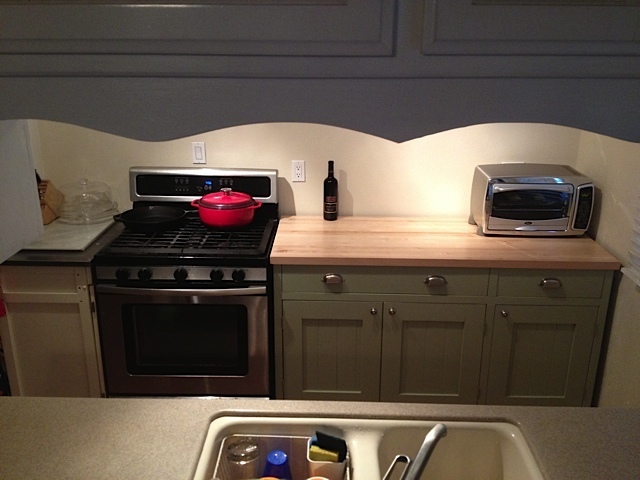
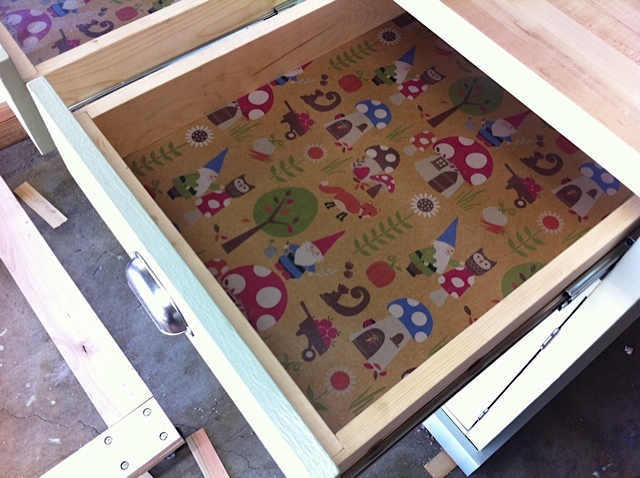
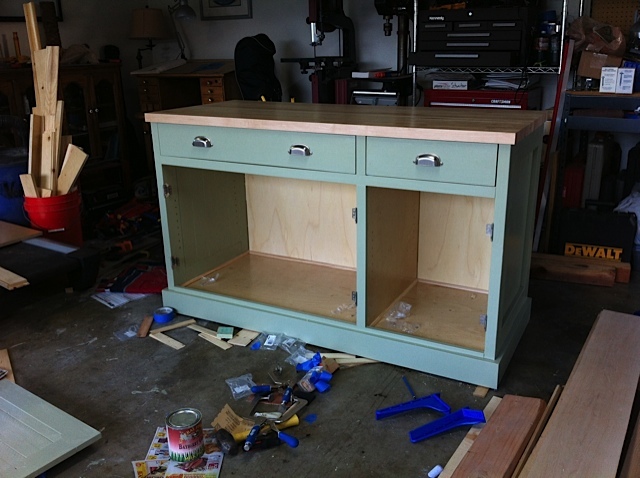
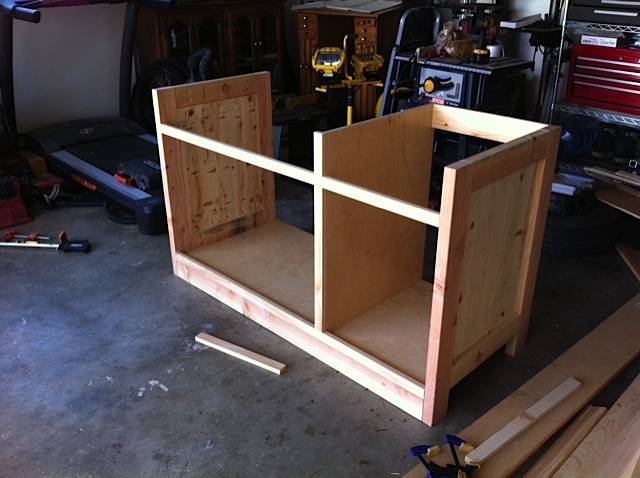
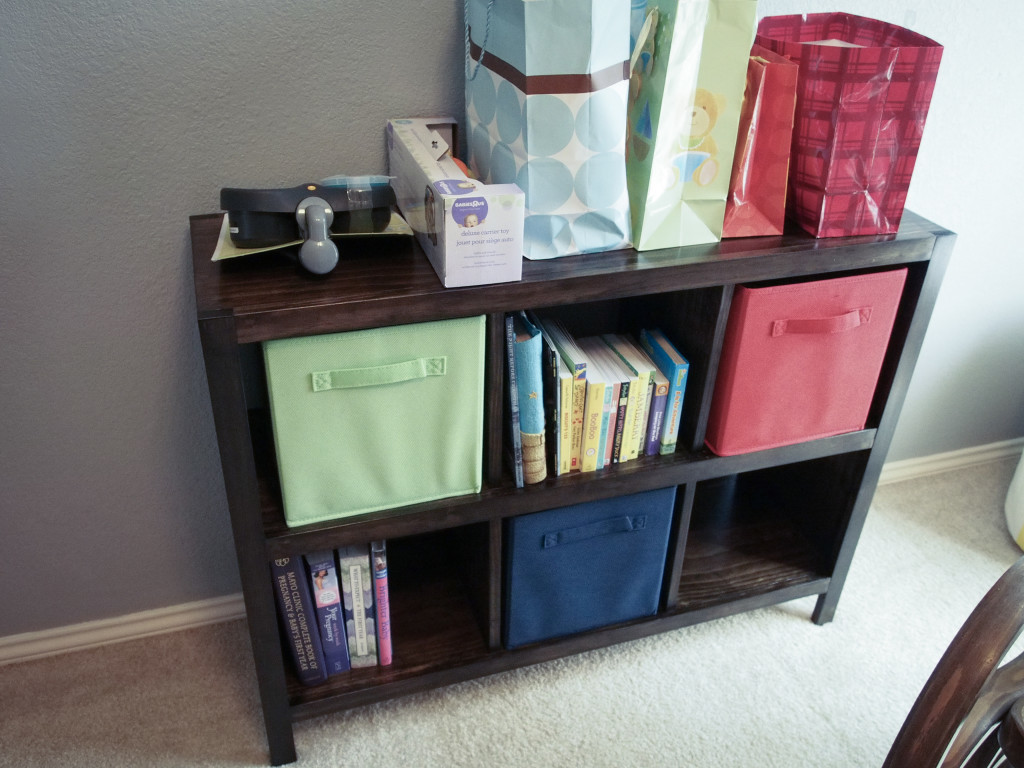
We had an area in our kitchen where the washer and dryer use to be, and we wanted to build a cabinet that would fit in that spot. We took these plans and adjusted the sizes to fit the space we needed. We made the depth deeper and we cut off one of the side drawers and doors. We found a pre-made 1 1/2 inch butcher block counter top at a local wood supply warehouse that fit our needs perfectly. The countertop was about a quarter of the price of the whole cabinet, but it was worth it. In the drawers we used wrapping paper that we found at Cost Plus which fits us to a "T". We painted it with General Finish Milk Paint in Bayberry Green and used a clear coat with a satin finish. My biggest advice to someone making this cabinet is to take your time and make sure everything is square.
Mon, 07/02/2012 - 10:10
You've done a beautiful job! What did you find was key to getting everything square?
This is lovely & has inspired me to make my own. I need a piece for my master bedroom that I can use as a TV stand and also to conceal my laundry baskets. Originally I'd planned on adapting a sideboard and using a tip-out door like Ana's trash bin for the laundry -- but this piece is so beautiful I may just ensure that my laundry basket will fit inside and build as-is so that I can easily have the option to use it differently if I want to.
Wed, 07/11/2012 - 19:42
Love your modified sideboard! The color is gorgeous and the butcher block is a great addition!
I was wondering what kind of hinges you used. I looked for flush mount hinges at Lowes today and they are not going to work. I want it to look like yours where you can barely see the hinge.
Do you remember the name of it? Where you got it? Pic? Any help would be appreciated!!
Dustin Roberts
[email protected]
Wed, 07/11/2012 - 20:15
Thank you very much. We had a really hard time finding hinges also. We tried Home Depot and Lowes and came up empty. We finally went on to Hillary Louise's blog and follow the links to the website where she bought her hinges. http://www.cabinetparts.com
Here are the links that she posted.
http://www.cabinetparts.com/p/amerock-traditional-cabinet-hinges-AMCM31…
http://www.cabinetparts.com/p/amerock-traditional-cabinet-hinges-AMCM31…
We just bought ours in a different color.
Sat, 09/08/2012 - 13:14
My husband & I are looking to build our own too but the dimensions of the original plan would make it too big for our dining area. Yours would be a perfect size though - would you mind posting the size adjustment for yours? Or could you email it to me? I would be forever grateful :)
Love the color you painted it too....very nice choice!
Sat, 09/08/2012 - 13:18
My husband & I are looking to build our own too but the dimensions of the original plan would make it too big for our dining area. Yours would be a perfect size though - would you mind posting the size adjustment for yours? Or could you email it to me? I would be forever grateful :)
Love the color you painted it too....very nice choice!

Sat, 01/19/2013 - 11:37
This is exactly the size down I had in mind and was wondering how it would look with one door off by itself, it looks great! I even thought about incorporating one door to actually be a tilt or pull out for trash. You guys did a wonderful job and it looks like it was built in where you ended up putting it in your kitchen... Are you going to do a little something now to match on the other side of the stove?
Wed, 07/31/2013 - 17:36
Really well done. I'll be clearing out the garage getting ready for this very soon. Do you happen to have a cut list or measurements?
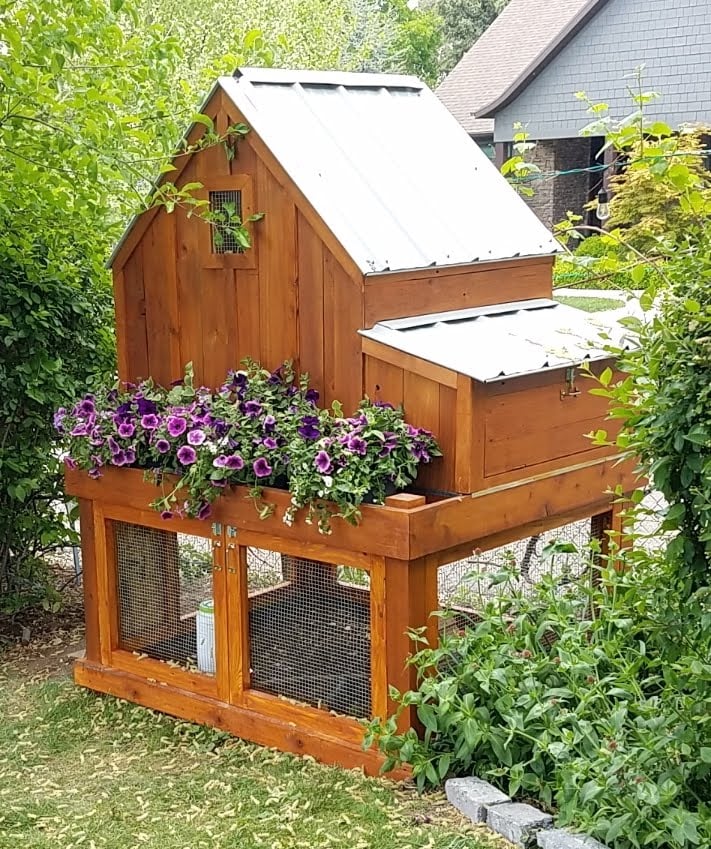
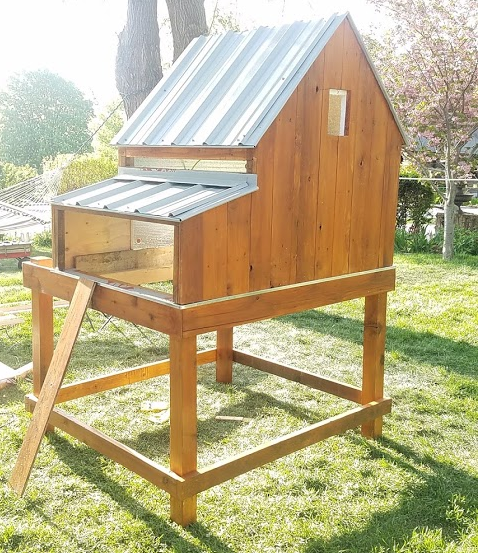
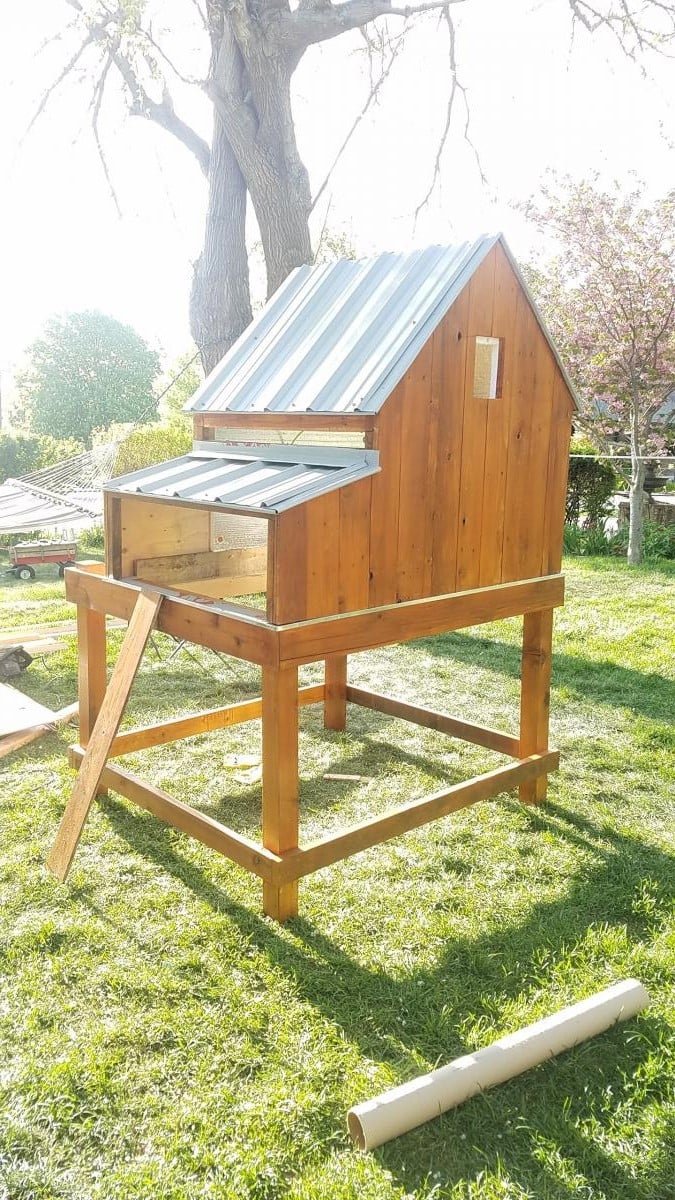
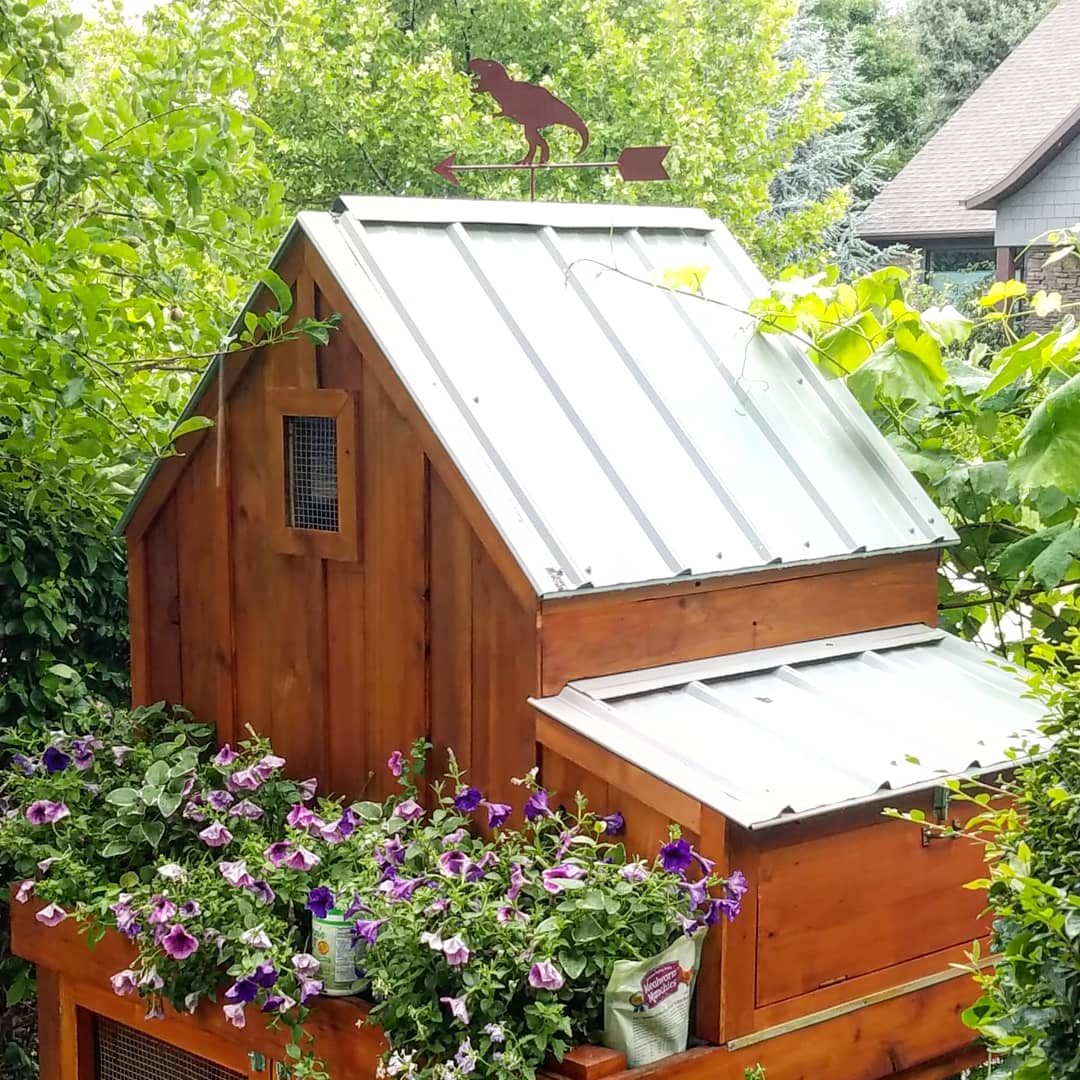
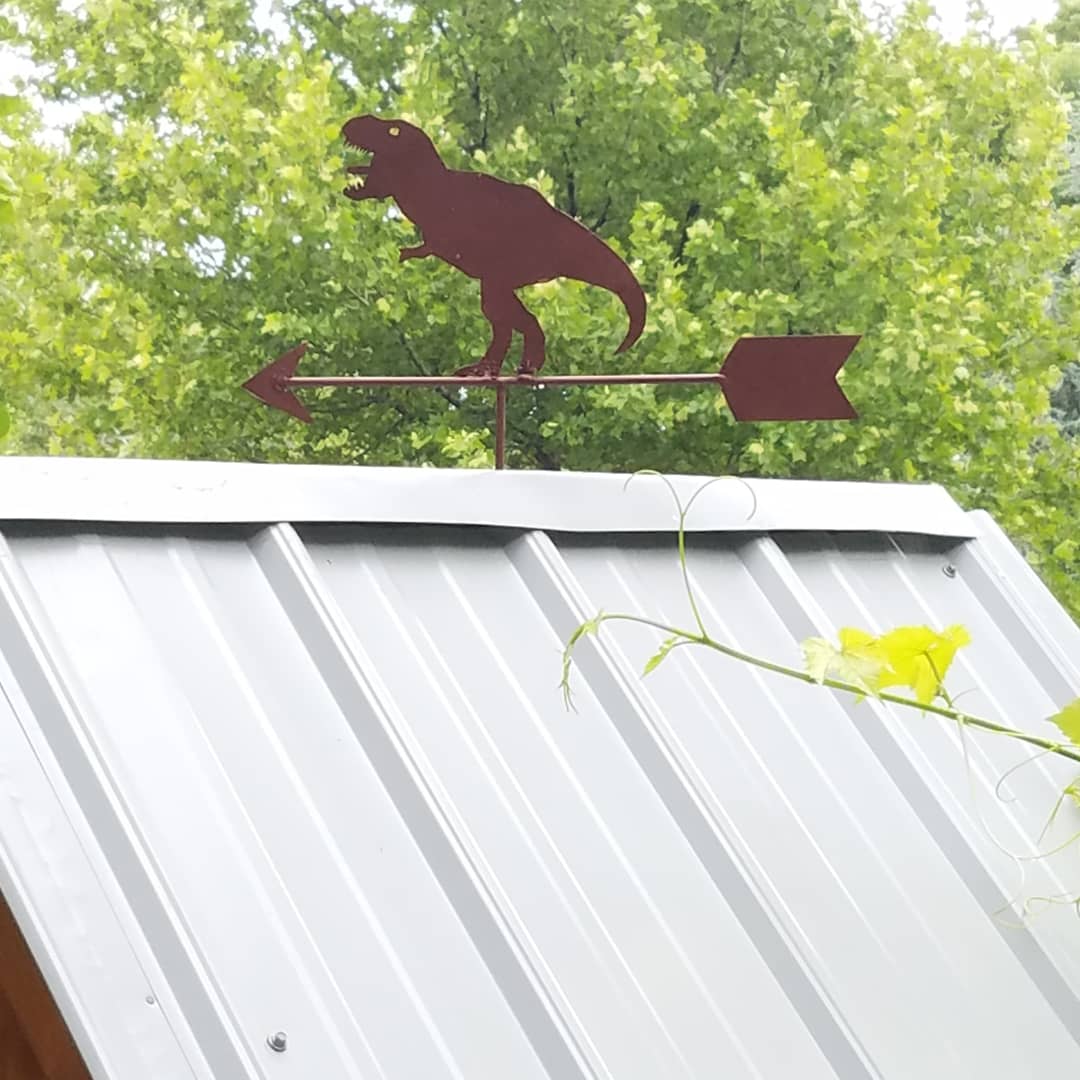
Modified to make the coop bigger and the planter smaller. Added 1" foam insulation on the inside and changed the design to use the "deep litter" method. This means the coop bottom goes all the way to the bottom of the support beam rather than using a removable tray. Added a steel roof with a ridge vent at the top. The chicken run under the coop is lined with buried hardware cloth so no animals can dig under the coop. All hinges are mortised and doors flush mounted. The coop is wired for power for a heat lamp. The planter is lined with a metal tray. The coop can be separated into two pieces so you can move it or rotate the top 180 deg if needed (so you can get to the eggs from the left or right side). Great plans, thanks Ana!


Tue, 05/12/2020 - 15:09
Amazing! Thank you so much for sharing a photo, this is truly beautiful!
Sun, 09/27/2020 - 14:42
Do you have the exact measurements that you used for this one?
Thank you for all the wonderful plans!
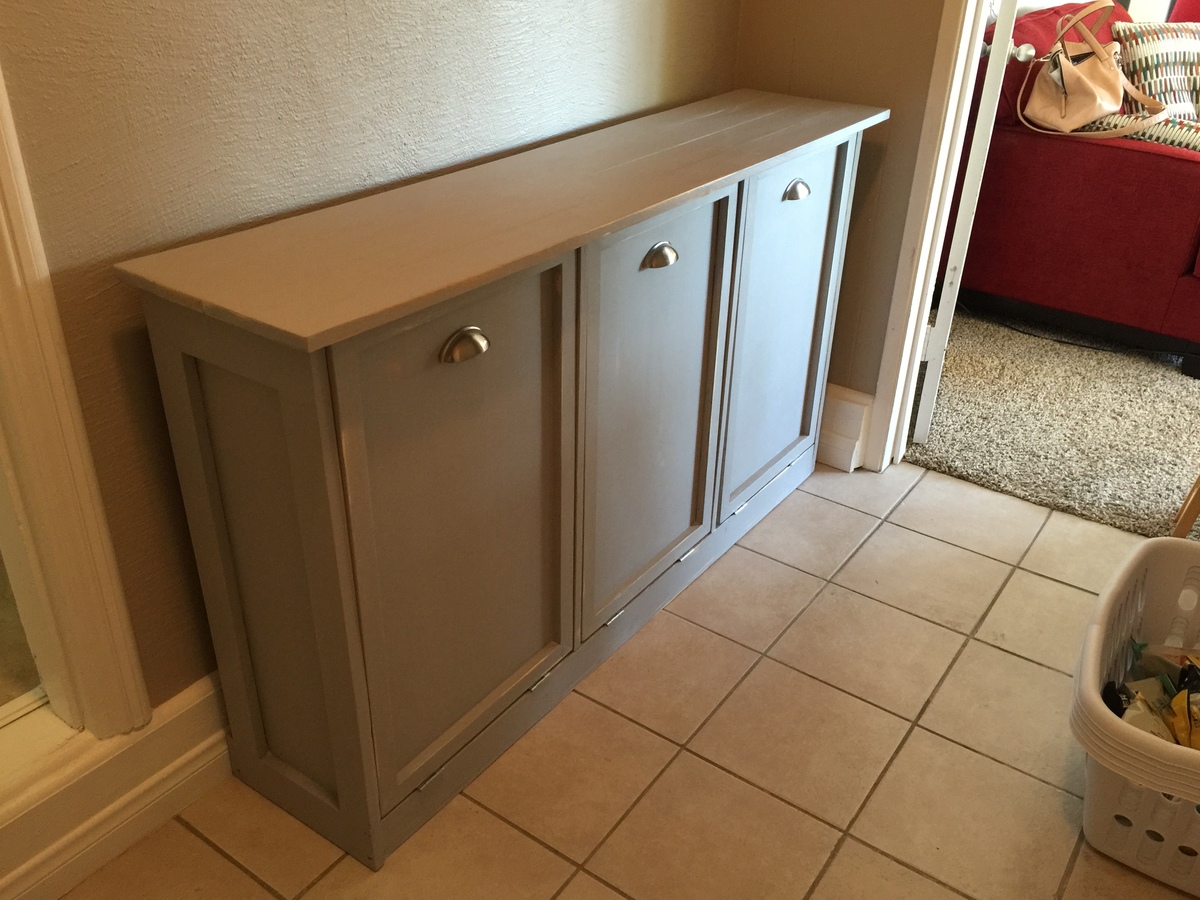
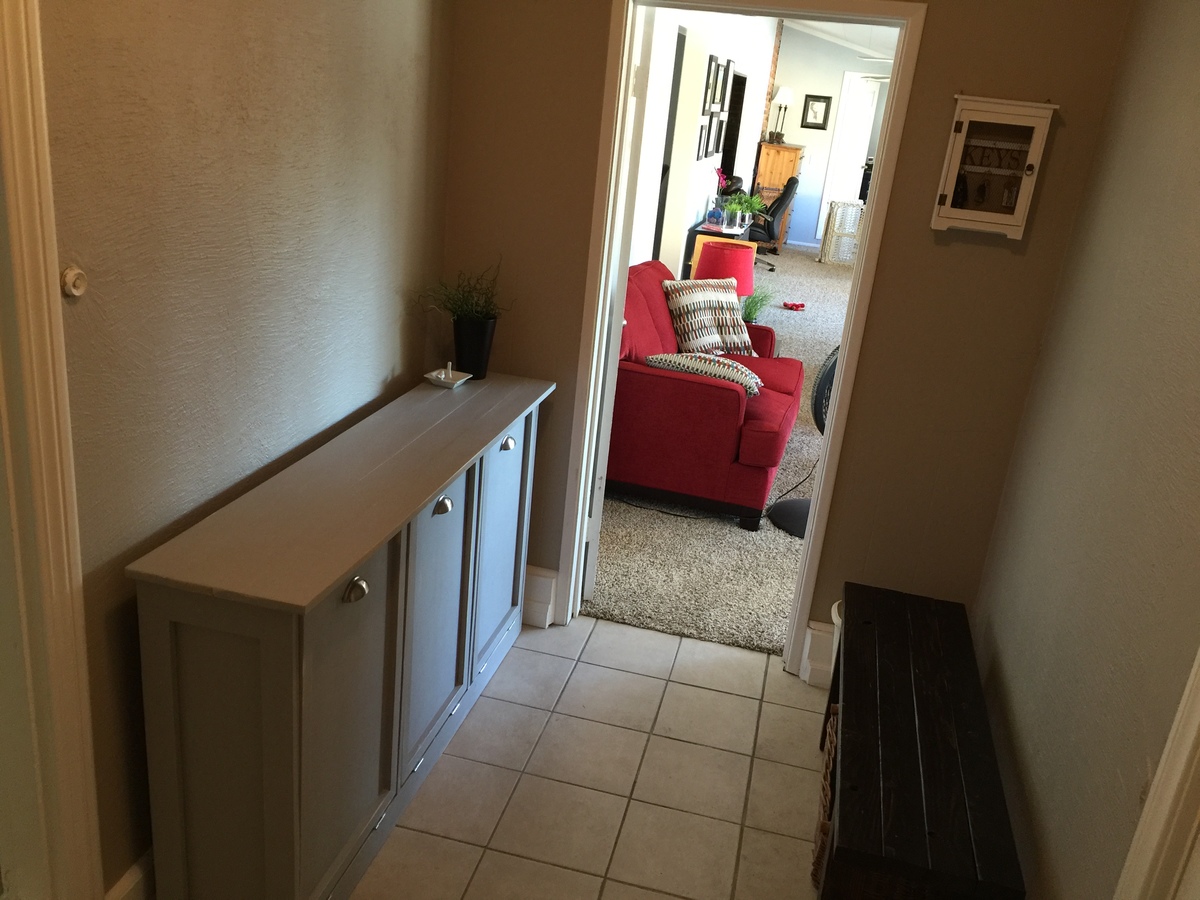
i used the modified plan of the tilt out waste bin that Shanty2chic put out as a three bin laundry sorter. It turned out great!
It is finished with chalk paint, lightly distressed.
Fri, 10/30/2020 - 10:44
Hi, you mentioned that you used the modified plan of the tilt out waste bin that Shanty2chic put out as a three bin laundry sorter. Can you share that please? Thanks!!
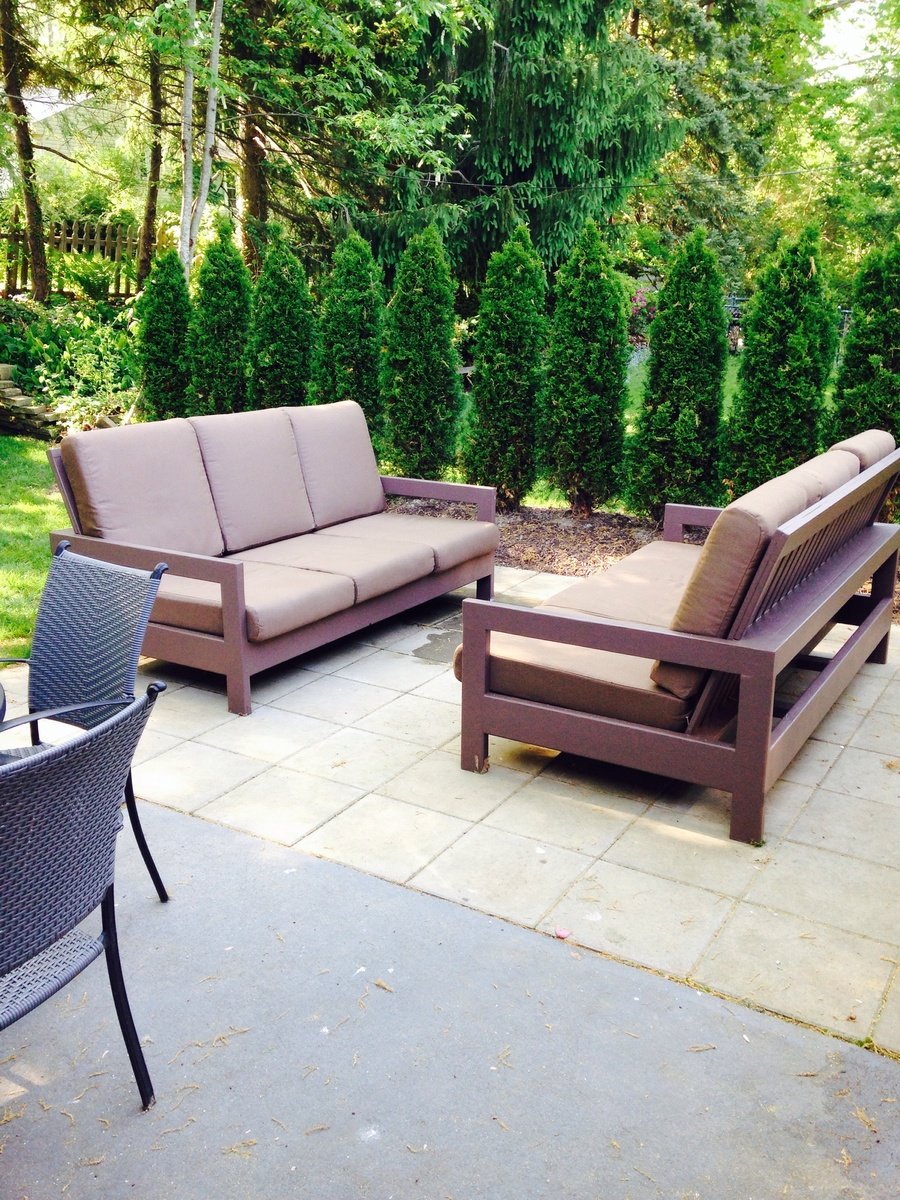
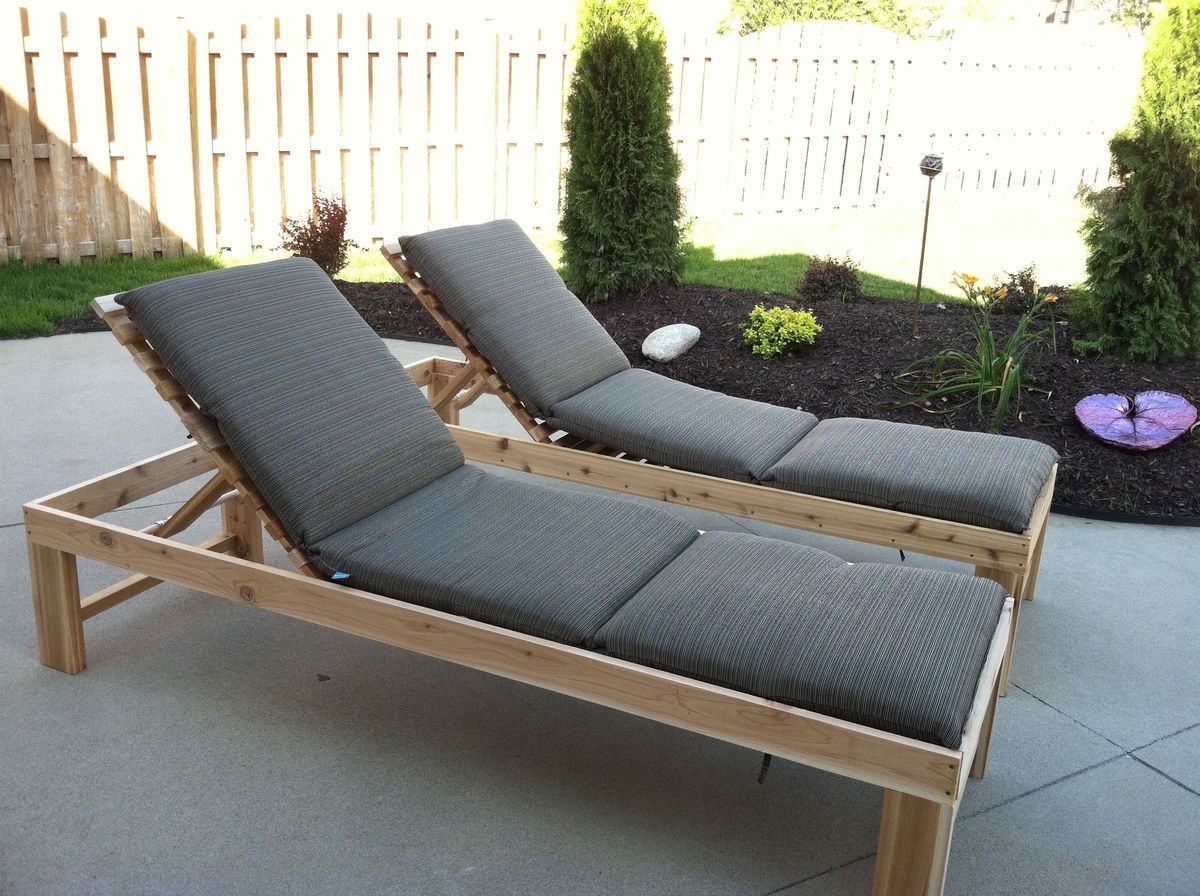
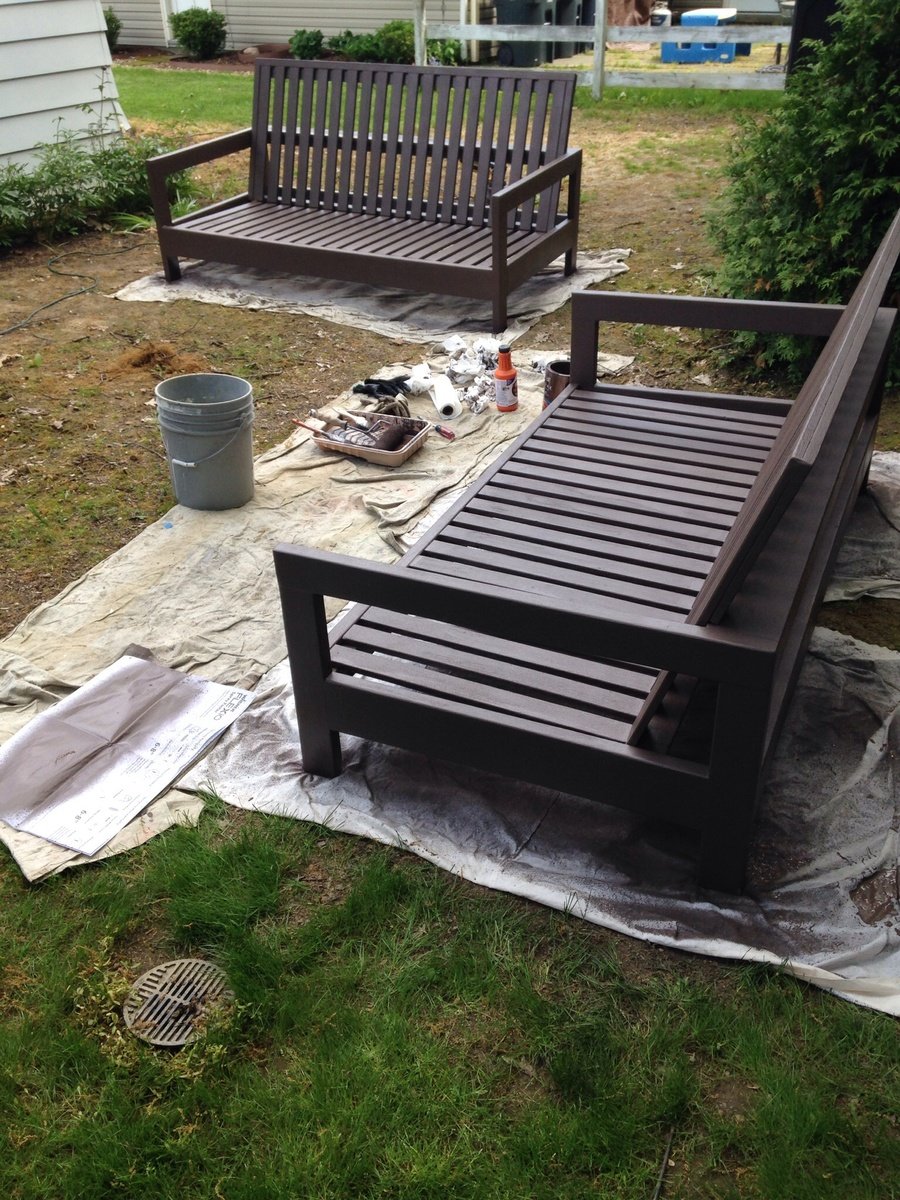
Love this design! We had to adjust the plans to fit a different cushion from Restoration Hardware. The couches turned out great and we had a party the day after the paint dried! Thx Ana-white!
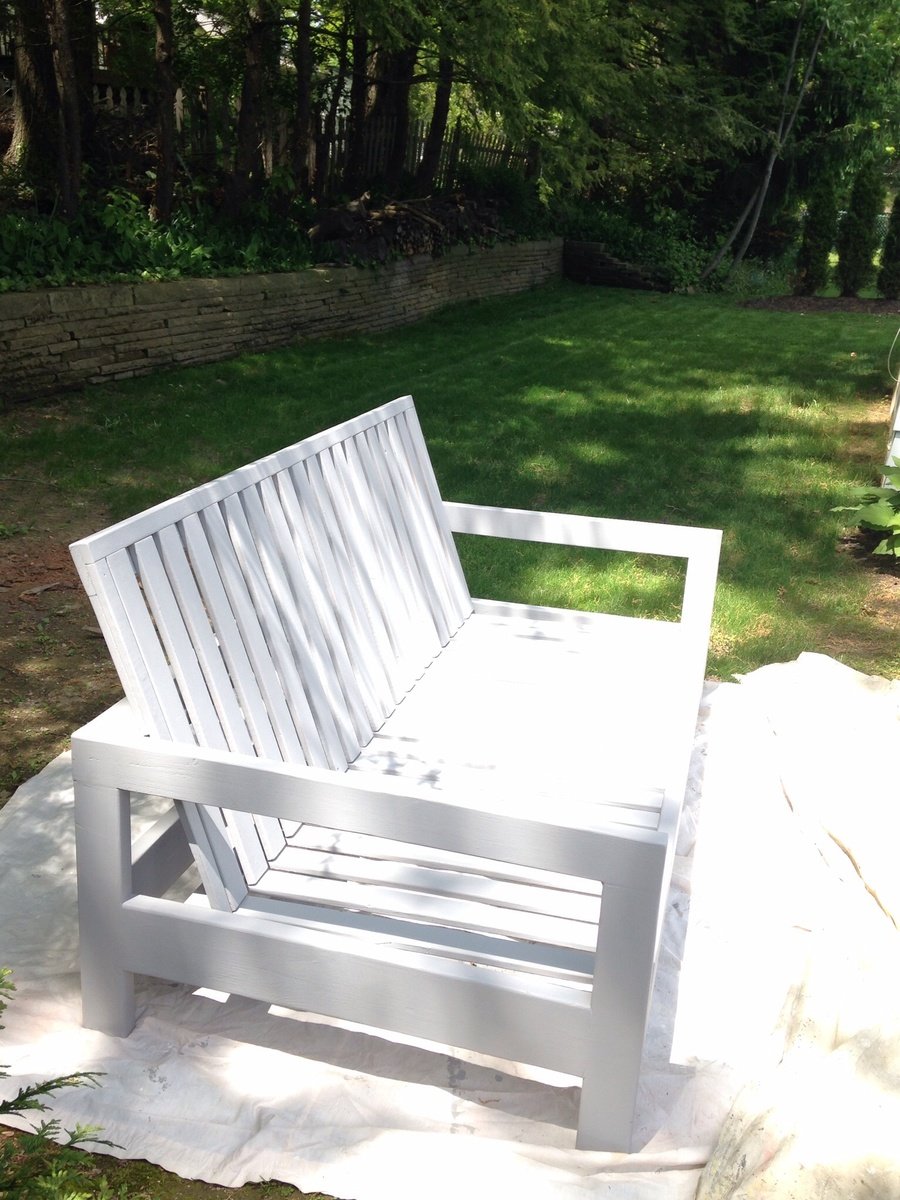
This was probably my favorite build yet! Love how it turned out
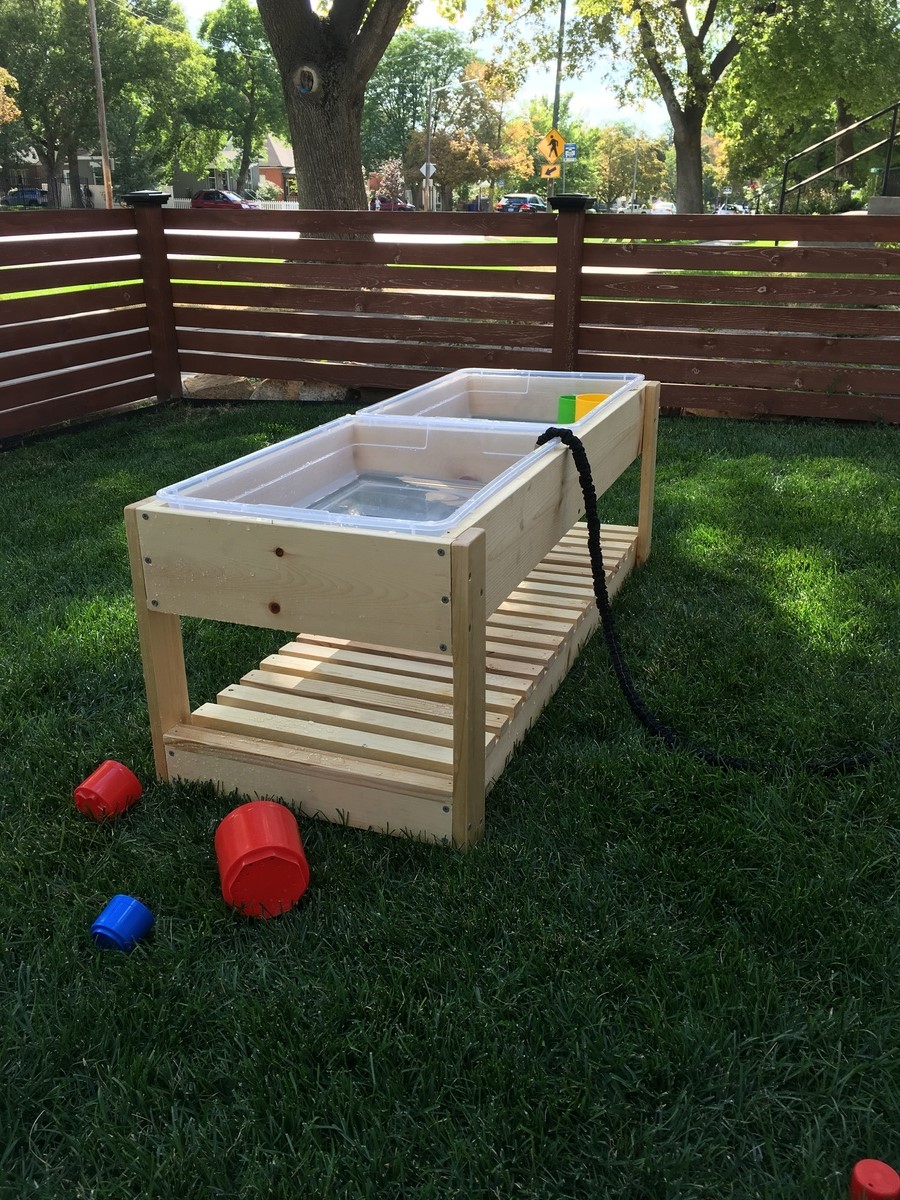
Shortened the legs to 17" and used 1x2s on the shelf because that's what we had on hand. Sealed with Thompson's aerosol clear waterseal.
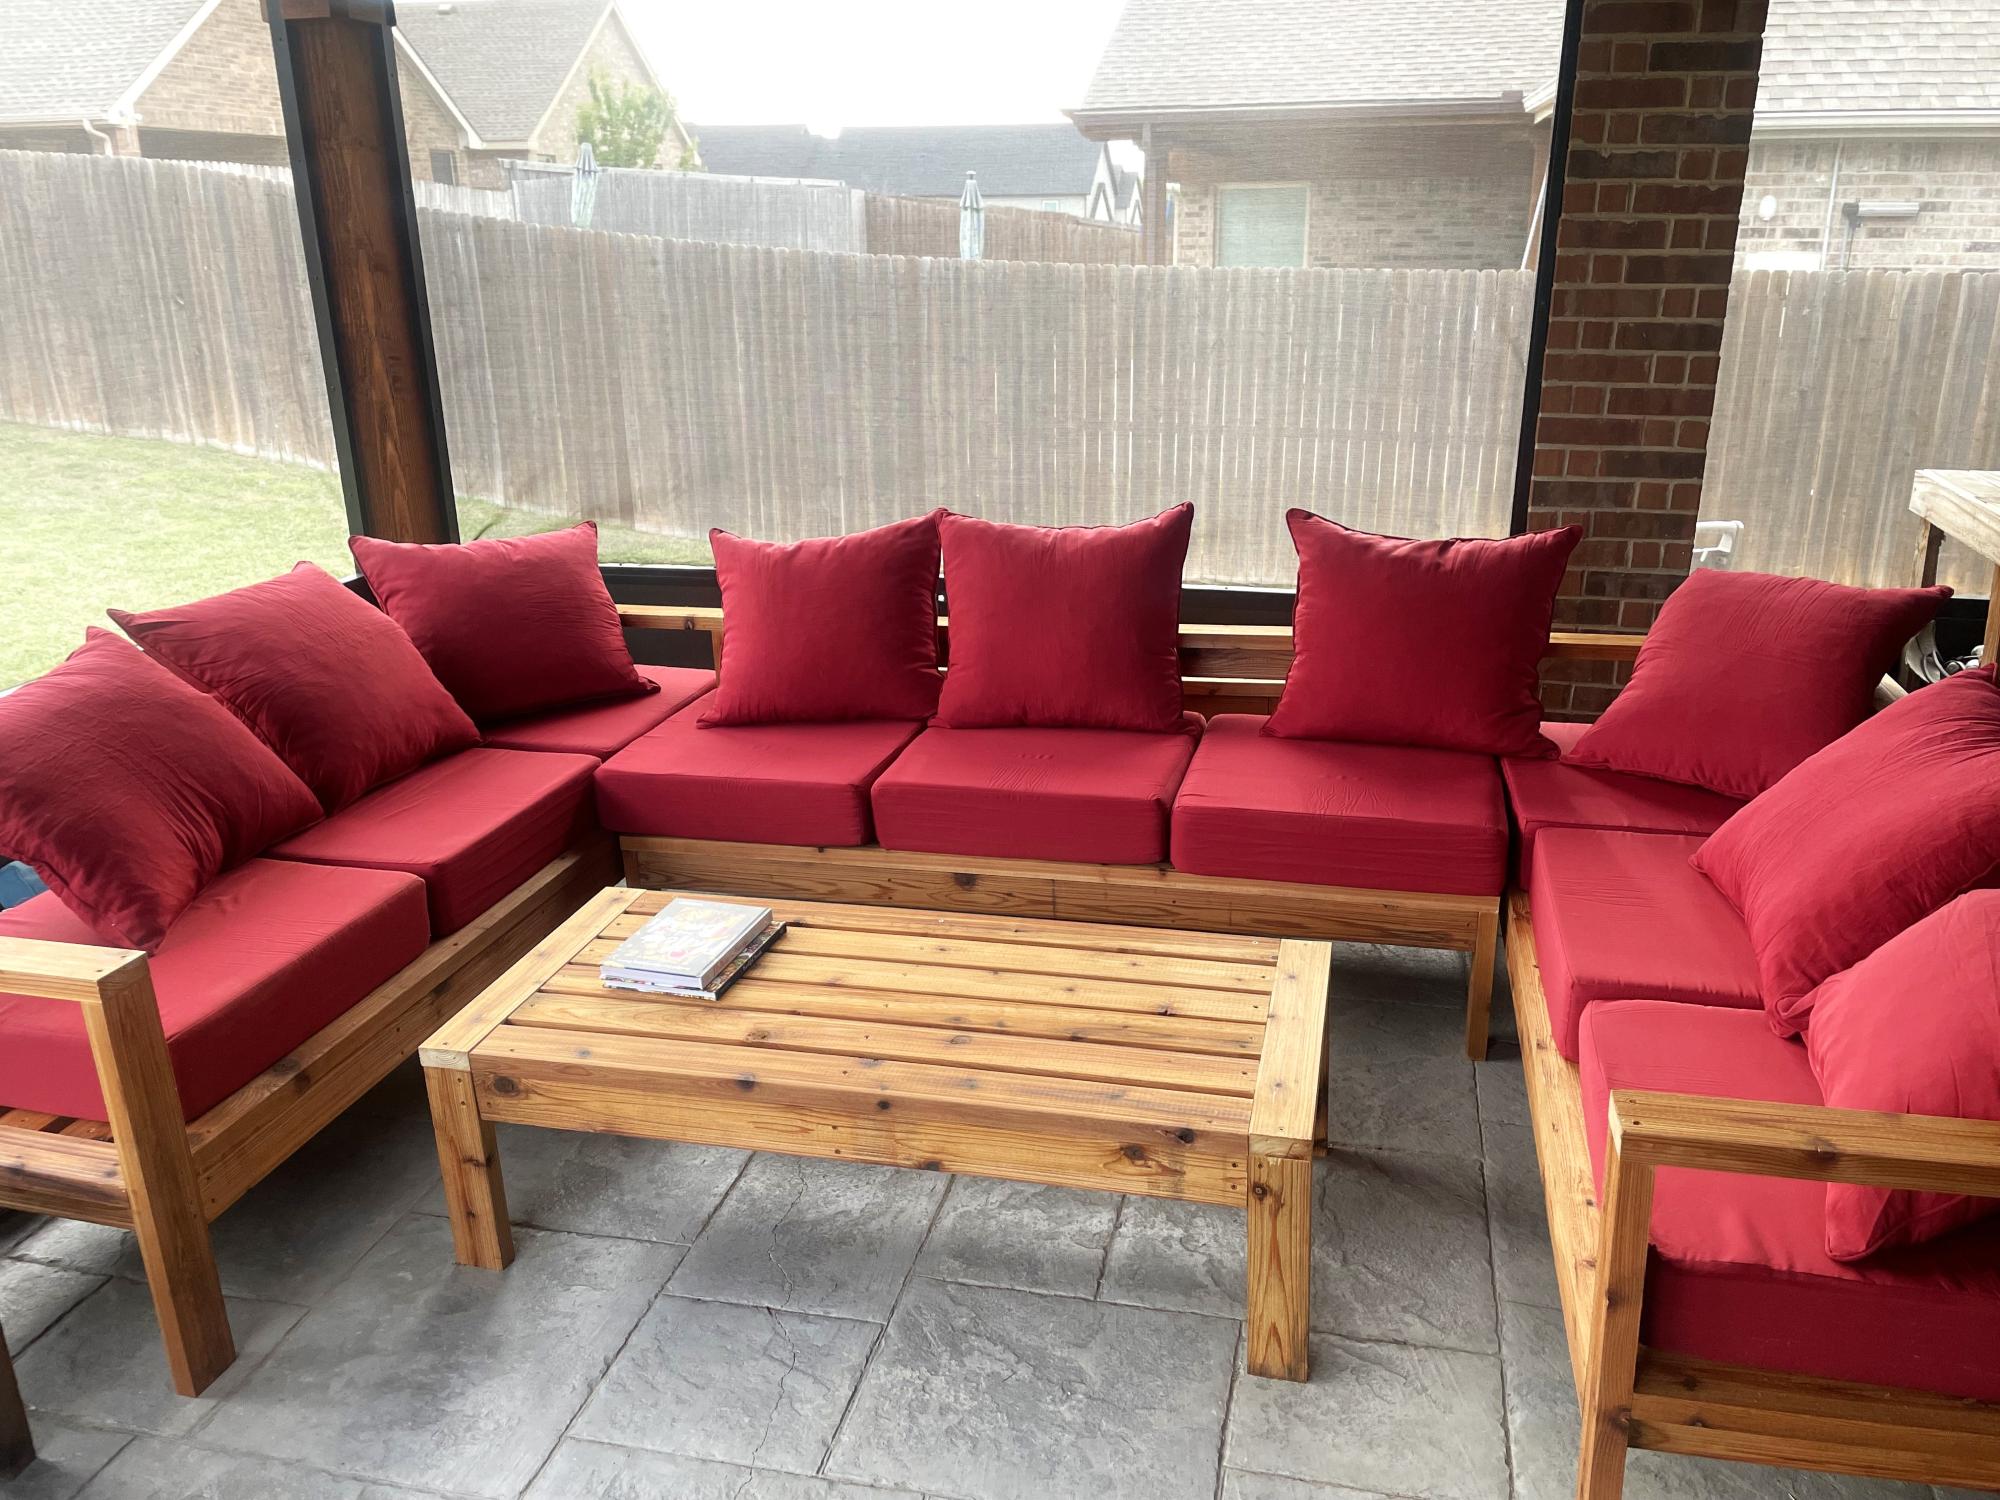
3 piece sectional from cedar for my new sunroom!
Thomas Lott
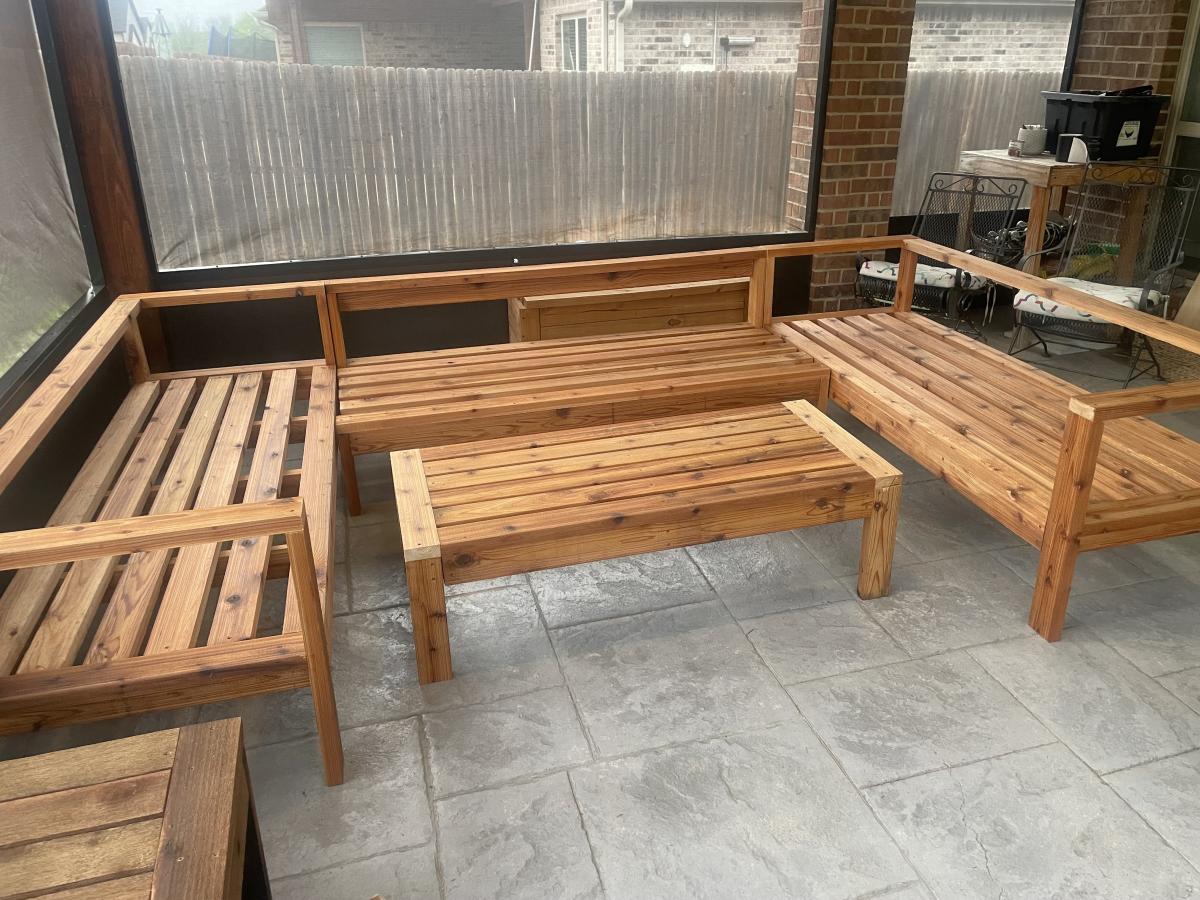
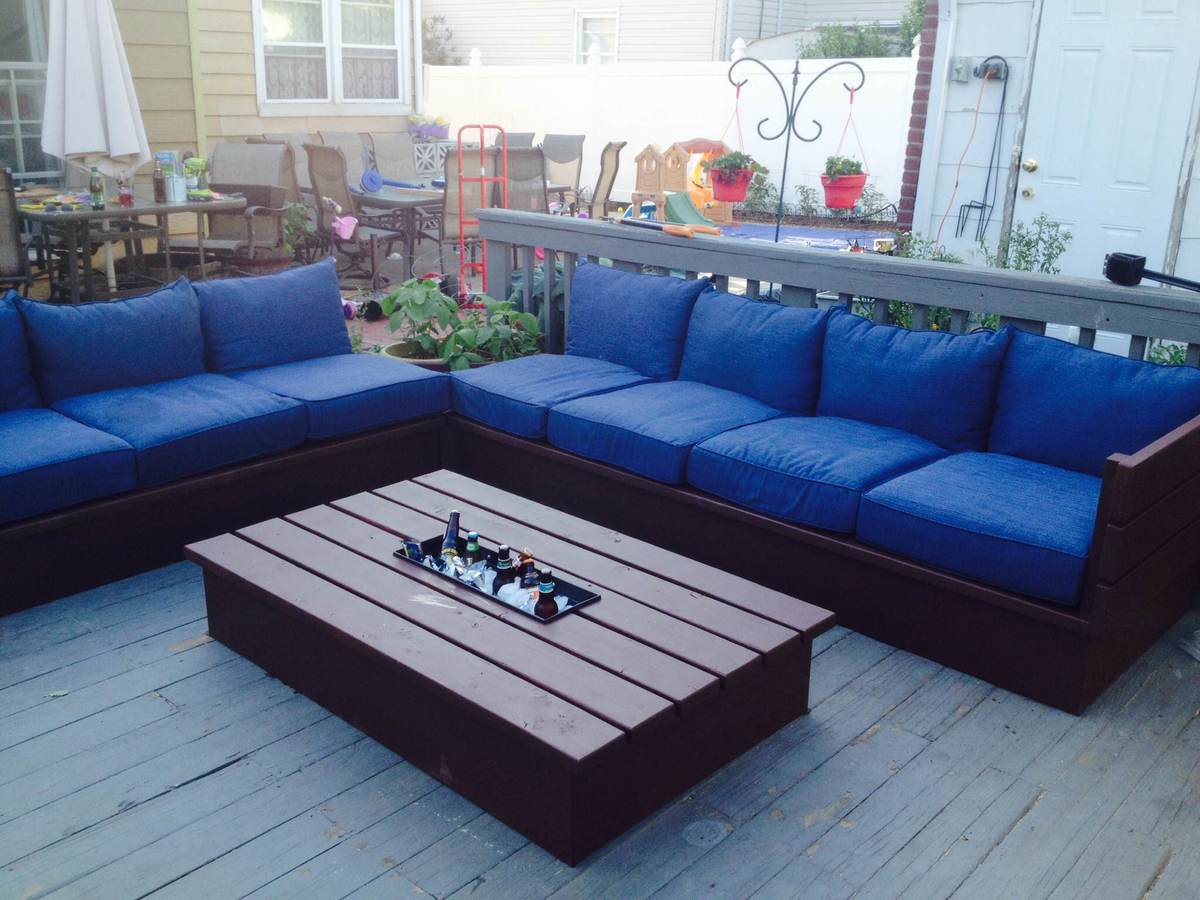
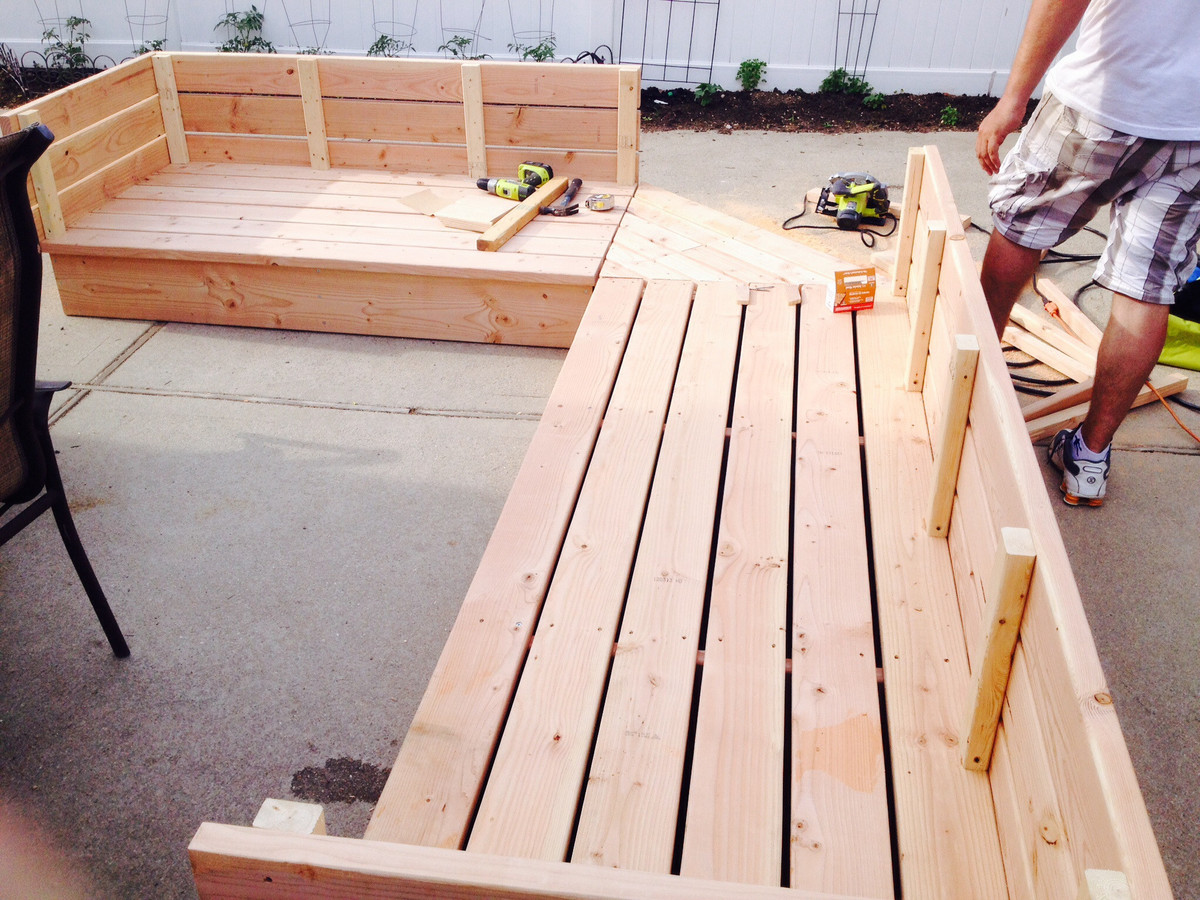
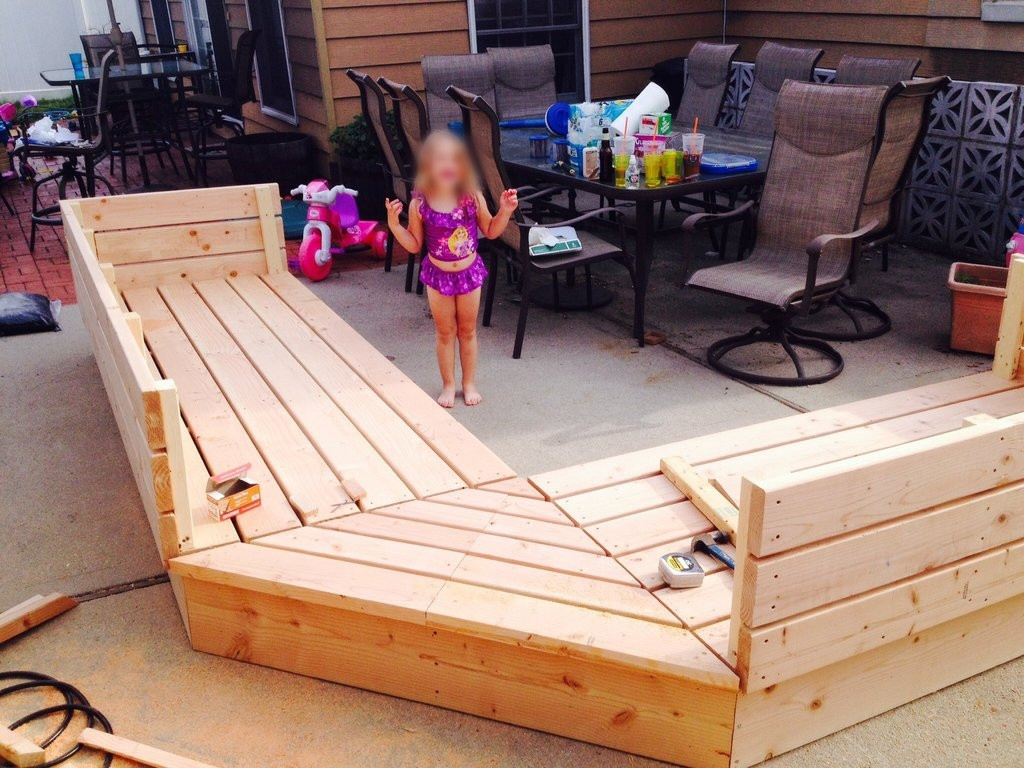
Saw the Outdoor sectional on your website and I just had to build it! Made some variations to the original plans, one being making it higher off the ground and the other was a necessity because Home Depot didn't have the right size wood and I wasn't about to go running around from store to store, so I used scraps to make a corner piece that fits perfectly. The most timely aspect was the sanding and removing all the rough edges. Also used Bondo to fill in all the holes that were on the outside to give it an all around smooth finish. The end result is just about the same though and the family and friends are in love with it! Thank you so much for the plans! Really could not even come close to justifying what it would cost to buy a sectional like this. Cushions were a huge concern and rightfully so. After building, I started searching and was mostly getting prices in the plus $800 range. It was breaking my heart knowing I was going to have to pay more than double what the entire sectional cost me. In the end though, was able to land some 25 x 25 x 6 cushions at Lowes for 50% off ($50 a piece).
Tue, 06/17/2014 - 14:11
You sure have outdone yourself, love the space! Thanks for sharing!

Mon, 03/16/2015 - 09:06
I love this modification. Did you use 2x8s or 2x10s for your base? It looks like you angles the back. How did you go about doing that? Thank you for posting this?! Great work!
Mon, 06/29/2015 - 18:00
nice build, when you get some time can you put up your modifications please:) would love to build this! Love the colours you used and how it looks!Me too..you cook like me, i make it my style...thats how i do my salsa ..my way i like it...
Mon, 06/29/2015 - 18:00
nice build, when you get some time can you put up your modifications please:) would love to build this! Love the colours you used and how it looks!Me too..you cook like me, i make it my style...thats how i do my salsa ..my way i like it...
Mon, 06/29/2015 - 21:50
sorry about the end of my comment, must of pasted a message in their somehow? My bad.
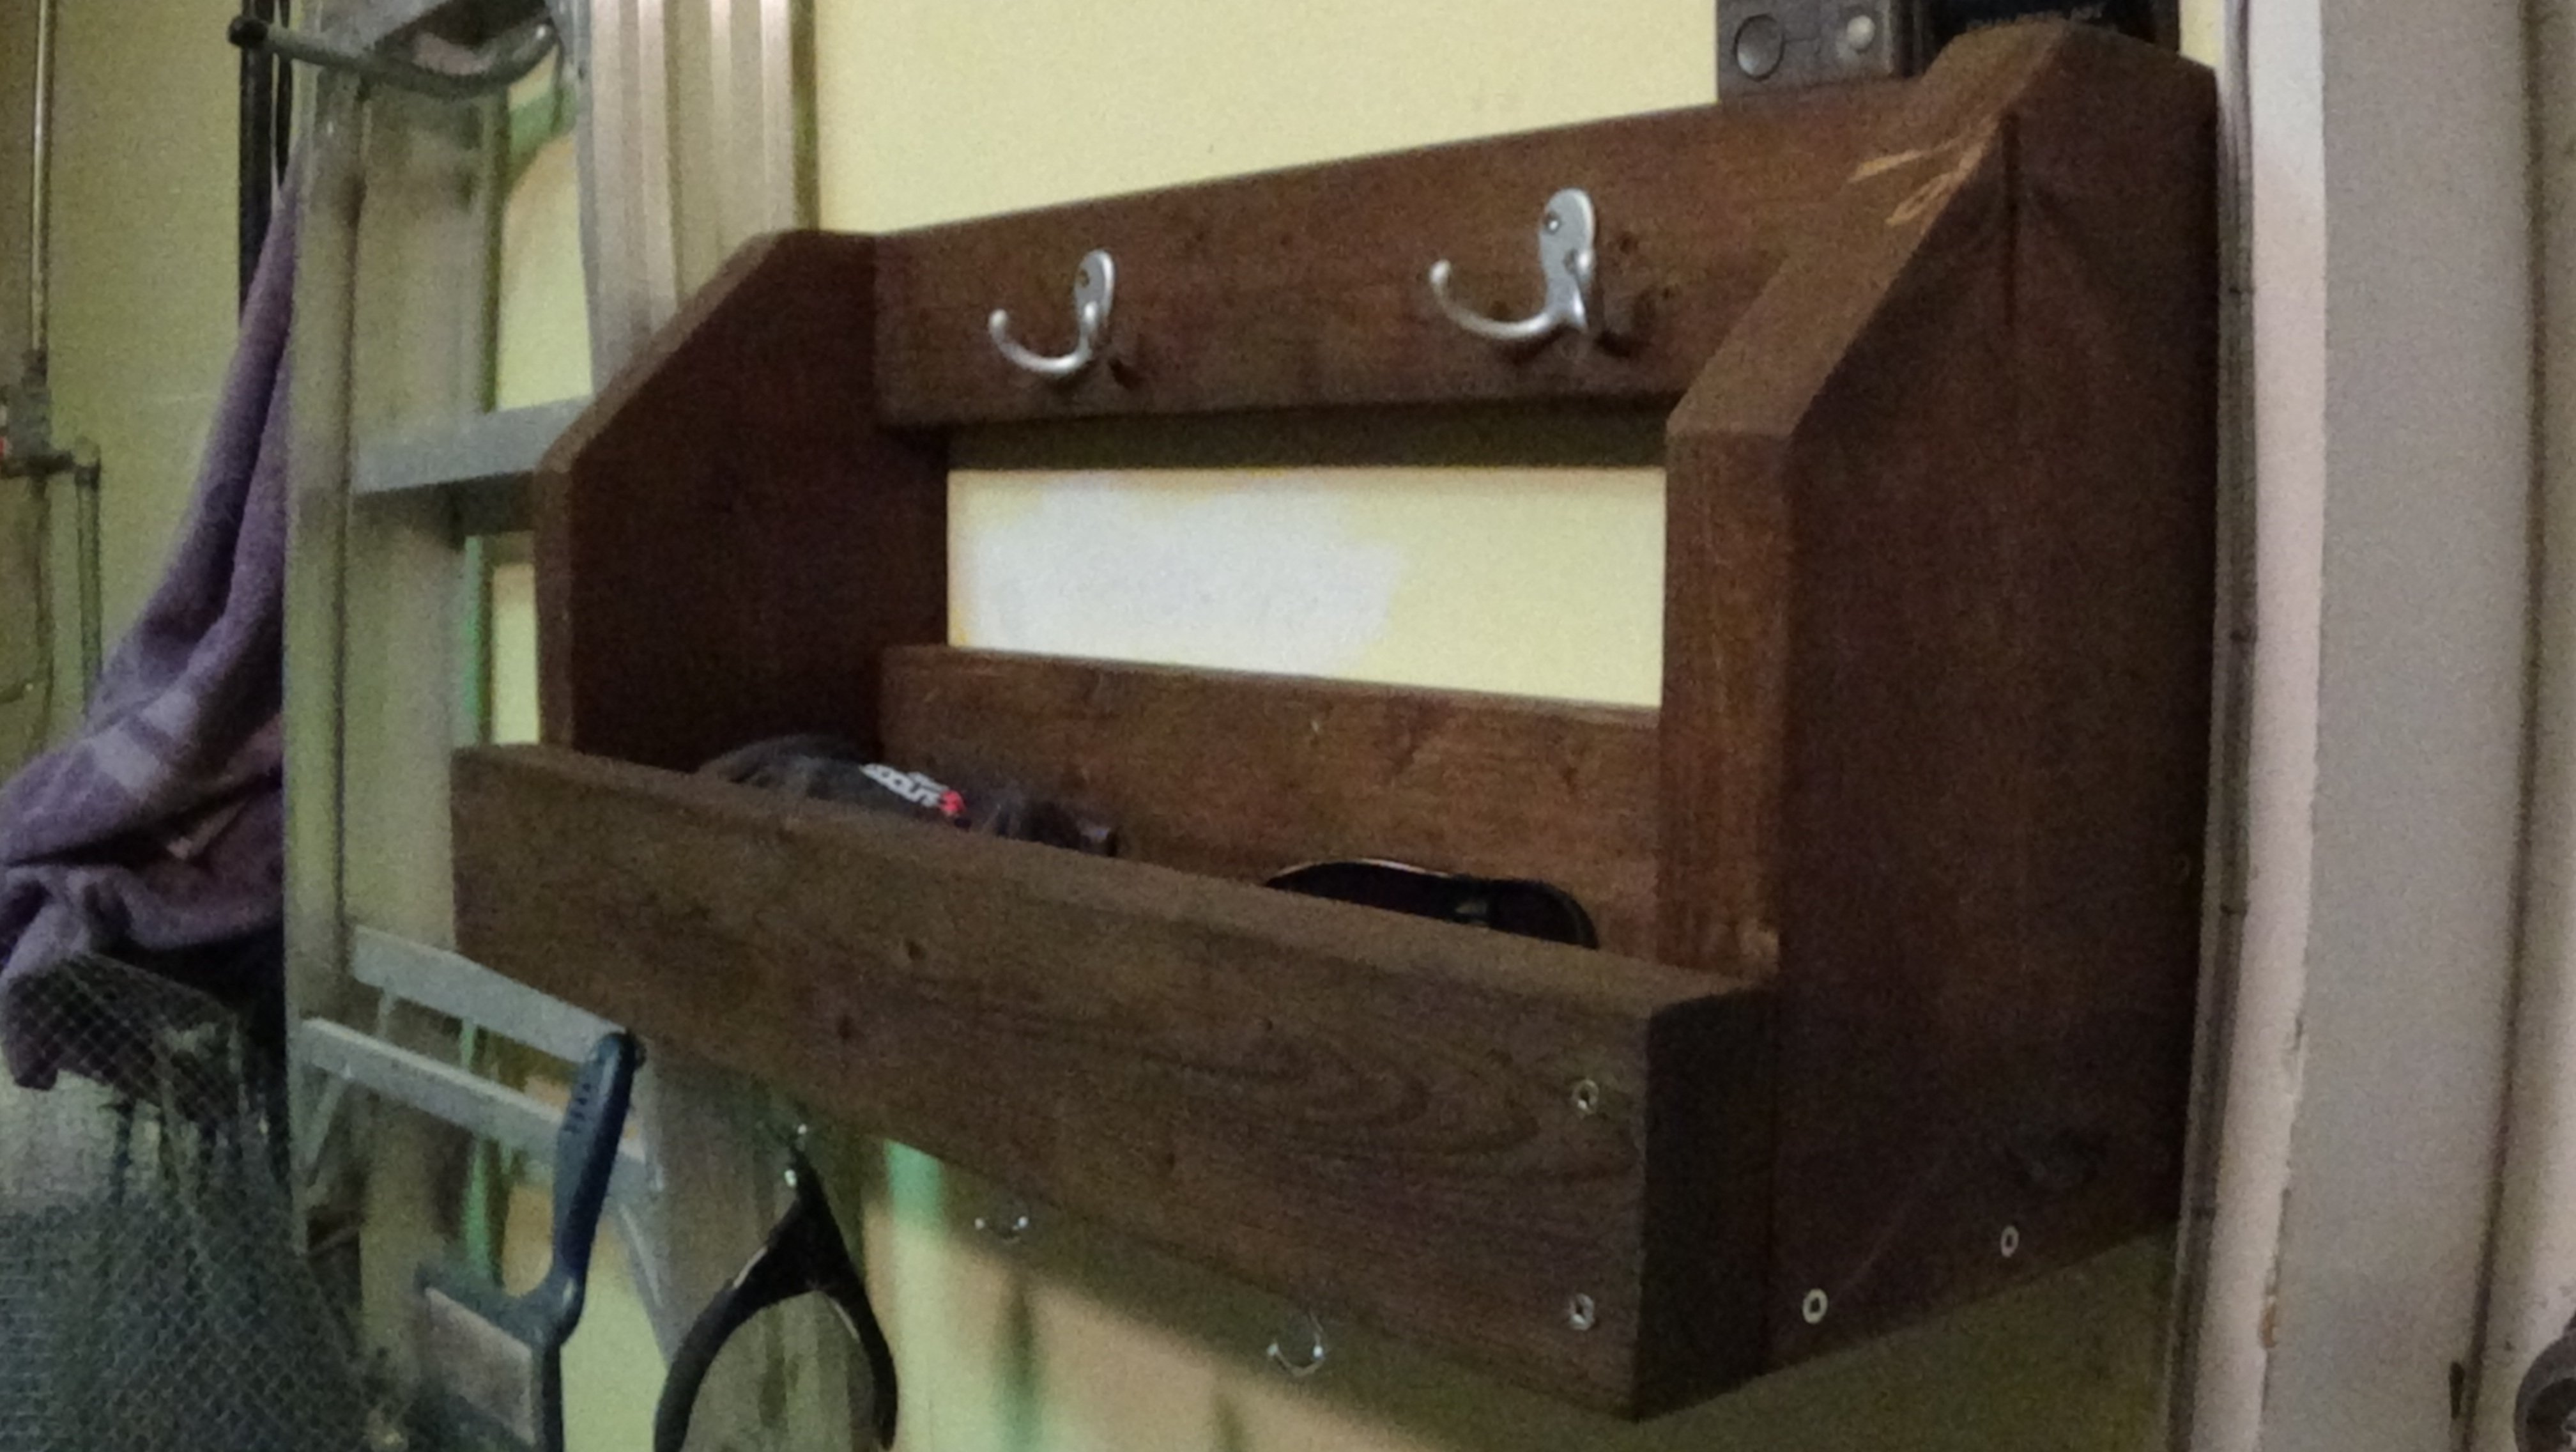
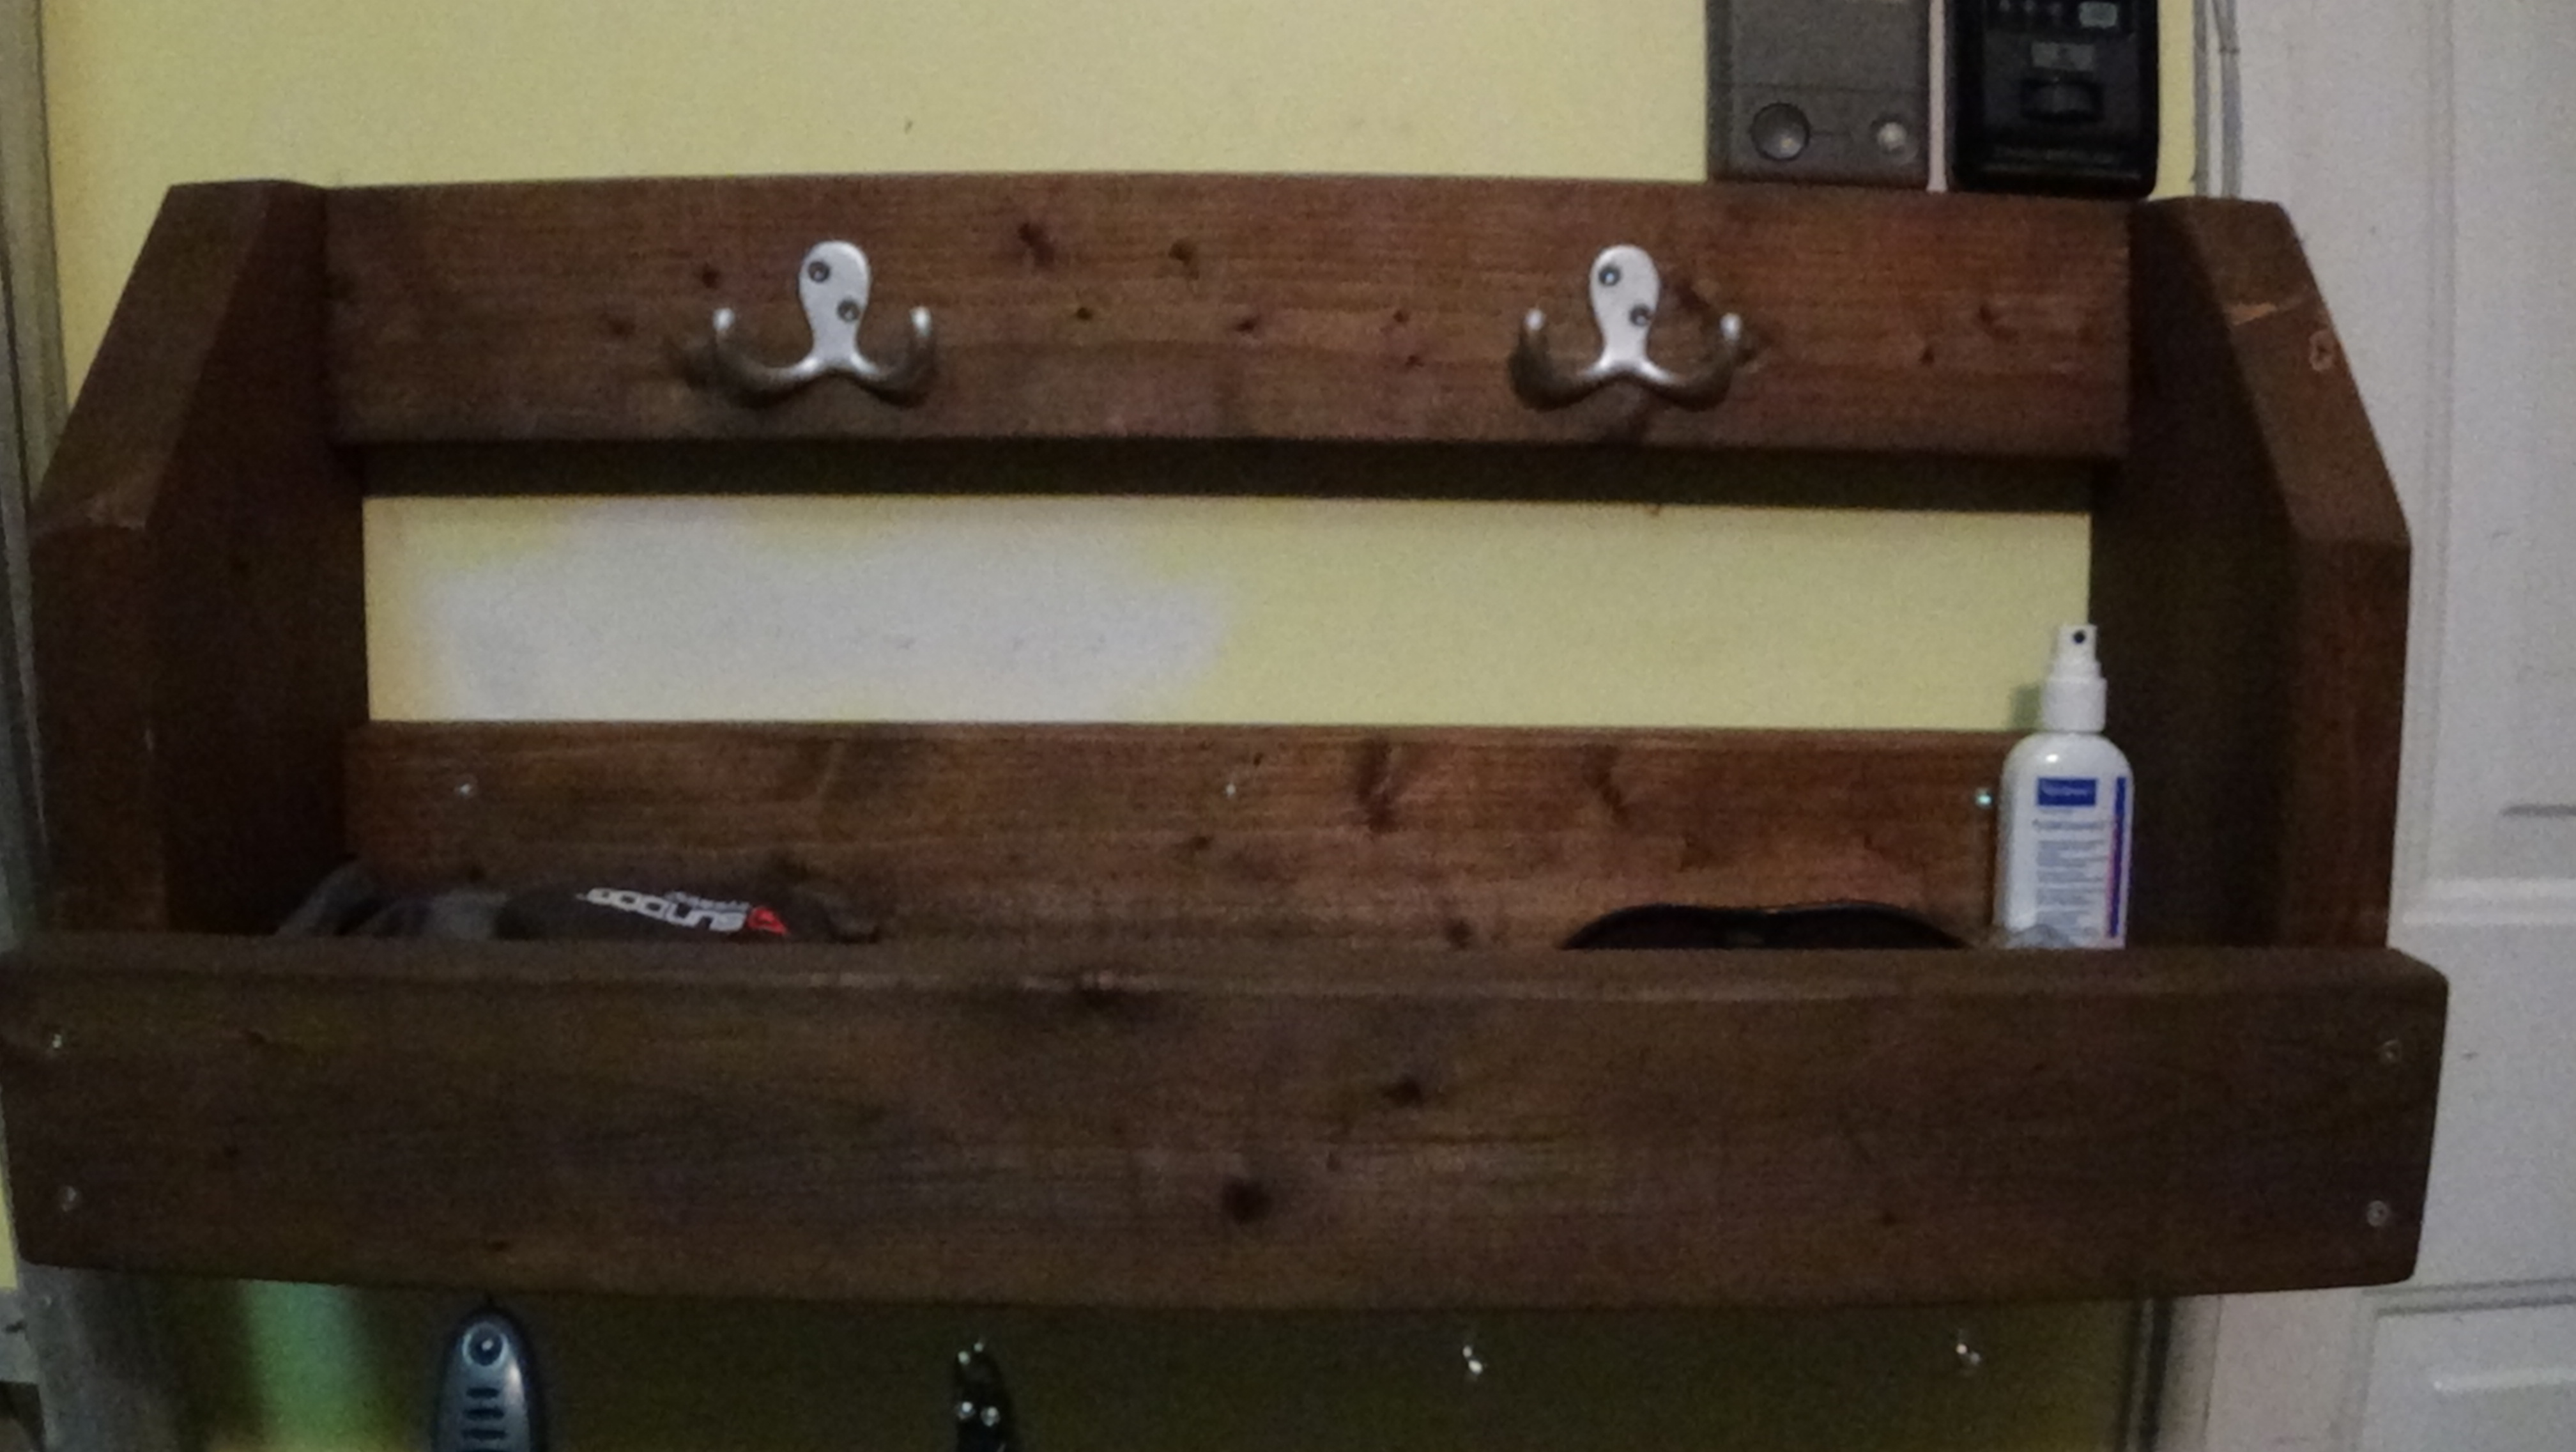
It's a little twist on Ana's Coat organizer. Turned out really useful and did not cost me anything since I ussed scrap wood. I wish I would build have built one for coats as well.
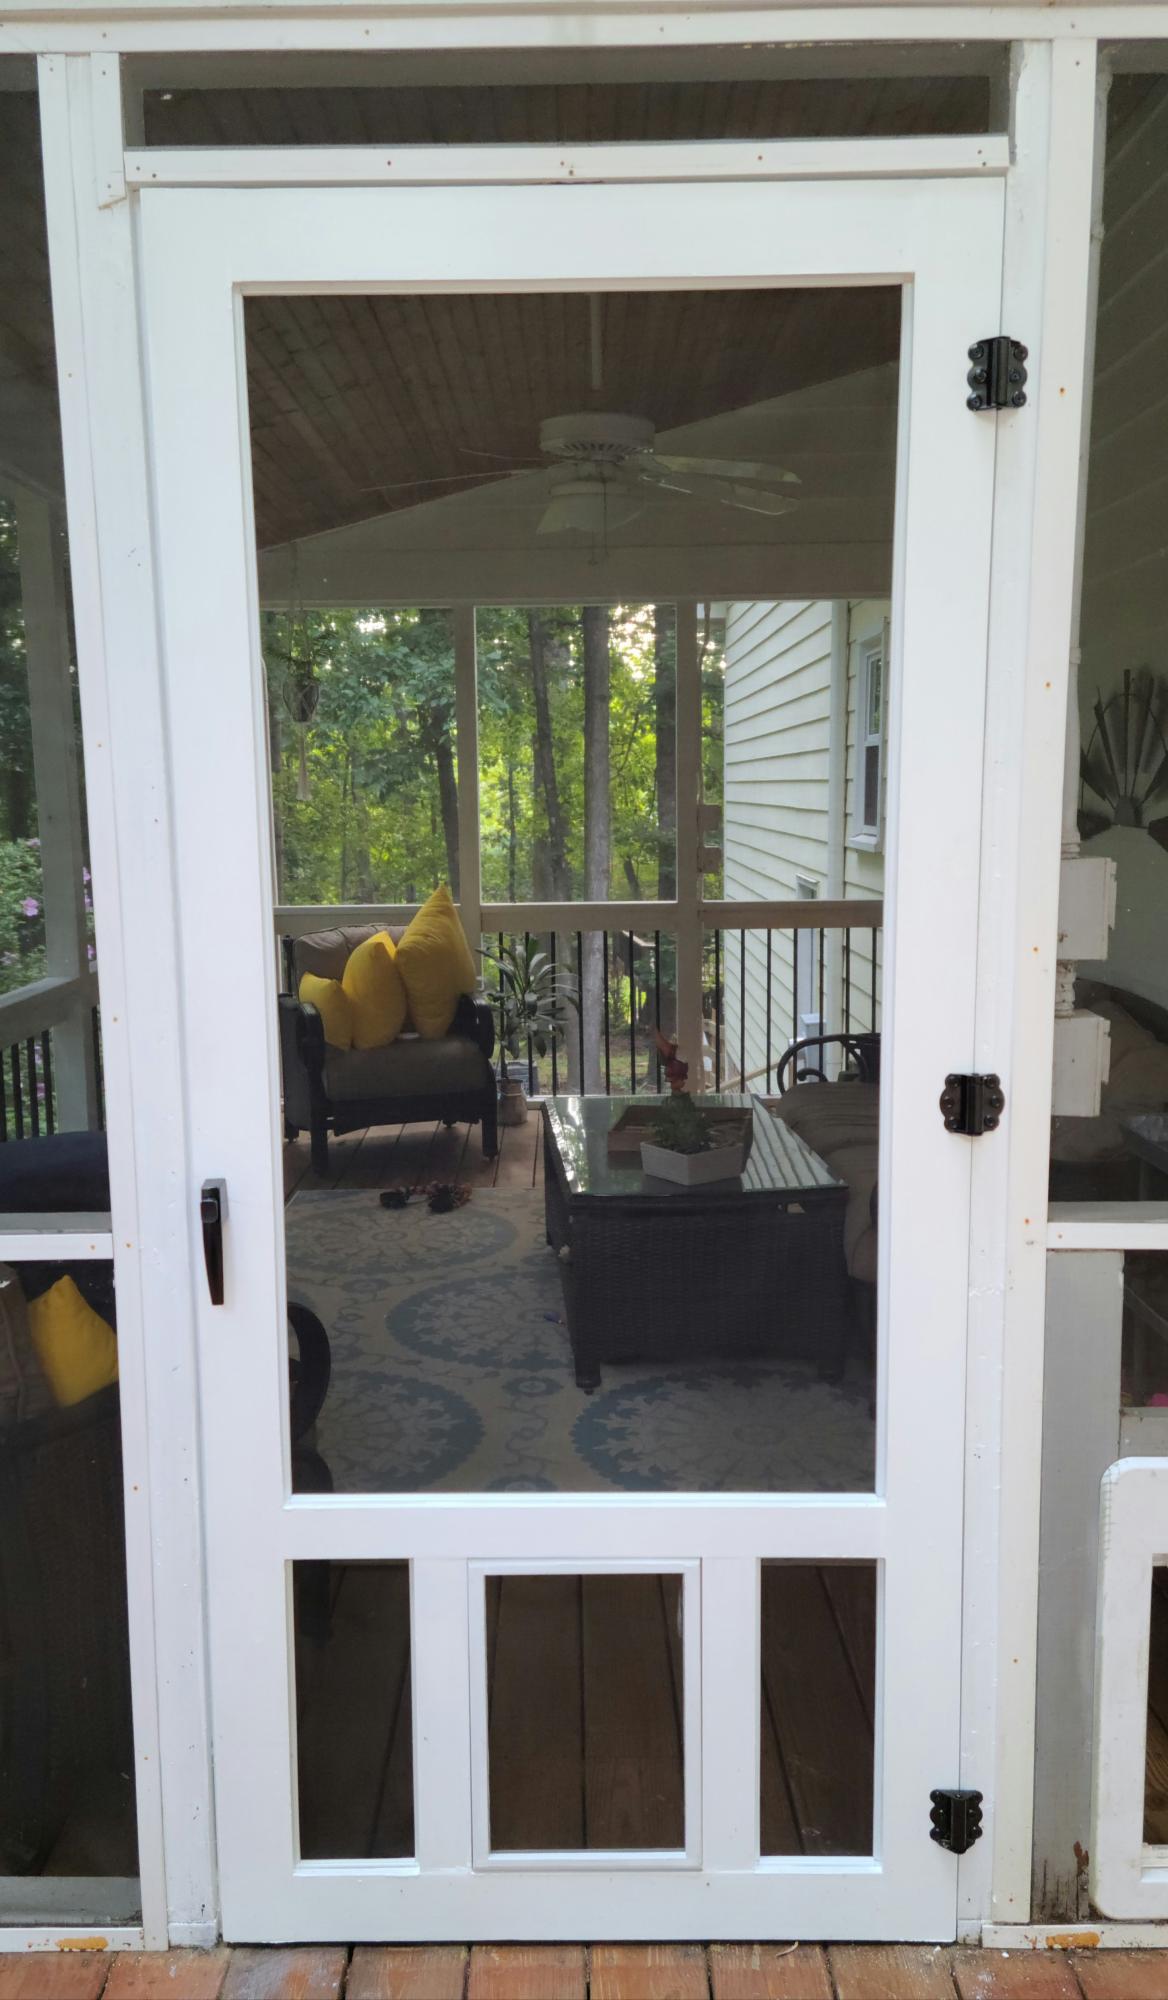
Our old screen door wasn't cutting it anymore, so I built a new one, and to kill two birds with one stone, I included a built-in dog door. Now I just need to find the motivation to close off the old dog door.
I have the plans to build this screen door with a built-in dog door posted via the blog link below for anyone interested.
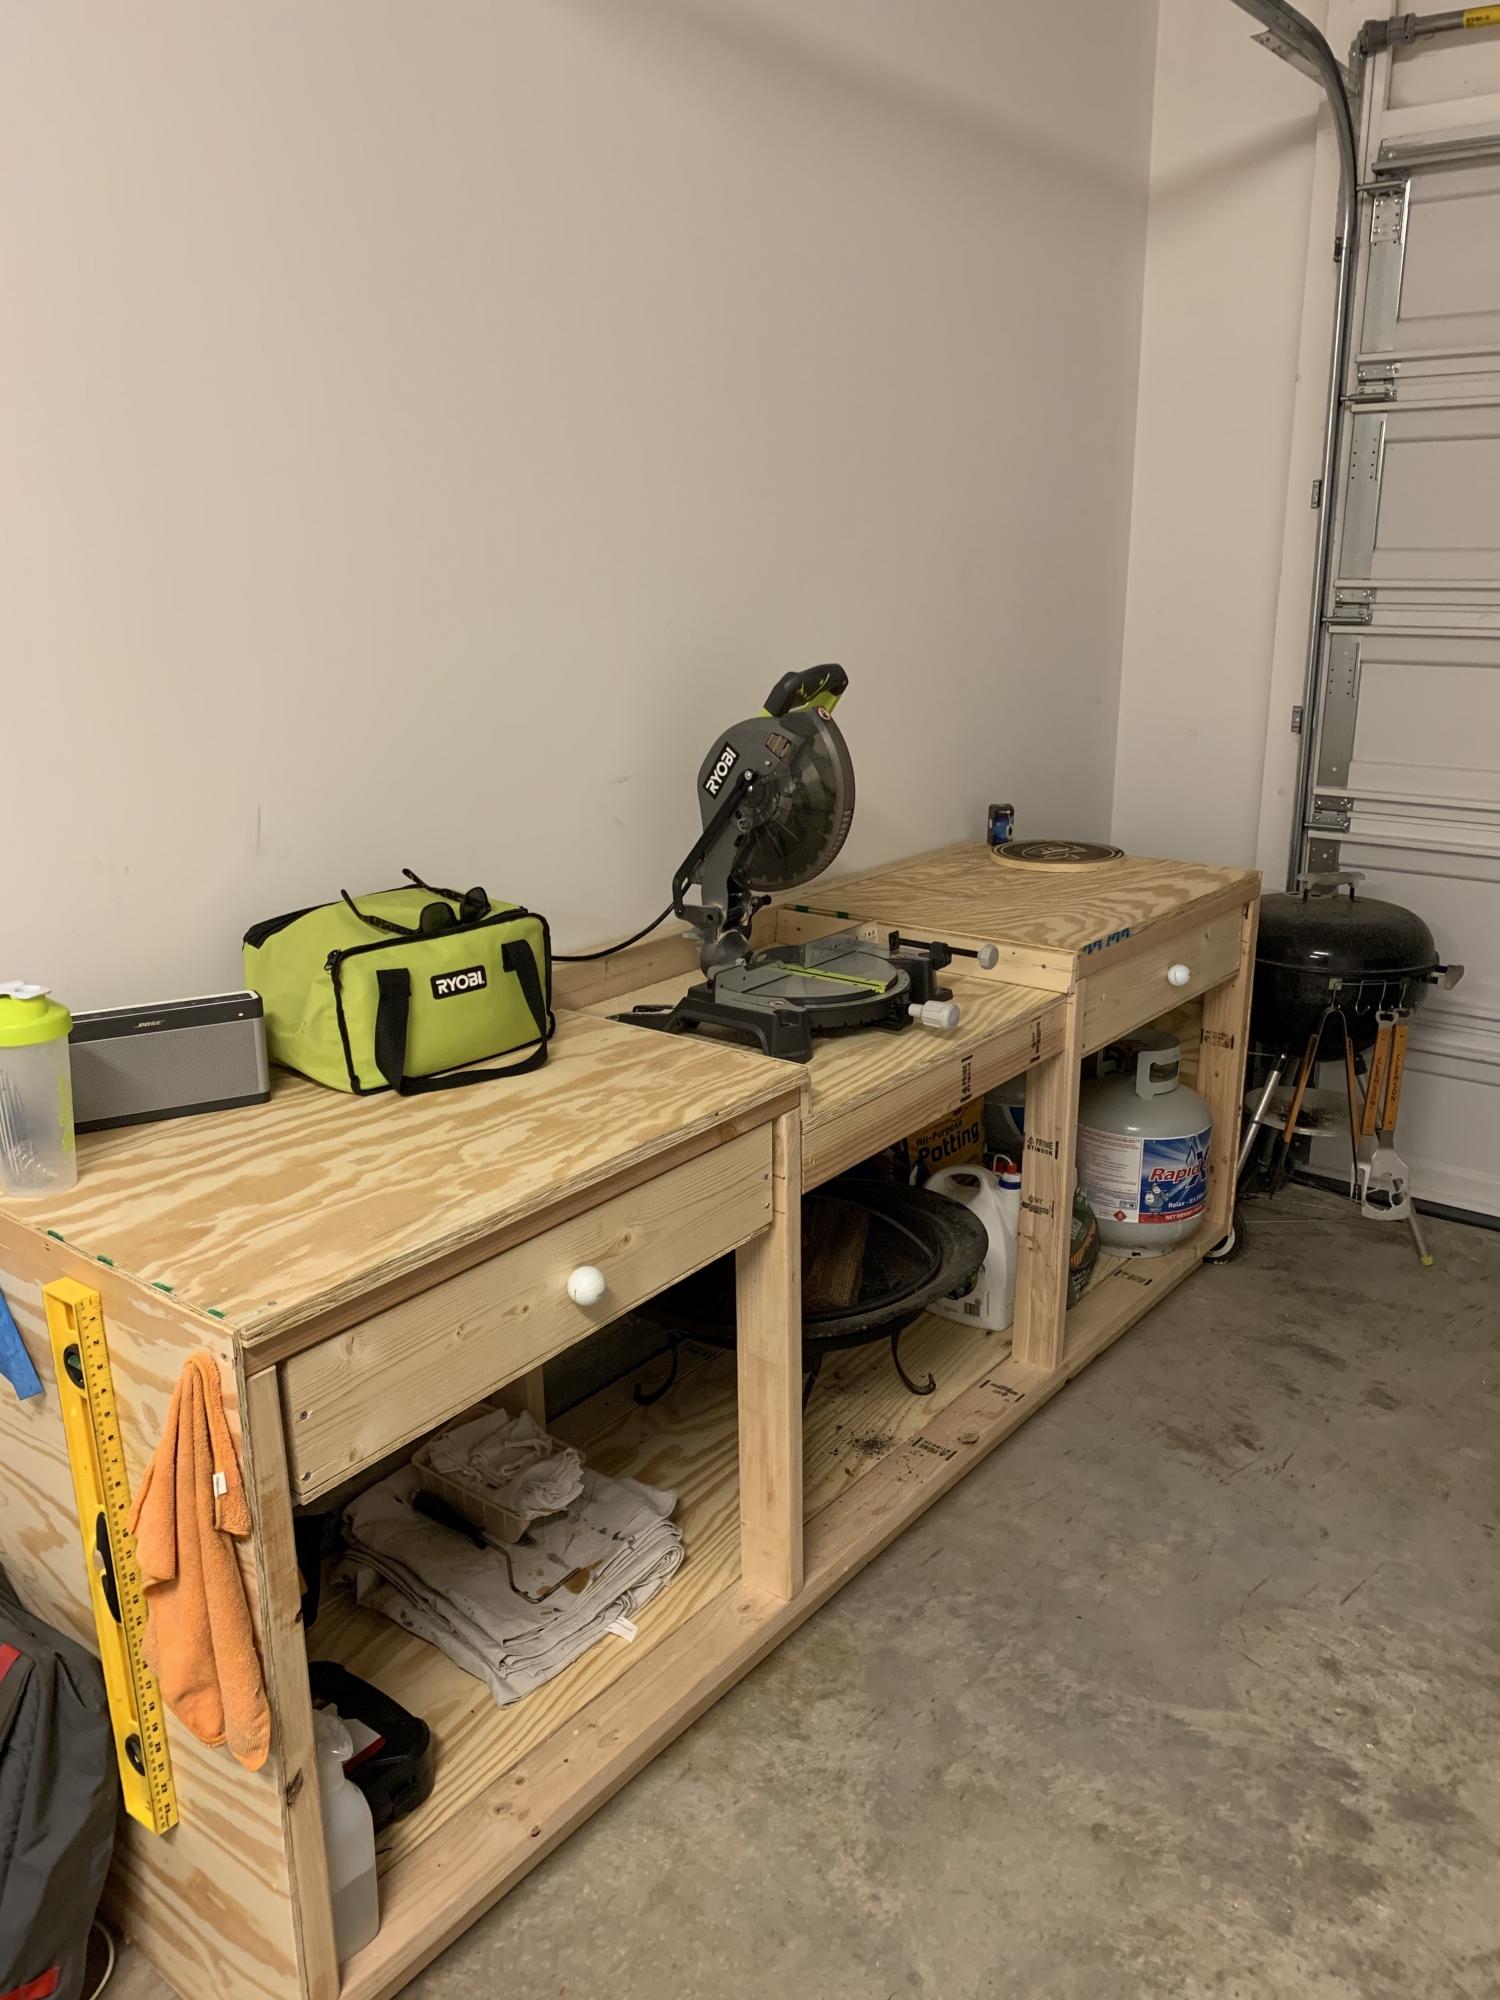
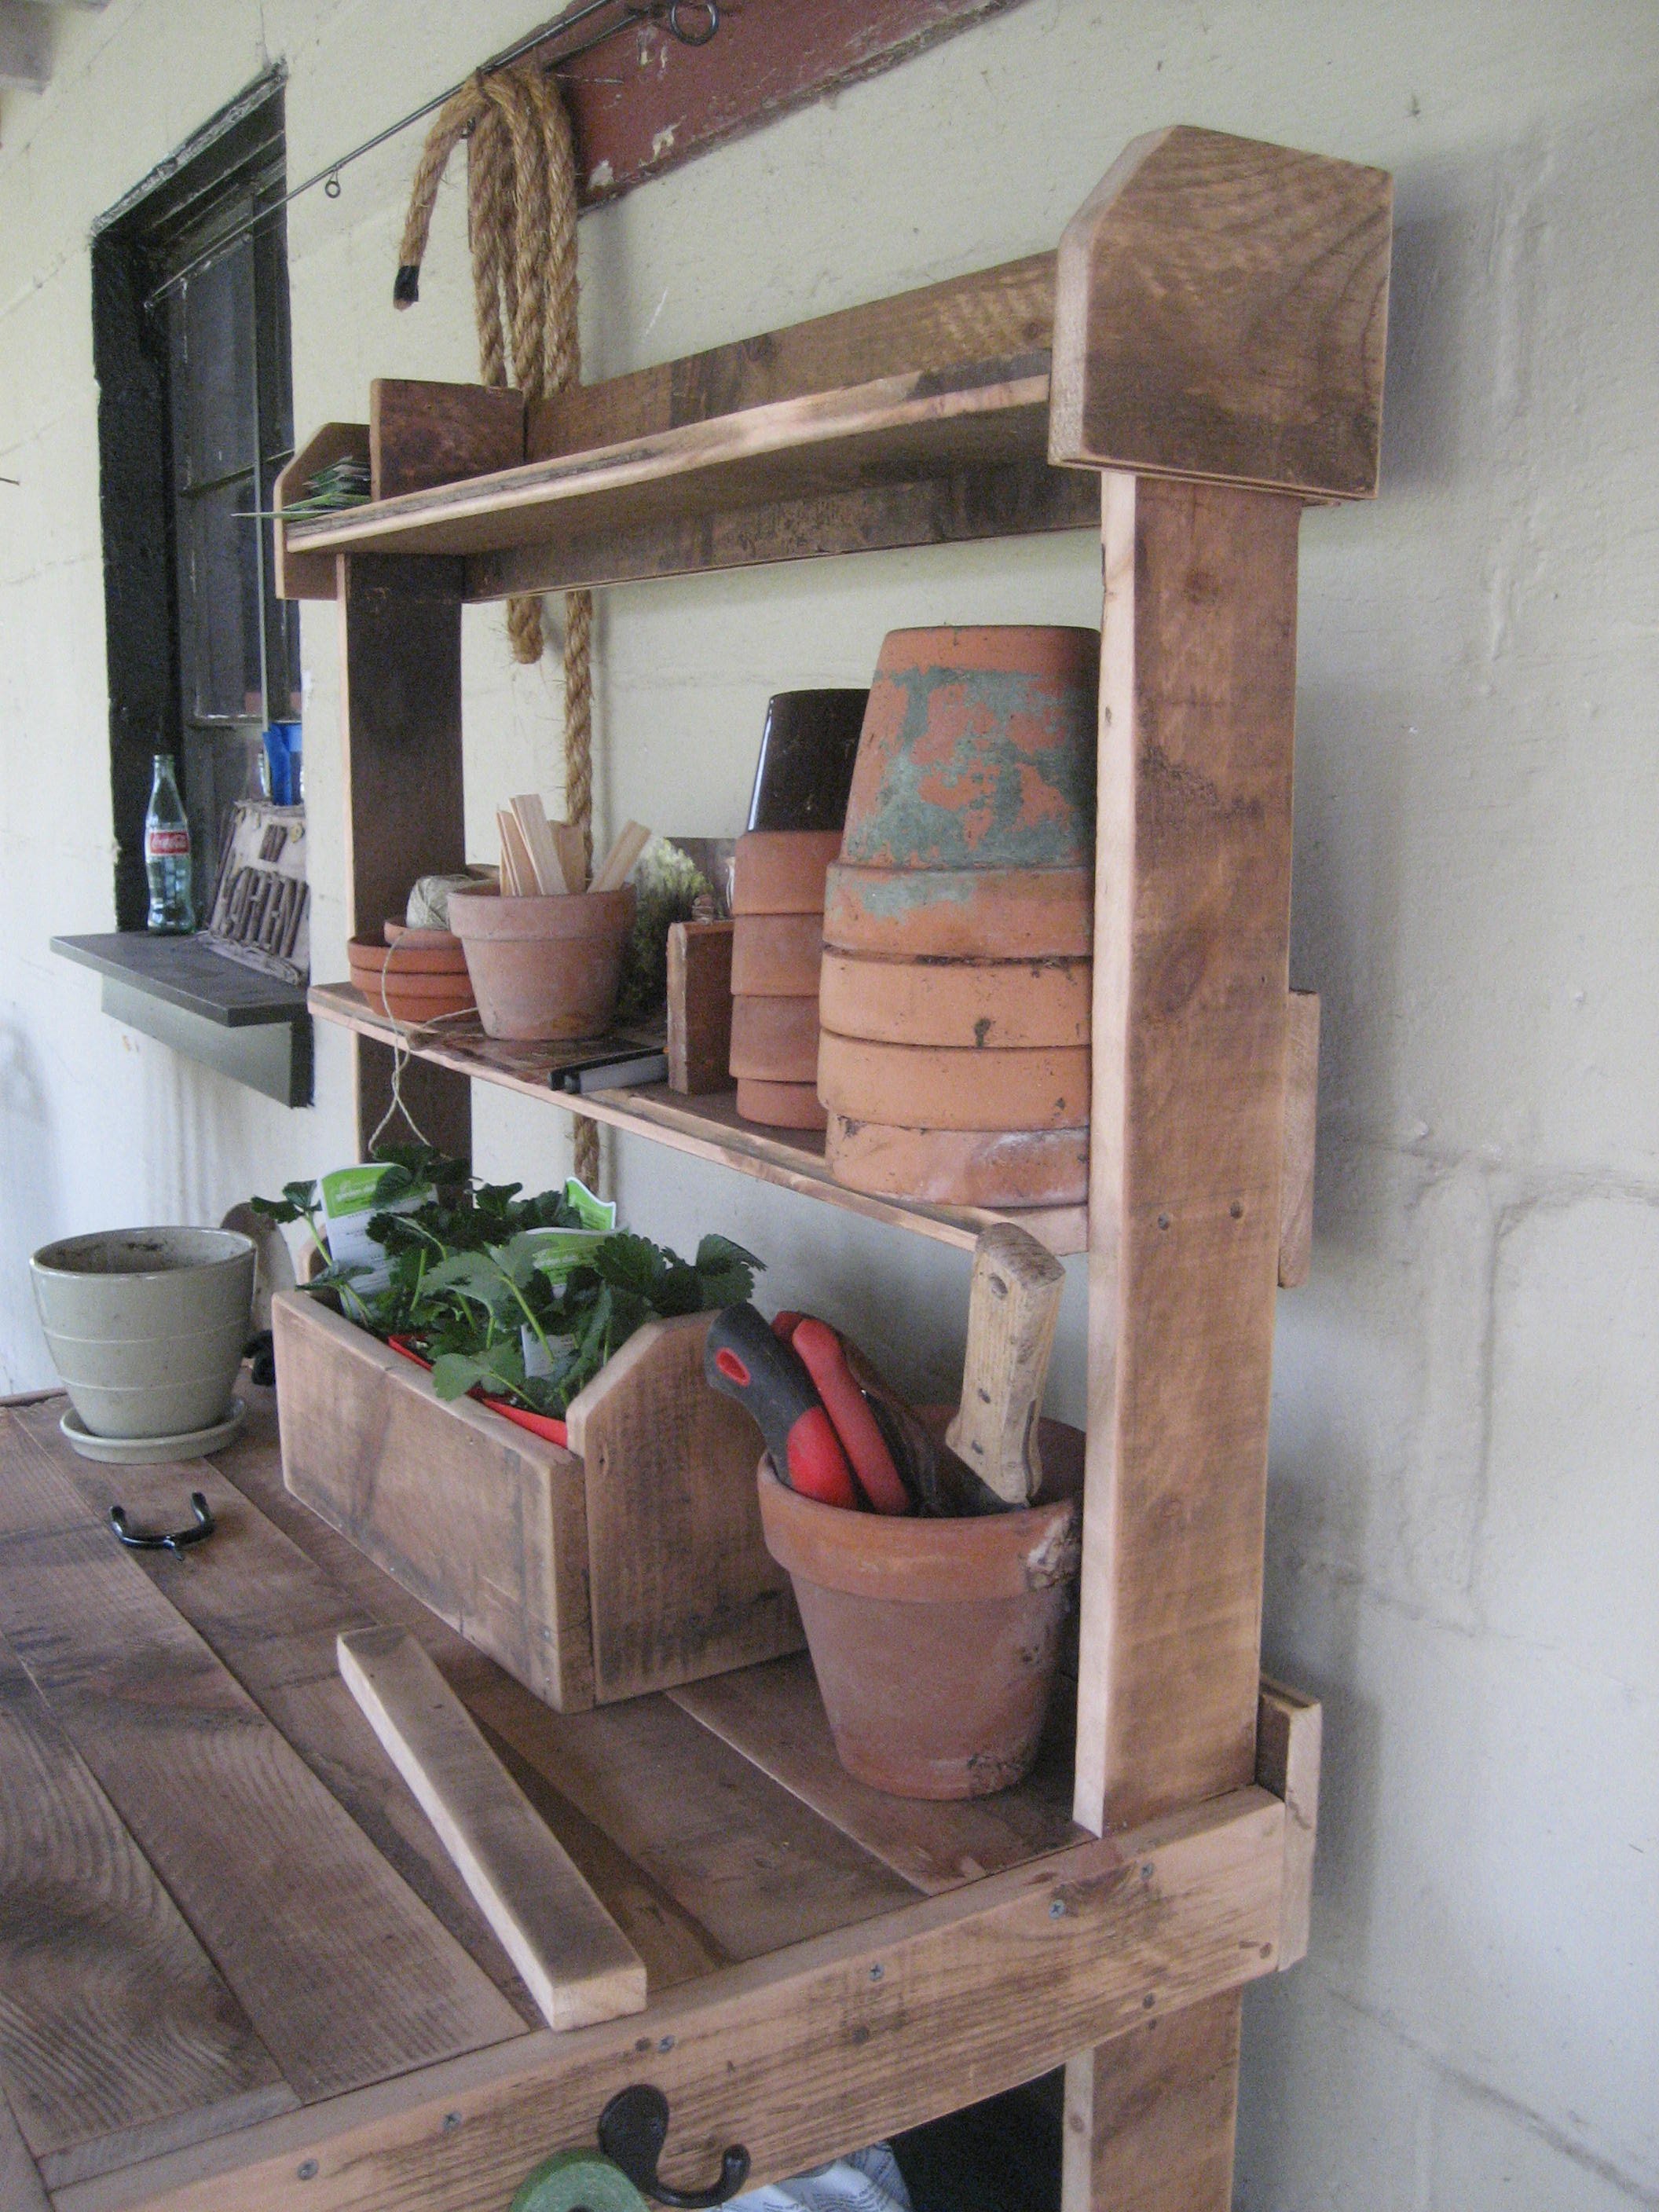
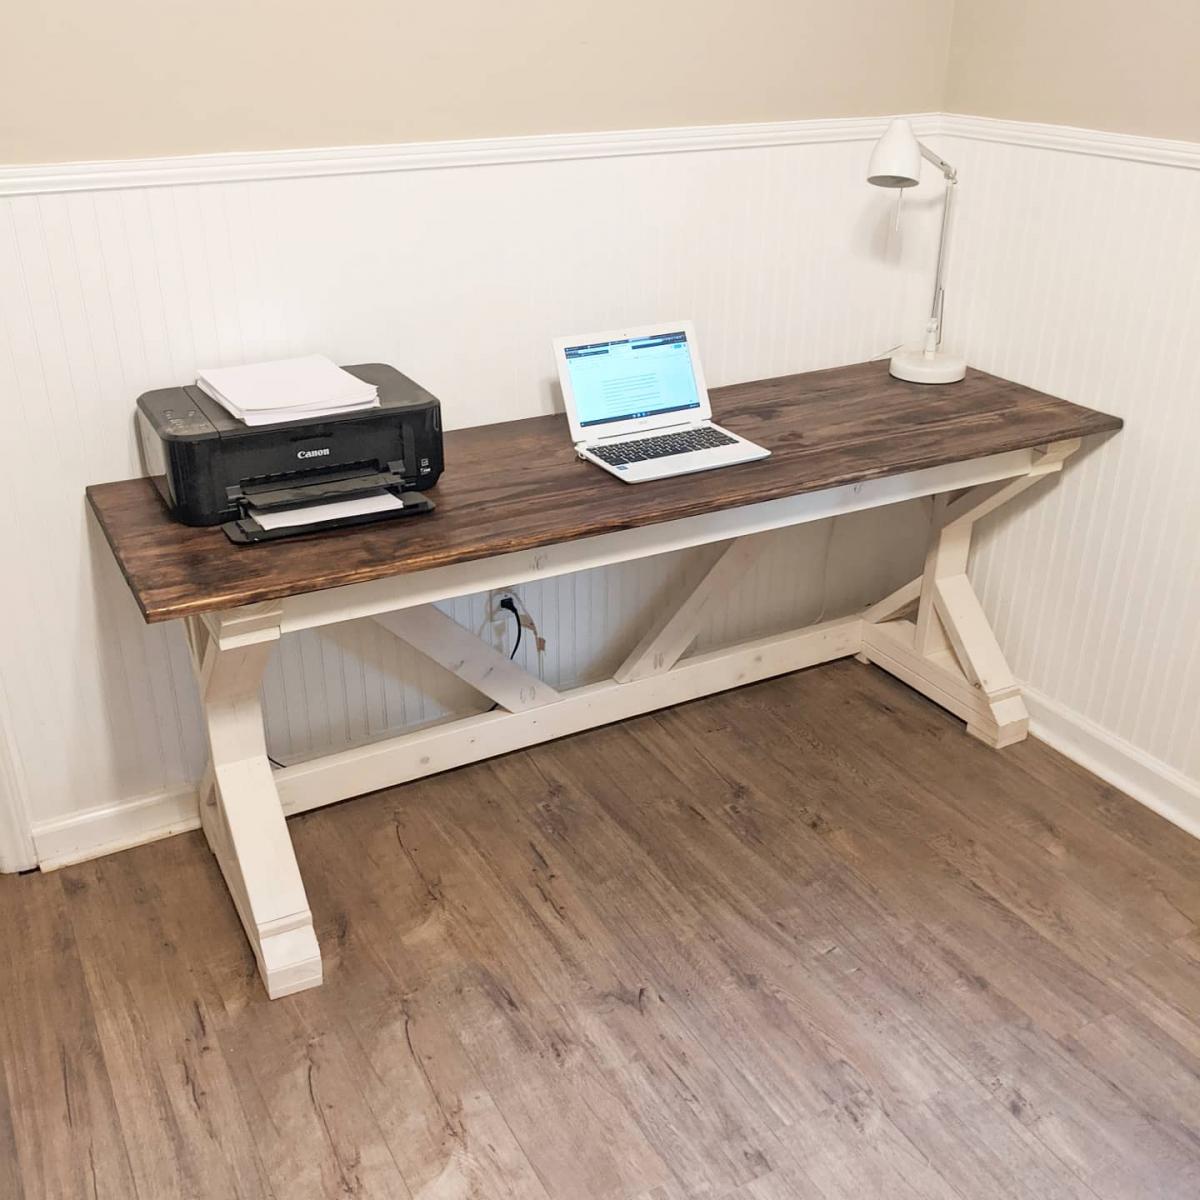
I picked up wood working as an indoor hobby during the Coronavirus and working from home. I was doing everything on the floor in my garage until I saw these plans for the Pony Wall Workbench. I'm 6'4 so having a bench to work at is such a savor for my back. I didn't have as much room, so I just used the 8 foot section and dropped the miter saw into the middle, two drawers on either side. I'm a big golf fan as well, so I spiced it up with some old golf balls I had laying around for drawer knobs!
I really appreciate this site and all the plans. I'm looking forward to many new builds, not on the ground haha!
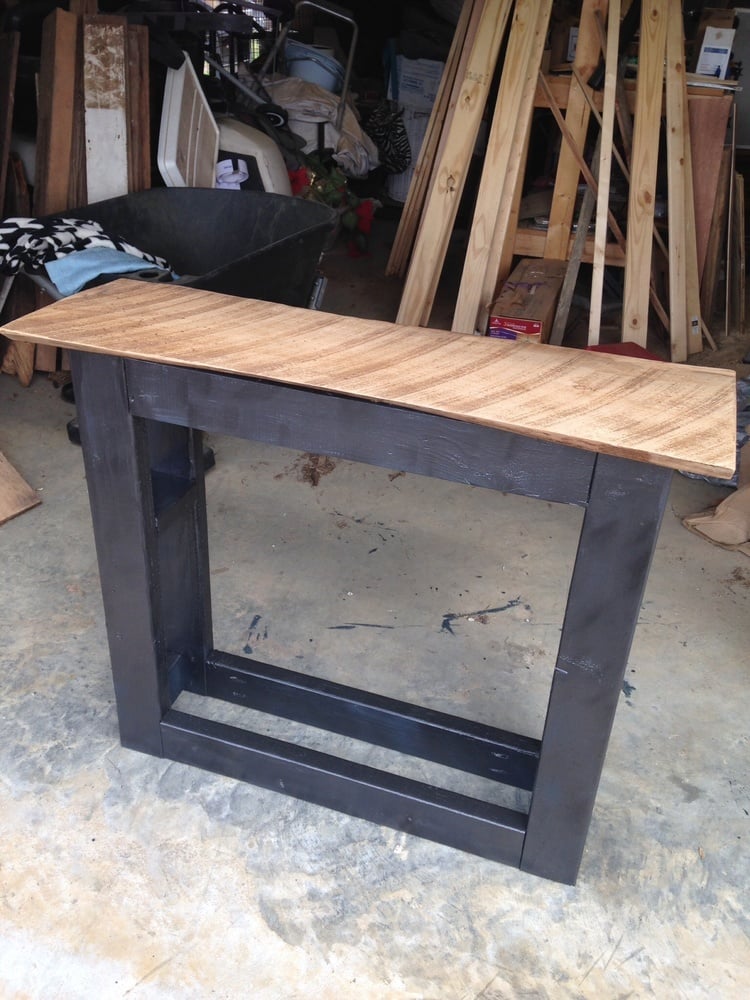
I took the end table submitted and modified it for a console table from the same collection with a piece of reclaimed wood as the table top. Please visit www.ourhomemadefamily.com for details on how I made it.

My father and I made this awesome poolside towel cabinet using the Benchmark Cabinet plans. A super easy 1 day build and it looks amazing on the patio. Bring on the pool weather!

This was my very first wood working project since working around my grandfather's shop 20 years ago as a child. I had to buy a few tools to get it done (circular saw, Kreg Jig), but it was a great learning experience!
I made a rookie move of wiping up excess wood glue, which didn't take the stain at all. I had to remove that glue with a Dremel tool and spot restain. Since then, I've been told to let the glue drops dry next time and just chisel off after they are dry.
Since this was my first project, I had to buy EVERYTHING I needed, so my costs were a little higher. Now that I have some groundwork laid, the next projects will be a snap.
I also highly recommend the Rockwell Jawhorse product, it made working with the Kreg Jig super easy!


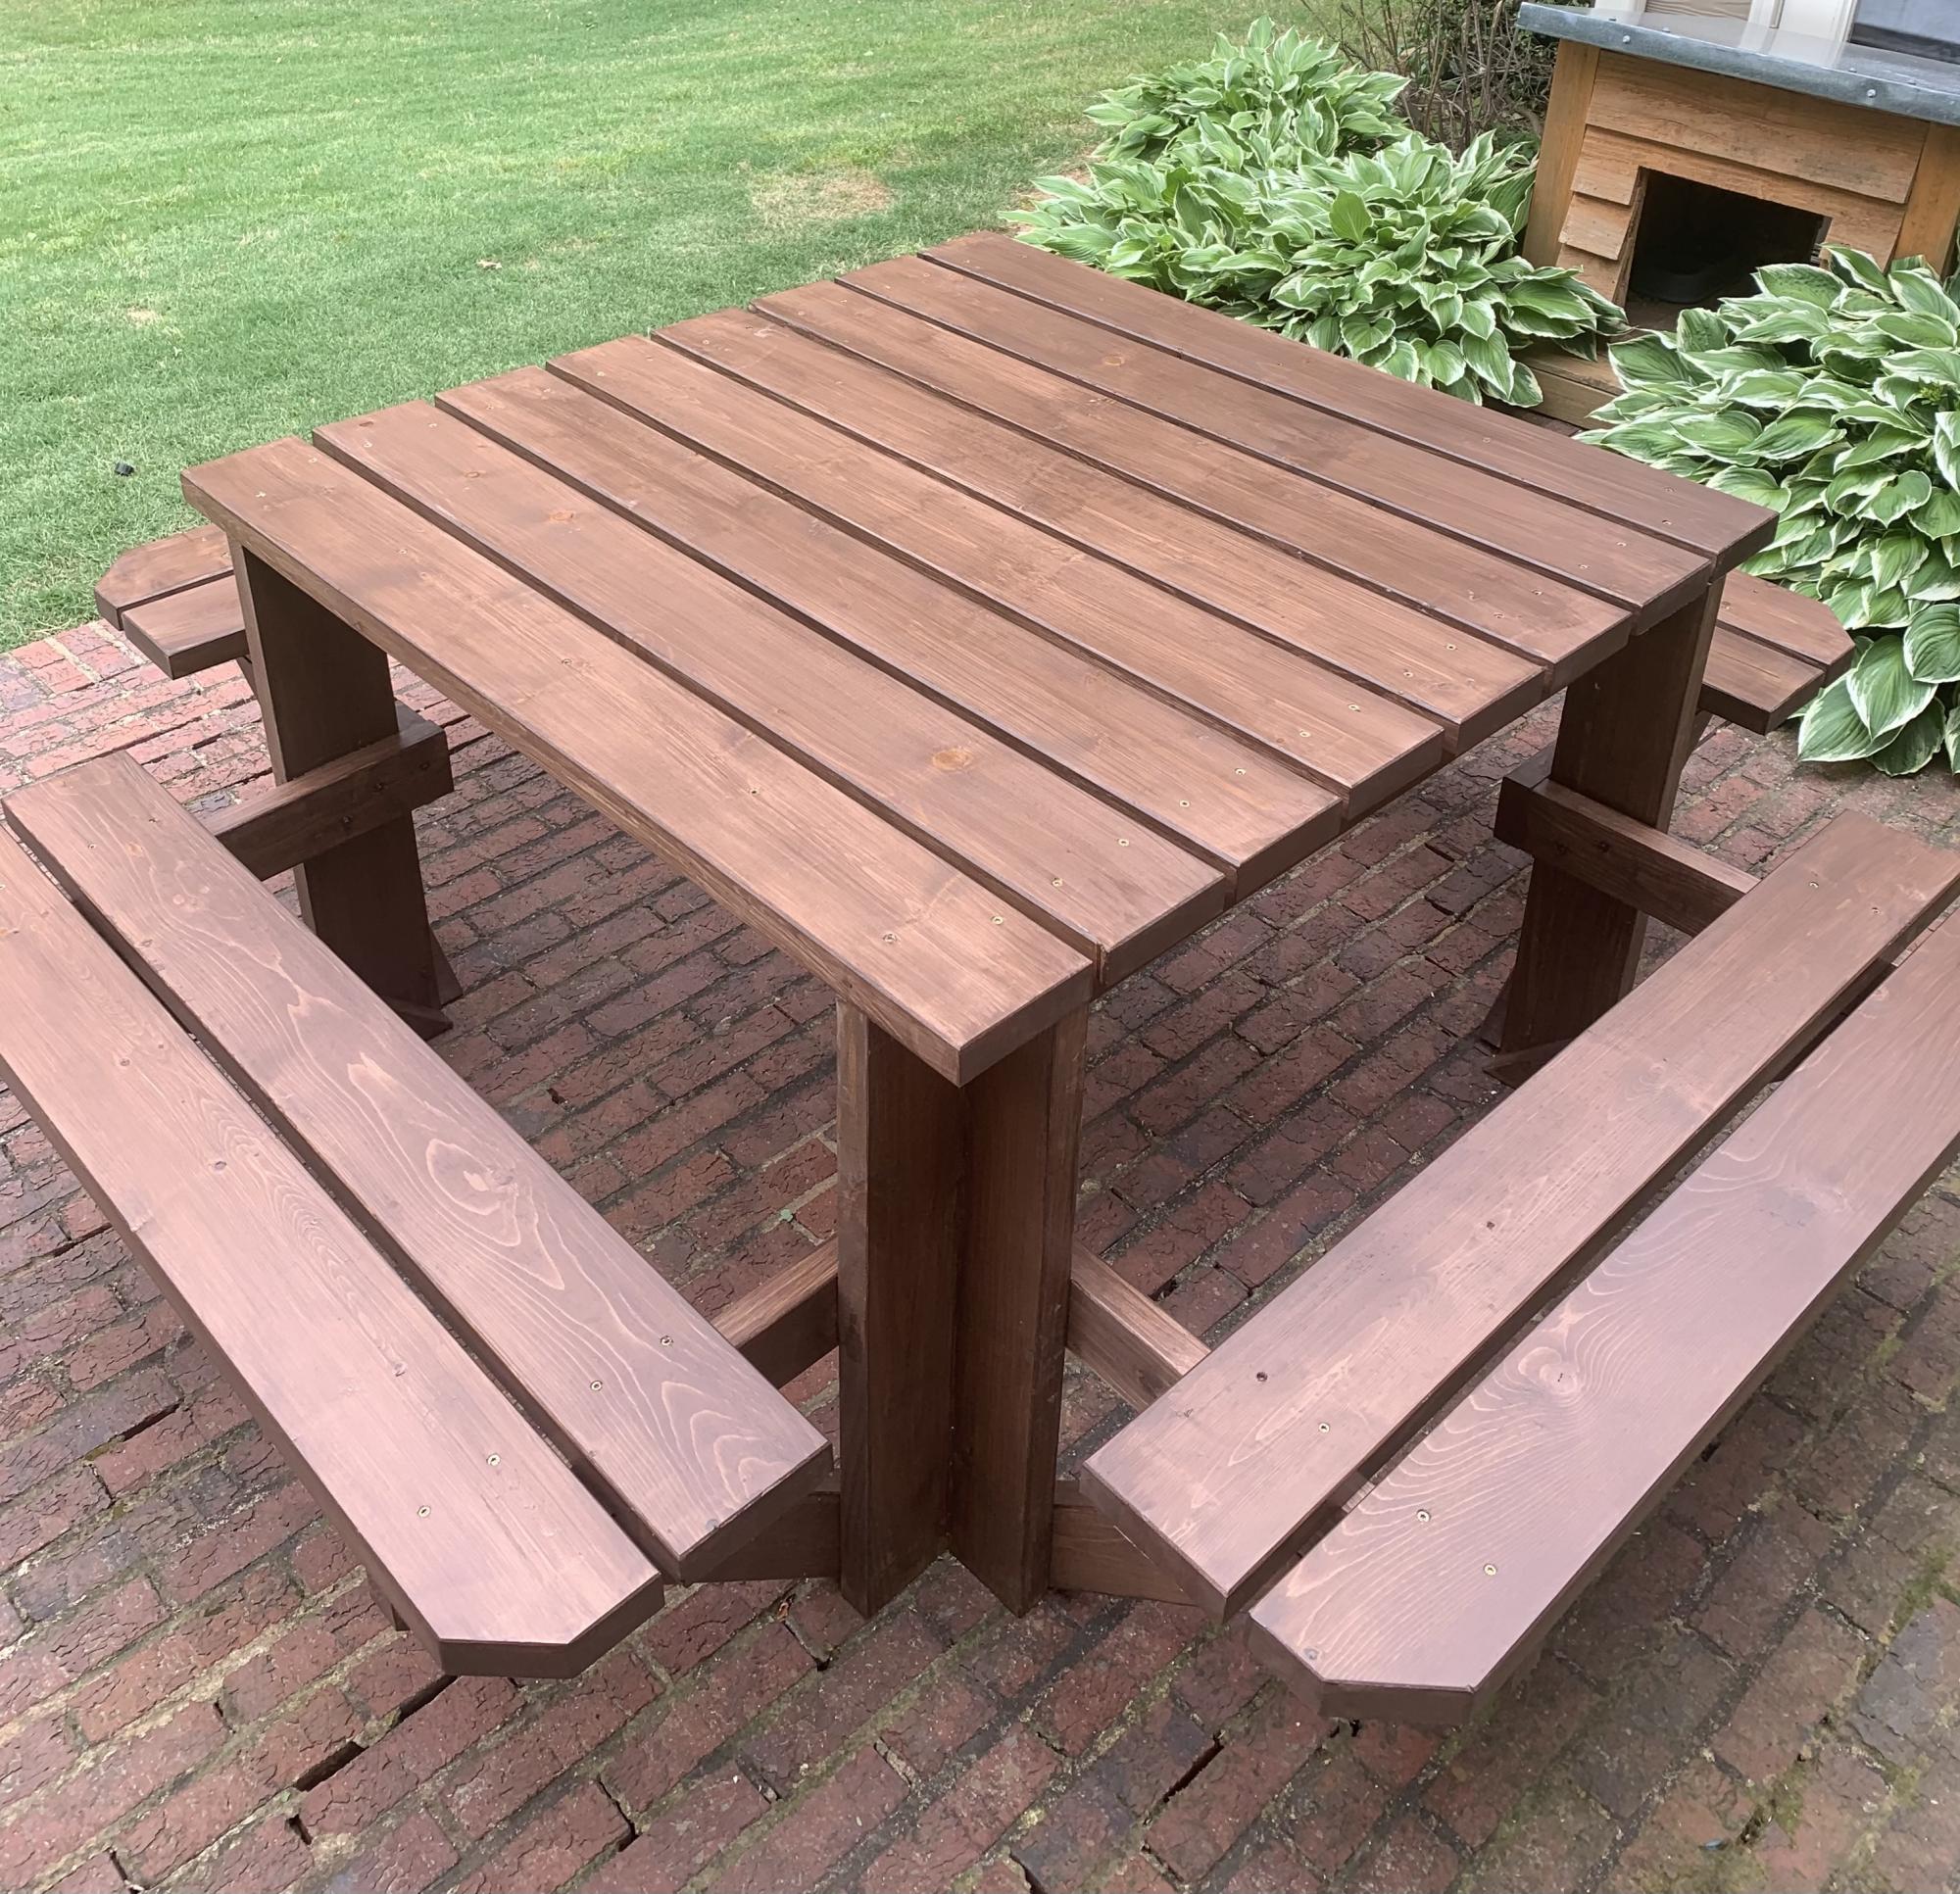
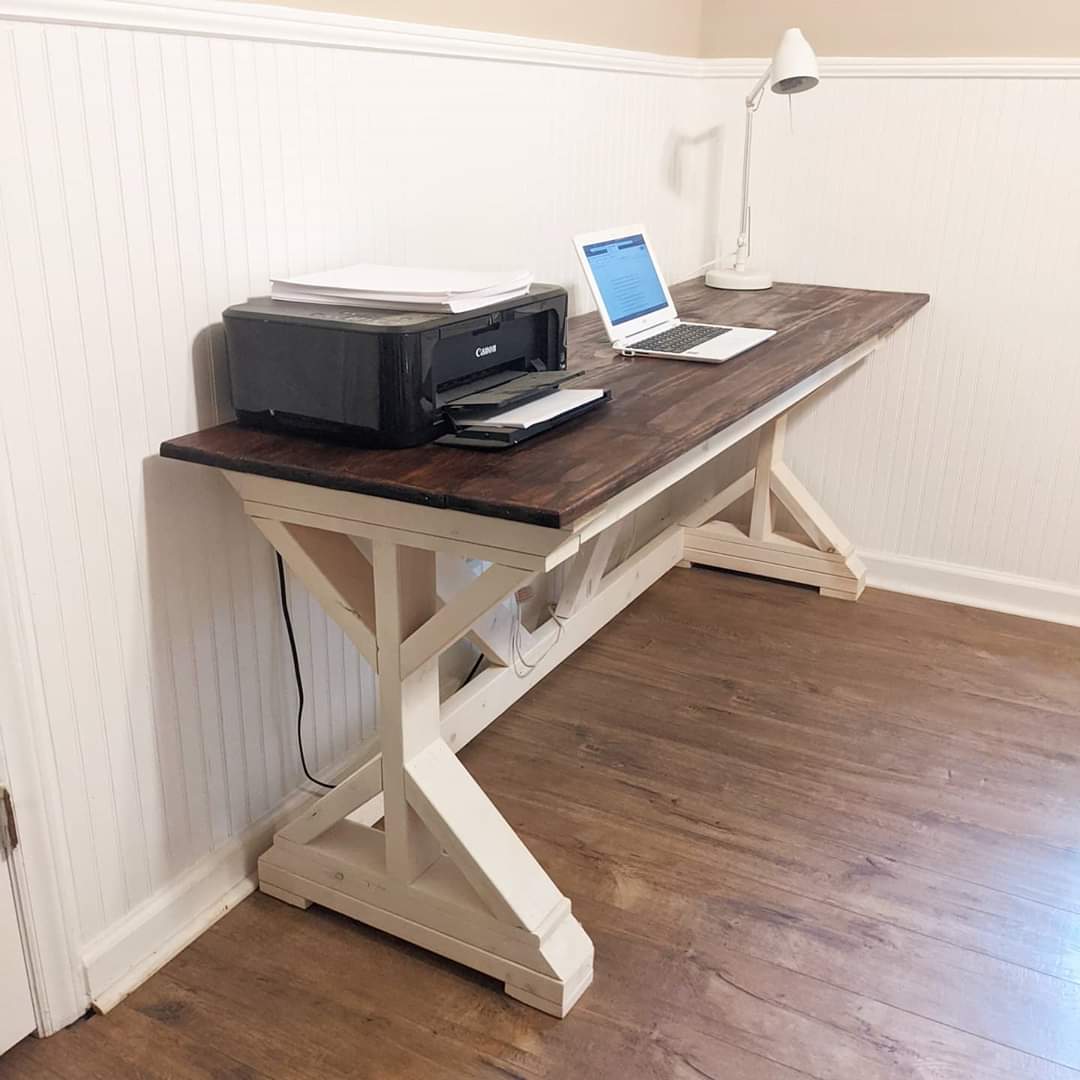
Followed Anna White’s plans except I beveled all the edges and flooded the table leg bottoms with penetrating epoxy sealer. The table looks great!
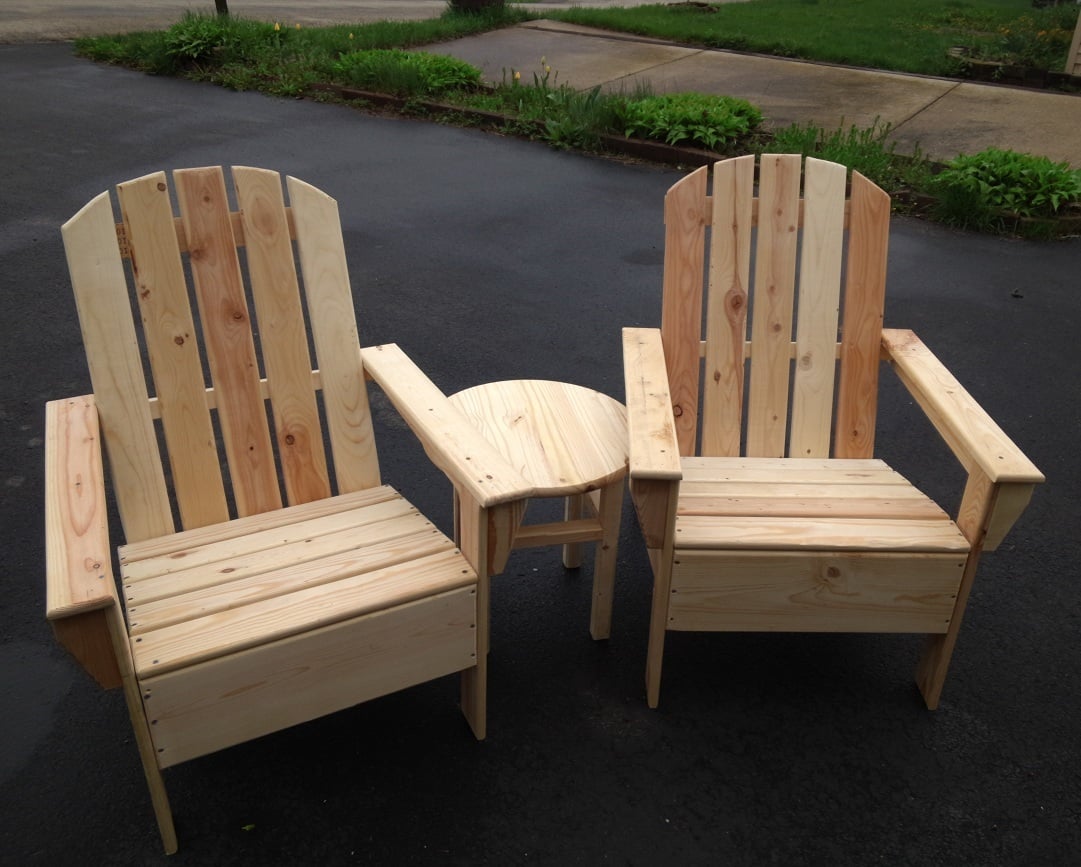
My dad and I built these chairs by following Ana's Adirondack plan, and then adding our own curved back. We also routed all the edges to give the entire chair a rounded feel. We also built the simple little round side table to use with the chairs.
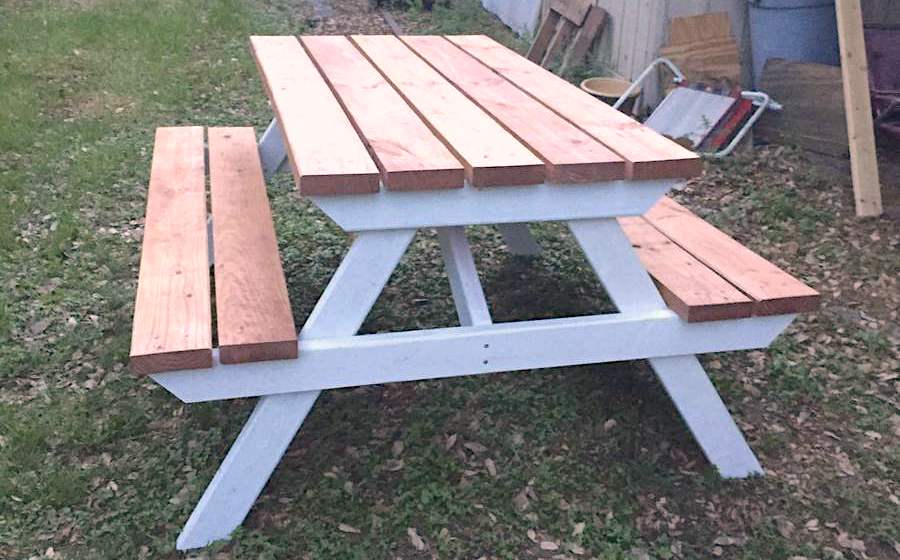
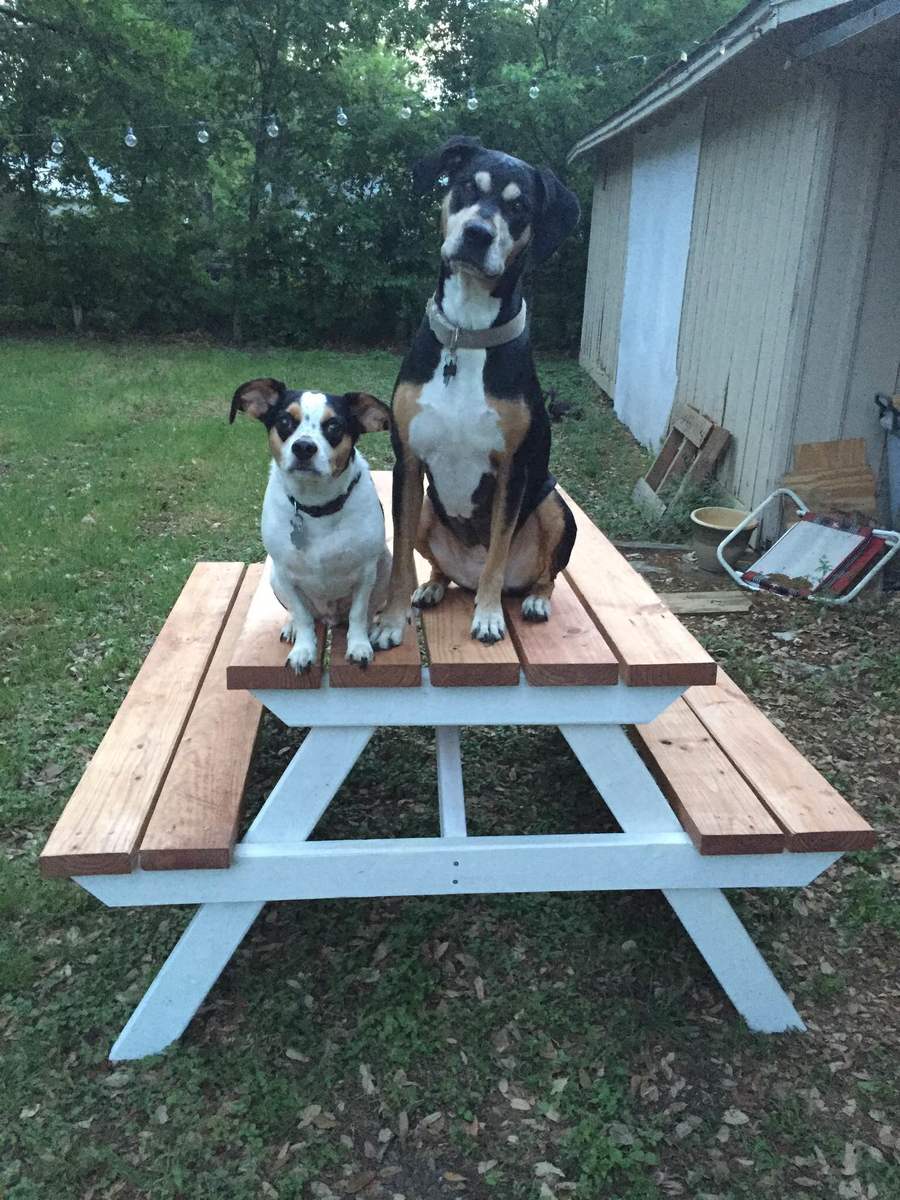
I made this picnic table for my upcoming wedding with the intent of using it as our guestbook. I'm hoping to have people sign, carve, and woodburn their names or a message on the table. I painted the legs and supports white and stained the top and seats with a cherry stain. I still need to put some finish on the whole thing, but overall I'm really happy with how it turned out. And so are my dogs.
Mon, 04/13/2015 - 09:46
I love your idea for a picnic table as a guest book! There are several brags showing benches used as guest books on this site, but no picnic tables. Not wanting to sound like a know-it-all, I would caution you to use paint pens rather than a permanent magic marker if you have guests who aren't comfortable using a woodburning pen (such as an elderly person). Magic marker ink smears when you apply a finish over it. (I read a comment from a mom who made her daughter a guestbook bench. They used permanent magic marker, then applied a poly finish over it, which then ruined all of the signatures.)
Mon, 04/13/2015 - 11:08
Thank you for your suggestion about the paint pens. I hadn't had much time to do research and was planning on just using sharpies. But now I can avoid making that mistake. :)
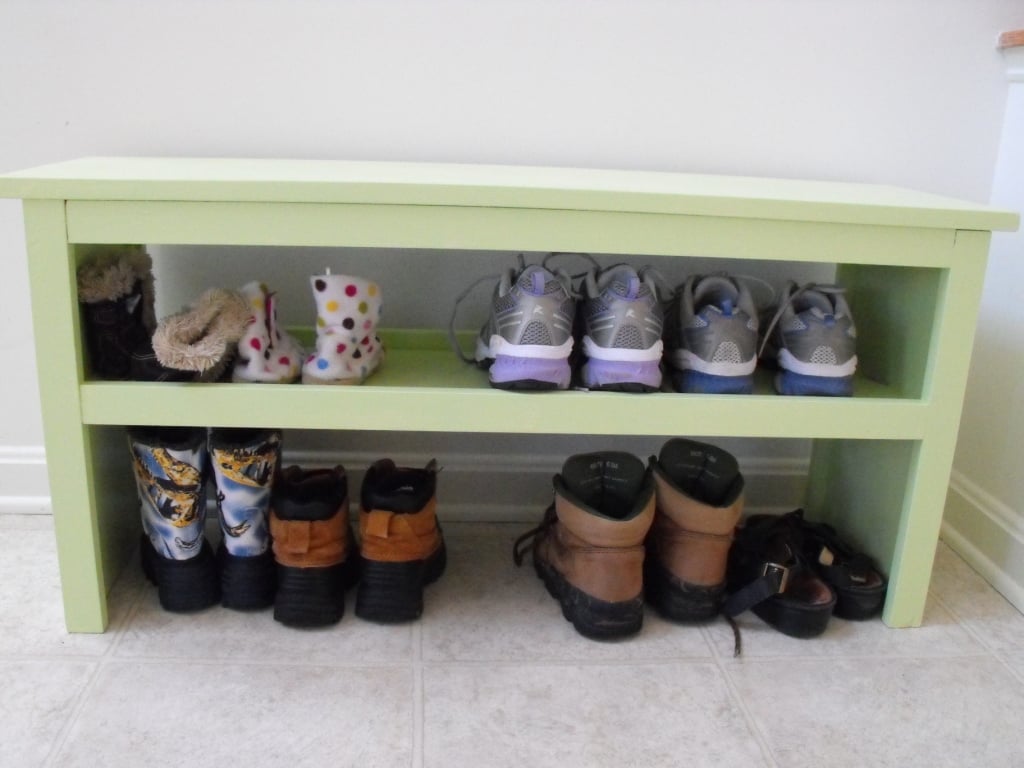
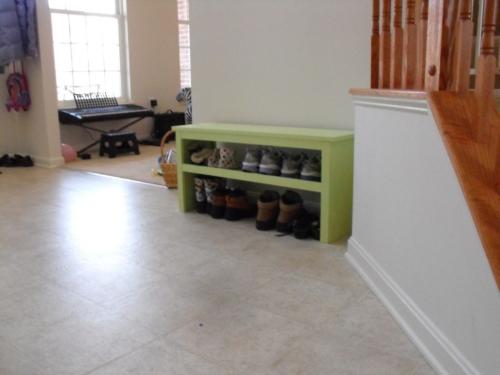
This was the first time I built something from scratch. I've done assembly required bookshelves and a doll-house, but never before had I cut my own wood and drilled my own screw holes, nor had I ever tried my hand at painting a piece of furniture. My husband's friend mentored me and got me going with the power saws, I used his shopsmith for a table saw, and I used the compound miter saw we own. Because this website is so user-friendly, I might have even tried to do this on my own, but it helped having someone much more experienced than I check in on me every now and then and give me some tips.
We are in a new house, so most of our walls are still white, but we did paint the family room a bright green, so I used leftover paint for the bench. I had to work on this in the evening after the kids were in bed so it took me about a week, working for about 1-2 hours a night. I found relaxing for the most part(except for where the newspaper underneath the bench started sticking to the painted legs).
I did not use furring strips even though they would have been cheaper, since my friend convinced me they would have required more sanding. The upgrade only cost a few extra dollars.