Community Brag Posts

Wagon

Submitted by gbyrne on Sun, 12/21/2014 - 17:22

Based this wagon on plans found on Ana White's site. I built this for a 2 year old girl of a co-worker. She is right now using it to pull around her dolls.

Built from Plan(s)
Estimated Cost
$25
Estimated Time Investment
Day Project (6-9 Hours)
Recommended Skill Level
Beginner

Industrial Closet System

Submitted by gmwillar on Wed, 12/24/2014 - 07:07

I built this closet system for our basement gym as a Christmas present to my boyfriend.  He loved it!

I stained all of the boards before building as suggested in the plan - it definitely saved a lot of time and stress.  After cutting and staining, and I brought all of the pieces downstairs to build.  

The actual building went relatively quickly, but without perfectly straight boards, the shelves themselves were a little tricky.  I also just nailed the shelf boards down with wood glue rather than screwing them in to save time - it's still sturdy and secure.

The length of the closet is about 8 feet long, so the middle shelf is about 1 foot and the two rod shelves are about 3.5 feet long.

Built from Plan(s)
Estimated Cost
$300 Canadian
Estimated Time Investment
Day Project (6-9 Hours)
Finish Used
Minwax Golden Oak
Recommended Skill Level
Intermediate

Comments

Cedar Tiered Flower Planter

Submitted by Anonymous (not verified) on Tue, 05/04/2021 - 14:30

We made this tiered planter for a Mother's Day gift for my wife. It was a simple build and the plans are very easy to follow. I couldn't get any cedar fence pickets so I used standard 1x6x8 cedar boards that were available at the local big box store; that's why the cost is a little high. The planters were made 24" wide for more room instead of 16'" wide as per the plans. We personalized it by adding the quotes to the boards and burning them into the wood with a pyrography pen.

Estimated Cost
$50
Estimated Time Investment
Afternoon Project (3-6 Hours)
Finish Used
Varathane Classic Penetrating Wood Stain - Natural
Recommended Skill Level
Beginner

Comments

Ultimate tool bench with rolling carts

This plan is so perfect and I love the fact that it has a space for most of the tools, for a miter saw, table saw, and could be customized to your needs and tools that you have!

Comments

Patio cooler/Grill cart!

Submitted by Anonymous (not verified) on Thu, 06/22/2017 - 14:06

Great project! I'm new to wood working and have been looking for simple but challenging builds. Needless to say this fit the bill... This grill cart was a great starter build and ultimately became a Father's Day gift!  My Pops loved it! 

I did add a couple of custom pieces: a foldable table top extension and towel bar... things Dad will undoubtedly need as he's an outdoorsman who loves to BBQ!

Thanks for the idea/design plans! 

Estimated Cost
$150
Estimated Time Investment
Weekend Project (10-20 Hours)
Finish Used
Semi-gloss spar urethane (3 coats)
Recommended Skill Level
Beginner

Comments

Modern Adirondack Chair

Submitted by abbulone on Mon, 09/13/2021 - 13:35

First time making this type of chair. Your plan made it really easy to cut and assemble the frame. I just changed the back to different types of flags. I’ve made them for my friends in the fire department, police department, ems, military, and a corrections Officer. They are an absolute hit.

Comments

Potting Bench

Submitted by bluejazz on Thu, 03/24/2011 - 12:09

The plans are great.  This went together really fast.  I am cheating a little here, it is not quite complete; I need to add the side blocks on top and my wife would like a another panel added to the front at work height level, just for looks.  But the overall look won't be changed.  I struggled some with finishing (I usually do).  A couple spots  have runs I didn't see.  One will be covered by the front panel I'll add,but another needs sanding.

Just for fun I added a picture of the bench 3 years later. Its held up well to a lot of use and a lot of sitting out in the elements.

Built from Plan(s)
Estimated Cost
$100
Estimated Time Investment
Weekend Project (10-20 Hours)
Finish Used
General Finishes Cedar Exterior 450 Water based stain. I was going to add a spar varnish to extend the life. I decided against that because while it likely would extend the life, I would have to strip it to re-stain. After a couple years, I can simply re-stain without stripping if I don't varnish.
Recommended Skill Level
Beginner

Timber Cabin Chicken Coop

Submitted by Julie101 on Thu, 12/02/2021 - 19:14

I had to convert all the measurements from inches to mm, but it was worth the brain drain. I didn't add the garden, but extended out the chicken coop. I am thrilled with the results! Thank you!

Comments

Ana White Admin

Fri, 12/03/2021 - 07:39

WOW, definitely worth the extra effort, just beautiful! I wish we could offer metric plans, may need to figure that out.

Seasonal And Holiday

Full size Murphy Bed

Submitted by Hartung26 on Wed, 06/26/2013 - 20:07

Used the plans for the twin bed, just added the difference in mattress size to the measurements. Pretty simple really. Used a cam lock centered above the door and a sawtooth picture hanger on the inside as a locking mechanism.

Estimated Cost
$275
Estimated Time Investment
Week Long Project (20 Hours or More)
Finish Used
WinMax English Chestnut
Recommended Skill Level
Intermediate

Comments

spiceylg

Thu, 06/27/2013 - 12:16

Been thinking of building one of these. Yours looks beautiful, nice job!

campbelllsara

Tue, 09/30/2014 - 14:16

Hello,

I have been scowering the internet... I too would like to have my murphy bed raised off of the ground and be a full size murphy bed.  But everytime I try to do "adjustments" and get "creative" it ends in disaster.  I am better at following instructions.  Is there anyway that you could give me the exact measurements for your fullsize bed and let me know how it is that you propped the bed up at the end?

[email protected]


Thank you.

Swing and arbor

Weekend swing project

Recommended Skill Level
Beginner

Comments

Ana White

Tue, 05/07/2019 - 10:42

We don't currently have this plan available, although I'd be happy to draw it with the author's permission.

I have linked a few plans above that could be used to create this plan.  Just make sure you bury the arbor uprights underground on concrete pier posts or similar (like building a fence)

The playhouse project!

We started this project a few months ago. My husband made most of the construction, and I decorated the inside. We added many little details, including a clothesline, windows with plexiglass, a BBQ, a little kitchen, a doorbell, a solar light, a slide, shelves, a table, a bench, etc. The kids loooooove their new house. The whole project took many many hours, but I am really happy with the results. Thank you so much Ana for the plans!!

Estimated Cost
900 $
Estimated Time Investment
Week Long Project (20 Hours or More)
Finish Used
primer and extorior paint
Recommended Skill Level
Intermediate

Comments

Theresa W

Sun, 07/14/2013 - 17:24

It is beautiful. I can only imagine how excited your kids are to play in this gorgeous space made just for them. Well Done!

LadyBird

Sun, 07/14/2013 - 21:10

Looks like your child has everything they need. Including a phone! I love the bench seat and the pillows with the window. So cool. You put a lot of work into this. Well done.

denaschance2

Thu, 04/03/2014 - 08:23

Love, love it! Couple of questions... how did you attach the walls to the decking and how far apart? How tall is the railing? I'm curious to know the sturdiness of the project overall and my SIL has concerns about the 3/4 roof sheeting over 1/4 walls. Comments please. My son-in-law and I have just started this project.

DIY Modern Rustic Outdoor Chair

Submitted by susanshamp on Fri, 07/10/2015 - 15:07

I made this outdoor chair by looking at a variety of plans and designs from Restoration Hardware and other stores. Check out more info on the project on my blog link. Thanks for looking!

Estimated Time Investment
Afternoon Project (3-6 Hours)
Recommended Skill Level
Beginner

Comments

Little girls Jr. Loft Bed

Submitted by TamiJ on Mon, 08/03/2015 - 22:26

I built this for my little girl's room and she loves it! She loves the play area underneath especially. The build did not take that long, but the finishing (sanding and painting) took many hours. It is very sturdy. My girls sleep up there together all the time, and we have even had adults sleep up there. We didn't have a corner to put it in, so I built wider steps along the same wall as the bed. 

Estimated Cost
$200
Estimated Time Investment
Week Long Project (20 Hours or More)
Finish Used
Antique white with a satin finish.
Recommended Skill Level
Beginner

Comments

Janeece

Wed, 09/16/2020 - 19:25

I am interested in this design, but would like to have it with a full size mattress. How would I alter the plans? I would also like to have the stairs be storage drawers/stairs. Can you help me with this?
Thank you!

Husky Farmhouse Table and Bench

Submitted by frmoody on Fri, 06/03/2022 - 09:23

I have built several of these tables but this was the first one with turned table legs. They were somewhat expensive but I think the final product looks great with them. I actually stained the bottom aprons and legs the same colour as the top and then put on two coats of an antique white followed by a little scuffing up with sandpaper. I also cut the aprons from 2 x 6's so they were actually 4" in width. I used MinWax Jacobean stain which I had never used before. I then applied three coats of Varathane Satin finish. Not the best photo from my garage but no way I was getting it inside my house for a better photograph. Thanks for the great plans Ana.

Built from Plan(s)

Comments

Simple Modern Outdoor Sectional and Ottomans

Submitted by dwcampb on Fri, 07/22/2011 - 12:04

This was my second project and is the simple outdoor sectional. Took me about 8 hours to build all the sections and another 8 hours to stain everything. We ended up buying the cushions and pillows from Garden Ridge in Texas. Total cost for the cushions was about $500. Wood and materials was about $300. I used 1 x 4 cedar to insure it was rot and insect resistant. Then I stained it with Behr Premium Outdoor Natural #500. Looks great out on our covered patio. I will be building more as we are in the process of installing a pool of which I need lots of furniture to go around the decking!

Estimated Cost
$850 with cushions
Estimated Time Investment
Weekend Project (10-20 Hours)
Finish Used
Behr Premium Outdoor Natual #500. I sprayed all stain with a cup gun and gently spread the stain with a pad applicator. I did 2 coats on all sides.
Recommended Skill Level
Beginner

Comments

Guest (not verified)

Fri, 07/22/2011 - 13:55

This is gorgeous and it goes really nicely with your brick house too! I'd love to see more pics if you have. Great job :)

spiceylg

Mon, 07/25/2011 - 08:09

I want to build this so bad but have to be patient and wait because of the cost of the cushions - it's crazy! You did an amazing job!

Guest (not verified)

Sun, 02/26/2012 - 12:41

Cushions are expensive because you want to buy a mold/mildew resistant foam on the inside. Secondly, you want the fabric to be an outdoor fabric that has resistance to fading from the sun, but again that will resist mold/mildew and withstand rain, etc...with that said it makes them expensive.

Seasonal And Holiday

Garage shelf and work bench

Submitted by Anonymous (not verified) on Wed, 08/10/2022 - 12:29

Used the plans from attached garage shelving to make a 10 ft, 24 inch wide shelf then used similar idea for workbench which I still need to put doors on. I love it! Such an easy plan!

Comments

My stainless steel kitchen island

Submitted by LRSinCA on Sat, 10/24/2015 - 22:36

I really do enjoy my island. It has great storage and the added prep space has been wonderful. With the added counter space It has aloud me to make breads and pizzas and with the stainless steel top it is a breeze to clean. I really have enjoyed Ana's website with all the great plans and tips. 

Built from Plan(s)
Estimated Cost
It was a bit more expensive because of the top. In total it was around $400.00
Estimated Time Investment
Week Long Project (20 Hours or More)
Finish Used
I used a primer and then the Red paint on all the wood except the inside of the drawers along with the stainless steel top which I love. I used a spray primer to seal all the wood and then I used my Paint sprayer for the Red. I then used a gloss poly spay for the top coat to give it a nice shine.The stainless steel top I had made here in the Oakland, CA area. It works great to prep on and roll out pizza rounds.
Recommended Skill Level
Intermediate

Garage / Basement Shelving + Bonus Wine/Liquor Under Stairs Storage

Submitted by MJC2DIY on Wed, 10/12/2022 - 21:35

Using the guidelines for the “BEST DIY Garage Shelves (Attached to Walls), I added this to our unfinished basement area for additional storage. I plan to replicate it in our actual garage as well and build the freestanding shelves also!

As a bonus, I used this plan as inspiration and built directly beside it, which is an unused space under stairs, a wine/liquor storage shelving replacing the plywood with cut 2x4s for added weight capacity/stability.

Couldn’t have been easier!

Comments

MJC2DIY

Wed, 10/19/2022 - 09:14

Thank you!! I am so thankful for Ana White and team! These projects are helping me build a lot of confidence to continue endeavoring more challenging projects each step of the way :-)

Tryde Media Center!

Submitted by perchik on Wed, 08/24/2011 - 20:04

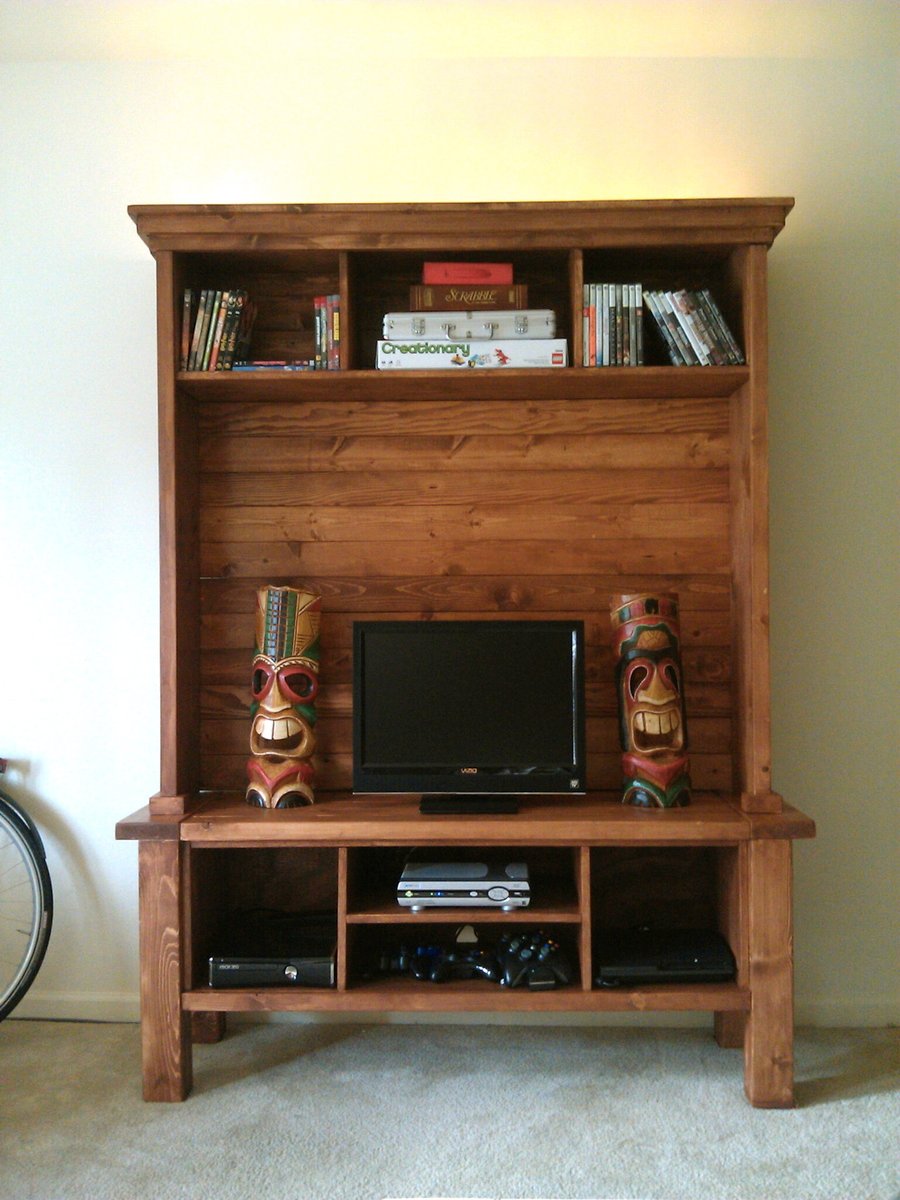
I finally got the tryde media center built! This is actually the last piece I built but the first one I finished. I've made the rest of the tryde tables and I'll upload those later.

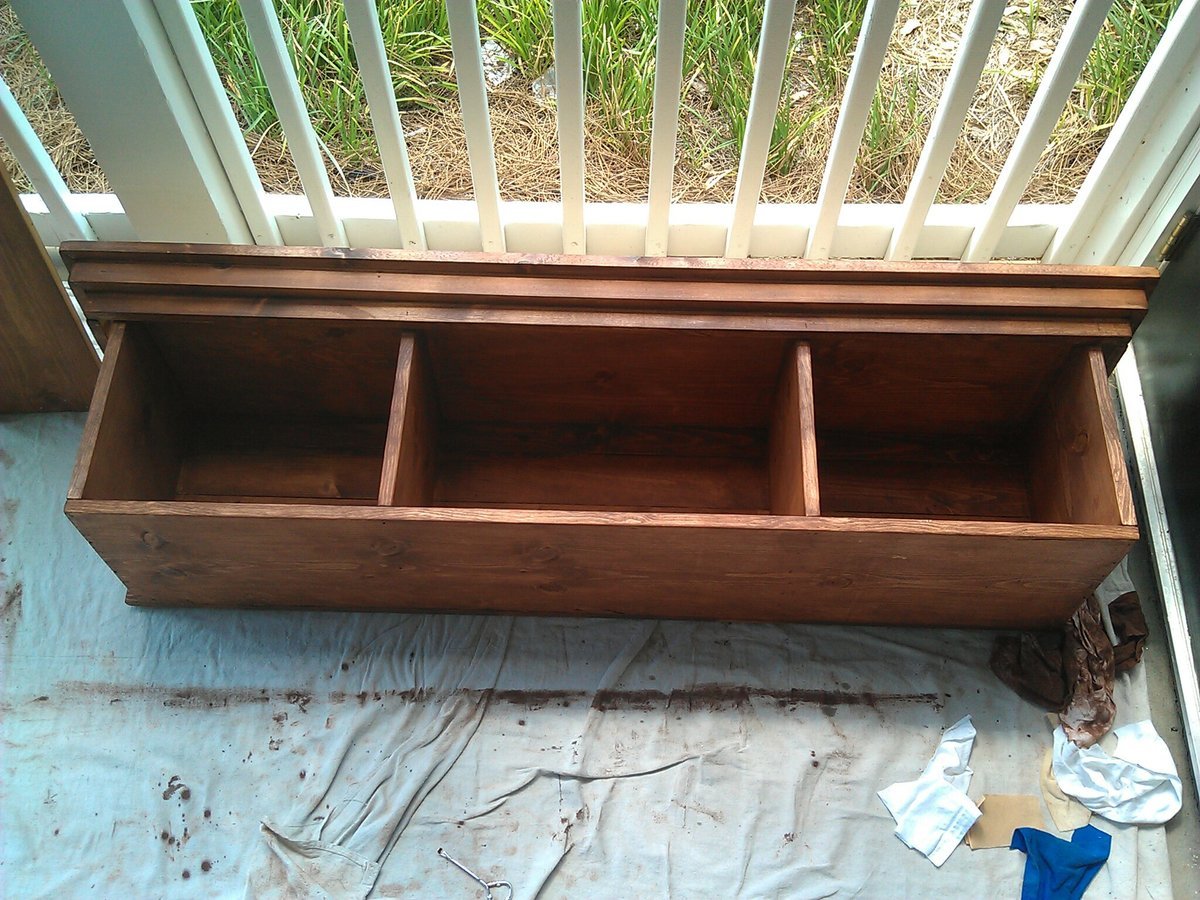
You'll notice that I made some cosmetic modifications to the hutch. I extended the top trim out and wrapped it around the sides. I also embellished the trim at the base of the hutch. Finally with the hutch, I changed the plans to allow me to break it down into smaller pieces to move. The top piece is basically a box with trim. Then the back boards break down into two sections of four boards and the sides come off. Everything is attached by screws so I can undo it later.

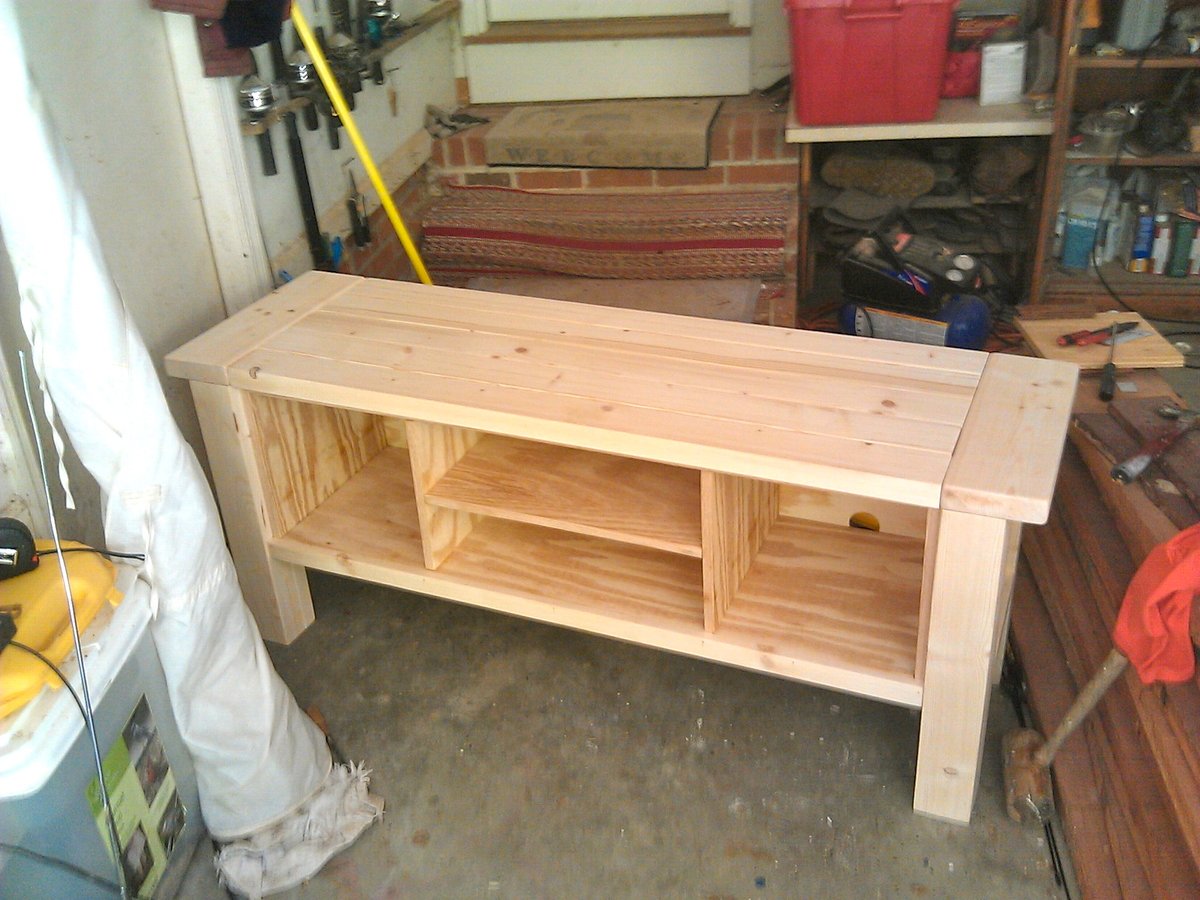
I slightly modified the base unit so that the top boards are 48" long [so I could get two from an 8' board] and the breadboard piece is a 2x6 instead of 2x4 to compensate for the lack of width a little. [This modification wasn't planned until I had the base built and realized I bought 8' 2x4s instead of 10' boards.]

Additionally, on all of my tryde pieces, instead of untreated 4x4s I used a 2x4 1x4 2x4 sandwich and modified all the plans to account for the extra width.

The first picture is the unfinished base.
Second is the top piece of the hutch.
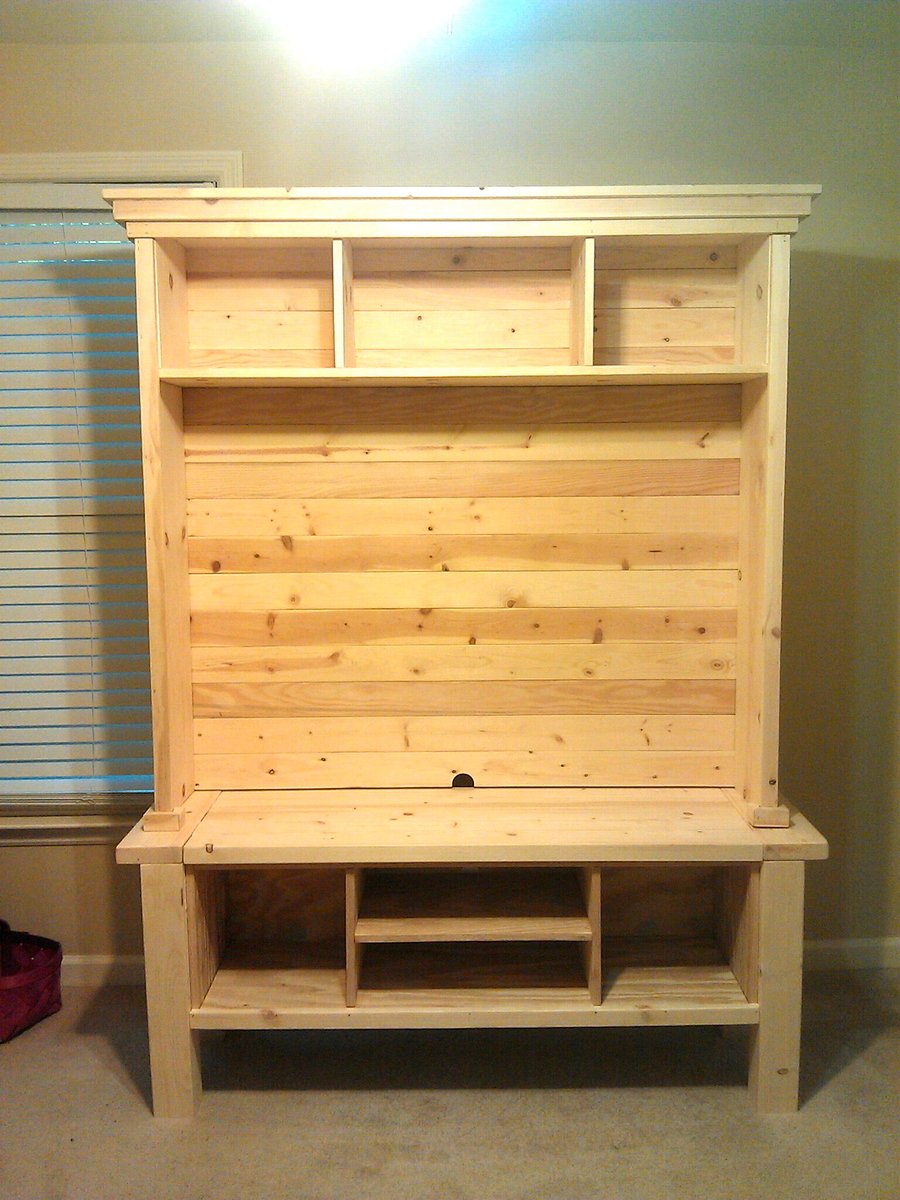
Third, the completed unit, unstained.
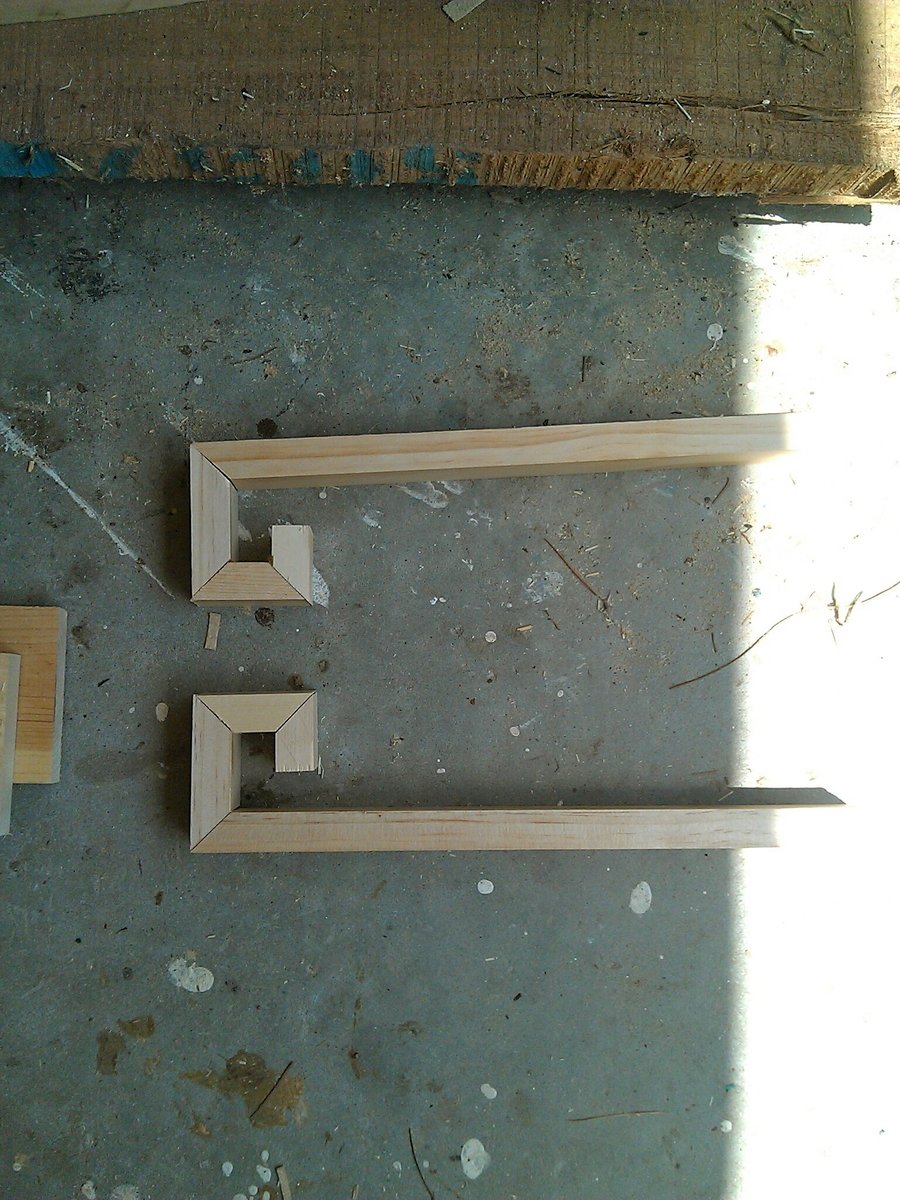
Fourth is a detailed pictures of the molding that went at the bottom of the sides of the hutch.
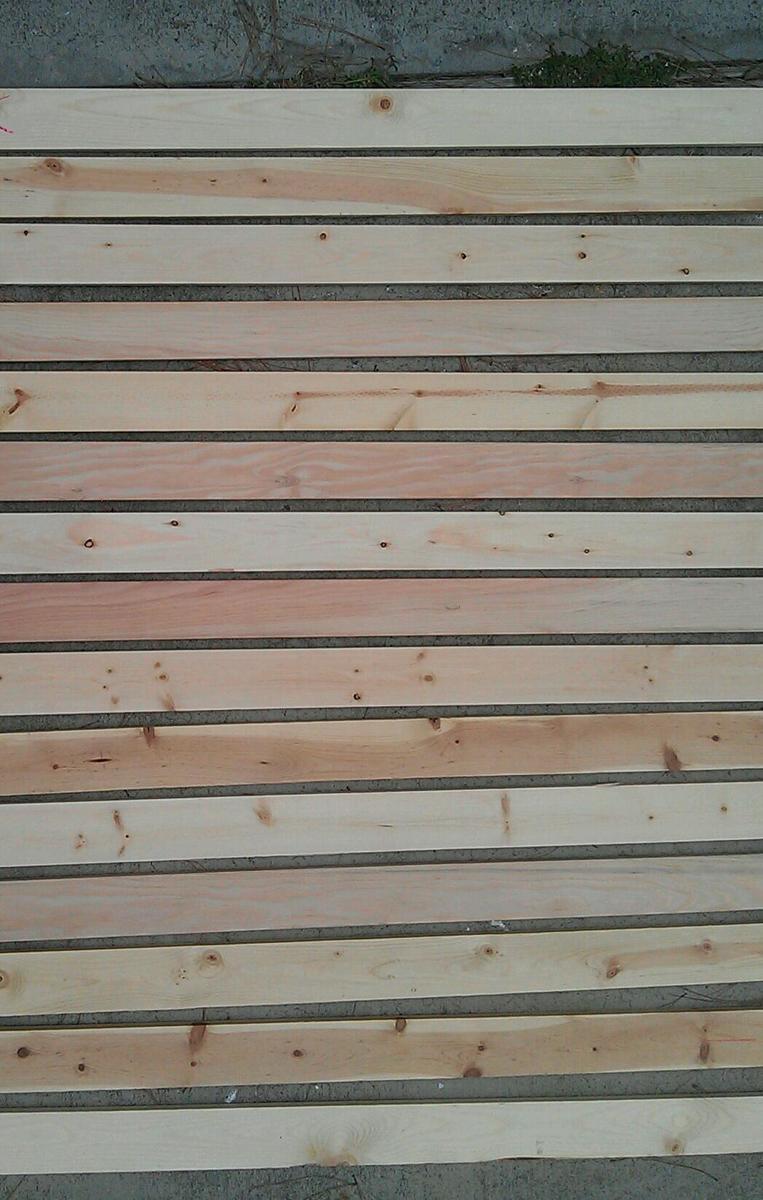
Finally, there's the back boards I used, just because I think they look neat.

After finishing, I ran a rope light around the top of the hutch [hidden by the molding], for some ambient overhead lighting. I also did a lot of cord organization on the back side of the base to hide all the cords.

Estimated Cost
~150
Estimated Time Investment
Weekend Project (10-20 Hours)
Finish Used
I sanded with 120 and 220 grit BEFORE assembling. This made it so much easier to finish. I'd strongly suggest doing this if you can.

The stain is Cabot "English Leather", which is one they have to tint for you at the desk.

I finished with a spray can of shellac. I liked how it came out, but it was too expensive for me. In retrospect I would have just done it right with a can of polyurethane.
Recommended Skill Level
Intermediate

Above Toilet Cabinet

Submitted by Smokeydog on Thu, 12/24/2015 - 13:08

I built this above toilet cabinet for my son and his wife for Christmas.  They needed a little extra bathroom storage.   Turned out pretty good.

Built from Plan(s)
Estimated Cost
$135.00
Estimated Time Investment
Weekend Project (10-20 Hours)
Finish Used
BEHR SATIN PAINT
Recommended Skill Level
Intermediate