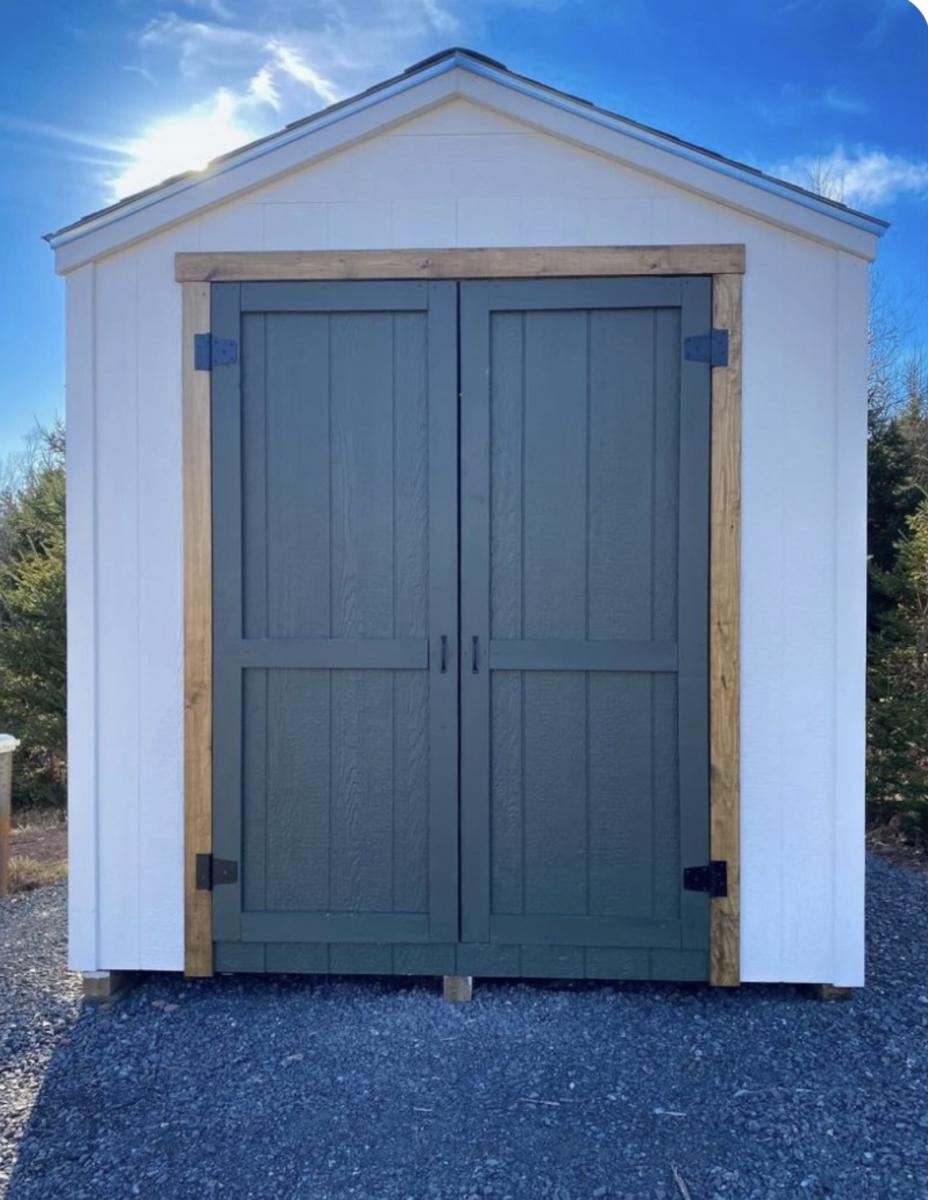
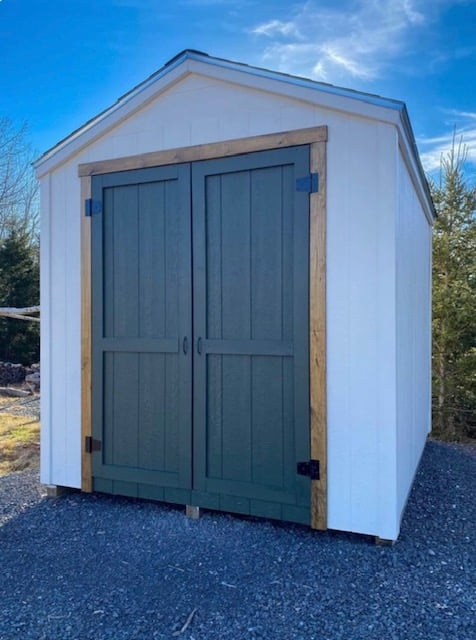
8x10 Shed - Built by Julia Eliopoulos
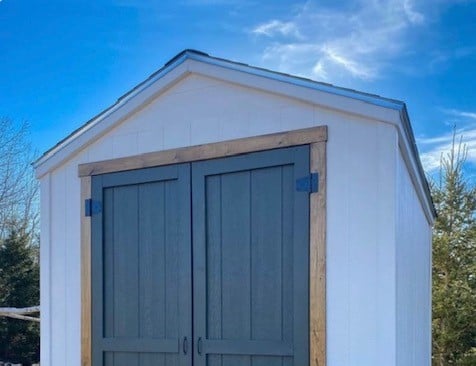
I made your 8x10 shed! Turned out so well, thank you for the amazing plans.
Julia Eliopoulos
Built from Plan(s)
I made your 8x10 shed! Turned out so well, thank you for the amazing plans.
Julia Eliopoulos
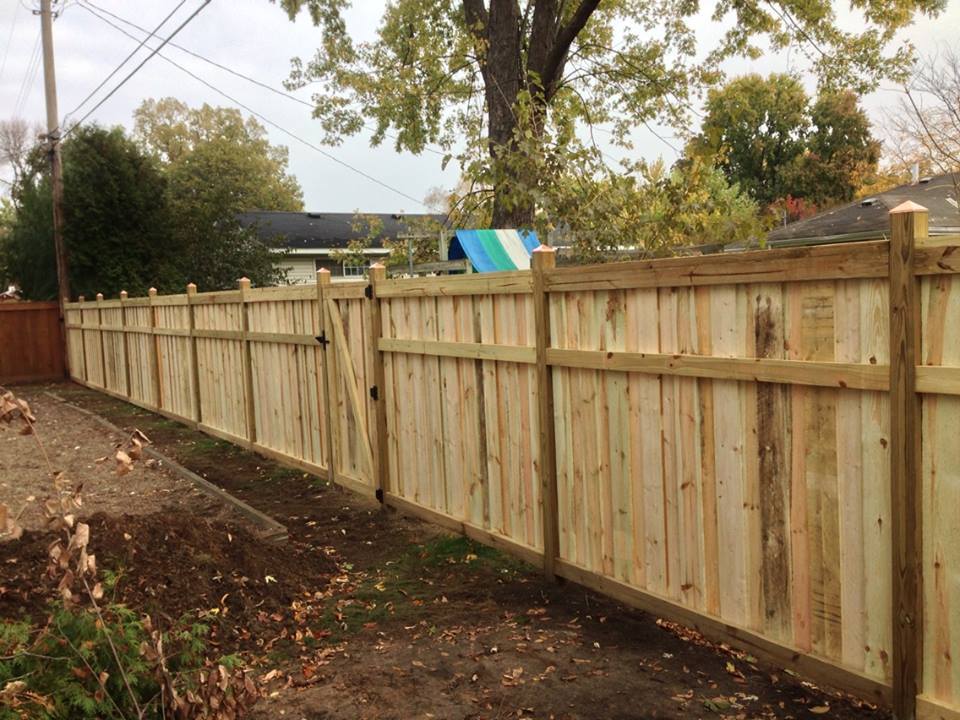
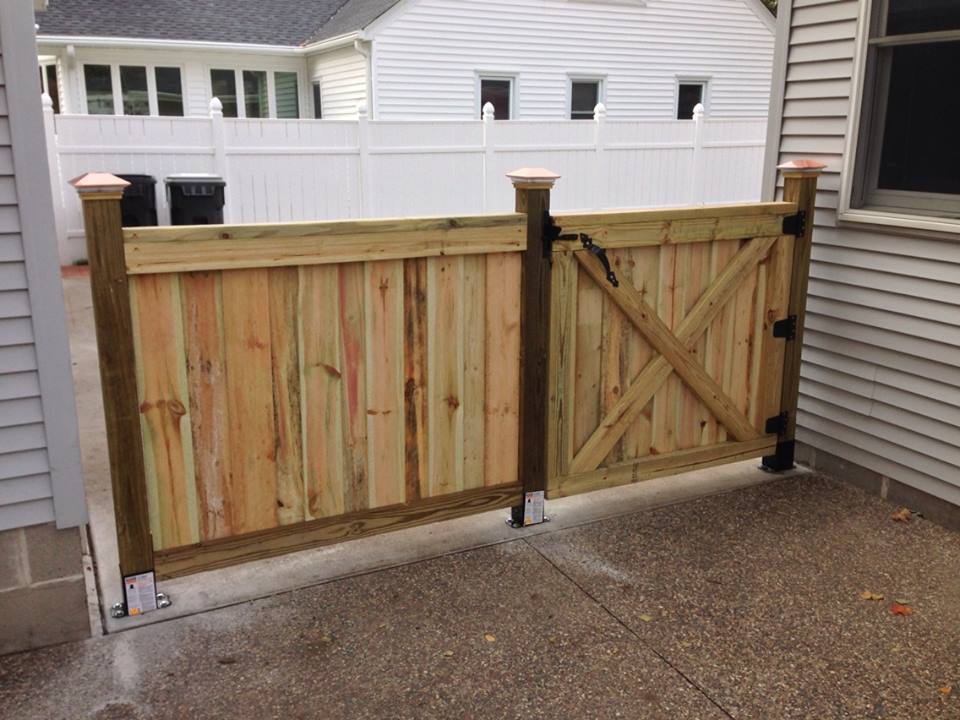
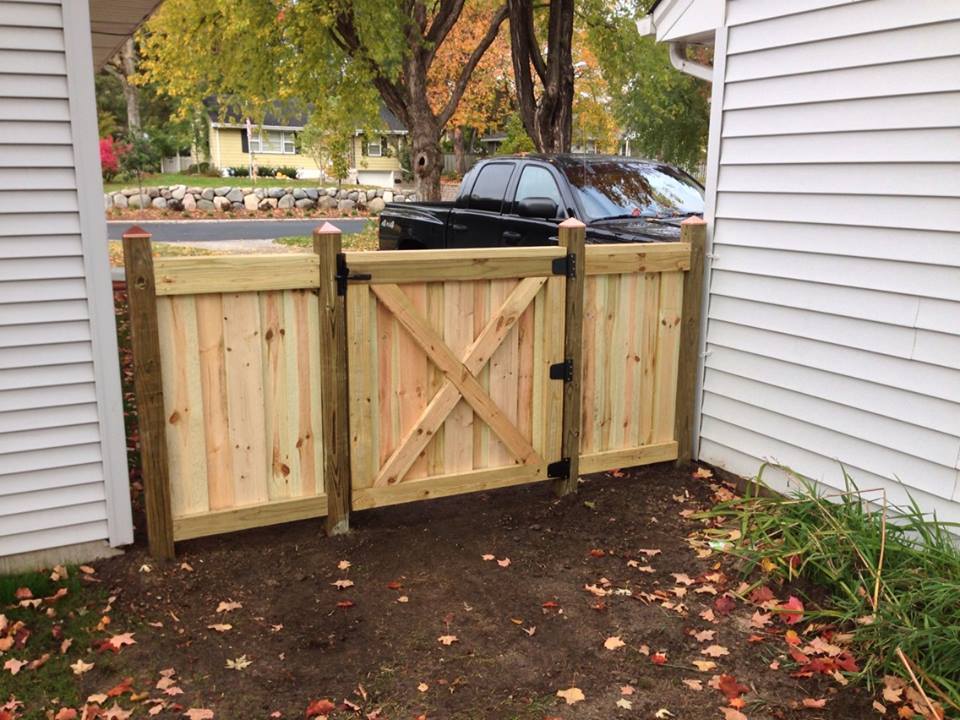
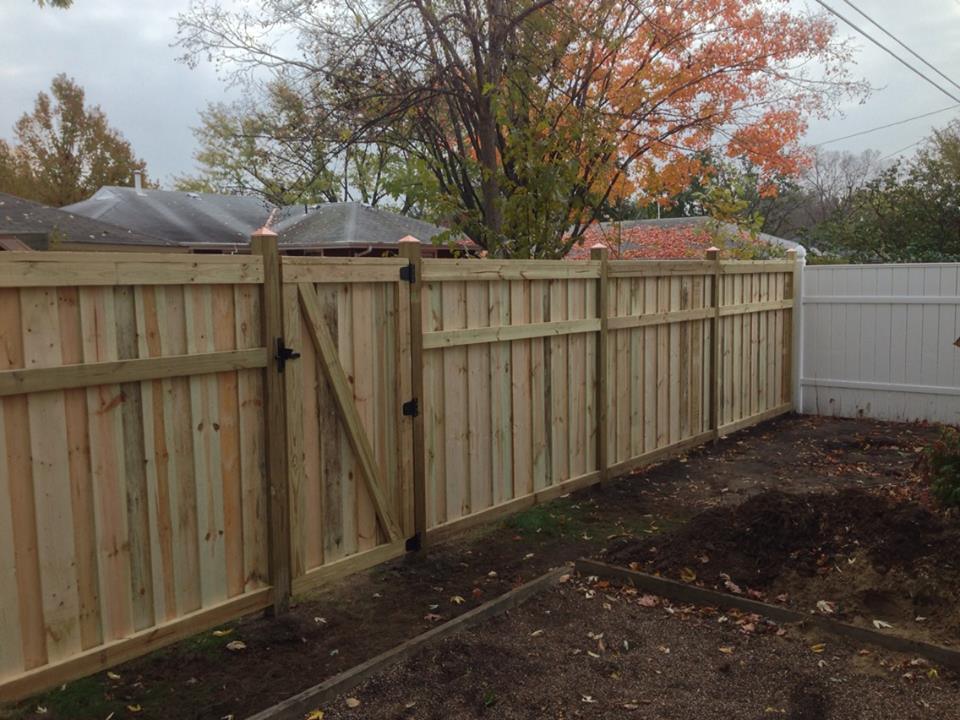
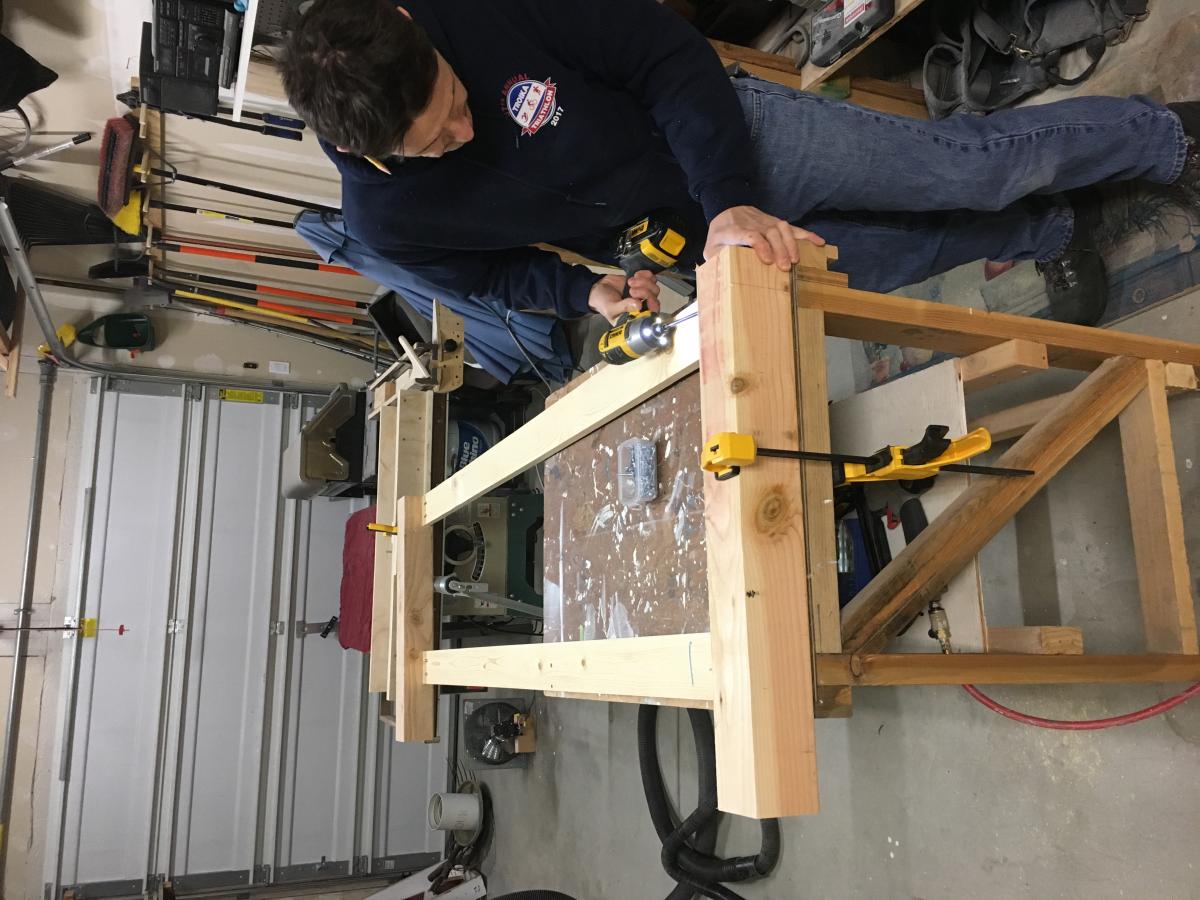
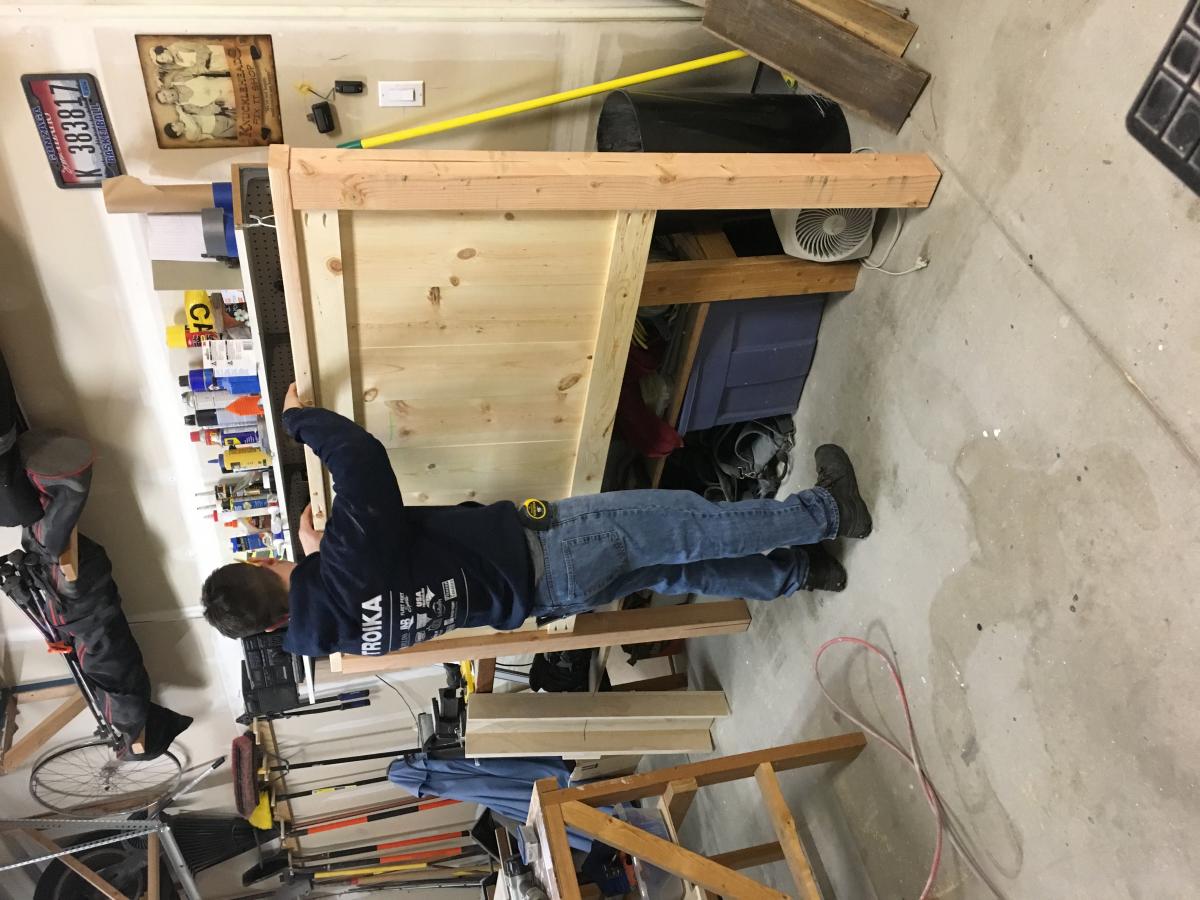
This project took me about 2 weeks. Granted, it would have been quicker, but I could only work on it a few hours every couple days. I've never built a fence before, I think anyone could do it. Just take your time and that includes time to plan. I designed houses for a year about 10 years ago, so I actually drafted some plans to help me determine how much lumber I would need. This fence will welcome our new family member soon, my wife's 4 year old german shepherd. Also, this is a treated pine fence, instead of cedar. Thanks for the tips Anna.


Fri, 07/17/2020 - 14:24
LOOKS GREAT. WHERE DID YOU SOURCE YOUR MATERIALS? I'M LOOKING HIGH AND LOW FOR THE PICKETS AND THEY ARE NO WHERE TO BE FOUND!
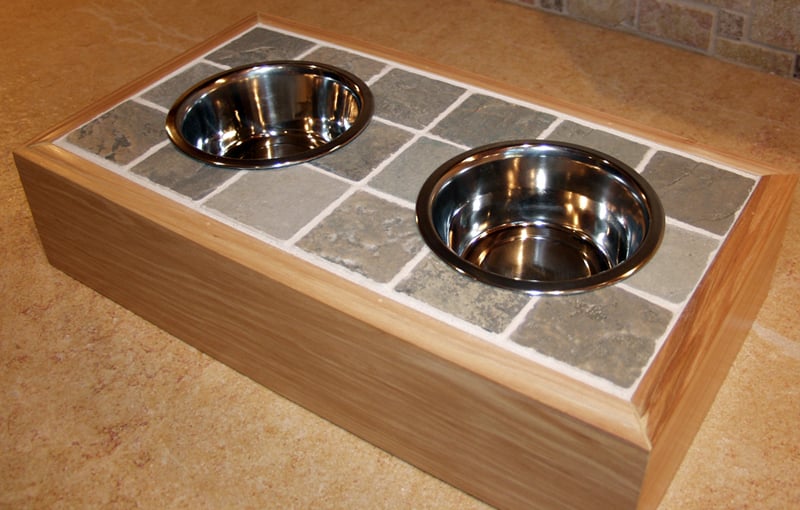
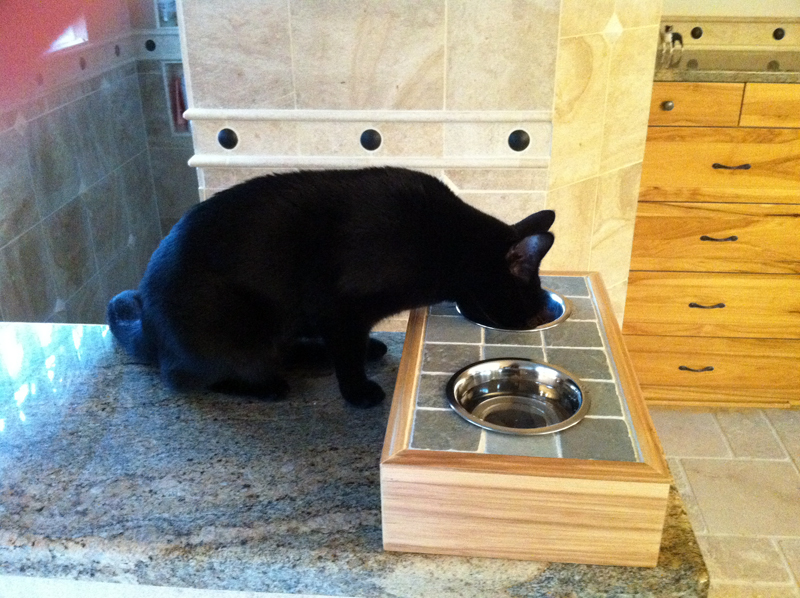
I didn't really use any of the construction techniques from the plan, but I got the idea based on seeing the platform feeder. I used spare wood (with routed trim already on it) that matched my bathroom, and made the cats a nicer looking feeder (one that they couldn't keep knocking to the floor and breaking!). The tile is mounted on cement hardibacker board, which is attached to the 3/4" wood platform. I used a zip saw to cut out the circles in the wood and the cement board (with the appropriate drill bit). I used a tile nipper to form the tile around the bowl opening. I added several coats of varnish to finish.
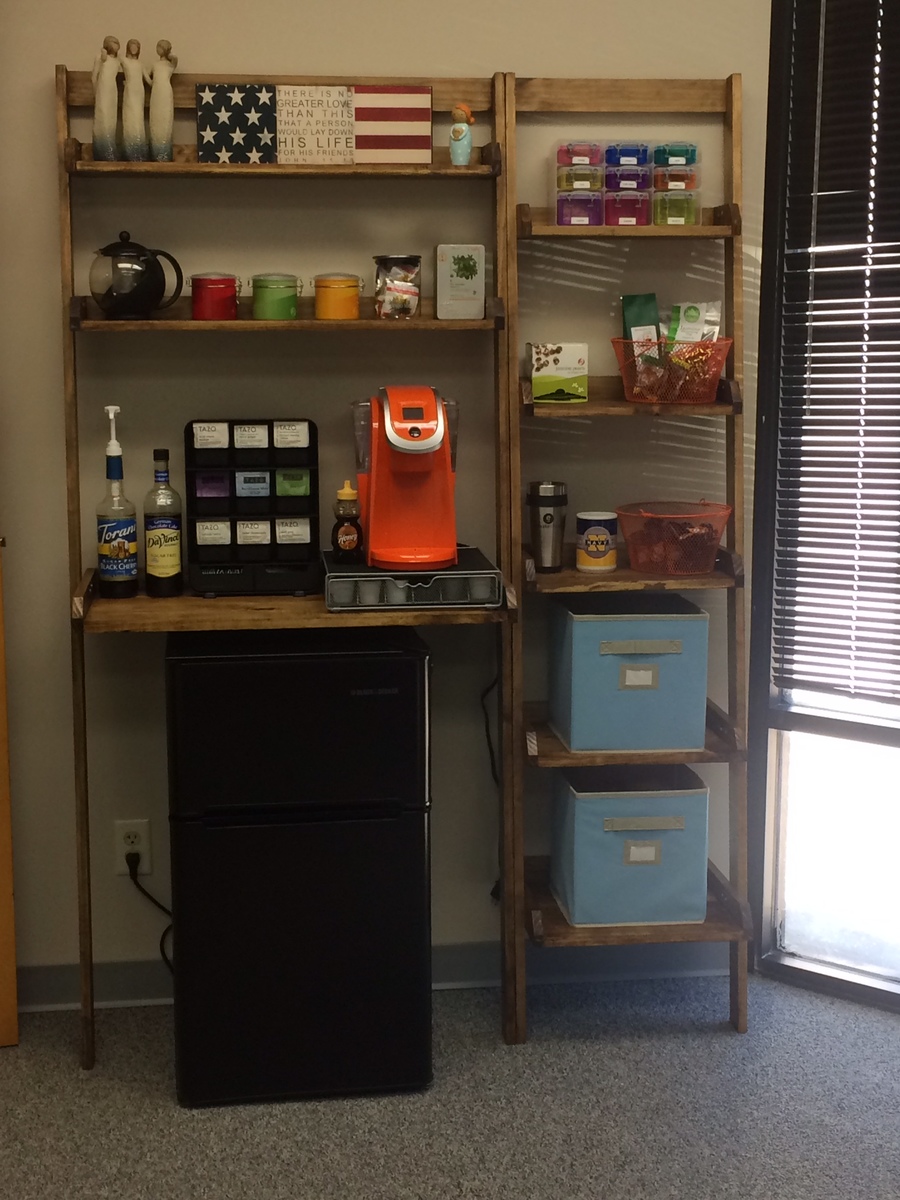
Love my new leaning shelves and desk I knocked out in one weekend. My office mates want them too.
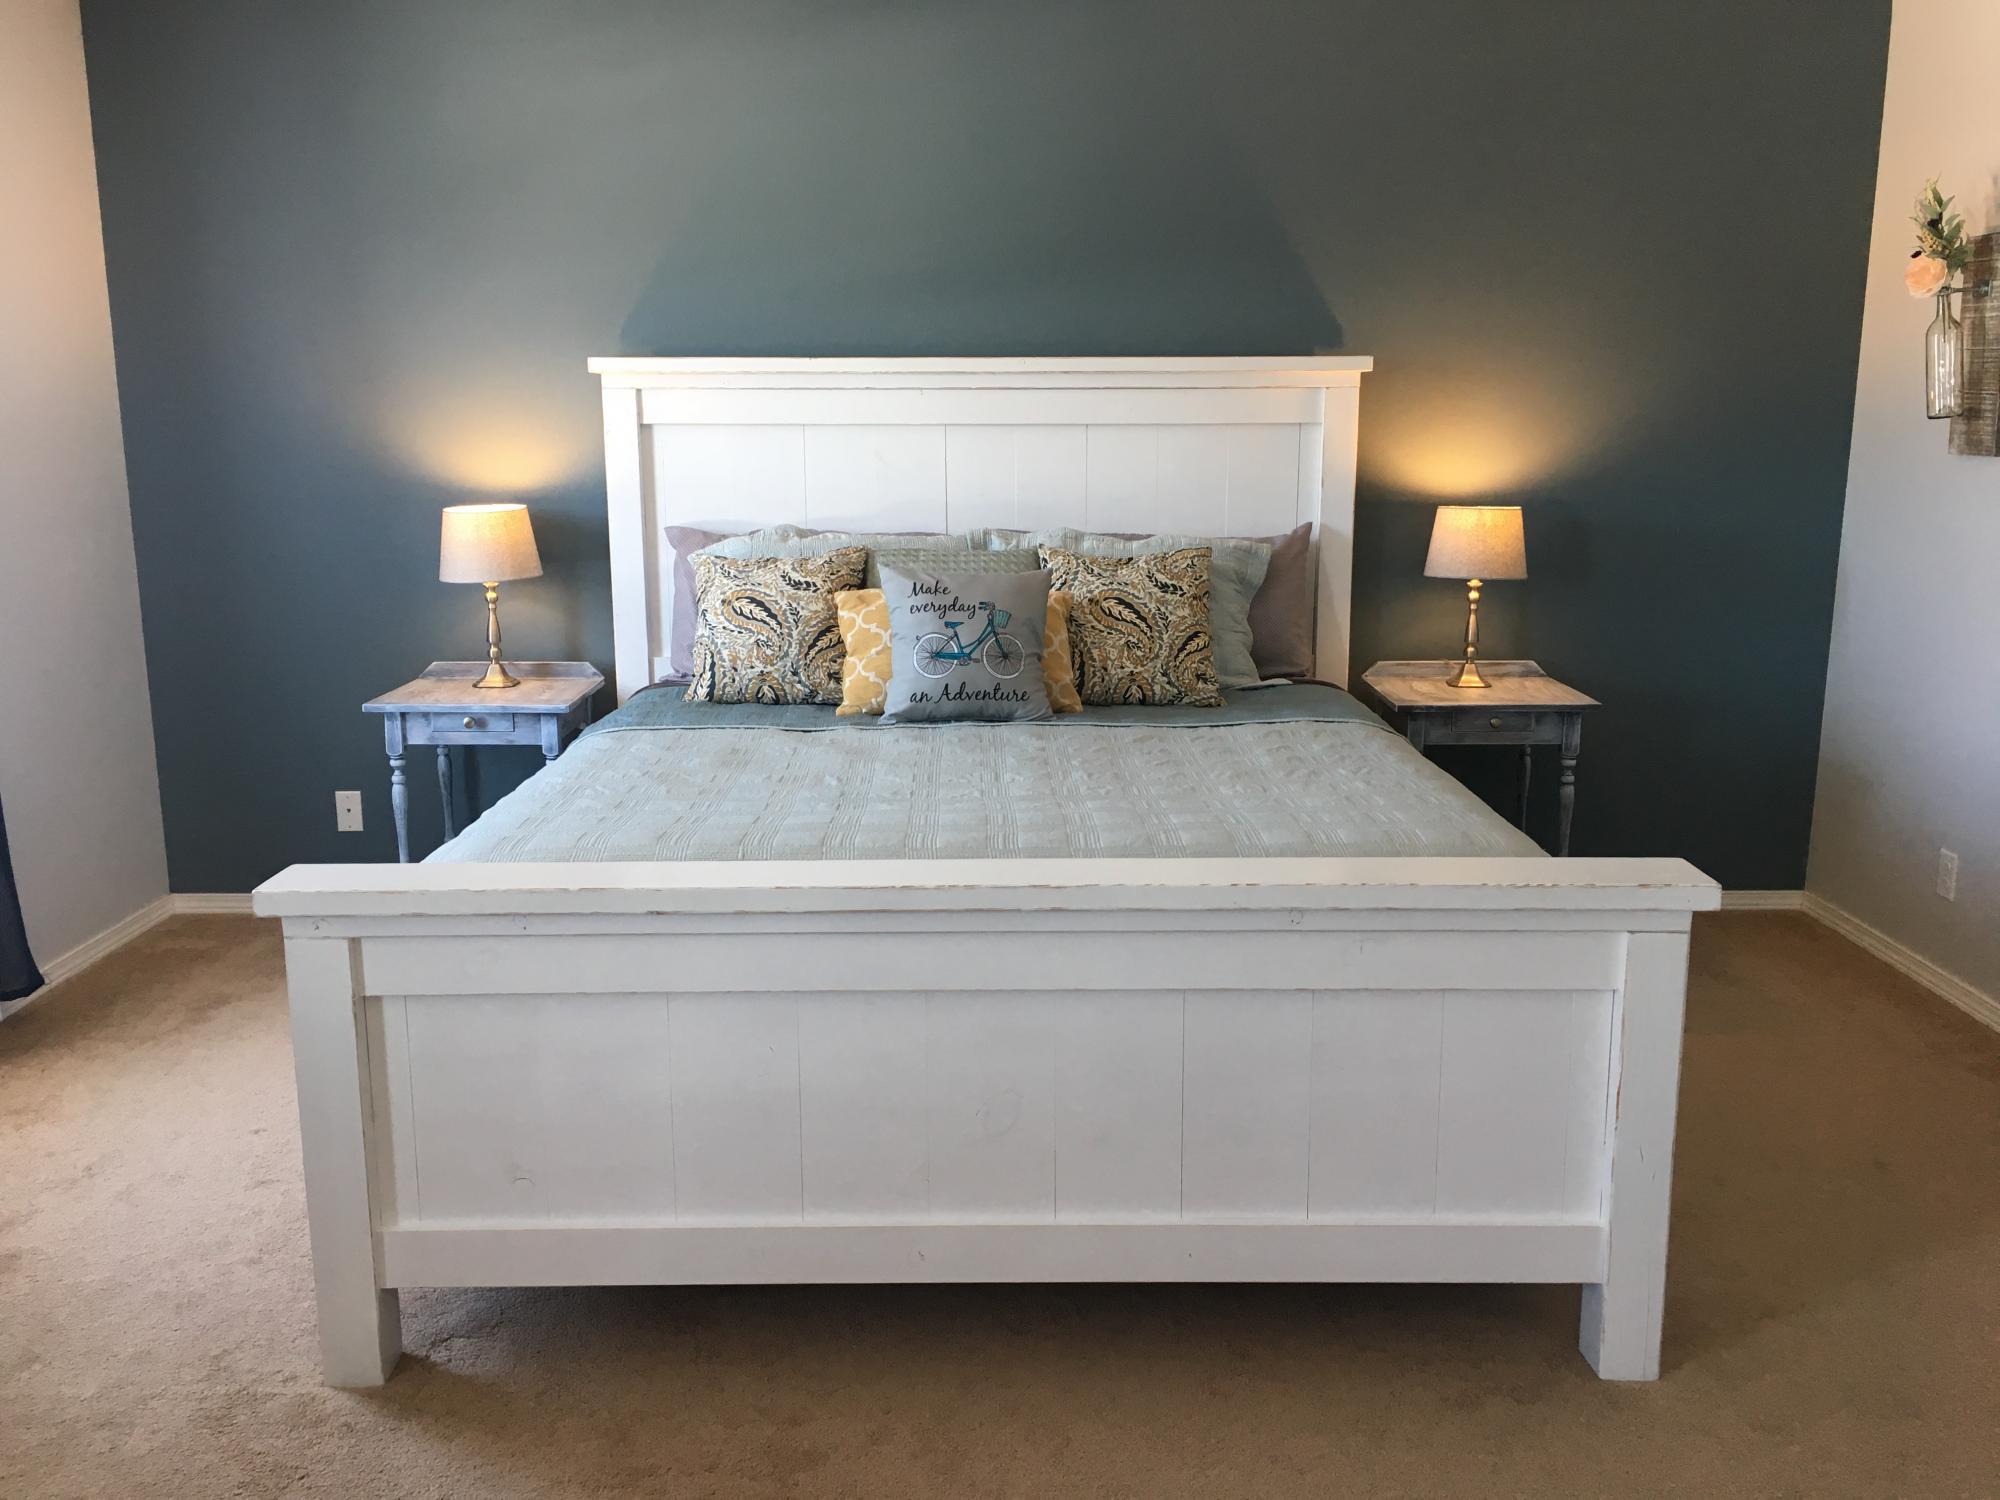
Fun weekend project to build together. We are loving the fresh look to our master bedroom.
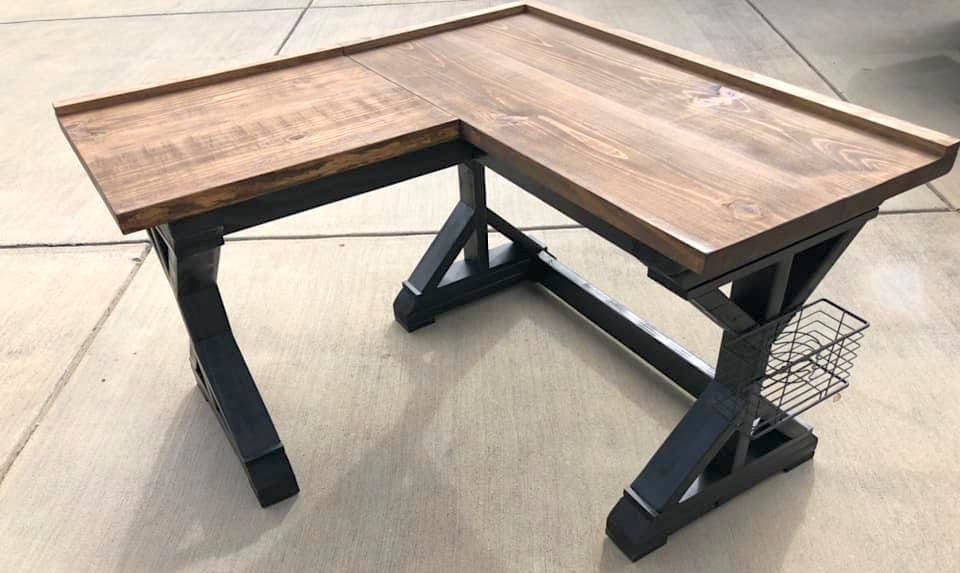
I used the Fancy X Desk plans then made half a desk as a side wing in order to make it fit a corner. I made this for a niece who goes off to college next year, so I made the extra side to be detachable in case she wants to take the table or desk with her but has limited room.
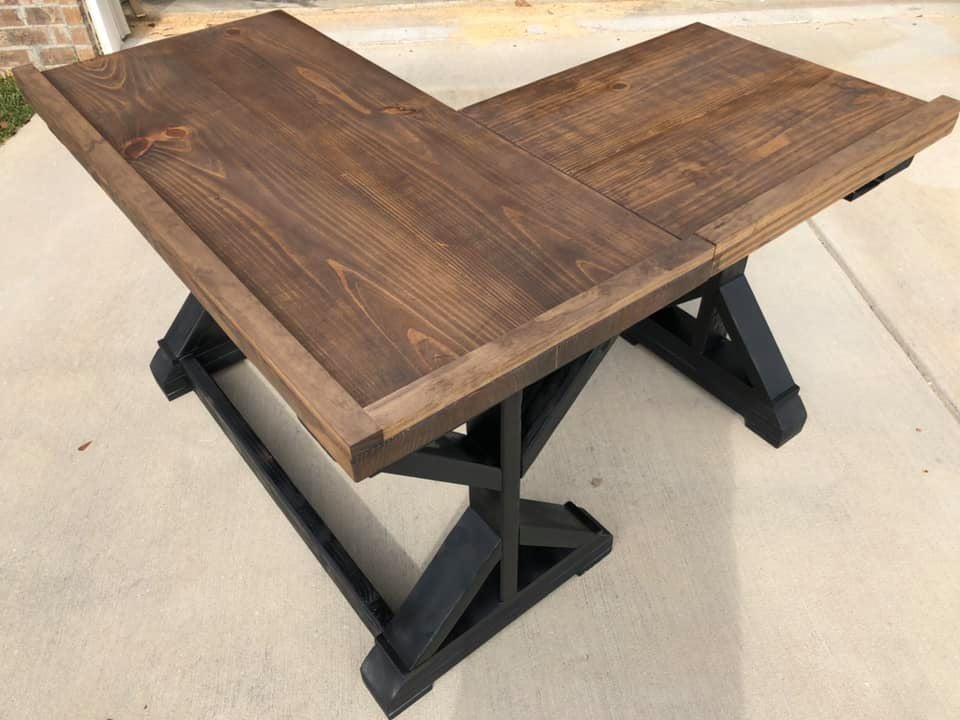

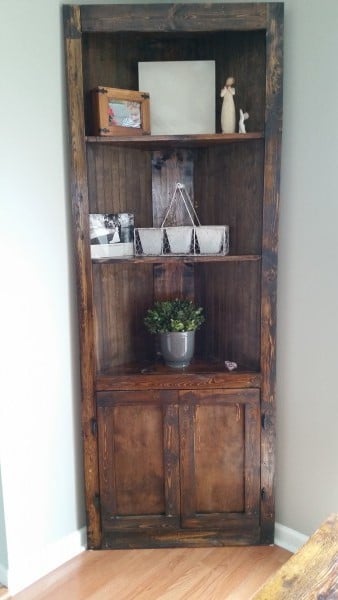
This was one of my first bigger builds. I am so happy with the way it turned out!

Thu, 05/10/2012 - 10:32
So stunning! It's gorgeous! I just love the wood!
Thu, 05/19/2016 - 19:05
This bookcase wouldn't be out of place amongst the Pottery Barn's bookcases. In fact, it inspired me to go out this afternoon and buy some cedar boards so I can start building my own version first thing tomorrow. Thank you, Becky.

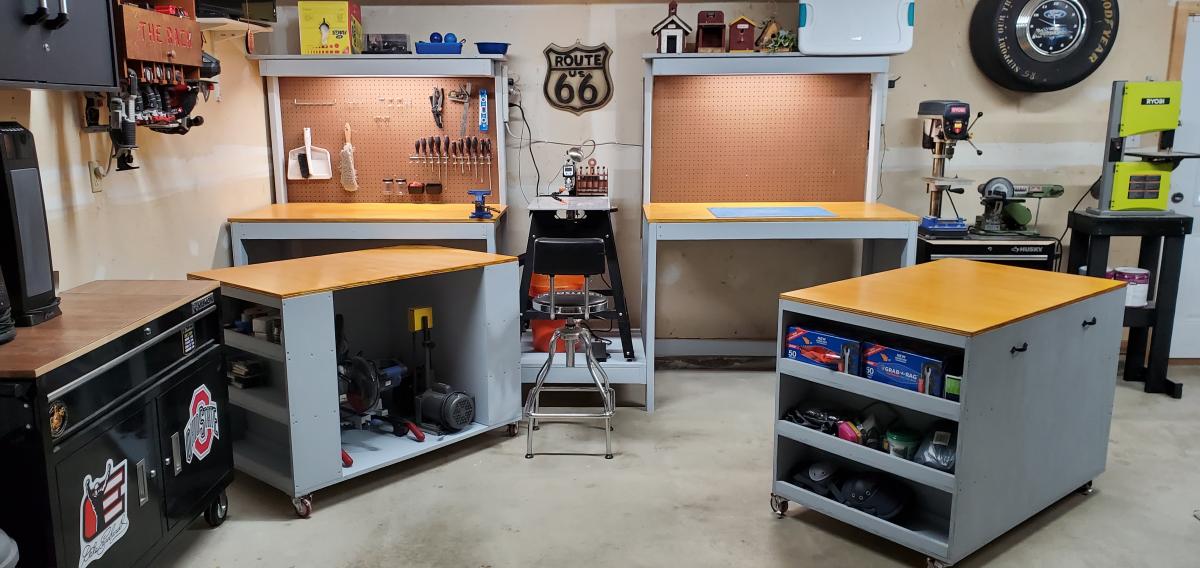
I loved the idea of roll away cabinets that could double as more tabletops for larger projects but then be able to hide them and save space. I usually have 2 cars parked in the garage and space us at a premium. Instead of a mitersaw I placed my scrollsaw in the middle added peg board, lights, and a shelf. Thanks for the plans and the idea.

Tue, 12/08/2020 - 18:19
Excellent use of space. This would be great in a smaller shop.
Just followed the plans, and am in love with the finished look!
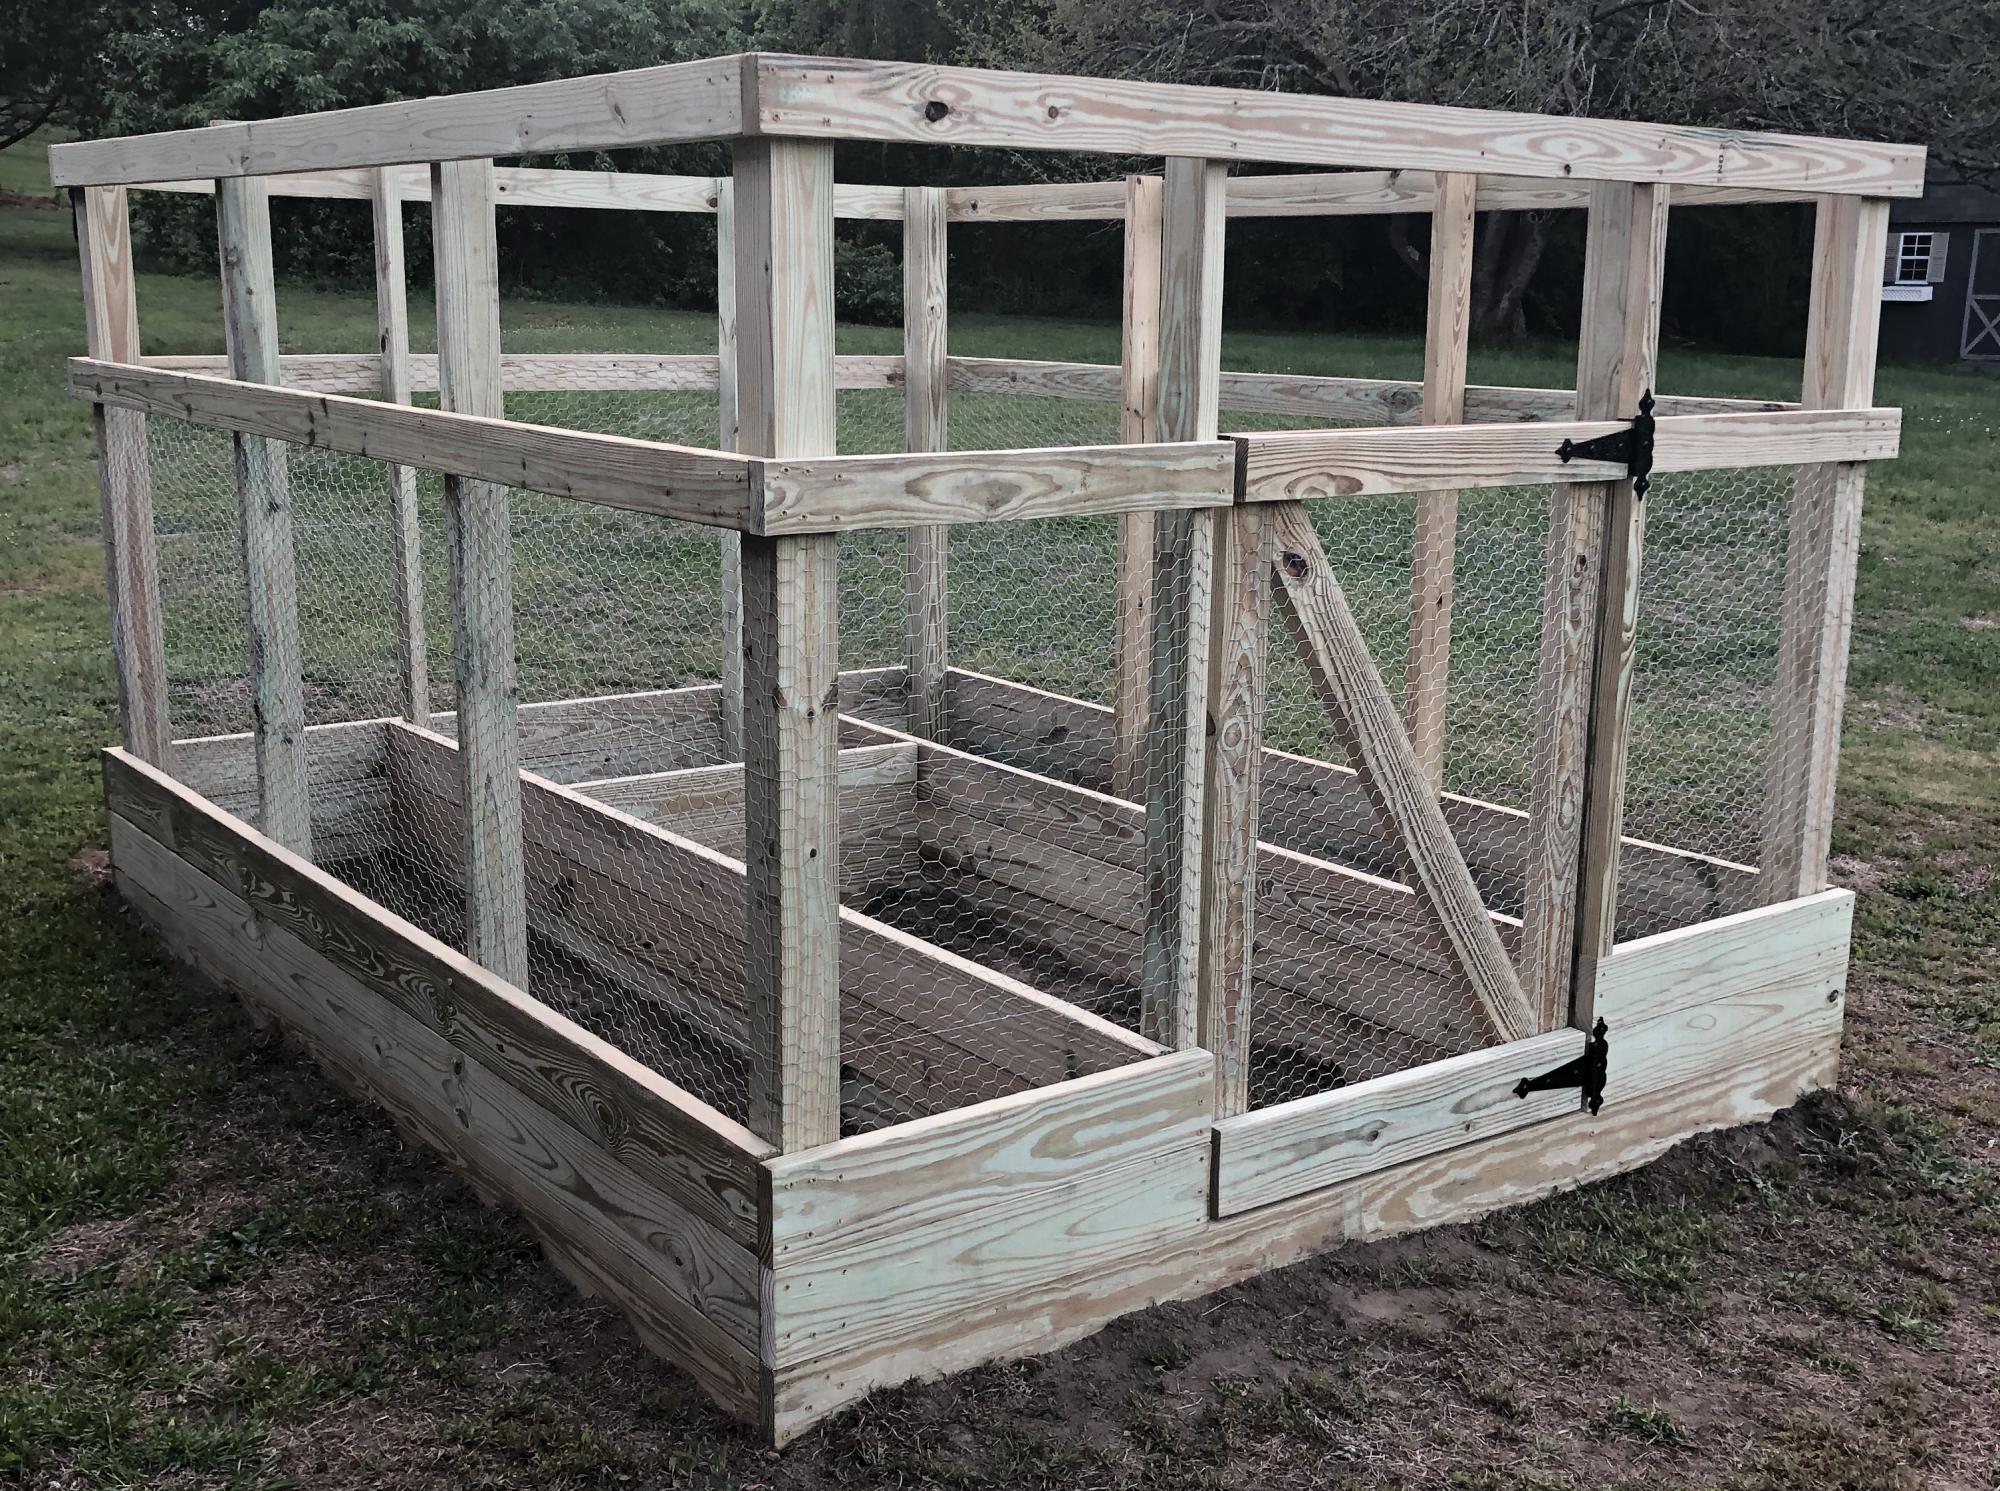
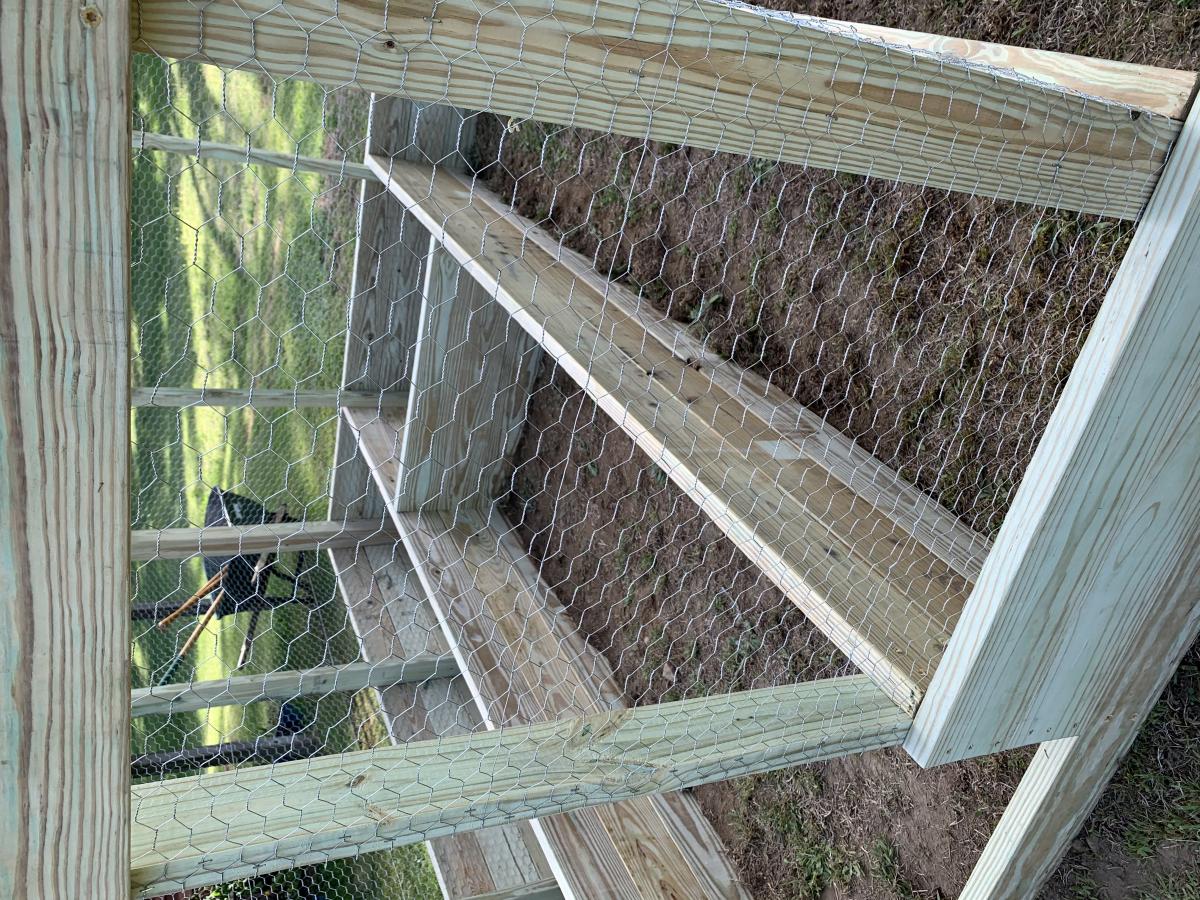
We perviously had a larger garden farther back in the yard, it was on the ground which is very hard and rocky. It was tough to till and maintain, so it was taken down a few years ago.
My wife and teenage daughter have green thumbs and have planted herbs and tomatoes in pots over the past few years, but this year they wanted something more substantial. After an online search we found this plan.
It was a bit small for what the girls had planned, so with a little bit of tweaking, we changed the depth of the enclosure to 10'. It was pretty easy to do. Also the girls wanted the beds to be a bit deeper, so we made them three 2x6's deep instead of two
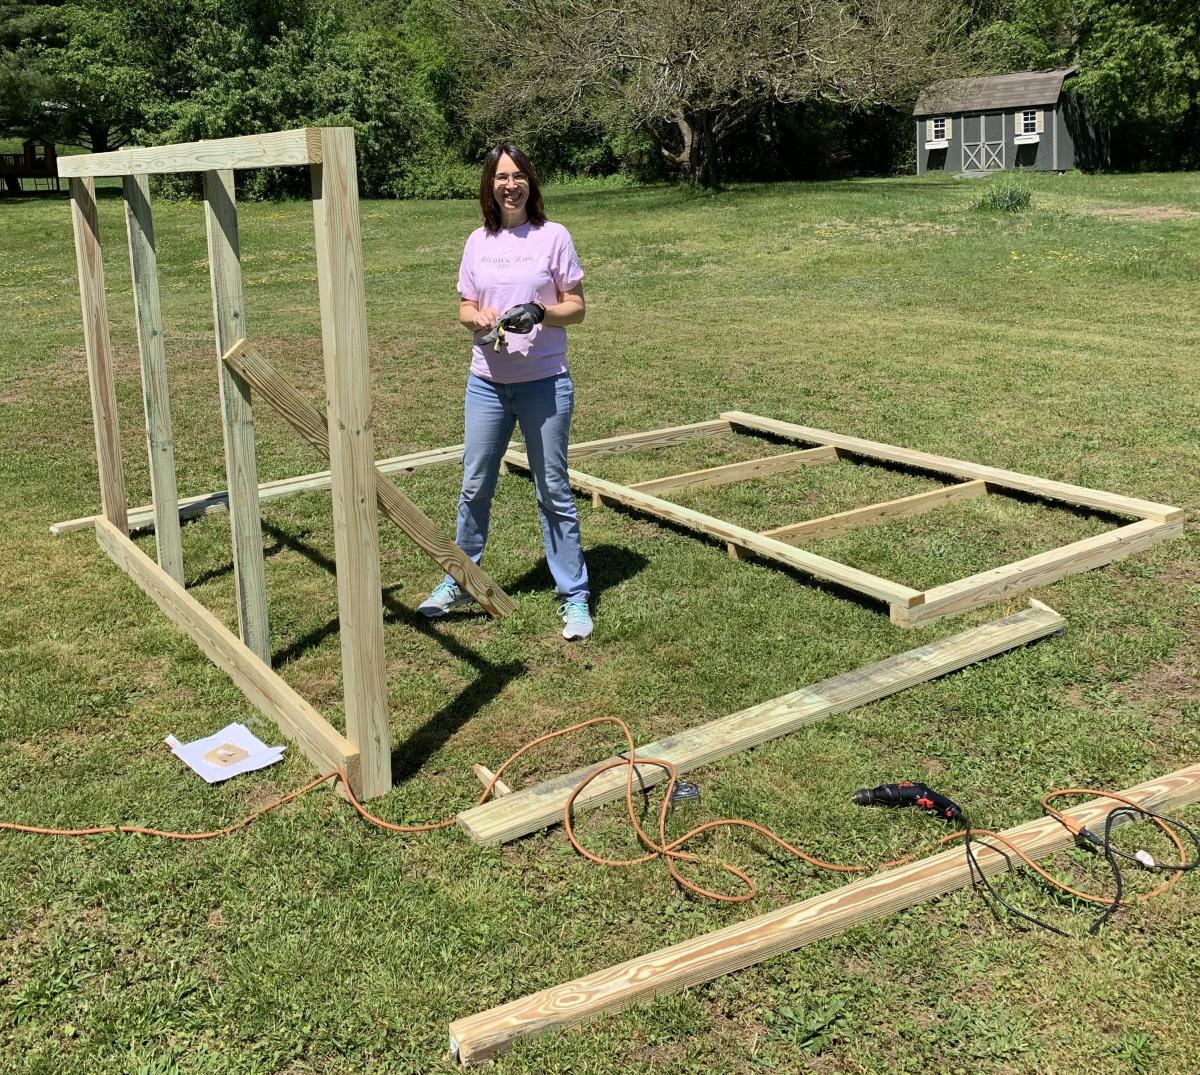
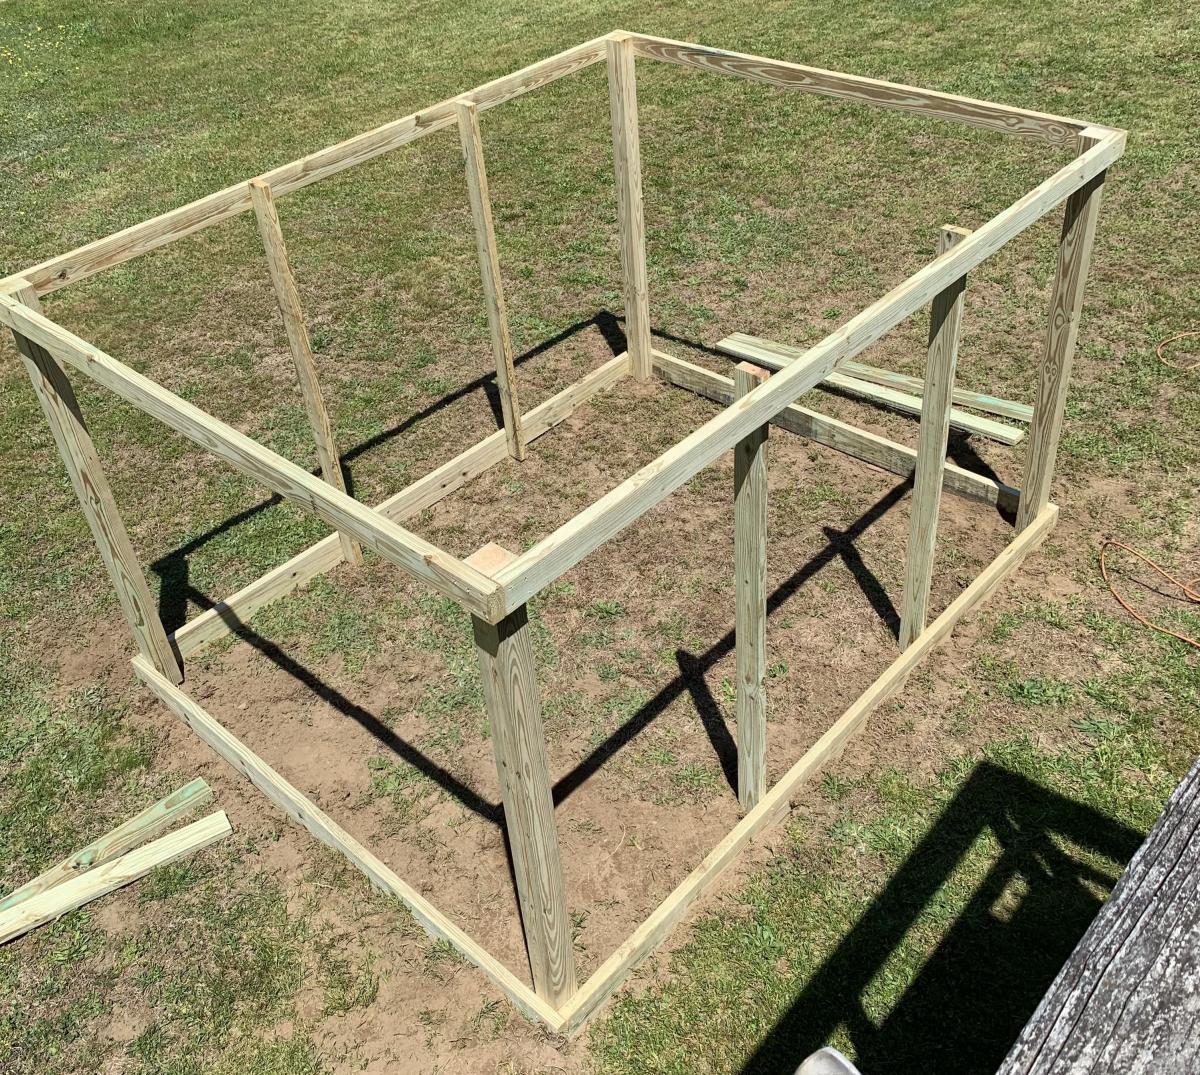
It was built by my wife and I in one weekend, well actually the truth is we built the entire enclosure, minus the door on Saturday about 10am and finish up about 5:30pm. I built the door the next day and we hung it together.
Just an FYI, I have quite a bit of woodworking experience and have a workshop with table saw, band saw and much, much more. I did use the table saw for most of the cuts, with the exception of the gate support which I cut using the band saw.
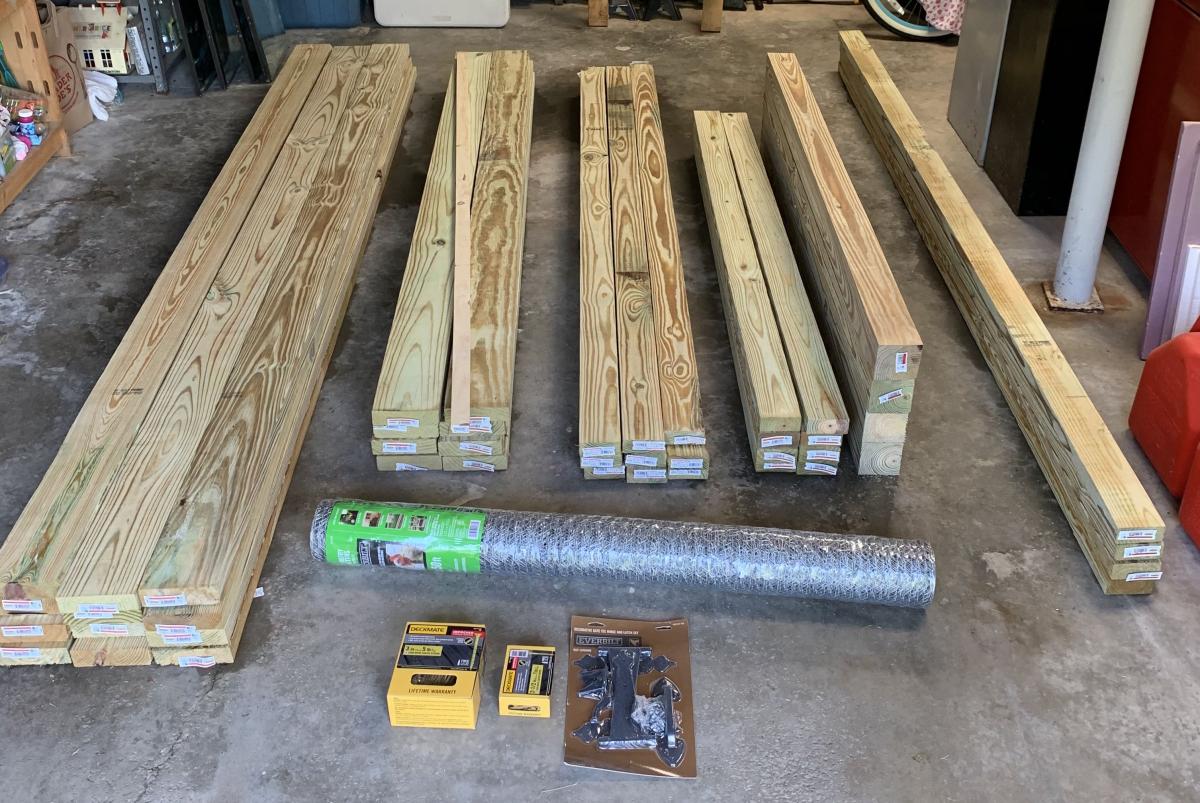
One caveat, if you have the lumber yard cut any pieces for you, make sure all the lumber is the same length. It's kind os a nit picky thing, but none of the lumber was exactly the length shown on the labels. If you want all the joints to be "perfect" I suggest measuring and cutting all the pieces to the correct length to match the plans.
We also used an industrial hand held staple gun to fasten the chicken wire.
The cost of all the materials, including two sets of work gloves came out to $447.92 from Home Depot in 2020.
We are now waiting for a delivery of the top soil to fill the beds. Since we used weatherguard lumber, we are going to gat plastic sheeting and line the beds.
It was a fun project and my girls are looking forward to planting all their seedlings.
For fun we made a time lapse video, which I have uploaded to Youtube. If you watch closely, you will see that we started the build in one area of the yard and moved it because the ground sloped much more than we originally thought.
https://www.youtube.com/watch?v=h7vvBLy034U&list=WL&index=112&t=0s
I hope that our experience may help others in some small way.
Thank you Ana for making these plans available!!

Sat, 05/30/2020 - 18:27
Love the added length! Thanks so much for sharing photos of your build!
Built from scrap lumber during my deployment with the US Navy to Camp Lemonnier, Djibouti, Africa, and brought home to Texas on my return Sept 2016.
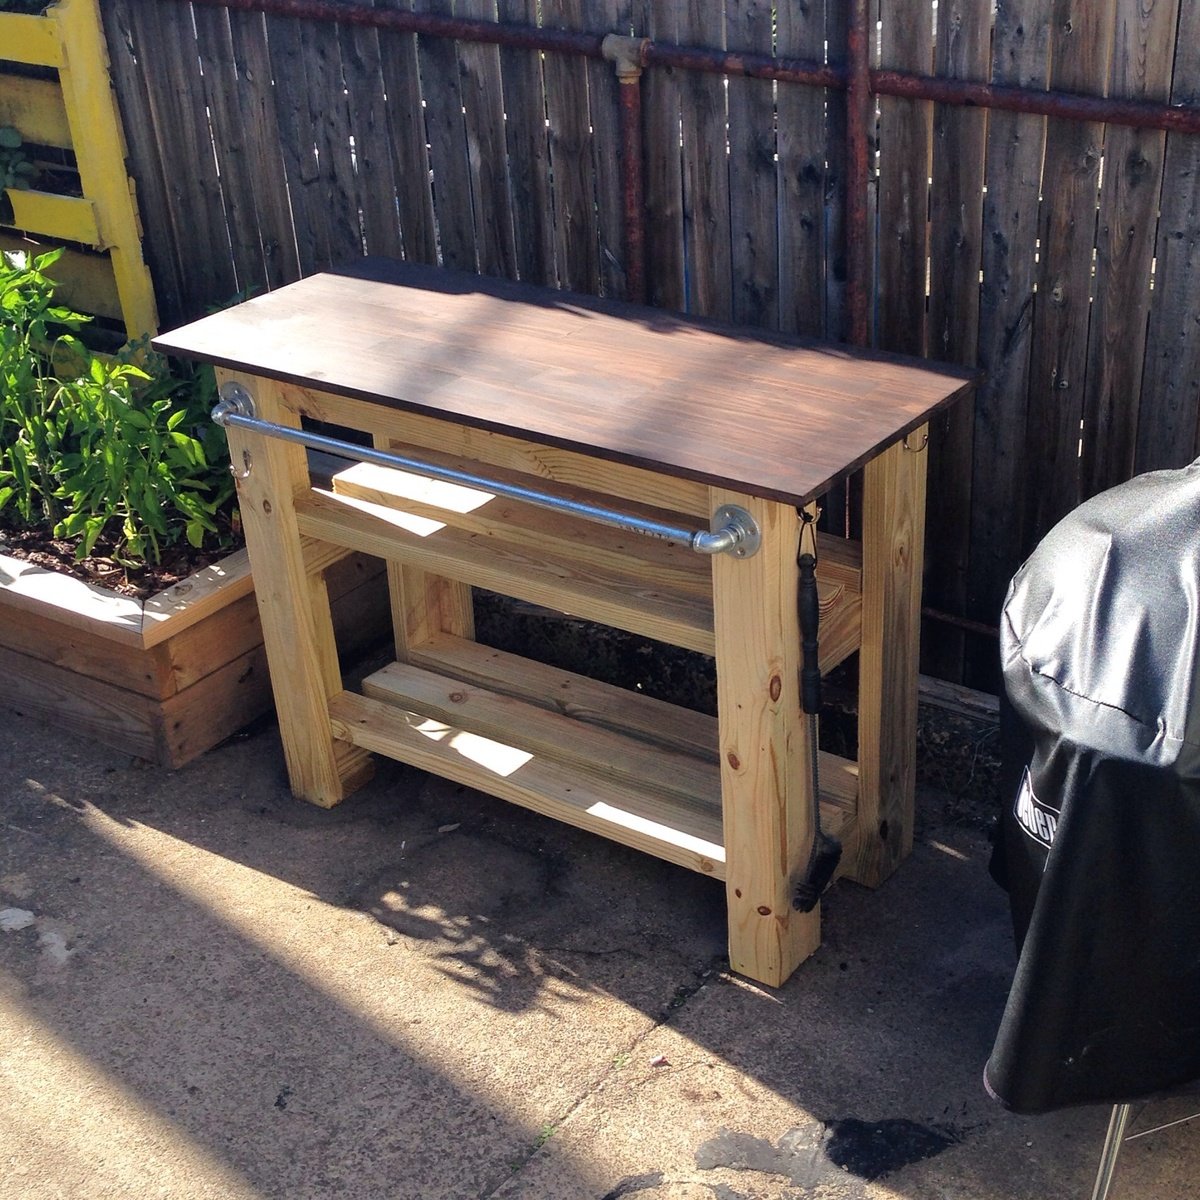
Grill station

I built the one bench using the original plan with the storage and table top unit but needed two additional seating benches to go around the firepit without the bulk of the backside of the bench.
I modified the original plan as follows:
Shopping List:
(2) 2X6X8
(3) 2X4X8
(2) 1X6X8
Cutting List:
(2) 2X4X17" front legs, 15 degree cuts, parallel long to short
(2) 2X4X23" back support, 15 degree cuts, parallel long to short
(2) 2X4X20.75" back legs, 15 and 60 degree cuts, not parallel long to long
(2) 2X4X24.75" under seat, 15 degree cuts, not parallel long to long
(2) 2X4X30" bottom support, 15 degree cuts, not parallel long to long
(1) 2X4X42" bottom cross brace between leg sets, 90 degree cuts
(2) 2X6 cut equally in half, 3 for the seat and 1 for the top plate
(2) 1X6 cut equally in half, 3 for the back rest and 1 to be tucked under the seat overhang
Thu, 09/08/2022 - 11:23
Great work! Have you had any tipping issues with the benches without the table back? If you kneel on the bench backwards and lean on the back do you think it would tip? Ha I clearly have kids around to be asking such strangely specific questions... TIA!
Thu, 09/08/2022 - 14:26
Also, what size platform did you pour for reference?
Sat, 02/25/2023 - 08:57
The concrete pad they are sitting on is 14 foot diameter.
Sat, 02/25/2023 - 08:56
I built these for my daughter/son-in-law and their young family. I have grandkids that use them and have never tipped them. However a strong wind gust 100km/hr did flip one over but not the other. I would suggest adding a horizontal ground level ‘foot’ extension on one or both back legs to alleviate any concerns of tipping.
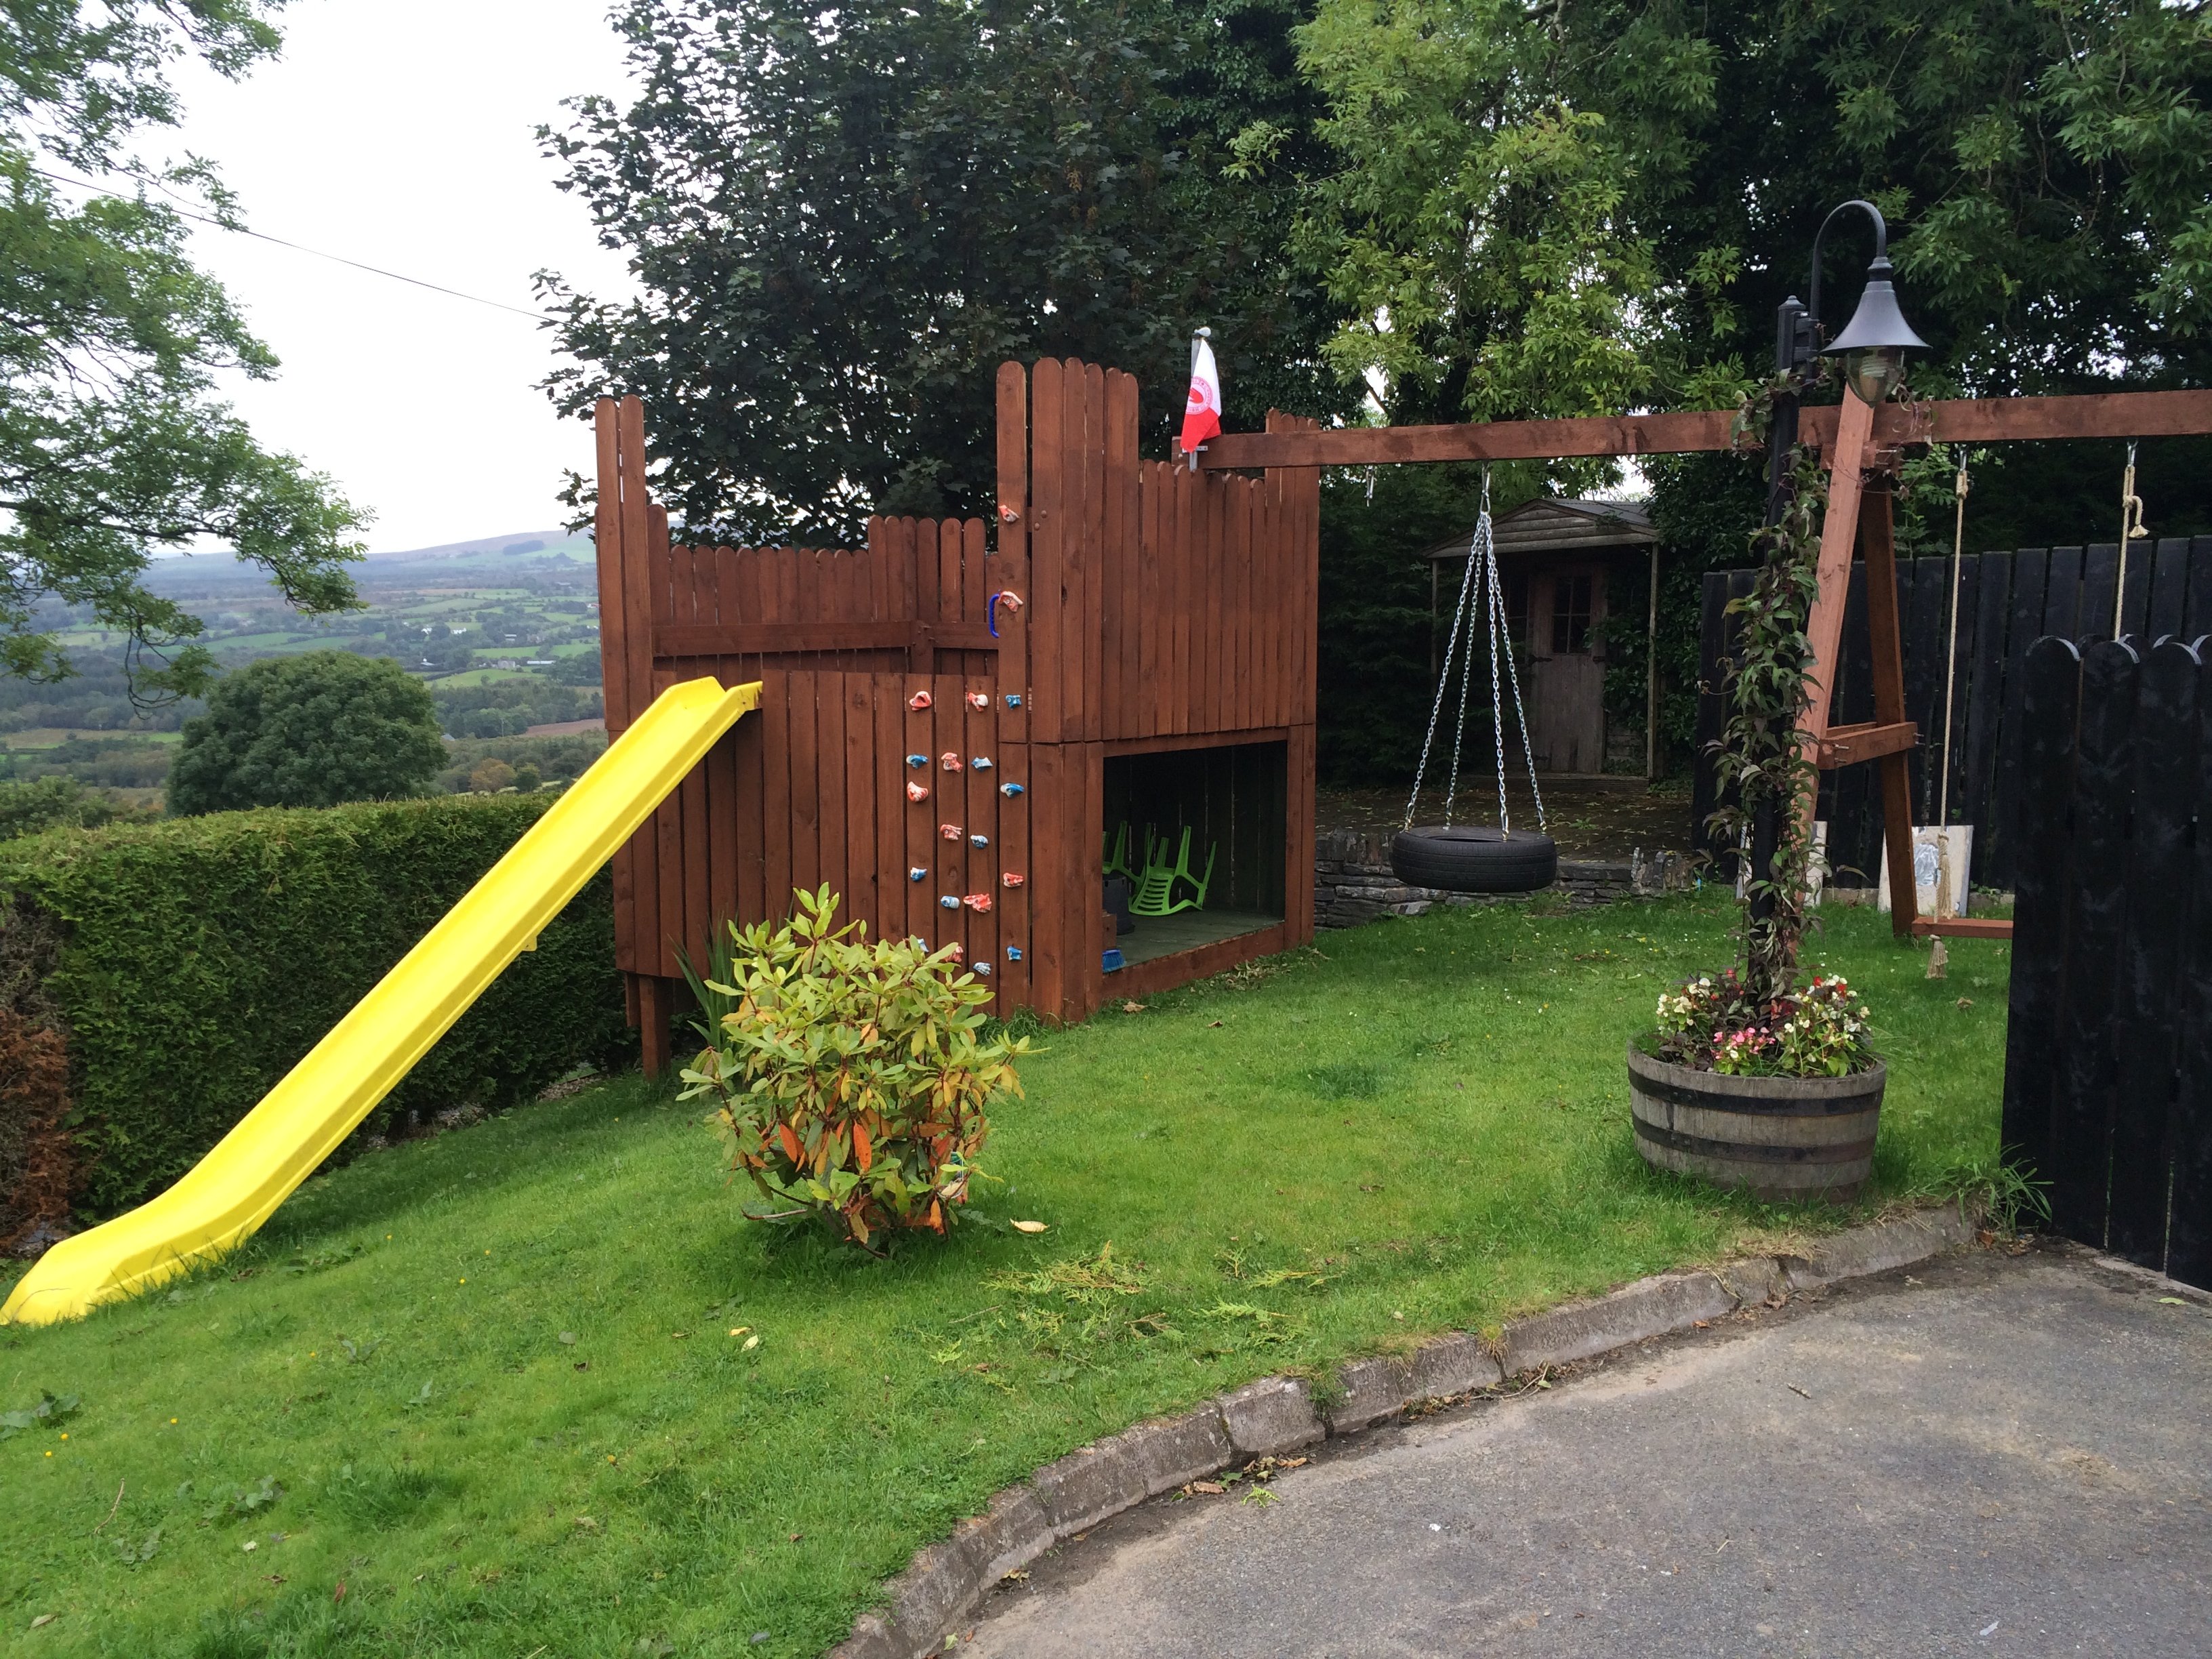
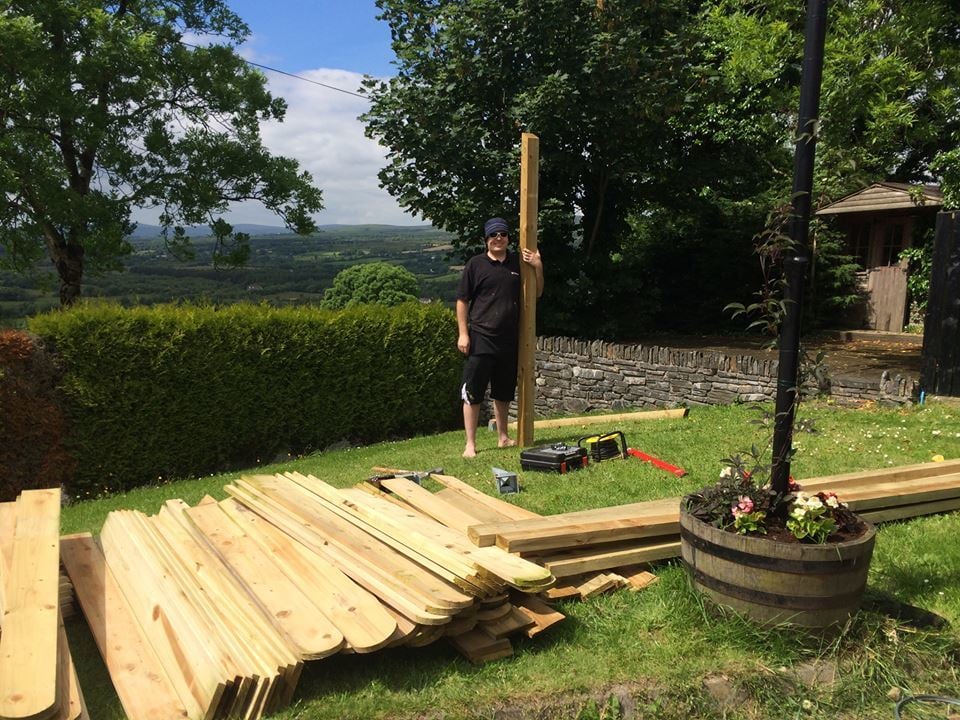
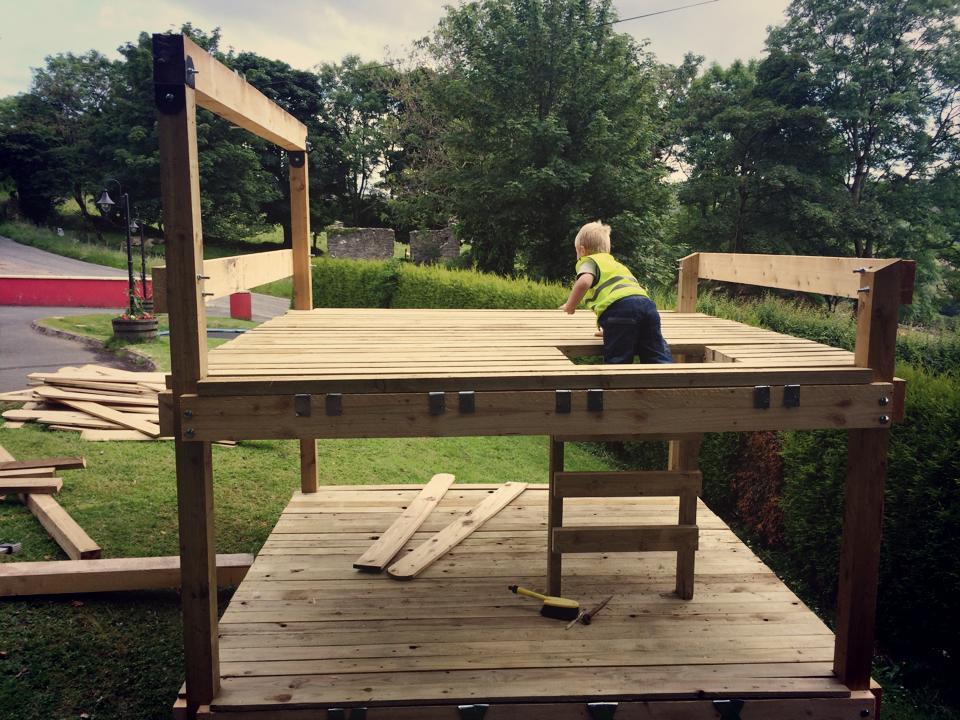
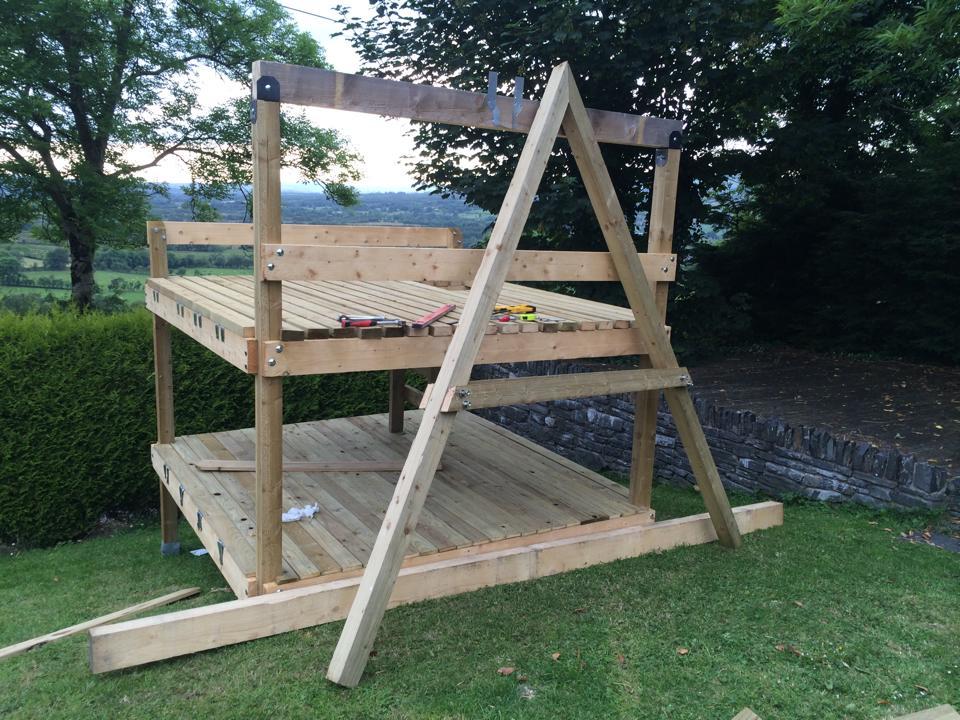
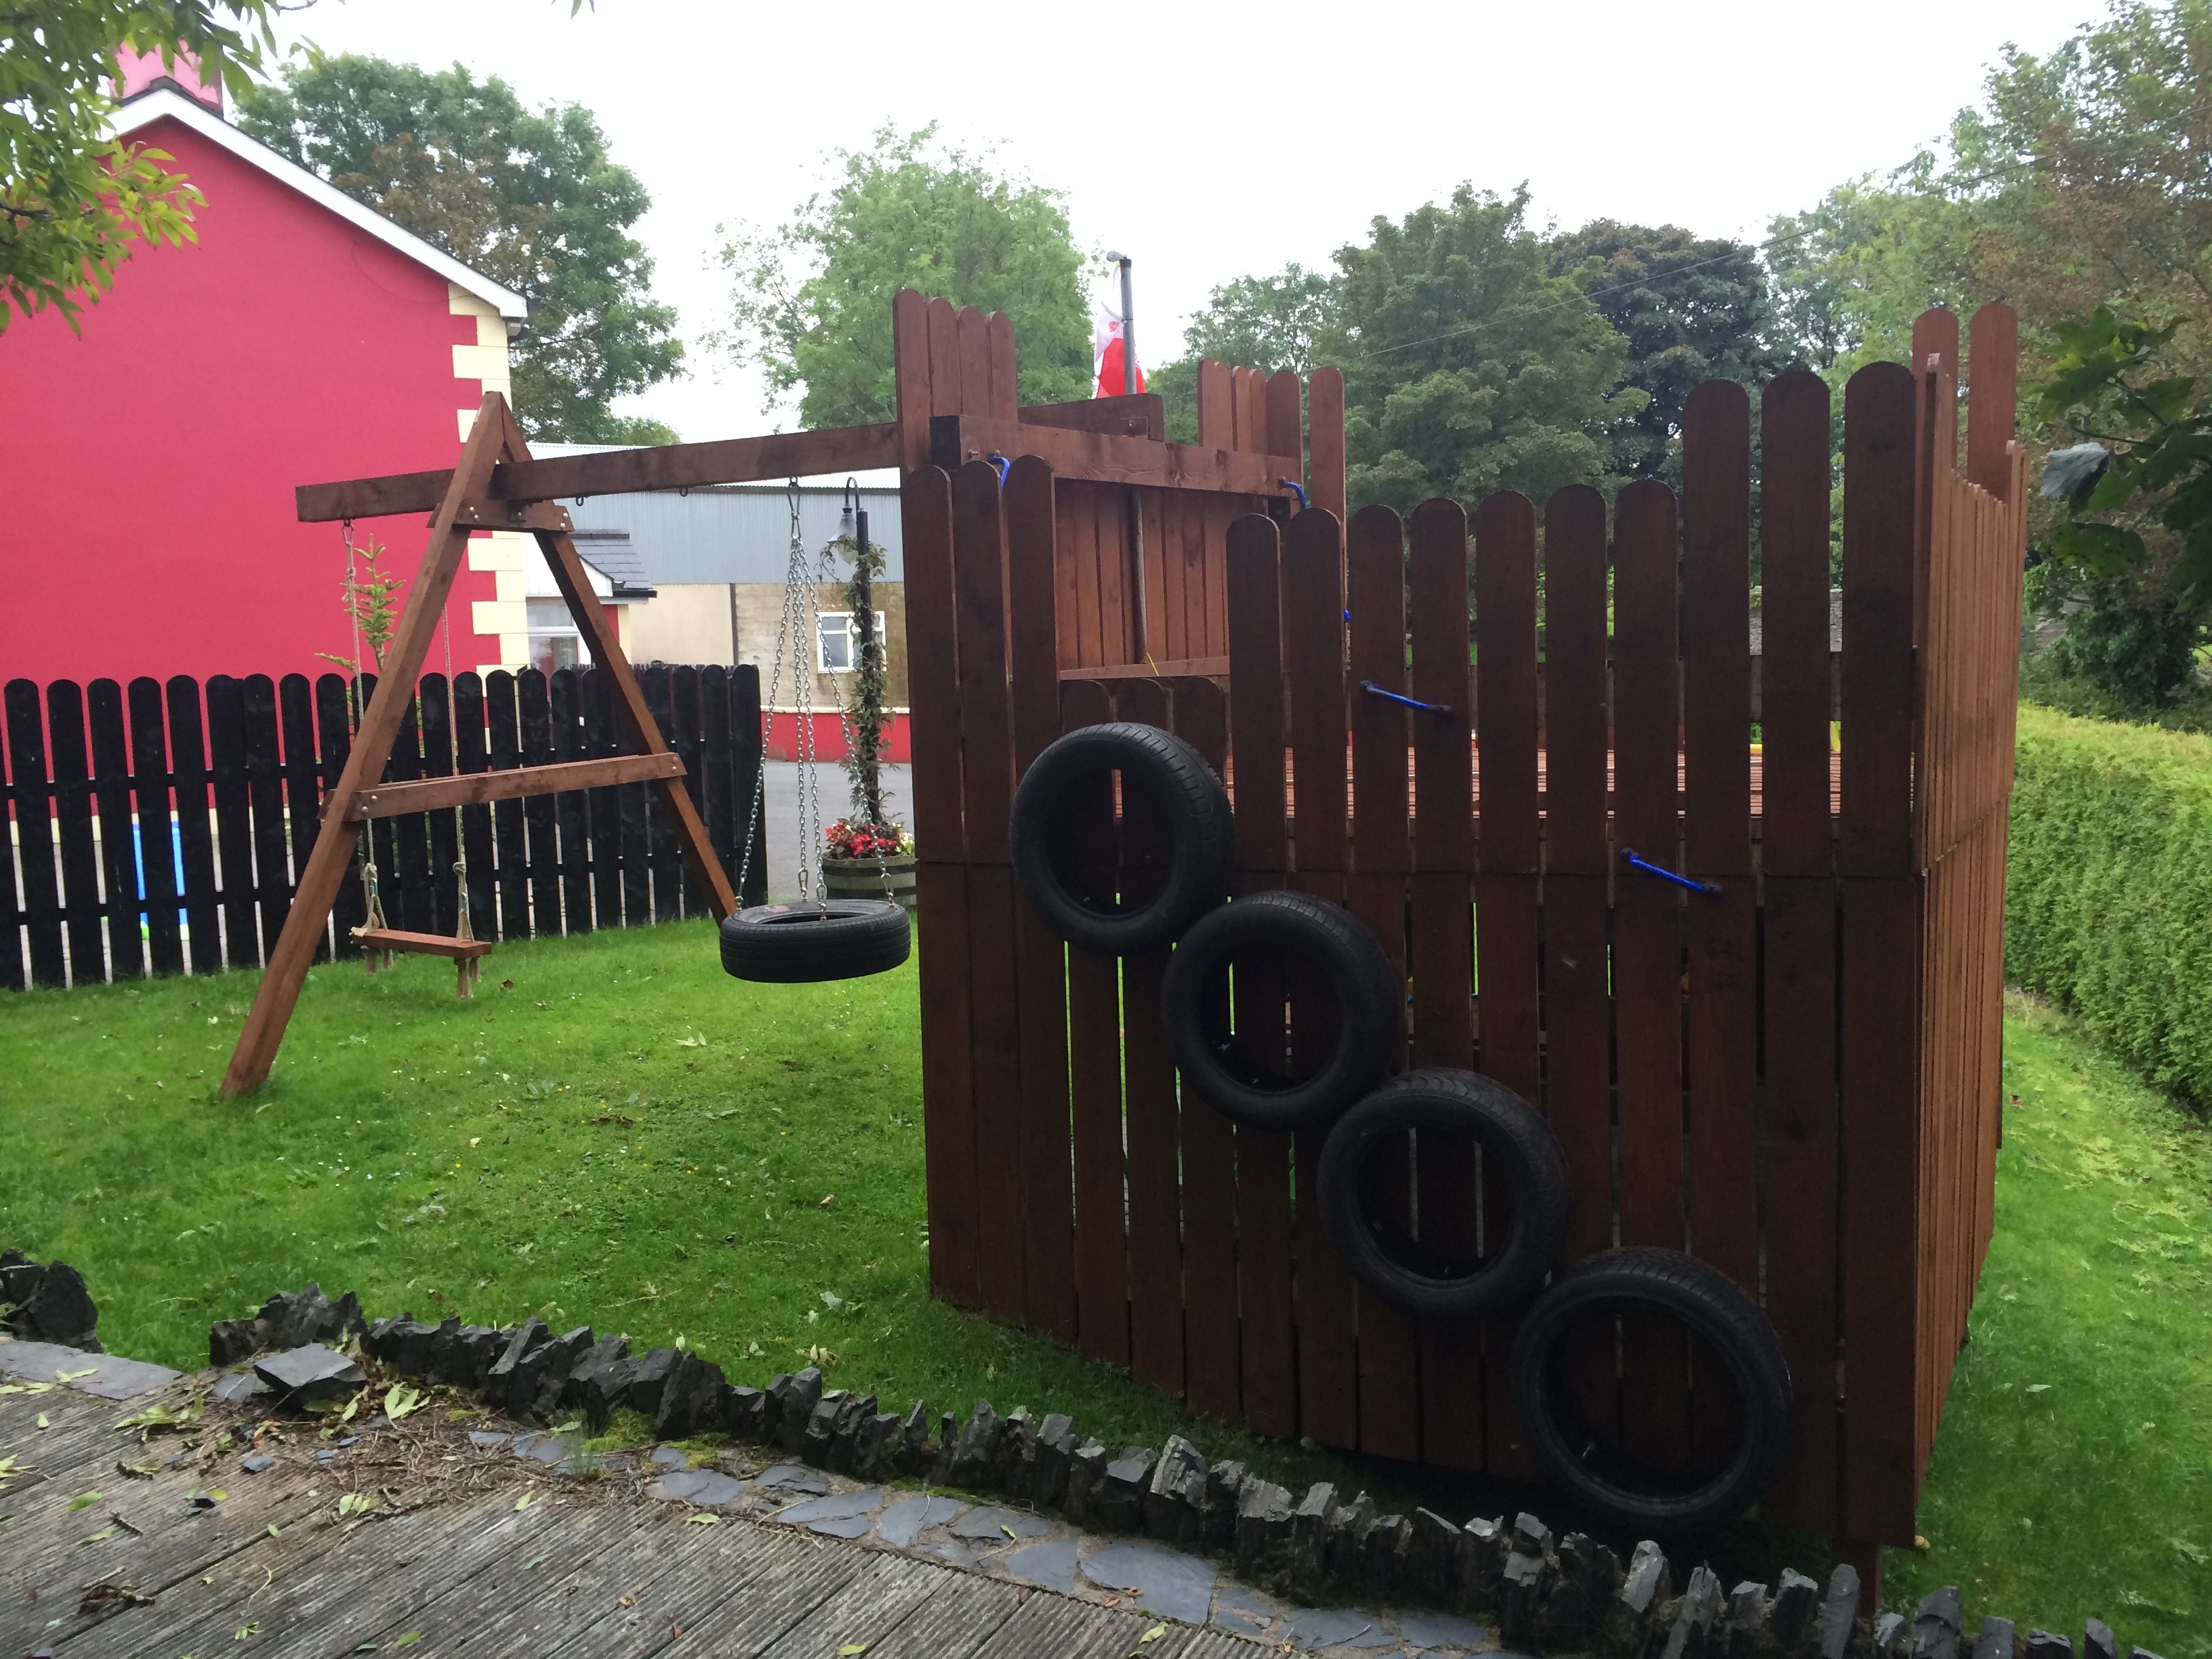
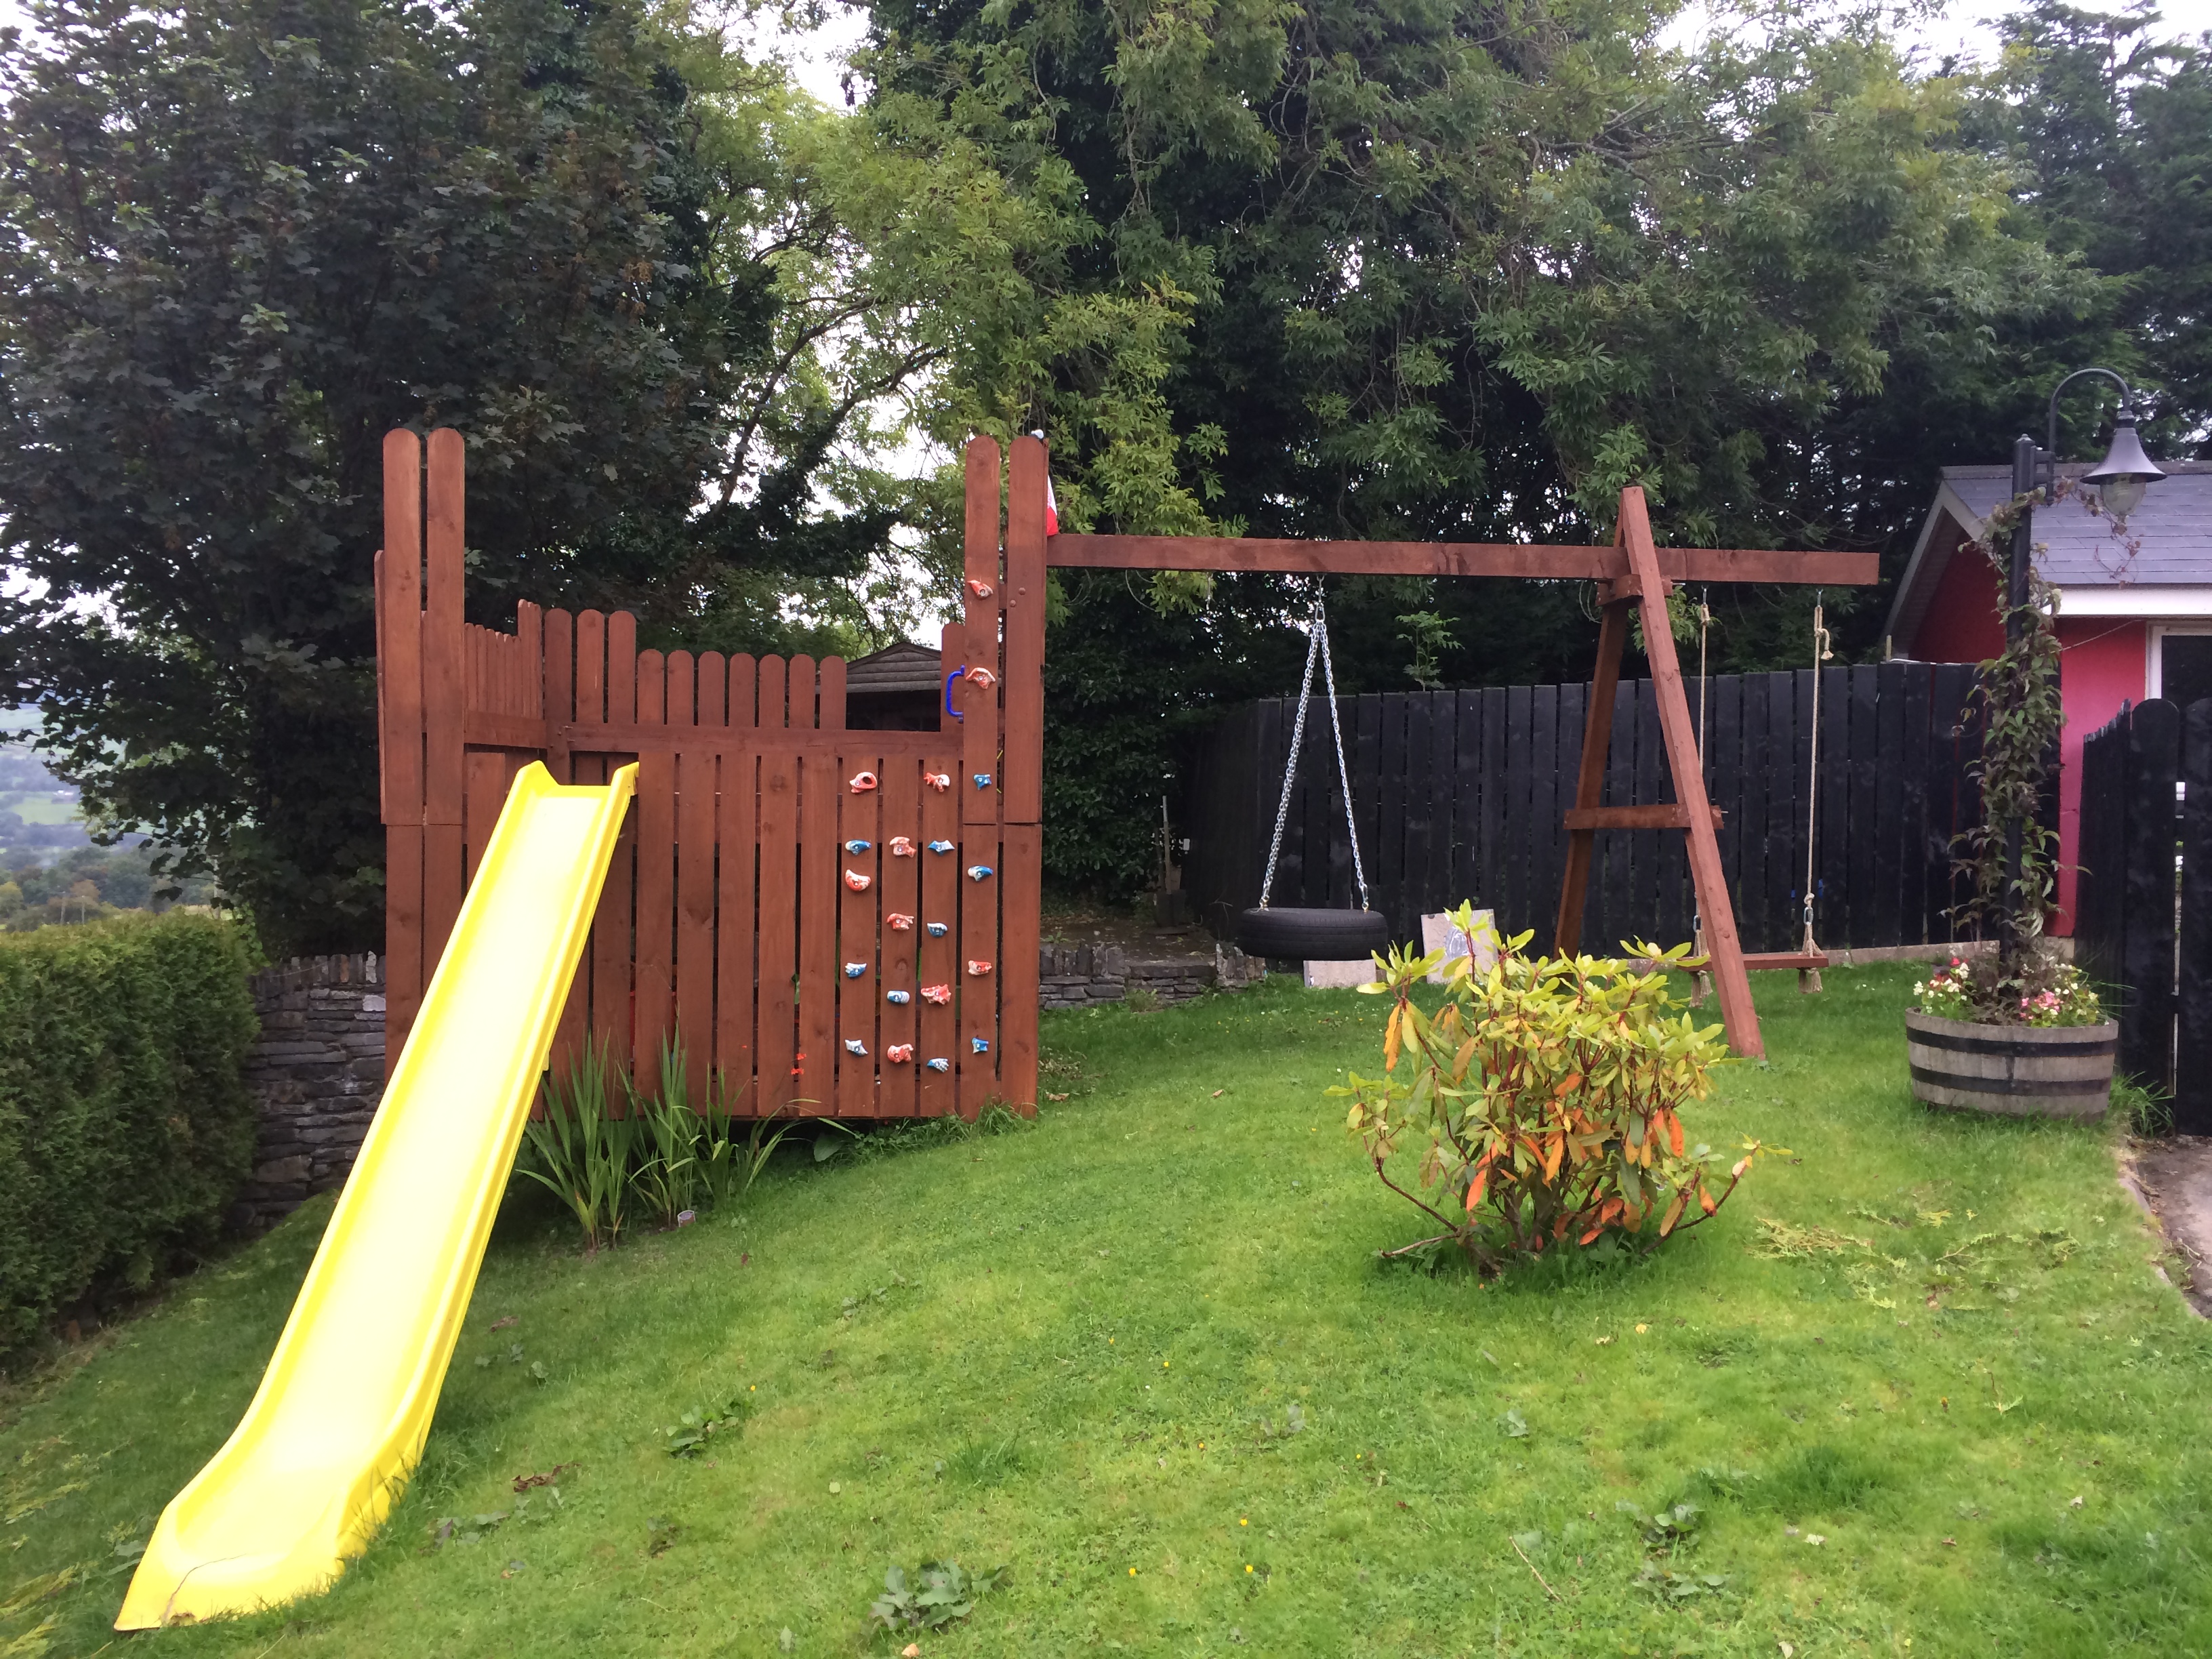
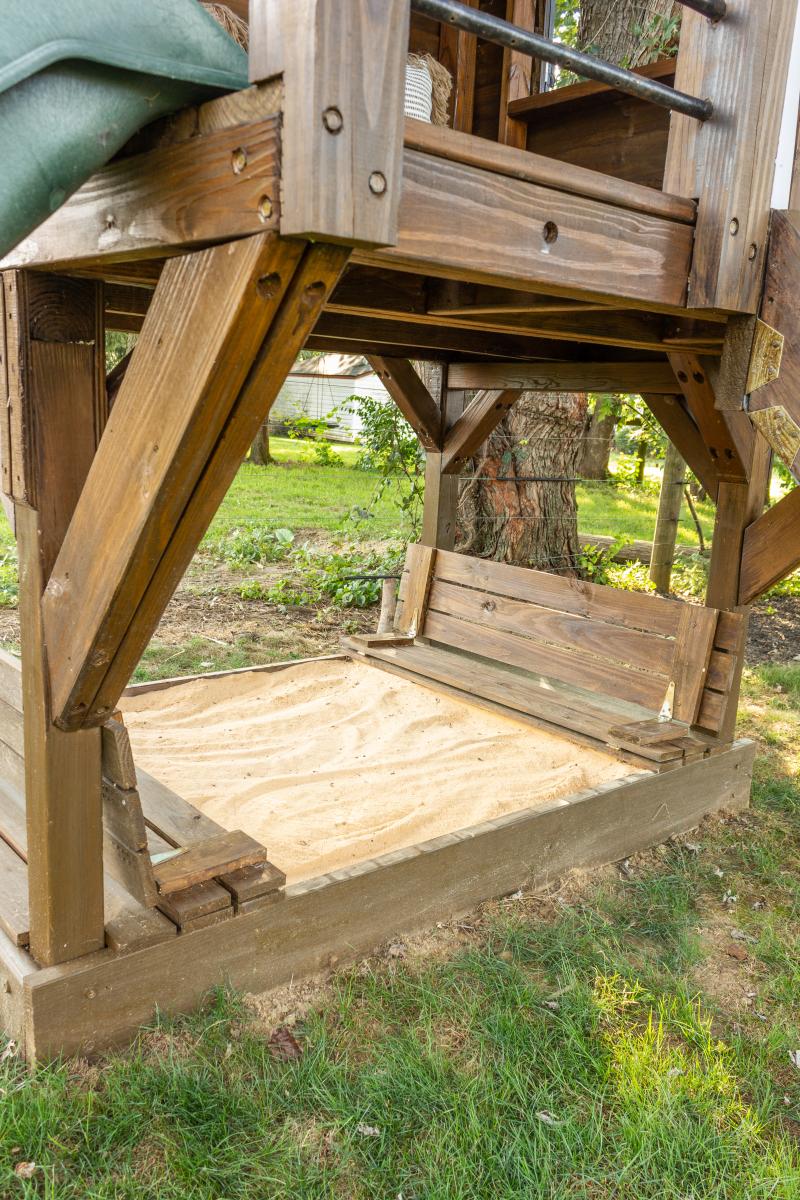
Play Deck and Swing
Wed, 09/03/2014 - 07:35
You have a BEAUTIFUL view from your yard! Just curious, where do you live? I assumed somewhere in Europe due to the currency. The play area looks fantastic. What lucky kiddos!
Wed, 09/03/2014 - 08:21
Thanks. Lovely part of the country outside Omagh, Northern Ireland
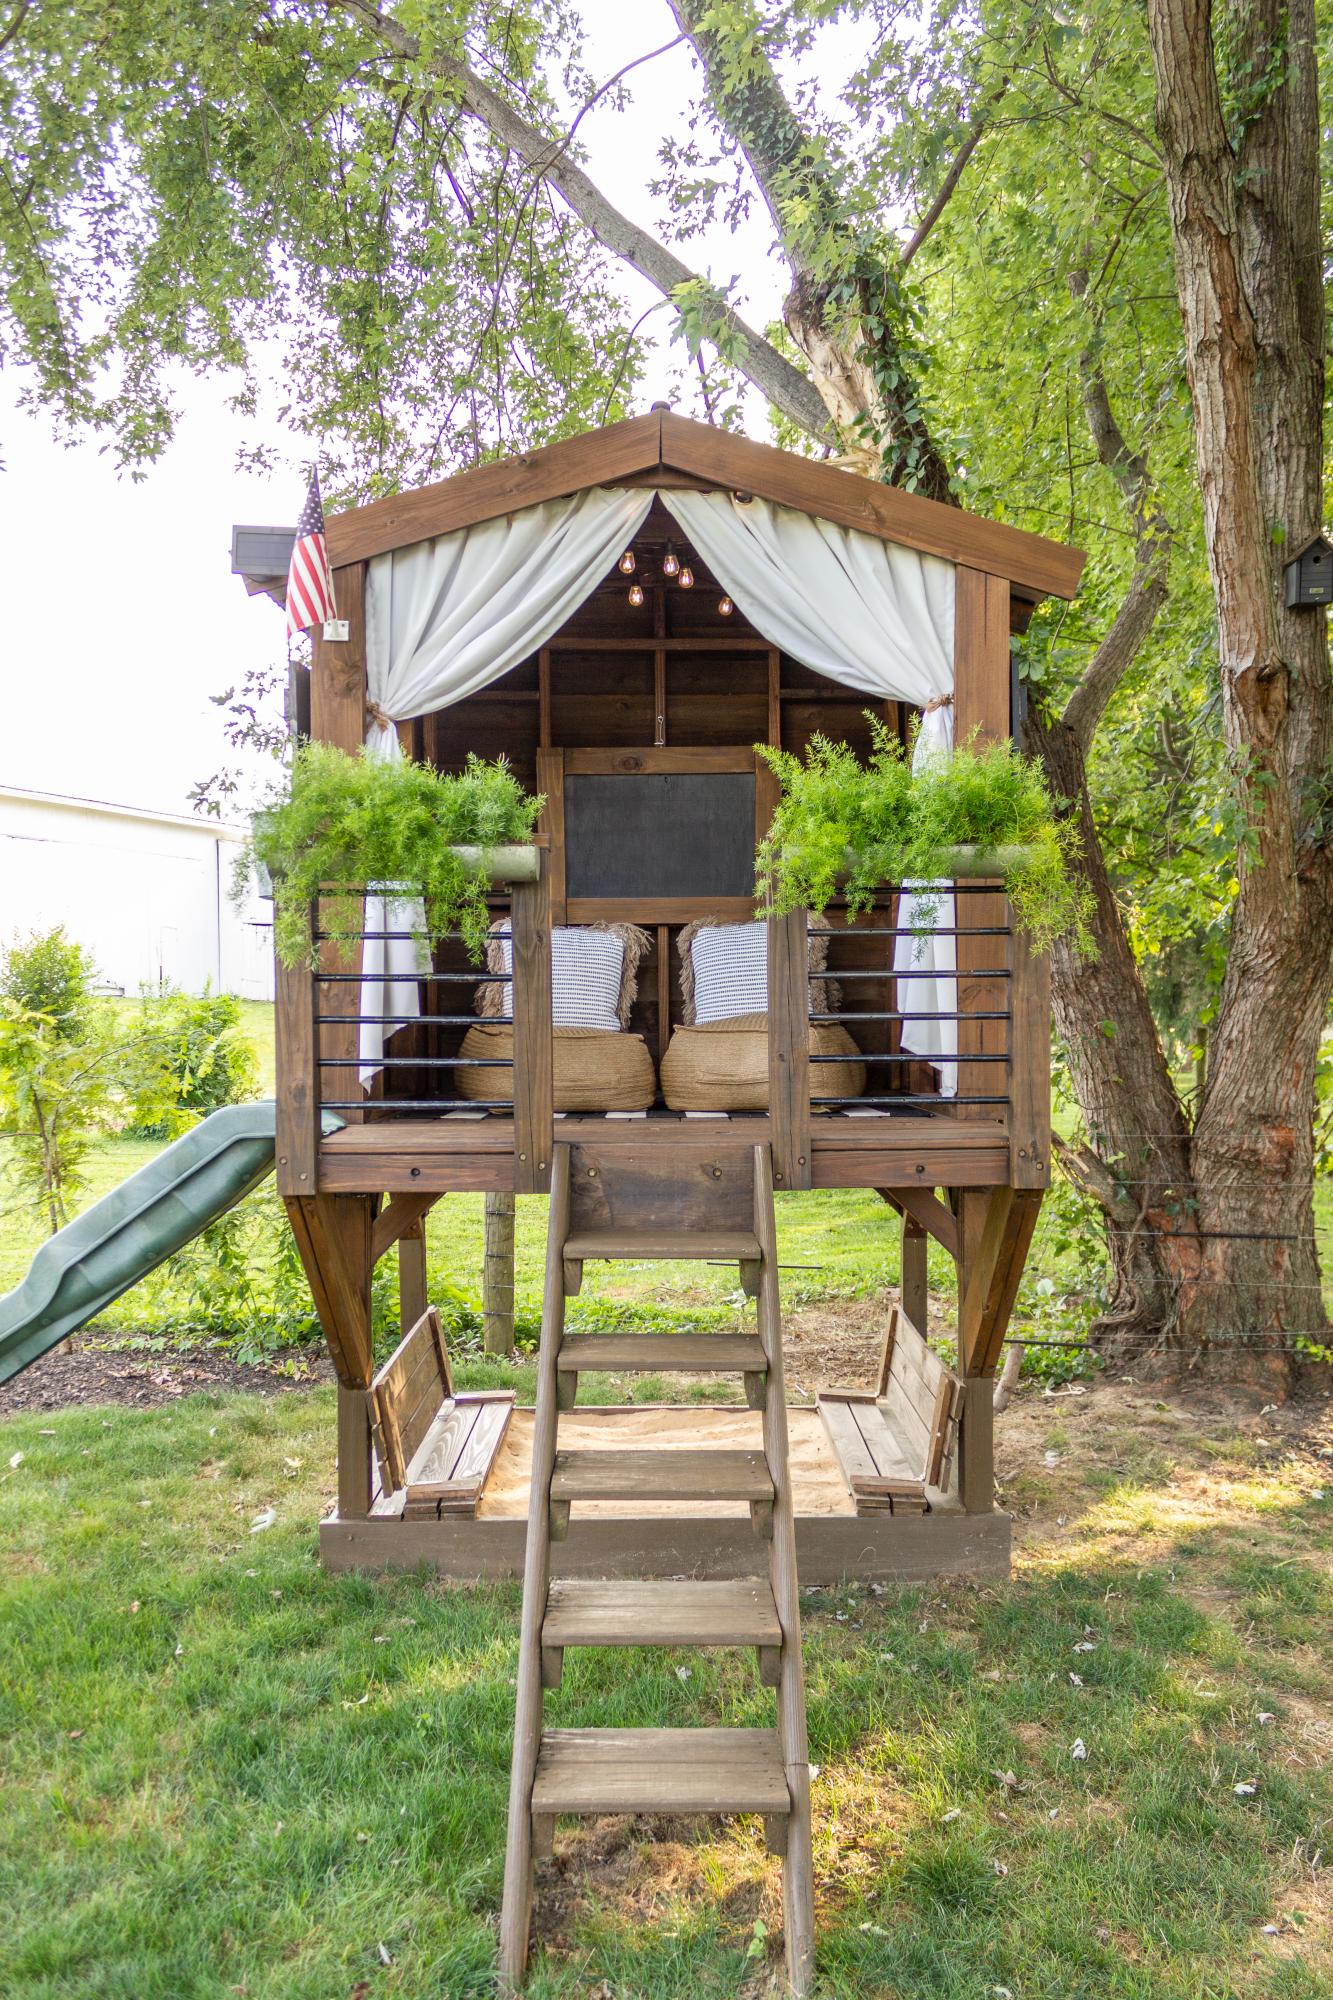
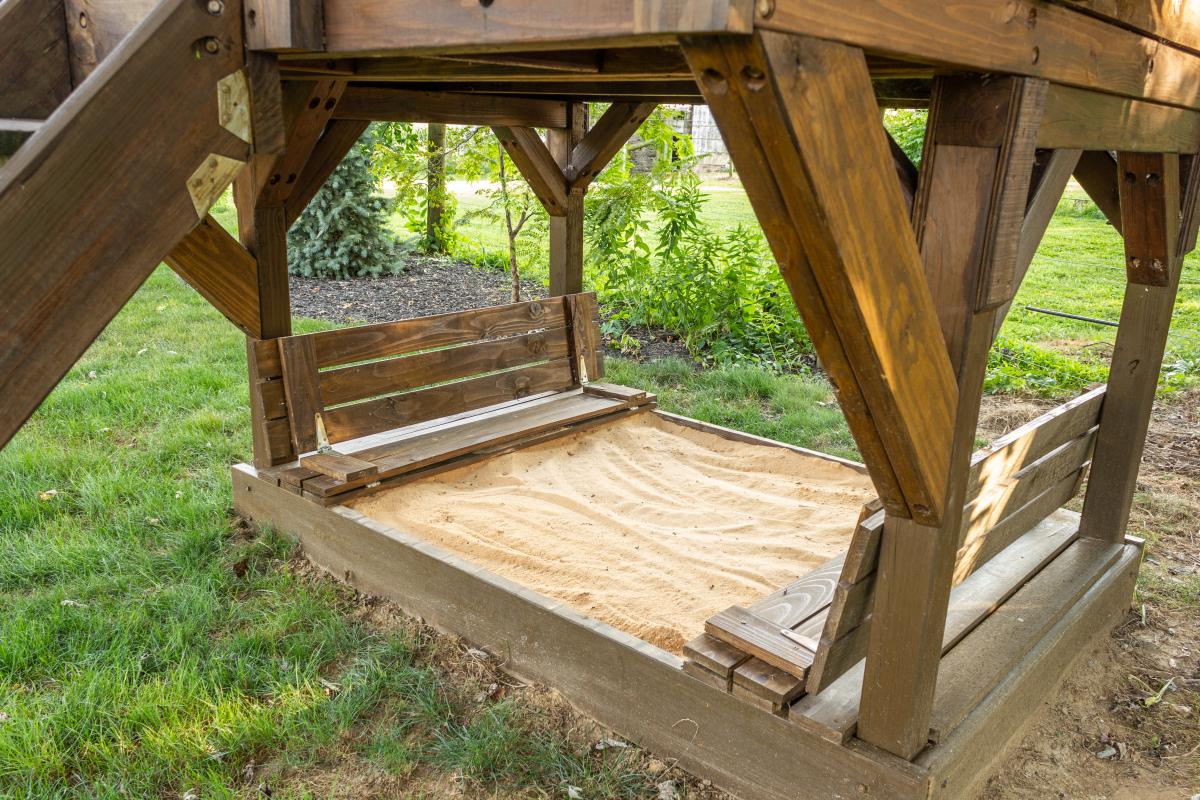
The base of our playhouse felt like the perfect spot to use the sandbox plan with built-in seats. The bench seats actually fold flat to create a lid for the sandbox when it’s not in use. I followed Ana’s plans exactly and used the list of materials she provided. The only modification I made was eliminating the back supports. It was not necessary for me to add the back supports since we have the playhouse posts to support the back of the bench.
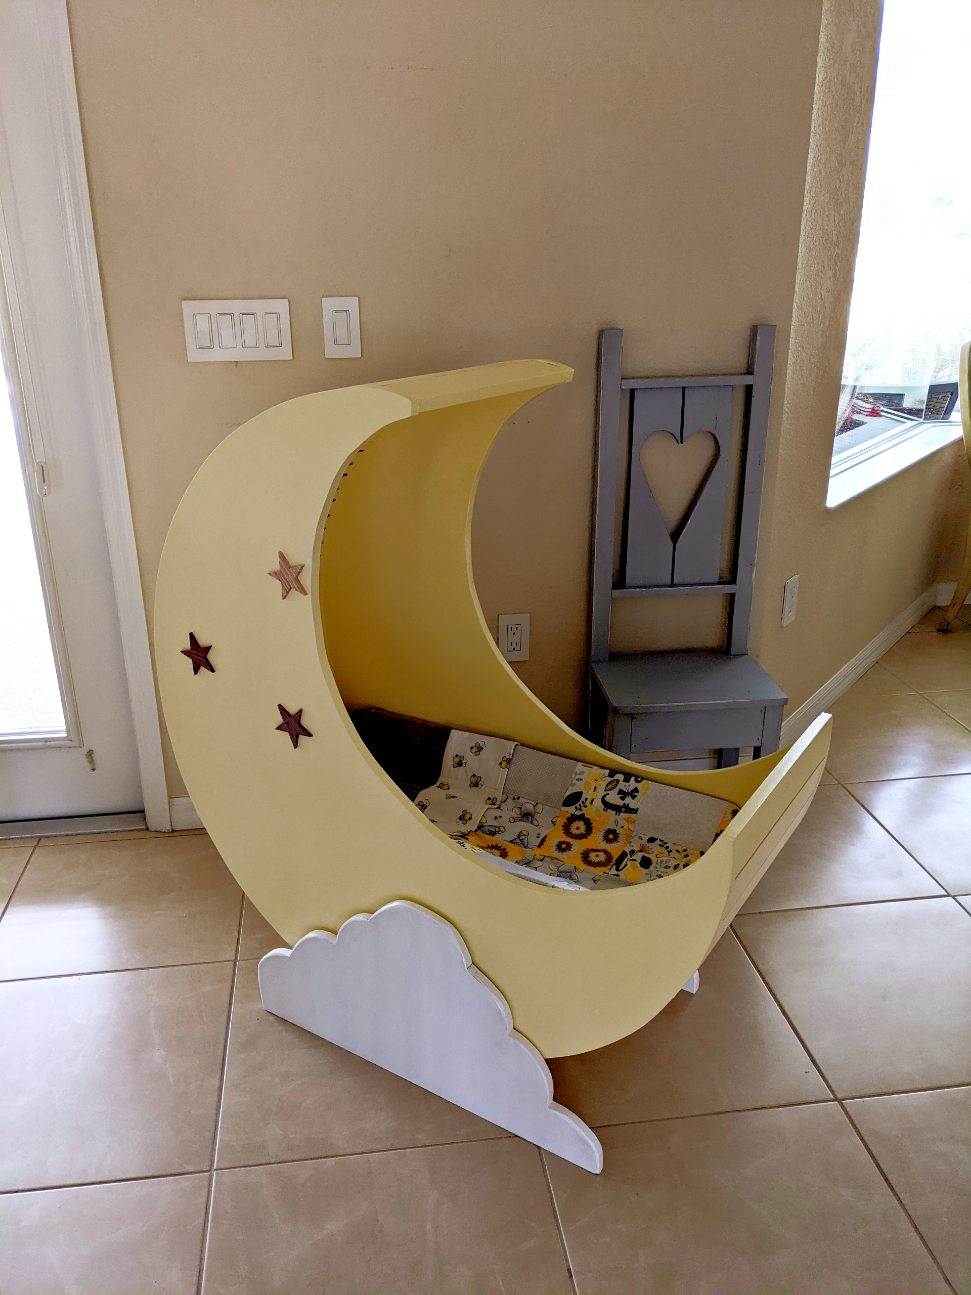
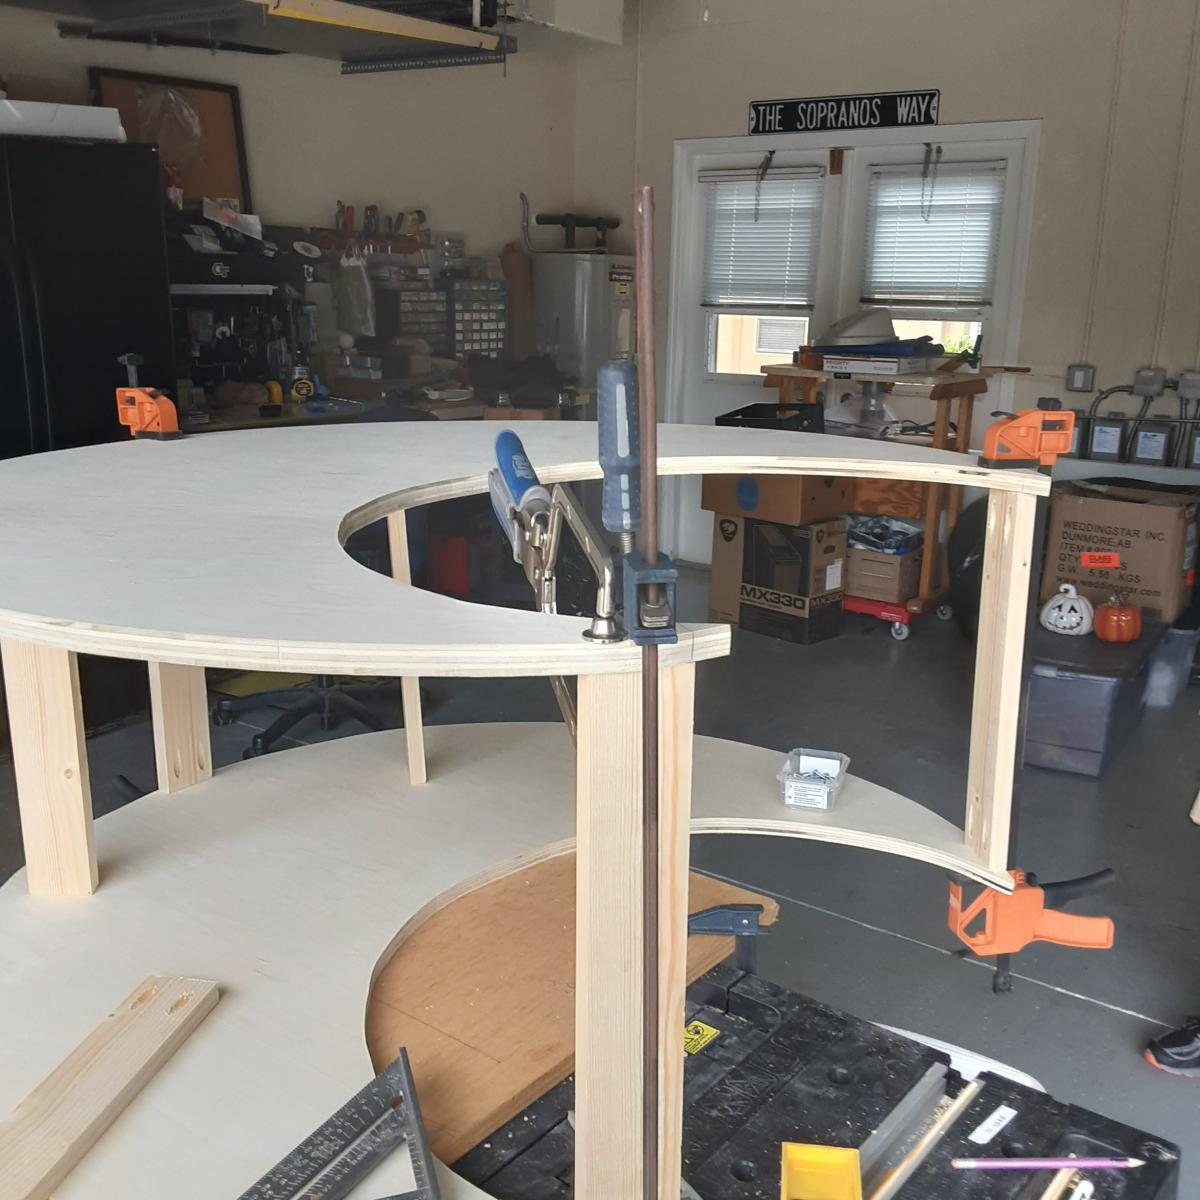
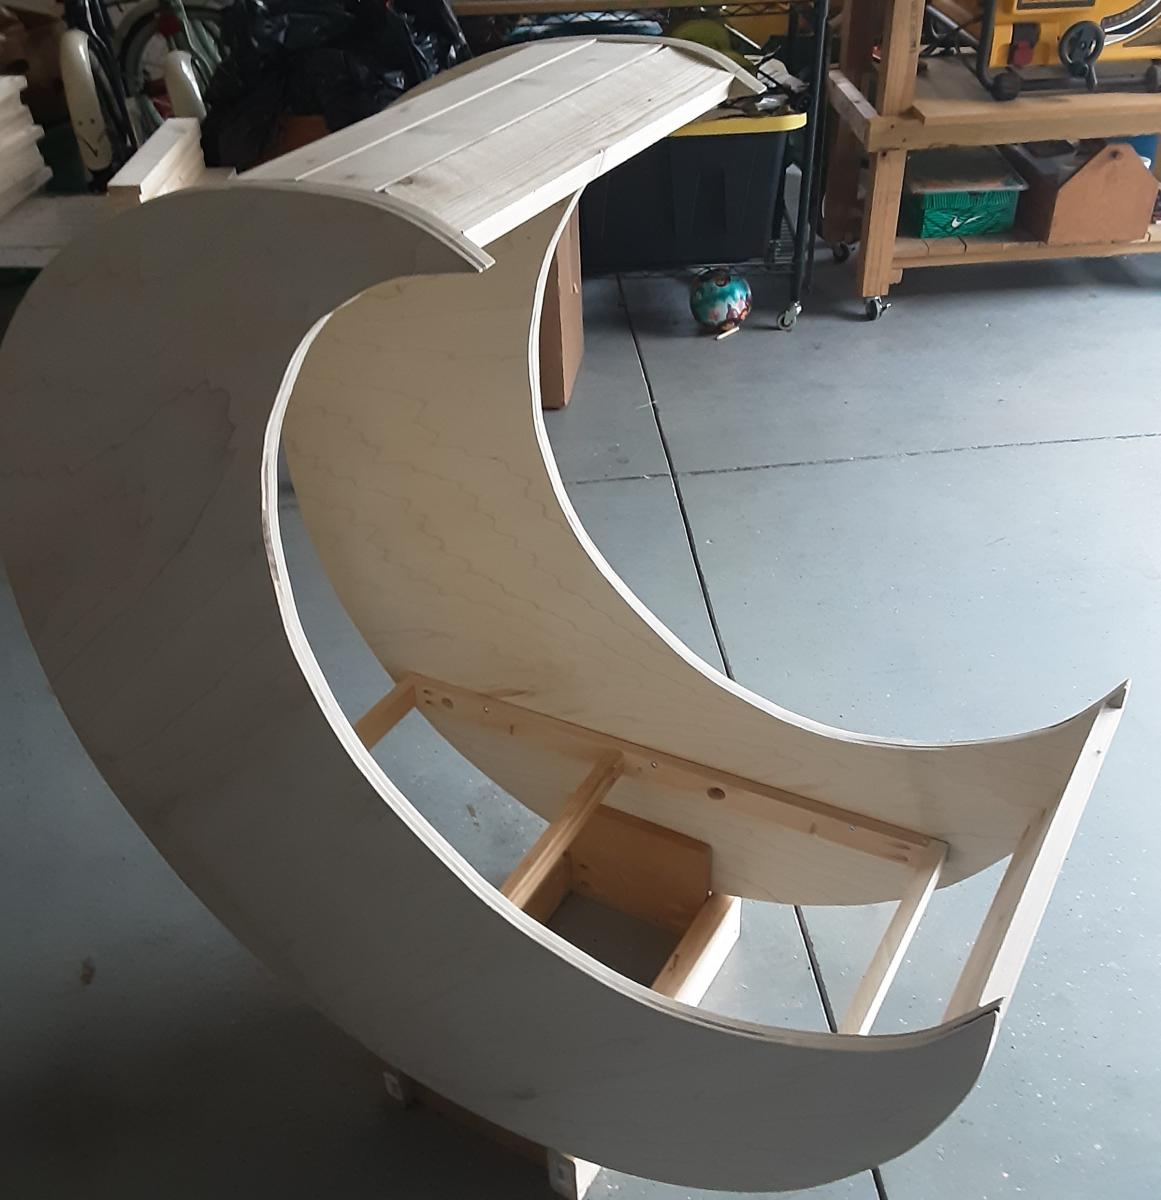
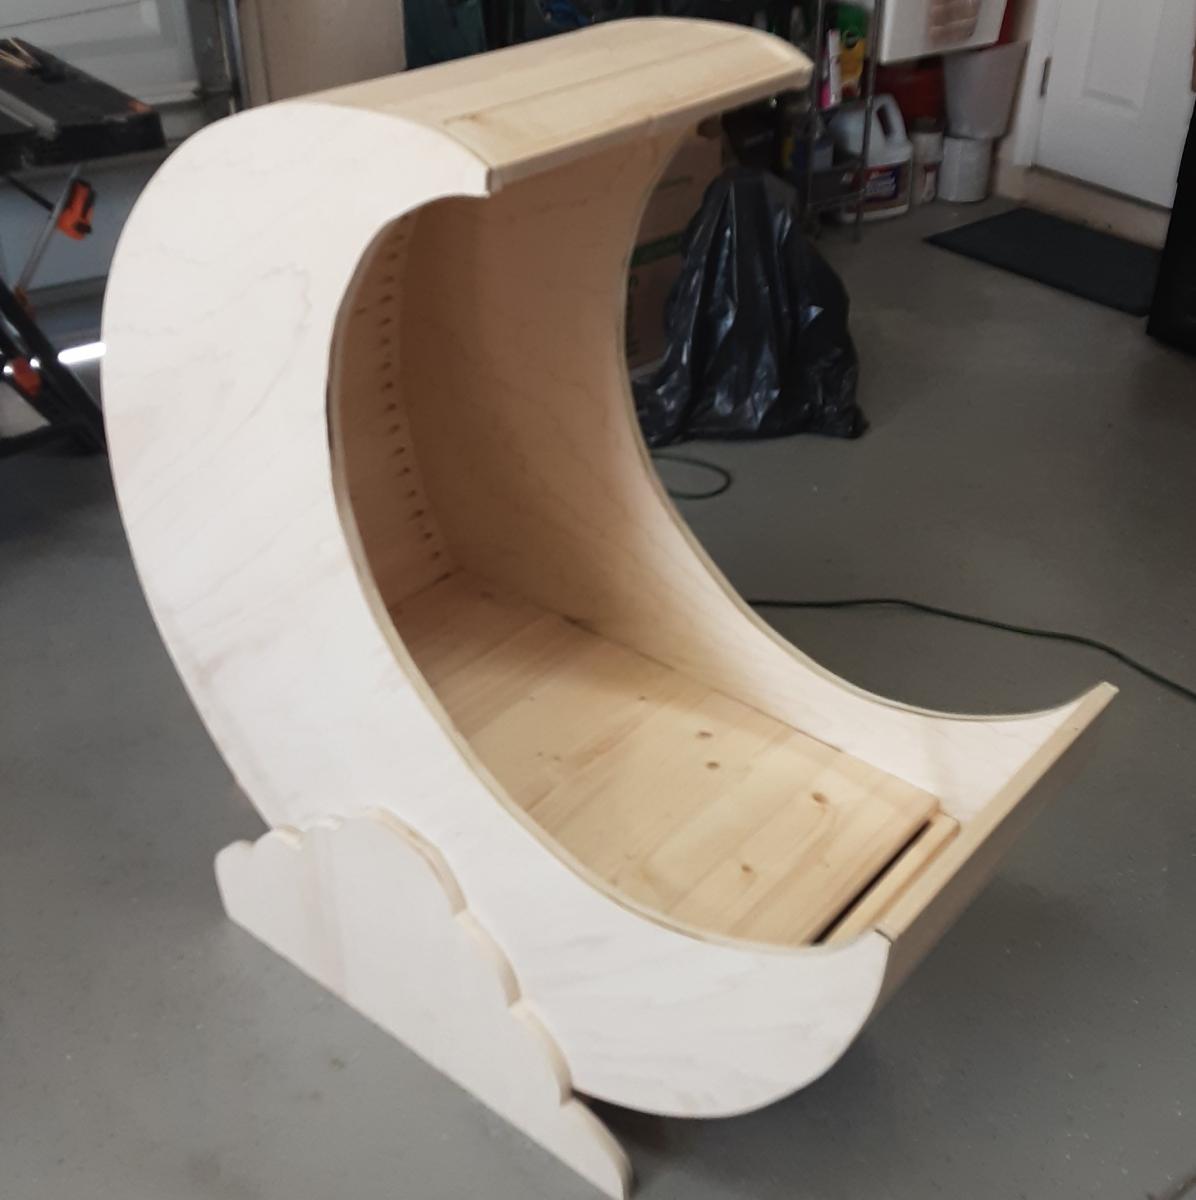
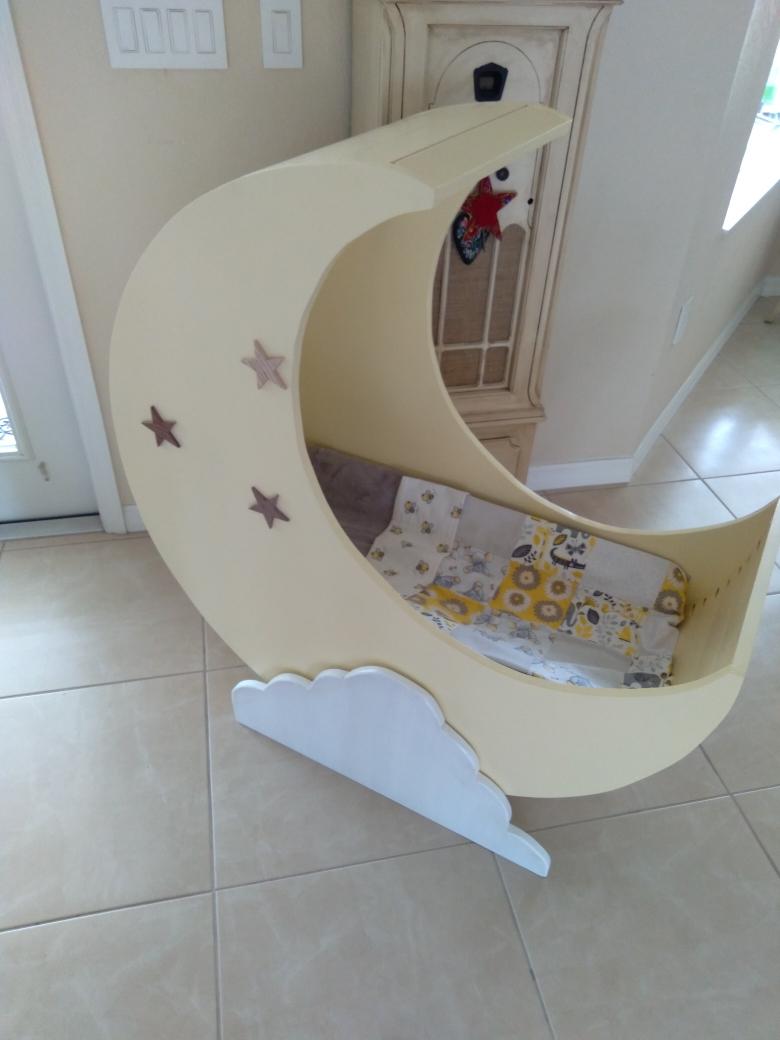
Built for my first Grandson Lucas. Made of pure bond poplar plywood and white pine. Templates were made of cardboard for a circle (20" radius) and a circle (14.5" radius). Placed small circle inside the larger circle to create a half moon shape. Identical sides were cut from the plywood. Extensive use of Kreg pocket holes to attach (25) 16" boards to the plywood sides. Each board requires 2 pocket holes (1 1/4) on each side. Added a base to the cradle for stability and attached plywood cloud shapes to cover base and add a decorative touch. Frame installed and attached rails to the inside supporting 30" by 16" infant mattress.


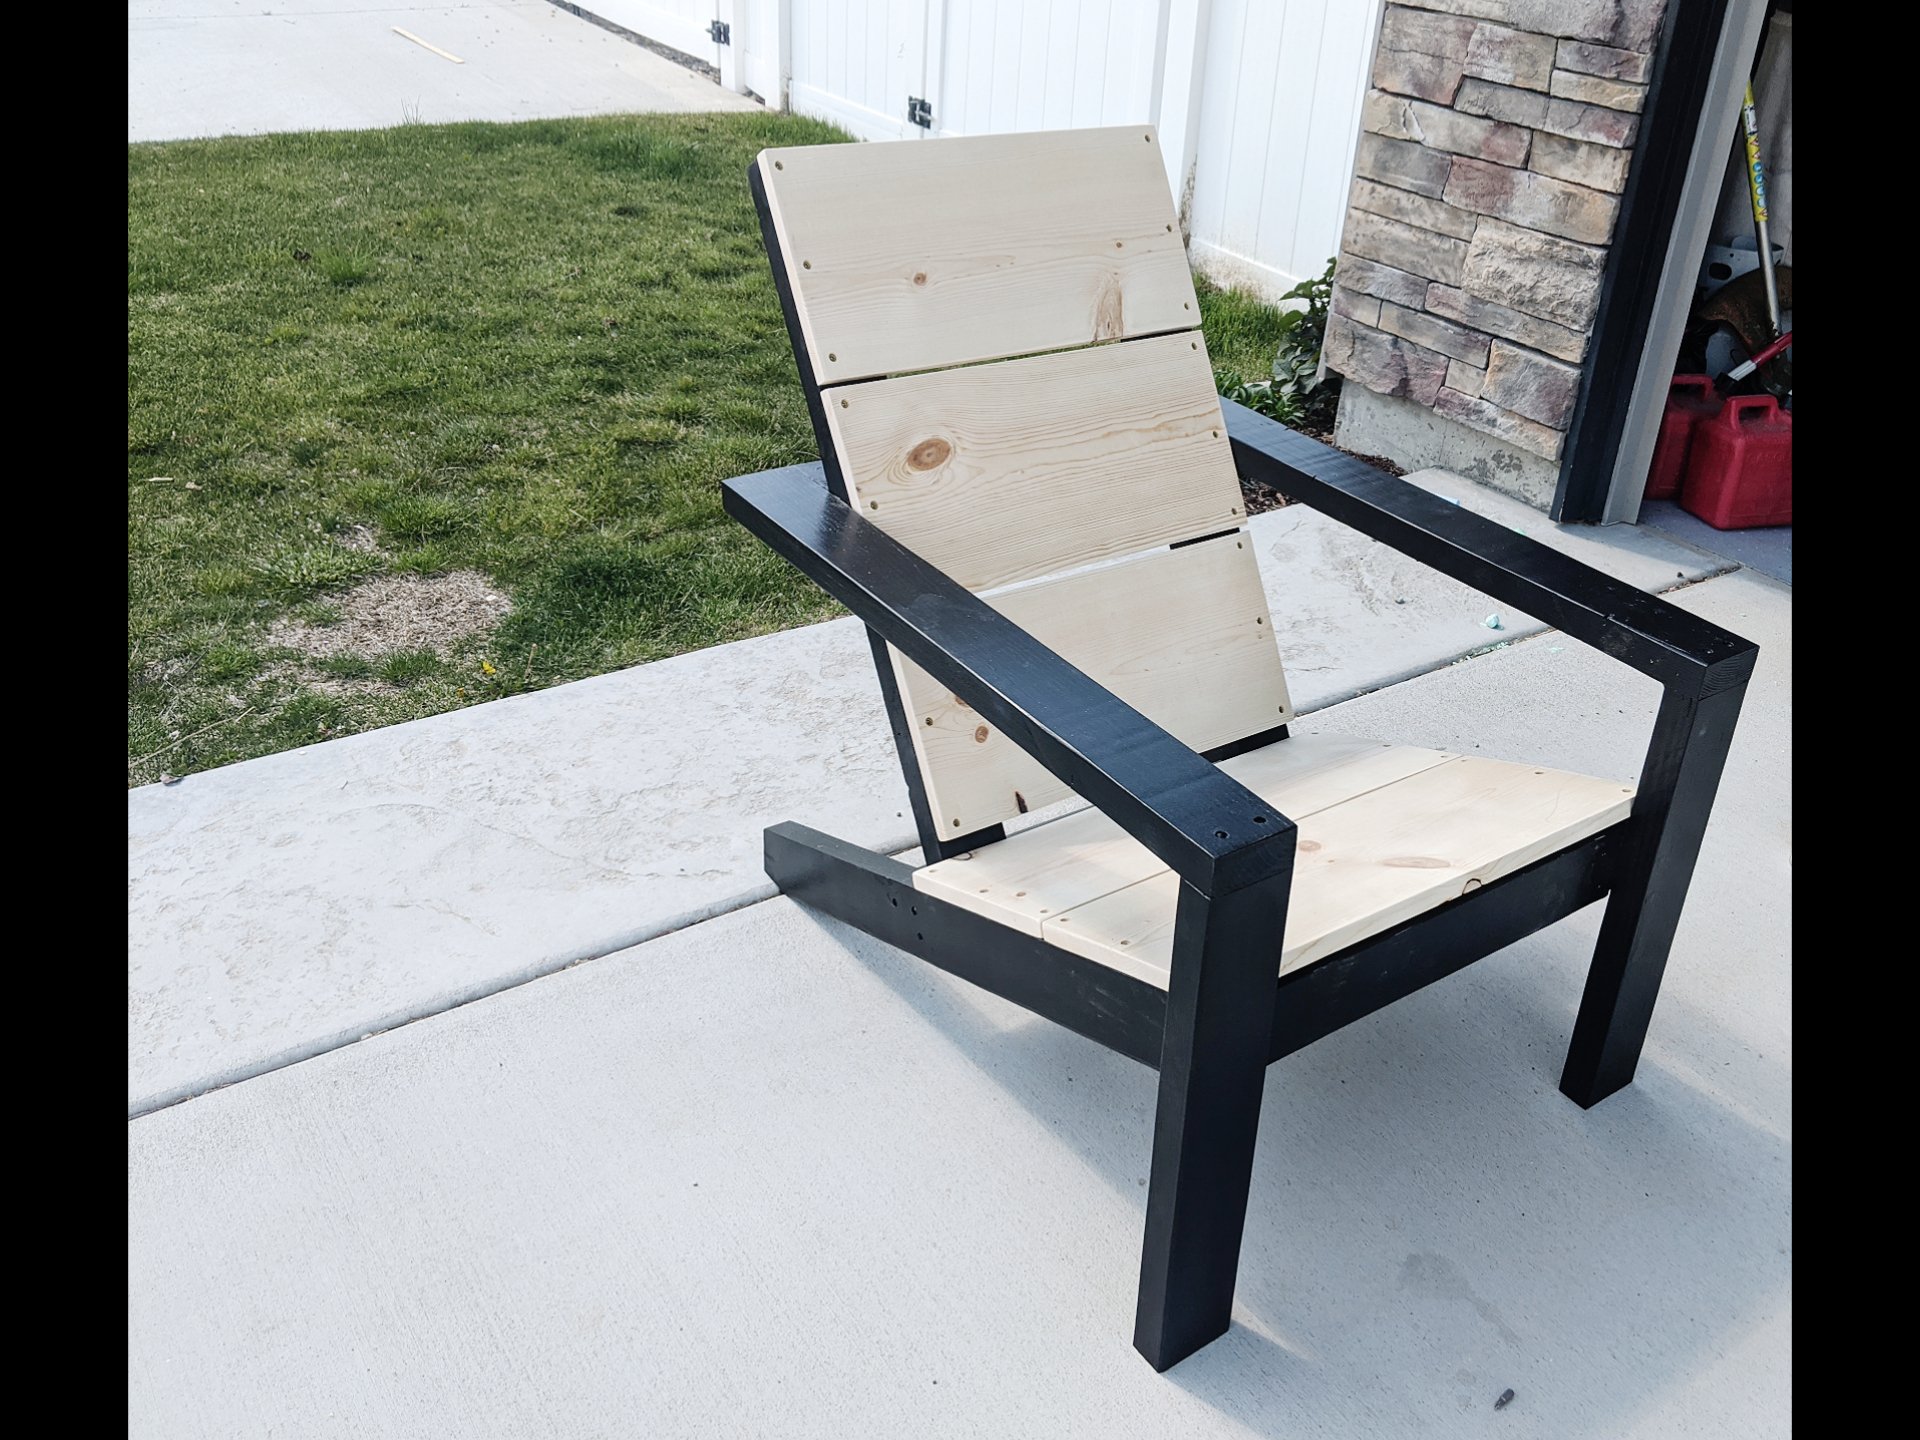
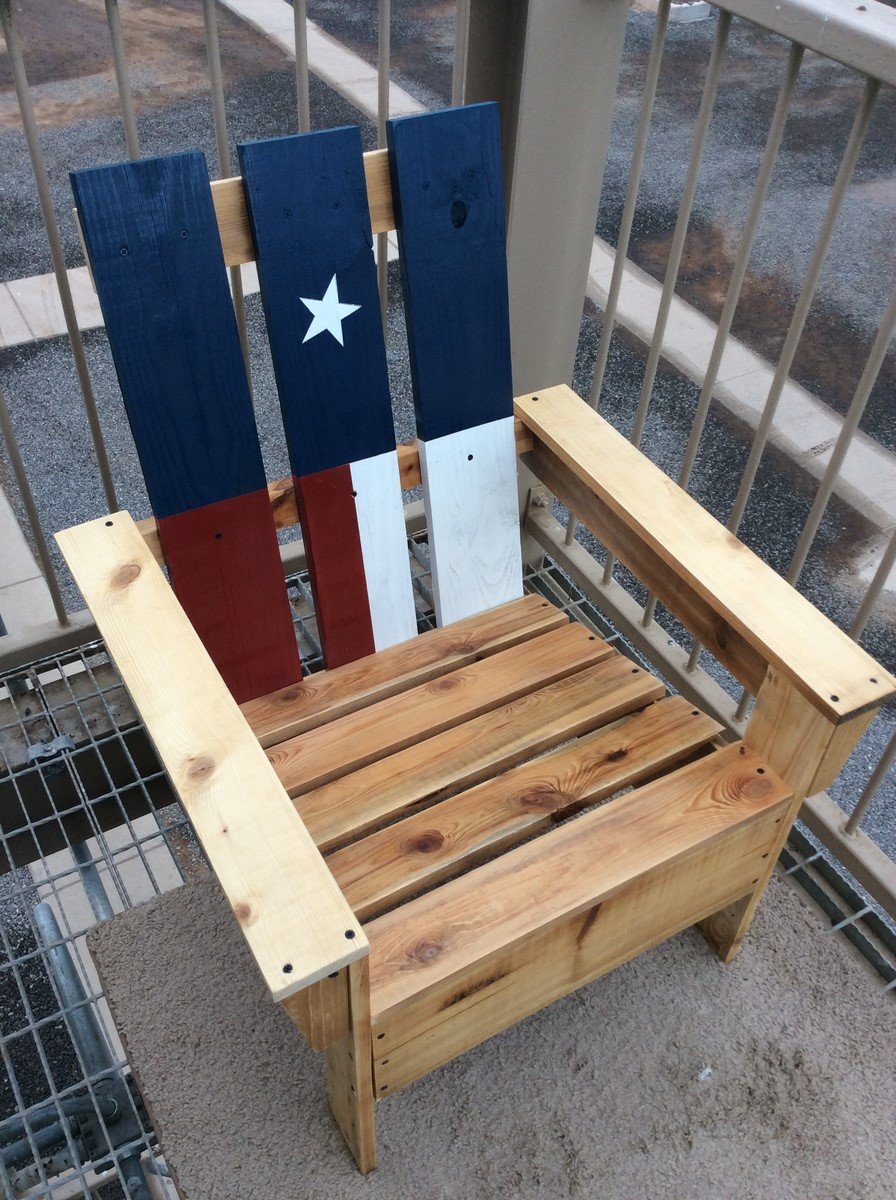
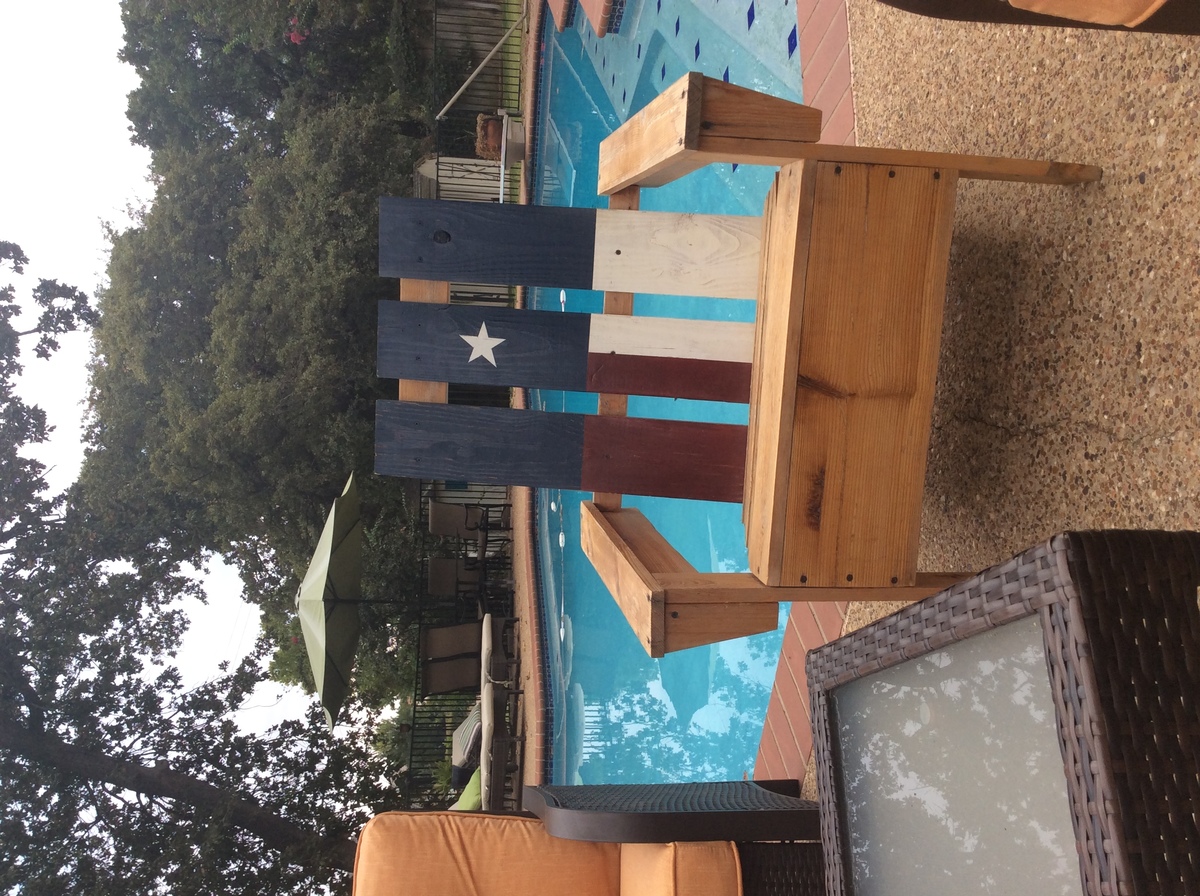
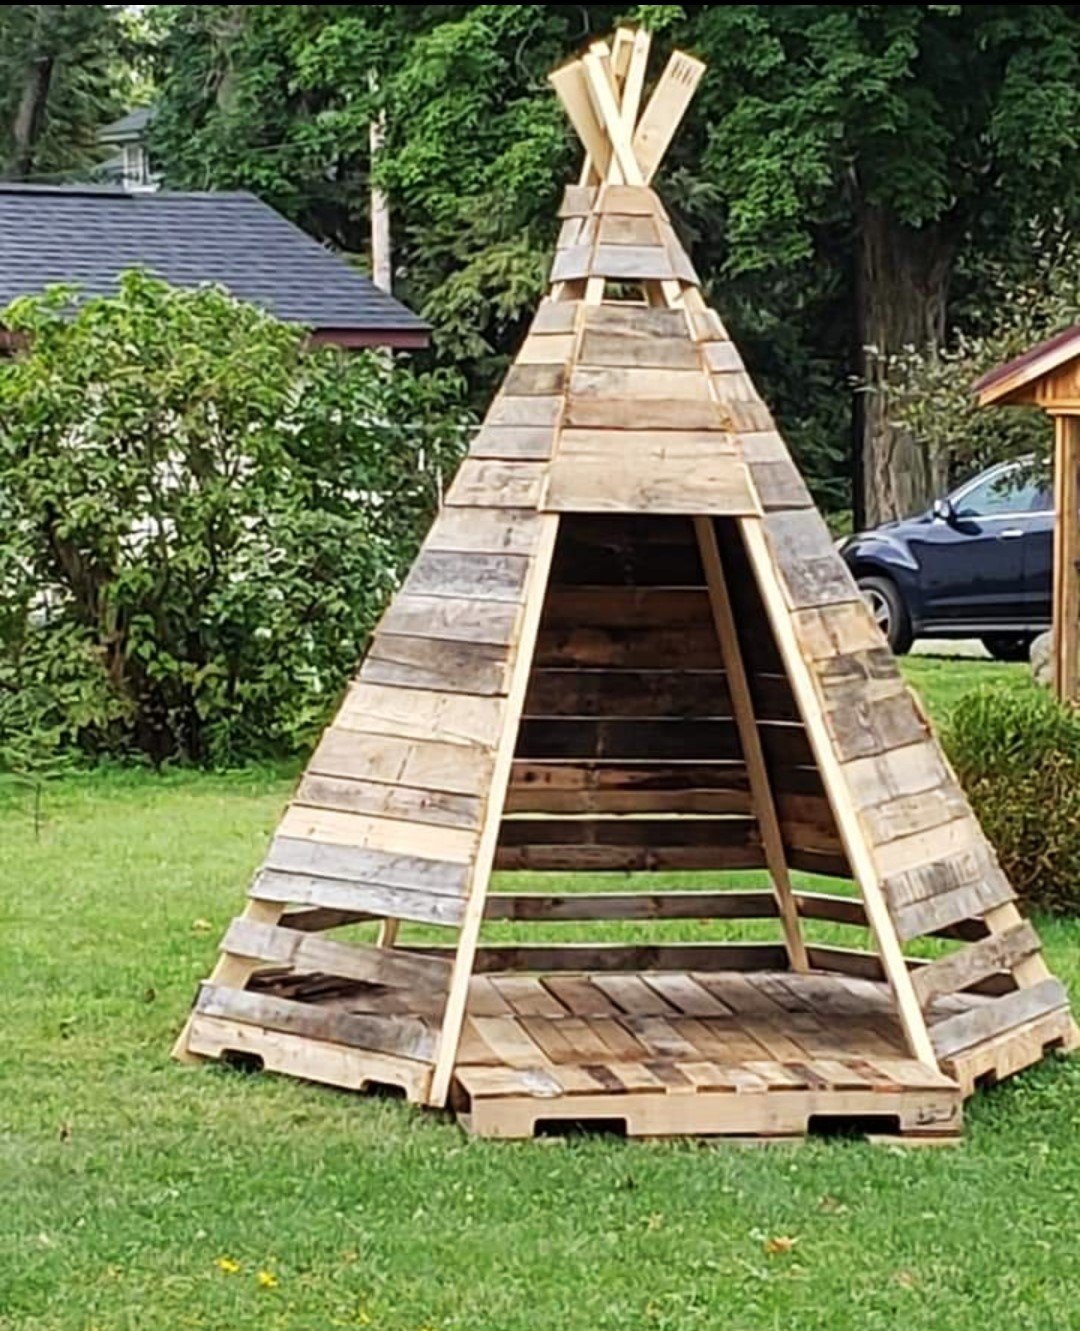
I decided to try and use the plans on Ana's site but with a twist. I wanted to limit myself to using only pallets. I think it turned out great! I can't upload all the photos because they exceed the maximum size limit. If I was able to you could see how each chair is slightly different and has a lot of character. I finished them with a waterproofing oil which I highly recommend over other finishes.


Mon, 04/10/2017 - 08:51
This is exactly what I'm looking for !! Fantastic build and re-purposing is always better.

Used square laundry baskets instead of regular rectangular baskets. The square ones aren't as deep but are a bit taller so I had to modify the plans. I added a backsplash and some wooden tags to the baskets to designate them for certain colors. I also added some decorative trim and finished the bottom in a gray stain and used white chalk paint for the top.


This was very easy to make. Stained with minwax dark walnut. It's very sturdy too.


Comments
lmmblog
Mon, 01/09/2023 - 07:55
can you share the stain on…
can you share the stain on the doors?