Community Brag Posts

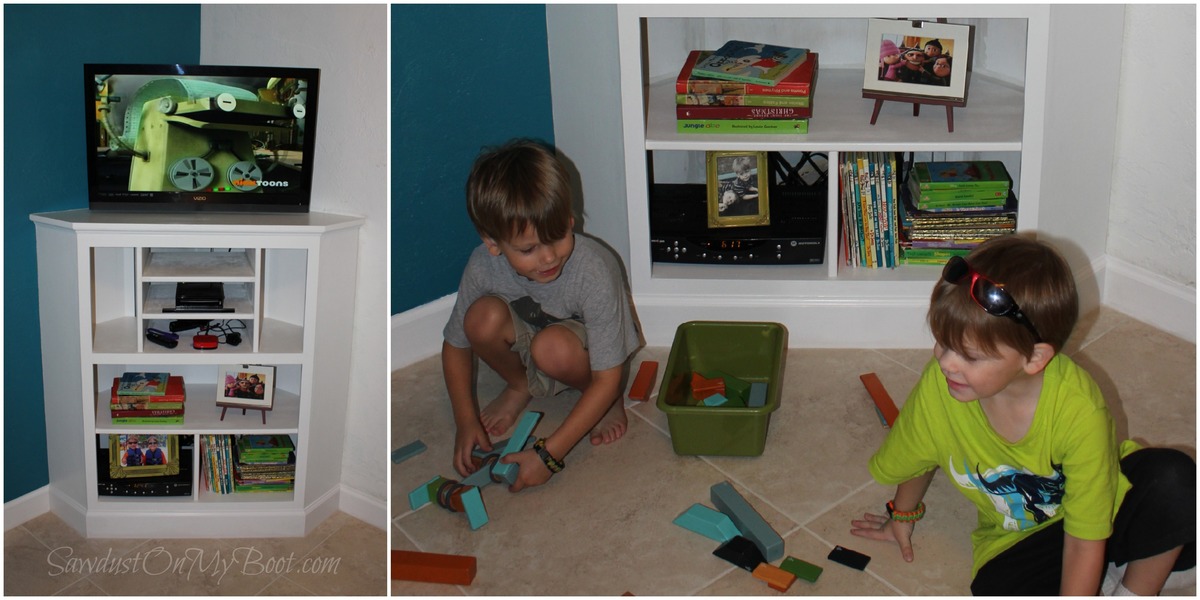
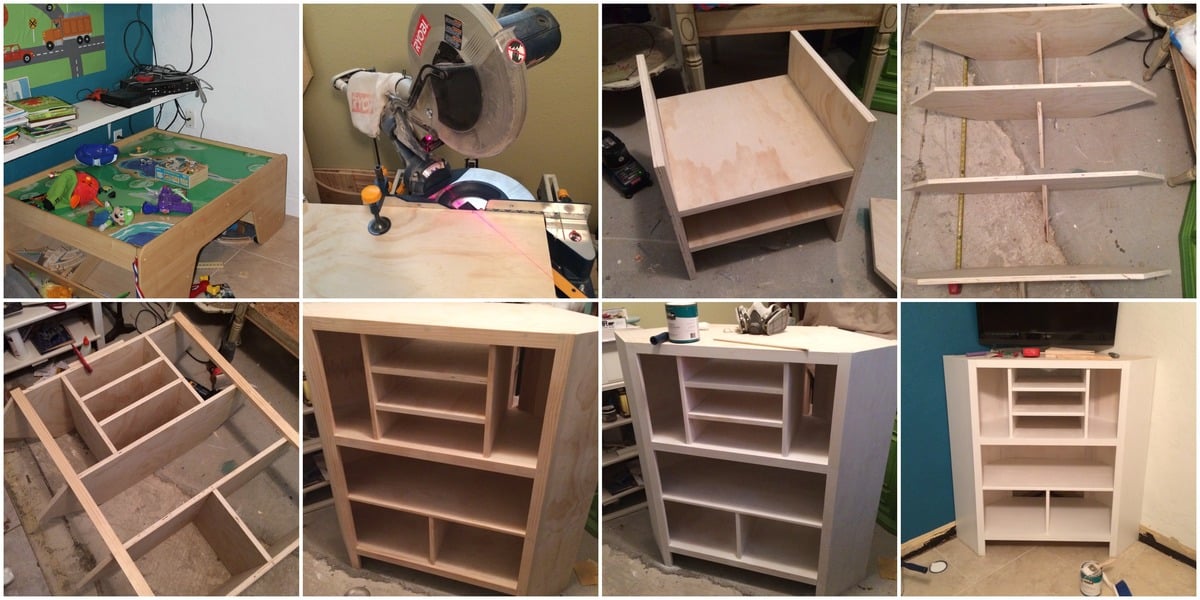
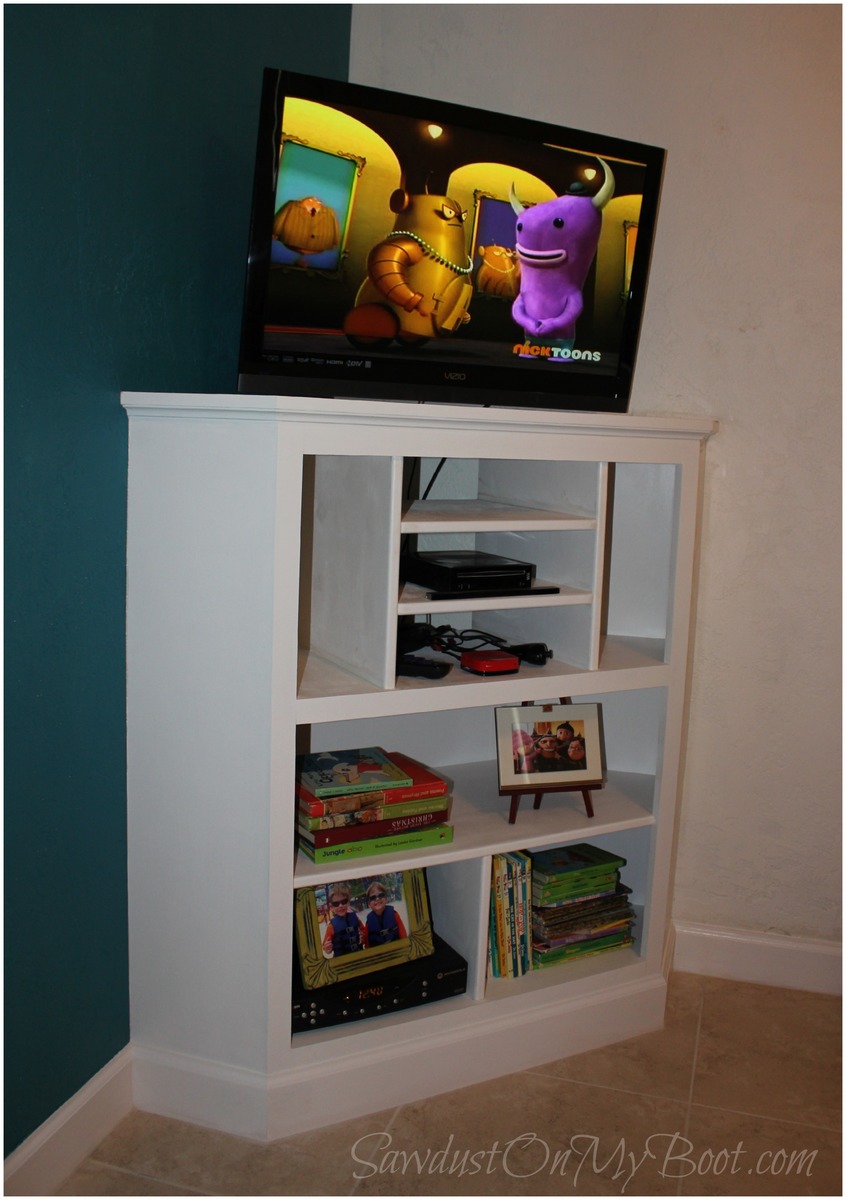
Built-In Corner Media Cabinet
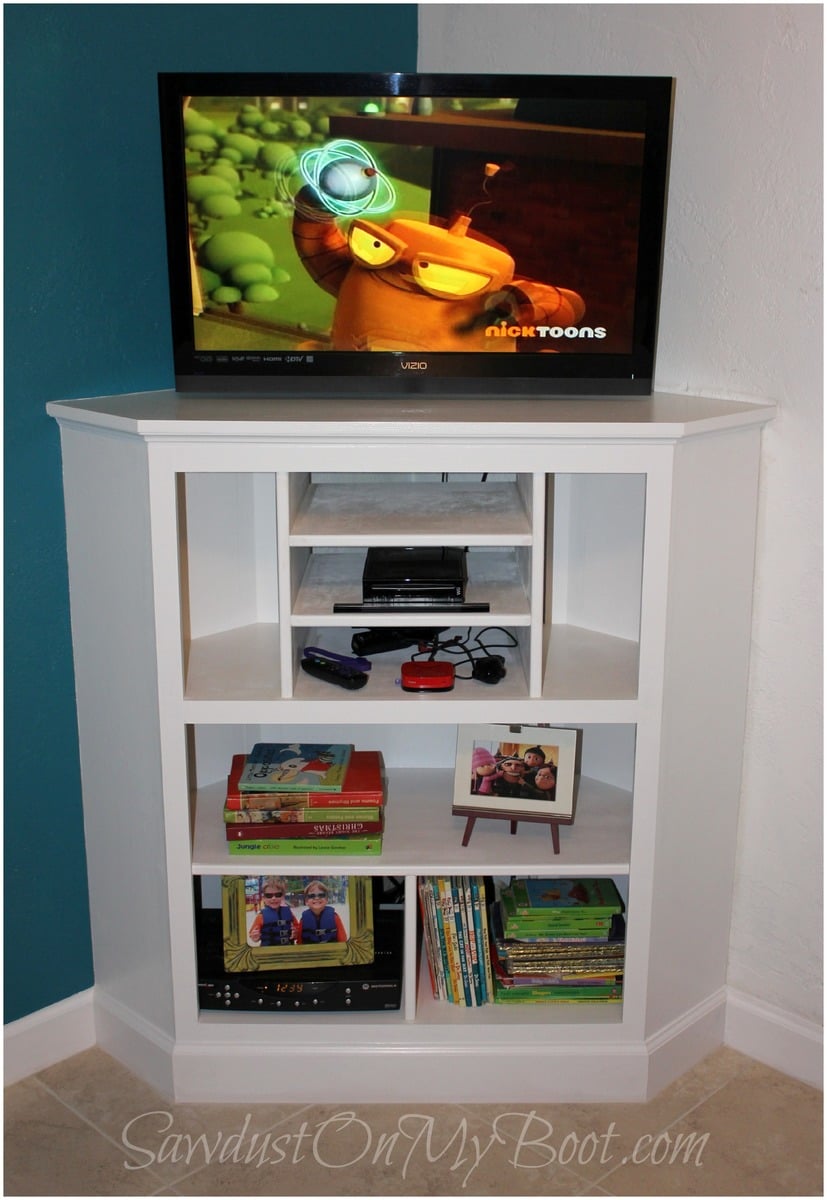
This was a particularly fun build for me since it was for my little guys' room! Hope Santa fills it with tech goodies on Christmas!! Please check out the details on my website! Happy Holidays!!! :D
Built from Plan(s)
Estimated Cost
$150
Estimated Time Investment
Weekend Project (10-20 Hours)
Finish Used
Semi-Gloss Latex Paint
Recommended Skill Level
Intermediate
Comments
Fri, 12/13/2013 - 05:38
Beautiful!!
Great job. The molding looks perfect too!! I love the name of your site. I live on an island and when I'm working on stuff I like to wear my cowgirl boots :) my friends all tease me for them...but I love getting 'sawdust on my boots'! Again, great job!!
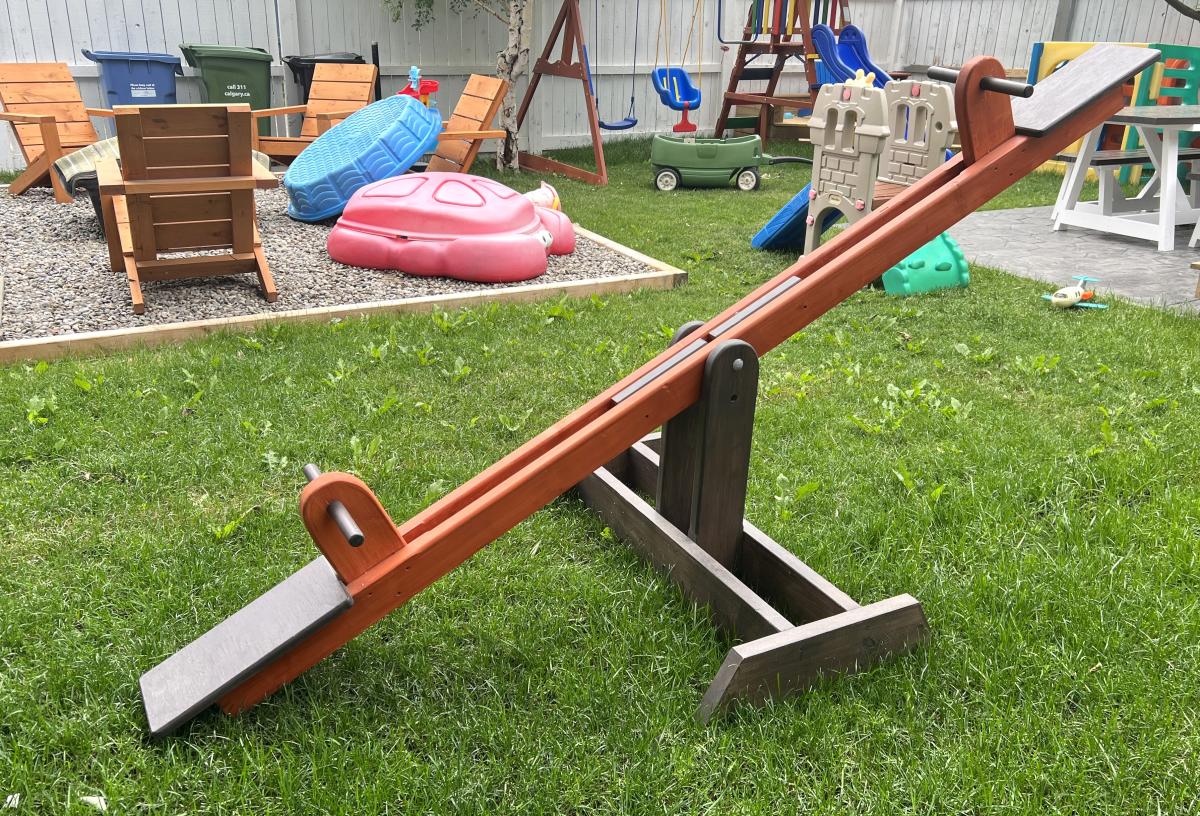
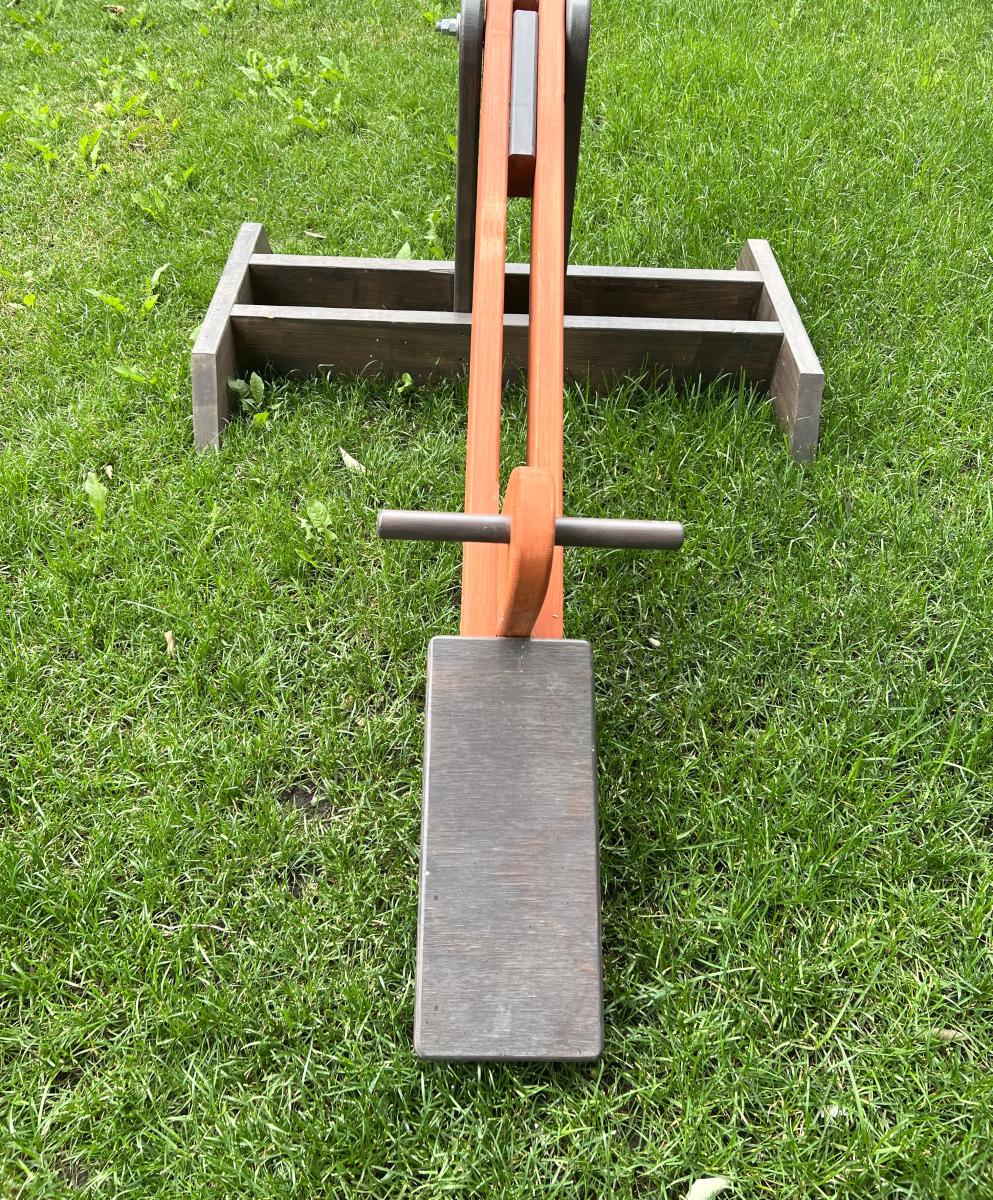
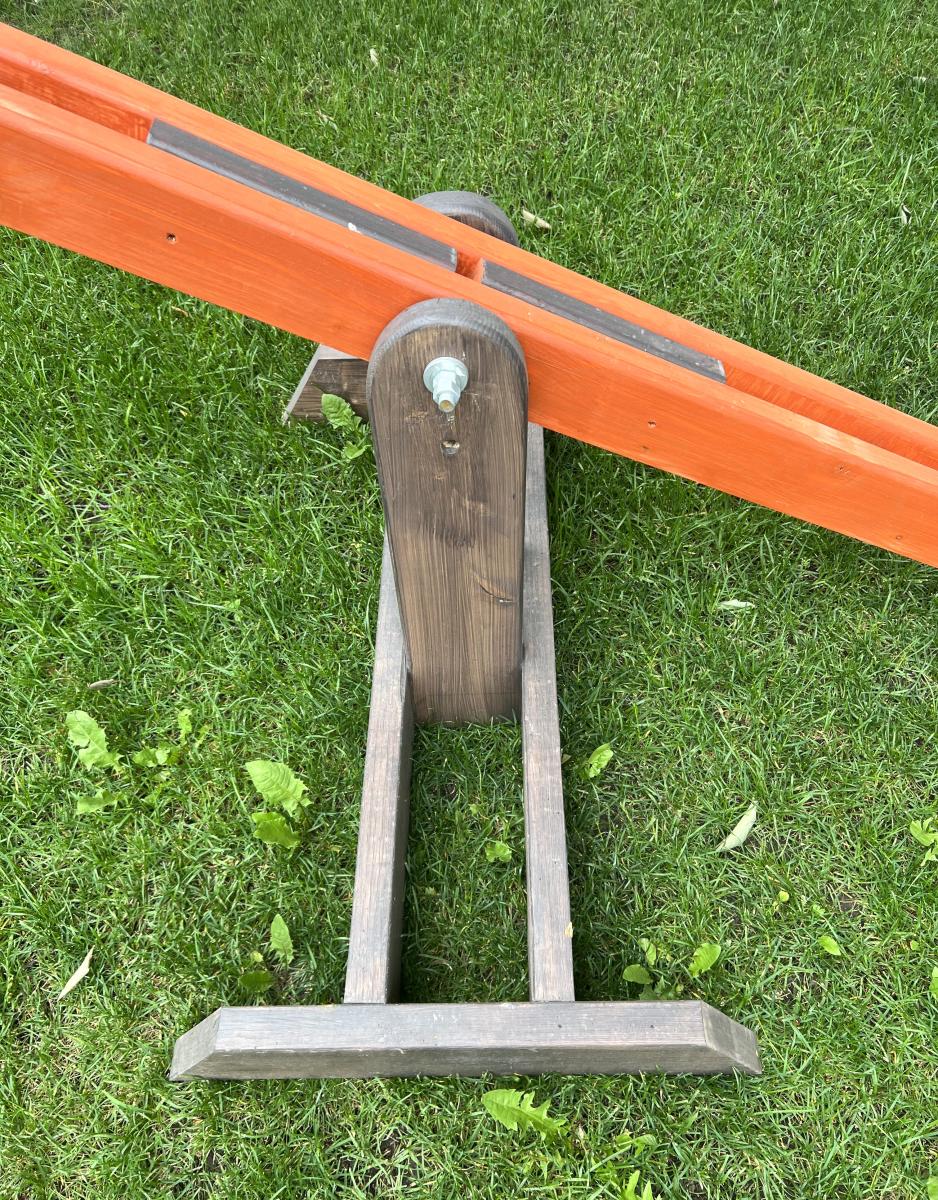
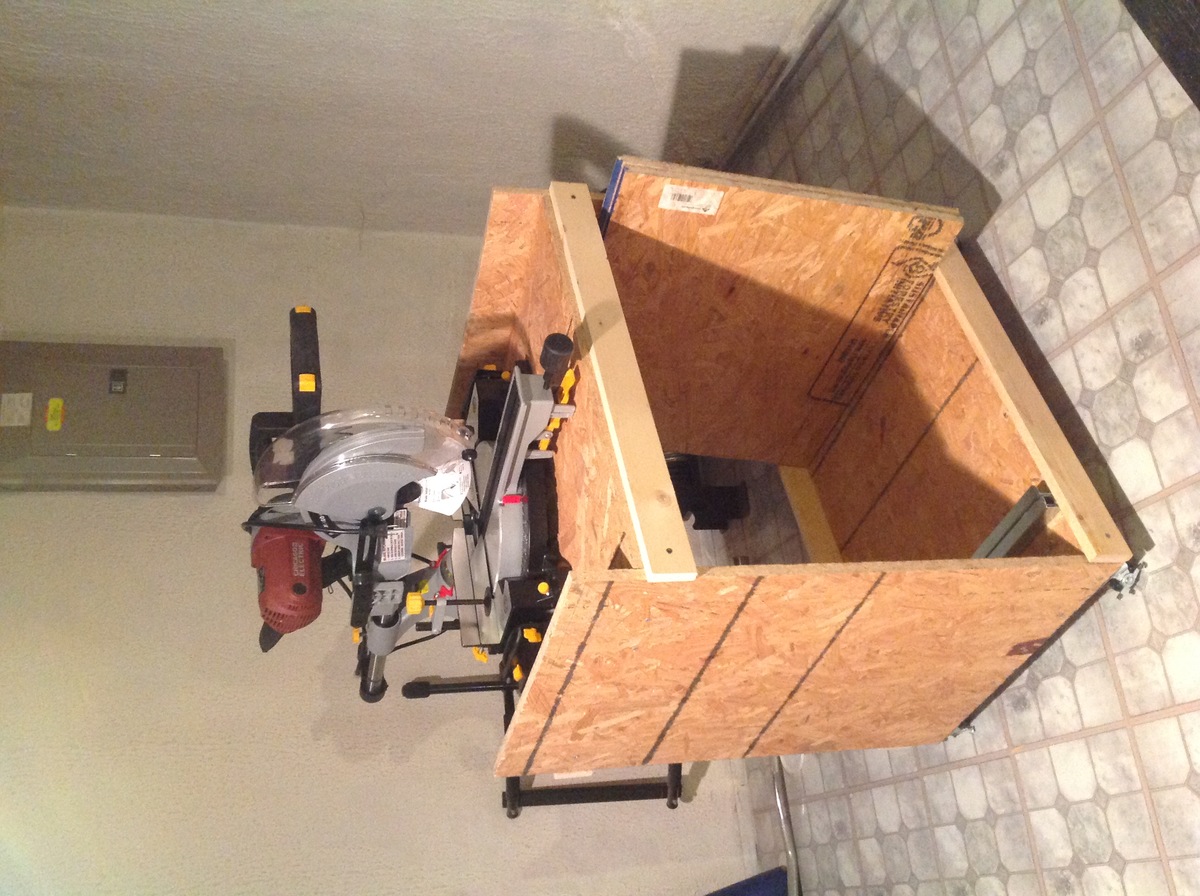
DIY Teter Totter
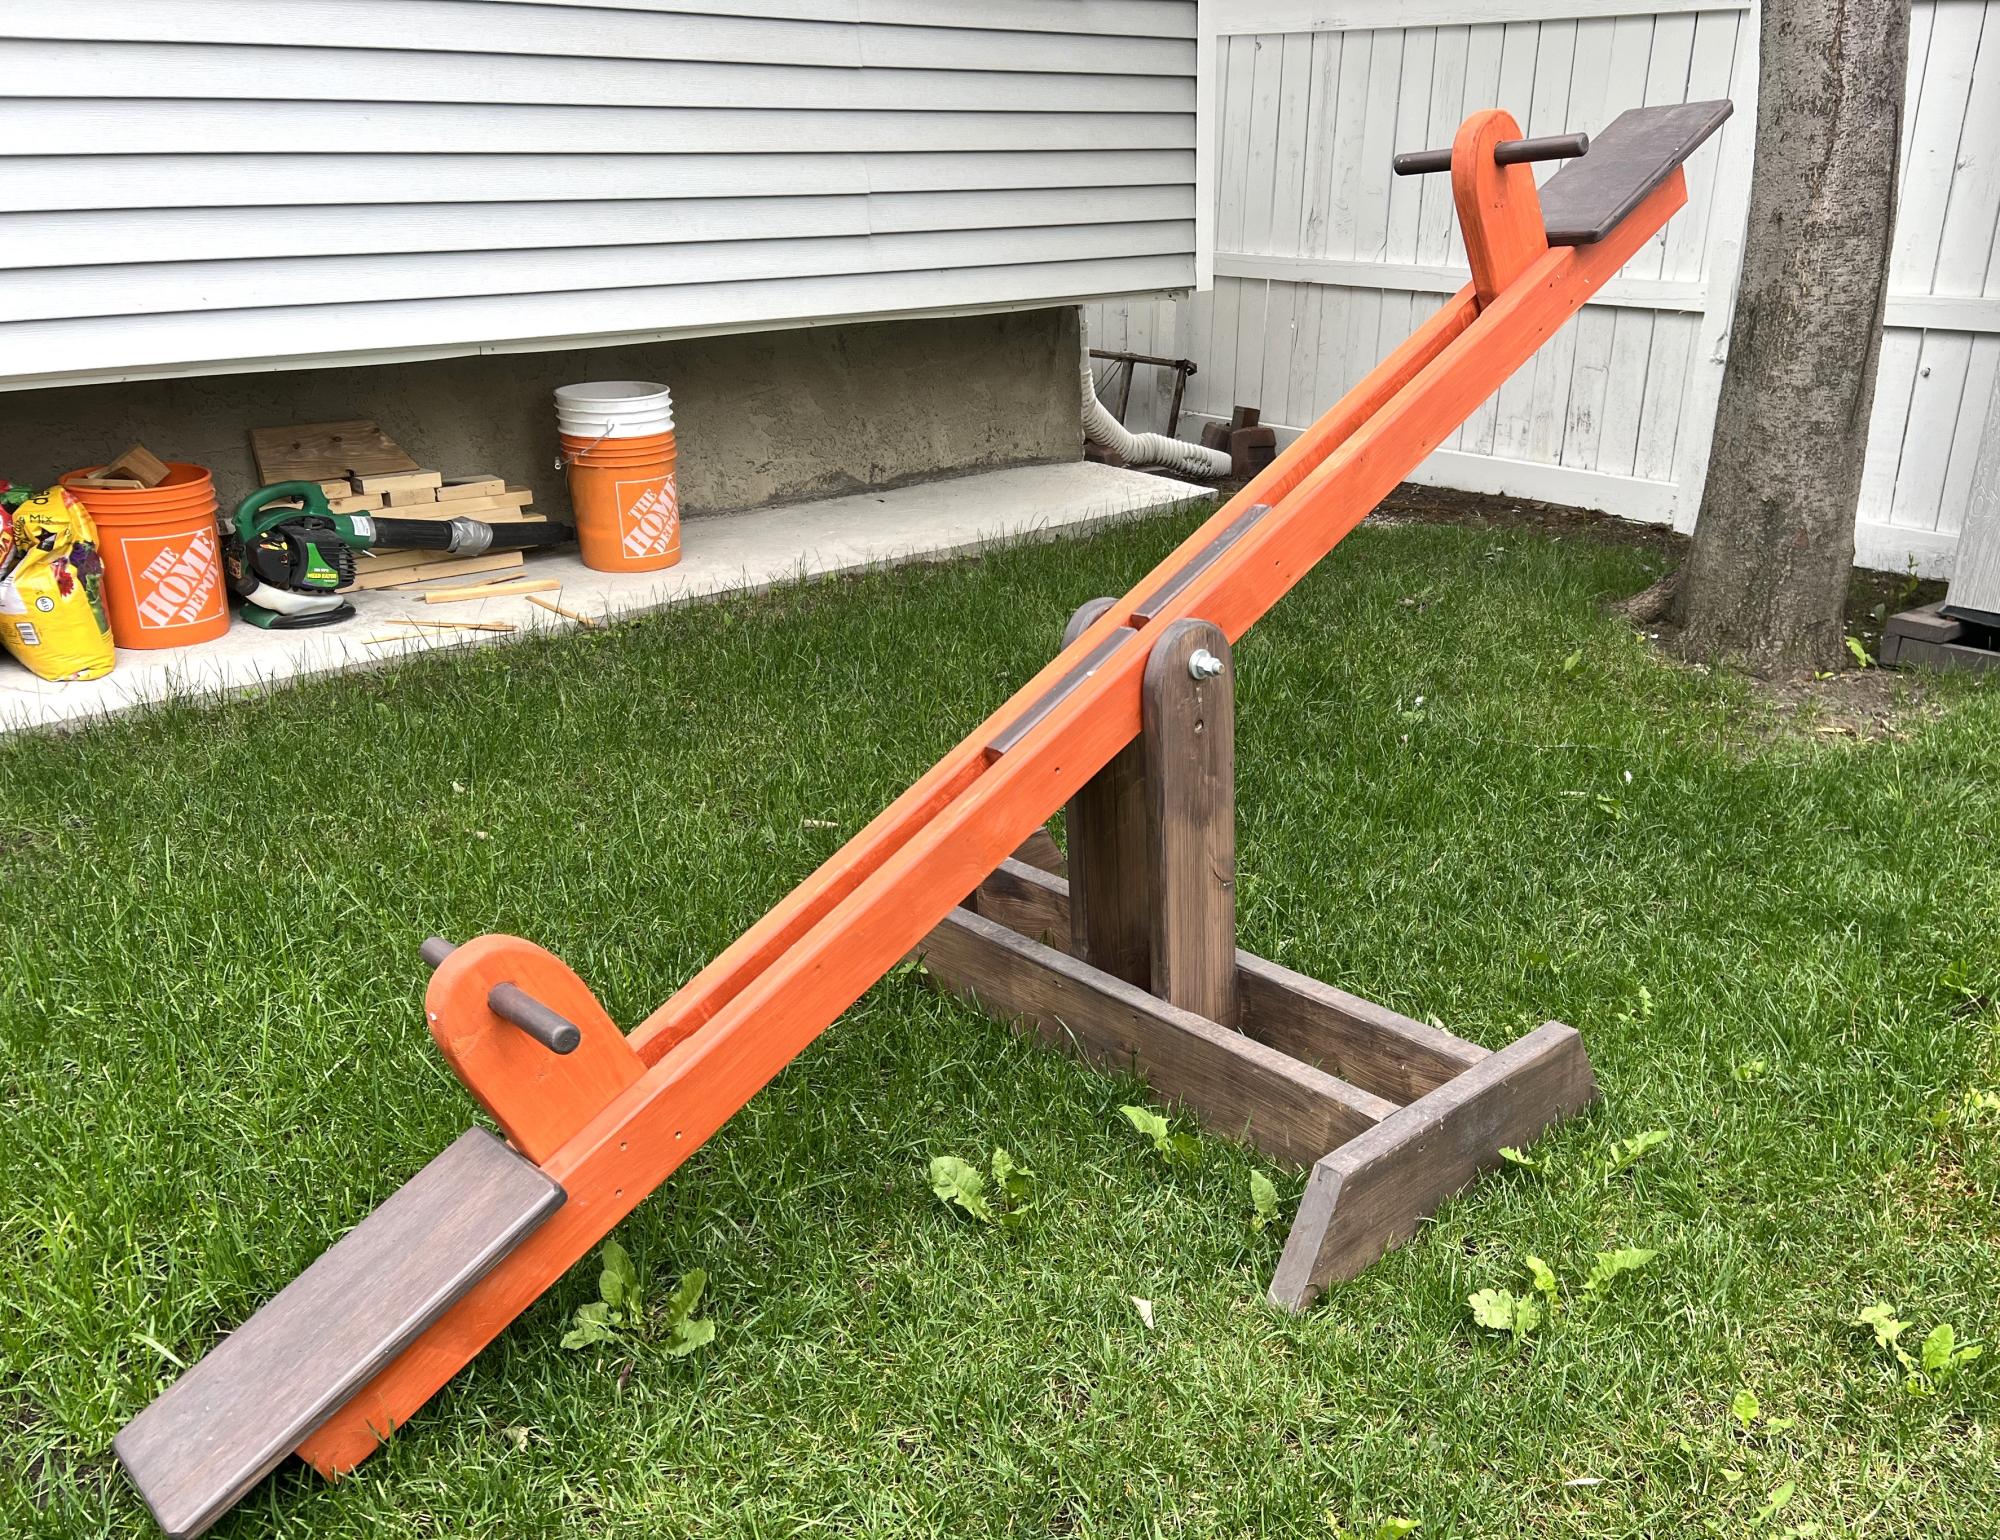
See Saw based in brag posts i saw here in Ana White website
Simple project
Built from Plan(s)
Newbie- so I forgot to add the height of the shelf to my calculations...
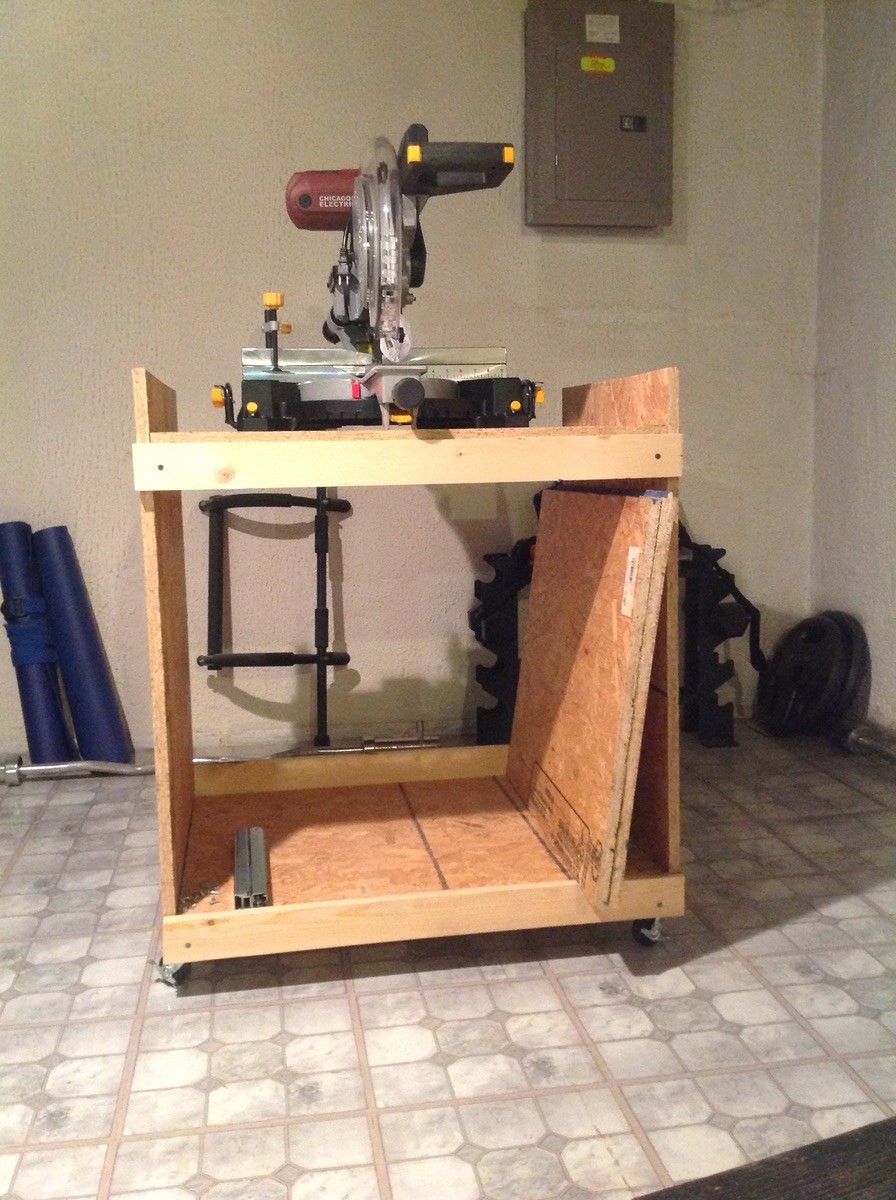
I forgot to add the height of the shelf when I measured for the placement of the two by two shelf supports, but it still turned out well.
Built from Plan(s)
Estimated Cost
$90 beacause the hinges were soooooooo expensive at Rockler
Estimated Time Investment
Day Project (6-9 Hours)
Finish Used
None
Recommended Skill Level
Intermediate
Rustic Console Project
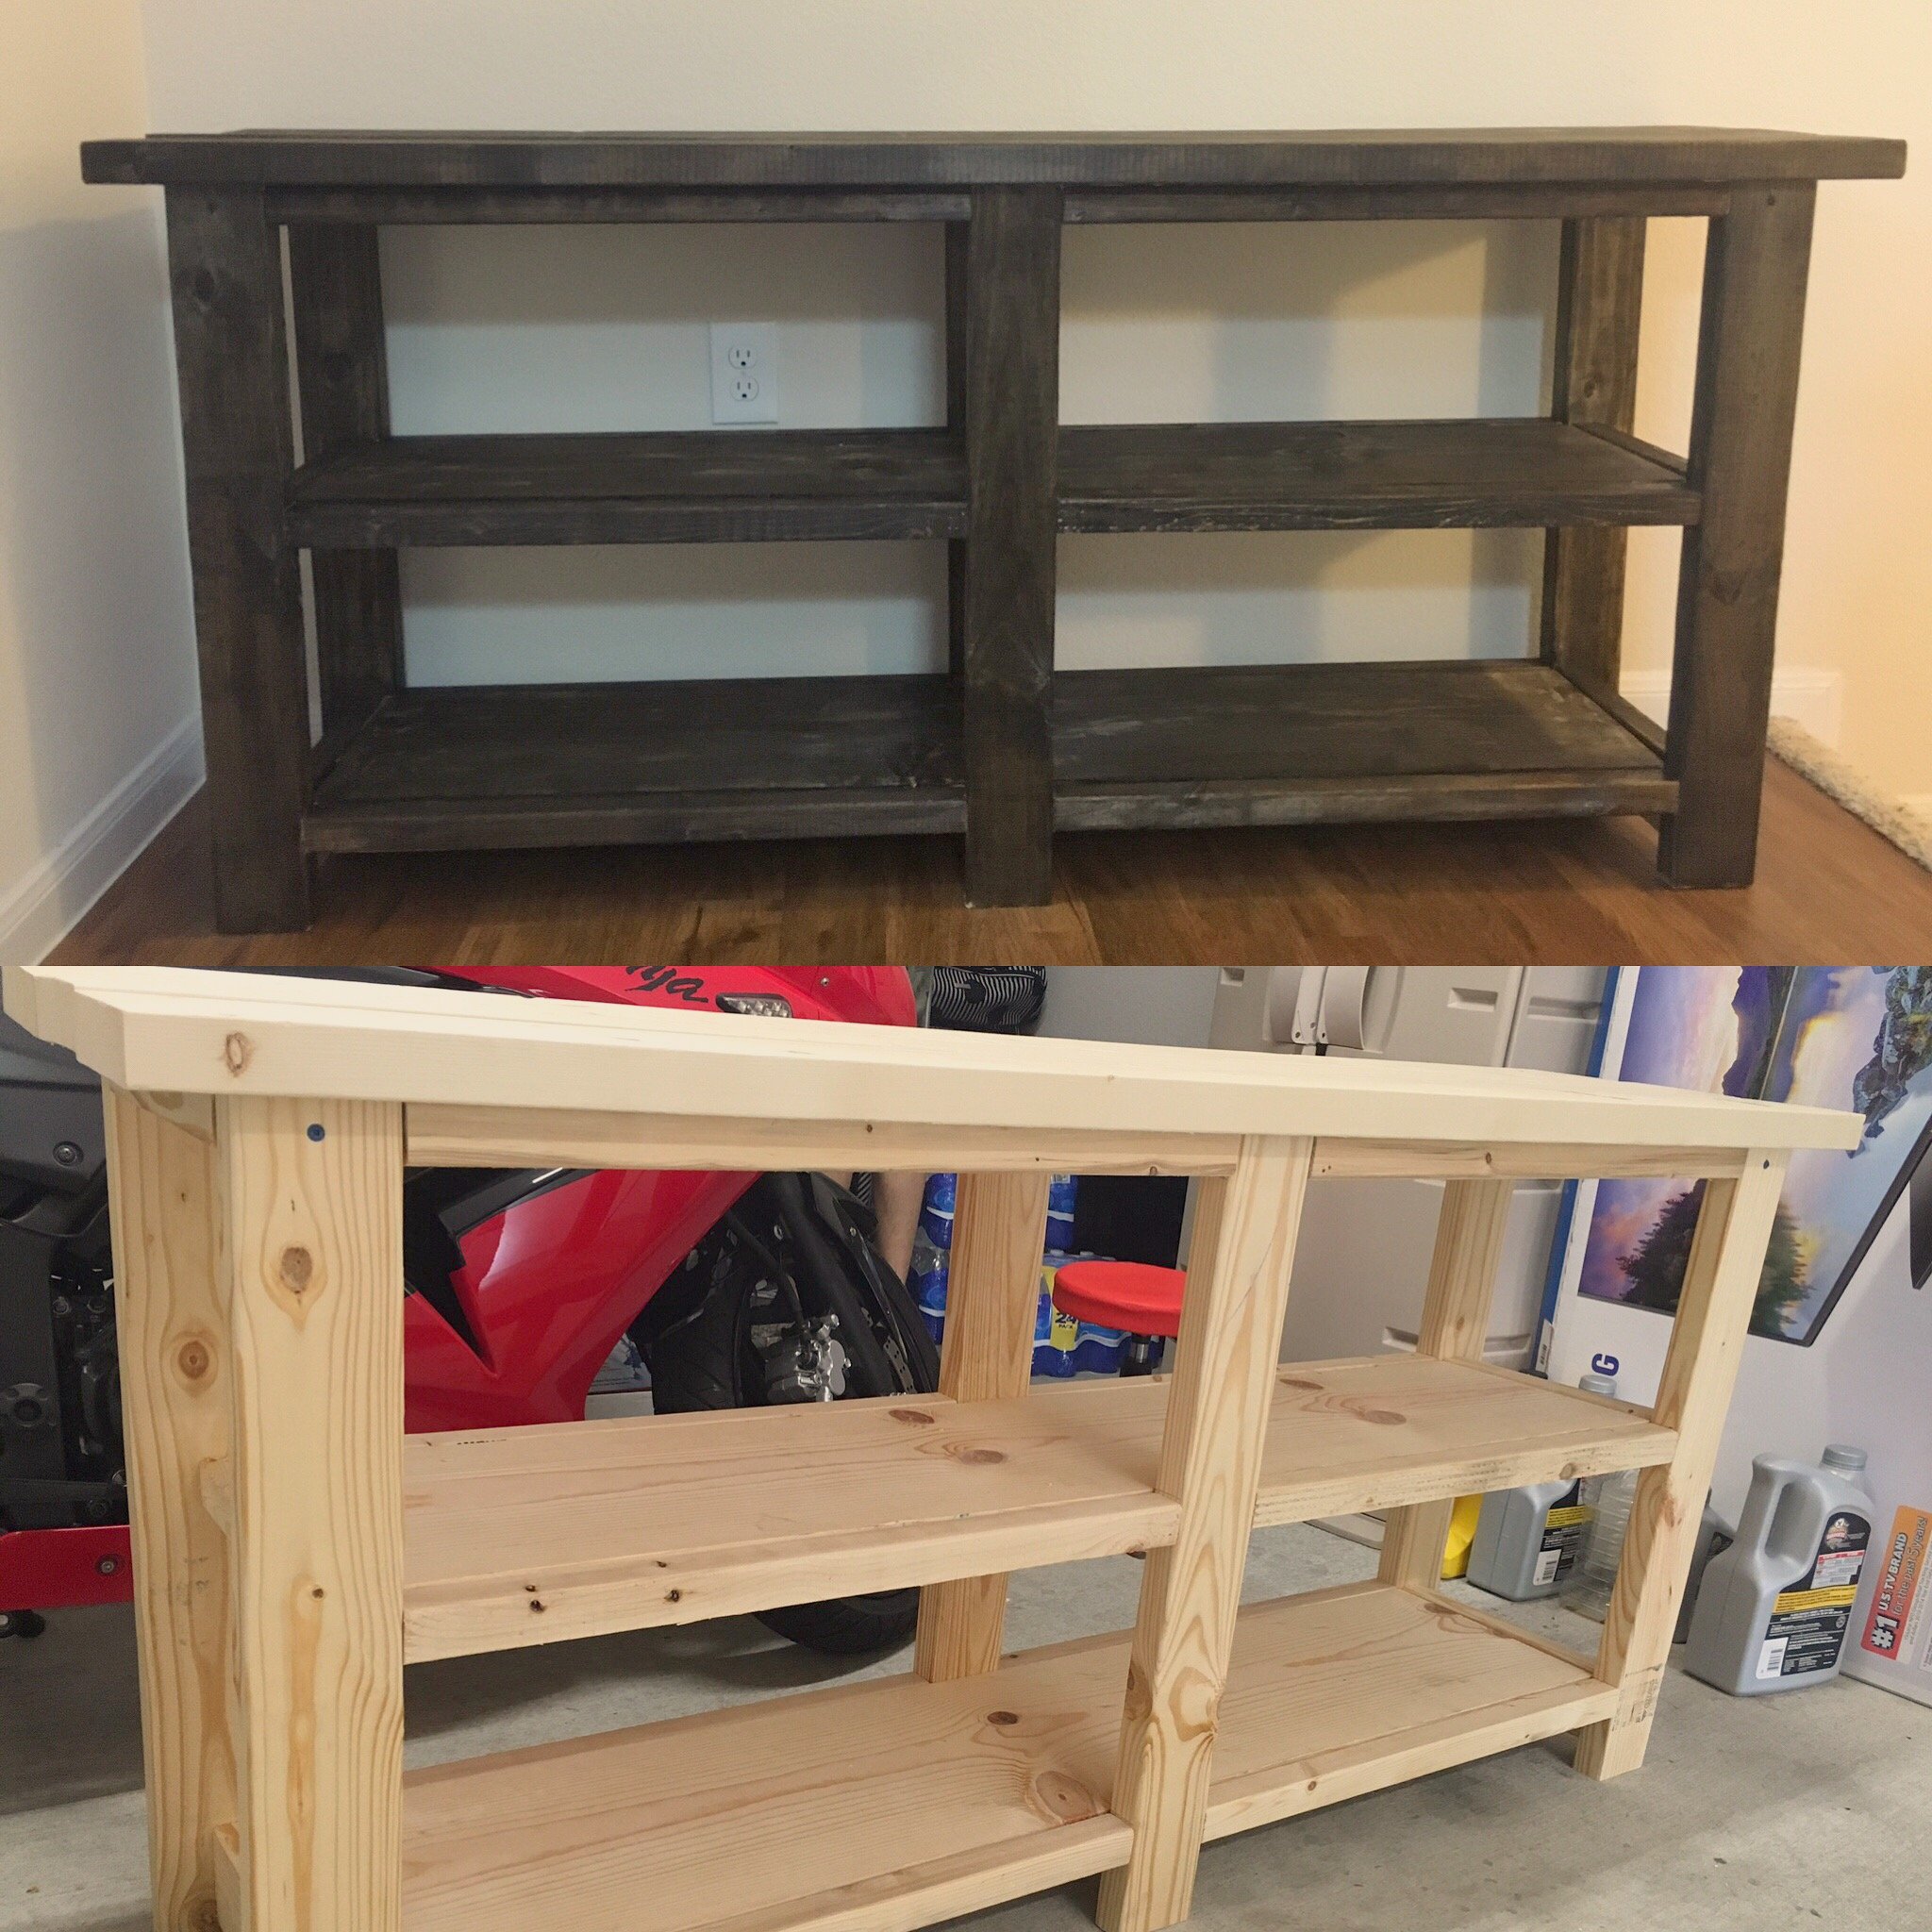
This was my first project building something from this site. I absolutely love it! We didnt add the X's because the miter saw was at my dad's house, which I was kind of sad about, but I think it still looks good. Not too bad for mine and my husbands first build!
Built from Plan(s)
Estimated Cost
$75
Estimated Time Investment
Weekend Project (10-20 Hours)
Finish Used
Minwax Jacobean
Recommended Skill Level
Beginner
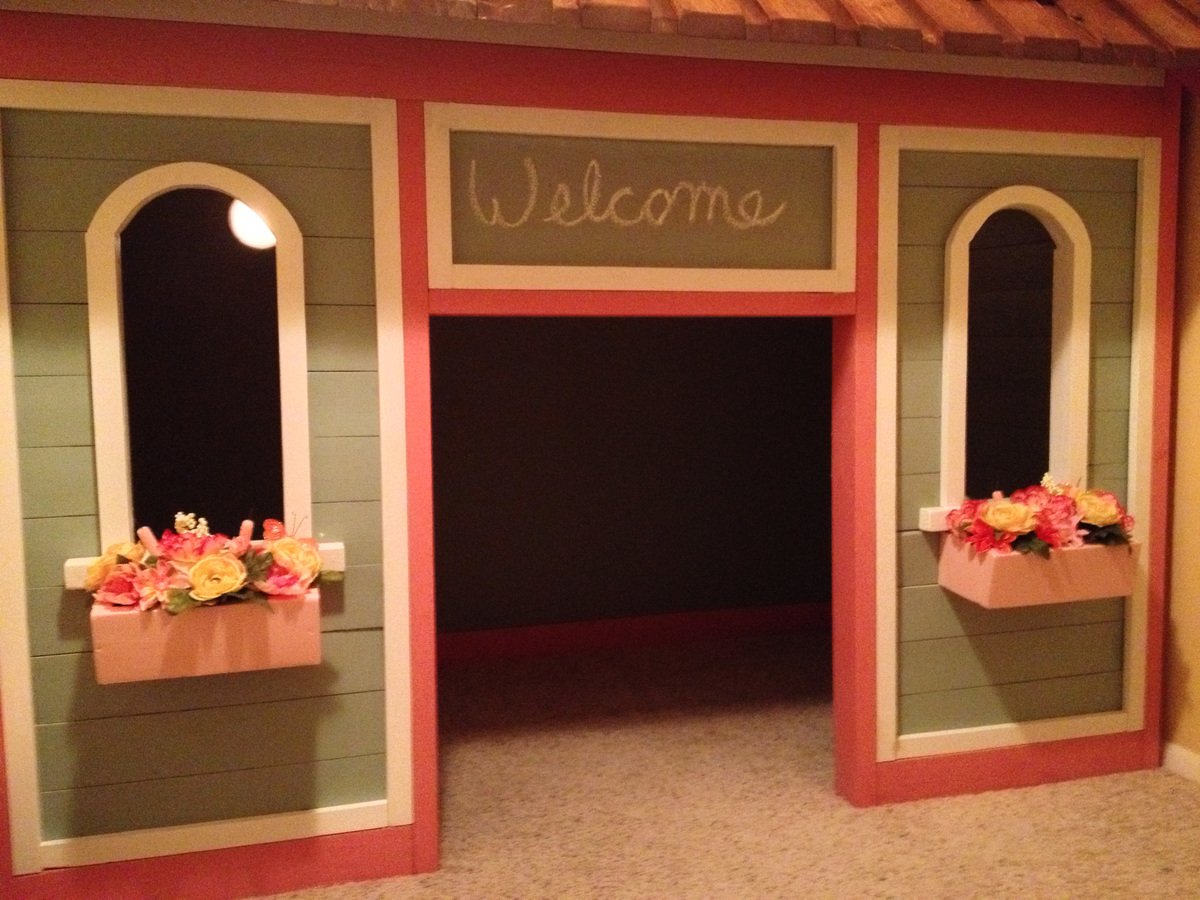
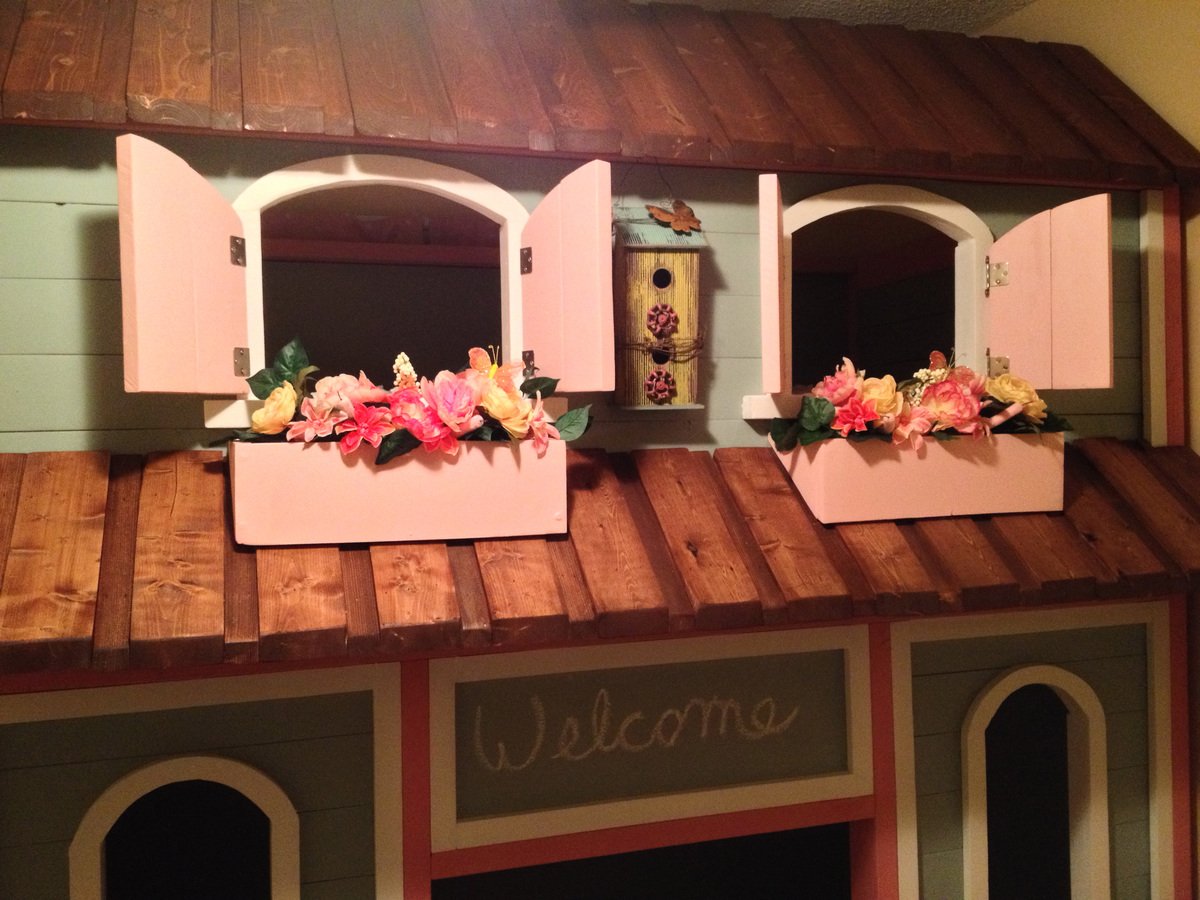
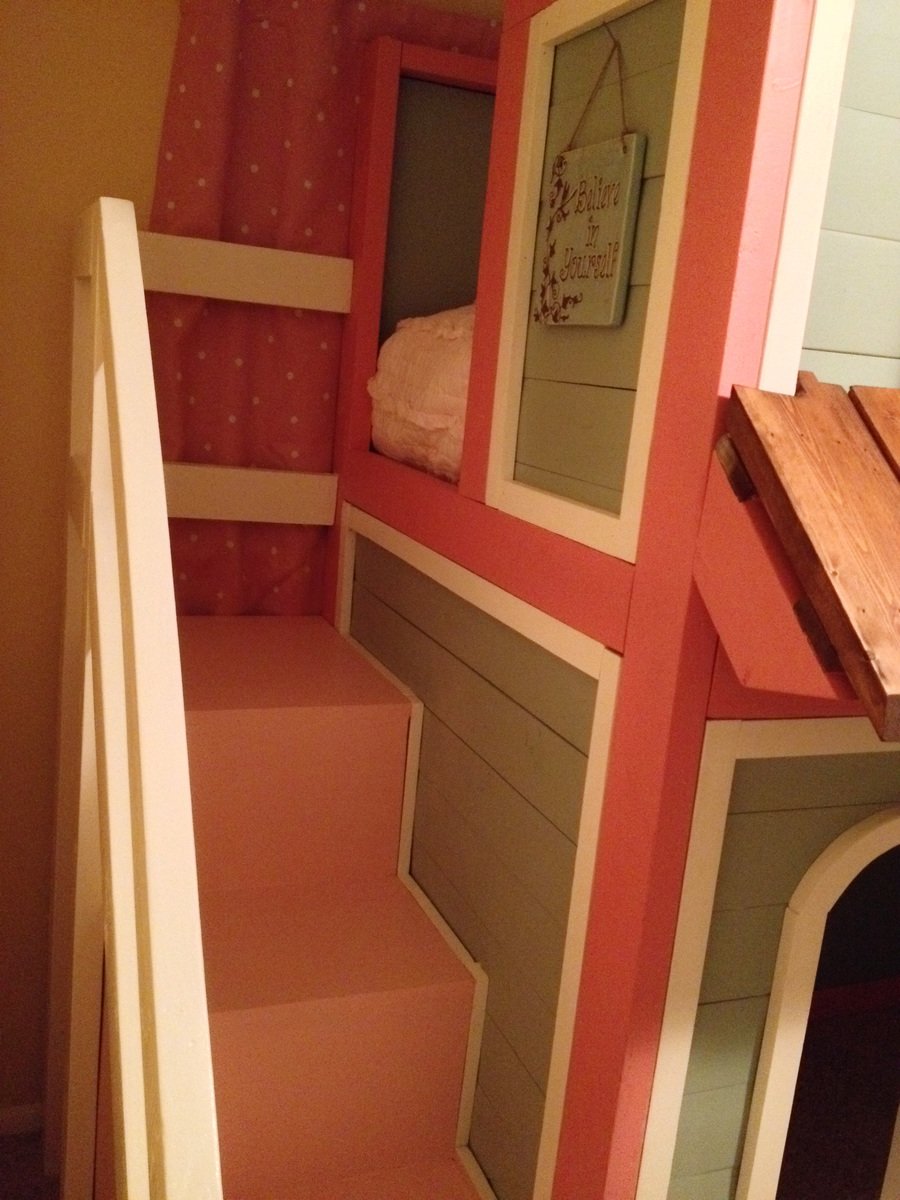
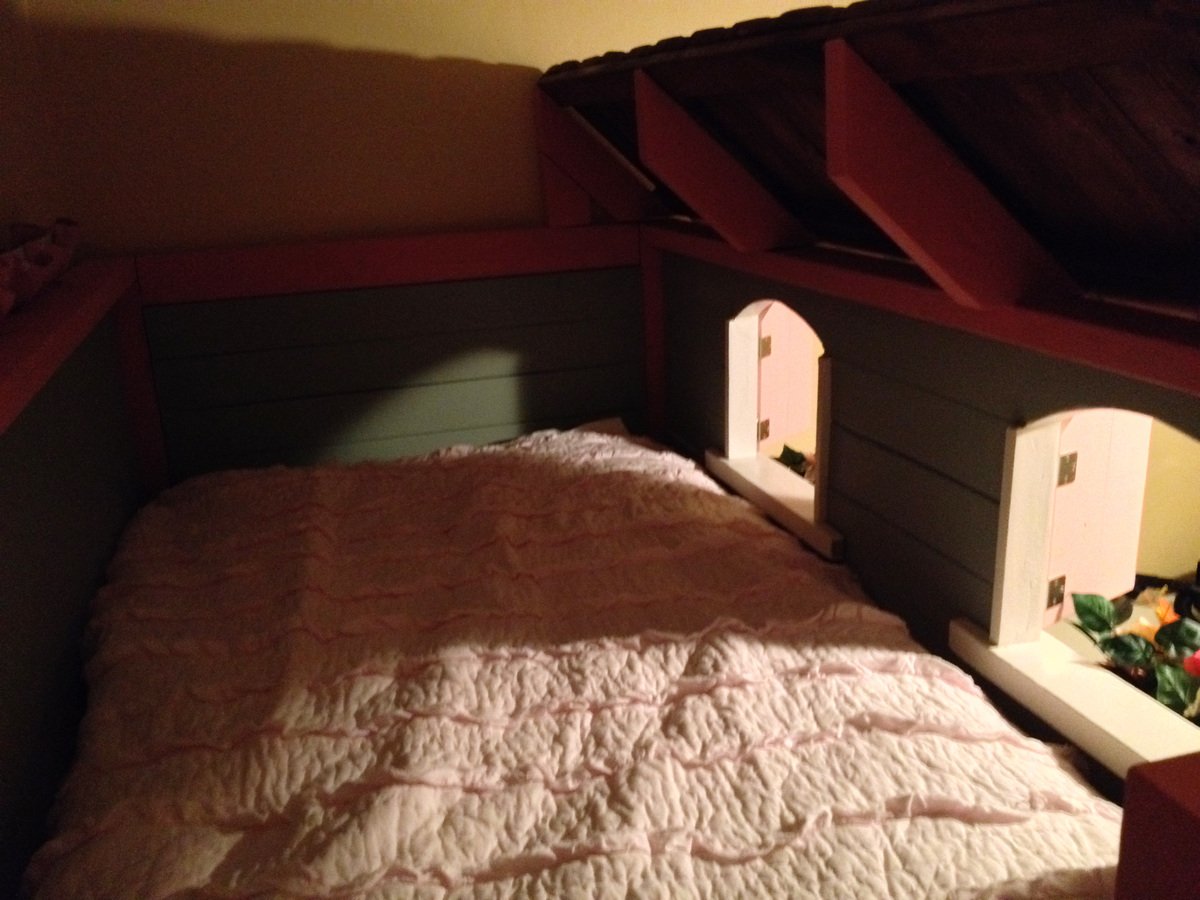
Sweet Pea Bunk Bed Plans turned into a dream for our Little Girl
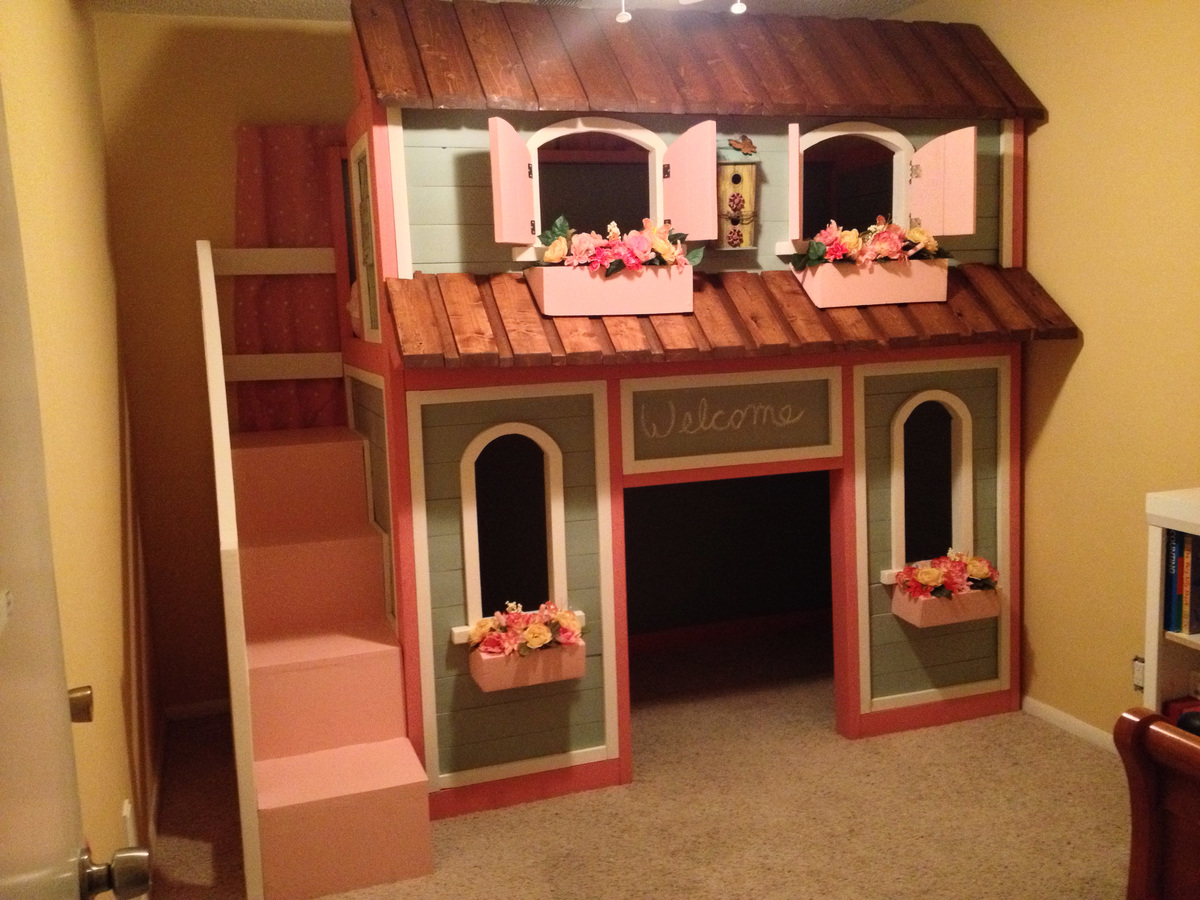
We loved the Sweet Pea plans so much but we didn't need bunk beds. We turned it into a loft bed with a playhouse underneath. We also inverted the shelves on the stairs to be inside the playhouse due to her room size. Added a second roof and window boxes. This project was fun and took us 10 days to complete. Thank You so very much for sharing these AWESOME plans!!
Built from Plan(s)
Estimated Cost
$1100.00
Estimated Time Investment
Week Long Project (20 Hours or More)
Finish Used
We used Baer Premium Paint sold at Home Depot
Recommended Skill Level
Intermediate
Comments

Fri, 01/31/2014 - 20:41
Ah! I love it! I love the
Ah! I love it! I love the roof on the lower level, this turned out adorable!
Sun, 02/02/2014 - 22:11
Awesome Job
I am looking at making this for my daughter and I also want to do a playhouse on the bottom as she is a single child. Did you just extend the opening to the bottom bunk to the floor and then extend the bottom windows down some to let in more light? Also, I love the idea of switching the storage from the stairs to inside the playhouse. If possible could you elaborate on how you did this. Thank you.
Tue, 02/04/2014 - 15:46
Sure Thing
We omitted the bottom bunk and took it straight to the floor. We left the side panel clear but the frame until we built the stairs then added trim & side boards around the cubbies.
Sat, 05/24/2014 - 07:51
Oh, the colors!
First of all, what an amazing job on your build! I was looking for ideas for a playhouse and I will be modifying the plans for Sweet Pea Bunk beds and your build let's me know how get it can be. But what colors did you use? The look great together!
Sun, 07/17/2016 - 14:49
So adorable!
I love the changes on this! I had a question. What did you use for the roof and is the lower roof section built to the same specifications as the upper roof?
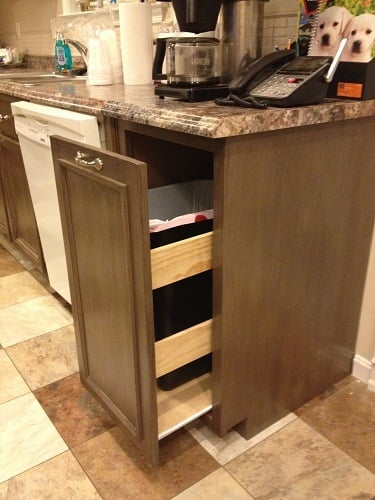
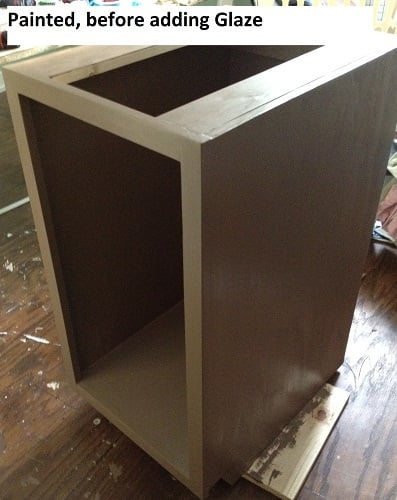
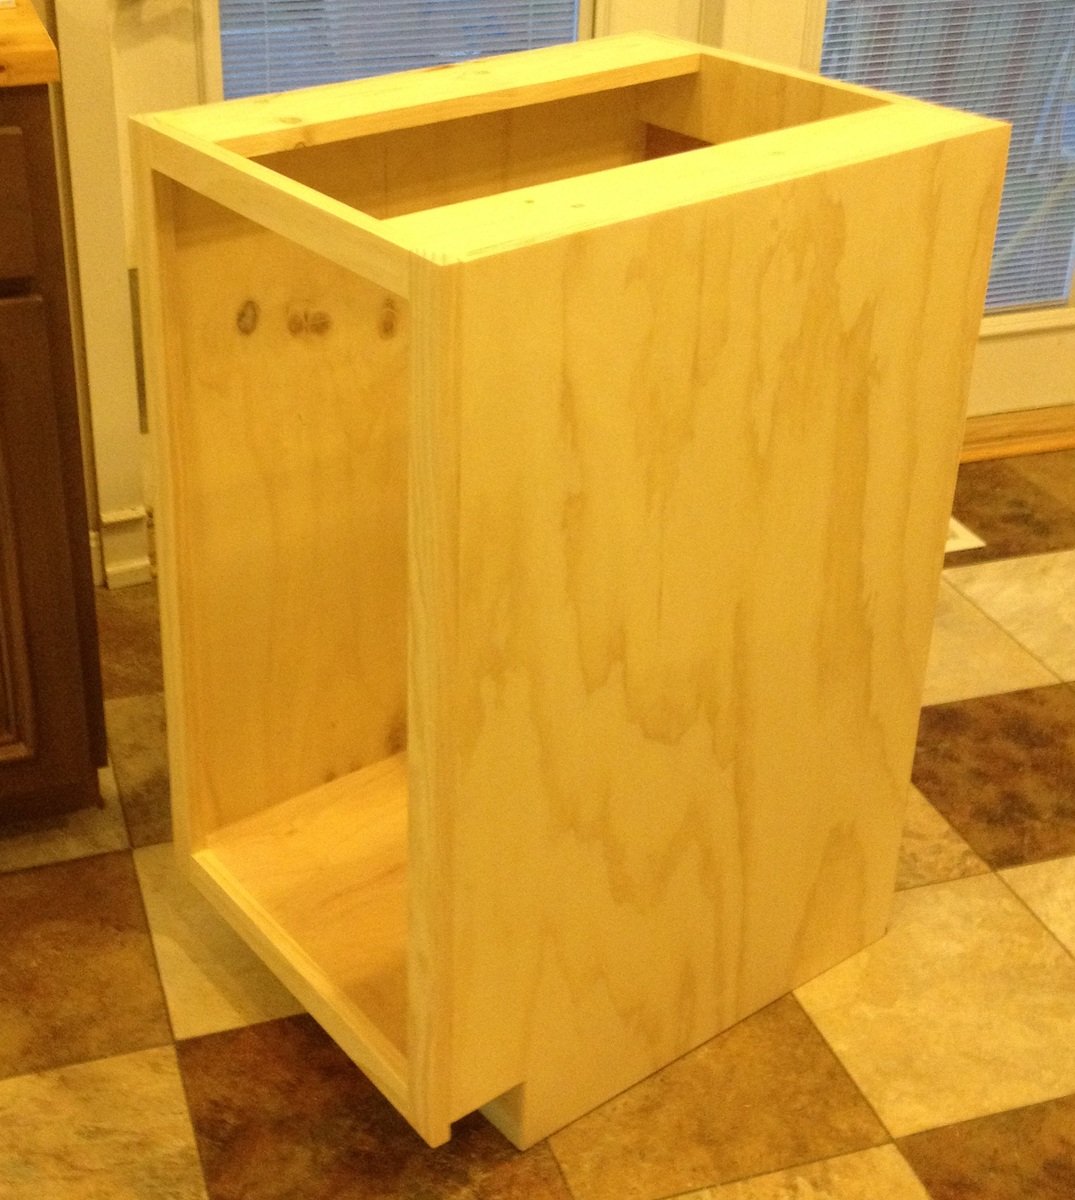
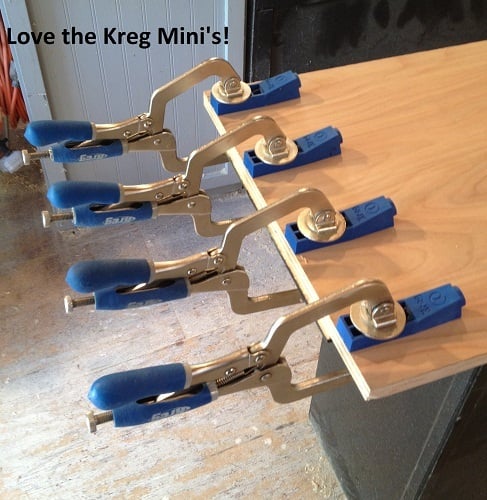
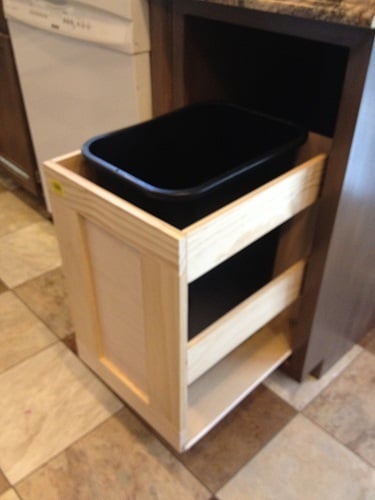
Kitchen Trash Pull Out Cabinet
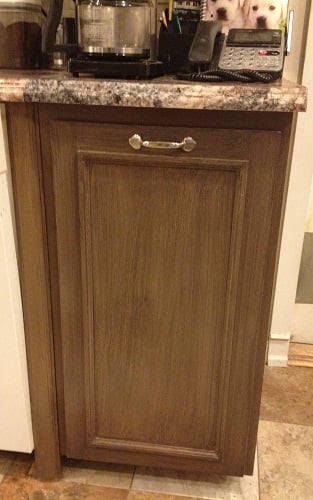
Plan was super easy to follow. Built a drawer type pull out so I could fit in odd sized trash cans. Made the pull-out part like an open sided drawer box, out of lightweight wood, and attached the door to it - used 75-lb euro drawer slides. Construction took a couple of afternoons, and finishing took a couple of afternoons. The finishing materials were all left over from other projects, and the plywood for the cabinet sides was left over from our kitchen island build. Topped with a leftover piece of countertop. The contractor who installed our new countertops said I did a good job on the cabinet build. I was very flattered! Ana, thank you for your wonderful plans!
Built from Plan(s)
Estimated Cost
$75
Estimated Time Investment
Weekend Project (10-20 Hours)
Finish Used
3 coats Benjamin Moore Aura paint in Spanish Brown (sanded between coats). Brushed on glaze (mixed 2 oz clear glaze + 1 TB flat black paint - lots left over), 2 coats of water based poly (satin) top coat
Recommended Skill Level
Beginner
Comments


Thu, 07/26/2012 - 15:16
Thank you!
Thank you Gina! Yep, I built the door too! :) This one is made from an edge glued Aspen wood panel (available from Lowes, ripped to size with the table saw), and then I added the wood mini-stop moulding 2" in from the edges (did these measurements and attached the trim before sanding). I did the glaze pattern over the paint so it looked like a frame and panel door when it was all done. This door is the same style we did for our pantry and island. I'm planning to do all the rest of my cabinet doors over (one at a time - ;0) to match this one. PS - I used the edge glued panel instead of plywood for the door so the edges wouldn't need any extra covering up, and also they are nice and flat and super smooth so they don't need much sanding. Aspen wood took the paint beautifully, and the grain doesn't even show through once it's painted. I had used stain grade pine panels for the pantry and island, but I think I'll stick with the Aspen for the rest of them, to save myself some sanding. ;)
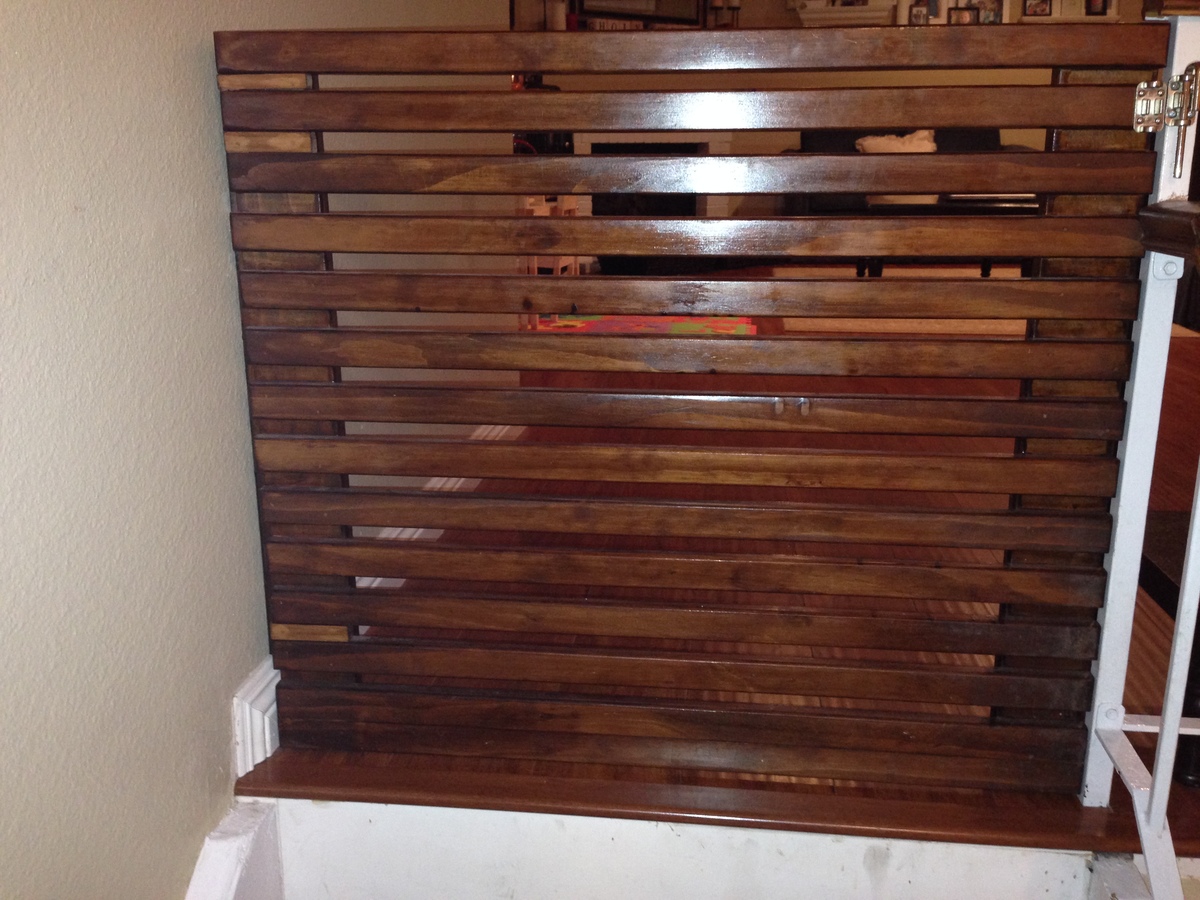
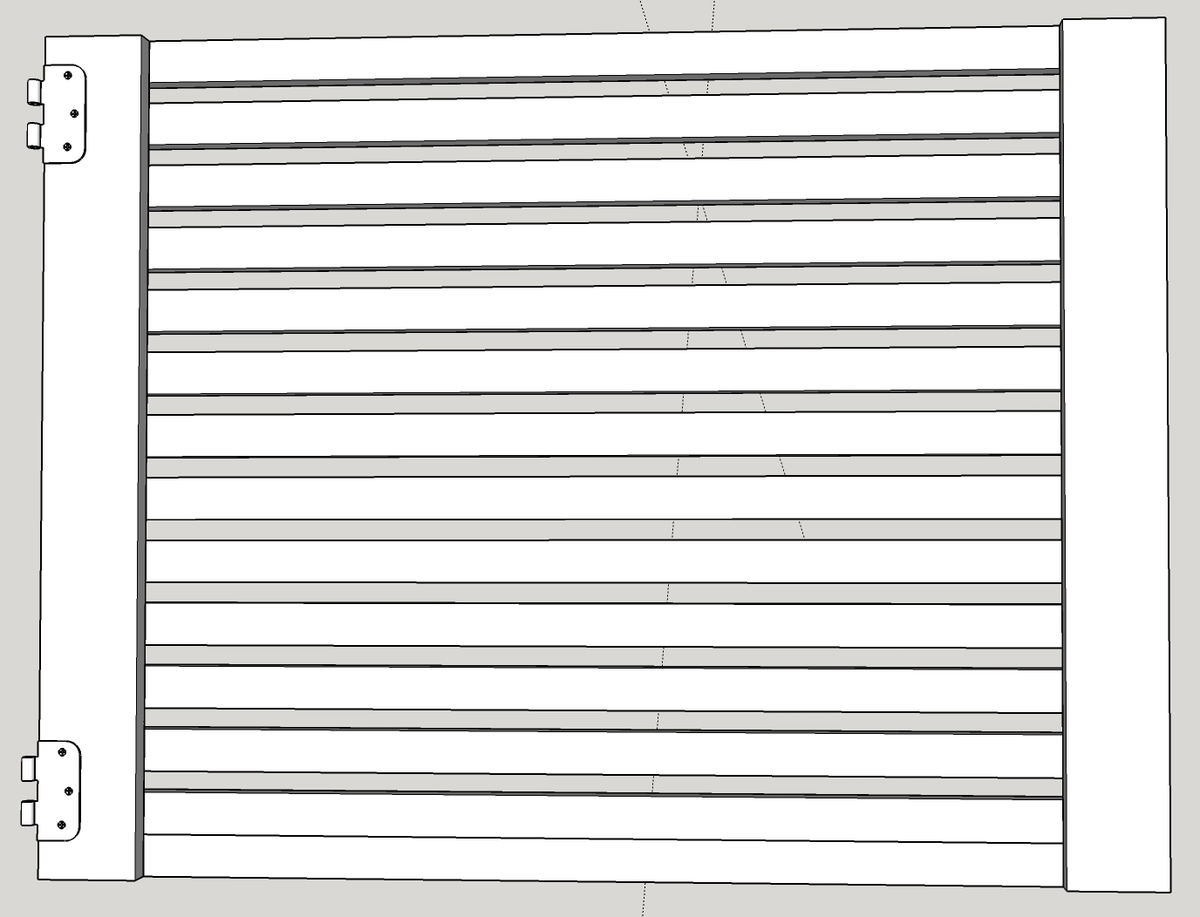
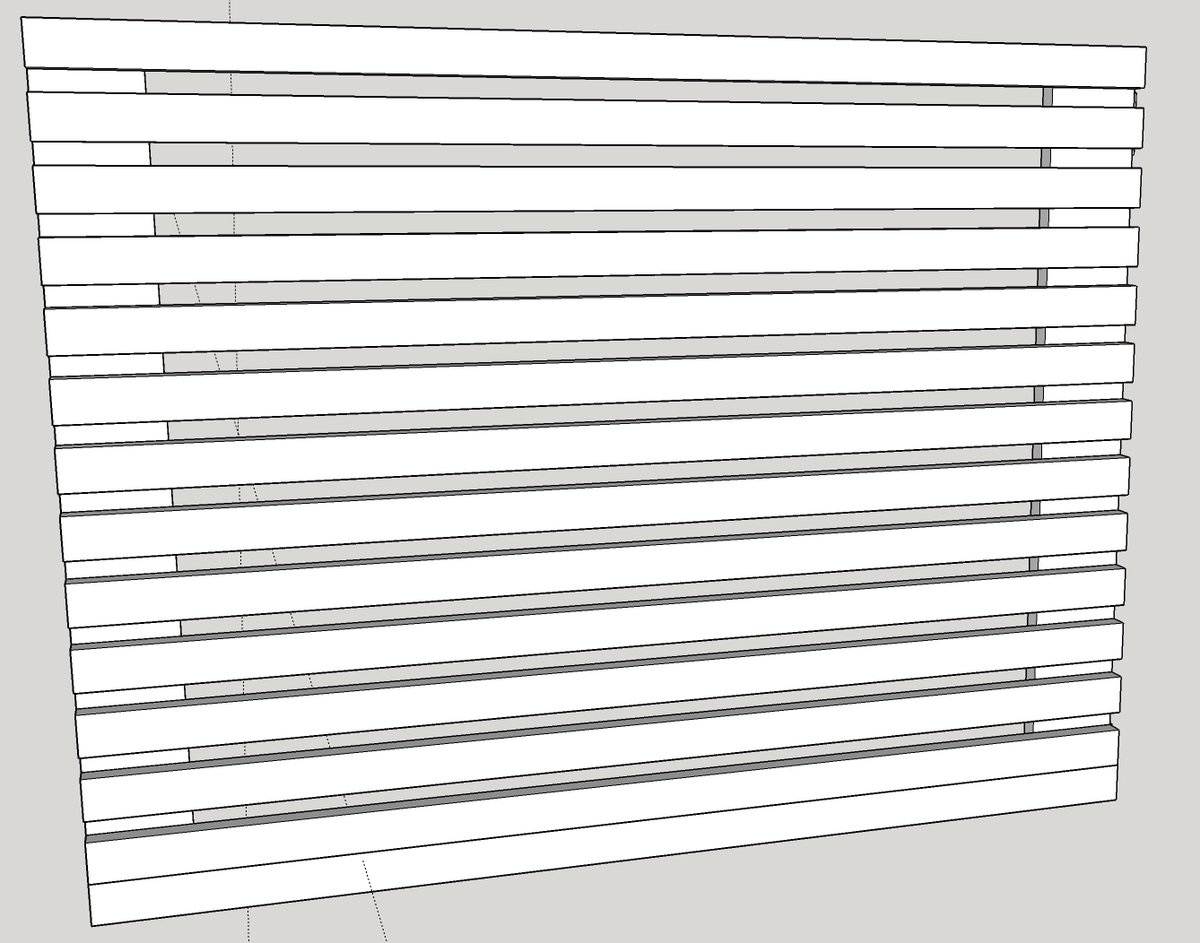
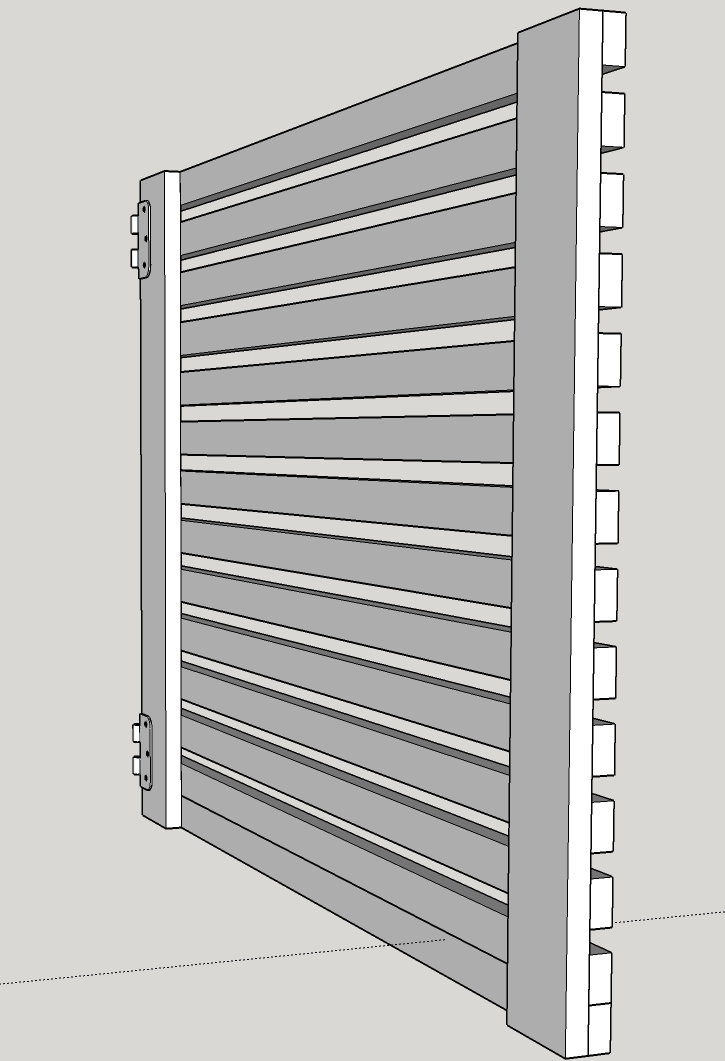
Custom Gate
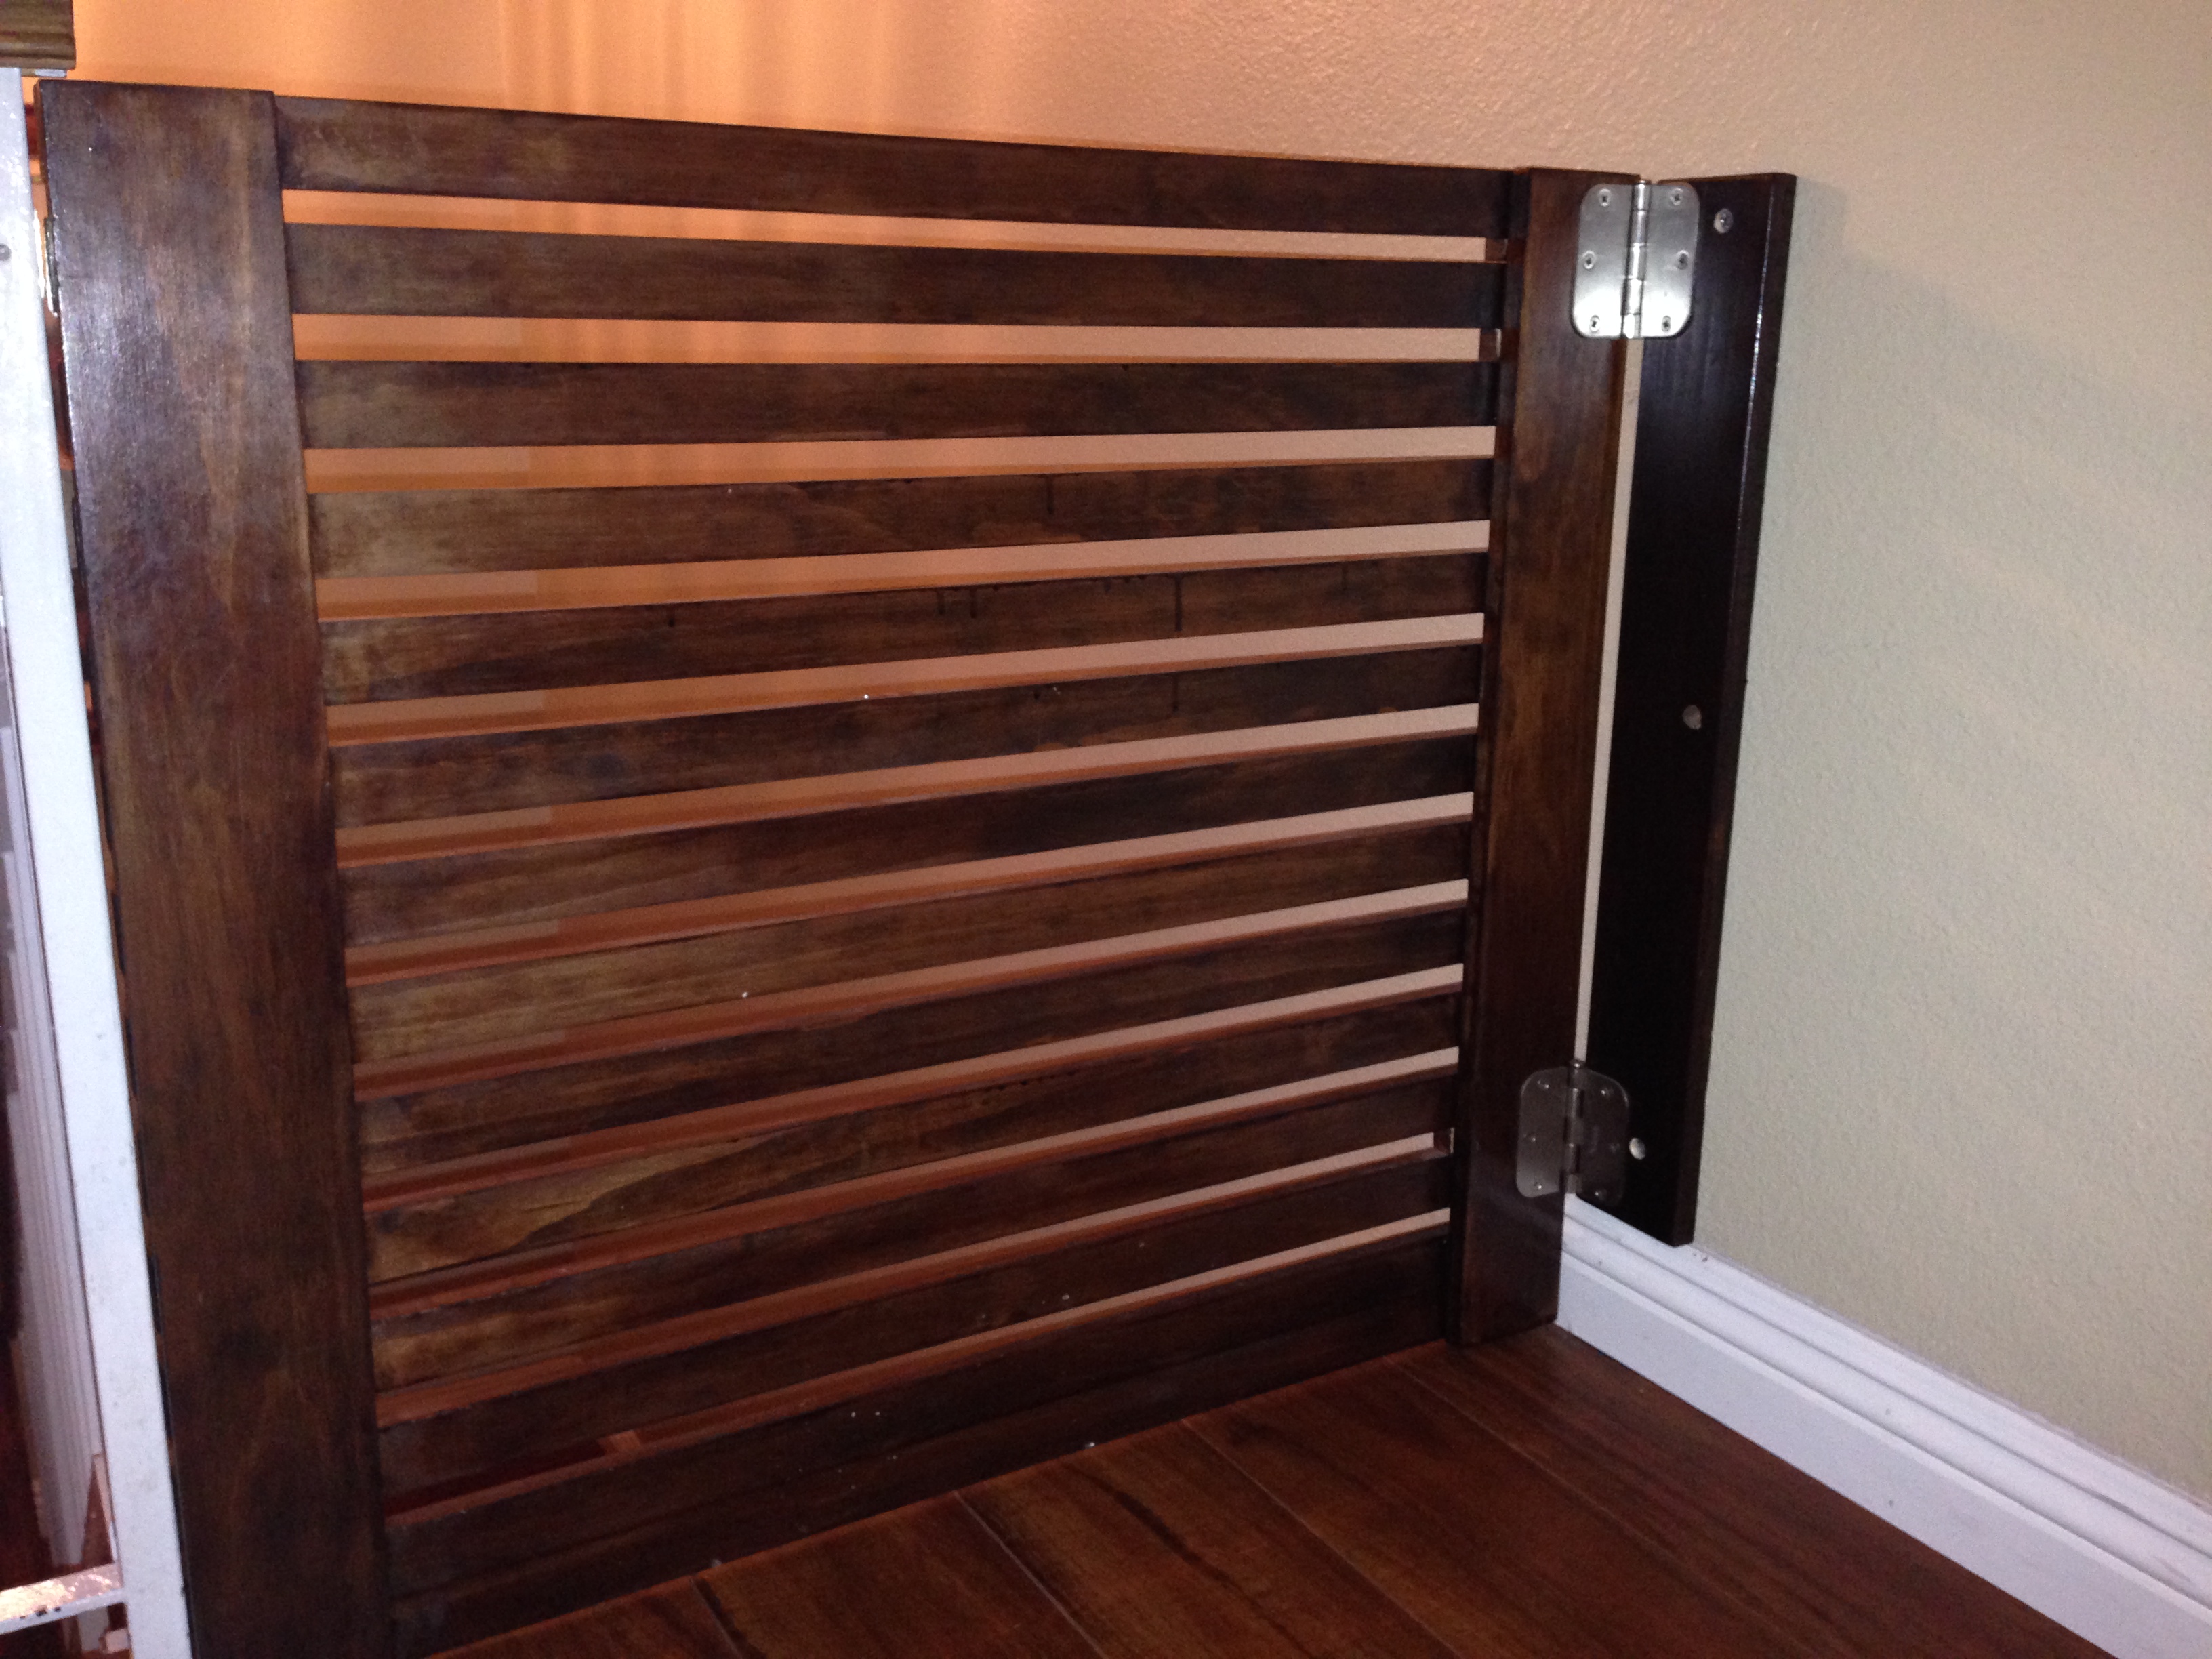
When we first moved into our new home one of the first things that I built for it was this custom gate that resides at the top of our stairs. We needed this to keep the baby from falling down and keep the dogs out when need be. Overall it was a great way to separate the two areas. It is also inexpensive and easy to build. I used a pneumatic nailer for all of the joinery on this one so it was quick to build as well.
Estimated Cost
75-125
Estimated Time Investment
Afternoon Project (3-6 Hours)
Finish Used
Early American Varathane Stain
Recommended Skill Level
Beginner
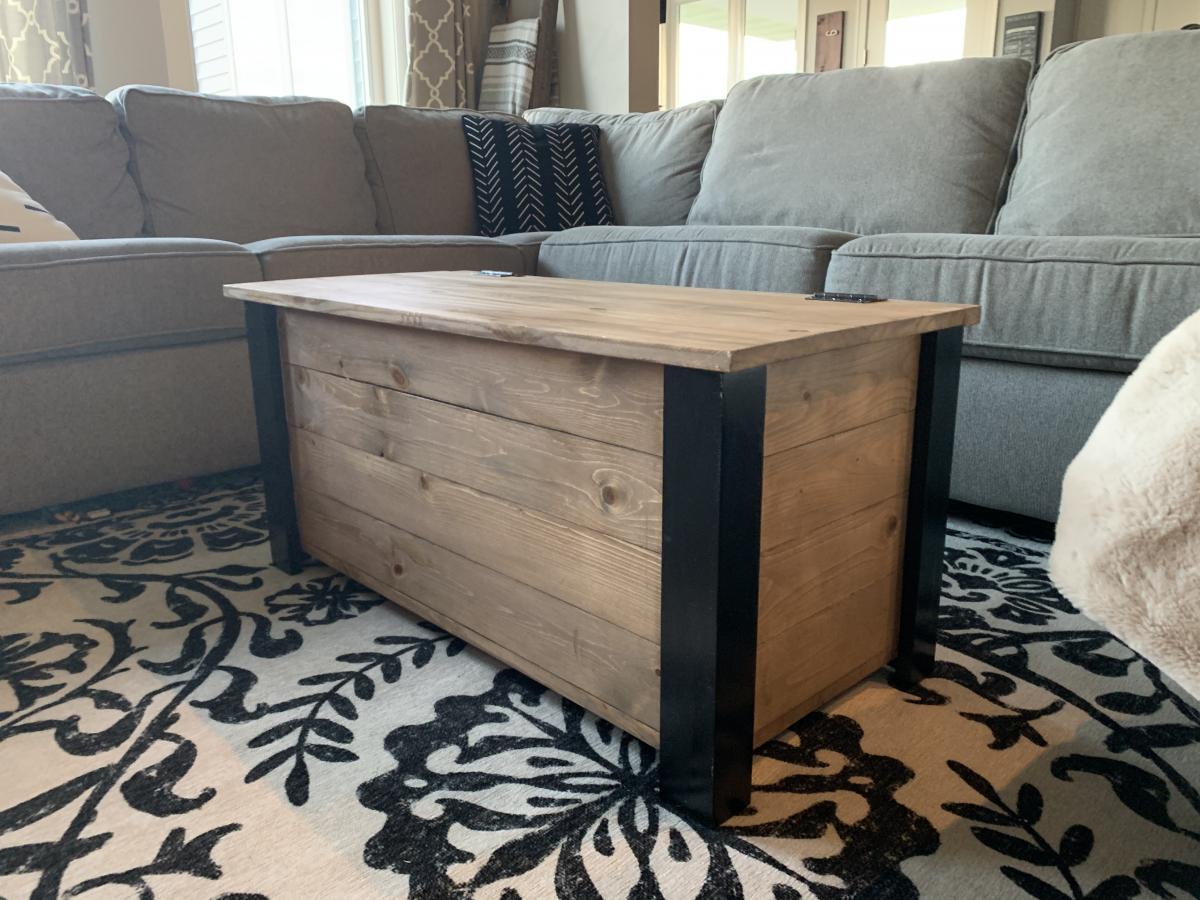
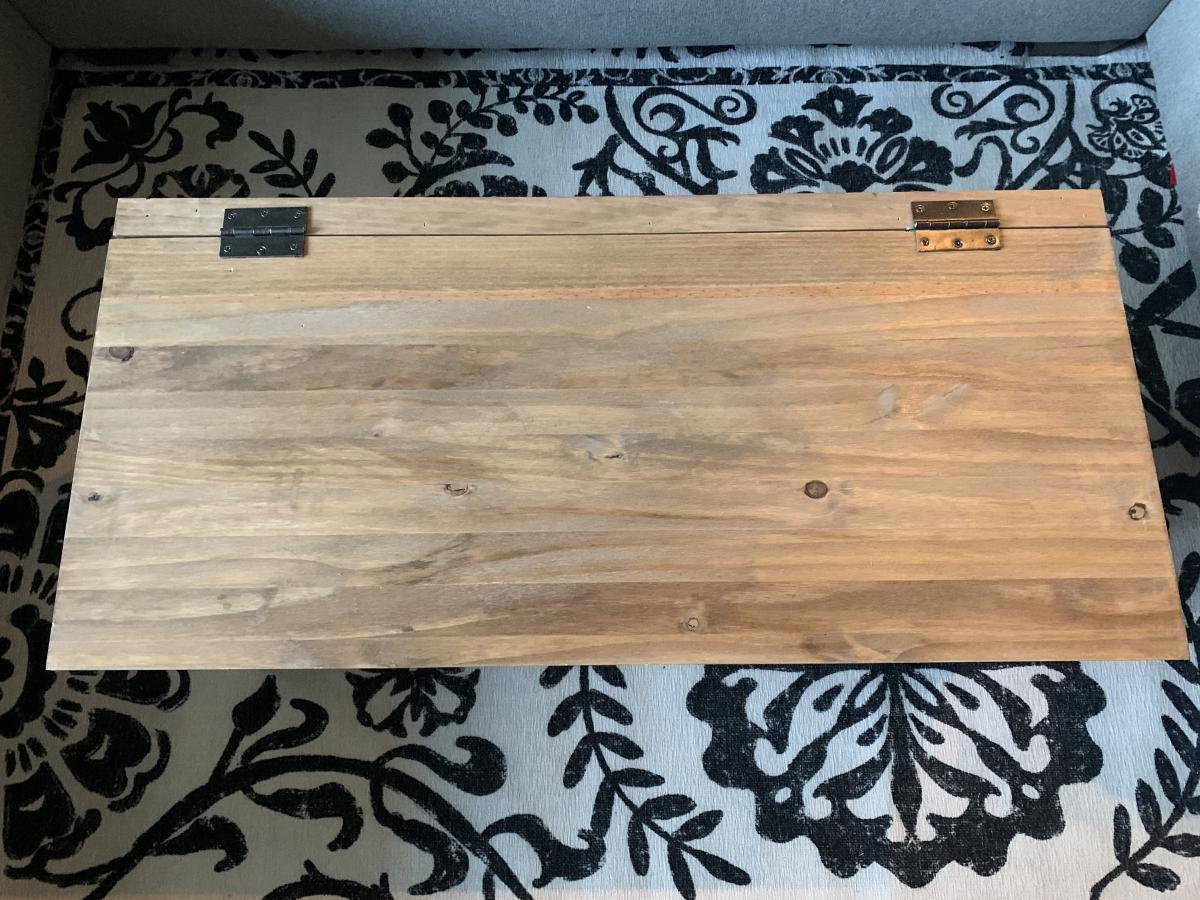
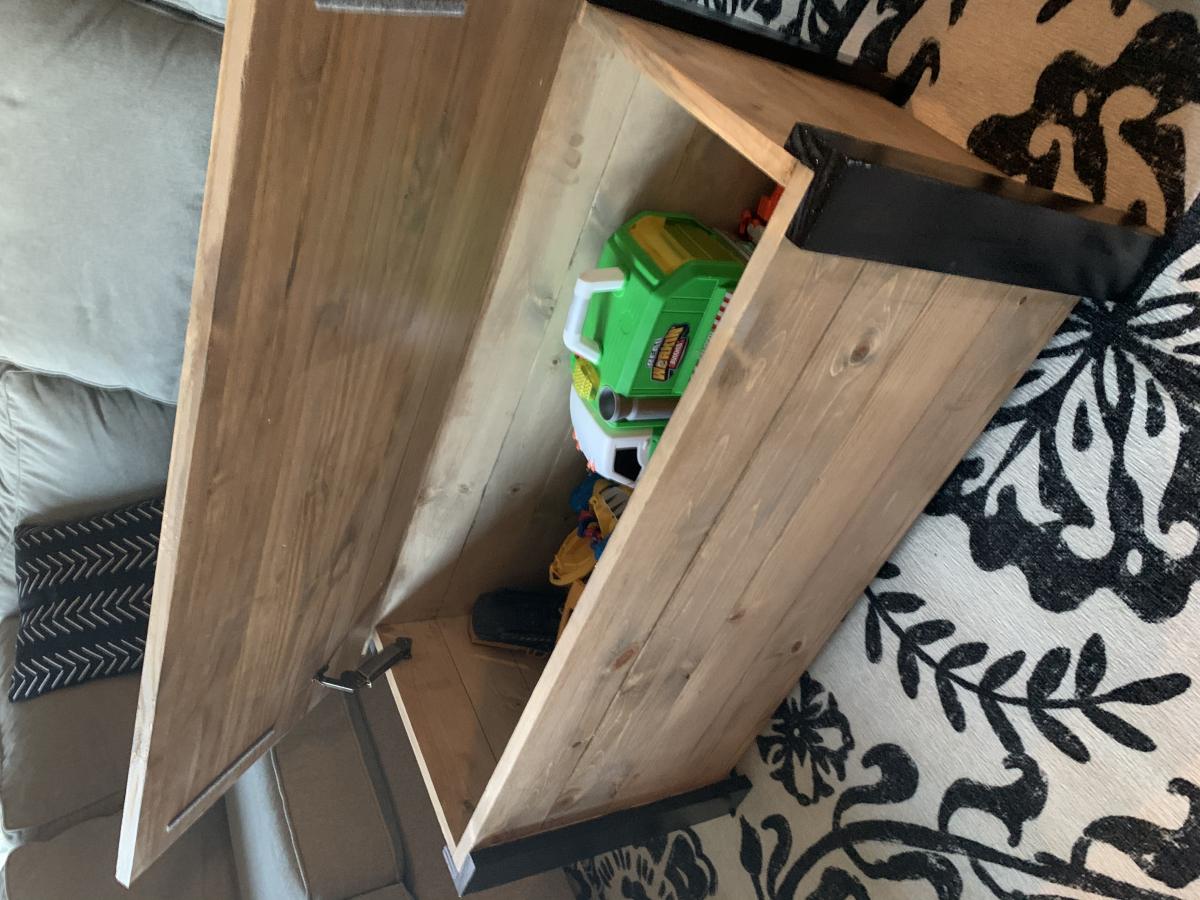
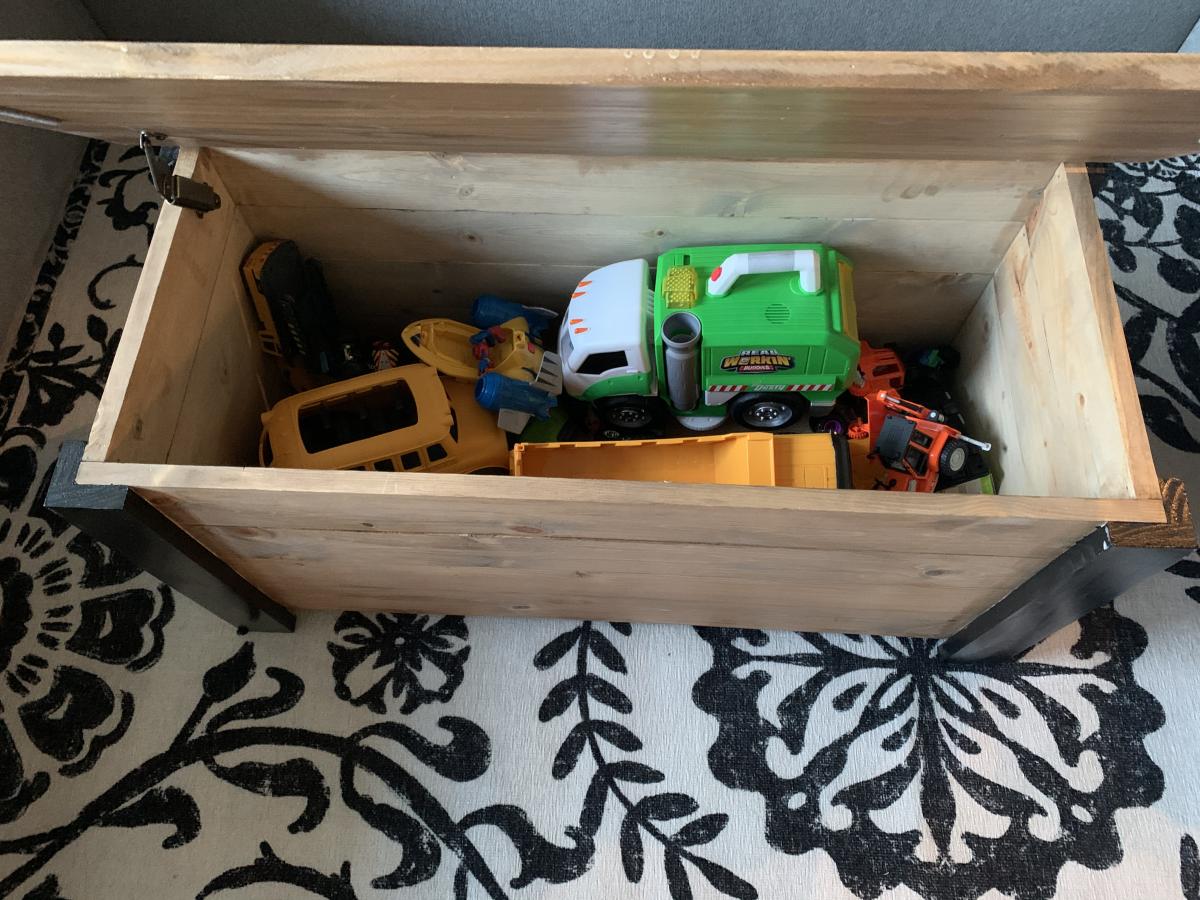
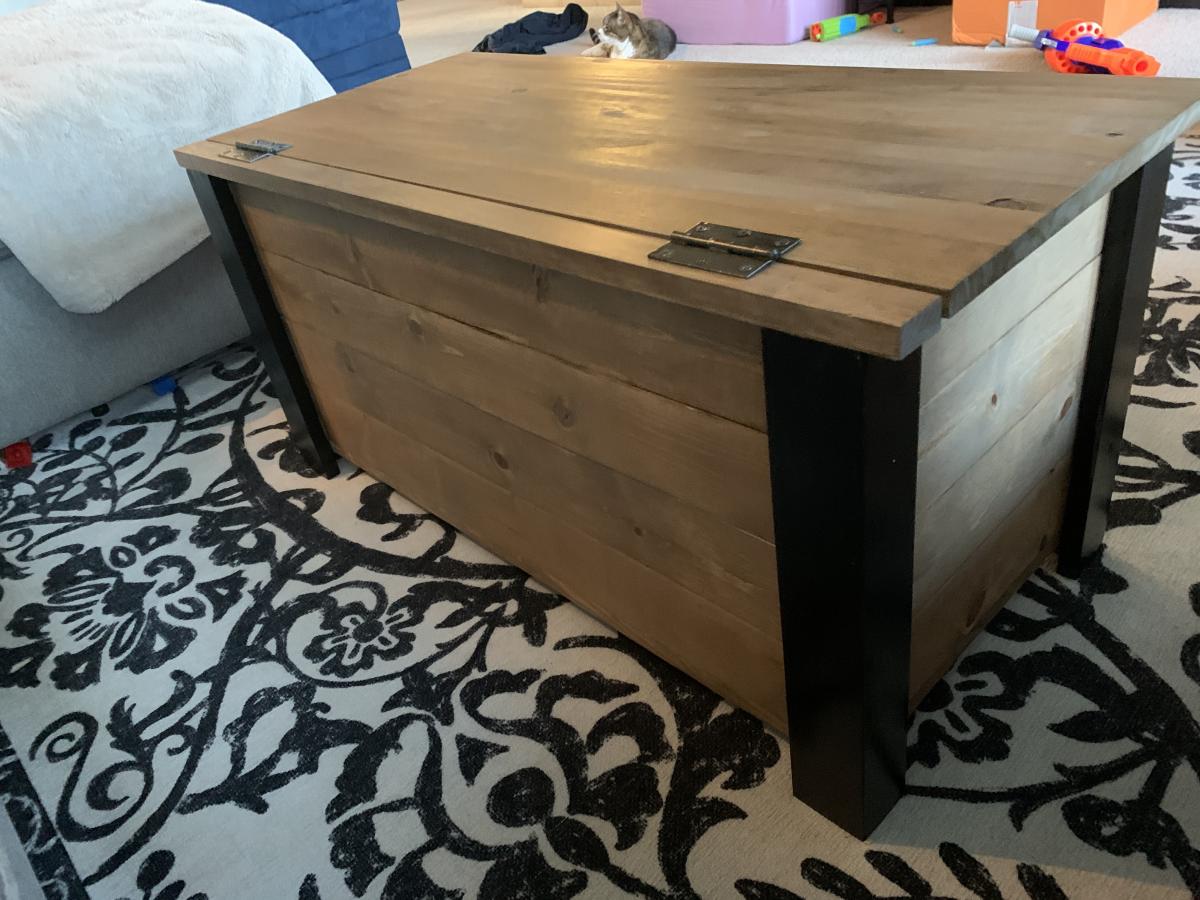
Farmhouse Toy Box
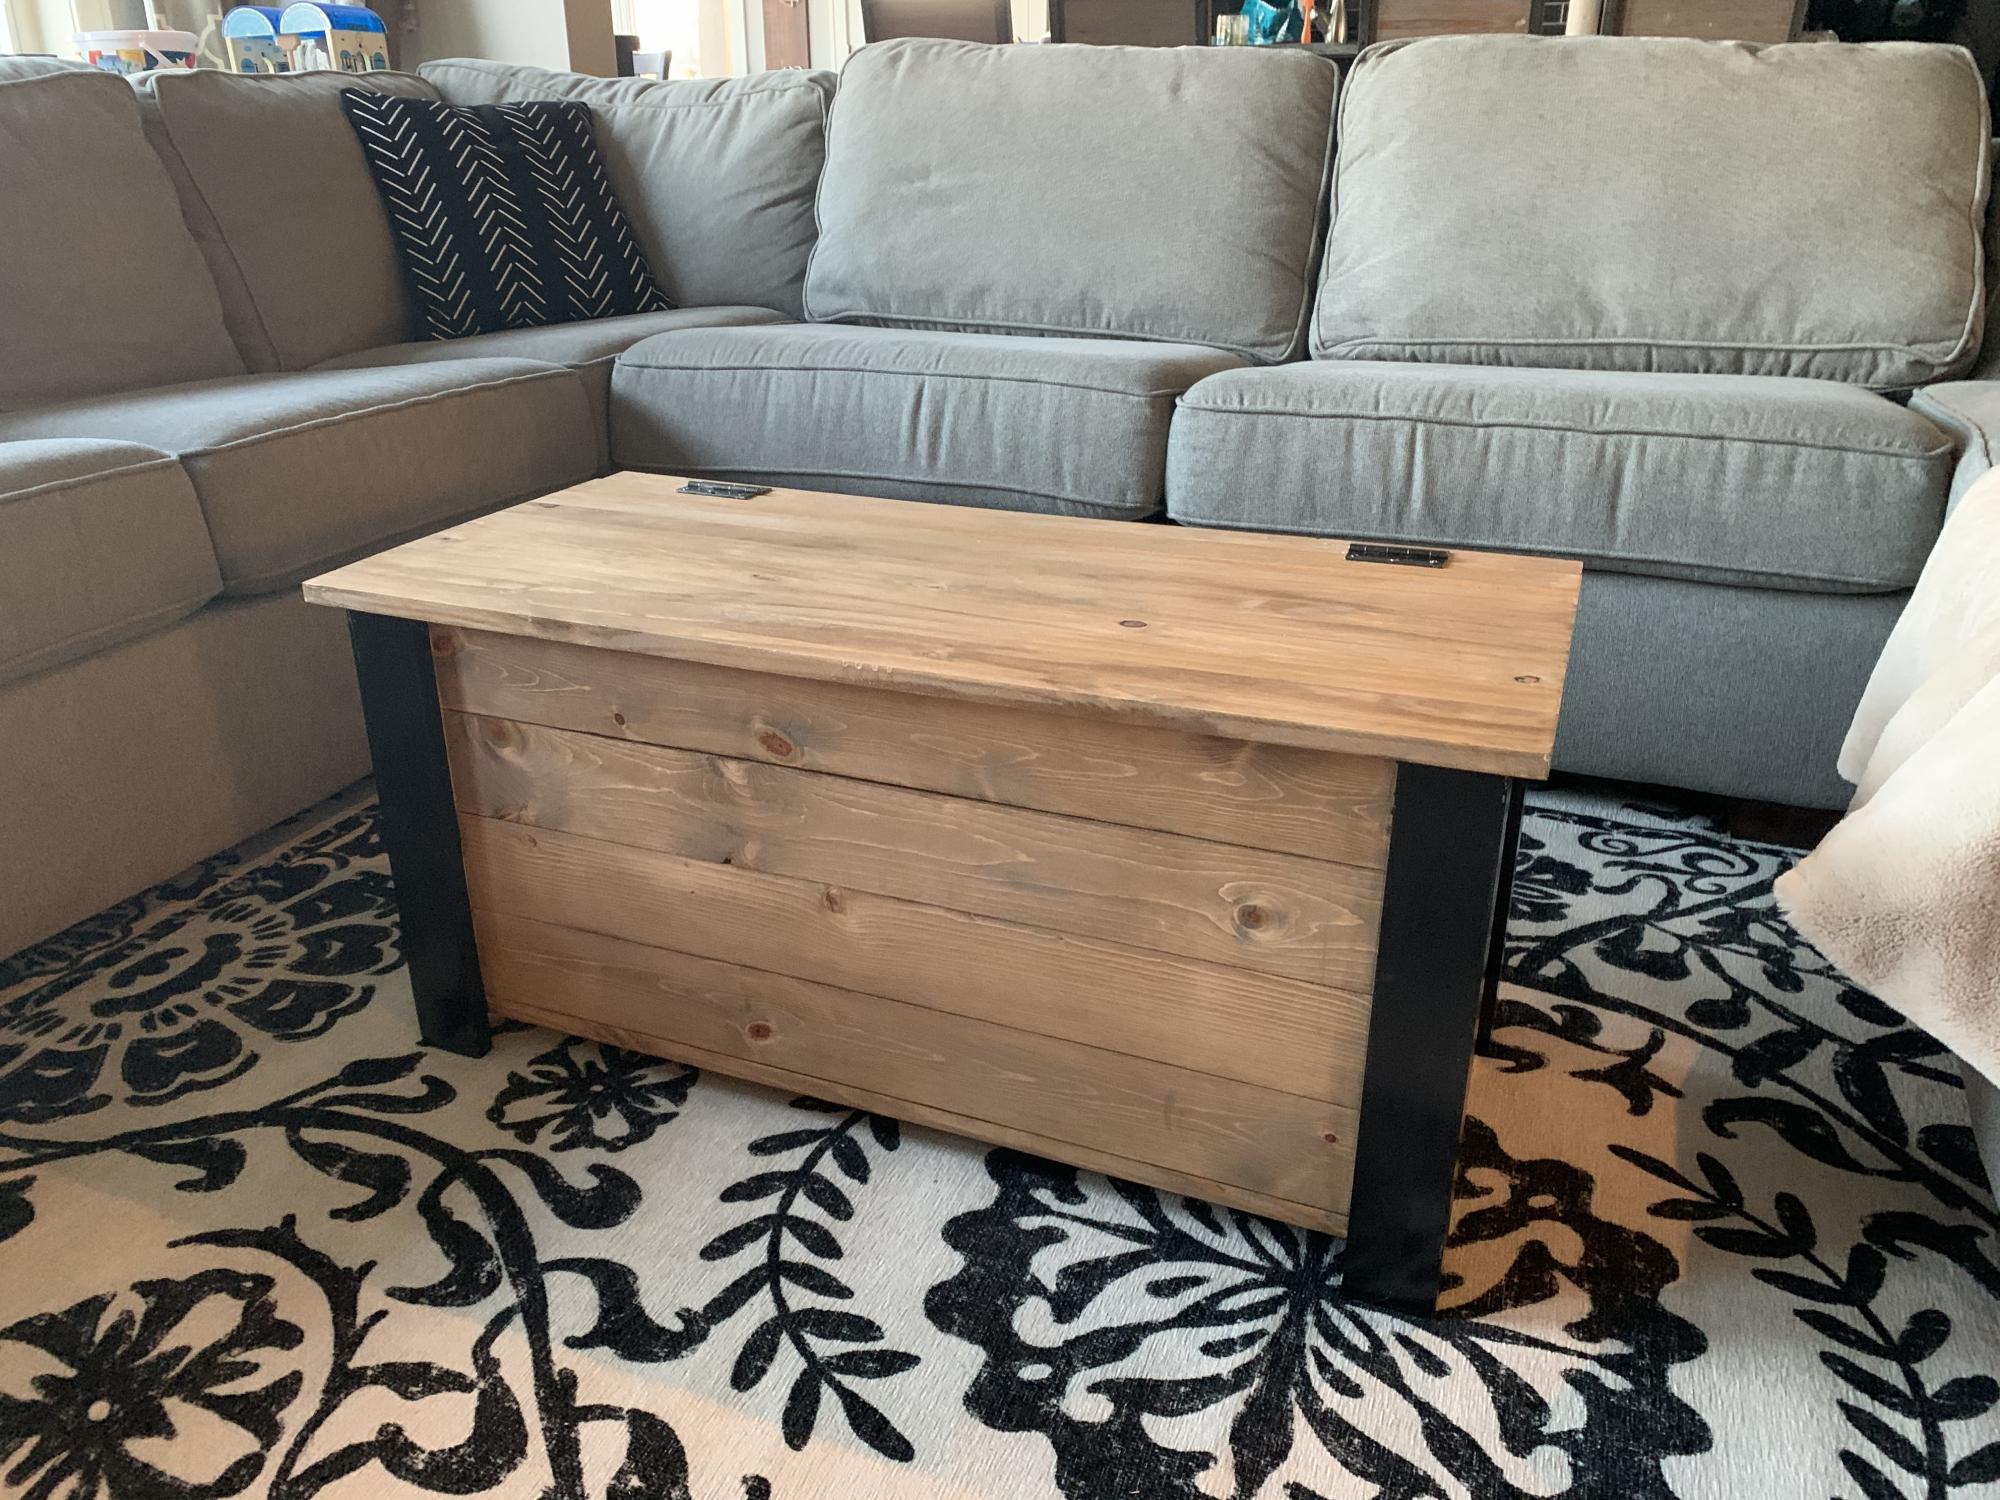
Super simple build with fabulous results! I have been using as a coffee table and it looks awesome and is functional for lots of toy storage as well. It would also work so great to house extra blankets and throw pillows. I added a lid support so it does not slam shut on little hands. This would also be a perfect addition to any playroom for some nice looking toy storage!
Built from Plan(s)
Estimated Cost
$50
Estimated Time Investment
Afternoon Project (3-6 Hours)
Finish Used
For the legs I used Rustoleum Canyon Black paint and for the rest I first used Minwax Weathered Oak with Minwax Early American over the top.
Recommended Skill Level
Beginner
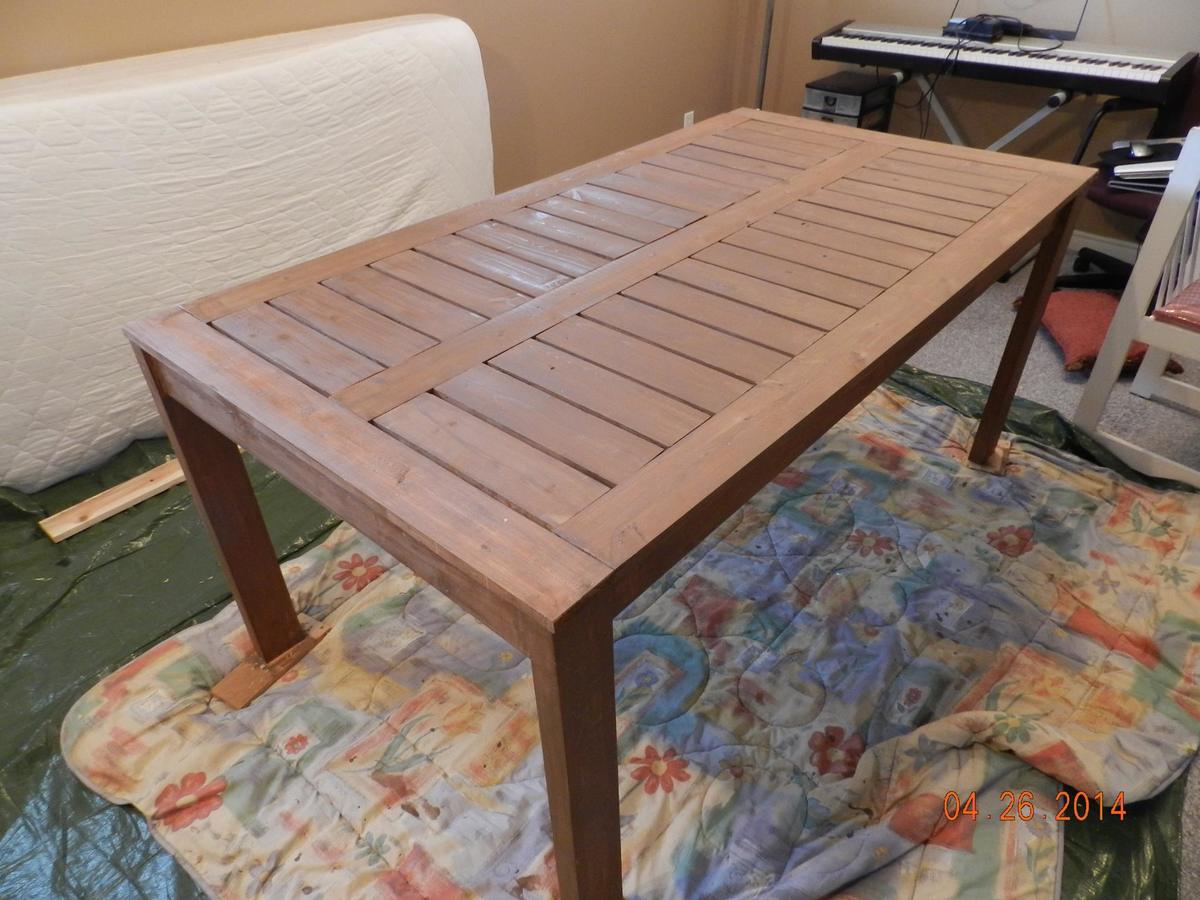
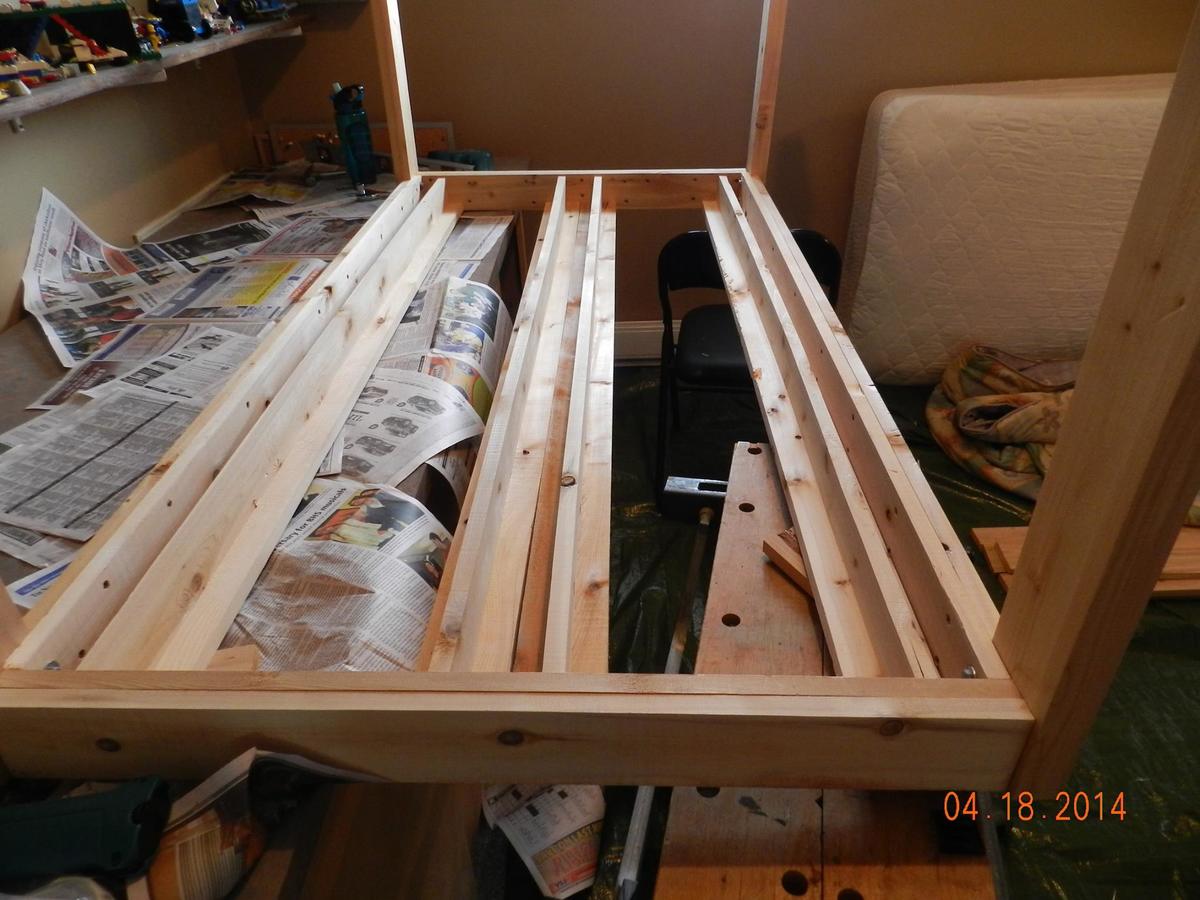
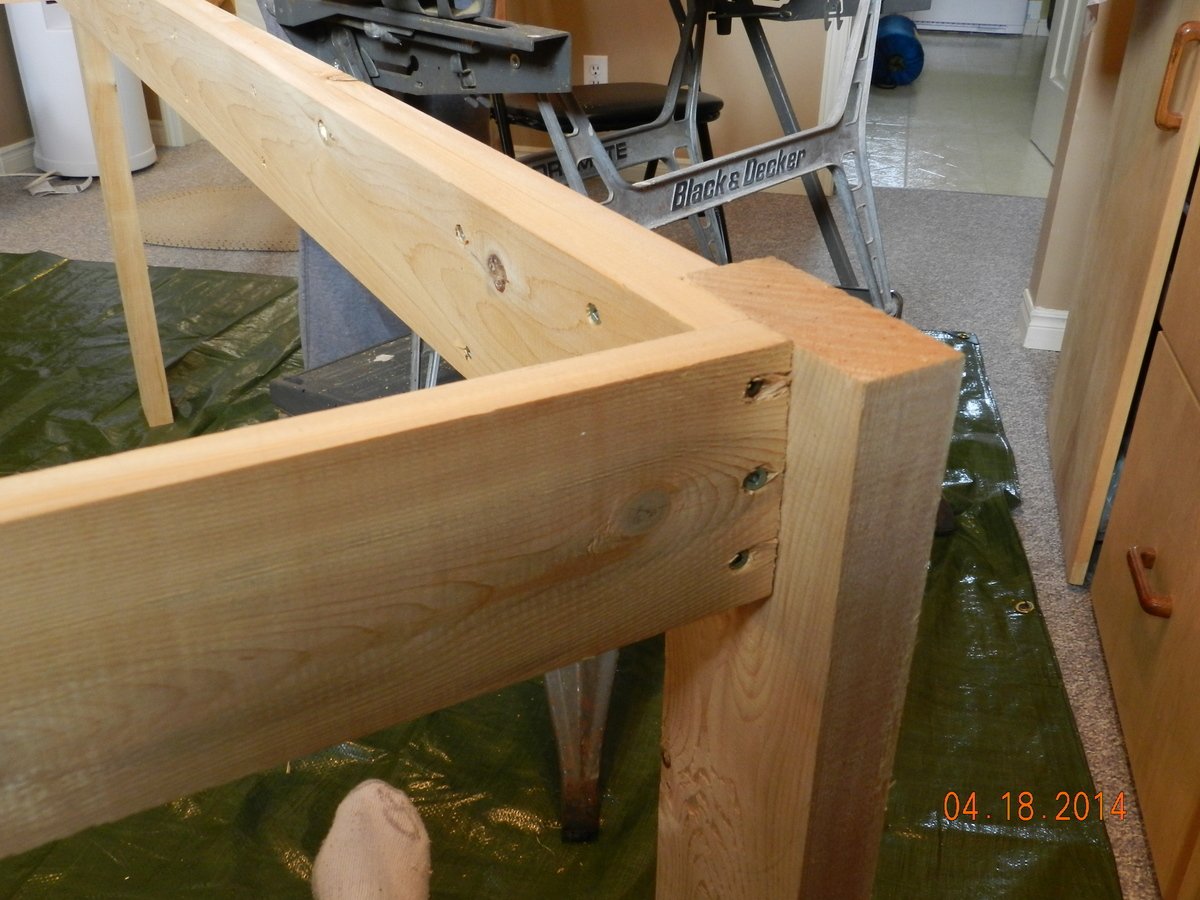
Modified Simple Outdoor Dining Table

I didn't make any changes , his orginal design was great. Hope these pictures help others. I tried to link to the modified-simple-outdoor-dining-table but wasn't able too.
Built from Plan(s)
Estimated Cost
120
Estimated Time Investment
Weekend Project (10-20 Hours)
Finish Used
make sure you stain as you go
Recommended Skill Level
Beginner
Comments
Sun, 04/27/2014 - 14:06
Found the plans
Found the plans "modified-simple-outdoor-dining-table" and I built it. Very nice table, I posted more pcitures to help others
Sun, 04/27/2014 - 14:06
Found the plans
Found the plans "modified-simple-outdoor-dining-table" and I built it. Very nice table, I posted more pcitures to help others
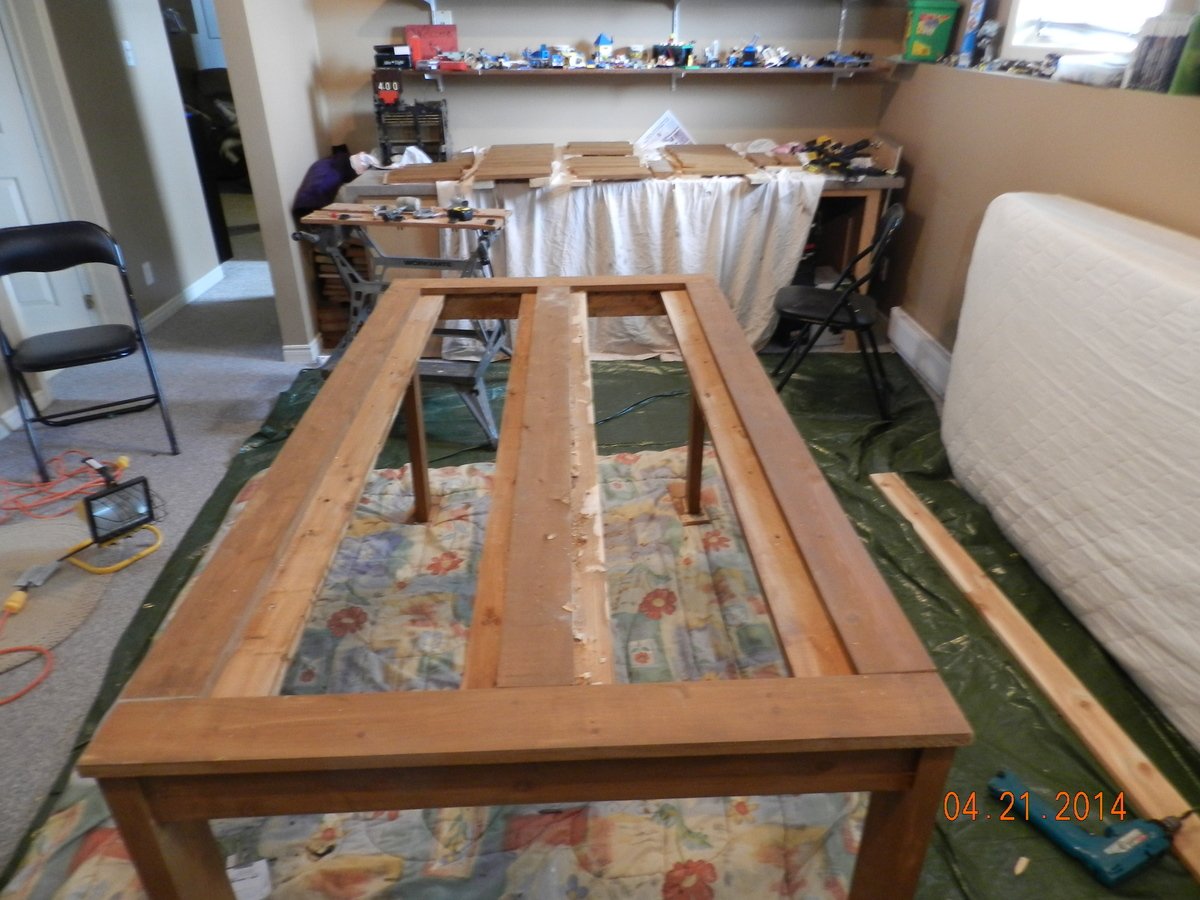
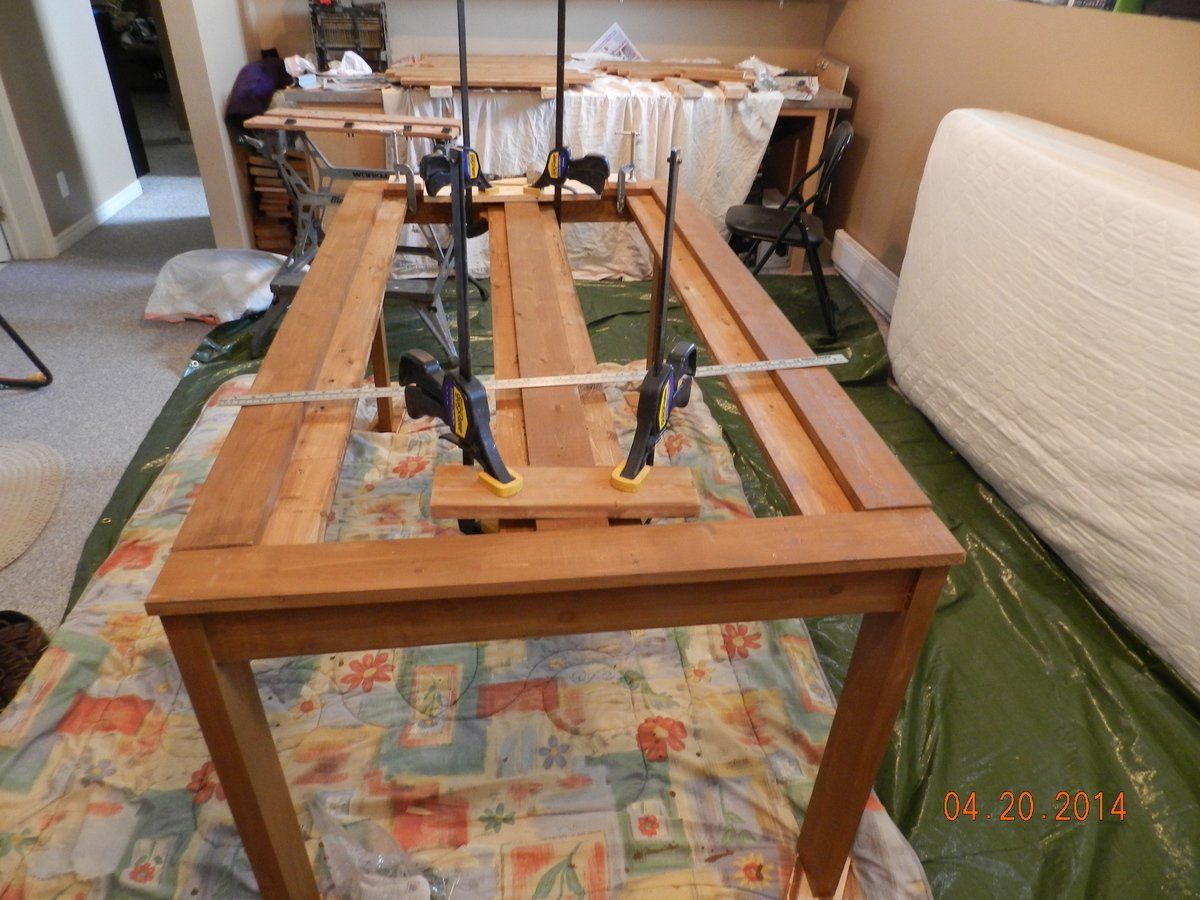
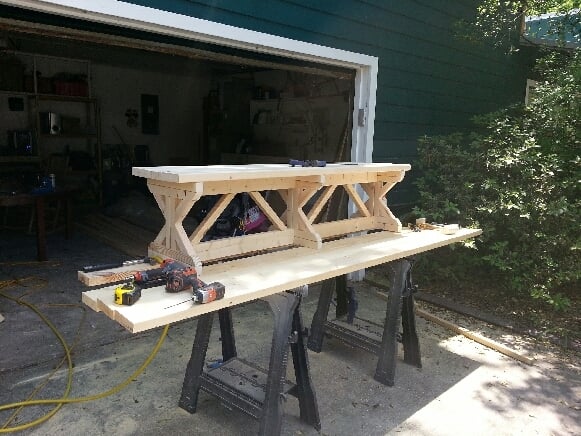
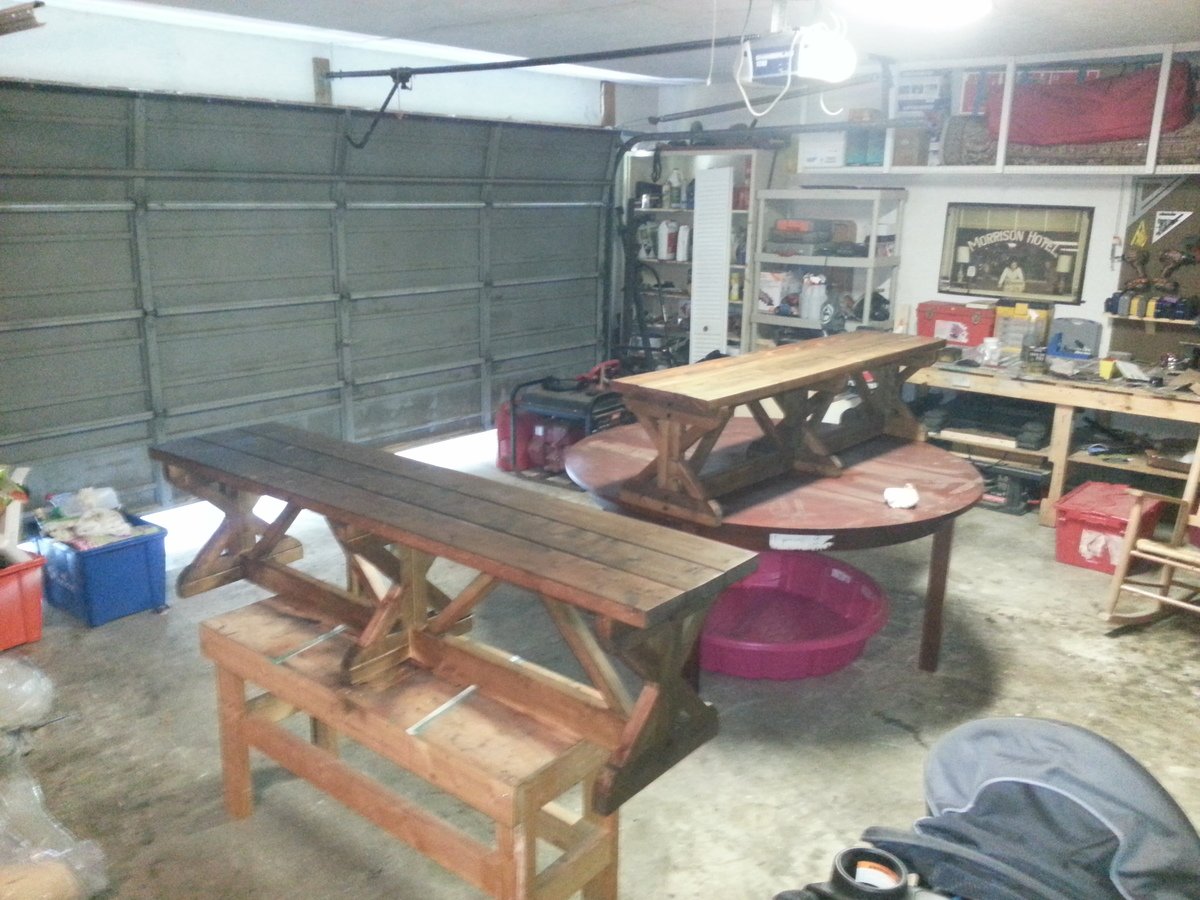
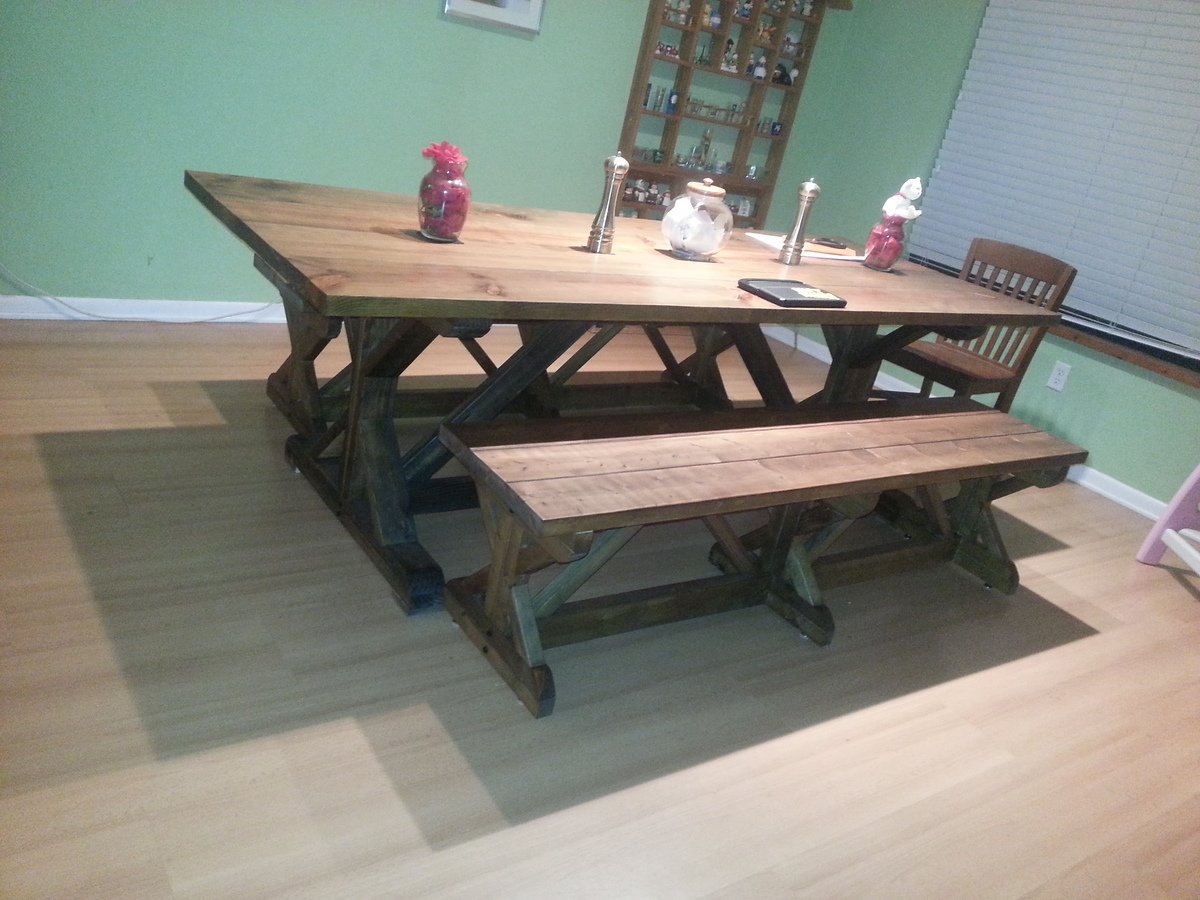
FANCY X FARMHOUSE TABLE
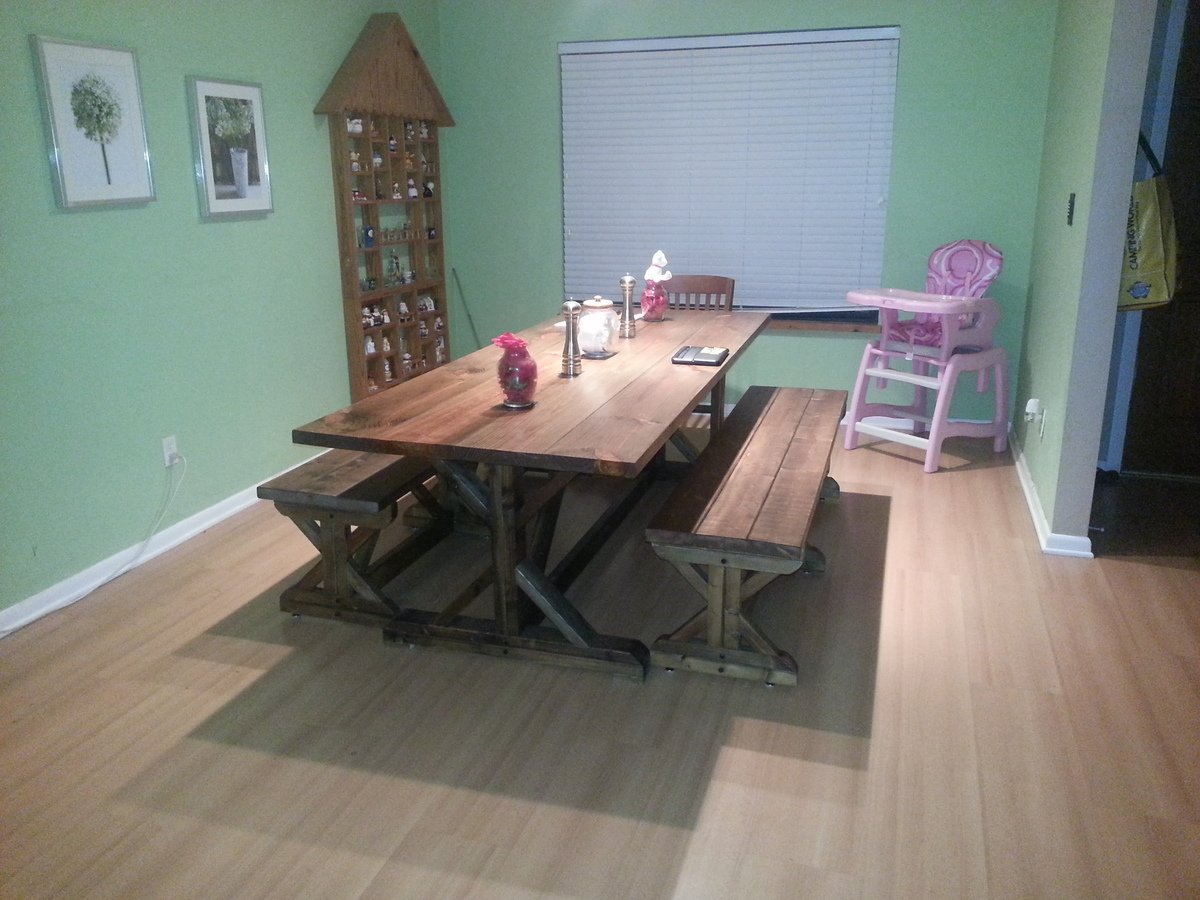
I built the table some months ago and my wife loved it so we decided to build a set of benches to go with it. I gotta say though i will never build these suckers again. Man there were so many cuts!!! The stain was steel wool, vinegar and tea bags and i used a rub on polly. The funny thing is I built both of these benches for a total of 30 bucks! I found all the wood laying around. I hope you all enjoy. Sorry about the horrible pictures I guess if I am going to be uploading pictures on here a better camera other than my smartphone is in order.

Built from Plan(s)
Estimated Cost
$30
Estimated Time Investment
Week Long Project (20 Hours or More)
Finish Used
steel wool, tea bags and vinegar
Recommended Skill Level
Intermediate
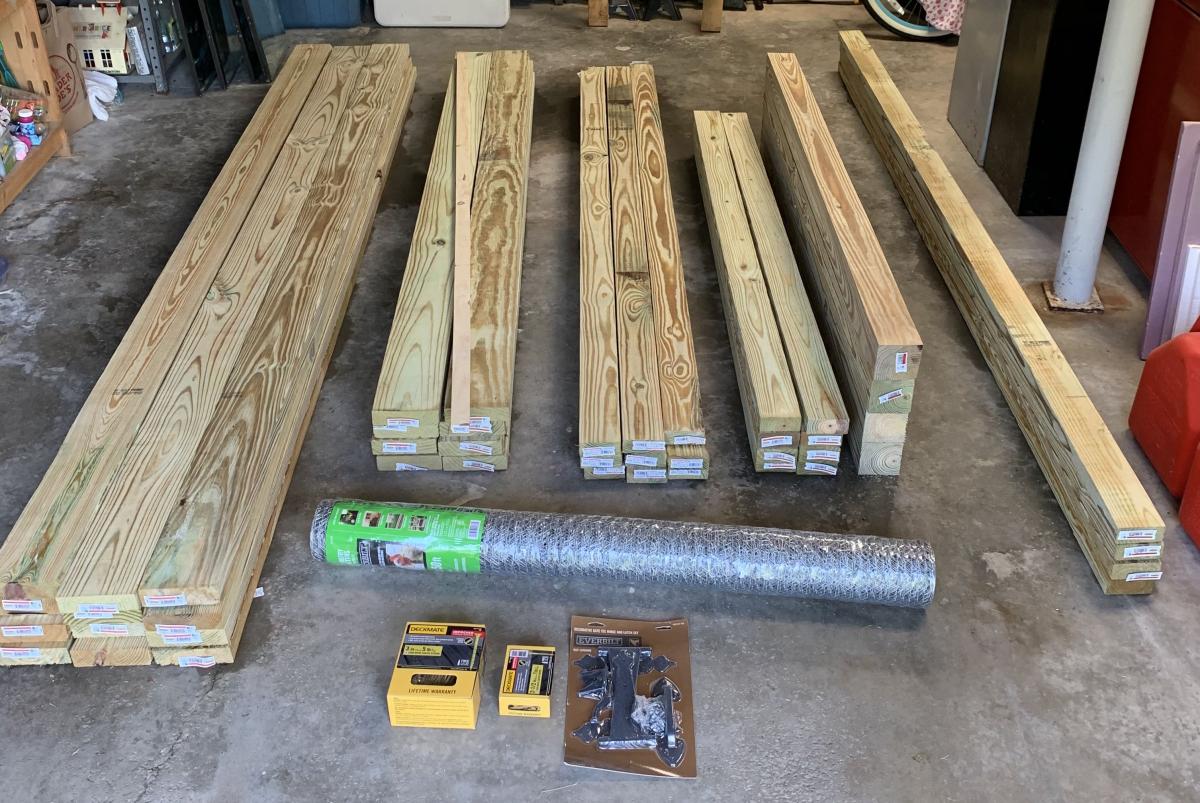
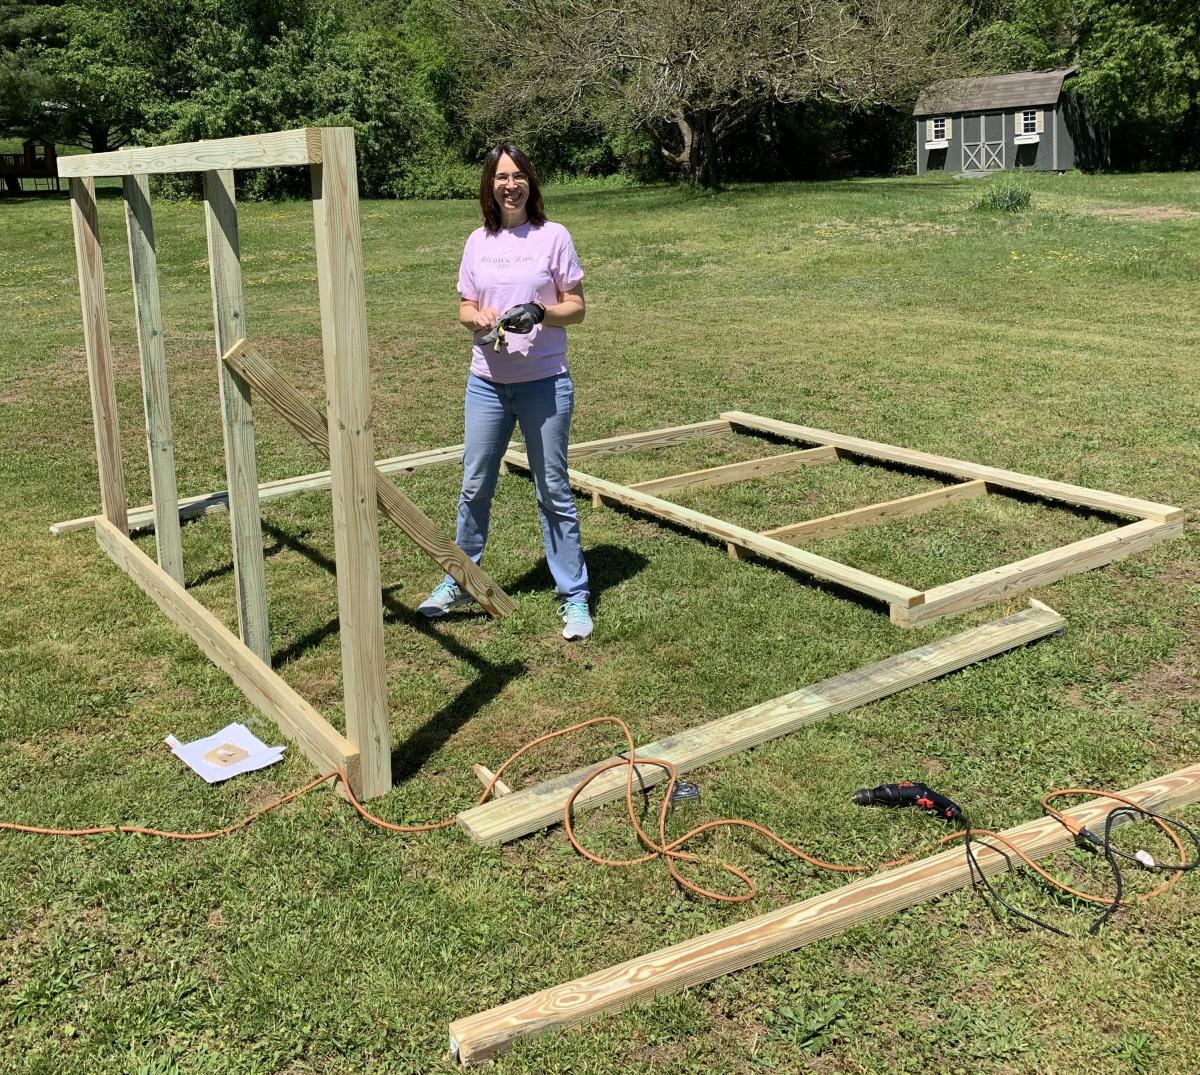
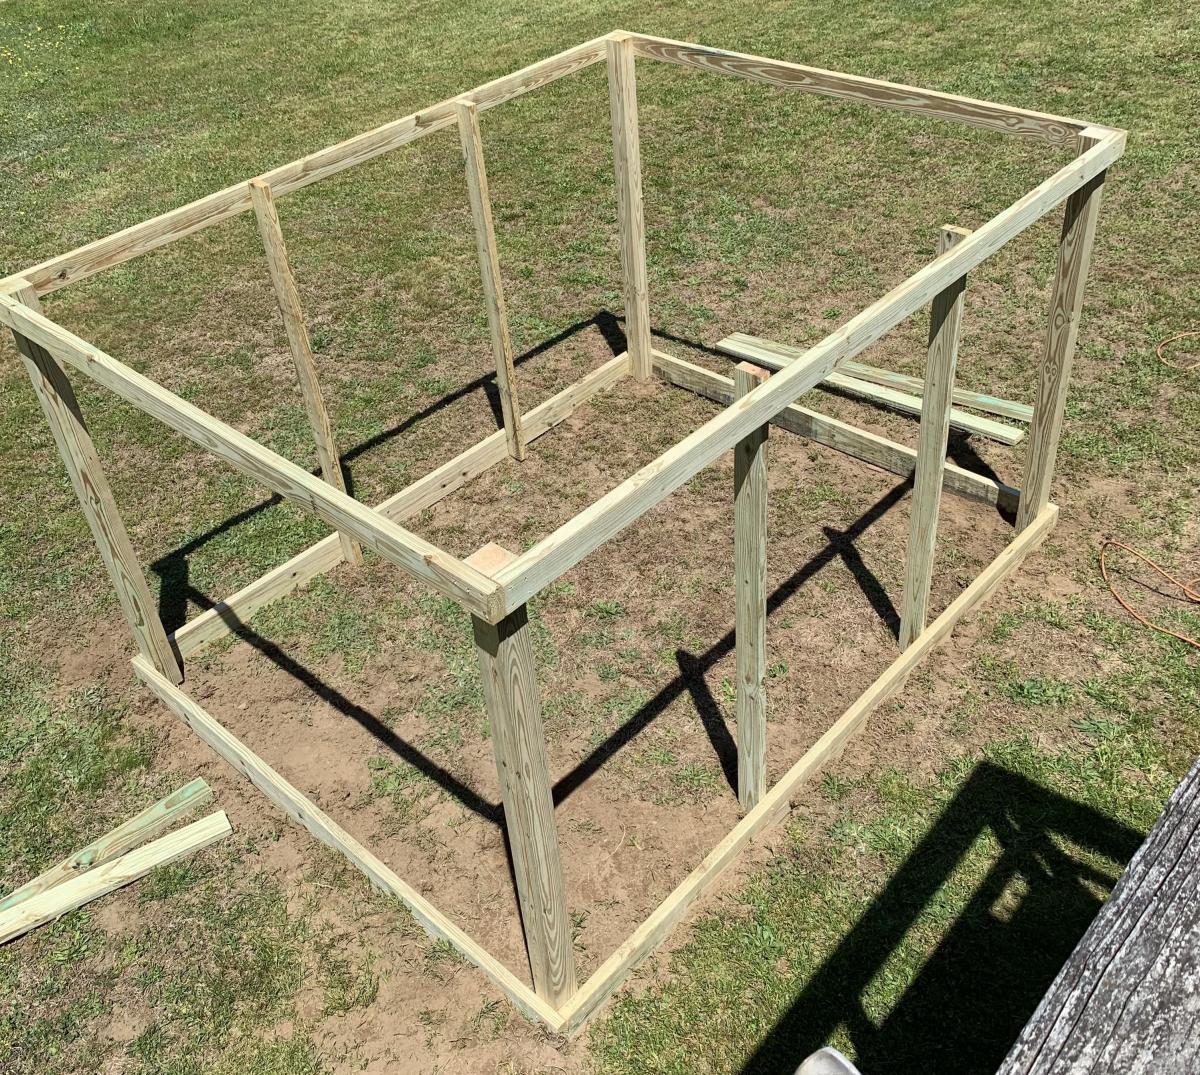
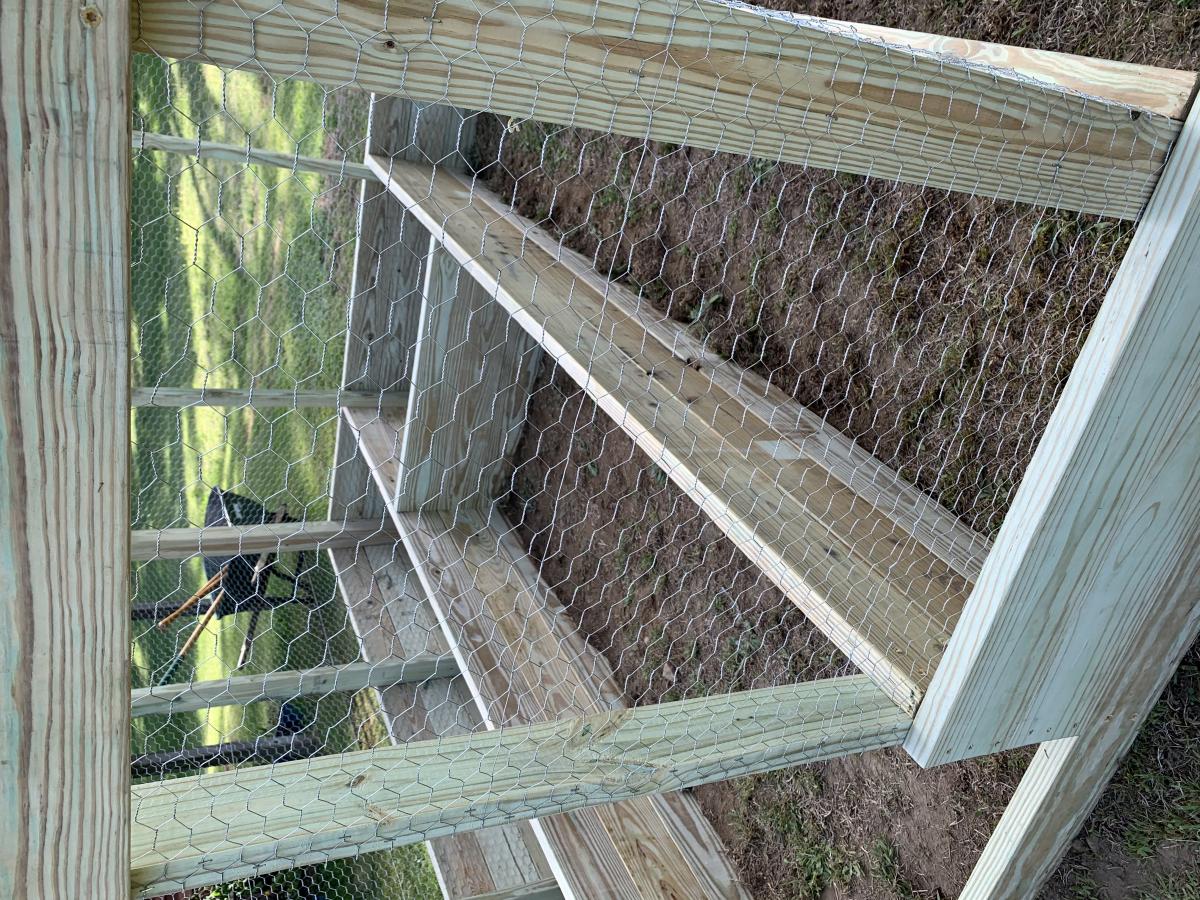
Raised Bed Garden Enclosure
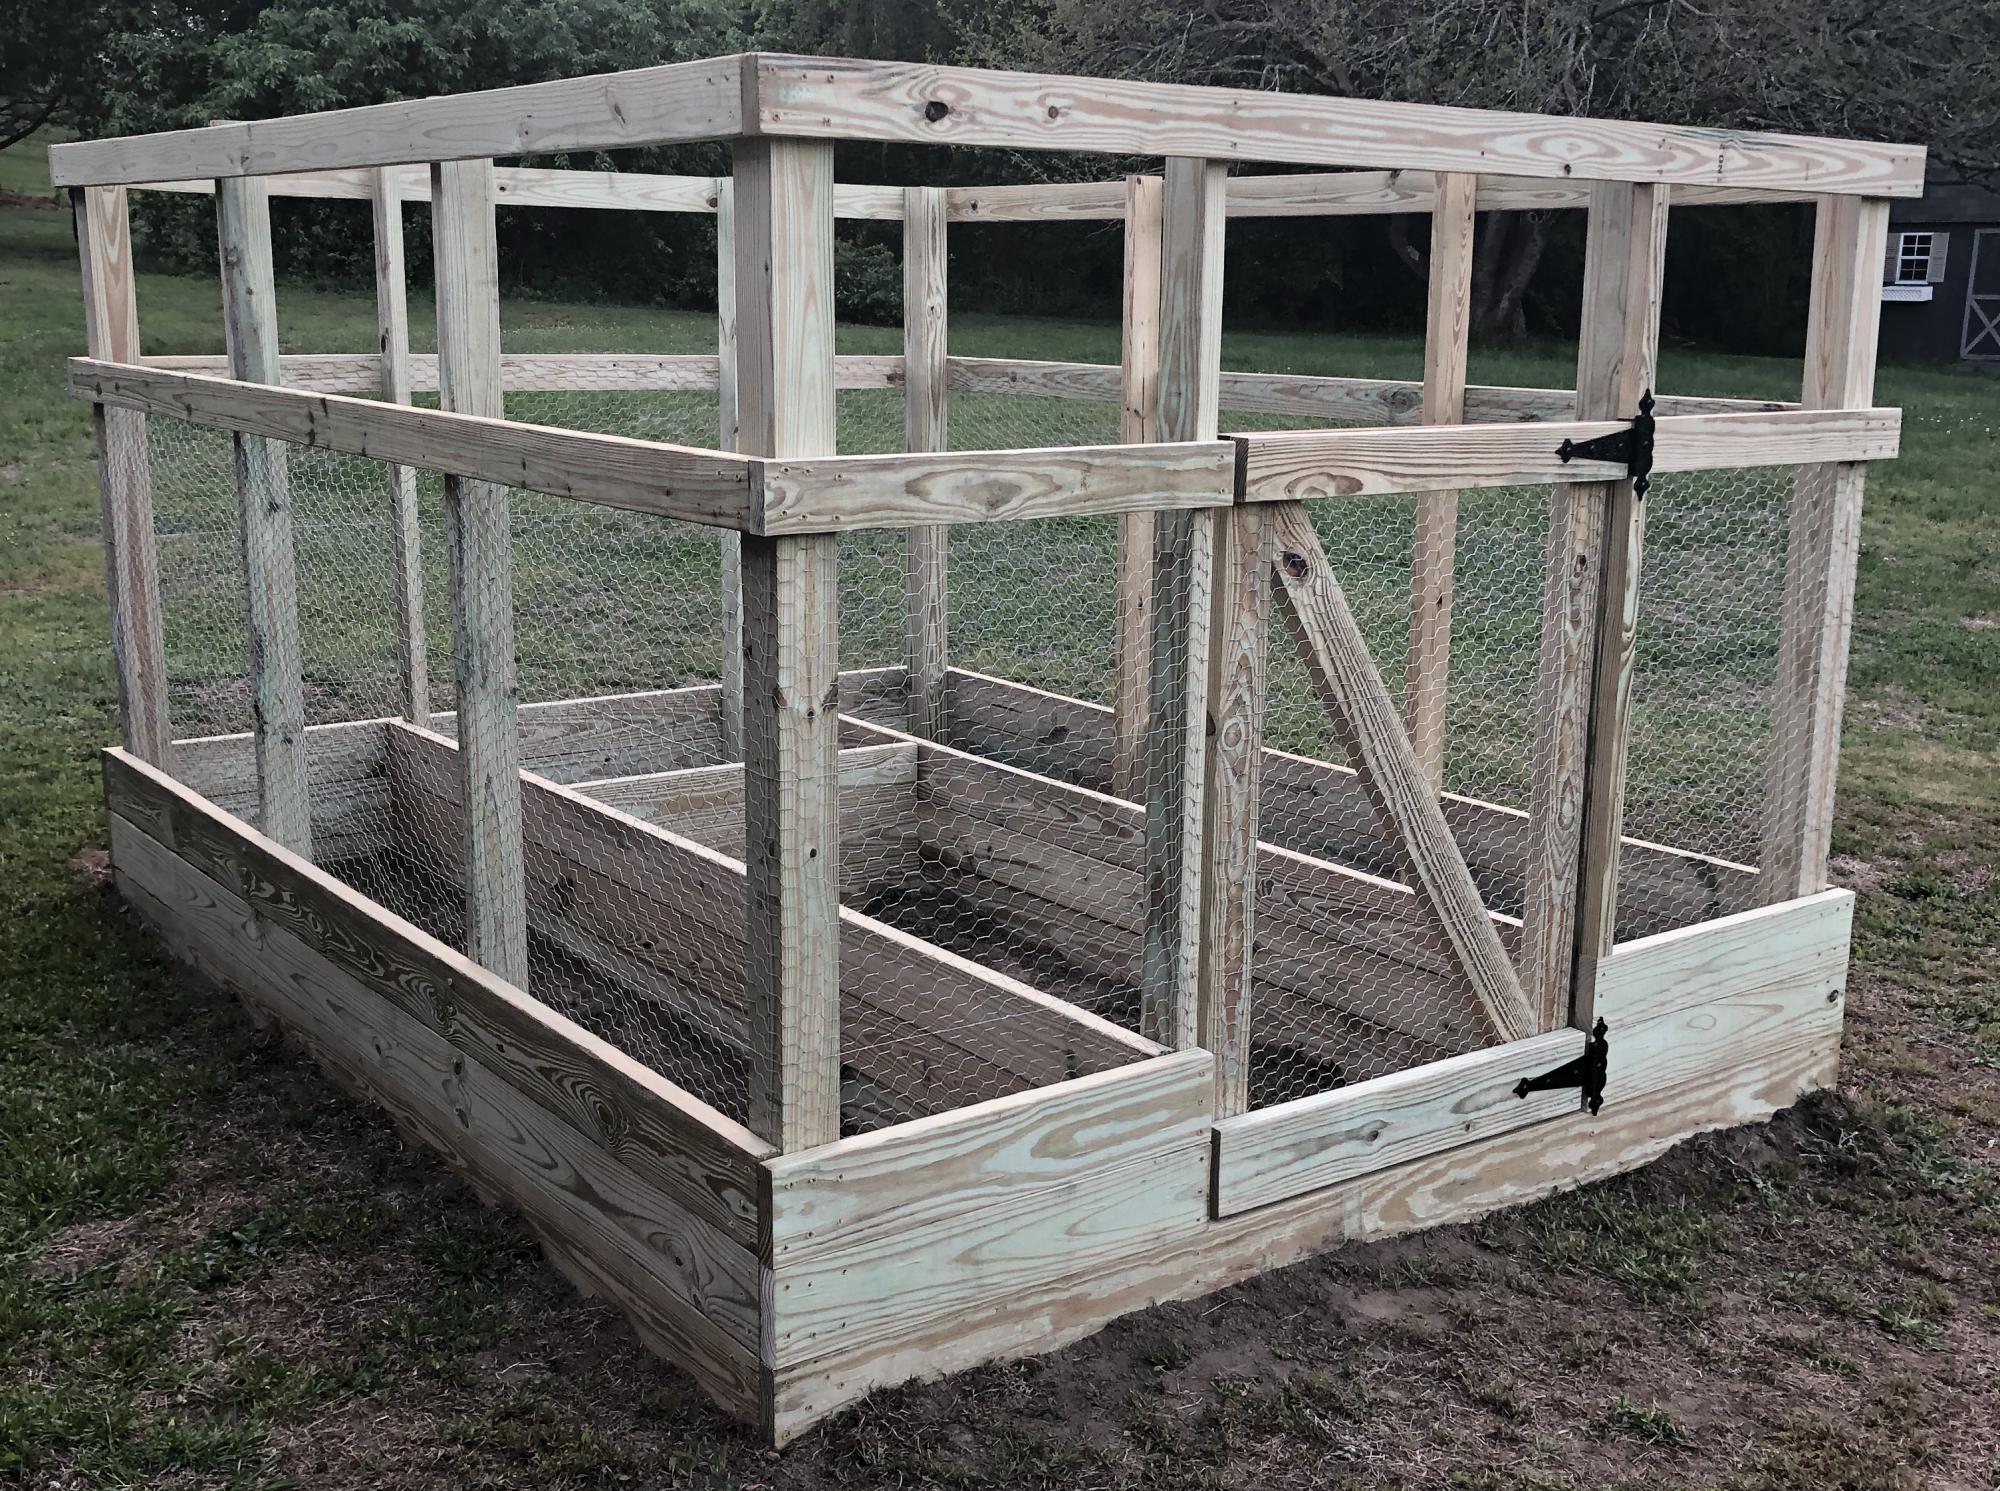
We perviously had a larger garden farther back in the yard, it was on the ground which is very hard and rocky. It was tough to till and maintain, so it was taken down a few years ago.
My wife and teenage daughter have green thumbs and have planted herbs and tomatoes in pots over the past few years, but this year they wanted something more substantial. After an online search we found this plan.
It was a bit small for what the girls had planned, so with a little bit of tweaking, we changed the depth of the enclosure to 10'. It was pretty easy to do. Also the girls wanted the beds to be a bit deeper, so we made them three 2x6's deep instead of two
It was built by my wife and I in one weekend, well actually the truth is we built the entire enclosure, minus the door on Saturday about 10am and finish up about 5:30pm. I built the door the next day and we hung it together.
Just an FYI, I have quite a bit of woodworking experience and have a workshop with table saw, band saw and much, much more. I did use the table saw for most of the cuts, with the exception of the gate support which I cut using the band saw.
One caveat, if you have the lumber yard cut any pieces for you, make sure all the lumber is the same length. It's kind os a nit picky thing, but none of the lumber was exactly the length shown on the labels. If you want all the joints to be "perfect" I suggest measuring and cutting all the pieces to the correct length to match the plans.
We also used an industrial hand held staple gun to fasten the chicken wire.
The cost of all the materials, including two sets of work gloves came out to $447.92 from Home Depot in 2020.
We are now waiting for a delivery of the top soil to fill the beds. Since we used weatherguard lumber, we are going to gat plastic sheeting and line the beds.
It was a fun project and my girls are looking forward to planting all their seedlings.
For fun we made a time lapse video, which I have uploaded to Youtube. If you watch closely, you will see that we started the build in one area of the yard and moved it because the ground sloped much more than we originally thought.
https://www.youtube.com/watch?v=h7vvBLy034U&list=WL&index=112&t=0s
I hope that our experience may help others in some small way.
Thank you Ana for making these plans available!!

Built from Plan(s)
Estimated Cost
$447.92
Estimated Time Investment
Weekend Project (10-20 Hours)
Finish Used
None.
Recommended Skill Level
Intermediate
Comments

Sat, 05/30/2020 - 18:27
Love the added length! …
Love the added length! Thanks so much for sharing photos of your build!
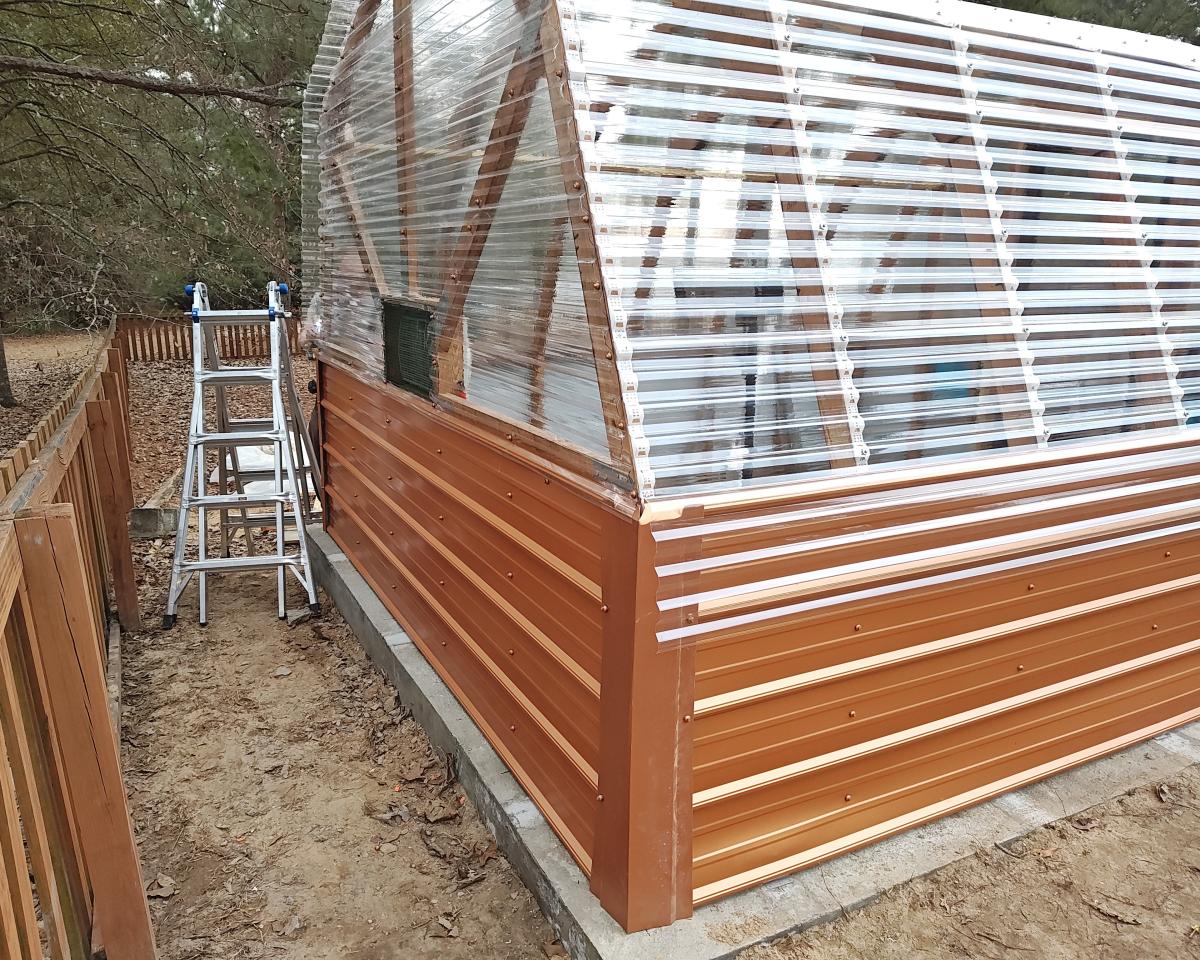
Barn Style Greenhouse with Extras!
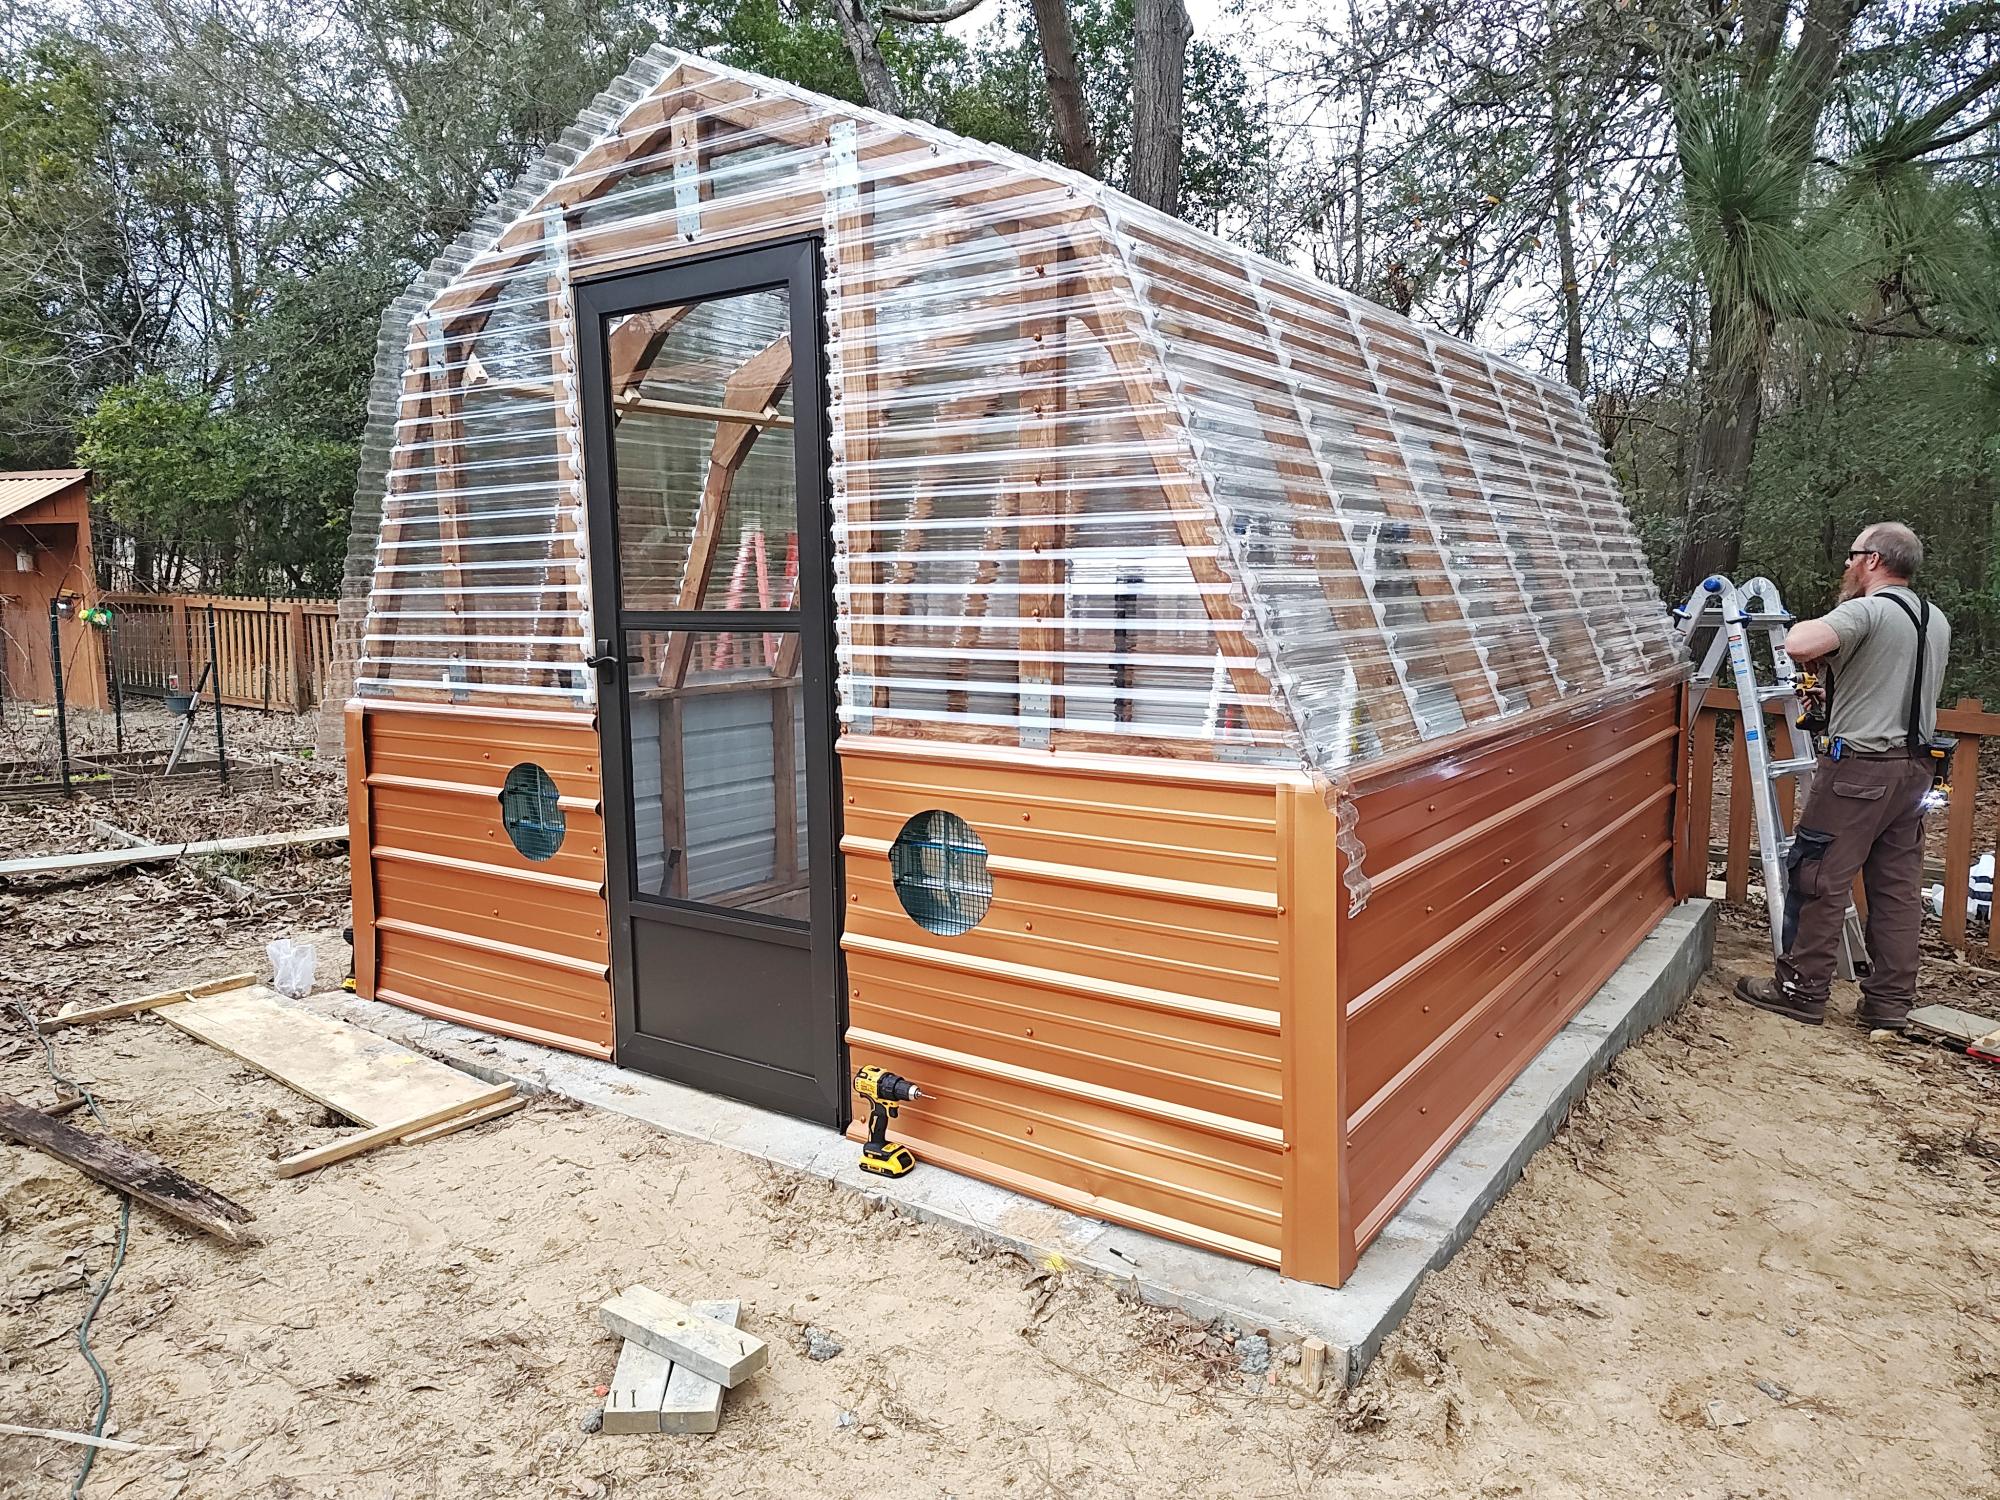
A variation on your barn style greenhouse. I included a cooling fan with intake louvers, temperature controlled heater and grow lights. Also used anchor bolts embedded in concrete footer.
David Buckmaster d [email protected]
Built from Plan(s)
Cedar Fence Picket Garden Bed

I made a couple changes to the plans to better suit my needs, but Ana's plans were my inspiration! And my veggies that were outgrowing their jiffy pots are happy to have a new home!!!

Built from Plan(s)
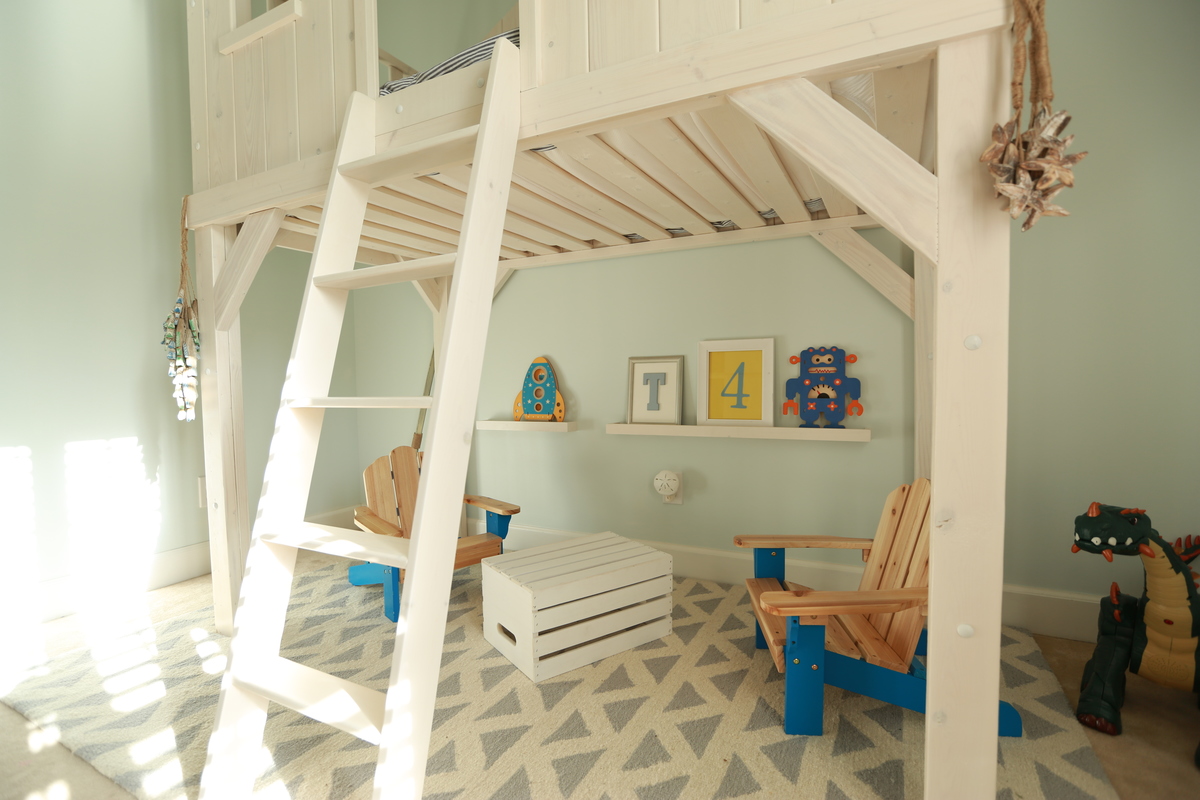
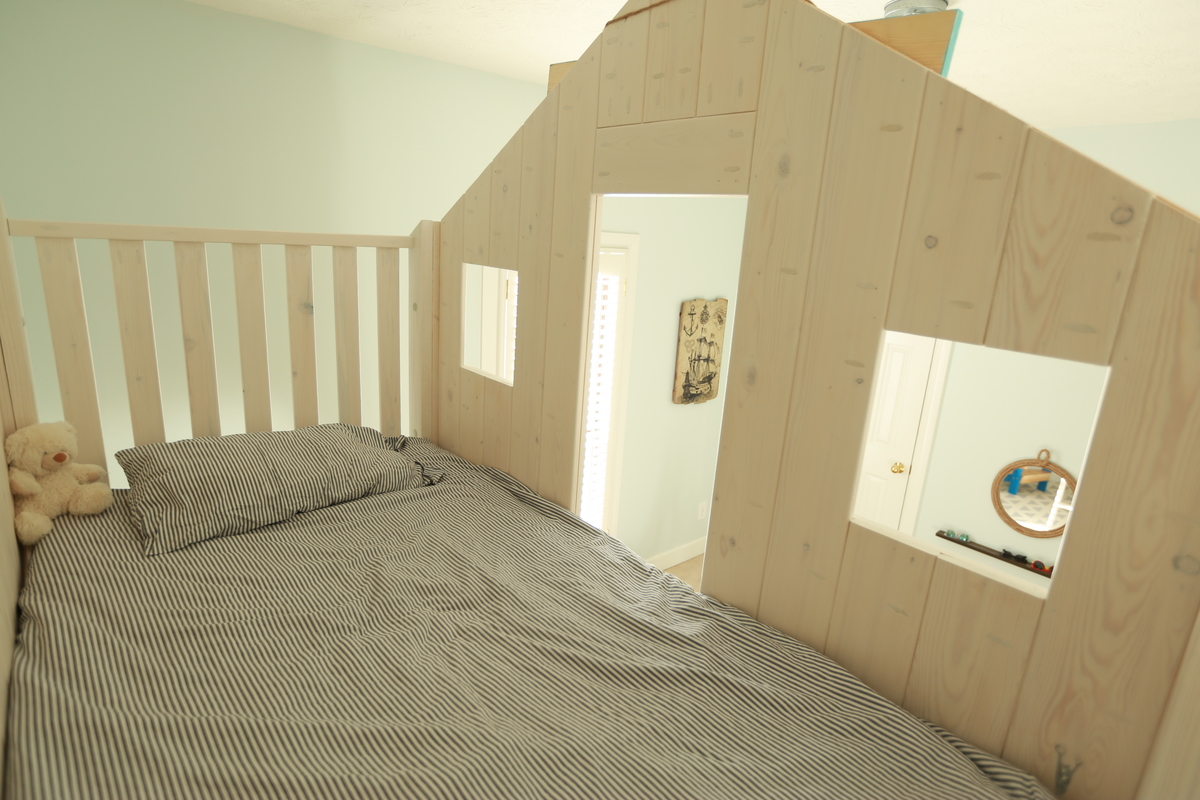
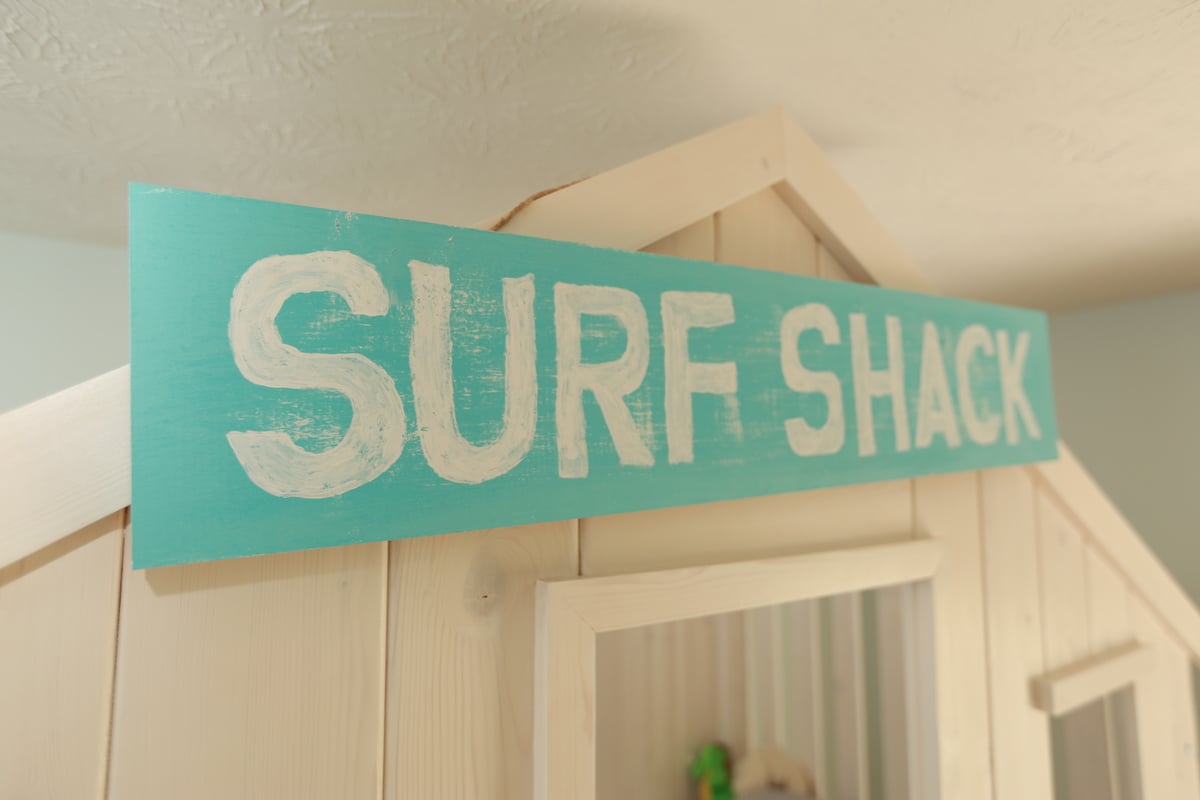
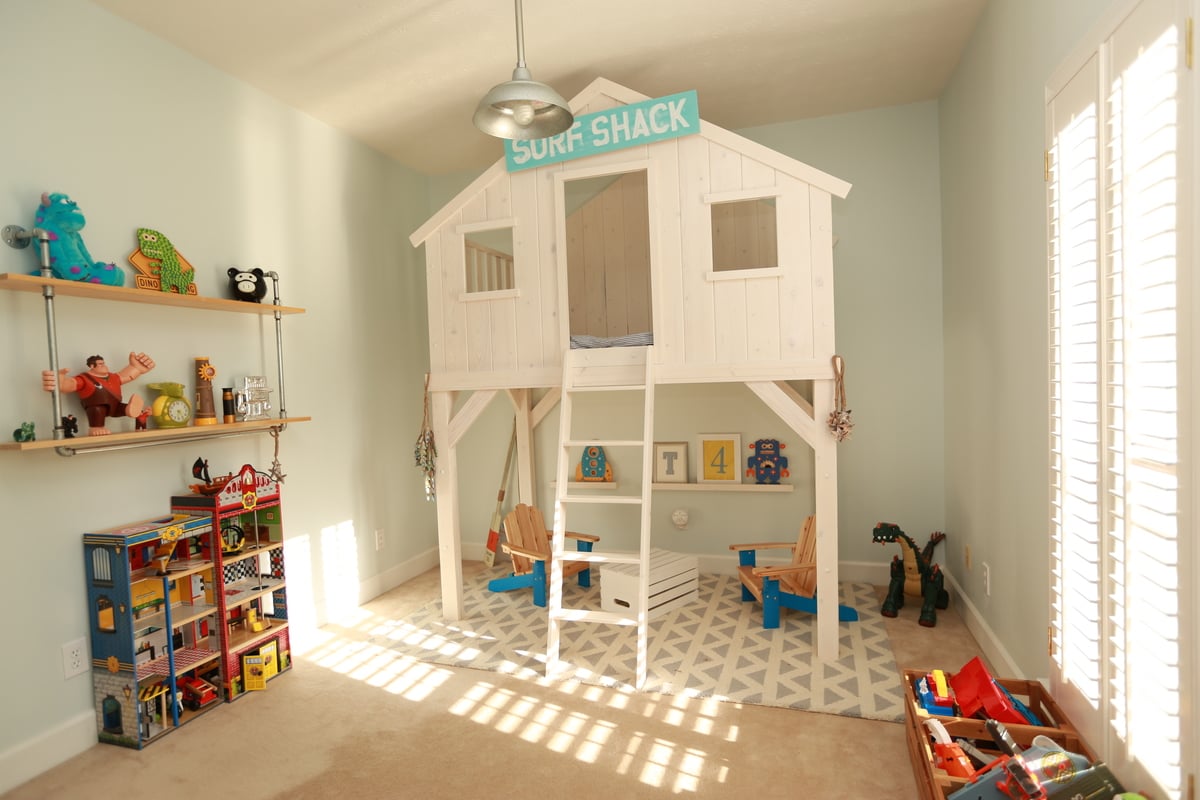
Beach Shack
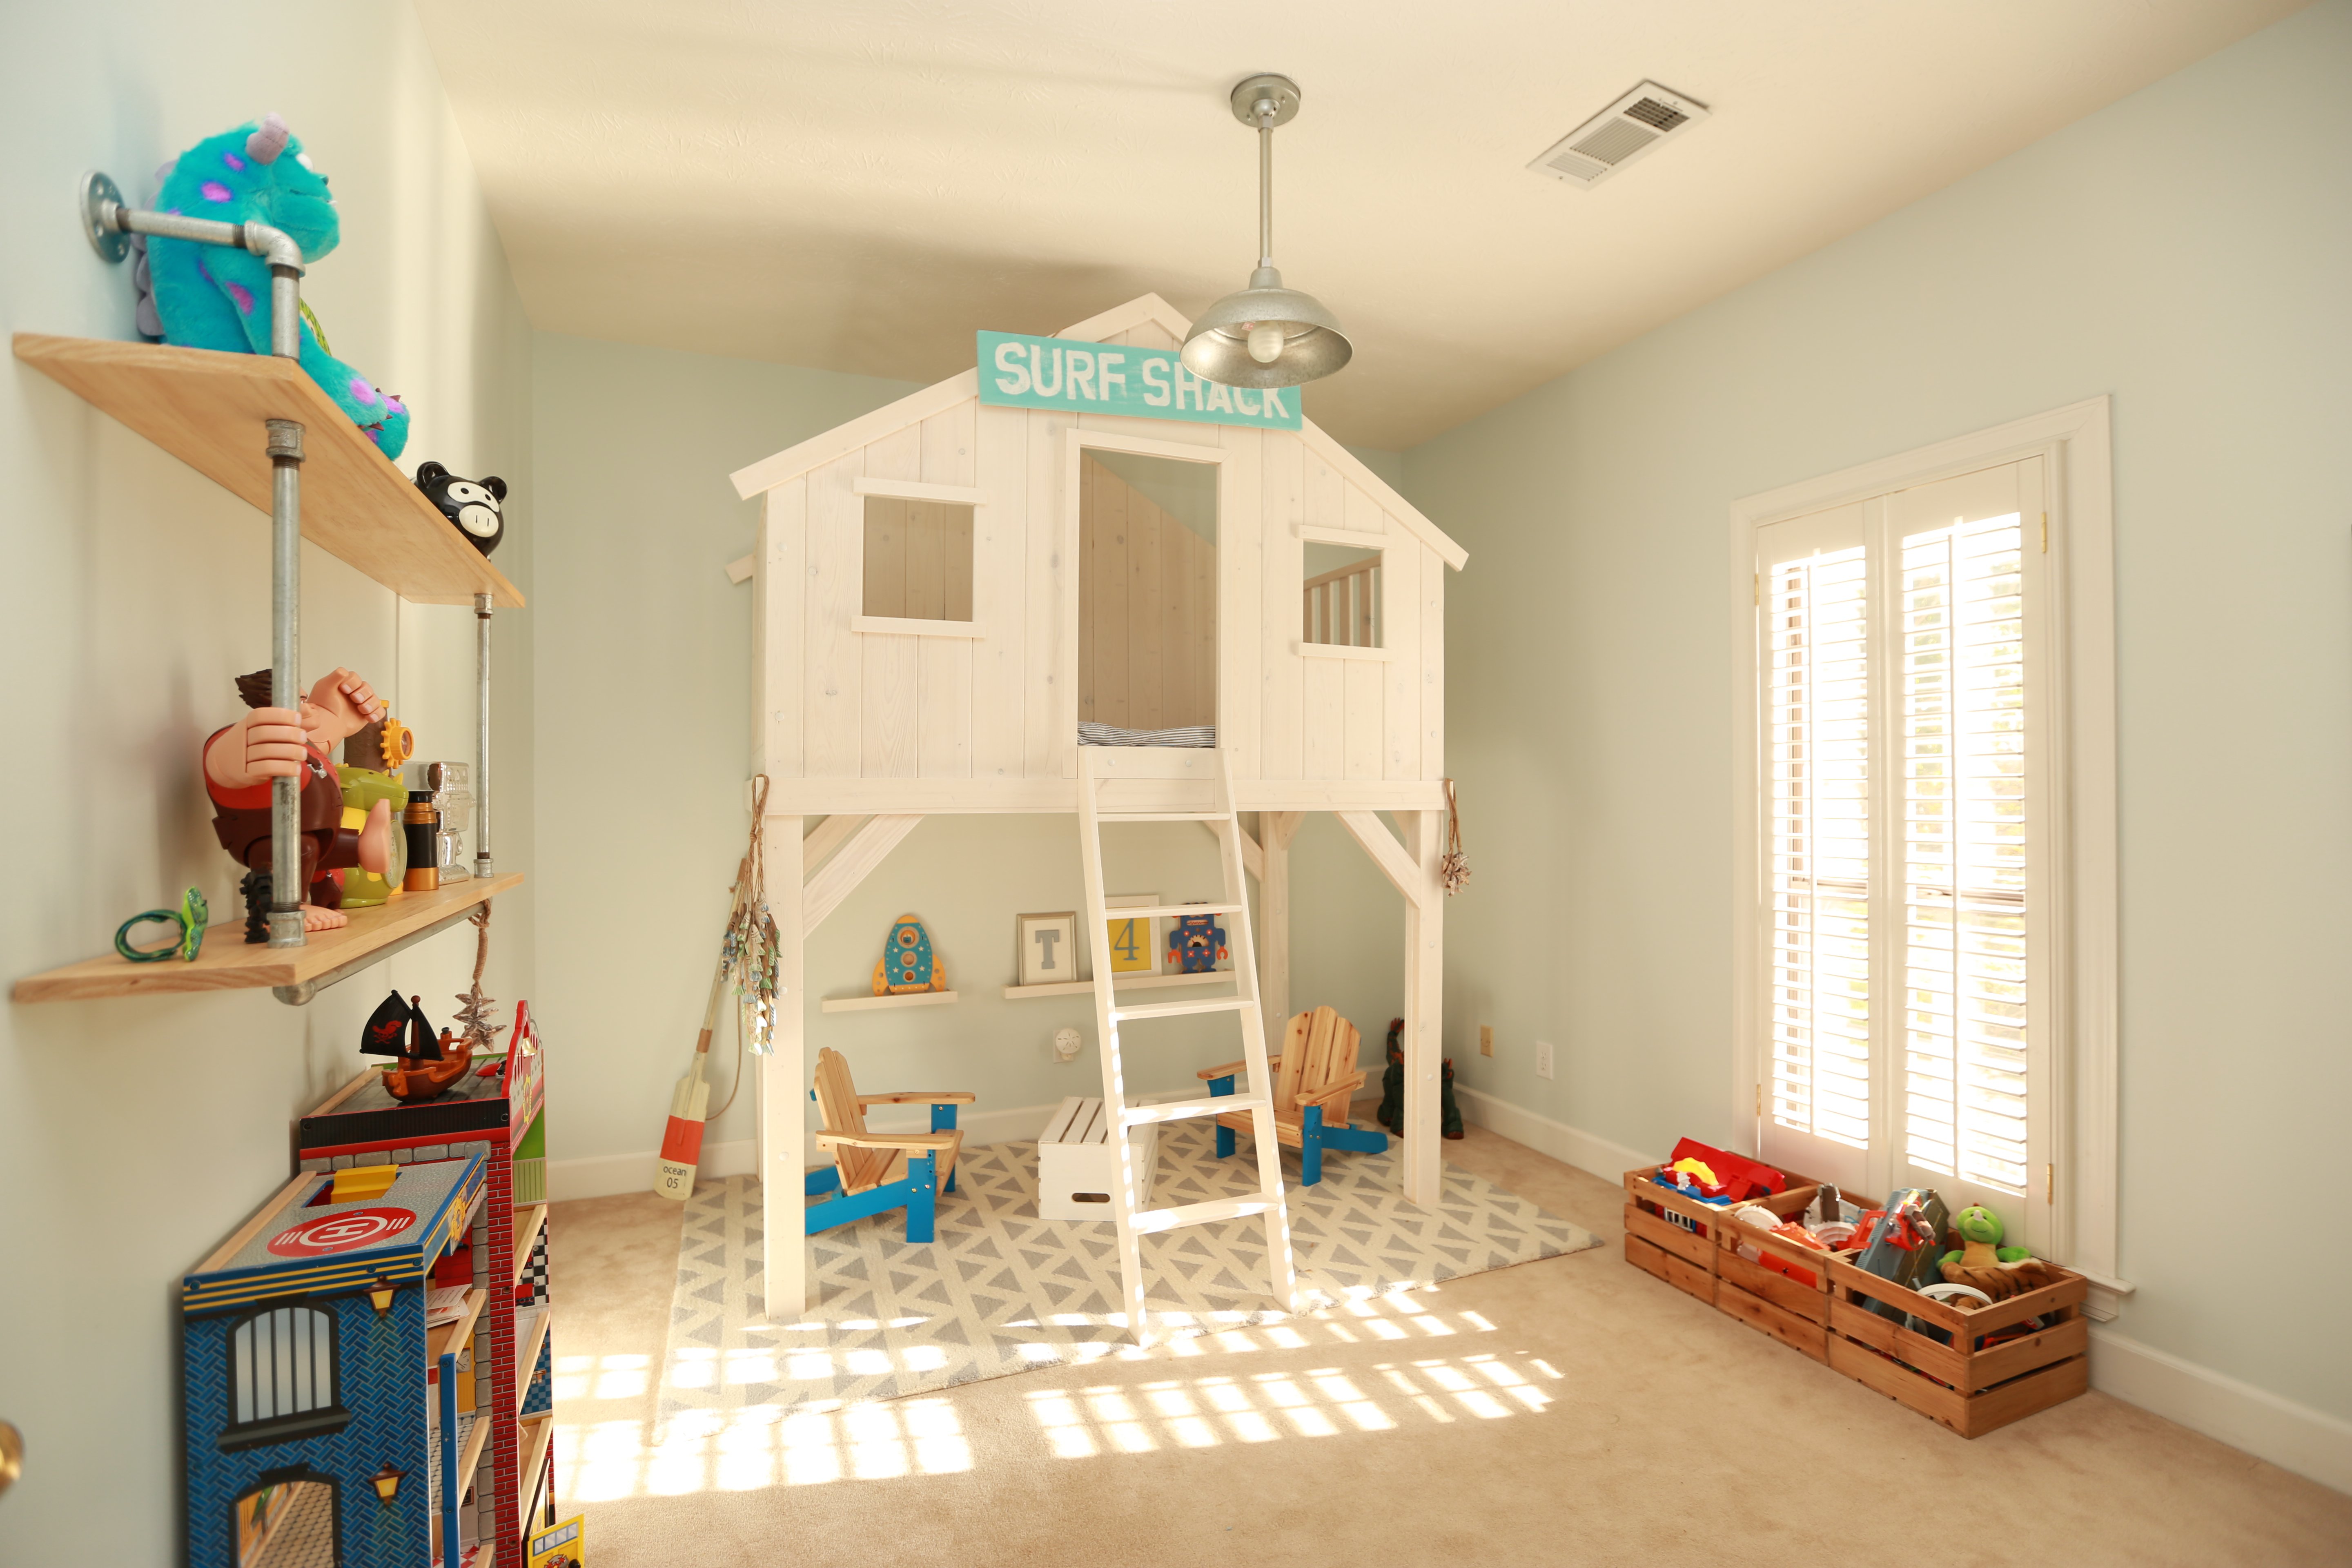
Customized version of the clubhouse bed that is so popular! We went the extra mile on the finishing touches to ensure an awesome bed for our little guy! We made the bed taller for more space underneath and polished up the finished product to create a higher end look. Care was taken to precisely sand all areas of the bed for a smooth finish and polished look. All pocket-holes are filled with plugs and sanded smooth on the inside of the bed for an overall finished product. No shortcuts taken! We went the extra mile and painted the carriage bolts so they would blend in with the whitewash finish and also recessed the nut on the back of the legs for safety and added a cap so they are not visible. Top of the bed, above the door, is filled in and a custom ladder finishes off the look. We went with smaller lumber to build the ladder and it is perfect!! We are over the moon with this project and will be building more items as fast as we can. Also, the sign, under-bed shelves, and industrial shelves were built by my husband. He did an epic job creating this room!! We used better grade wood and spent a lot of time sanding to ensure a great bed in the end. We also went with a Benjamin Moore stain that was a little more expensive and took the time to finish the slats under the bed.

Built from Plan(s)
Estimated Cost
$400
Estimated Time Investment
Week Long Project (20 Hours or More)
Finish Used
Benjamin Moore exterior semi-transparent stain.
Recommended Skill Level
Intermediate
Comments
Mon, 02/22/2016 - 07:38
what benjamin moore stain?
I love this bed! I was looking at the BM site and was wondering what exact stain did you use? there are 5 different opacities & I want to make sure I get the right one. Thanks!!

In reply to what benjamin moore stain? by jeawels
Fri, 08/19/2016 - 05:58
Benjamin Moore Stain
Did you ever figure out what stain was used on this particular bed? I love it.
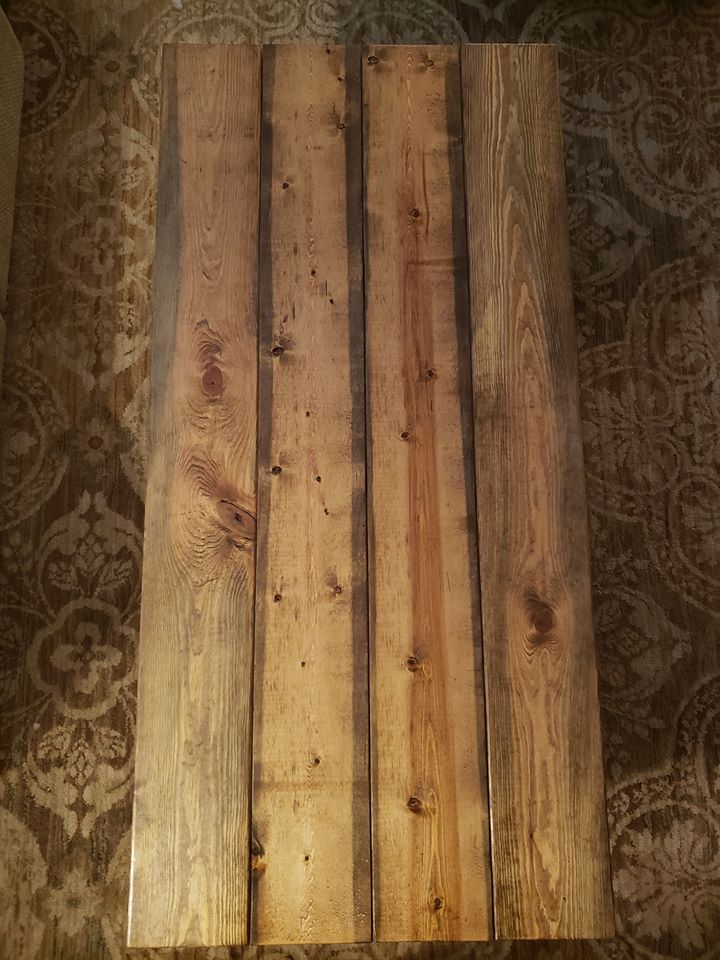
Farmhouse Coffee Table
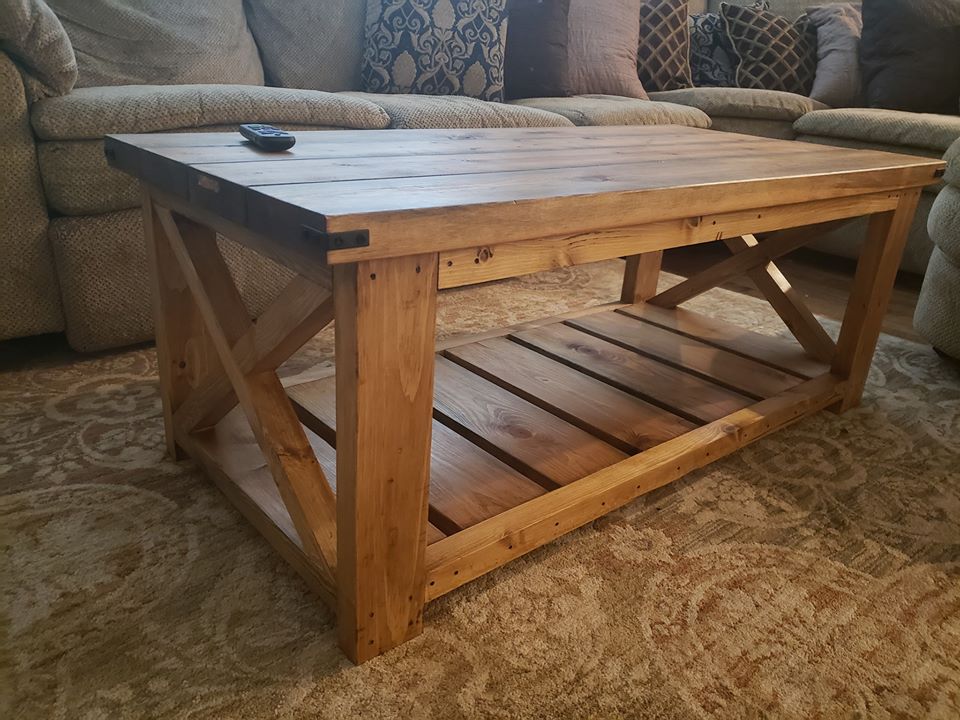
This was a fun project to build! It took about 1.5 hours to build start to finish, with another couple of hours to stain and then seal.
Built from Plan(s)
Estimated Cost
$43
Estimated Time Investment
Afternoon Project (3-6 Hours)
Finish Used
Dark Walnut stain and Satin Sealer
Recommended Skill Level
Beginner
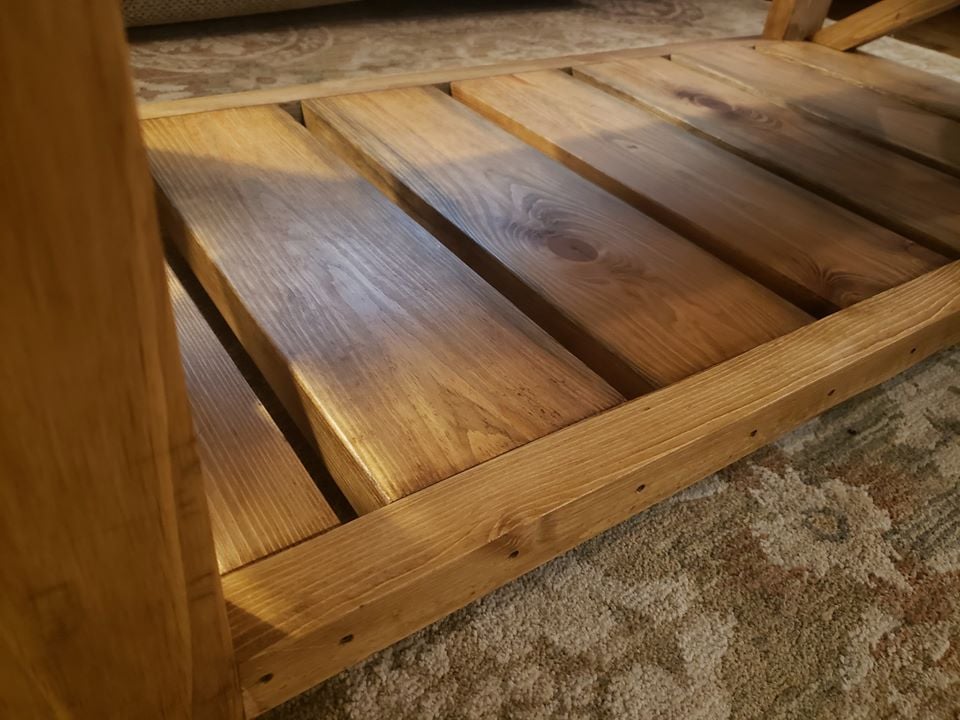
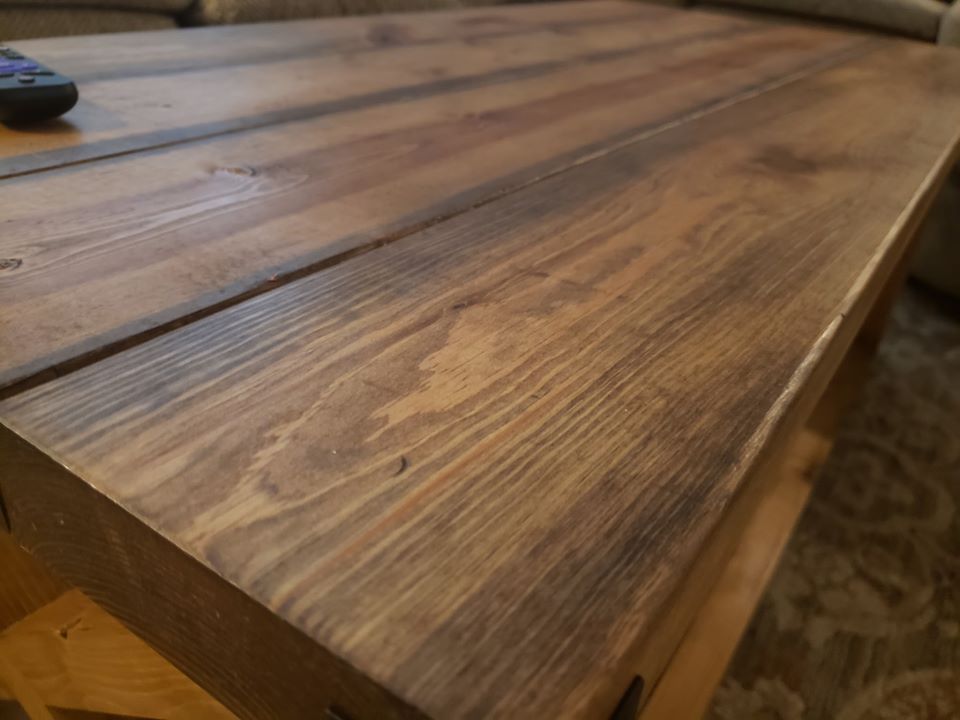
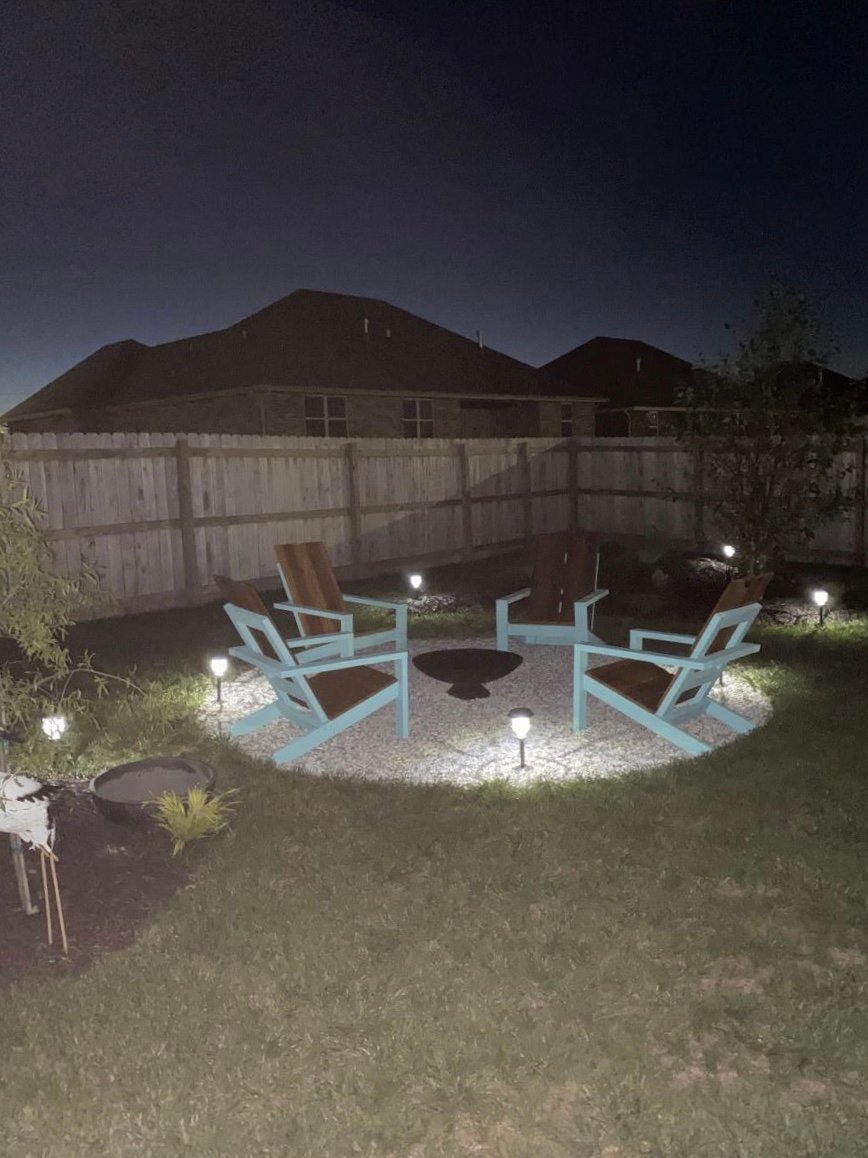
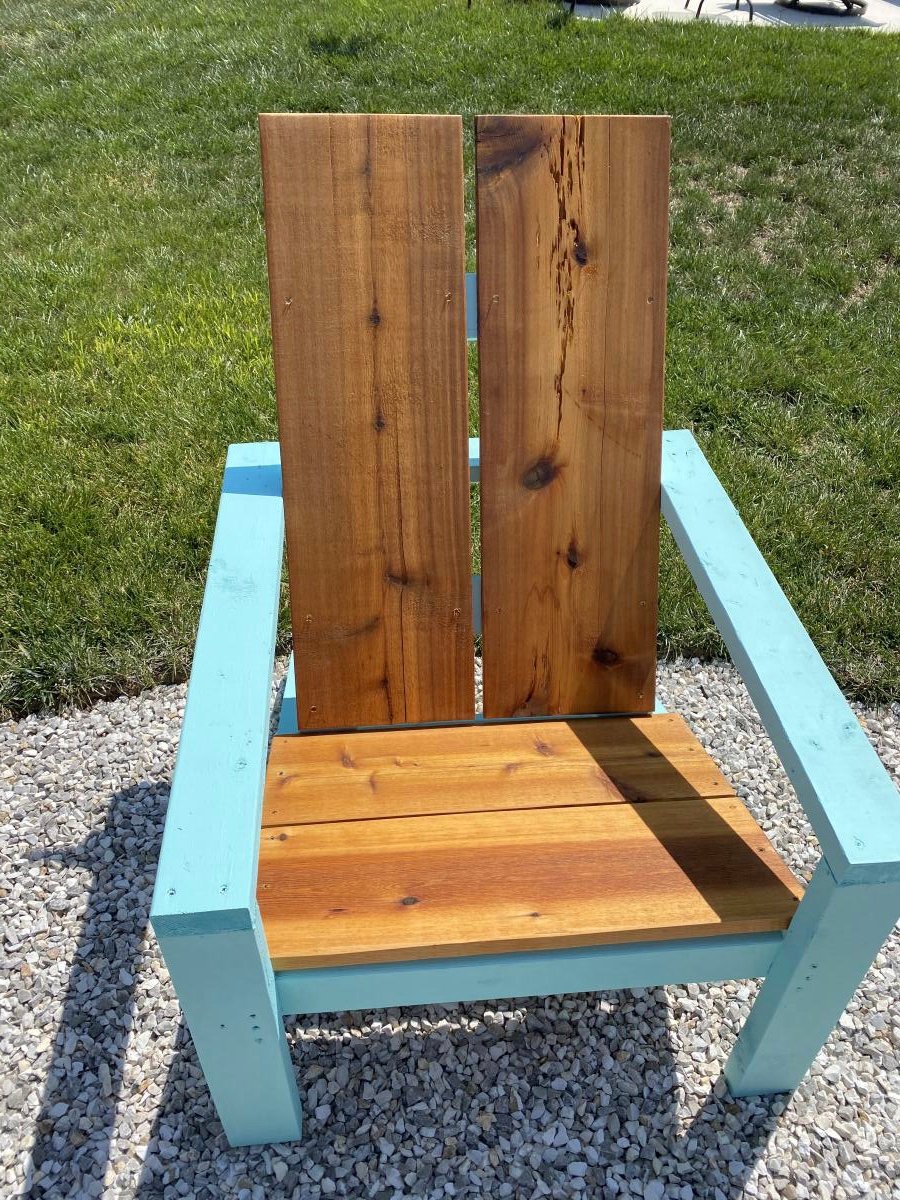
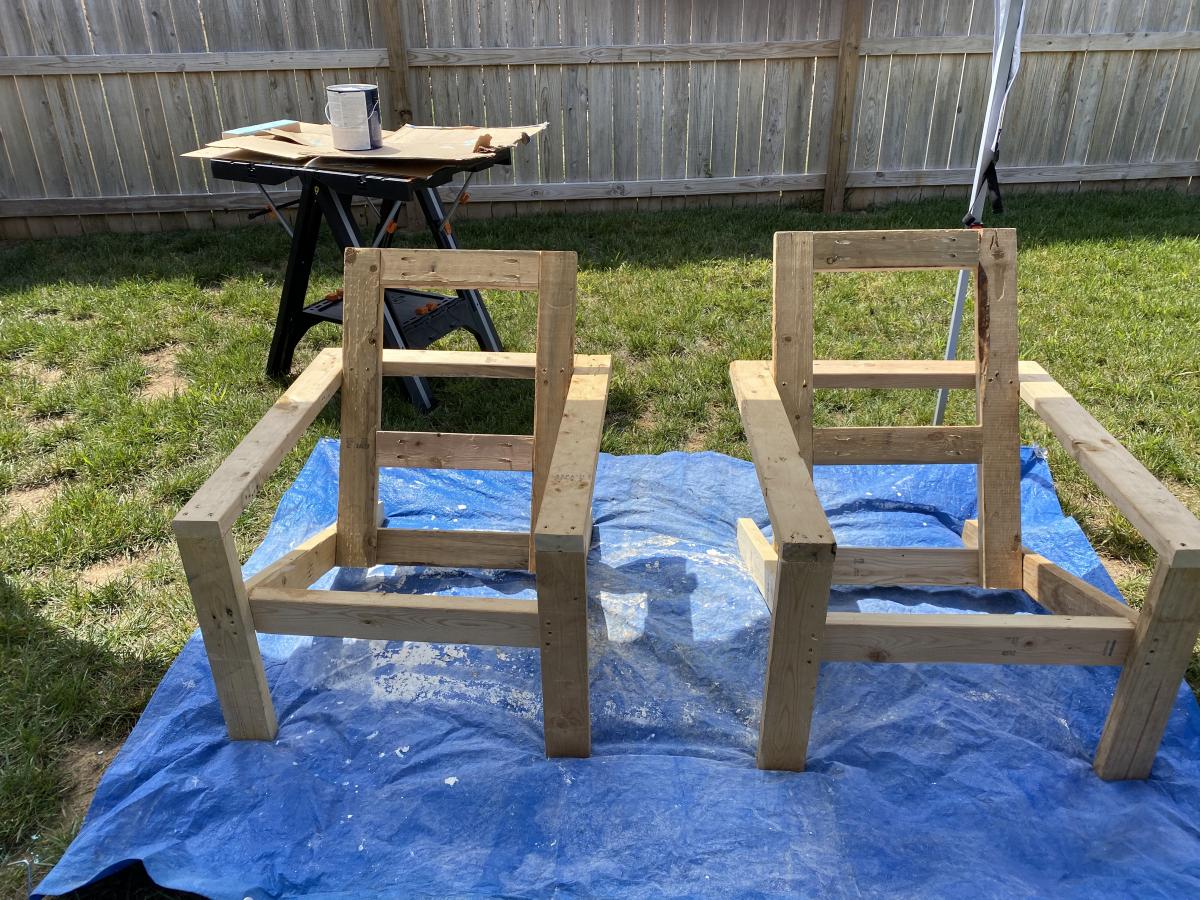
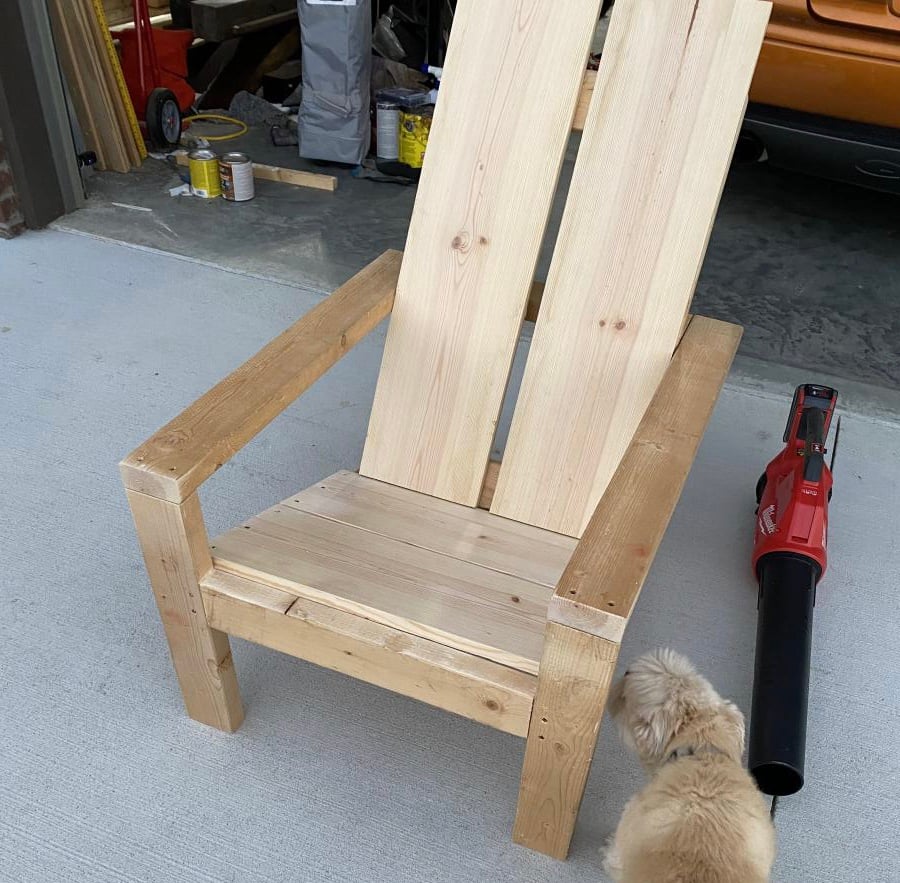
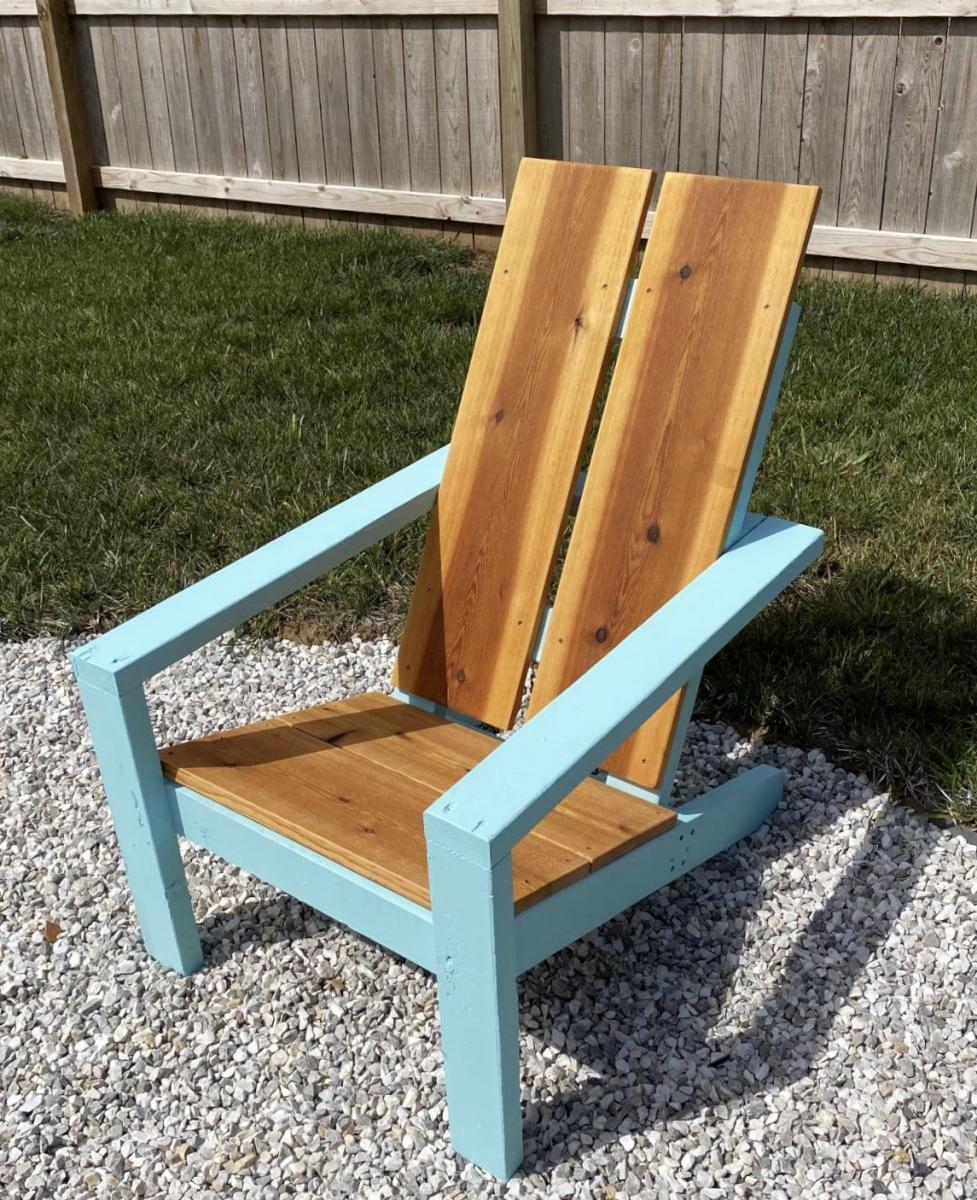
Modern Adirondack Chair, Super Sized
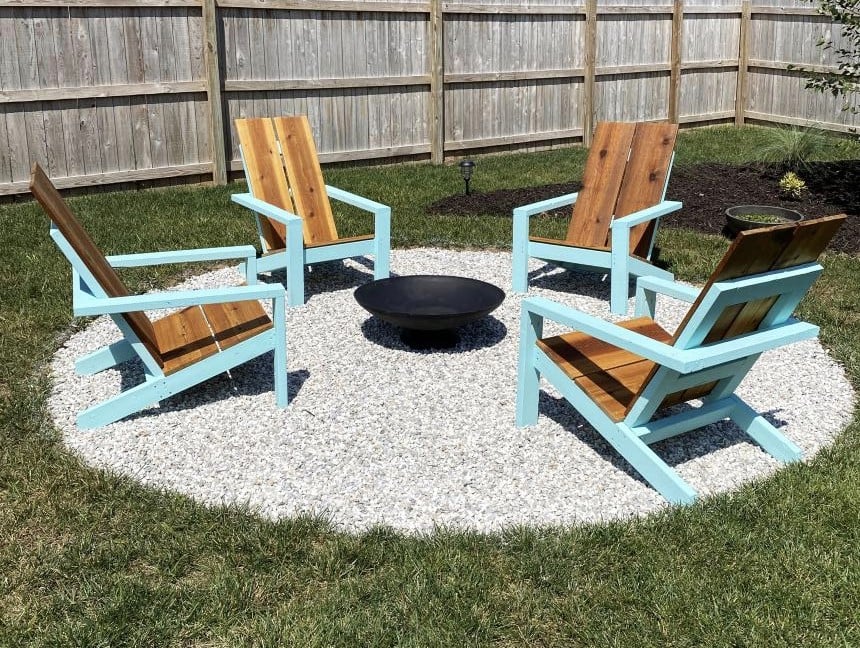
Am a big fan of Ana's work, and have used several of her plans in prior builds including the more traditional Adirondack chairs. Those stayed with my old house, and I wanted something different for my new house. Really liked her Modern Adirondack design with the floating arm rest. However, plans are like recipes to me--a guideline. I wanted the back boards to run up and down, and I am a bit more robust than the lovely and petite Ms. White, so they would need to be wider after I built the first one at 19 1/2" wide per plan. The next three I made 22" wide and that worked well without throwing off the geometry and angles of the other parts. Since I ran the backboards up and down, I needed some cross beams for stability and to give an attachment point for the middle of the boards. Cut some 2x4s at 15" wide, drilled pocket holes in both ends, and attached in between the back supports with the pockets facing up to be hidden by the back boards. All of the 2x4s were leftover cut-offs from the houses being built in my neighborhood. Since the frames were free, I splurged and went with cedar boards for the backs and bottoms. With the wider frames, I had to use 1x12s ripped down to 10 3/4" to get the right look (about a board's width in between). Needed some color, so I painted the frames Teal Seaglass from Menards. Cedar was stained with a natural deck stain from Sherwin Williams. I experimented with salt paint (mixing unsanded grout with the paint) to give a heavily textured and weathered finish but this was unecessary--the wood was distressed enough and I am a terrible painter. It also toned down the color so I skipped that step and just went with 2 coats of plain paint. It looks like outdoor furniture should up close. As always, am pleased with Ana's plans. Thank you for doing all the hard work!
Built from Plan(s)
Estimated Cost
about $200 for all 4 chairs due to cedar and paint
Estimated Time Investment
Weekend Project (10-20 Hours)
Finish Used
Paint - Pittsburgh matte exterior with Dutch Boy coloring Teal Seaglass
Stain - Sherwin Williams Superdeck stain, Natural finish
Stain - Sherwin Williams Superdeck stain, Natural finish
Recommended Skill Level
Starter Project
Comments
Fri, 08/21/2020 - 16:59
I absolutely love how the…
I absolutely love how the back was done!! Thank you so much for sharing!
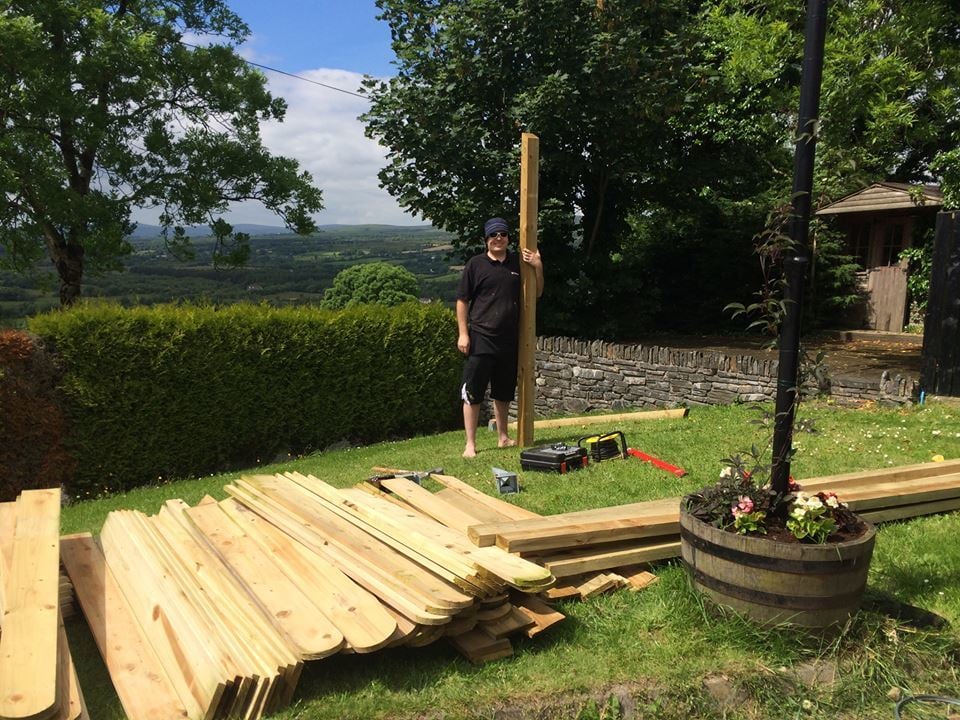
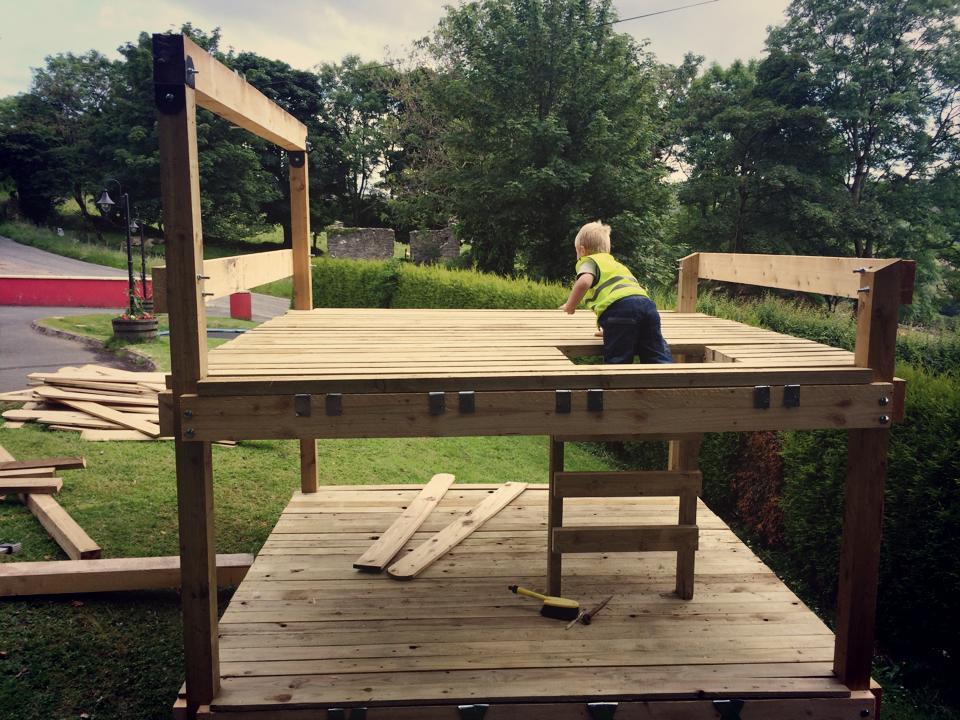
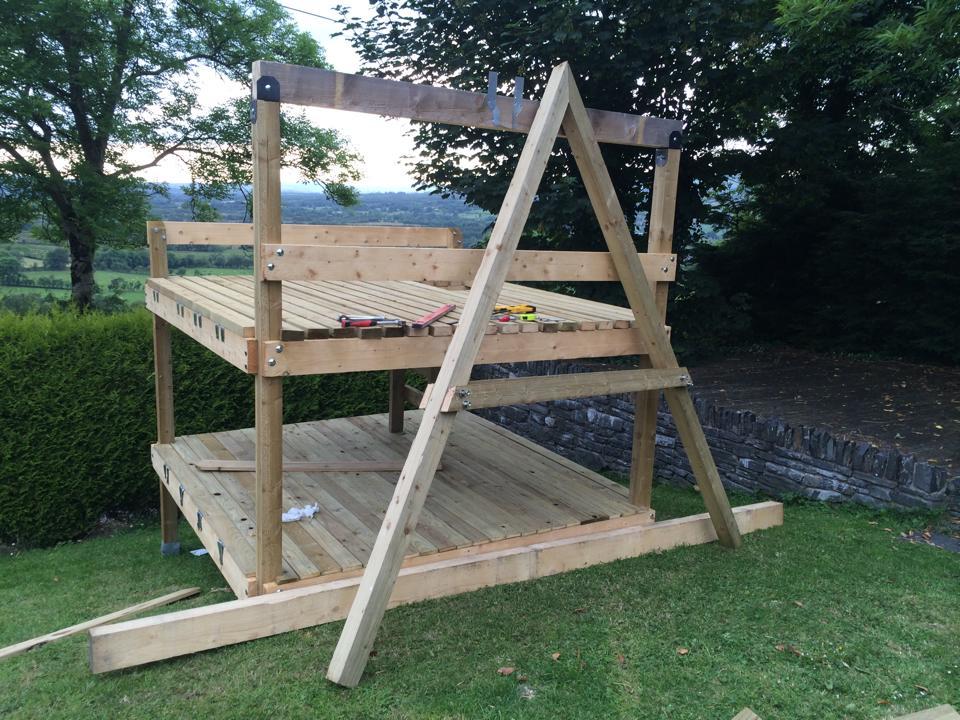
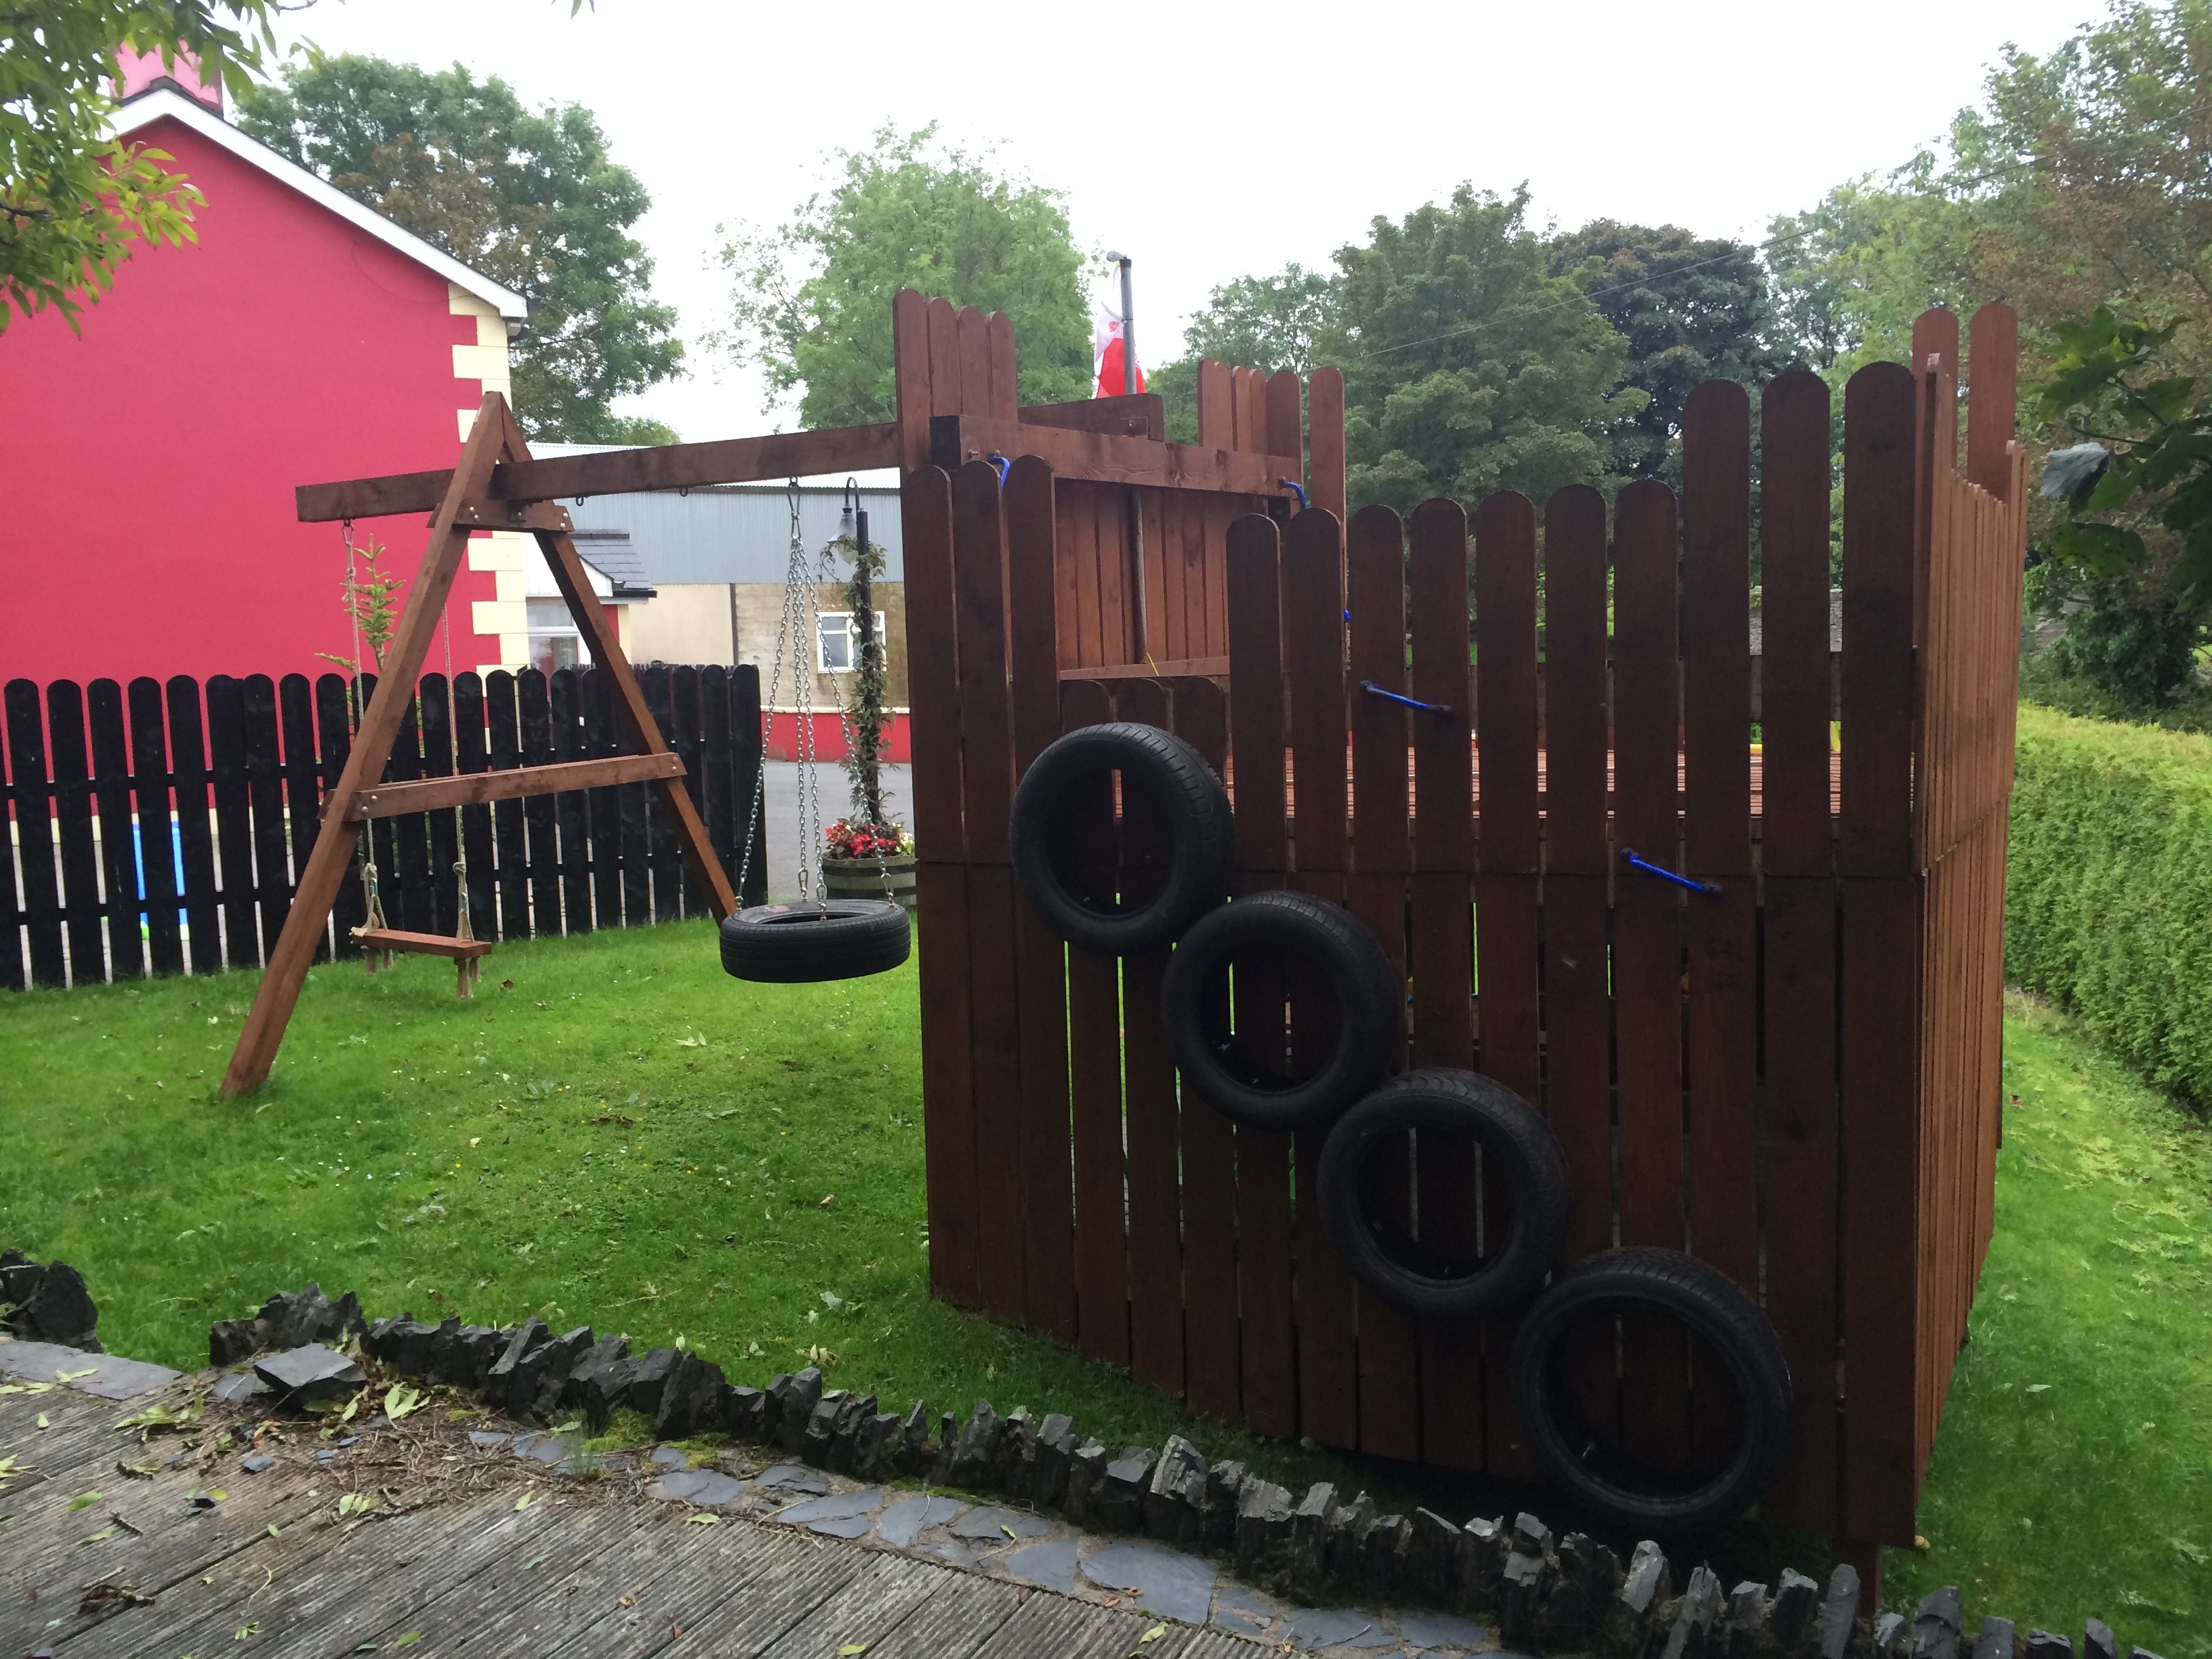
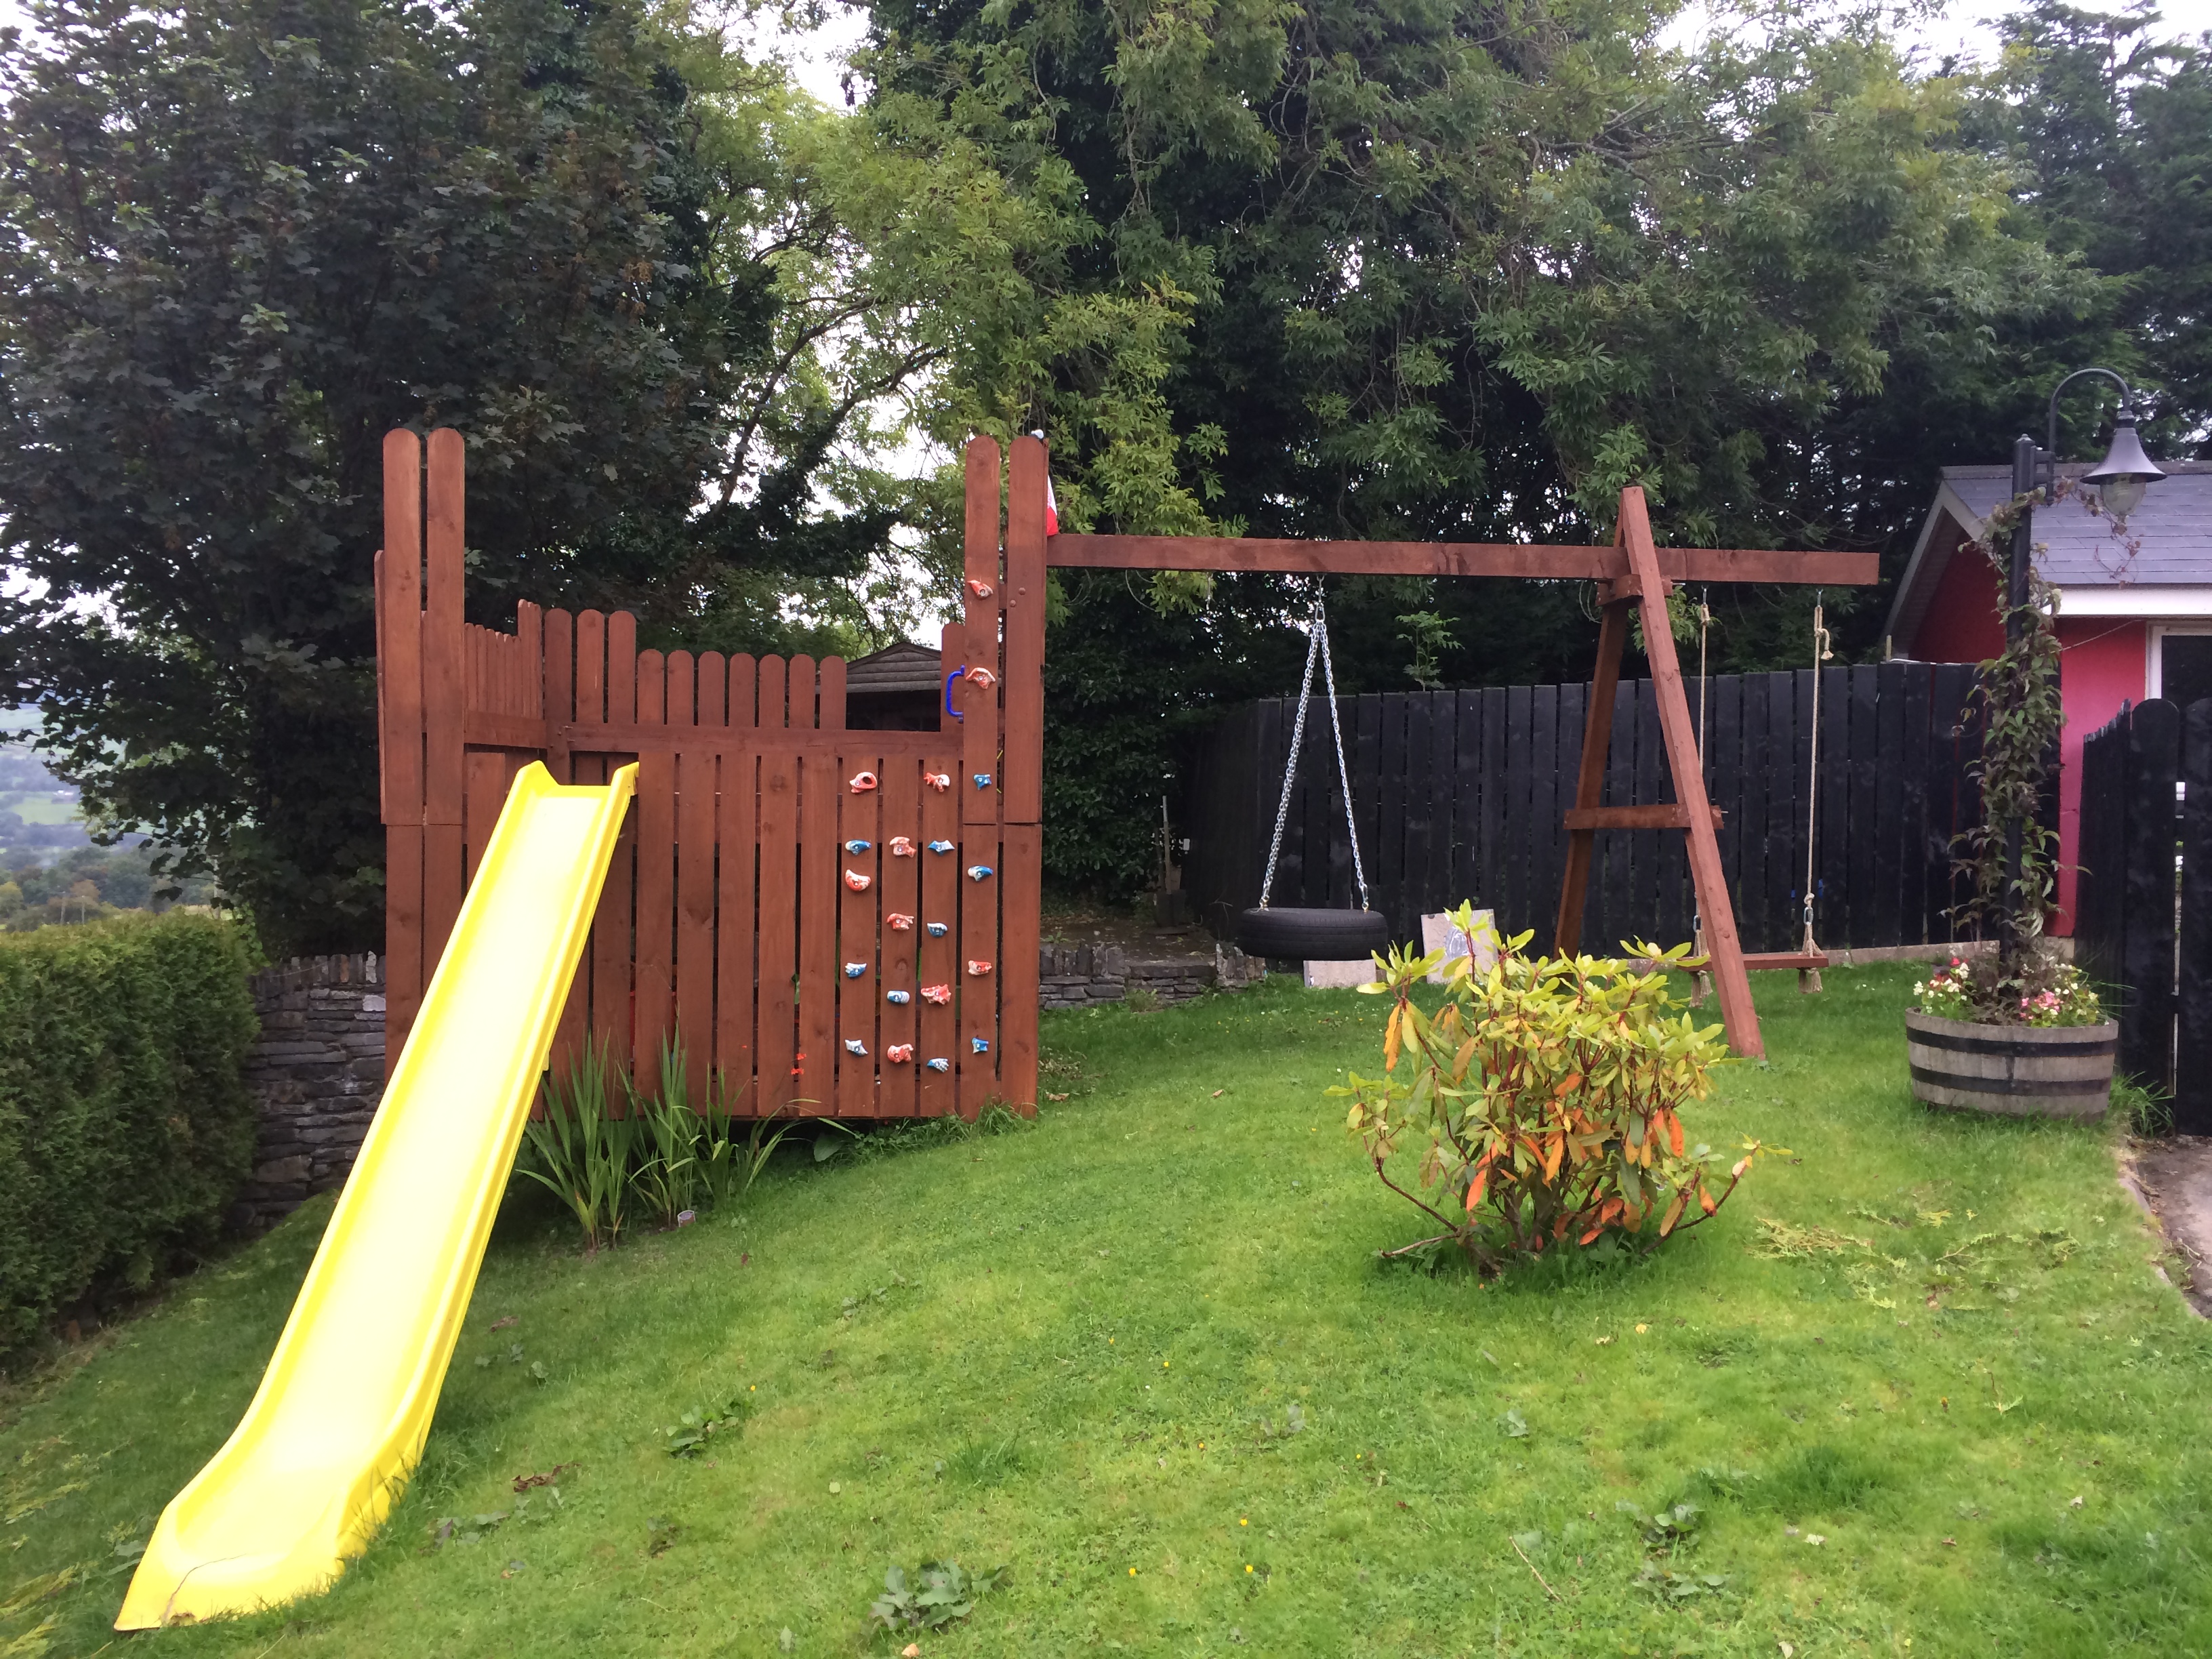
Play Deck and Swing
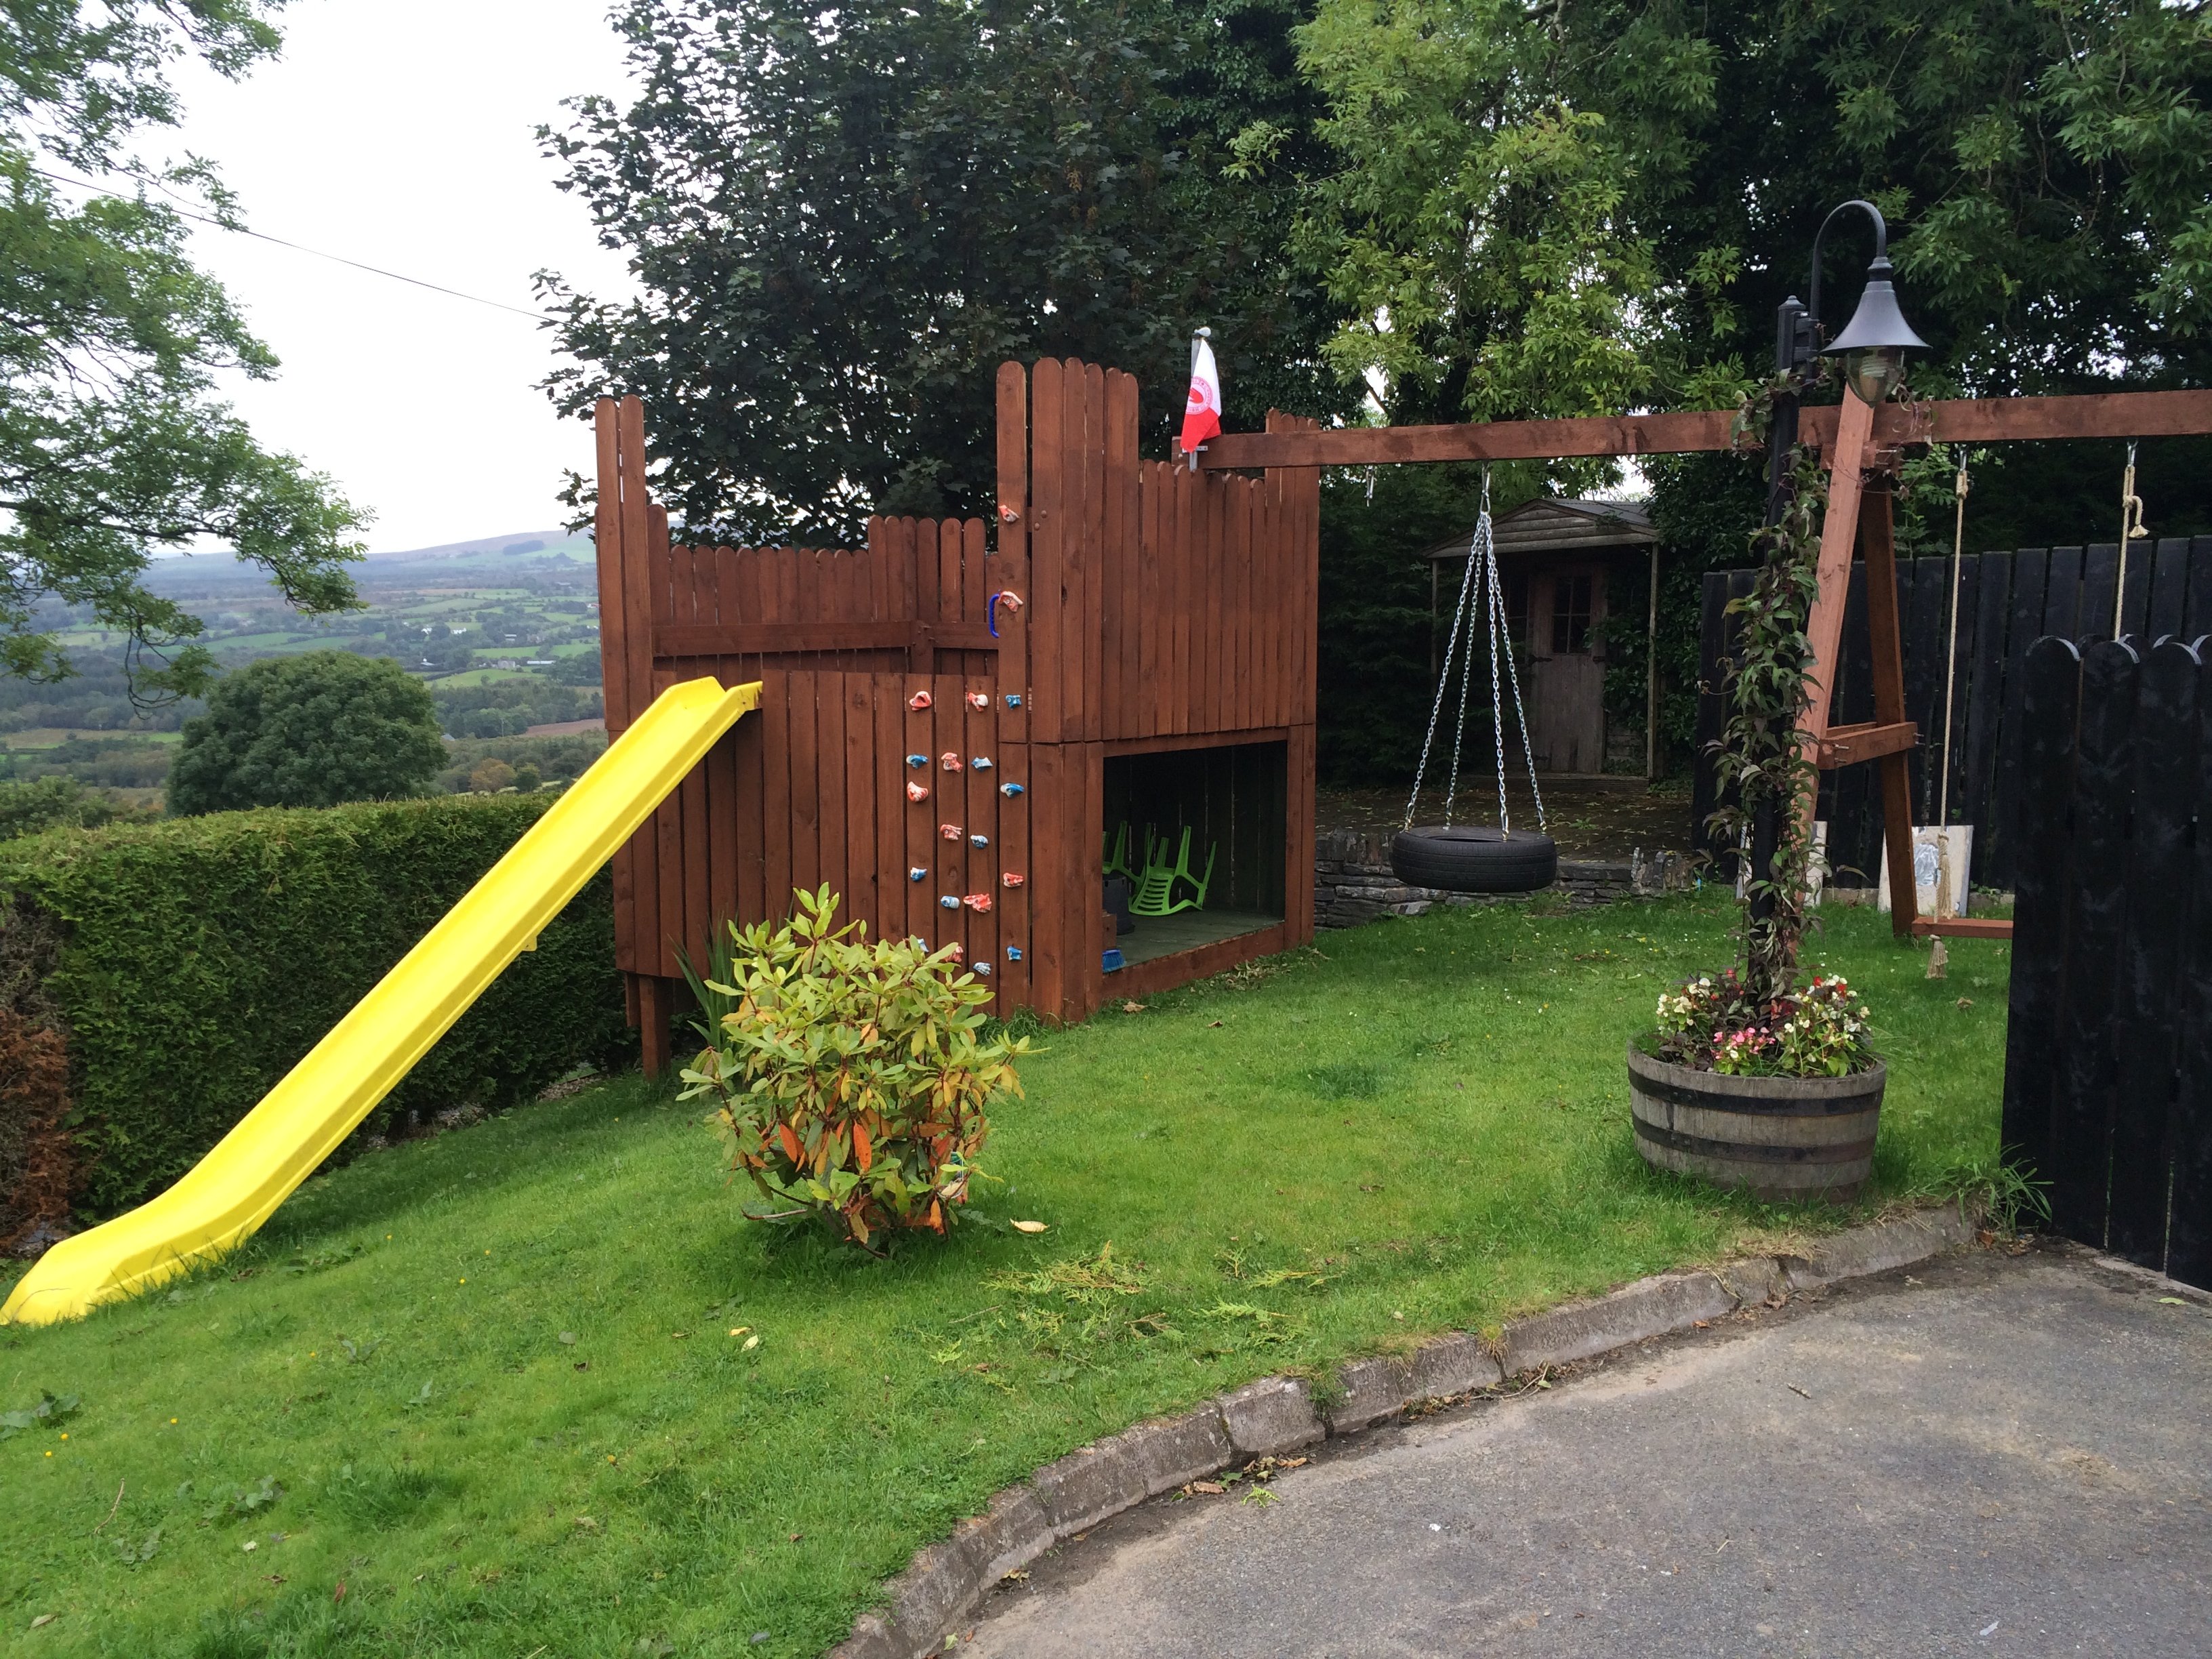
Play Deck and Swing
Built from Plan(s)
Estimated Cost
£700
Estimated Time Investment
Week Long Project (20 Hours or More)
Finish Used
Ronseal Country Oak Fence Stain
Recommended Skill Level
Intermediate
Comments
Wed, 09/03/2014 - 07:35
You have a BEAUTIFUL view
You have a BEAUTIFUL view from your yard! Just curious, where do you live? I assumed somewhere in Europe due to the currency. The play area looks fantastic. What lucky kiddos!
Wed, 09/03/2014 - 08:21
Thanks. Lovely part of the
Thanks. Lovely part of the country outside Omagh, Northern Ireland

Wall Frame from page 70 of The Handbuilt Home
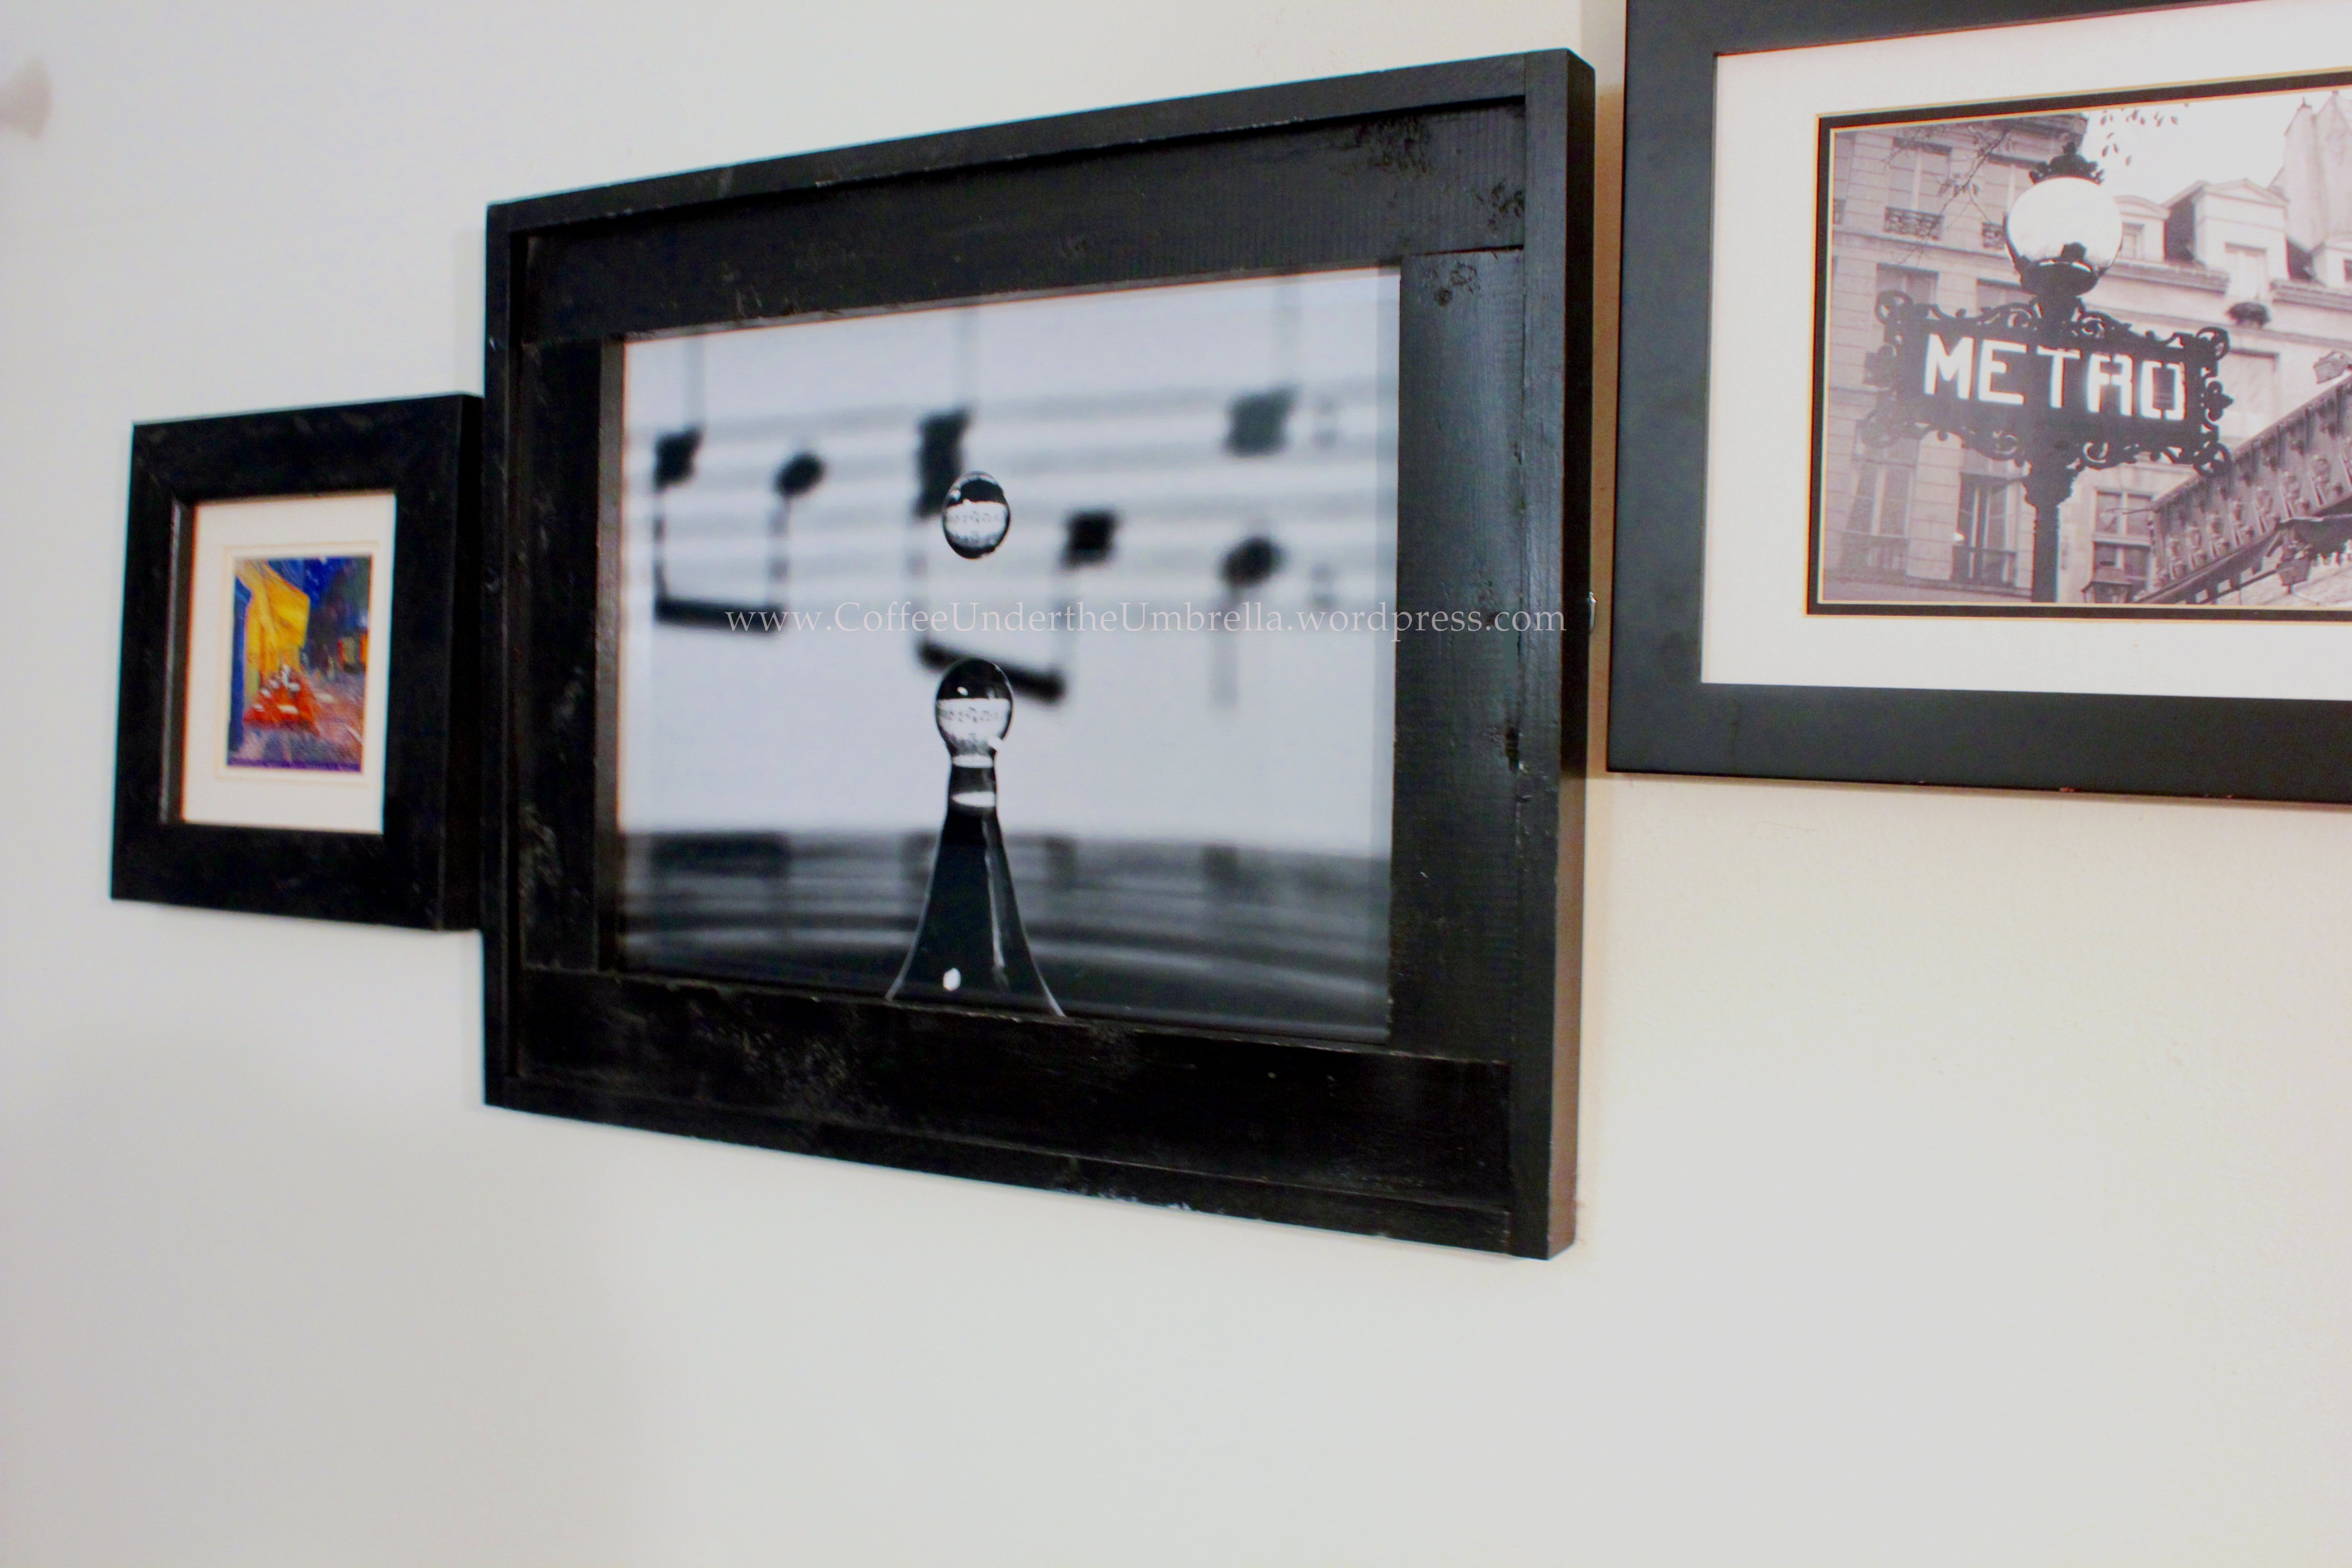
So I bought this print, sized 16" x 20", from an independent photographer. My husband said I could get it only if I built the frame, so I was on the hook.
I used pine boards and glued and clamped the outside part since I don't have a nail gun. I sanded the really rought parts, but probably could've sanded more. Finished with Valspar's black spray paint and used mirror clips and 1" wood screws. Blue had glass pieces in 16" x 20" for less than $6. Hung with D rings and picture hanging wire.
Time estimate includes time for paint to dry and rigging up all the hanging hardware.
Estimated Cost
$15-$20
Estimated Time Investment
Weekend Project (10-20 Hours)
Finish Used
Valspar spray paint in black semi-gloss
Recommended Skill Level
Beginner
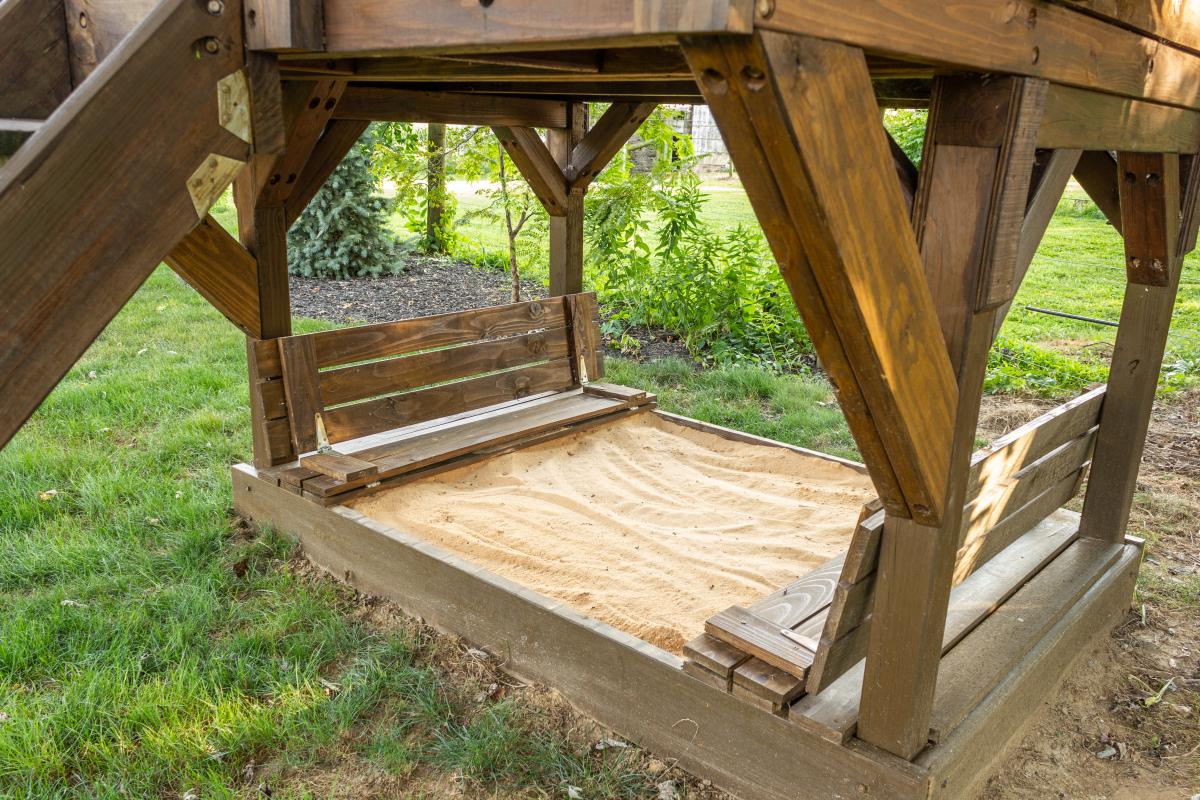
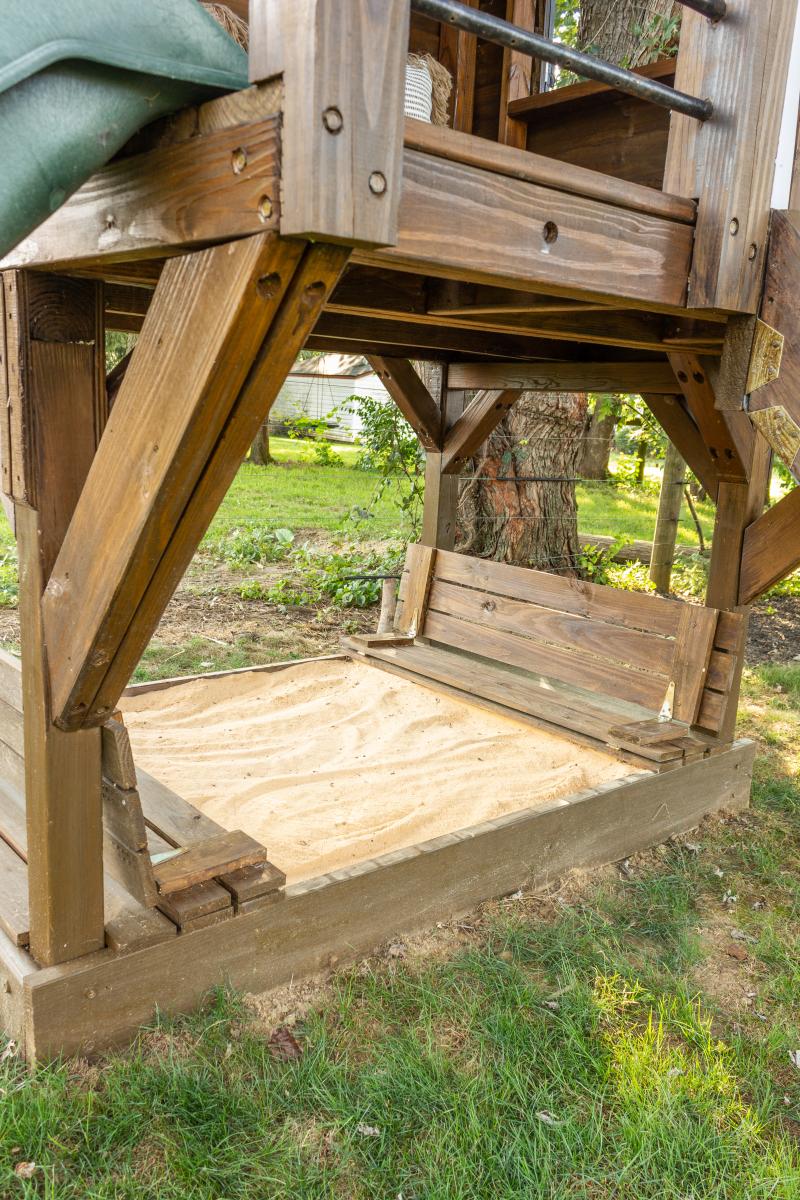
Sandbox with built-in seats in our playhouse
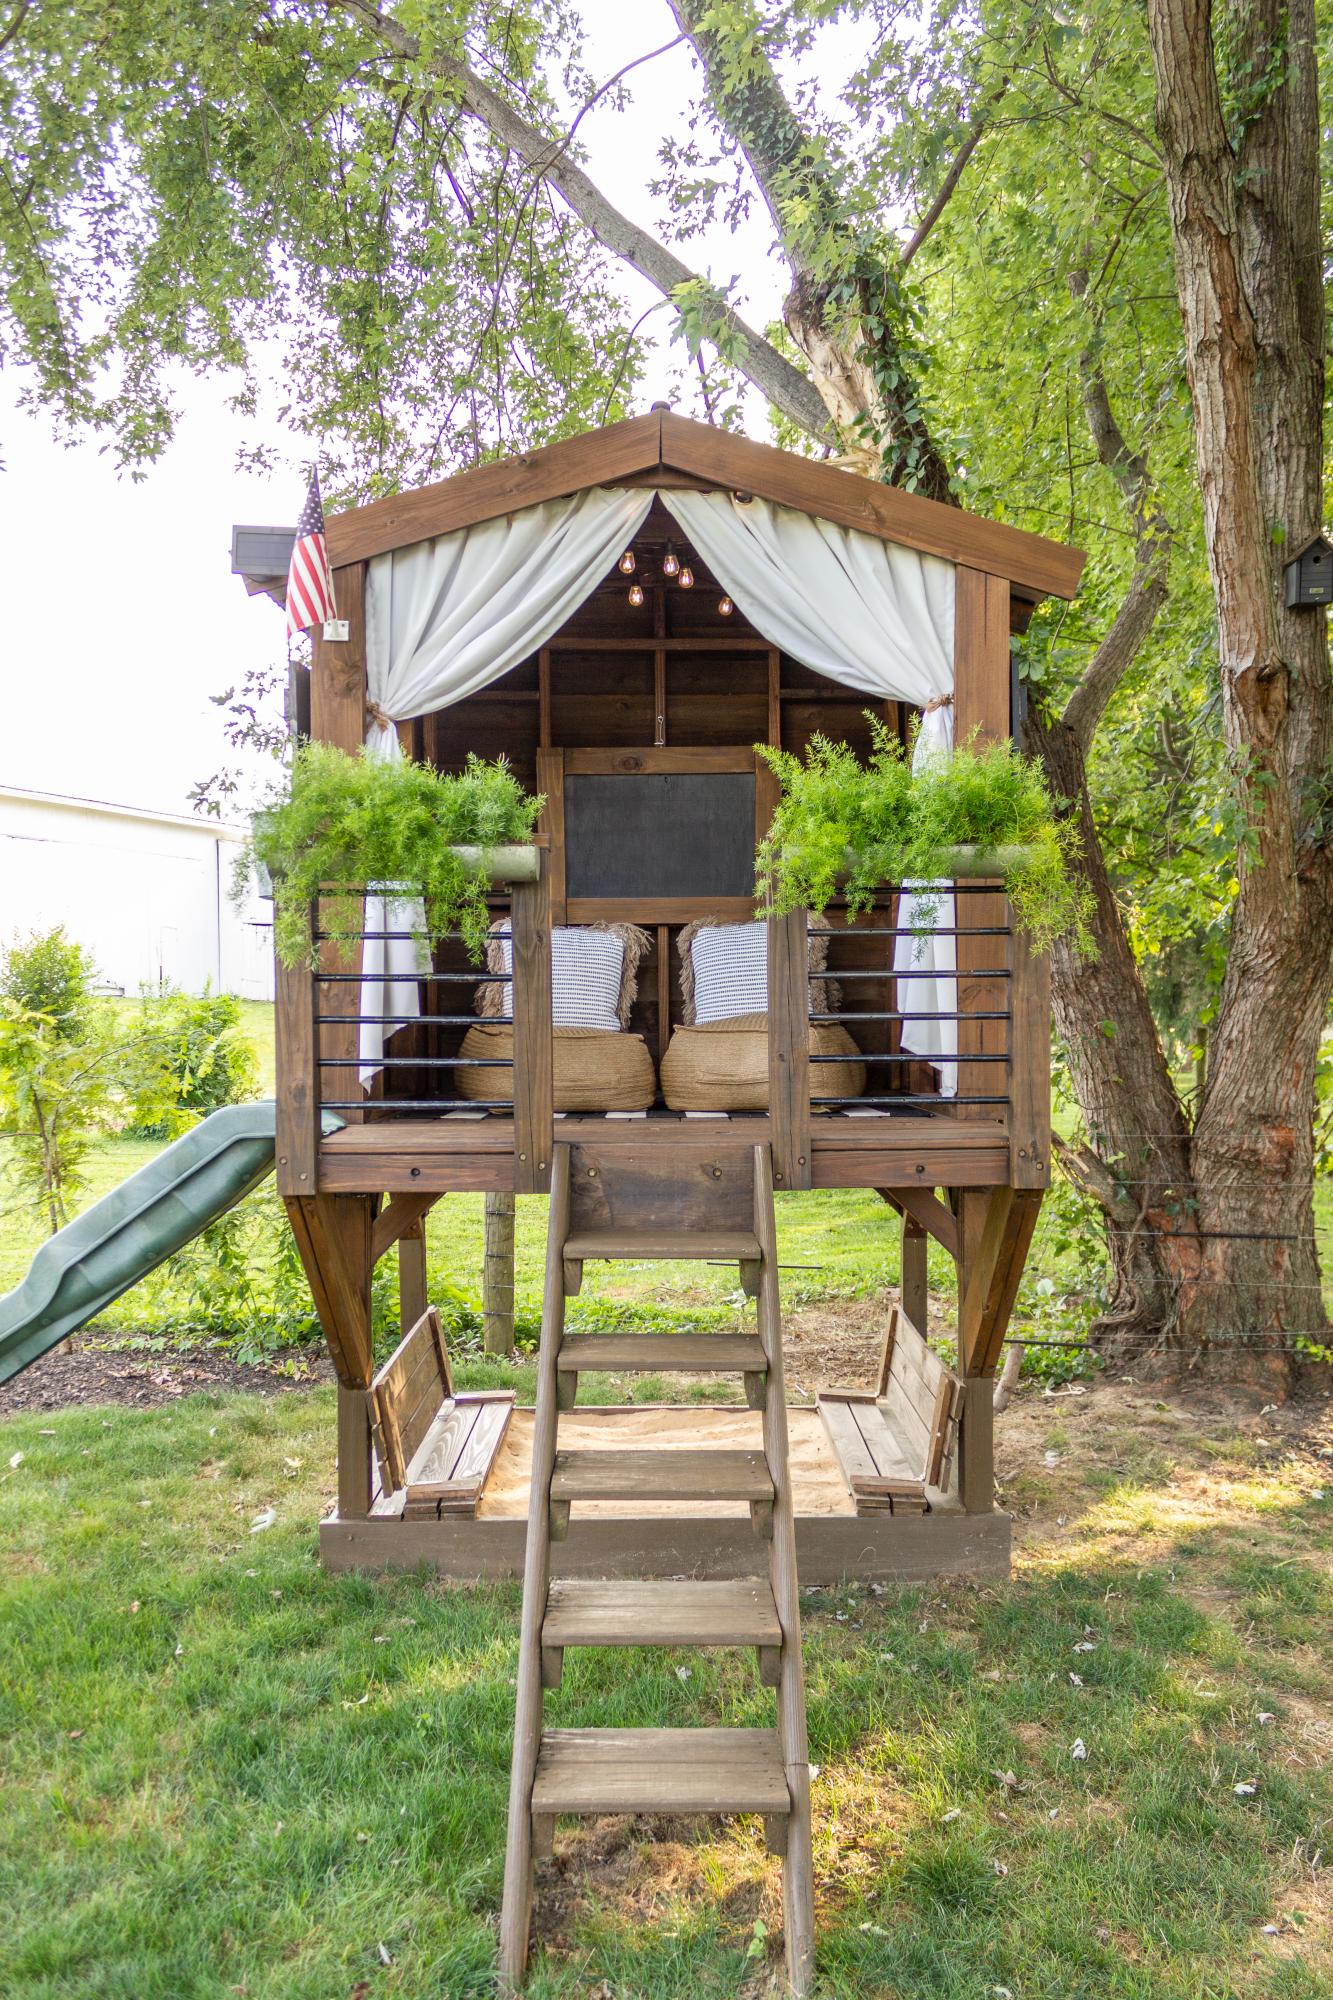
The base of our playhouse felt like the perfect spot to use the sandbox plan with built-in seats. The bench seats actually fold flat to create a lid for the sandbox when it’s not in use. I followed Ana’s plans exactly and used the list of materials she provided. The only modification I made was eliminating the back supports. It was not necessary for me to add the back supports since we have the playhouse posts to support the back of the bench.
Built from Plan(s)
Estimated Cost
$60
Estimated Time Investment
Afternoon Project (3-6 Hours)
Finish Used
Stain
Recommended Skill Level
Beginner
Dollhouse
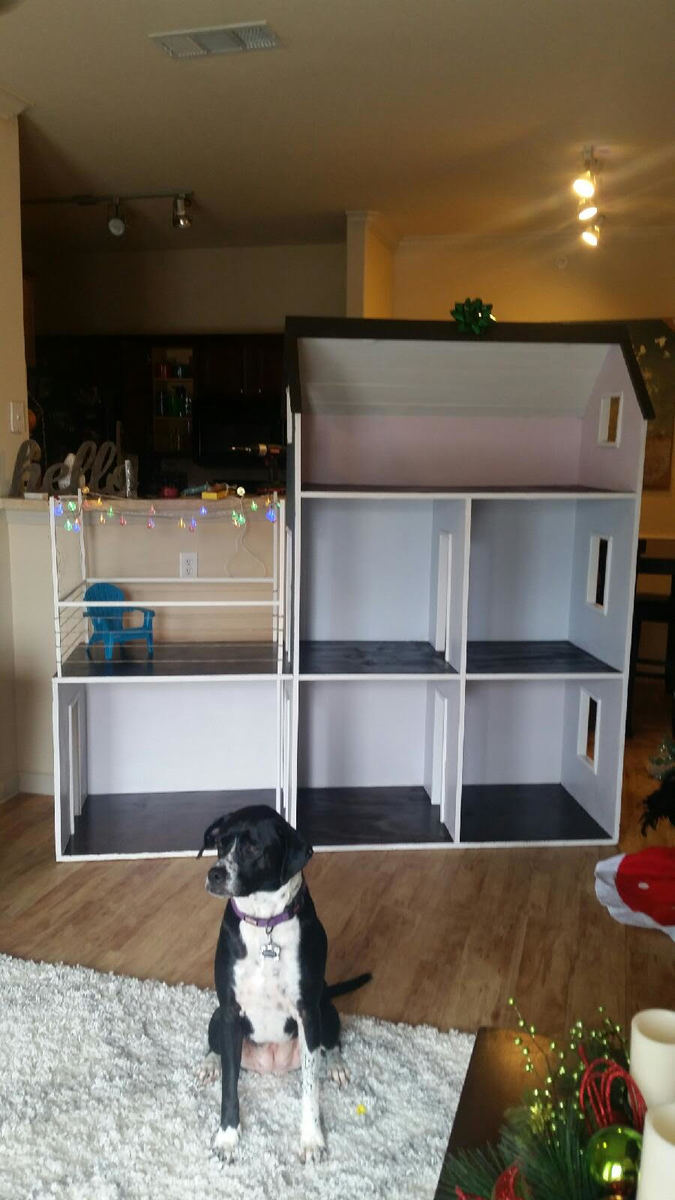
Thank you for the plans! It came out great.
Built from Plan(s)
Estimated Time Investment
Weekend Project (10-20 Hours)
Recommended Skill Level
Intermediate