Outdoor Wood Furniture
I made these with your plans first time I ever made anything. Your plans are amazing.
Janet Power
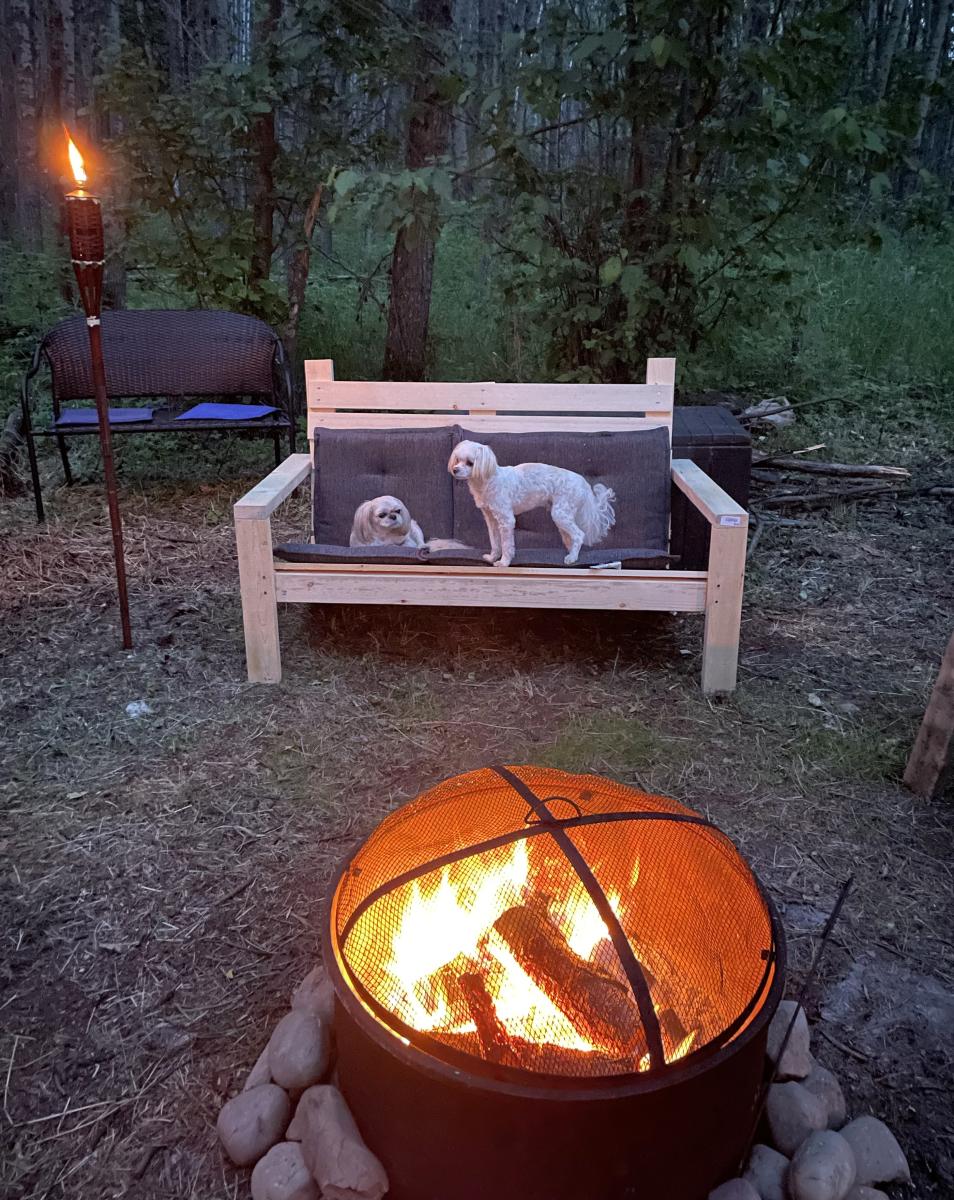
I made these with your plans first time I ever made anything. Your plans are amazing.
Janet Power
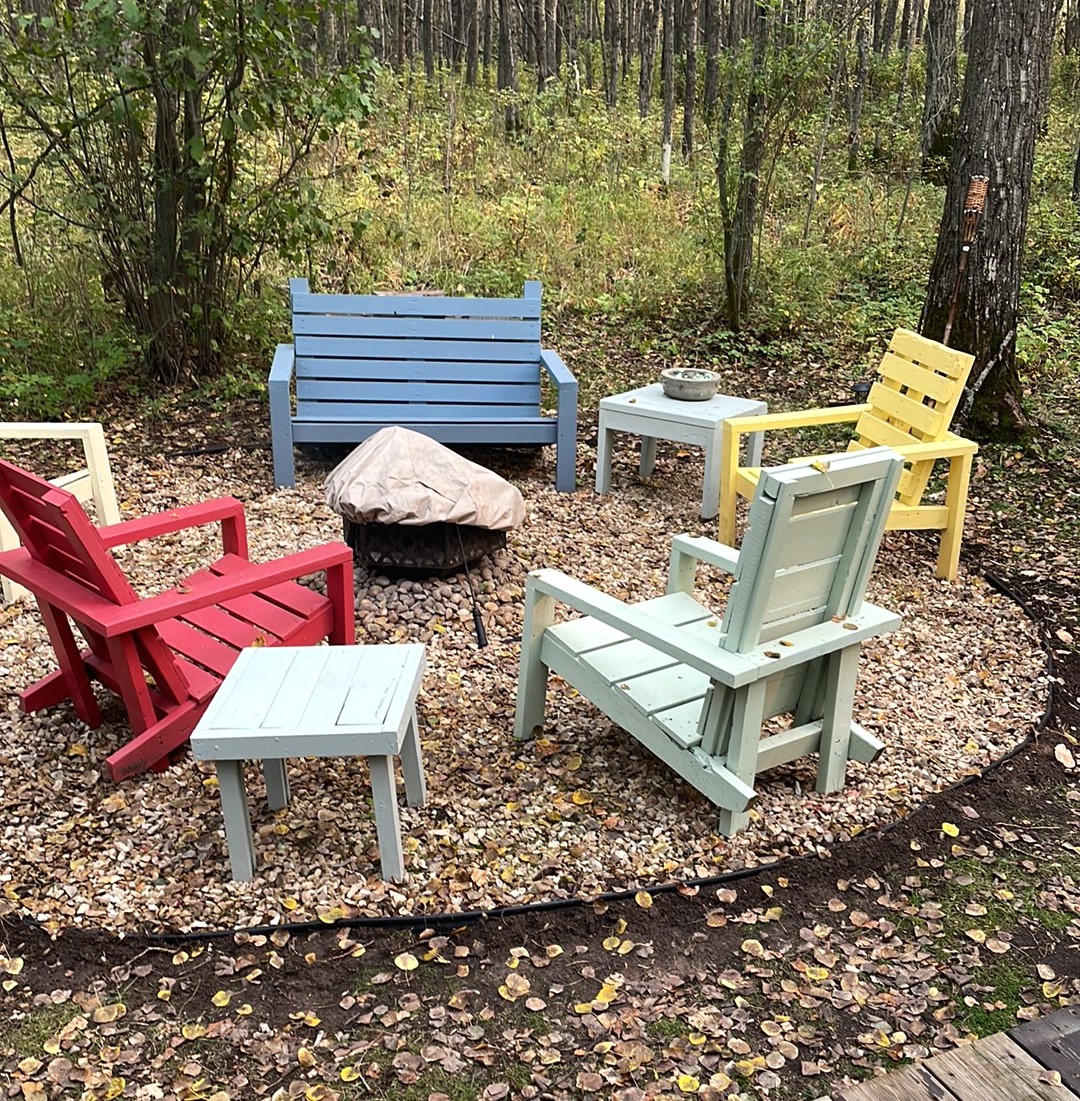
I was so excited to find the plans for these awesome chairs, I’ve built 7 this season already—the modification happened as an accident, but I loved the result !

Thu, 03/04/2021 - 10:59
This is absolutely gorgeous! I love the modification!
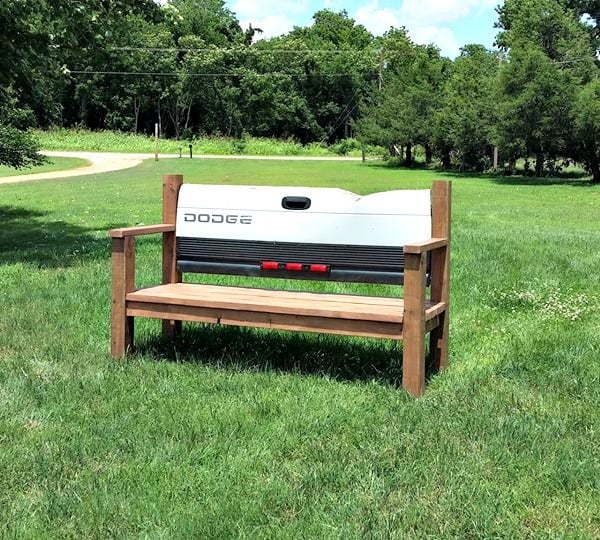
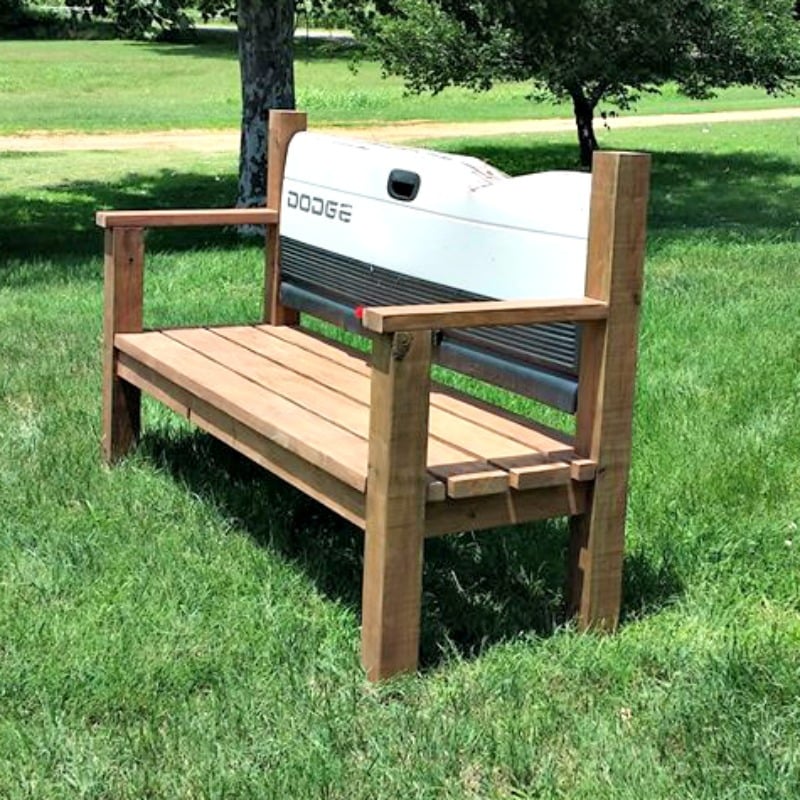
I want to give a big THANK YOU!! to Ana. I found your website a few years ago when I wanted to move my toddler to a big girl bed. Since then I have built several things but this is the first that I have shared on the site. Long story short this is a bench that I made for my father in law for Father's Day. It was a pretty simple build that I believe came together pretty well. Next, a tailgate bench for my own dad for Father's Day. Luckily he doesn't mind that it will be late.

Queen headboard. Natural finish.
Jeanne
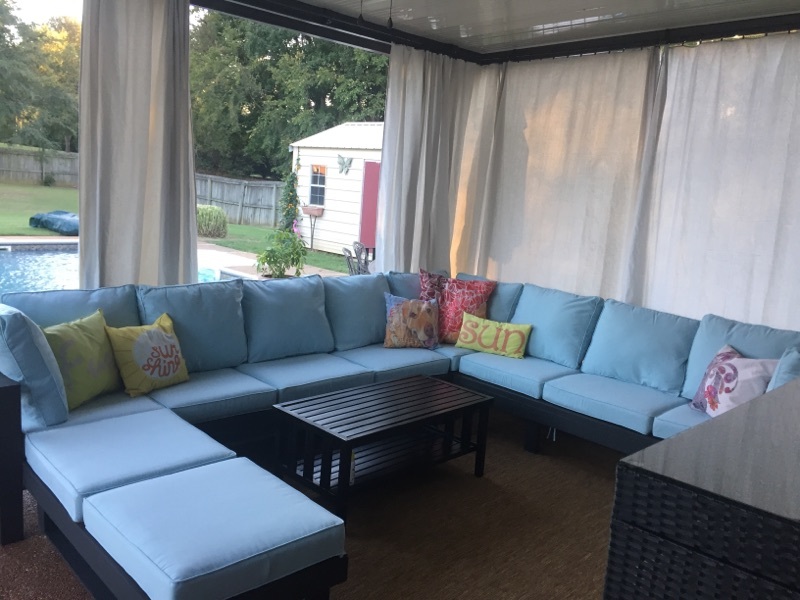
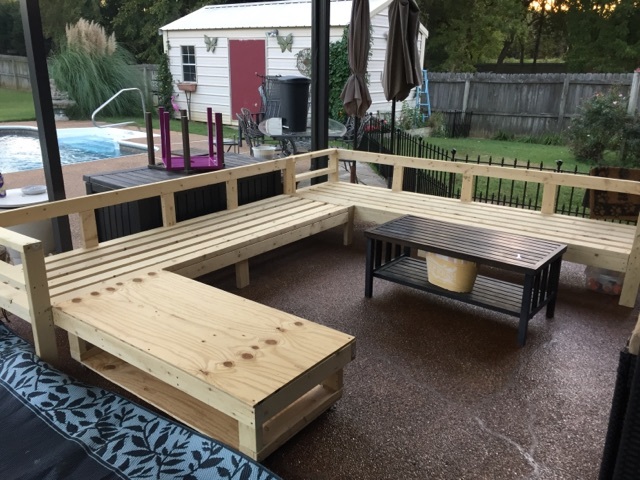
Thank you Ana! the directions were right up my alley! We have never built anything and now we cant wait to build our next piece! we used your insturctions and made minor modications to accomodate our cushions. We got brave and designed our own ottoman and put it on casters :-) We also added a few back support and legs.
We used one coat of deck over paint
Cushions were on sale at ballard http://www.ballarddesigns.com/ballard-basic-seat-and-back-cushion-set-w…
Quality of cushions is amazing! they were the most expensive part. We spent $600.00 on cushions.
Wood, putty, paint and screws about 350.
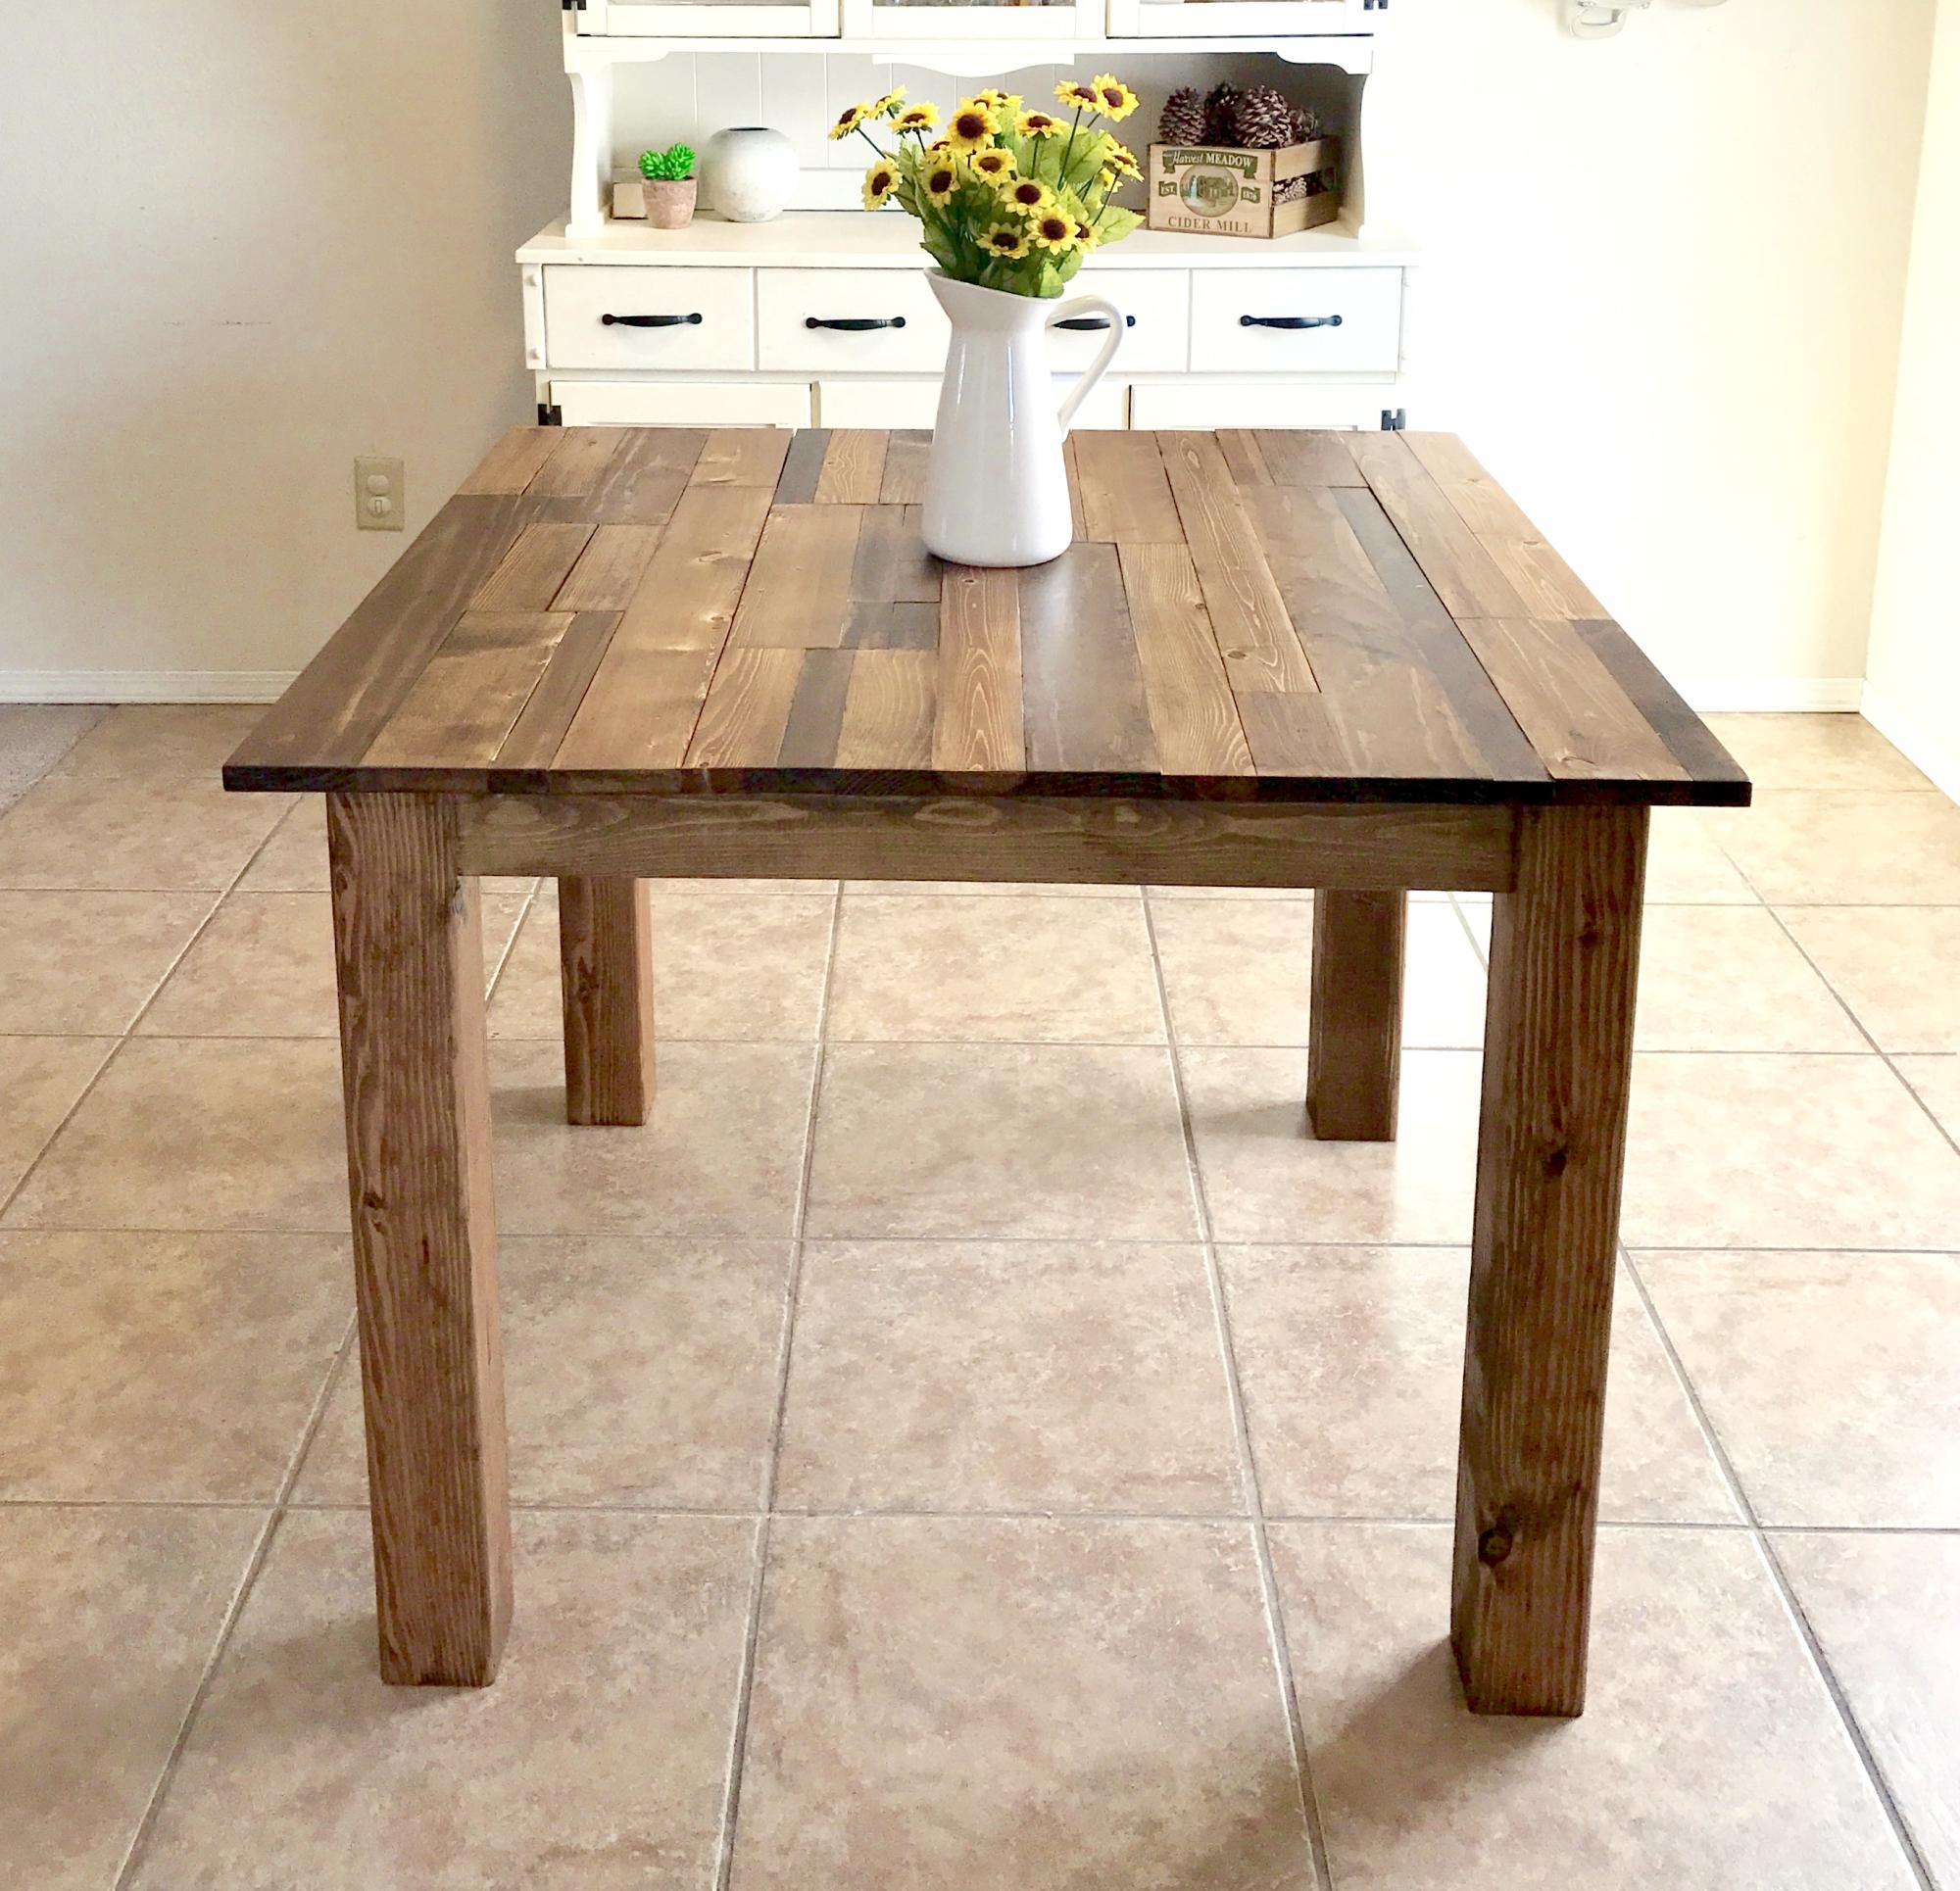
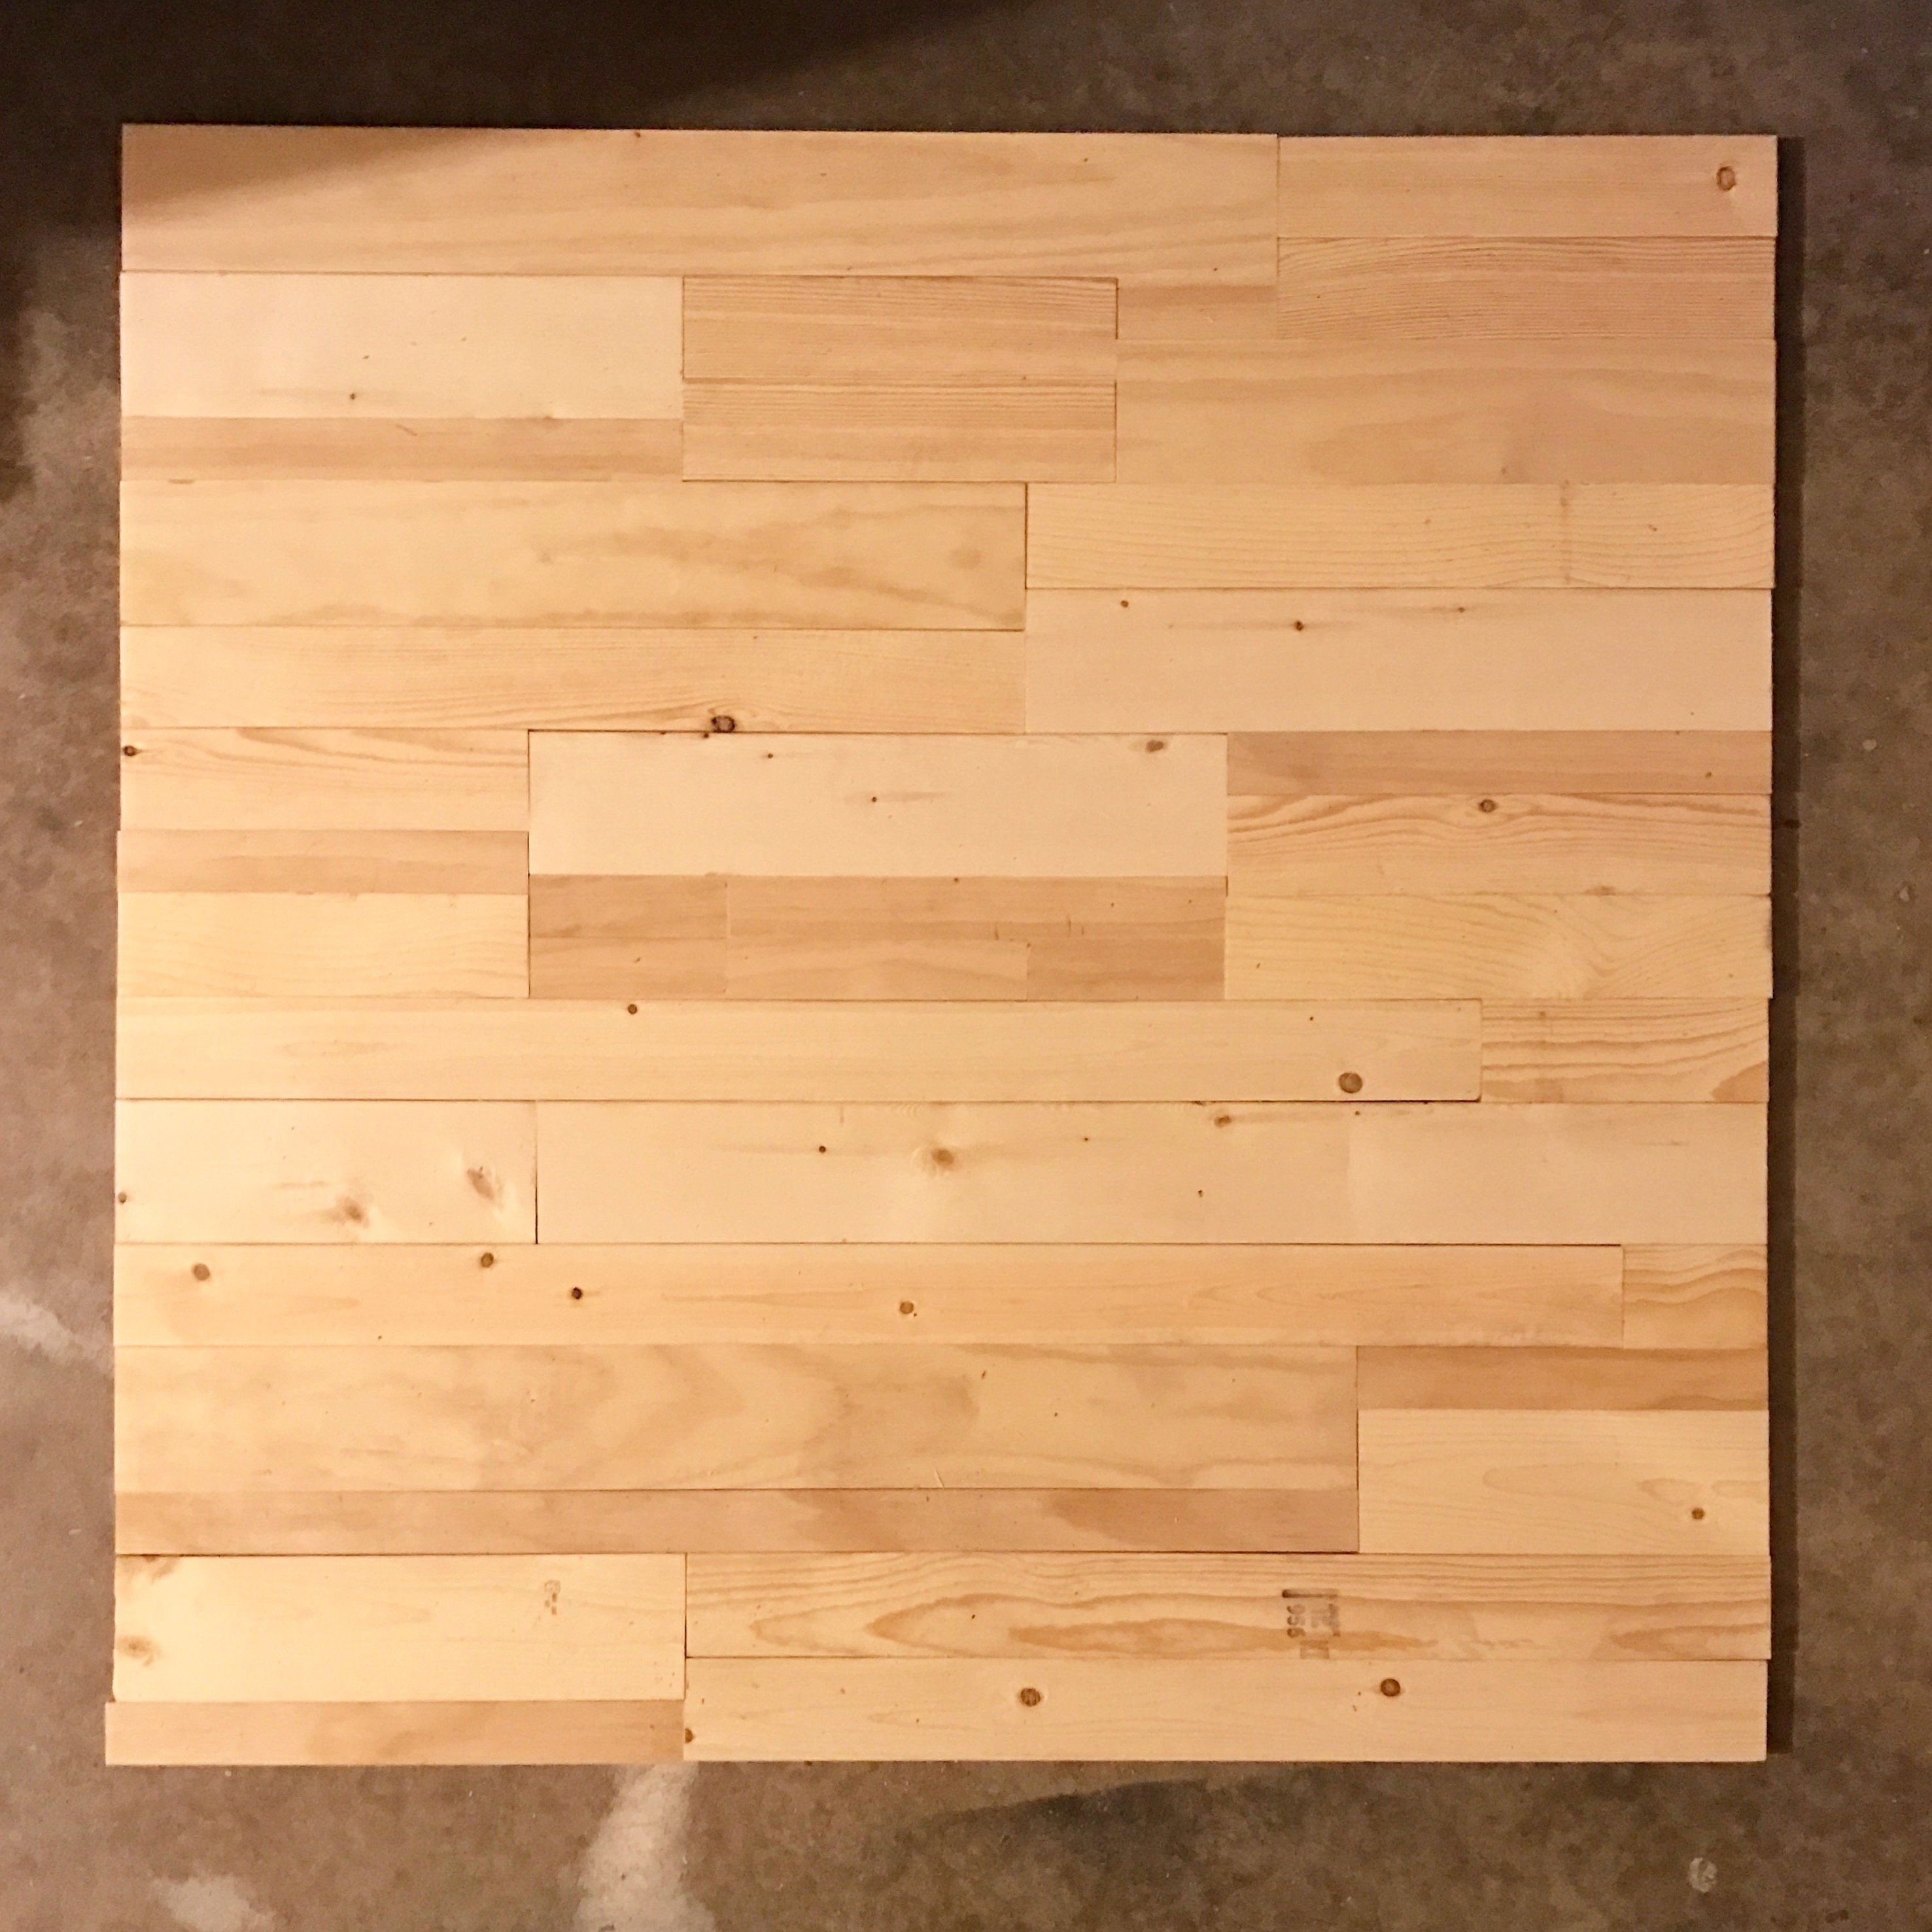
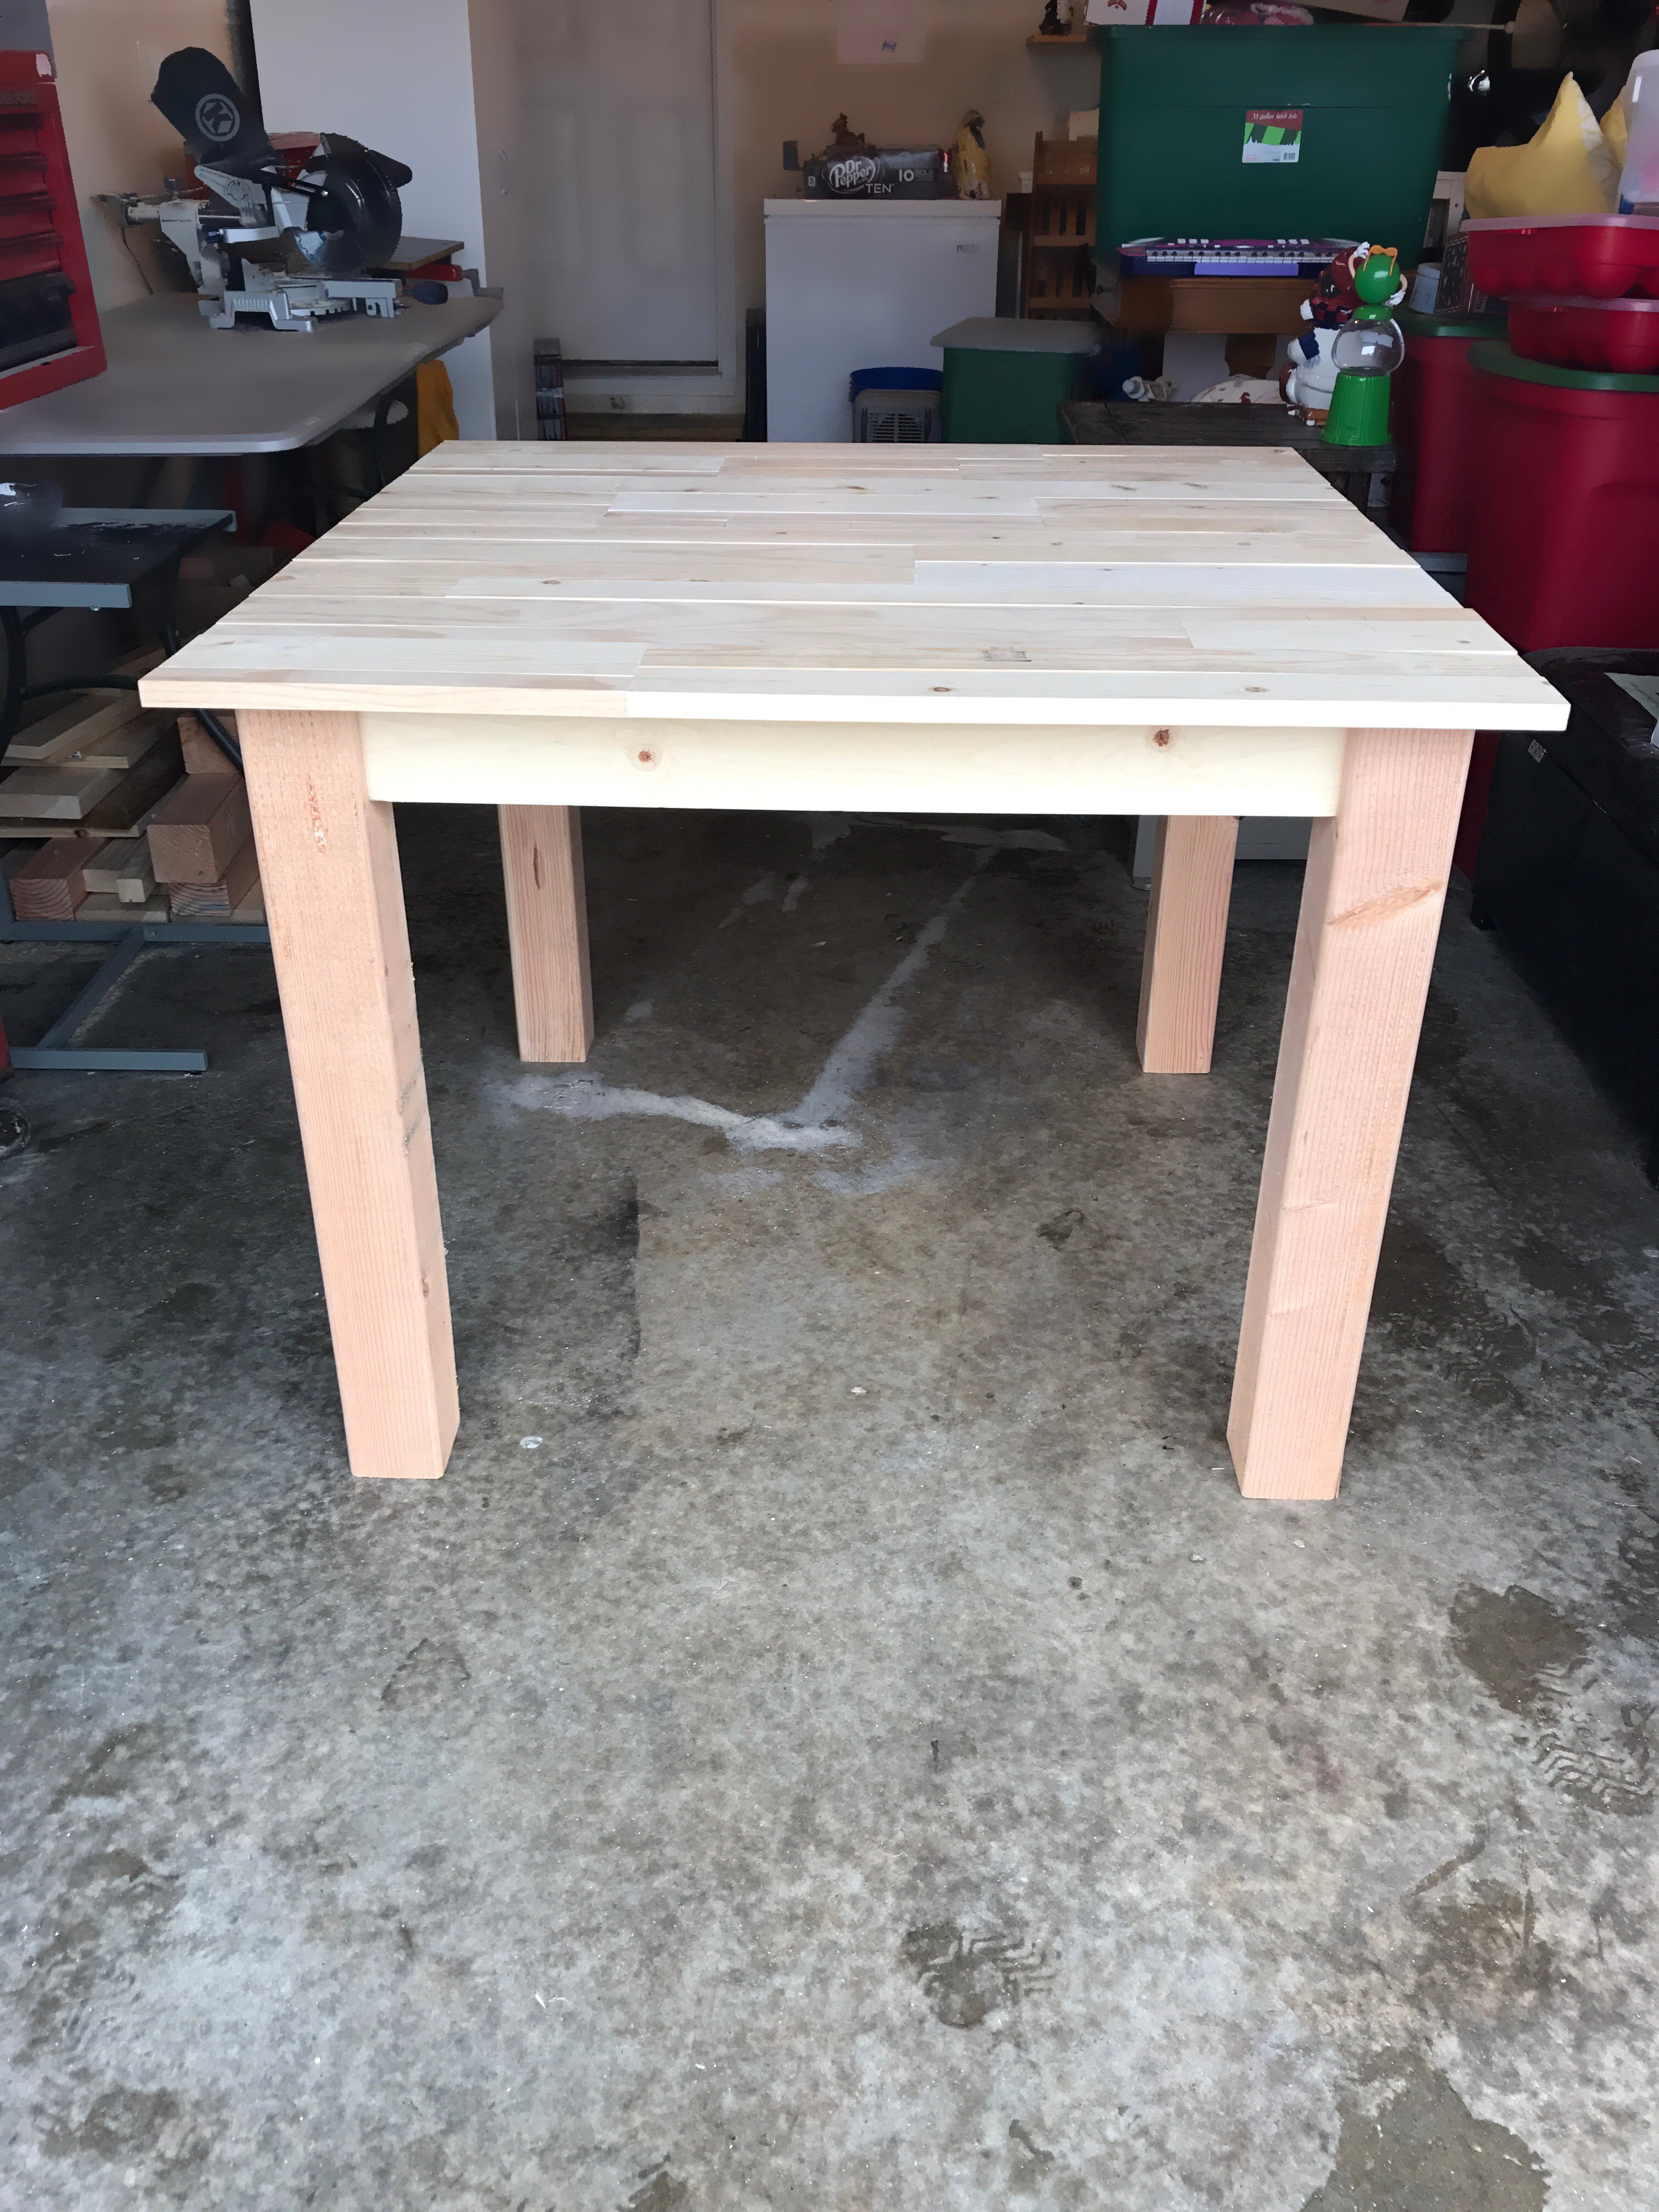
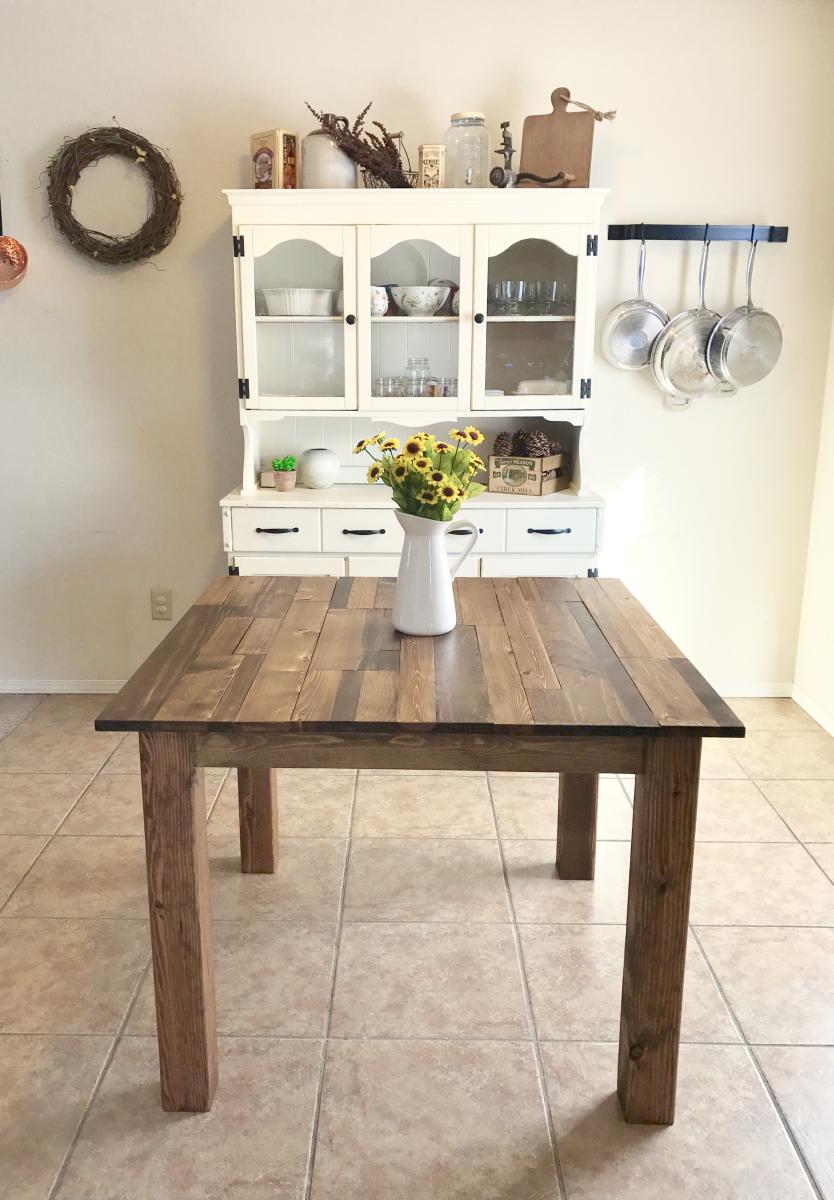
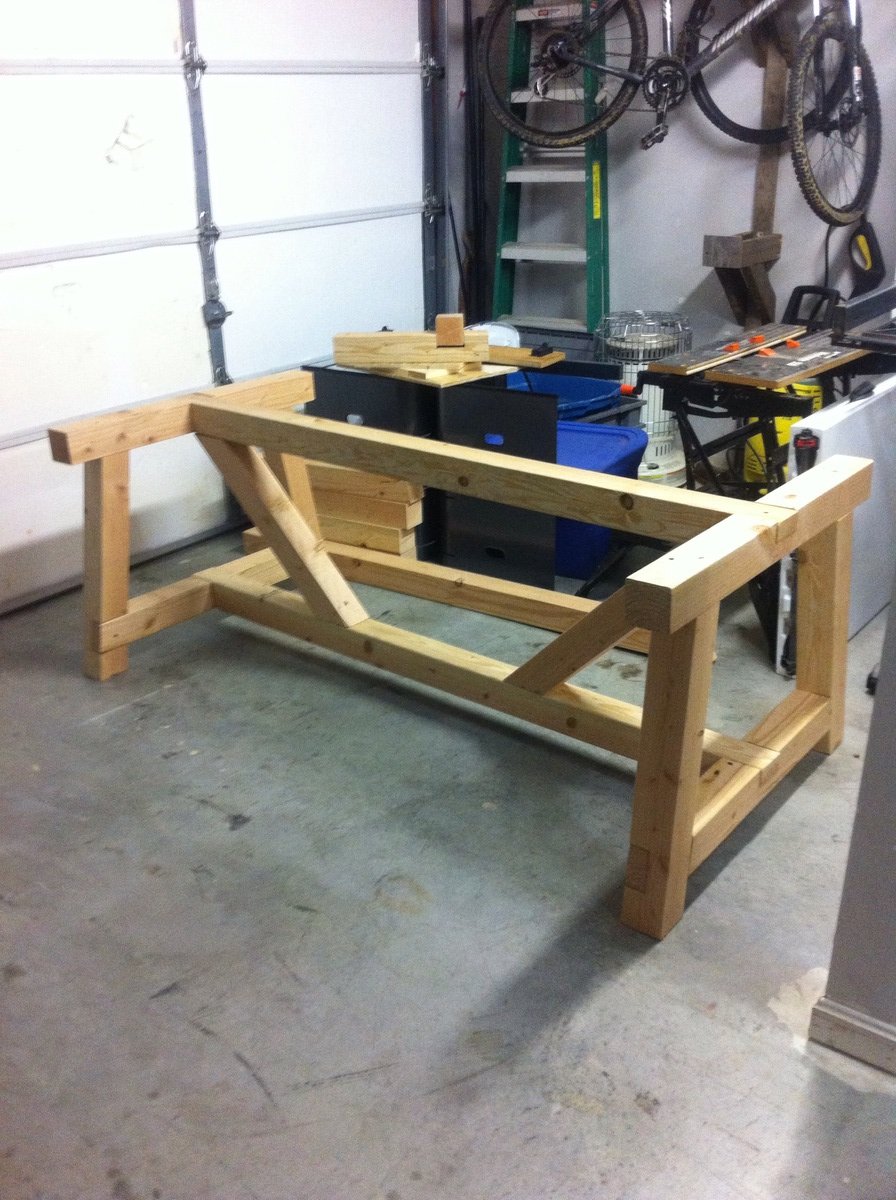
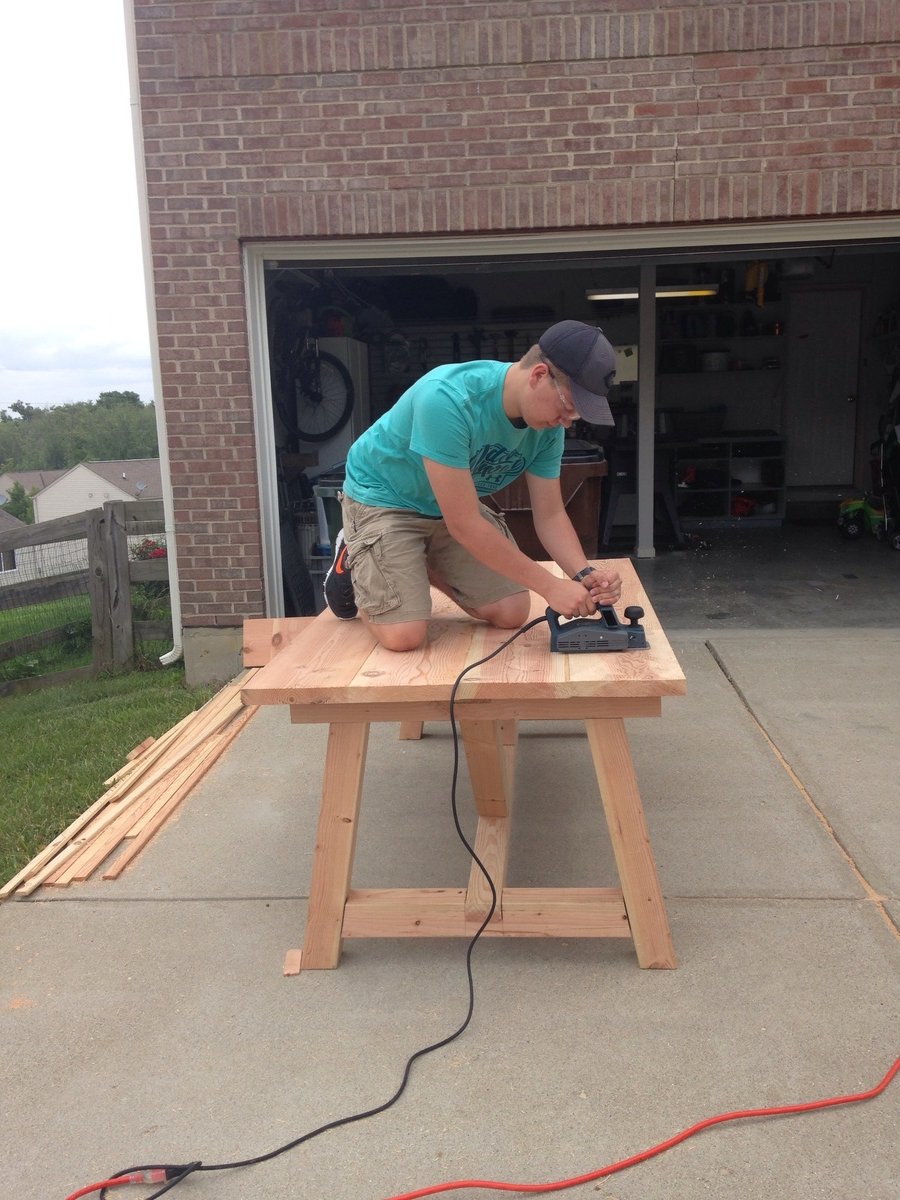
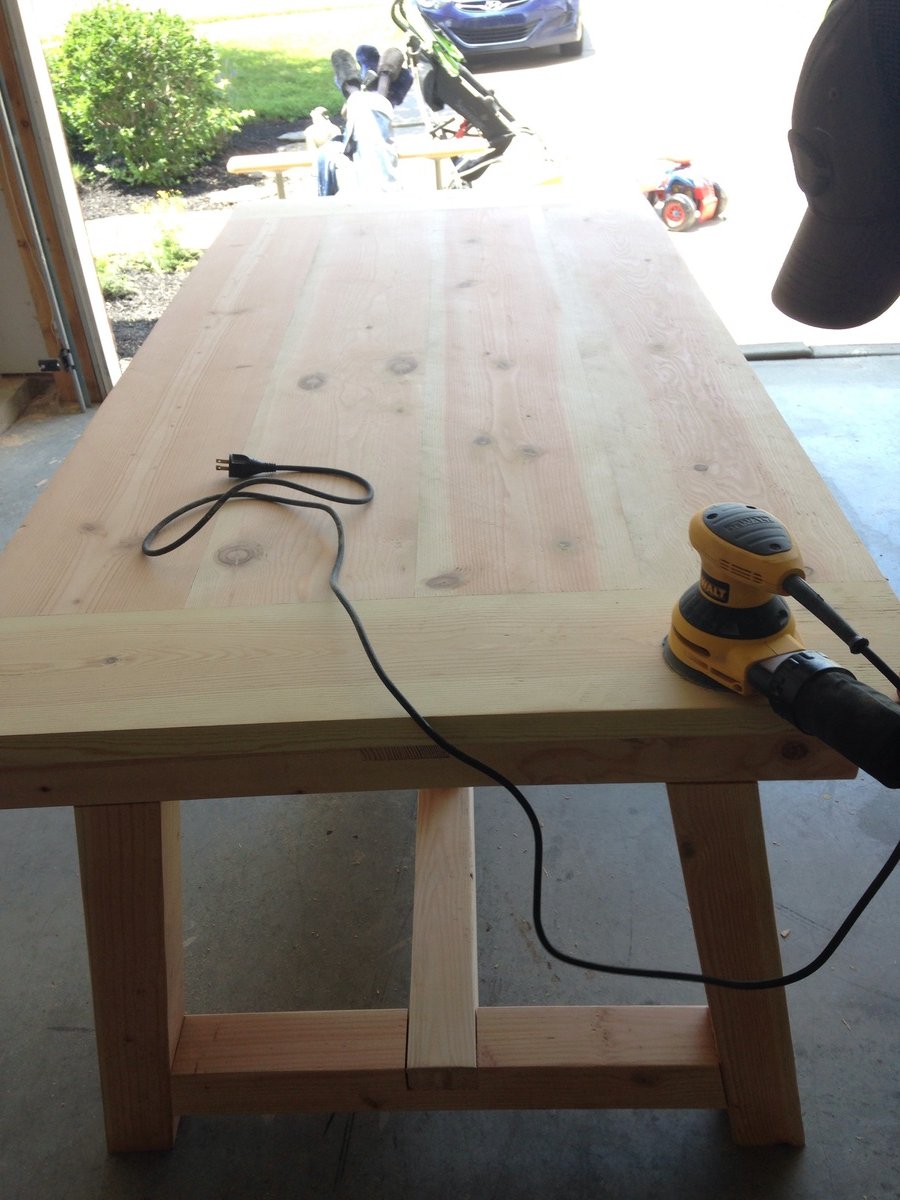
I built this table for a friend who wanted a rustic, plank-top kitchen table. She wanted a square table with 4x4 legs. Since I don't have clamps, I used pocket holes and wood glue for the table top. Also, I only have a 7&1/4" miter saw, which means the 4x4s were too thick to cut. So I made one cut in the legs, then flipped them and made another. It worked! :) I sanded down the sides of the table top with 80 grit. They needed to be evened up since some of the planks were a little longer than others. I back braced underneathe the top with (3) 1x3s. Then, I sanded all over with 120, vacuumed, then wiped it down with a damp towel. Fun build!!
Thank you Ana for the great plans! We adapted the project for wood we had on hand. It is only 40 inches wide instead of 42”. Our widest pallet board was only 40”.
Thank you for continuing to inspire us! We made two couches a couple of months ago. Great plans!

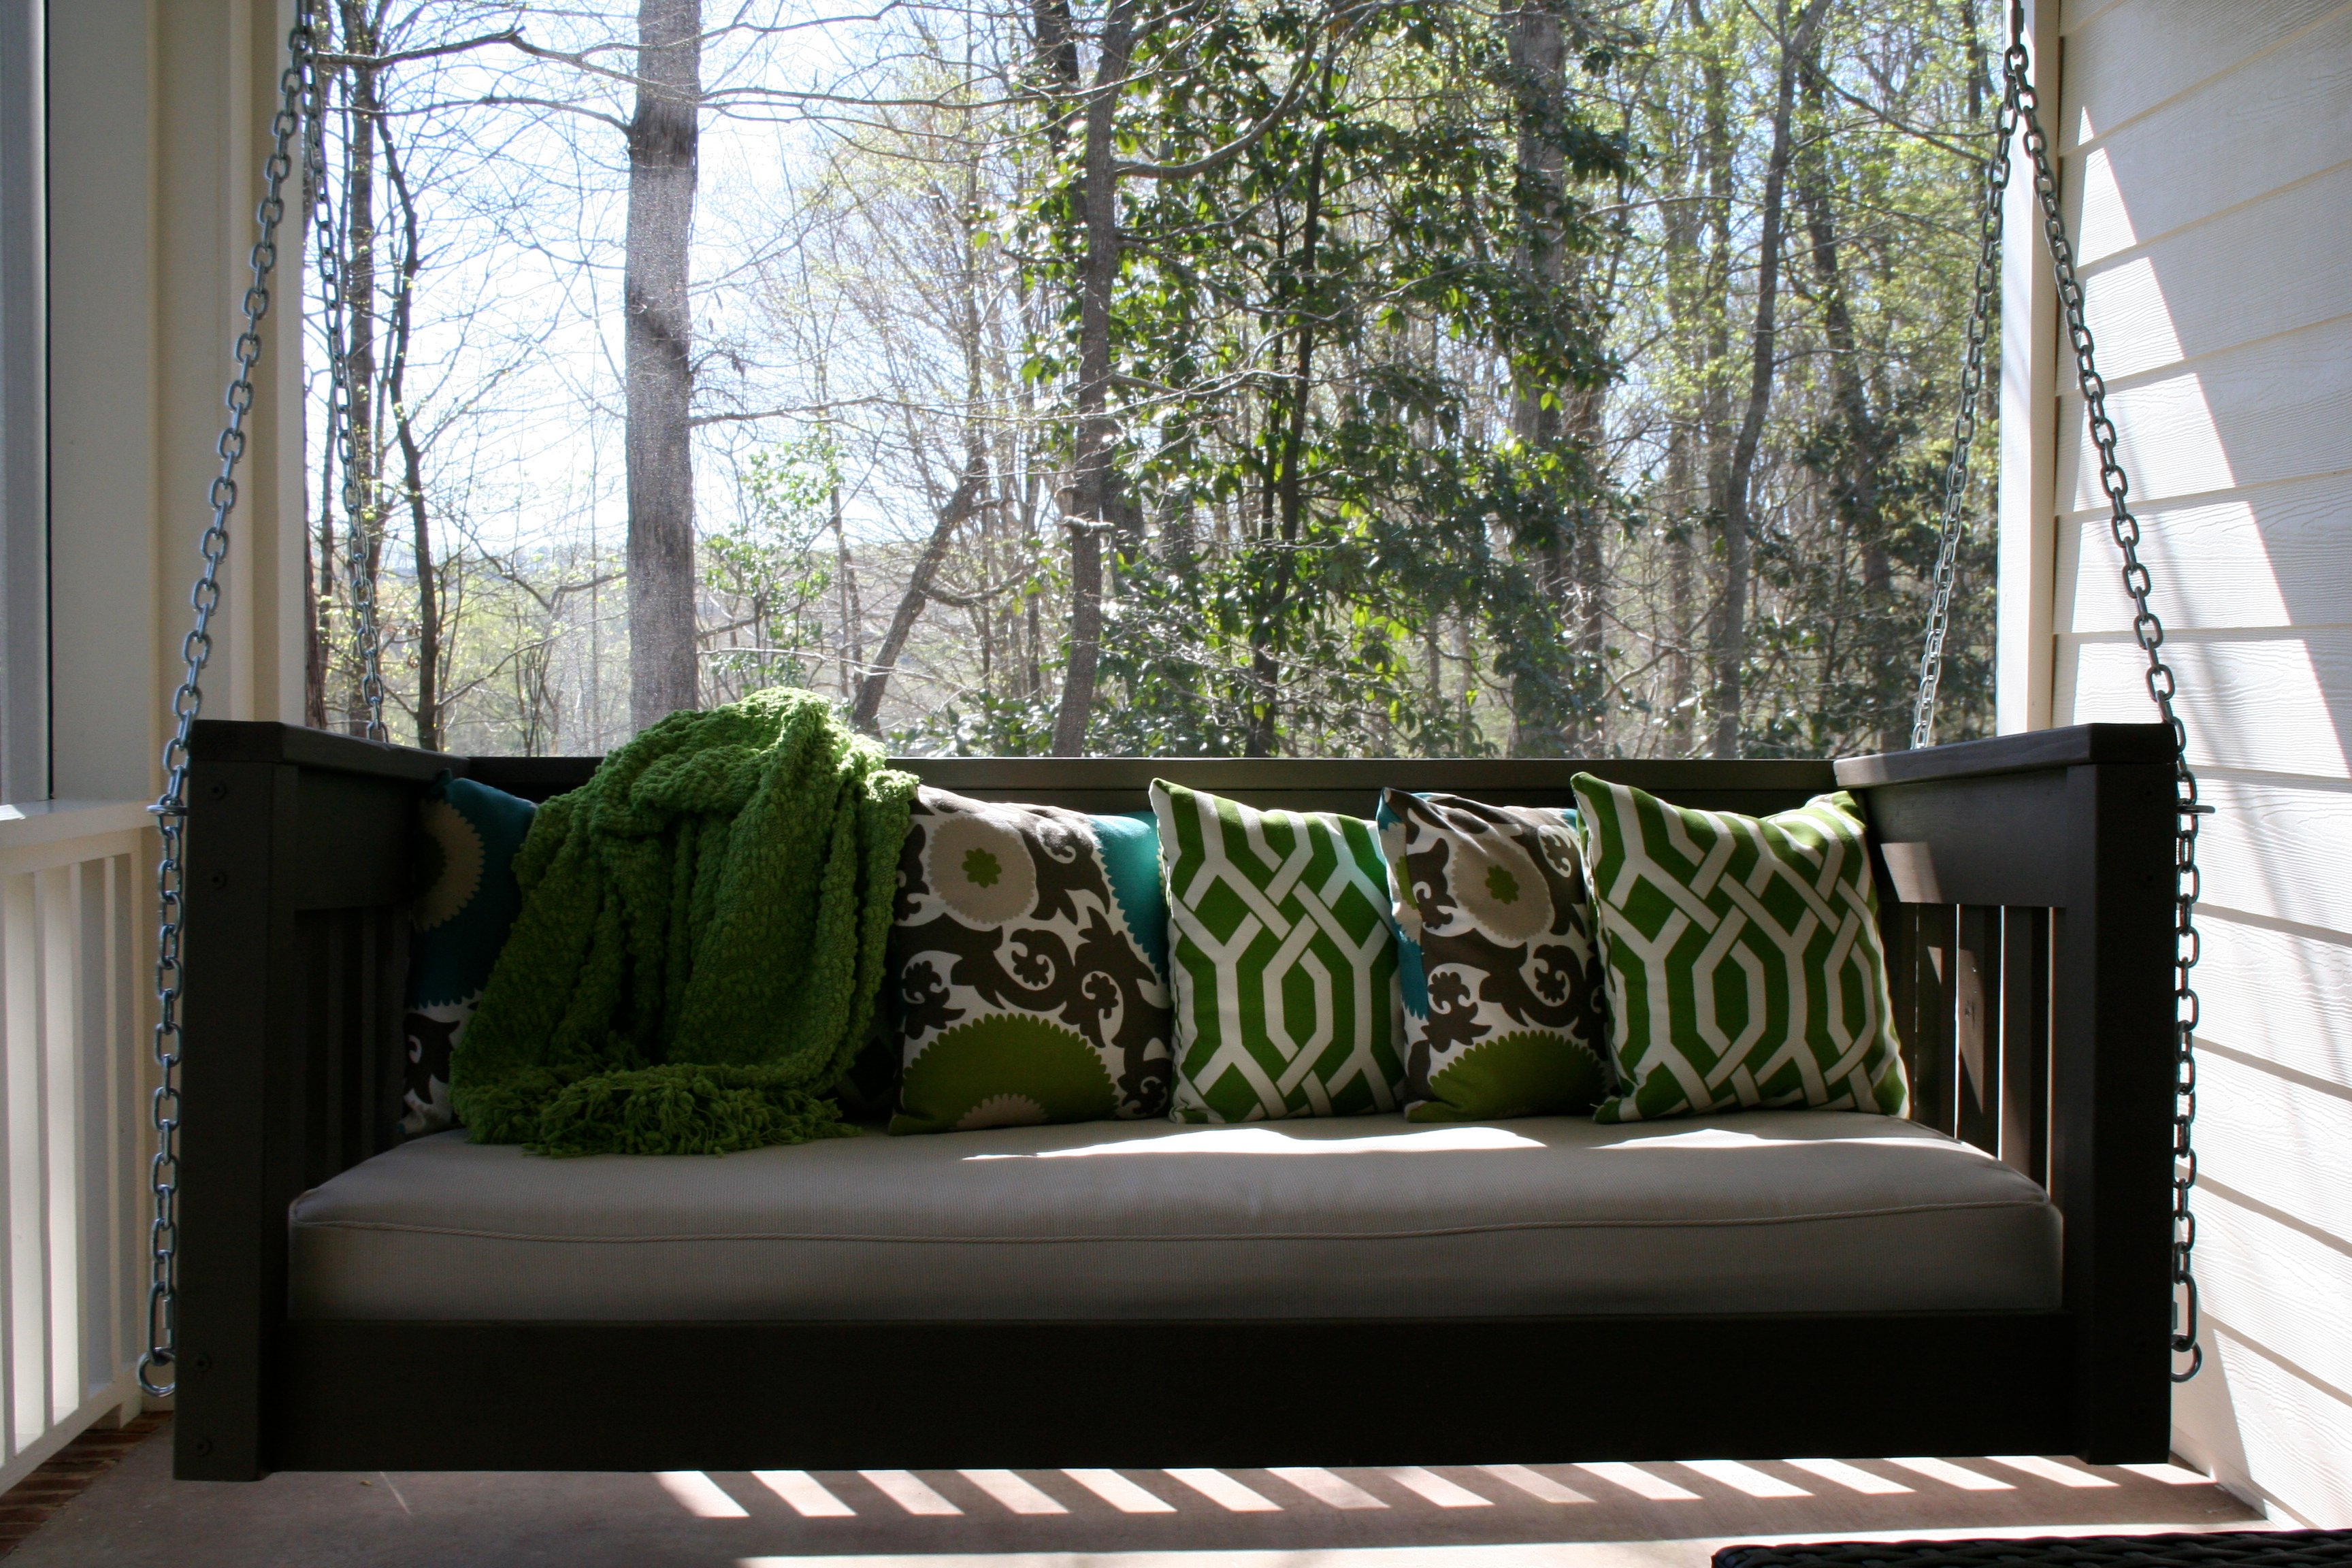
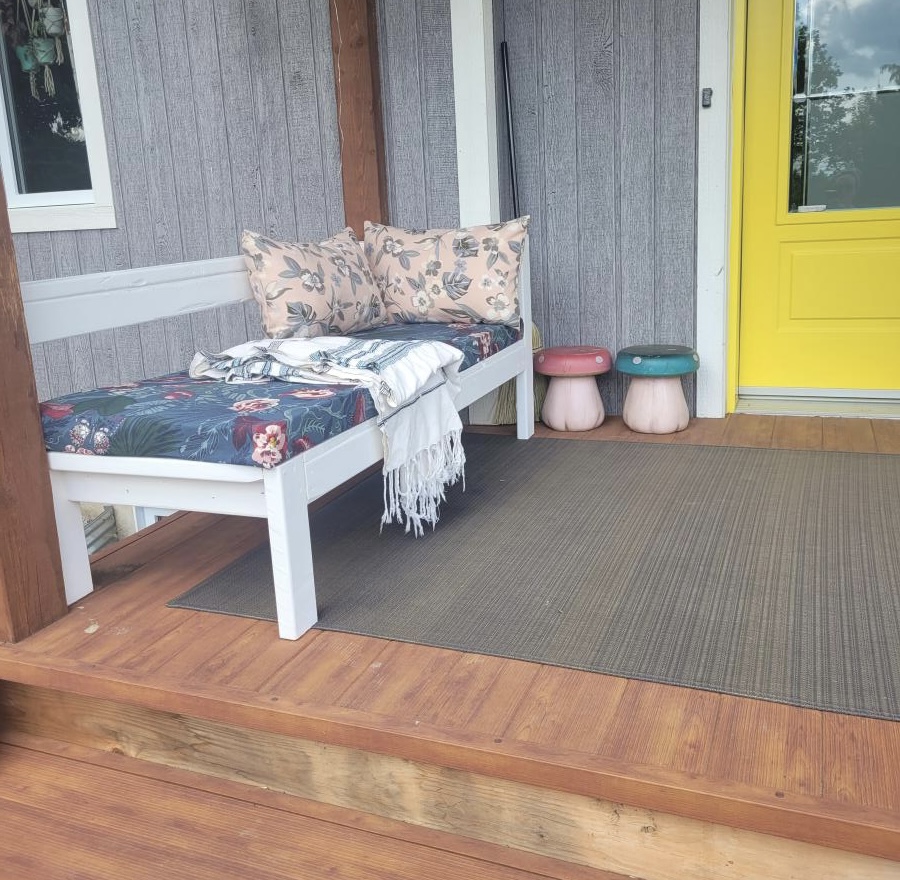
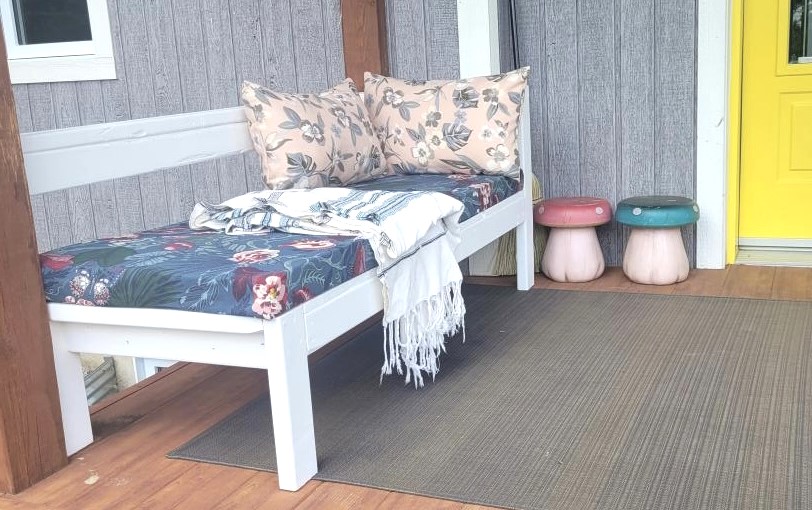
I wanted to make a large porch swing but just couldn't find the exact design. I wanted to be able to stretch out and take a nap but also be able to have a back to lean against. Most plans that I found were just basically a box you could put a mattress in and then hang. So I found Ana's plan for a basic daybed and chopped off the legs and raised the back just a little. It's perfect!! Thanks Ana. The plans were very simple to follow. This is my first project and I think it turned out great.
Sat, 07/26/2014 - 07:37
Looking forward to do one like this !
Do you still have the measurement for the back you have raised ?
Really nice !
Thanks :-)
Sat, 09/20/2014 - 16:33
Thanks! The height of the back and sides is 28 inches.
Tue, 11/18/2014 - 17:38
We made the bed and it looks awesome! Thanks for making the plans easy to follow and providing the picture, which was a fantastic reference. I do have a question for you in regard to how you hung the beg. We would like to hang this from our porch, but can see that we simply have 2x4 roof trusses. We are concerned that the weight of the bed (pretty heavy) plus mattress and support plus a person may be too much. Any additional information you could provide on how you hung the swing would be greatly appreciated! Thanks!
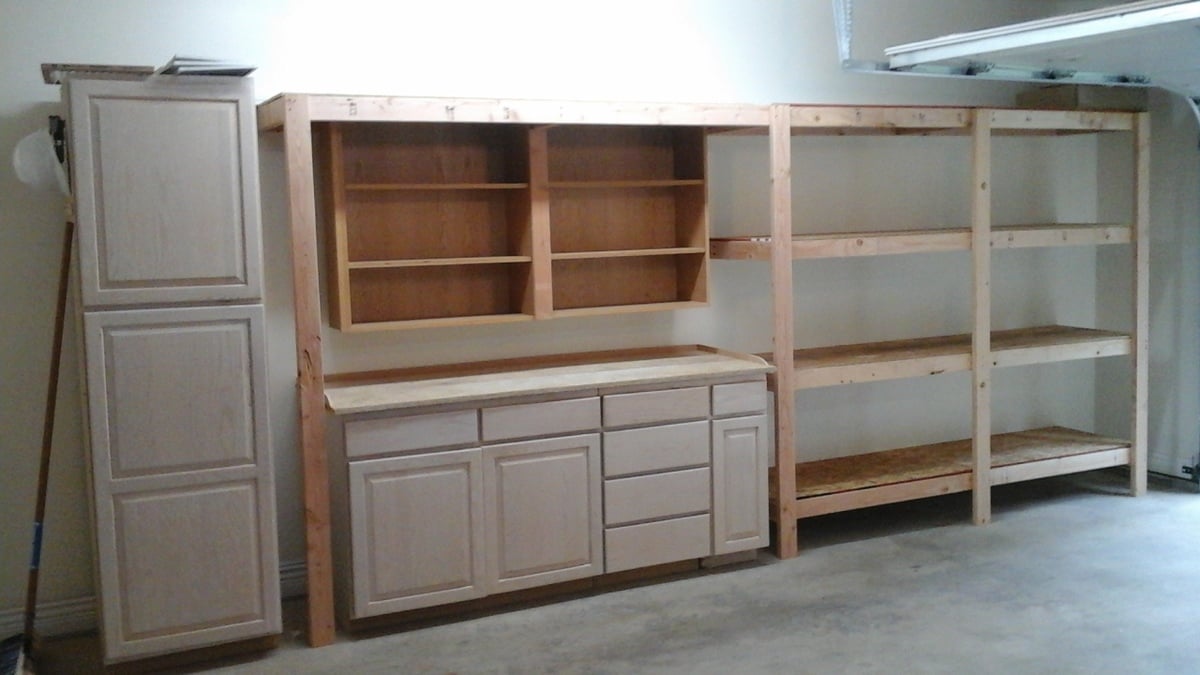
Thanks to Ana's 2x4 storage plan and a neighbor's discarded kitchen cabinets we now have a very clean and convenient storage area in our garage. It even features a work bench and sorting area.
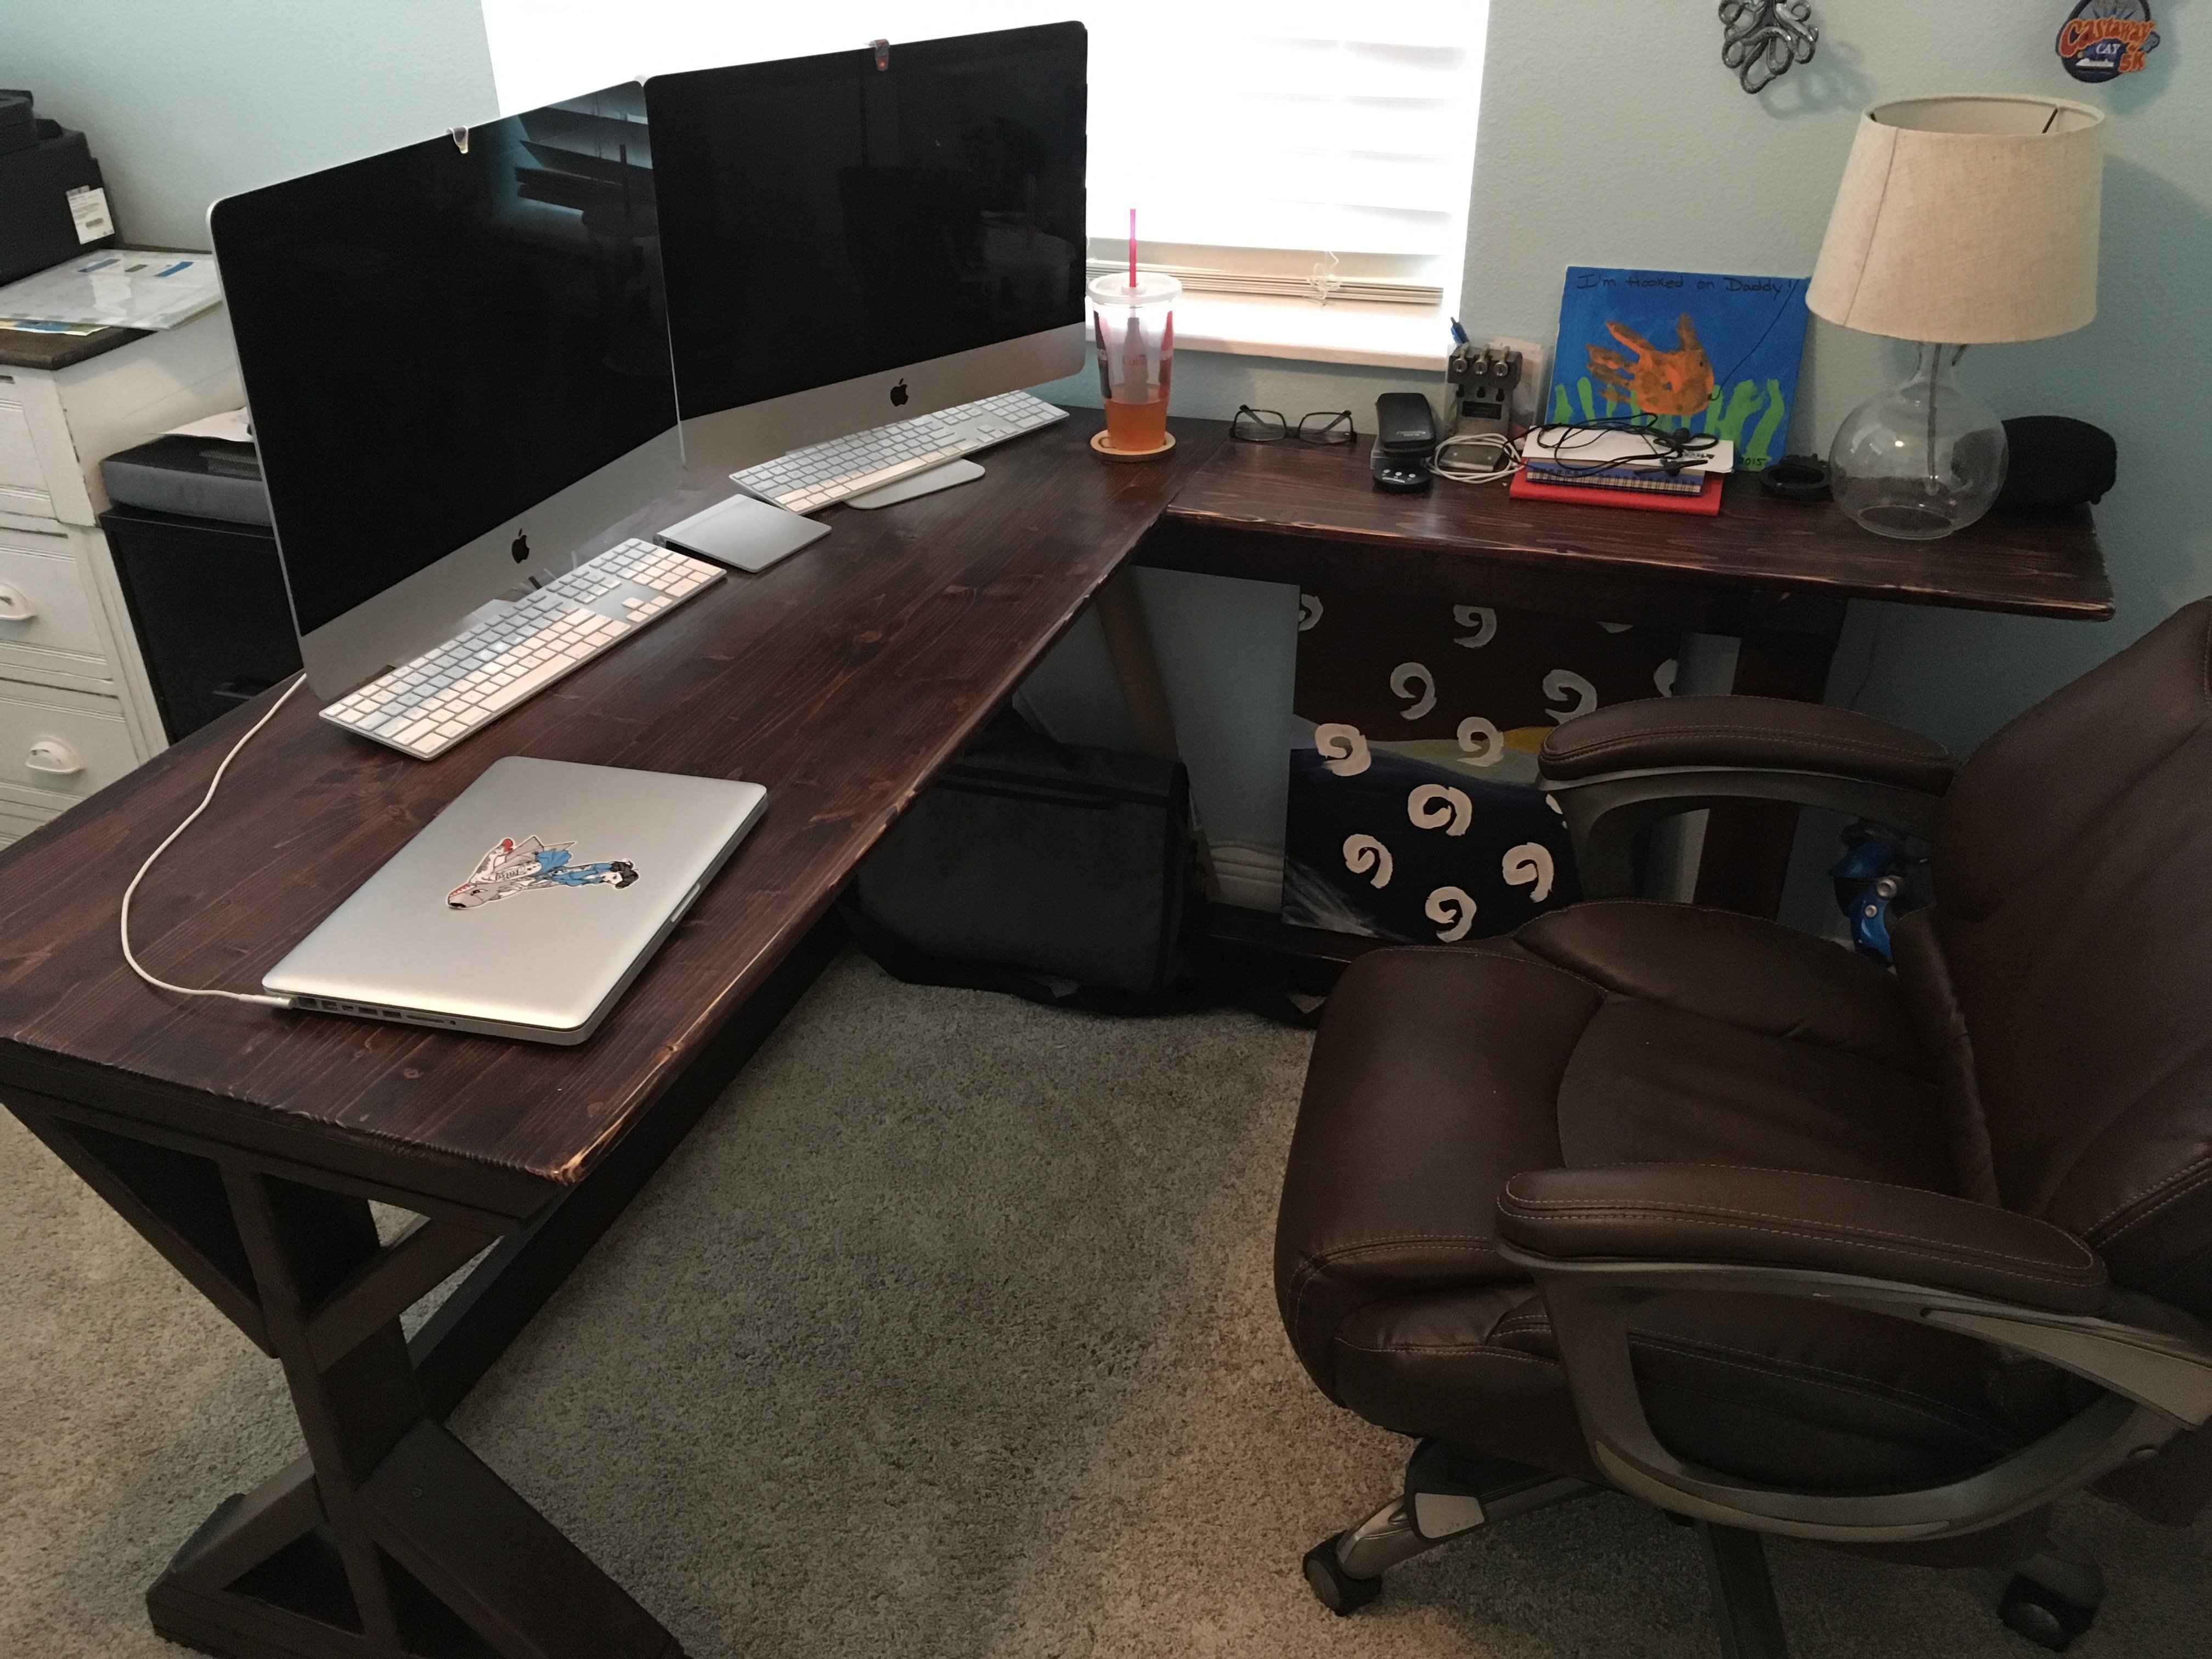
Added an L section to the Fancy Desk to increase usable space So far it still stands strong for me. Thanks Ana
My first brag post!
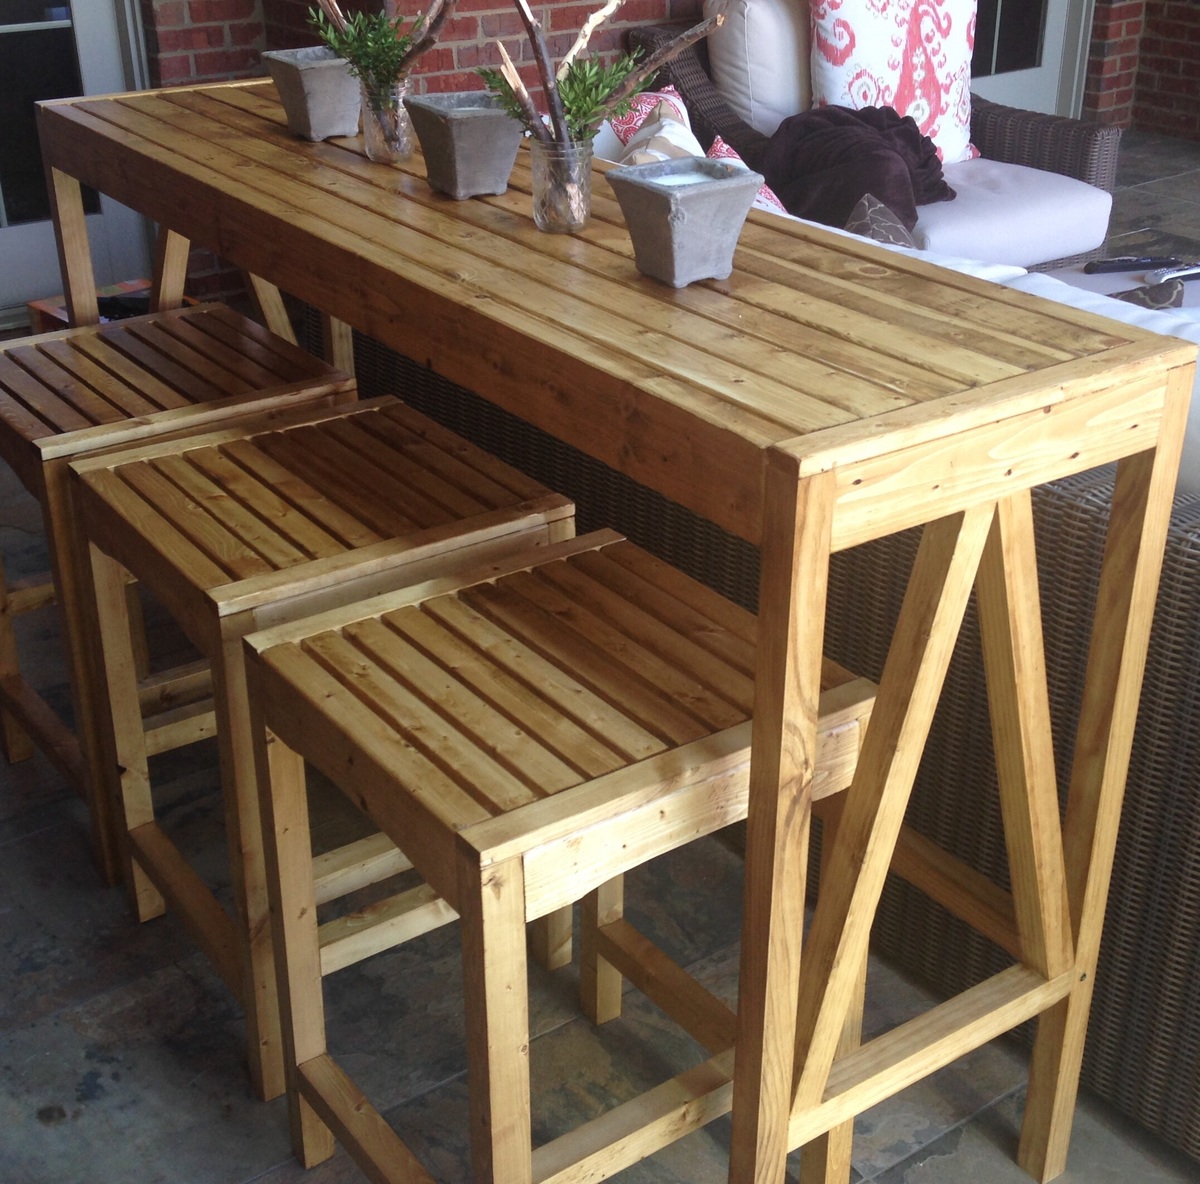
UPDATED: New photo with bar and stools on covered porch. Very happy with how it worked.
We wanted the Ballard Sutton Console Bar Table and three stools to go with our outdoor furniture. Unfortunately, that little package was going to run about $2,500. Decided instead to see if I could build the things and make up my own stools to match. So basically by studying the picture a little bit figured out my plan. Then the stools are more or less a mini version of the table with a couple modifications.
I haven't itemized the bill, but built 3 stools for about $50, and the table was a little less. Incidentally, I can never find decent common 2x2s, so I have started ripping 2x4s into two 2x2s, and they come out clean, sturdy, smooth, and most important, straight!
Stained them using MinWax Puritan Pine to try and get the new teak look we wanted. Not too dark -- wiped the stain after 5 minutes.
Have the stool plans if anyone is curious!
Best regards!
cstarliper

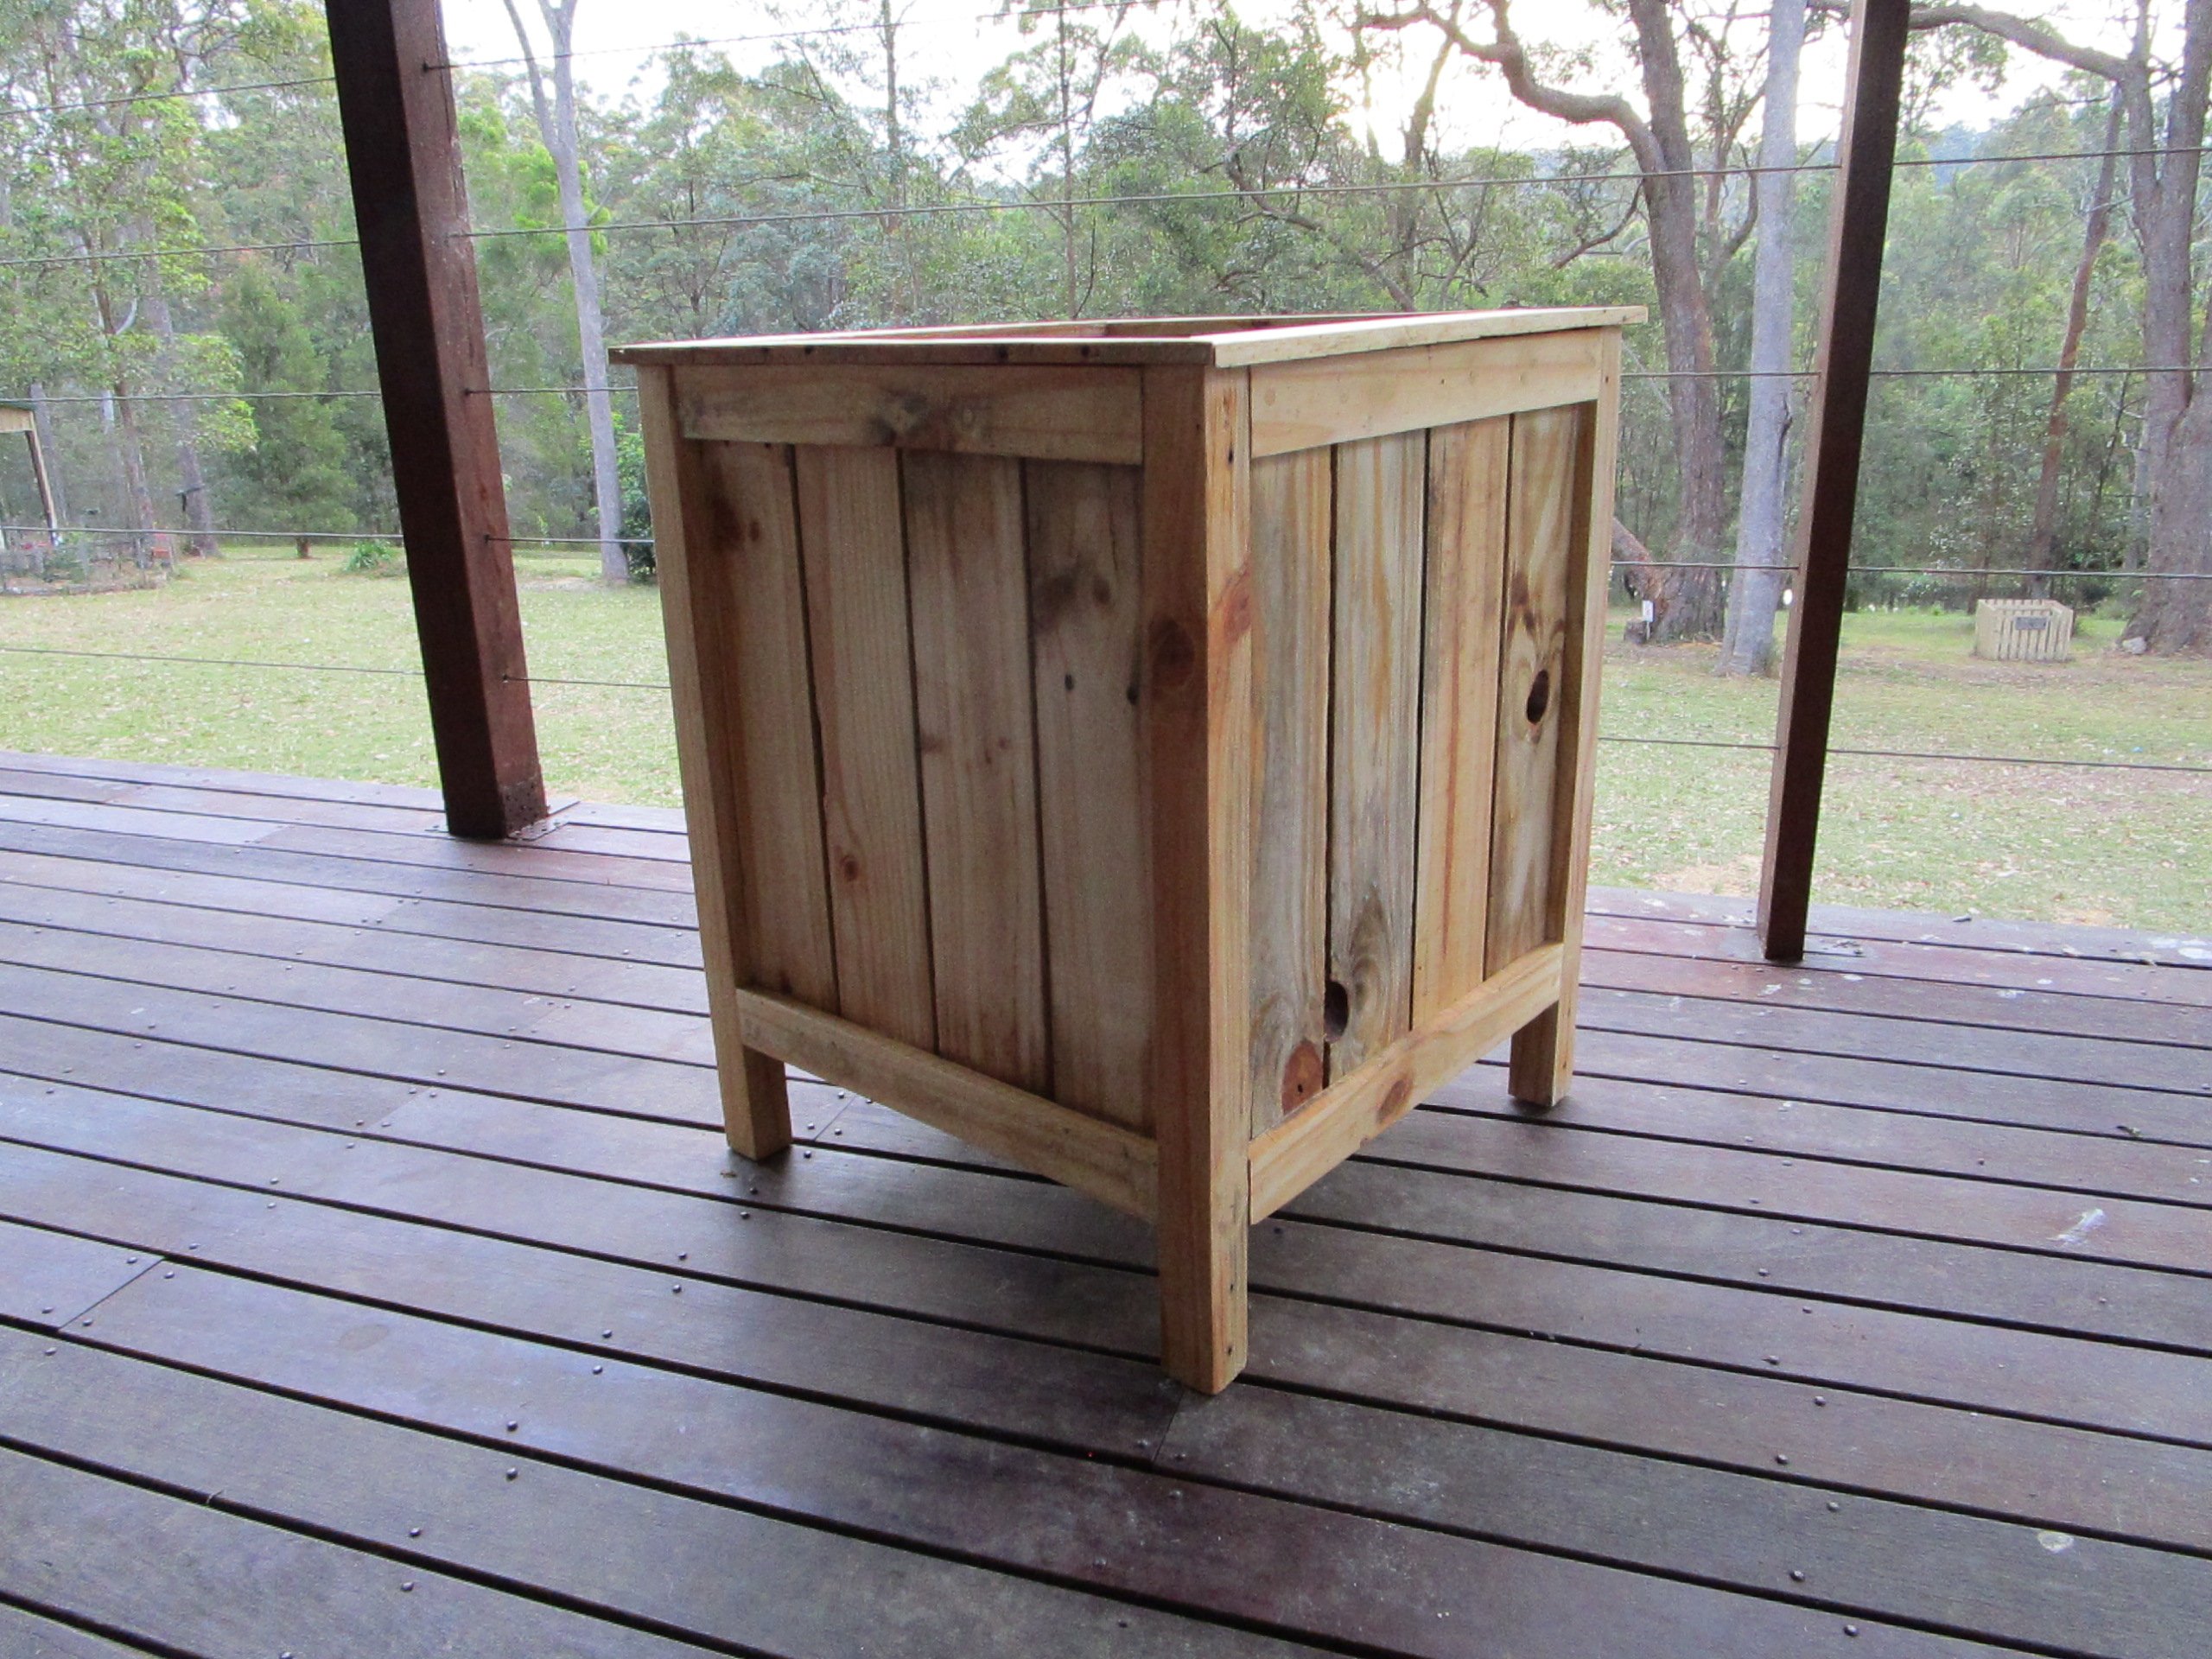
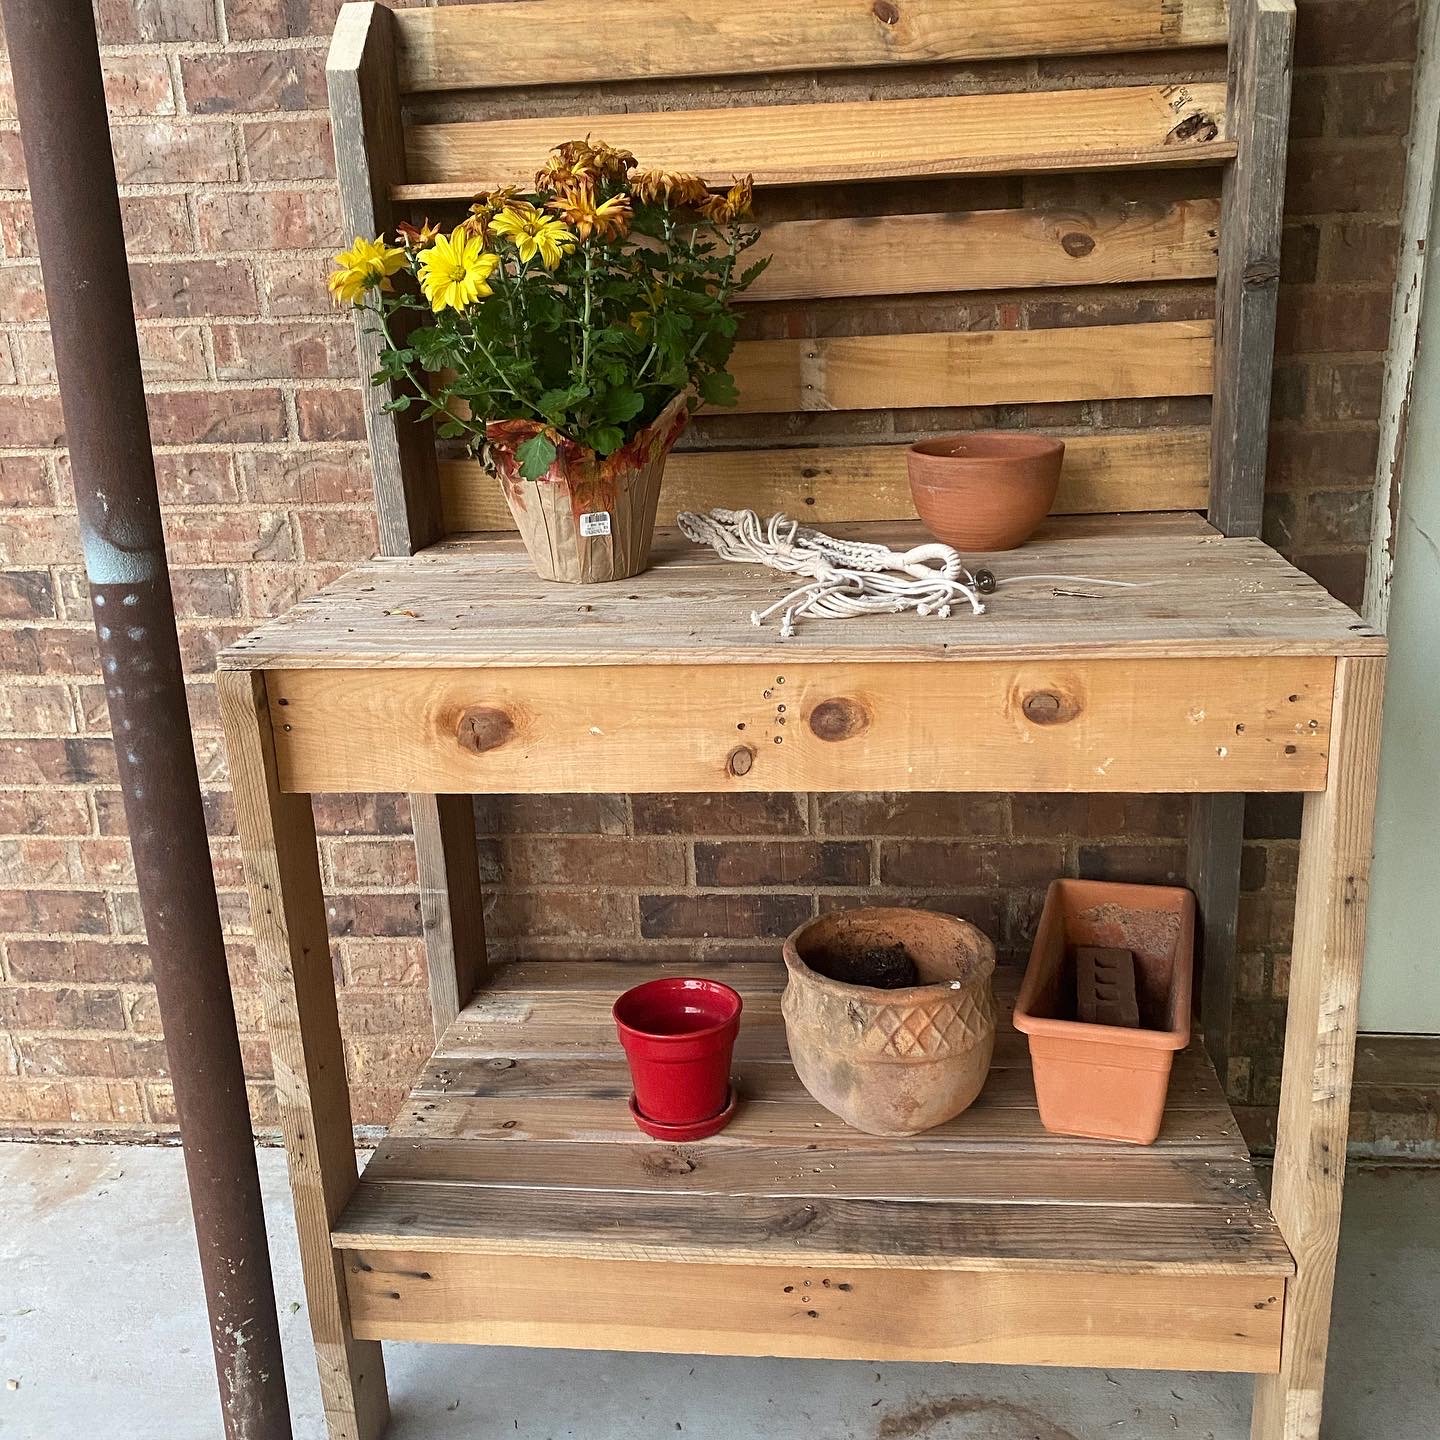
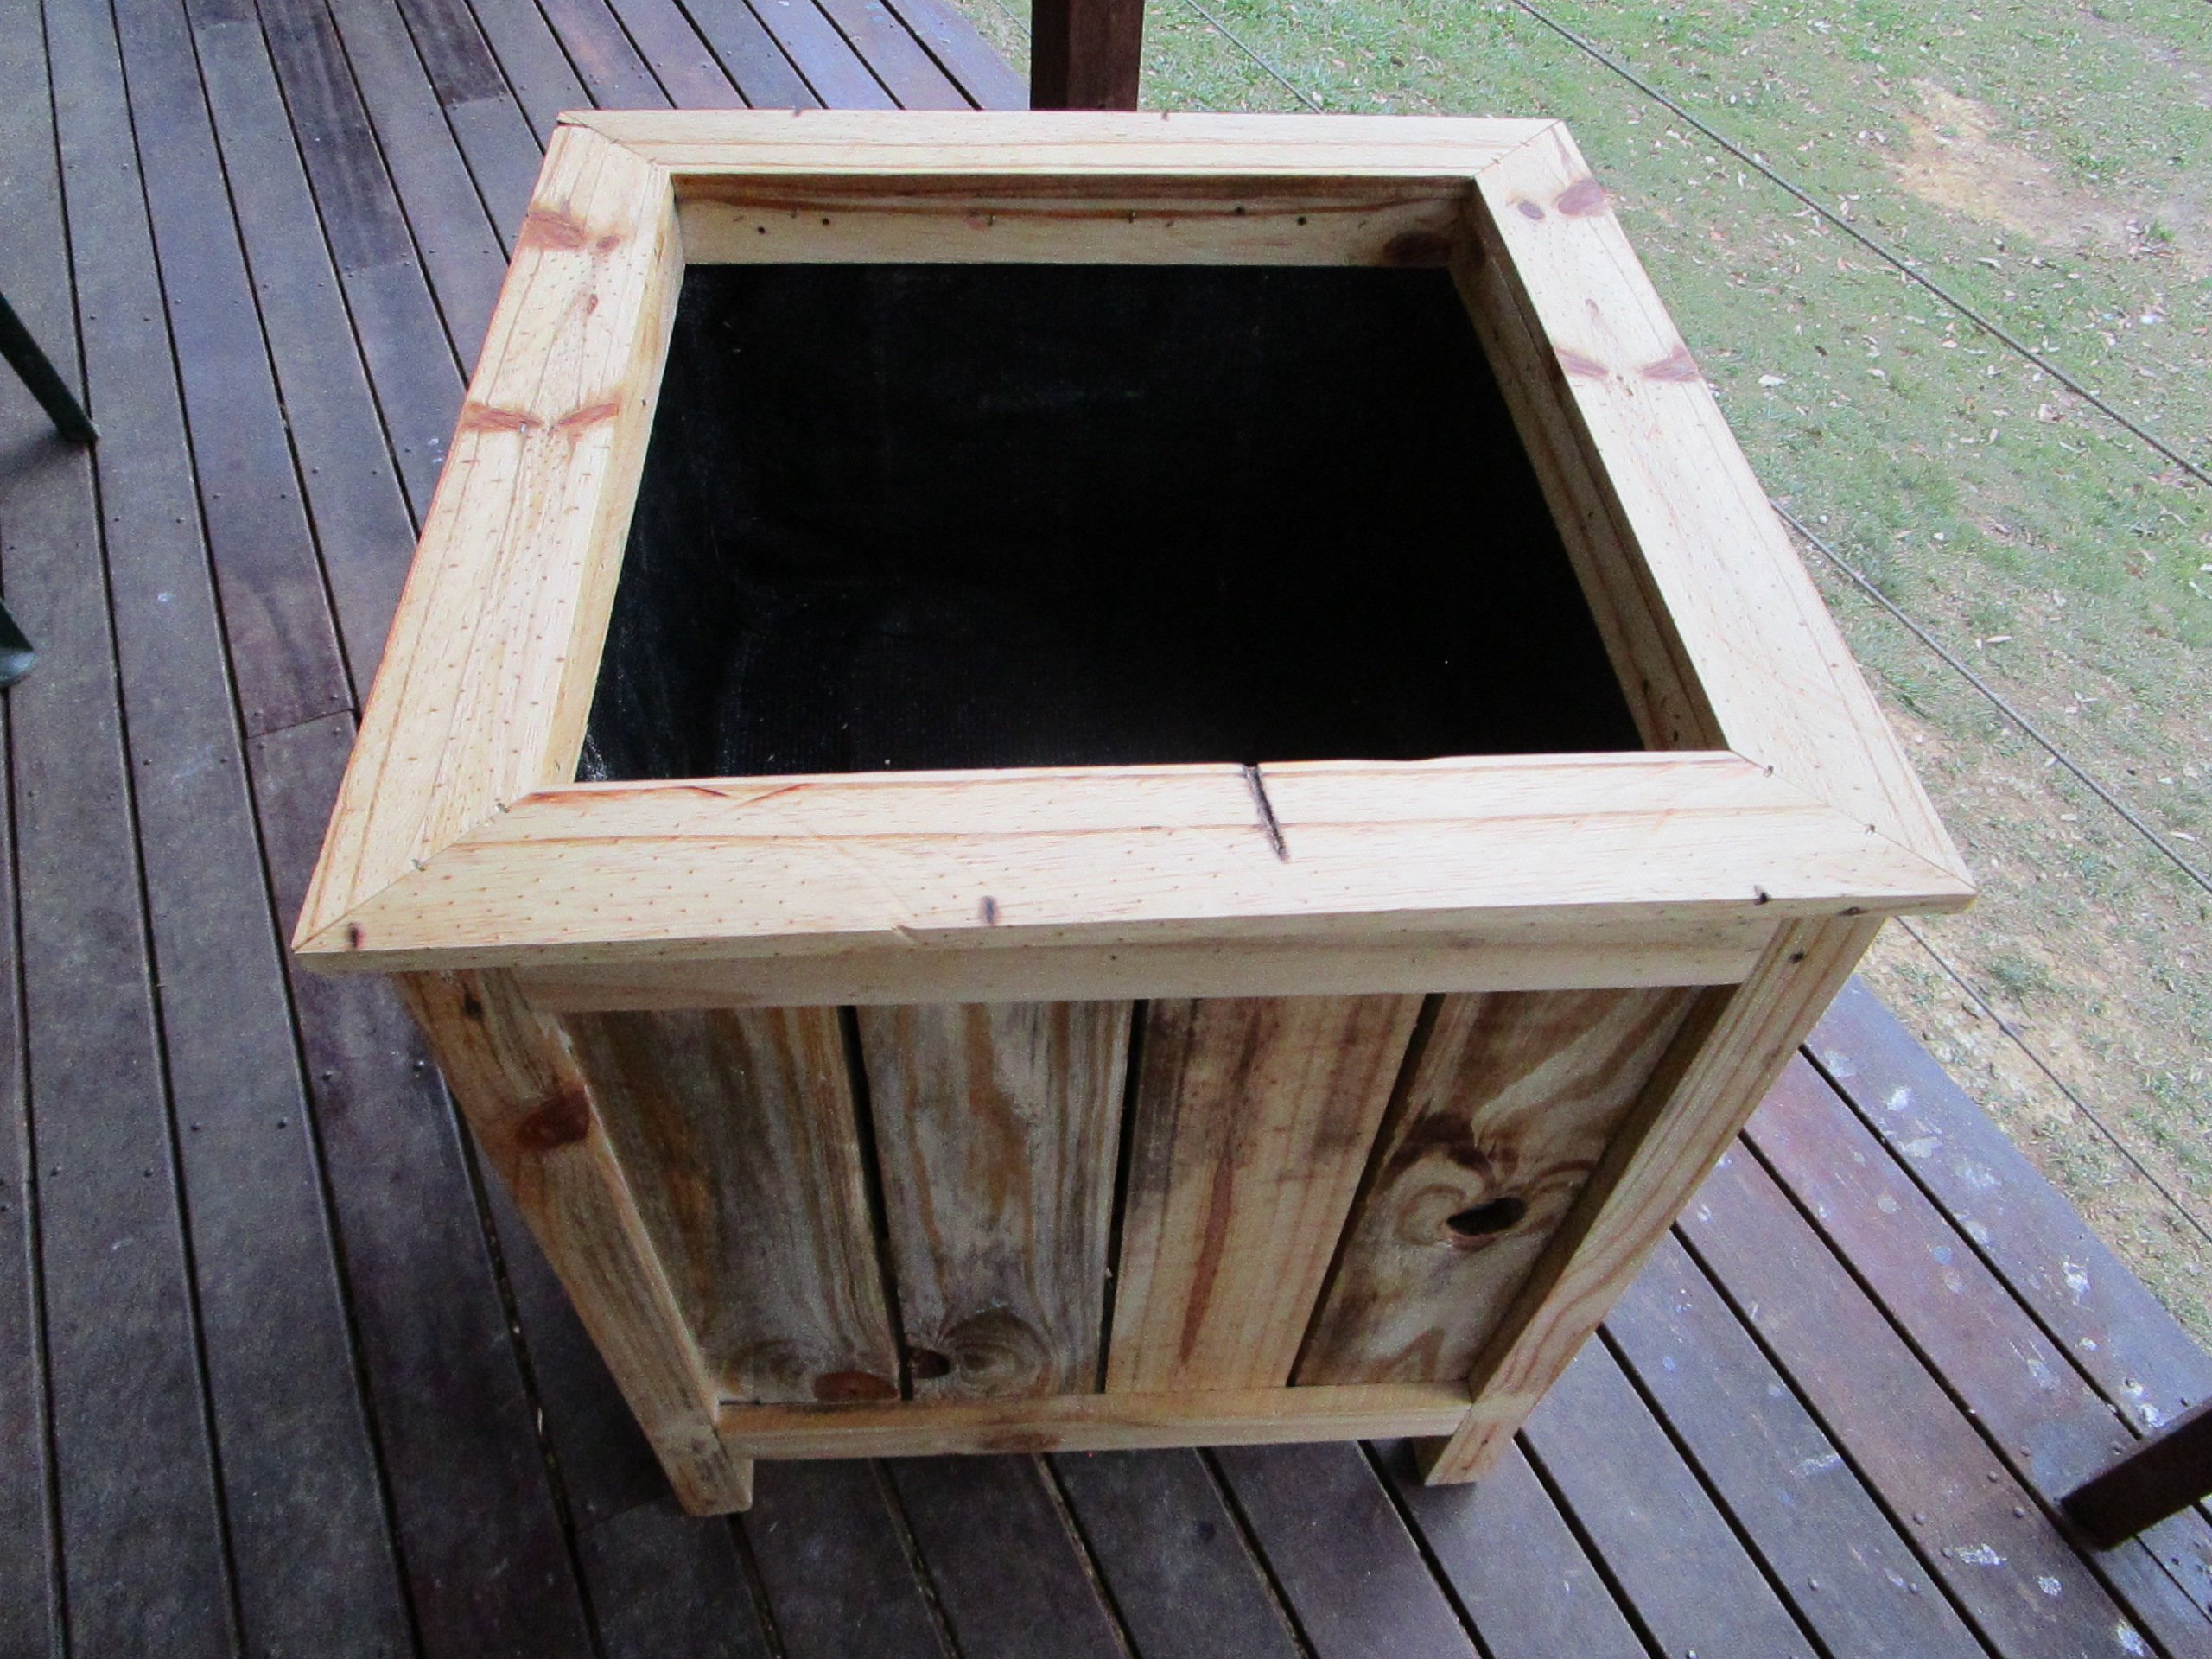
Thanks for the plans, I was able to make this for a friend's birthday. I made it from pallet wood and it was so easy, I did a mitred top though because I wanted it to look neat and trim. .
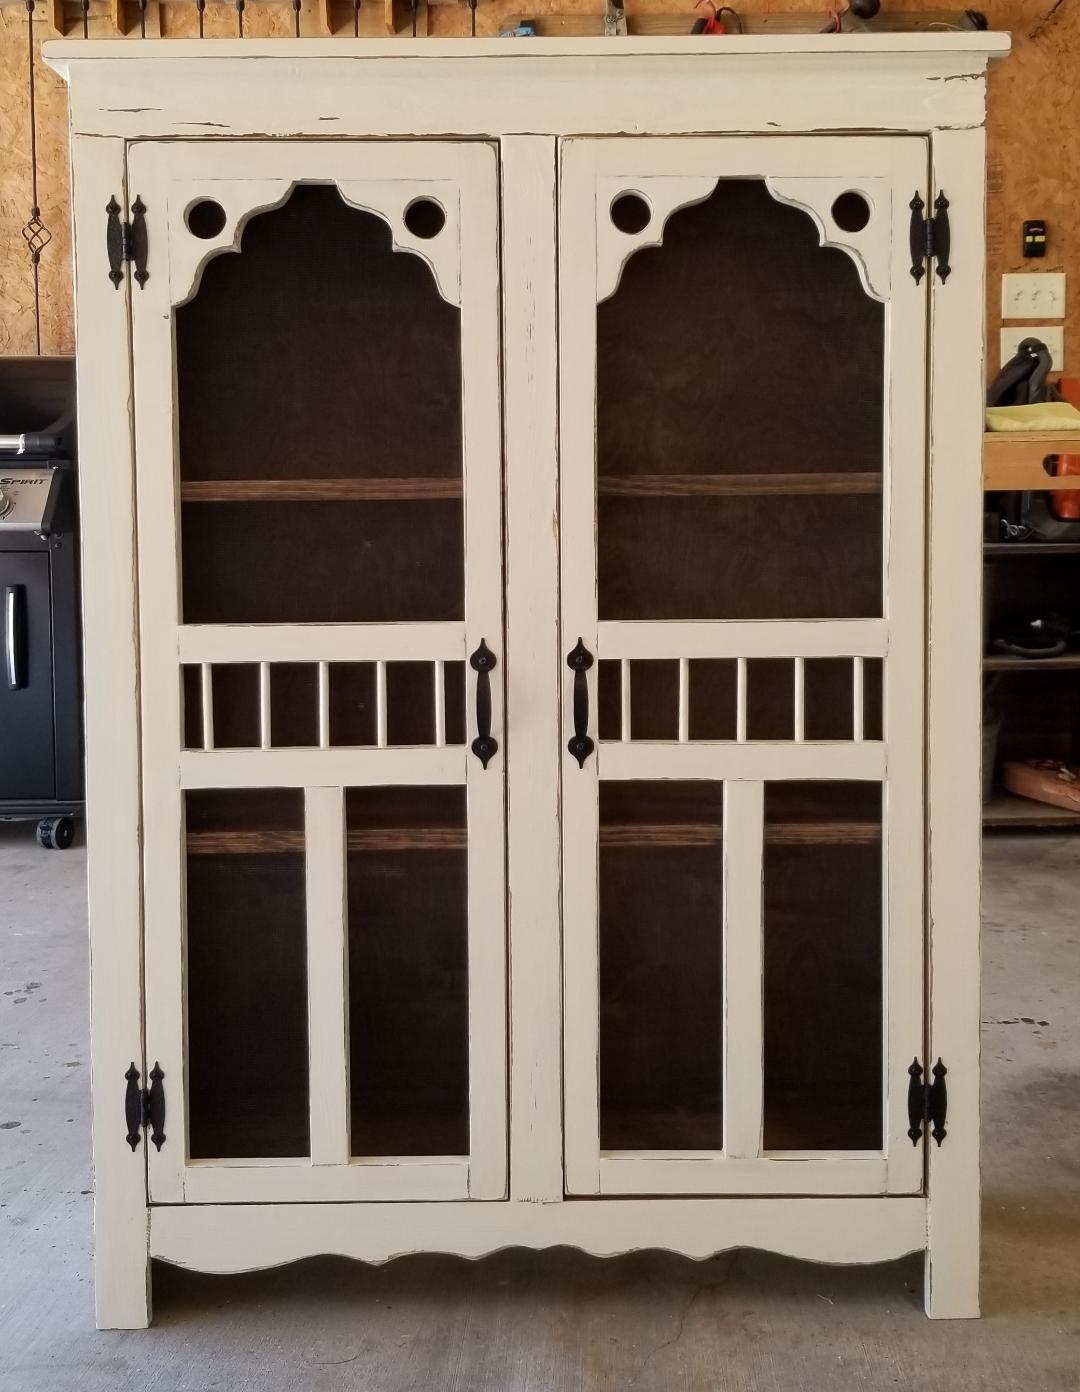
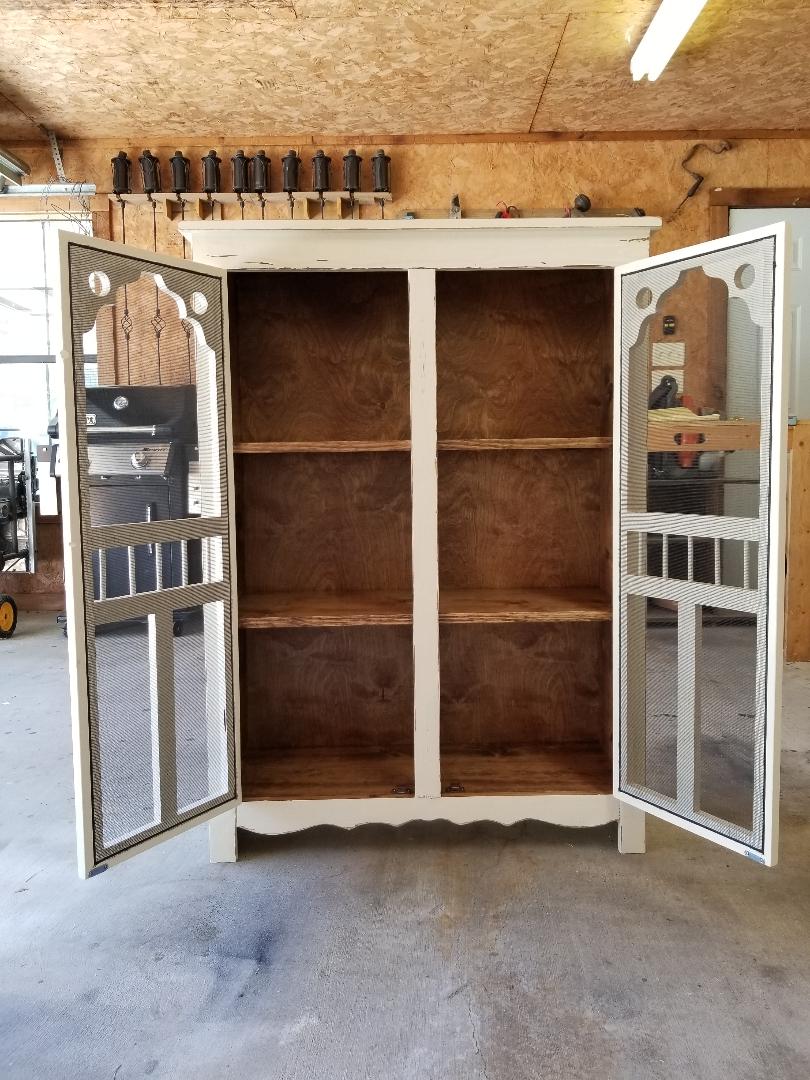
I love, love how this turned out. I was originally going to build it exactly as the plans are written, but somehow a screen doors came into the design. Thanks again Ana for sharing!!
Thu, 01/06/2022 - 20:06
Wow, that is gorgeous! Thank you so much for sharing.:)
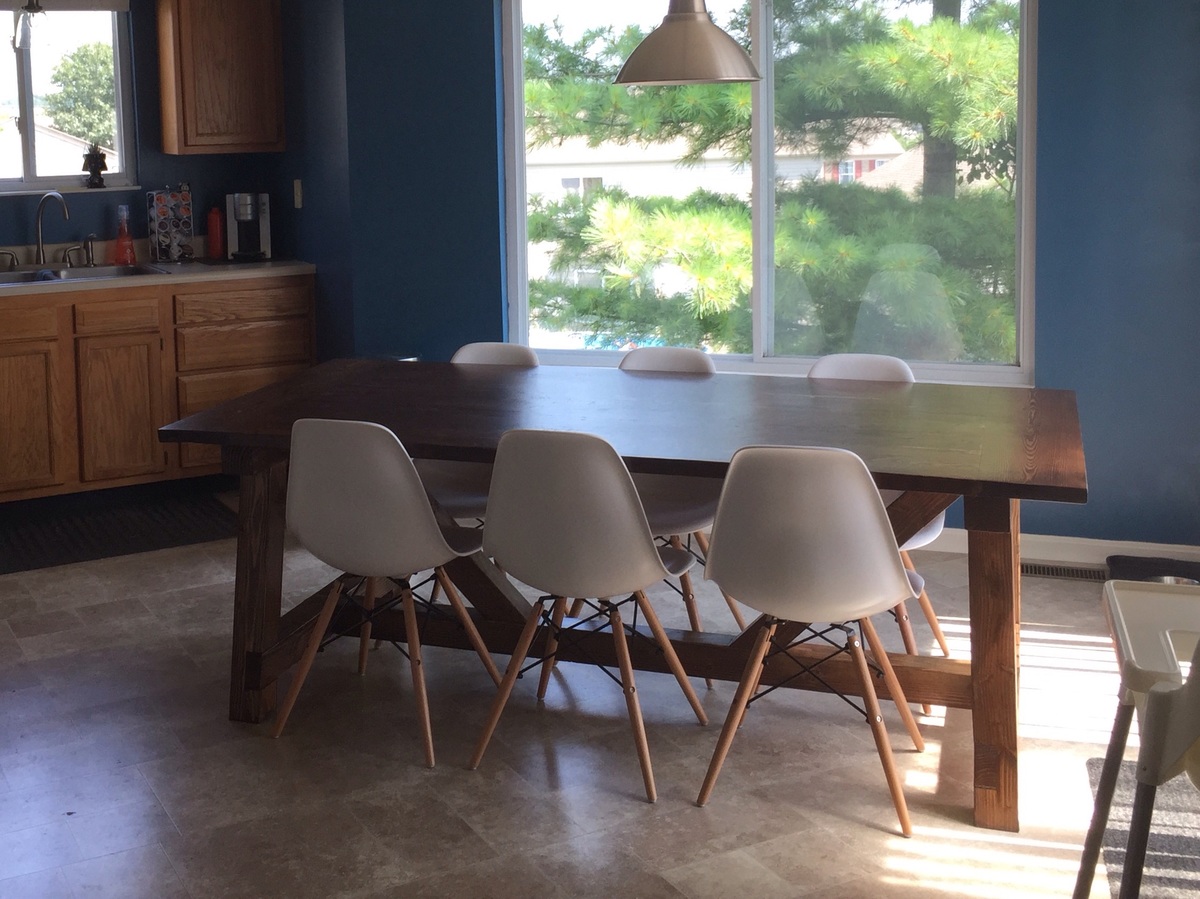
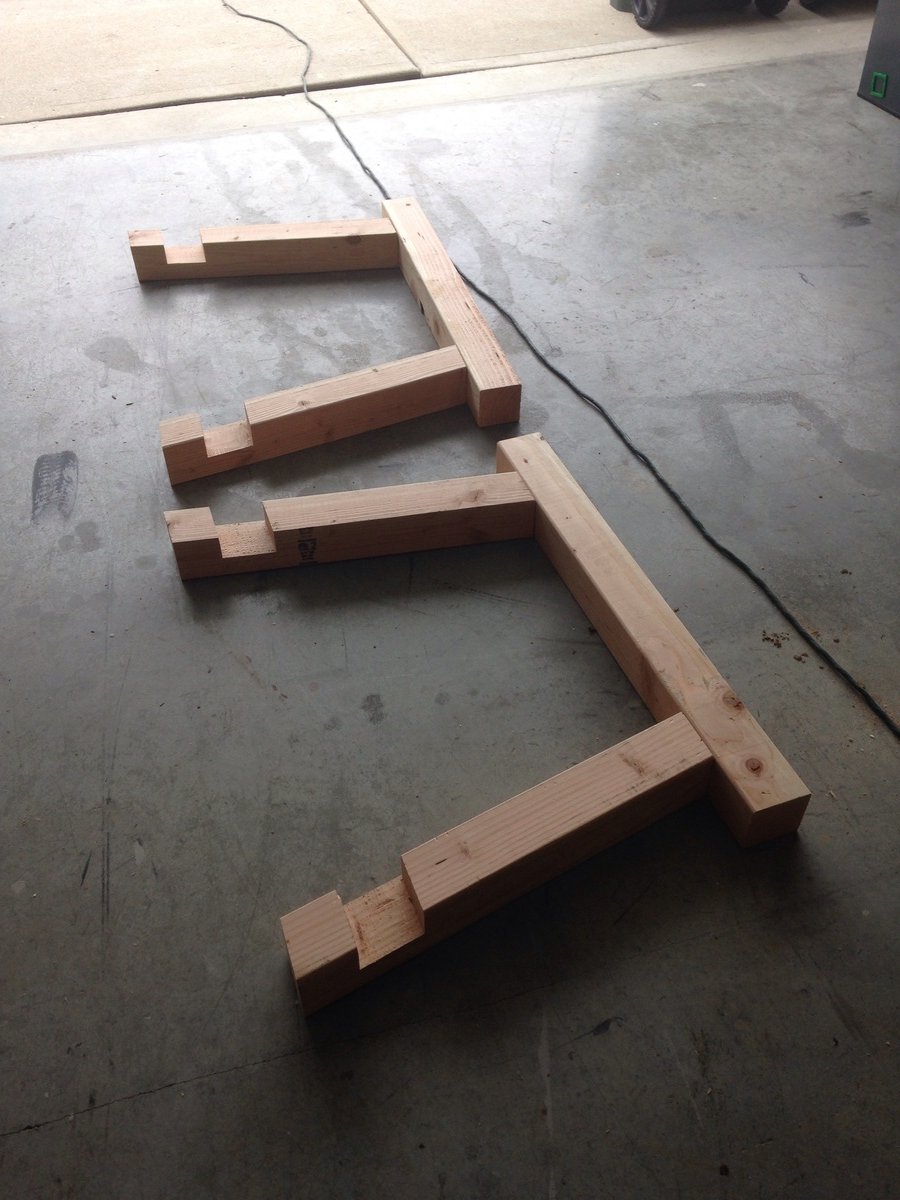
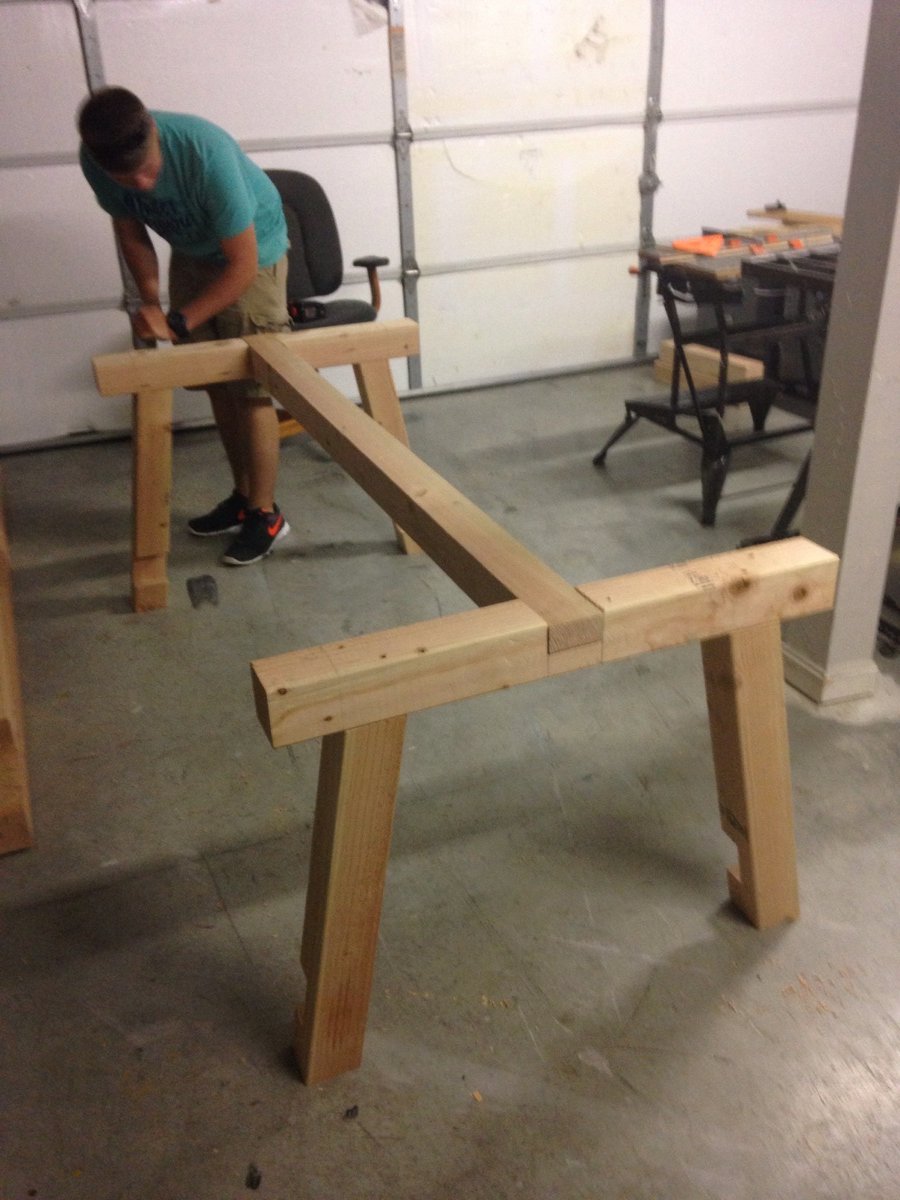
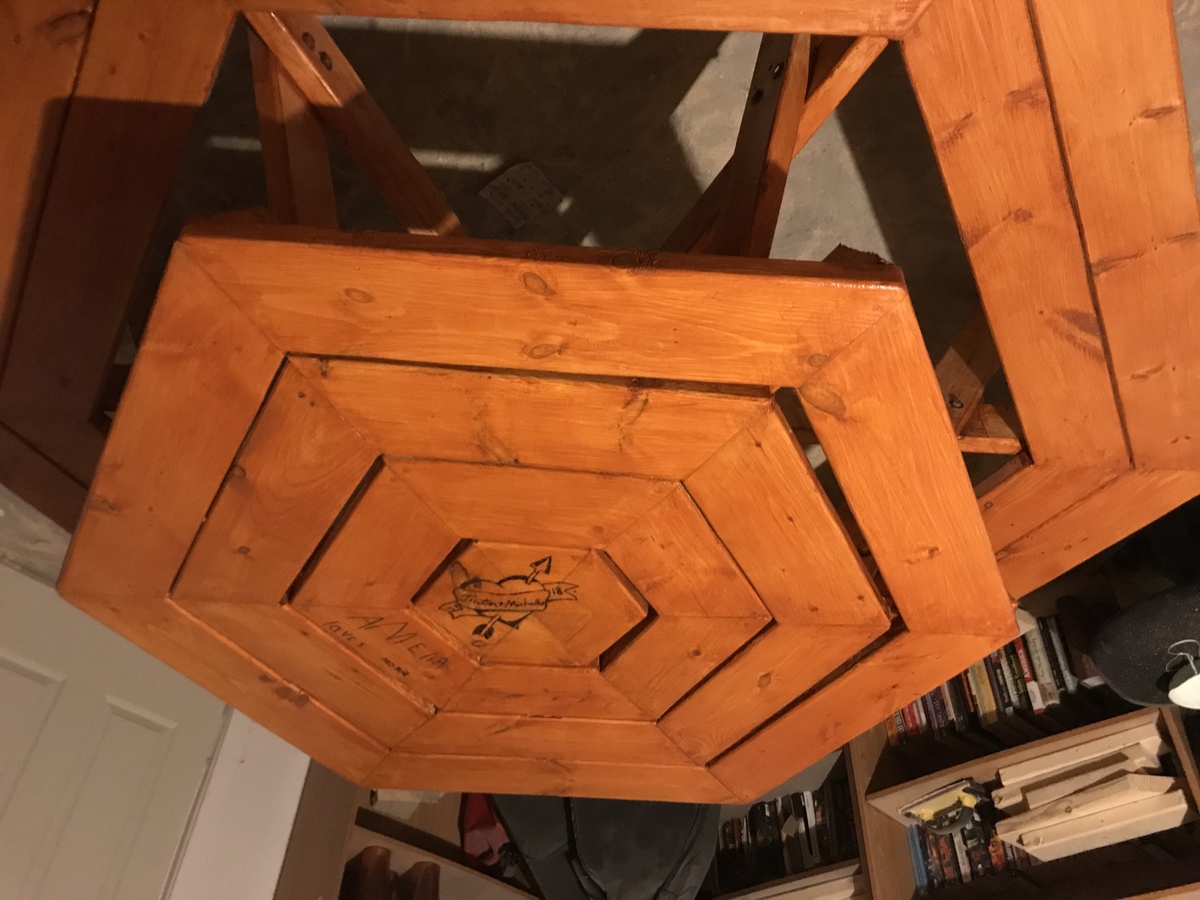
My take on Ana's table that I made with my son over Summer Break.
Wed, 03/30/2016 - 01:07
I really like how you made half cuts so that the beams were more supported!
On the legs did you attached with pocket holes or where did you attach so that the screws were hidden?

I took what was a single cabinet and doubled it.

Made for my wife for a Christmas present. Awesome project.
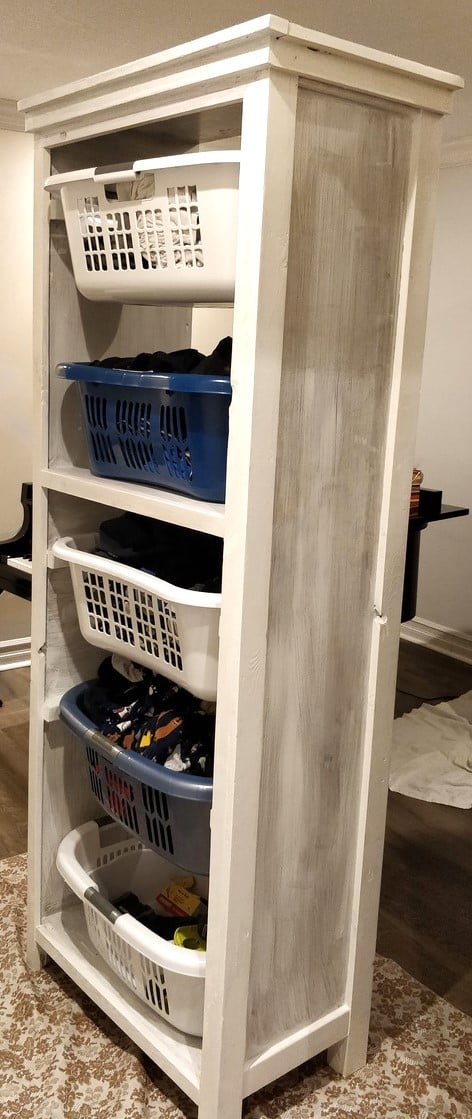
I modified the plans from the favorite Bookshelf to fit my laundry baskets. Once I'm done painting, this will be installed in my master closet. (Finally all the dirty laundry off the floor!)
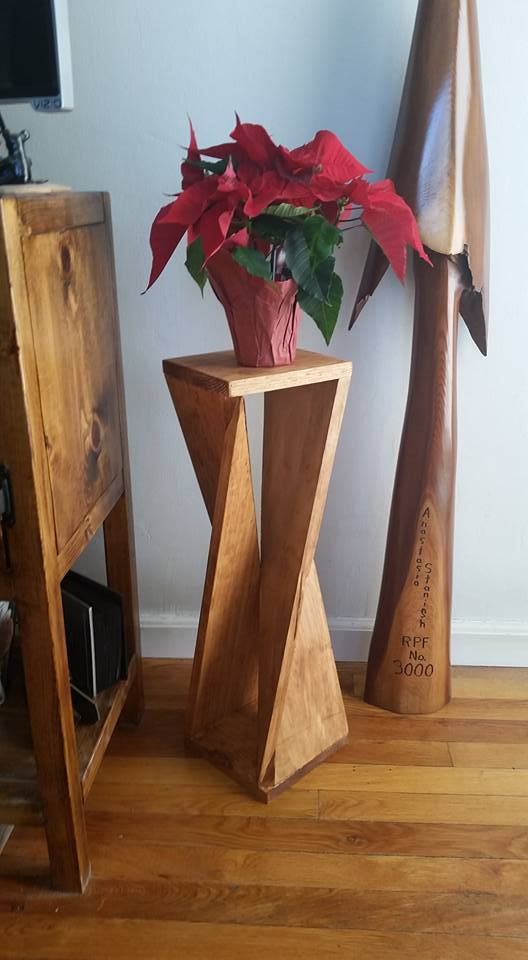
Saw this clever side table on Pinterest. It's made out of 1 1x8x8. I was able to figure out how to build a jig for the table saw to suit the project and then it was easy peasy lemon squeezy from there.
Mon, 12/21/2015 - 09:41
This is so clever and would make an inexpensive yet first-rate gift! I love it...thanks for sharing.
Fri, 10/28/2016 - 08:40
I would love to build this unique table, but can't seem to find some actual plans with dimensions and jigs
Fri, 10/28/2016 - 08:45
Would you please email me the plans for this table. Thanks so much

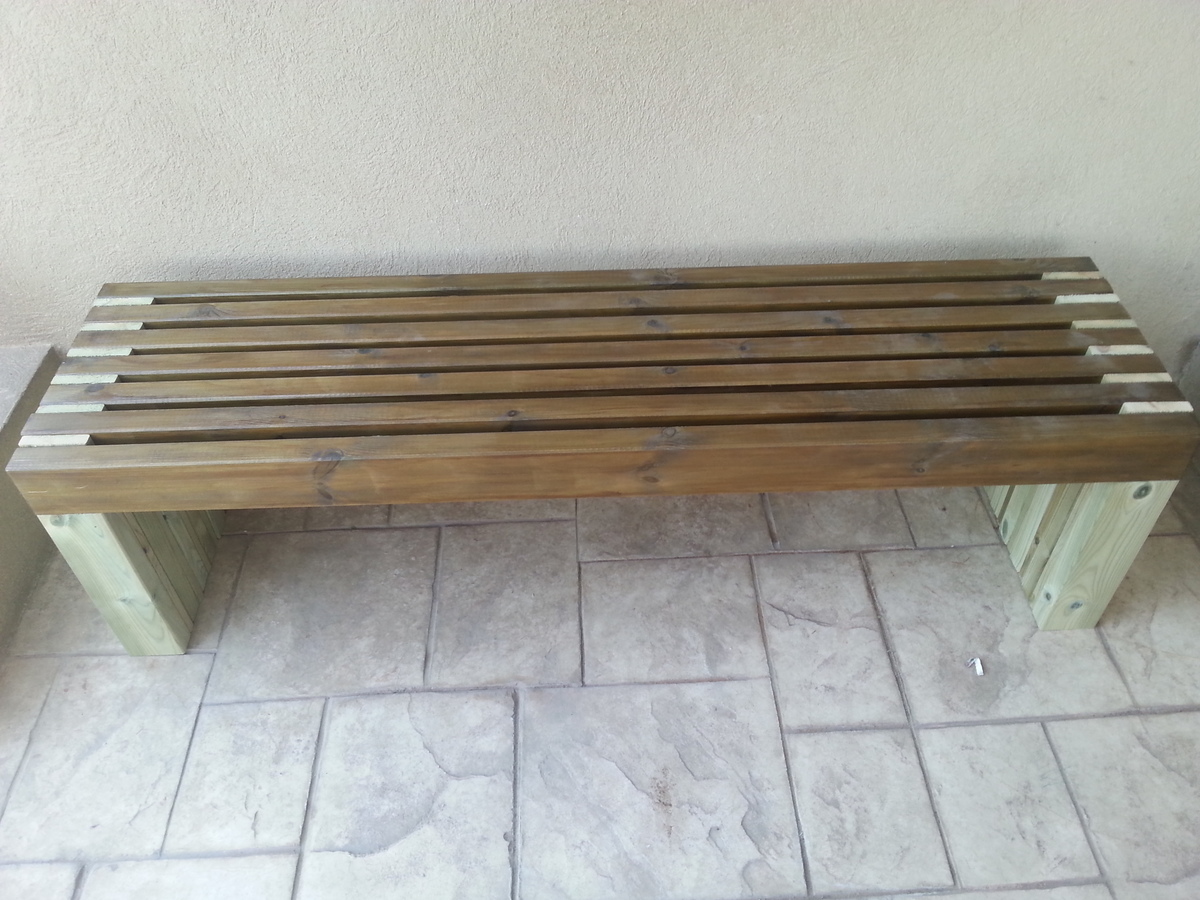
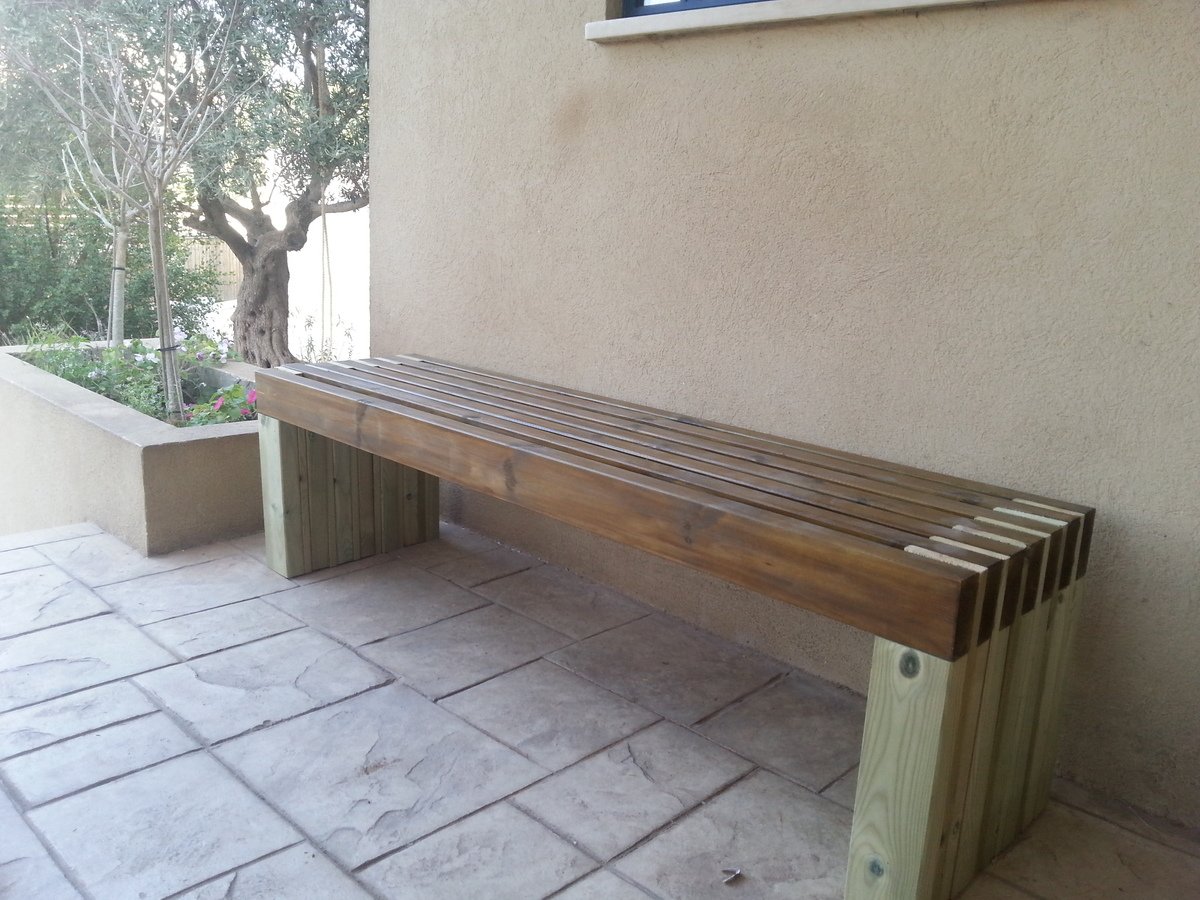
Thank you for the easy and fun bench plan.
It was really easy to install.
Even my 2 little daughters had fun (-:


Thu, 04/24/2014 - 08:06
I love the finish you did on the bench. Thanks for sharing!

It was so much fun to do and it's perfect for my front porch! I modified it a bit to fit and it was easy to do so.
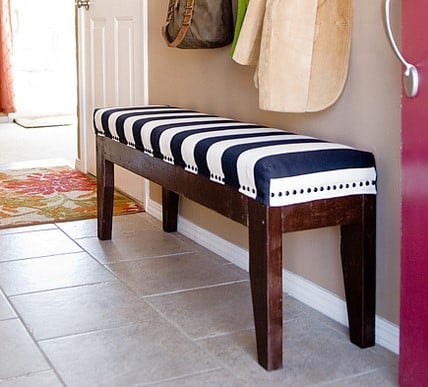
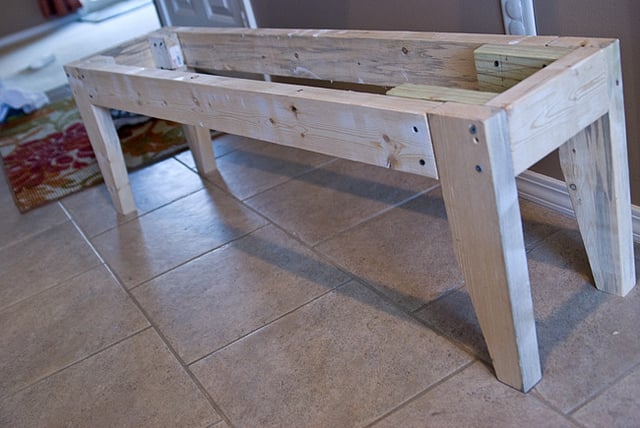
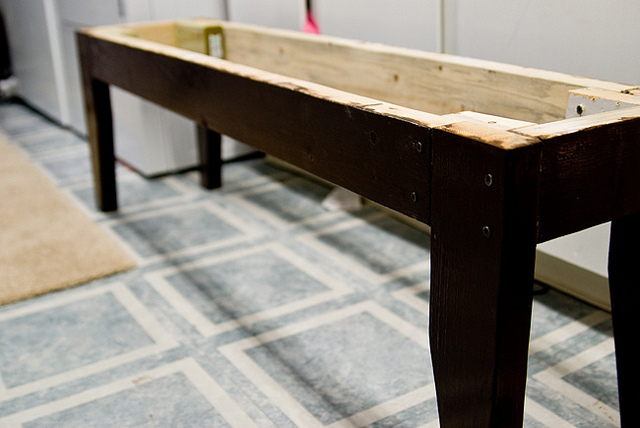
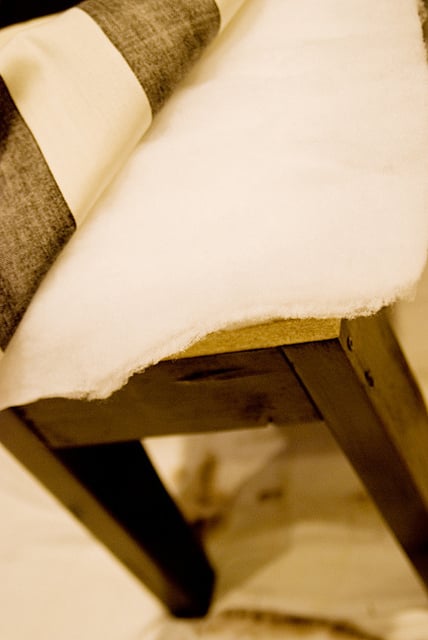
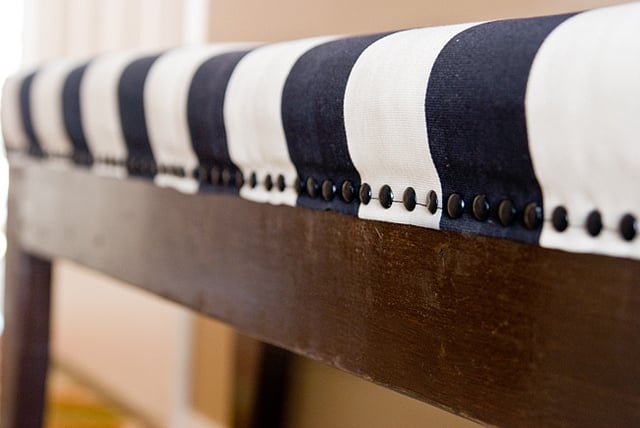
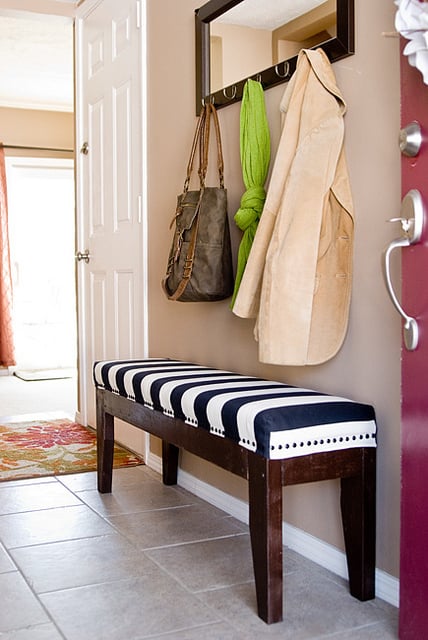
Wonderful project! Very fun. Built a bench from scrap 2x4s (left in the garage by our home's previous owner, so they were free!) and a piece of MDF shelving. Perfect for our entryway. The bench itself was incredibly easy to build. The hard part, in my opinion, was finishing it. So many pretty things to choose from! I used a piece of 2-inch foam plus a double layer of batting for the top, some striped upholstery fabric, and 160 nailheads to finish it off. Love it.

Tue, 02/14/2012 - 12:45
This really came out nice, and lovely selection of fabric.
Sun, 02/19/2012 - 12:54
Love it! Wondering if I could build it and have some type of slipcover on it. (house with three kids under 5 years old does not go well with permanent upholstery! haha)
Fri, 03/09/2012 - 09:06
If you check out Ana's original plans for the Easiest Upholstered Bench, you'll see that she DID use slipcovers! You could make different ones for each season, or for holidays like Christmas or birthdays...
Wed, 10/30/2013 - 08:36
Hi Katie, I am having a difficult time finding fabric (hard to believe)! did you get yours online? How wide are the stripes? most fabric I am finding is not wide enough to cover the top and sides. Thanks for the help! Great build!

