DIY Greenhouse
DIY Greenhouse by Trenton Kirby on Facebook!
Built from Plan(s)
DIY Greenhouse by Trenton Kirby on Facebook!
House Beds are a huge trend right now. I saw my first house bed over a year ago and I fell in love and I swore that as soon as we built our daughter a toddler bed someday, I would make a super cute pink house bed, decorated in cute pom pom buntings and it would be perfect. Well, fast forward a year, and she’s only 16 months, still a ways away from being in a toddler bed. Then I had a idea! We are in the process of decorating our boys bedroom. and we needed to build them a new bunk bed set as their old set was massive and took up half their room. Click link below to view the full tutorial!
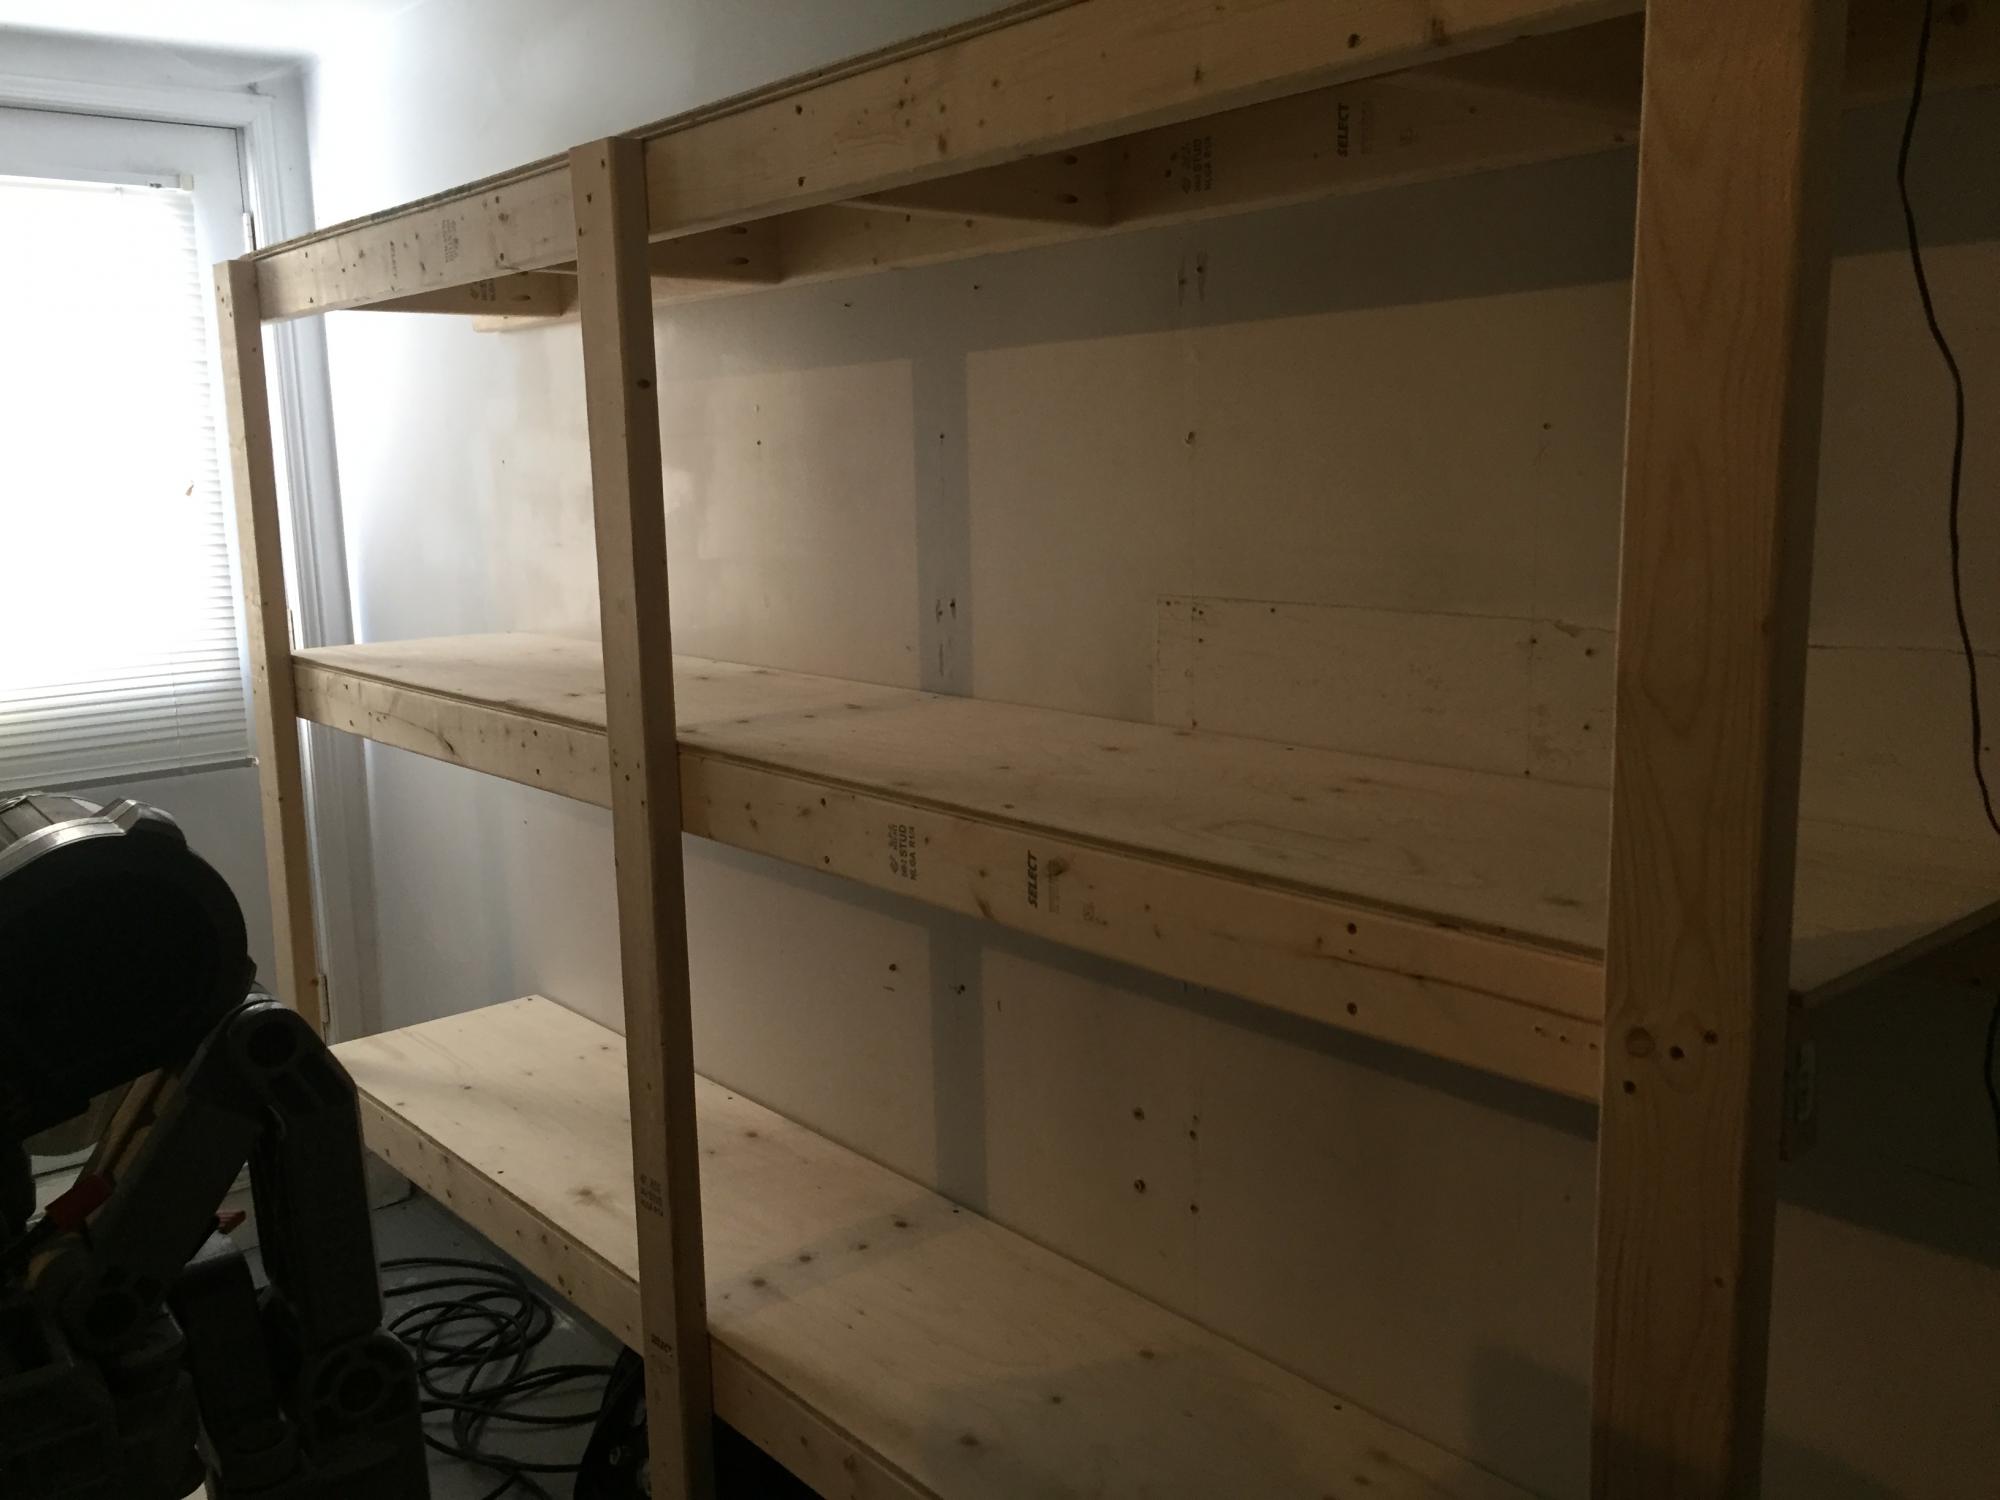
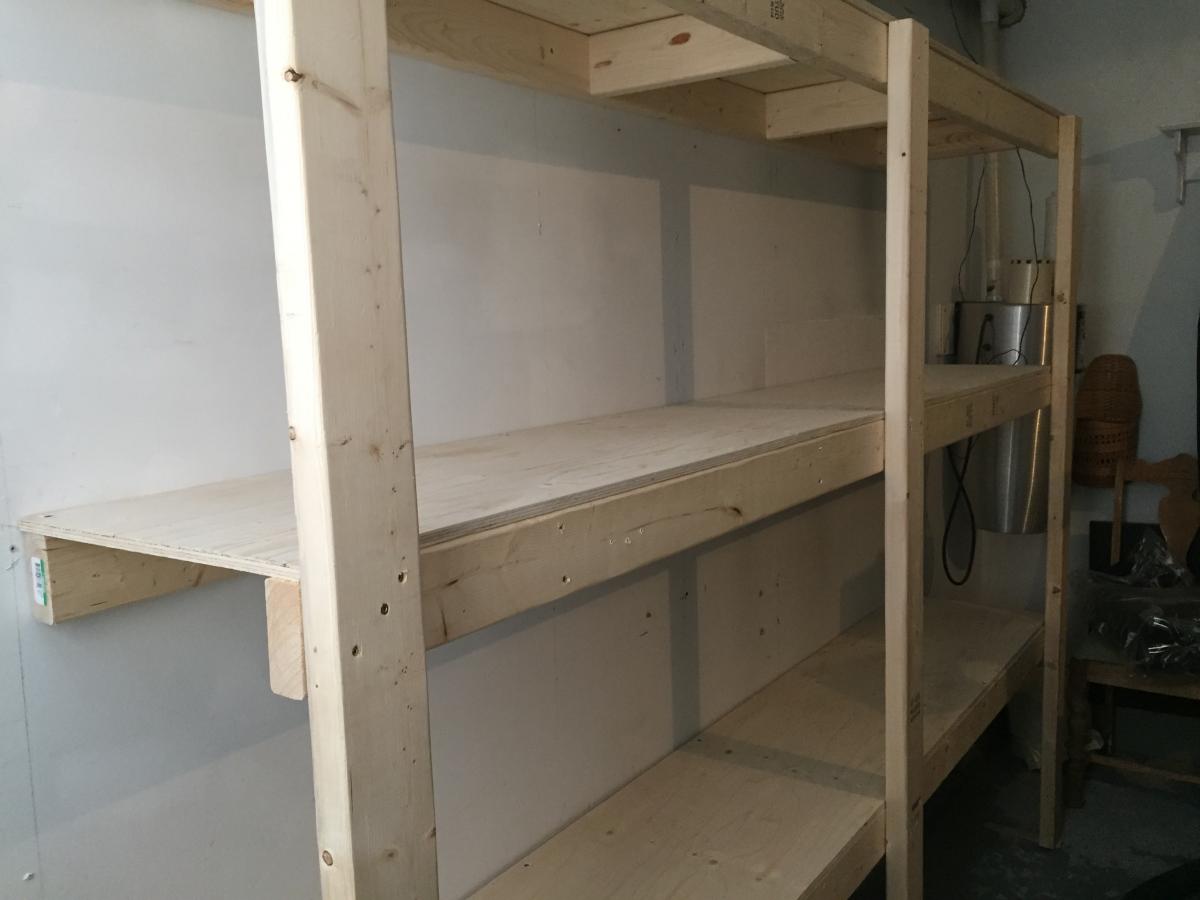
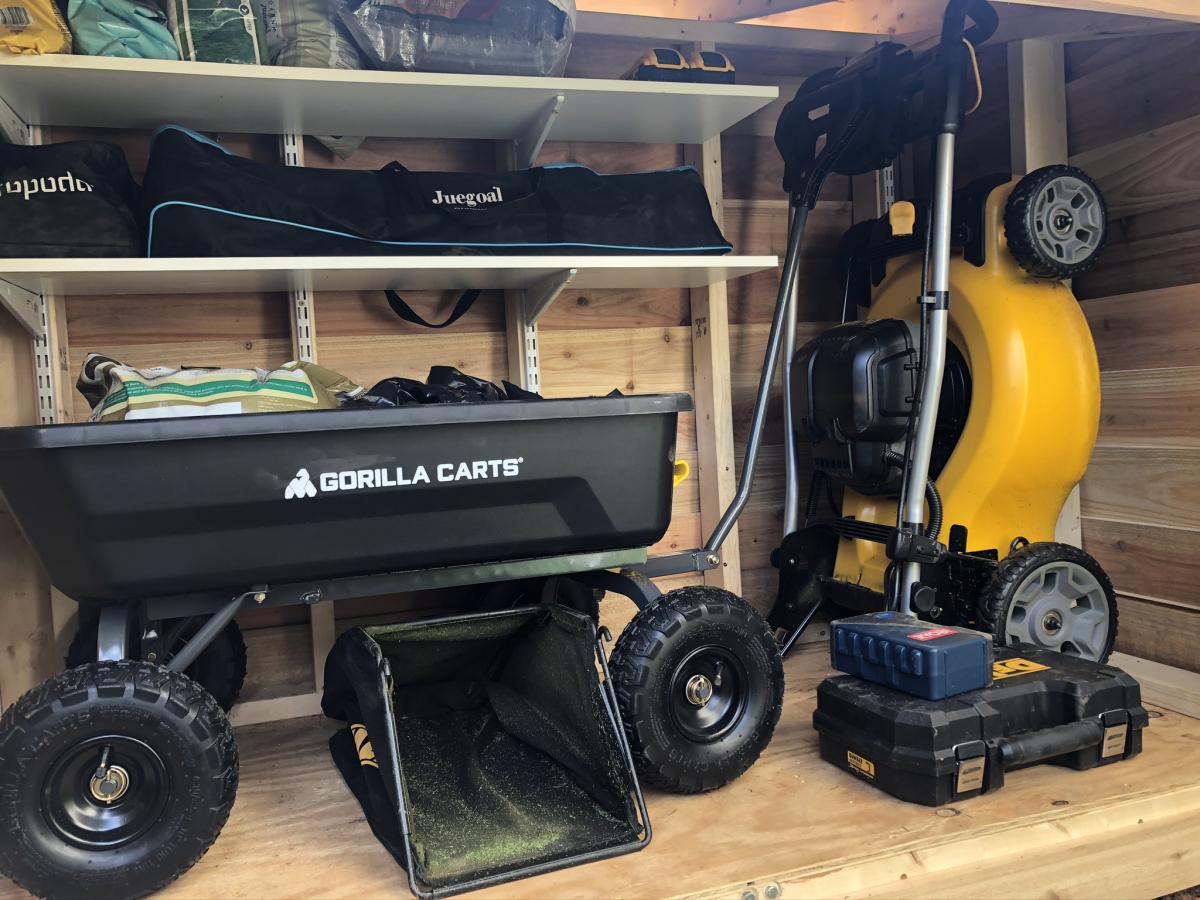
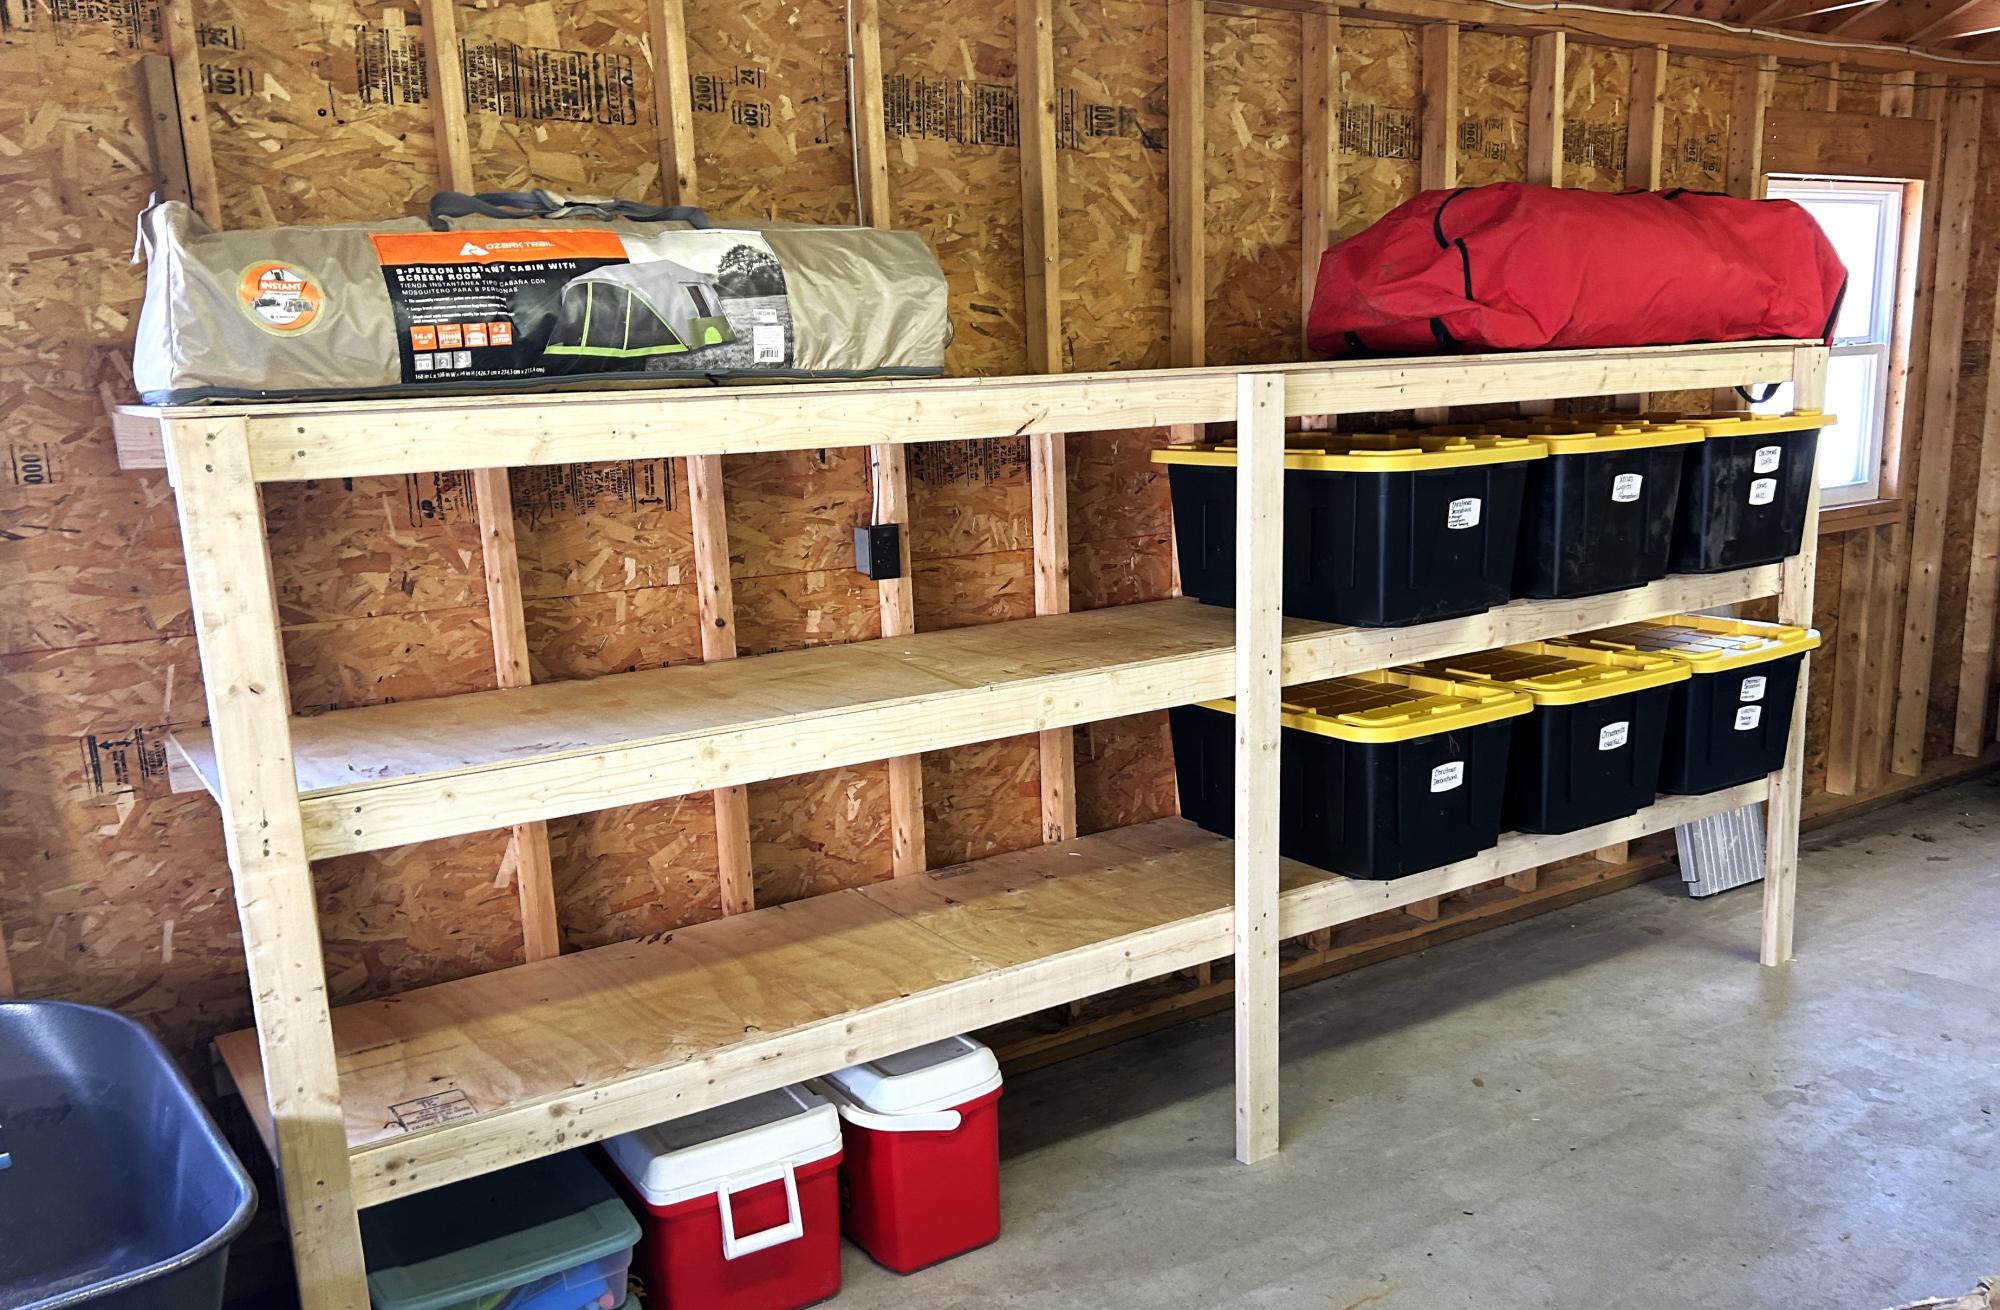
These shelving were great for our garage storage.
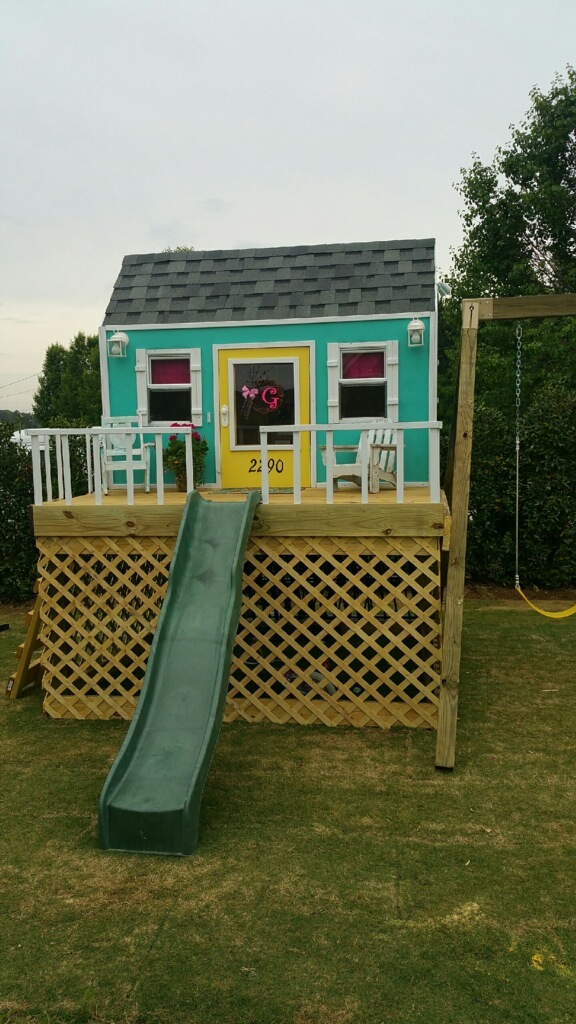
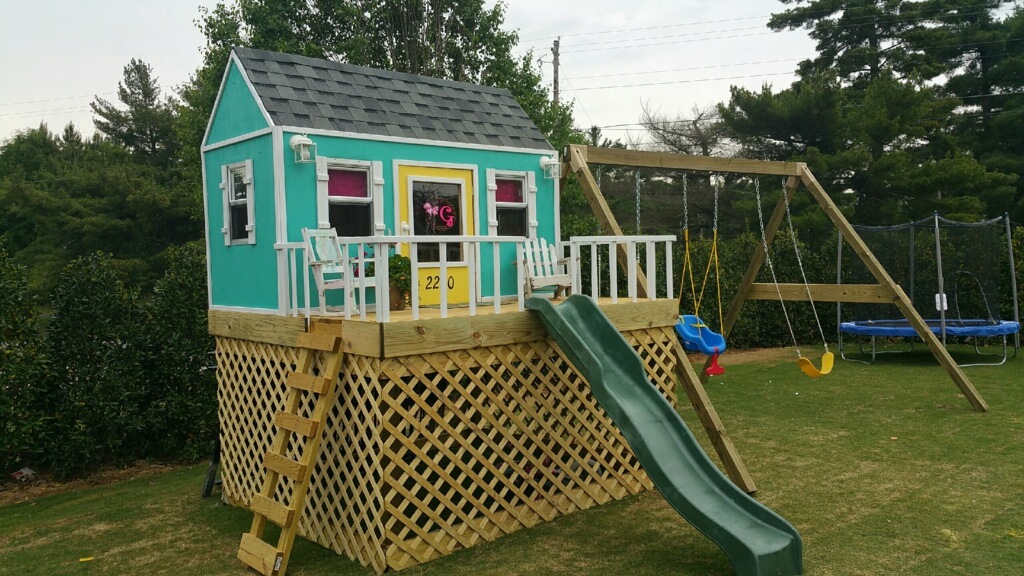
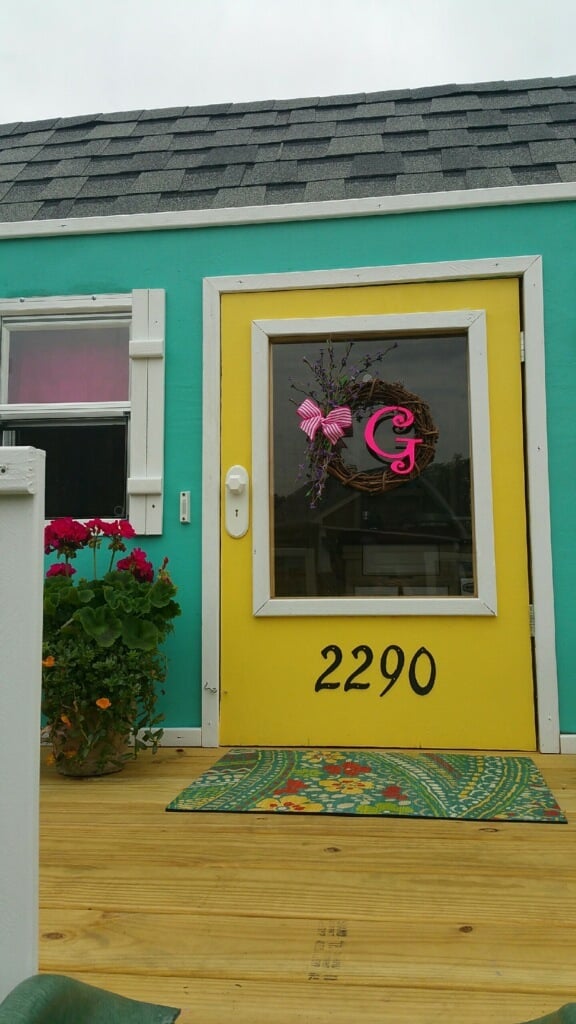
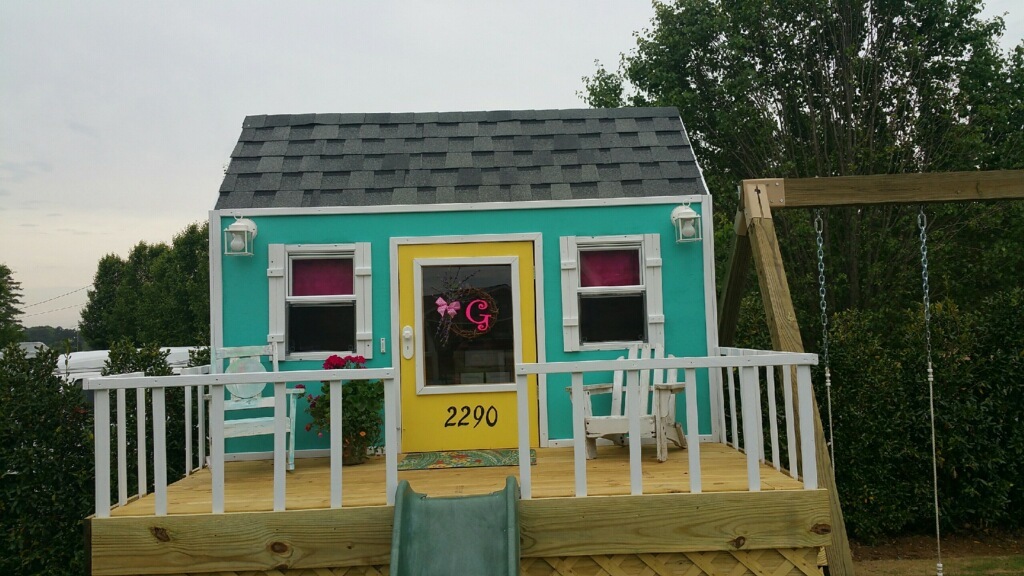
Perfect little playhouse my husband built for our girls. It took about a week to build by himself, but worth every minute. He did a wonderful job. Such a good daddy!
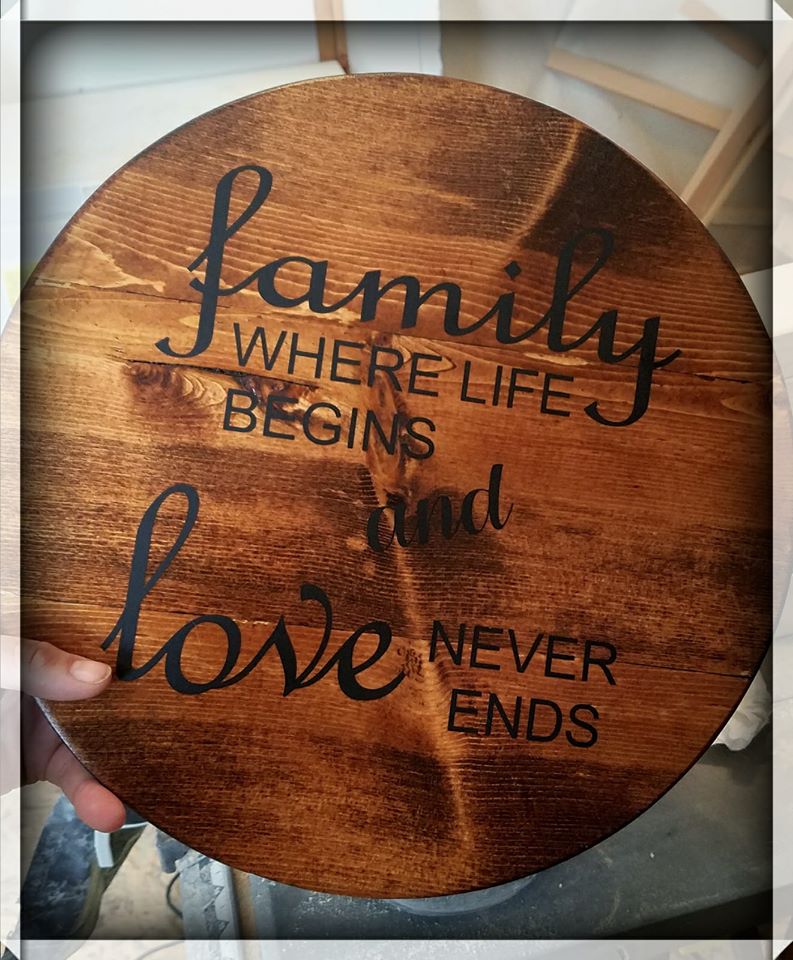
Used a Milescraft Circle Guide to cut the circle, then stained in Minwax Honey and used a Silhouette Cameo for the vinyl wording.
These were so easy to make. I actually messed up on the smaller one and used the 2x4's on the legs. By the time I realized it, I had to use the 2x3's on the top. I just used more of them. It still turned out great. My wife had me make another one for an empty space we had. I used the same basic layout and just modified my length and width. Thanks for the great plans.
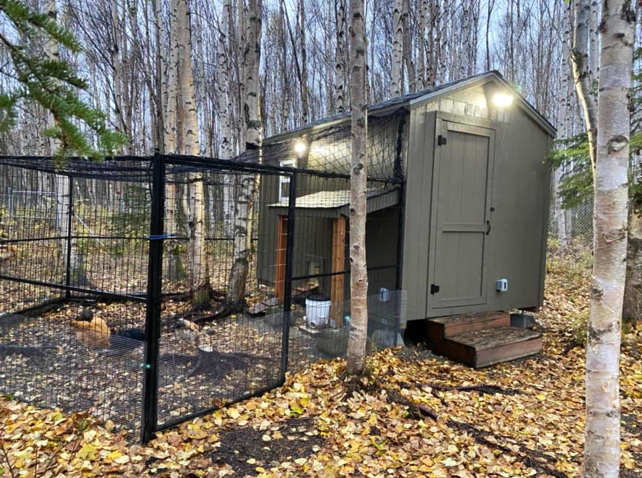
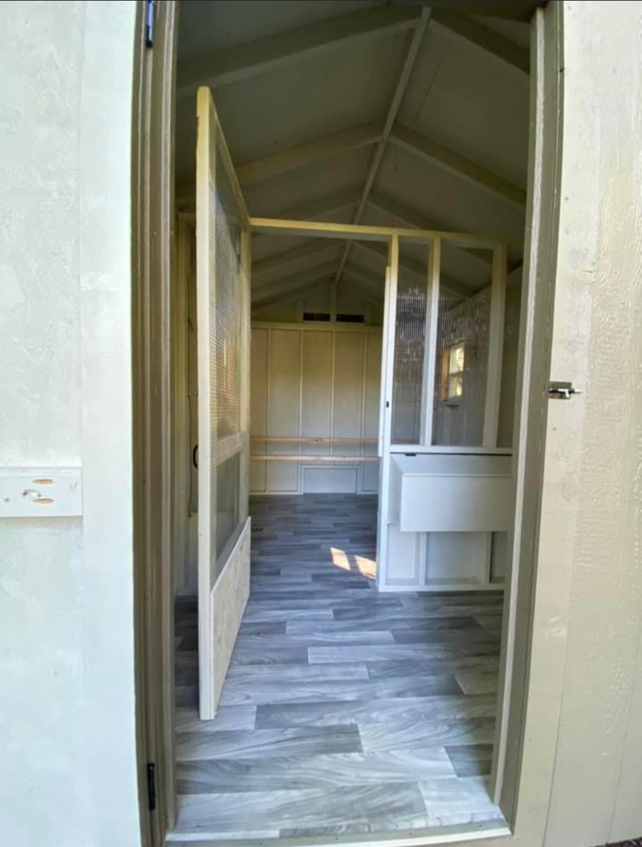
8x12 coop modified from your classic shed plans. 2/3 for the chickens, 1/3 for storage.
by Harmony Munson
Mon, 10/16/2023 - 10:48
Fabulous job on this project, love the color choice and functionality!
Fri, 10/27/2023 - 11:54
Look really roomy plus a place for storage in front for feed.
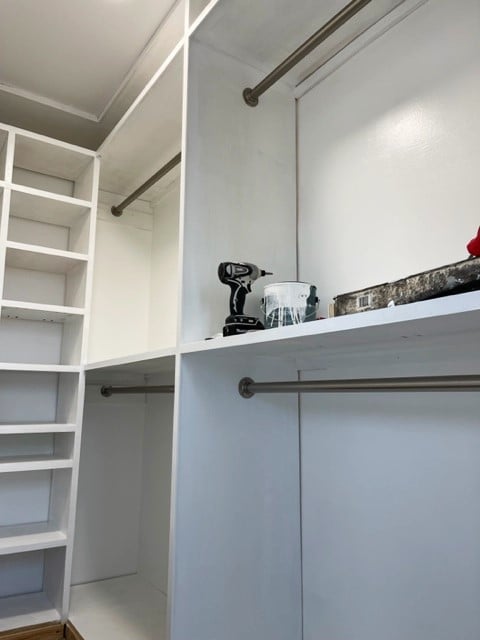
I love the outcome of this project! I removed the old wire shelving and used 3/4 inch sanded plywood and few pieces of trim and pine to build this floor to ceiling custom closet. Then I primed and painted, and installed the clothes rods. Out of the frame are new recessed lights and a tile heated floor!
Laura E.
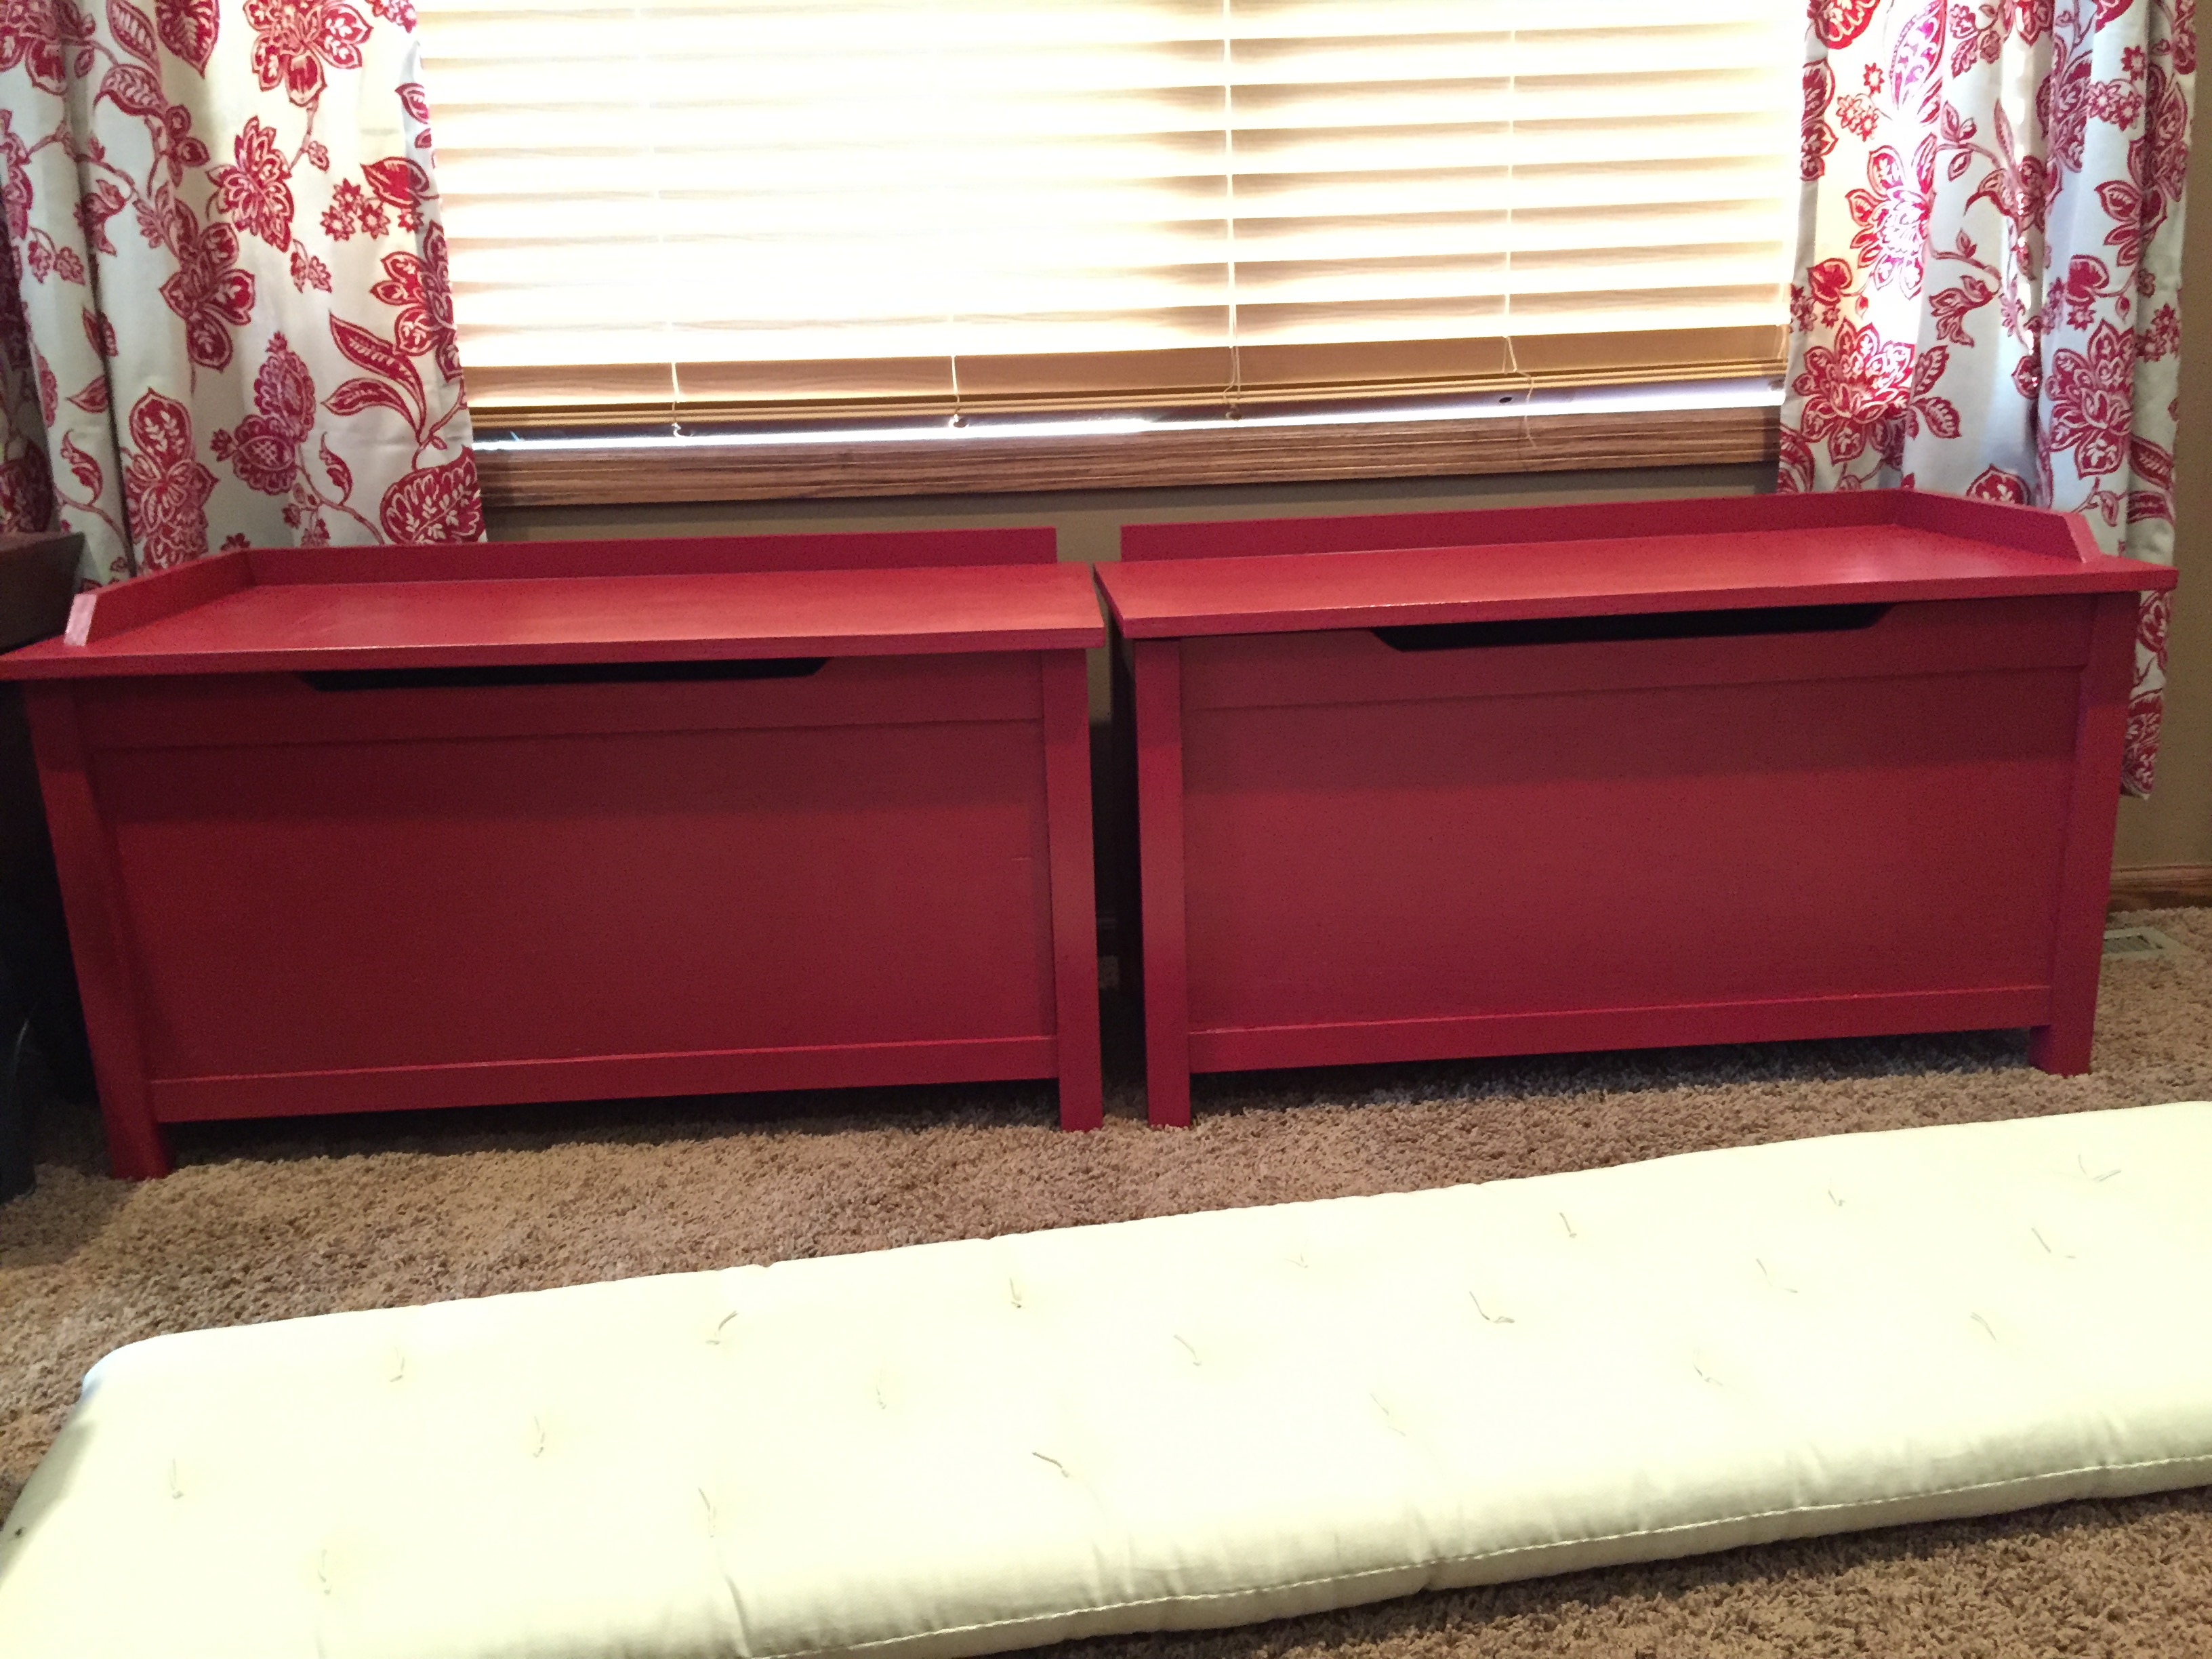
-made with pine.
- paint was matched at Sherwin Williams to other furniture.
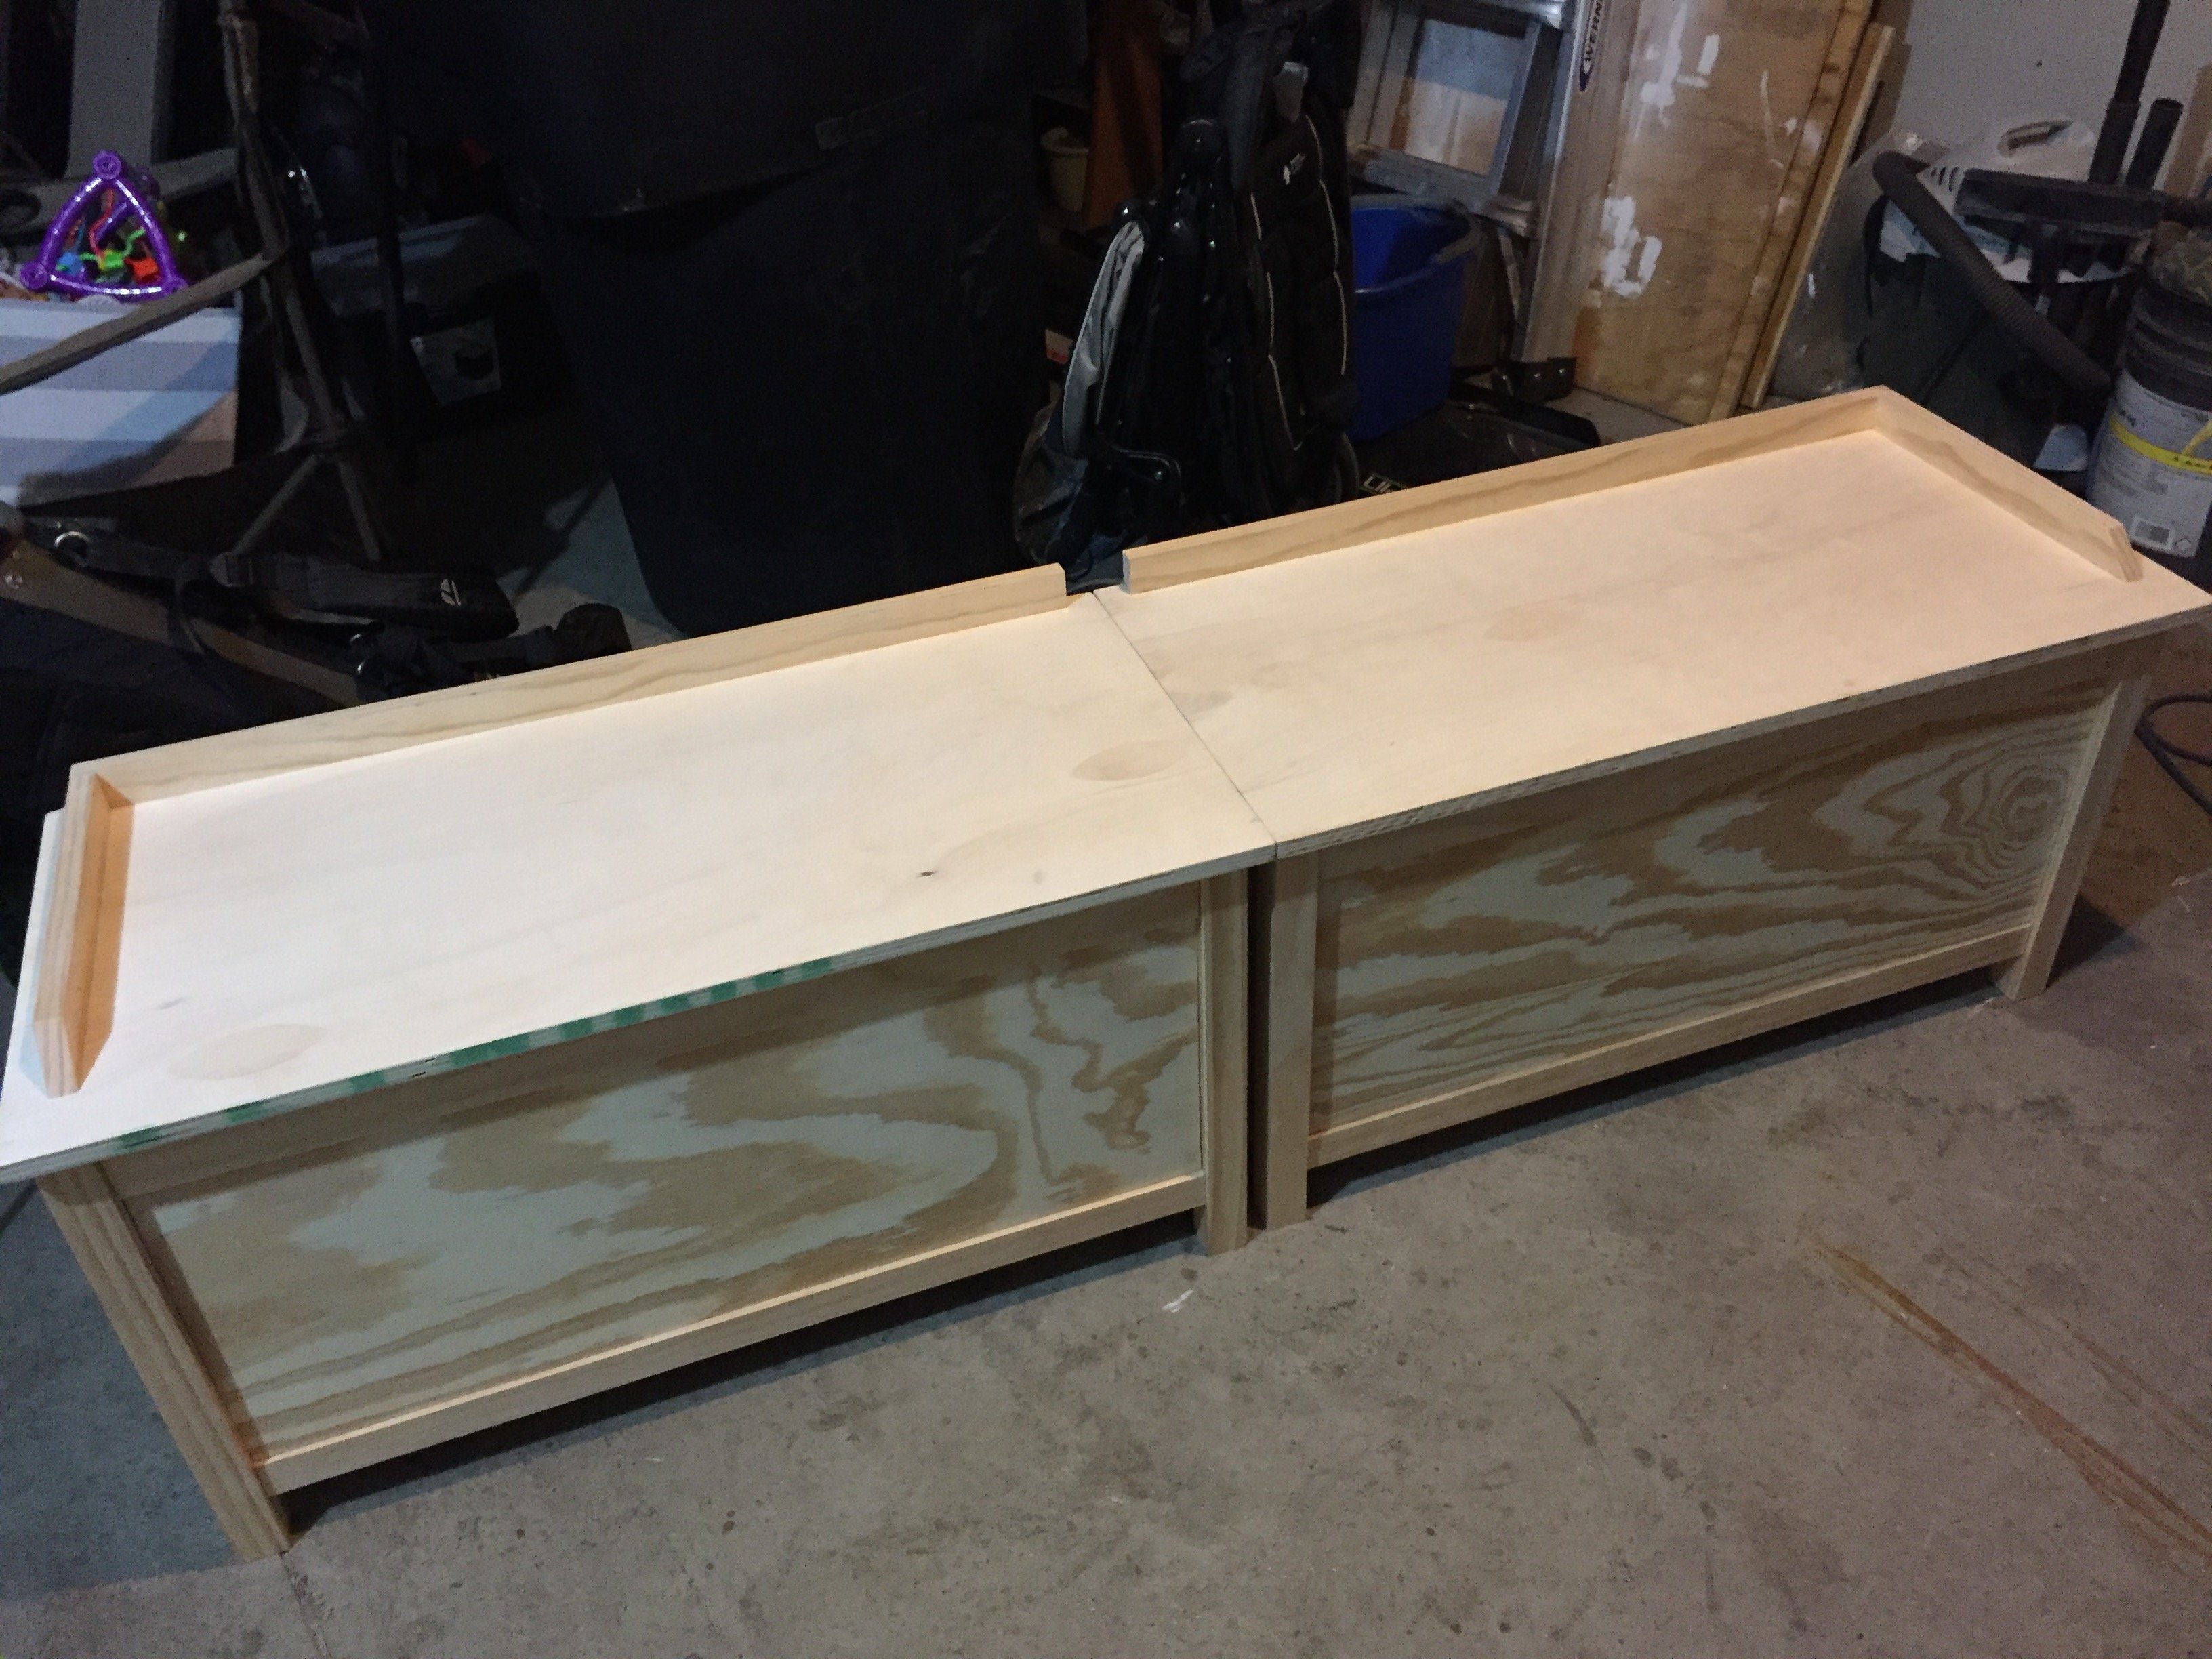
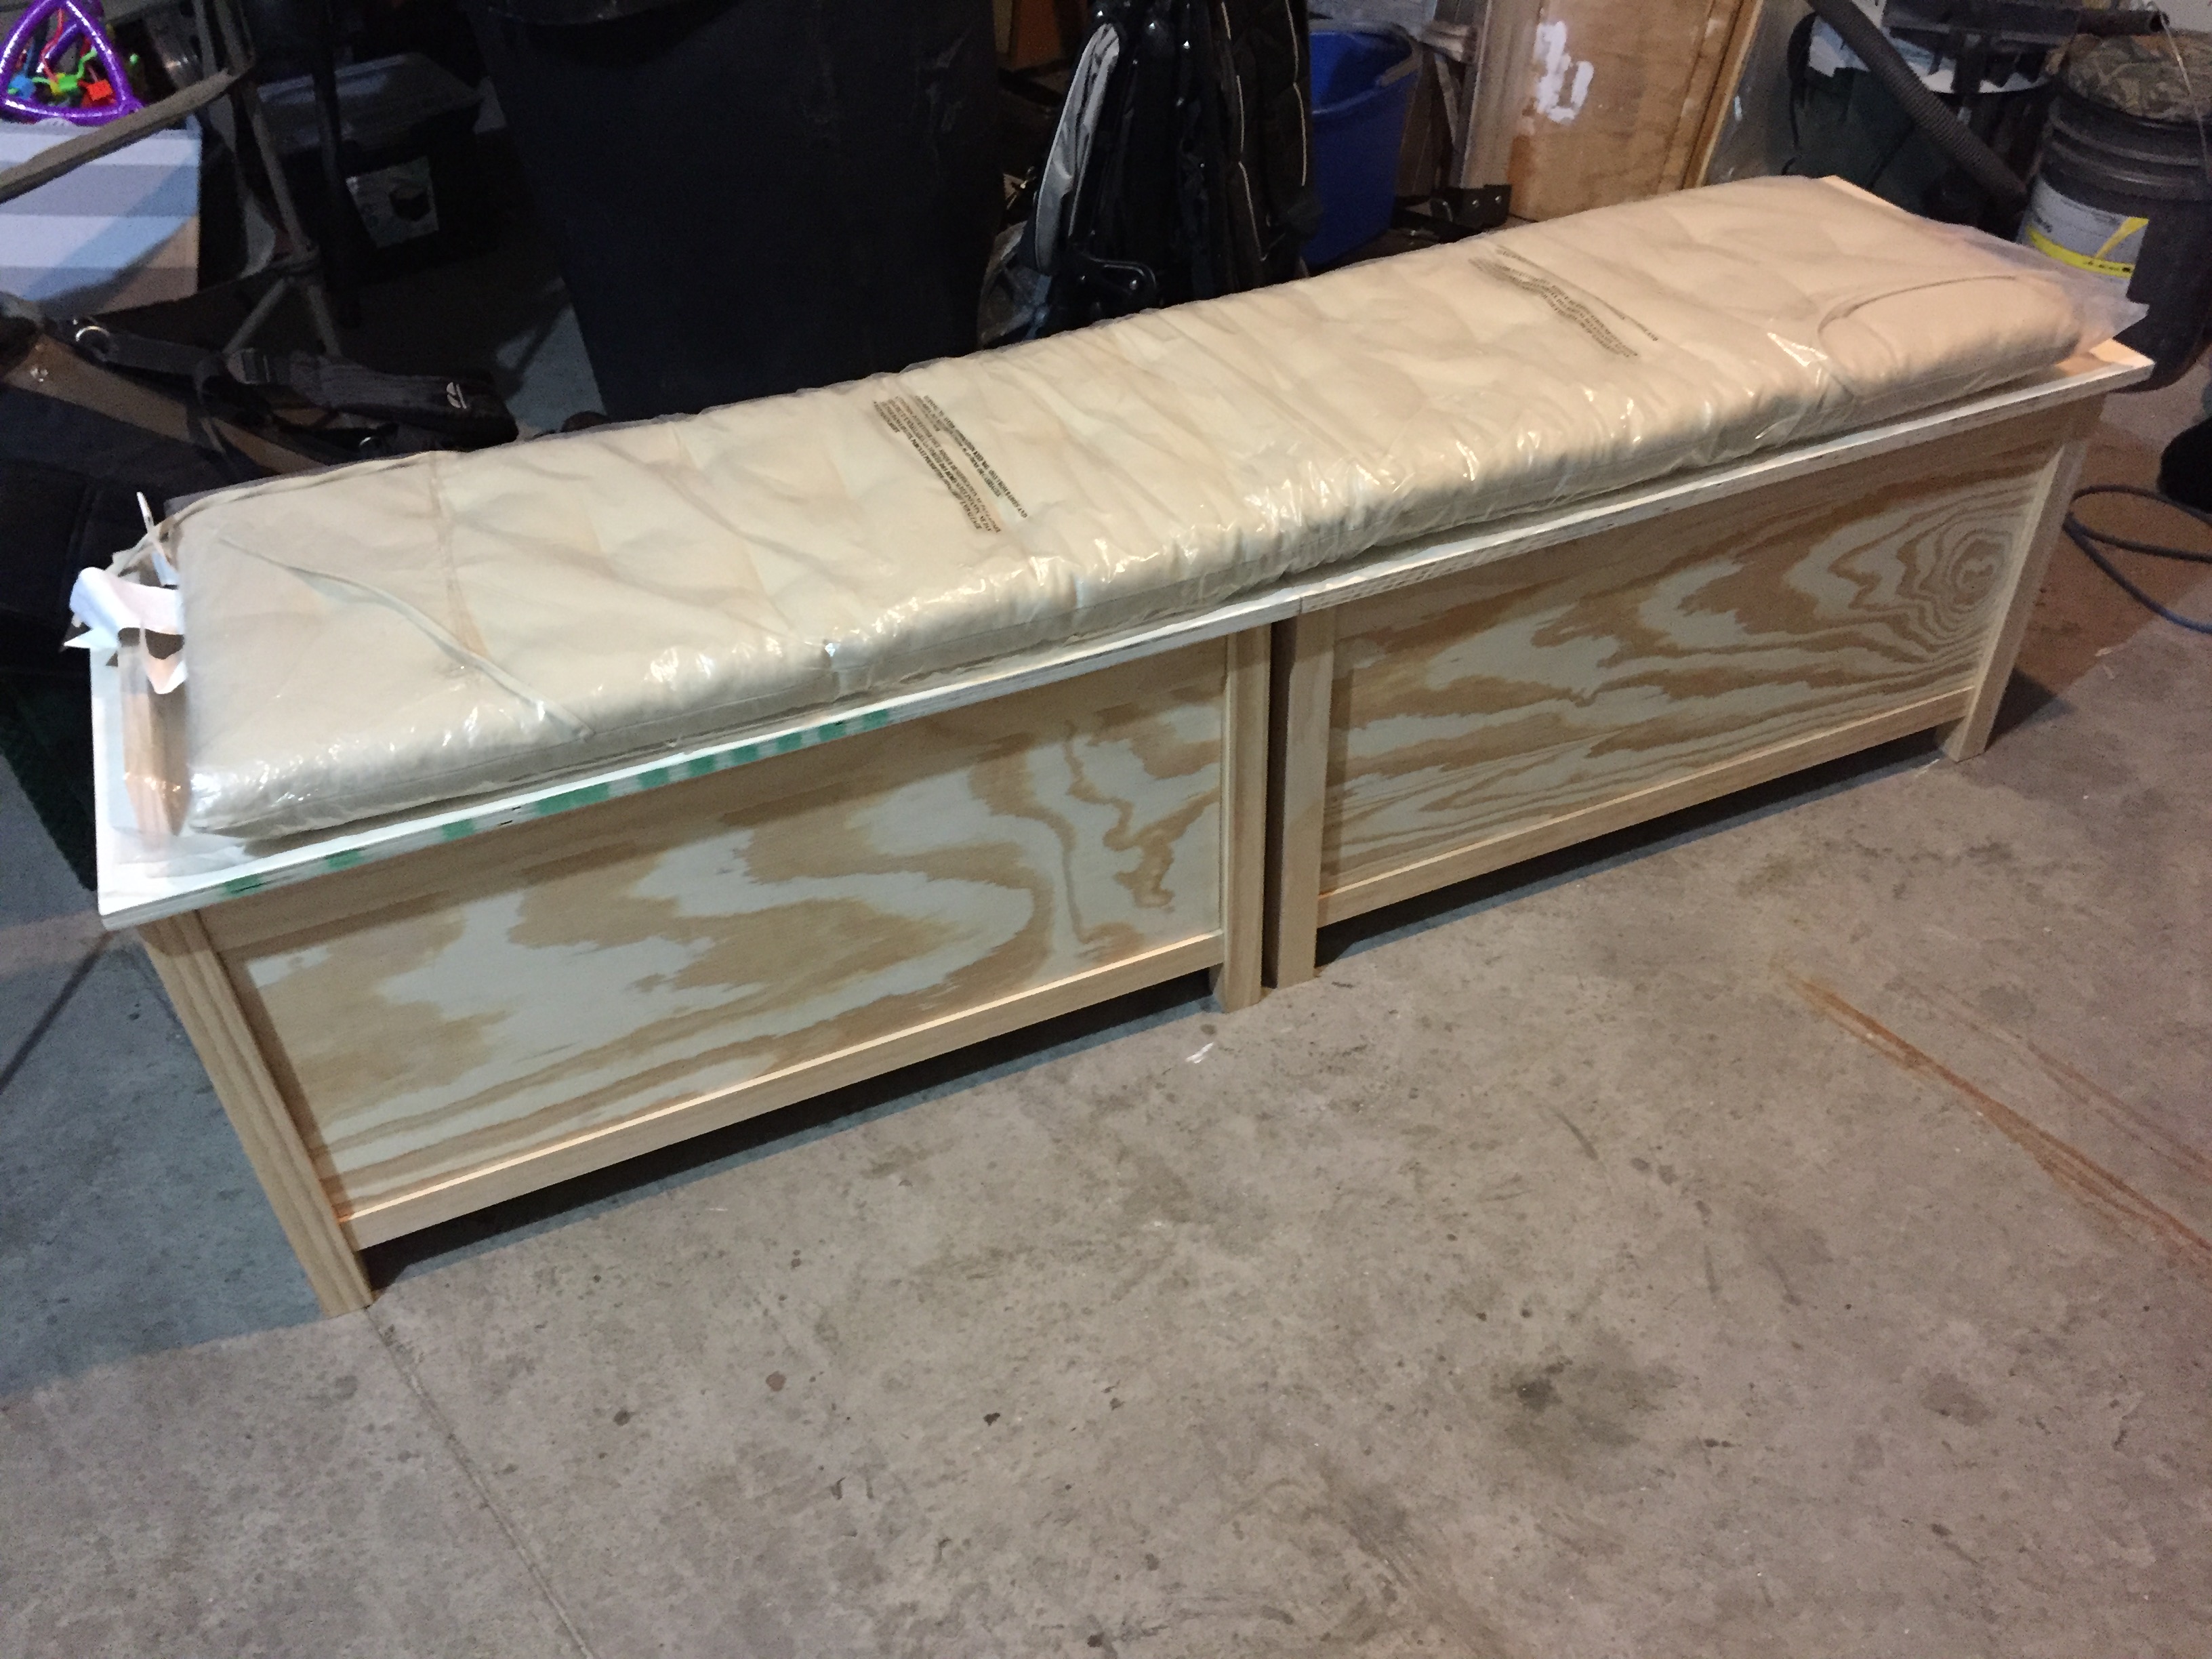
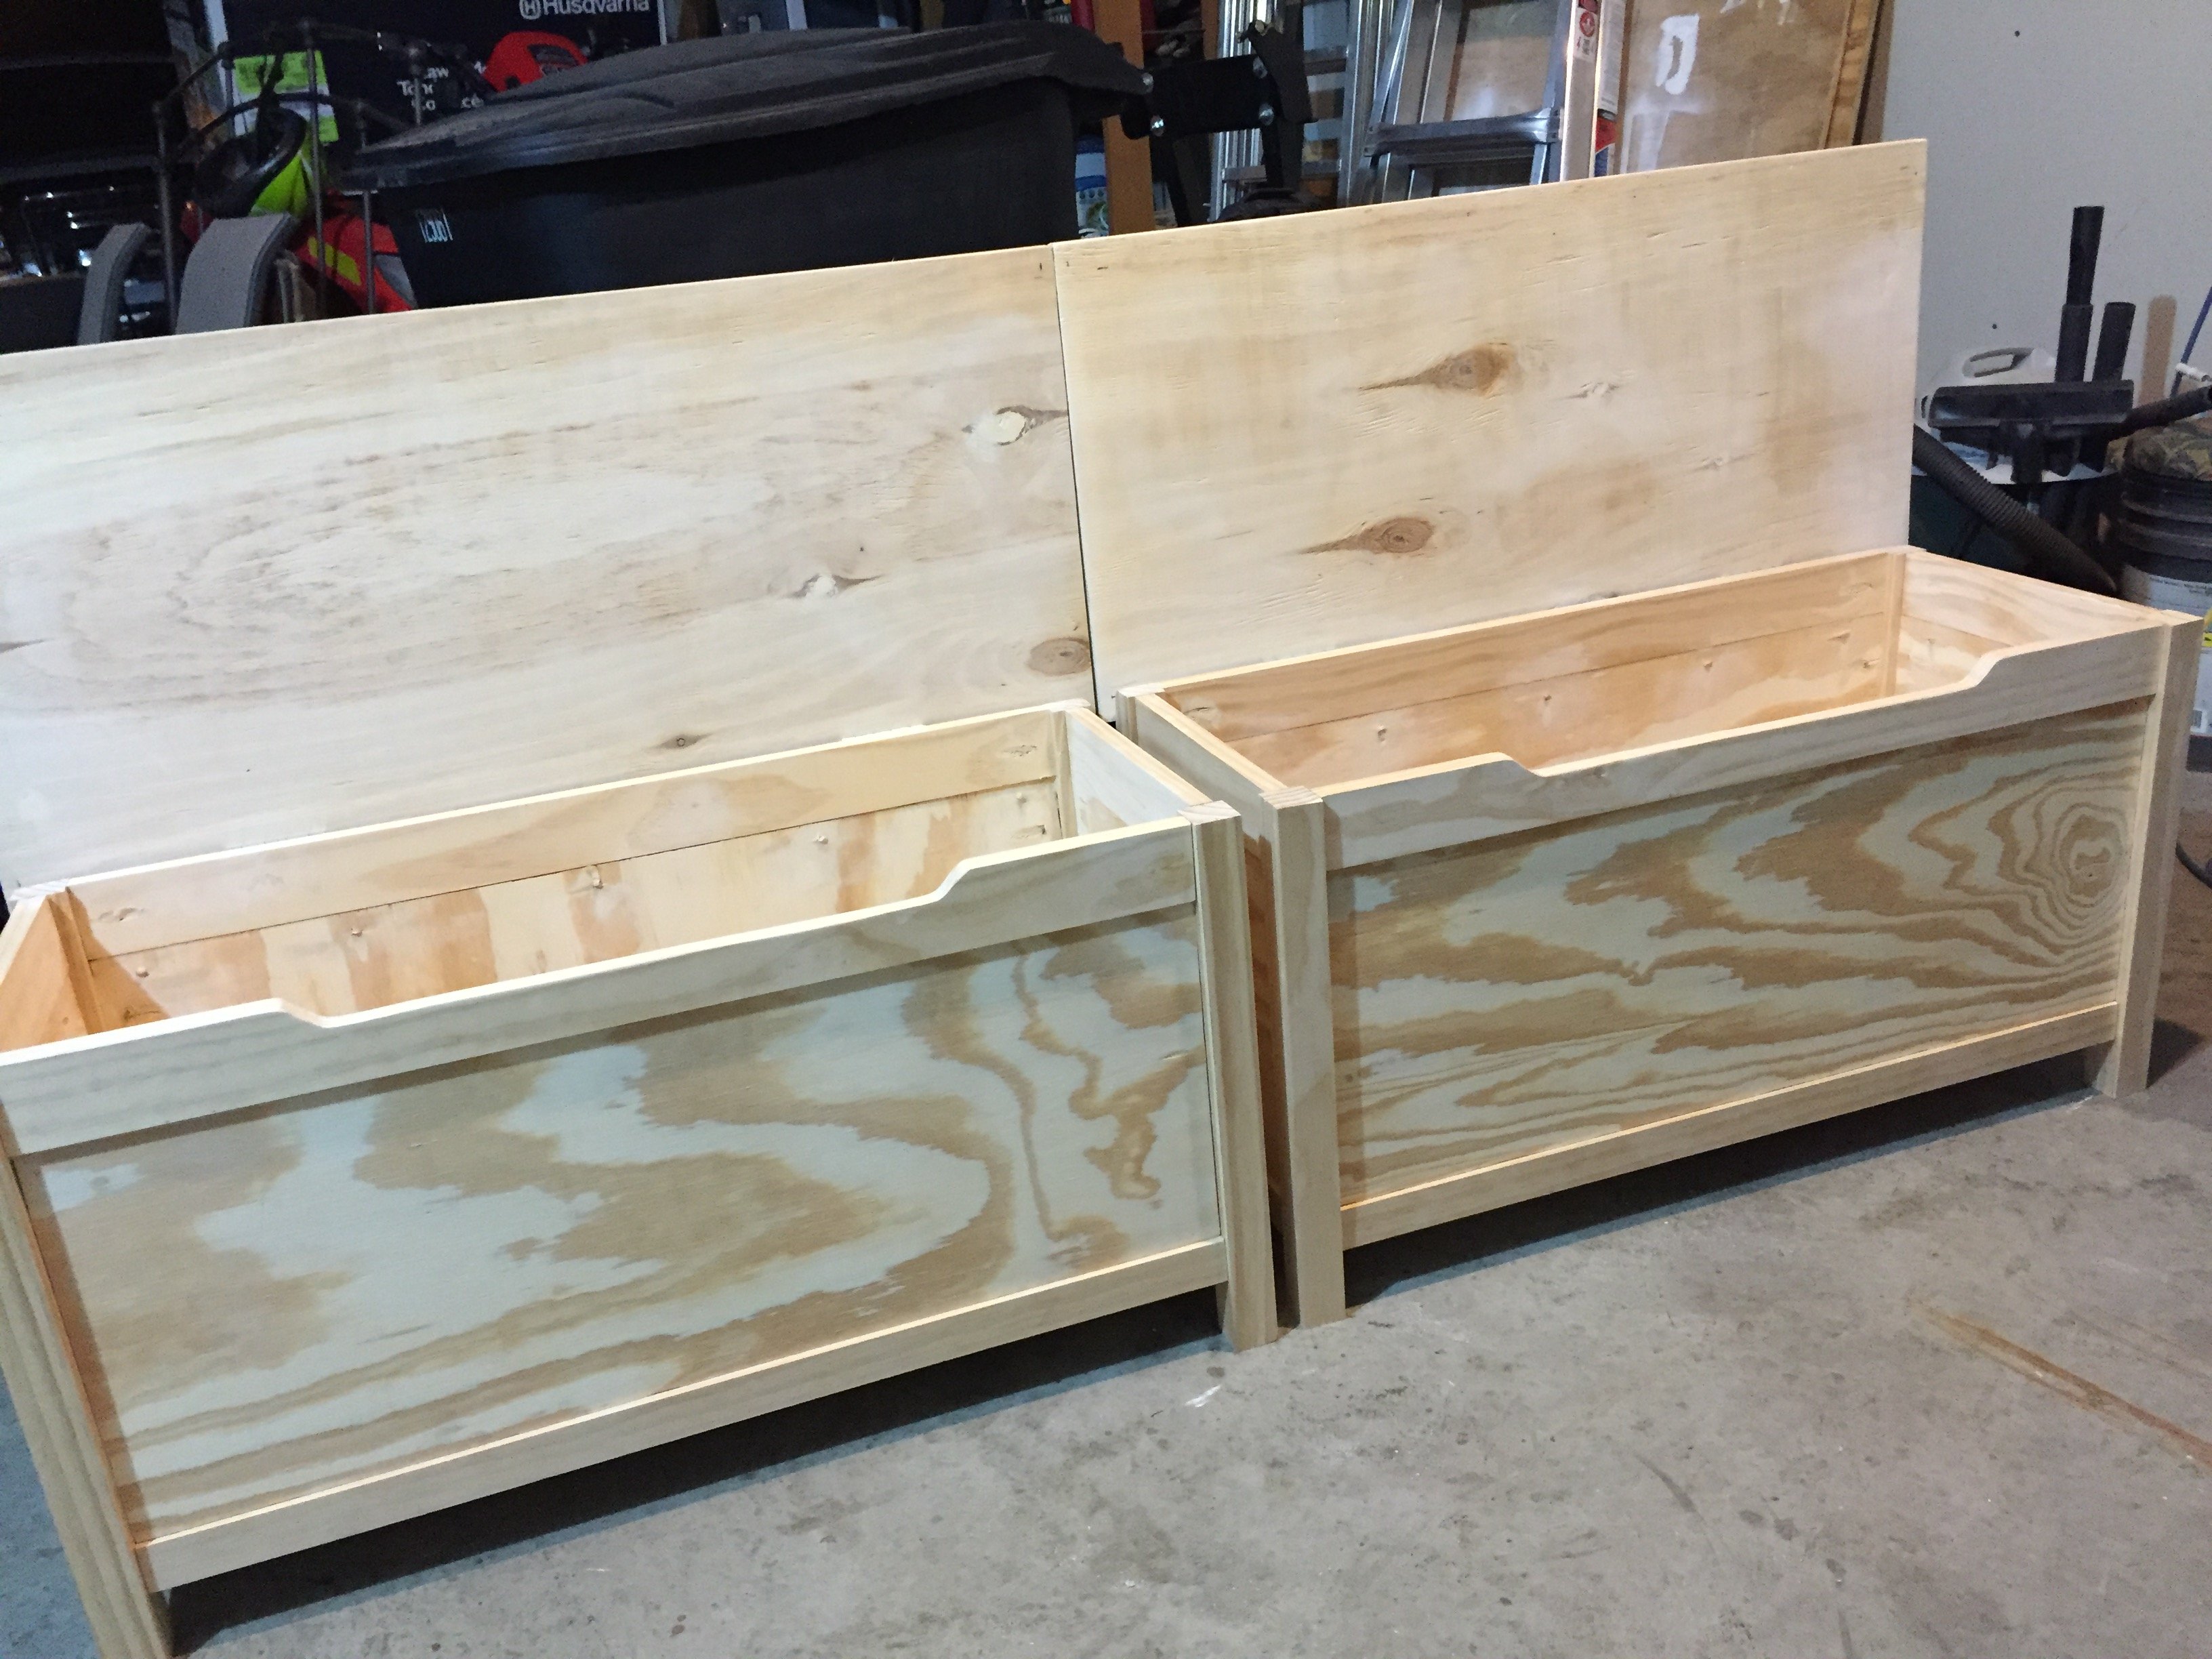
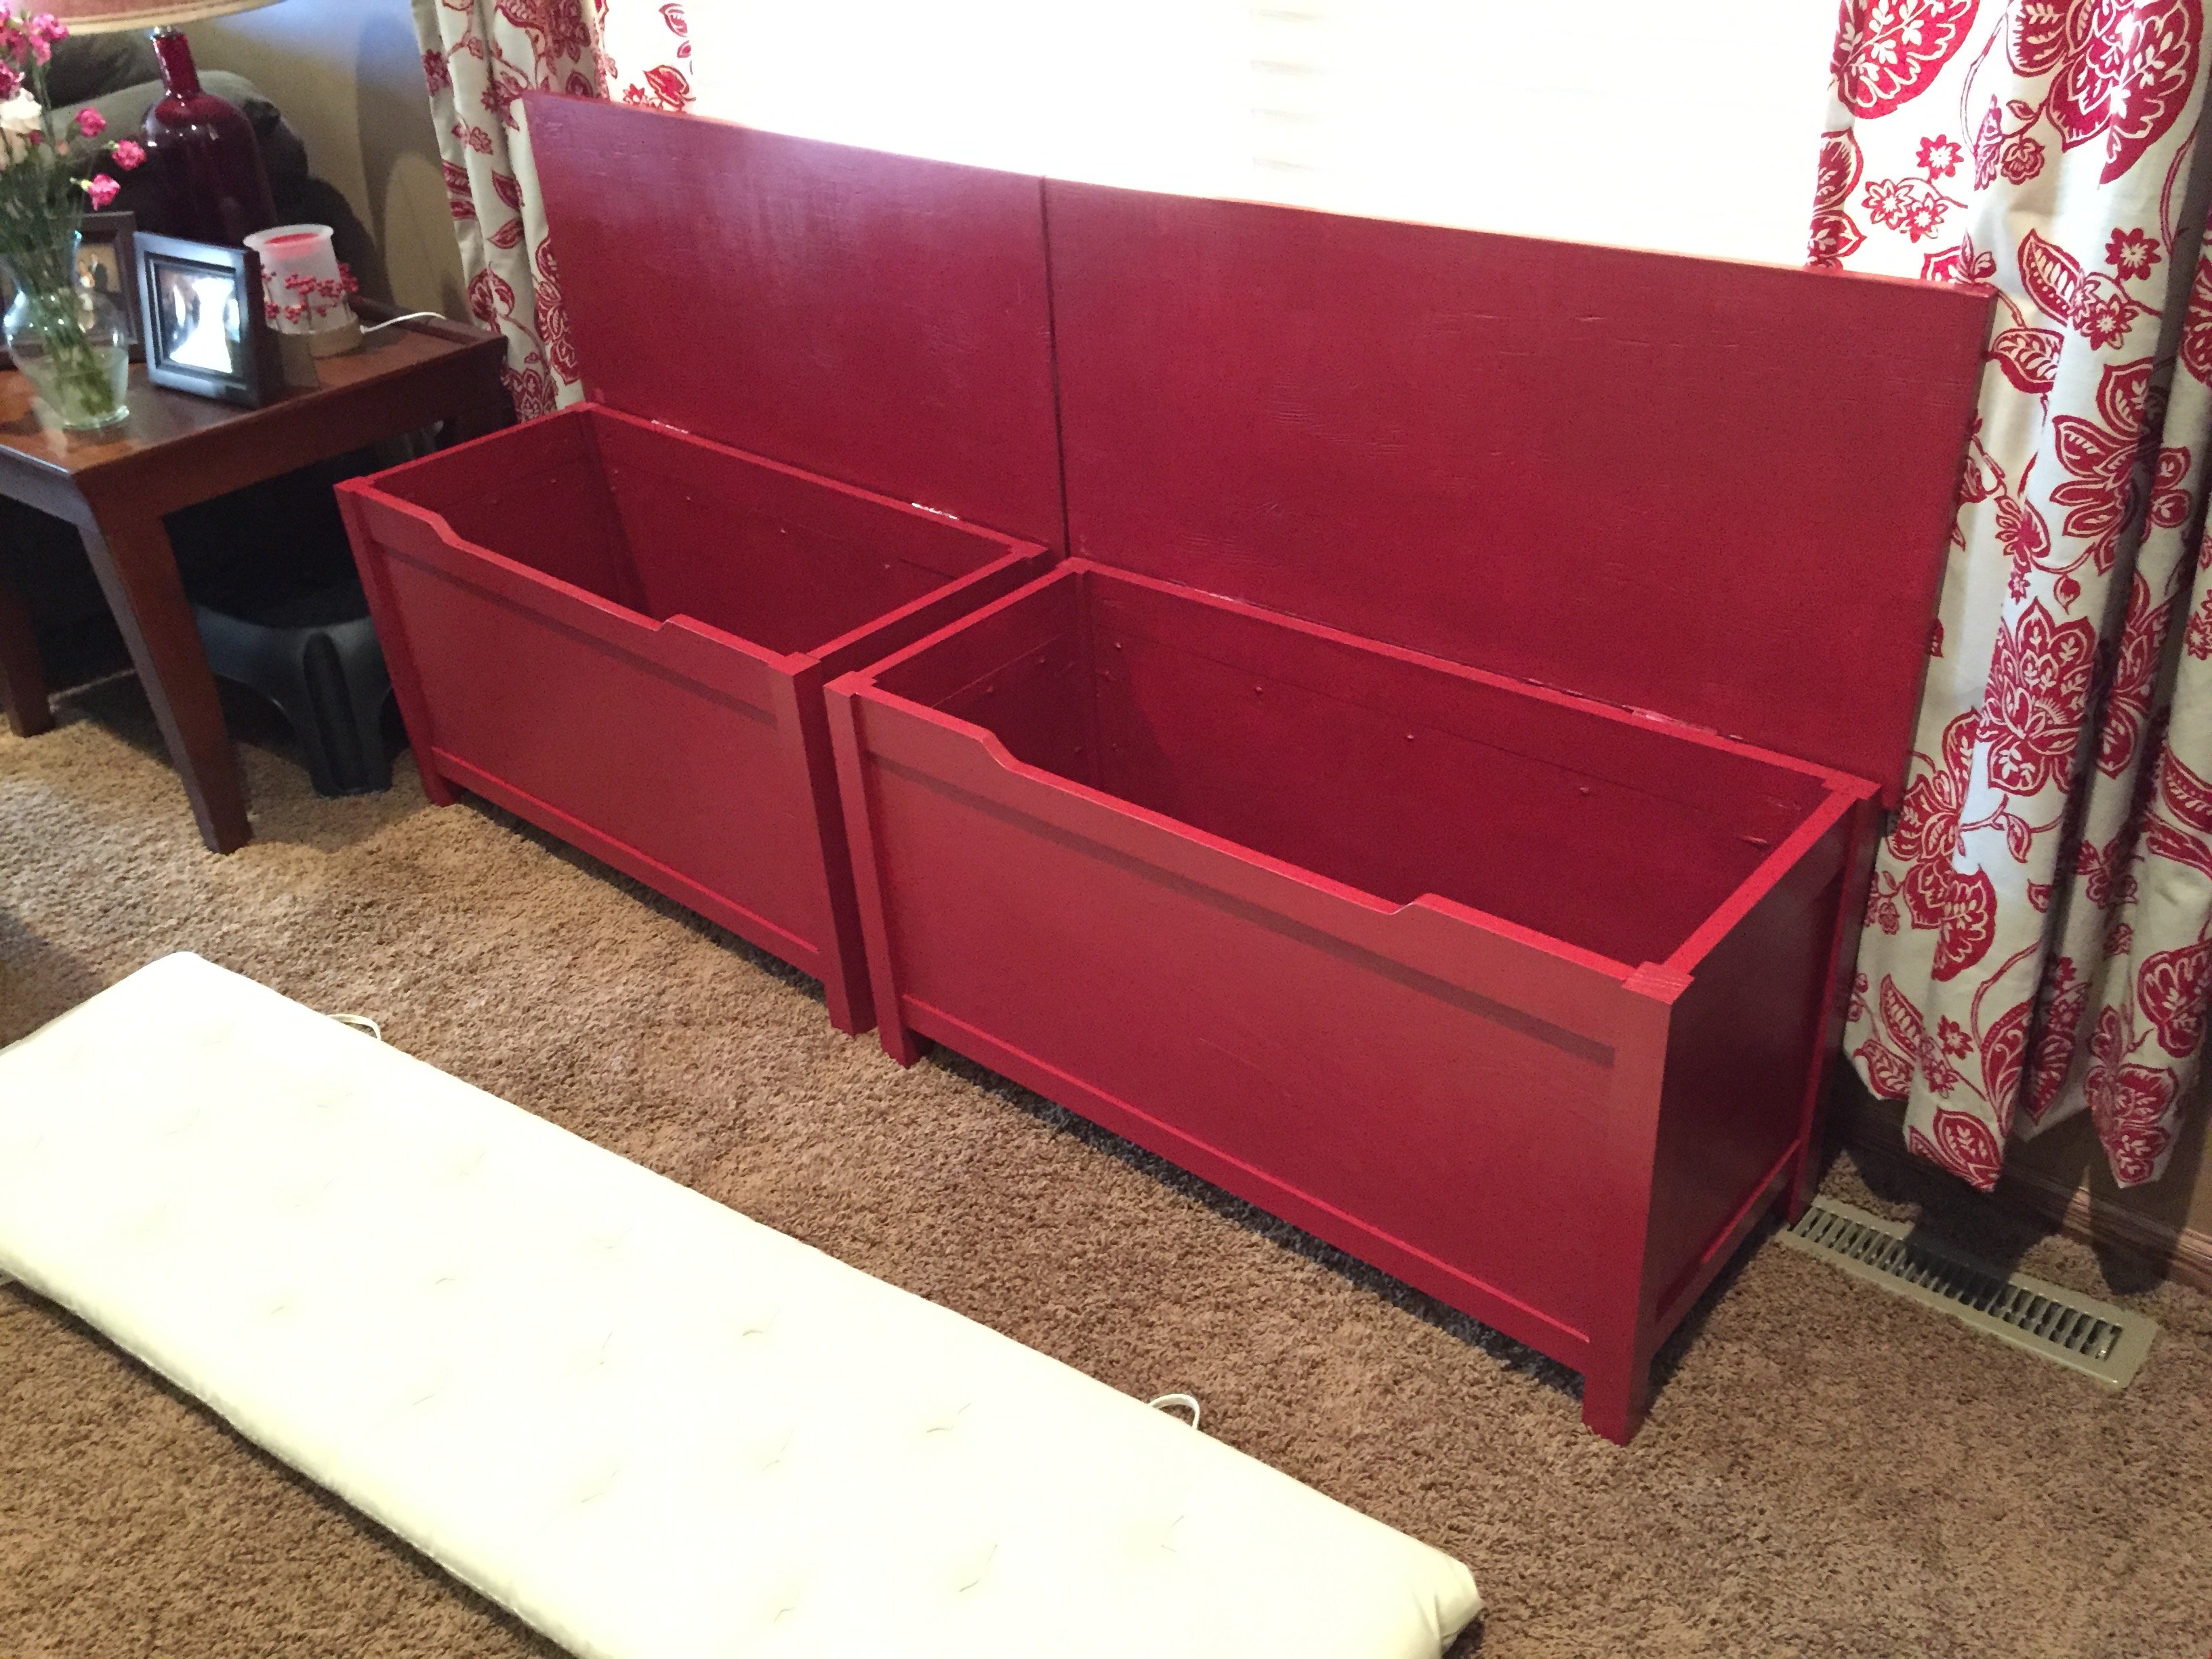

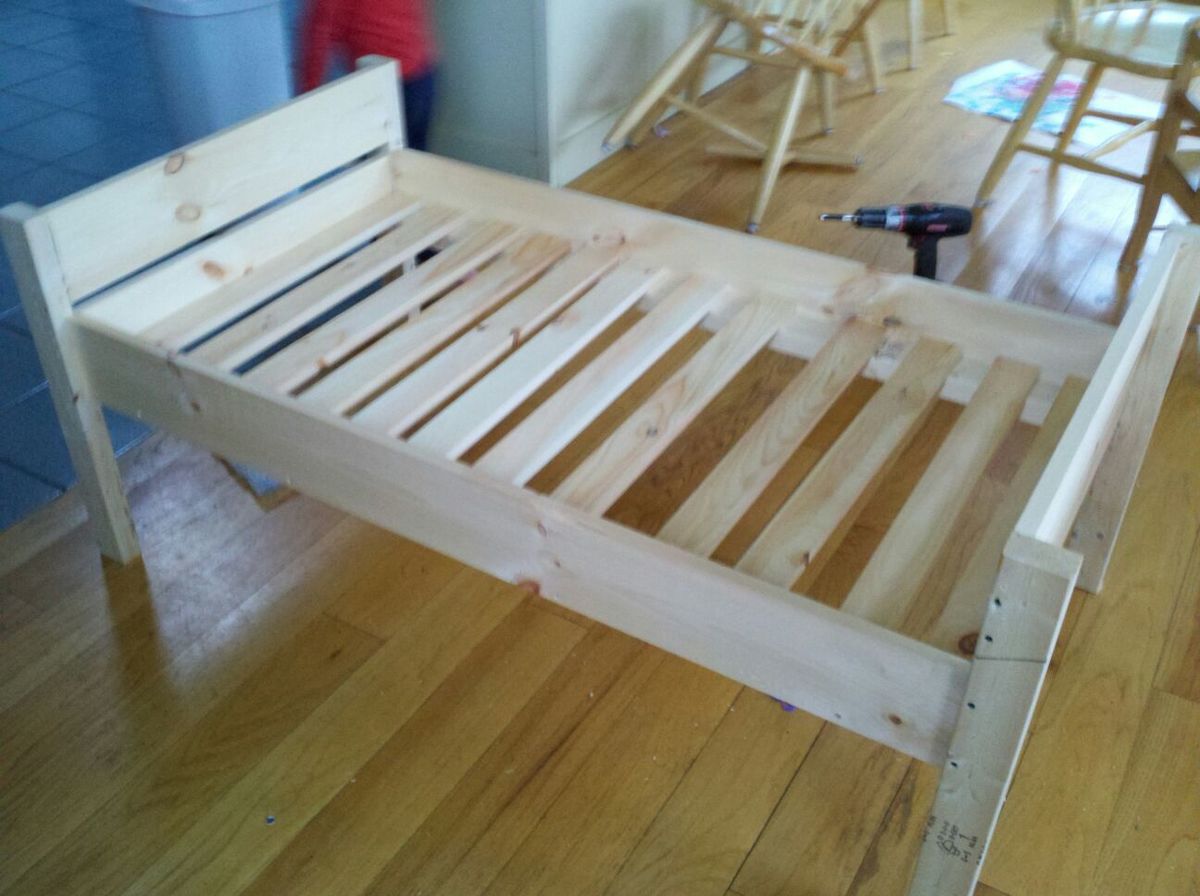
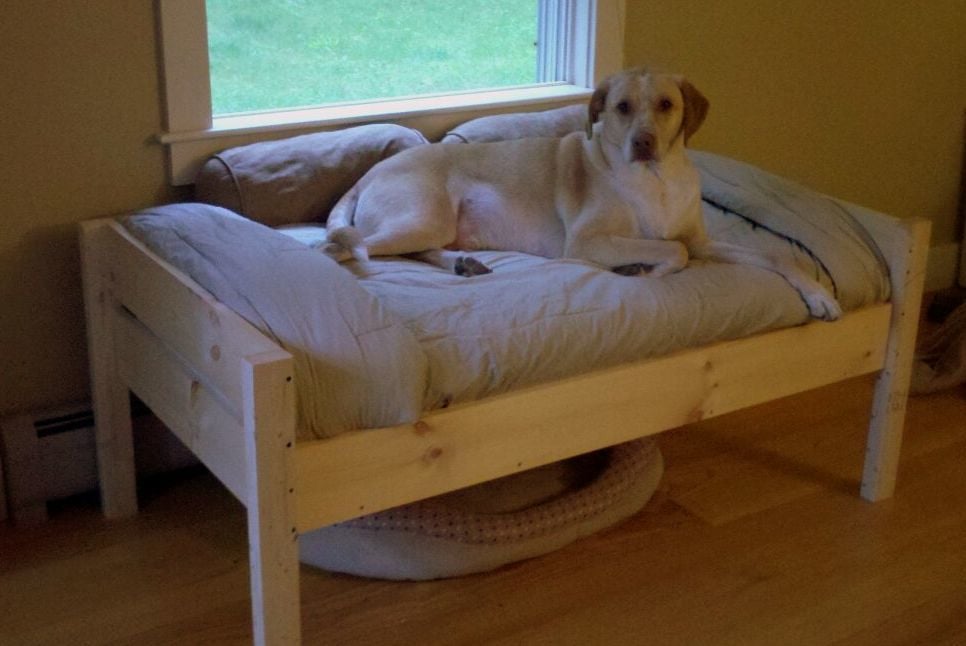
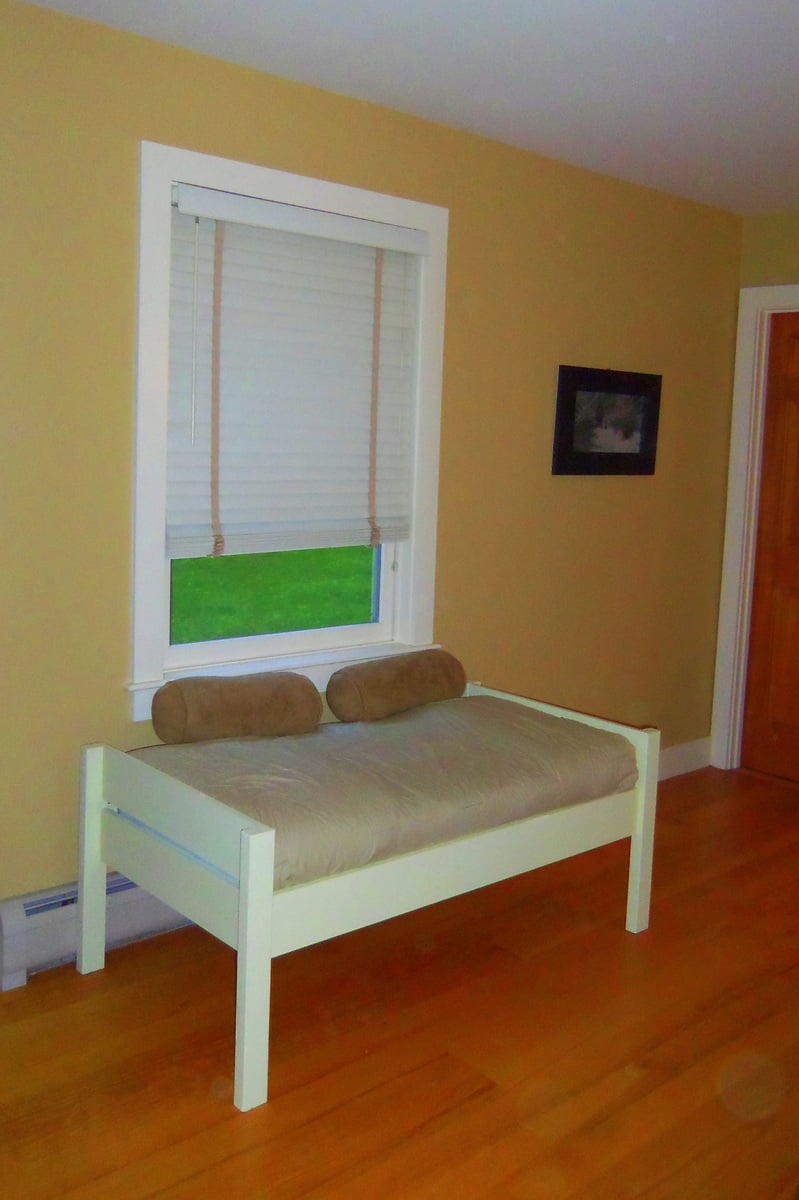
I've thought for a while about building a bed for our dogs, but wasn't sure where to start. We had an extra crib mattress so I set out to find a toddler bed that would work. I decided the Lydia Toddler Bed plan would work best. It doesn't look anything like it, but it was a great starting point.
First, I got rid of the canopy and the decorative side pannels. I also raised the bed 12 inches. (The hope is to add a rug on the floor underneath as sort of a "bottom bunk") The lumber store didn't have 2x2s so I used 2x3s for the legs. I also only used two 1x6s at the head and foot of the bed. They are seperated by 1" because when I got home, I realized they were actually 1x5 (RUDE).
All in all, it turned out exactly as I had hoped and the dogs love it! GOODBYE stinky dogbeds!
**Photo 1: Just finished building--the slats weren't screwed down yet.
**Photo 2: Deacon is testing out his new digs! See the stinky dogbed underneath?YUK!
**Photo 3: Dog Bed Completed! Mac & Deacon love it!
Thu, 10/16/2014 - 18:49
Thanks for sharing the great plans. We built this end in a few hours and she loves it!
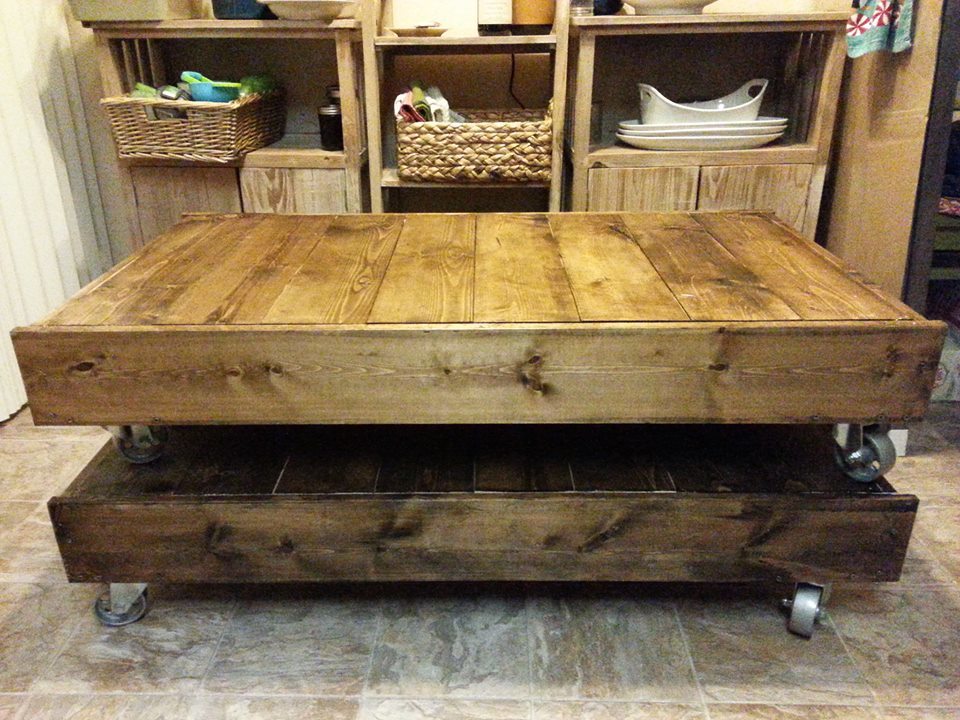
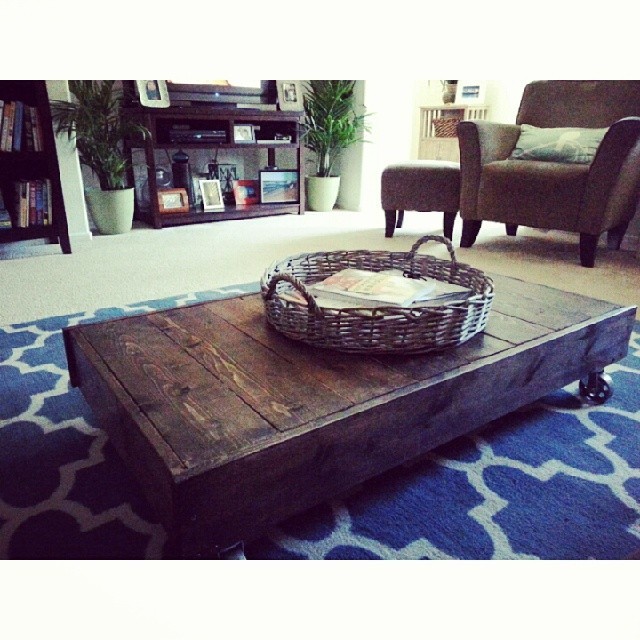
Made two tables with my sister in less than six hours! During this time we also went to the store, took many breaks and even ate lunch! A fun project that develops tons of confidence :) Made out of pine, used 3" steel casters, stained in espresso, and didn't use wood glue. Ate sushi on them tonight! Also.....a perfect table for sitting on the floor and coloring, using a lap-top, or toss some pillows on it for a sleepy pup. Super neat!
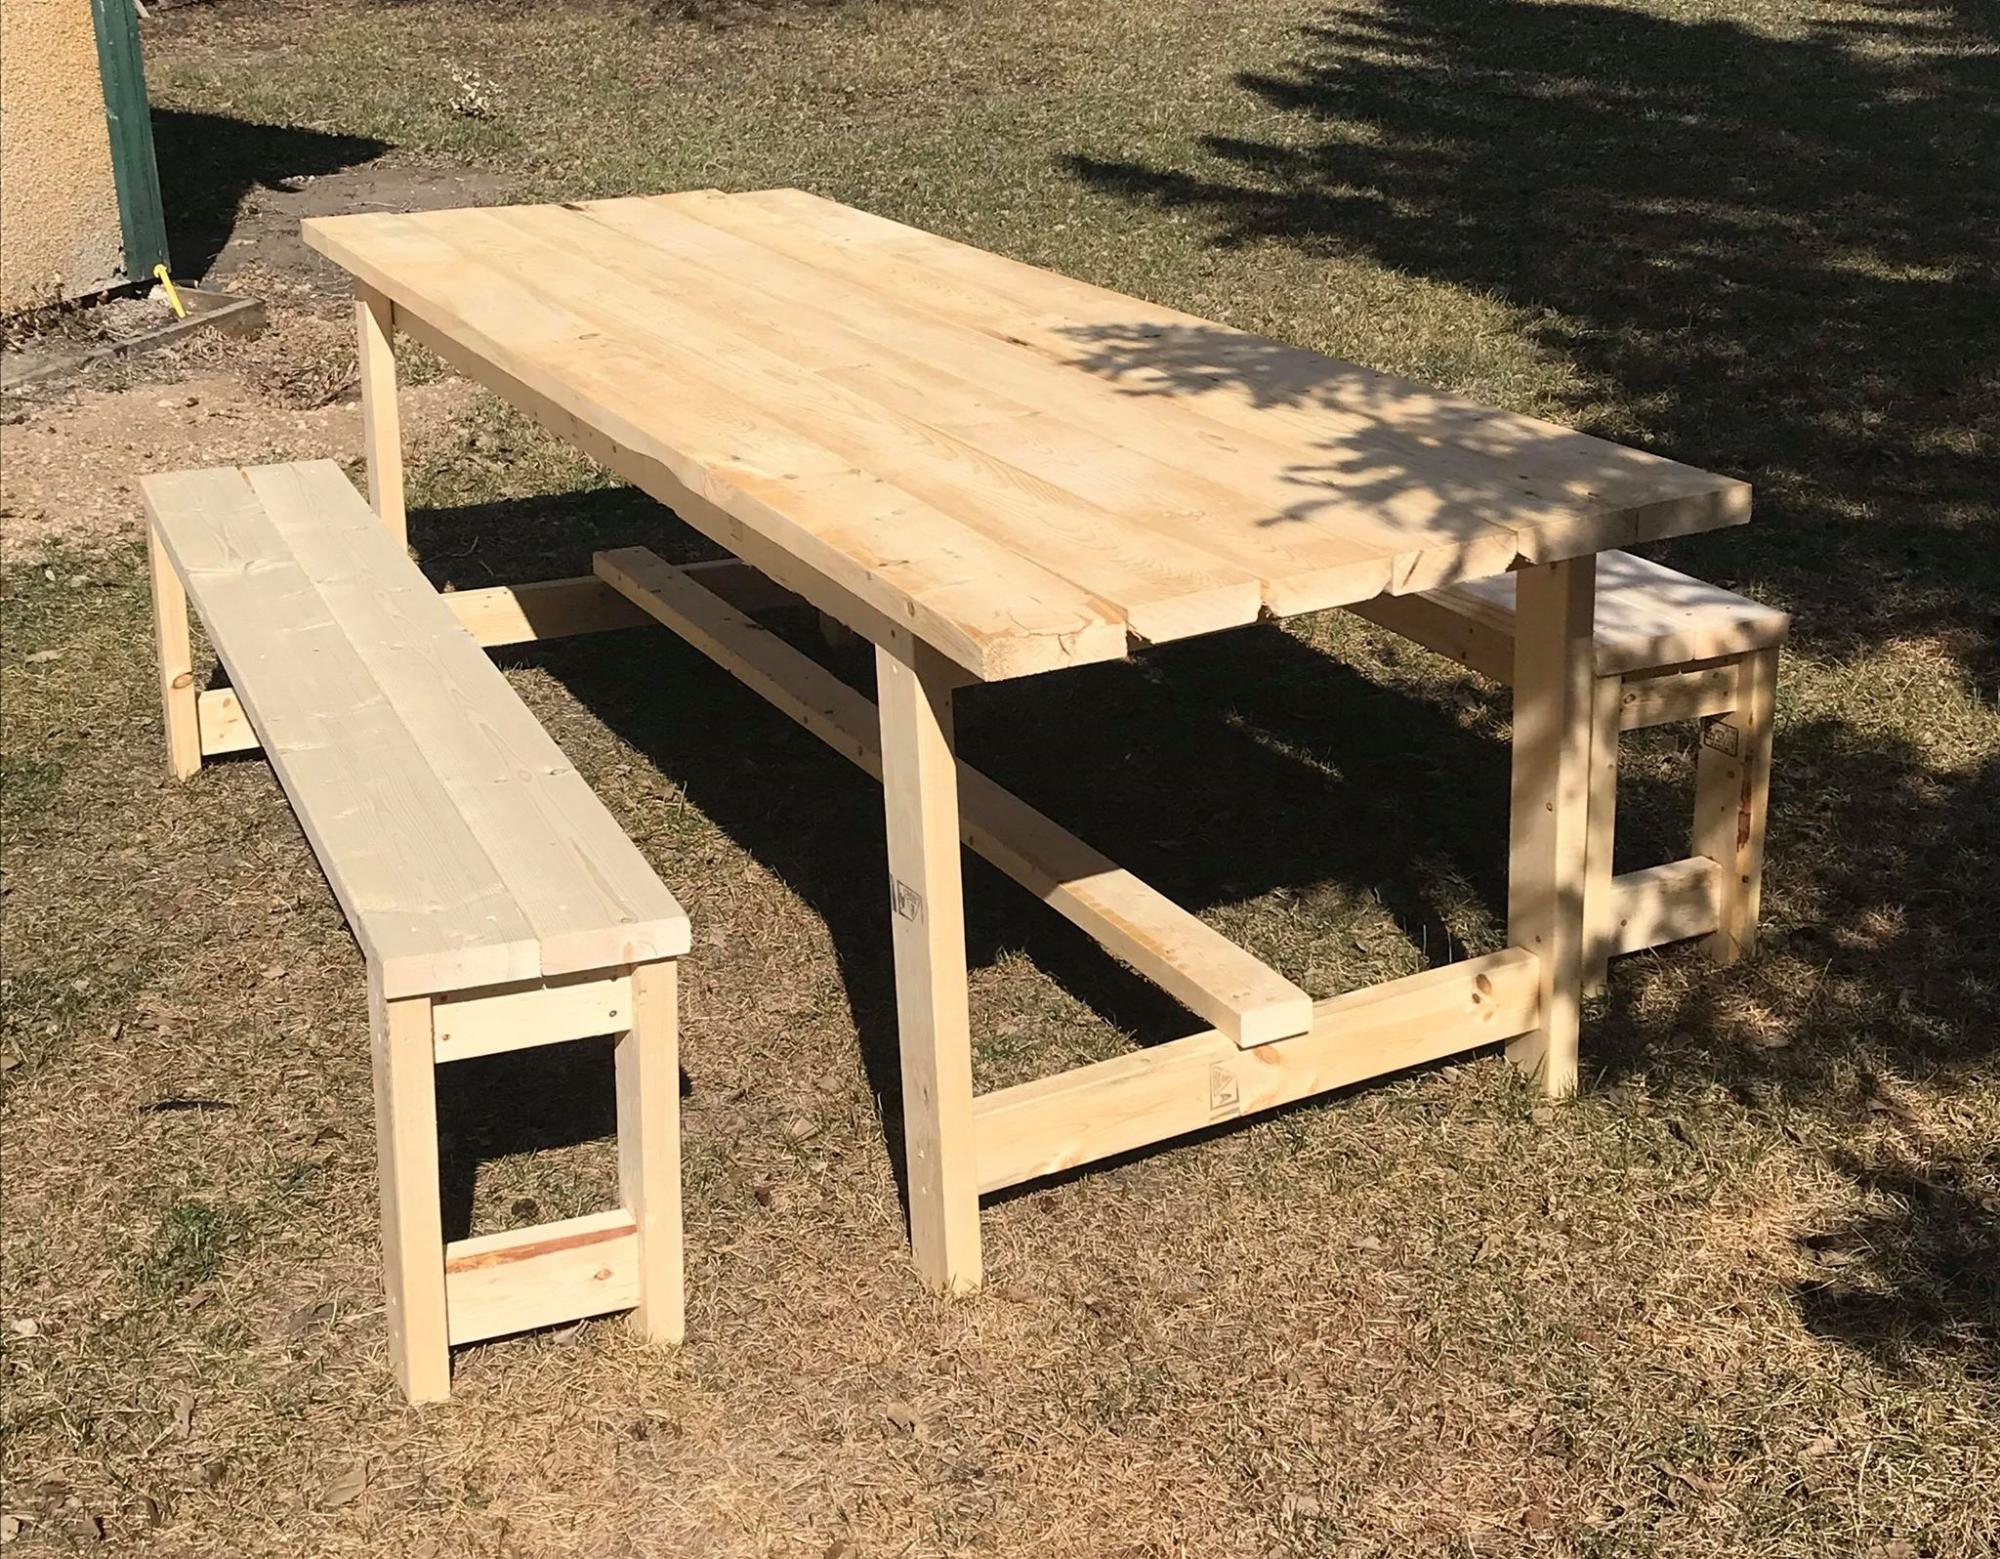
This was my first time building anything! The plans were so easy to follow along! Once I master some things like this, I can work on fine tuning things a bit more so I can build some more intricate plans. Thanks so much for your website! My kids are loving the BBQ's outside at the table!
Tue, 06/02/2020 - 15:09
re the farm table. your cut list calls for 8 2 x 4 at 28 1/2 inches but the plan actually only needs 4 of them. The pics do not show you doubling the 2 x 4s for legs. Am I missing something.
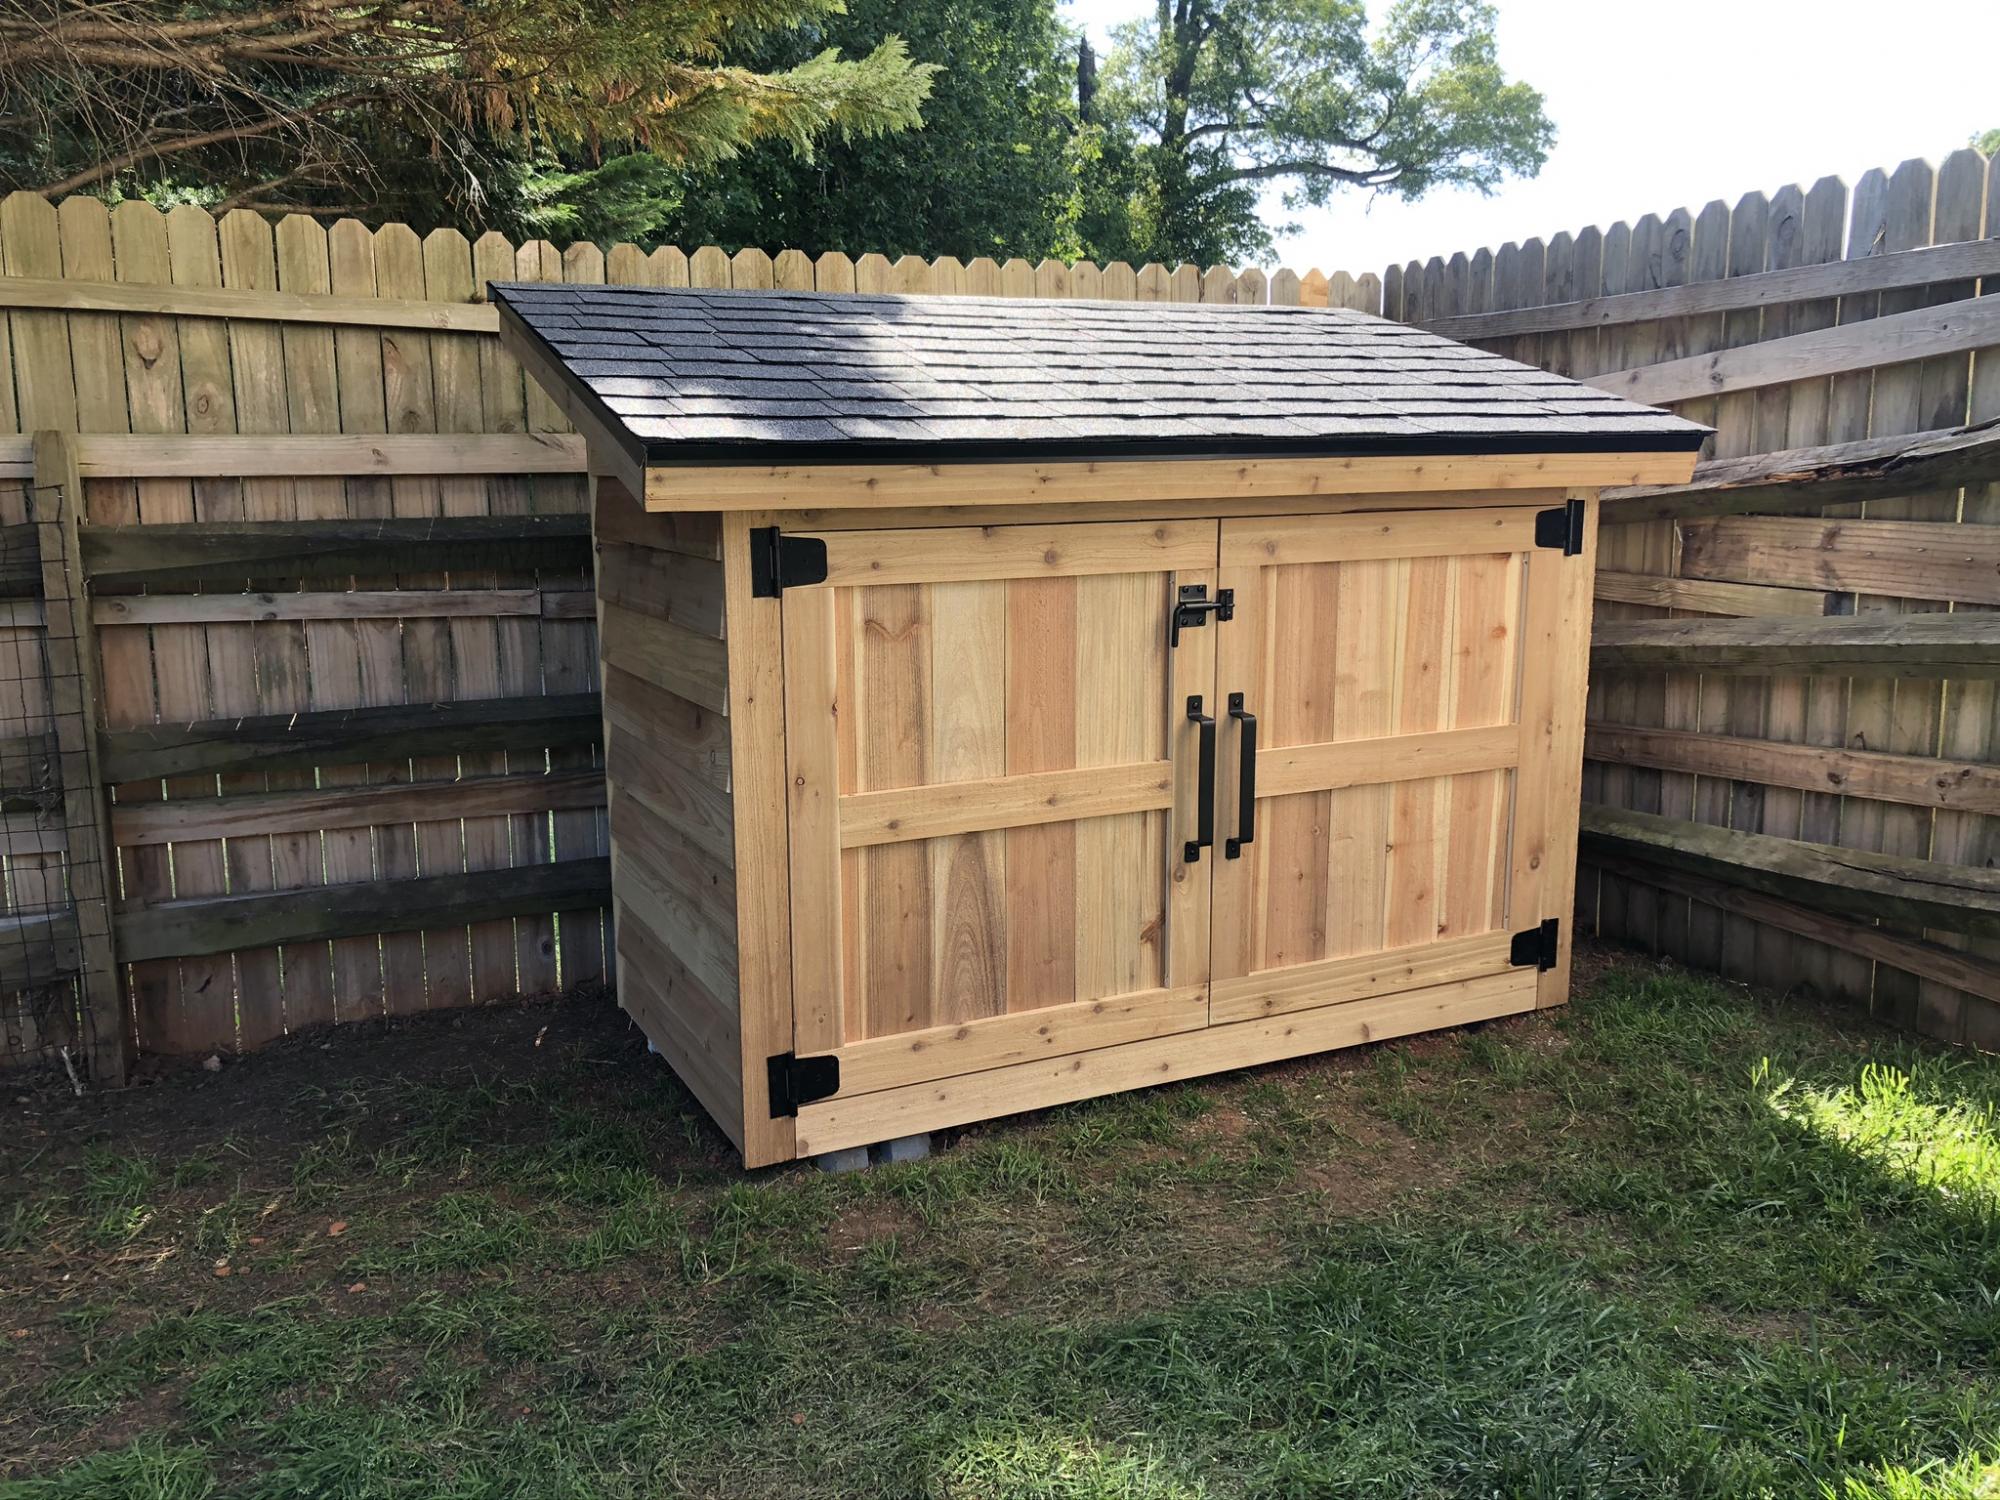
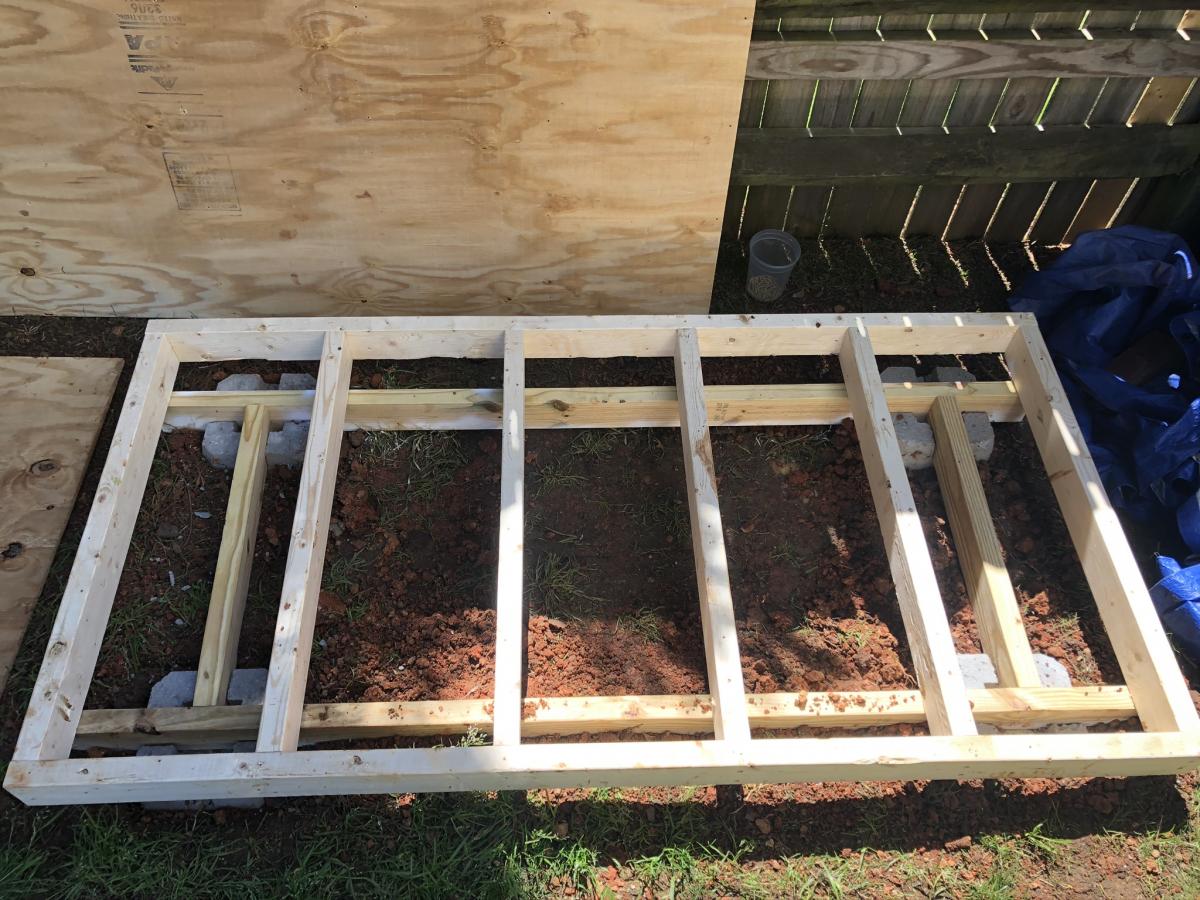
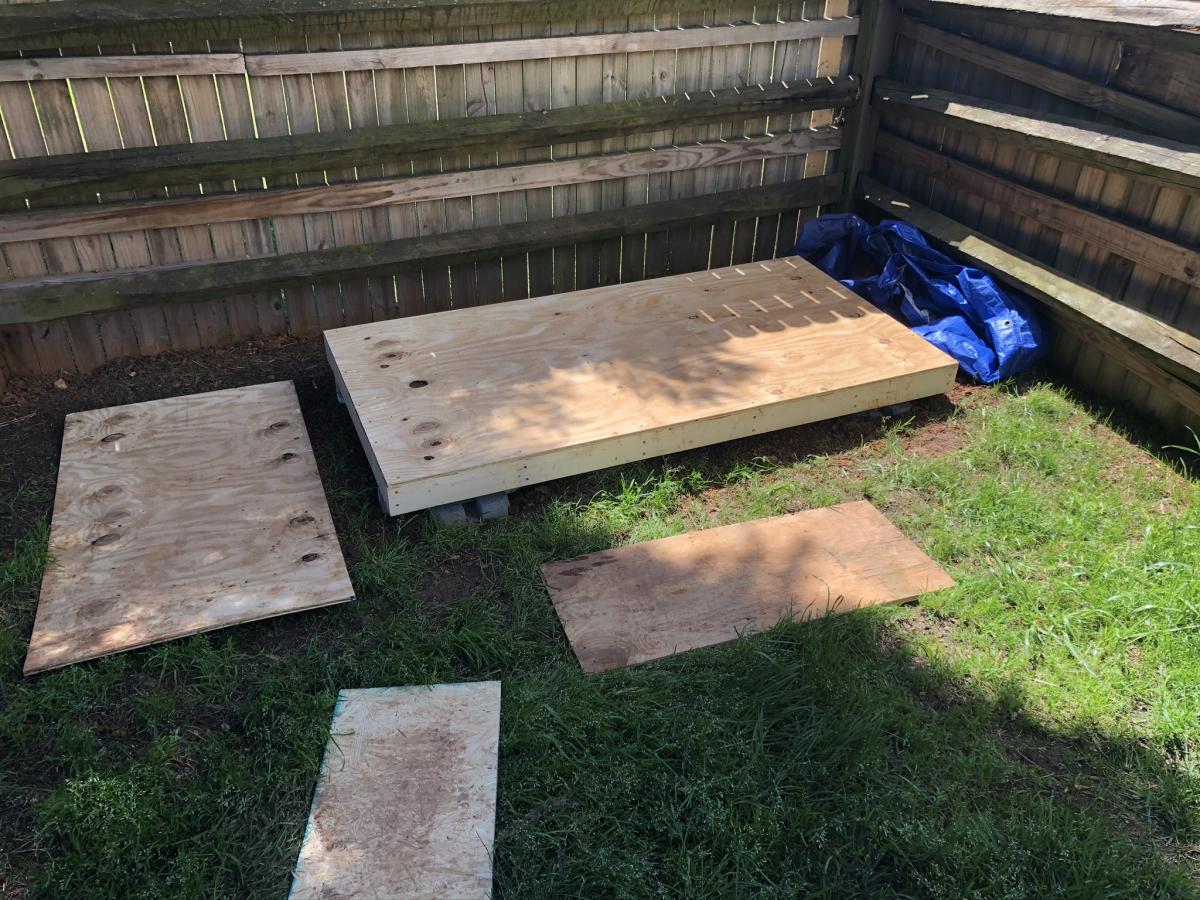
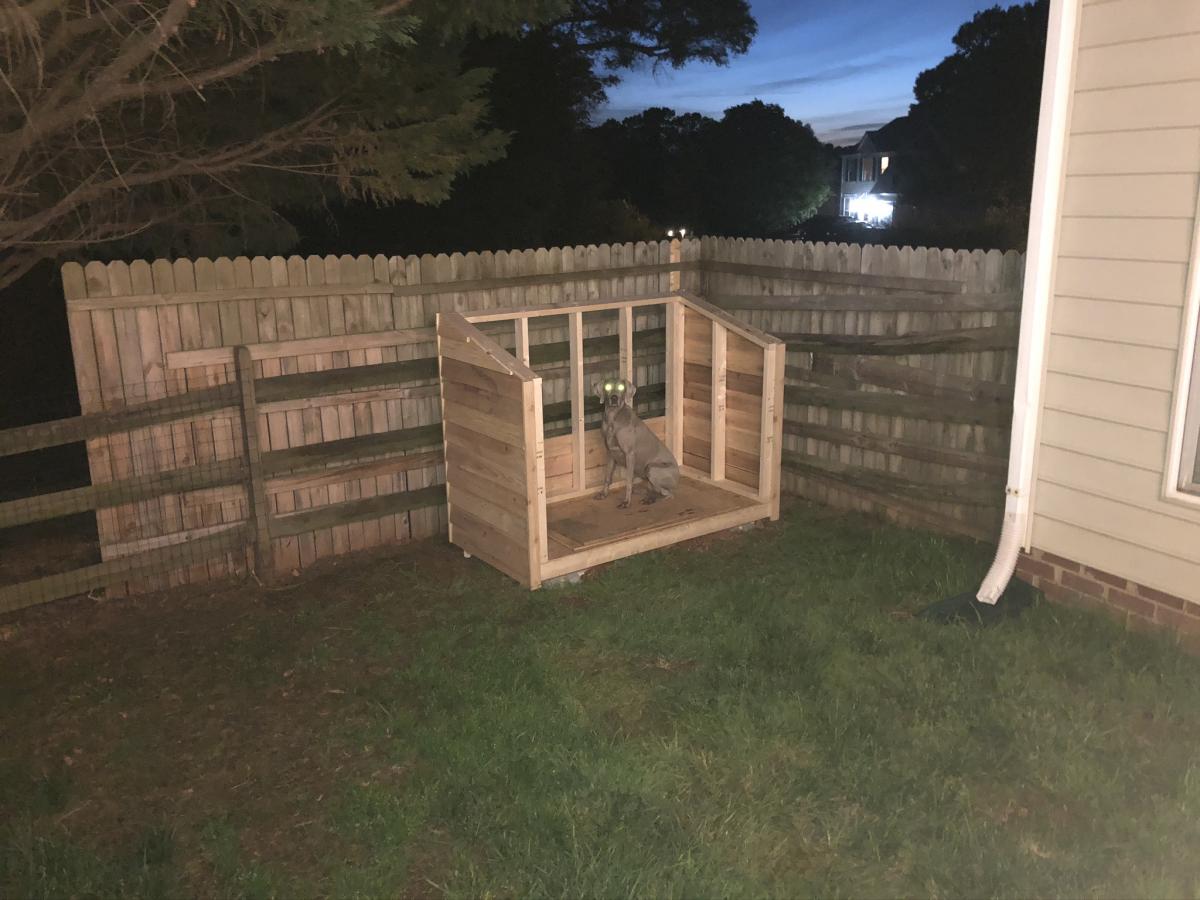
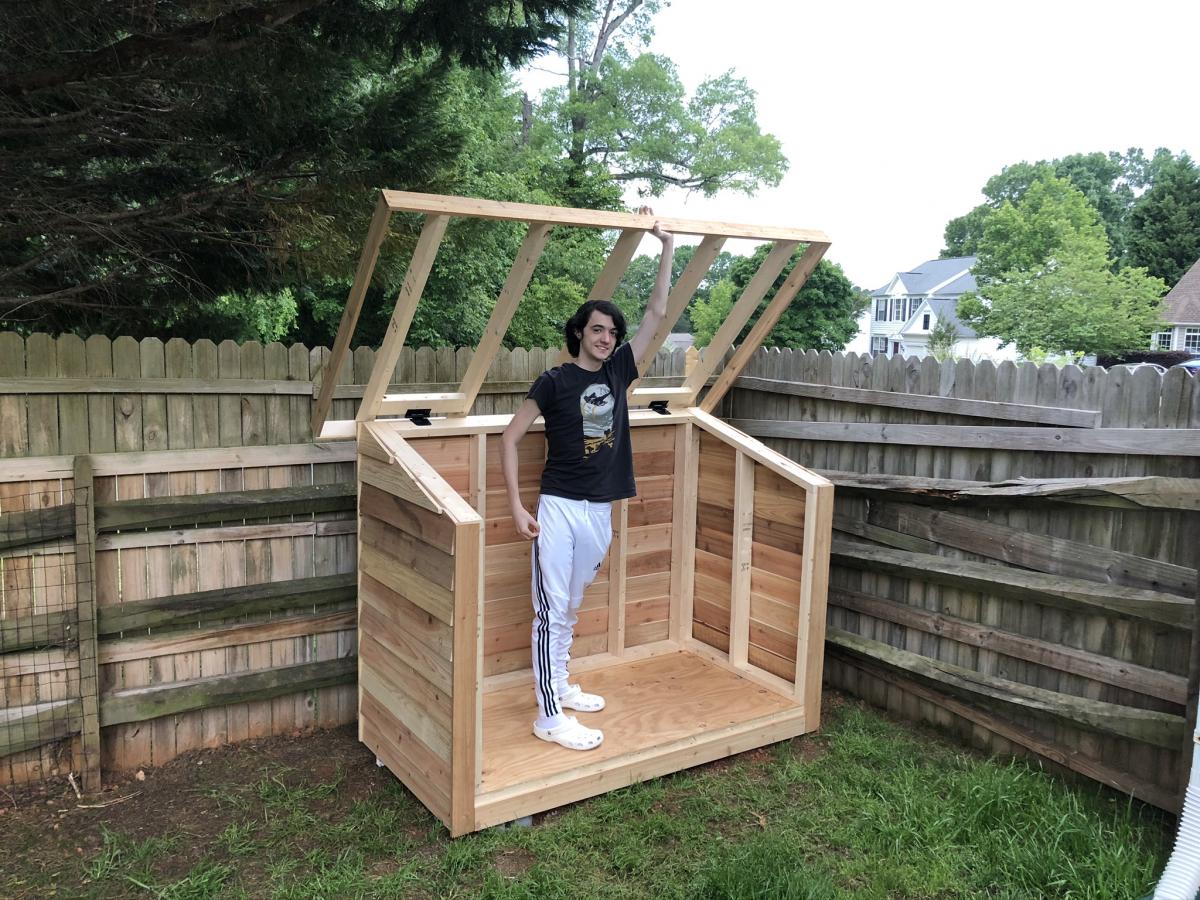
We wanted a shorter version, so that it would hide behind this fence. I just needed somewhere to store lawnmower, wheelbarrow, and a few yard supplies. I started putting the roof on hinges, but the gas struts couldn't support the 170 pound roof. So it's fixed in place (stronger structure anyway). That's why I went with 2x4's for the framed walls instead of 2x2's.

Thu, 06/11/2020 - 17:15
Very Nice modification. Two thumbs up! May I please ask you for the dimensions of the shed?
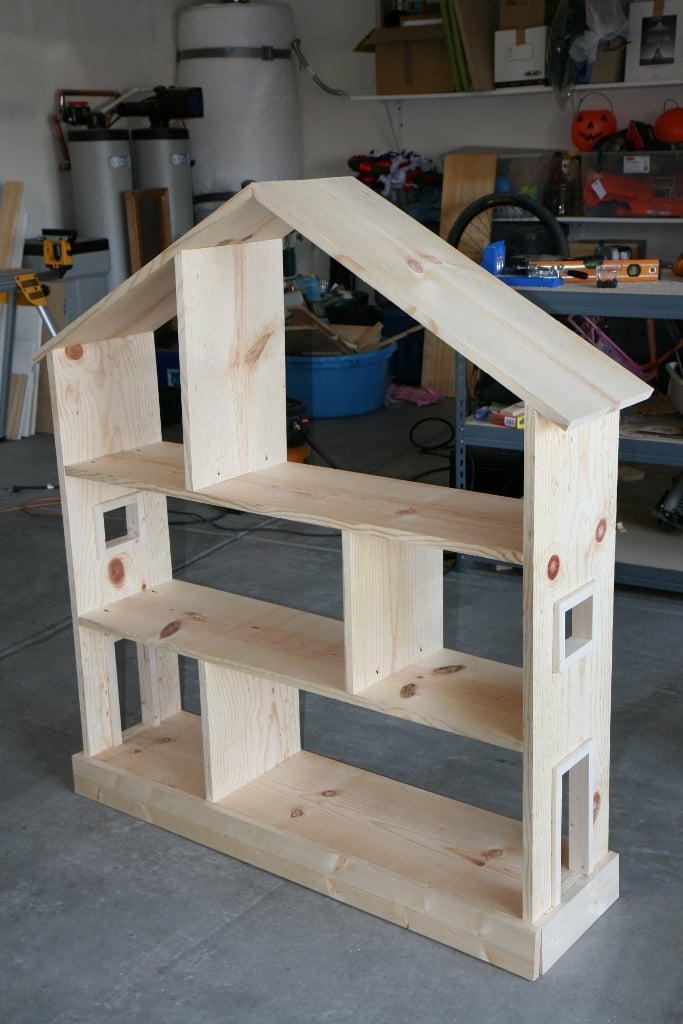
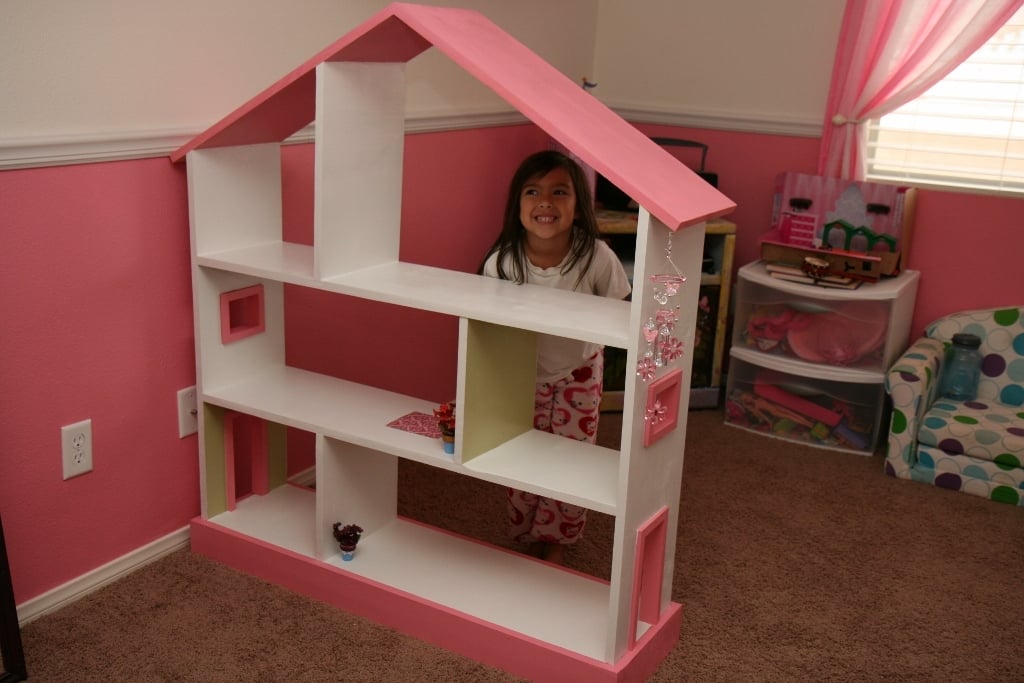
We built this for our daughter's 6th birthday! Love how it turned out :D As you can see we opted to leave the plywood backing off for the time being so she can use it as a doll house and play on both sides. When she grows out of the doll house phase we will either convert it to a book shelf, donate, or sell in a yard sale ... so many options!

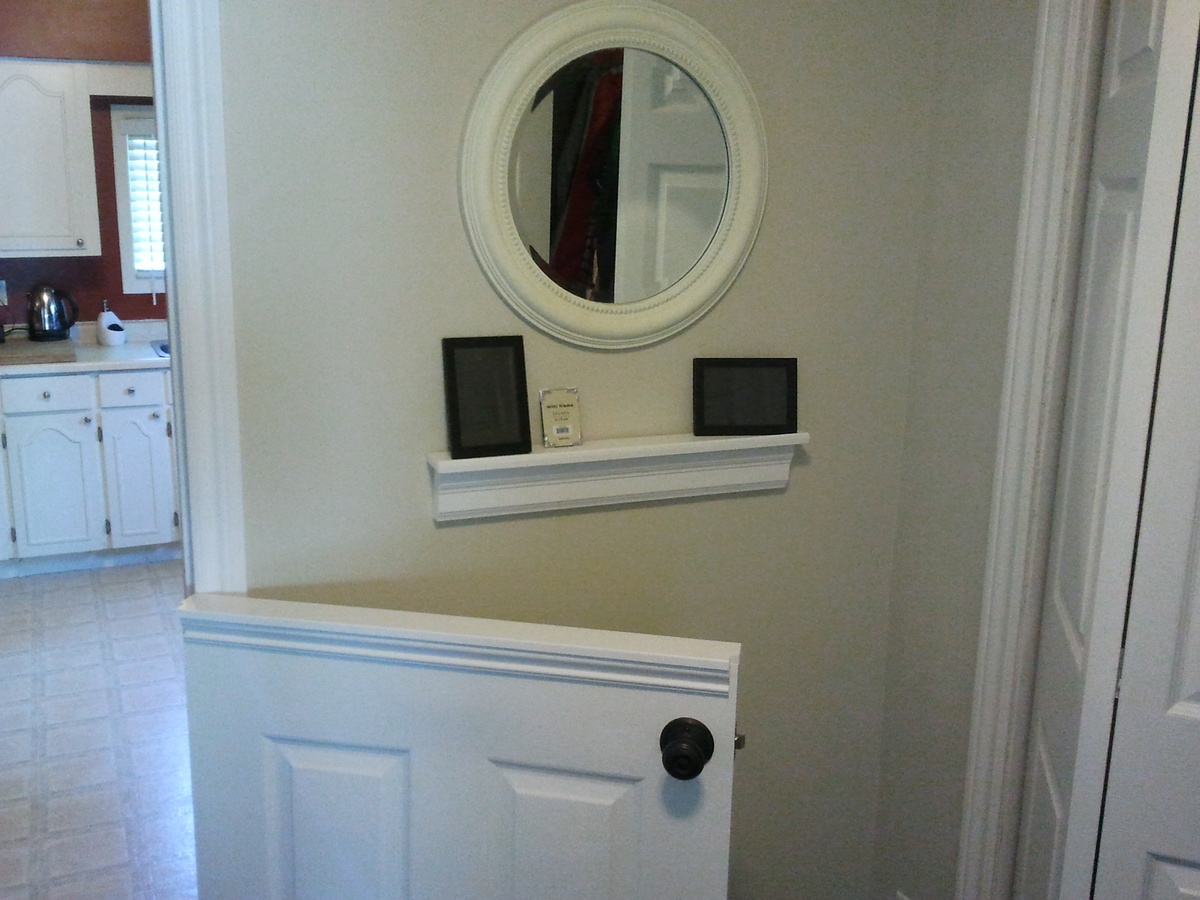
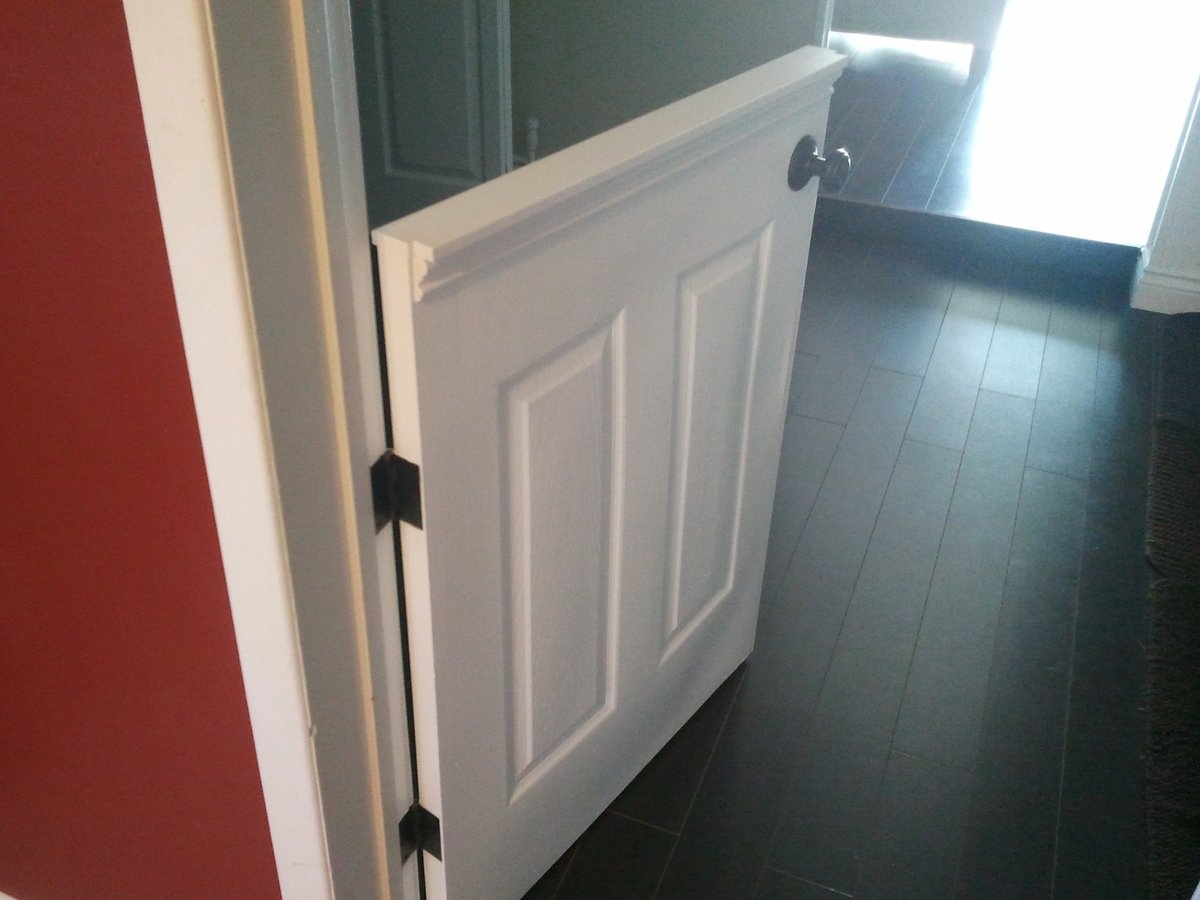
I installed a half door to isolate our dog from the laminate flooring when he sleeps at night.
It was only $25 for the hollow core 6 panel door from HD, which got cut in half.
$25 for the passage knob.
$10 for top plate and trim
Less than $5 for the hinges.
Not having to replace the laminate flooring priceless!
Some Tips:
The $25 door is not prehung. Buy the $14 dollar irwin door jig to install the door "http://www.homedepot.ca/product/door-lock-installation-kit-carbon/904157" It will come in handy if you are remodeling and installing new doors to replace those old flat panel doors. You will also have to chisel out the hinges.
When installing and marking the hinge locations in the door frame shim the door a 1/4" off the floor.
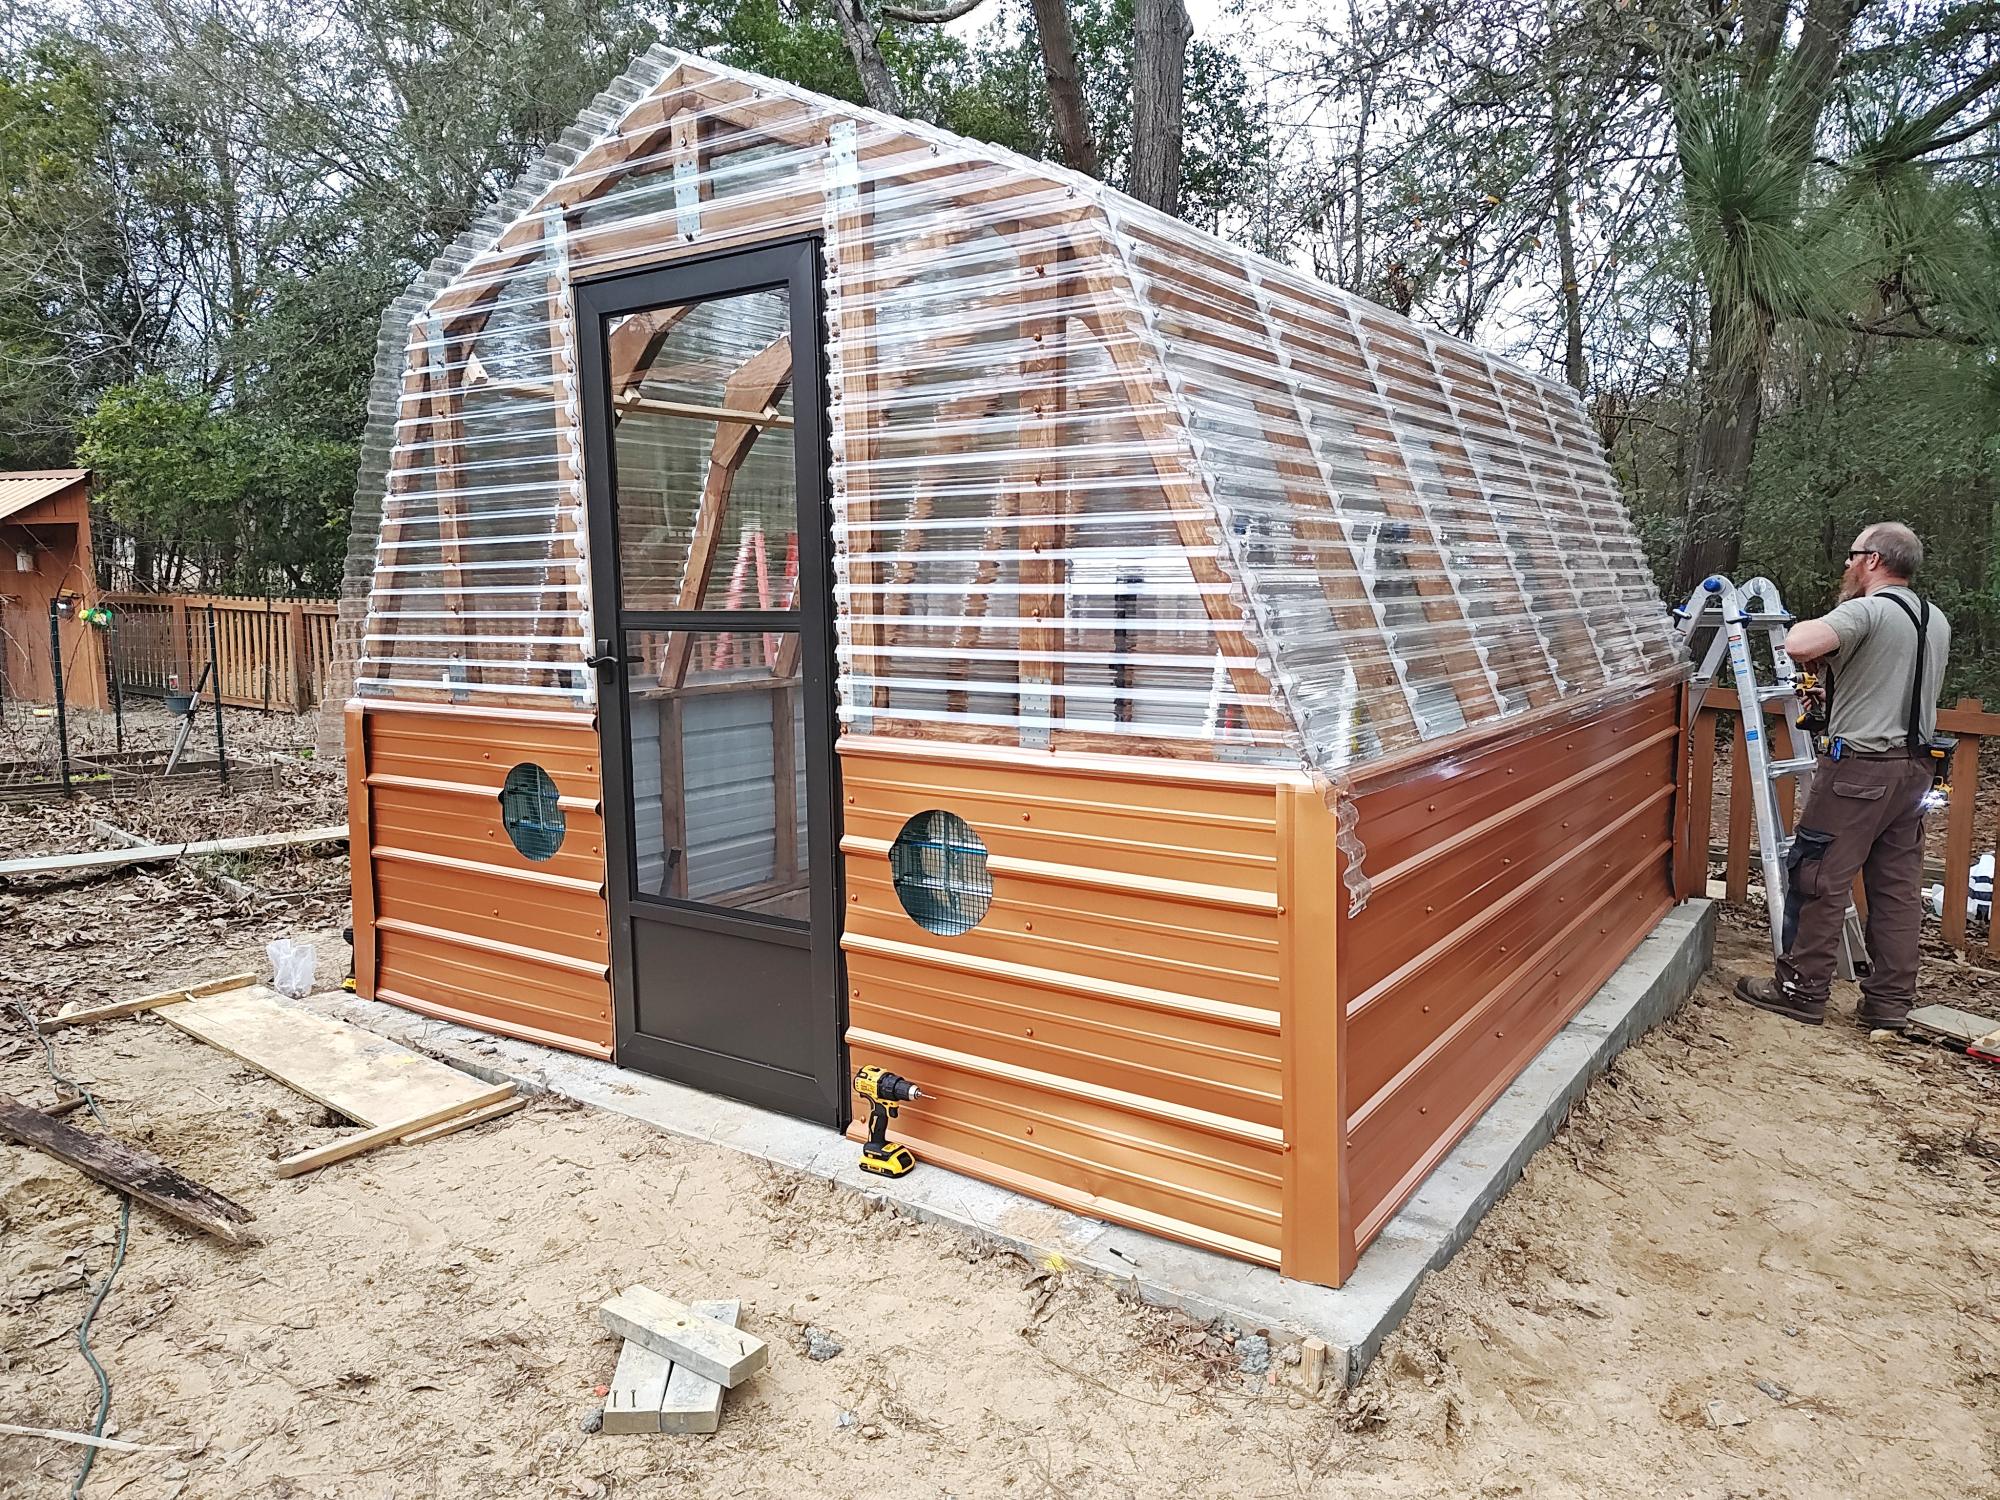
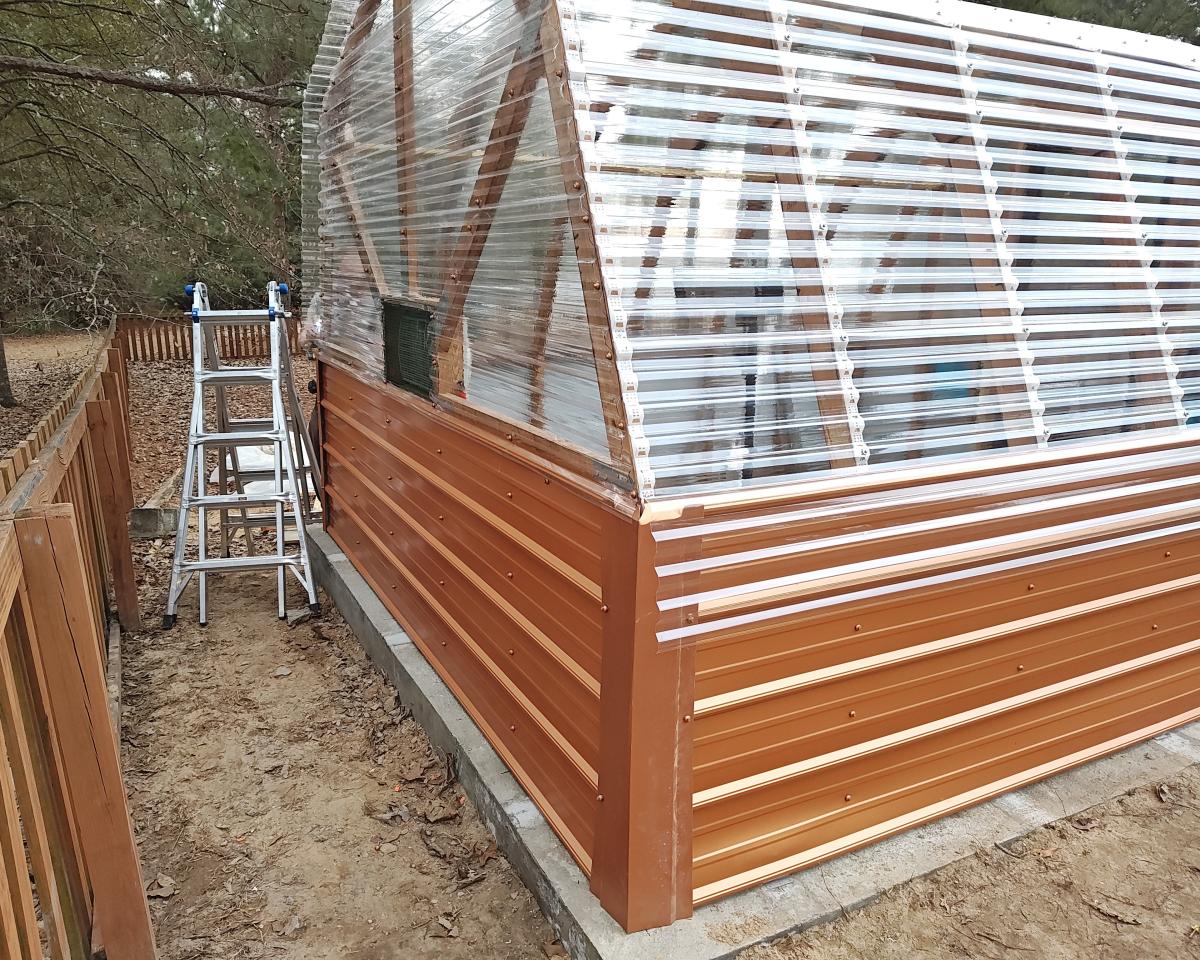
A variation on your barn style greenhouse. I included a cooling fan with intake louvers, temperature controlled heater and grow lights. Also used anchor bolts embedded in concrete footer.
David Buckmaster d [email protected]
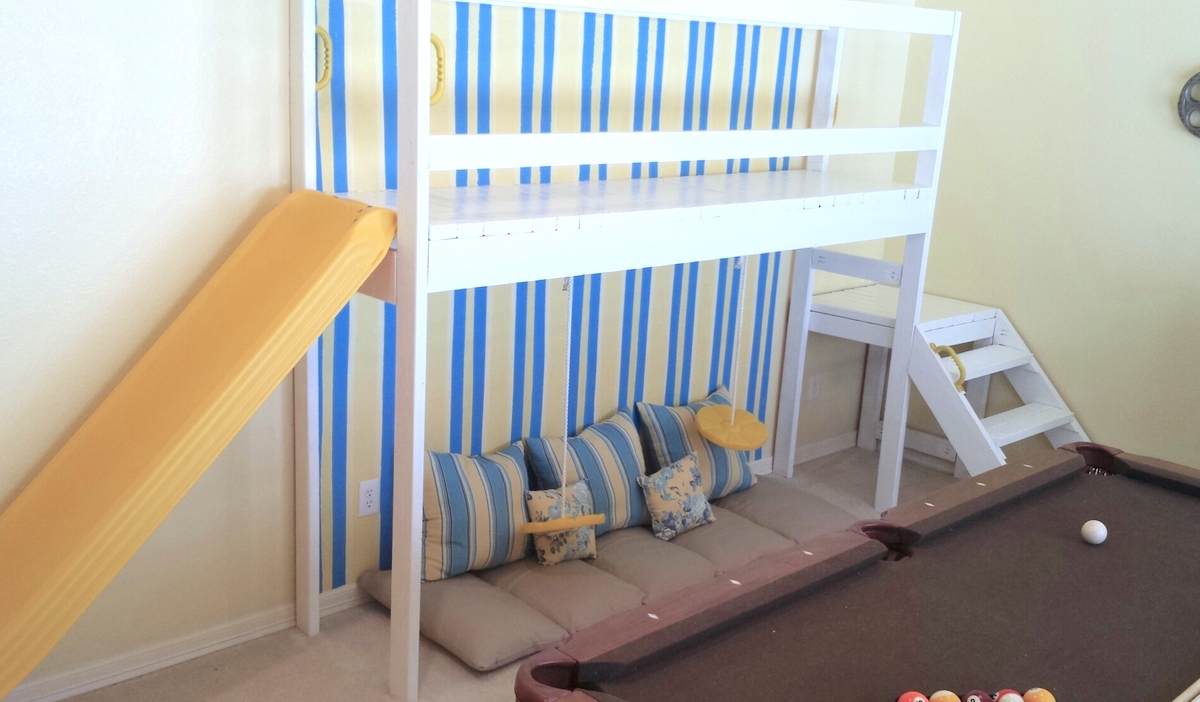
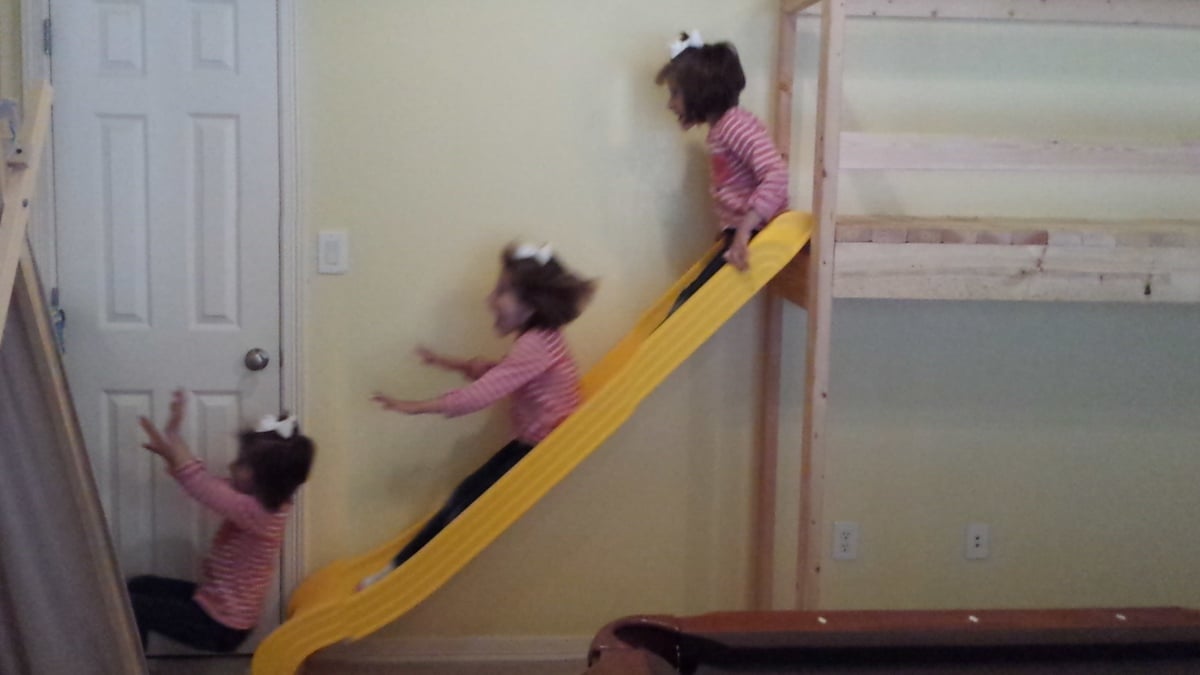
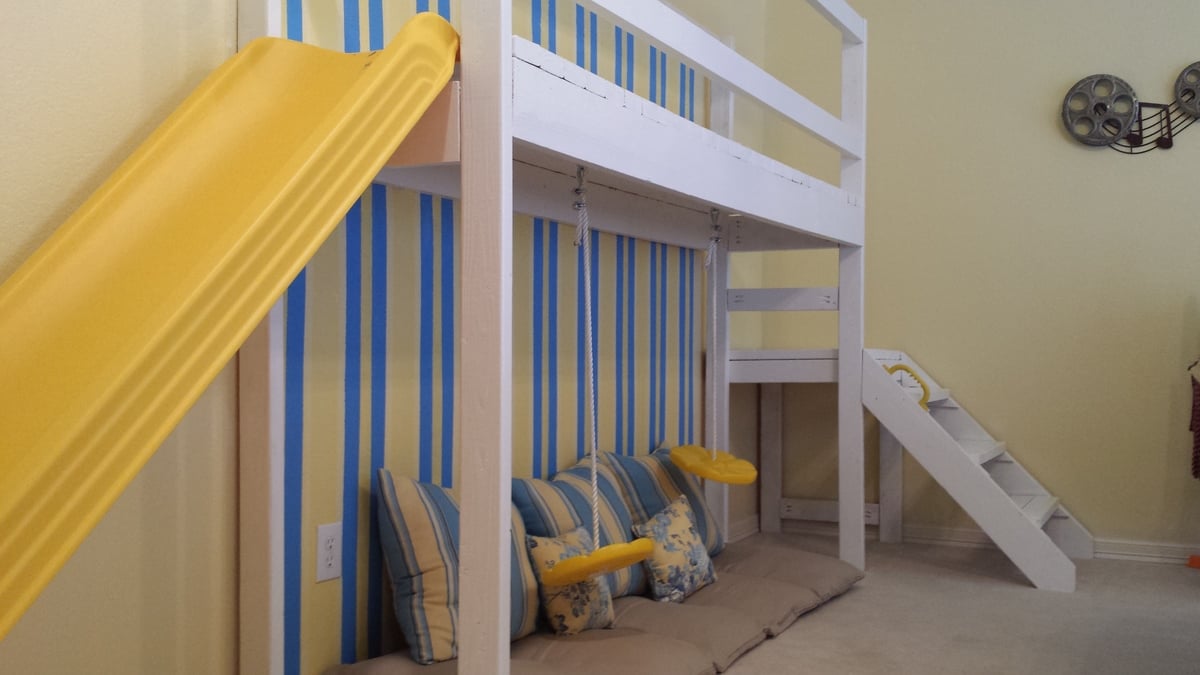
We wanted a place for the kids to play when the weather outside is unbearable. So, we modified the camp loft bunk bed plan to work in our game room. We have a pool table in the room and we didn't want it to interfere with any shots. Subsequently, we cut the width down to 24 inches and extended the length to 93 inches to fit in our space. Additionally, we pre-ordered a slide that had to be mounted at 48 inches and measured 71 inches in length. So, my husband framed it out so the planks that are meant to hold the mattress would sit right at 48 inches and we could mount the slide. This has been the best idea ever for our kids, because they can't get enough of sliding and swinging indoors.

Wed, 05/28/2014 - 18:53
Loved this project. Paid back with hours of giggles and fun. :)
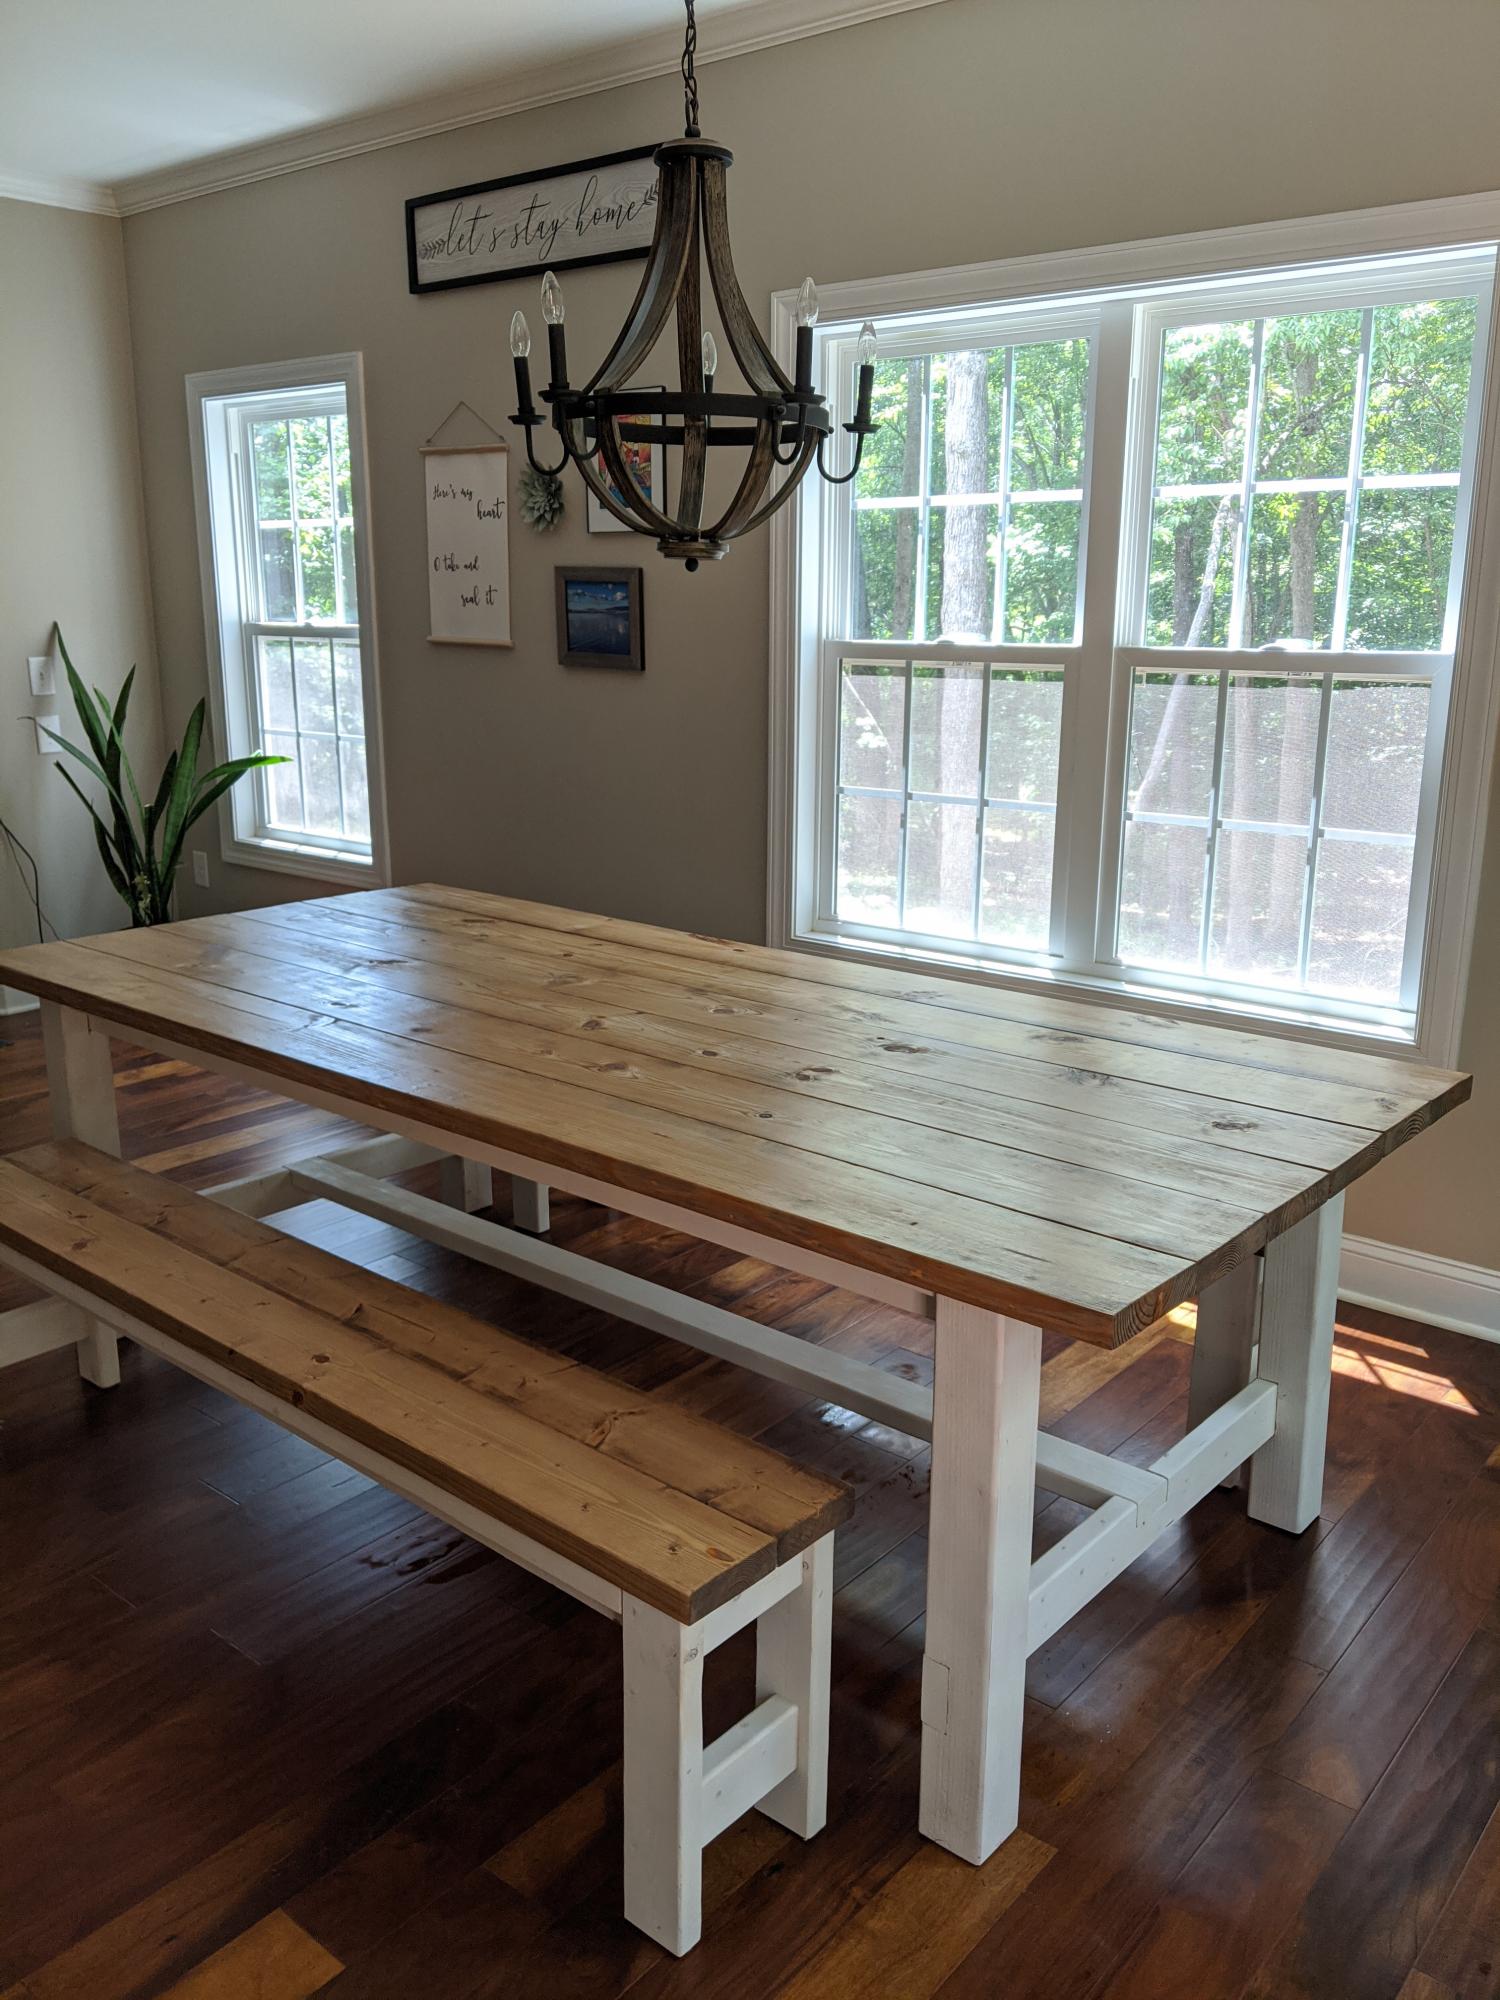
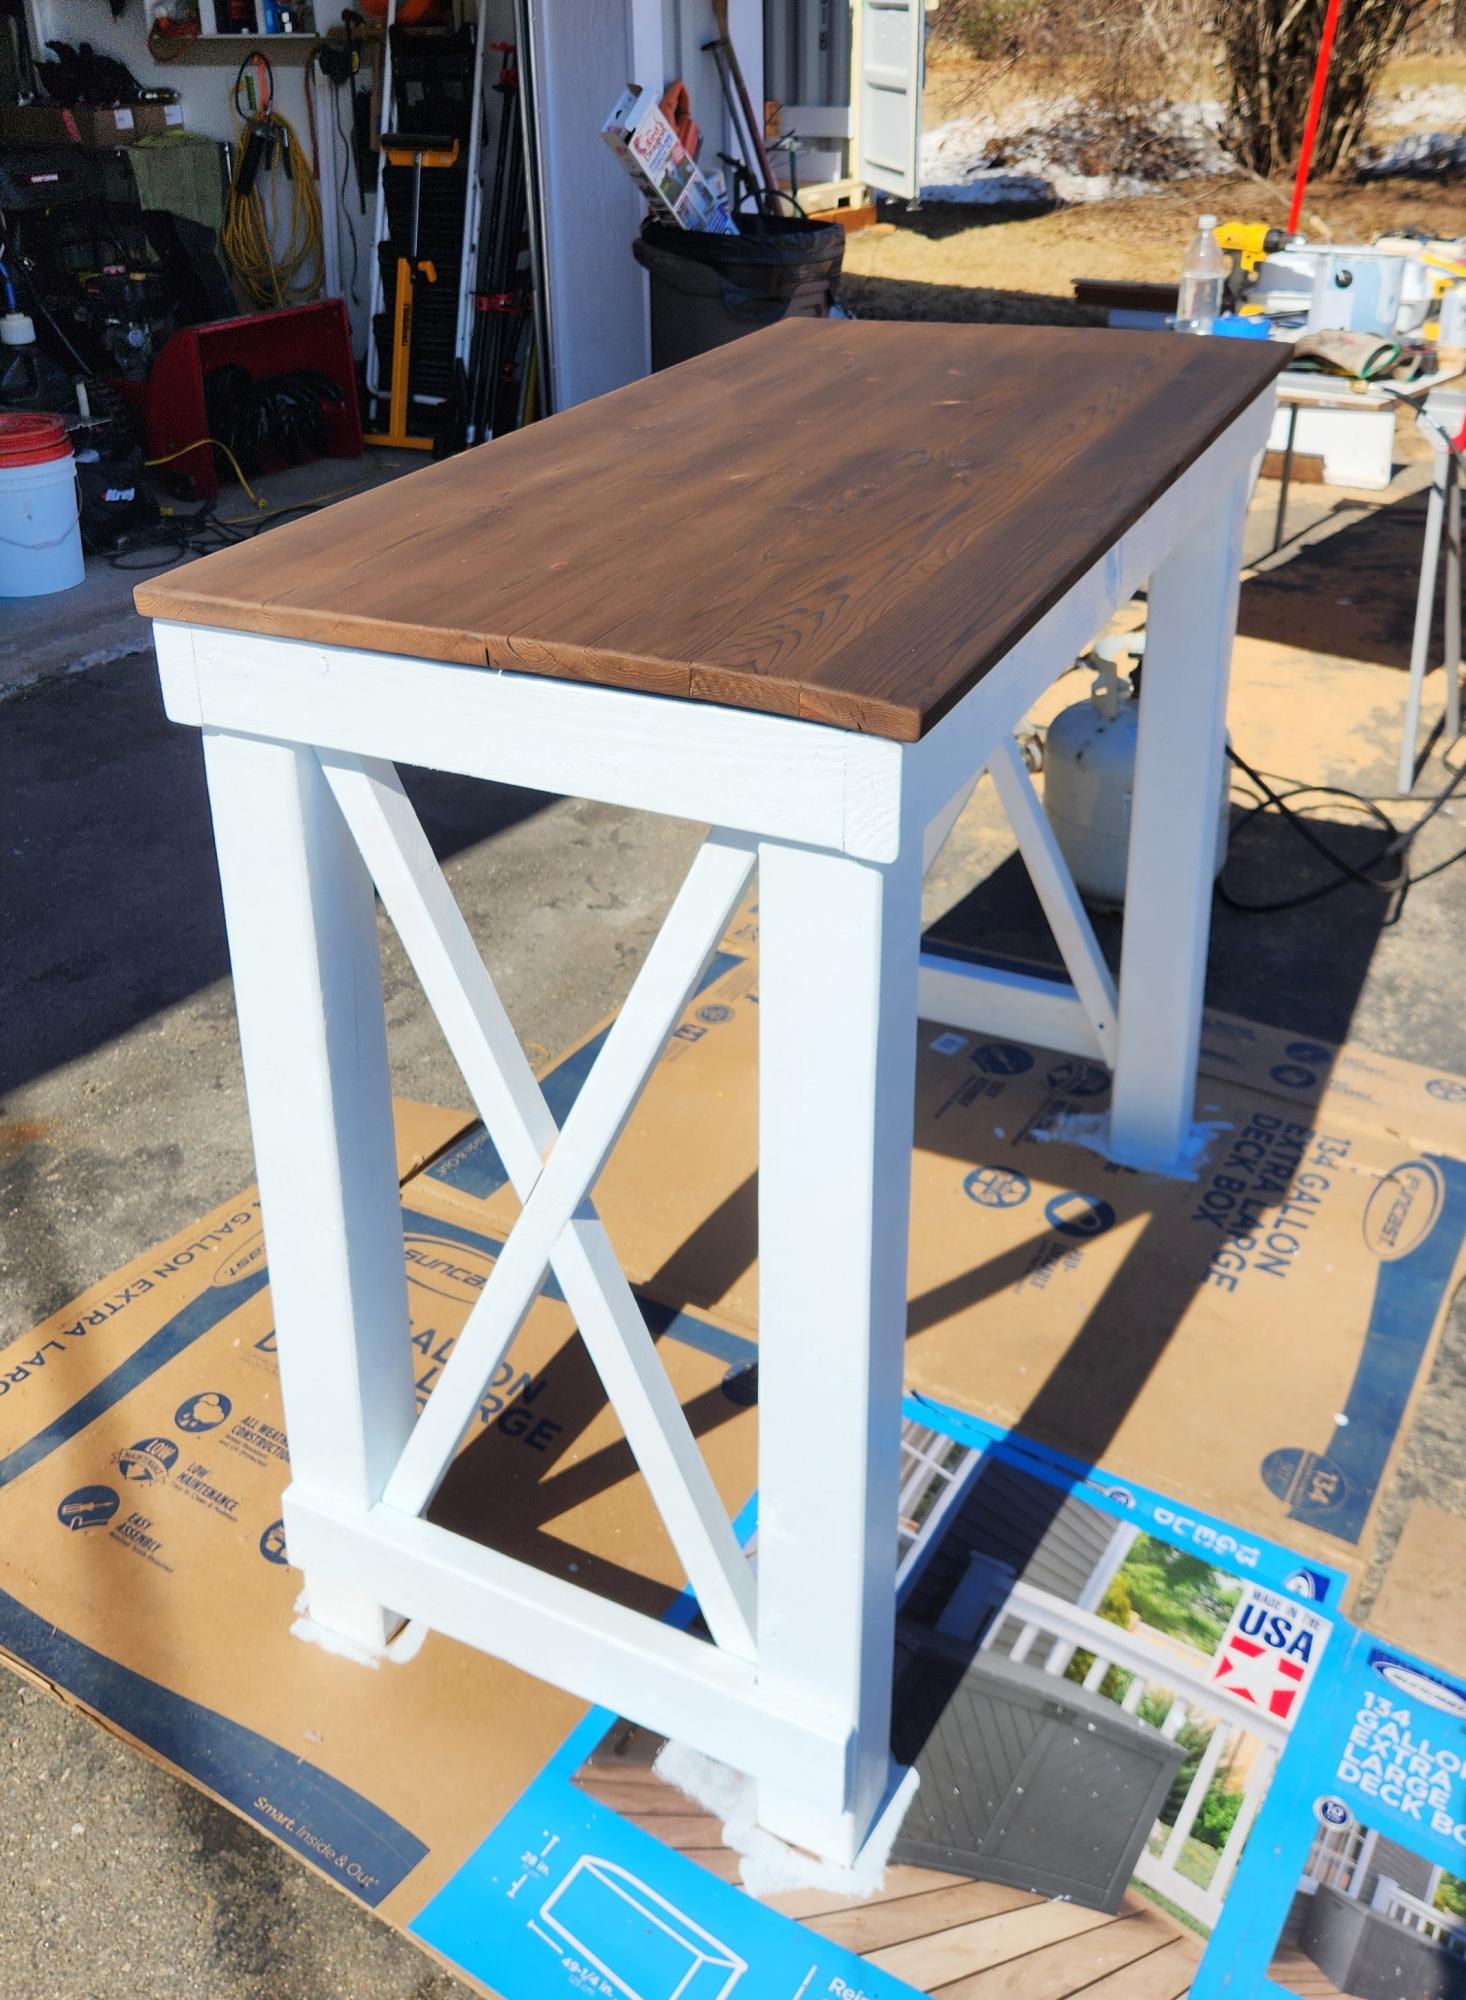
First table build! We modified the plans with no breadboard ends since we live with lots of humidity and wanted to allow the wood movement. We also used 4x4s for the legs. White chalk spray paint legs and custom mix of special walnut and weathered oak stains. We LOVE it!!
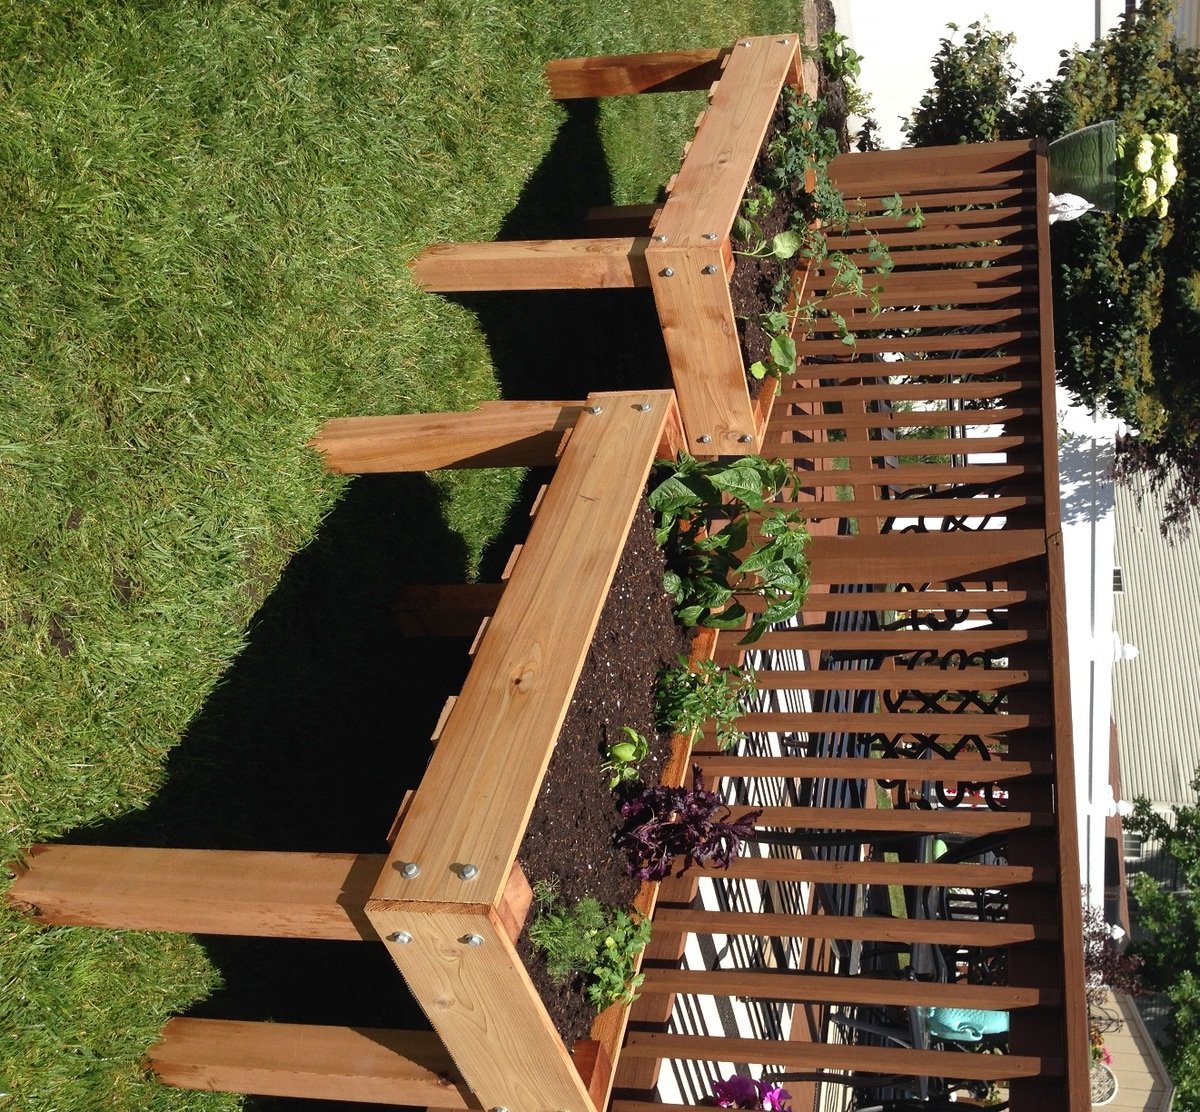
Using the counter height planter plans from Janettx. Thanks!

Mon, 09/20/2021 - 13:24
Nice job!!! I'm still using mine. I ended up putting 12"x12" pavers under each leg to extend their life. After the 2nd year now we get bumper crop out of ours each season.
This was my second project (first was a work bench) and it came out great.
W. Knight
I saw this table and nesting grill station on your FB page. I changes it up a little bit, but the concept is perfect for my back yard deck.
Dharris