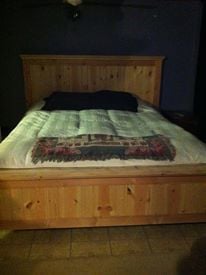
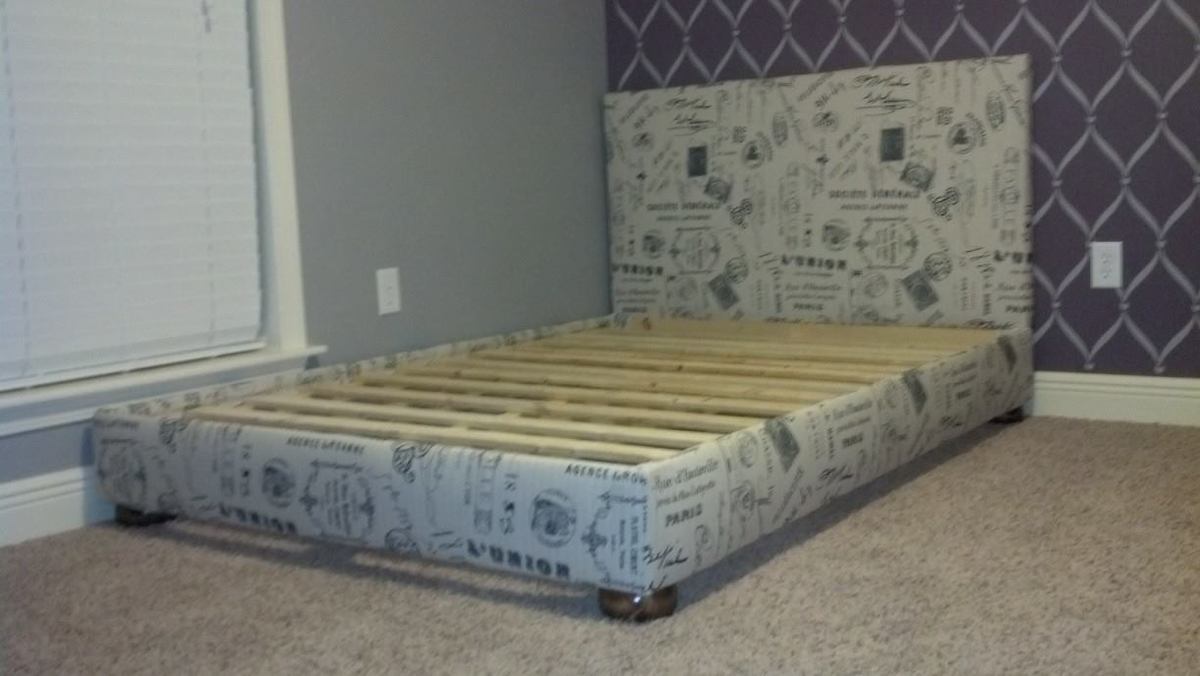
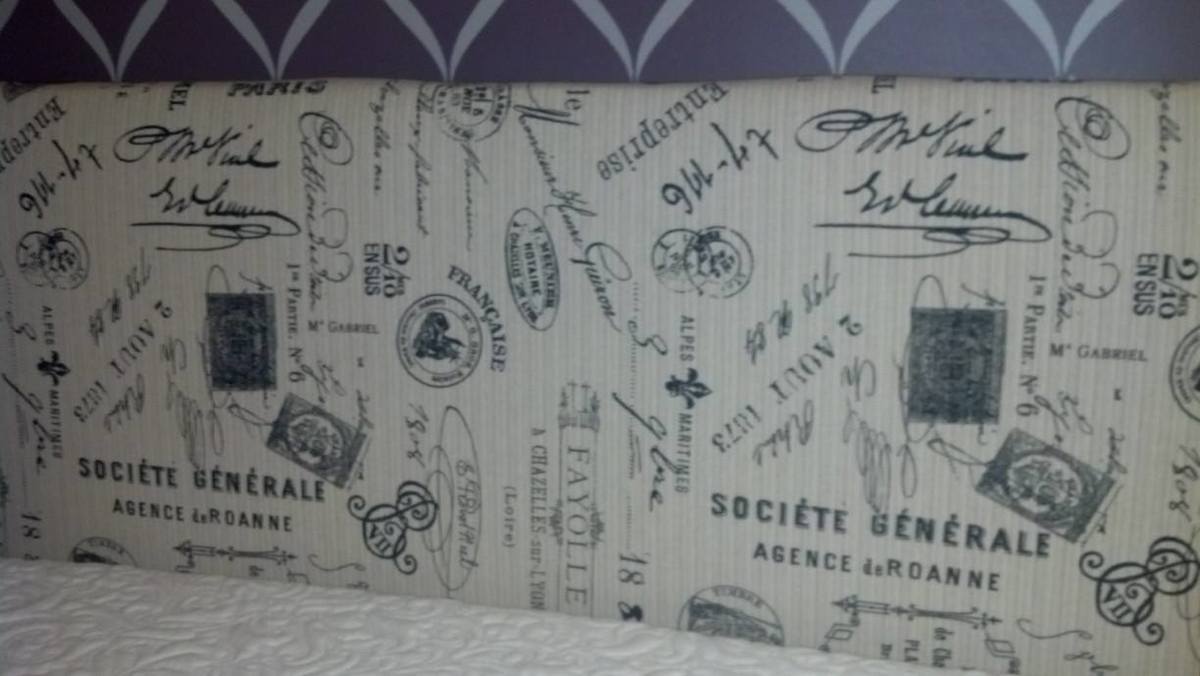
Corner Headboard Storage for Twin Beds
![](/sites/default/files/corner%20twin%20beds.jpeg)
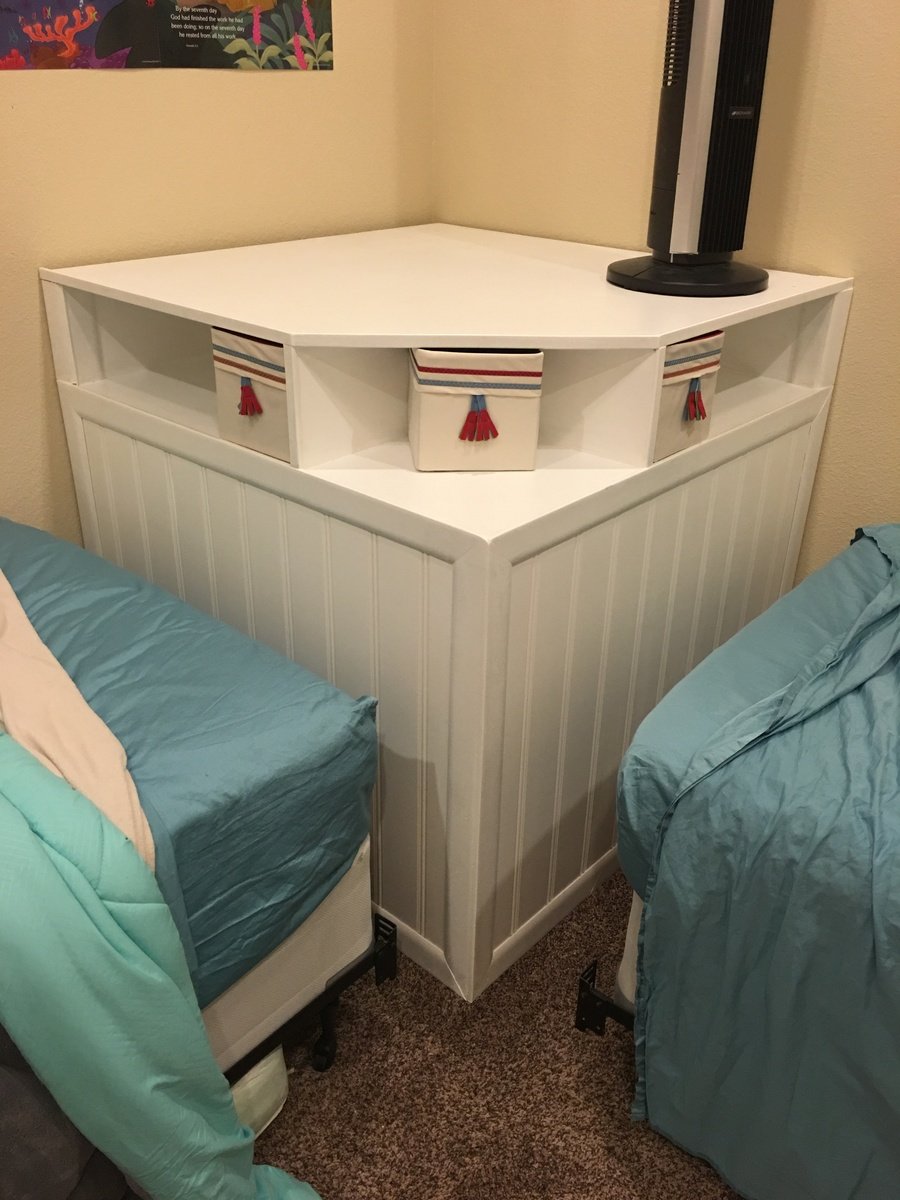
Corner unit for kids bedroom. Added fabric boxes from ikea. The fit perfectly
Loved this floating shelf. First time no Ana white and to woodworking. Thanks for the inspiration Ana white. Plans are from Best floating shelf. I used dark walnut stain. And just left the plywood off of the bottom. Low enough so no one can notice it
This was so much fun to make and so relaxing to enjoy.
After posting about my 20 Second Tidy Up table I built on my blog, a local reader commissioned me to build one for her too! I used a Kreg jig for the top and sides, as well as the 2x2 frame supports. I also added some L-brackets to the sides for added stability. This thing is solid! Since Lowe's doesn't carry fixed-wheel 1 5/8" casters I used an epoxy putty on them so they only roll in one direction. It keeps the trundle from bumping into the sides and being hard to open. Love the table, and so does Christine!
Sun, 04/29/2012 - 20:12
I've only built a couple of things for sale, and came up with a basic pricing method that I'm happy with right now. I start with cost of all materials, then charge $10/hr for how long it takes me to build, sand & finish. Cost was $80, and it took 7 hours from start to dried poly.
I have always wanted a farm bed and didn't think I could make it but here it is
Thanks for posting this great project.It took about 5 hours. I used a Kregg Jig to build it and I love it. I have built a lot of other things with it sense.
this was a lot of fun to build
Hand made dining table with 4 benches made with brown chalk paint white pine for the top of the table and benches
Beautiful storage mantle by Lynae Moore on Facebook
Project took me about 6-8hrs with cutting and assembly (each). I used Home Depot's Top Select Pine. I will be giving it a distressed look this week with Minwax's Dark Walnut!
Mon, 05/07/2012 - 05:48
Just finished the 2 Kentwood nightstands and they look like yours in this picture (untreated pine). Wow, these took a long time to do. I'm dreading the thought of finishing the insides of these. I also built shelfs inside. Can you post pictures of your finished nightstands. Any tips on finishing? Did you poly? I'm going to use a Minwax mahogany gel stain, but unsure of what to do after that.
Tue, 05/15/2012 - 13:49
Yeah, no kidding, it did take longer than expected. I ended distressing the tops and sides of the nightstands and the technique I use is...
1. Spay the surface with water. I use a regular misting bottle. This will soften the wood even more to allow the make for easier distressing
2. I used a combination of screws, hammer, chisel, and screwdrivers to make my indentions.
3. I do light coats of Minwax dark walnut on the wet surface to allow the stain to absorb deep into the wood and not on the surface.
4. Since oil and water don't mix the wet surface will not hold the stain on the surface but deeper into the wood.
It seems to work for me. Let me know what you think!
My precious second granddaughter loves her tower!
I made a few mods:
1. Eliminated the curvy top: no band saw.
2. Used piano hinges for strength.
3. No need for anti-tipping legs; just lower the platform to lower center of gravity.
4. Kreg-Tool a MUST. Didn't like the KregTool white plastic hole plugs.
PS I built my precious FIRST granddaughter a toy box to match her bedroom furniture.
And a Cradle Boat:
http://www.clcboats.com/shop/boats/rowboats/dinghies/baby-cradle-pram.h…
When a friend sent me a picture of a Restoration Hardware inspired dining table from Shanty to Chic and asked if I could recreate it as a coffee table, I was up for the challange. After sketching up new plans to the measurements she needed, I came up with this and am thrilled with the finished piece...and so is she!
All lumber is knotty pine. I used pocket hole construction for most of it, but used my 16 guage nailer and glue to attach the angled pieces. I attached the table top with "z" clips, first cutting a slot with a biscuit joiner for the clip to slide into.
Sat, 05/14/2016 - 18:16
I love this. It's perfect as a coffee table. And the finish you used is perfect. Excellent job!
In reply to It's Beautiful! by jkassel78
Wed, 05/18/2016 - 22:27
Thank you so much Jackie! :)
Cristina
Mon, 03/21/2022 - 17:06
Could I get your plans?? I would love for my husband to build this for me!
Built 4 of these, slightly narrower and thinner to fit all 4 next to a kitchen island. Decided to skip the false ends and use fabric sprayed with scotch guard instead of leather. I did the woodworking and my talented wife did the painting and fabric work. Very pleased with how these turned out.
My best man (and his wife) are expecting their first child and this was my very first project. The Kreg Jig is great but you need a right angle clamp to put this box together. I stained the project using Minwax white tint base in their driftwood color, I'm not a big fan of the color on the entire box but it serves it purpose as being gender neutral for any future kids. I bought the letters at a crafts store and painted them white and then sanded off the edges and rubbed Danish Oil on it to give it the "distressed" looked.
I used Ana's simple closet organizer and some other brag posts and created a closet organizer for my craft/kid size room.
I used:
(6) 1x12x6' pine for tower and shelving
(4) 1x4"x6' pine for all the cleats
(3) sets of closet rod holders
(2) 4' 1.25" wooden dowels
I primed everything outside after cutting the pieces, which took way too much spray primer - I should have just used brush on. Then painted the finish coat in place using some good Benjamin Moore trim paint.
I'm happy with how it all turned out - errors and all.
This is my interpretation of the Rustic Modern Nightstand. The top is made from Padauk, an African wood that is reddish orange in color. It is surrounded by a band of hard maple. The front legs are Poplar. The shelf is Jatoba from South America. The drawer fronts are African Mahogony. All wood was left natural and finished with three coats of Varathane Satin water-based finish.
My wife and I needed two new nightstands for quite a while. When I saw this plan, it just seemed right. I built two of them in tandem. I was quite surprised at the weight when they were finished. Much heavier than most furniture.
Dennis Janssen
We have been using TV trays as bedside tables for two years. The room is a work in progress... I was waiting to find the perfect pieces...or a plan to build the perfect pieces! So glad I found that plan here. Too impatient to wait for nice weather to head outside, I built this in February on my kitchen floor. It was a little messy and a little dusty, but I am a lot happy with the result :). Cheers.
We modified the plans a little so that our little girls bed would fit snug into the bedframe. We also cheated and bought round short legs from Lowes and stained them with Rust-Oleum Dark Walnut. We wanted the bed to sit low since she is only 3 and I also didnt want her to be able to stuff things under her bed!!
I altered the plans just a bit so that I could make use of the drawer closest to the headboard, while using bedside tables as well (not the ugly ones in the pictures, but some that only exist in my mind as of now). With the plan as is, I didn't think that first drawer would be able to open if you have a nightstand. So I left about a 17" gap that can be used as an open shelf for storage, and still had room for 3 drawers. I also wanted to include a bookshelf as the footboard to make it multifunctional. We have a ton of books and no place to store them (fear not, a large bookshelf/media center is coming soon!) I also altered the top of the headboard just a bit to give it more texture and visual appeal (hopefully, but beauty is in the eye of the beholder so I've been told). Lastly, I did not put the 1/4" plywood backing on the drawer carcasses. They were pretty sturdy as is, and only got more sturdy as they were attached to the headboard and footboard; I'm not worried about racking at all. Leaving the back off also allows me to pull the drawers out and access some hidden storage in between the two drawer carcasses.
I wanted a simple finish, so I rubbed it with dark walnut Danish oil. Super simple finish and I think it'll hold up as the bed is not like a desk that needs poly or something.
Sun, 08/28/2016 - 19:50
This bed turned out amazing. I love the modifications and agree the first drawer will be more usable.
Thu, 05/28/2020 - 06:11
Could you please tell me how you attached the footboard on this one? I thought about using some bolts and counter sinking them from inside the self. How did you do it?