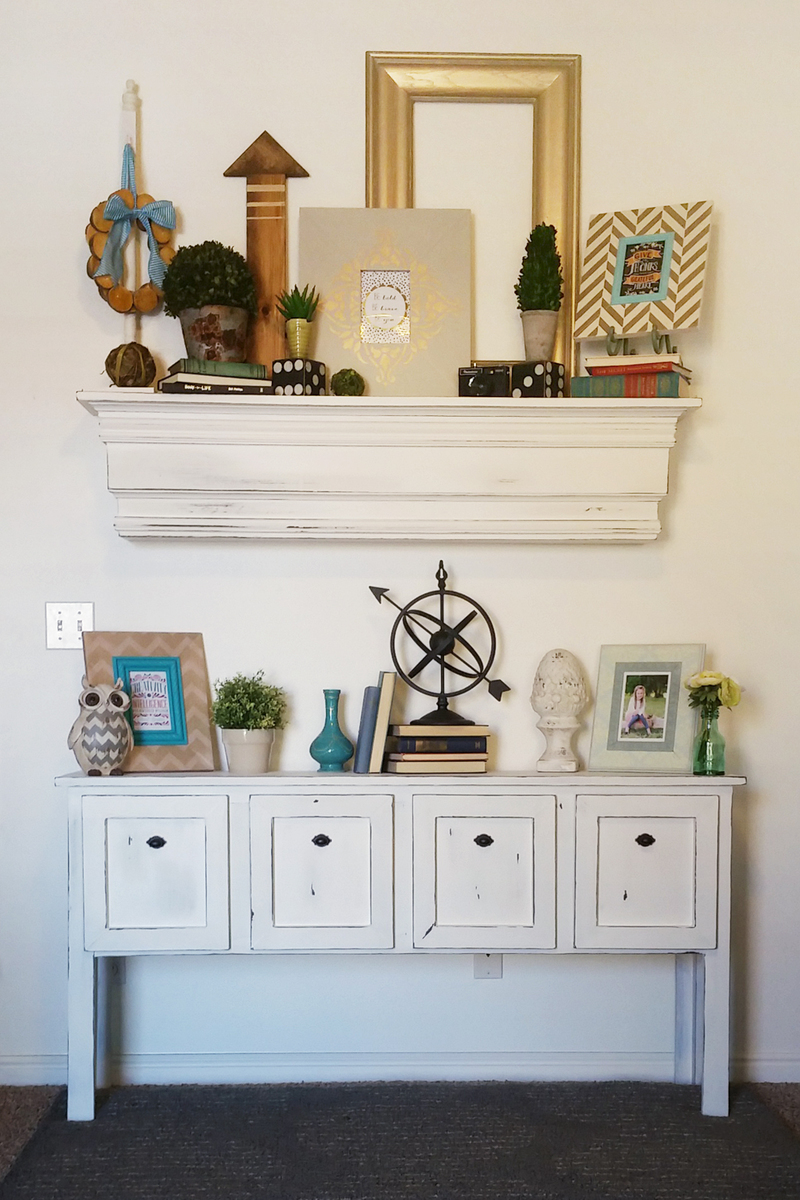
Community Brag Posts
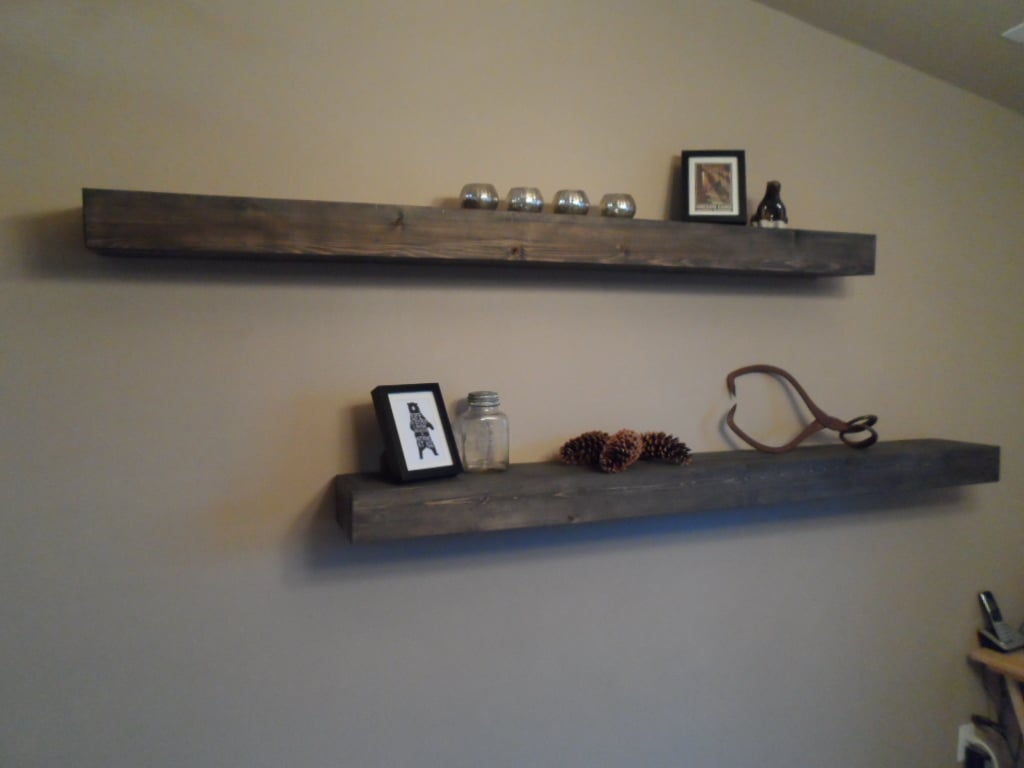
$10 shelf...but cheaper...
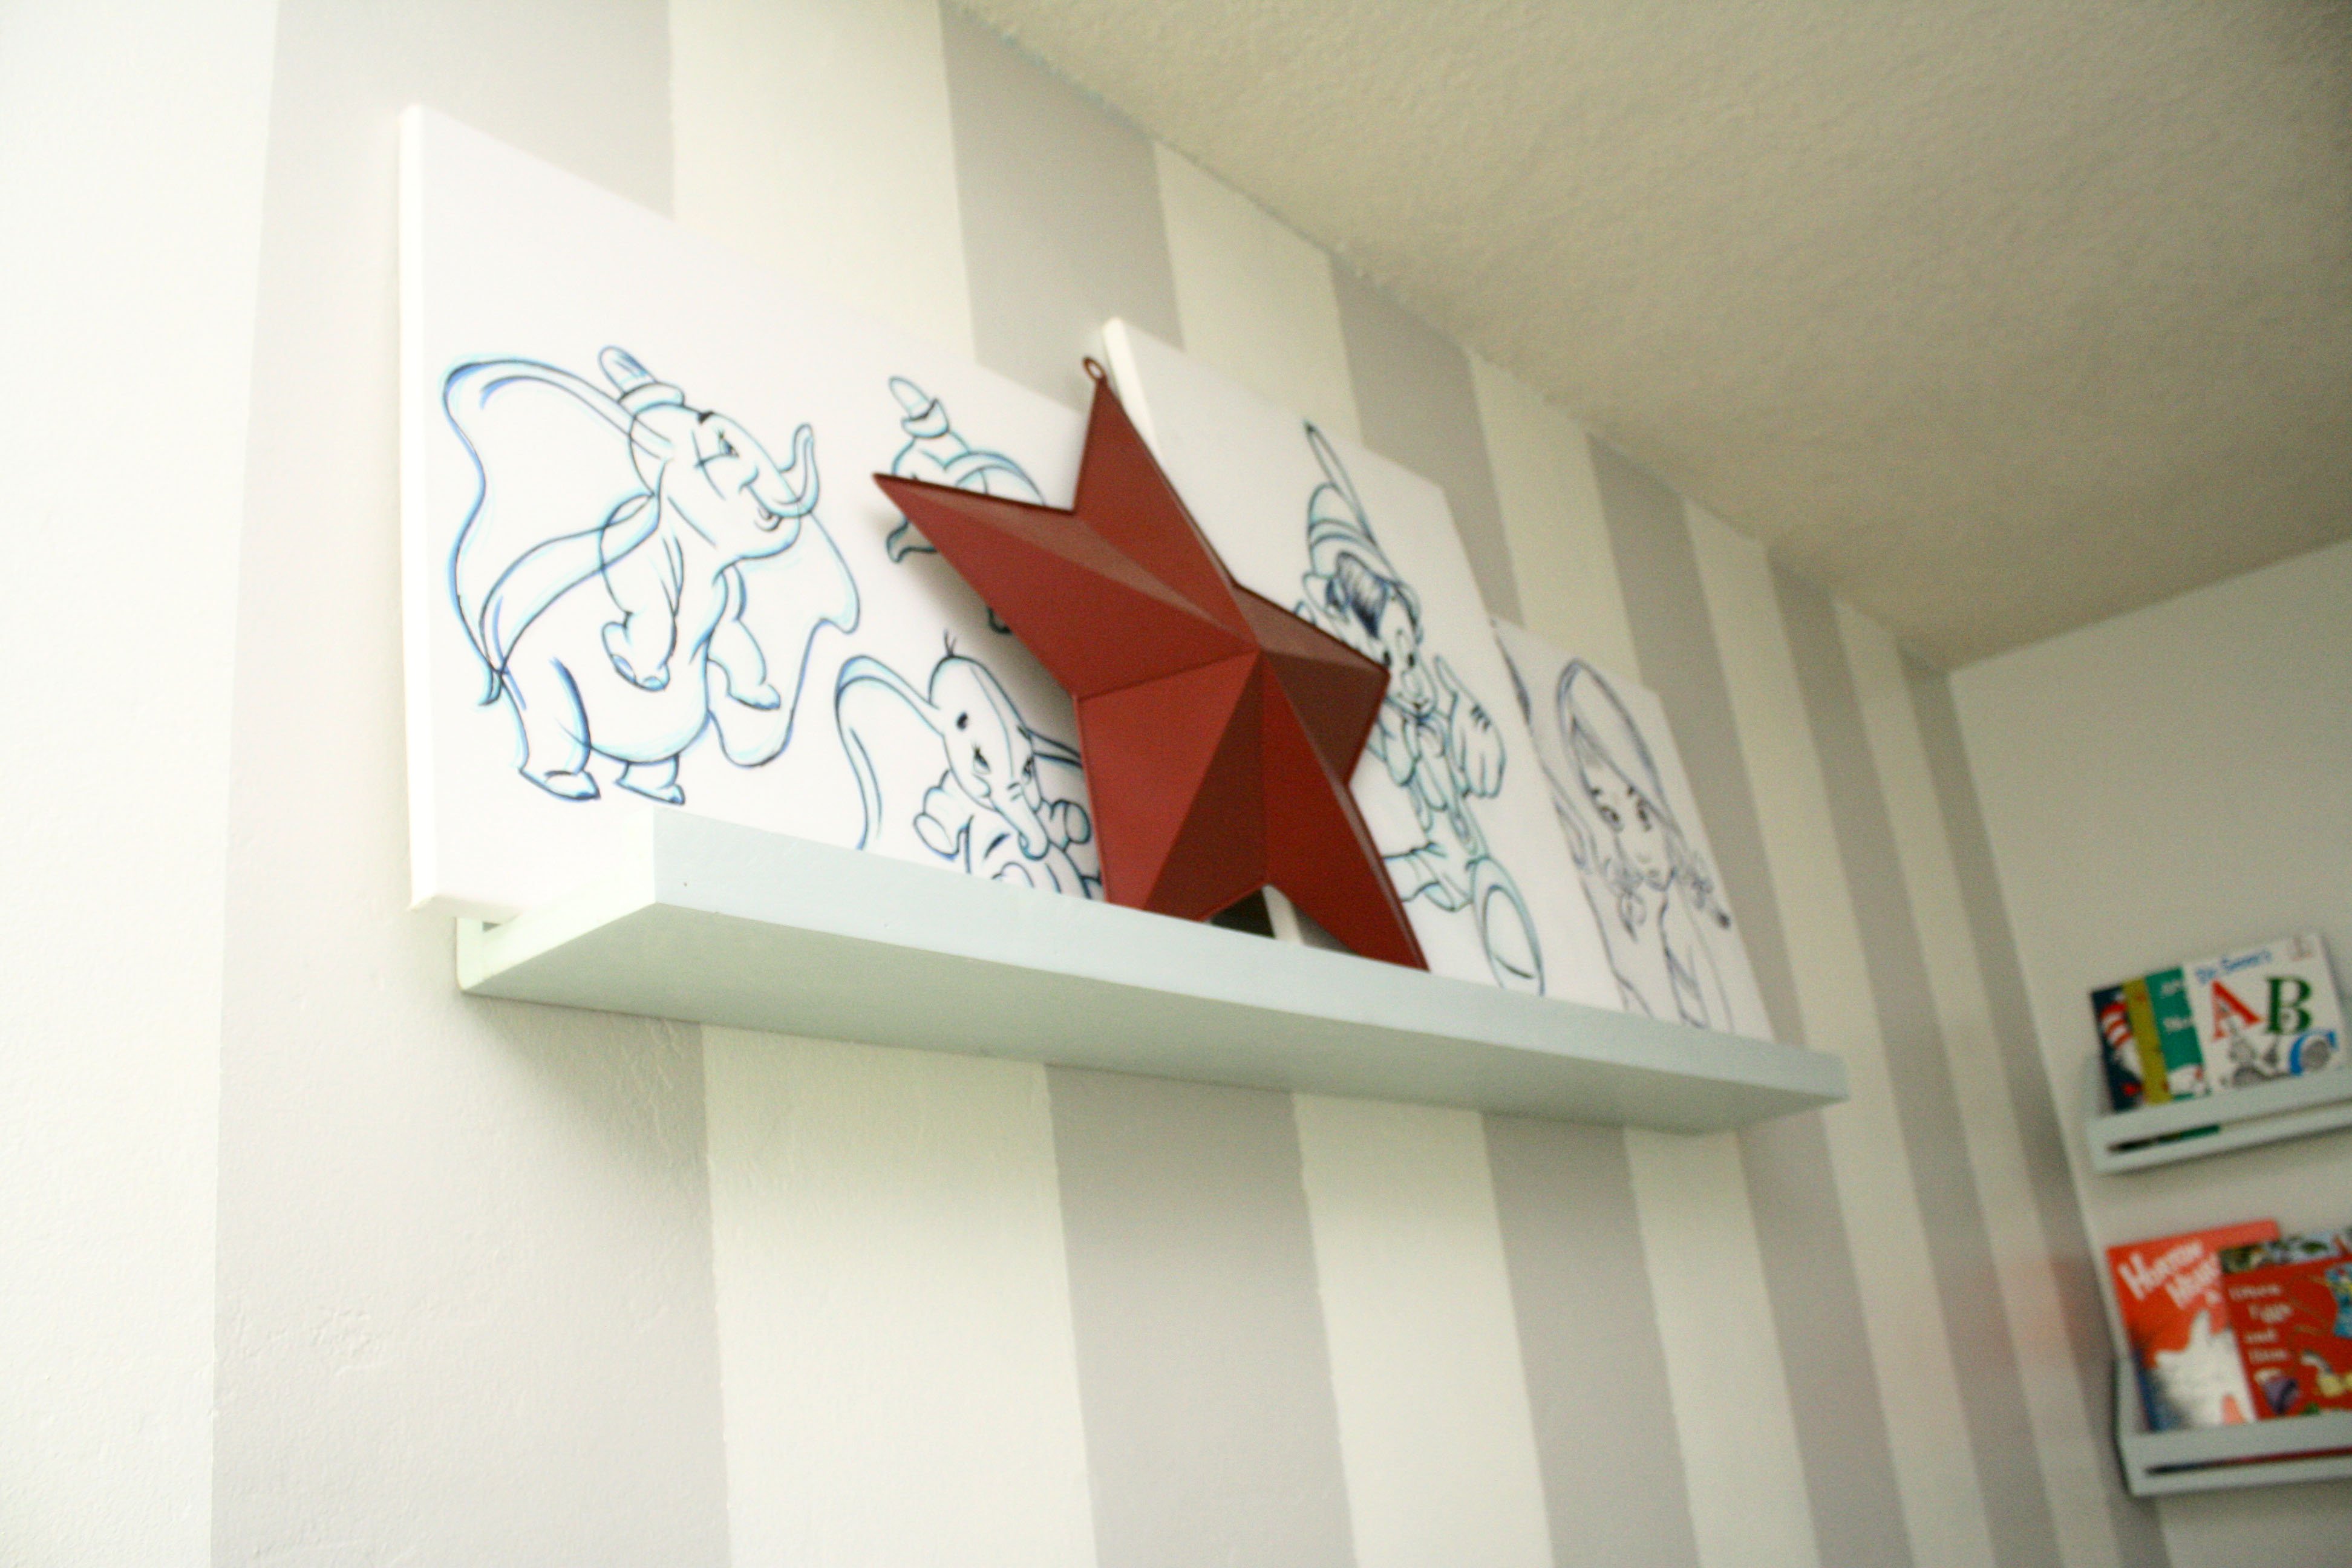
had a lot of scraps and put them to good use with this shelf, east to change out any art/photos my kids would like on their walls, size of frames, etc...without nailing frames, changing positioning, just re-arrange on the shelf :)
Built from Plan(s)
Estimated Time Investment
An Hour or Two (0-2 Hours)
Finish Used
Annie Sloan Duck Egg and home made white chalk paint mix.
Recommended Skill Level
Starter Project
Comments


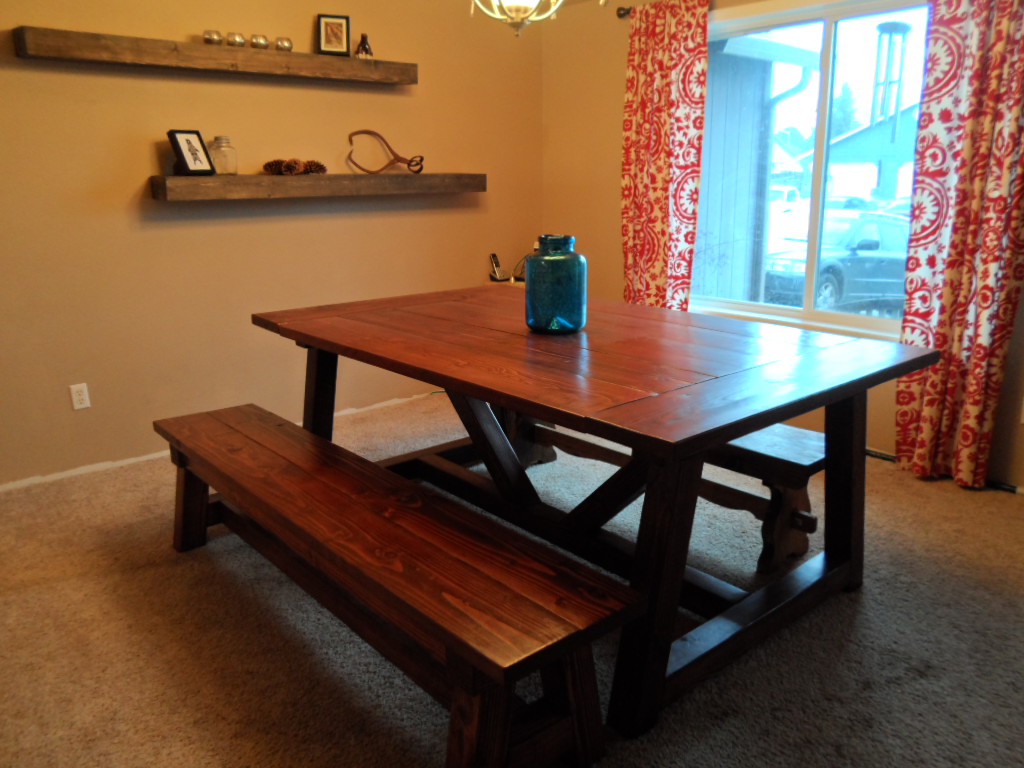
Floating Shelves
I modified the size to fit my dining room and I am so pleased with the results!
Built from Plan(s)
Estimated Cost
$25.00
Estimated Time Investment
Afternoon Project (3-6 Hours)
Finish Used
I dinged up and scratched the boards, sanded then brushed on black latex pain that I thinned with water and immediately wiped it off.
Recommended Skill Level
Intermediate
Comments

Tue, 02/10/2015 - 05:44
Great projects!
I love the finish on your floating shelves, they really look like old barn wood. Table is gorgeous!
Two-tone open wardrobe
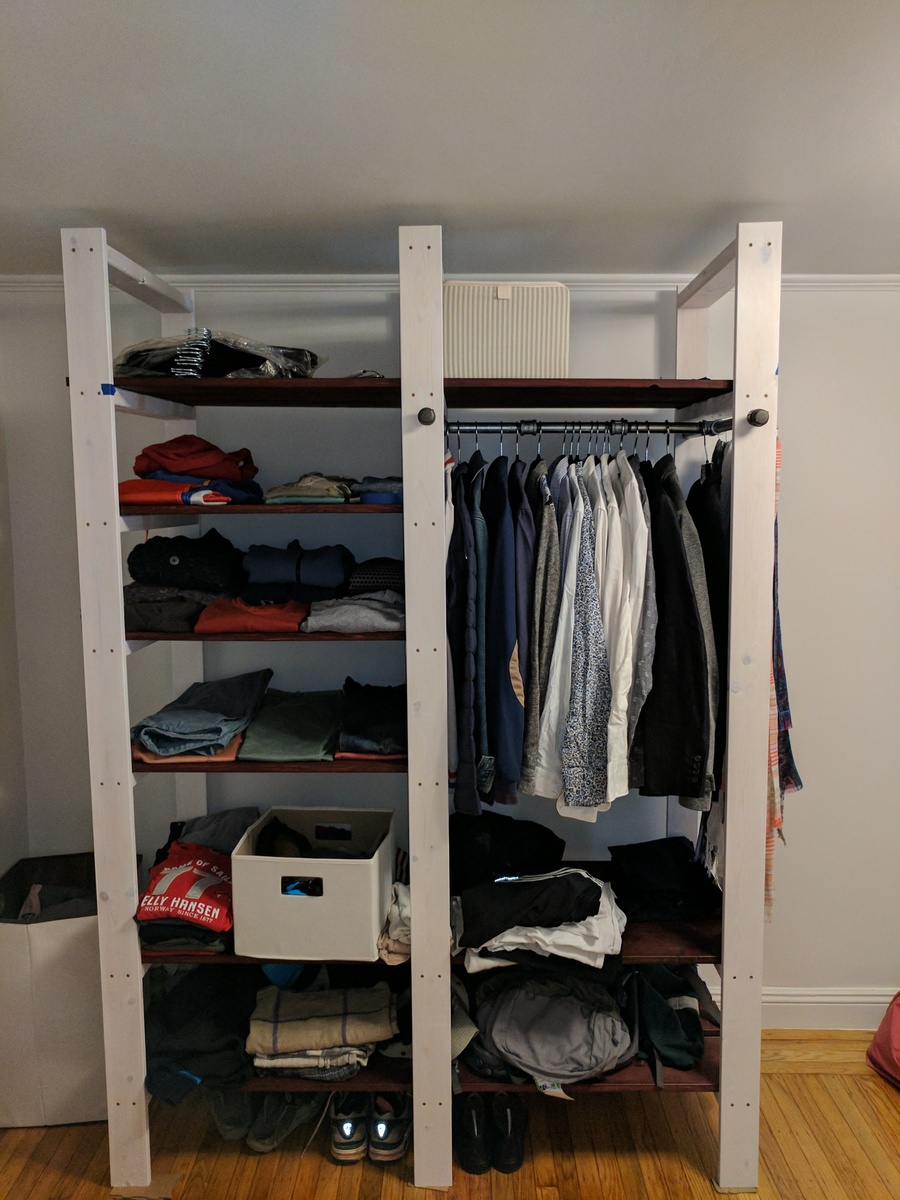
I couldn't find any wardrobe that I was really happy with - and then I stumbled upon Ana's design, and I loved it! I went for two different colors (white for the supports and rosewood for the shelves) to give it more presence. Dimensions are 60" wide X 22" deep x 86" tall
Built from Plan(s)
Estimated Cost
$300
Estimated Time Investment
Weekend Project (10-20 Hours)
Finish Used
General finishes rosewood stain (for dark wood, it gives a red hue) and whitewash.
Recommended Skill Level
Starter Project
Comfy sofas
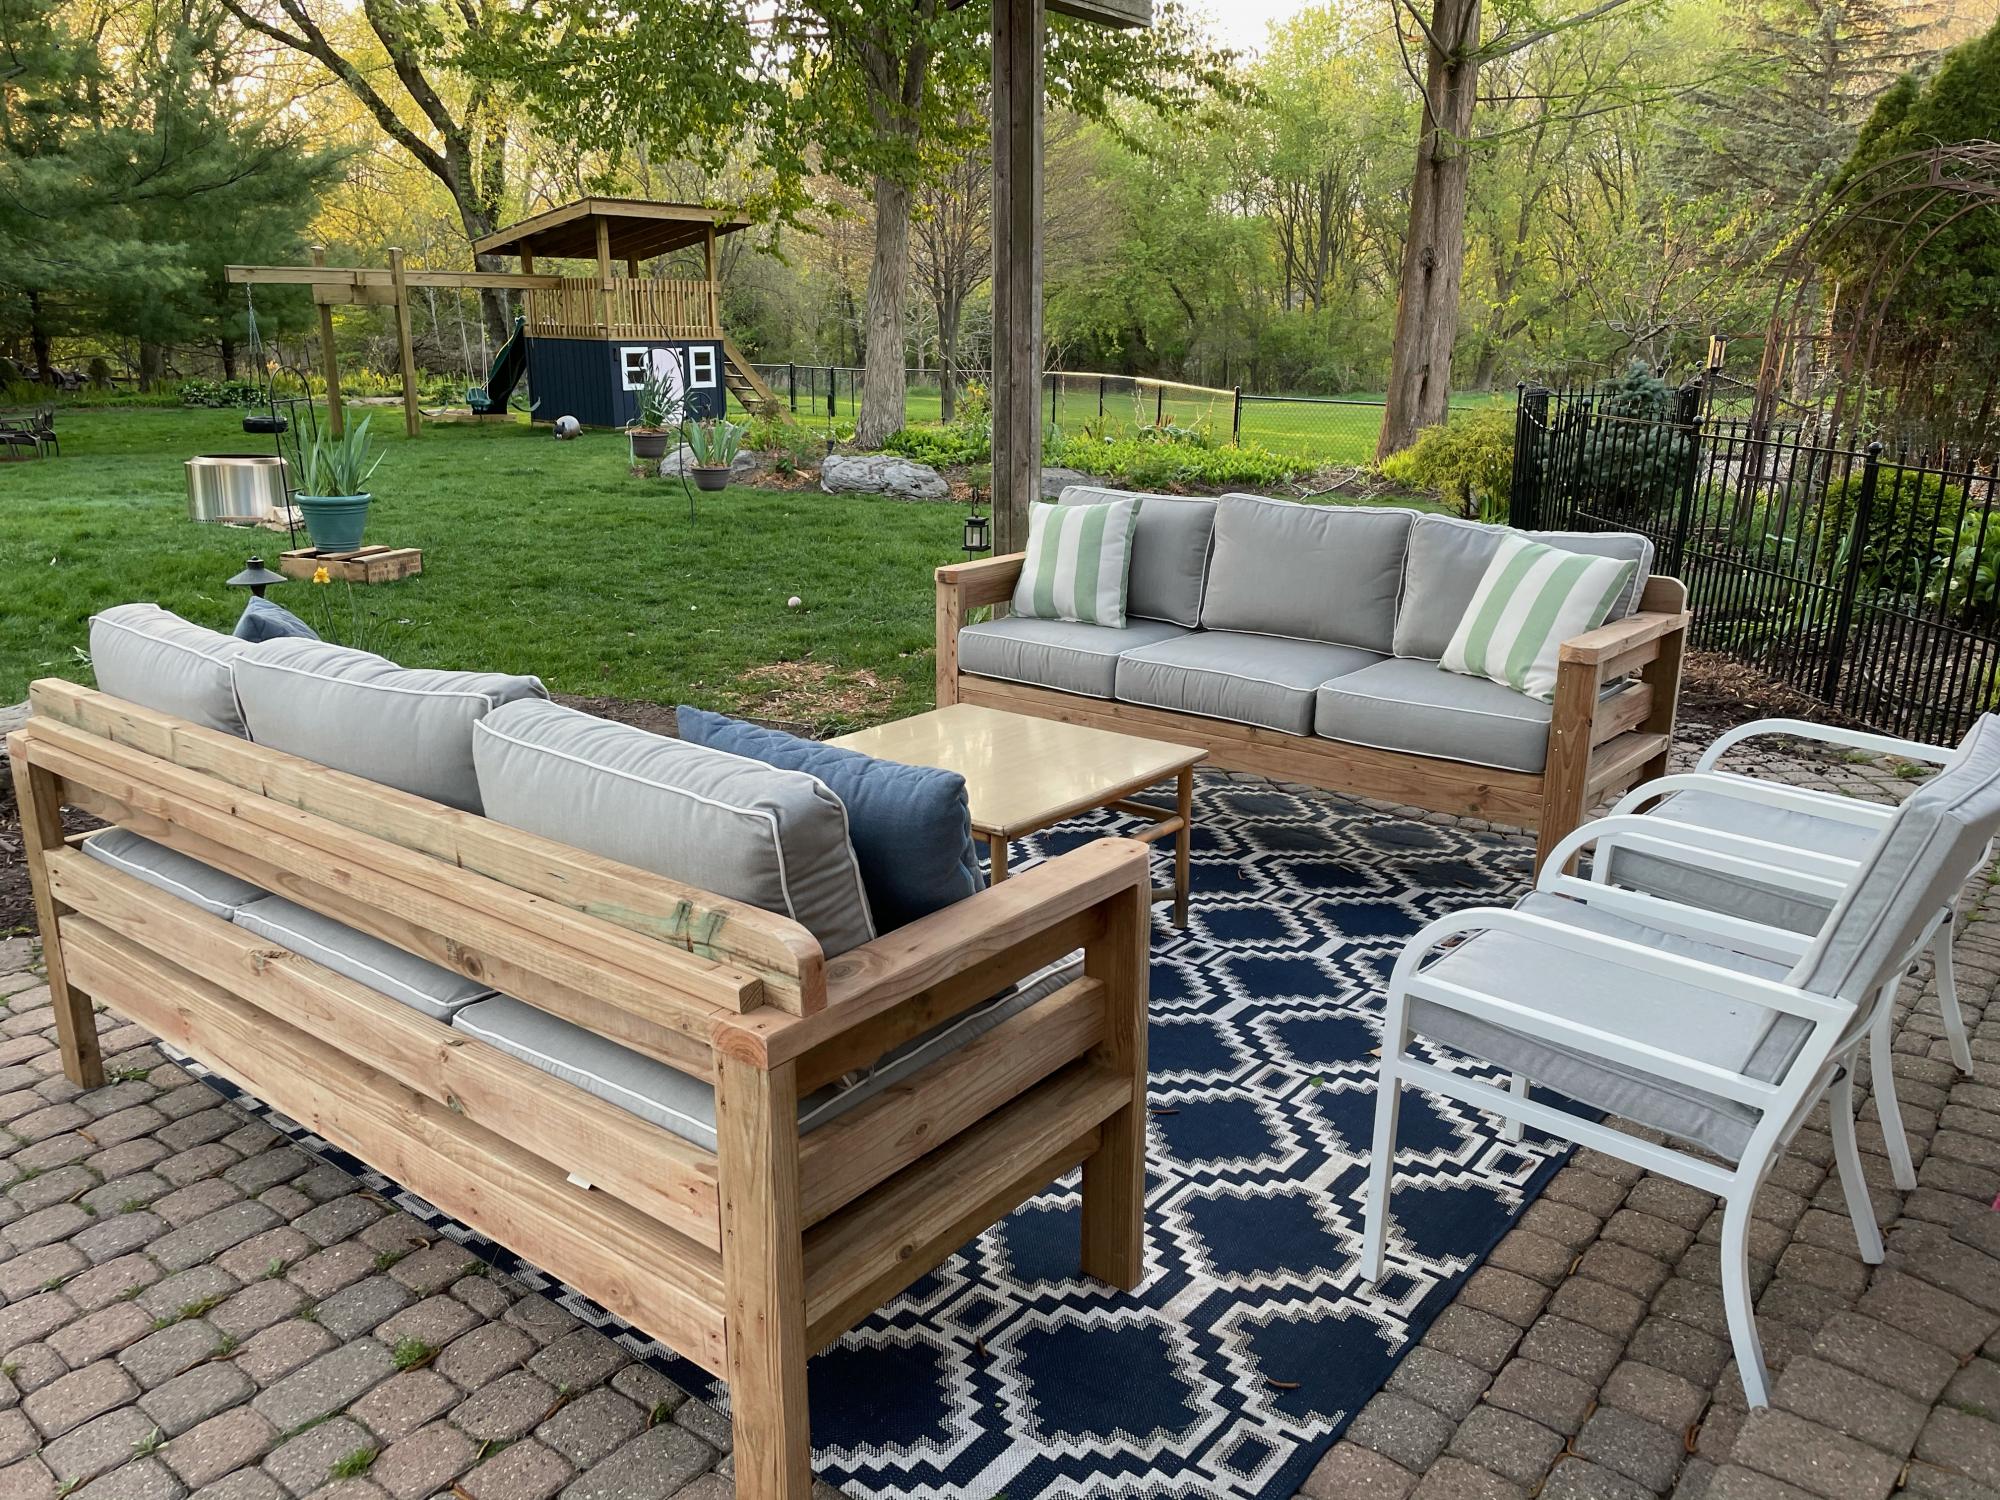
These were a blast to make. Cant wait till my next project.
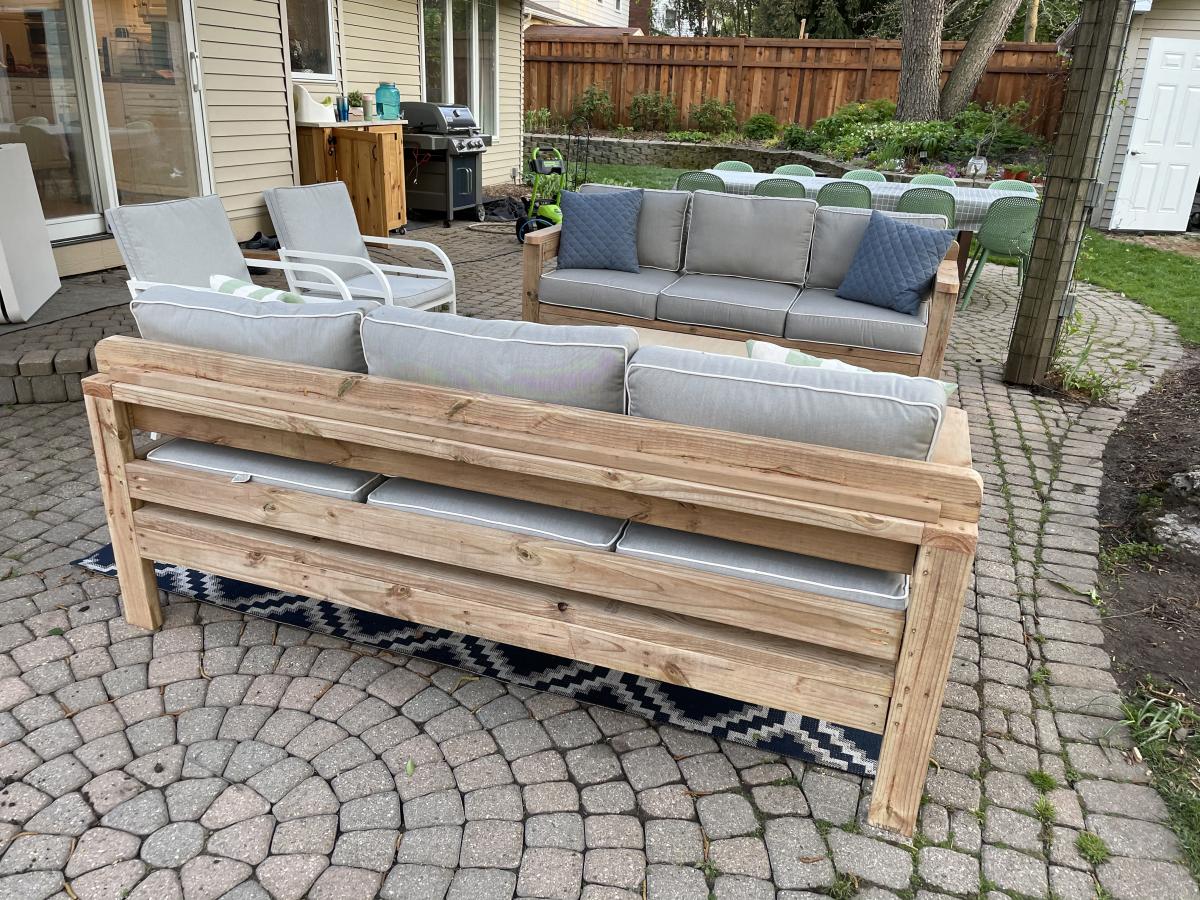
Built from Plan(s)
Estimated Time Investment
Weekend Project (10-20 Hours)
Recommended Skill Level
Intermediate
Comments
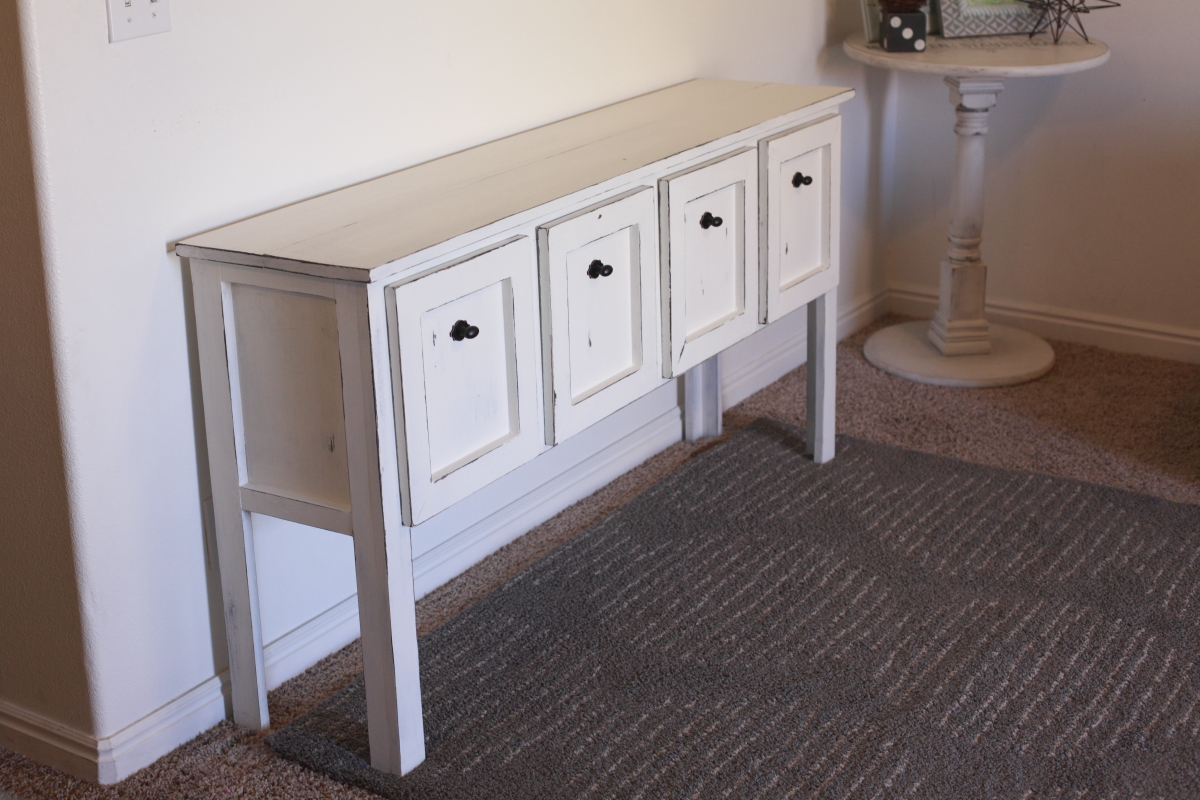
Apothecary Console
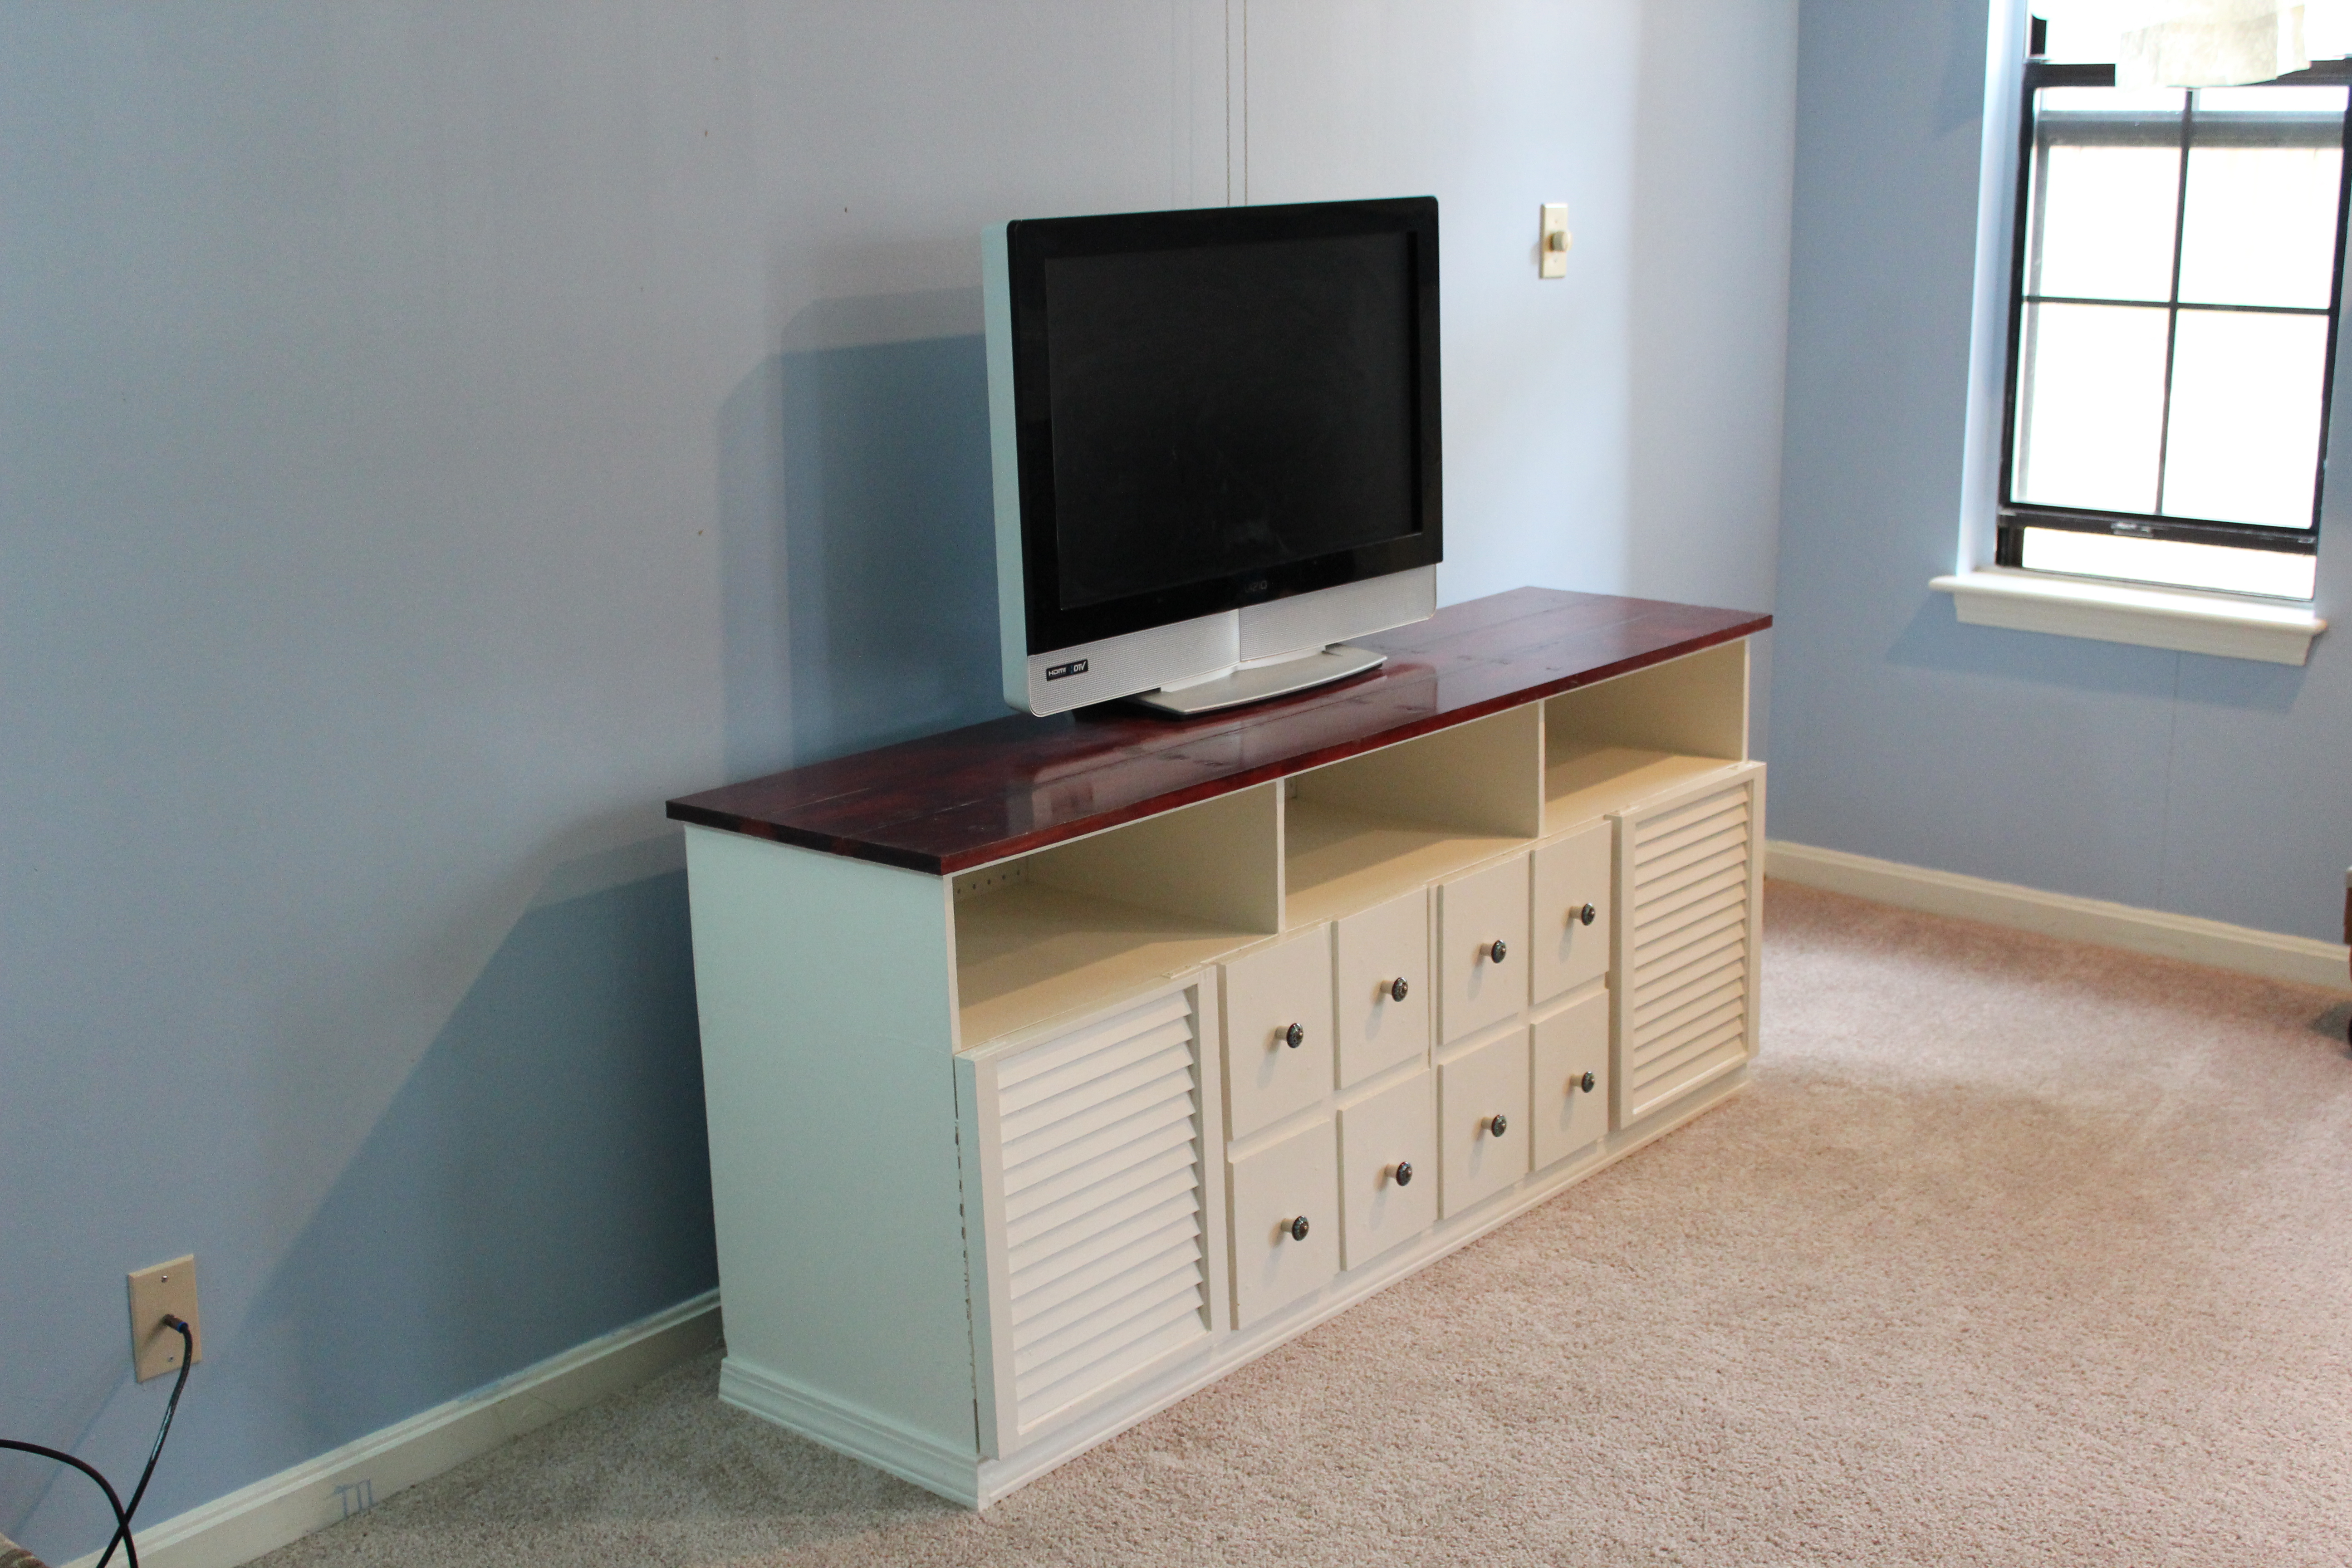
My Apothecary Console
Built from Plan(s)
Estimated Cost
$250
Estimated Time Investment
Weekend Project (10-20 Hours)
Finish Used
Olympic Latex Paint for MDF , color - antique white, cherry colored wood Stain and gloss for pine.
Recommended Skill Level
Starter Project
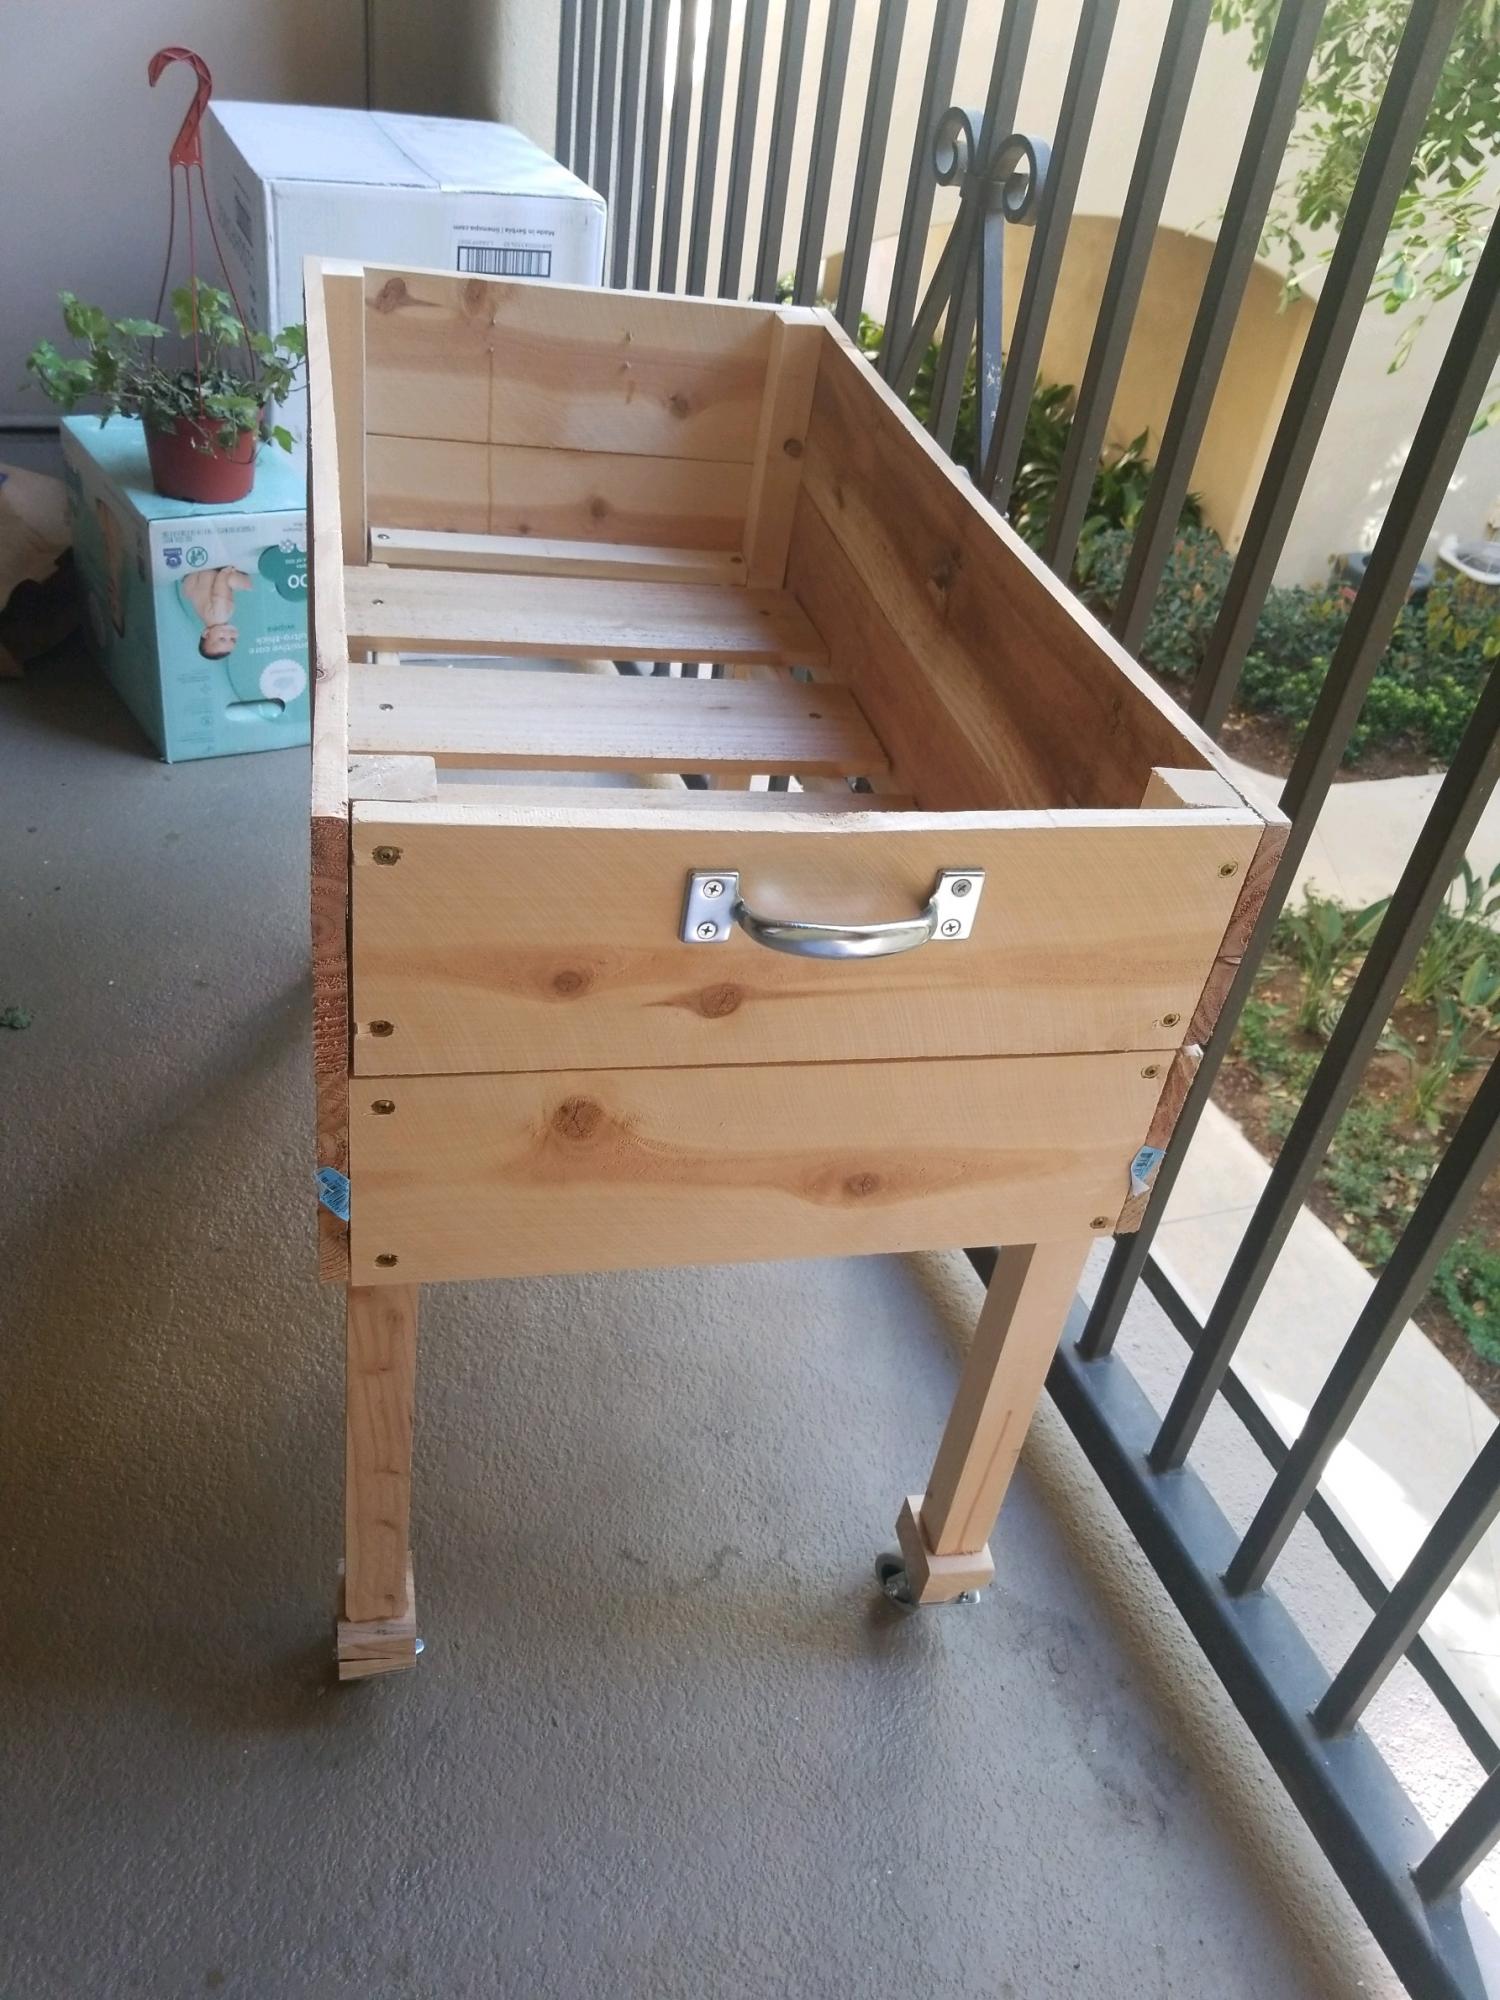
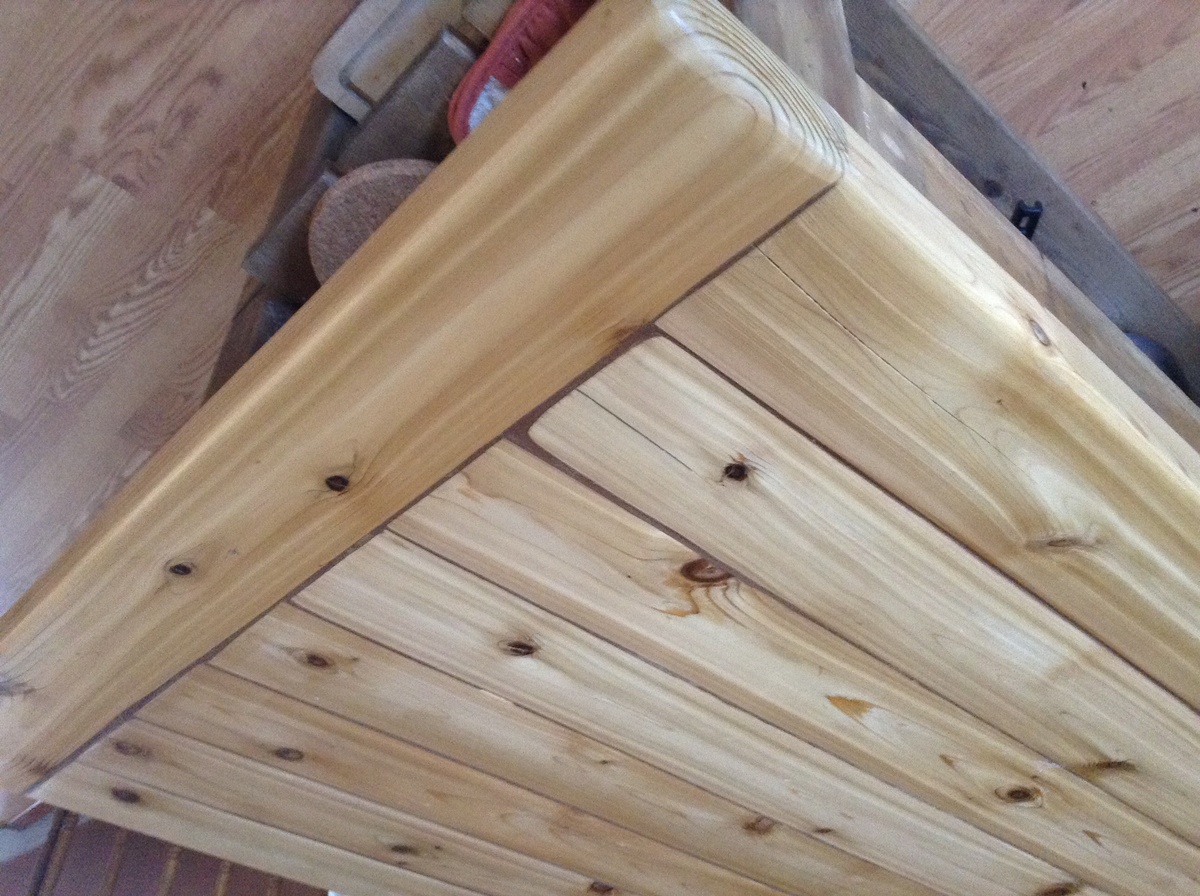
Rustic Cedar Kitchen Island
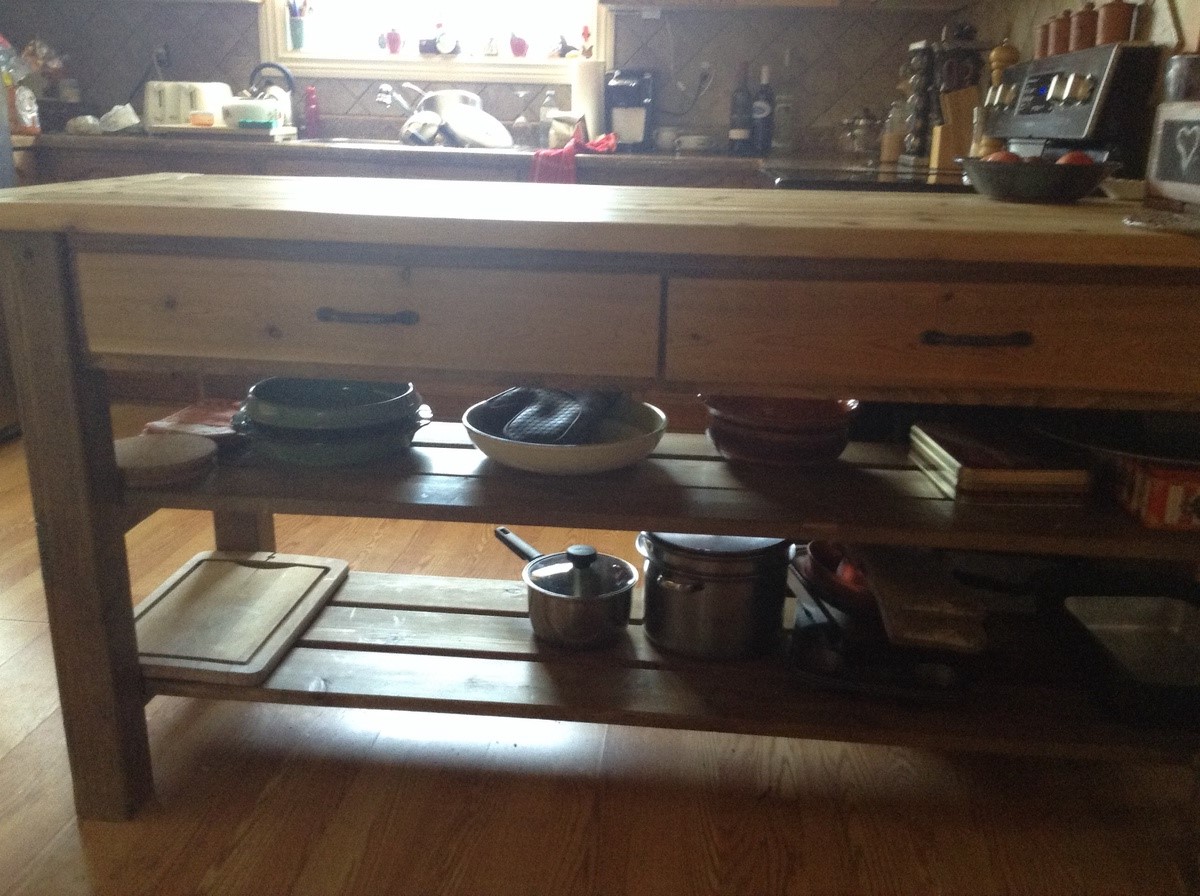
The original plans were altered to measure 6 feet long to fit the space. The top is all cedar which I had planned to keep unfinished and oil each month. Well, that was the plan until I found that it was very hard to clean with kids eating on it and because the 2x4 boards were screwed down, they allowed a lot of food, water to seep through. Some of the boards began splitting and warped considerably. Then I discovered the pocket hole jig!! I took the top off, gave a good sand to them and attached all with pocket hole screws which tightened them up so much that I needed to add an extra 2x4 to adequately cover the top of the island. I also added a breadboard to the end to give it that finished look. To fill in the grooves I used wood filler with a dark pigment, and gave it a really good sanding after it dried. I then applied Varathane in 4 coats to the top after using steel wool in between coats. Gives it a lovely natural cedar patina and keeps the breadcrumbs out.
Built from Plan(s)
Estimated Cost
$250
Estimated Time Investment
Weekend Project (10-20 Hours)
Finish Used
Special Walnut stain from Minwax on everything except for top and drawer fronts. Varathane Diamond Water based Wood Finish
Recommended Skill Level
Beginner
Husbands birthday gift
My husband loves to set outside and look out over our 10 acres with his coffee in the mornings. I thought this chair would be a great birthday gift to use for that purpose! It was fairly easy to put together. I just have to purchase some cushions and it'll be ready to give to him. I did modify a few things...used some 2x4s, changed up the back boards a bit and put some angle cuts on the arms. I'm very pleased with it! This is the third or fourth project we've made from Ana's plans. We just love them!
Built from Plan(s)
Estimated Cost
$60
Estimated Time Investment
Day Project (6-9 Hours)
Recommended Skill Level
Beginner
Love Seat Adirondack Style
Thanks to Ana White for the free plans
I had the challenge to do a love seat Adirondack style
I did and it turned out beautiful and I’m very happy
I spent les than $100 (canadian)
Thanks Ana 🙏🏼
Estimated Cost
$100
Estimated Time Investment
An Hour or Two (0-2 Hours)
Finish Used
Behr waterproof wood finish Cordovan brown (T-104)
Base 500N
Base 500N
Recommended Skill Level
Beginner
Comments
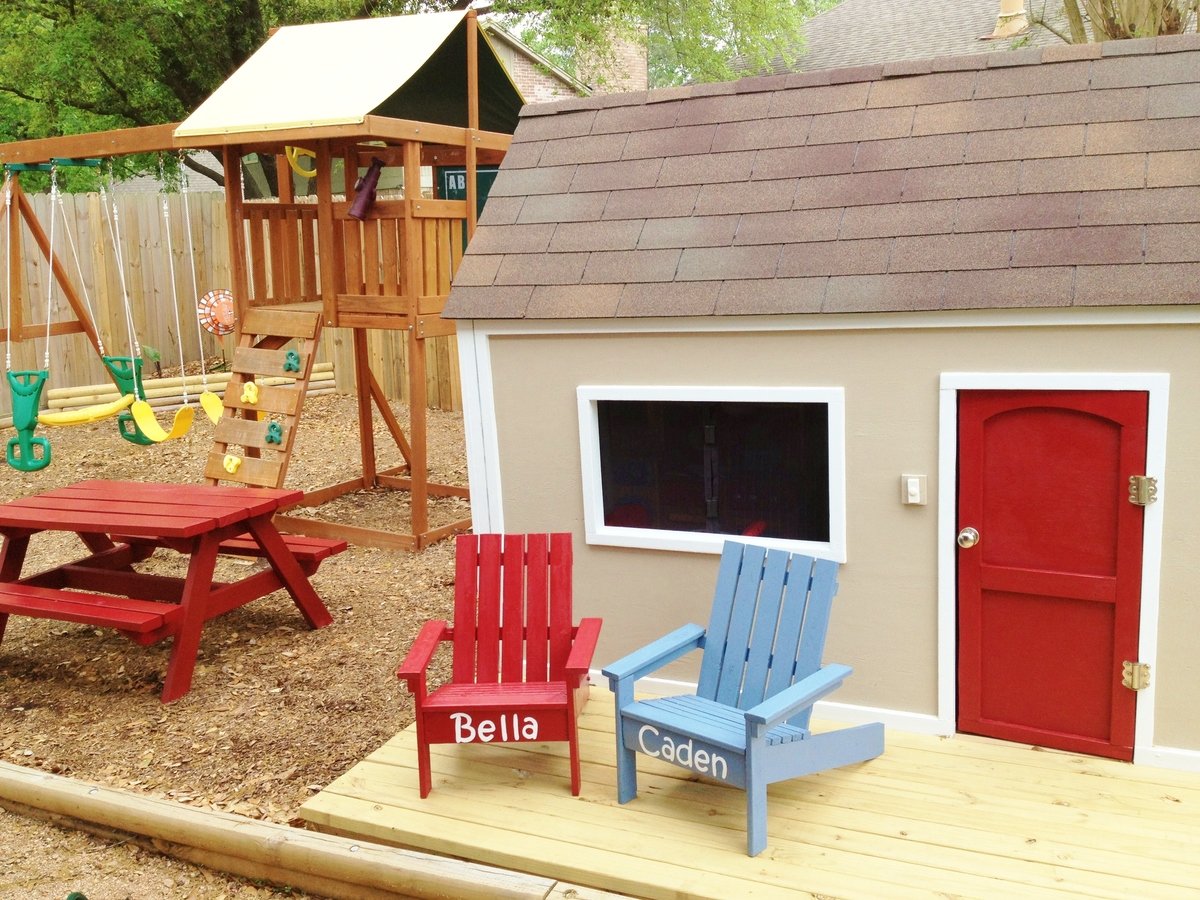
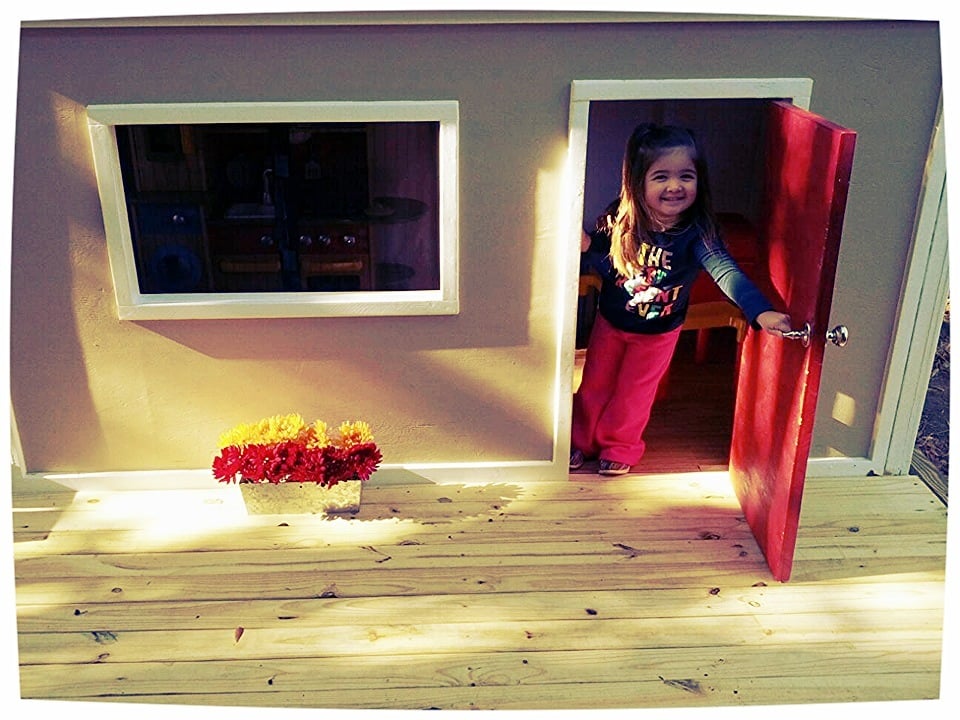
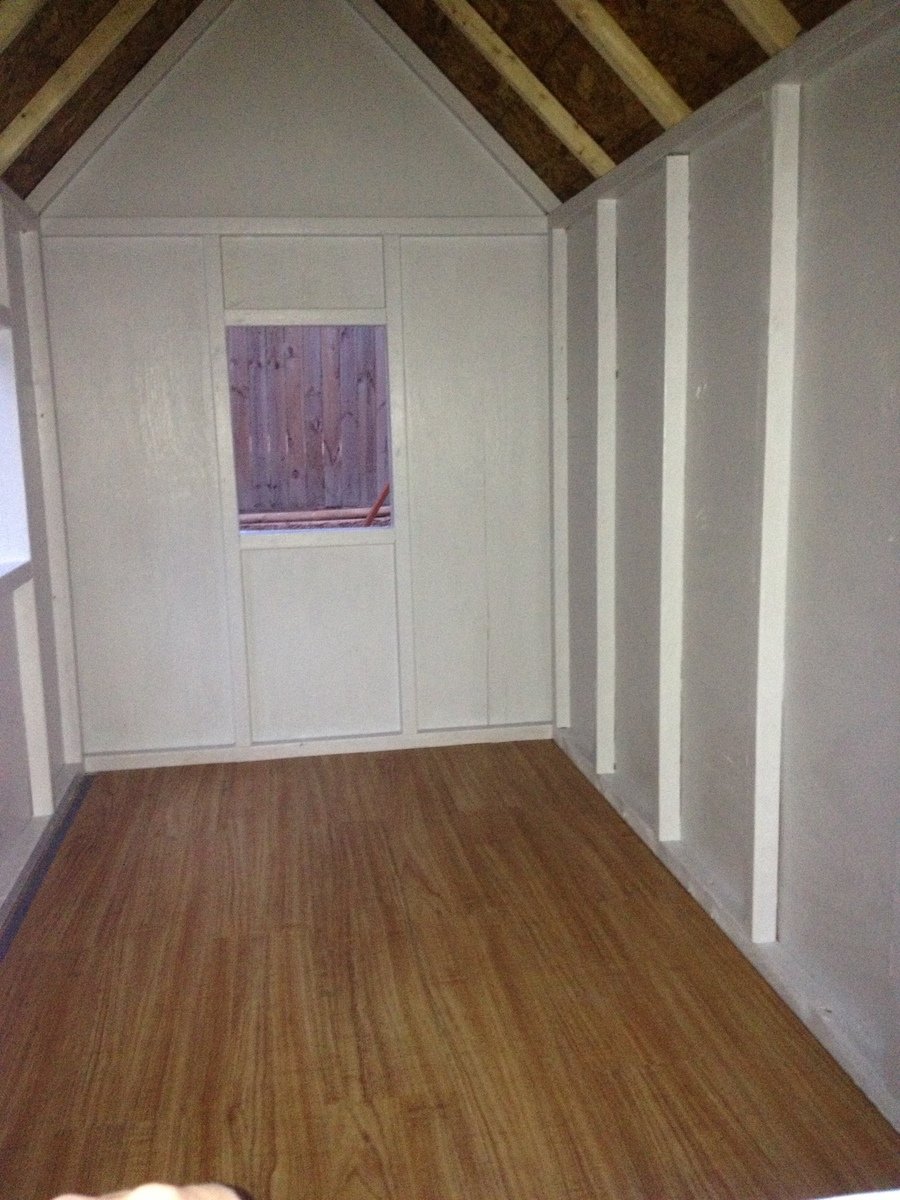
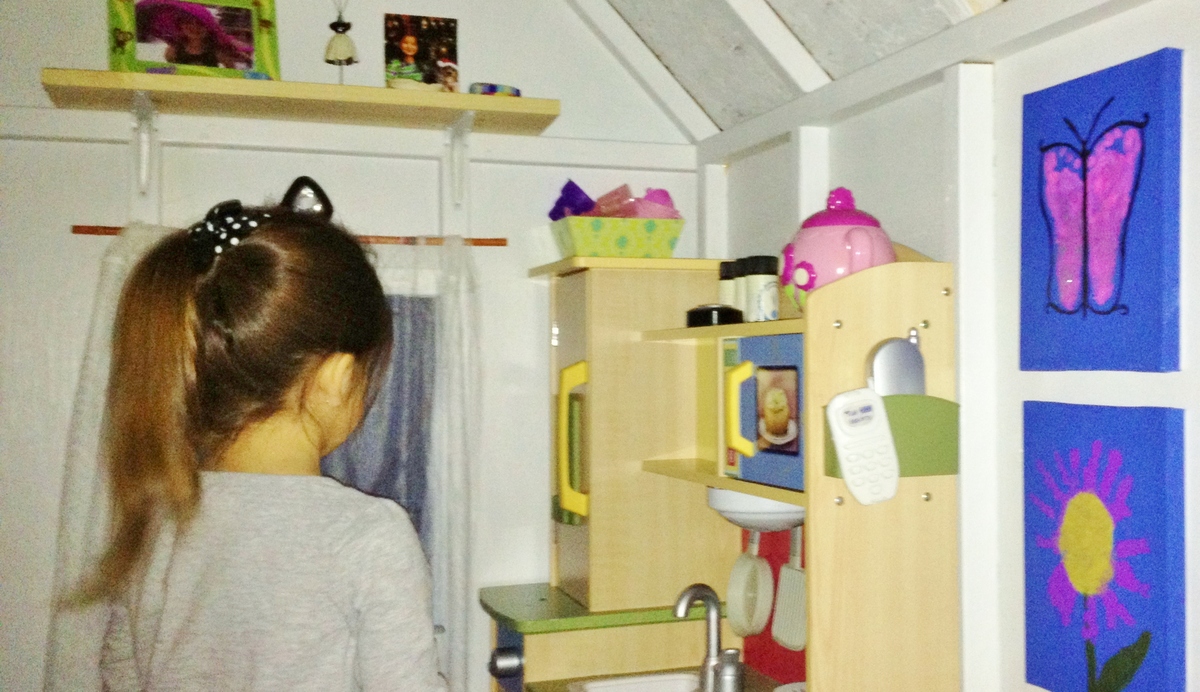
Bella's Backyard
My first project ever was the red picnic table about a year ago and have built many more as housewarming/kid's bday gifts. This Christmas, instead of buying my daughter more toys, I decided to build her a playhouse. Not only was it a very special gift for her but also freed up space in my house being able to put her play kitchen, table, and other toys in it. The small changes we made were the size of the deck to better fit our available space and the shutters (made out of scrap 1x2s and hinged to close with a hook and eye). We put down 3/4" treated plywood as the base and then used 1 box of vinyl plank flooring that looks like wood to hold up to the Texas humidity. I eventually want to make accordion-like shutters for the front window but have up a bug curtain (used for regular size doorways and closes together with magnets) that I cut in half to fit. We have bad mosquitoes here in Texas! I also added a wireless doorbell.

Built from Plan(s)
Estimated Cost
$500
Estimated Time Investment
Week Long Project (20 Hours or More)
Recommended Skill Level
Advanced
Comments
My version of the Wooden Snowflake
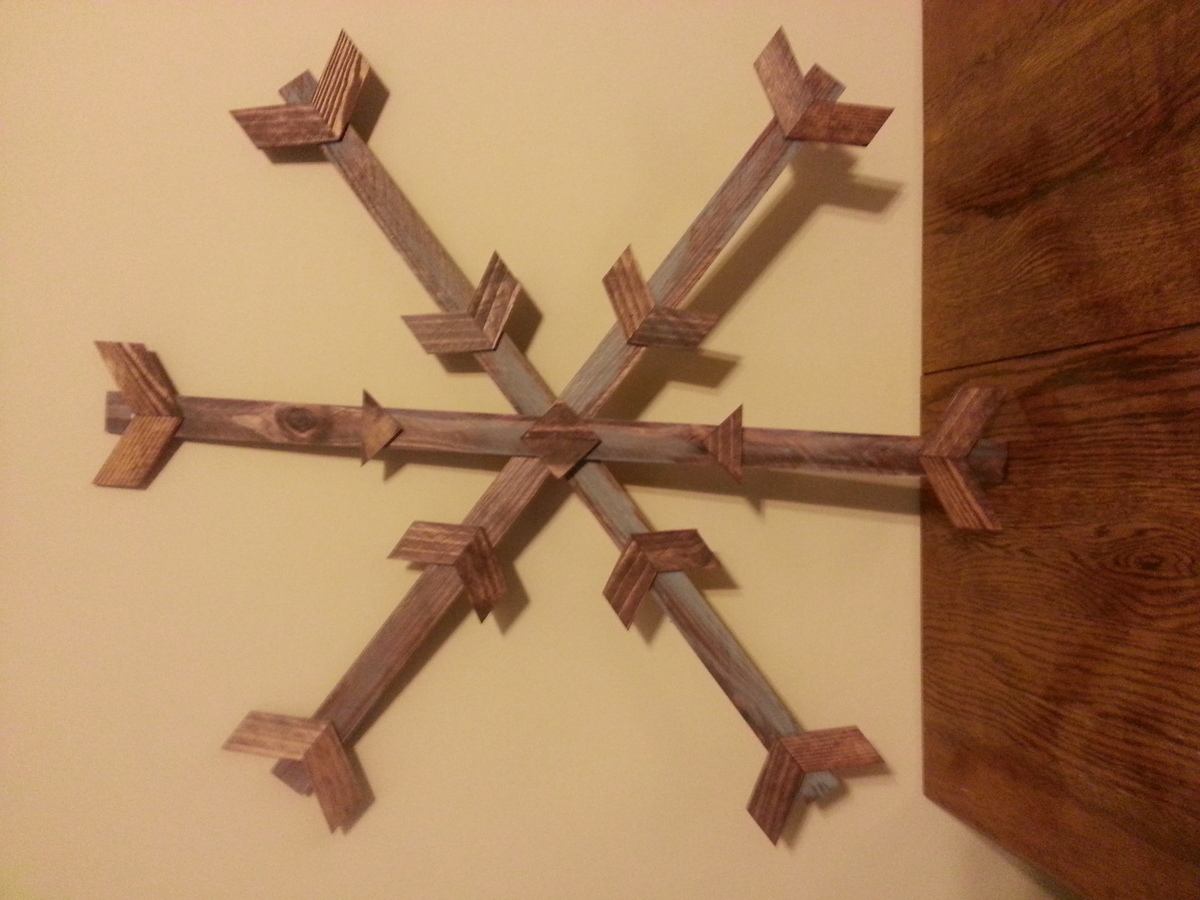
Bought a bundle of lath just to see how it would work. Cut great and took the stain perfectly. Since the snowflakes are going up against a pale green house, I kept them dark so they would stand out. Made five and have a ton of lath left over. Made them 33" wide. Great plan, thanks!
Built from Plan(s)
Estimated Cost
$25 but have a bunch of wood left over
Estimated Time Investment
Afternoon Project (3-6 Hours)
Finish Used
Walnut stain
Recommended Skill Level
Beginner
Comments

Cubby Bookshelf - Large
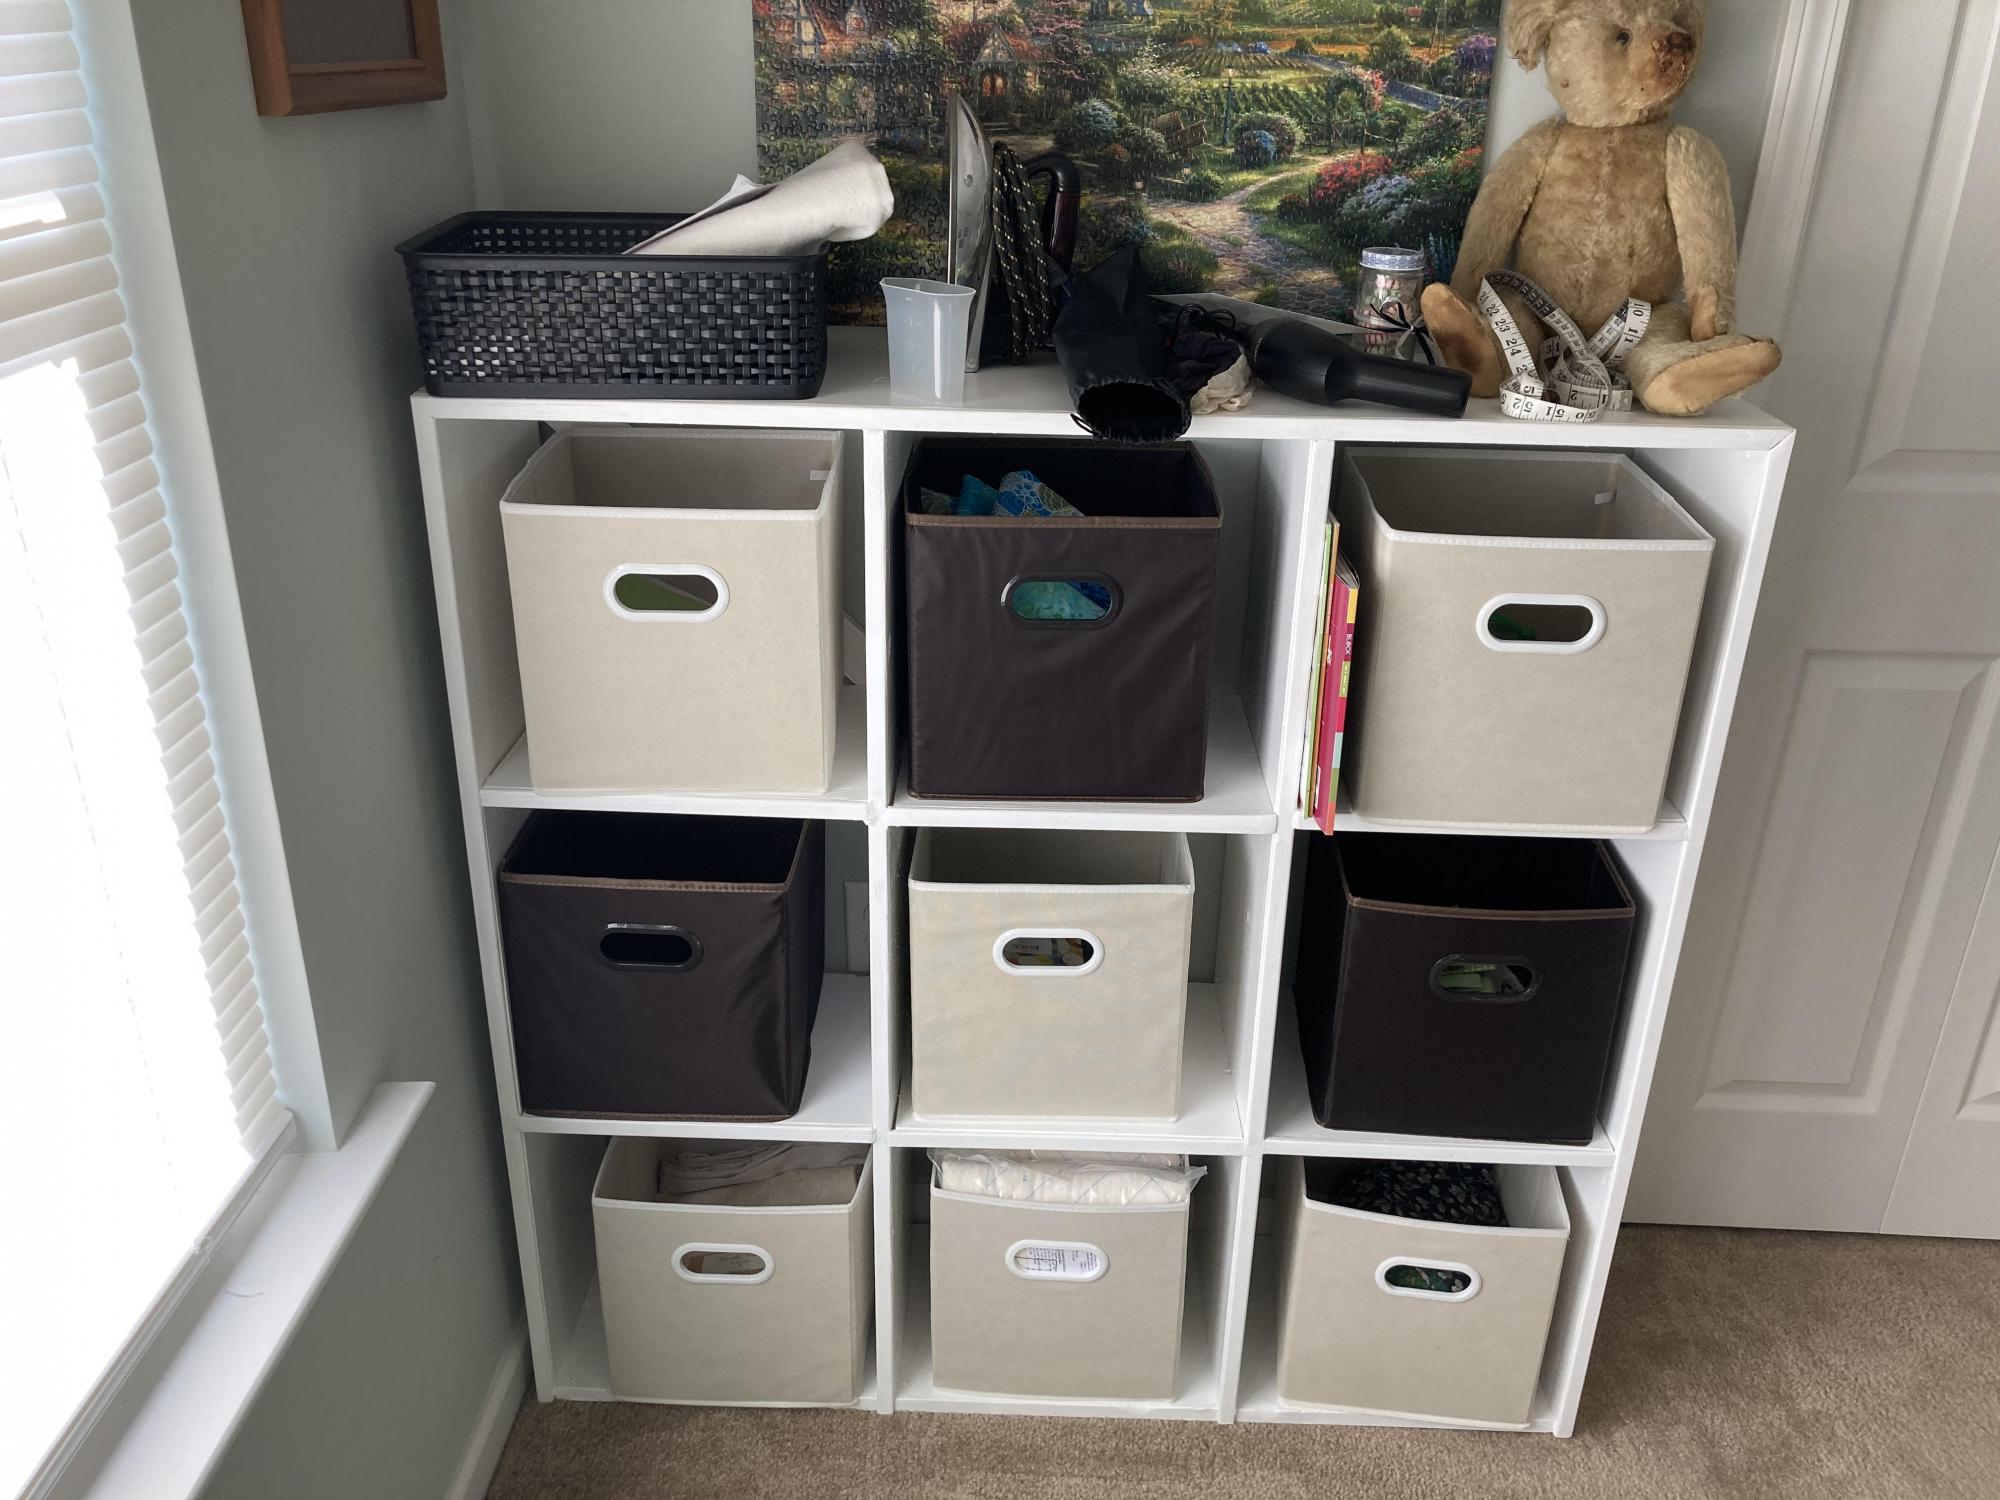
My wife is a crafter, and her room is chockful of material for projects planned and projects waiting to be inspired. Our house is not a large house, and I had this desire to give her some organization. She already had a cubby bookshelf similar to this one, but that was store bought. I have only recently begun building things in my retirement, and I wanted to give her something that was me. It turned out nice, if a little wobbly, but I fixed that with a couple diagonal cross pieces across the back. It fit the space we had perfectly. The important thing is she loves it, and has (obviously) filled it up nicely.
Built from Plan(s)
Estimated Cost
75.00
Estimated Time Investment
Day Project (6-9 Hours)
Finish Used
Paint - two coats
Recommended Skill Level
Beginner
Comments
Miter Saw Cart named Dolley
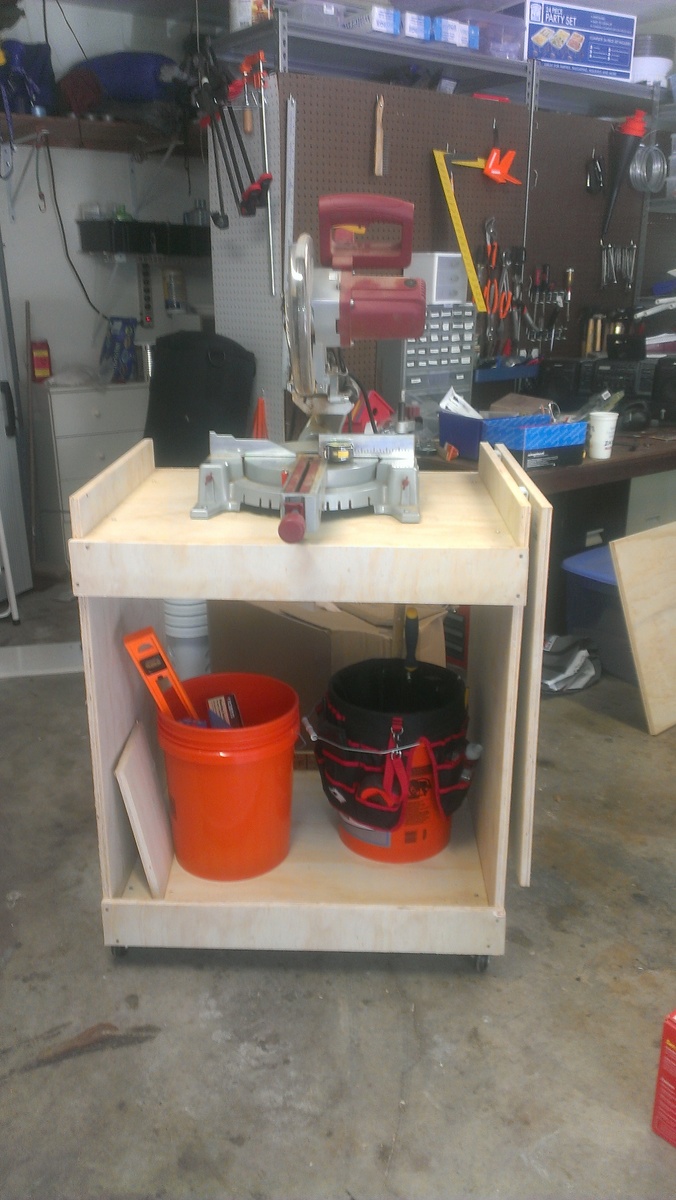
I made the miter saw cart today. It took me about 2.5 hrs, but I was going slow and taking lots of breaks.
Built from Plan(s)
Estimated Time Investment
An Hour or Two (0-2 Hours)
Recommended Skill Level
Starter Project
Comments
Fri, 04/05/2013 - 10:46
Looks great! I really,
Looks great! I really, really need to build one these. Are you happy with the way it works?
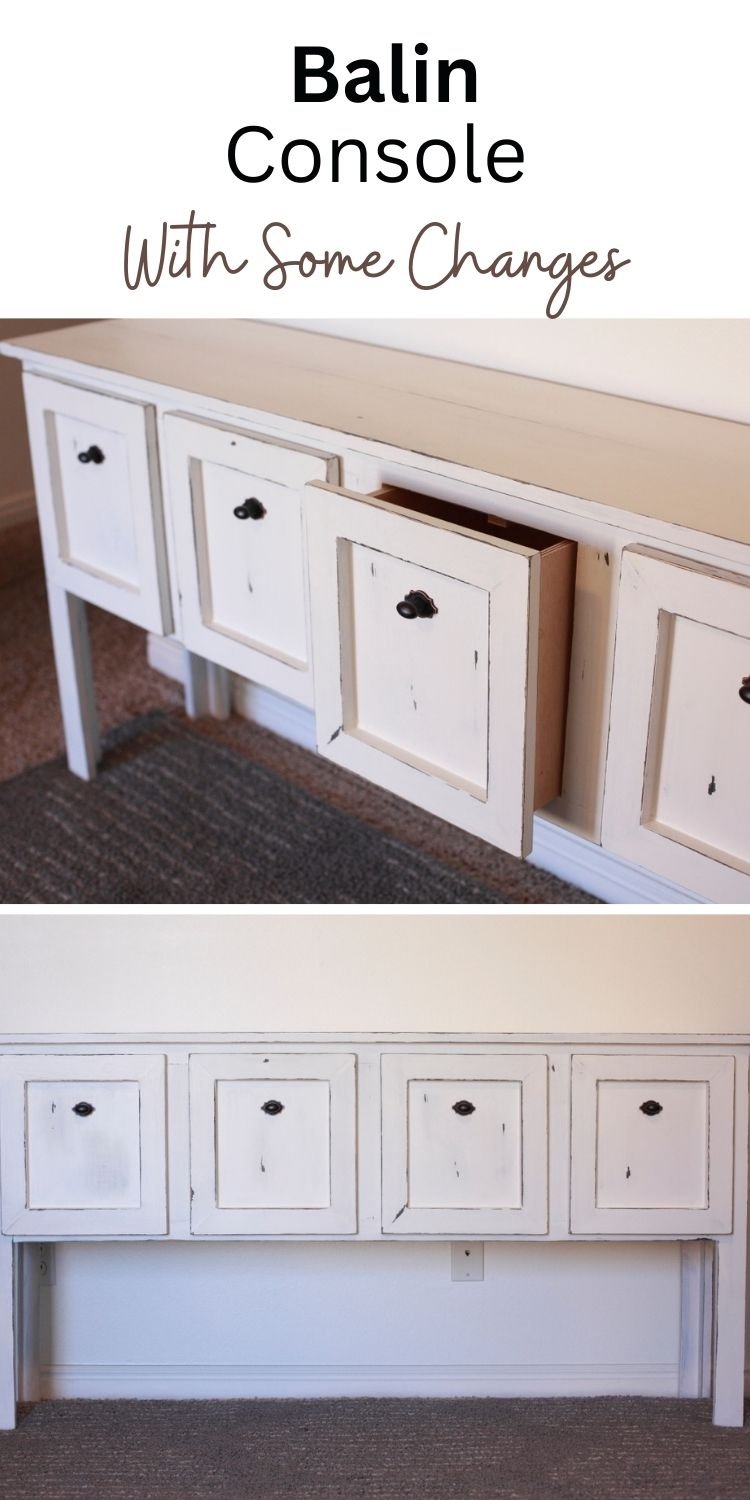
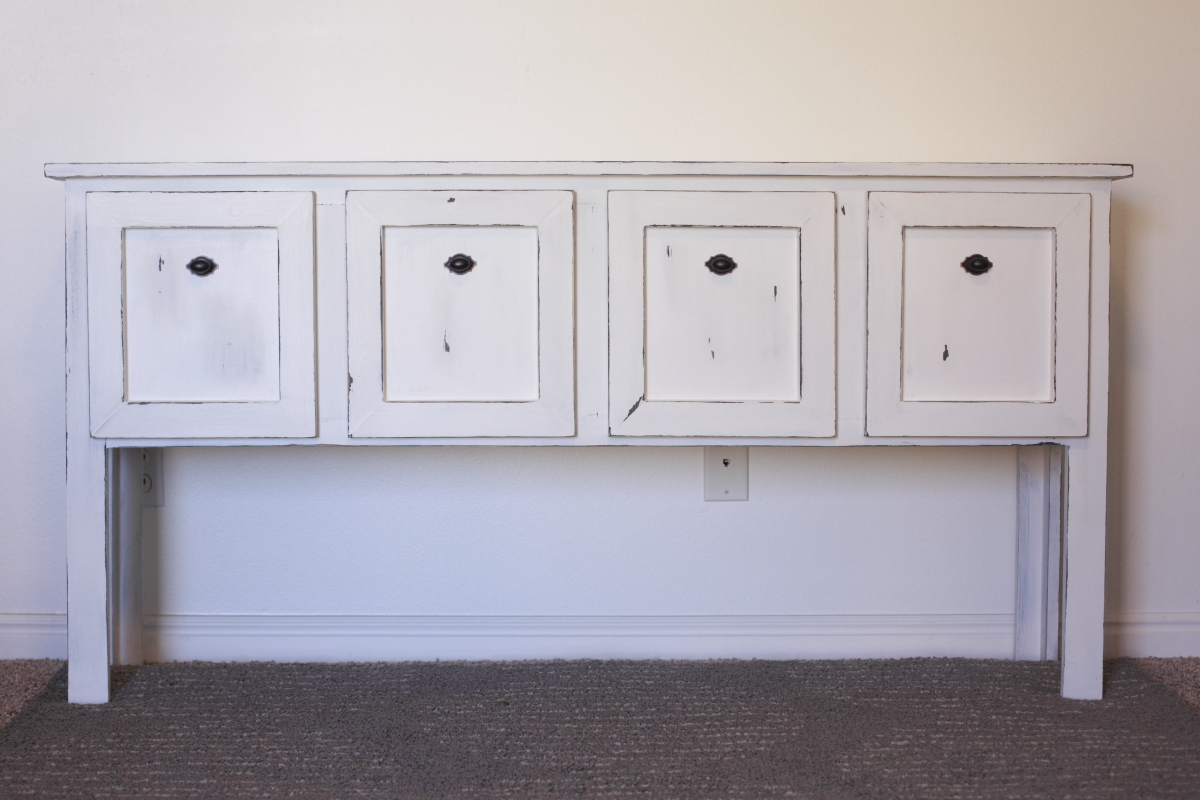
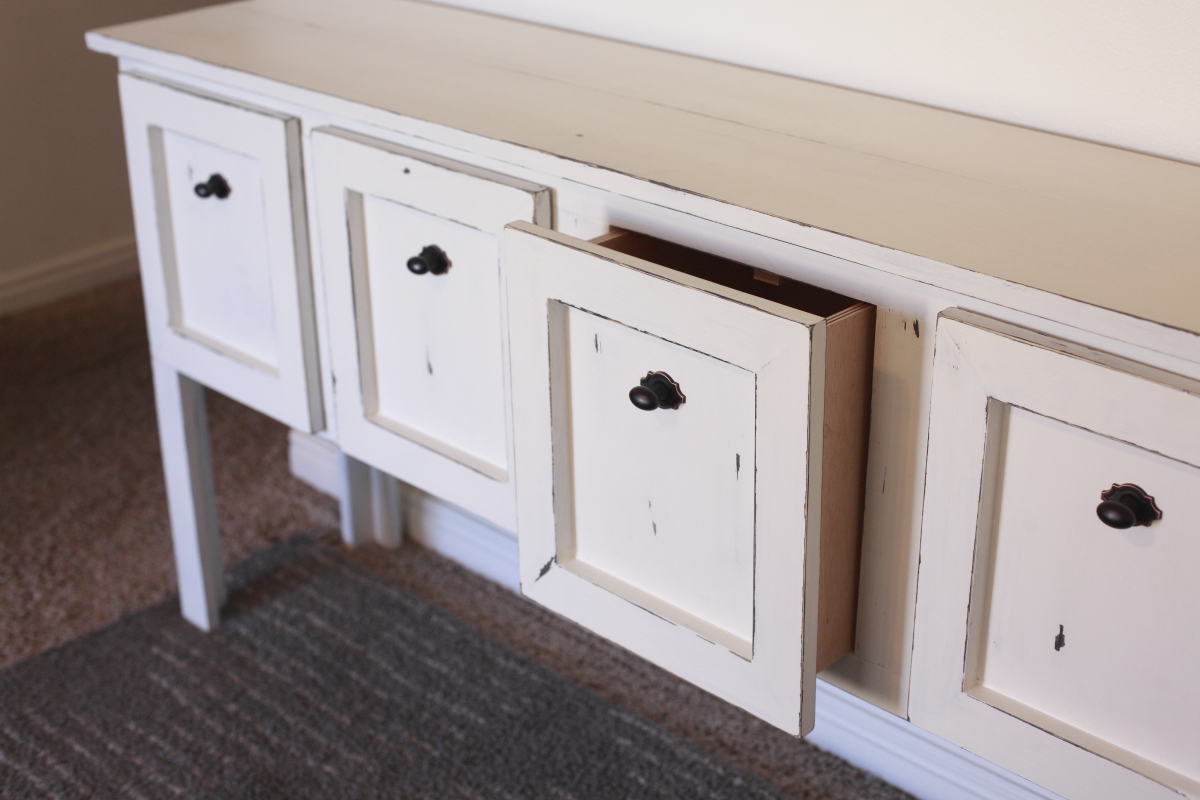
Balin Console With Some Changes
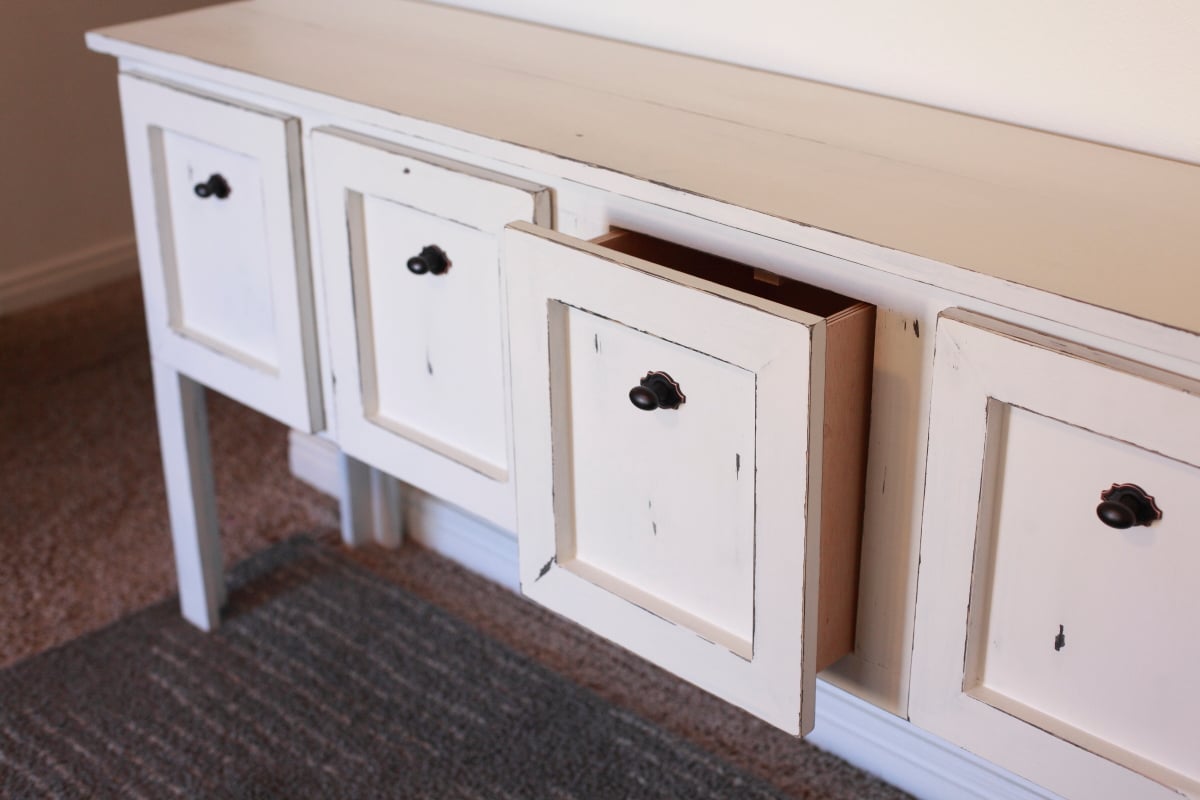
We made this table from the original Balin Console table plans, but faced out the drawer fronts with some mitered trim and added some drawer stops inside to keep the drawers from falling out when pulled all the way.
The drawers were made with a cabinet grade plywood along with the sides and bottom of the table. We used 1x8s on the console top to get that nice wood look, where all corners and ends would be showing, but for the sides and bottom of the table, since the edges were all trimed out, the plywood worked out nicely.
The legs seemed plenty sturdy without the extra trim, so we skipped that to get a more simple look.
Drawer handles were found at our local Home Depot.
For the finish, we stained (with Minwax ebony) the edges where we wanted distressing, then wiped on vaseline along edges and painted over in Behr Swiss Coffee (white) in matte. After drying we took sandpaper to the edges to show the dark stain through. Because we used matte paint, after everything was finished, we waxed with a clear wax and buffed for a nice shine and a smooth texture.
Pin For Later!

Built from Plan(s)
Estimated Cost
$125 for plywood, wood pieces and knobs. We already had paint and stain.
Estimated Time Investment
Day Project (6-9 Hours)
Finish Used
Minwax ebony stain, vaseline where you want distressing, then paint Behr (matte) Swiss Coffee on top. Sand all surfaces to distress and smooth, then wax with clear wax to add shine.
Recommended Skill Level
Intermediate
Chaise lounge chairs

This is from your plans for your favorite chaise lounge chairs only I beat them up 2 x 6 Bass four by four legs and 5 quarter tops also change the tops so they're all the same directions this made it a lot sturdier for heavier folks of course my dog Dozer thanks I made them just for him thanks for the great plans
Built from Plan(s)
Estimated Cost
150
Estimated Time Investment
Day Project (6-9 Hours)
Finish Used
I bought oops paint from the hardware store just happened to go perfectly it's a light mint green
Recommended Skill Level
Beginner
test project

First project and very happy with outcome! Little trouble with top trim not lining up with the top piece of mdf, but it give them a rustic look so it's not a big problem. Now that my husband sees that it is possible to build good furniture in our tiny apartment, I can begin planning my next project!
P.s.- Homedepot guy says thank you for handy cut list and mdf chart!
Estimated Time Investment
Day Project (6-9 Hours)
Recommended Skill Level
Starter Project
Camp bunk beds for Toddlers
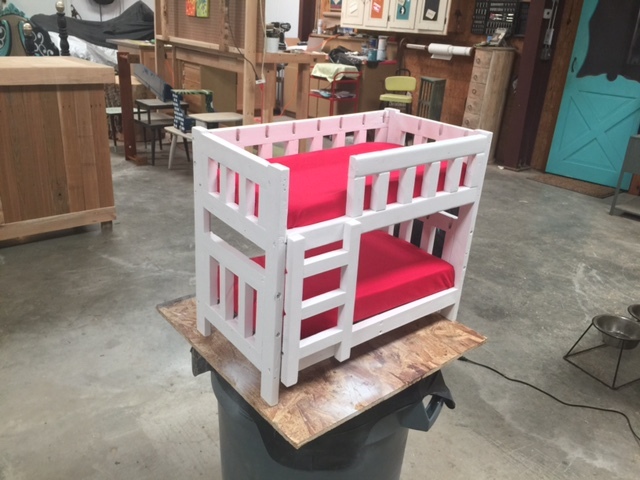
Made this cute little bed for my three year old Granddaughter....she absolutely loves it!!!
Estimated Cost
free....used pallet wood!
Estimated Time Investment
Afternoon Project (3-6 Hours)
Finish Used
White flat paint, with polycrylic gloss finish.
Recommended Skill Level
Beginner
4 X 4 Truss Beam Table
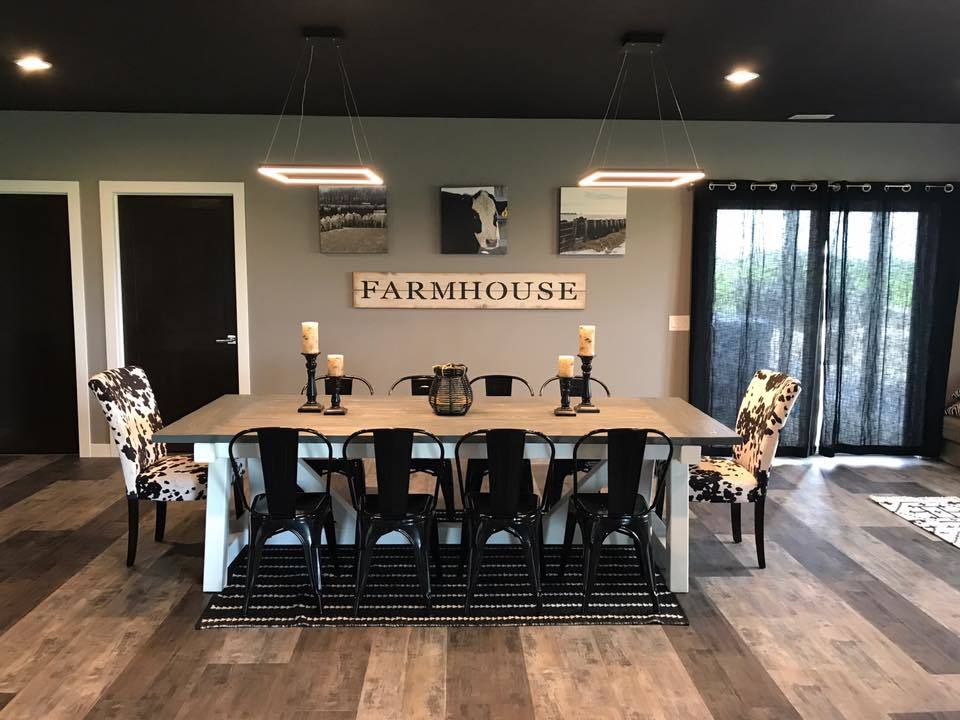
This was the first table that I built and turned out great.
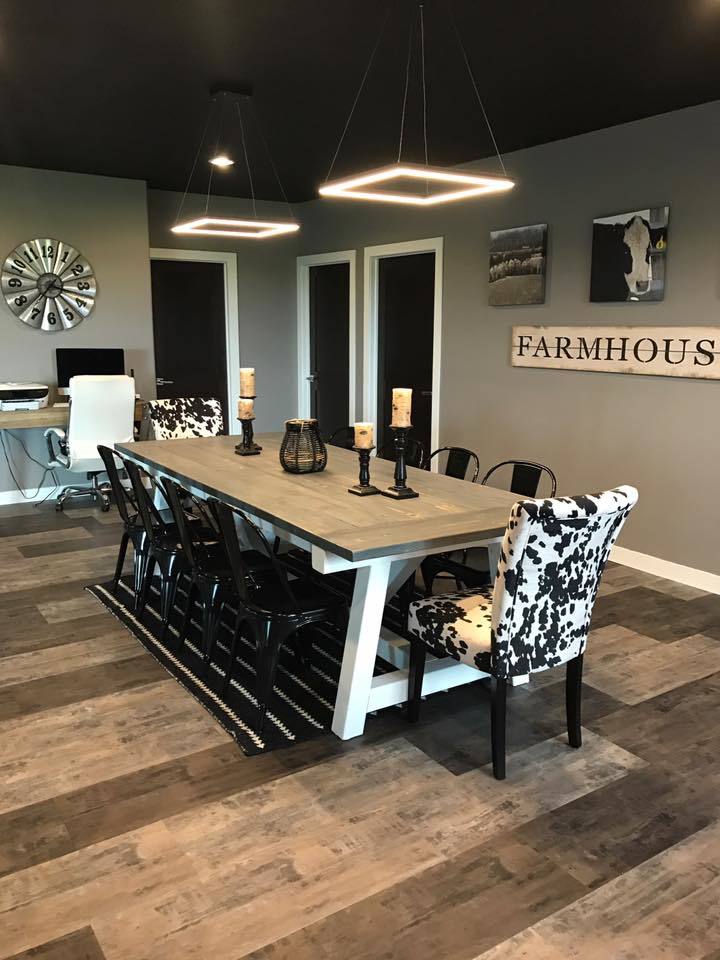
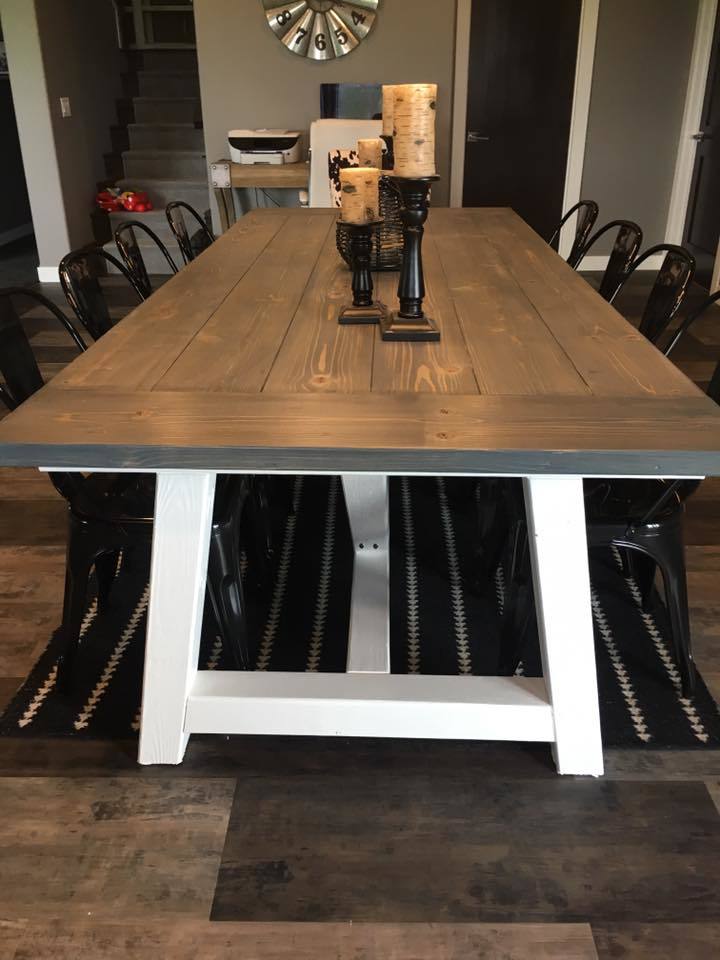
Built from Plan(s)
Estimated Cost
$125
Estimated Time Investment
Weekend Project (10-20 Hours)
Finish Used
Charcoal Grey with a matte finish
Recommended Skill Level
Intermediate
Homeschool Bookcase with Barn Door
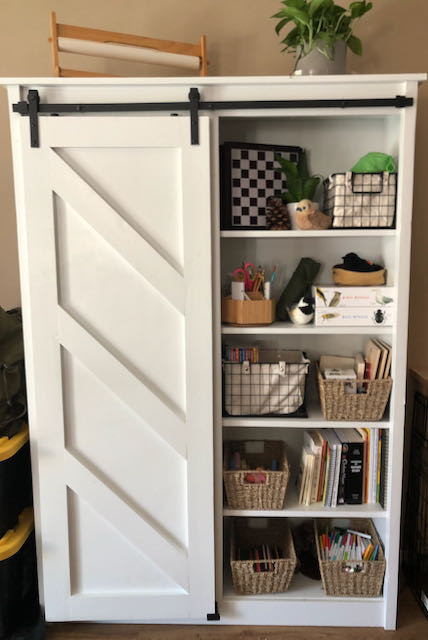
I LOVE, LOVE, LOVE this homeschool bookshelf my husband made from your plans! THANK YOU! We homeschool three children and the clutter was overwhelming! This bookshelf provides storage and a beautiful accessibility to supplies without the clutter! THANK YOU!
Built from Plan(s)
Finish Used
Homeschool Bookshelf
Comments
Fri, 06/04/2021 - 09:42
Wonderful application!
Nothing beats functional and beautiful! Thank you for sharing:)
Comments
Ana White Admin
Mon, 04/26/2021 - 17:23
Easy and functional!
Love the added casters and handles, thanks for sharing!