Community Brag Posts

Modern Farm Table (Square)

Submitted by LelandM on Tue, 04/23/2013 - 10:41

I needed a smaller table than the one I had, so I decided to build a new one. I loved the look of the Modern Farm table that was posted on this site and I just modified the plans to make it a 36" x 36" square. I finished it with a Kona stain.

Built from Plan(s)
Estimated Time Investment
Afternoon Project (3-6 Hours)
Finish Used
I applied a Minwax Kona Stain and wiped it off with a rag after 10 minutes then applied 3 coats of Polyurethane to protect.
Recommended Skill Level
Starter Project

Side Street Bunk Beds

Submitted by ananda473 on Fri, 04/26/2013 - 07:45

We built these beds Nov/Dec 2012 for our boys ages 2 & 4. This was our first furniture project. It was fairly easy but I did learn a few things along the way. They may seams dumb to most of you, but being our first project we encountered a few problems. My #1 tip is to cut your pieces, THEN SAND THEM. Before constructing the beds. We sanded afterwards, and trying to sand in the little gaps between the slats was hard. Like other posts, we had some trouble with the ladder. The side pieces were not long enough. We just re cut them and added another "rung". The finish is Valspar's Fly By Night blue. It is a very deep navy. Although I sanded my heart out and used a whole tub of wood filler they are still made using 2x4s and have dings and nicks that just come with soft woods. Our boys love them, and no they're not perfect but I think it will work to our advantage. Now when the boys act like boys I'm not away or stressing or any little dings they might be creating to the bed.

Built from Plan(s)
Estimated Time Investment
Week Long Project (20 Hours or More)
Finish Used
Valspar Fly By Night
Recommended Skill Level
Beginner

Dining Room Table

My first woodwork project from the DIY on this website and I'm very happy with how it turned out!

Built from Plan(s)
Estimated Cost
$90
Estimated Time Investment
Weekend Project (10-20 Hours)
Finish Used
English Chestnut for the Table Top
White Paint, distressed then coated with Weathered Oak stain for base
Recommended Skill Level
Beginner

Comments

Face frame cabinets with shaker doors and metabox drawers, swedish drying cabinet

Submitted by sylvialh on Fri, 08/27/2021 - 05:37

My first projec twith drawers! the metabox drawers were definetly easy to make and use and work beautifully.

I made the carcase using plywood and did 1x2 poplar for the face frame. Shaker doors are 1x3 poplar and sureply underlayment for the inserts.

cabinet doors were finished using BIN primer (2 coats with sanding) and then Benjamin Moore Advance cabinet paint in High gloss silver satin. Interiors were finished using leftover / mistints, and I still need to do some filling and sanding on the insides of the doors (I have to take them down to do a final coat but am waiting until I have finished the other set of doors)

the upper cabinet is a dish drying cupboard so I omitted the bottom plywood piece and instead used 1x3 on the front and back so the bottom would be open. then I made the shelves using 1x2 and dowel (paint the dowel first before cutting!!). This thing is a dream to do dishes in!

Used Kreg pocket screws, Kreg jig for the euro hinges (1 1/4 and 1/3" overlay), and also a kreg jig for the shelf pins. Metabox hinges for the drawers. Still trying to decide on handle hardware so I'm using painters tape at the moment.

Countertops are concrete using Rapidset mortar mix and the michael builds method (linked below).

Planters are just a small poplar shelf using leftover 1x3 with metal terra cotta pot hooks attached to the front. I lined the pots at the bottom with plastic yogourt tubs with holes in the bottom so the cutlery doesn't chip the pots. Those also drain onto the drain rack below. everything is painted the same colour although I used high gloss for the door fronts, so the shelvings behind the pots matches the wall perfectly and sort of dissappears into the walls to highlight the terracotta.

sink is a "new" vintage ceramic sink that I found on FB marketplace for 50$!!! had never been installed and didn't even have the holes bored out. unfortunately the drain holes were very deep and requied some macgyvering but luckily my husband had a great attitude about it and managed to make it work with a lot of googling for odd sized drain bins. Props to husband for doing all the plumbing on this bad boy, including moving over our RO system from the other side of the kitchen and installing a new hose bib under the sink for the other side of the house (why not?!).

I learned so much from this project! Including to store your poplar inside and on the flat surface or it will warp and your doors will not be flush. luckily it only affected one door but it is still super annoying.

thank you ana for everythign! loved the comment "Get on board with these euro hinges!" you are so right they are so forgiving!!

Comments

Ana White Admin

Fri, 08/27/2021 - 08:31

Love the integrated flower pots and the dish rack is so cool! Thank you for sharing, I can tell a lot of work went into it!

Trestle Table with Mahogany Top

My grandfather built the base for this table decades ago. I never got to know him because I was very young when he passed. I told my mom that I loved this table and she gave it to me under the condition that we split it into two pieces. I get the base and she gets the top. That way I can build 2 tables from this and we can both keep the memory.

I made a new table top from Brazilian Mahogany and painted the base that was made from pine. Soon I will be making a new base to attach to the old table top and send it to my mother.

Minwax Antique Oil Finish is awesome. I have trouble with finishing and this worked like a dream. No stain was used.

Estimated Cost
n/a
Estimated Time Investment
Day Project (6-9 Hours)
Finish Used
Minwax Antique Oil Finish, Foam Brush
Recommended Skill Level
Intermediate

Rustic X Entry Table

Submitted by tedgray86 on Wed, 03/18/2015 - 22:01

Rustic x end table build

Built from Plan(s)
Estimated Time Investment
Afternoon Project (3-6 Hours)
Recommended Skill Level
Beginner

Comments

Weekend Project King Bed

Submitted by Anonymous (not verified) on Sun, 06/18/2017 - 10:26

First ever wood project. Under $200 in materials! Less than a weekend of work (for two people). Beautiful results!!!!! Built from plans on Ana-White.com The only change we made to the build was adding some additional support legs in the middle of the bed. 

Built from Plan(s)
Estimated Cost
$200
Estimated Time Investment
Weekend Project (10-20 Hours)
Finish Used
Satin Medium Walnut
Minwax water based poly stain combo
Recommended Skill Level
Beginner

Baby Changing Table for First Granddaughter

Submitted by Anonymous (not verified) on Sun, 09/05/2021 - 19:09

We are expecting our first granddaughter in October 2021. We used Ana White’s plans for a baby changing table as our inspiration and this design was the outcome of our efforts. We surprised our son and daughter-in-law and they were elated!

Built from Plan(s)

A Pair

We built a pair of these for our kids. Wanted to surprise them with a little shelf for each and it was really easy to do. Kids never saw them until it was all done since we bought the wood for this at the same time as we bought the wood for our own bed that we made.

Spray painted them using Krylon spray paint had more trouble locating appropriate paint (needed pink & purple seems most places didn't have this actually in stock!) than we had making the actual shelves. Took quite a few coats of paint though to get them looking nice.

Biggest complication that we actually had was finding the wood in suitable straight pieces. Ended up taking quite a while to select suitable pieces since most were bowed or warped to the point of being useless for our needs.

Final result though looks great and the kids absolutely love them. They are perfectly sized for water bottles and both kids had them in usage within mere minutes of them going up on the wall.

Built from Plan(s)
Estimated Time Investment
An Hour or Two (0-2 Hours)
Finish Used
Krylon Spray Paint
Recommended Skill Level
Starter Project

Comments

Box Train Bookshelf Knock-off

Submitted by efmolly on Sat, 03/21/2015 - 10:32

I recently found a photo of Pottery Barn Kids Box Train shelves. The have been discontinued, so I decided to build a set of my own. They were really easy! I was able to build 3 shelves from (2) 1 x 8's, (1) 1 x 4, and (1) 2 x 4. Plans, silhouette file, and printable image available in my blog post. 

Estimated Cost
$40 for all three shelves
Estimated Time Investment
Afternoon Project (3-6 Hours)
Finish Used
paint and custom designed image which was decoupaged on.
Recommended Skill Level
Beginner

Comments

Rustic Lanterns

Submitted by naomi on Fri, 06/23/2017 - 06:17

I always have heaps of scrap wood so I decided to make some lanterns.

These lanterns are larger than the last lanterns I made.

They are huge and they make a great statement.

I used old rusty fencing wire for the handles.

I also added some alluminium sheet to the 'ceilling' of the lantern so that there is no risk of burning.

The only cost was for the candles.

Estimated Cost
$0 made from scrap wood.
Estimated Time Investment
An Hour or Two (0-2 Hours)
Finish Used
walnut stain
Recommended Skill Level
Beginner

Scrap twisted stud outdoor sectional and table

Submitted by kaciejo on Wed, 09/15/2021 - 10:17

What to do with leftover twisted wood? Utilitarian single moms I straightenand make the outdoor sectional and table. Been wonderful.

Comments

Double Pedestal Farmhouse Table (8 feet)

Built from the Triple Pedestal Farmhouse Table plans. Had to size down the plans a little bit to fit into my dining room. Created three pedestal legs but only ended up using two on the final table. Took about 16 hours from start to finish. All of the wood is pine except for the top, which is Poplar. Made a couple of mistakes along the way but am very happy with the way everything turned out. Feel free to ask questions and I will do my best to answer them. Happy Building!

Built from Plan(s)
Estimated Cost
$175
Estimated Time Investment
Weekend Project (10-20 Hours)
Finish Used
English Chestnut. Stained once and waited 7 minutes to wipe off. Two coats of Clear Satin Polyurethane.
Recommended Skill Level
Intermediate

Comments

Fancy Farmhouse Table

Submitted by Lordclint on Mon, 03/23/2015 - 00:17

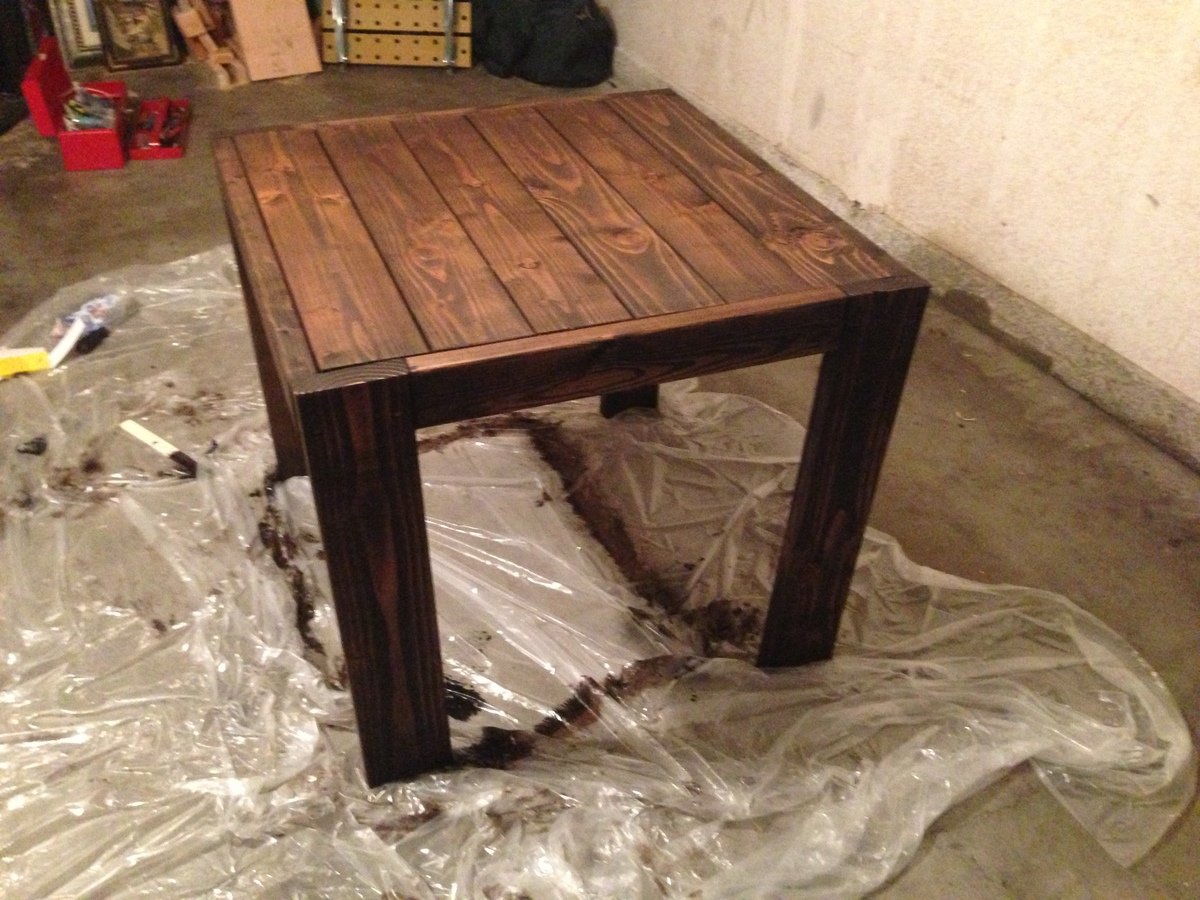
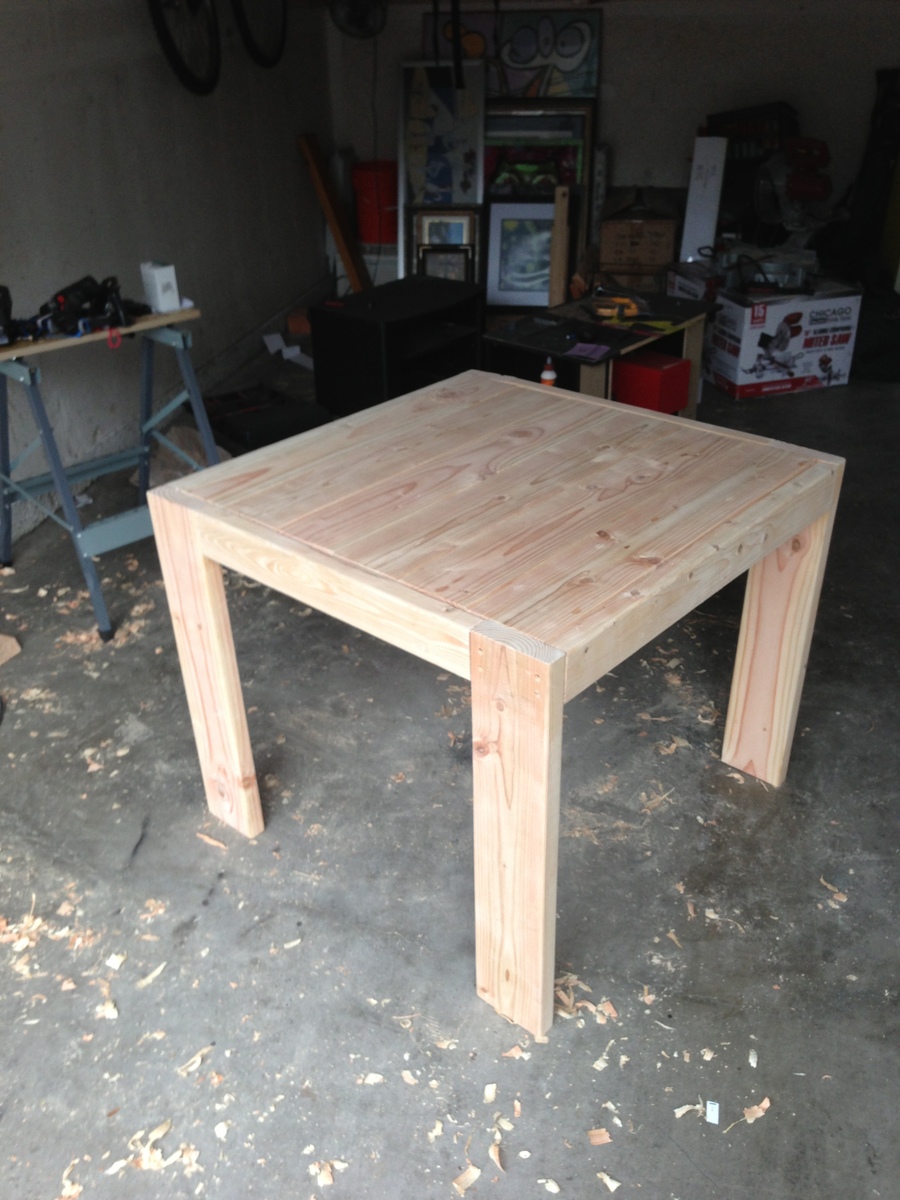
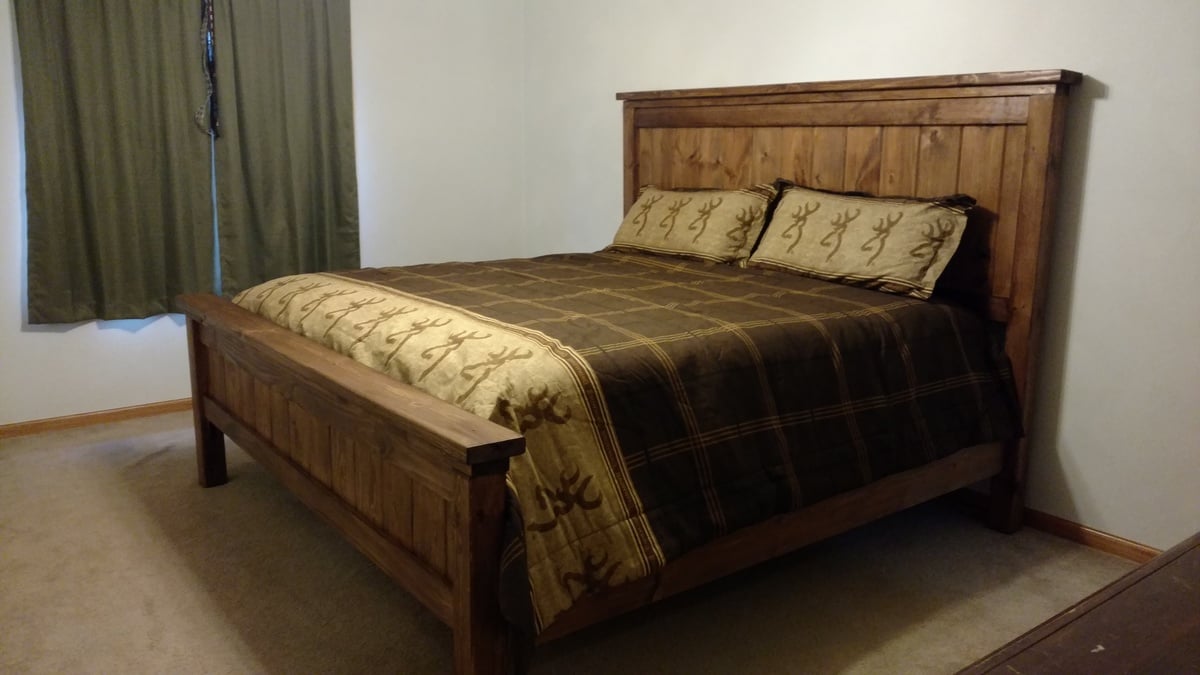
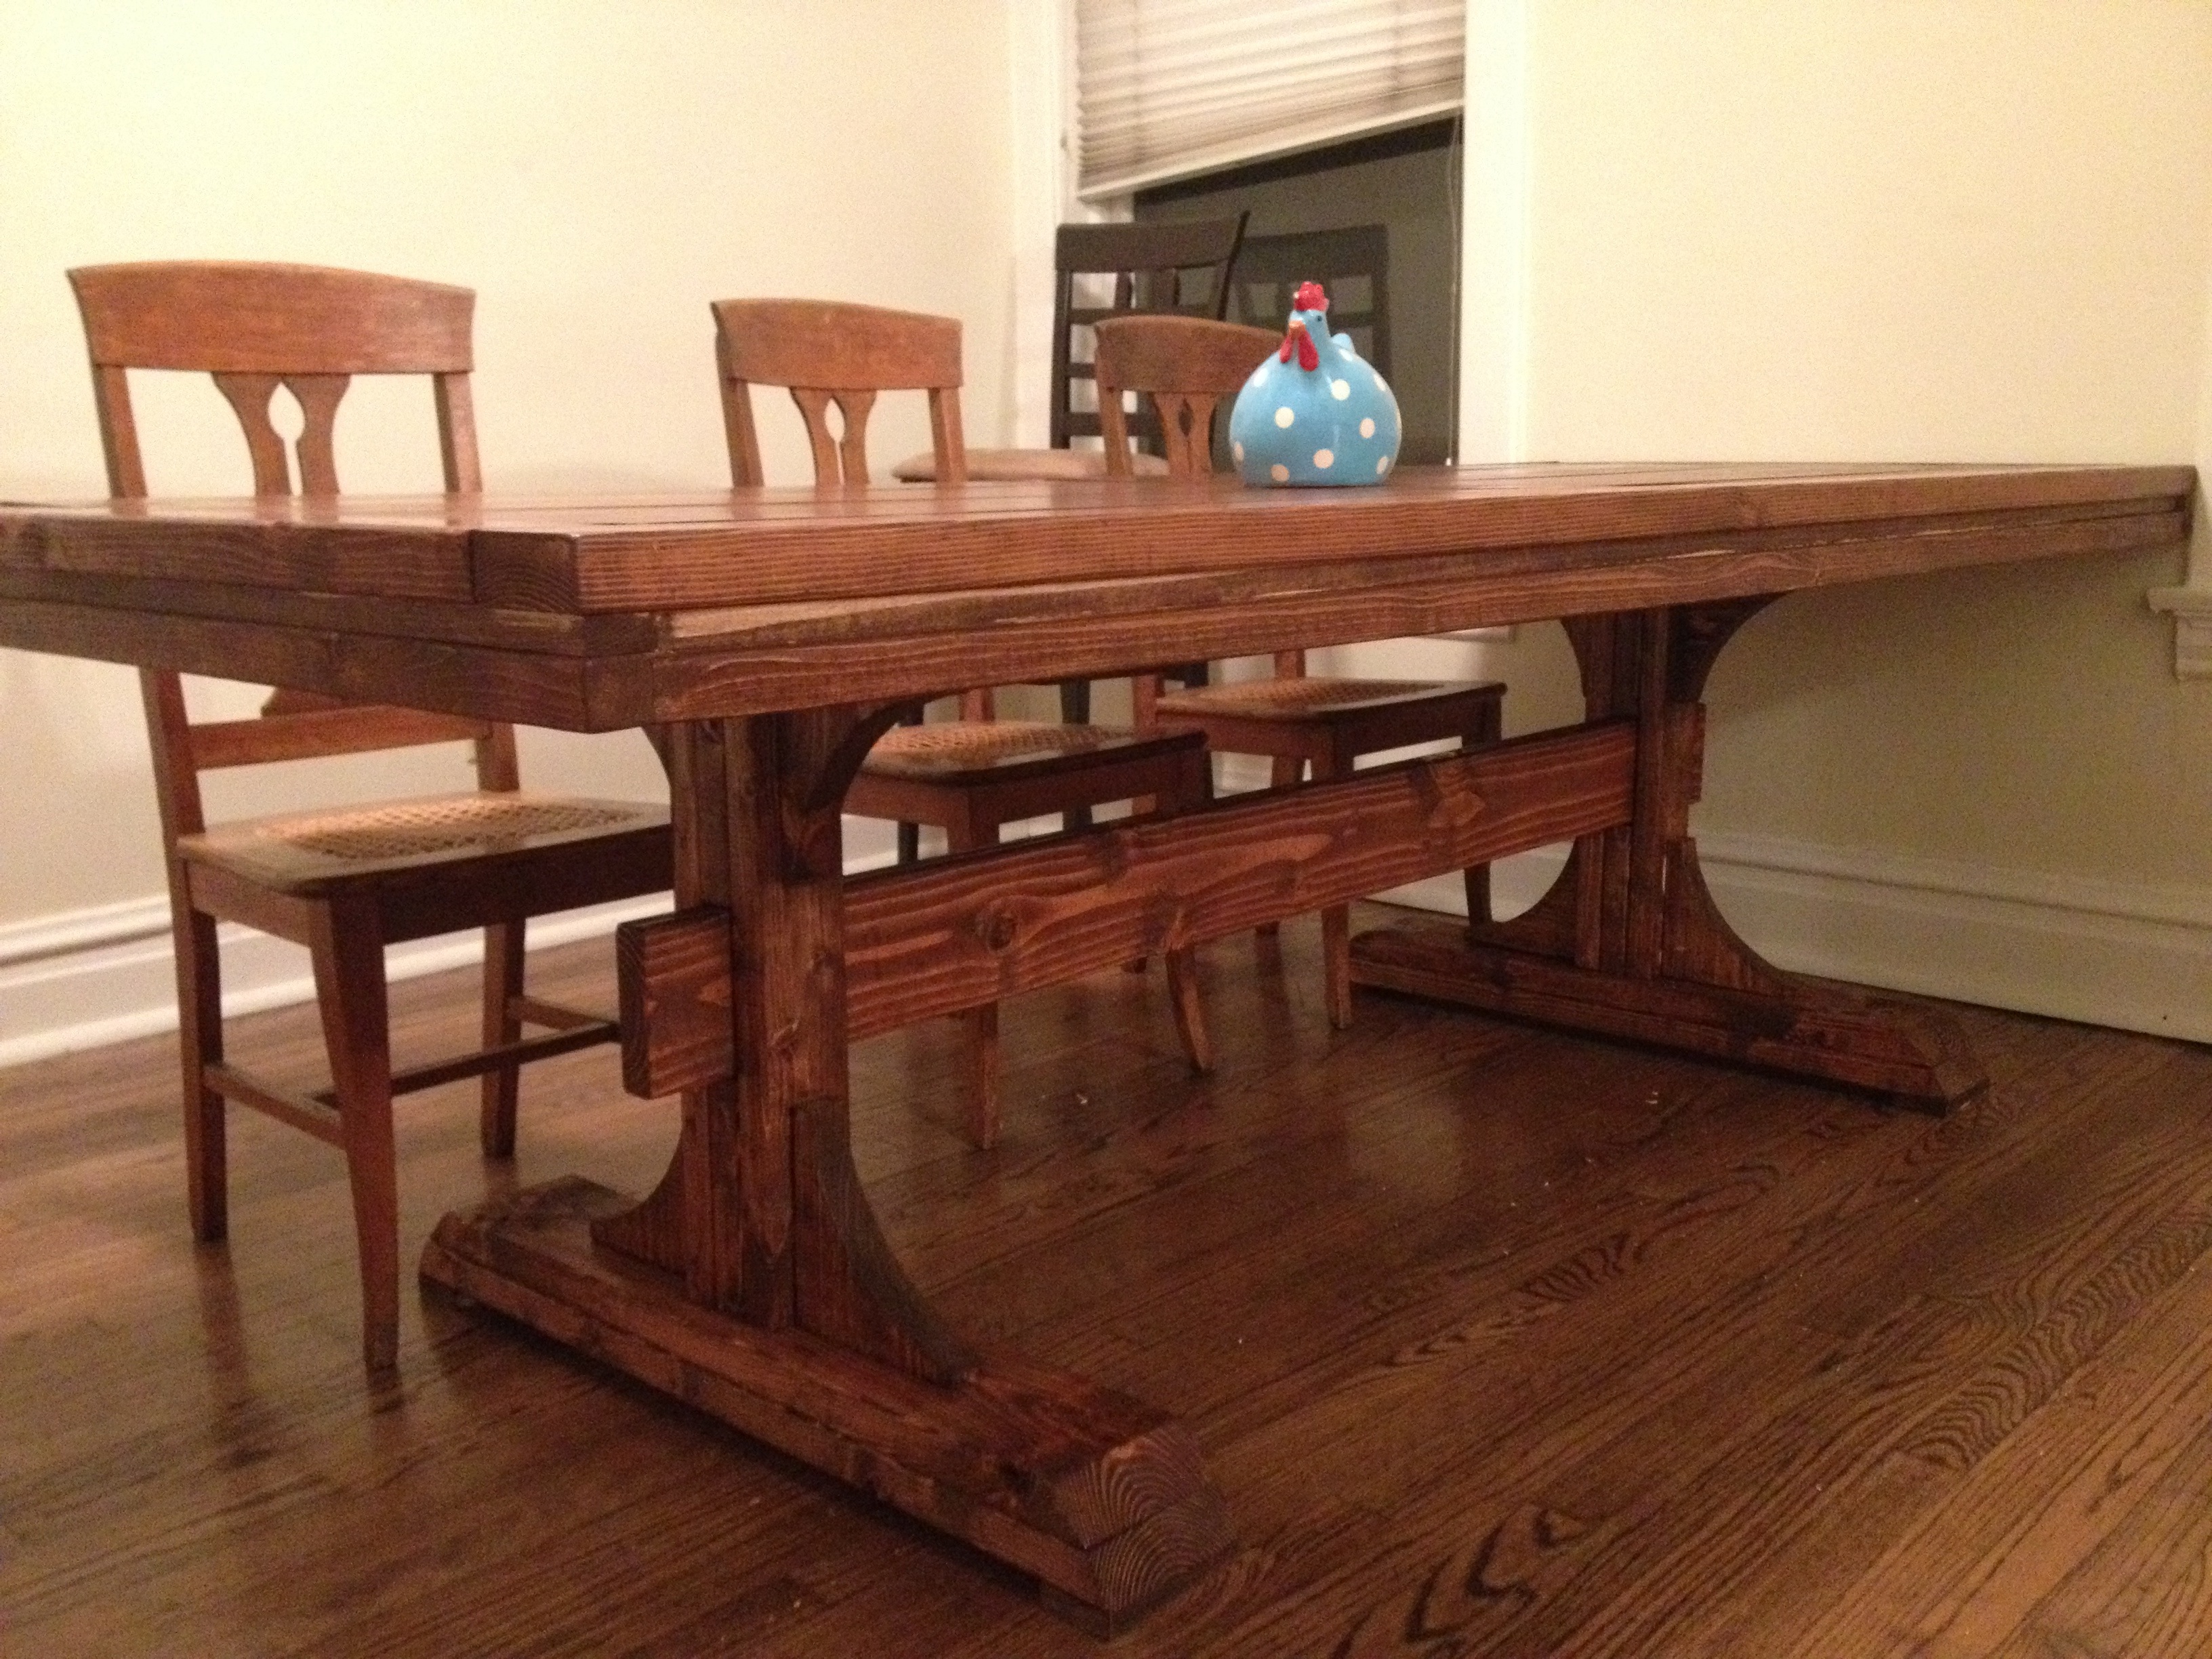
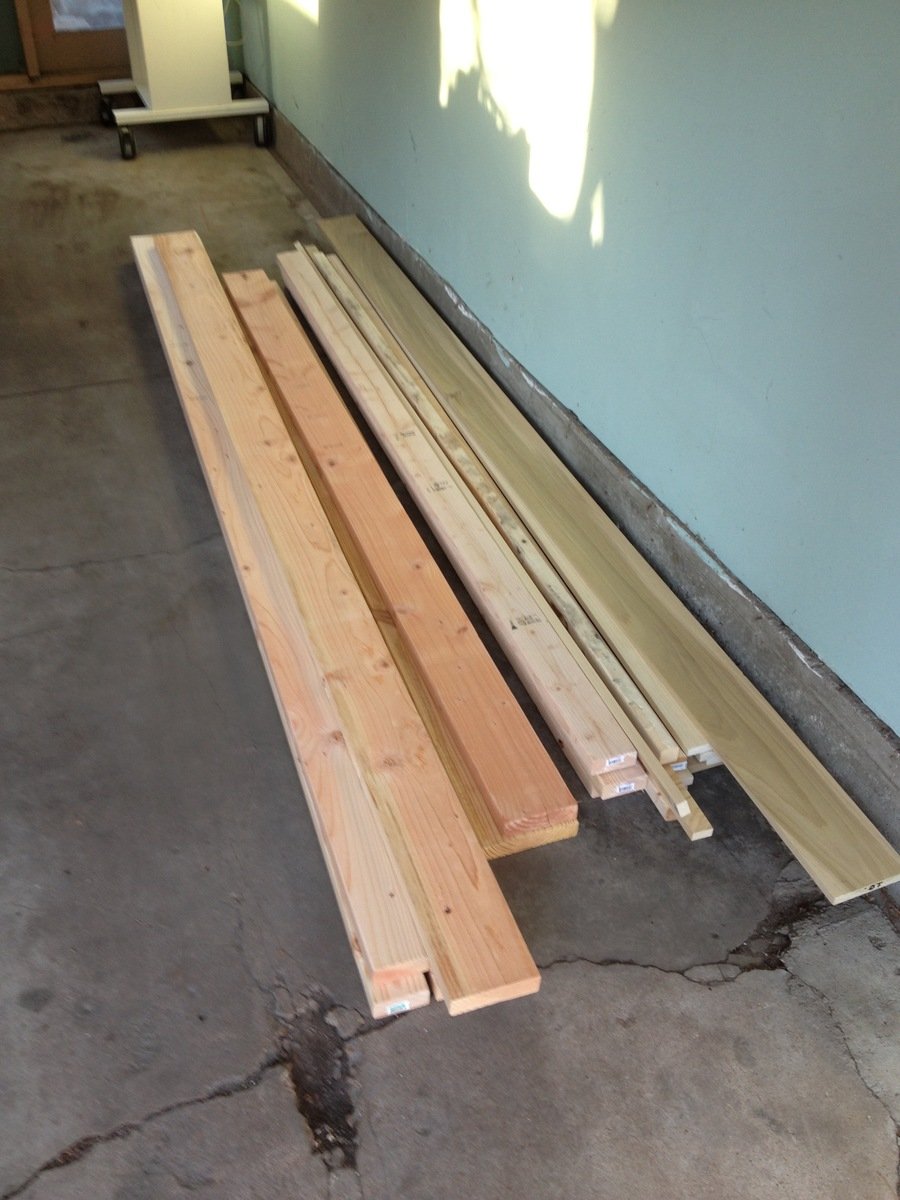
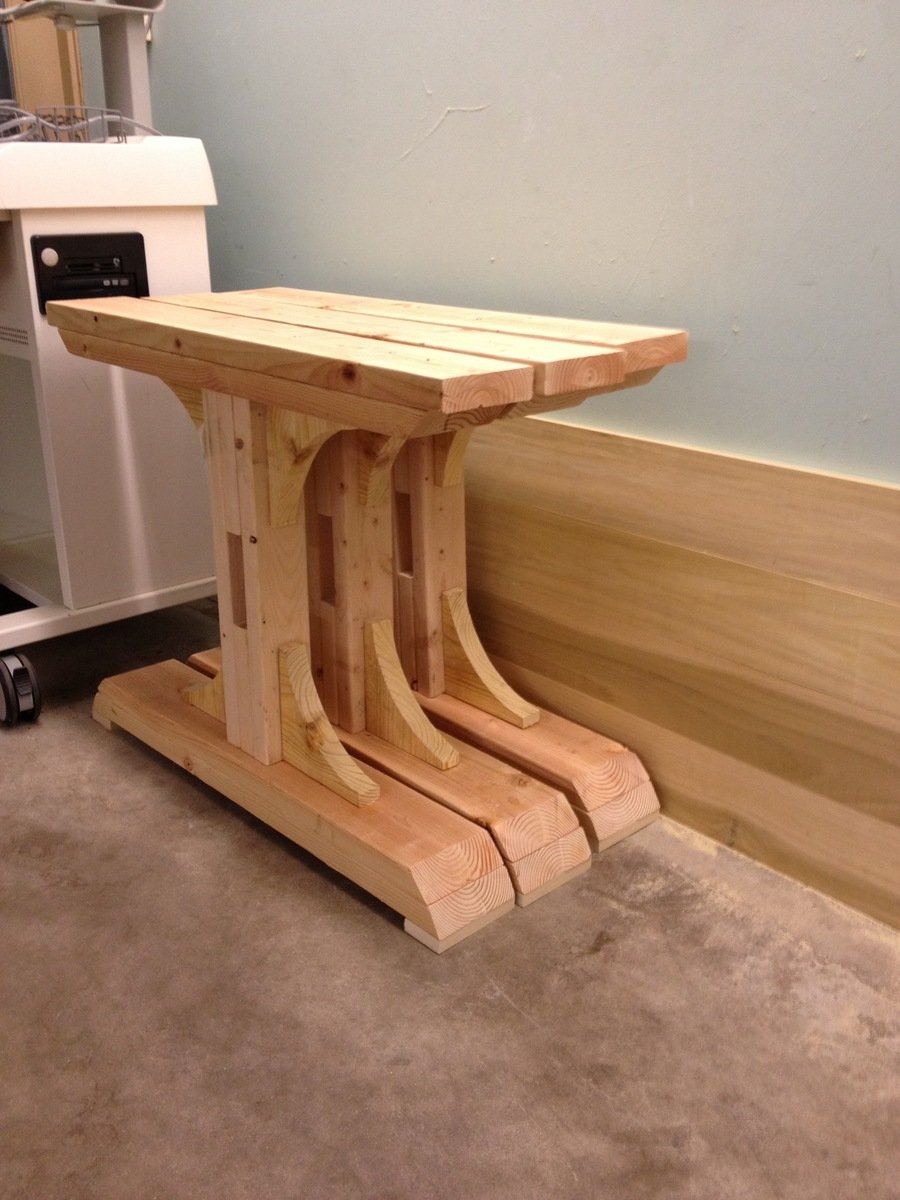
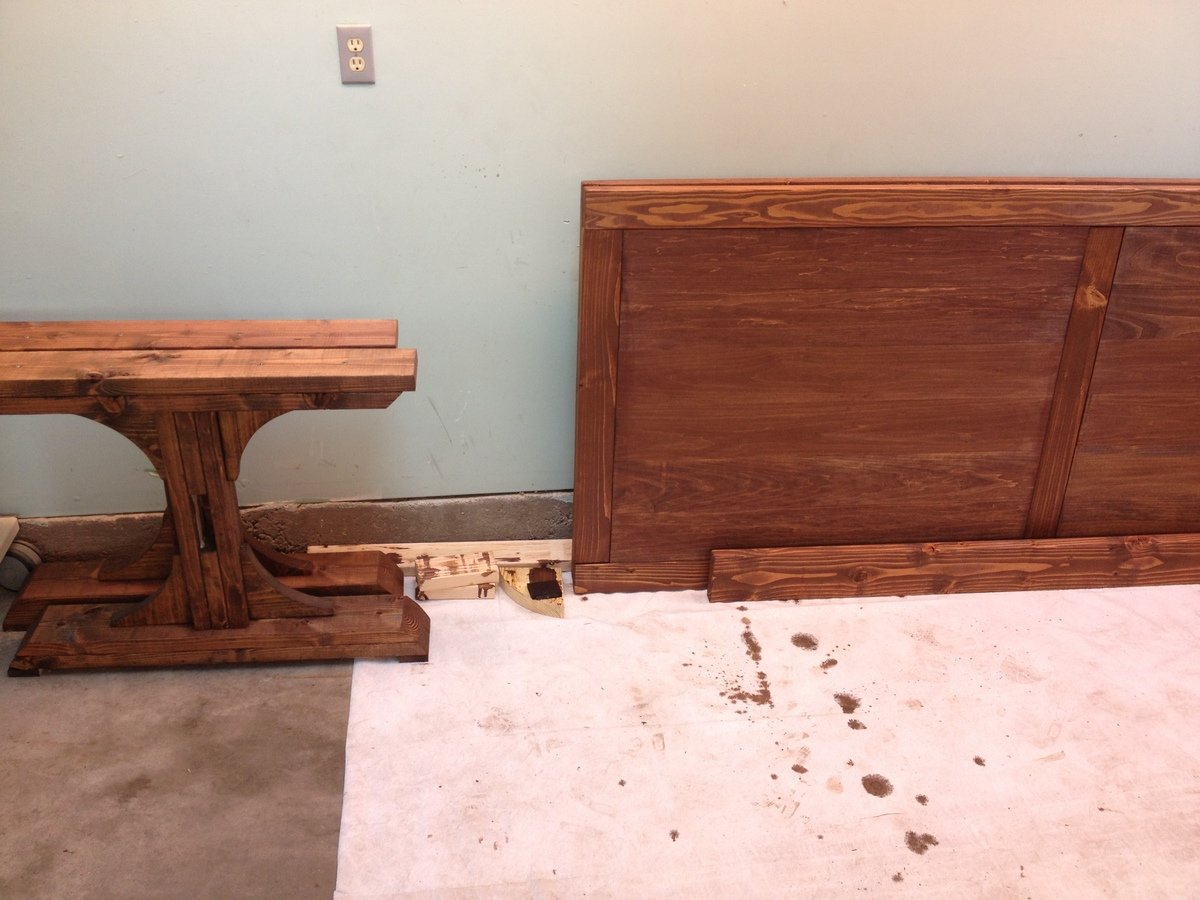
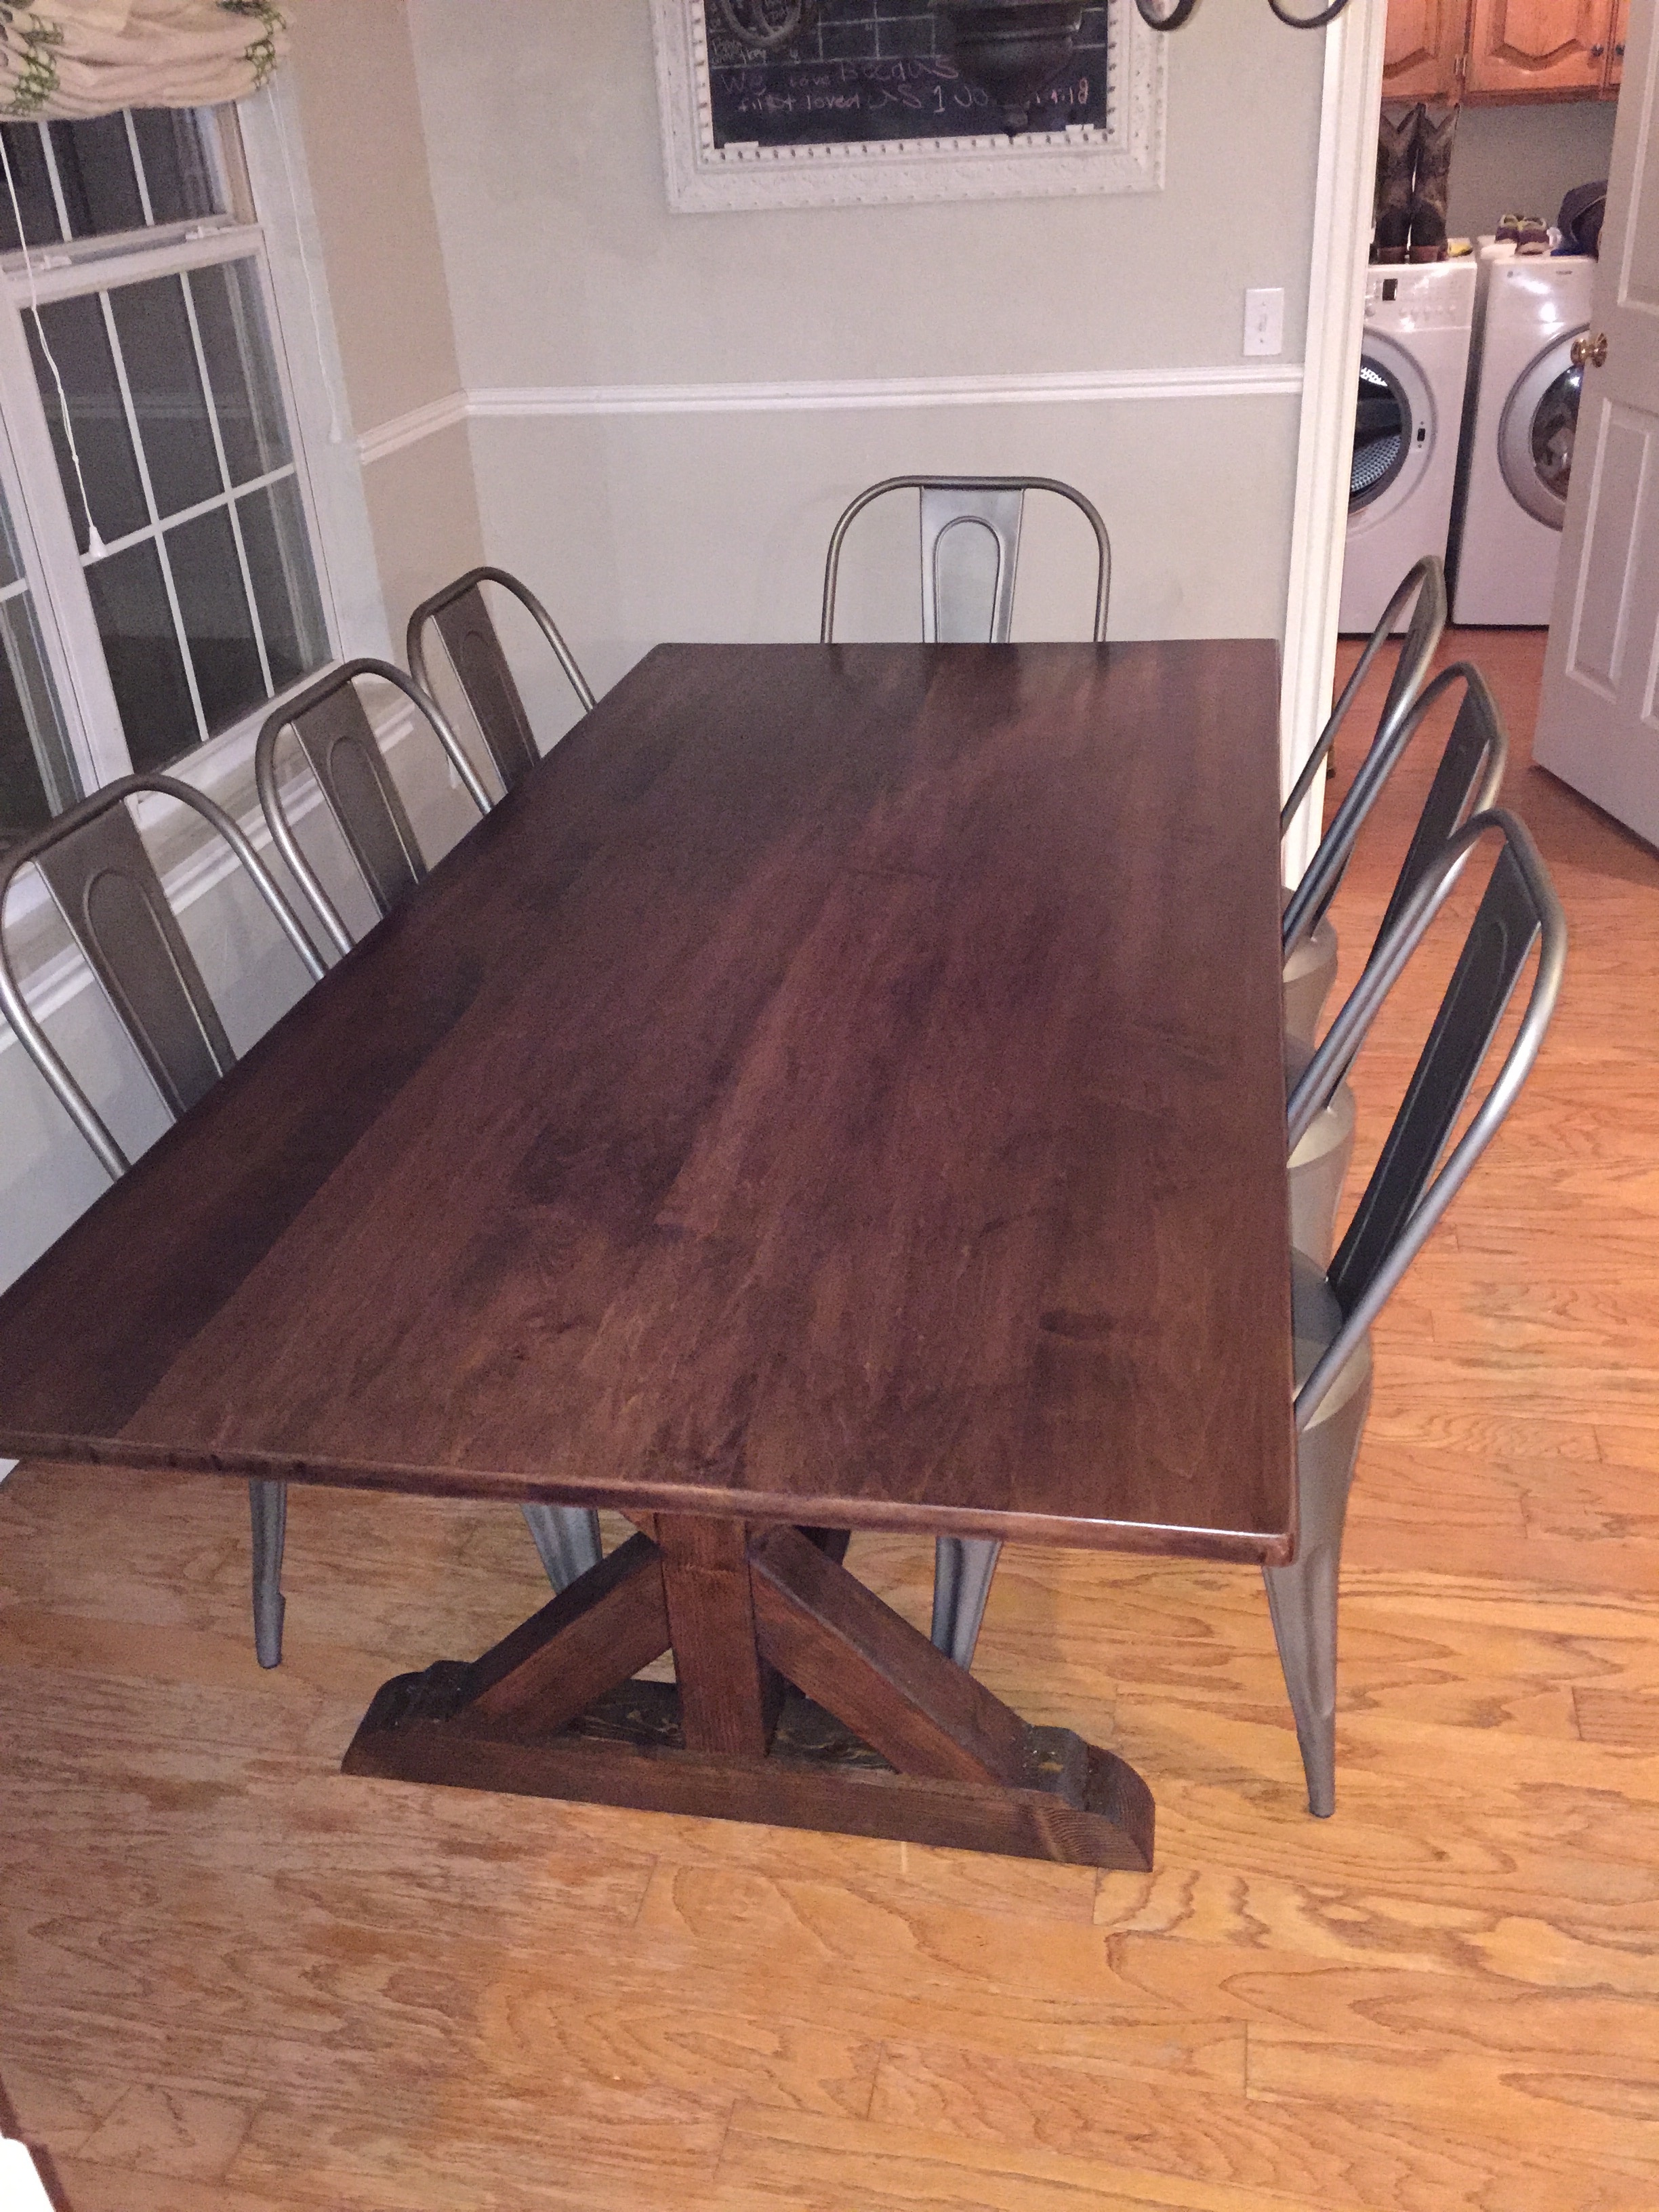
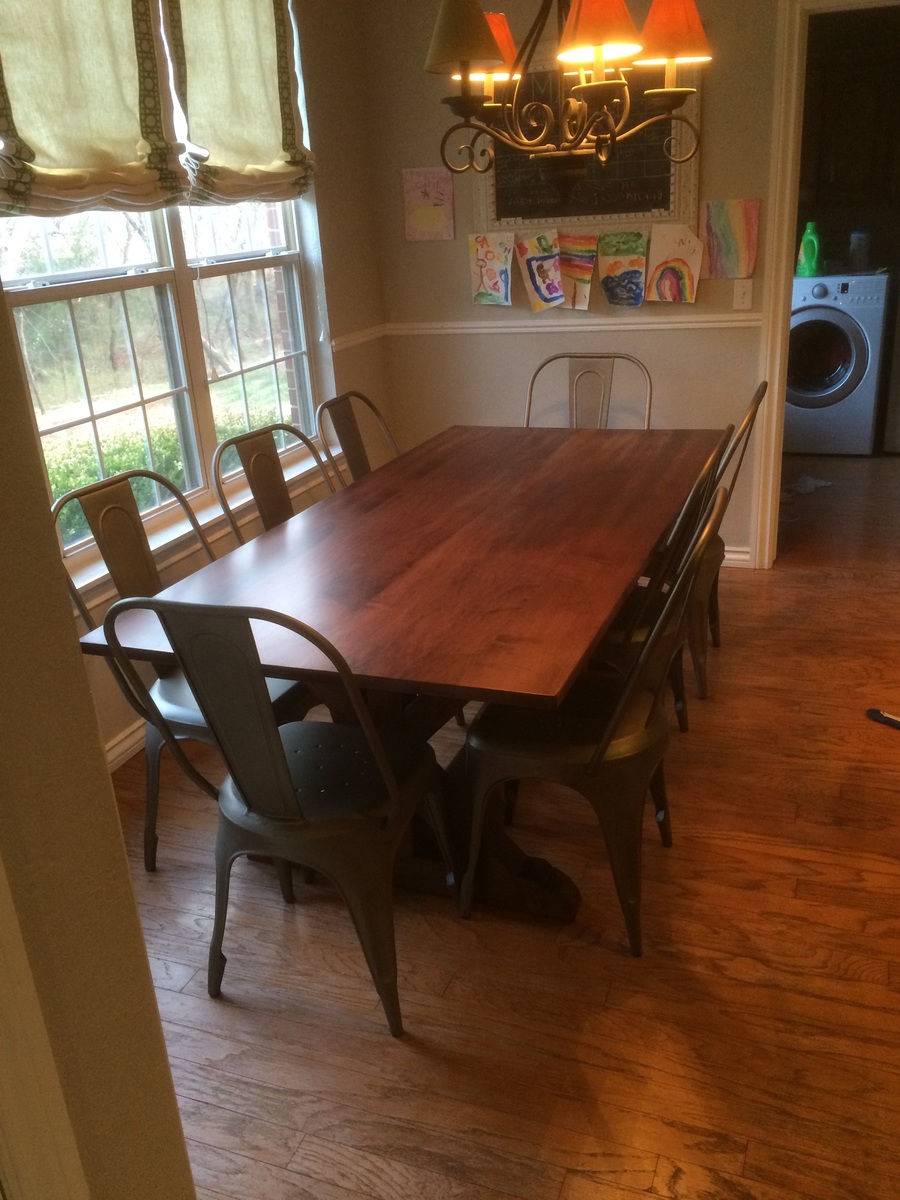
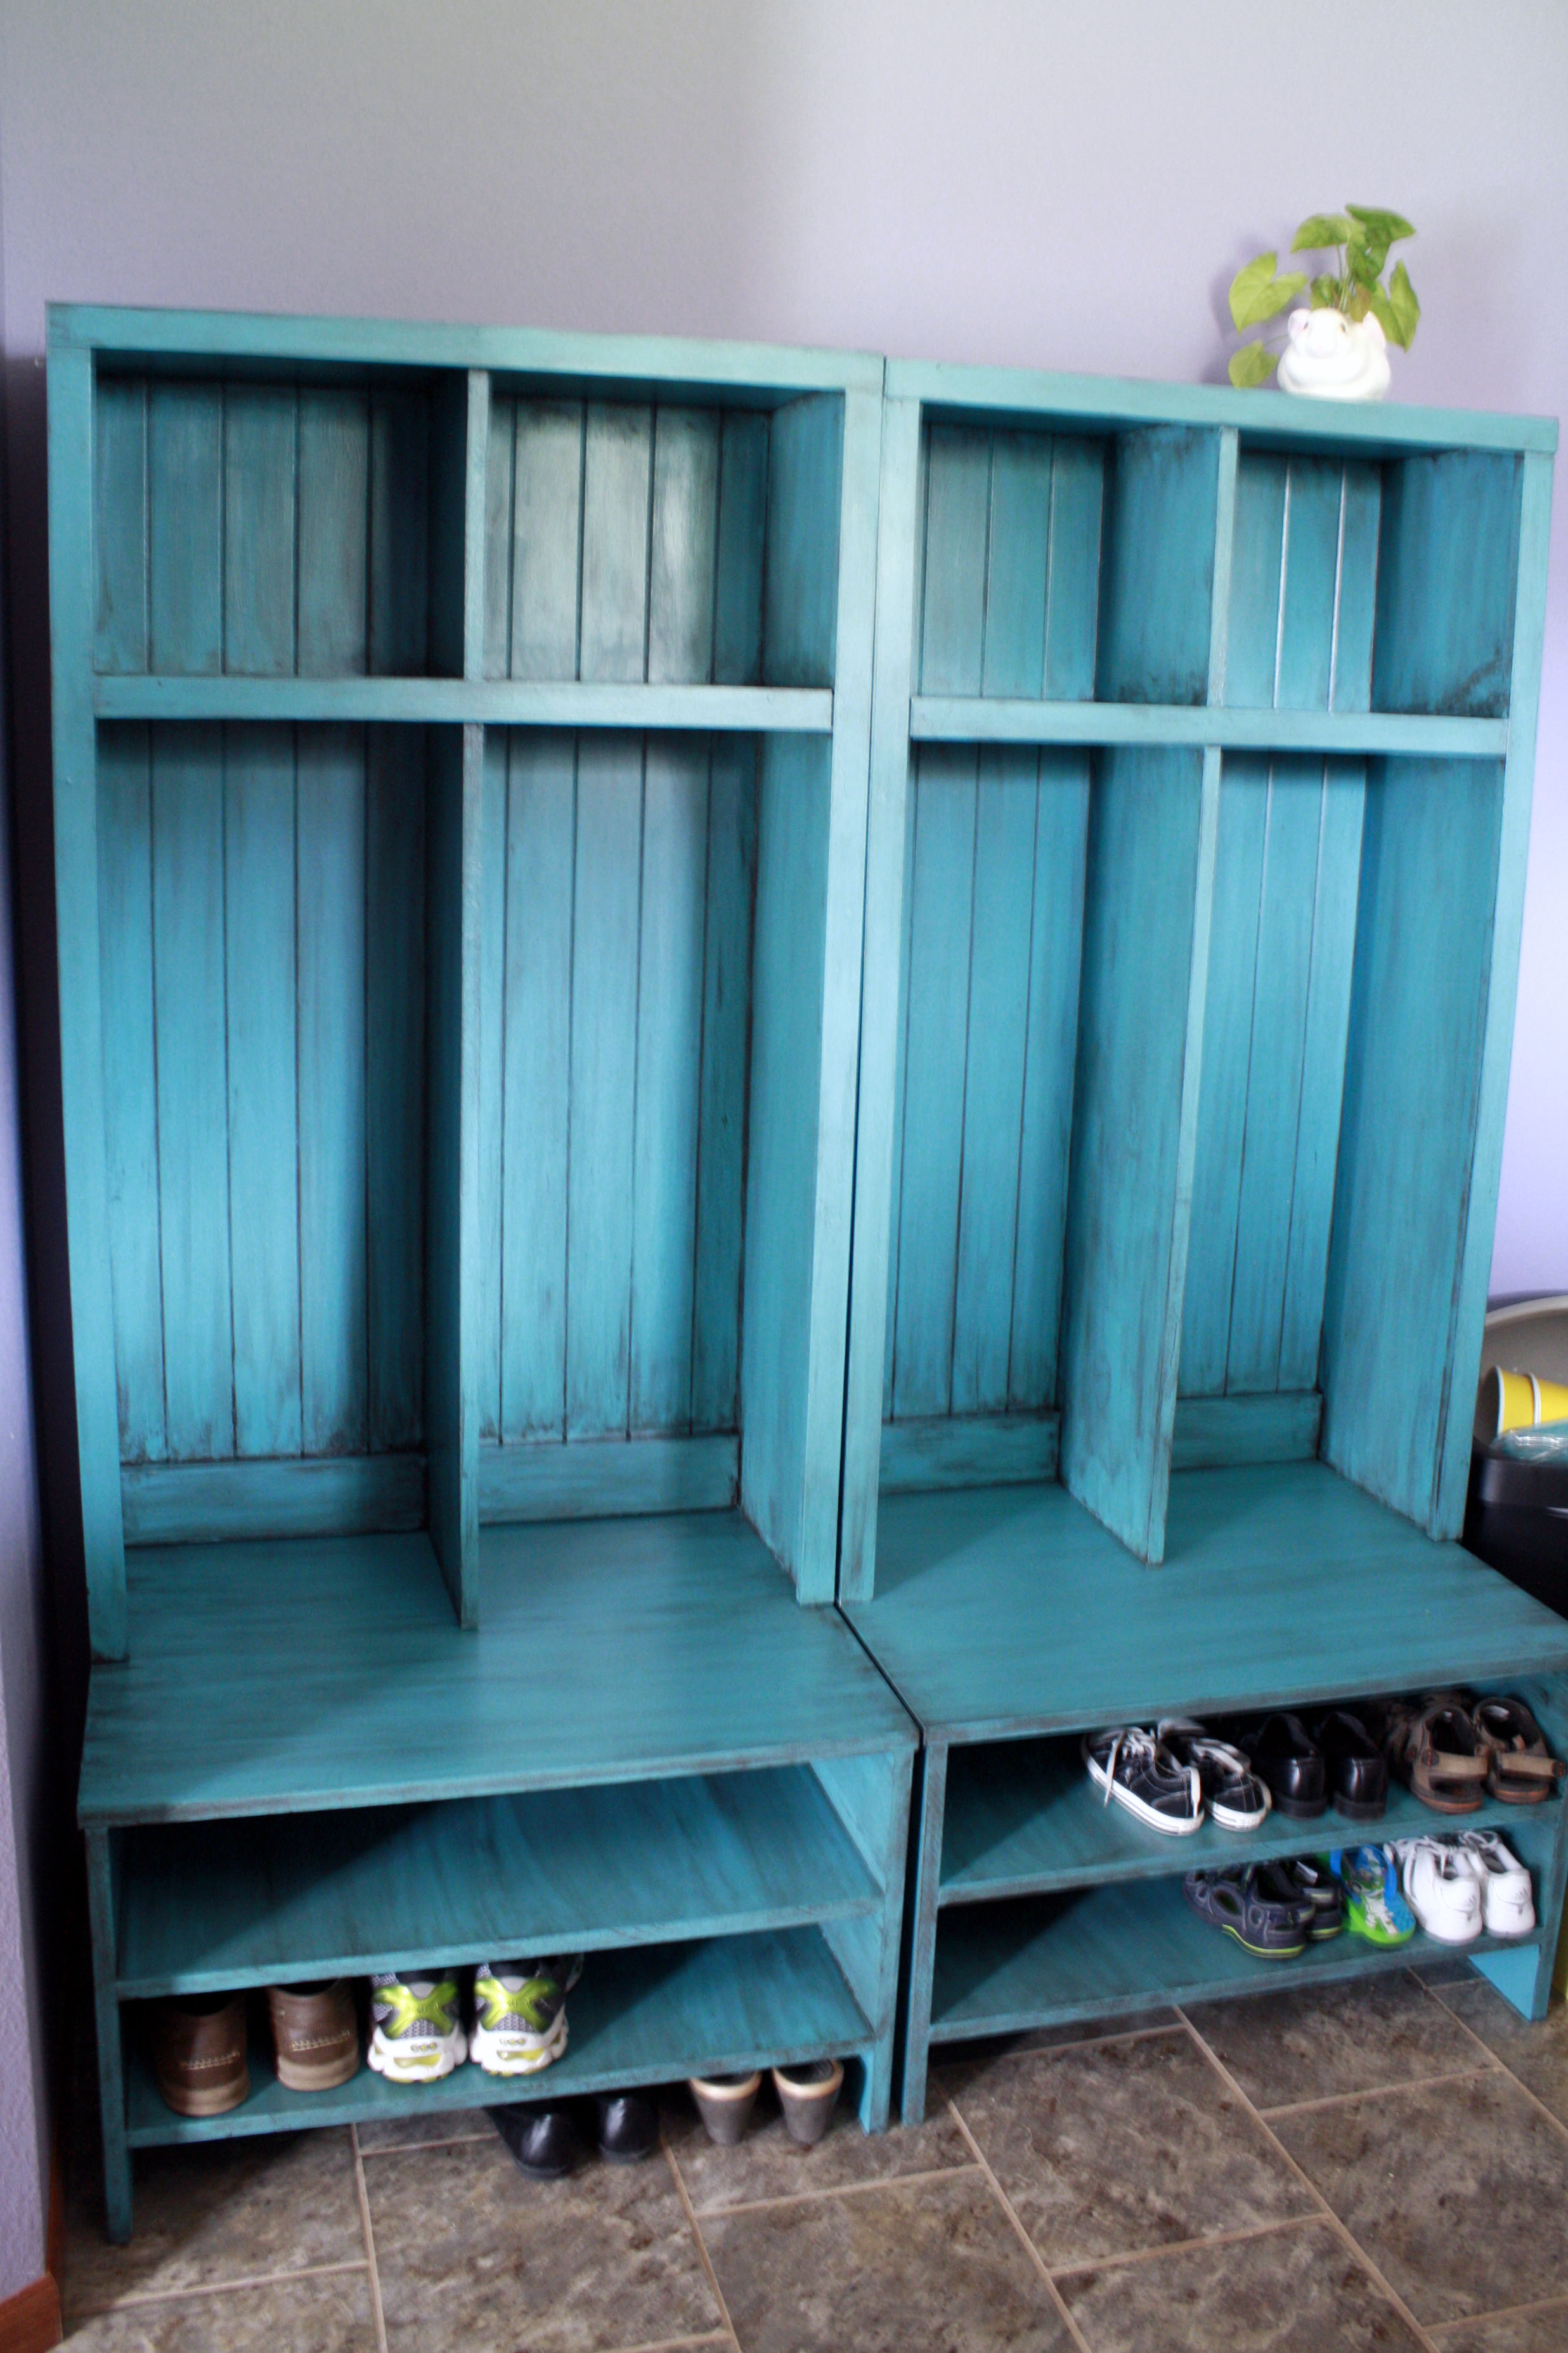
The legs of this table are made from douglas fir purchased at my local big box home improvement store.  The table top is made of hard maple that i purchased from a local mill.  I modified the dimensions from the original plan because i really liked the look of the 4x4 legs.  The douglas fir is relatively inexpensive material and because the legs for the most part unseen once you have chairs.  I chose hard maple because i have three kids under the age of 6 that can destroy anything in their path. So having a kitchen table that could double as a nuclear bomb shelter was high on my priority list.

I recommend you purchase your wood from a local mill.  There are few technical terms you will need to learn before heading over to purchase your wood stock.  For example, lumber mills sale their wood stock by the board foot (width x length x depth) and if you want a 1 inch thick board you will need to ask for 5/4 board (pronounced five quarters) Marc Spagnolia (aka: The Wood whisperer) has a great 5 minute video that gives you all the information you need to walk into a lumber yard with confidence and purchase what you need.  KEY POINT: make sure your boards are straight and square. If your boards are not straight and square, it will cause you problems down the stretch.  In order to achieve this you must joint and plain your boards.  Since I do not have a jointer or plainer, I asked the lumber mill if they could help me out and they were nice enough to do it for an extra $25 dollars.  Well worth it in my opinion.

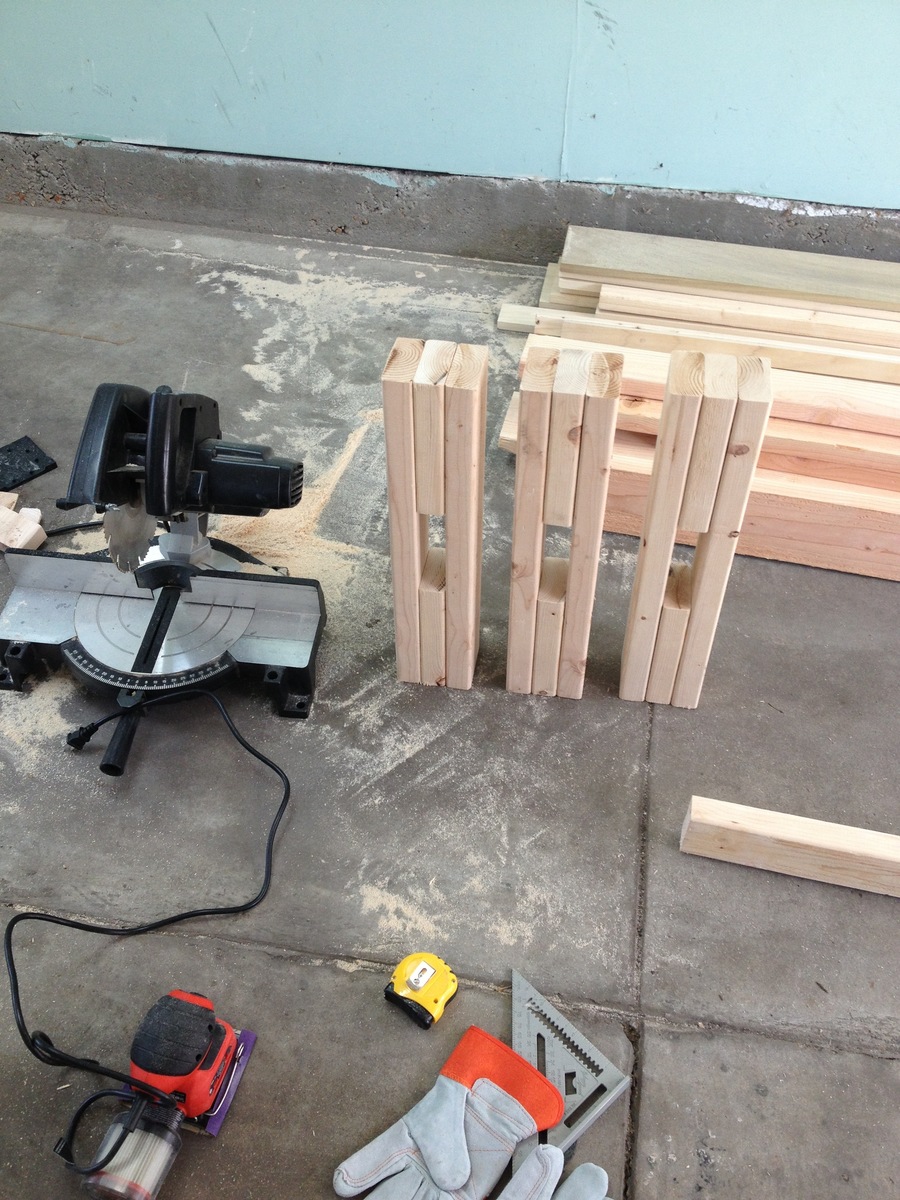
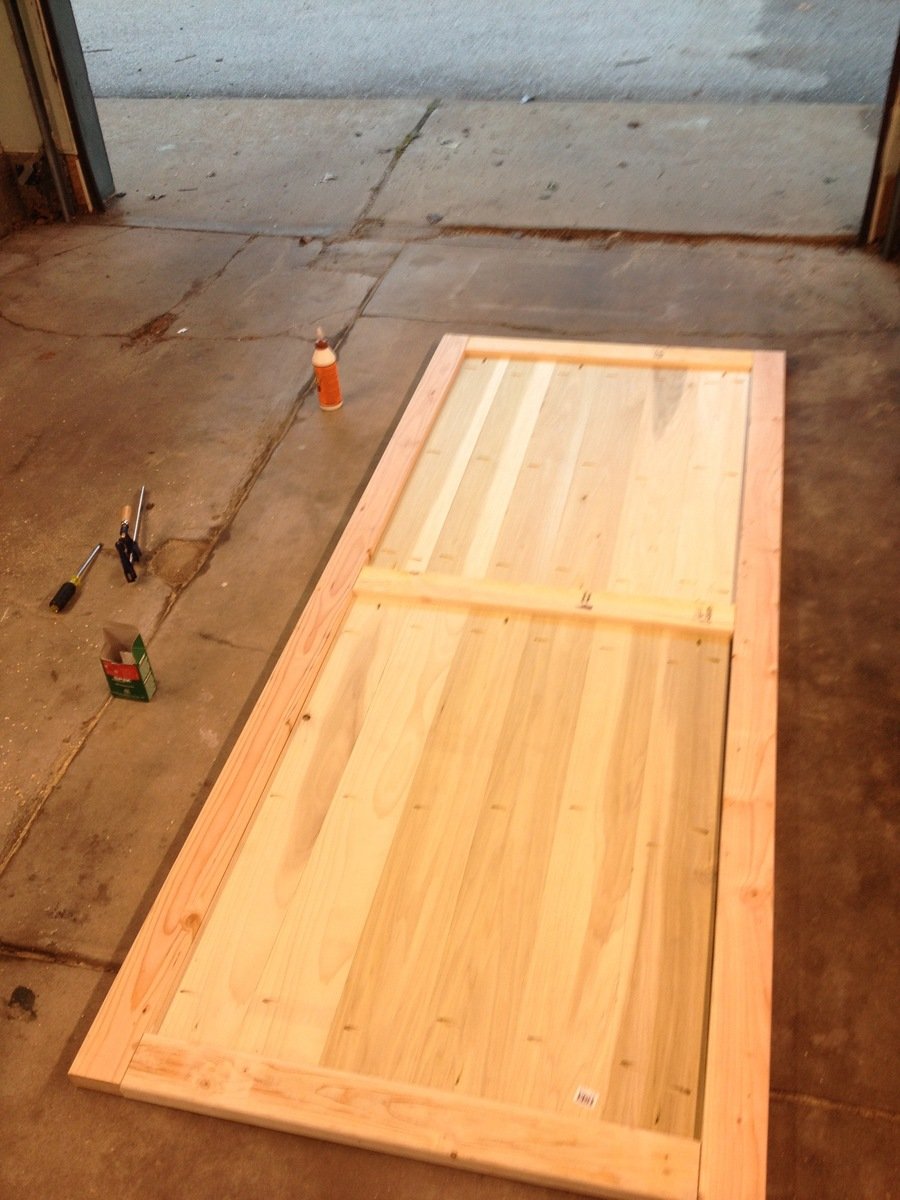
I did purchase one tool for this job, a biscuit joiner.  A biscuit joiner makes small cuts in the sides of your boards.  Small wooden biscuits are inserted in these slots and help keep your boards level when you glue up your boards.  They do not add any strength to your glue joints, but will save you a lot of time sanding your table top perfectly flat. I won’t go into a lot of detail on how to glue your boards up.  There are lot of great YouTube videos that give pretty good advice on the glue-up of your table top.

After you get your table top glued up, it is time to sand.  KEY POINT: Sand by sight, not by feel.  Your table top may feel really smooth to the touch, but when you go to stain, small swirl marks can make your final product look lackluster.  Invest the time in sanding.  I suggest getting some hallogen lights and put at the end of your table.  These lights help you see those imperfections that need to be sanded out. Also, I recommend using an orbital sander.  Be sure not to put any downward pressure, let the sander do the work.  Putting downward pressure is so tempting, but ultimately causes deep gauges in your wood that take even longer to sand out.

So one thing that I did learn when doing this project was that hard maple is one of the toughest types of wood to stain.  The wood is a very dense with tight porosity. This is what makes hard maple extremely durable and pretty, but unfortunately very difficult to stain. Most stains leave the maple looking blotchy (dark and light color all over the boards).  It was really frustrating trying to figure out how to stain this type of wood.  I searched the entire internet looking for tips on staining hard maple with very little luck.  So if you’re interested in using this wood…here is my playbook that produced pretty good results.  First of all you should really avoid the pigment type stains.  These are your run of the mill stains you find at your big box store.  I also had terrible luck with gel stains as well.  The best way to stain maple I found was to use a dye stain.  Dye stains have the ability to penetrate into the tight grain structure of the hard maple and leave you with a pretty nice color.   I used general finishes “dark brown” dye stain with the following steps:

  • Sand up to 120 grit, then take a shop vac ( I know it sounds crazy) and vacuum all the dust up from the top of your table.  The shop vac pulls all the dust out of the pores and allows for better penetration.  Then take a tac clothe and wipe down your table top.  I used Minwax sanding sealer 1 to 1 ratio of sanding sealer to denatured alcohol.  This helps prevent blotchiness.  Please note that I tried prestain conditioner, dewaxed shellac and a few other products, but got significantly better results with the sanding sealer…..
  • After letting the sanding sealer dry for 2-3 hours, I then proceeded to make 4 passes over the table with 220 grit sandpaper with my orbital sander. I proceeded this sanding with the shop vac and tac clothe wipe down of the entire table top.   I also did a slight wipe down with a clothe towel and denatured alcohol.  This helped raise the grain slightly/open up the pores of the wood.
  • Finally I took a spray bottle with my stain and sprayed over the entire table top putting a nice even coat of stain.  This really worked well as my table was 7 foot wide. I quickly and gently wiped the excess stain off the table.

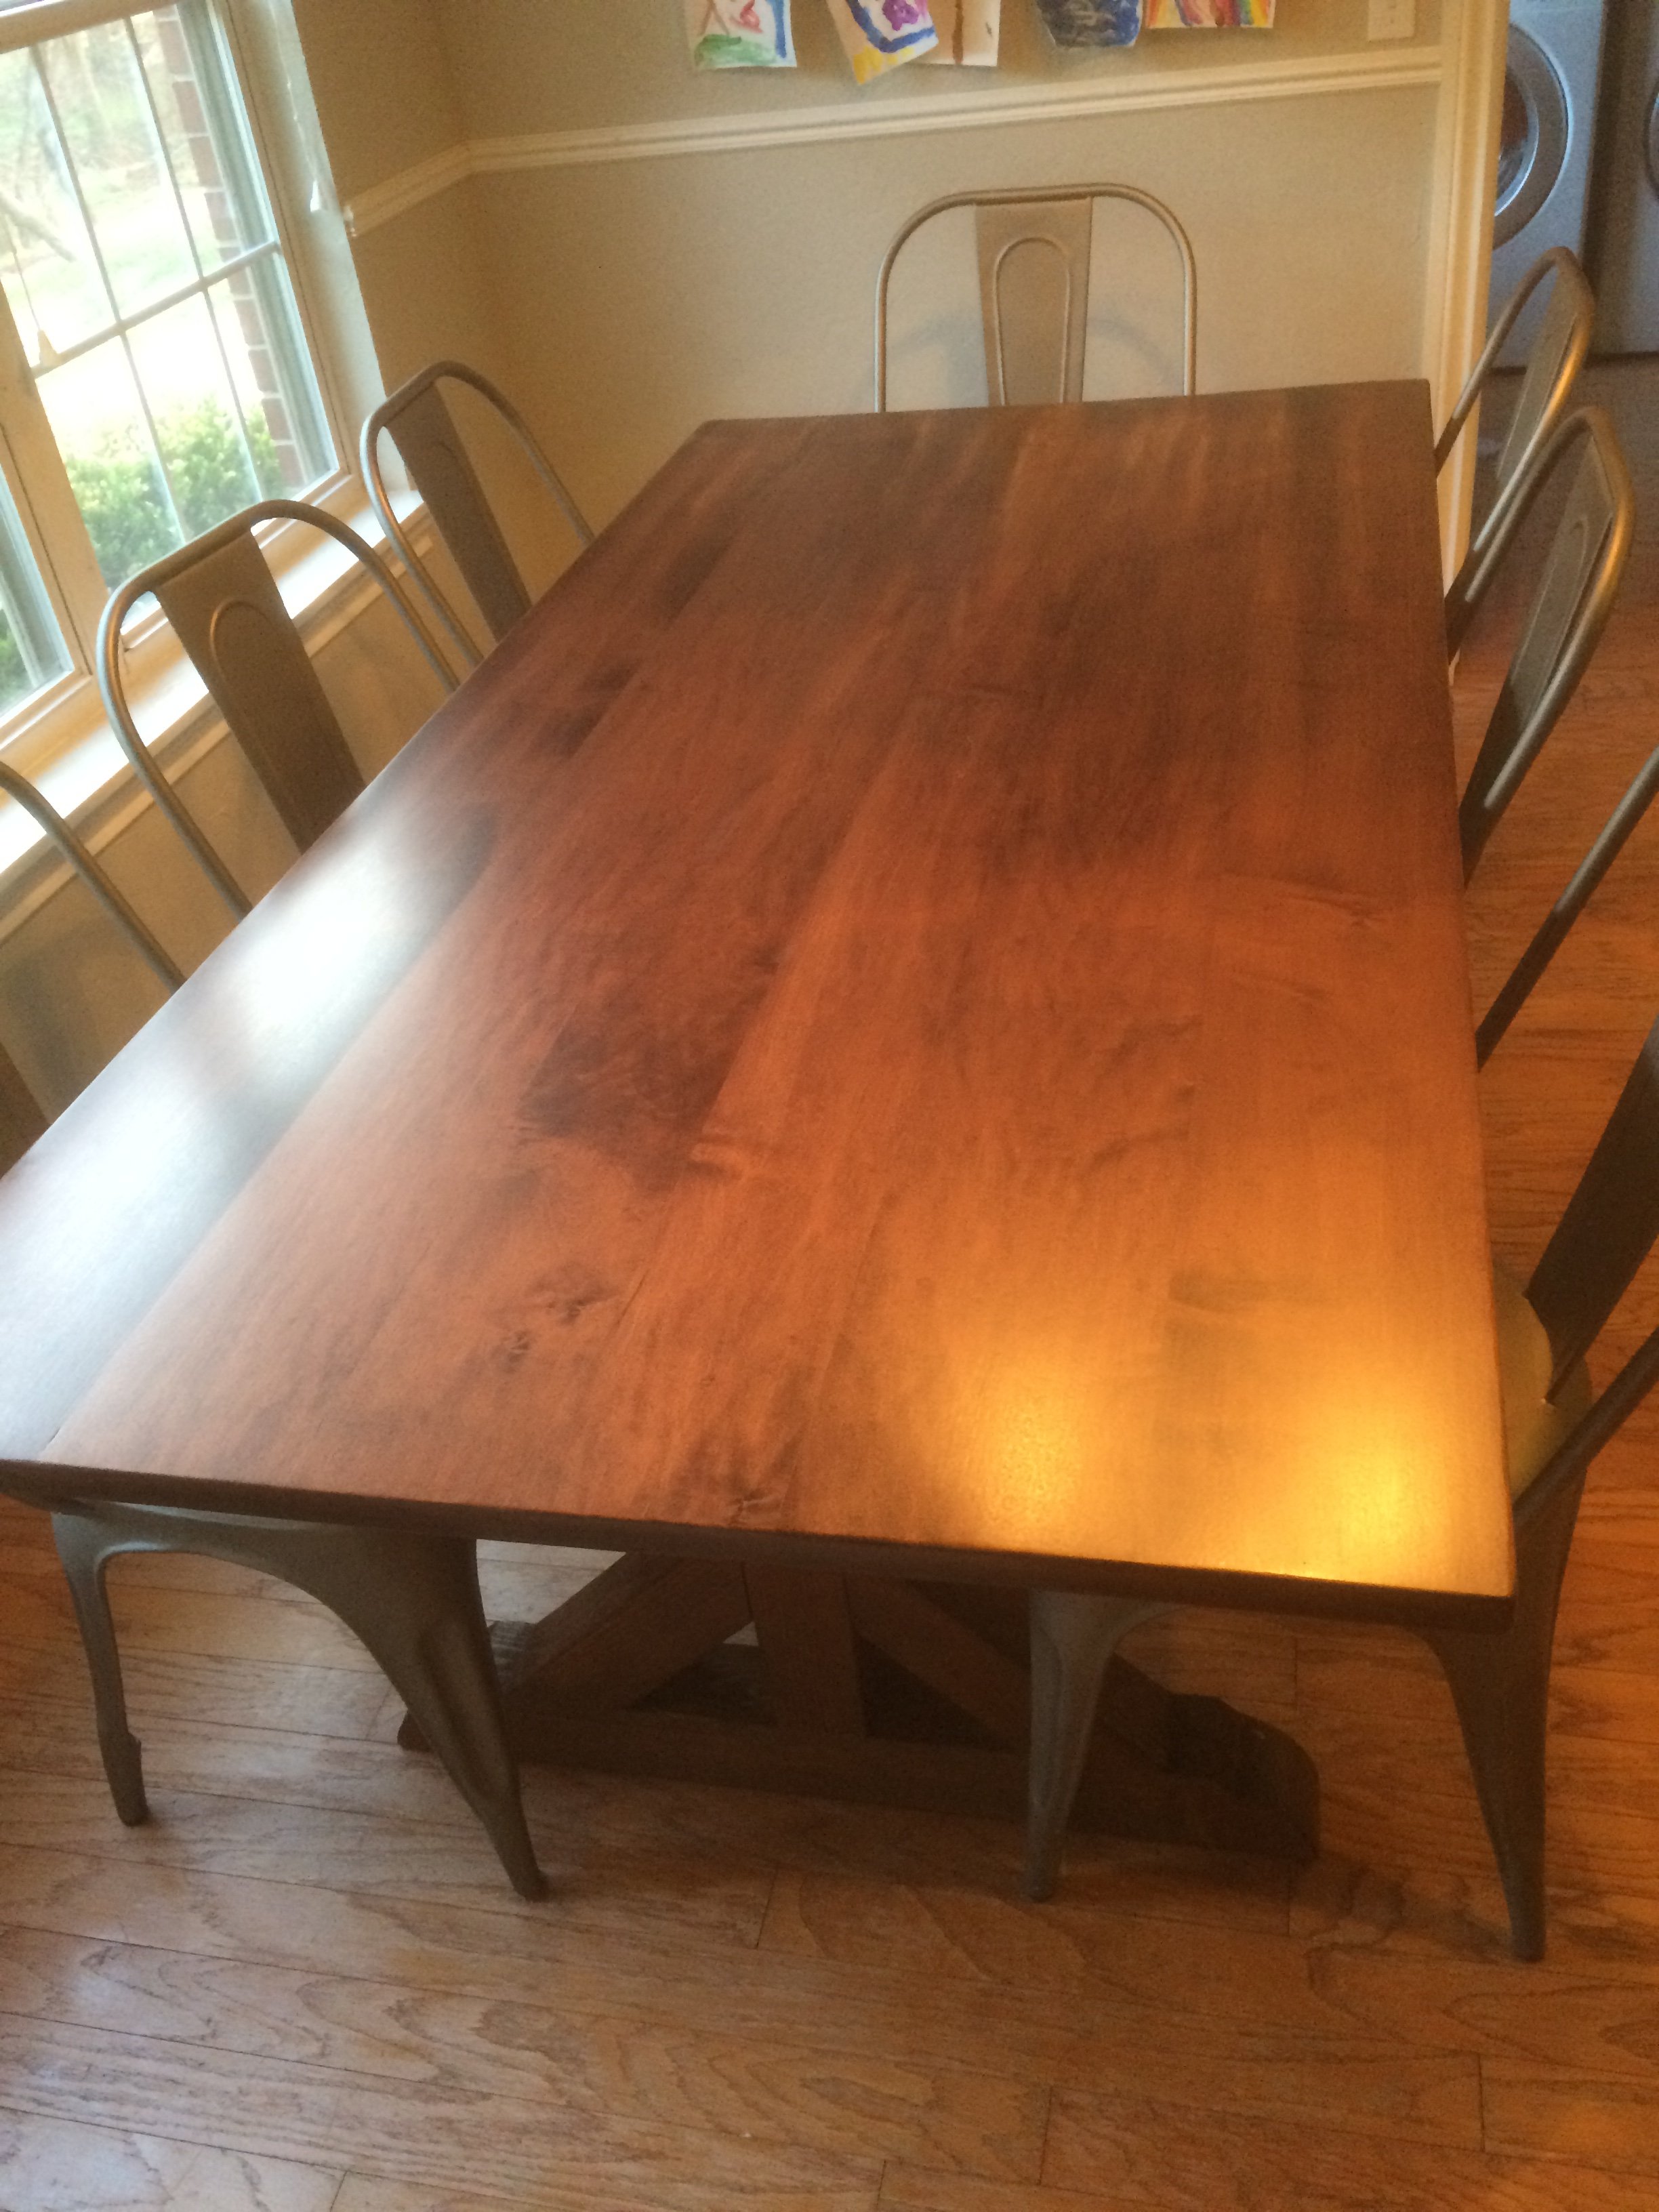
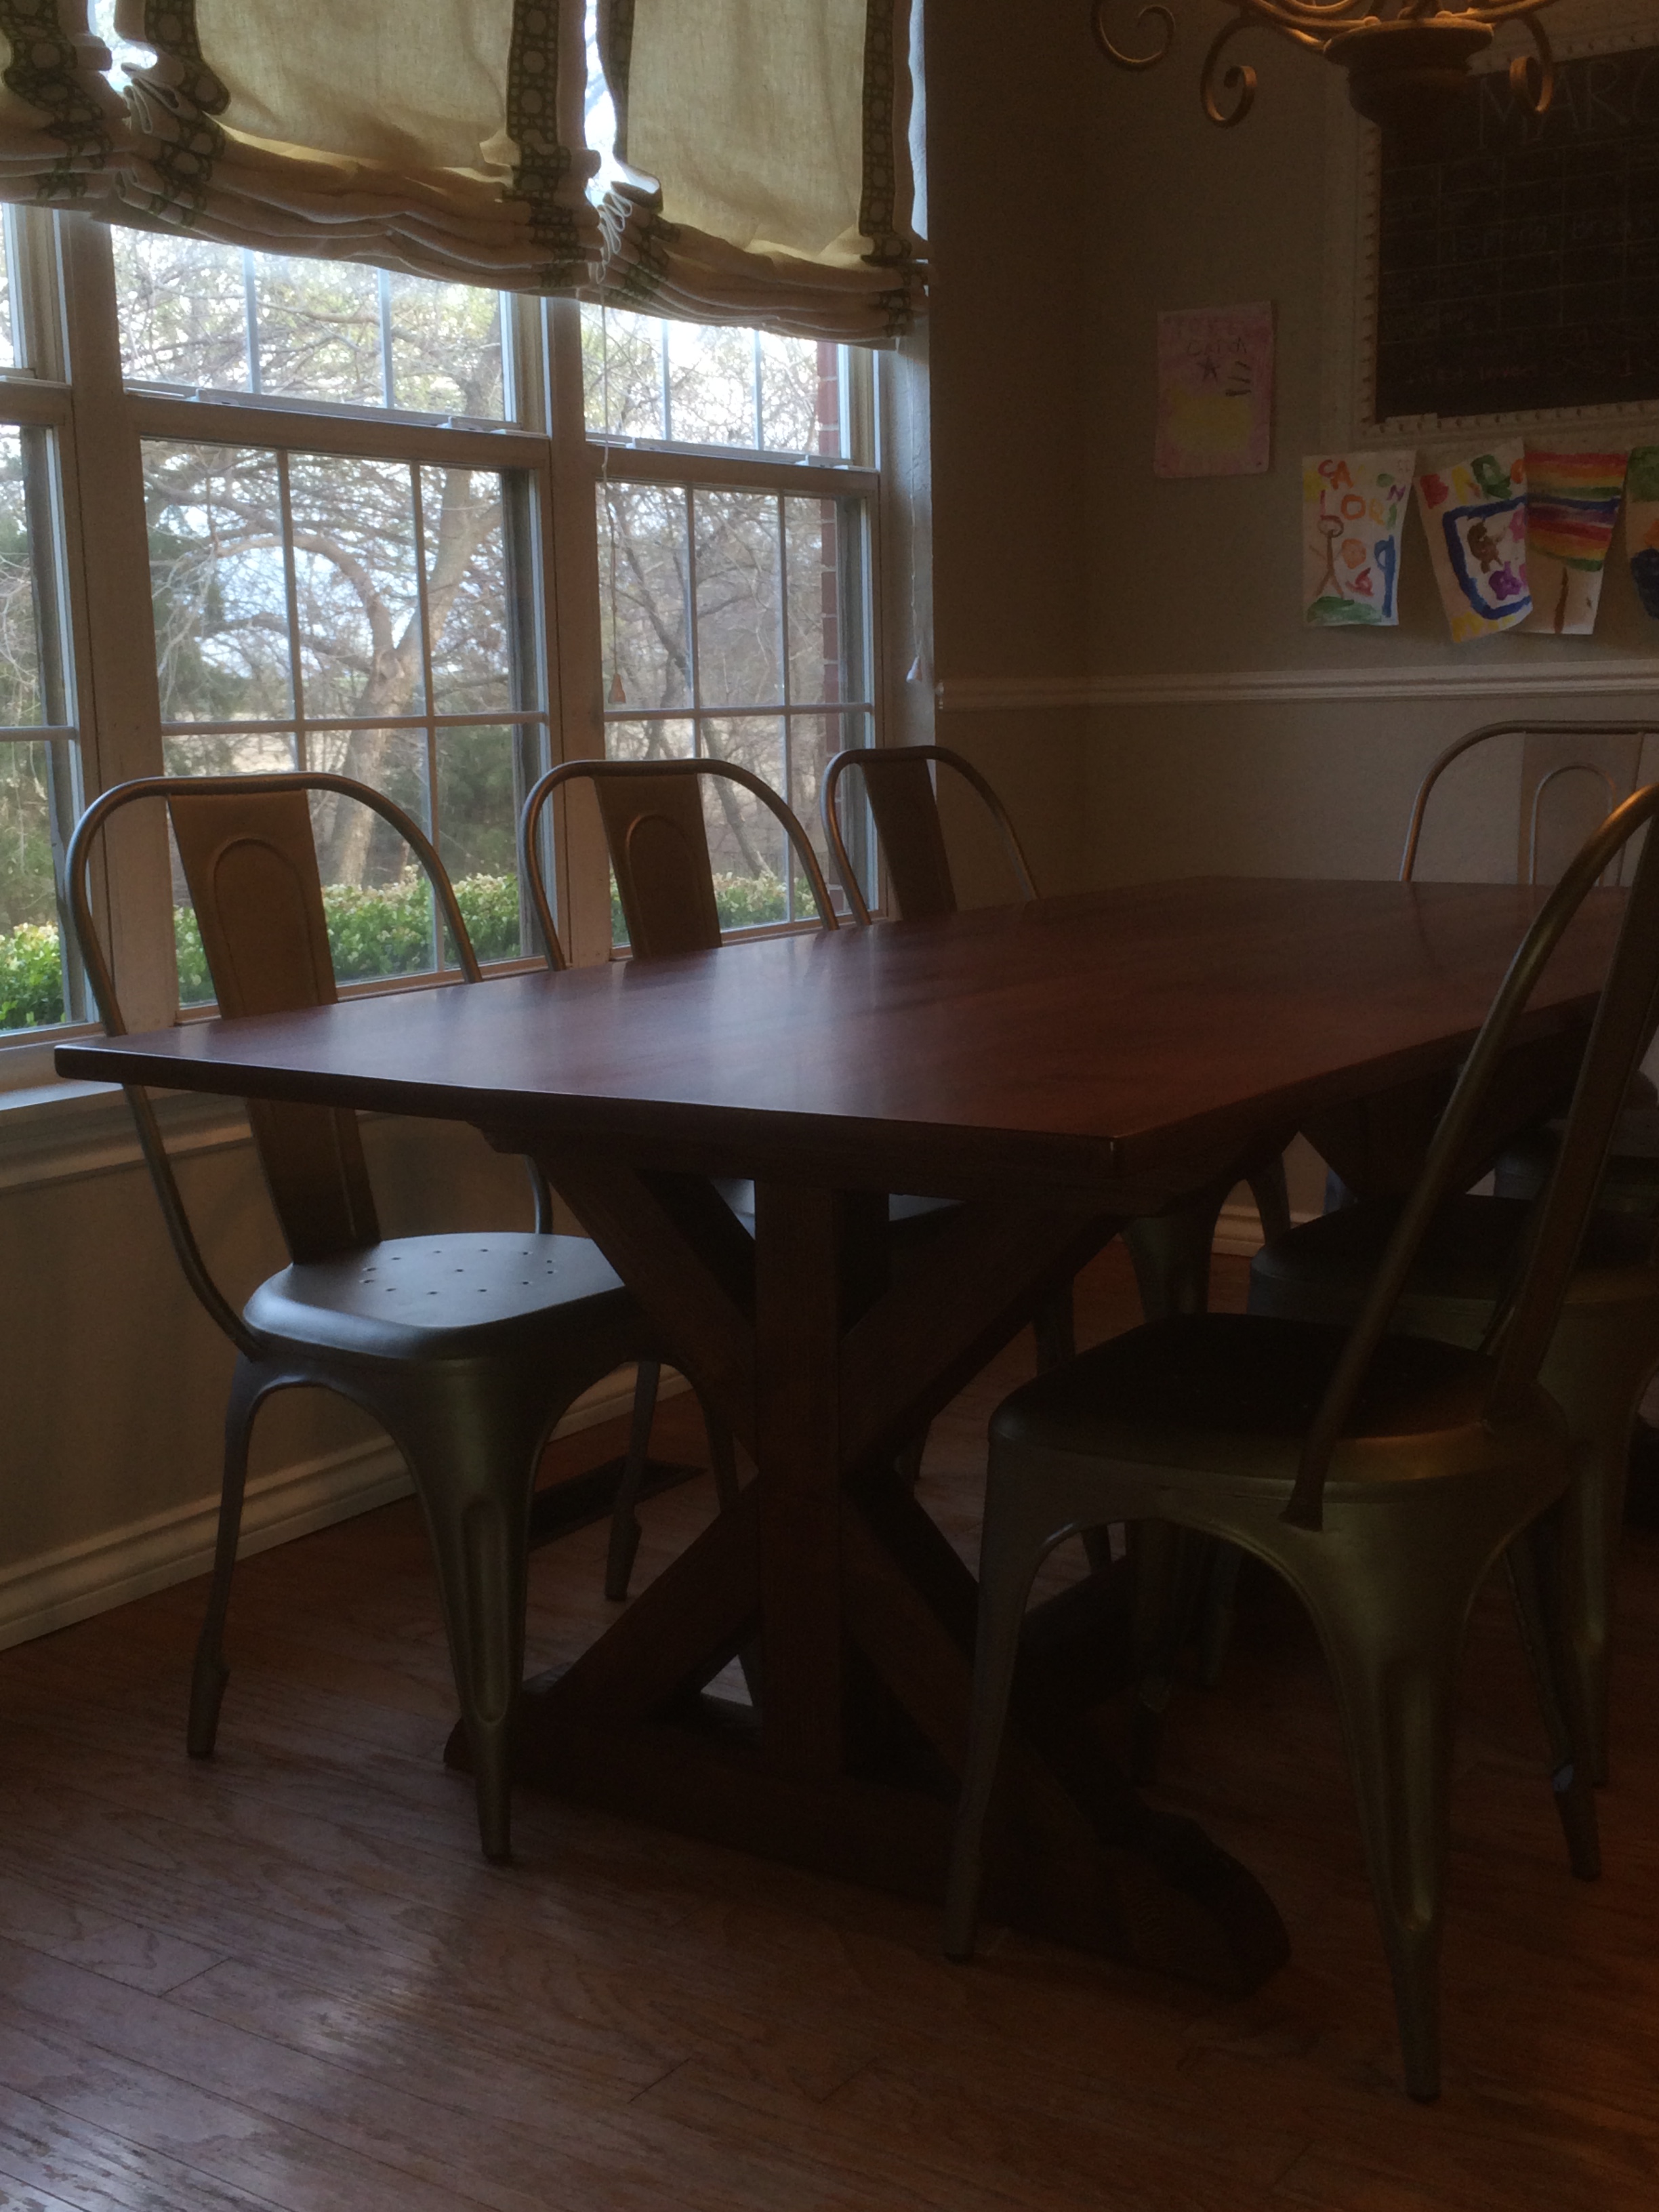
The results were really great.  The dye stain makes the figure of the wood “pop” and the sanding sealer keeps the color relatively even across your top.

For the top coat, I started out putting minwax high gloss poly.  I put several coats of this poly on the table, sanding with 400 grit sandpaper in between coats.  I really like this product.  I recommend putting it in the Fridge for 4-6 hours before you start working with it.  It will give you more time before the product sets up.  My final 2 coats I used behlen’s rock hard urethan satin varnish.  This product was truly rock hard, but once you put it on it sets up really fast…then it takes a long time to completely set up.  You had better work pretty fast using this stuff.  I used a roller to roll on all of my poly applications then evened it out with a really good paint brush. I built up layers of poly starting out with high gloss first, then switching to satin.  If you start out with satin and apply lots of coats, it can give a plastic type appearance to your finish that I do not like.

After 3 days of letting my final coat dry, I rubbed out the finish by taking 4 (0000) steel wool and a product called mohawk wool lube paste.  The steel wool evens out the finish and gives it an even sheen throughout the entire table top (see pictures).  The wool lube keeps you from burning through the finish with your steel wool.  Head over to Jon Peters Art & Home and he has videos on how to do this.

Hopefully this post helps some people. Let me know if you have questions.


Built from Plan(s)
Estimated Cost
$600
Estimated Time Investment
Week Long Project (20 Hours or More)
Finish Used
General Finishes - Dark Brown Dye Stain
Behlen Rock Hard Eurathane Varnish
Recommended Skill Level
Beginner

Comments

Ana White Console-my version!

Submitted by Anonymous (not verified) on Sat, 06/24/2017 - 14:44

Used the grandy sliding door console plans but modified due to space. Shortened it to a 5 foot length. Wanted rustic feeling so did a custom stain using a golden pecan mixed with golden mahogany. Being mindful of cost and used pine with bead board on the back.  Super pleased with the result! Thanks for the ability to use your plans!

Built from Plan(s)
Estimated Cost
$125 without labor
Estimated Time Investment
Weekend Project (10-20 Hours)
Recommended Skill Level
Intermediate

Open bench and hutch

Submitted by Beginner52 on Mon, 10/04/2021 - 05:21

Hayden and Tanner's Play Fort / Swing Set

I built this play fort and swing set based on Ana's Playhouse design. Today is my daughter's 3rd birthday and it is a present to her.
She has helped me the whole way through the project. It was a lot of fun building it with her.

For more pictures on my project see
http://flic.kr/ps/2spv6t

The deck is 12' x 8' and it is 5' off the ground to the top of the deck. The tube slide comes off of a platform that is 3' x 4' and 7' high off the ground to the top of the platform. I got the slides, swing arm and swing legs off a set from someone selling and old set through craig's list. Everything else i built myself.

Estimated Time Investment
Week Long Project (20 Hours or More)
Finish Used
paint playhouse, pressure treated will be stained probably next year after drying out
Recommended Skill Level
Beginner

Comments

Side Table

Submitted by AndyH on Thu, 03/26/2015 - 12:46

I made these side tables (two matching ones) last year but never posted the pictures.  I will soon have plans available as well.

I made these from select Pine which is more expensive than the normal No2 Whiteboards.

They were made to suit the height of one of our sofas and finished in  Minwax Ebony and Minwax Satin Poly.

The hinges were from www.directfrommexico.com

Estimated Cost
$100
Estimated Time Investment
Day Project (6-9 Hours)
Finish Used
Minwax Ebony and Satin Poly
Recommended Skill Level
Beginner

Comments

wconnor12

Wed, 08/19/2015 - 17:24

Very interested in making these for the new house, you have plans to share? Thanks in advance. BTW nice work...

American Girl Bunk Bed - YAY - so easy, we did it!

Submitted by Anonymous (not verified) on Mon, 06/26/2017 - 14:13

Thanks for the easy tutorial...Made that last night with my two oldest kids (7 and 9) and we love it! 

Estimated Cost
Cost was higher than what was said on the blog - Altogether 50 dollars because Lowes charged us for the leftover cut wood.
Estimated Time Investment
Weekend Project (10-20 Hours)
Recommended Skill Level
Beginner

Braden Entryway lockers

Submitted by bowers8307 on Wed, 05/08/2013 - 12:11

We needed some way to organize shoes, coats, book bags and the the things that need a home when you have 4 kids. I found the plans for the Braden entryway units and I loved them! I showed them to my husband who built them for me one Saturday afternoon. We decided to use piece of paneling for a wall on the back of the lockers and used MDF for the shoe bases since we wanted them to be sturdy. I painted them Valspars "Tidal Teal" and then technique glazed them with a black brown color. I LOVE THEM! They are colorful and fun and so functional. I love this site and have many other projects for my husband to build as long and I get to do the fun part, PAINTING!!

Estimated Cost
$300
Estimated Time Investment
Weekend Project (10-20 Hours)
Finish Used
Technique glazing. Valspar's Tidal Teal and black/brown technique glaze.
Recommended Skill Level
Beginner

Comments

Jen Morningstar

Sat, 06/28/2014 - 18:42

This was the first piece of wood work that I have worked on since I was 19; however, your site is so filled with such beautiful work, that I just had to make something.
Luckily we were in need of an entryway--a place to sit and tie shoes, hang coats, and have cubbies to store hats, mitts, scarves, as well as my gardening tools!
I modified your Braden Entryway Collection to fit the space I had, but I hope you agree that it turned out quite nicely, despite my novice alterations.
I'm very fond of the look and smell of bare pine, so the piece is only finished with Tung oil.
Thank you so much for such a rich site, and for an incredibly detailed 'how to,' I don't think I could have managed without it. I wish I could send a picture to you, but I have yet to figure out how to do that.