Community Brag Posts

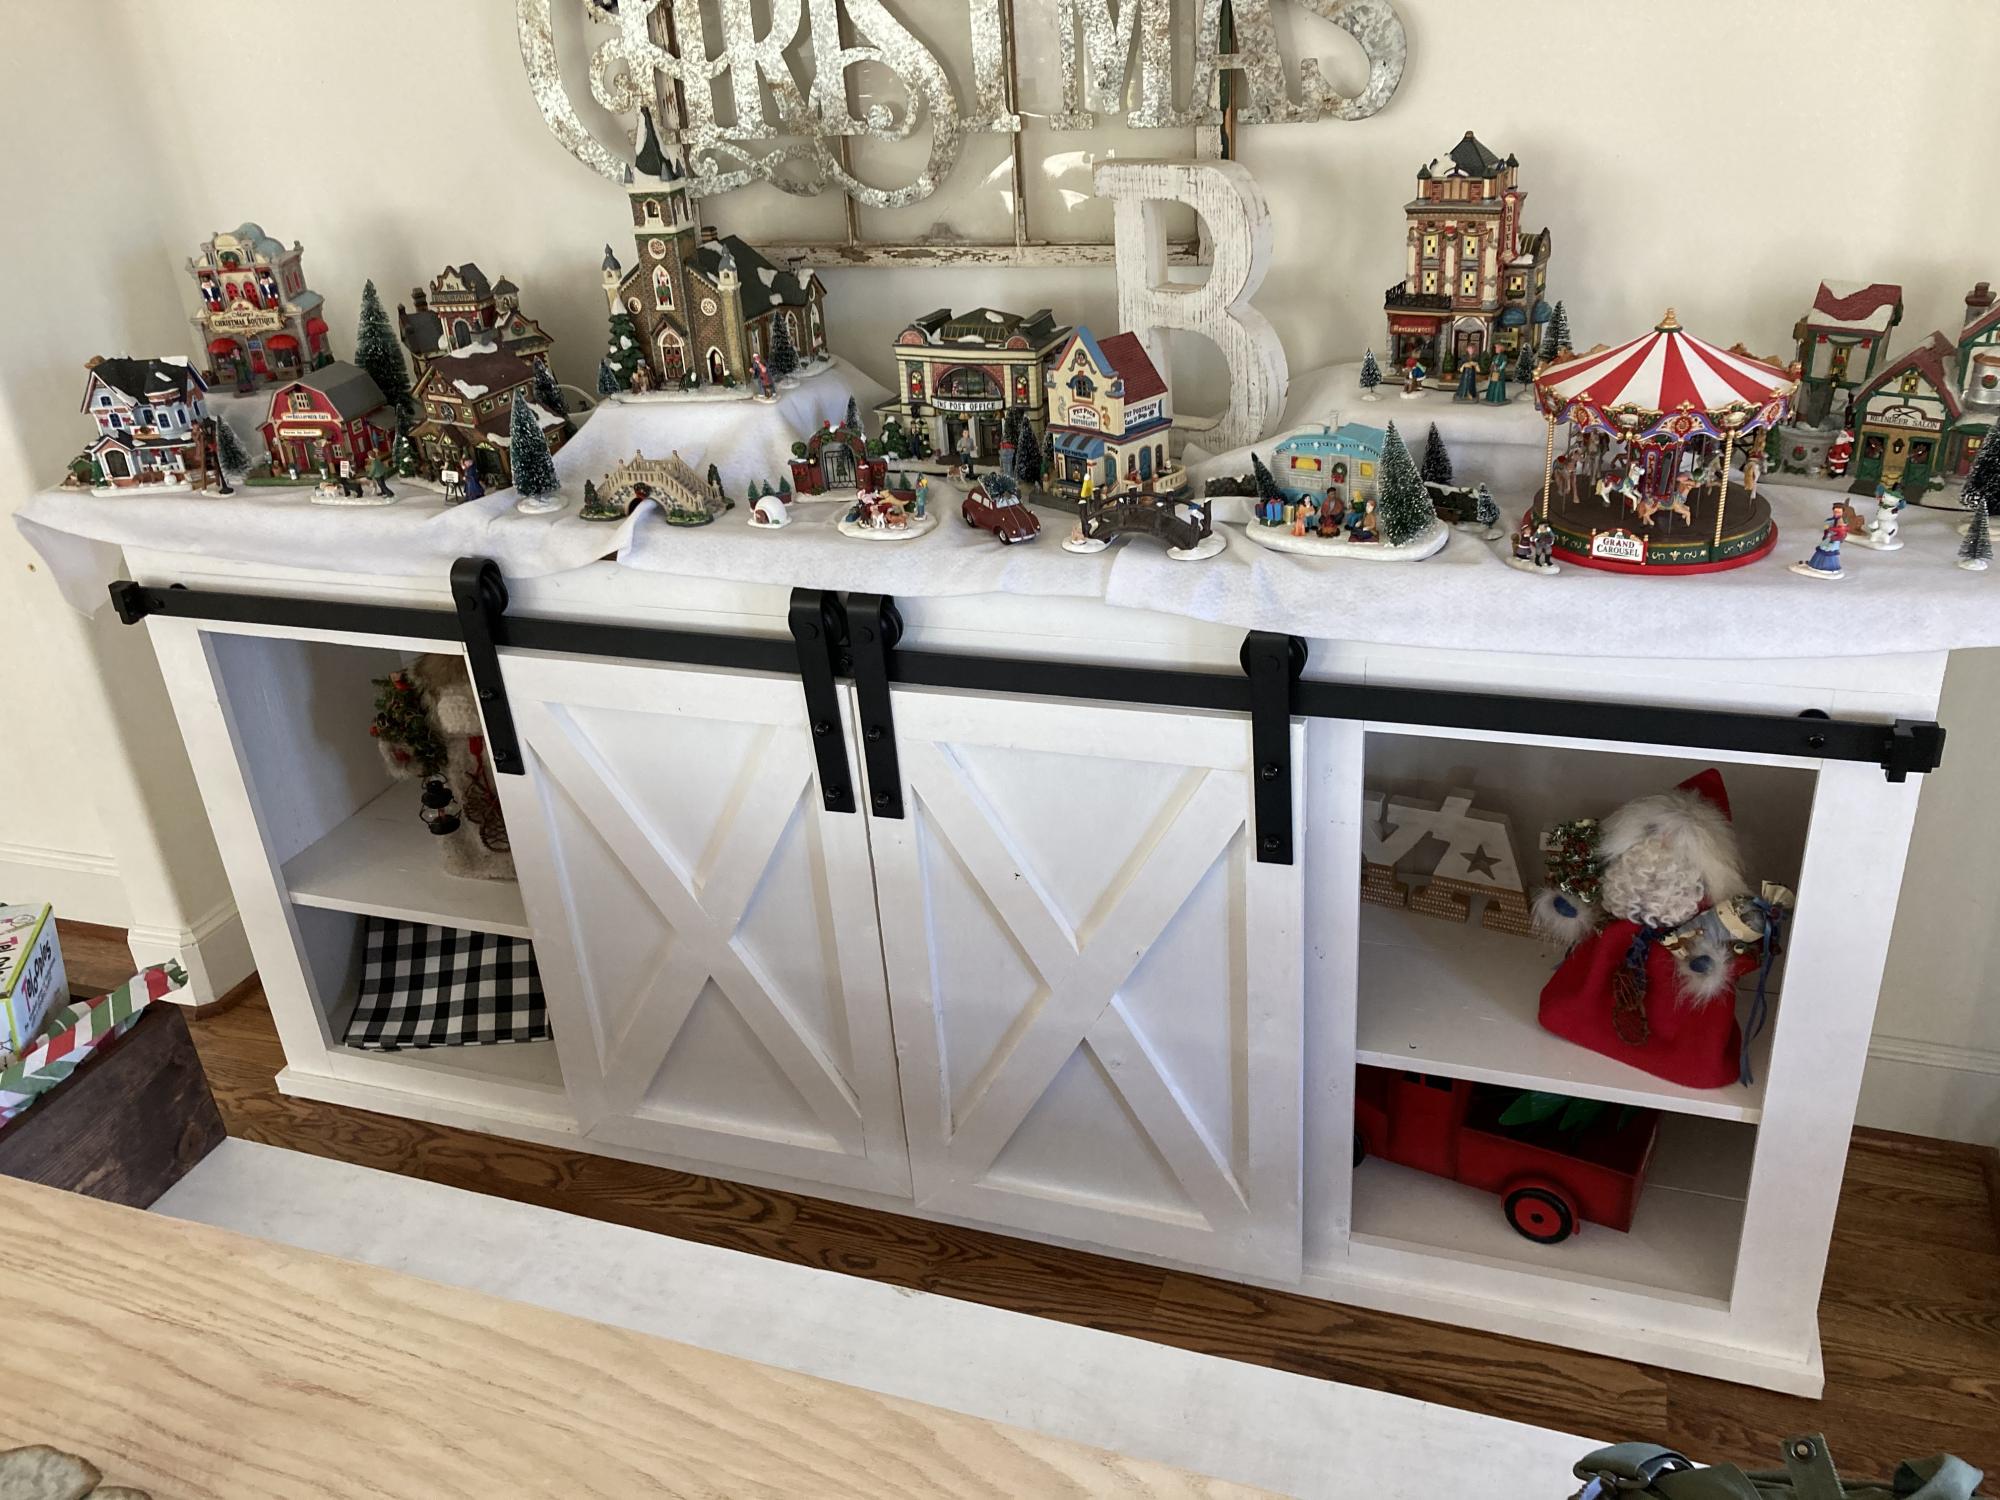
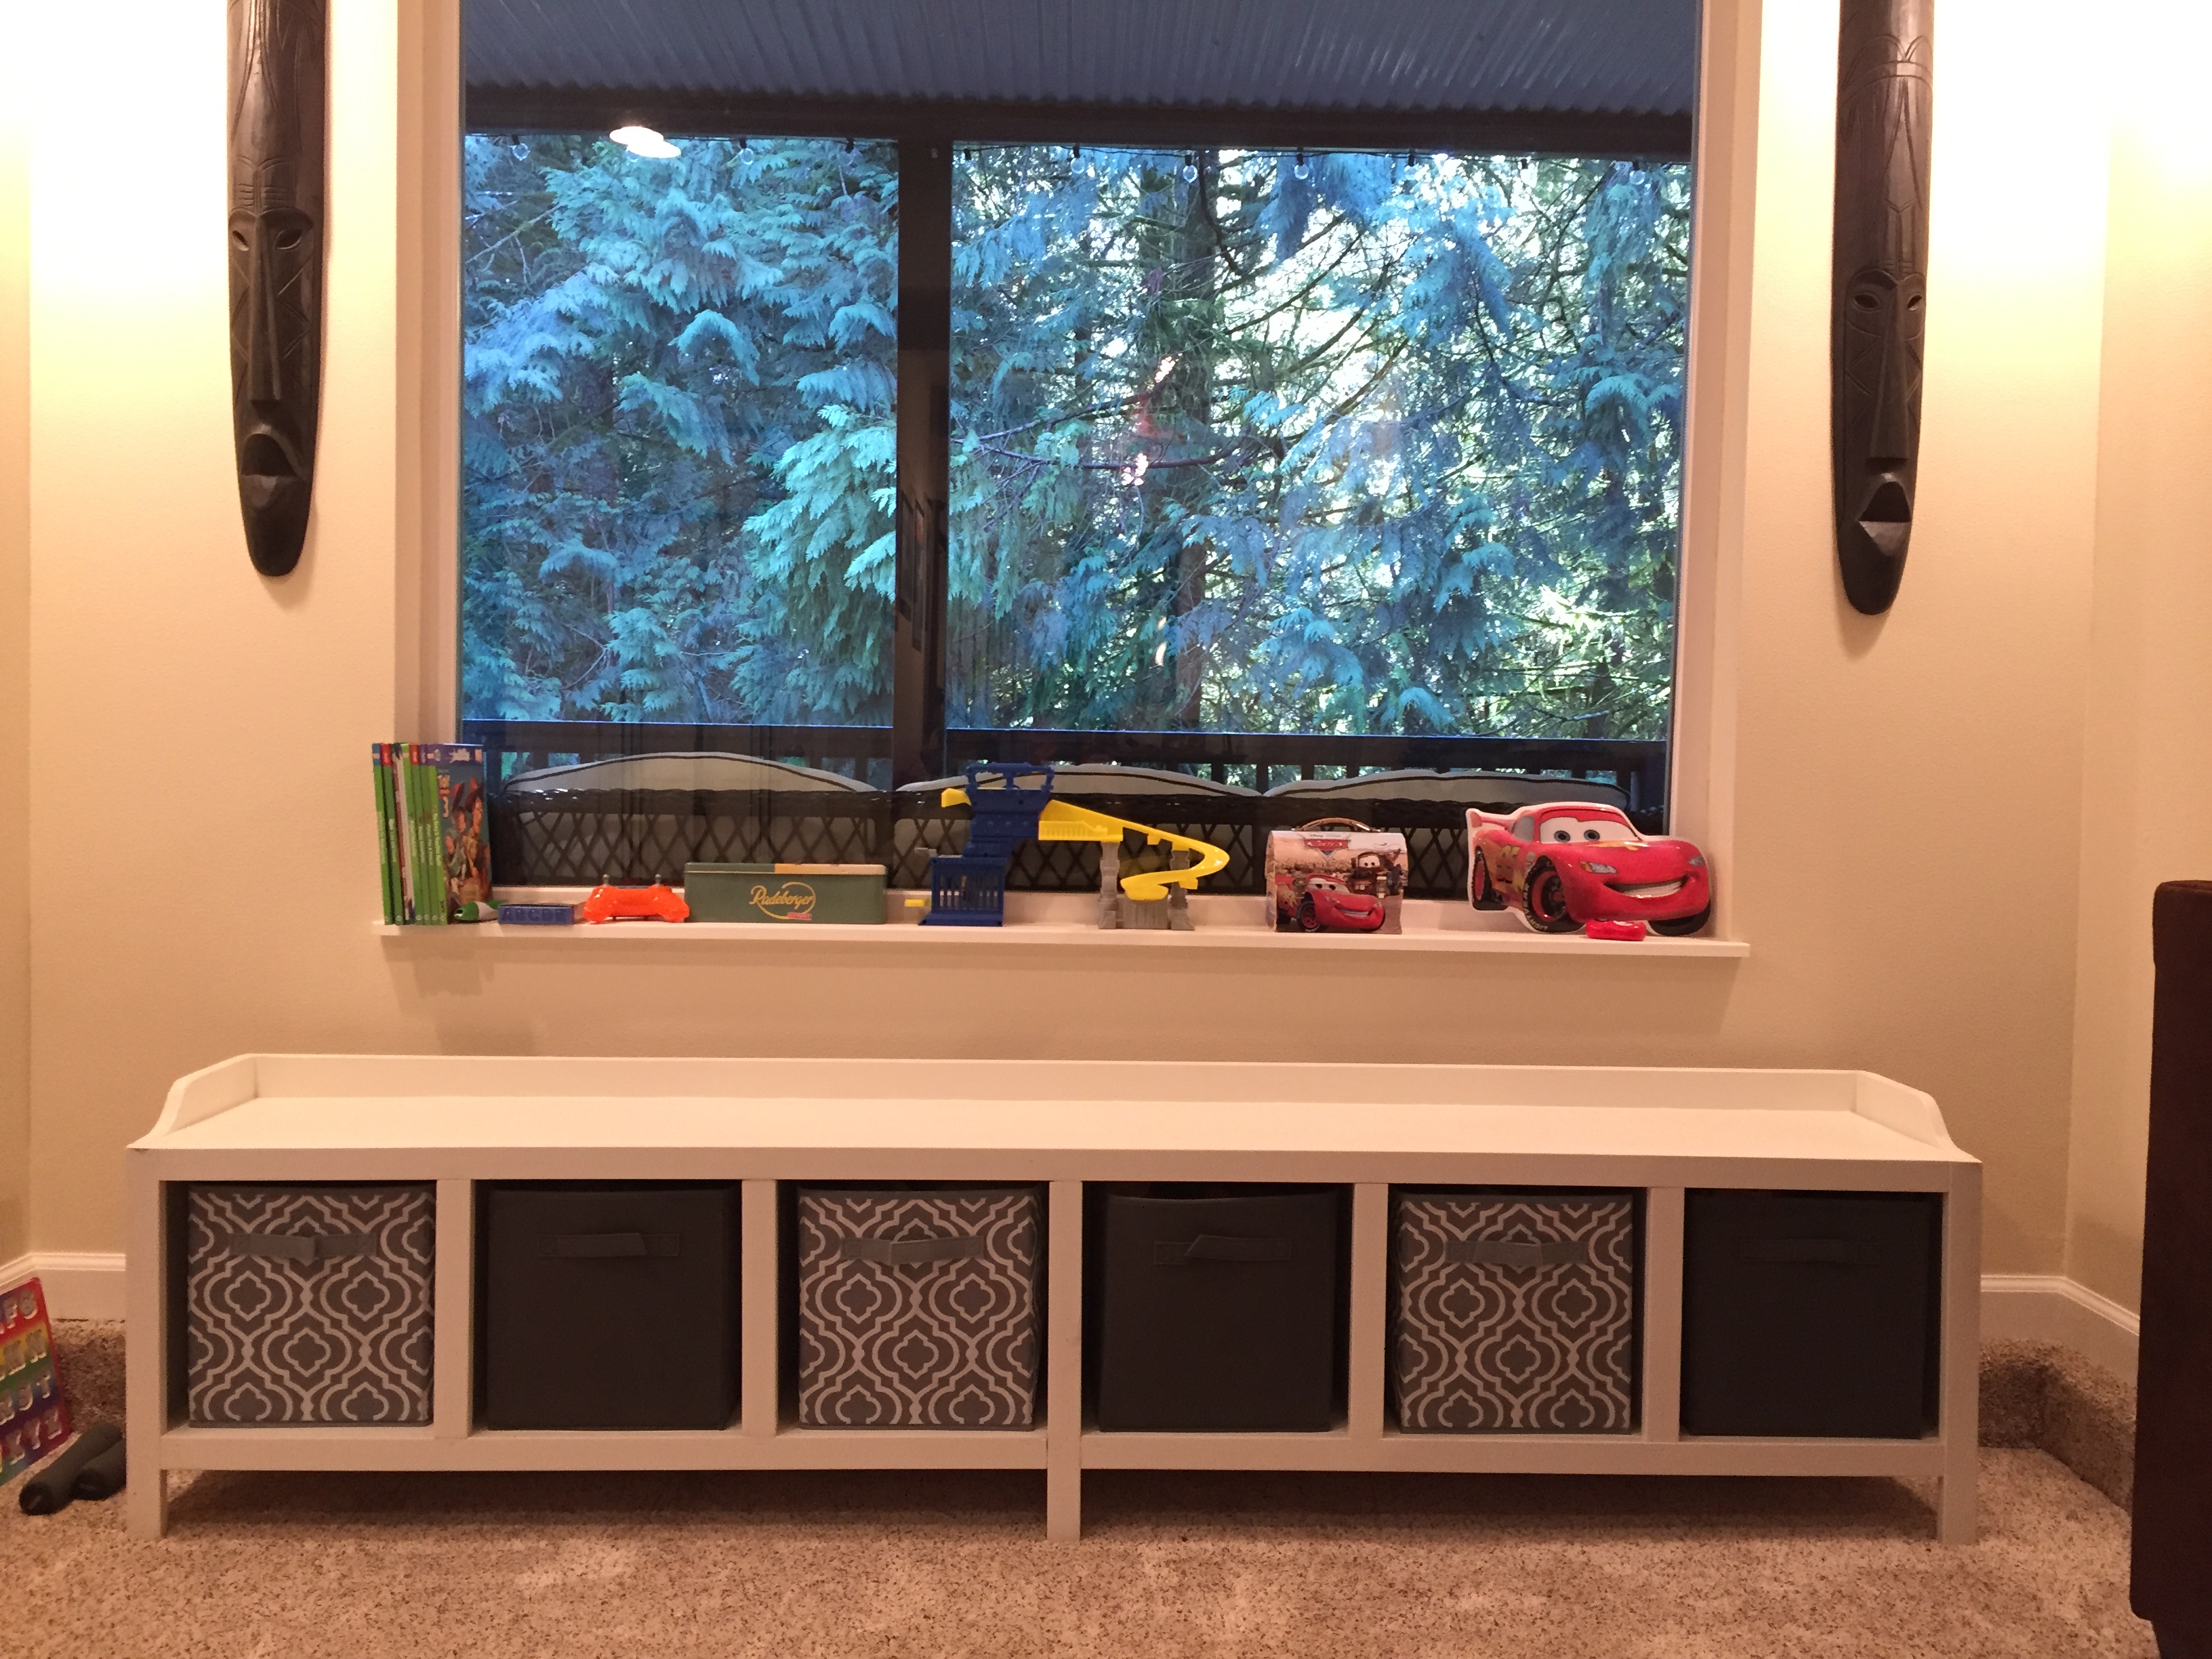
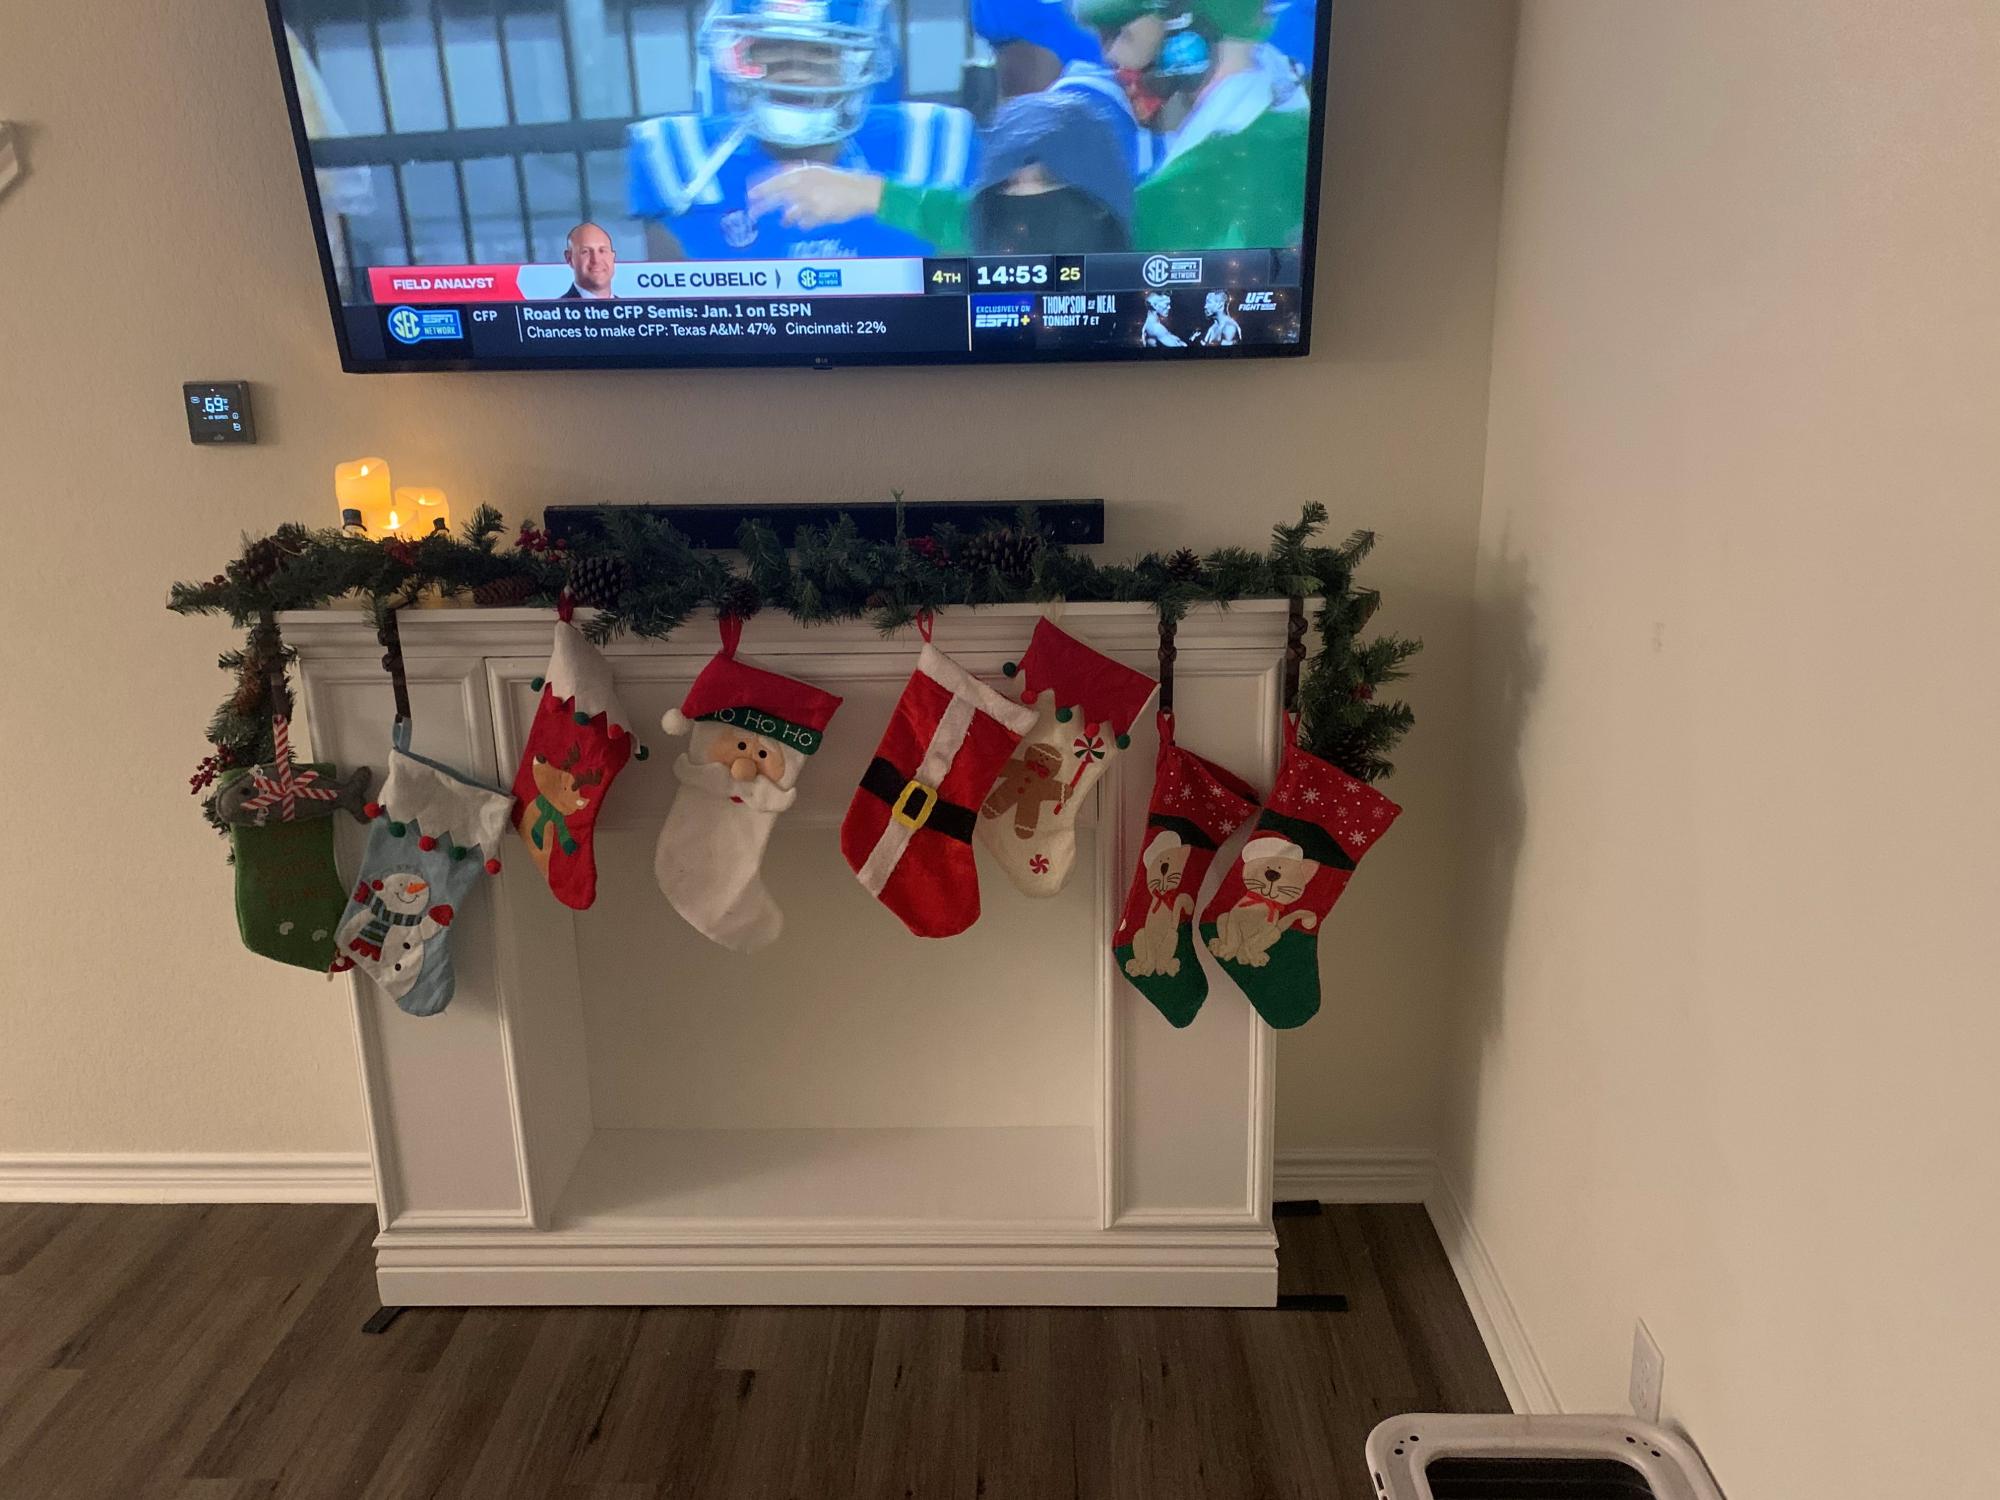
Our version of the Rebecca Media Center

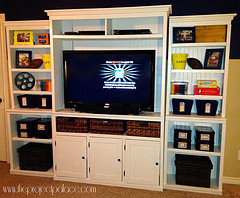
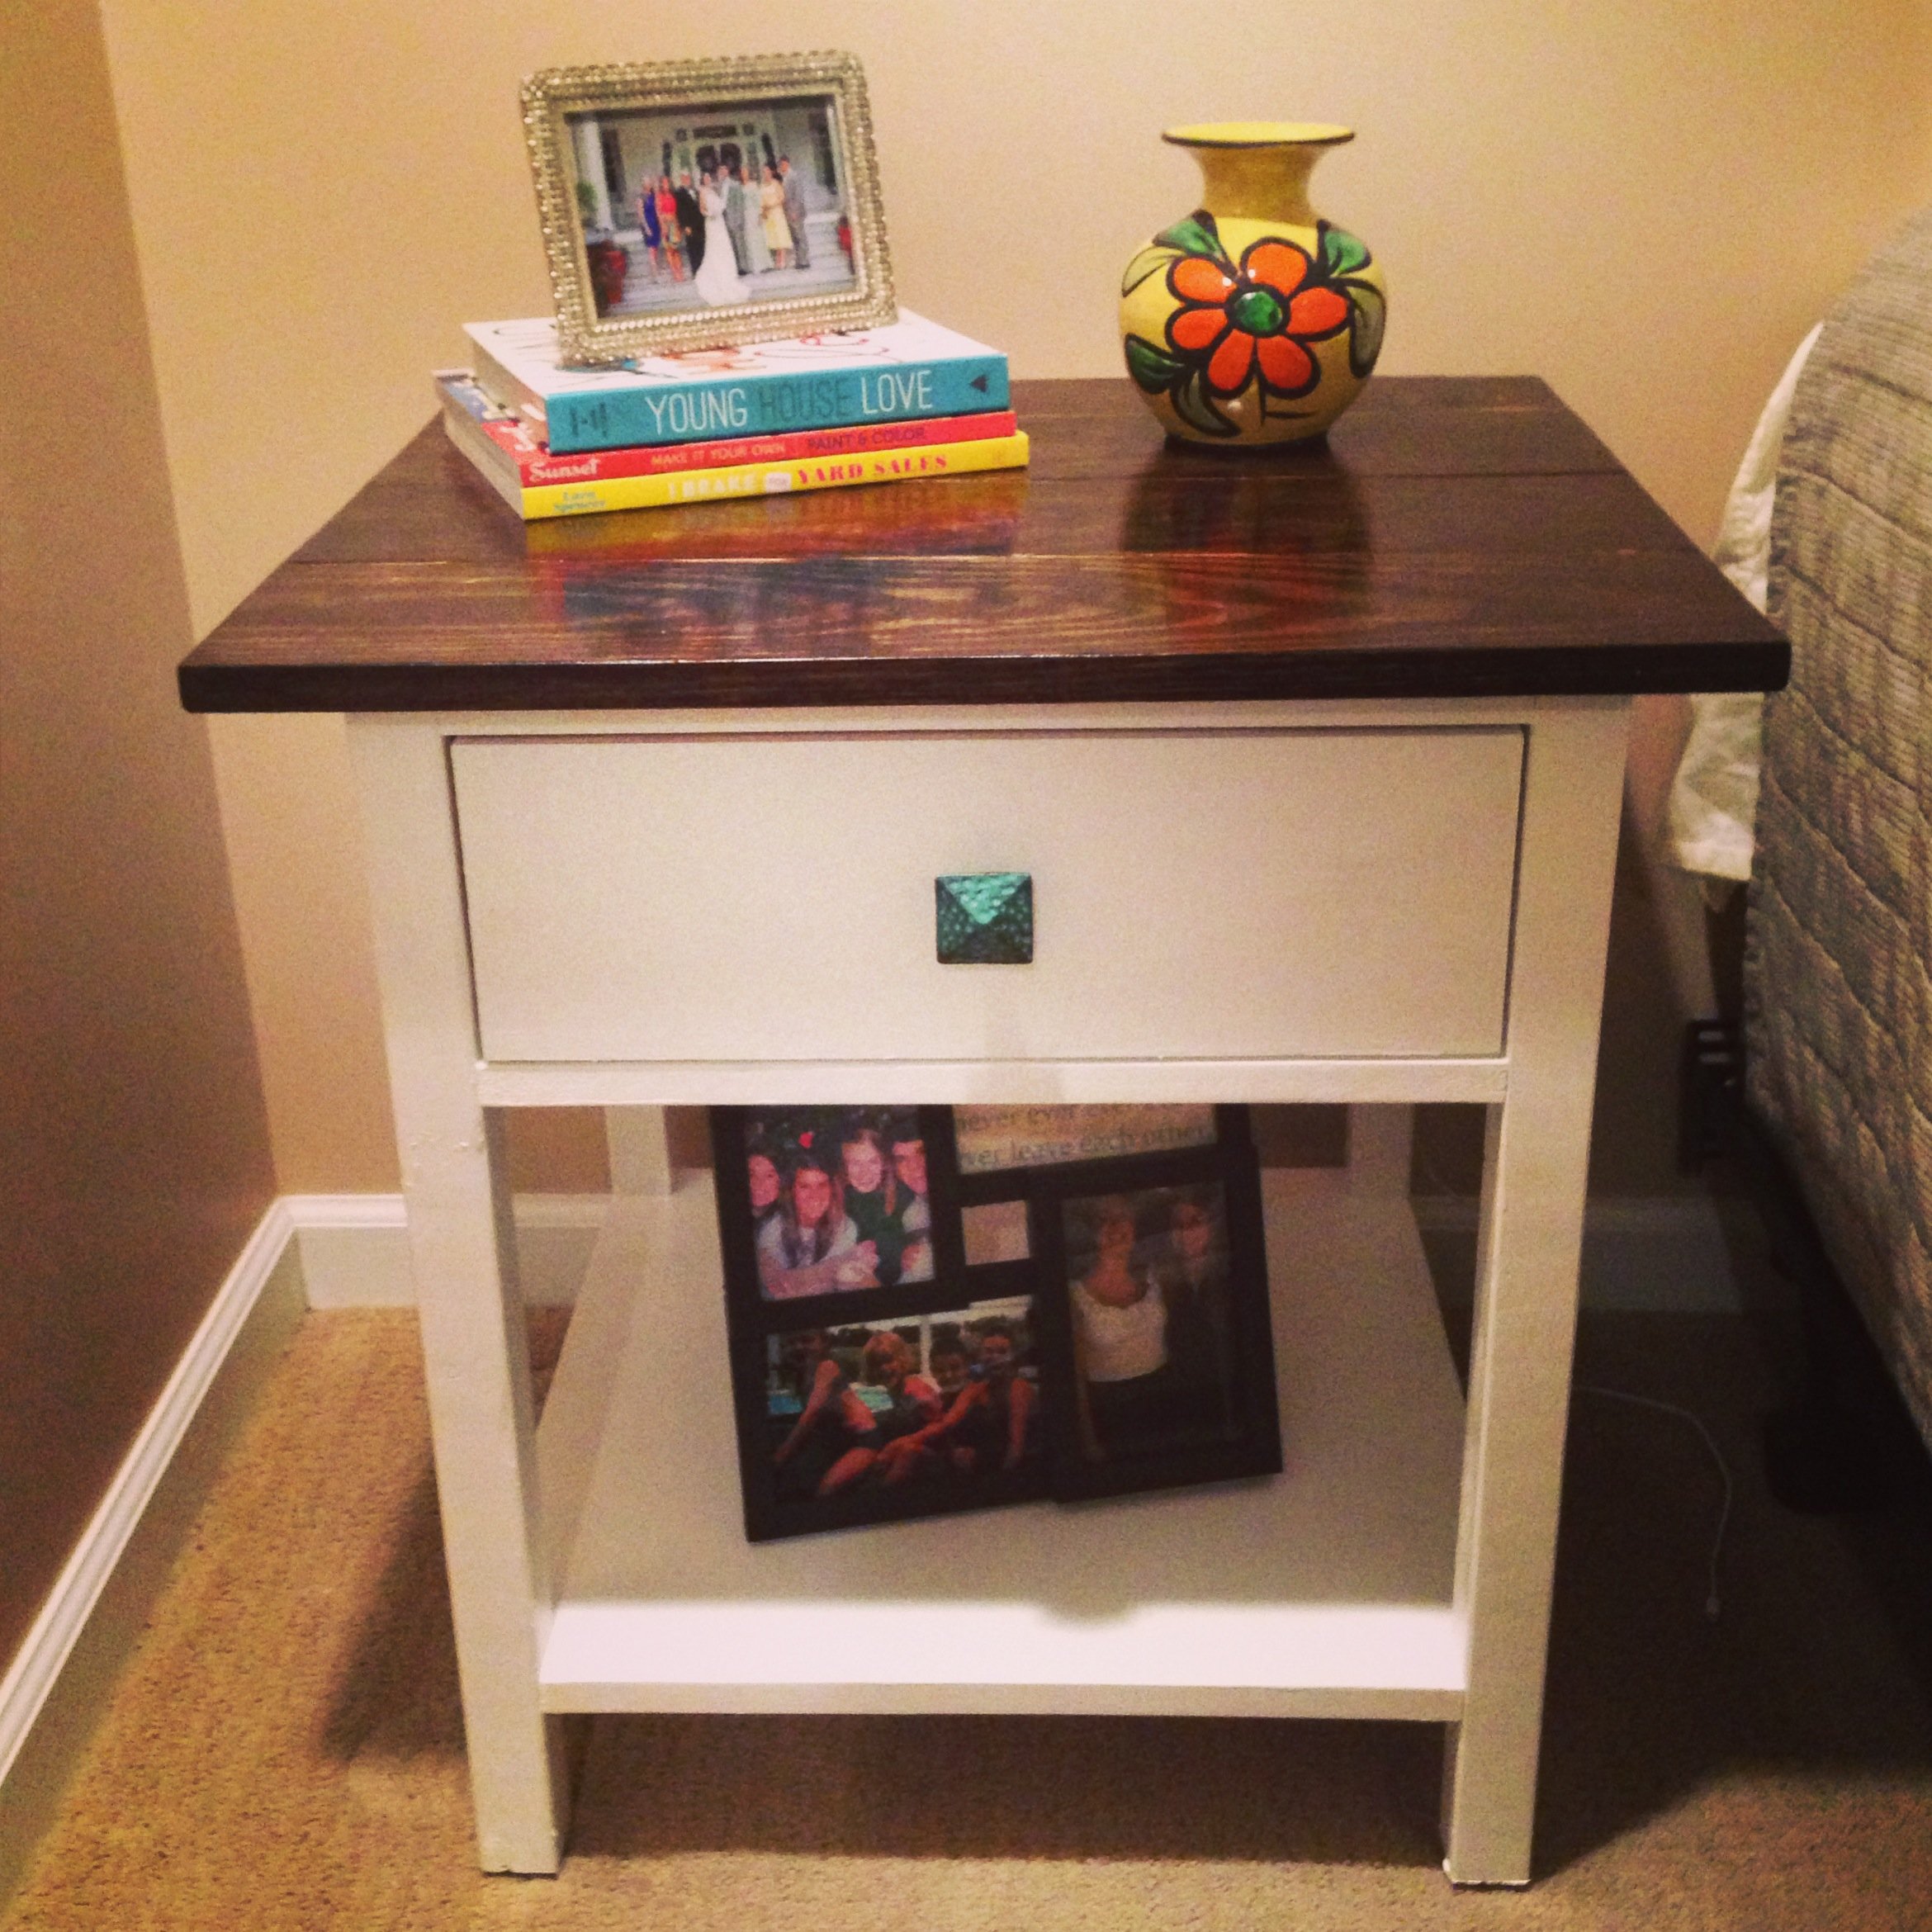
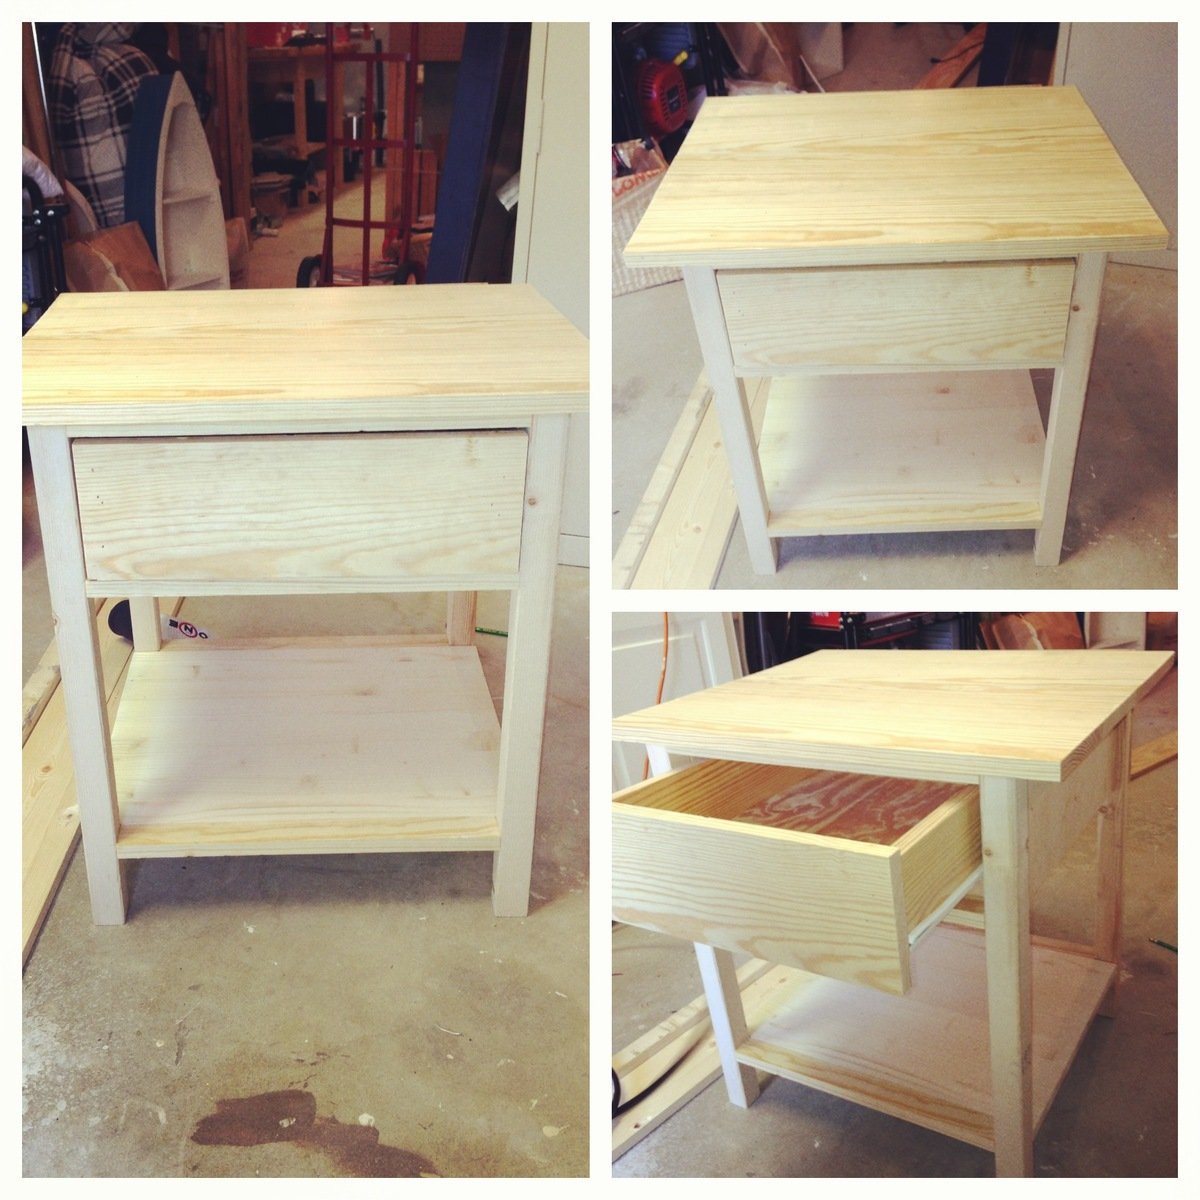
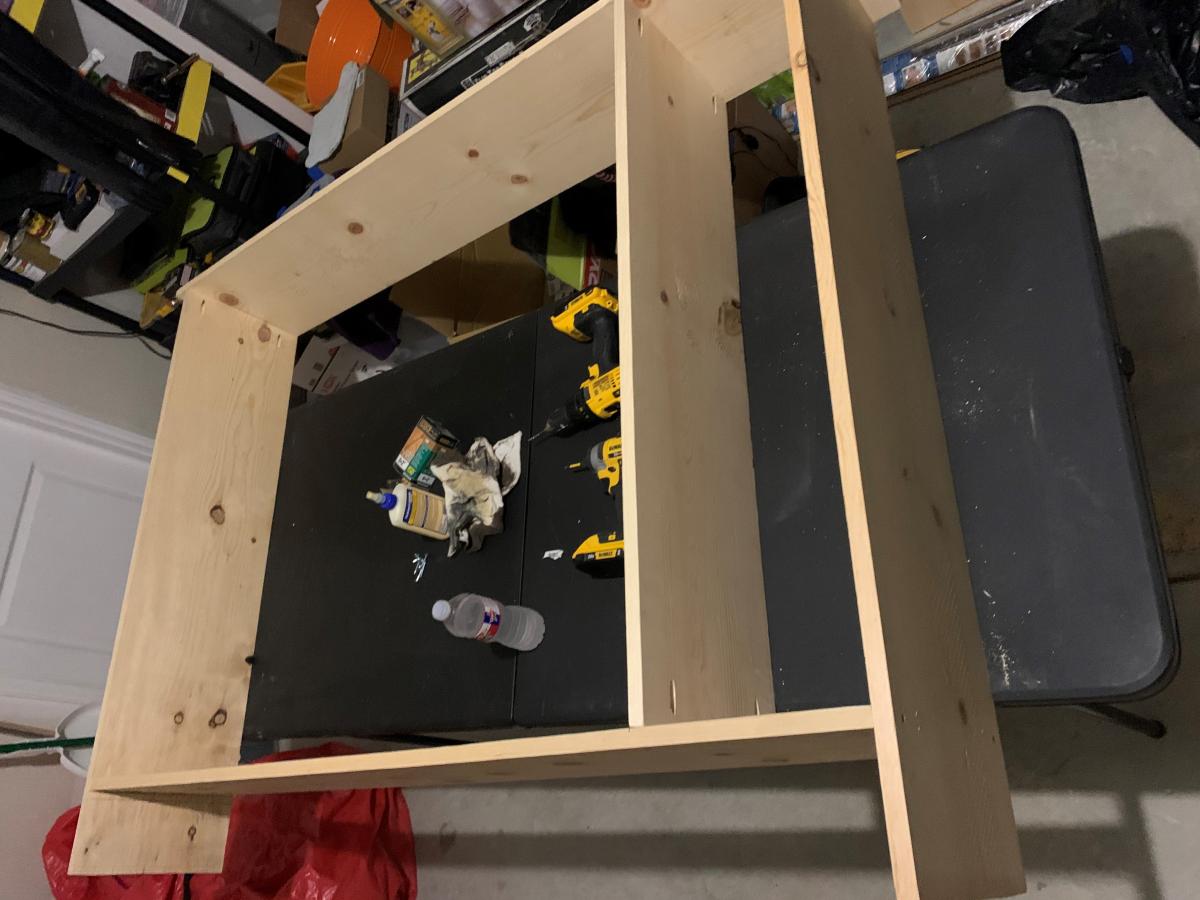
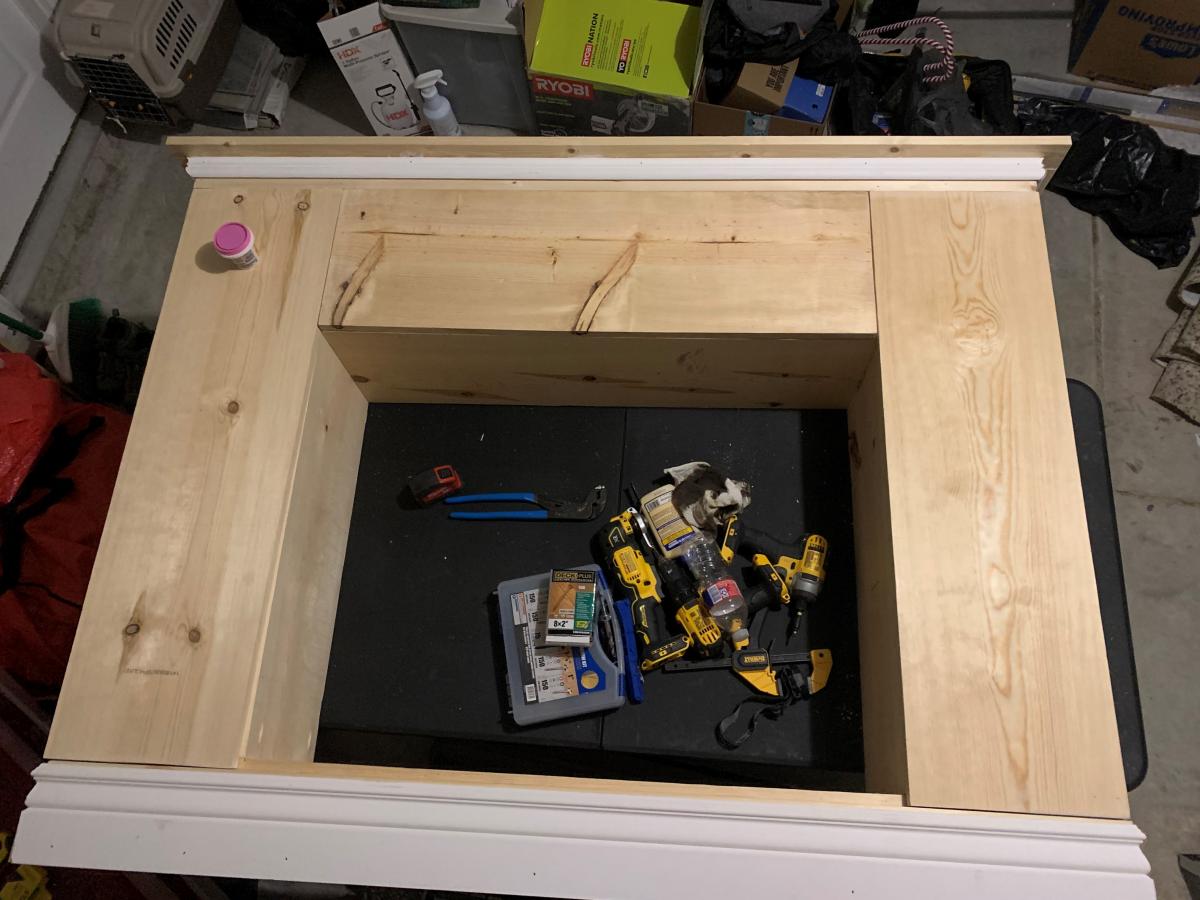
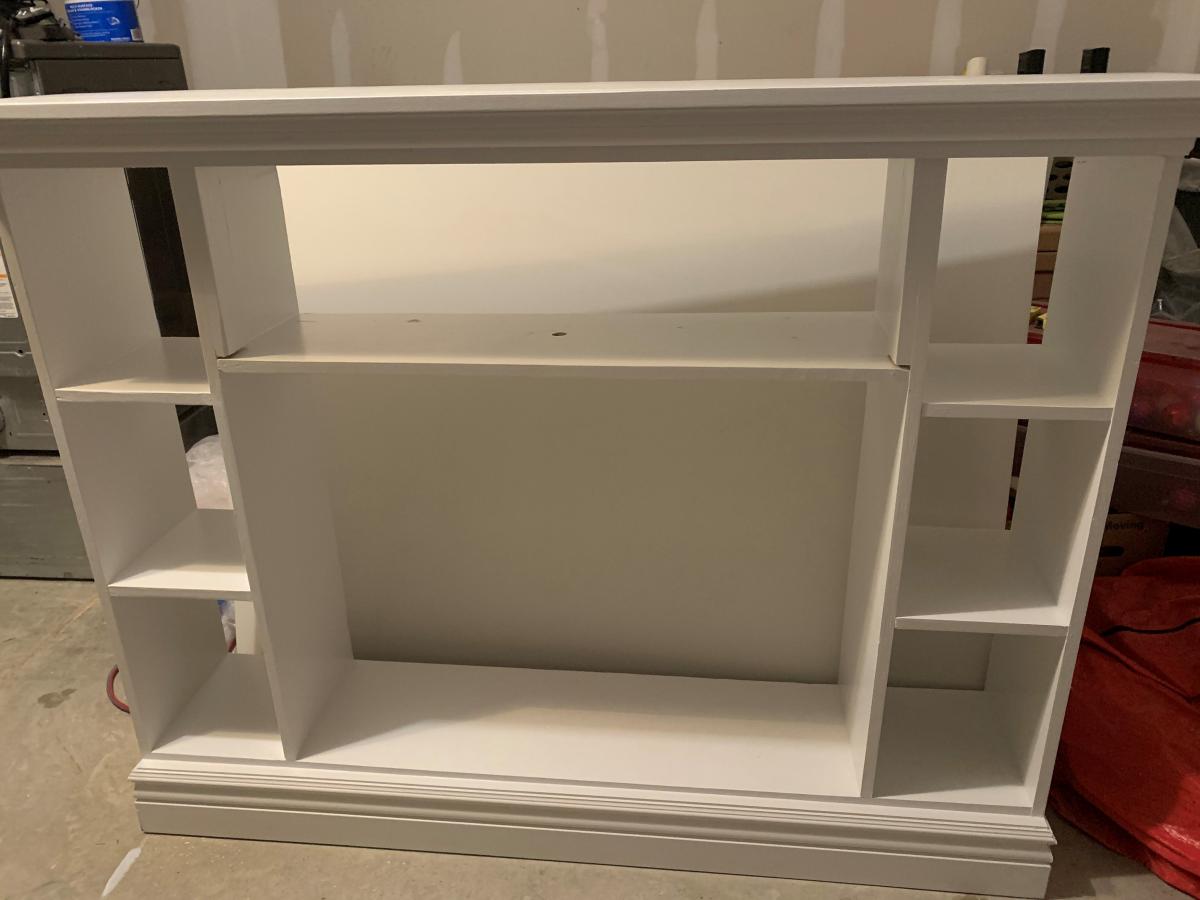
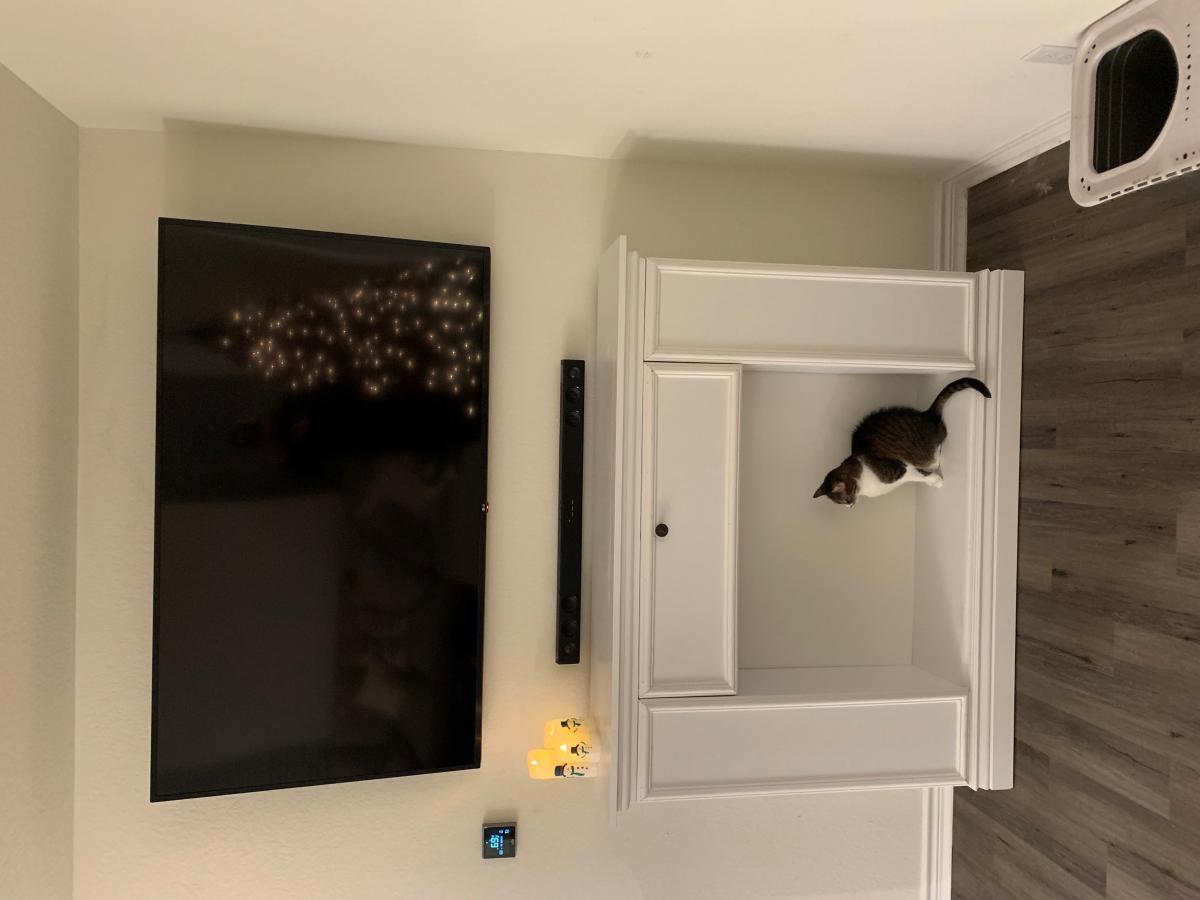
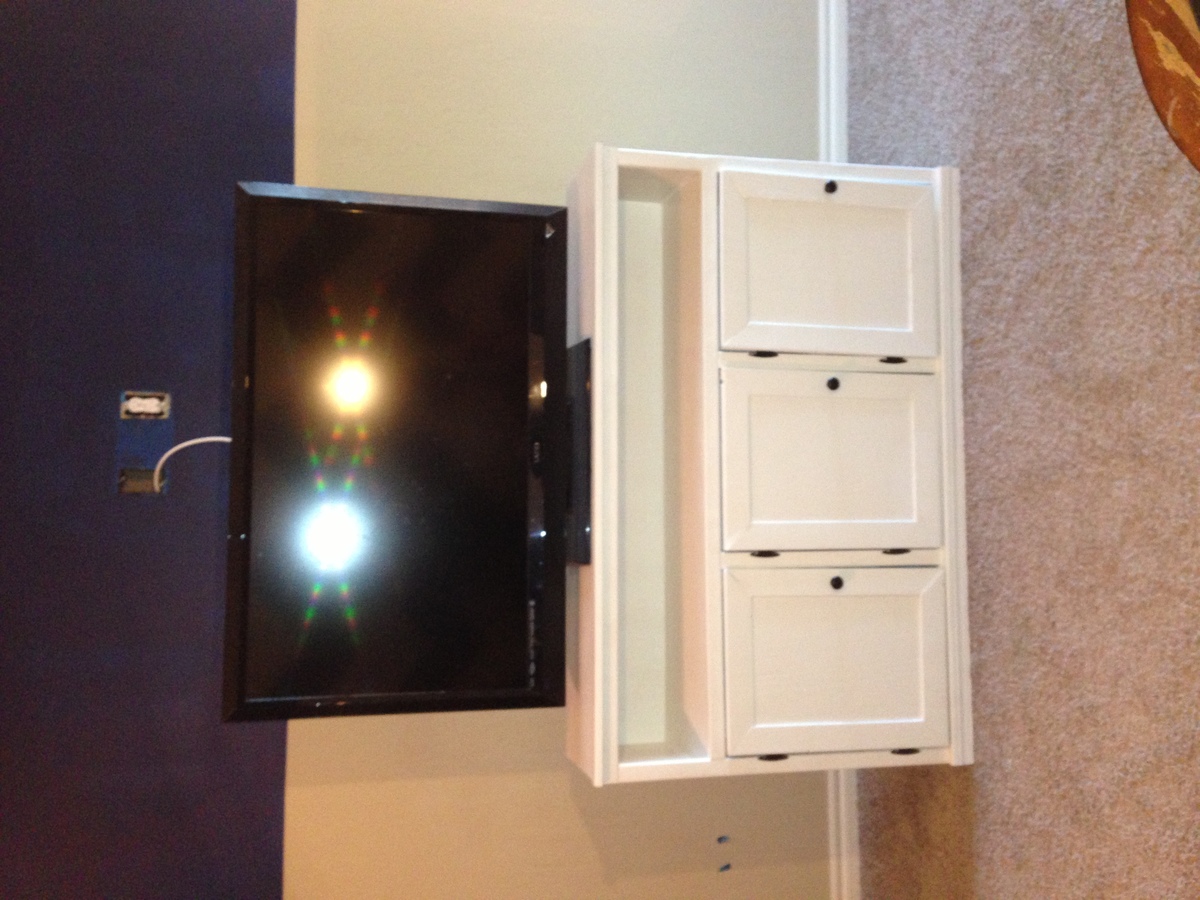
Here is our version of the Rebecca Media Center. We love it!! It provides so much storage and since it's only 11 3/4 inches wide it does not take up a lot of space. Thank you so much Ana for these plans.

Estimated Cost
$400-$500
Estimated Time Investment
Week Long Project (20 Hours or More)
Finish Used
White paint and poly
Recommended Skill Level
Intermediate

My modified Michaela's Kitchen Island

I wanted to build my Wife a kitchen island and we settled on the Michaela's Kitchen Island design. I made it without the bottom shelf and bought a couple of spin top stools from Pier One. 

Ana, thanks for your awesome website that has inspired me to get into wood working. Thanks for sharing your knowledge, experience, and passion with the rest of us.

God bless,
Jody & Glenda Knowles

Built from Plan(s)
Estimated Cost
$100
Estimated Time Investment
Weekend Project (10-20 Hours)
Finish Used
I used Minwax Polyshade "Espresso" for the top. For the bottom I used Modern Master's Crackle Finish along with an ebony latex base, and antique white latex top finish (the crackle medium is used between the top & bottom coat). I also gave the top a couple of extra coats of Minwax Polyshield.
Recommended Skill Level
Intermediate

Comments

The Long Bench

Doug Fir Long Benches for dining room table

Estimated Time Investment
Weekend Project (10-20 Hours)
Recommended Skill Level
Intermediate

Vintage bar stools

Submitted by bunchsc on Wed, 01/30/2013 - 20:31

Really enjoyed building these stools. This is the most difficult project I have attempted yet from your plans. Next, I am going to build a farmhouse headboard / footboard. I really enjoy browsing through all of your wonderful plans.

Estimated Time Investment
Weekend Project (10-20 Hours)
Finish Used
Primed, spray paint brown, apply vaseline to desired distress locations, paint antique white, when dry rub with wet cloth until desired effect, poly.
Recommended Skill Level
Intermediate

Faux Mantle

Submitted by nikkirumm on Sun, 11/30/2014 - 12:04

The joys of military life is constant moving and rarely  having a mantle to hang stockings on. Problem solved with Mimi's Faux Mantle and it'll come with us next time we move. This was my husband's second build that I teamed up with him on. We're both pretty excited about how it turned out. 

Estimated Cost
$100 excluding stain, nails and screws
Estimated Time Investment
Day Project (6-9 Hours)
Finish Used
Mixwax Polyshades in Mission Oak
Recommended Skill Level
Beginner

Comments

JoanneS

Sun, 11/30/2014 - 13:02

Looks Marvelous!  Love the trim, and the finish is awesome.  Great job on this build!

Seasonal And Holiday

Extended cubby bench

Submitted by Anonymous (not verified) on Mon, 03/06/2017 - 15:53

Basically went off the design of the 3 cubby storage bench but extended to about double size. Took me a while to rework all the dimensions but luckily it worked out. I also extended the sides and back up 2 inches to accommodate a cushion (at some point) 

Built from Plan(s)
Estimated Time Investment
Weekend Project (10-20 Hours)
Finish Used
Valspar Whispy white sample from Lowes
Recommended Skill Level
Beginner

Farmhouse Bedside Tables 2 toned

Submitted by lolli020 on Sat, 02/02/2013 - 14:17

This was my husband and I's first building project. The plans were very easy to follow, with exact dimensions and lists of materials needed. We are really pleased with how they turned out and are about to build a matching king size Farmhouse bed to go with the Farmhouse bedside tables.

The pocket hole jig was optional, but it definitely helped make the finished product much more sturdy and professional looking. Since that cost about $100, it raised the total price of the tables, but now we can use that on any project. We highly recommend it!

We built both of these in about 2 weekends.

**Also, the plan we followed was for the bedside table in Ana White's published book of plans. It may differ from the plans that this post links to**

Built from Plan(s)
Estimated Cost
$120
Estimated Time Investment
Day Project (6-9 Hours)
Finish Used
-Dark Walnut Minwax Stain for the tops of the table- 2 thin coats, that soaked into the wood for 15-20 minutes each time before wiping excess off
-Polyacrylic clear gloss on top of the stain- 2 thin coats applied with a paintbrush

-Kilz stainblocking waterbased primer
-Clean White Valspar semi-gloss latex paint- 1 quart- paintbrushed and foam roller

-Teal paint for inside the drawer

-Oil rubbed bronze and teal drawer pulls from Hobby Lobby
Recommended Skill Level
Beginner

Comments

rhettar

Sat, 02/02/2013 - 19:06

This turned out beautiful! I already started cutting the wood for mine and will hopefully get it finished by tomorrow (with the exception of the finish). I just love this nightstand and I now have all new bedroom furniture for under $300. Again, you did a beautiful job!

My wagon

Submitted by motogirl on Wed, 12/03/2014 - 15:47

I burnt the wood with a torch, and then sealed it with polyurethane. I don't have the tools to cut medal lathe, so I used wood. This is a Christmas gift for my nephew.

Estimated Cost
$85
Estimated Time Investment
Afternoon Project (3-6 Hours)
Recommended Skill Level
Beginner

Comments

Chunky Farmhouse Nightstand

Submitted by wacman on Wed, 03/08/2017 - 09:20

A hefty nightstand with deep drawer and open shelf.  Built to match headboard, the legs are 4" x 4" with slightly angled panel boarding around to add lines. Oak slat top with a counter-top style retractable charging port (two plugs, two USB). 27" x 27" top gives more than enough room to decorate as well as place tablet or phone to charge over night.

Estimated Cost
$100 (though a lot was made from drops from another project)
Estimated Time Investment
Weekend Project (10-20 Hours)
Finish Used
Oak top was stained Minwax Espresso and then coated with 3 layers of poly. Base was stained ebony on corners and edges and then painted antique white, then distressed to expose stain and wood. Topped with light brown creme wax.
Recommended Skill Level
Intermediate

Comments

Faux Fireplace

Submitted by jhelton on Tue, 12/29/2020 - 08:19

Decided to try my hand at a faux fireplace for our house to be completed and setup before christmas. Used ana white's faux fireplace with hidden storage plans but made a few tweaks to the size and style. Still have to add the electric fireplace logs and will update photos once it is added.

Estimated Cost
$300
Estimated Time Investment
Weekend Project (10-20 Hours)
Finish Used
Kilz primer, White semi gloss valspar 3000
Recommended Skill Level
Beginner

Hall tree

Submitted by joshabel on Mon, 02/04/2013 - 05:42

This was the first time I have built furniture, and I really enjoyed it. (And my wife loves the results!) I made it about a foot shorter and two inches wider to fit under the window, and I attached it directly to the wall.

Built from Plan(s)
Estimated Cost
$80
Estimated Time Investment
Weekend Project (10-20 Hours)
Finish Used
Sherwin Williams Dover White
Recommended Skill Level
Beginner

Comments

Cottage style end table!

Submitted by ncderemer on Sun, 12/07/2014 - 16:54

This was my first time building a project that had a drawer involved. It took me three attemts to get the drawer right and I ended up building internal wood slides for the drawer to sit on and a couple of stops to keep it from falling out or going too far back. Not having to deal with finicky drawer slides made it much easier for me. I think it looks nice and it really is the perfect height for next to a bed or chair. 

The cuts are very simple but I don't know how I would have done this without a kreg jig. It made putting all the boards together so much easier and kept them tight and strong. 


Built from Plan(s)
Estimated Cost
$20-$35, Mine was around 35 since I bought a nicer pine 2x2 for the legs and a pine 1x3. If I had used the common wood it would have dropped the price at least $10.
Estimated Time Investment
Afternoon Project (3-6 Hours)
Finish Used
Rustoleum primer 1 coat; Coat of Glidden Connecticut Blue (eggshell
Recommended Skill Level
Beginner

Comments

ncderemer

Sat, 12/13/2014 - 18:15

I really appreciate your site Anna! I spend so much time on here plotting :) and looking at all the great stuff other people are coming up with to match their own style. Thank you for all the work you put into this and the amazing plans you create.

Made by Debbie

Submitted by Anonymous (not verified) on Fri, 03/10/2017 - 08:05

Made for my great neohew's birthday. 

Estimated Time Investment
Weekend Project (10-20 Hours)
Recommended Skill Level
Intermediate

Reclaimed Wood Live Edge Nightstand

Submitted by ds0919 on Fri, 01/01/2021 - 15:11

I used the plans for the Nightstand for Modern Farmhouse Bed, but modified them. My nightstand is 30 inches tall and I added an additional drawer. It is made entirely from reclaimed wood and I left the natural edges on the top and the drawer fronts. The woods I used are cedar, oak, heart pine and poplar. This is the first thing I have ever made, so I am pretty pleased with how it turned out. I purchased a nail gun to make it, so I foresee more wood making projects in my future.

Estimated Cost
$30
Estimated Time Investment
Weekend Project (10-20 Hours)
Recommended Skill Level
Beginner

Modified Farm Table

Submitted by Jscully825 on Wed, 02/06/2013 - 11:56

This is my modified version of the farmhouse table. I wanted to be able to sit 6 people at a 6' table, so I decided to go with a different style of legs. It is still very sturdy.

Estimated Cost
$85
Estimated Time Investment
Weekend Project (10-20 Hours)
Finish Used
Several coats of minwax water based stain in Coffee color.
3 coats of water based minwax poly.
Recommended Skill Level
Beginner

Comments

Linda7

Fri, 02/08/2013 - 09:40

Love the leg modification. My brother-in-law likes the farmhouse table look with the exception that he couldn't place chairs at the end, so he fell in love with this table. We may be following your modifications if we build him a table at some point in the future. Excellent job!

Christmas Tree

Submitted by AndyH on Wed, 12/10/2014 - 08:31

Simple Christmas Tree made from 3/4 inch and 1/2 inch square dowels, a bit of scrap 2 by 2 and some scrap 2 by 6.

The dowels were drilled and a metal rod inserted through them all.  Two nuts at top and bottom tightened once the dowels were arranged in place.

Each dowel was cut 0.5 inches shorter than the previous one so it was 1/4 inch sorted on each end.

Each dowel was placed 45 degrees from the one below it.


Pin For Later! 

Christmas Tree


Estimated Cost
$15 for dowels. Base was from scraps left and paint was left over from another project.
Estimated Time Investment
Afternoon Project (3-6 Hours)
Finish Used
White paint.
Recommended Skill Level
Starter Project

Comments

Upgraded room with more storage.

Submitted by Anonymous (not verified) on Tue, 01/05/2021 - 12:02

My son's room still had his nursery colors and decorations. Now that he's in 1st grade, we decided it was time for an upgrade. Decided to make the full storage bed frame to allow for more storage. Turned out great!

Built from Plan(s)
Estimated Cost
$200
Estimated Time Investment
Weekend Project (10-20 Hours)
Finish Used
Black matte spray paint
Recommended Skill Level
Beginner

Bi-Fold Closet Doors

We wanted to replace the vented / painted bi-fold closet doors in our Master Suite with something that was warmer and more consistent with the decorating motif of the house.  We priced out various wood bi-fold doors and were shocked at the $350 - $600 price range of what was available.   We decided that building them ourselves was a much better choice.

The frames are made from 1” Knotty Pine and the panels are from ¼” Knotty Pine.   Frames were made to fit and assembled w/ Kreg screws & Glue.  Rabbet channels were cut w/ the router and the panels were brad nailed & glued.

It was finished w/ the same stain used on our Knotty Pine ceilings / walls and finished w/ a satin varnish for a perfect match to our house.

This was a very straightforward, quick & inexpensive alternative to purchasing expensive bi-fold doors.   

The doors took about 15 hours to build / sand and 10 hours to finish.   Total cost was around $100. 


Estimated Time Investment
Week Long Project (20 Hours or More)
Finish Used
Custom stain and satin varnish.
Recommended Skill Level
Beginner

Comments

Spice Rack

Submitted by Anonymous (not verified) on Mon, 01/11/2021 - 15:48

I made a spice rack for my wife. I asked if I could use it for a Mother's Day gift but she said I could use it for a Valentine's gift. Rabbit joint 1/2" maple plywood into back. Shelf bottoms dadoes into sides. No nails or screws, only glue joints. Sides are 3/8" thick and top is 5/8" thick. Slats are 1/8" fat glued to shelf bottom and sides with 1/8" shadow reveal line on three sides.

Built from Plan(s)
Estimated Cost
scrap wood from the shop
Estimated Time Investment
Weekend Project (10-20 Hours)
Finish Used
McCloskey Marine Spar Varnish
Recommended Skill Level
Intermediate

Comments