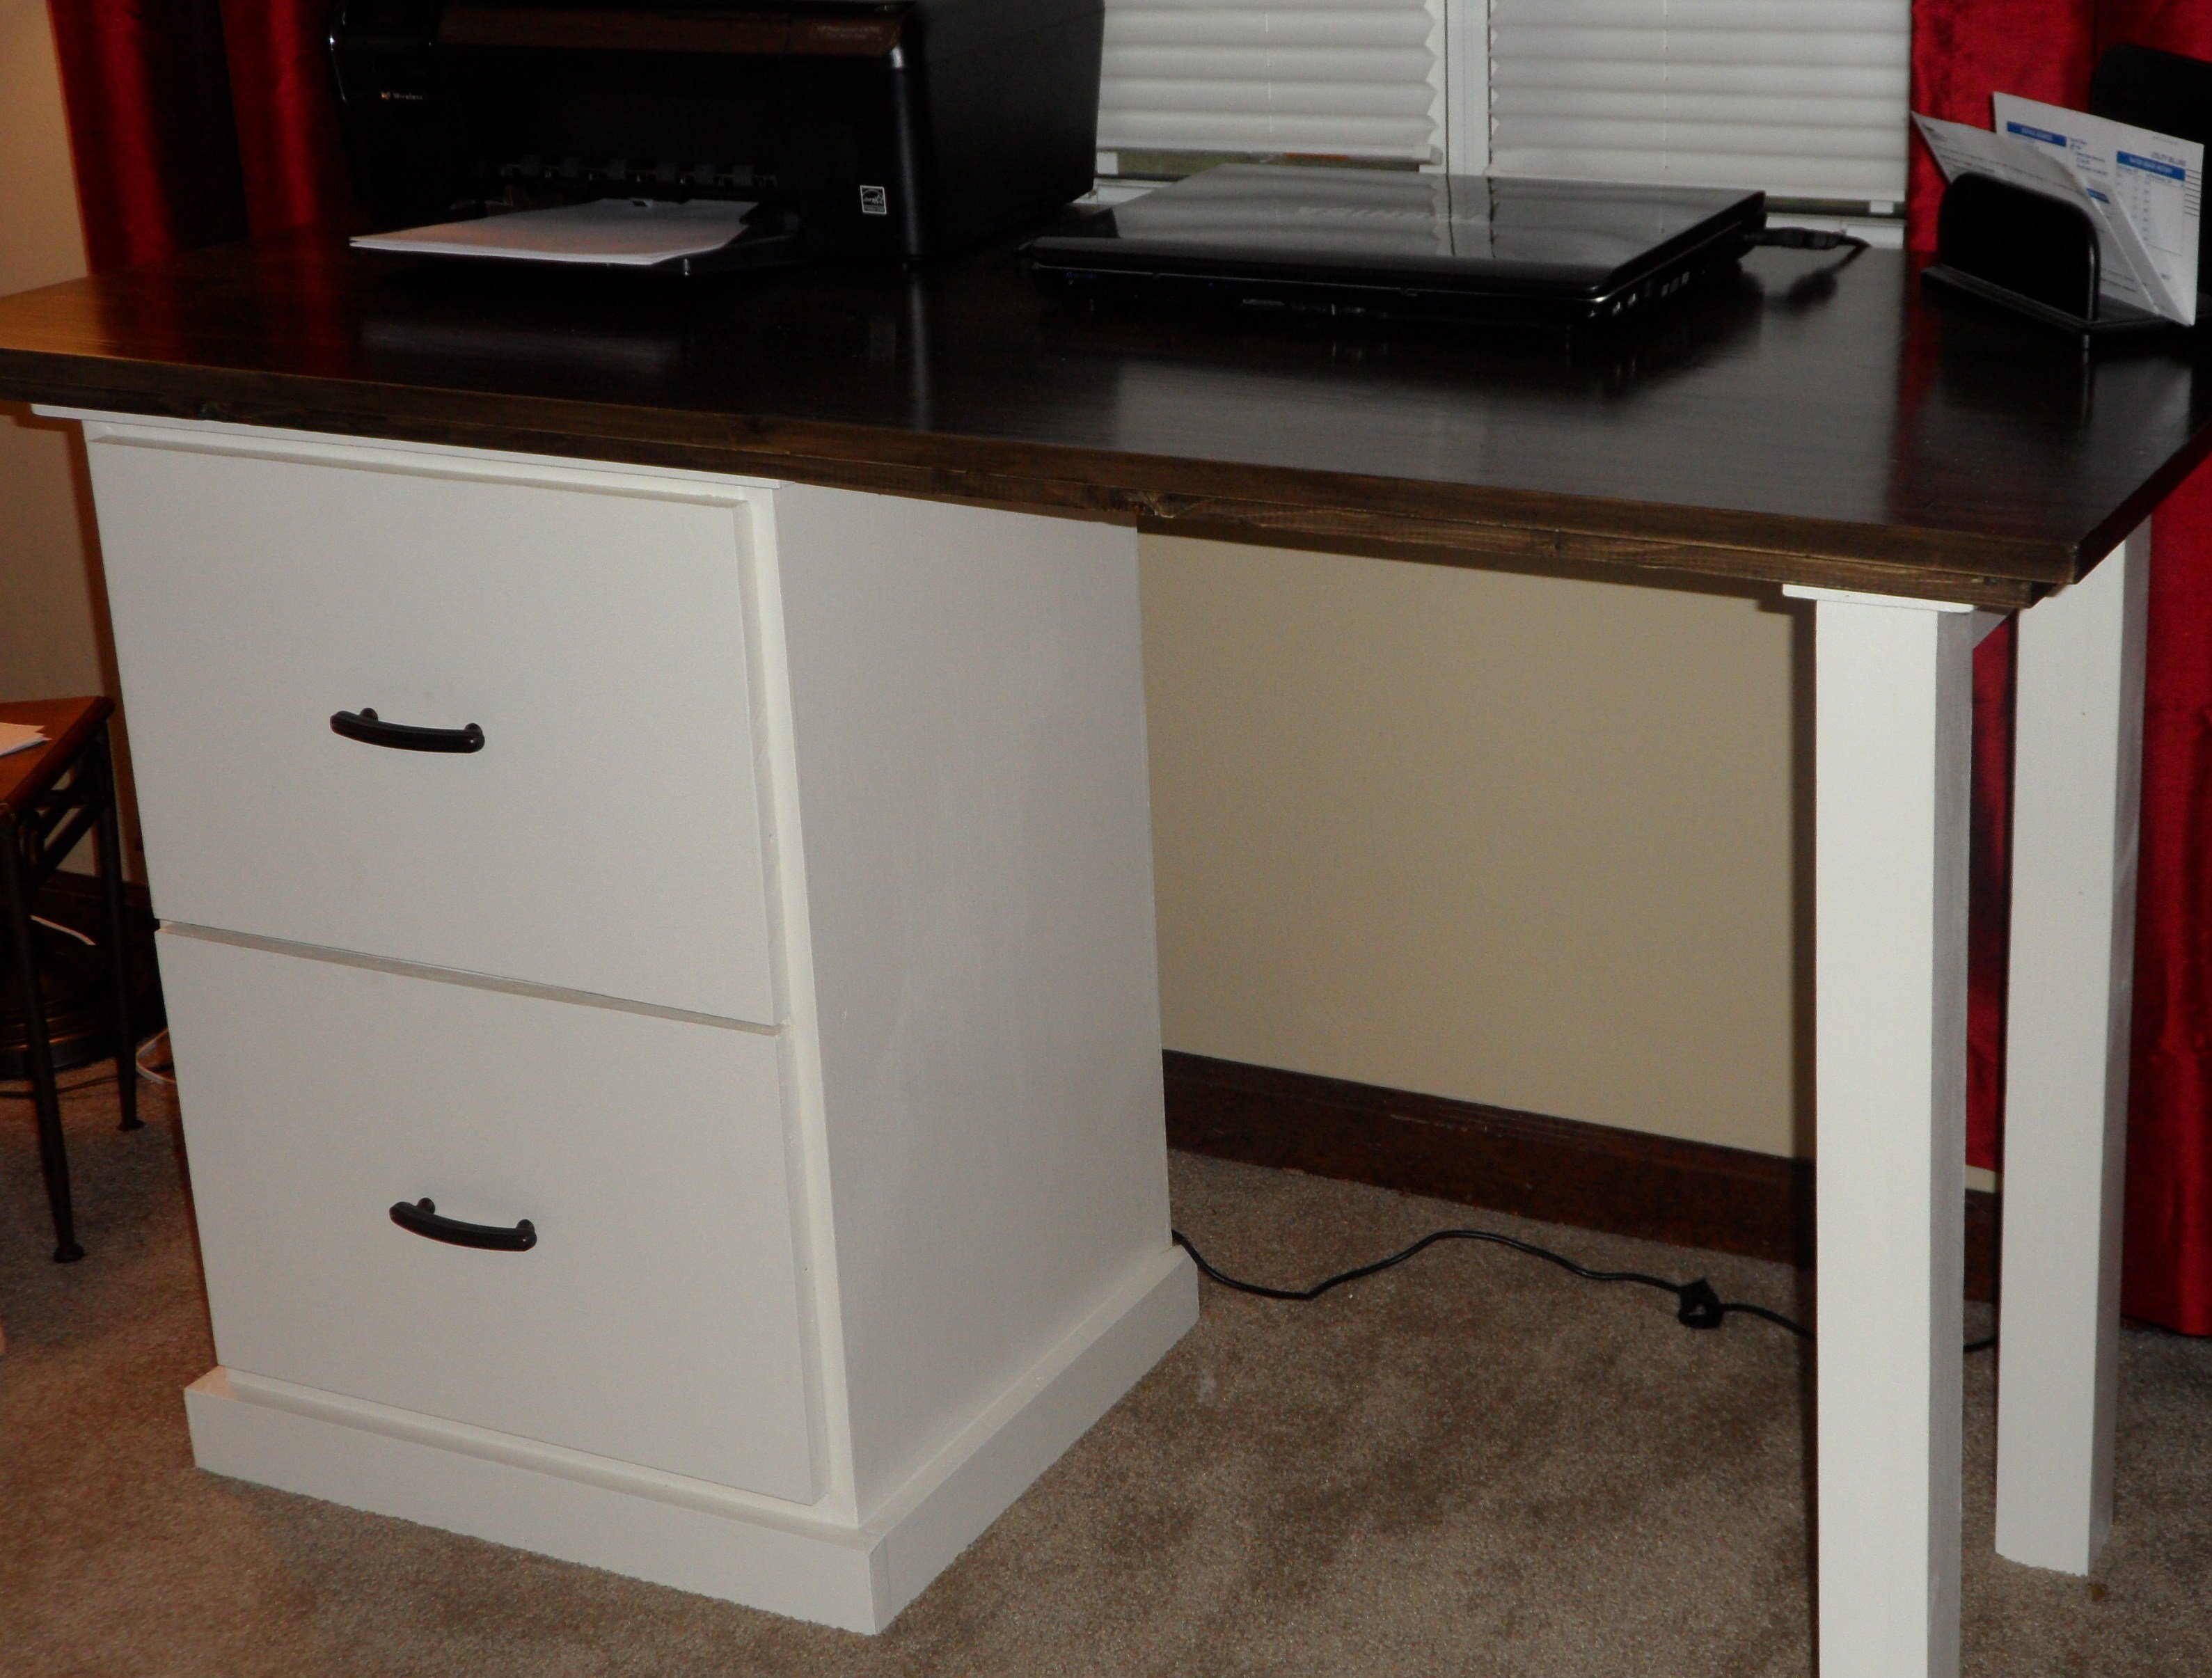
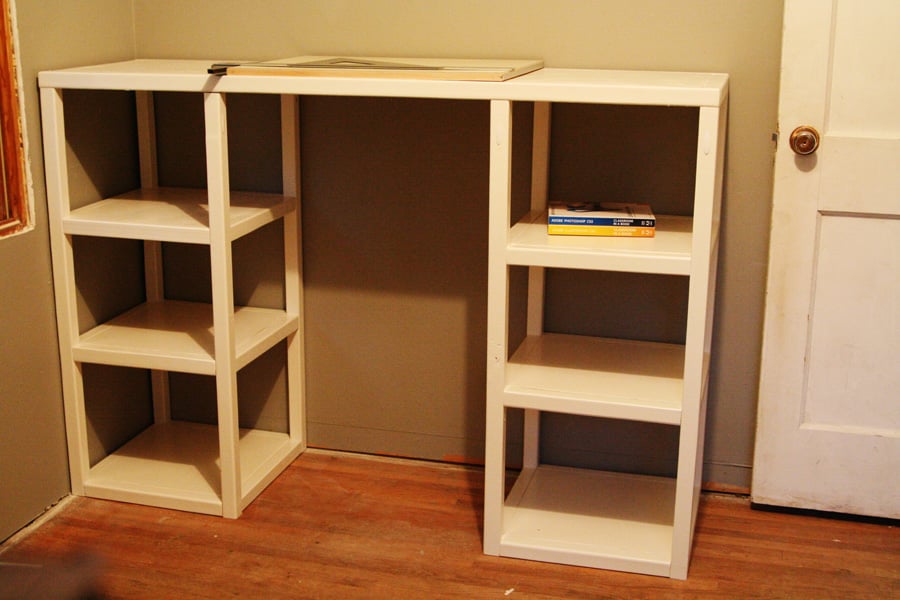
DIY farmhouse table
A farmhouse table I built based on one of your inspiration projects! All by hand and chiseled myself 😍
Using this plan I built my lounger with some changes, mainly adding lawn mower wheels to one end. The cushions I made have a mesh bottom to let the cushions dry faster, and zippers so they can be removed and machine washed. More details on what I used and many more photos on my blog.
Tue, 09/20/2011 - 12:49
I love the idea of the mesh! It would work as a great bench when you need more seating too. I think it'd be nice with huge wooden wheels also.
I made this bench for a friend who had a very specific space that needed a bench. I had to make it so that there was about 30 inches of length on top but with enough room on the inside of the cubbies for 10-11 inch baskets but also had to make it so there wasn't enough space for a dog to get its head into the baskets when they were put into the cubbies. So it took some thinking with the math, but ultimately, I think they turned out great and the 10 inch baskets she bought work perfectly. I made the legs with 1x3s instead of 1x2s for extra support (and that's also what I had in my scrap pile). I left it unstained because my friend is going to do that part. This took about 3 hours to plan and build. I used the kreg jig to hide pocket holes to attach the legs to the top and bottom and also to attach the inside divider to the top of the bench (I used nails to attach the inside divider to the bottom).
Used 2x4s for the top instead of 2x6s. All the shelves are 1x2s. My first attempt at a door and drawer - it kicked my a**!
Top stain: Minwax Golden Pecan
Then Minwax Polycrylic 3 coats
Adjusted the dimensions to make it smaller. I used scrap plywood and mdf for the base. I used oak for the top. I routed the top instead of using edge trim. I added a USB charging outlet on the table top that plugs into an outlet.
I built this tall farm table for his new home. They love it and now need to get more furniture which I will over time build for him. Therefore, more to come.... I love your plans and keep them coming.
My DH and I built this using the side tower plan. It was about $50 in materials, including the birch 1/4" plywood we used for the back. We made it 48" tall and 24" wide. I finished it with a charcoal grey water based Minwax stain, and then sanded that out to bring out the wood grain more. I topped it with two coats of wipe on poly, also by Minwax. It was not too hard to build and was pretty fun actually. I am just glad that it actually looks like a piece of furniture and not some boards screwed together. I kind of want to do one with red stain now to make it look like barnwood, hmmm...
This is my latest project and my first project post on my new blog. I've included some step-by-step photos on my blog. I'm using this kitchen island as a craft cart in my craft room. This project was so fun and easy to put together. I love how it turned out!
Wed, 10/02/2013 - 06:52
We have a small house and my craft closet shares space with well other household stuff. :( My sewing table is the computer table when my self employed husband doesn't need to work. Your work has give me a great idea for a roll away craft table. Something like this could really work for me. Thanks for posting it, and good work!
Thu, 10/31/2013 - 19:10
I'm in the middle of making one of these also. I had to shorten by 4" so it will fit where I need it to go. I love the color you used. I might need to try that with a dark stained top.
I made these two tables for a coworker who lost her home in the Valley Fire in California in 2015. She only had owned her home for 71 days and she lost everything. So, I thought I could make her some furniture as a very small token. They took me just half a day to build. I love this hobby.
Tue, 12/22/2015 - 05:57
Your co worker is very lucky to have a friend that will go above and beyond to help them. You do beautiful work.
Wed, 12/23/2015 - 05:34
I agree with the above comment. These are beautifully made, and a very thoughtful gift for your friend.
All pine stock from Home Depot. I had to mill some ofvthec2 x 6s to get straight edges for the top. Dark walnut stain. 3 coats varathane. Came out great! Thanks for the plans Ana!
I modified the plans for the farmhouse hall tree to build this for our entryway. The farmhouse hall tree was a perfect base plan for this project! We went from a mess of jammed in jackets and piles of shoes to a clean and organized entrance! Thank you so much for providing the original plans! We love this!
This is absolutely the first thing that I've built and I have the bug now. Having been recently laid off, this project peaked my interest from a creative and financial standpoint. Handmade gifts are the best and I've long been a paper-crafter. This was a birthday present for my daughter that would be something that she would love and that her friends wouldn't have. The challenge was impossible to resist. Aside from not mastering wood filler as well as I would have liked, I could not be happier with the way it turned out. Ana's plan was super!
This was such an awesome plan for us. We have two phones, two kindles, a tablet, a laptop, lamp dimmers and heated mattress pad controls. Needless to say the wires got a little out of control. The plans were super quick and easy, and it was no hassle to make two of them. I used the same stain combo Ana used on her's but I finished with Miniwax Polycrylic for extra protection against wet water glasses, early morning coffee spills and dog slobber. I love the rustic earthy tone the stains make. Dresser set soon to come! P.S. the center pieces on the doors are left over oak scraps I had in 1/2" thick. Thus, they stained a bit more red than the pine boards. I was worried about the contrast but I really like the way it turned out.
Thu, 10/03/2013 - 19:38
I know right, that was really disappointing when i tried to find more of the latches for the dressers. Boo.
Tue, 10/22/2013 - 09:33
I'm in the process of making two of them right now. I can't wait to get them done. Your's looks great.
I just loved this shelf that I made 10 of them for family for Christmas! We made the original size but decided to size it down by a third. :)
Wed, 11/16/2016 - 12:57
Those are wonderful!!! What a great gift idea!
I decided to build my potting bench out of all cedar. I added some extra reinforcements, especially under the table top and shelf, since cedar isn't the strongest wood around. But I love the look!
I liked Sausha's original design of the washer and dryer pedestals, but I wanted to add a few little personalized touches to it.
First, rather than using MDF, I went with plywood because of cost and weight. Also, I chose not to fill in the imperfections of the surface of the plywood. The top piece will be covered by the washer and dryer, and the bottom piece will be covered by baskets, etc. I like the look of the imperfections, as well.
Lastly, I spent an extra $10 on some additional cap molding for the base and the top, just to give it a more finished look. My wife chose white over black to fit the room better.
This was my first project and I am excited to build more!
Thanks for the plans they were easy to follow. Complete the pair over two weeks, working on them a few hours at a time. I routed the tops at the wood shop on base for a small fee.
Built this from the exact plans given. Very easy to build and learned a lot. Built whenever I had time after work
Your outhouse design was modified for a snowmobile club project as the building needs to be towed across a lake to a site next to a warming shelter. An LED light with a timer switch and solar battery charger were installed to provide light in a remote area of Lake of the Woods.
A steel hitch and skids with hyfax were added to the design.
Thank you for providing a design that allowed us to make modifications for winter outdoor recreation accommodations.
Comments
Ana White Admin
Thu, 12/29/2022 - 11:13
Gorgeous dining table!
Thank you for sharing, such a beautiful handmade piece!