Community Brag Posts

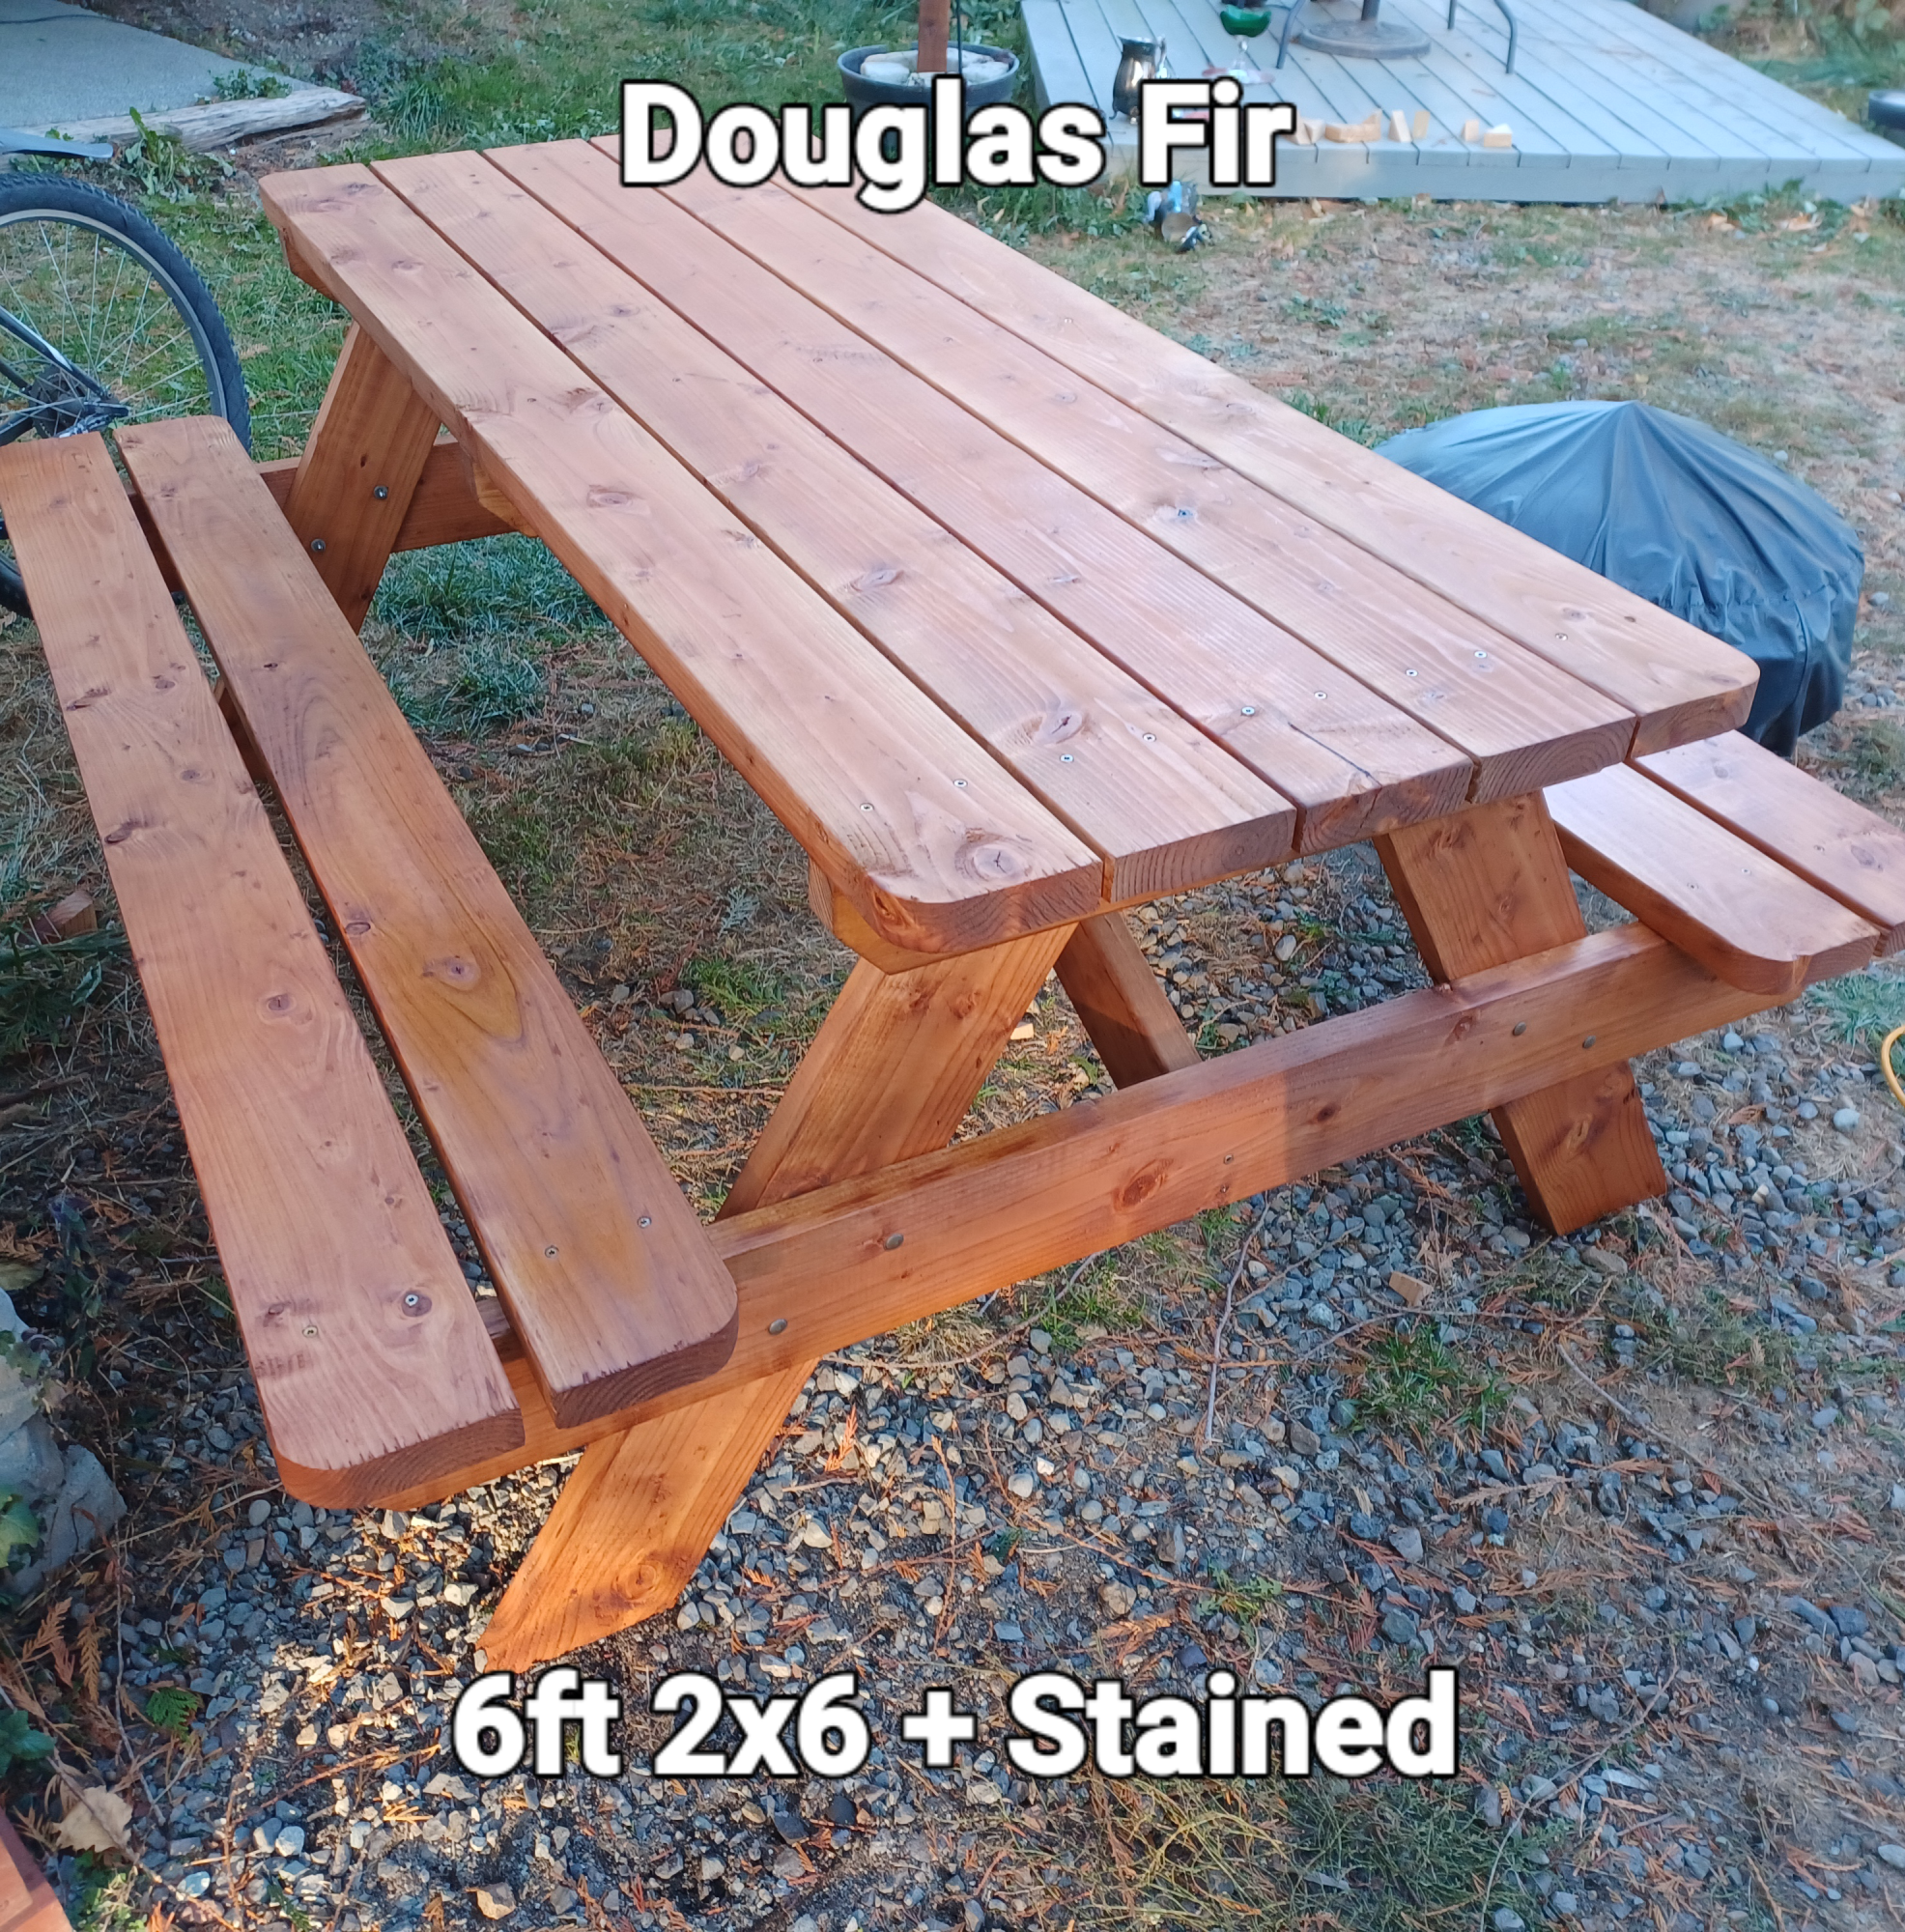
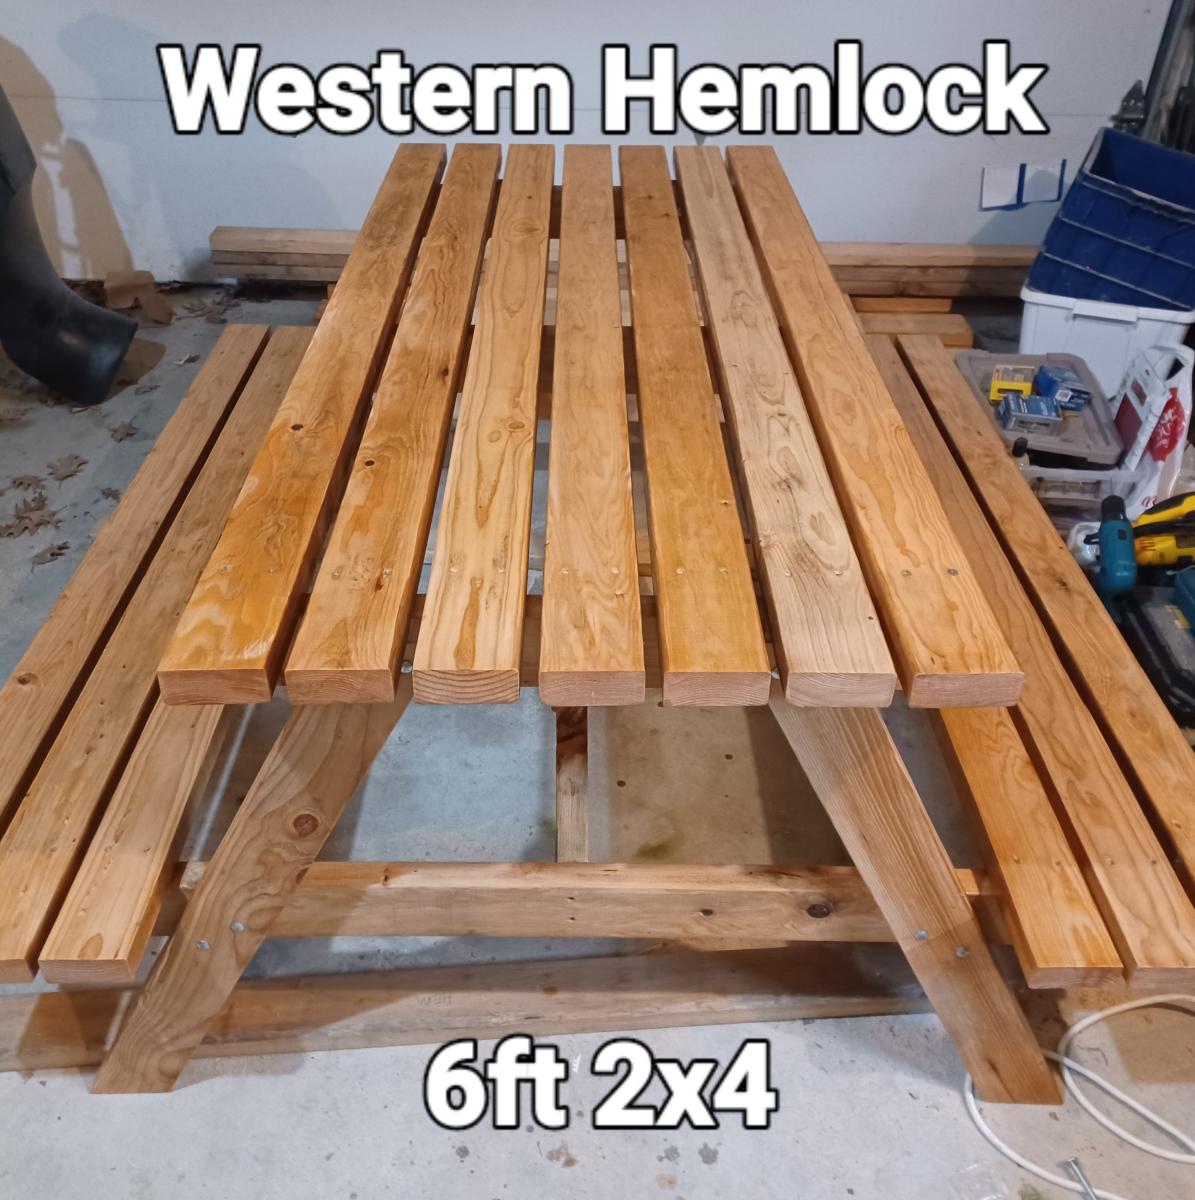
Picnic Tables

Submitted by Anonymous (not verified) on Fri, 03/22/2024 - 07:53

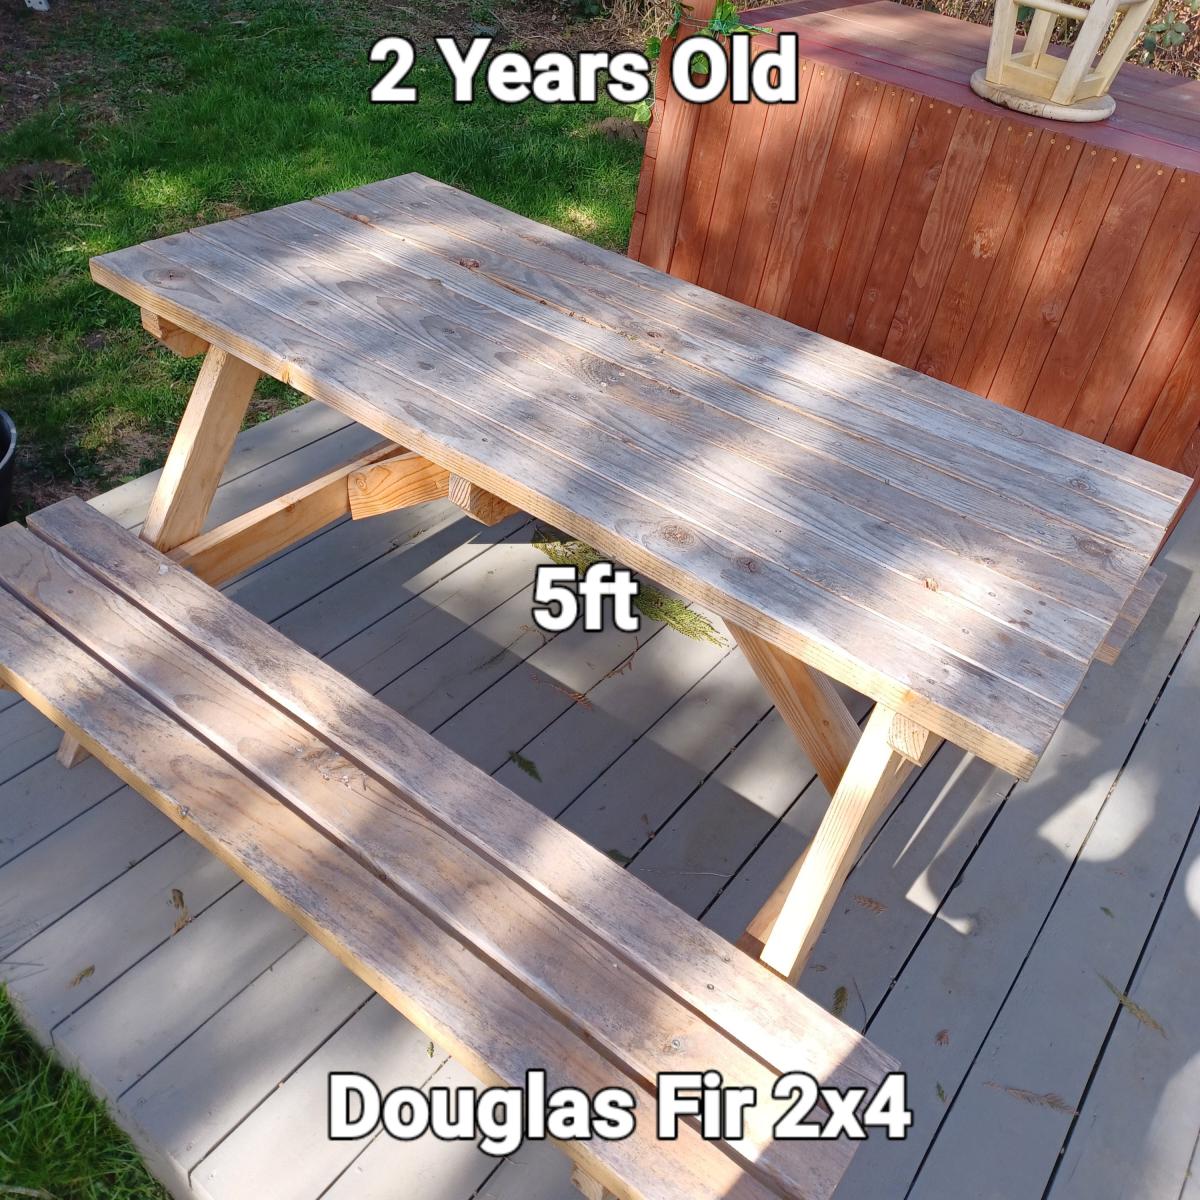
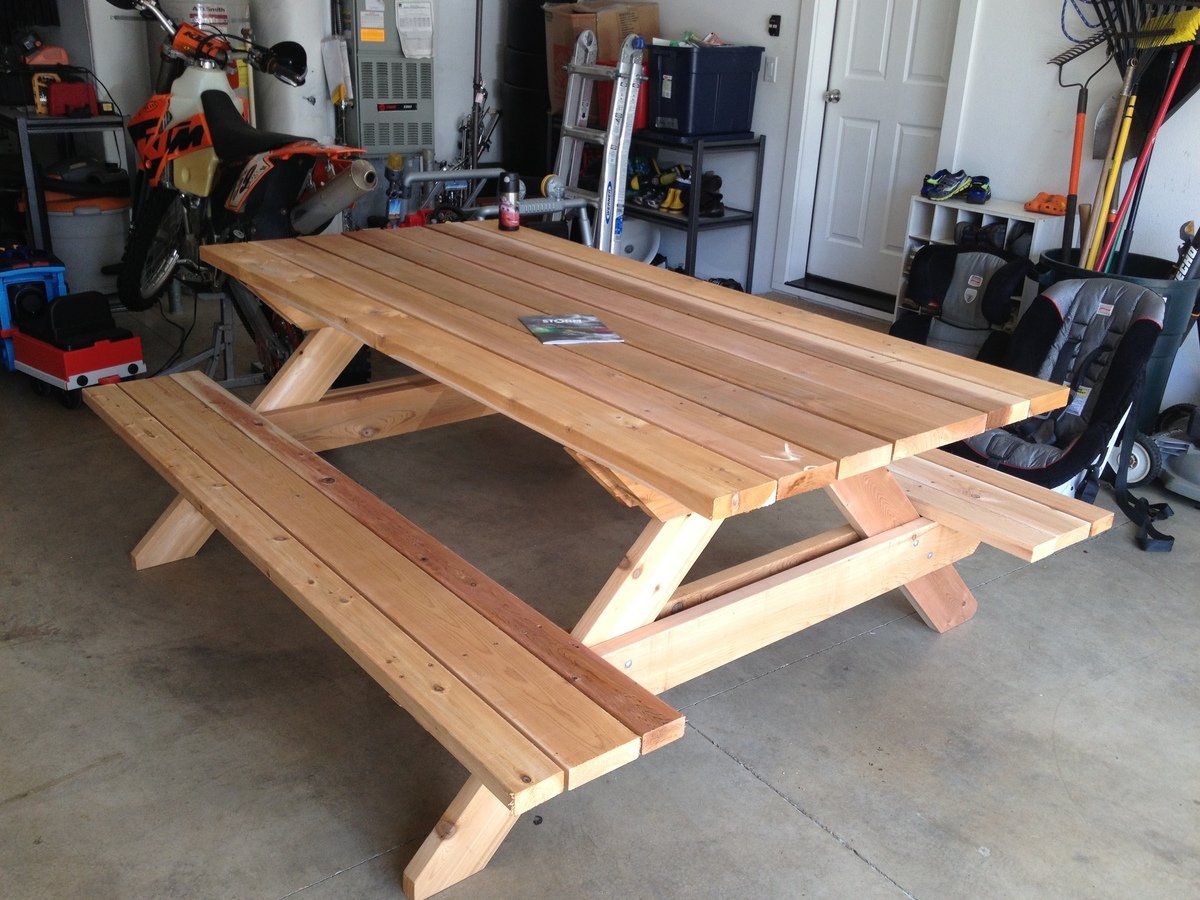
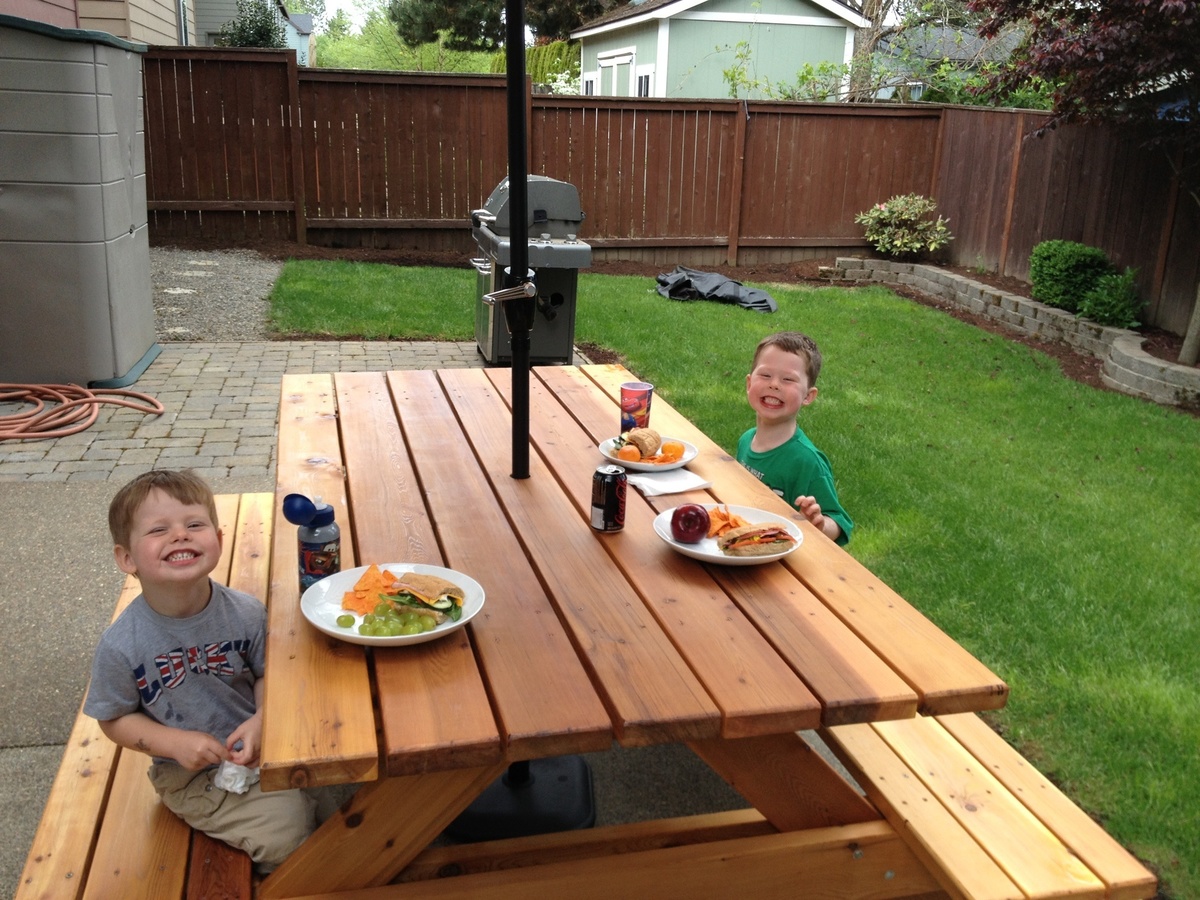
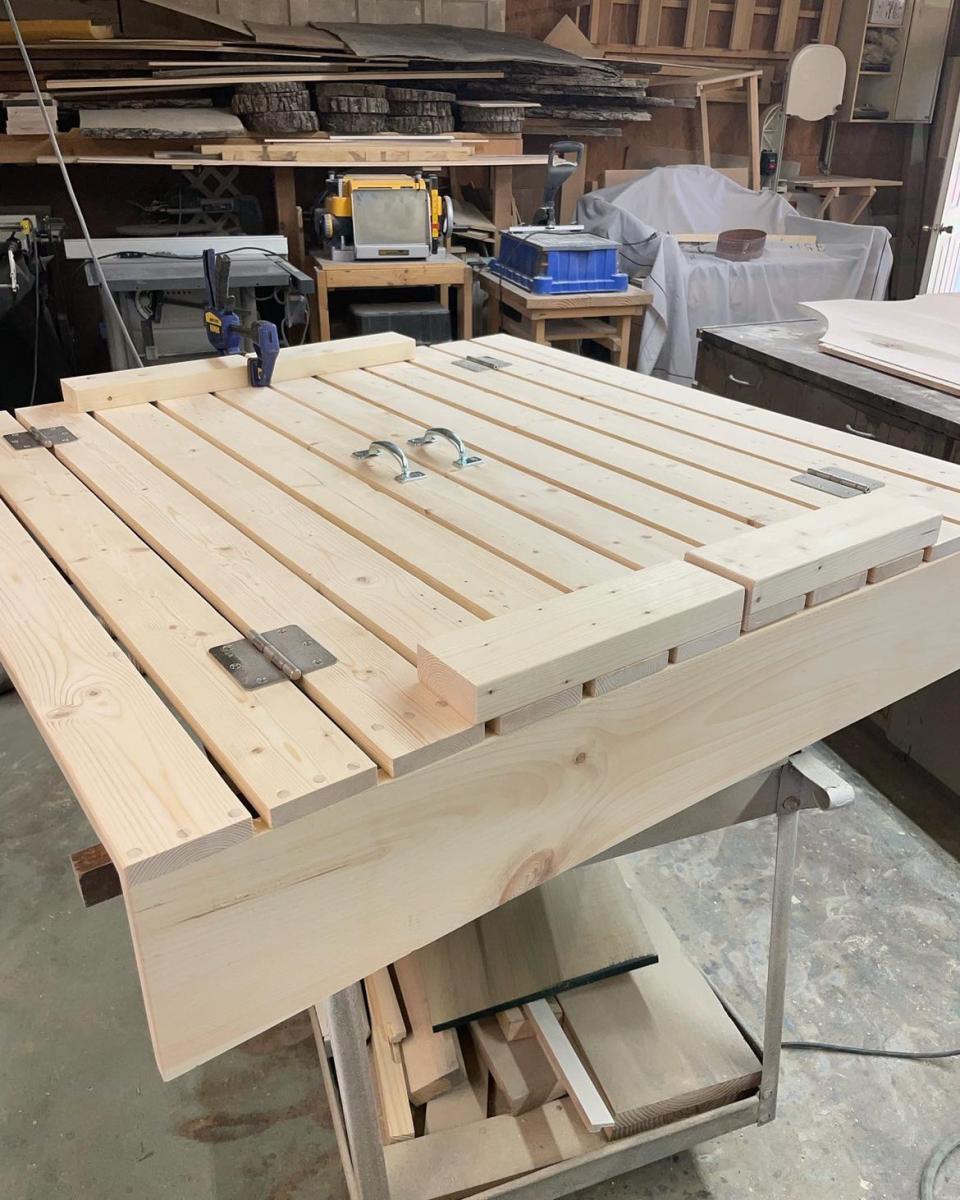
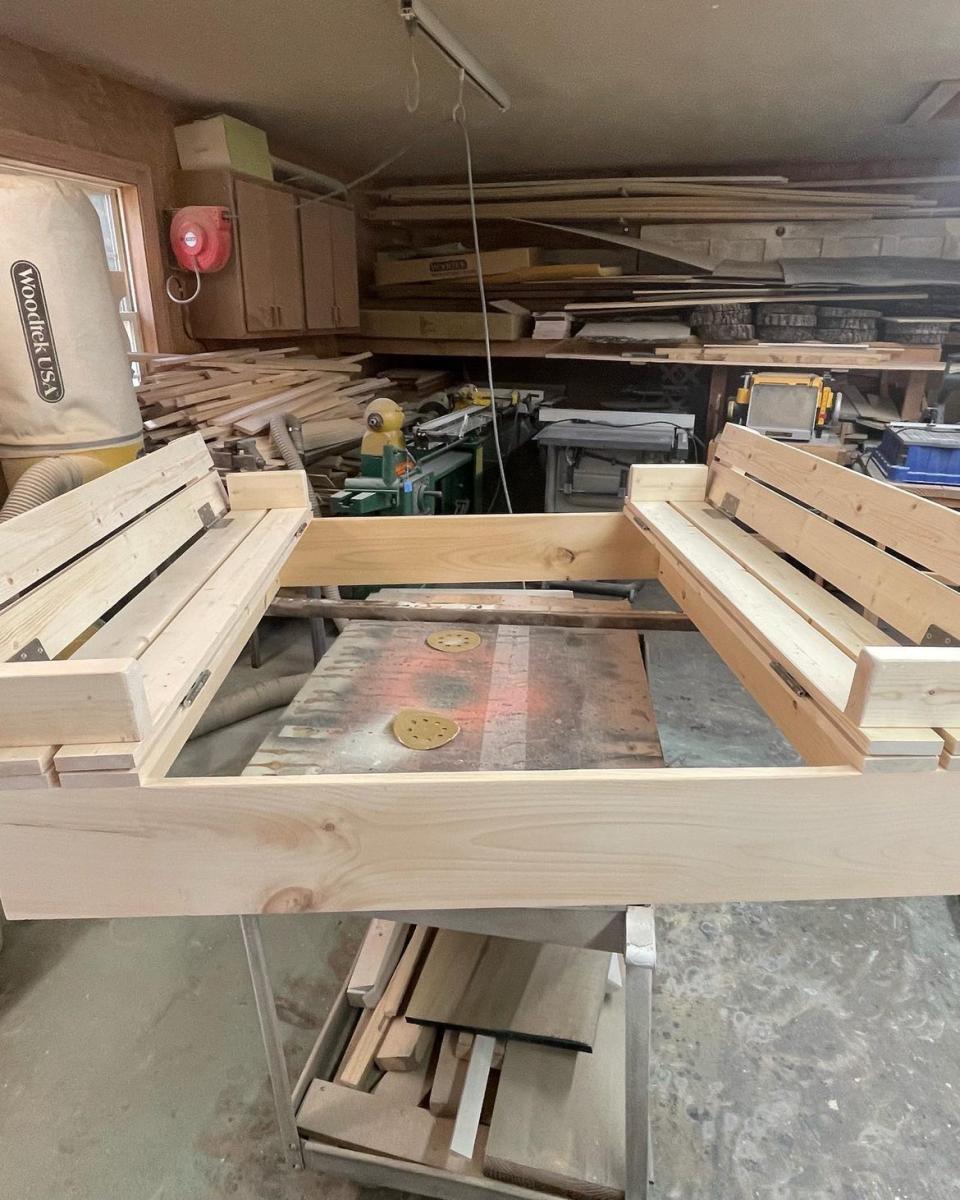
Using some of your different picnic table plans, I have been building, casually, picnic tables that are made using handpicked wood of similar grain orientation, same species, etc, creating a unique piece every time. I'm turning into a real wood nerd! They are all sanded and sealed for greater weather resistance and to accentuate the natural look of the wood.

Sam Warburton Productions

Cedar sectional

Submitted by rhn0489 on Mon, 07/06/2020 - 11:39

My sister needed new outdoor furniture for her deck and liked the look of the sectional. I used cedar with a clear varnish to creat this piece for her that was perfectly sized for her deck. The challenge to this one was getting it to her house about 3 hours from mine. Fully assembled it would have been tight getting it in my truck. I ended up cutting all of the boards and drilling all of the pocket holes in my shop and then assembling at her house. I have added backs to some of the pieces I have made fro others that want the extr support. I add a 1x4 laying flat across the back of the seat. The slats going up and down then have a slight angle to them which adds comfort and support. I attached the pieces to the 1x4 and the upper back rest piece in the plans.

Estimated Cost
$340 including lumber and hardware
Estimated Time Investment
Weekend Project (10-20 Hours)
Recommended Skill Level
Intermediate
Seasonal And Holiday

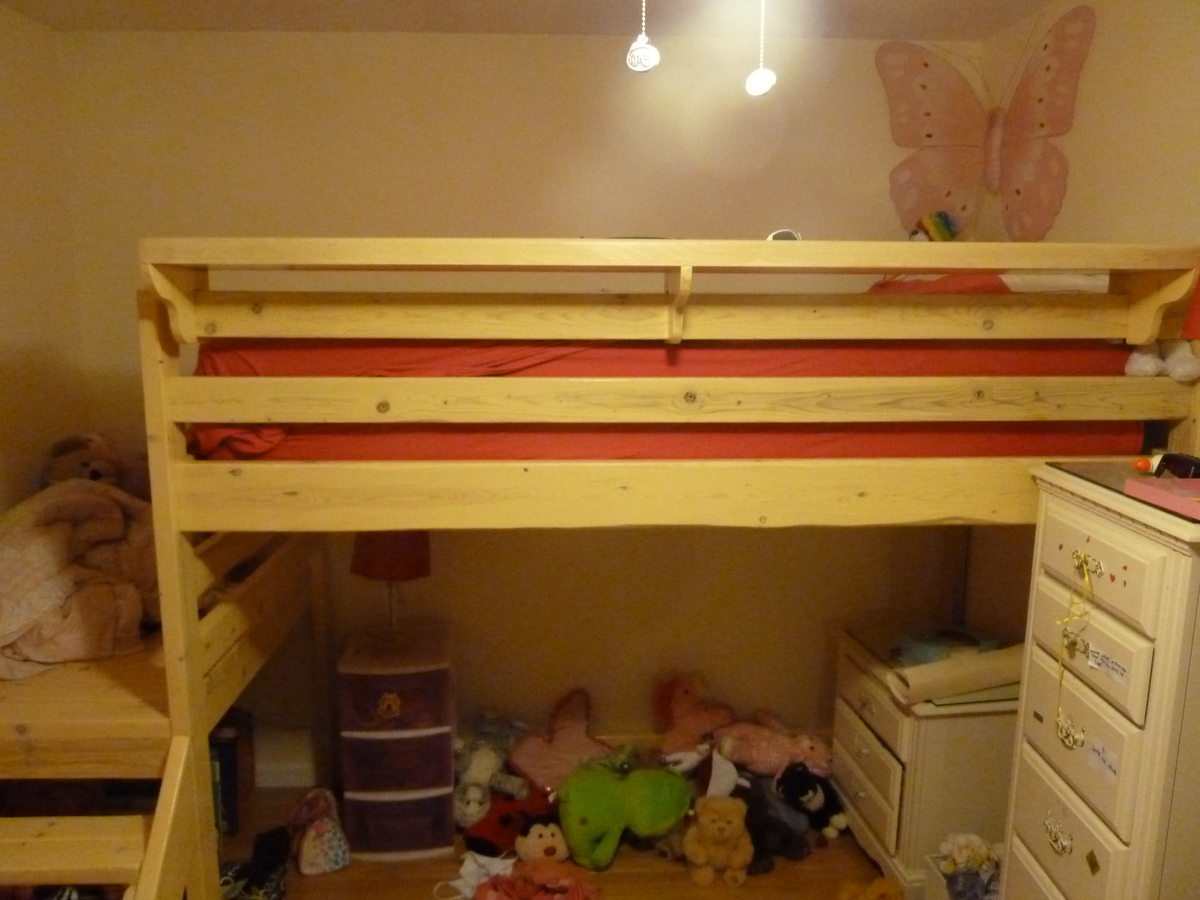
Camp Loft Bed with Added Book Shelf and Curtain.

Submitted by rparker on Wed, 09/12/2012 - 12:40

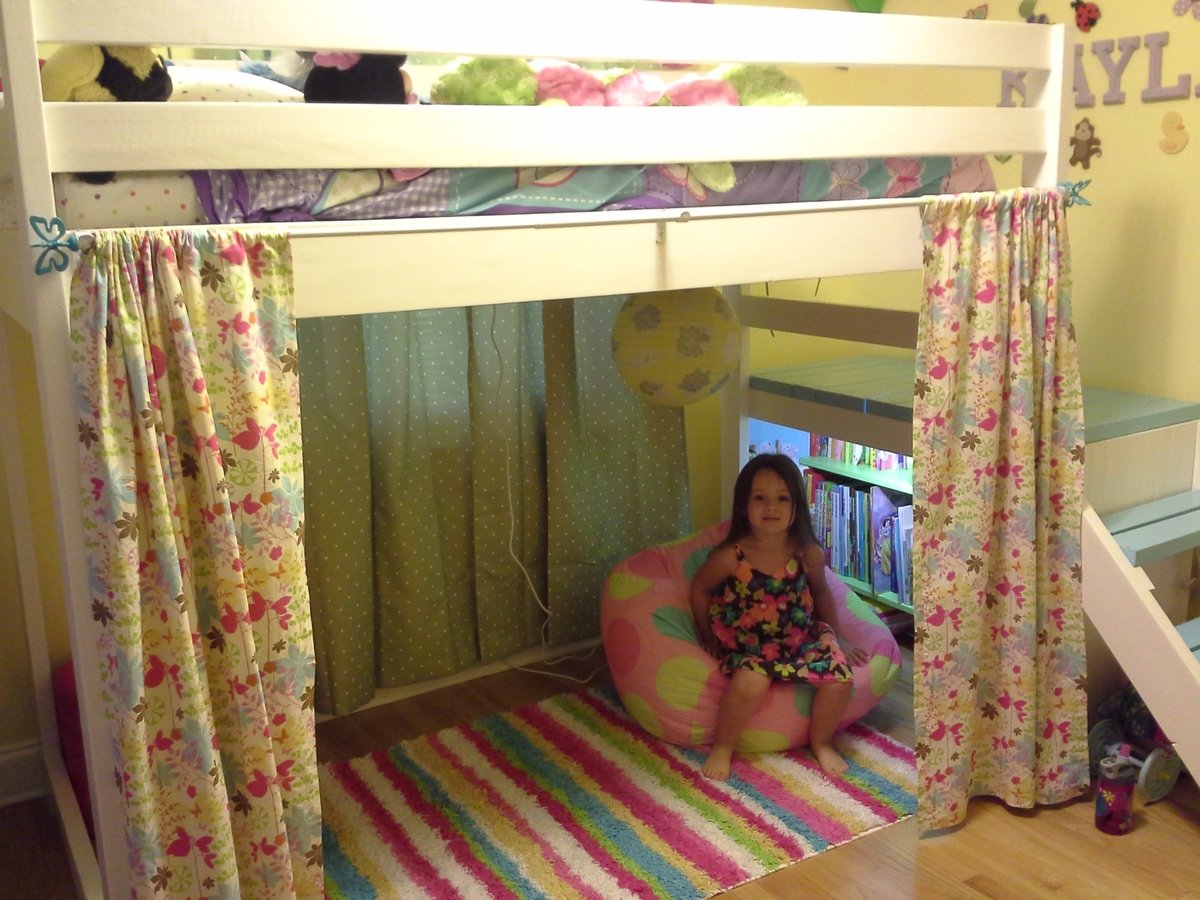
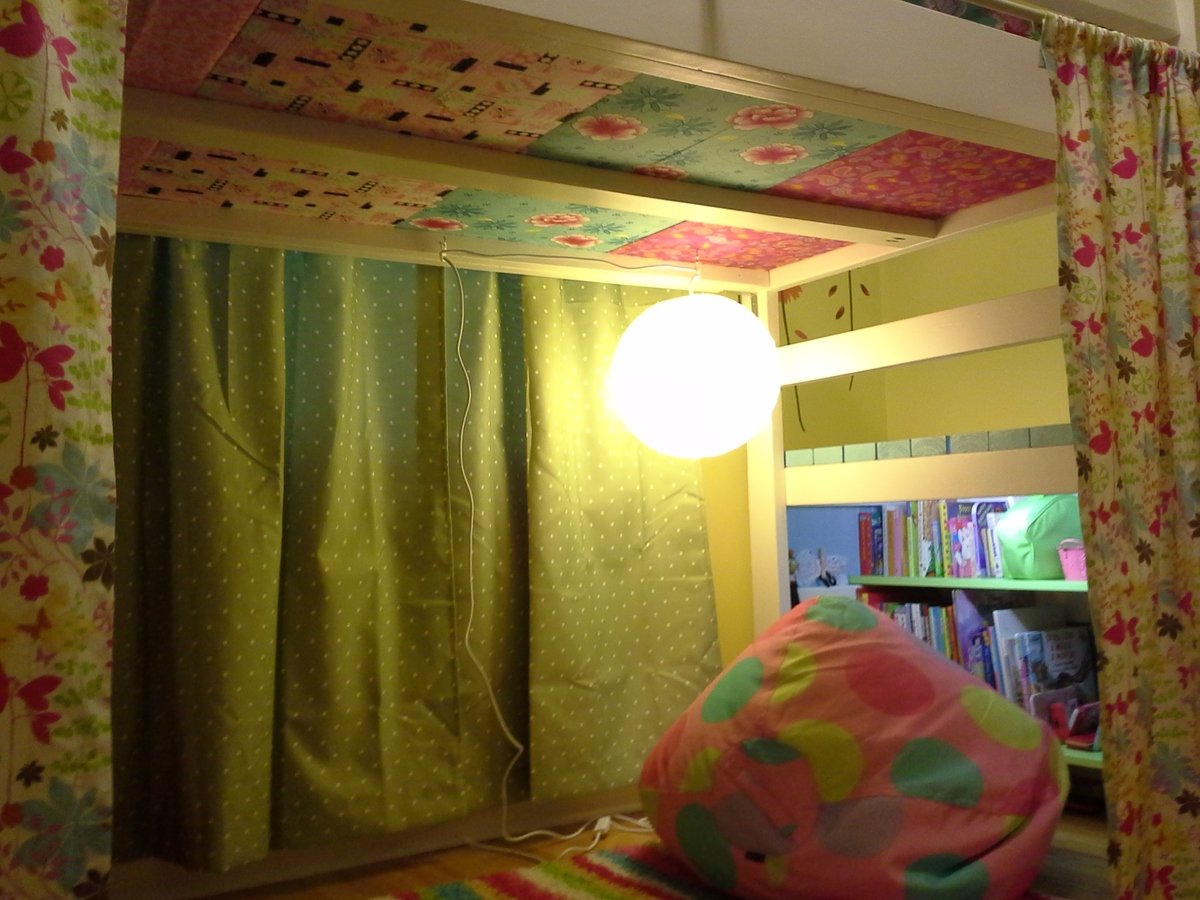
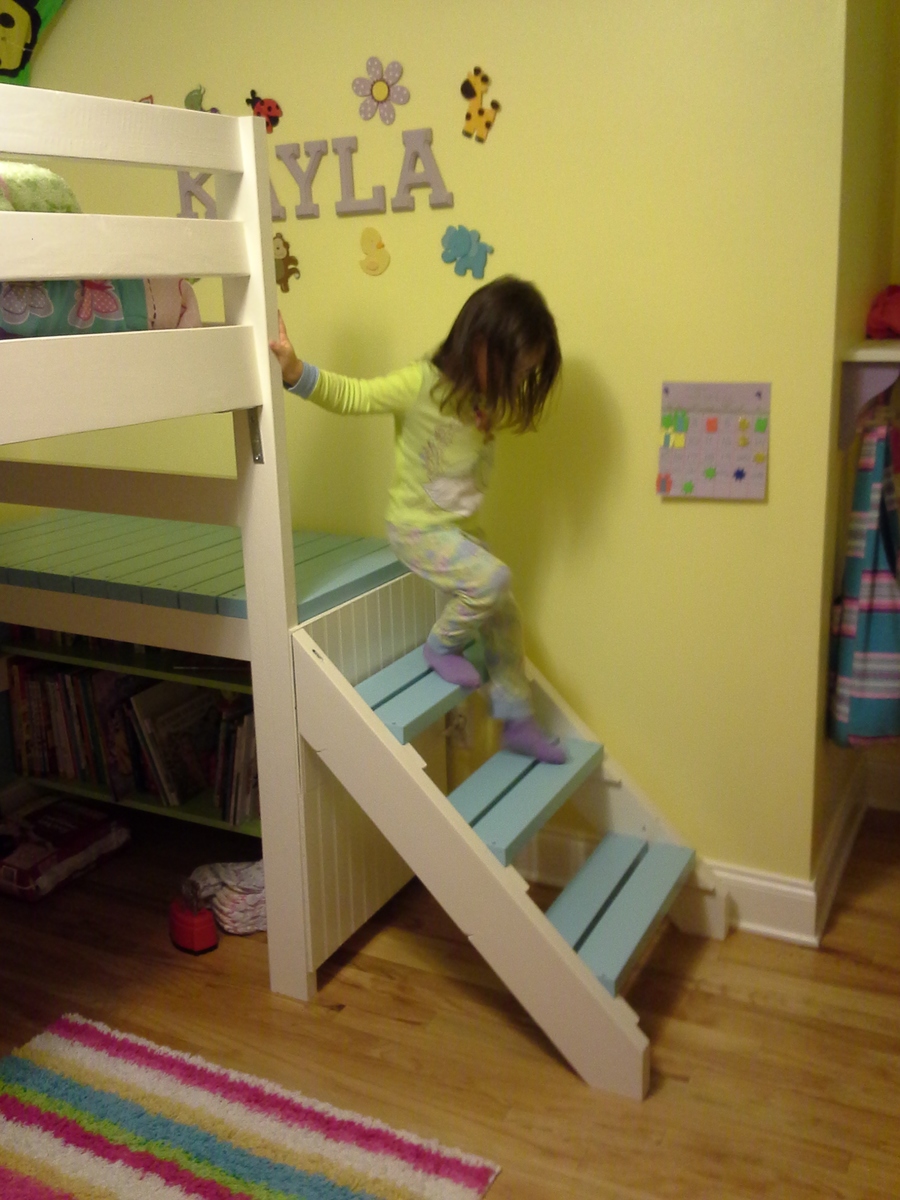
My daughter is 3 and though her room isn't terribly small, I thought this project would be awesome all the same. I wanted to do the doll house bed, but I figured this bed would grow with her more and I liked the platform at the end so I just added a curtain and called it good.

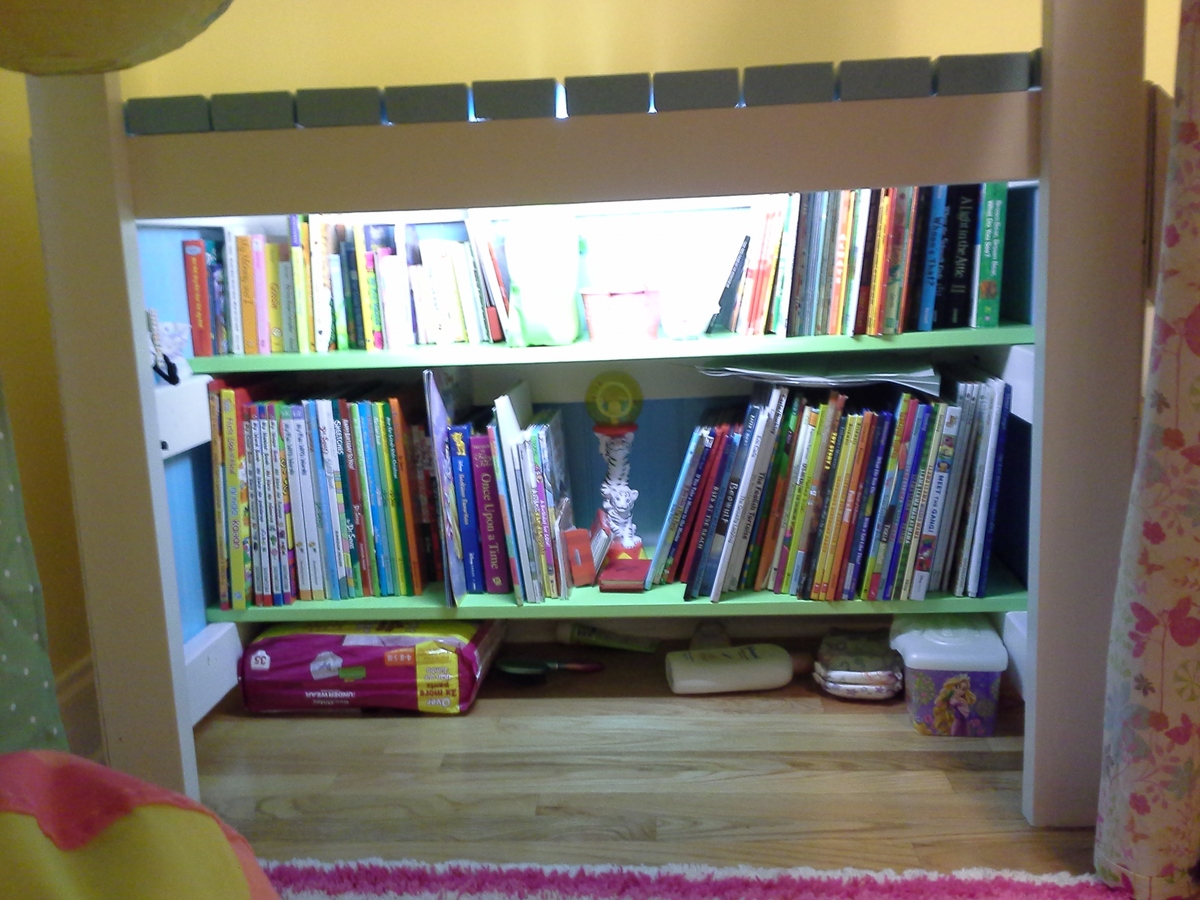
The book shelf is by and large my favorite part of the project. I just added some more 2x4's, a sheet of 1x10 and some left over bead board paneling that I had and used left over paint from her play kitchen that I had previously repurposed from an old entertainment stand. I added an inexpensive, small fluorescent light to the book shelf, out of sight, and found this great, inexpensive paper lantern.

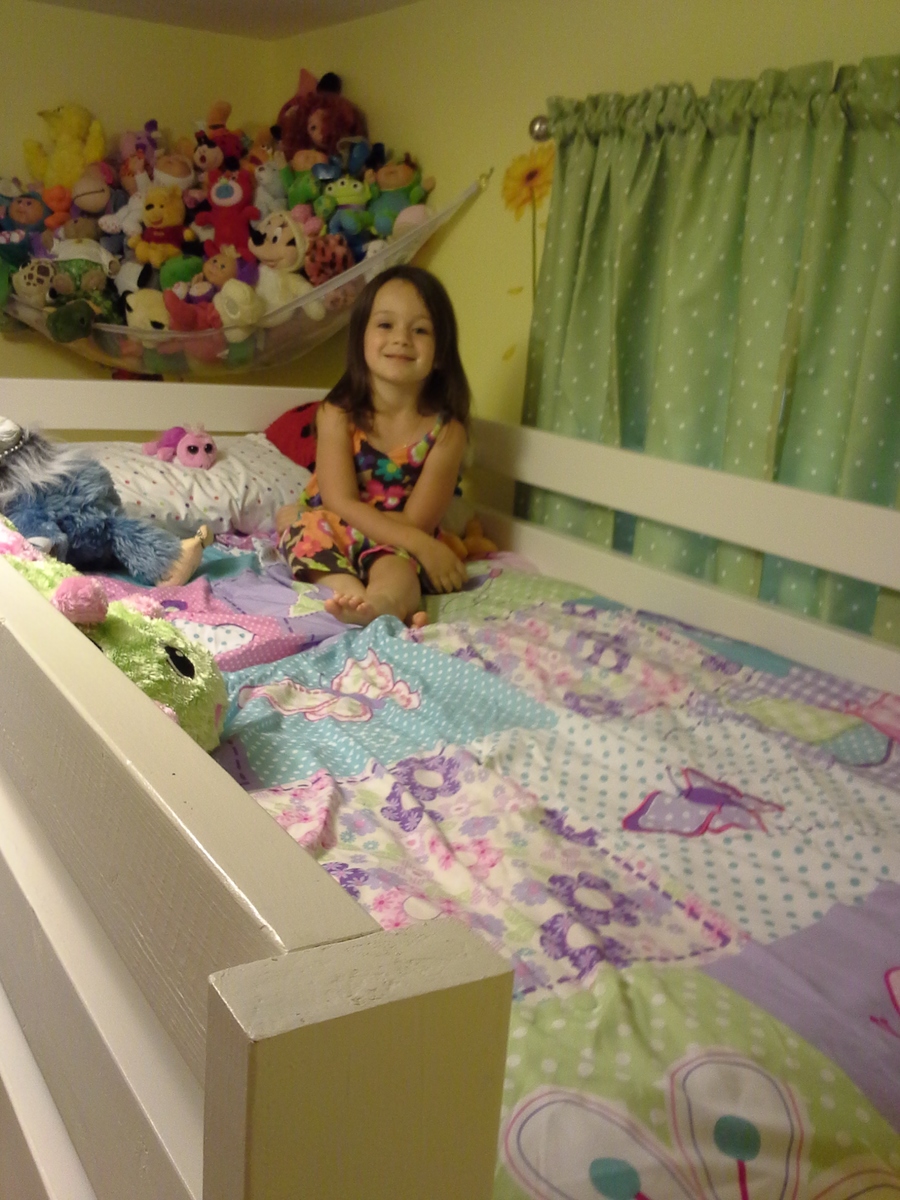
I also added a support beam down the middle of the mattress area and used some 1 in MDF board that I had from another bed and wrapped it in fabric (which ended up being a little pricey, but she loves her ceiling)

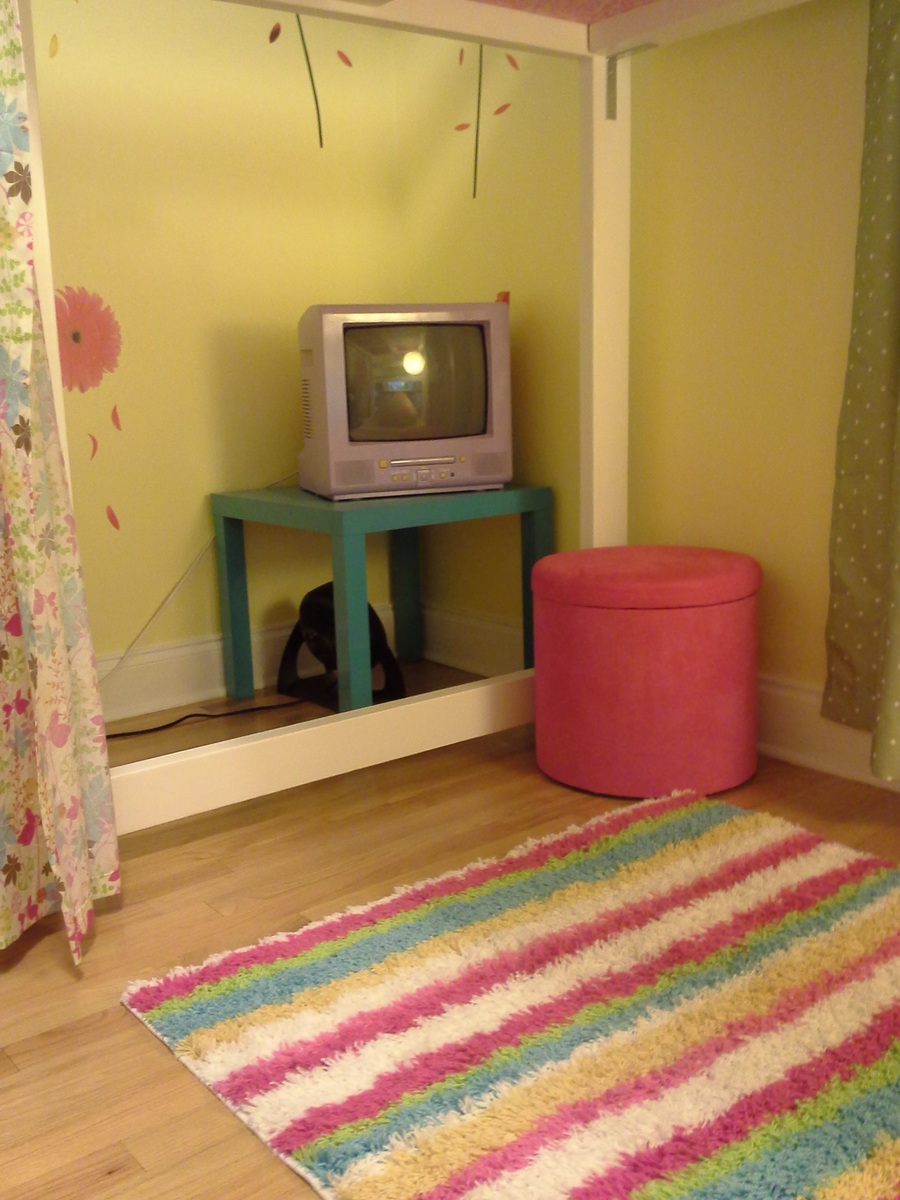
Because she is so young, I pushed the bottom of the bed against the wall instead of building a railing off the platform because I was afraid she would fall as she still gets up in the middle of the night. This worked out because the space that was left at the head of the board fit her TV stand and laundry basket without leaving a foot print on the actual area under her bed. With the curtain up (and almost always closed, as insisted on by the primary tenant) it really is like a clubhouse under there. I can't even begin to go into the hours she spends under there with her books; who doesn't love that?!

This was my first "from scratch" projects and I learned a few things. 1. Don't strip screws inside of pocket holes. 2. Sand more than you think you need to, especially if you plan to paint. 3. Staining might be a faster way to go, 2 coats of primer and 2 coats of paint takes a lot of time if you want to avoid runs. I would say painting took twice or three times longer than the building! 4. I may avoid lumber from the big box stores from now on, or be much much more careful in picking it out, but I had a 3 year old running circles around me as I was picking it out, so I guess I can cut myself a little break.

Finally, price wise I would say I spent more than I thought I would at first. Lumber was more expensive than a lot of posters mentioned, which is strange, because I thought NC was supposed to have cheap wood. But just for the lumber, I would say I was at or a little over $100. I would say all together I spent between $150 and $200, but I added a good bit, and honestly, fabric isn't cheap either, and I bought about 9 yards all together. With that being said, I think this bed was well worth the investment. I couldn't have gotten something like this for anywhere near that price in a store.

Oh, and I built the entire thing completely alone as my husband was out of town when I got the bug to do this. It didn't come out perfect, but every project I do is an improvement from the last and it's for a kids room! As long as it is sturdy and safe, and it definitely is, and is still attractive, then that's all that matters. My daughter loves it!
Estimated Cost
$150-$200
Estimated Time Investment
Week Long Project (20 Hours or More)
Recommended Skill Level
Starter Project

Comments

tommirhea

Wed, 09/12/2012 - 13:11

This is wonderful!!! I kind-of wish i would of seen this before I made my daughter her farmhouse bed-but I love that too. I can only imagine how special your daughter feels :) I bet your husband was pretty impressed as well!

I also want to say I appreciated you points. I too have found that painting is tedious and I too have stripped my screws before!!!!

Robohead

Wed, 09/12/2012 - 23:03

You did a great job with this bed. I really like how you did the "ceiling". And yep, no matter how much you spent to build it, there is no way you could buy a bed like this for that amount of money. I also built this bed (with a 2nd bed below it) and when all was said and done, it came in at around $200. More than I had planned, but far, far less than if I had went to a furniture store (which I will probably never do again thanks to this site).

angip (not verified)

Thu, 09/13/2012 - 09:01

I love your loft bed. As much as I love the white with the blue steps. I may just stain mine! This will be my first big wood working project, I will be more comfortable with my husband or friend helping me on this one.

nickonchuks

Sun, 01/27/2013 - 20:14

I want to make this bed and paint it similarly to you (white with some colour on the platform) but I am pretty sure I could not build this bed and then move it into my daughter's room after the fact. I am pretty sure I will have to do all the final assembly in her room, but I don't want to paint it in her room, either. At what stage did you paint? Would it be wise to paint all your pieces before assembly?

Raised planter boxes

Submitted by SandraVee on Thu, 07/23/2020 - 06:55

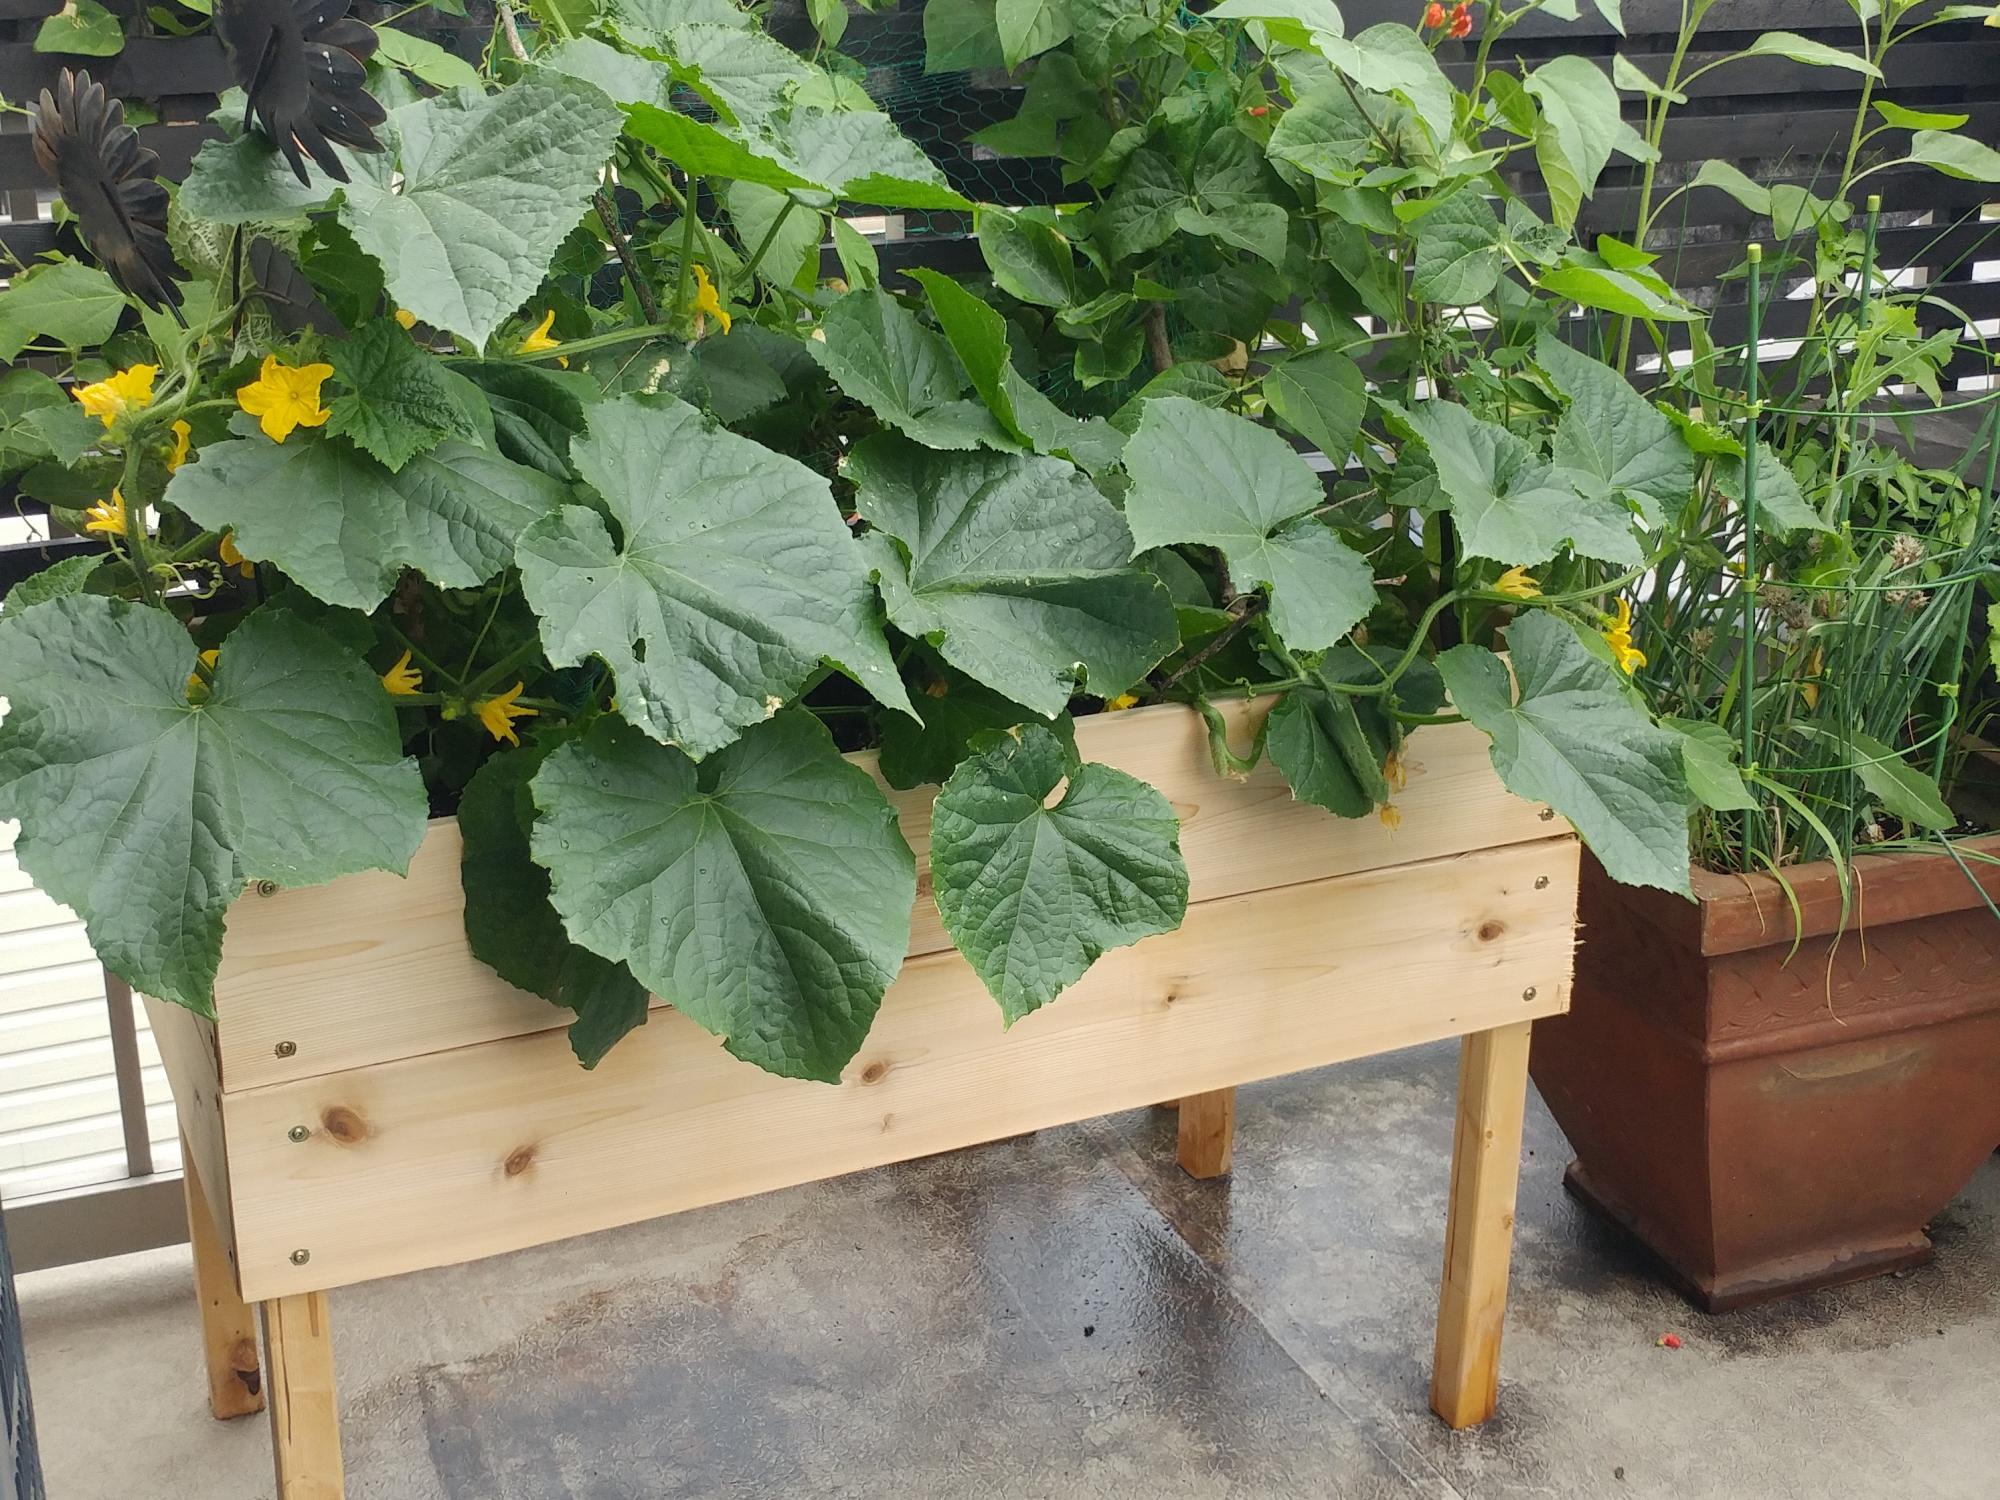
My first ever build! I made two of these planters for my deck. They were easy and the cucumbers and runner beans I grew from seed loved the deep soil in them! They make my little space feel like an oasis.

Built from Plan(s)

Camp Loft Bed twin XL w/ shelf

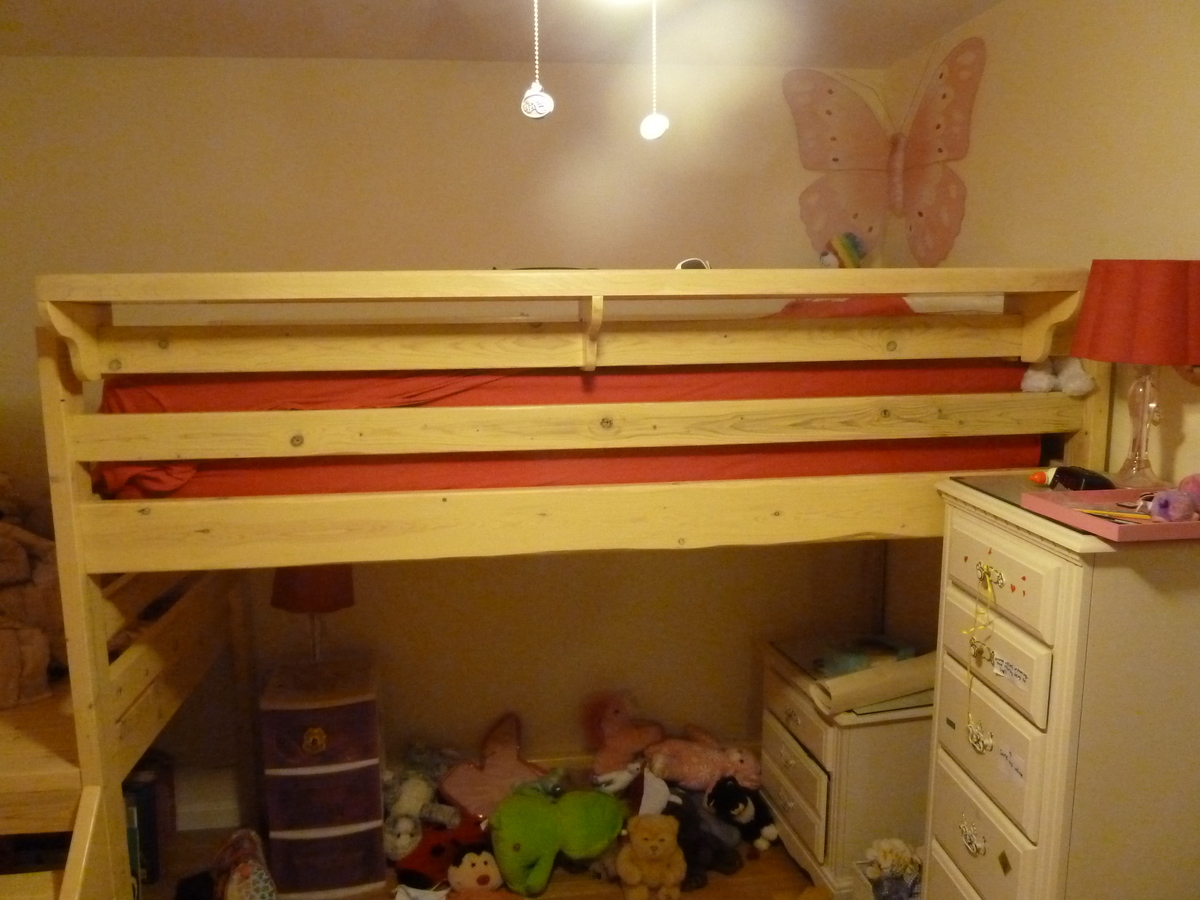
My daughter needed a loft bed to give her more floor and storage space in her bedroom. I modified the original plans to fit her twin XL bed, which is 5 inches longer than a regular bed. I also added an extra 2x6 across the back two posts for extra support.

Cutting and assembly was relatively easy; I glued every joint and used pocket holes per the instructions. I sanded using 80, 120 and 220 grit. The finish is a Minwax "parchment" water-based stain, with 3 coats of Polycrylic. All pocket holes were pre-drilled prior to finishing.

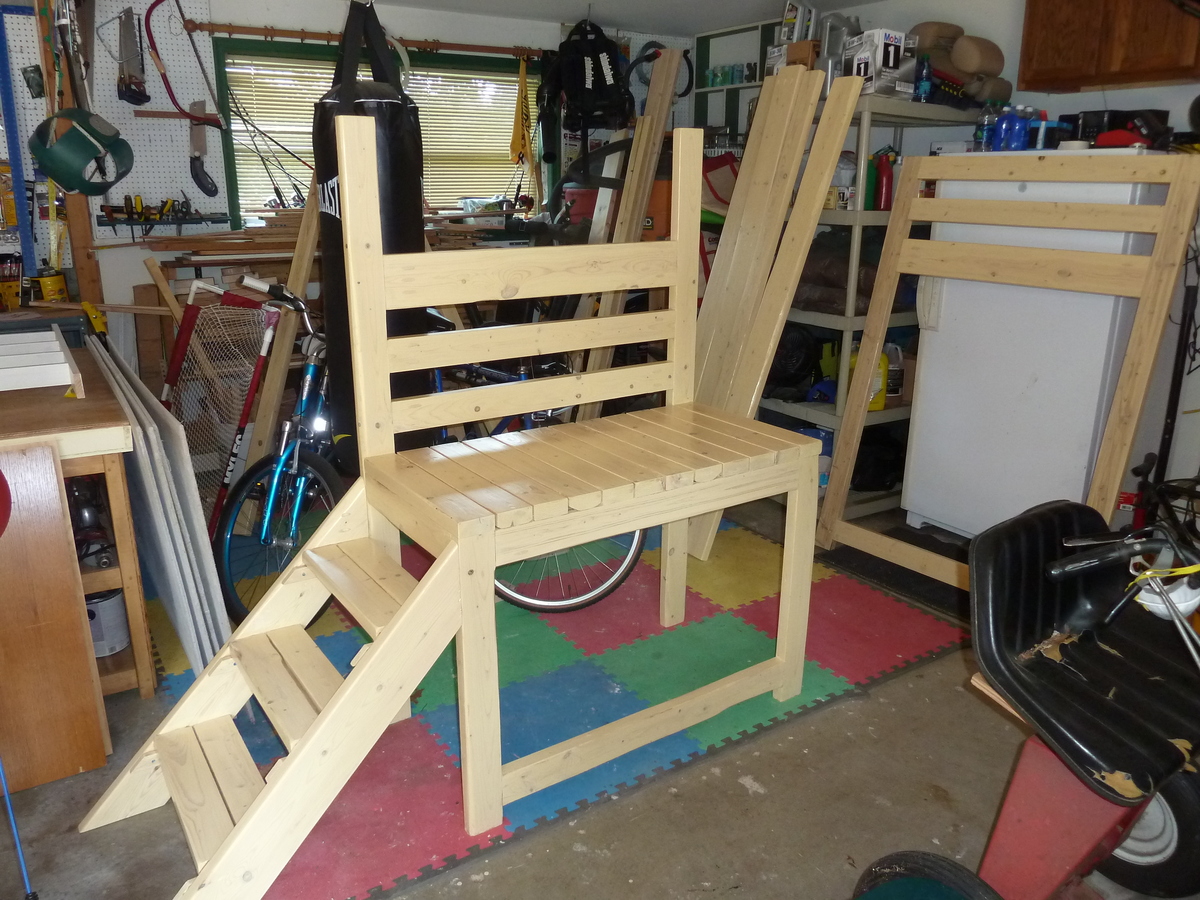
I assembled the platform and footboard in the garage and brought it into the house as a single unit; same with the headboard. I brought in the rails separately. To assemble, I marked 1 1/4 inches from the outside post edges, and used wood scraps/clamps to align and hold the rails while securing them with pocket hole screws.

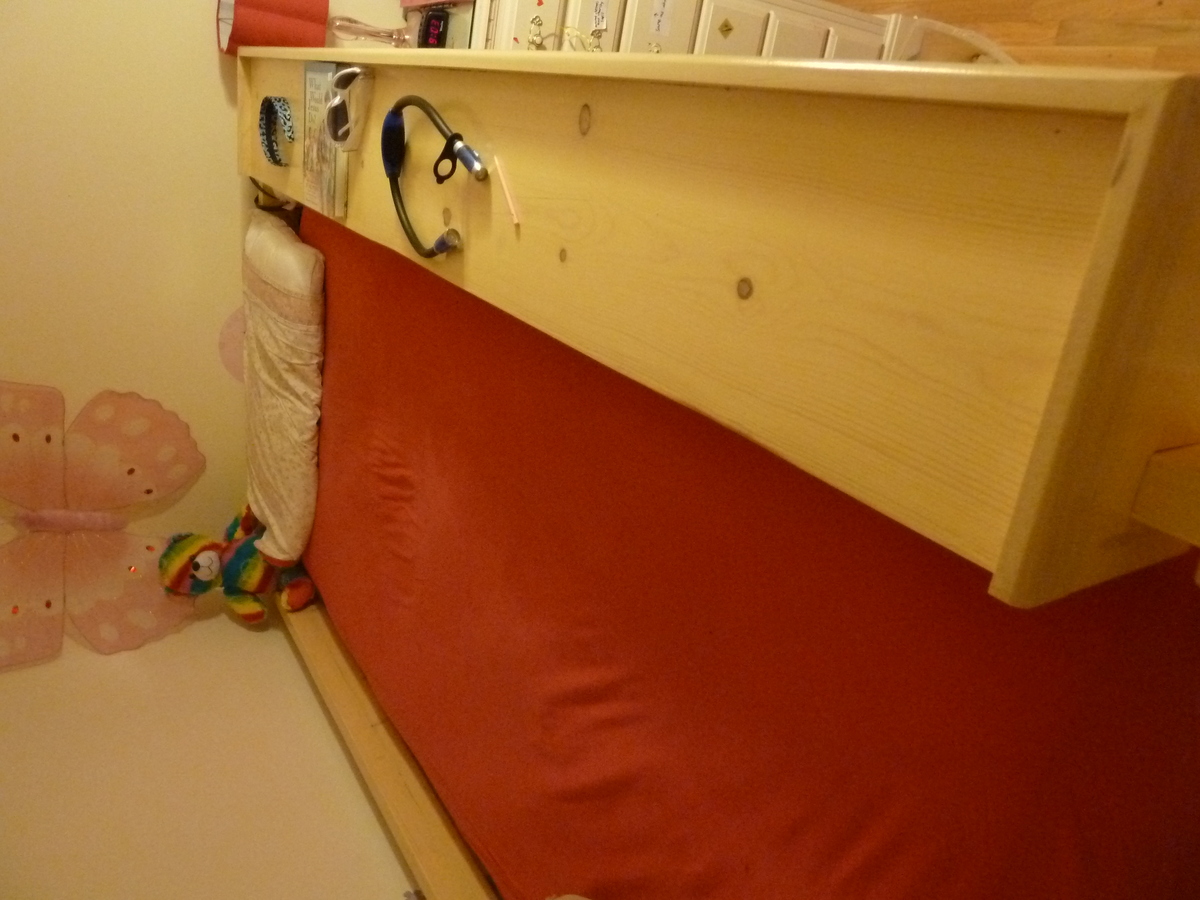
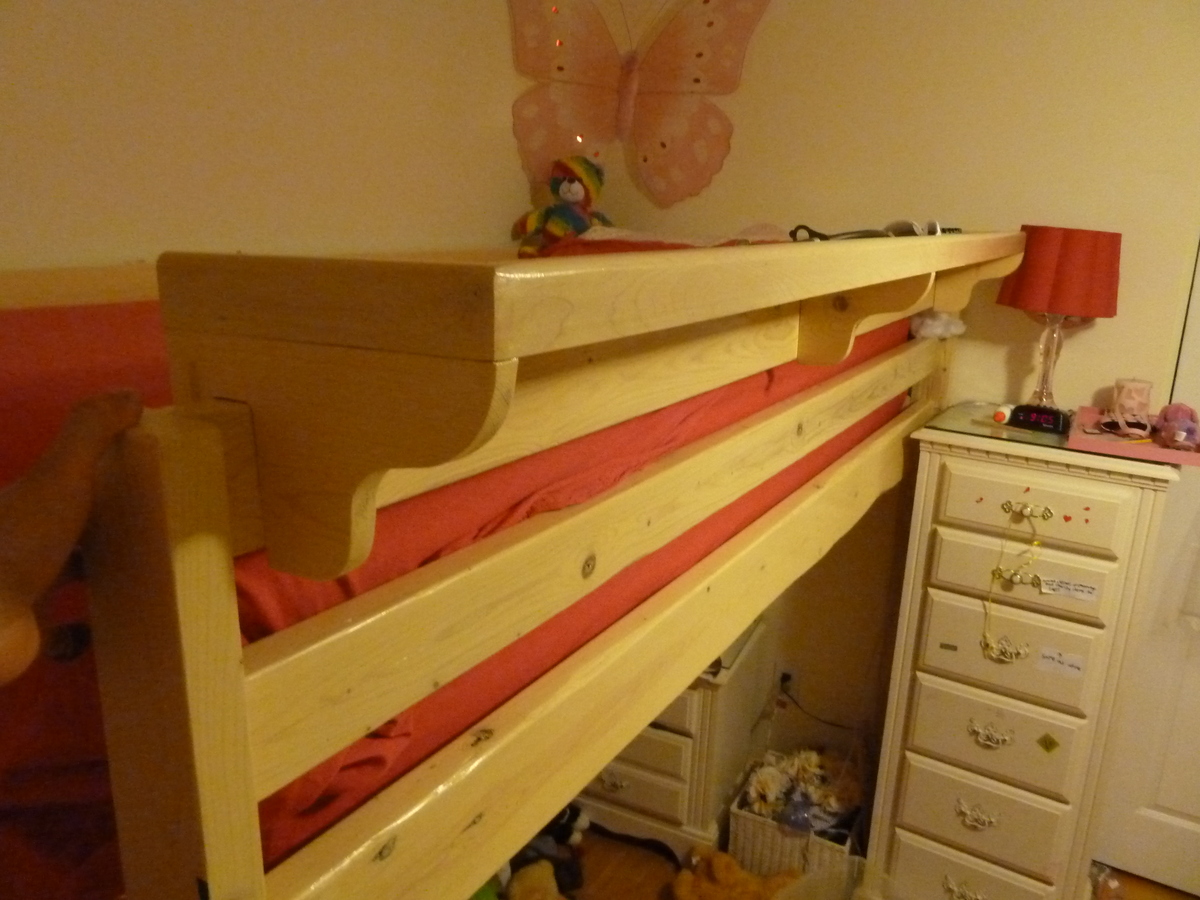
My daughter's mattress is very high; it rises only about an inch below the top of the top rail. So I build a bed-length shelf which also had the added benefit of providing a little more height/protection against her rolling out of bed in the middle of the night (see pics).

In all, I was surprised at how long this took me. Probably because I'm a novice and this was only my 2nd project. The totals are:
- Cut and assembly: 14 hours
- Sanding: 25 hours
- Finishing: 2 days

After finishing, I left all pieces in the garage for 5 days to air-out before bringing into the house.

Total cost the lumber was $125, 1 qt stain @ $13, 1/2 gal Polycrylic @ $50 per gal, and $20 hardware for a total of just over $200.

Estimated Cost
$210
Estimated Time Investment
Week Long Project (20 Hours or More)
Finish Used
Minwax water-based stain, "parchment" (single coat)
Minwax Polycrylic (three coates)
Recommended Skill Level
Beginner

Comments

mariad444

Tue, 03/15/2016 - 22:17

I am curious what your mattress size was here, please educate me as I think I will have a similar issue. I liked the shelf idea you did! 

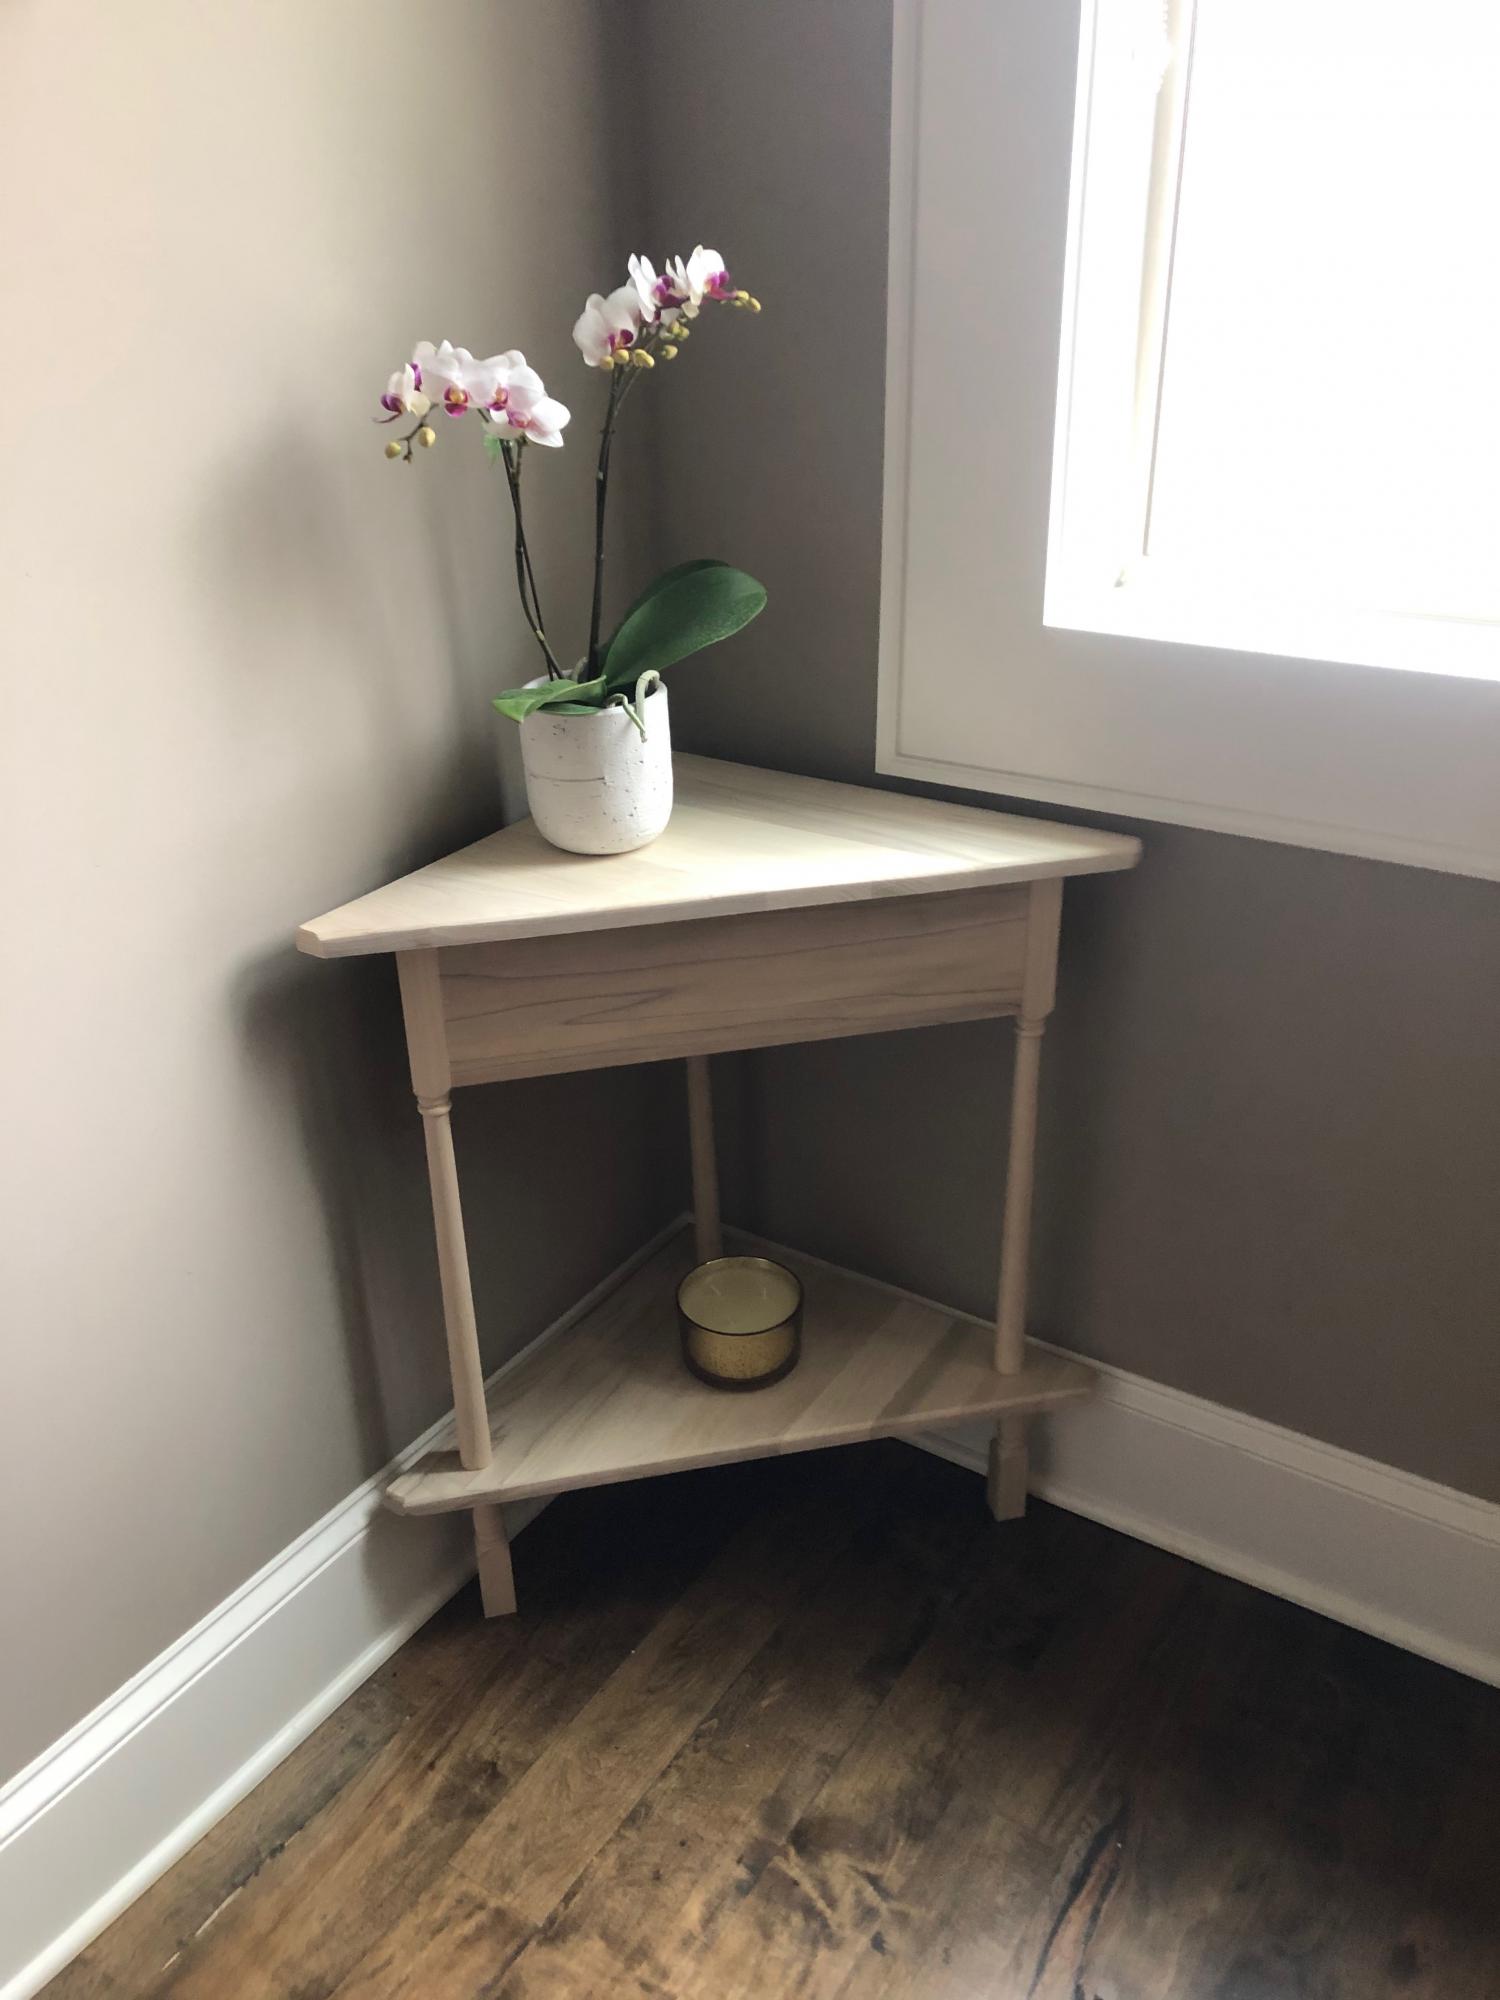
Corner Table for stair landing

Project for corner of stair landing at my house. Made in an afternoon using poplar wood -- no finish, only water based matte finish polycrylic. No plan used, please let me know if you would like plan supplied.

Estimated Cost
$30
Estimated Time Investment
Afternoon Project (3-6 Hours)
Finish Used
Topcoat only - water based polycrylic
Recommended Skill Level
Intermediate

Comments

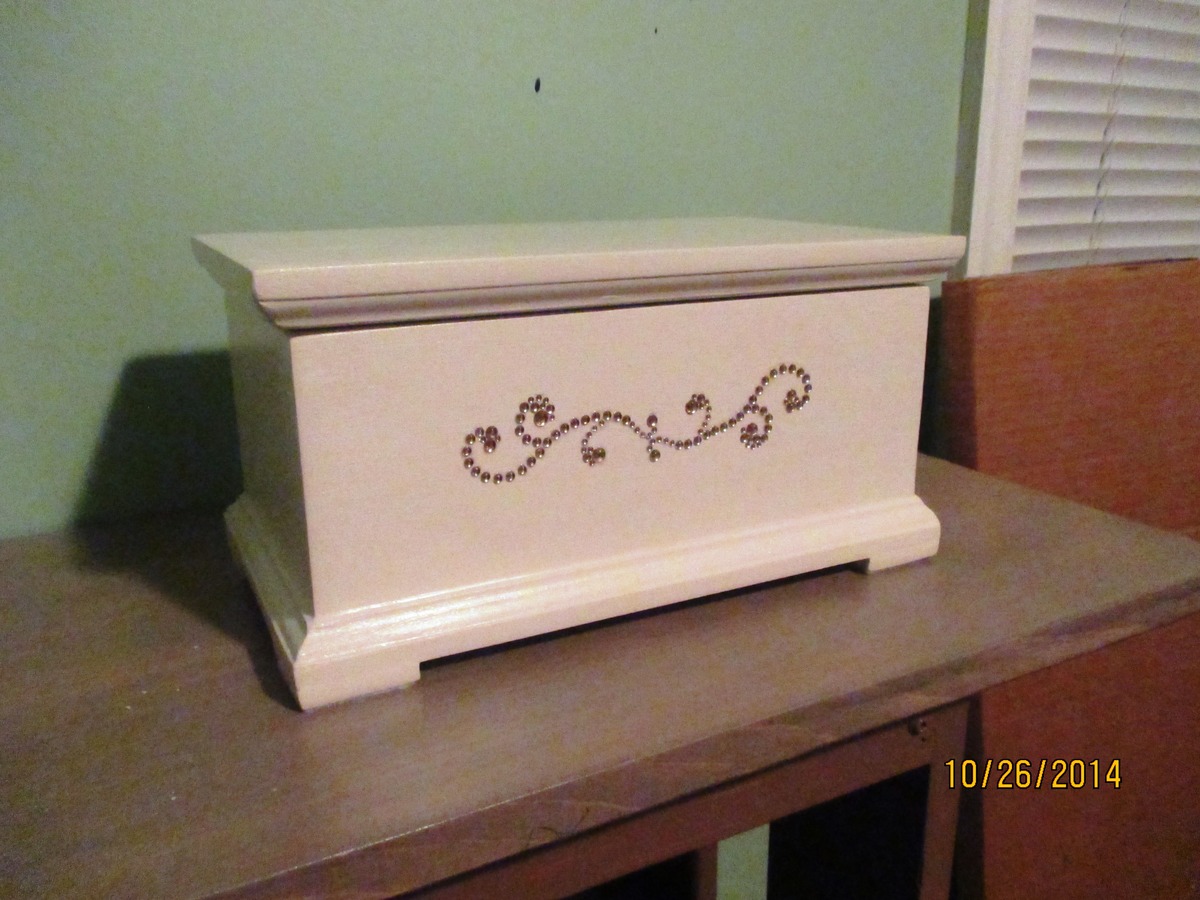
Miniature Hope Chest

Submitted by JoanneS on Tue, 10/28/2014 - 18:59

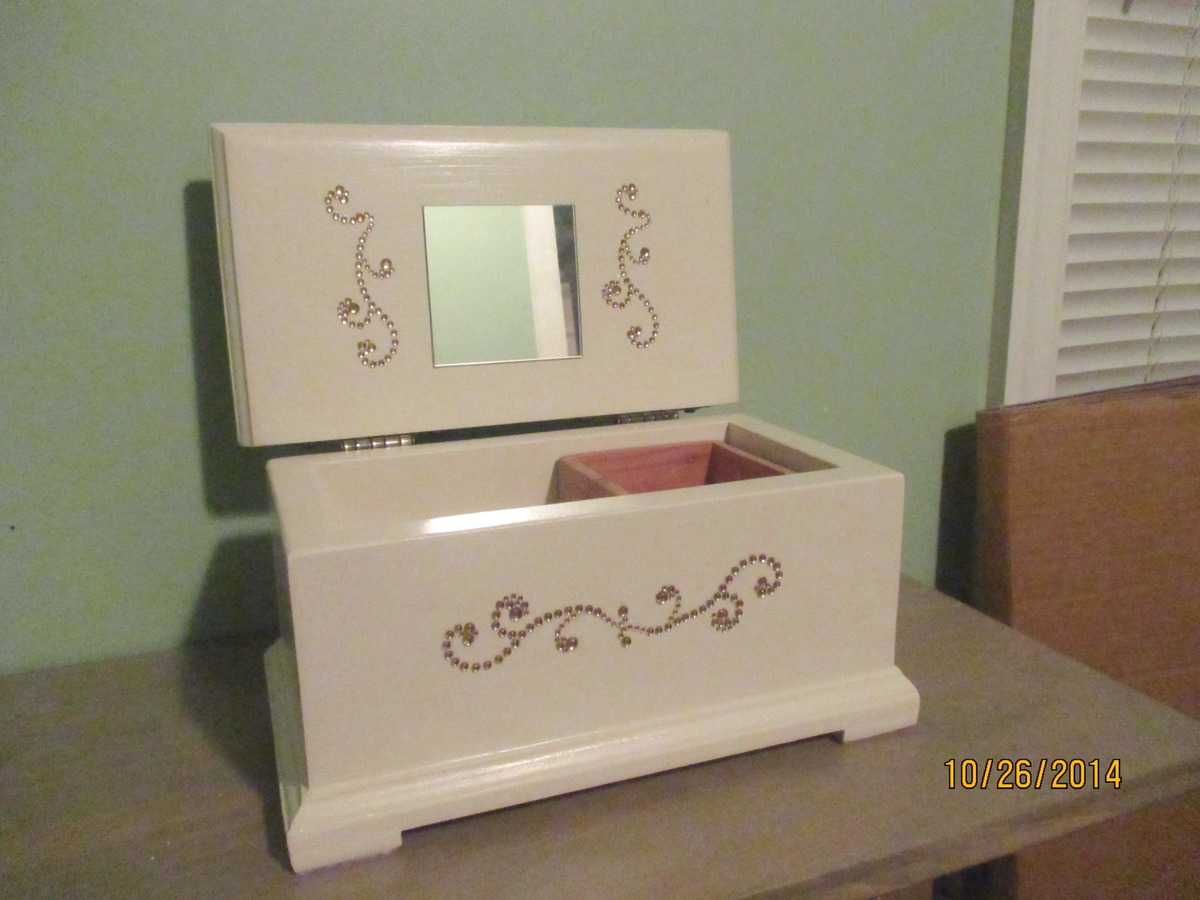
This build is a gift for a friend who is retiring.  It is made from scrap wood and left over finishes, so the only things I had to purchase were the moulding, hinges and “bling”.

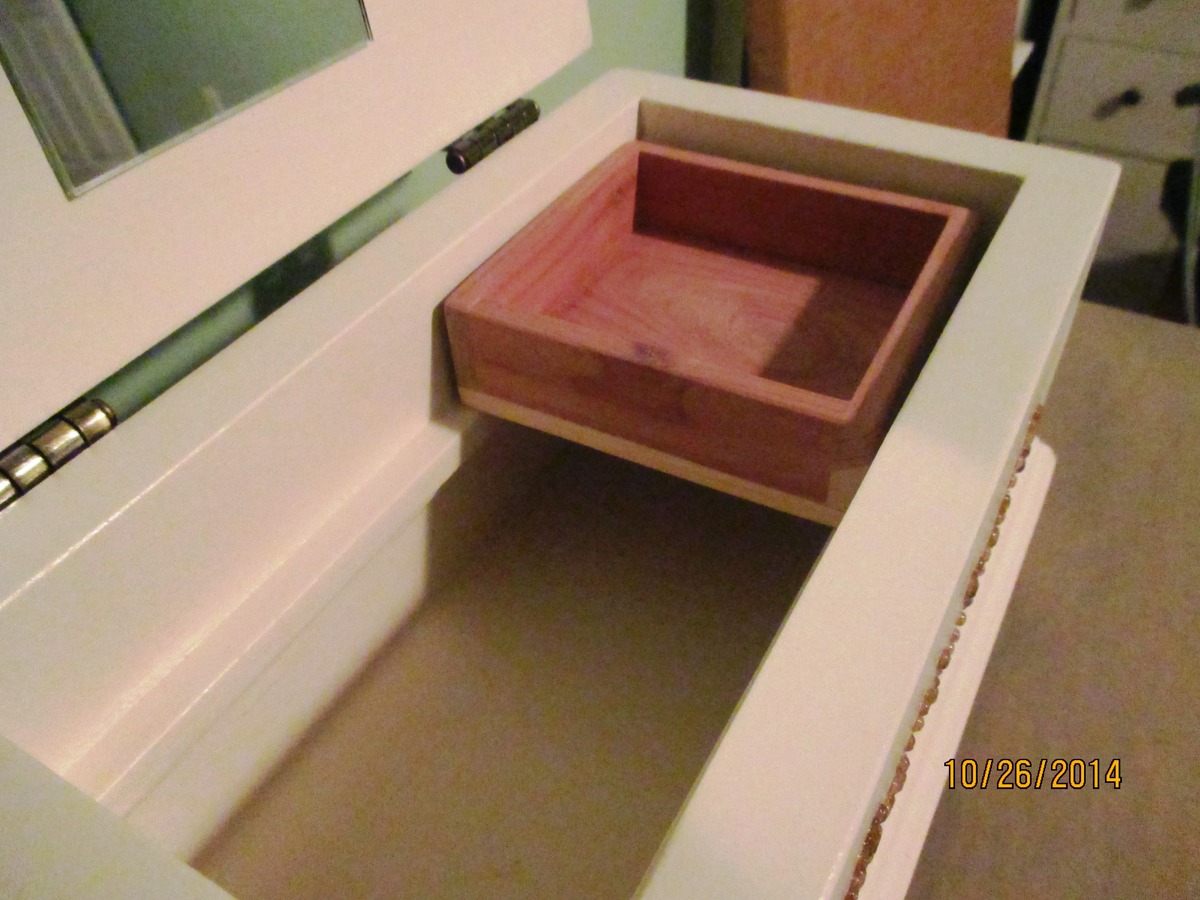
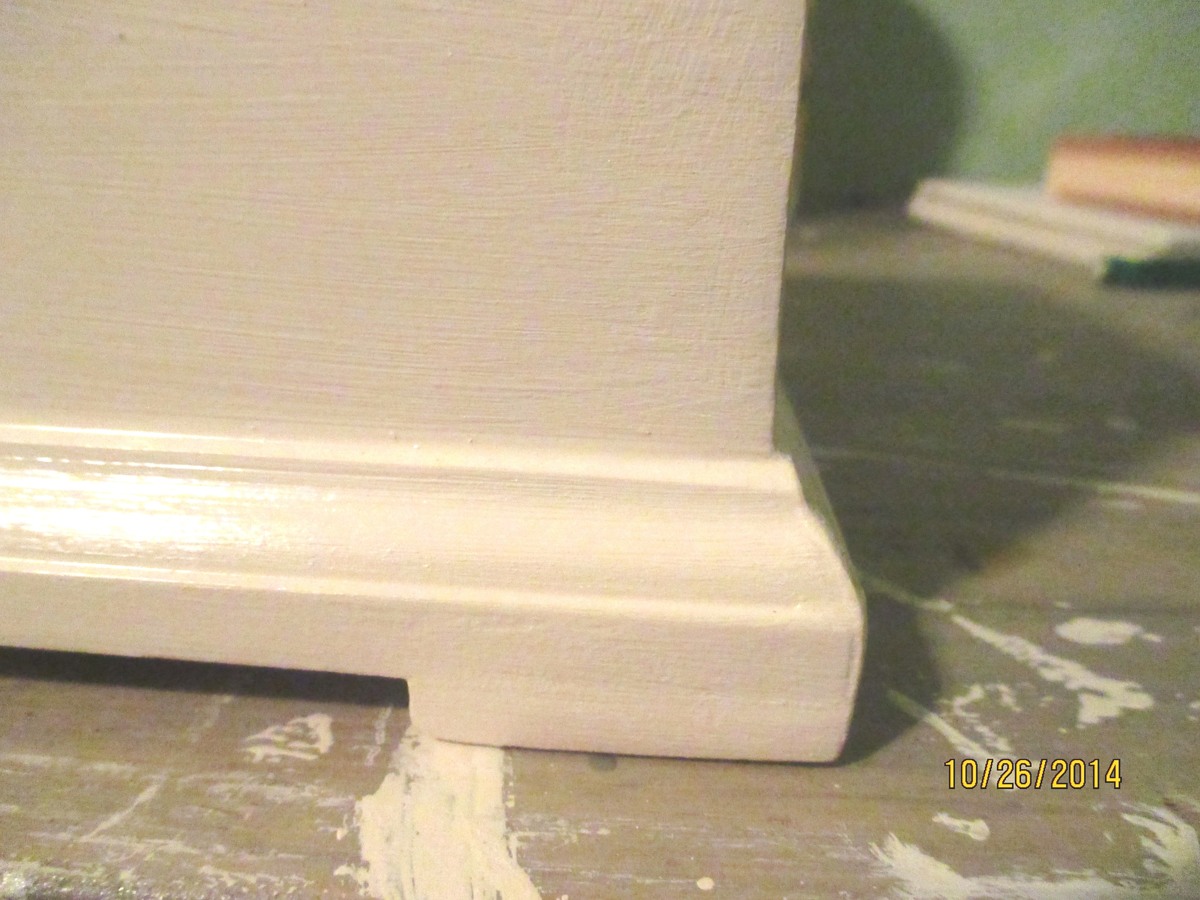
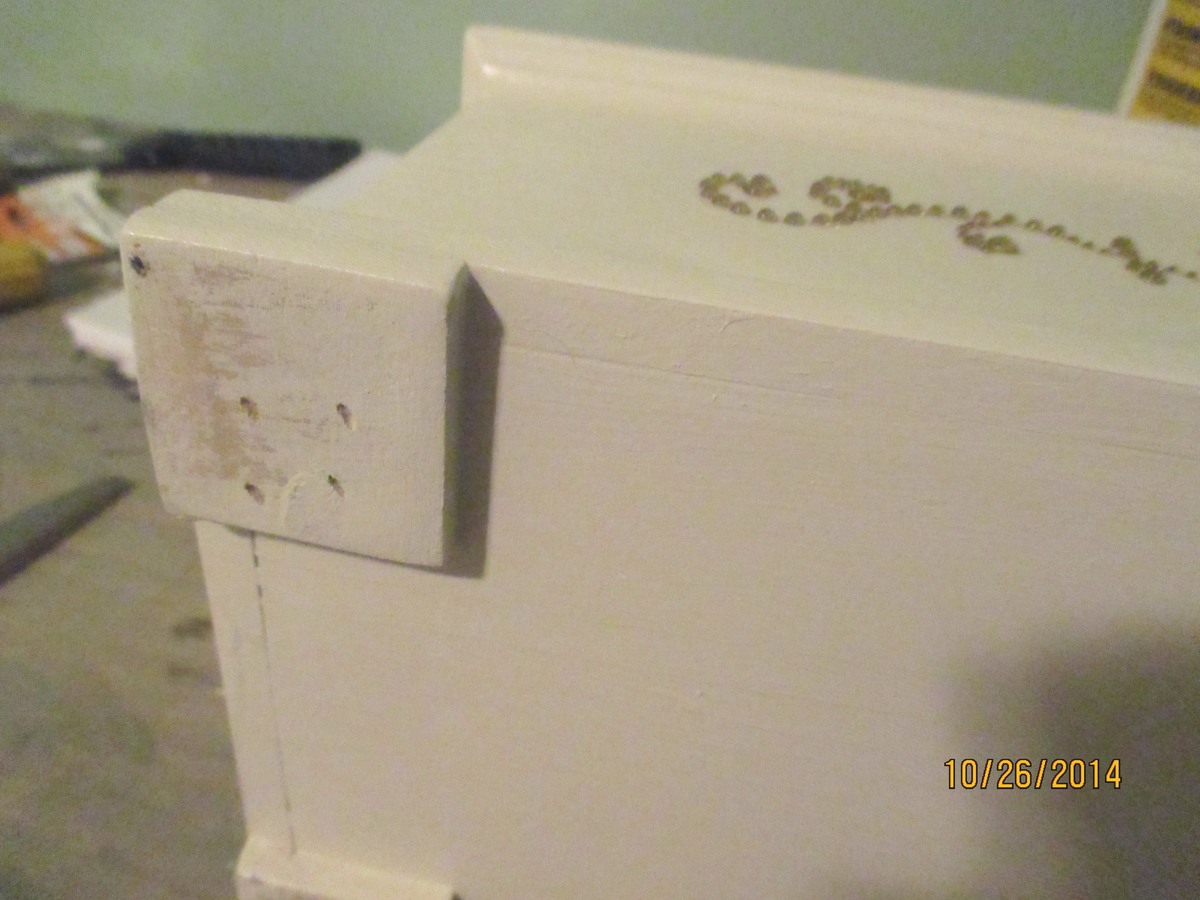
Used Georgia’s Jewelry Box plan, with these mods:  made it a little longer with no overhangs; added stop moulding trim around the top and bottom; added some lattice squares for “feet;” added a small sliding tray in aromatic cedar (1/4” cedar closet lining for the tray, stop moulding for the rails), and some self-adhesive rhinestone flourishes (found these at Michaels). 

This would be an afternoon build.  The finish took longer than the build - probably 2 or 3 hrs  (filling, sanding, painting, and attaching the hinges and  “bling”).   It took me much longer to decide how to decorate it, than it did to actually build it ;)

Some squares of sticky-back felt were also added to the bottoms of the feet.

I’m very pleased to say that this gift was a big hit!

Built from Plan(s)
Estimated Cost
$15
Estimated Time Investment
Afternoon Project (3-6 Hours)
Finish Used
Finish is 3 coats of Ace Royal semi-gloss in Crushed Peanut, sanded between coats, and the rhinestones are a champagne gold color. Also added some crystal clear super glue (I used Loctite) around the rhinestones with a tiny artist brush, to make sure the stones stay in place.
Recommended Skill Level
Beginner

Comments

JoanneS

Fri, 10/31/2014 - 15:24

Thank you for the nice comment!  :)  I might build some more of these for Christmas gifts.

:)

Outdoor Furniture Set

Submitted by Anonymous (not verified) on Sun, 11/08/2020 - 16:56

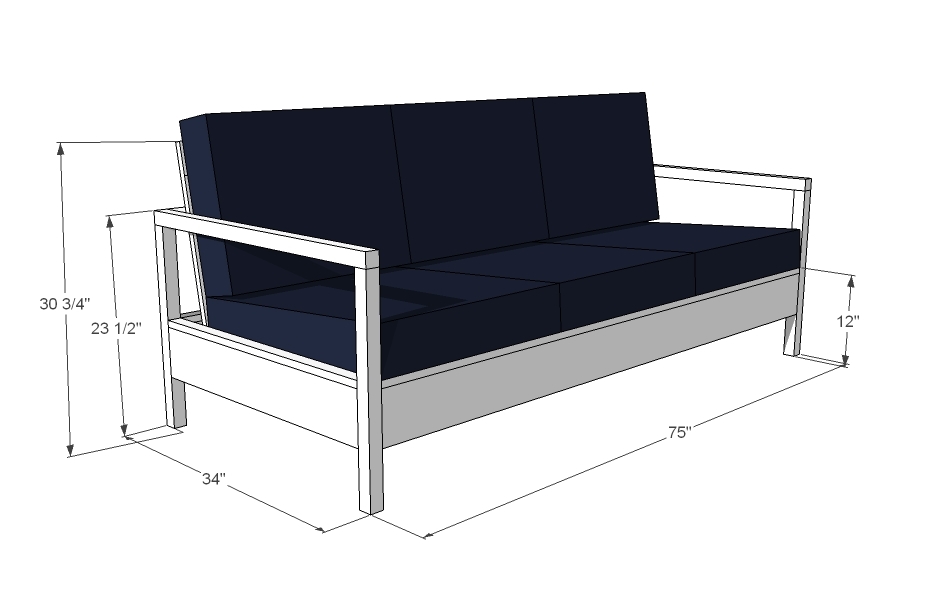
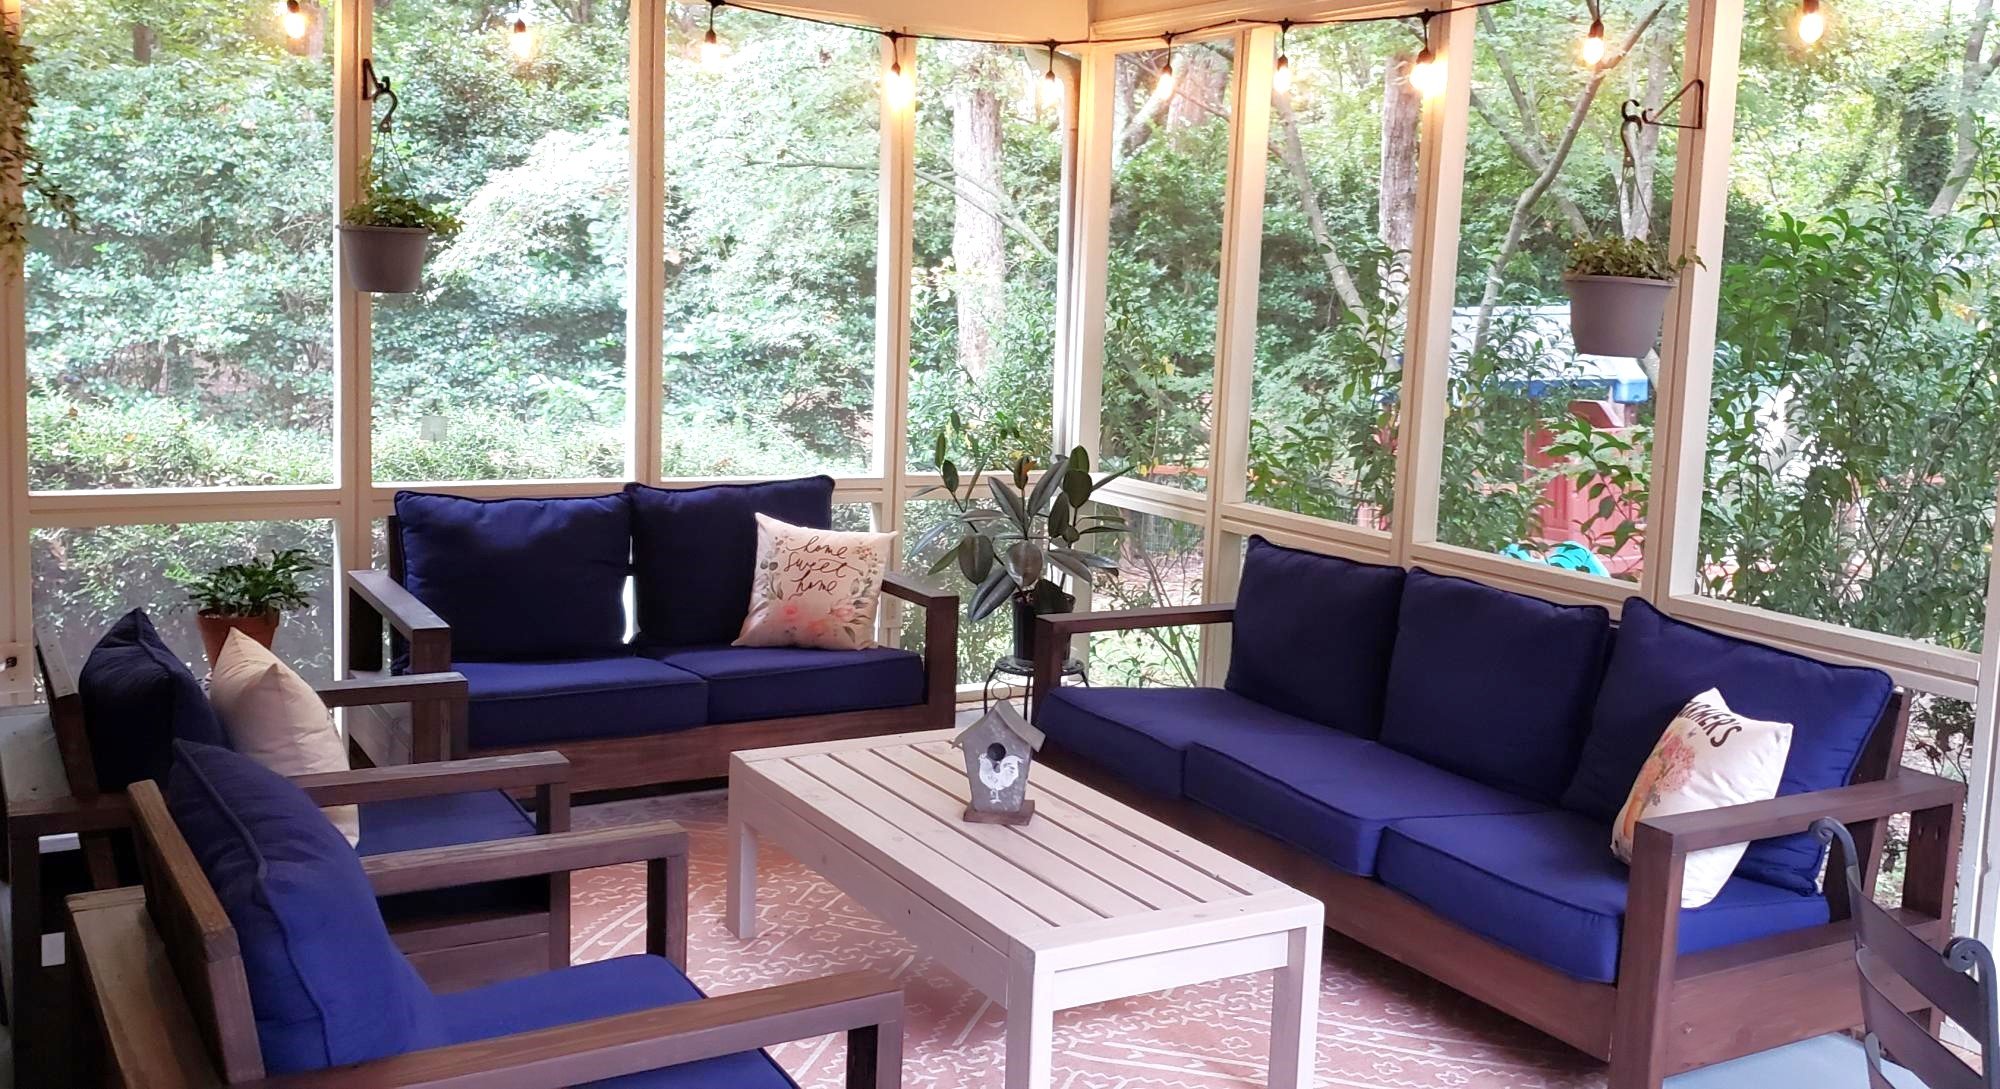
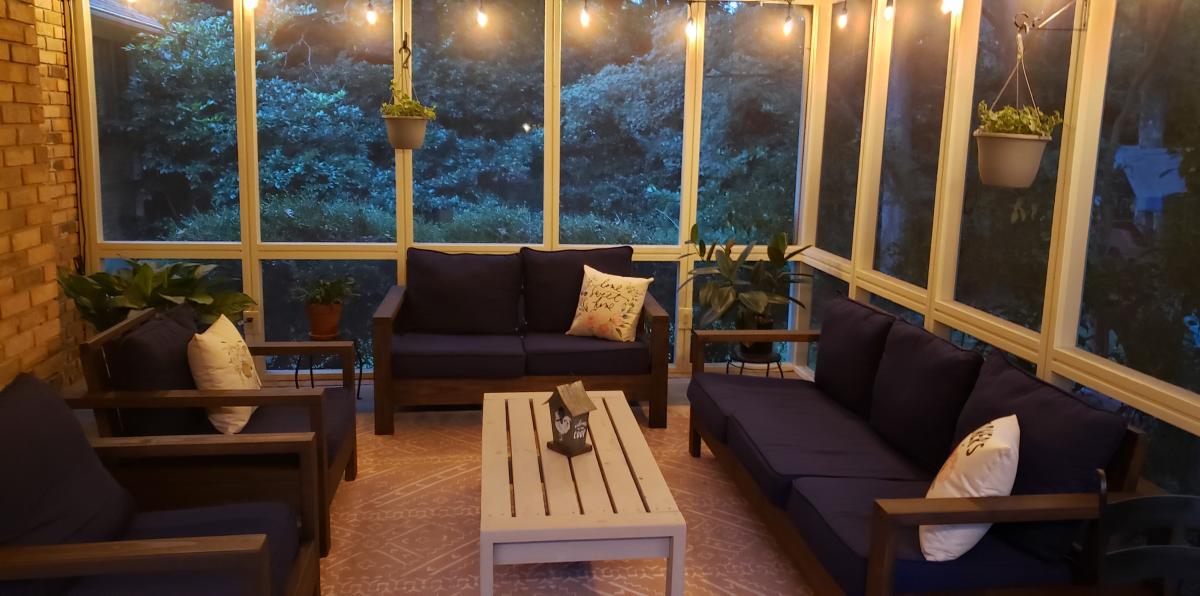
This set was the first thing I've built. I did it completely by myself and am so proud! I started with the coffee table to get a hang of the tools the. Moved on and made the sofa, love seat, and two chairs. I had a little trouble finding cushions but eventually found some at Lowe's. The cushions are just so expensive. I didn't love the color of the stain on the coffee table and the plan was to sand it and retain after staining the rest but I actually like how it stands out. It took a long time to finish because I had to work on it whenever I had spare time but a motivated individual with some building experience could do this all in a weekend or two. Coat of wood and screws for the whole project was $350. All the cushions were $518.

Estimated Cost
$875
Estimated Time Investment
Week Long Project (20 Hours or More)
Recommended Skill Level
Beginner

Comments

Seasonal And Holiday

Walk-in Master Closet

Submitted by DionneM on Fri, 03/15/2013 - 17:18

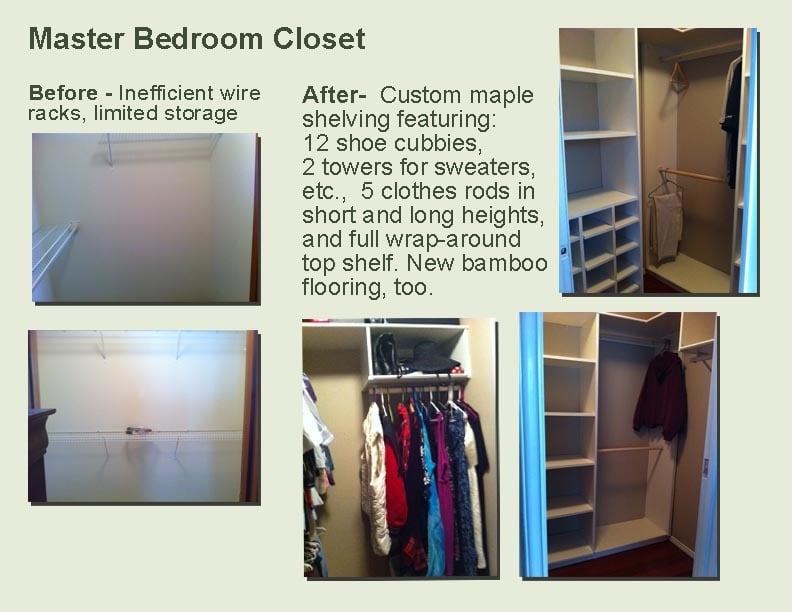
I've been drooling over those custom closet organizers for years, but they were either too expensive, not well made or some combination of not right for us. So seeing Ana's master closet plan really sent my imagination soaring. My challenge. My master closet is a small walk-in 5'x7' so I did have to do some adjusting. I love having a place for shoes and sweaters. One of my favorite parts is the continuous top shelf that connects all the parts together forming a big 'U'. I used my Kreg jig to connect each of those pieces. Anyway, thanks Ana White for the inspiration.

Estimated Cost
$300
Estimated Time Investment
Weekend Project (10-20 Hours)
Finish Used
Ace Hardware Trim and Cabinet Paint
Recommended Skill Level
Intermediate

Picnic Table

Submitted by Medickep on Mon, 05/06/2013 - 07:39

My wife started looking at expensive patio sets, which I thought were not worth the price, so I decided to build a picnic table. This is not the cheapest table out there, but it's built to last for years!! I used a high quality cedar as I got a price cut from a friend. I also used deck screws, so there would be no rusty screws!! The table top measures 7' long and looks like one you would see at a state park, notHome Depot!

Estimated Time Investment
Weekend Project (10-20 Hours)
Finish Used
Cabot Australian Timber oil: For this project I went with an oil project so I wouldn't have to sand it every year, like so many in my area with their decks. With this product, you simply clean the table and reapply!!
Recommended Skill Level
Beginner

Comments

Medickep

Thu, 09/05/2013 - 13:04

Thank your hanks for the kind words! This was my first real project and I was pleased with the results!

Gerry Czerniawski

Thu, 08/25/2016 - 09:48

Really like the picnic table - do you have plans for this? (I'm new to this site so apologies if they are here but I just could not see where?).

best wishes

Gerry

Patio Revamp, Part 2

Submitted by BrookeEye on Mon, 07/27/2015 - 08:54

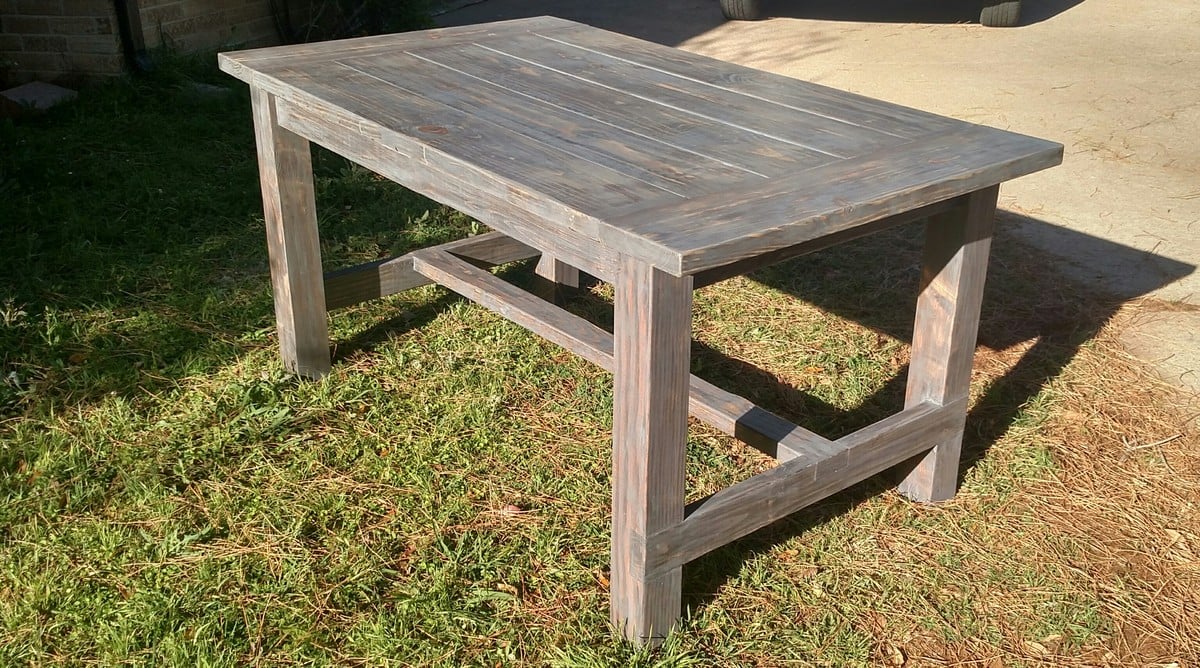
We needed a new table for our patio, so we looked no further than Ana's plans. I was going back and forth deciding between various table plans until I saw the plans for the Providence Table and Providence Bench, and it was love at first sight. The whole project turned out to be a relatively easy build for us, and we are just about as "amateur" at woodworking as it gets! We used white pine for the entire project. We shortened the table about 18 inches to fit our space. It is so gorgeous, we have gotten tons of compliments from guests so far and we absolutely love it! Thanks, Ana!!
Estimated Cost
$70 for the wood
$20 for the paint
$15 for the stain
$20 for the Kreg blue kote screws and brushes;

$125 Total.
Estimated Time Investment
Weekend Project (10-20 Hours)
Finish Used
Behr Exterior Paint in Pure White for the bottom;
Minwax Classic Gray stain for the top boards with Minwax Spar Urethane (for exterior use) in Satin as a sealer (on the top only).
Recommended Skill Level
Beginner

Comments

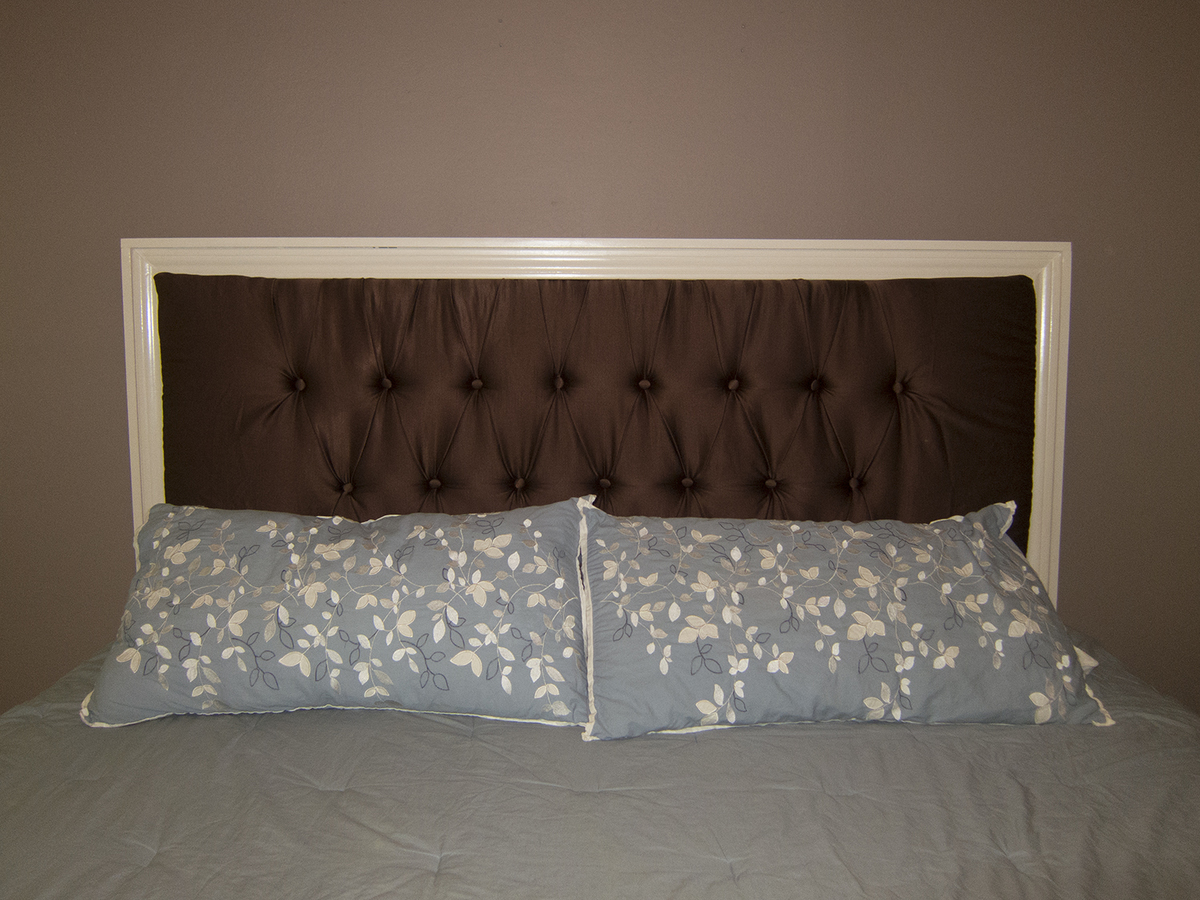
Framed and Tufted Upholstered Headboard

Submitted by marrsgirl on Wed, 08/21/2013 - 17:16

I love the look of diamond tufting, so that's how I did the upholstered insert, which added hours to the project. The frame itself was built in about 3 hours, so this could easily be an afternoon project if you skipped the tufting.

Estimated Cost
$200
Estimated Time Investment
Weekend Project (10-20 Hours)
Finish Used
Behr "White Mocha" with wipe-on poly finish
Recommended Skill Level
Beginner

Corner Hutch Storage Bed for my Girls

Submitted by hawaiitara on Tue, 08/09/2011 - 16:19

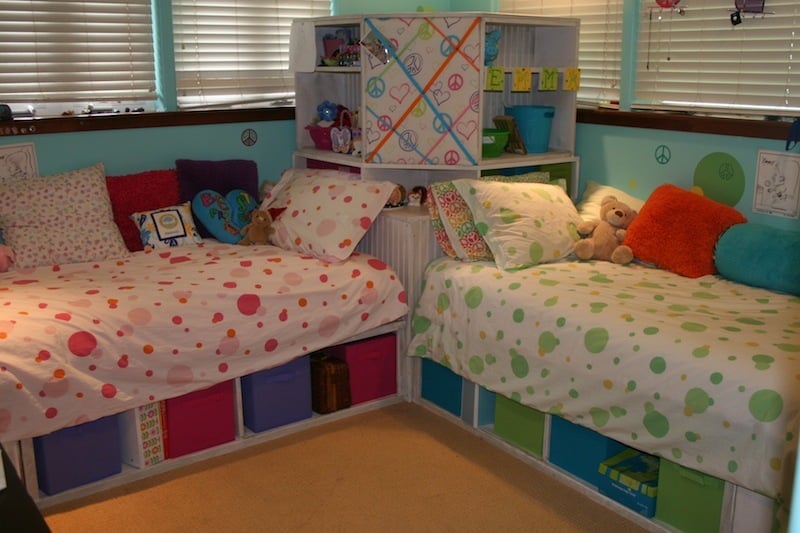
I made this bed for my 2 girls who share a room. It was my first real attempt at building anything substantial. They are thrilled. The plans were so easy to follow. The only thing I did different was use 3 inch screws in the hutch base because I felt it made it more sturdy. I used bead board for the outside of the hutch and the back of the book cases. Thanks Ana for such great plans.

Estimated Cost
$525
Estimated Time Investment
Weekend Project (10-20 Hours)
Finish Used
White semi gloss paint with special walnut minwax stain brushed over to age
Recommended Skill Level
Beginner

Comments

sgilly

Tue, 08/09/2011 - 18:31

What lucky little girls to have a mom who can build them beautiful furniture! Great job.

Rachel Stacy (not verified)

Tue, 12/25/2012 - 04:39

I really want to do this for our twins who are about to move to big girl beds. However, I do not see the plans for this. Do you have a pdf to show how to build them? I especially love the hutch!

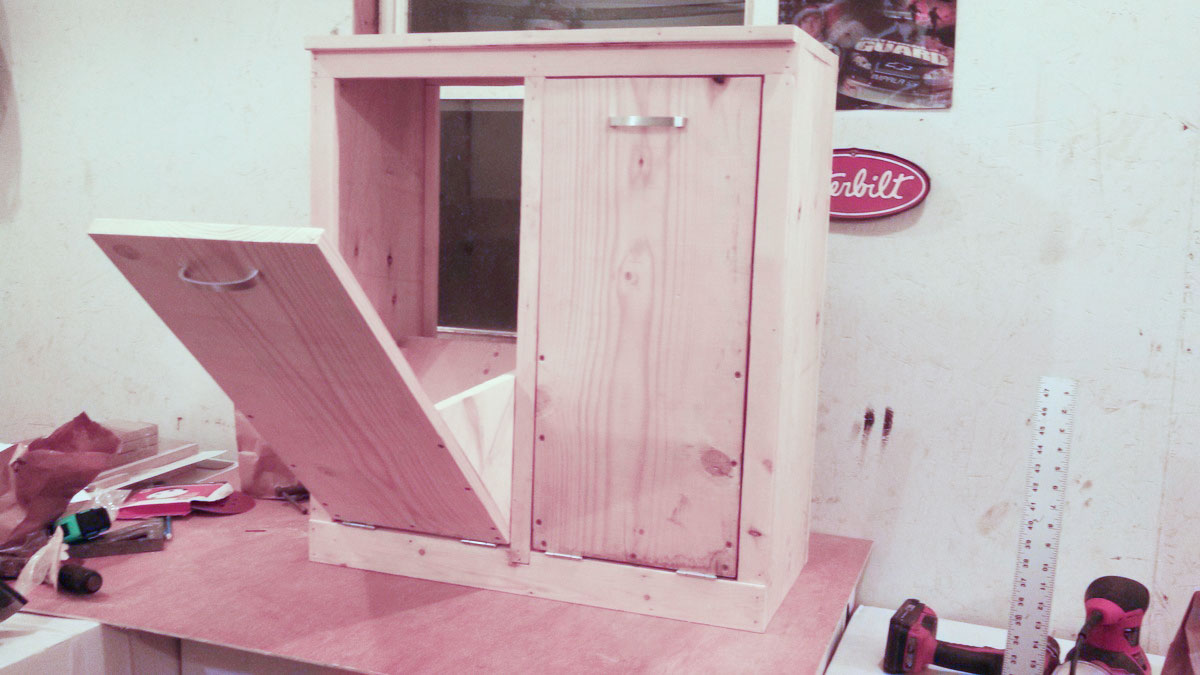
Double Tilt-out trash bin

Submitted by lindy19 on Wed, 10/23/2013 - 17:47

Really wanted one of these but everything I found was way too expensive so I found these plans, tweaked em a bit to fit the space I had and voila, double tilt-out trash bin. Thanks for the wonderful plans!

Estimated Cost
$50-75
Estimated Time Investment
Day Project (6-9 Hours)
Recommended Skill Level
Beginner

Comments

ADeboer

Sat, 05/02/2020 - 14:36

This is the exact Style I've been looking for!! I see that you made this ages ago - any chance you still have the dimension modifications you made somewhere?

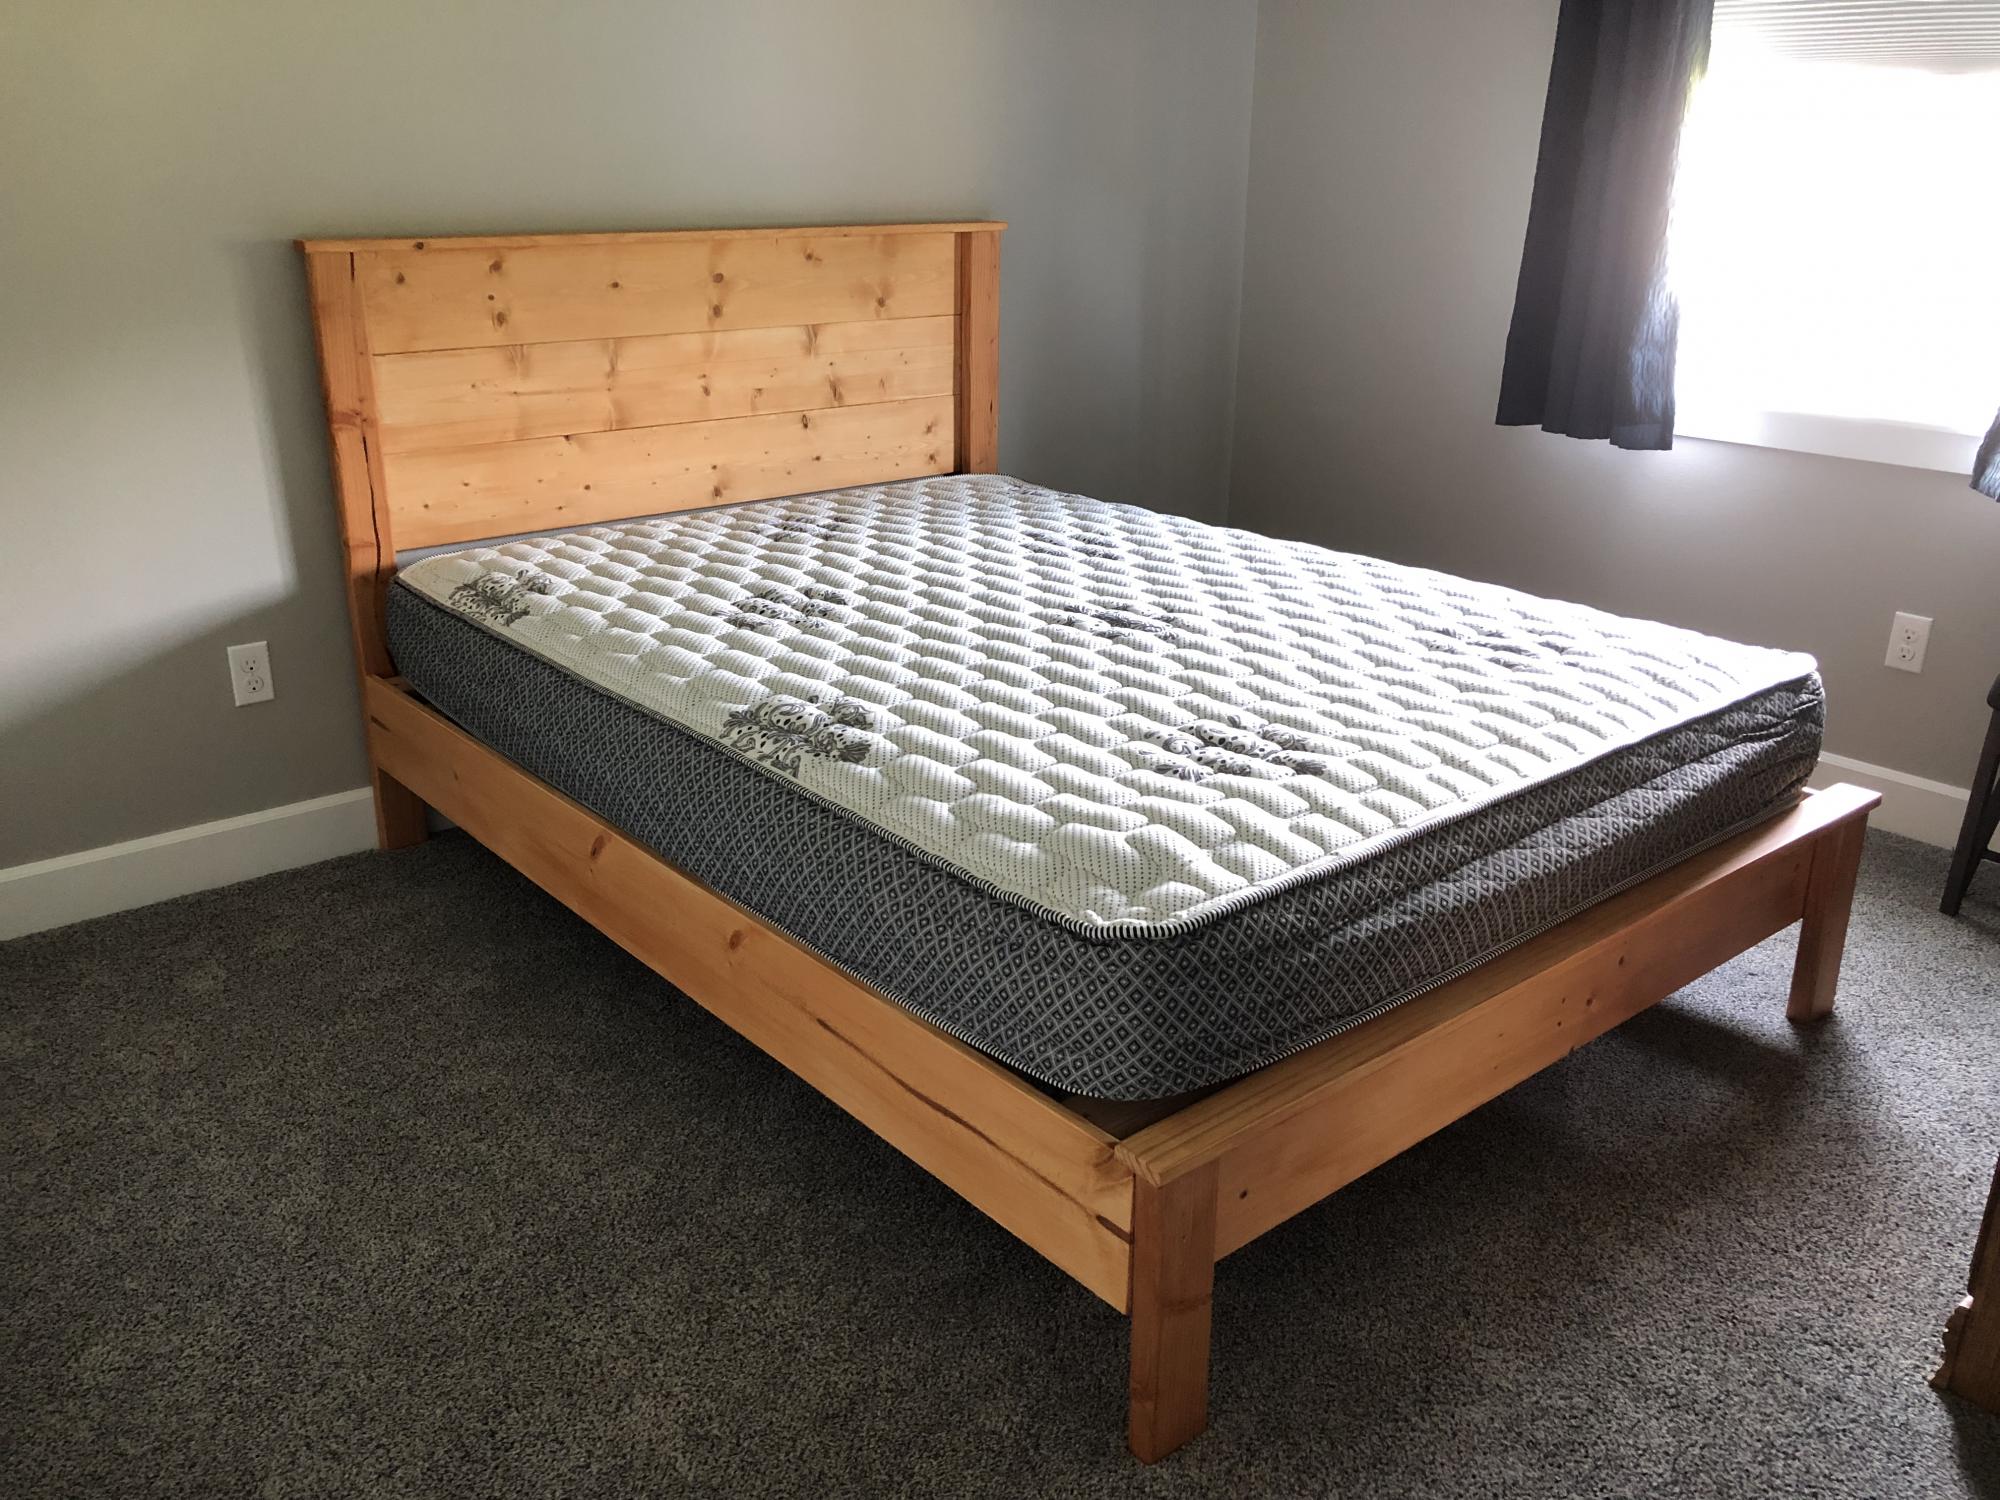
My wife built a bed.

Submitted by AKMan279 on Sun, 06/02/2019 - 20:45

We looked for a simple plan for a bed and found this one on Ana’s site.  Easy to build in a weekend.

Estimated Cost
$140 with all lumber and stain.
Estimated Time Investment
Weekend Project (10-20 Hours)
Finish Used
Poly stain
Recommended Skill Level
Beginner

Comments

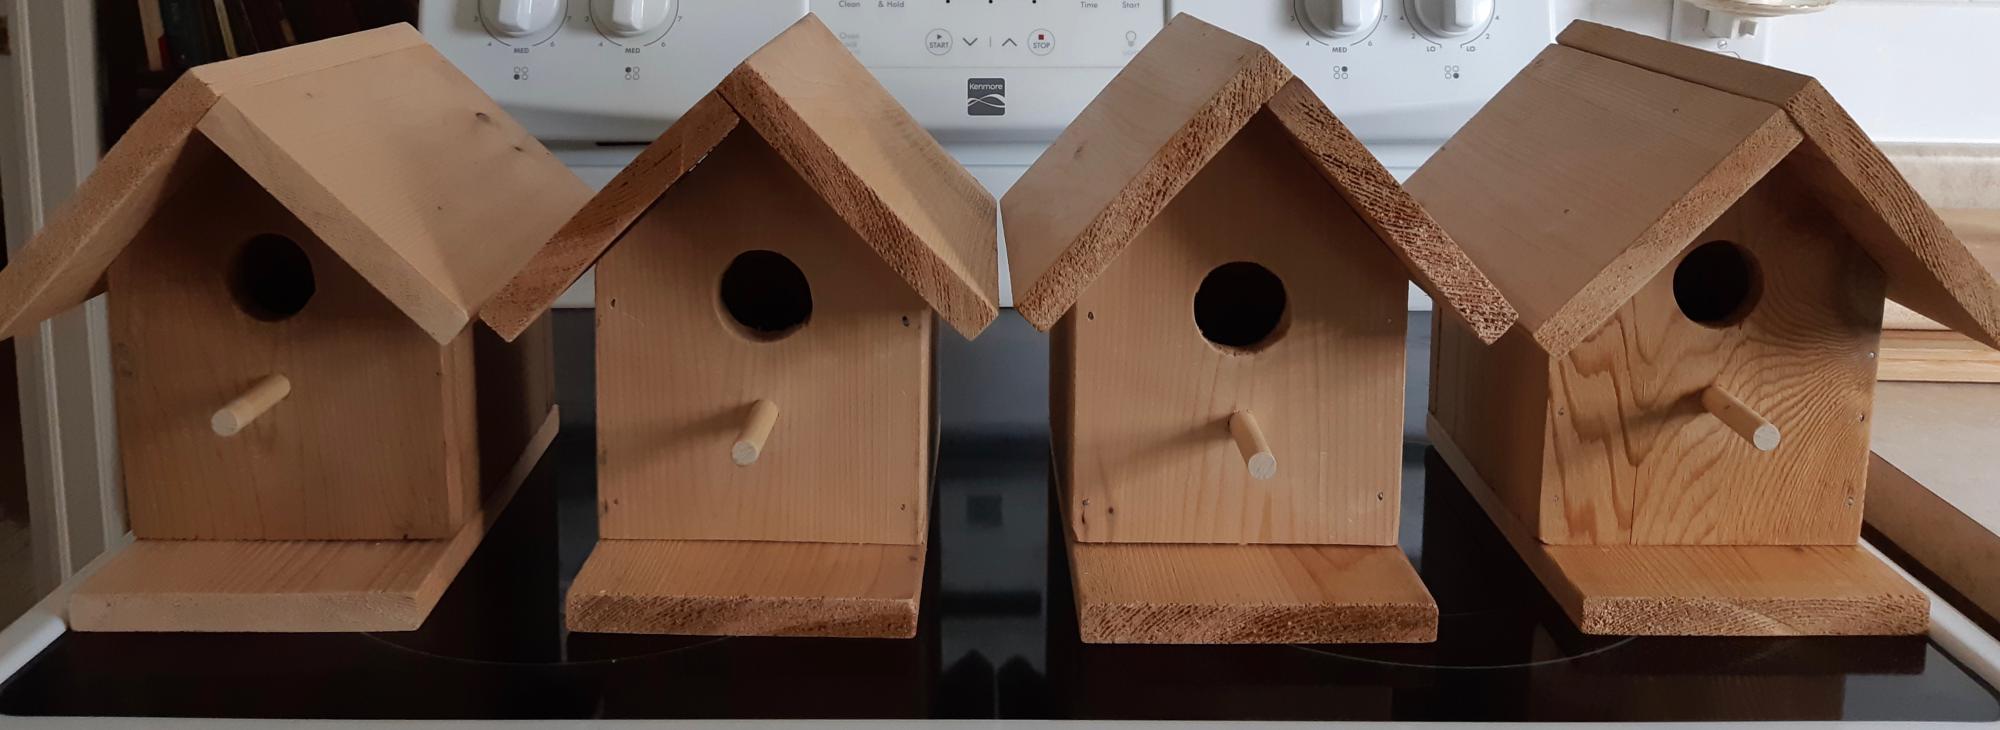
Bird Houses

I love this pattern of Ana's! My husband and I made these together. We have 3 very tall pine trees close together, planted by my Mum 50 years ago; one for each child. Now a cedar bird house for each tree. An extra for our cottage in Garden of Eden, Nova Scotia.

Thank you for sharing this pattern Ana.

Darlene & Garry

Estimated Time Investment
Day Project (6-9 Hours)
Recommended Skill Level
Starter Project

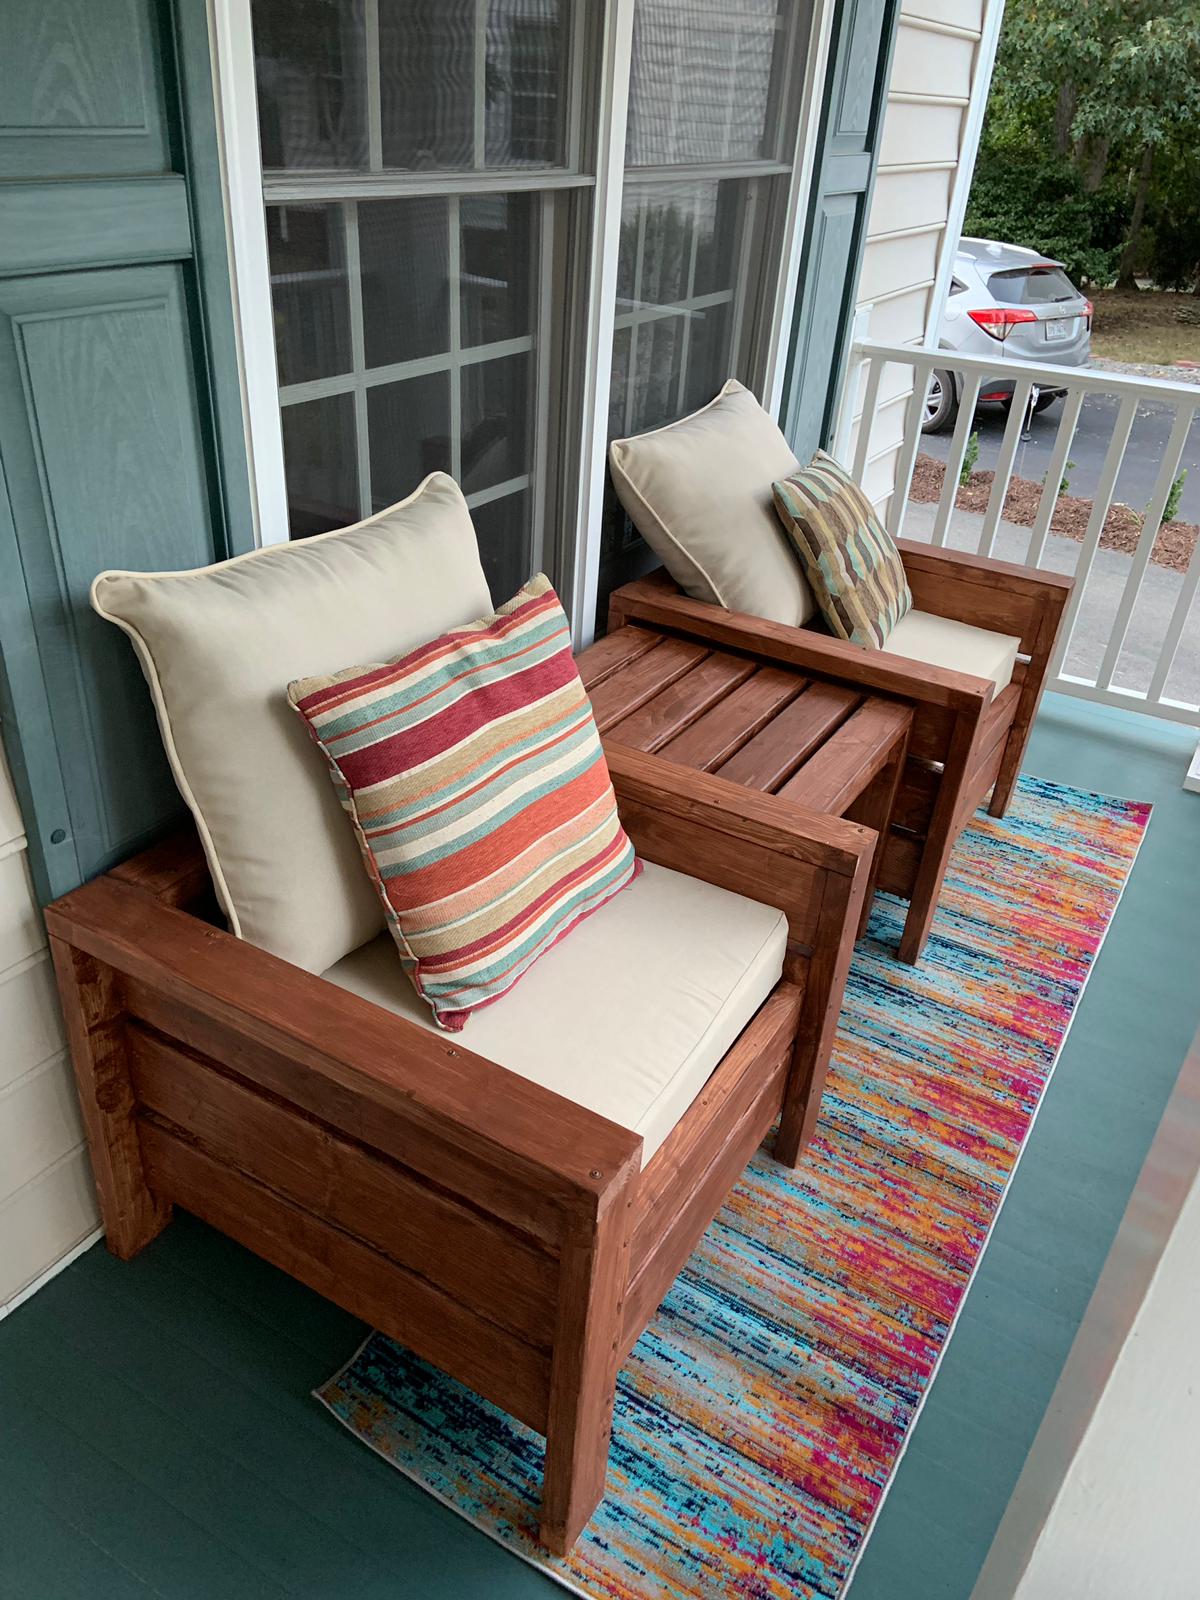
Outdoor chairs w/ accent table

Submitted by bnakka on Wed, 09/25/2019 - 18:18

I have bookmarked these plans for my front porch a year ago. Finally last Saturday I decided to finish. 

I had to change the chair dimensions to fit 24" x 24" cushion, and the accent table leg height from 13 1/2" to 20". 

I also forgot sanding the surface too fine makes staining so hard and fine sawdust is not good to be around. 

Estimated Cost
80 for the furniture (100 for cushions and carpet)
Estimated Time Investment
Afternoon Project (3-6 Hours)
Finish Used
Behr Premium (Russet). Finish the wood before you assemble. If you want the cushions to be snug take off half inch more than the recommended specs.

Found the cushions on wayfair for around 30 a piece and the carpet for 40. I am using old pillows I already have in storage.
Recommended Skill Level
Intermediate

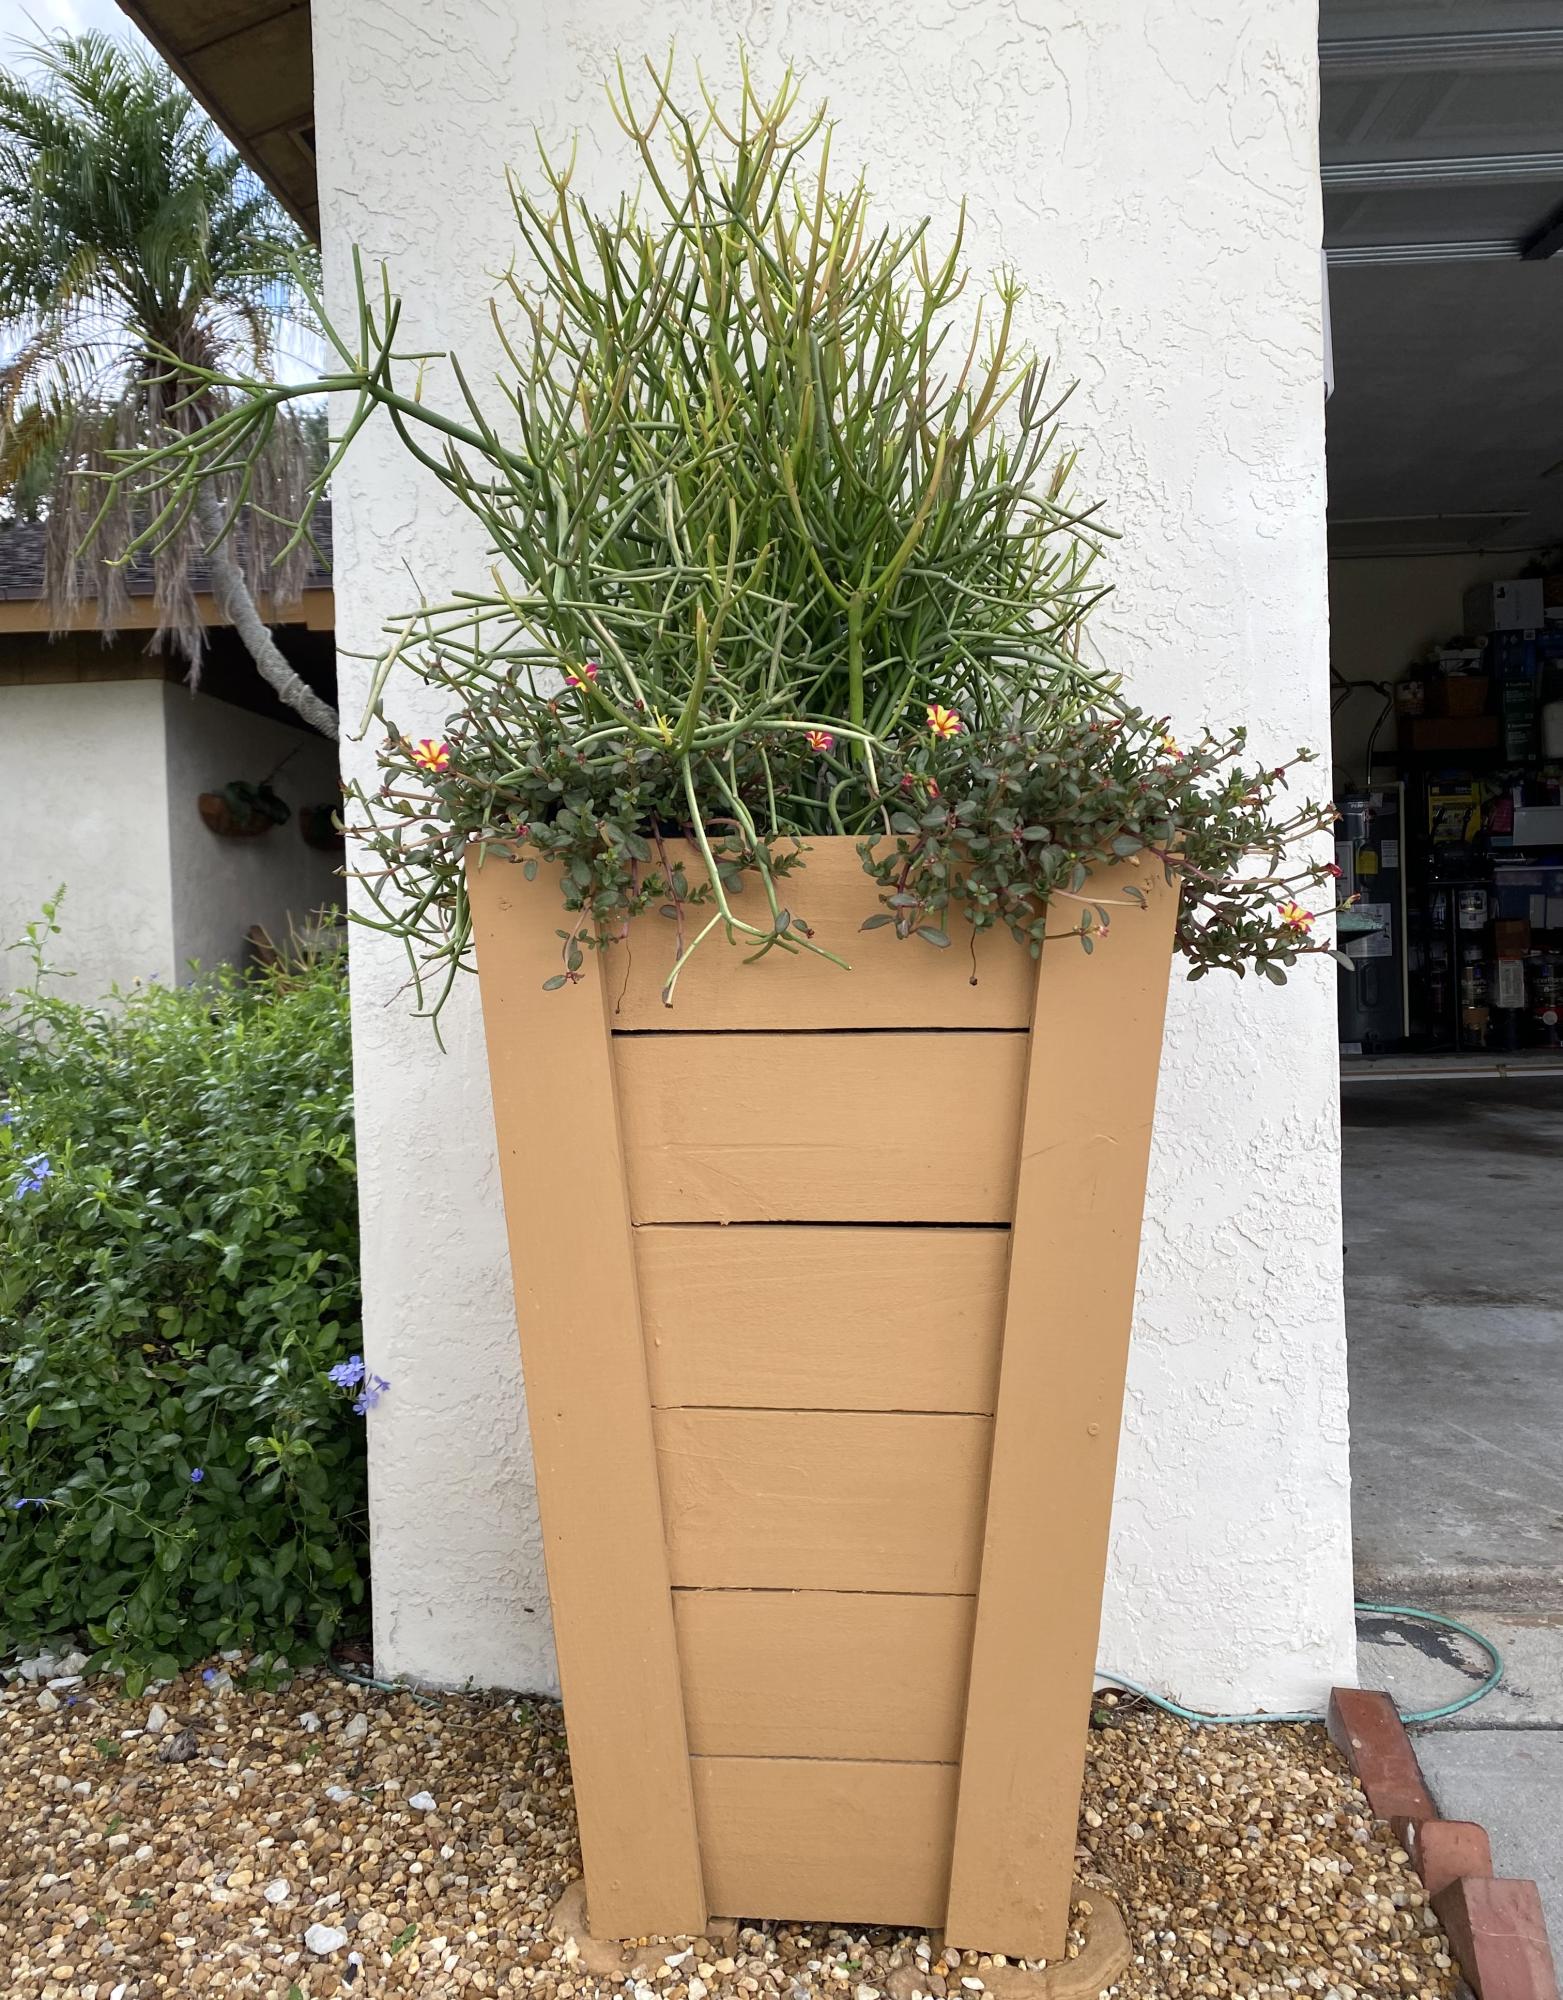
Tapered Cedar Tall Planter

Submitted by Anonymous (not verified) on Sun, 07/02/2023 - 11:30

My husband made these fabulous tall planters based on your plans and video. We painted them the same color as the trim on our home. We live in Florida so instead of filling the entire planter with potting soil my husband put screening about 1/4 from the top so the plants can drain easily, especially in the rainy season. He made the planters with pressure treated wood which is perfect in south Florida.

Thank you so much for providing us with such a beautiful idea for unique and custom planters. My husband had a great time with this project and the results are just fabulous.

Annemarie

Built from Plan(s)
Back