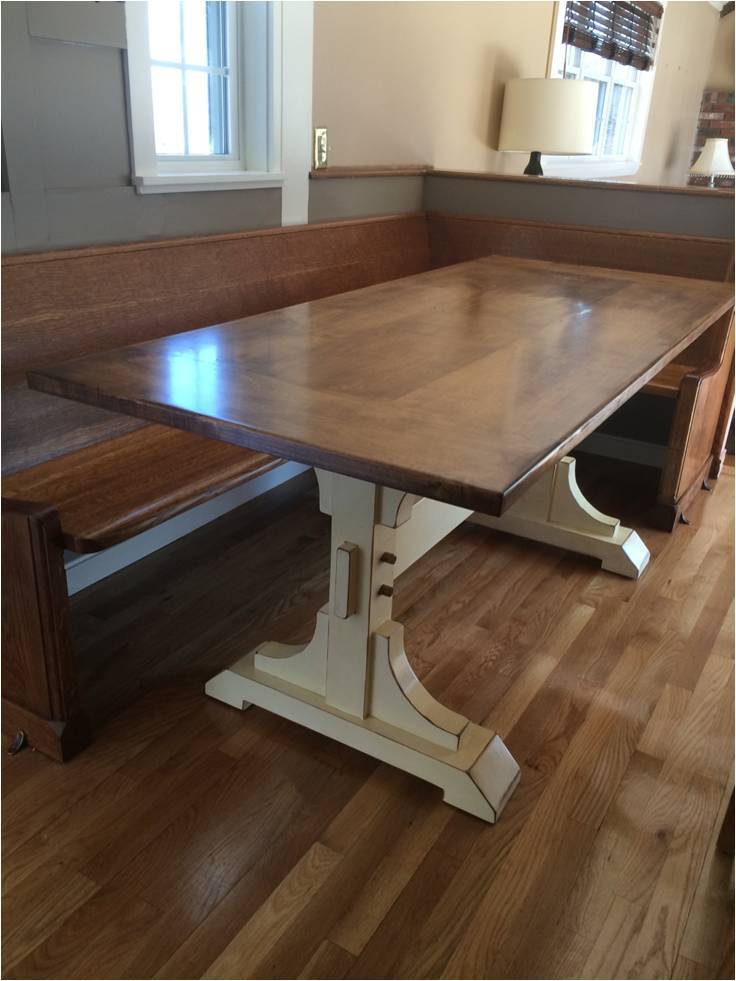
Kitchen Island
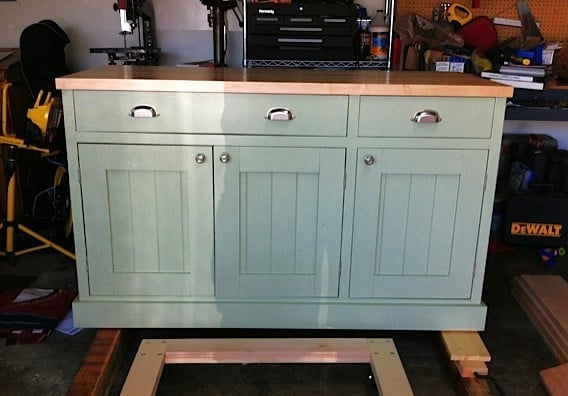
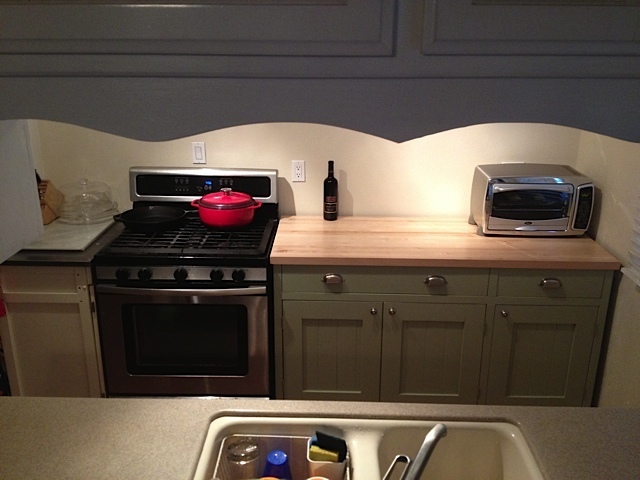
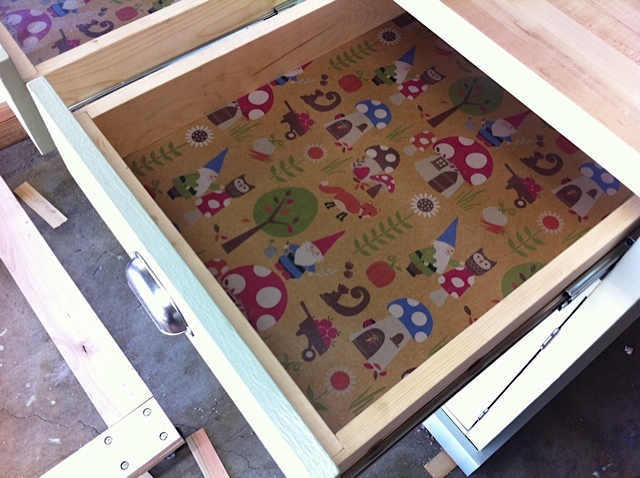
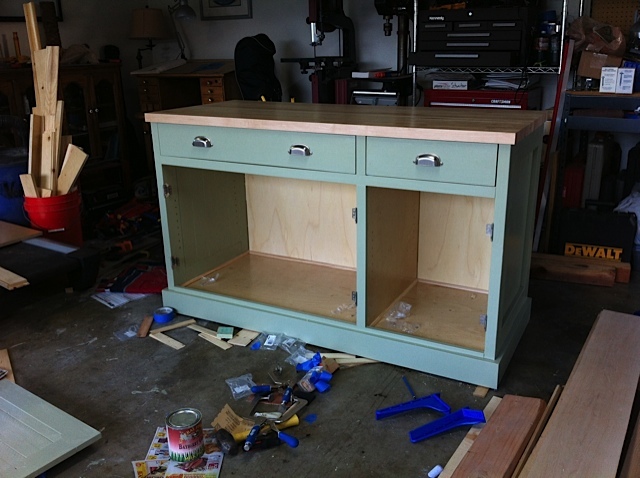
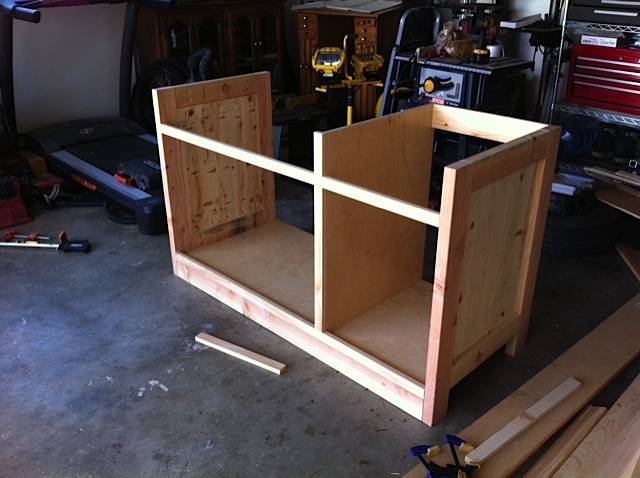
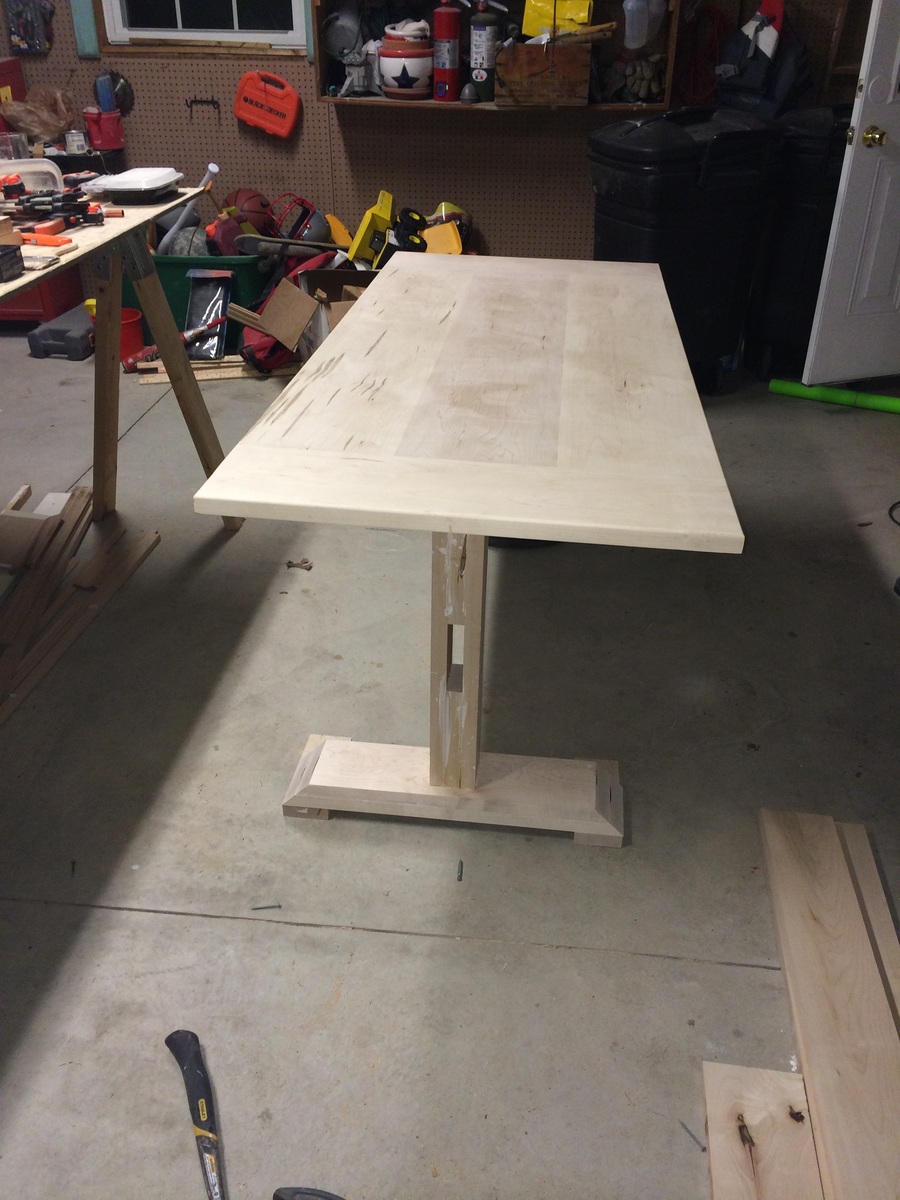
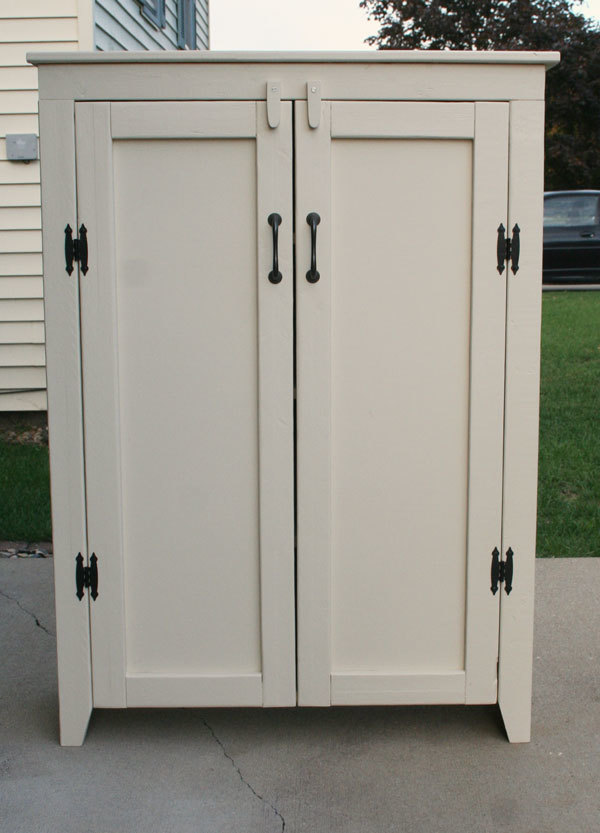
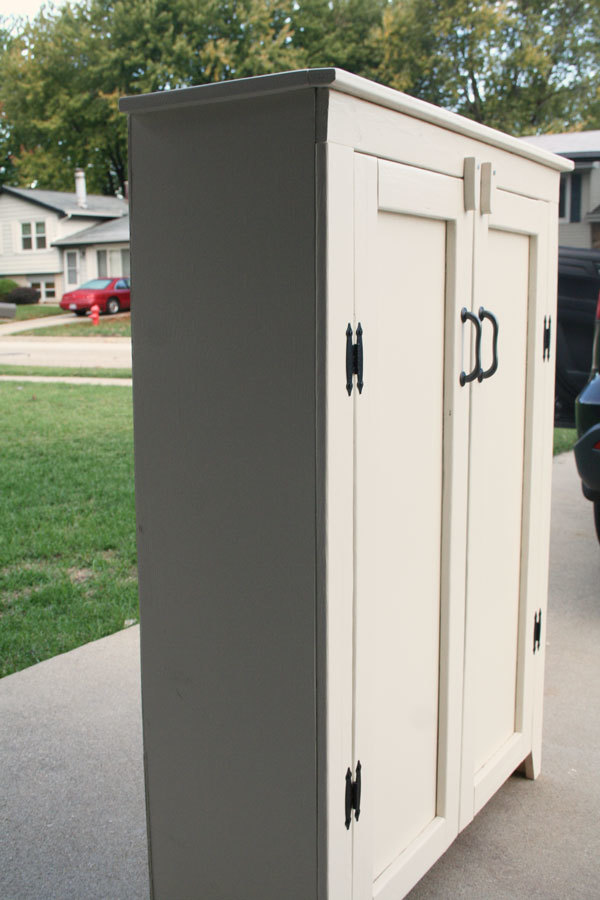
We had an area in our kitchen where the washer and dryer use to be, and we wanted to build a cabinet that would fit in that spot. We took these plans and adjusted the sizes to fit the space we needed. We made the depth deeper and we cut off one of the side drawers and doors. We found a pre-made 1 1/2 inch butcher block counter top at a local wood supply warehouse that fit our needs perfectly. The countertop was about a quarter of the price of the whole cabinet, but it was worth it. In the drawers we used wrapping paper that we found at Cost Plus which fits us to a "T". We painted it with General Finish Milk Paint in Bayberry Green and used a clear coat with a satin finish. My biggest advice to someone making this cabinet is to take your time and make sure everything is square.


Comments
vabvive
Mon, 07/02/2012 - 10:10
Gorgeous!
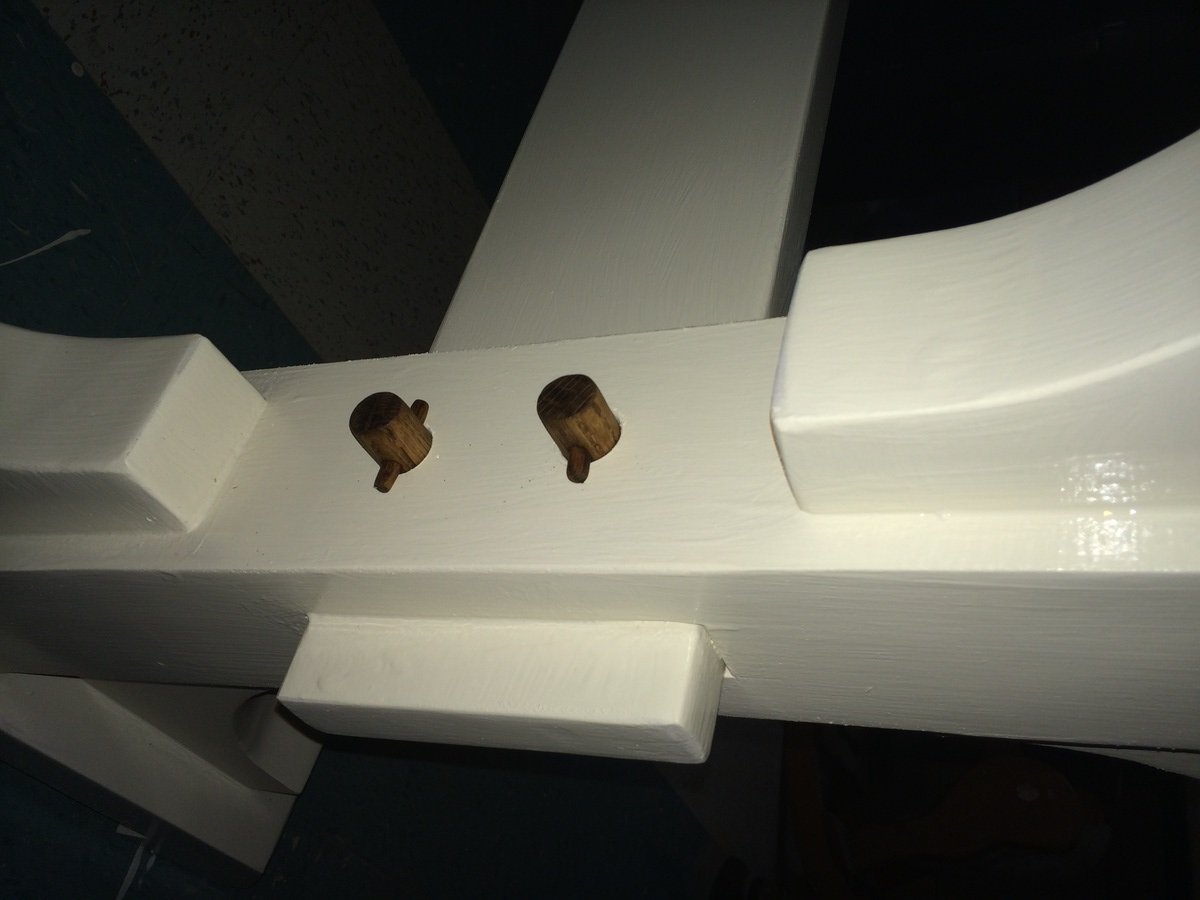
You've done a beautiful job! What did you find was key to getting everything square?
This is lovely & has inspired me to make my own. I need a piece for my master bedroom that I can use as a TV stand and also to conceal my laundry baskets. Originally I'd planned on adapting a sideboard and using a tip-out door like Ana's trash bin for the laundry -- but this piece is so beautiful I may just ensure that my laundry basket will fit inside and build as-is so that I can easily have the option to use it differently if I want to.
Schweizerfamily
Wed, 07/04/2012 - 06:59
Clamp It
Thank you so much. We purchased a couple of Clamp it Assemby Sqares from rockler.com. These helped a lot for getting everything square. We also took our time and did not rush.
Dustin (not verified)
Wed, 07/11/2012 - 19:42
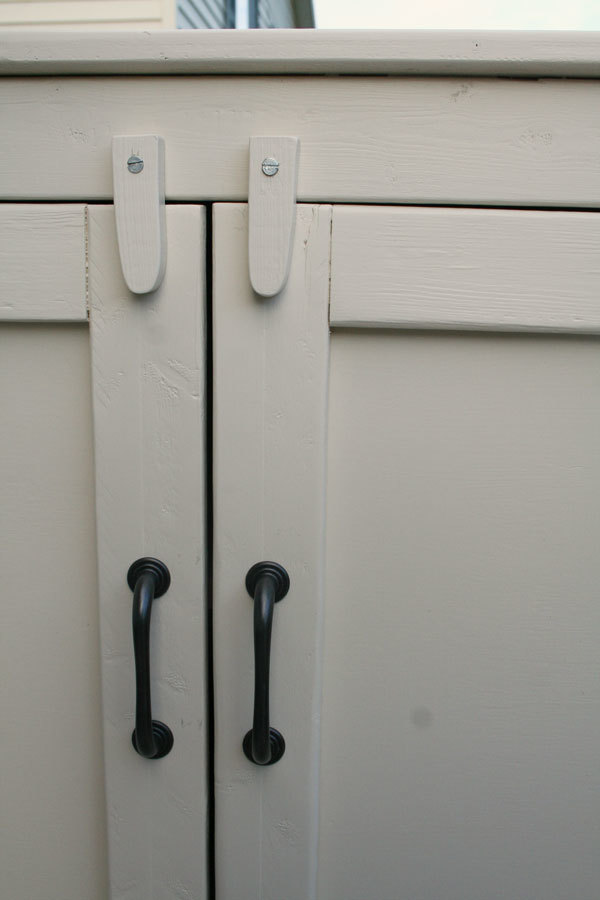
hinges?
Love your modified sideboard! The color is gorgeous and the butcher block is a great addition!
I was wondering what kind of hinges you used. I looked for flush mount hinges at Lowes today and they are not going to work. I want it to look like yours where you can barely see the hinge.
Do you remember the name of it? Where you got it? Pic? Any help would be appreciated!!
Dustin Roberts
[email protected]
Schweizerfamily
Wed, 07/11/2012 - 20:15
Hinges
Thank you very much. We had a really hard time finding hinges also. We tried Home Depot and Lowes and came up empty. We finally went on to Hillary Louise's blog and follow the links to the website where she bought her hinges. http://www.cabinetparts.com
Here are the links that she posted.
http://www.cabinetparts.com/p/amerock-traditional-cabinet-hinges-AMCM31…
http://www.cabinetparts.com/p/amerock-traditional-cabinet-hinges-AMCM31…
We just bought ours in a different color.
Becka (not verified)
Sat, 09/08/2012 - 13:14
Awesome!
My husband & I are looking to build our own too but the dimensions of the original plan would make it too big for our dining area. Yours would be a perfect size though - would you mind posting the size adjustment for yours? Or could you email it to me? I would be forever grateful :)
Love the color you painted it too....very nice choice!
Becka Krikorian (not verified)
Sat, 09/08/2012 - 13:18
Awesome!
My husband & I are looking to build our own too but the dimensions of the original plan would make it too big for our dining area. Yours would be a perfect size though - would you mind posting the size adjustment for yours? Or could you email it to me? I would be forever grateful :)
Love the color you painted it too....very nice choice!
rhettar
Sat, 01/19/2013 - 11:37
Absolutely gorgeous!
This is exactly the size down I had in mind and was wondering how it would look with one door off by itself, it looks great! I even thought about incorporating one door to actually be a tilt or pull out for trash. You guys did a wonderful job and it looks like it was built in where you ended up putting it in your kitchen... Are you going to do a little something now to match on the other side of the stove?
Schweizerfamily
Fri, 01/25/2013 - 09:12
Up next
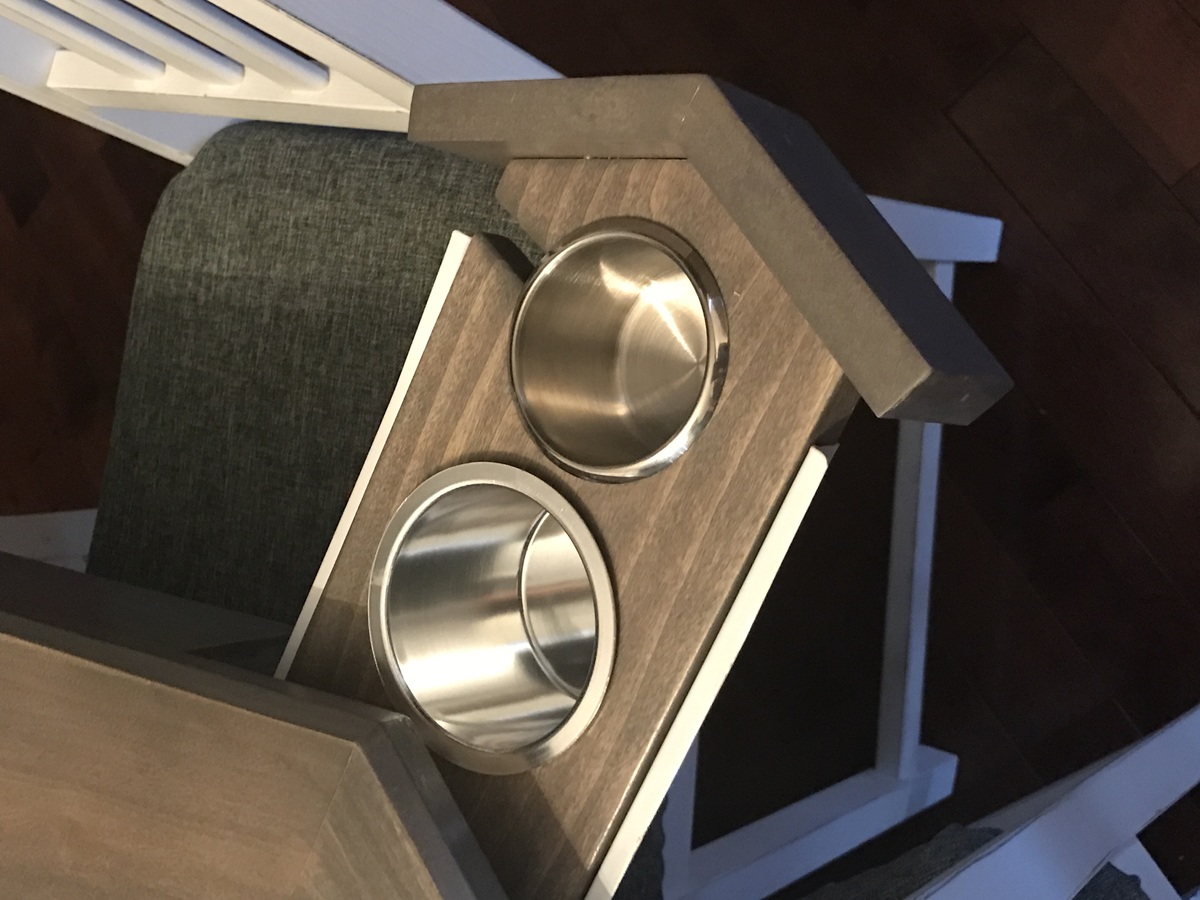
Thats a great idea. We were thinking one our next projects would be a mix between this and Ana's recycling center with the tilt out for dog food.
Fatmike
Wed, 07/31/2013 - 17:36
Cut list or measurements?
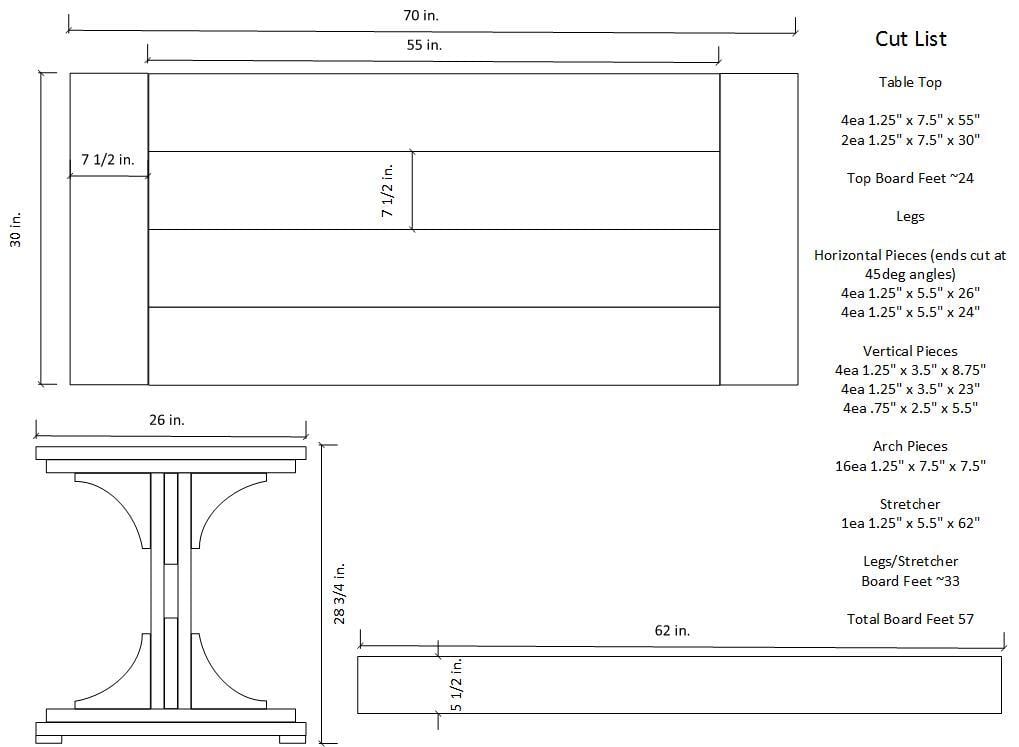
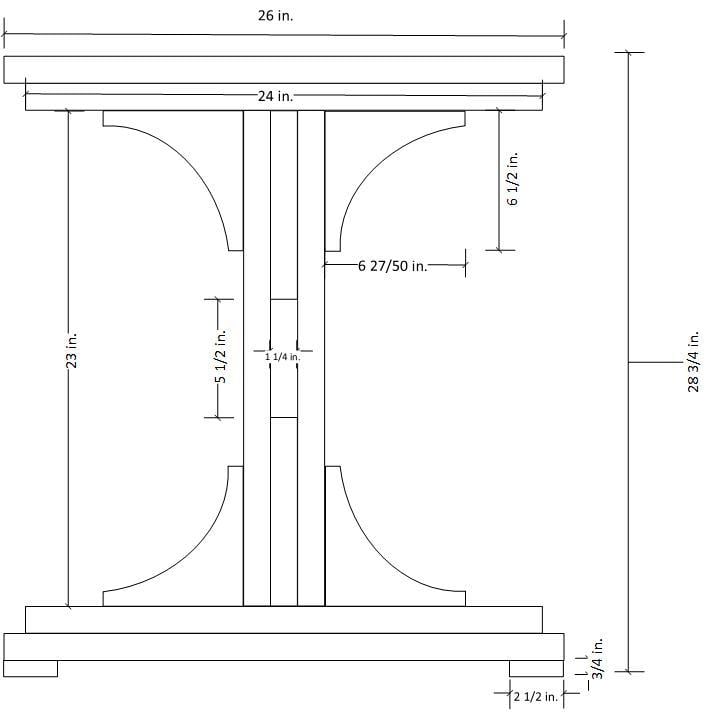
Really well done. I'll be clearing out the garage getting ready for this very soon. Do you happen to have a cut list or measurements?