Community Brag Posts

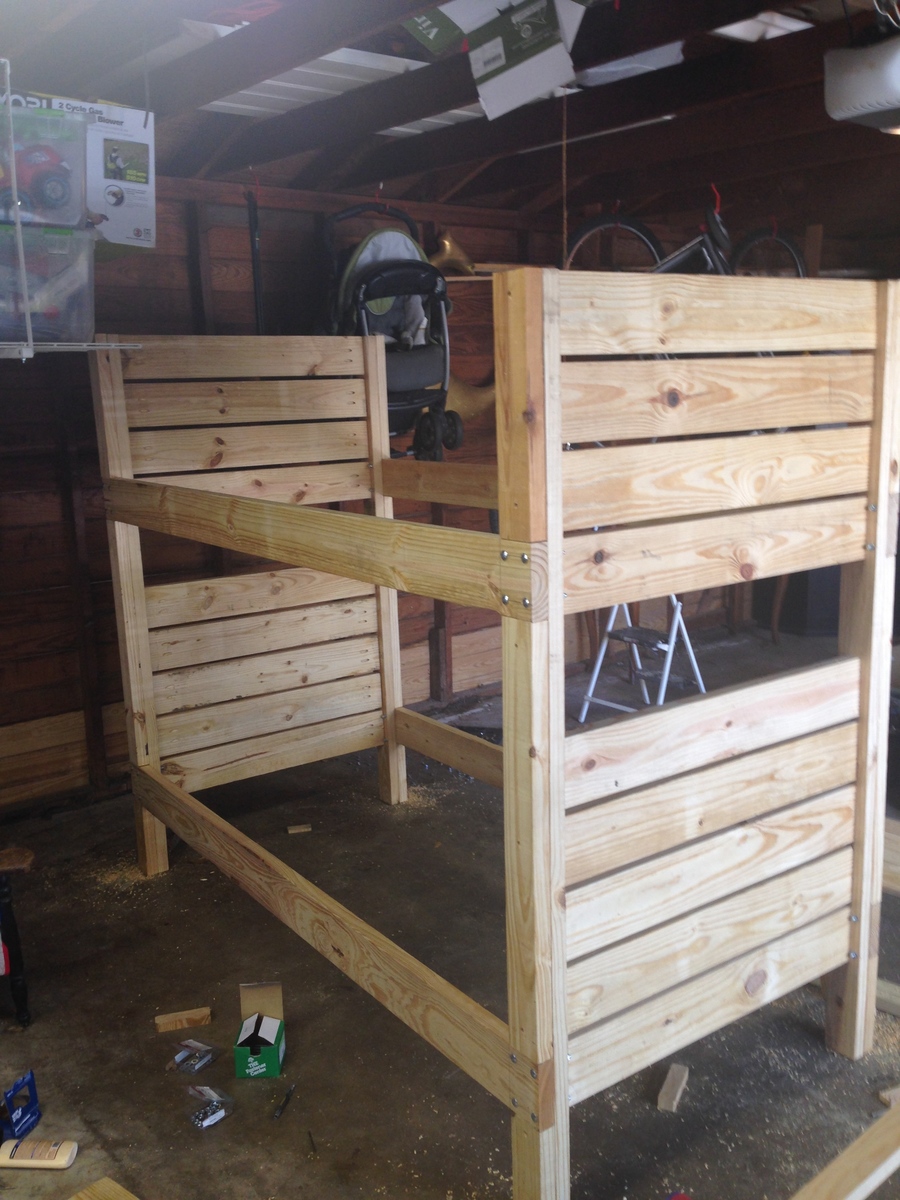
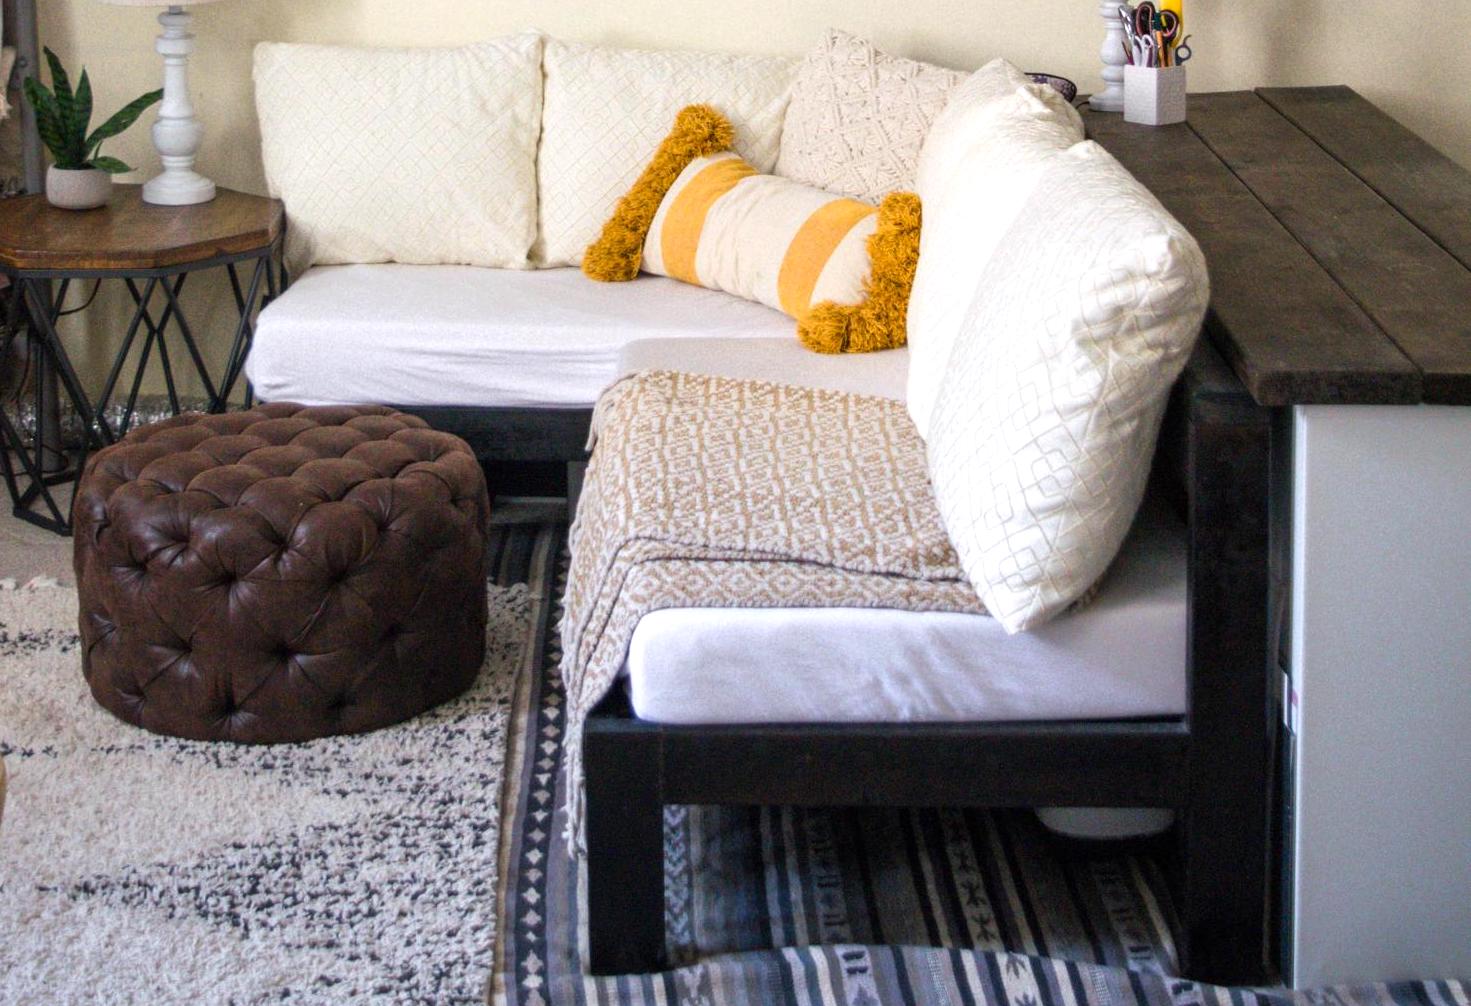
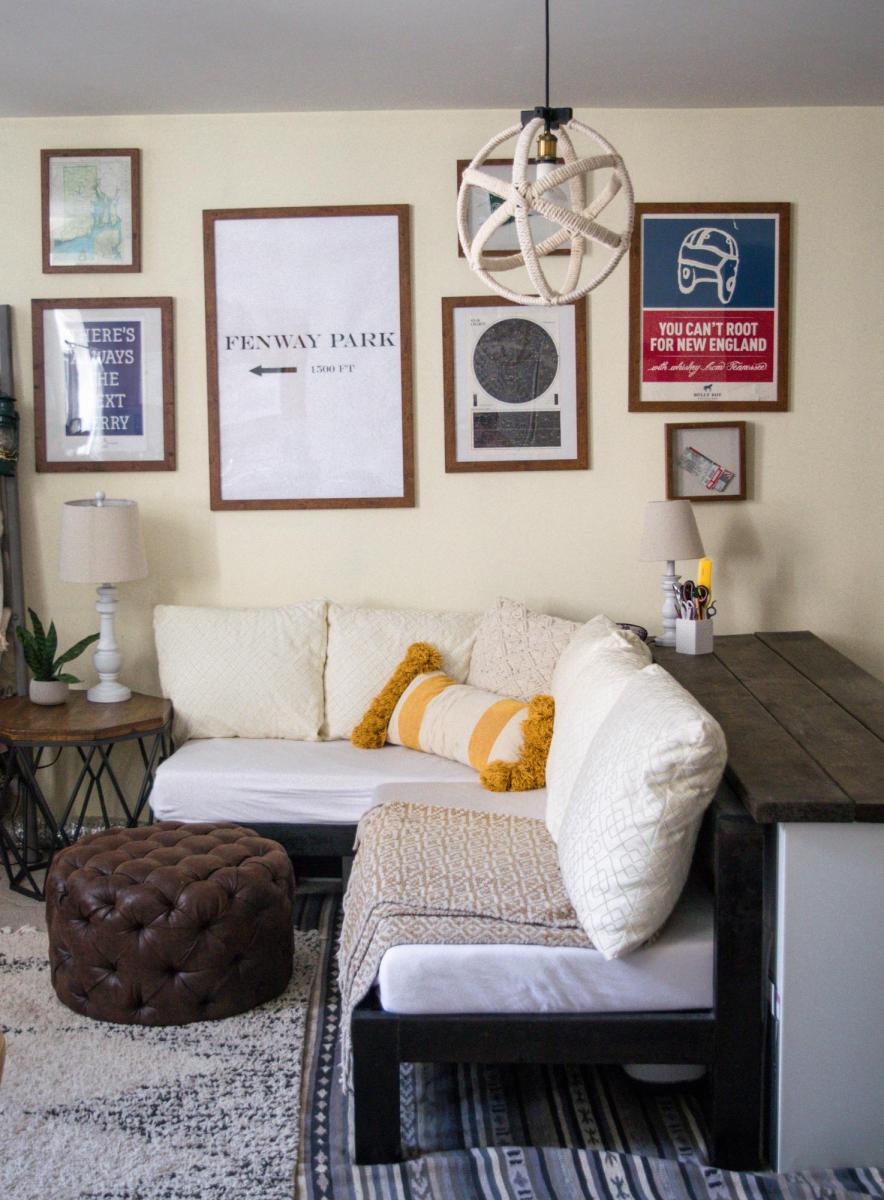
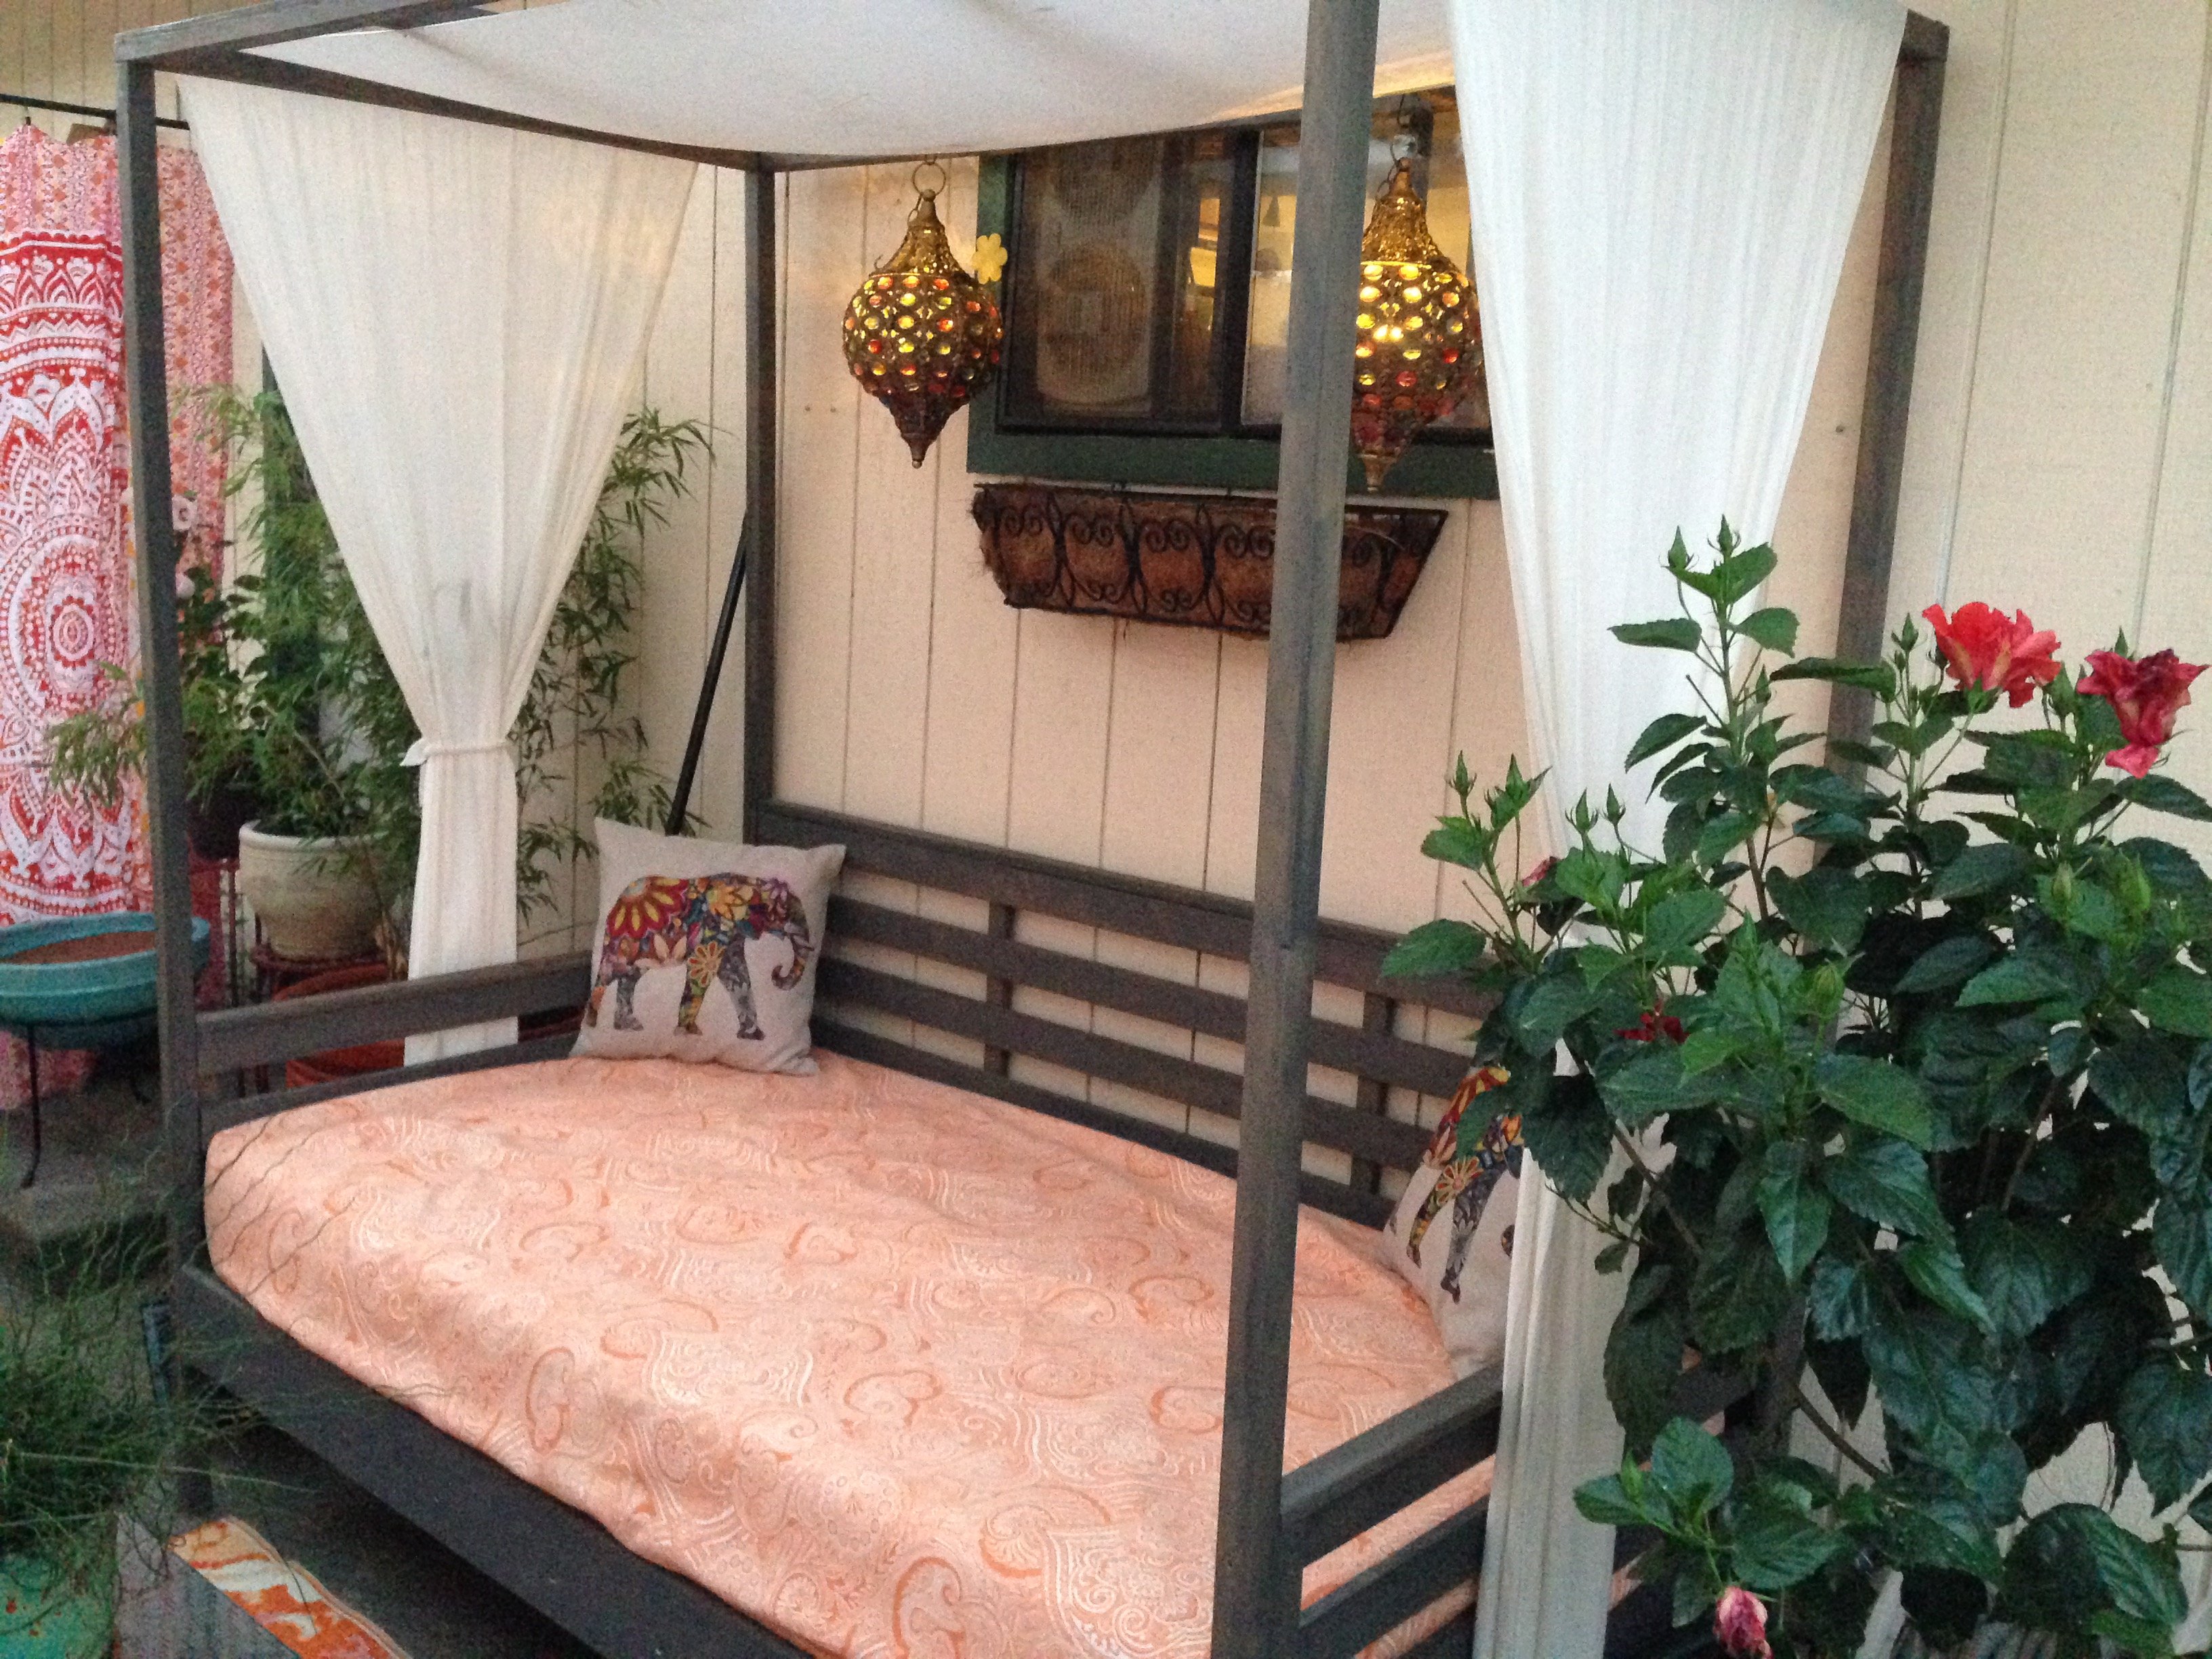
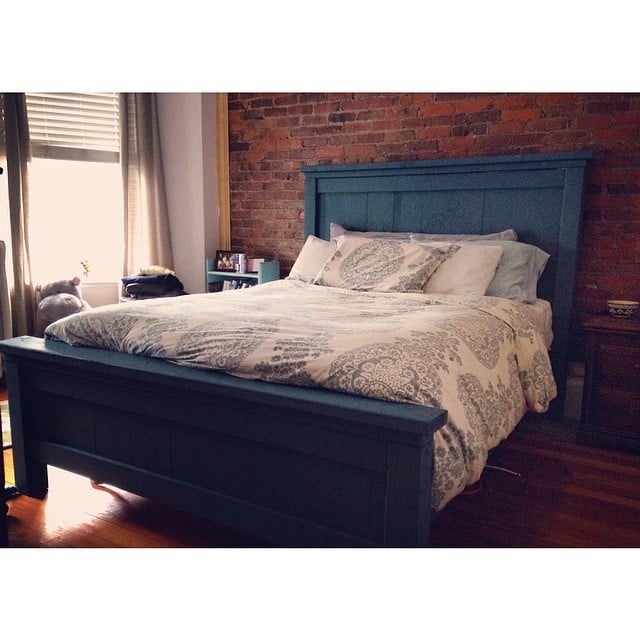
Side Street Bunk Bed

Submitted by wotto on Sat, 03/22/2014 - 16:10

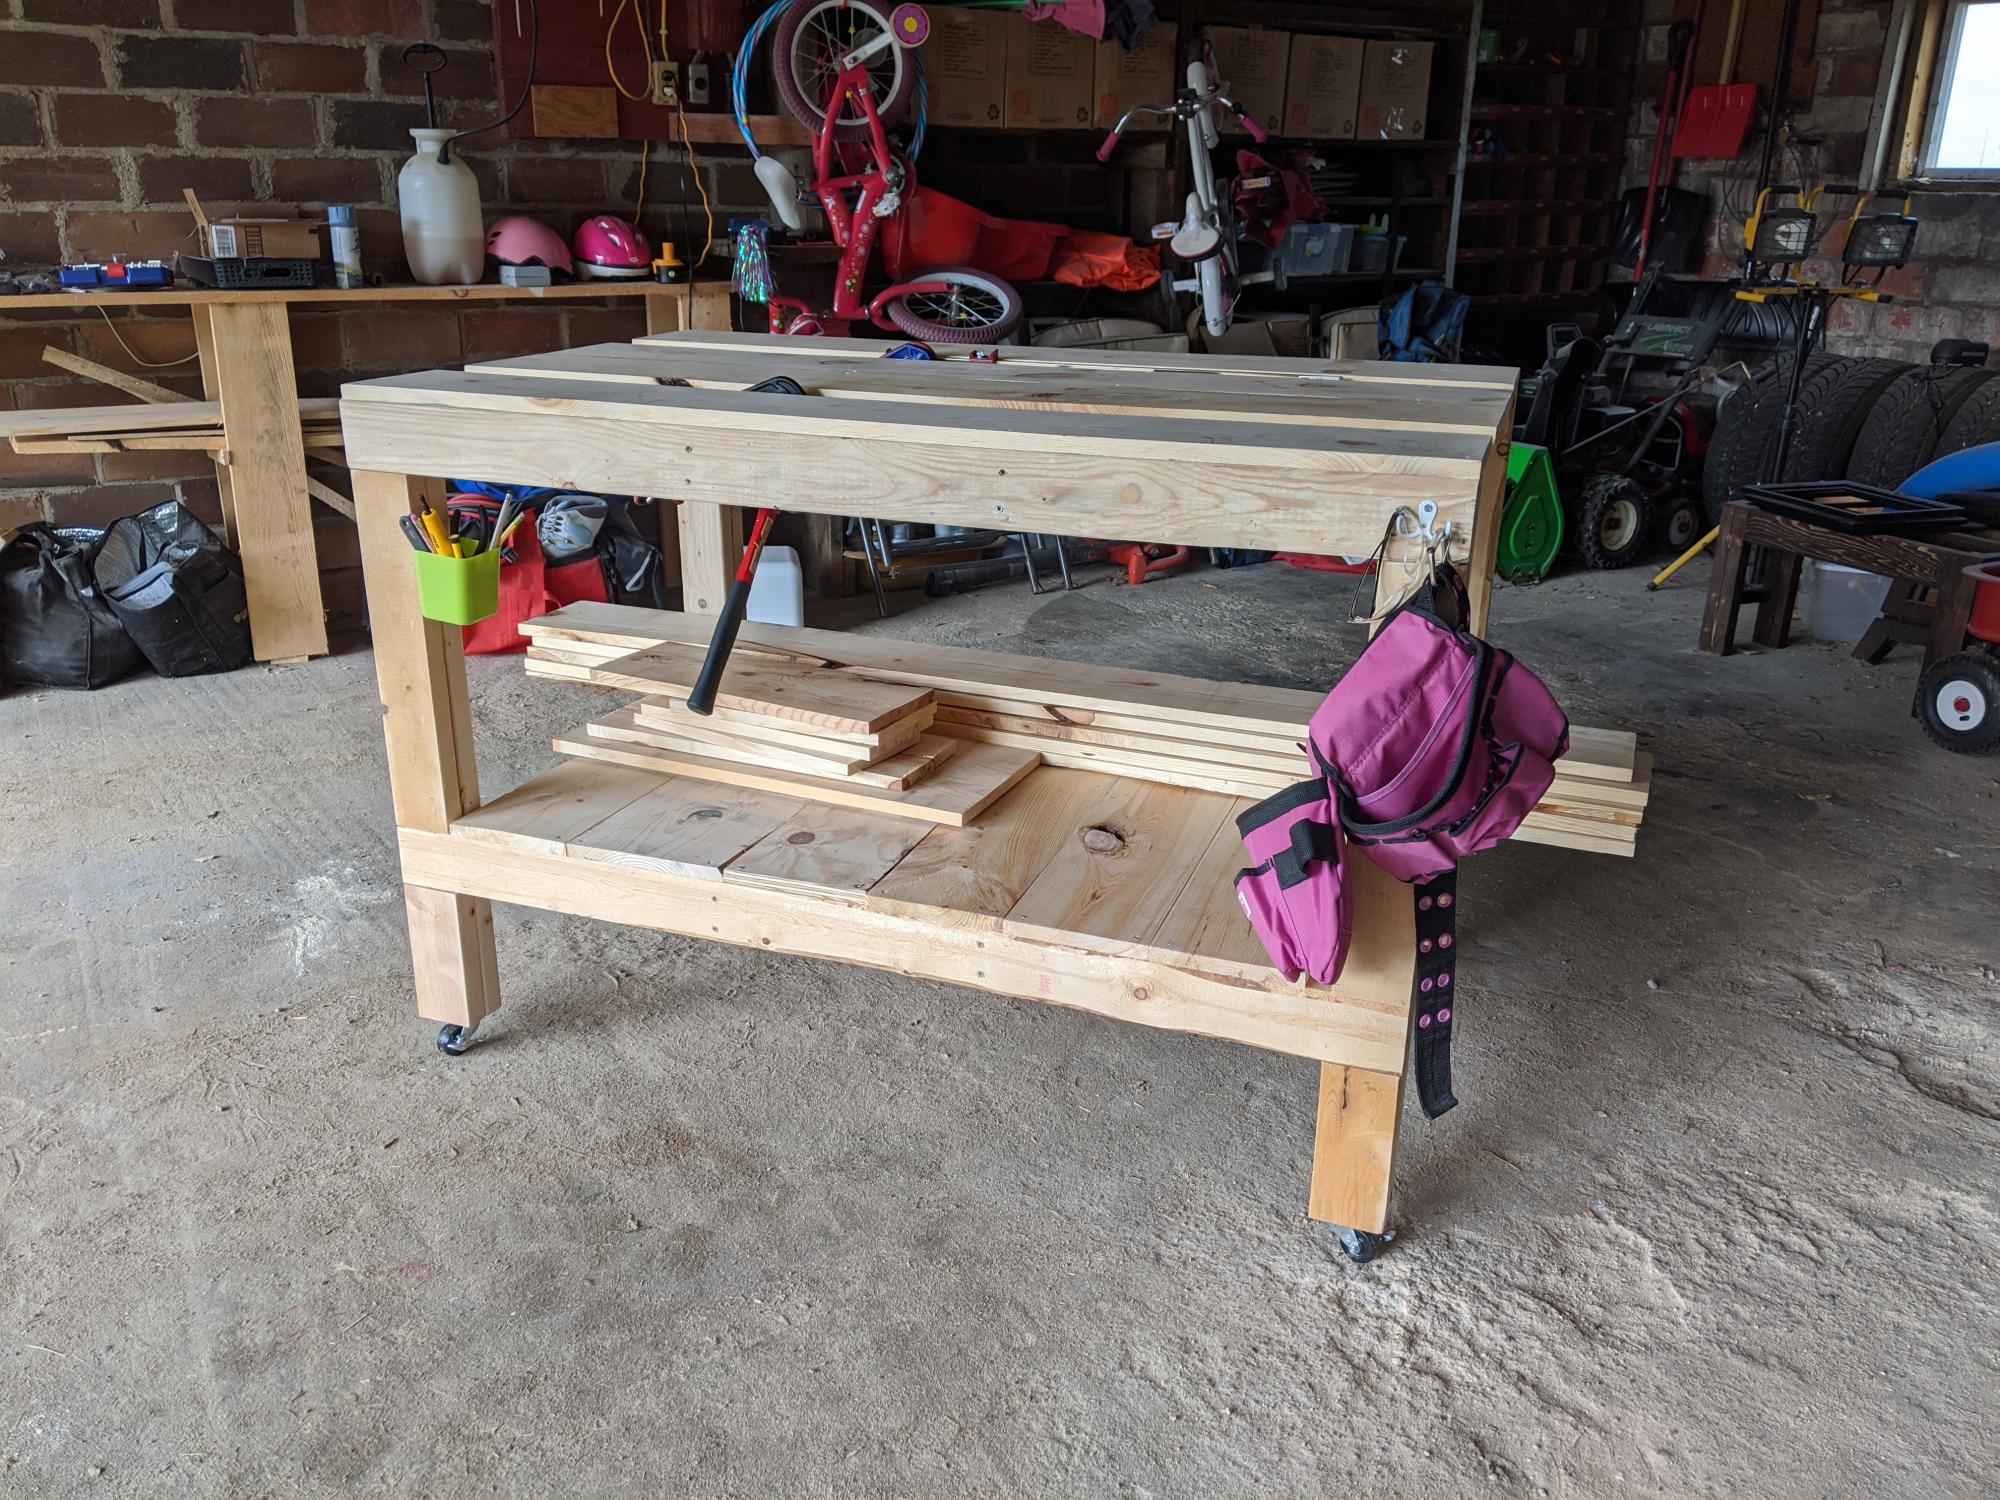
This one will be around for a while... heavy as sin, but solid.
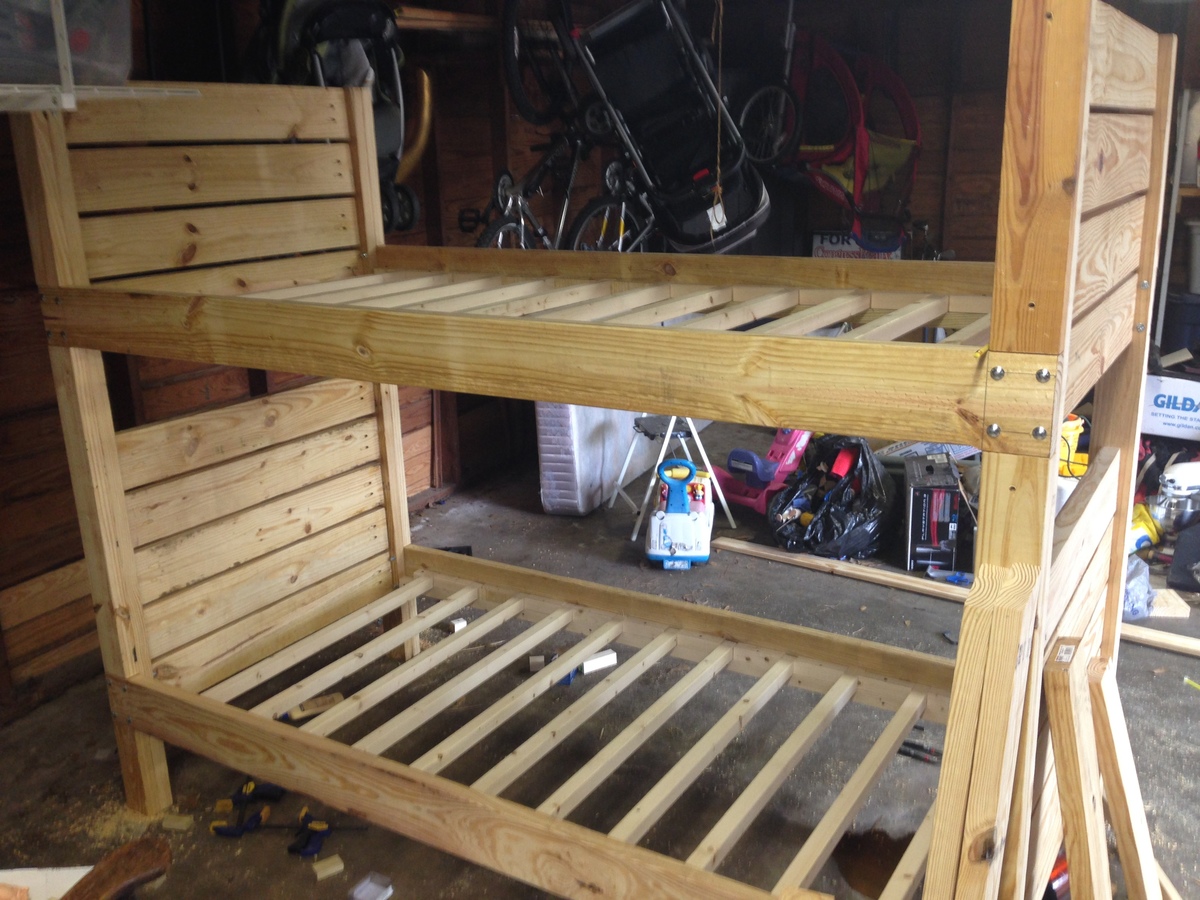
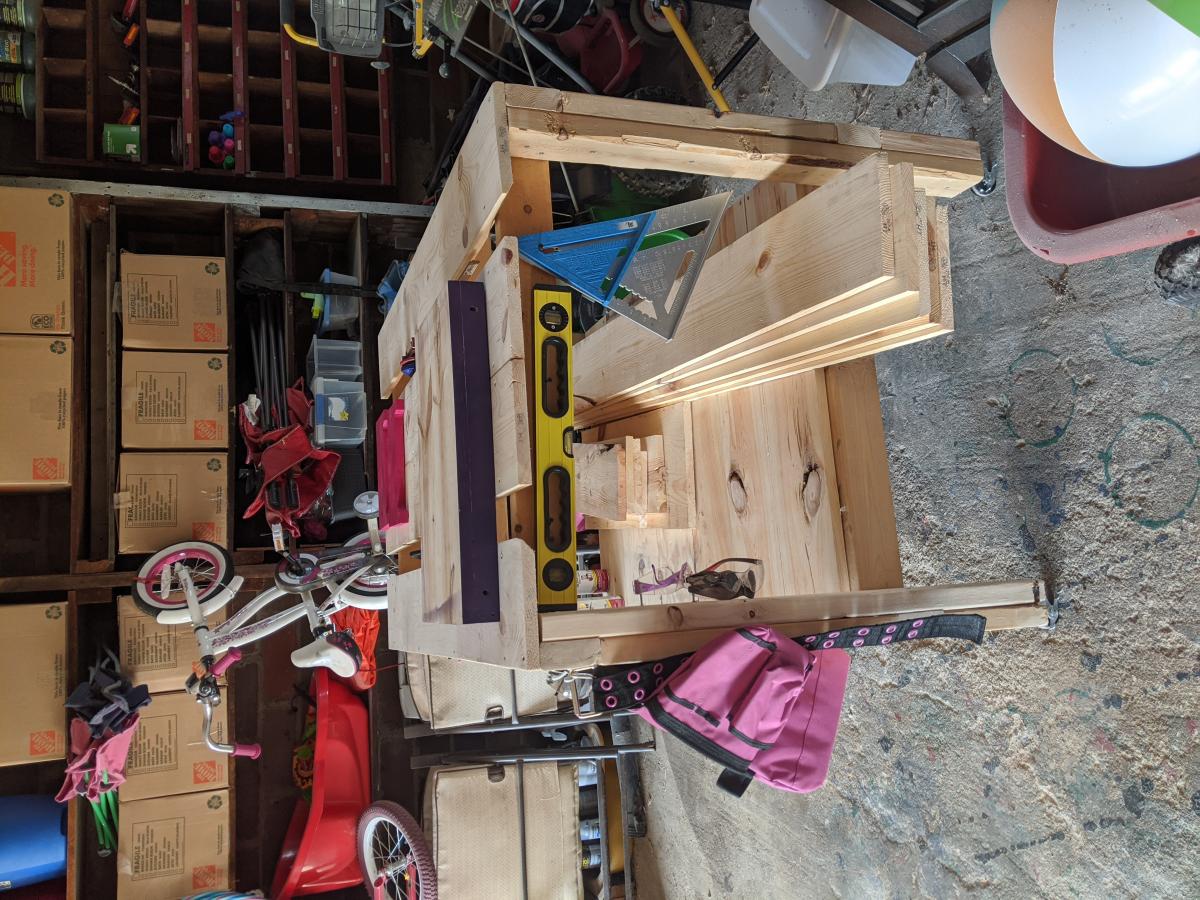
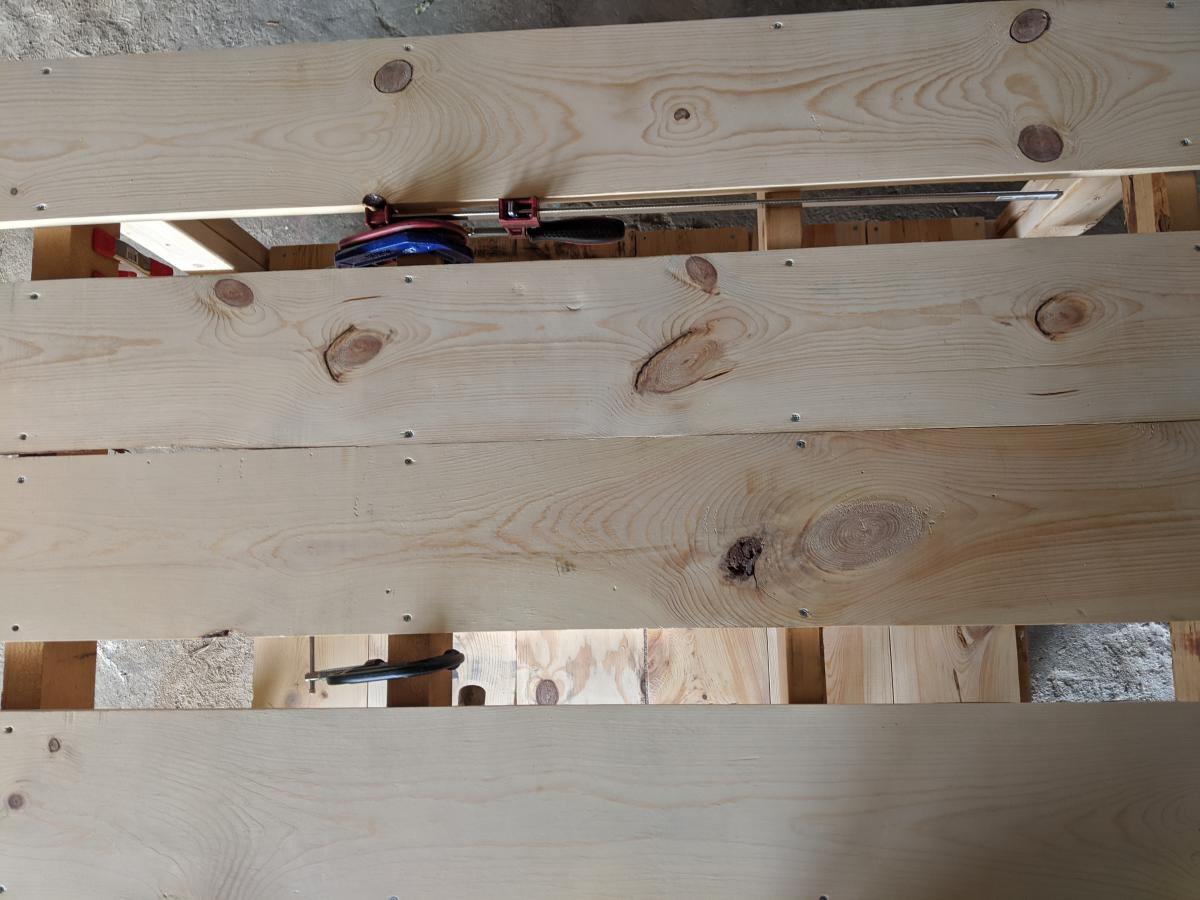
Used 11 2x2 removable slats per level spaced 5 1/2" apart by 2x2s.
Added a 44" ladder and back rail and front rail with 30 degree miter cut on 2x4s.

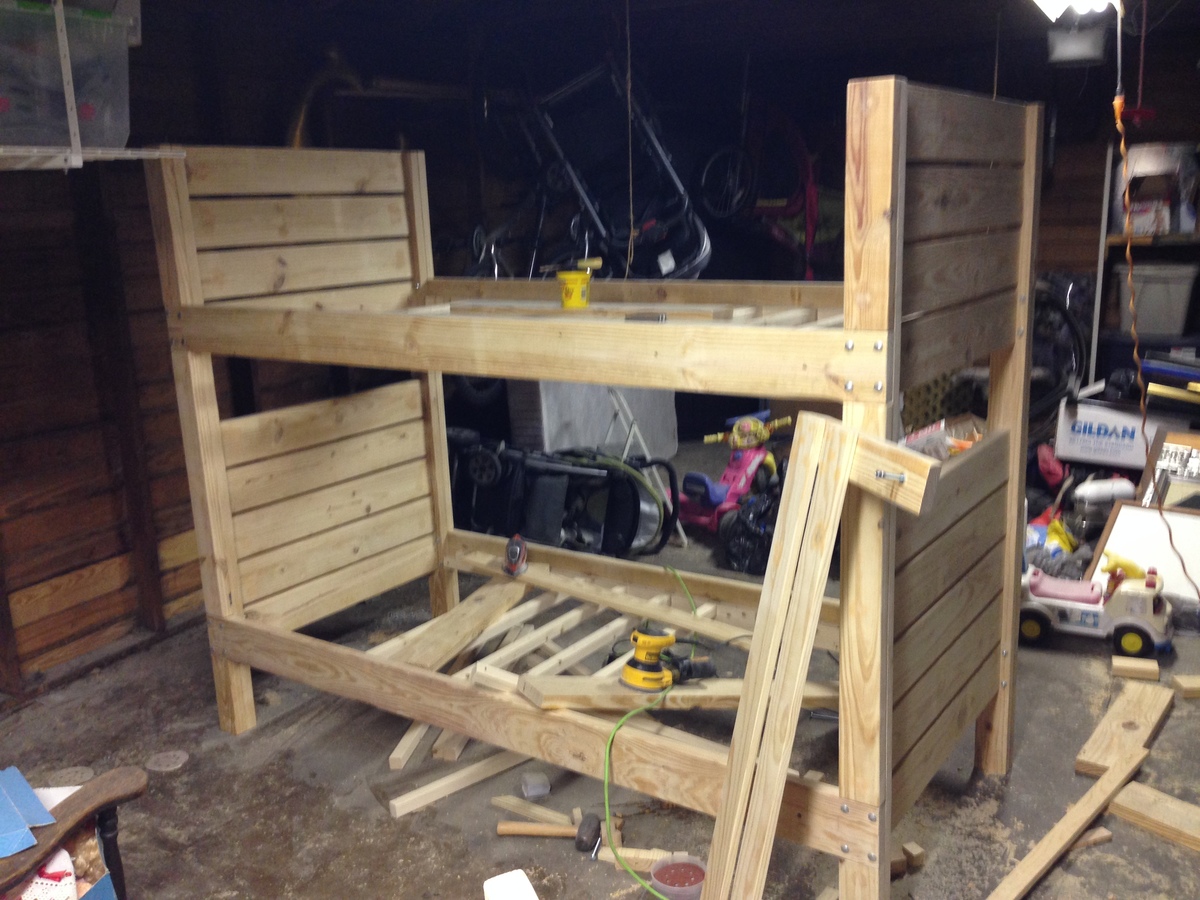
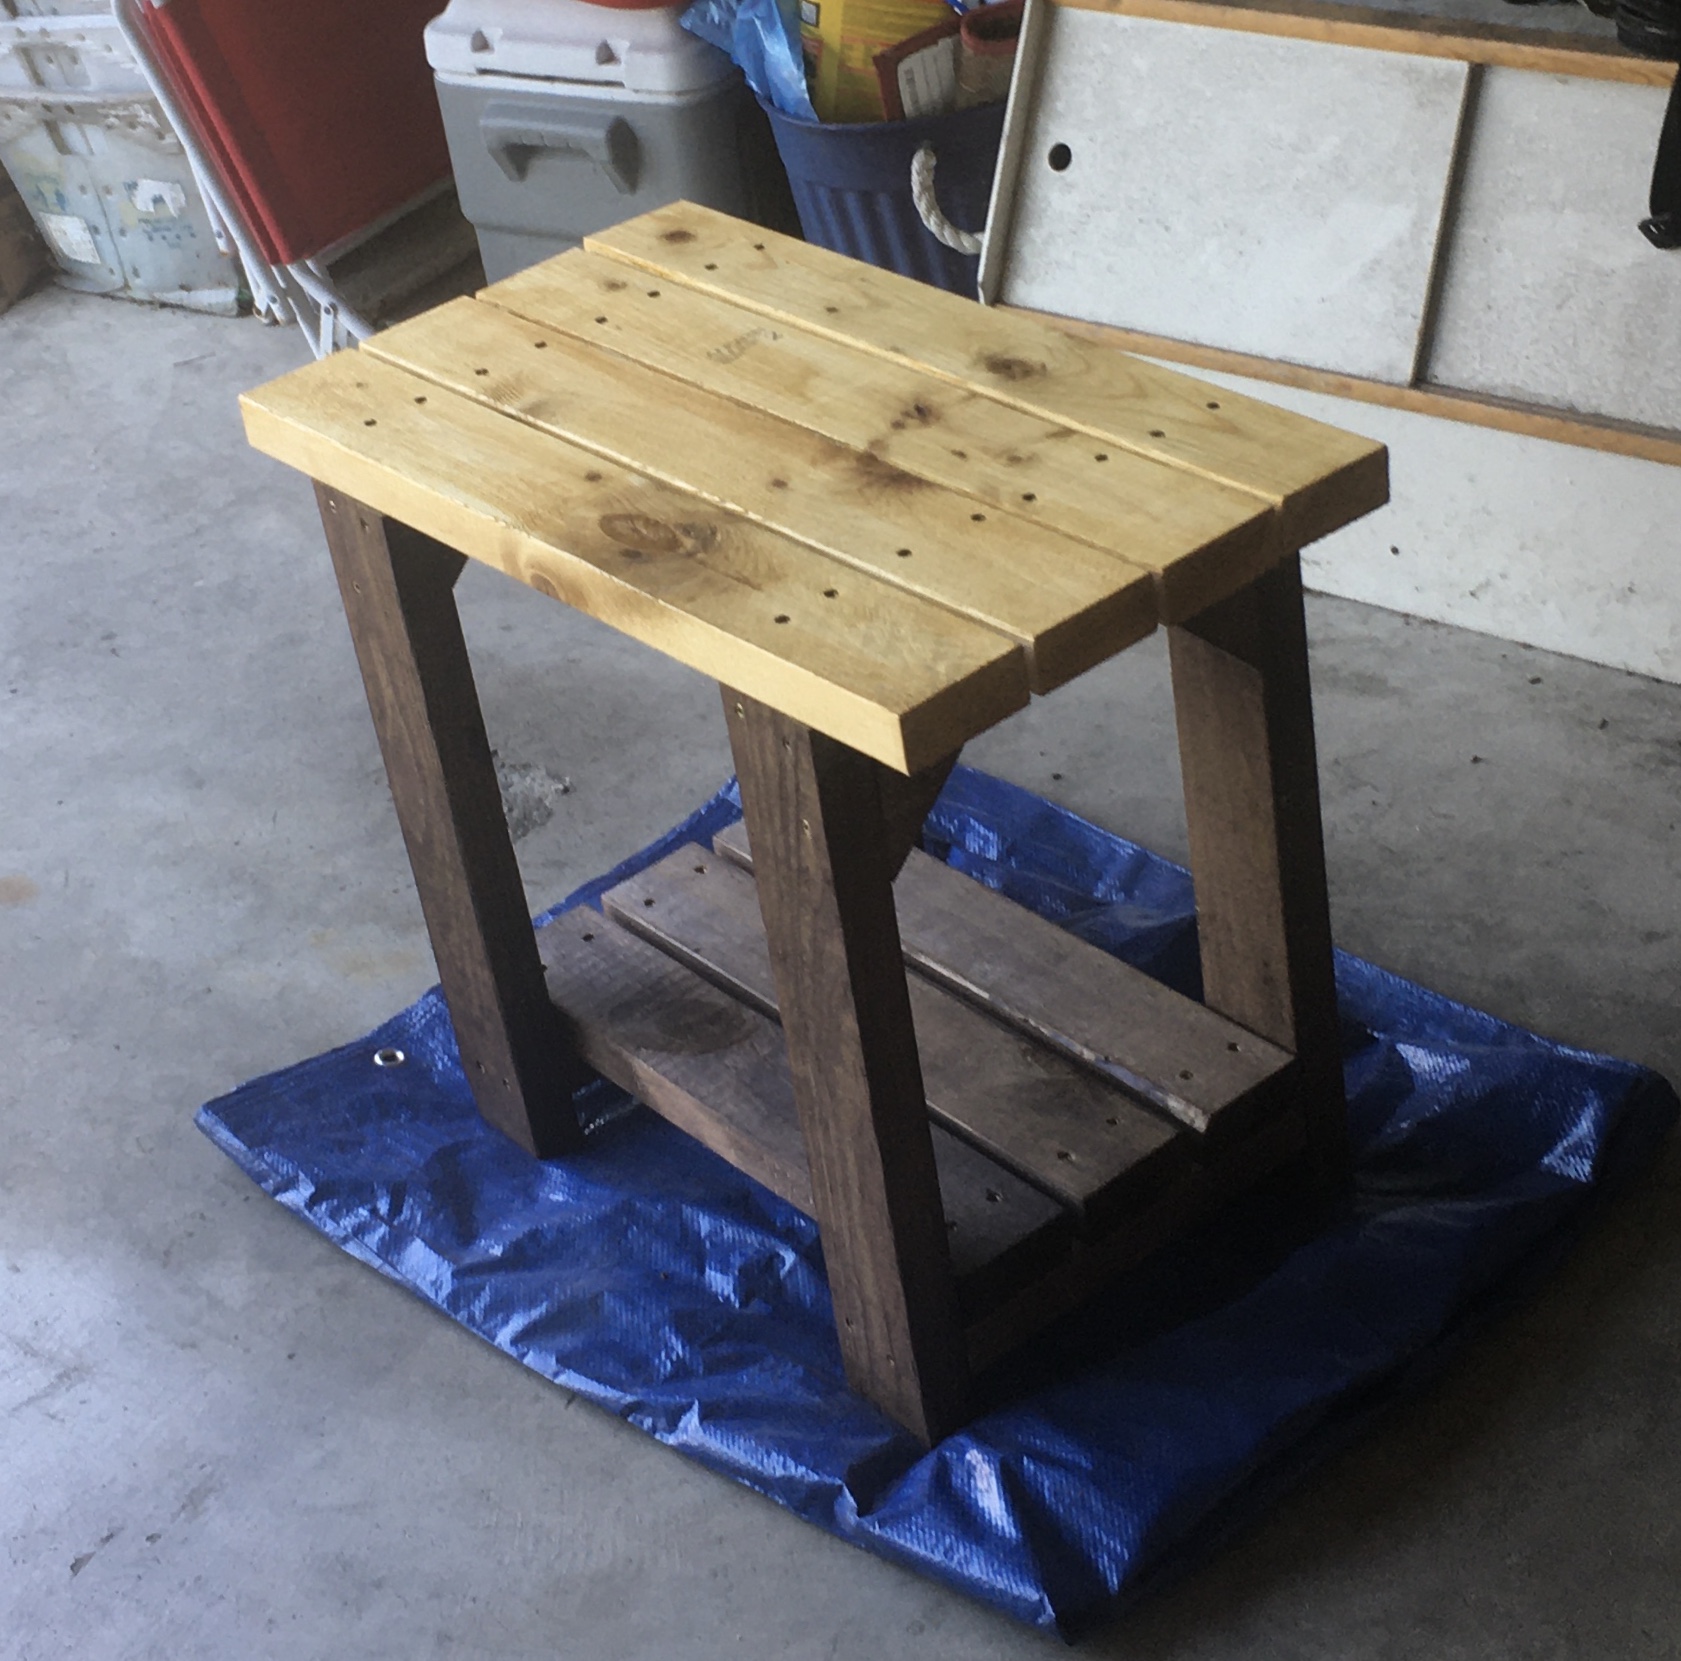
Next time, would have sanded & stained the headboard/footboard 2x6s on the ends before screwing them to 2x4s. Didn't have a sander that could get between the 1/2" gap and the hand sanding from position can be tough. Overall, very pleased with the result.

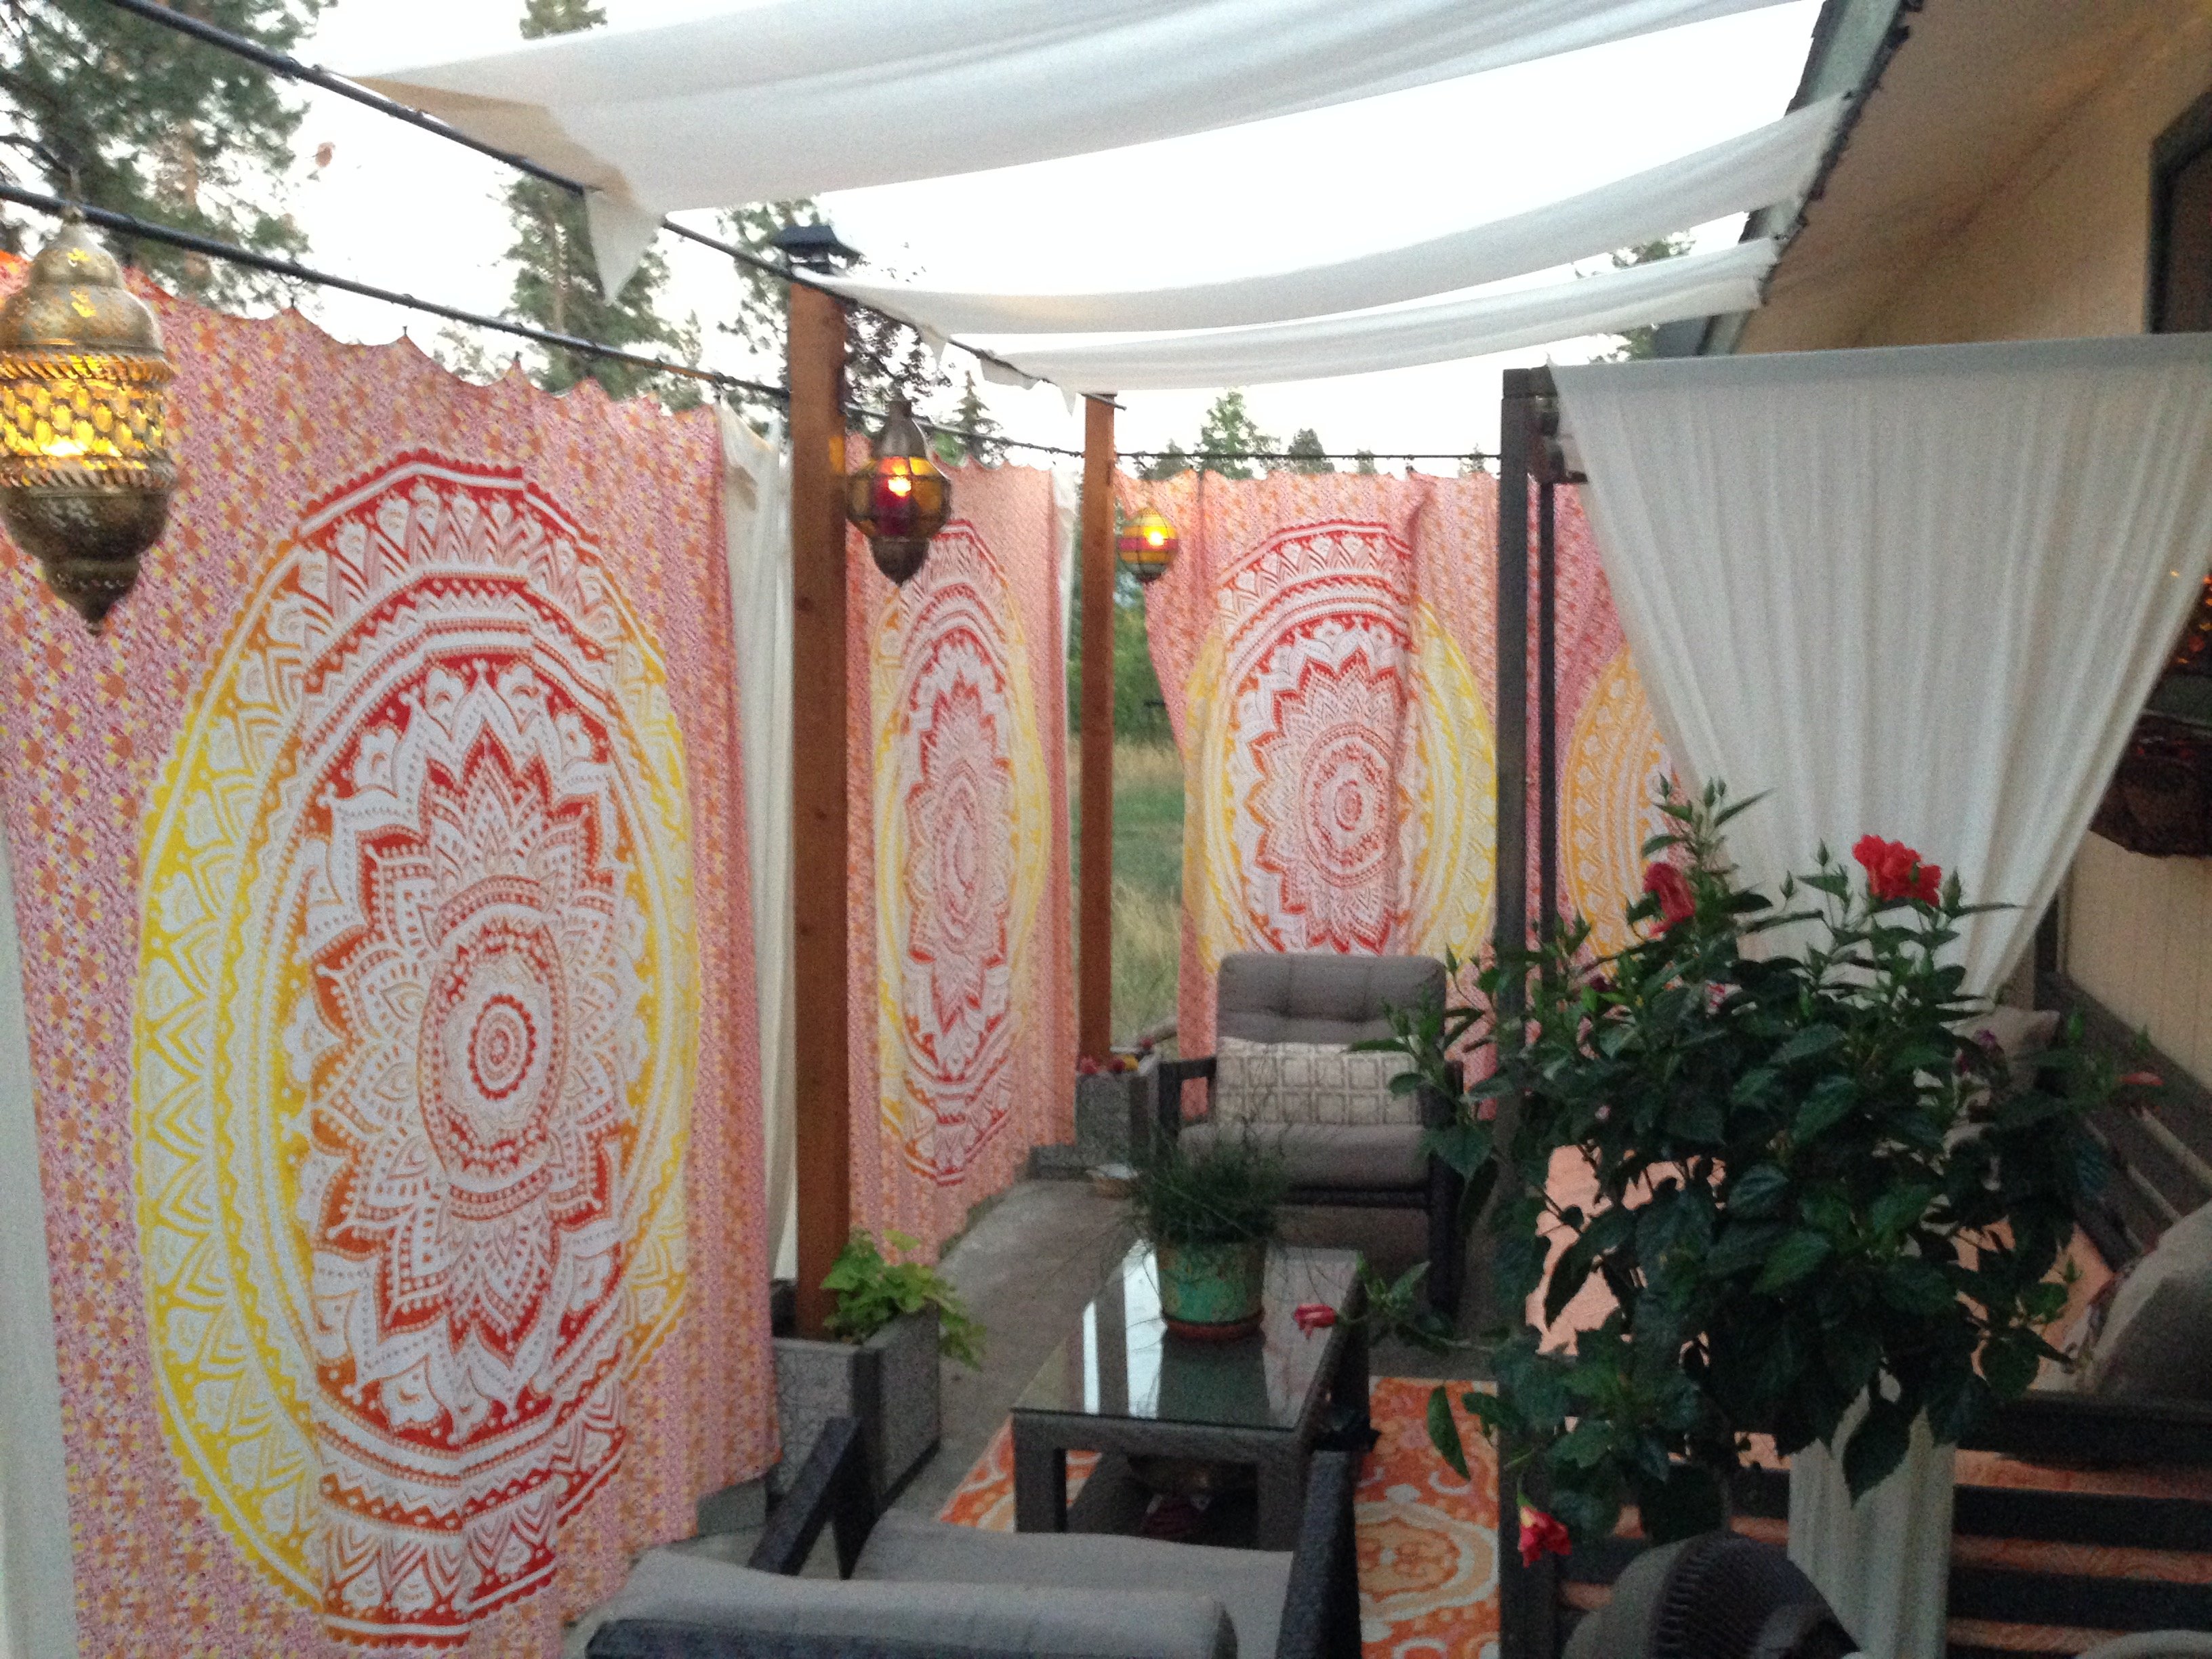
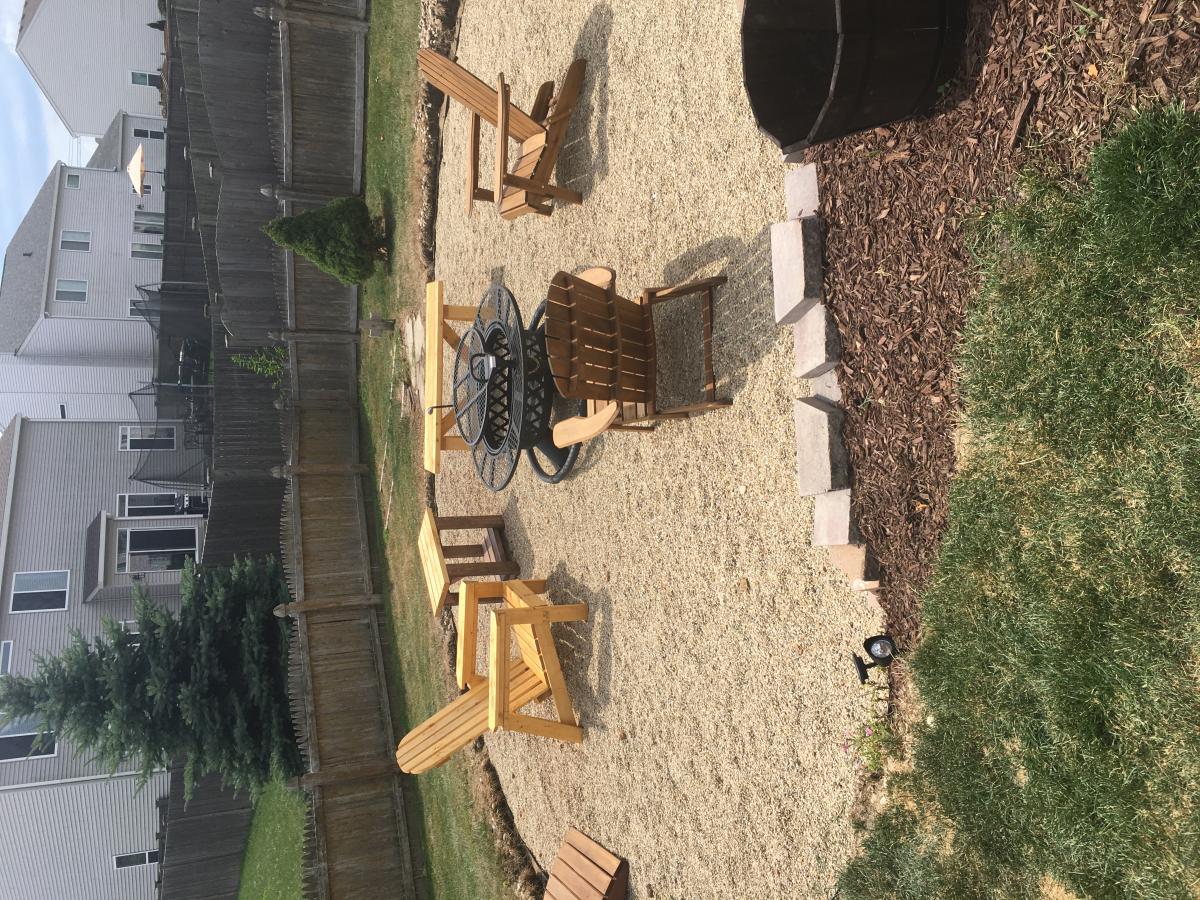
Kids love it! First of many projects I will be doing from this website.

Built from Plan(s)
Estimated Cost
$300
Estimated Time Investment
Weekend Project (10-20 Hours)
Finish Used
Rust-oleum Kona
Recommended Skill Level
Beginner

Comments

Red and Black Hutch

Submitted by market5e on Sat, 06/09/2012 - 13:34

This was an older hutch, oak in color. I took off the top glass doors off, put wood putty where the hinges were. I lightly sanded the hutch and cleaned it with TSP. Finally I primed and then painted black first. I used a candle to put wax on the area's I wanted to look distressed. After the black dried, I lightly sanded again, before I sprayed the red paint on. I lightly sanded the hutch once more, concentrating on the black to show through. Finally I glazed the hole hutch in a black. Black baskets were added to add to the appeal.

Estimated Time Investment
Weekend Project (10-20 Hours)
Finish Used
Glaze
Recommended Skill Level
Beginner

Comments

Sectional from Crib Mattresses!

Submitted by Anonymous (not verified) on Tue, 04/28/2020 - 07:17

I modified the kids couch plans to make a sectional sofa for my apartment! We removed all but one of the arm rests. So when pillows are removed it doubles as a twin bed for our friends!

Estimated Cost
$200
Finish Used
Espresso minwax
Recommended Skill Level
Intermediate

Outdoor Daybed with Canopy

This was an awesome, quick, and easy project. The sanding, staining, and drying, took forever for me but the actual cutting and assembly was super quick. I have this on an uncovered patio and my local store didn't carry cedar in the sizes I needed so I went with the cheapest wood I could find and used a high quality oil based outdoor stain. I am hopeful it will hold up to our pacific NW winter because it won't be coming in. Considering I had never made anything before and had never used a miter saw, sander or quick square, I am happy with the time it took to finish this.
 

Built from Plan(s)
Estimated Cost
$150 for lumber, screws, stain, and glue
Estimated Time Investment
Weekend Project (10-20 Hours)
Recommended Skill Level
Starter Project

RH Inspired Shanty Hutch & Sideboard + glass doors

Submitted by mandi10uga on Fri, 09/09/2016 - 10:50

This was my first woodworking project ever - and am thrilled!! Thank you Ana-White.com!! I needed a beautiful china cabinet for a fraction of the retail cost. Once I found plans on this website, I bought some power tools and got started! I only worked a couple of hours each weekend so it took a while to finish.


I modified the Shanty sideboard and Shanty hutch plans in a few ways: Shorter overall width to more comfortably fit my dining room, shorter height (which I now regret), fewer shelves in the hutch, different method to attach shelves, and added glass doors to the hutch. My shelves were not perfectly flush with the cabinet walls (oops) so I couldn't use pocket holes to attach them. Because I detest traditional shelving hardware, I just secured 1/2-in quarter round to the walls and rested the shelves on that.


For the glass hutch doors, I built frames similar to the sideboard doors' frames -- two frames for each door, for a total of 8 frames. On 4 frames, I used a rabbit router bit to create an inset for the glass I bought and had cut at Lowe's. I secured the glass with glazier's points and silicon caulk, then attached an un-routered frame to the back of each door with screws. I chose to keep the screws on the back visible and accessible so that I could easily replace the glass if needed without destroying the door.

Built from Plan(s)
Estimated Cost
$630 plus $70 for fancy door knobs
Estimated Time Investment
Week Long Project (20 Hours or More)
Finish Used
Followed Ana-White staining tutorial and used Minwax Weathered Oak (1st coat) and Minwax Special Walnut (2nd coat). Used matte polyurethane clear coat.
Recommended Skill Level
Intermediate

Comments

Surfboard bench

Modified the sofa design and created a surfboard bench

Estimated Cost
£30
Estimated Time Investment
Afternoon Project (3-6 Hours)
Finish Used
Dark Oak woodstain

Entertainment center

Submitted by Sb1212 on Fri, 10/28/2016 - 11:18

I really liked the barn door entertainment center! I attempted to make my own hardware for the door. It didn't turn out as planned. So I had to come up with a different design. This is what I came up with. I love it!

Built from Plan(s)
Estimated Time Investment
Week Long Project (20 Hours or More)
Recommended Skill Level
Intermediate

Comments

lyds6382

Mon, 11/07/2016 - 07:14

I love this even more than the original!  I think I'd get tired of the sliding doors and my kids messing with them.  What size of TV will this fit?


Dartboard Cabinet

I had a big empty wall in my den/man cave, so I decided to build a dartboard cabinet instead of just hanging a dartboard on the wall. No plans for this, I just made it up as I went. Measured twice, sketched it out and cut as I went.

I use pine 1x4's for the frame and back. 1x3's for the accessory box, 1x2's for the door frame, and poplar strips for the doors and door braces. The darts are held by 6" long 2x2's with holes drilled.

Wood screws, finish nails, and small brads were used to hold everything together.

The chalkboards are simple MDF's cut and sprayed with chalkboard paint. Overlay hinges are used for the doors, and the dartbord is held on with screws from the back so it can be replaced when needed.

The Alabama A is hand-painted.

Estimated Time Investment
Day Project (6-9 Hours)
Finish Used
Minwax Classic Gray with light coats of spray glosscoat.
Recommended Skill Level
Beginner

Chicken Coop

Submitted by Elloh on Tue, 08/11/2020 - 11:05

This was my biggest build yet and these plans along with being able to see a few brag posts with modicifactions made this project less intimidating. I extended the coop in order to add a walk in door. The drop down doors on both sides will give plenty of access and help with cleaning. I've added door latches to all the doors since putting it in place. My dad provided the cedar so that greatly reduced my costs. This project took about six days to complete. The fun part was getting it out of my carport : ) This was built for my daughter's chickens and she is thrilled with it. So am I! Thanks for the plans Ana!

Estimated Cost
Hardware, screws, hardware cloth and plywood - around $150

Outdoor side table

Keeping budget with wood projects, made side table for outdoor fire pit area.

Estimated Cost
$25
Estimated Time Investment
An Hour or Two (0-2 Hours)
Finish Used
Legs and braces=rosewood stain
Top=honey pine
Recommended Skill Level
Starter Project

Workbench

Submitted by MaryL220 on Mon, 08/24/2020 - 21:20

I needed a legit workbench and I had a bunch of wood to use up. I got a bunch of 1x8x6s from my local hardware store's scrap pile. There's a reason they were free... But I couldn't just toss them. I used all scrap, from the hardware store, my garage, and my brother-in-law's farm, except 3 2x4s that I bought new.

For this workbench, I used slats on the top and the bottom shelf. The frame is 2x4s. I had some idea I could use the space in between the slats to cut wood, but after adding 2in casters, it appears it might be a bit too tall. Even still, the spaces in between the slats make for excellent clamp storage.

And now I finally have a legit, mobile workbench to keep all my chaos somewhat contained.

Estimated Cost
$50-75
Estimated Time Investment
Afternoon Project (3-6 Hours)
Finish Used
None. I sanded the whole thing down to reduce the splinters but didn't feel that my workbench needed anything else.
Recommended Skill Level
Beginner

Outdoor bistro table and tall backed stools

I build the bar table with an x-base and created some stools using part of the plan. We really wanted backs on the stools so I made them up!

Estimated Time Investment
Afternoon Project (3-6 Hours)
Finish Used
Primed and painted white, sealed against the weather.
Recommended Skill Level
Beginner

Comments

spiceylg

Tue, 11/13/2012 - 05:39

That build came out really nice, but the scenic background, wow!!!!

Jake

Wed, 11/14/2012 - 18:16

Hard to believe that you are a beginner. Fantastic work. Keep it up and the whole home will be furnished.

dallynd

Sat, 04/13/2013 - 13:47

I'd love some information on the backs. My husband has a bad back and it's a necessity, but I'm a beginner and not sure how you did it/

Modified Industrial Style Coffee Table w/ Bottom Shelf

Submitted by danandbeth on Wed, 12/28/2016 - 08:36

Our first project!


We used the "Industrial Style Coffee Table as seen on DIY Network" plans and simply added a bottom shelf. This required an extra 2x2 bracer (same cut as top bracer) and 8 more 1x4s, cut slightly smaller than the top 1x4s in order to have them sit flush with the bottom 2x2s. The table is all pine.


We spaced the bottom shelf boards roughly a half inch apart (give or take - it's "rustic"!) and screwed in from the bottom just like the top boards. 


On the top shelf, we used 3 coats of Minwax Natural stain, and followed up with 3 coats of Minwax Satin Poly. We sanded these after attaching to the frame in order to achieve a level surface. We started with 80 grit, then 120, then 150. We then used 220 in between coats of poly. The result is a smooth, but not store-bought smooth surface, which we think works well.


We didn't spend as much time on the bottom shelf since they'll be mostly storing items, giving them just a quick 150 sand prior to 2 coats of stain and 2 coats of poly. Finally, we nailed in some plastic feet to keep it about a half inch off the floor.


All in all, being our first project, and going beyond what the original plans called for, it took us a few weeks to complete, working on it mostly on weekends and here and there in the evenings after work. We love the finished project and it works really well in our living room!


-Dan and Beth

Built from Plan(s)
Estimated Time Investment
Week Long Project (20 Hours or More)
Finish Used
Natural Stain (Minwax)
Satin Poly (Minwax)
Recommended Skill Level
Beginner

Living Wall

Submitted by Rantzay on Thu, 10/02/2014 - 16:16

Found the plans for the little 3 tiered planter really interesting.  I built a few of the boxes when my wife says "You know...." She has wanted a "living wall" for years, so I modified some of the sizes to make the boxes 18 inches long to accommodate my 37" inch wall.  I added a french cleat to the back of each box, cut down a couple furring strips that I anchored to the wall and added the other half of the french cleat to the frame.  Woot! Together in moments.  The individual planters can be easily removed and rearranged.  I added LED's to the bottoms of the planters for additional lighting and it's really a cool affect.

Estimated Cost
$25 using cedar pickets
Estimated Time Investment
Afternoon Project (3-6 Hours)
Finish Used
sanded smooth and treated with linseed oil
Recommended Skill Level
Beginner

Comments

Cubby/Bookshelf/Corner Desk Combo

Submitted by Anonymous (not verified) on Wed, 01/18/2017 - 20:40

This is a mashup of several plans, combined into one big, bad ass, office desk. I've had a little experience years ago in high school woodworking classes, but haven't really built much since. This reminded me how much I enjoy working with wood. So rewarding to be typing this message at my new office desk!

Estimated Cost
$400
Estimated Time Investment
Weekend Project (10-20 Hours)
Finish Used
Minwax "Early American"
Recommended Skill Level
Intermediate

Comments

treemeagher

Wed, 08/19/2020 - 06:25

This is amazing! So amazing could I ask you to share with me what prices from the collection of plans you used and how? I’m looking at your pic trying to figure out how to incorporate the plans you used. I want to build one for myself lol fantastic job!!!!

Farmhouse table meets turned leg coffee table

Submitted by KathyV on Sat, 01/05/2013 - 16:47

This was my first project and I LOVE it. We desperately needed to get a new table for our kitchen, and thanks to Ana... here she is. I love it. I cannot wait until I build more things. The Handbuilt Home is ear marked for many projects. I am such a geek, I have not only the book, but the digital version as well. This is so helpful because the digital version is on my phone and I have it readily available when I go to the store. I cannot recommend this book enough. Ana exudes confidence and that helped me to pick up that circular saw. NO FEAR! Ok, I was petrified that first cut, and probably all of the other cuts too, but it didn't stop me.

This table was so time consuming because I have three children and those little stinkers take up at lot of time. I am positive if I could have dedicated a day or two just to this project, I would have been done sooner. I underestimated how much time needs to be dedicated to sanding and staining and sanding and sanding :) I also underestimated how heavy this table is. I needed help to turn this table right side up.

All in all, I could not be happier with the finished project.

Estimated Cost
approx. $100.00
Estimated Time Investment
Weekend Project (10-20 Hours)
Finish Used
I used minwax water based stain and water based poly on top (three coats).
Recommended Skill Level
Beginner

Farmhouse Bed

My boyfriend and I made this bed in about six hours on a saturday. The instractions were easy to follow and I am in love with this bed! Its very sturdy and i get tons of compliments on it! 

Built from Plan(s)
Estimated Time Investment
Day Project (6-9 Hours)
Finish Used
blue paint
Recommended Skill Level
Intermediate

Comments

Corner Cabinet

Submitted by T-Dan on Sun, 02/12/2017 - 13:02

built to fit messy corner.  wife loves it there!

Built from Plan(s)
Estimated Cost
$105 for wood and I had the stains and screws from previous projects. Fixtures (some yet to be installed), were about $20.
Estimated Time Investment
Day Project (6-9 Hours)
Finish Used
mixture of walnut and gray stains, with polyeurethane topcoat.
Recommended Skill Level
Beginner

Comments

6 cube bookshelf

Submitted by lindsay on Thu, 01/24/2013 - 04:27

This was my first project that I've built and I feel really great about how it turned out!

Built from Plan(s)
Estimated Time Investment
Day Project (6-9 Hours)
Finish Used
White paint
Recommended Skill Level
Beginner

Comments

ACM

Thu, 01/24/2013 - 14:25

Great job! Your bookshelf looks solid and the color is crisp against the darker wall. Love the frames too!