Community Brag Posts

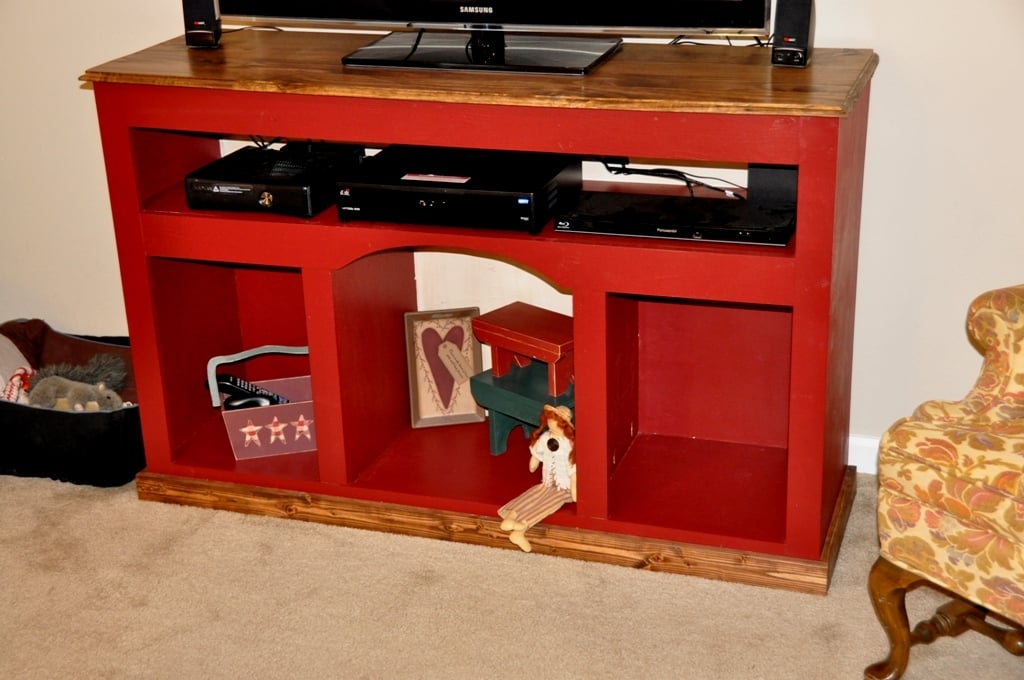
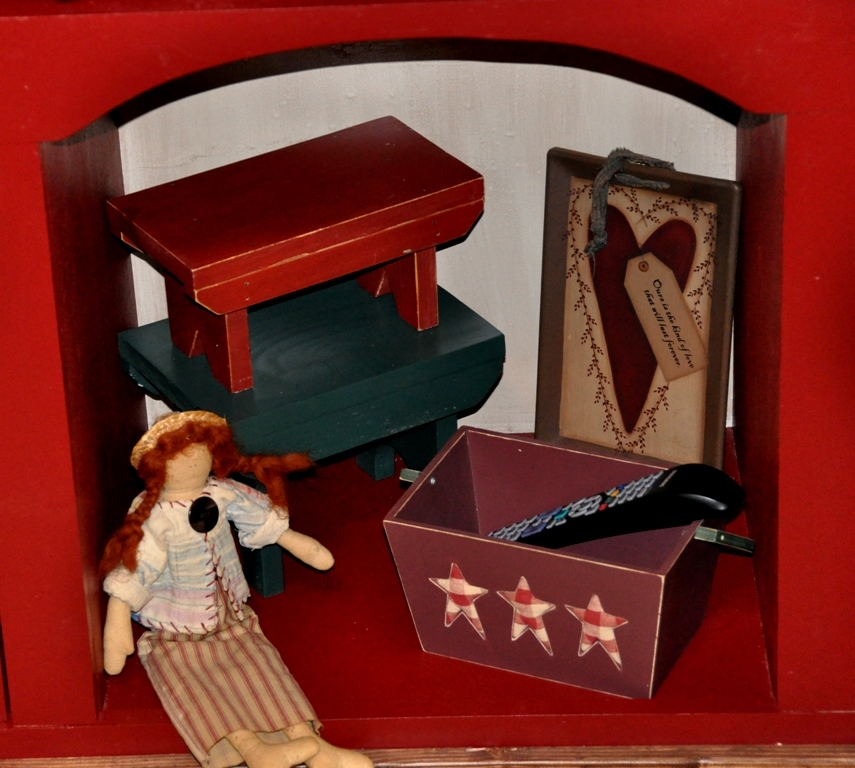
Country Entertainment Center

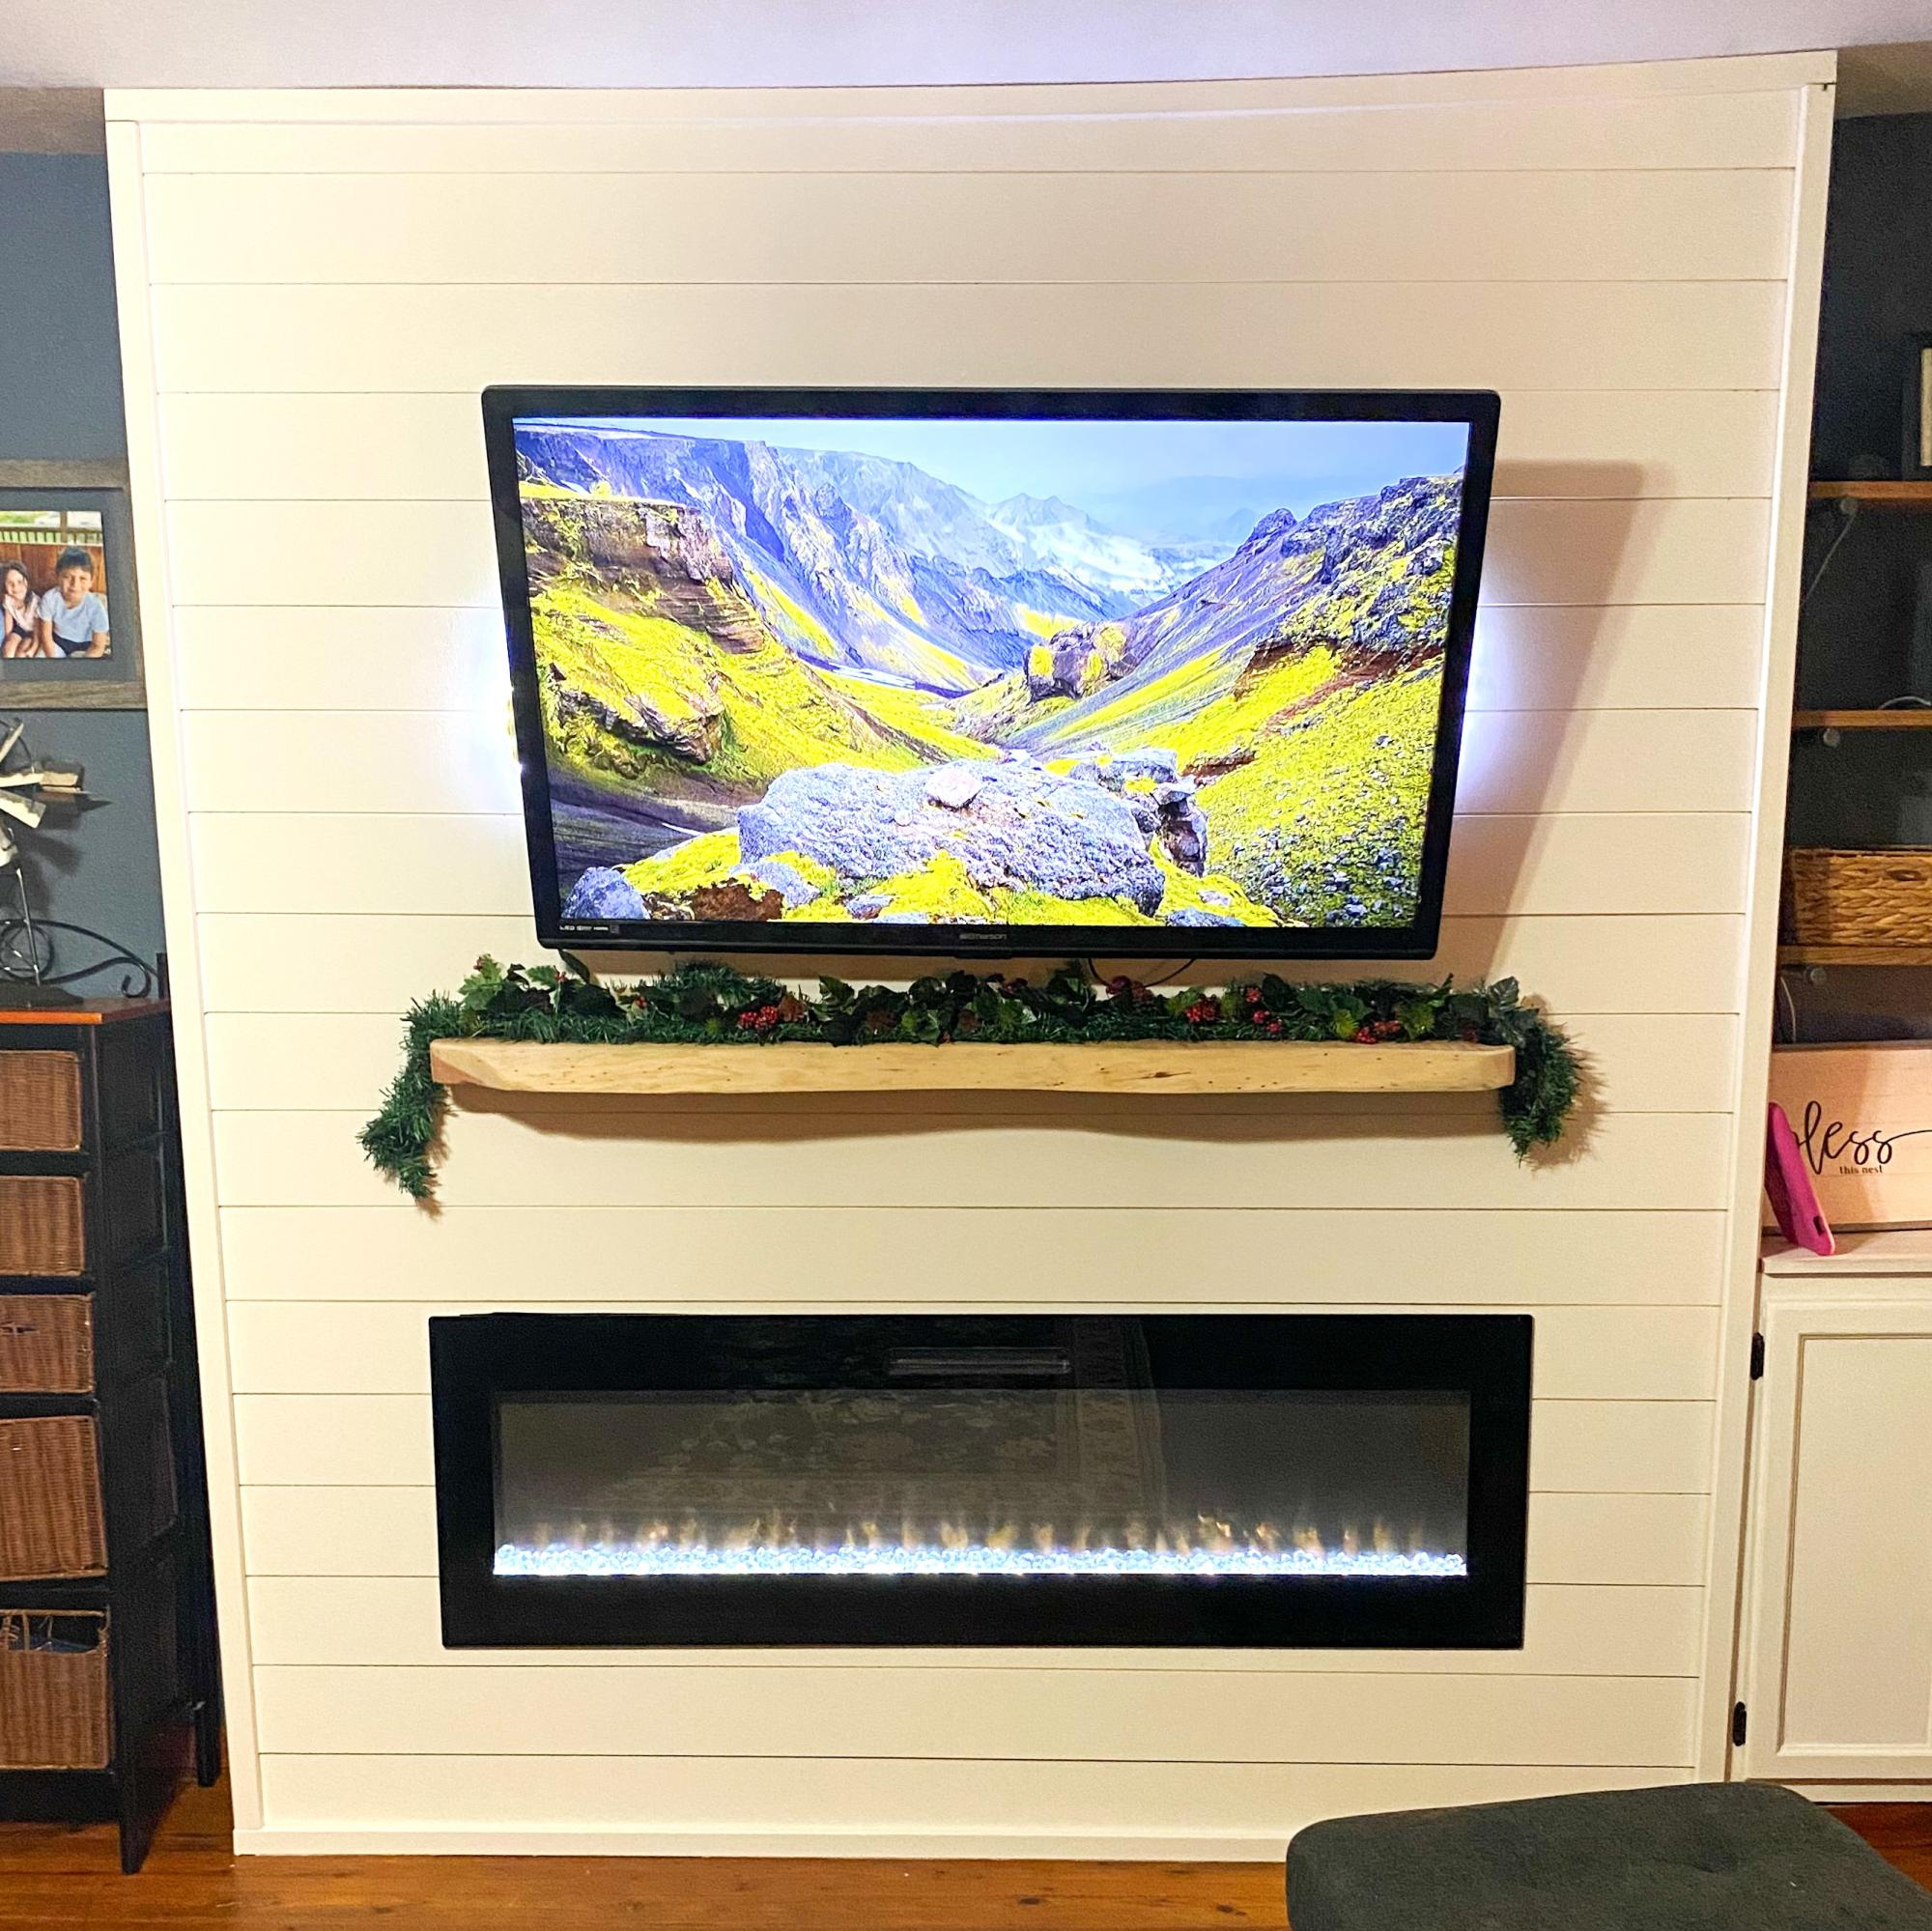
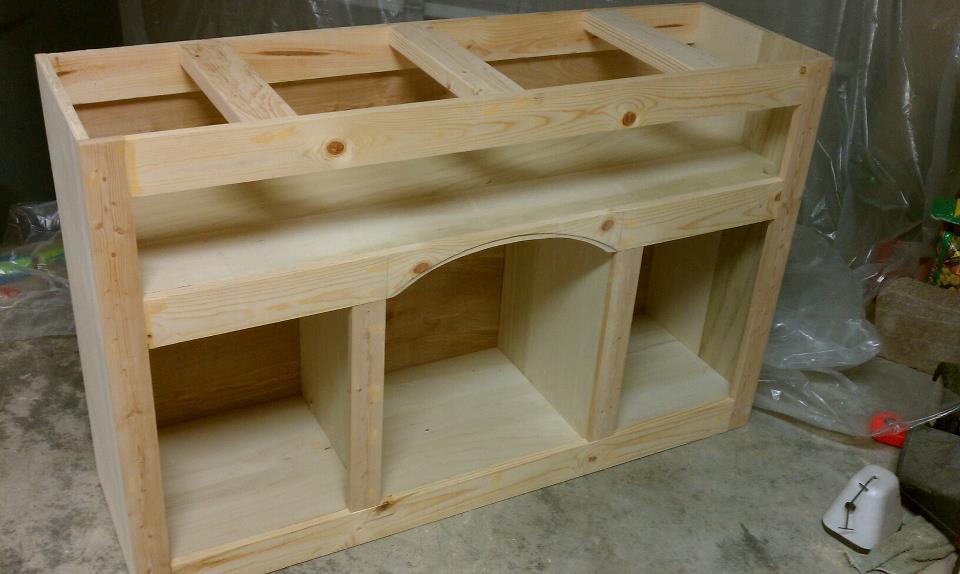
Another piece that my wife saw online that she liked. We wanted a new entertainment center for the house. I looked at the photo and drew up the plans in my head and got to building. This was a one day build and came together really nice.

Estimated Cost
$60.00
Estimated Time Investment
Day Project (6-9 Hours)
Finish Used
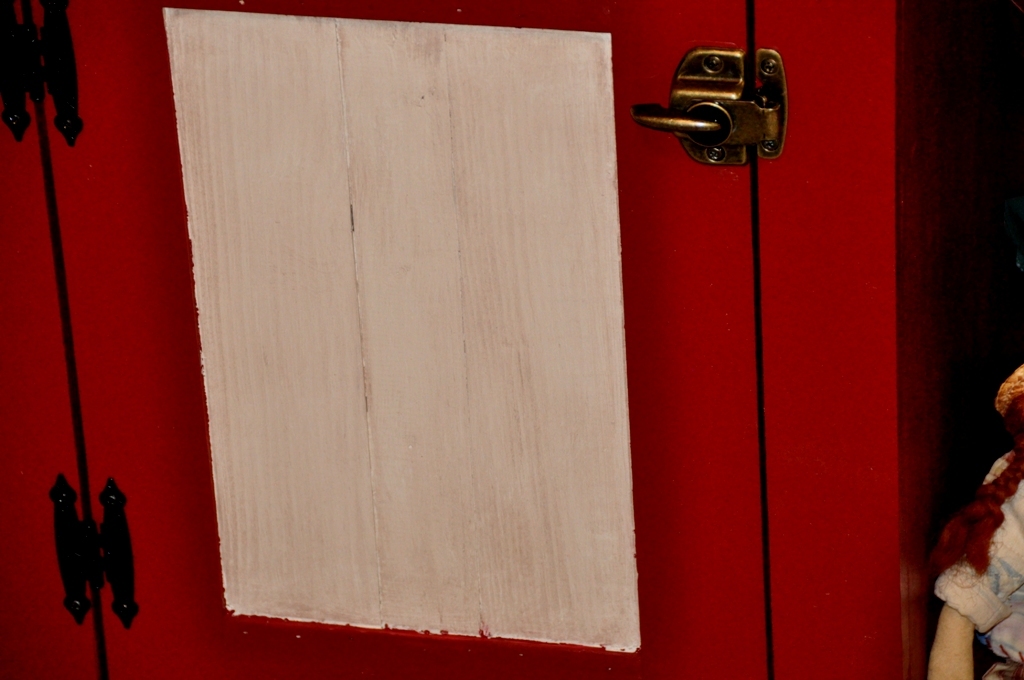
Burgundy Behr paint, Minwax Special Walnut stain, and Antique white with stain wiped
Recommended Skill Level
Intermediate

Hall Tree Bench with Shiplap Back

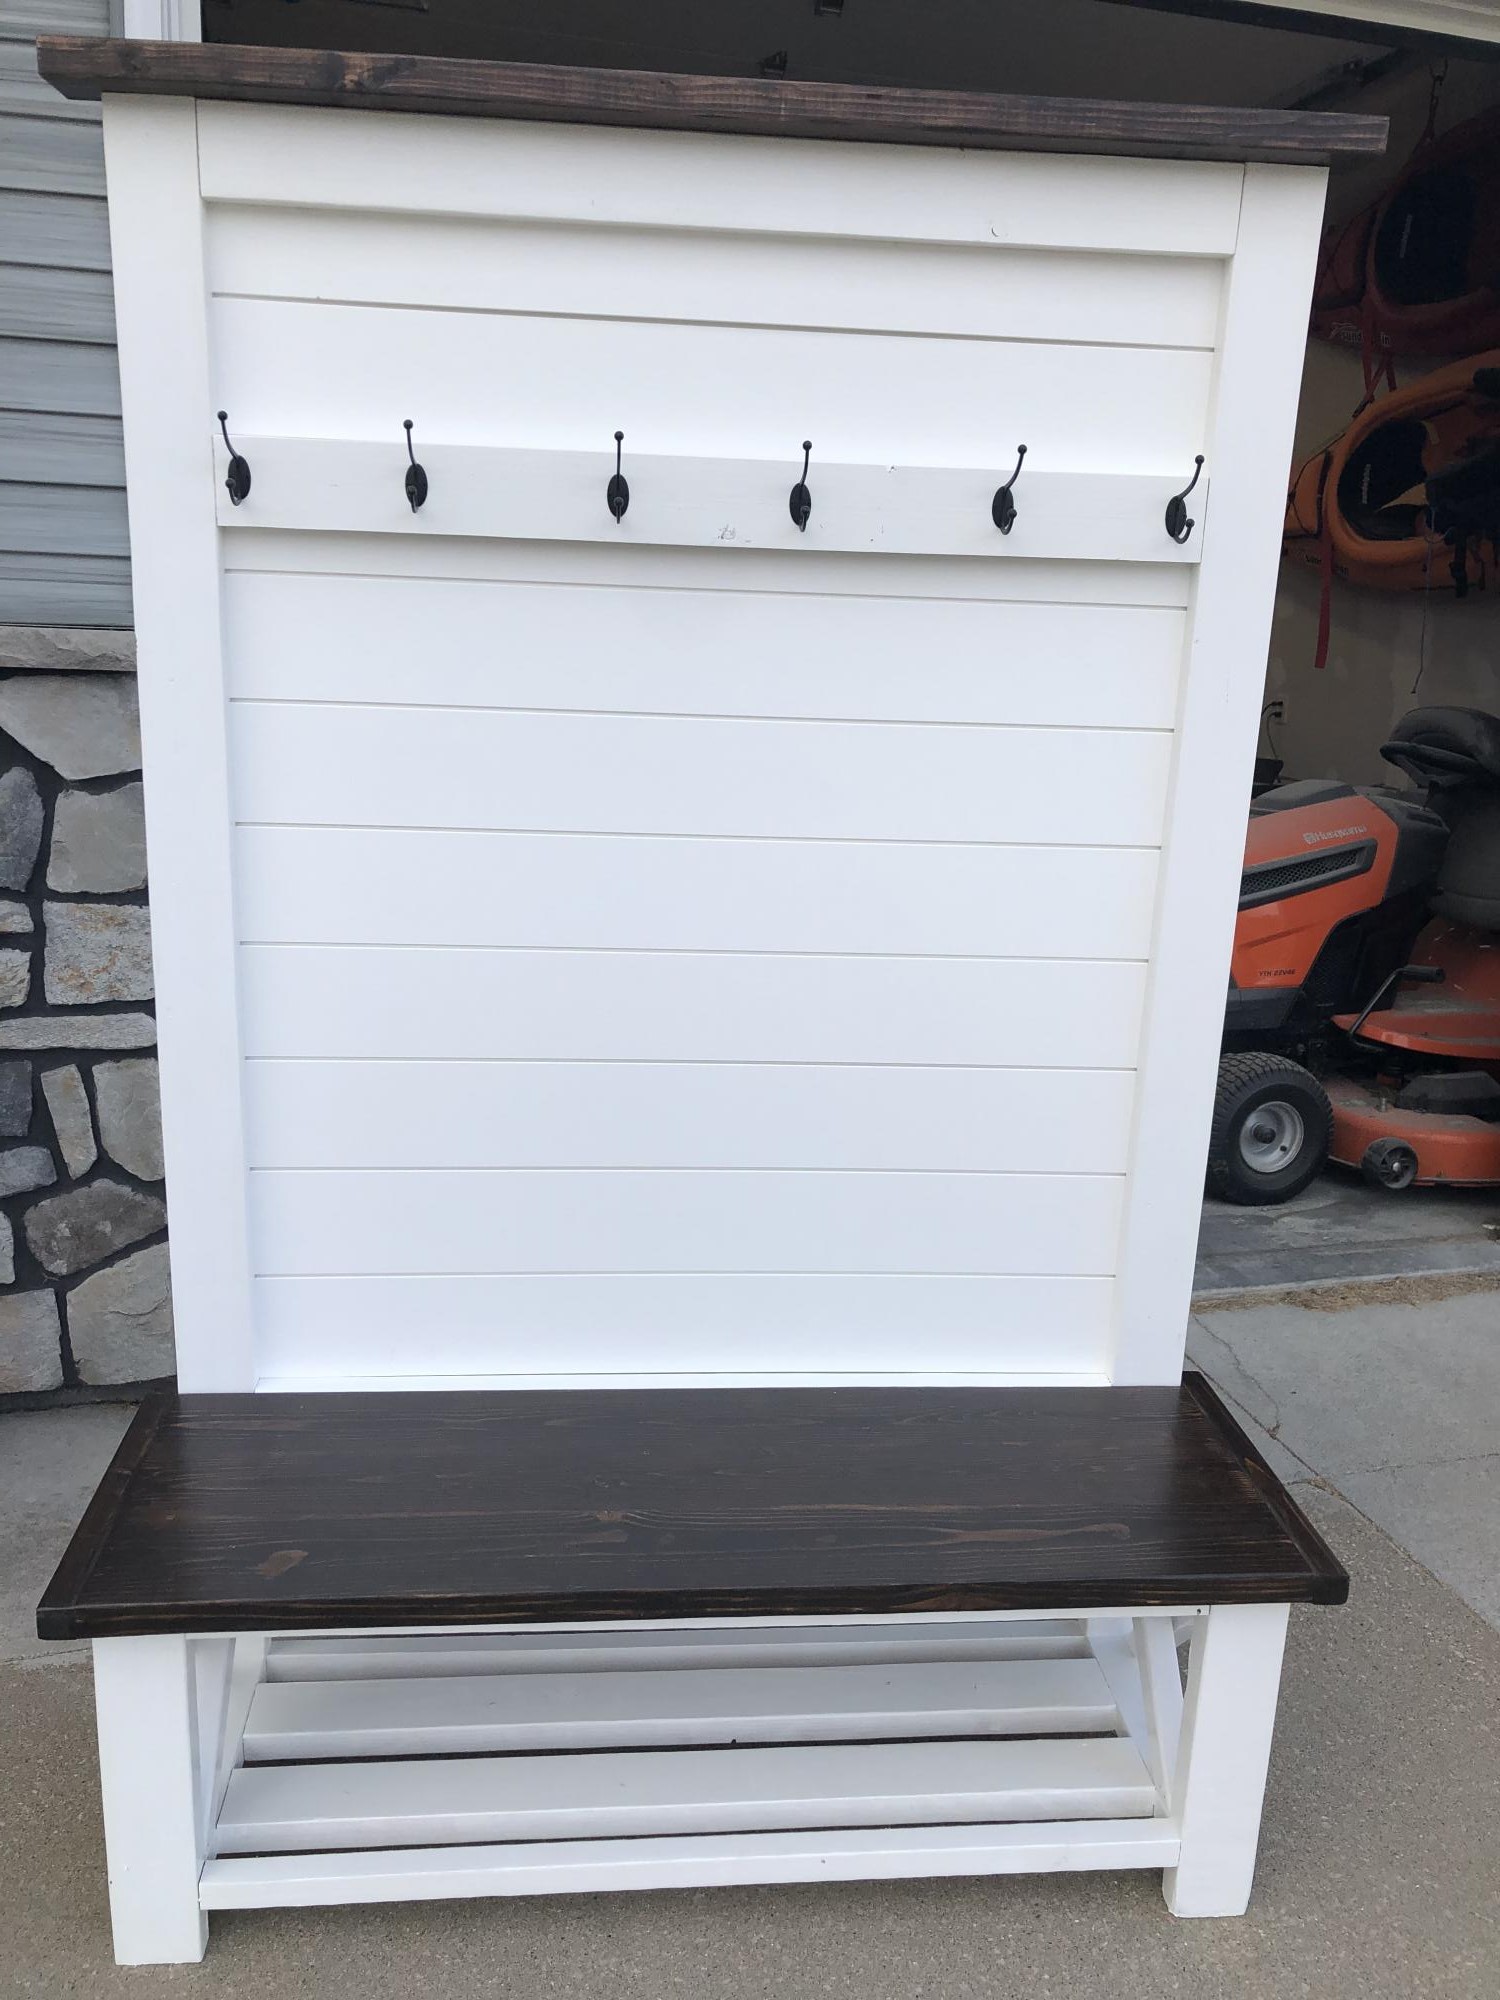
I made this for a cousin, but now I think I am going to need to make one for myself too!  I used shiplap for the back instead of plywood. It cost a little more but was less effort than cutting the lines into the plywood. Plus it was already finished. 

Built from Plan(s)

Simple Modern Outdoor Double Lounger

Submitted by Tammy MT on Sat, 05/26/2012 - 09:16

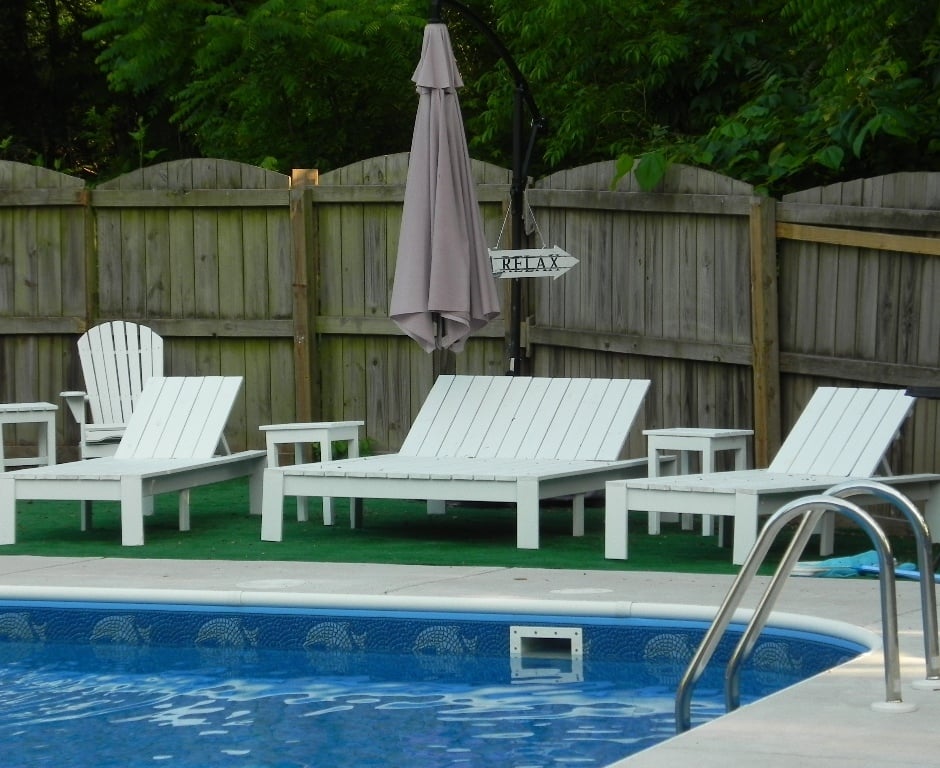
It took about 2 hours to build it. We have a large family, so we put 2 extra legs on each, just in case. We had problems with the hinges. I think we bought 3 or 4 different hinges before we found something that worked for us. But the end result was wonderful!

Estimated Time Investment
An Hour or Two (0-2 Hours)
Finish Used
painted white
Recommended Skill Level
Intermediate

Raised Bed Garden Enclosure

Submitted by Anonymous (not verified) on Tue, 06/21/2016 - 08:07

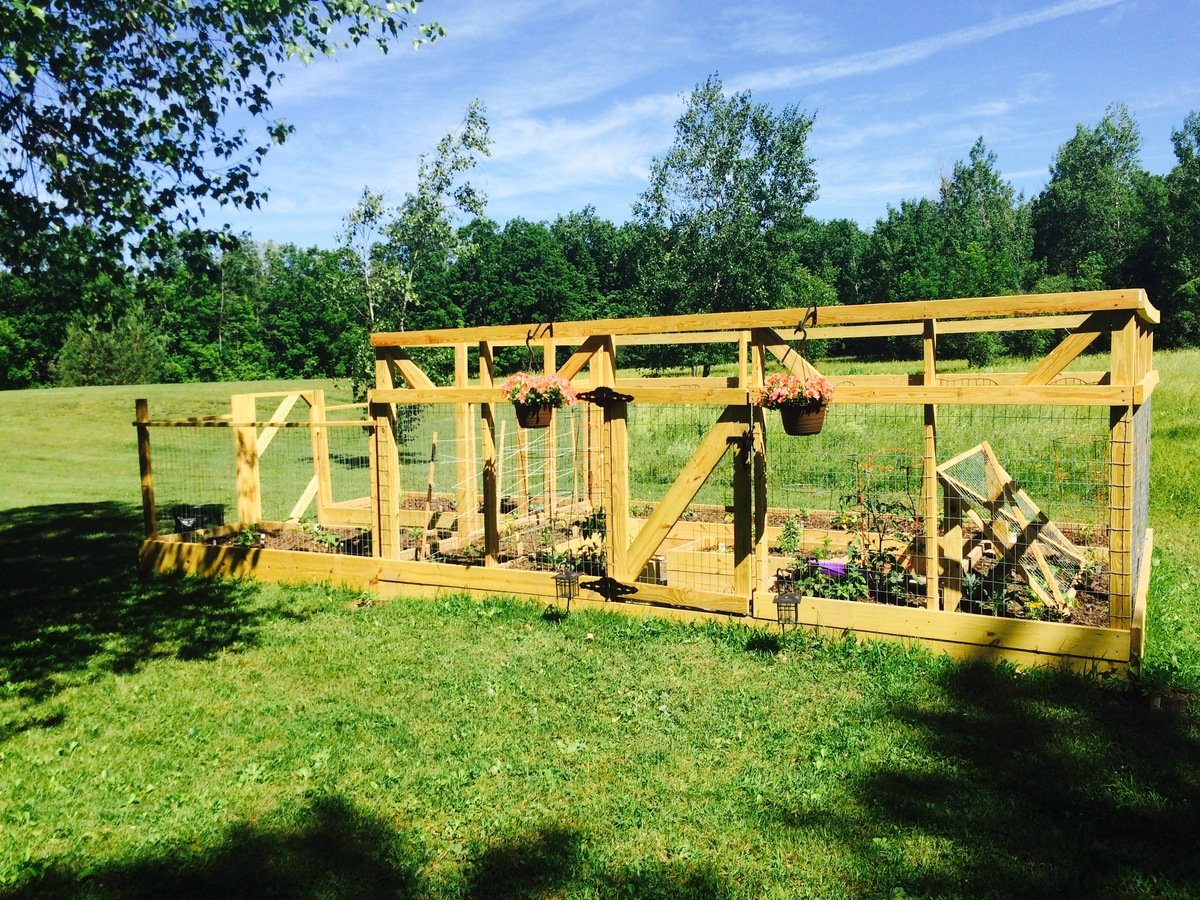
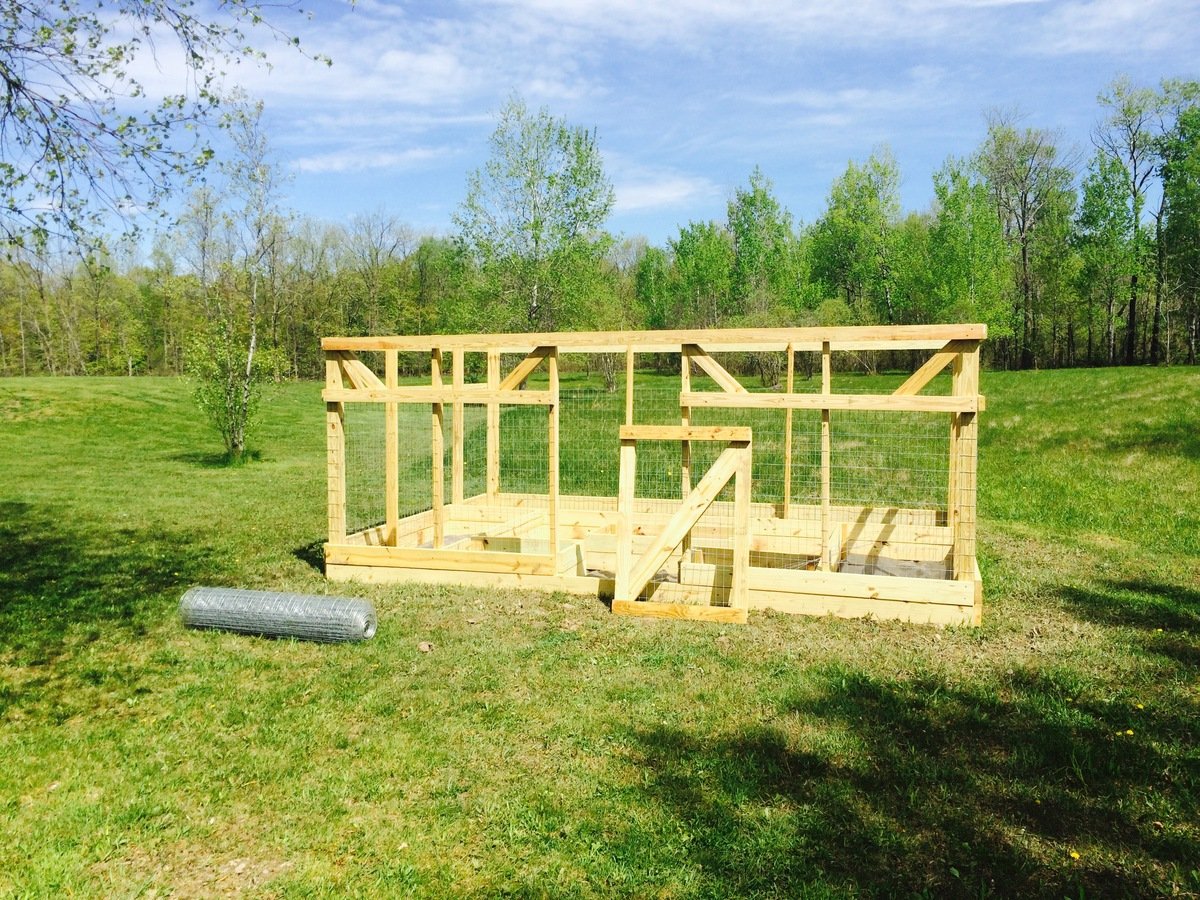
With lots of deer, rabbits, coyotes, and the occasional bear, garden enclosures are a must in our area (although I am not sure they will really help if a bear decides they're interested in our food). As our old garden enclosure was falling down due to the high winds and a quite a few winters in upstate New York, my mom found a horseshoe shaped garden with rasied beds that she loved. So, after searching around for a good plan, I found Ana White's collaboration with Home Depot for this enclosure.

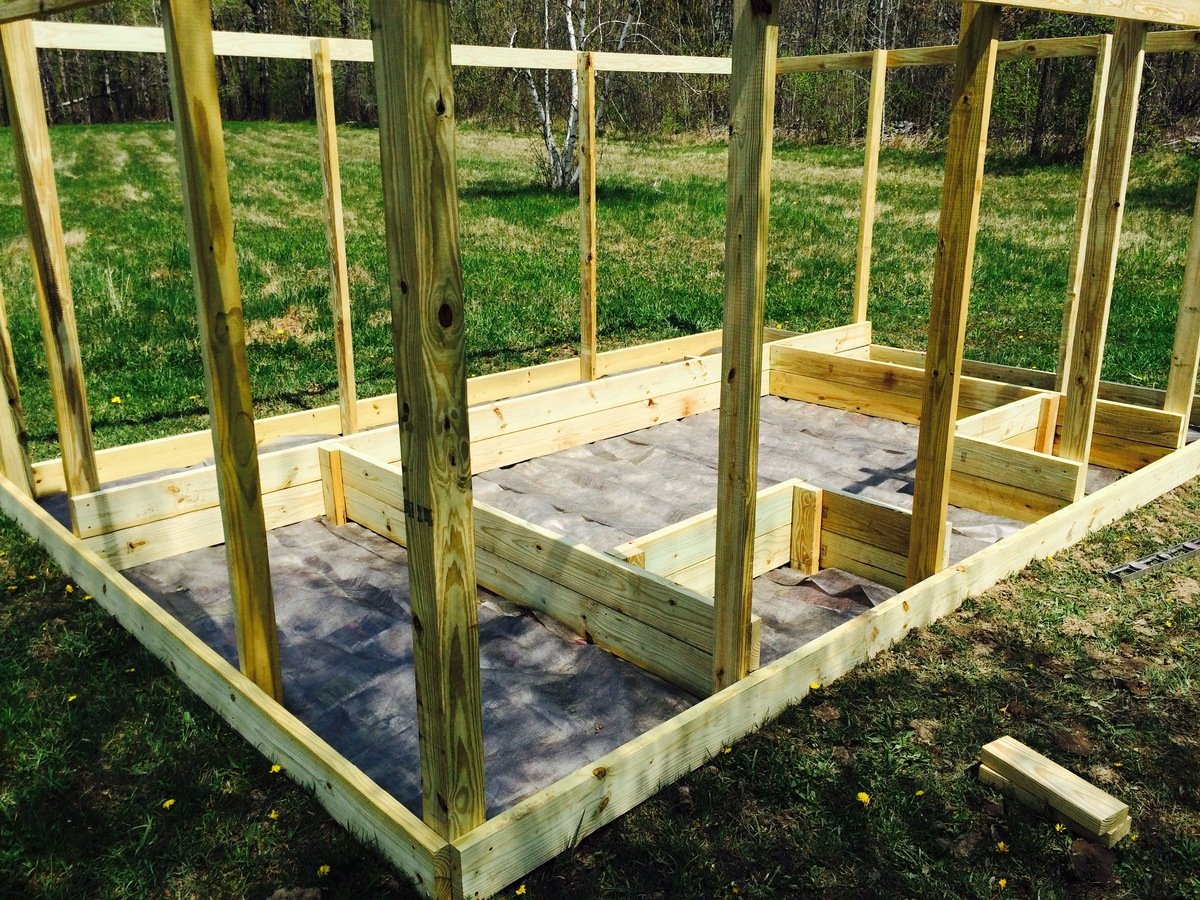
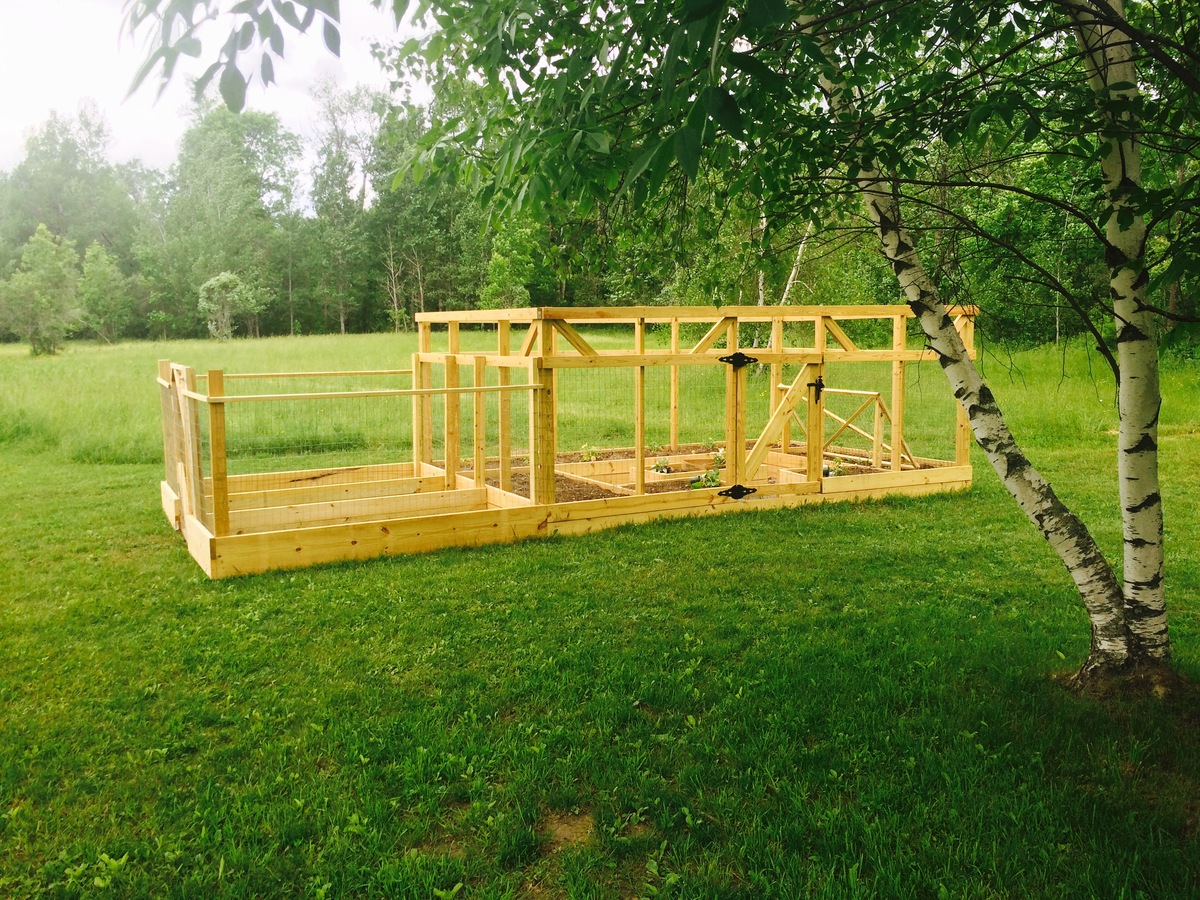
While the original plan was far too small for our needs, I was able to expand the length of the enclosure creating enough room to add two small beds on either side of the door and a center bed, which is perfect for herbs. The build was not difficult as I was able to do most of it by myself (with the exception of contructing the frame and attaching the door) and I am sure this would go much quicker with an extra set of hands. As I did not have a large chunk of time to devote to this project, it did take me quite some time stretched over a few weeks. Nonetheless, I am very happy with how it turned out.

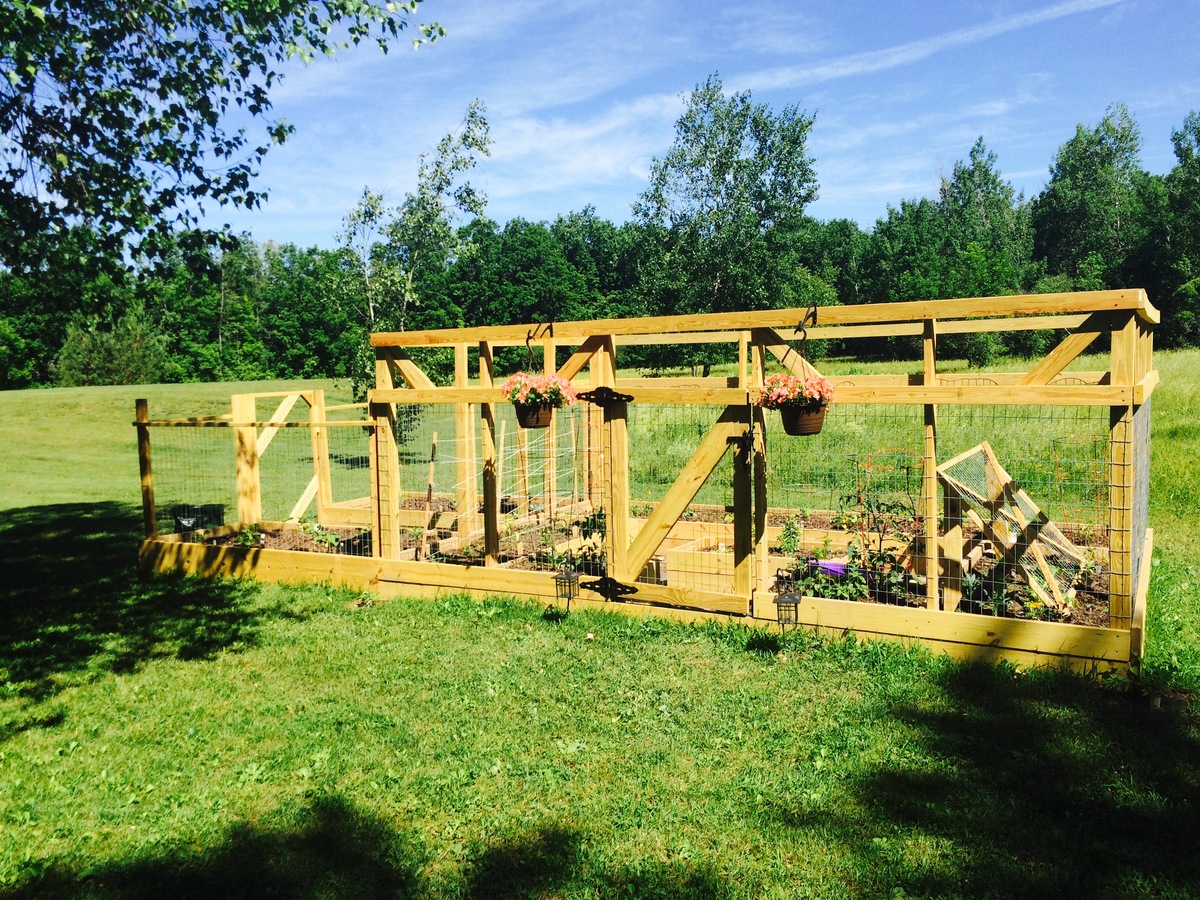
After construction, my family got a little garden happy and decided we wanted to plant even more vegetables than we had originally planned. So, we created a much simpler but nonetheless less pest-proof enclosure for two more beds to the left of our original project (shown in the photos).

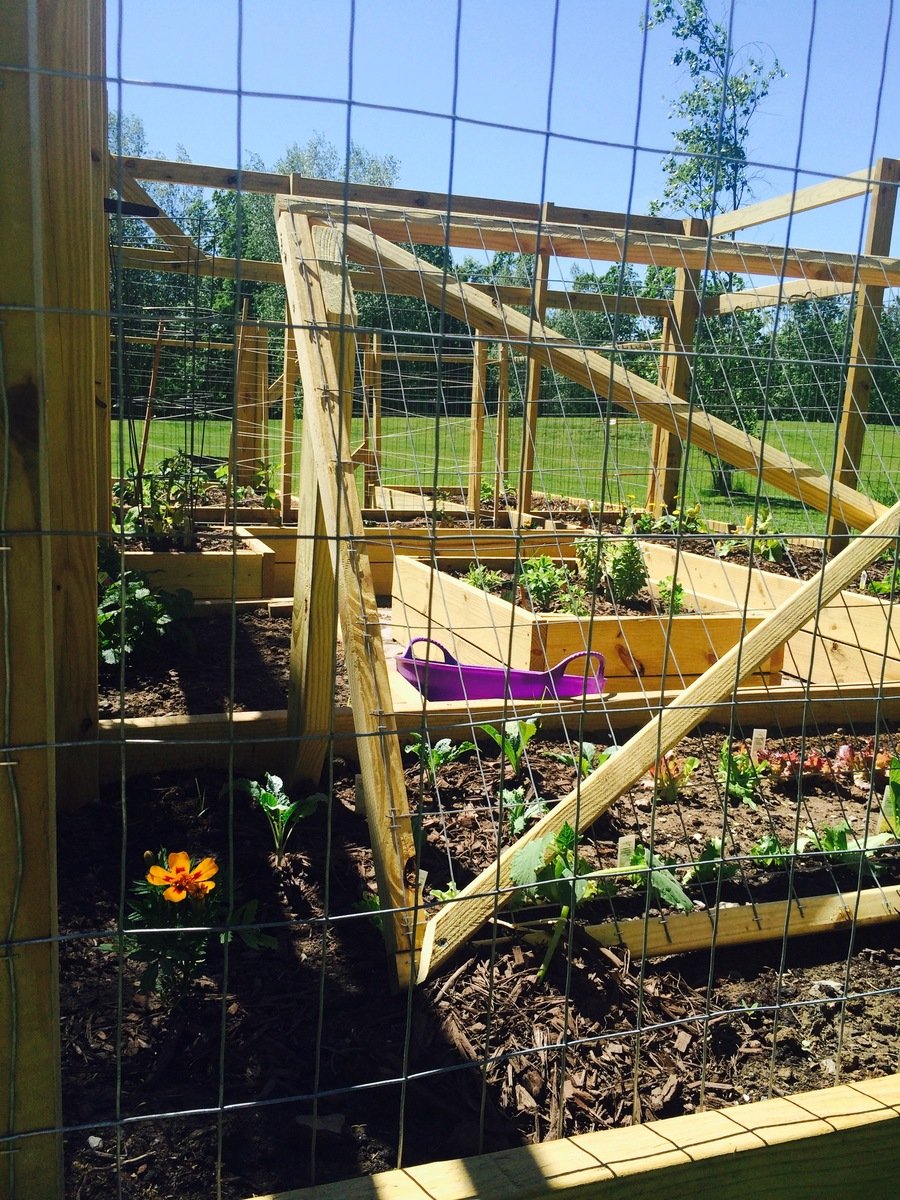
Although this was an expensive project (exact price is unkown), it is quite sturdy and we expect it to last a long time and provide lots of vegetables. We added some hanging baskets for decoration and decided next year we will add some morning glories around the outside corners for some extra shade during the afternoons. Some minor alterations also included a latch that allows us to open and close the door from both sides, we actually picked up a gate latch kit for this part of the project, and using welded wire fencing instead of chicken wire. While the welded wire added to the cost, it will hold up better to the wind and snow and is still protective enough to keep out our main predators.

Thanks so much for the plans Ana! In the begining, our neighbors joked we were building a guest house :). I have included some photos from throughout the build as well.
Built from Plan(s)
Estimated Cost
~$500?, we had to make some adjustments in size and swap out some materials due to the high winds we get, so this could probably be done for cheaper. The cost is also a guess as I am not completely sure what the total came to after many trips to the store. Nonetheless, our garden is twice the size of the enclosure kits Home Depot and other stores sell for what I predict to be more than twice the cost.
Estimated Time Investment
Week Long Project (20 Hours or More)
Finish Used
Unfinished
Recommended Skill Level
Beginner

Rolling saw horses

Submitted by Craig P on Mon, 07/04/2016 - 07:26

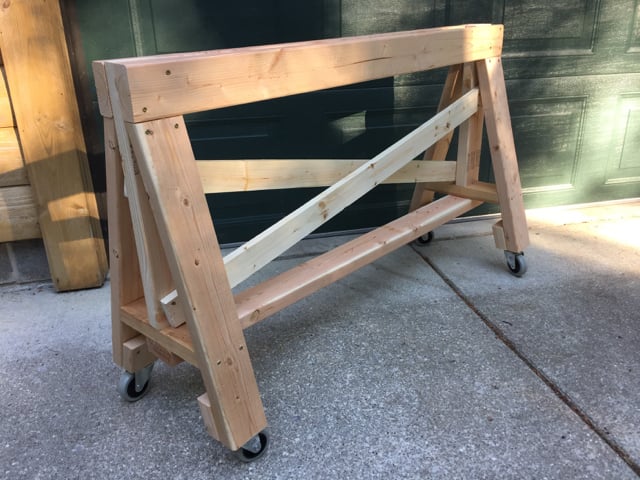
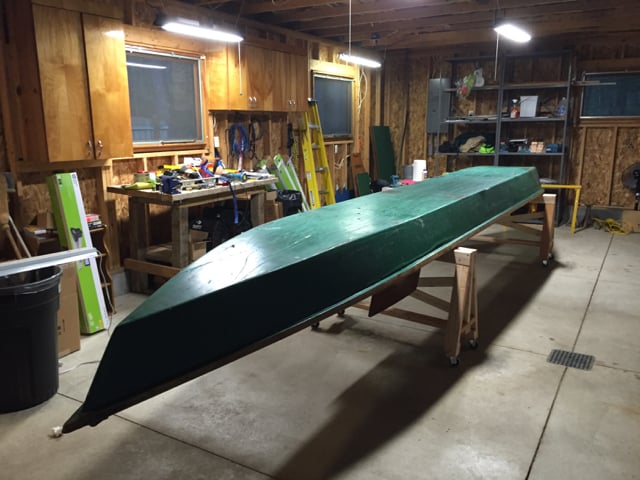
Your saw horse plan worked great for a wooden boat project I'm doing -- the 3" wheels (with one locking) enable me to move the boat around the workshop or even outdoors for heavy duty sanding. 

I added blocks of 2x4 to the legs for more surface for the wheels and I extended the cross pieces to 4-feet long as the old AuSable River (MI) guide boat is about 40" wide.

Built from Plan(s)
Estimated Cost
$60.00 (a lot of the cost is in the 3" wheels..)
Estimated Time Investment
Afternoon Project (3-6 Hours)
Finish Used
None, though thinking about putting some finish on them as they'll be getting wet when I wash down the boat...
Recommended Skill Level
Starter Project

Comments

Playhouse big build

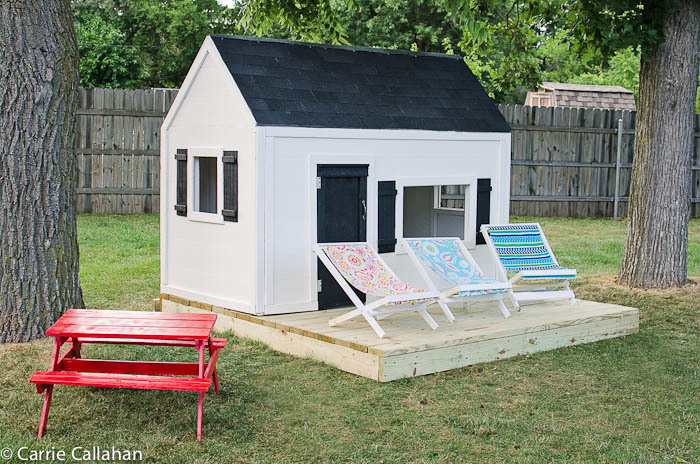
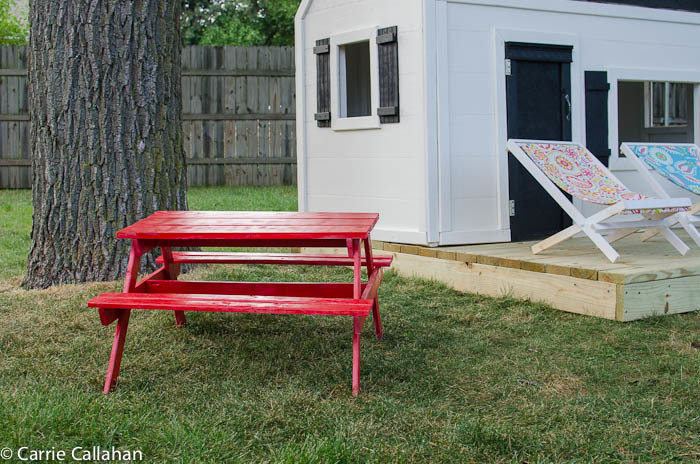
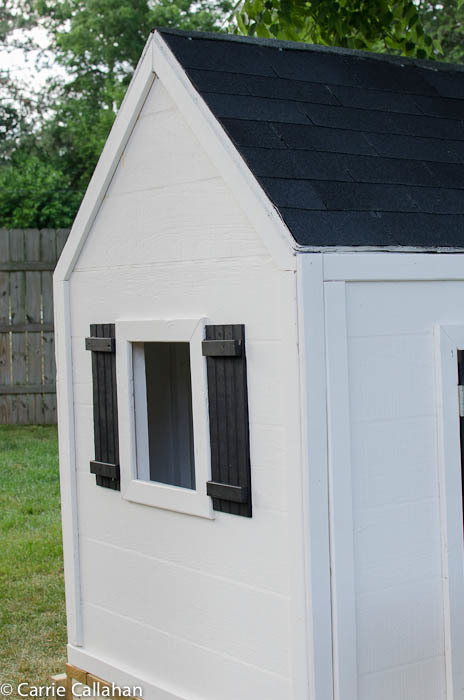
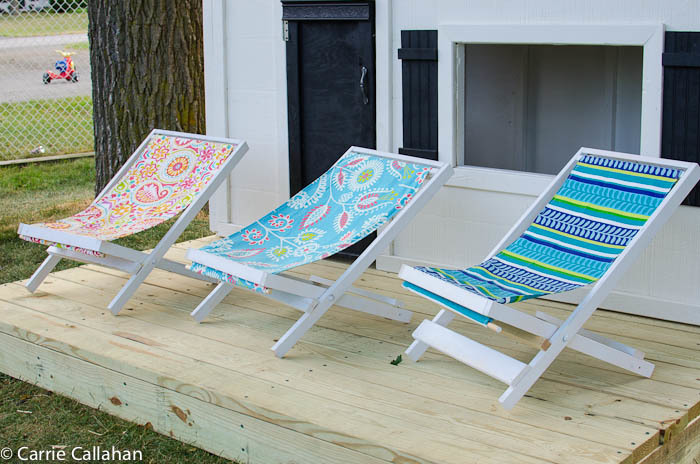
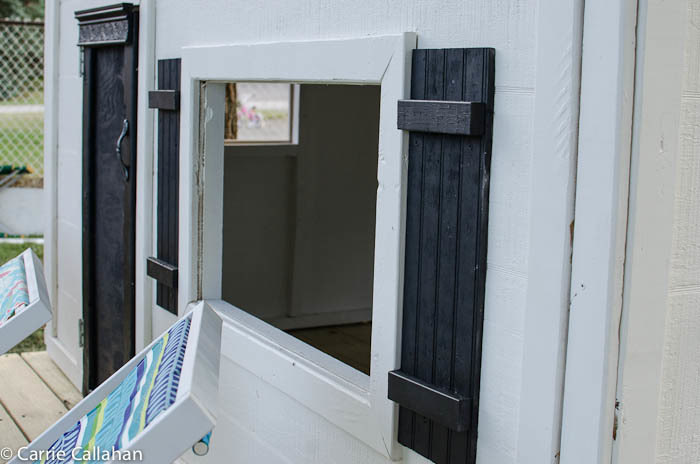
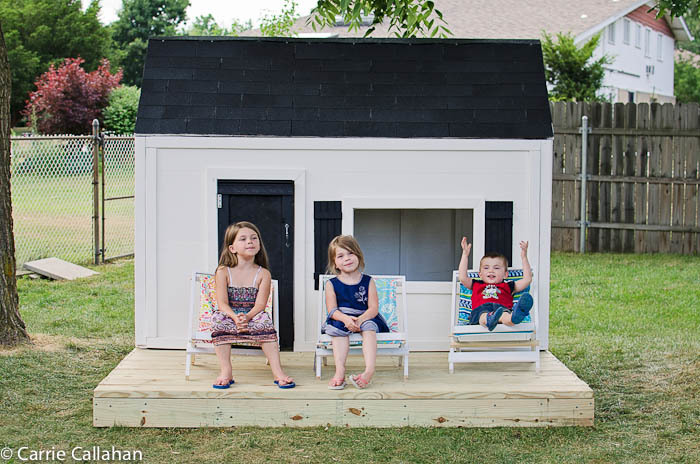
I went a little out of control on the week of the 4th of July - I set out to build a picnic table, 4 sling chairs, a deck and a playhouse - and I did!!!! I owe Ana a great debt of gratitude for these amazing plans and empowering me to do it! I built the picnic table and the sling chairs as I was waiting for primer and paint to dry on the frame, inside and outside of the house. For the shutters - I scrounged around the garage and found some leftover wainscoting, and put a leftover 1x2 on them. The door frame wasn't straight - so I added a piece of leftover trim from my daughters bed I built. My only next step is curtains for the windows. I even moved the full kitchen set I built the kids a few christmas's ago into their. They have only been playing with it for 2 days and I can't drag them out of it!!!

Estimated Cost
$500-$550
Estimated Time Investment
Week Long Project (20 Hours or More)
Finish Used
Primer and paint
Recommended Skill Level
Intermediate
Seasonal And Holiday

Board & Batten Inspired Headboard

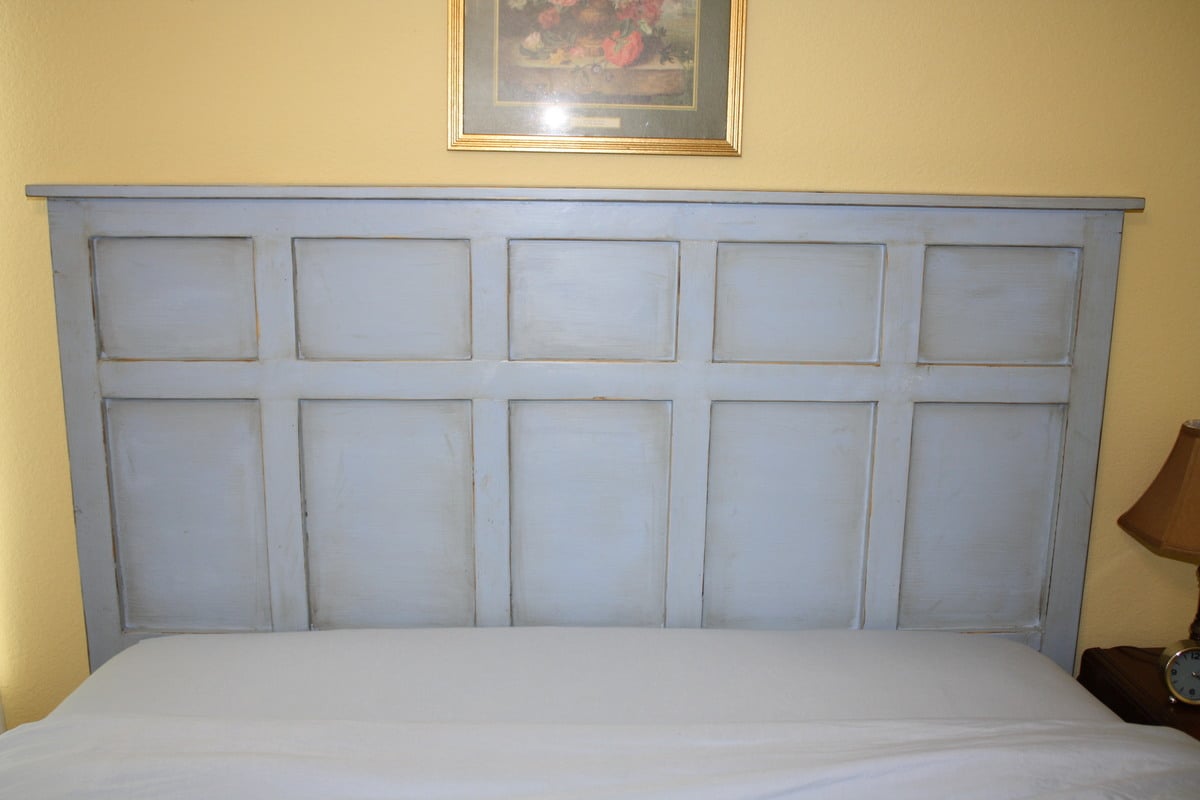
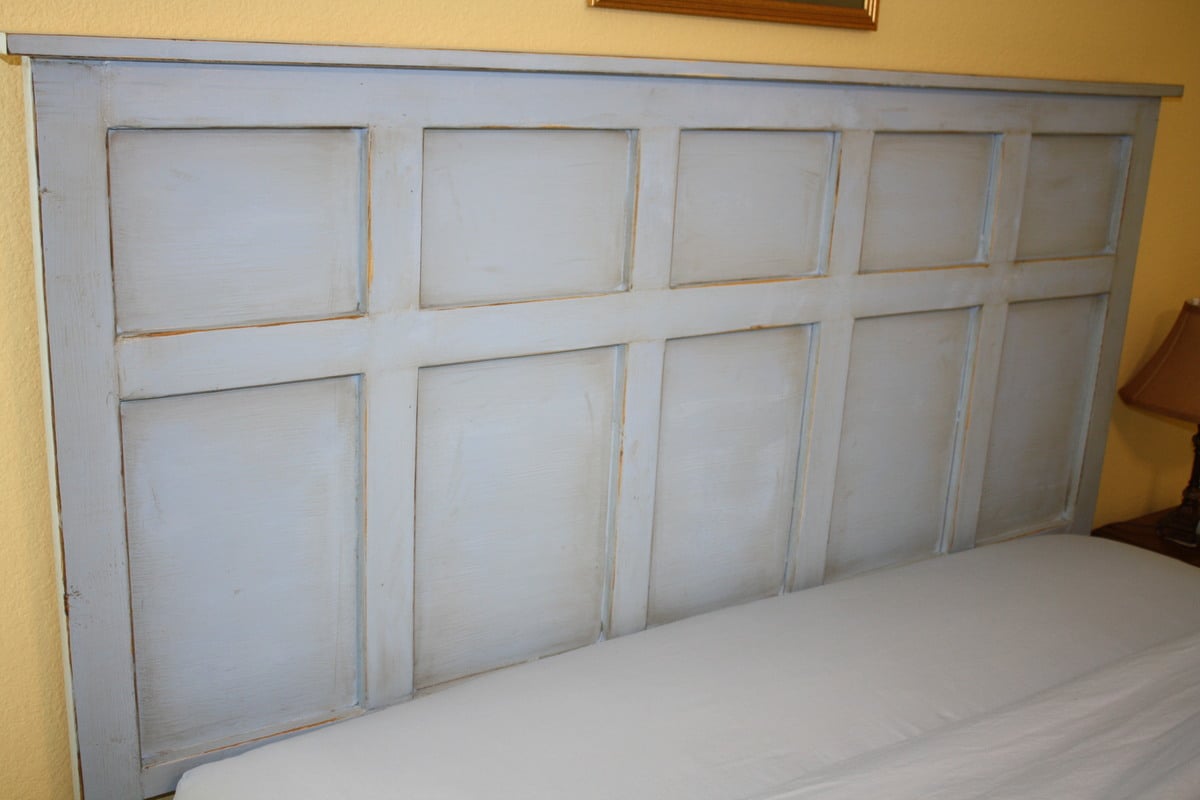
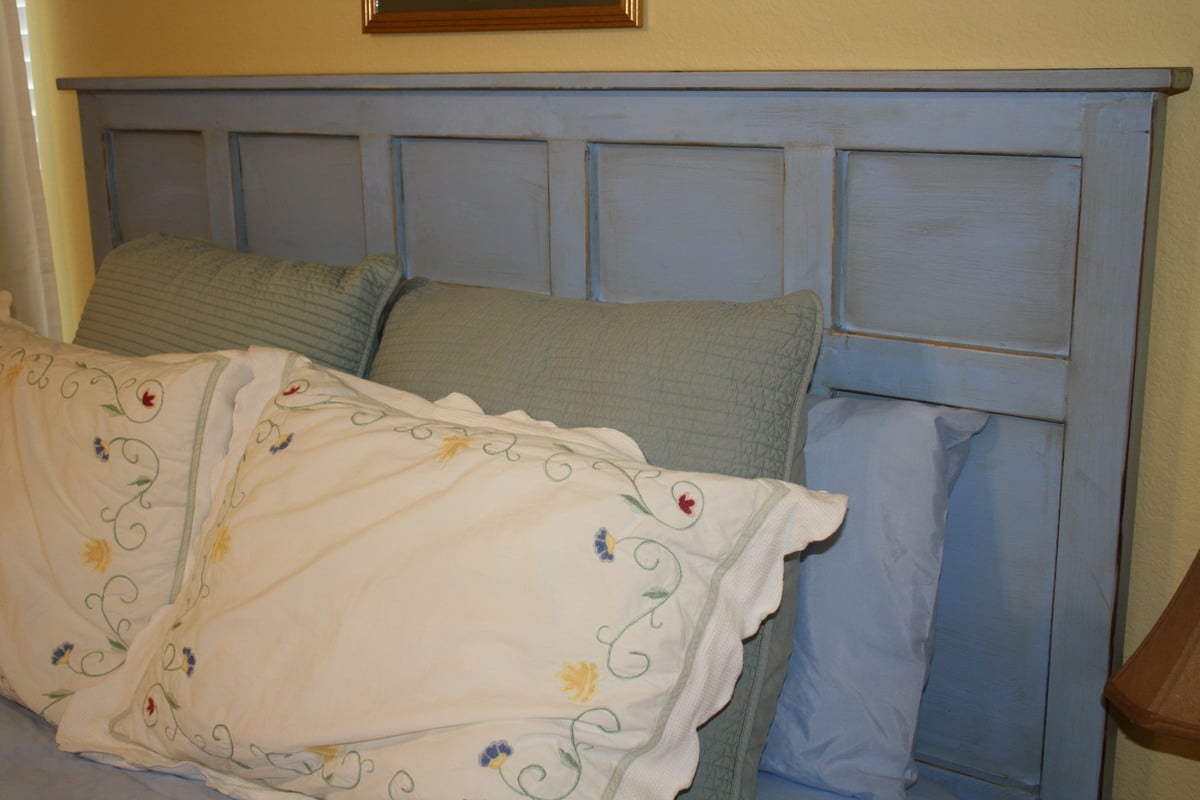
Our guest room finally has a headboard! I put together this queen size headboard using what I had learned building my daughter's headboard (and consulting the plans for the Reclaimed Wood Headboard) using the remainder of the plywood sheet from her headboard project, 2x3s for the legs, a 2x4 to join the legs (and connect to the metal bed frame), furring strips, and a 1x3 to top it off.

Our plywood had been cut to fit our car, so the first vertical furring strip was placed to hide the seam where I joined the two pieces back together. Then we evenly placed them from center as just looked right to us.

We had a great time seeing this come together as we didn't follow a specific plan, but were able to be a bit more creative inspired by various plans.

Estimated Cost
$45 including hardware & paint
Estimated Time Investment
Afternoon Project (3-6 Hours)
Finish Used
We painted with Martha Stewart's Stratosphere in a flat finish, distressed and rubbed on Minwax Provencial stain. Unfortunately, the stain gave the headboard a very green tint, so after a lot more sanding, we were able to finish the project with two quick coats of Minwax water based Poly.
Recommended Skill Level
Beginner

Comments

Modern outdoor furniture from Ana white

Submitted by Anonymous (not verified) on Tue, 06/16/2020 - 19:40

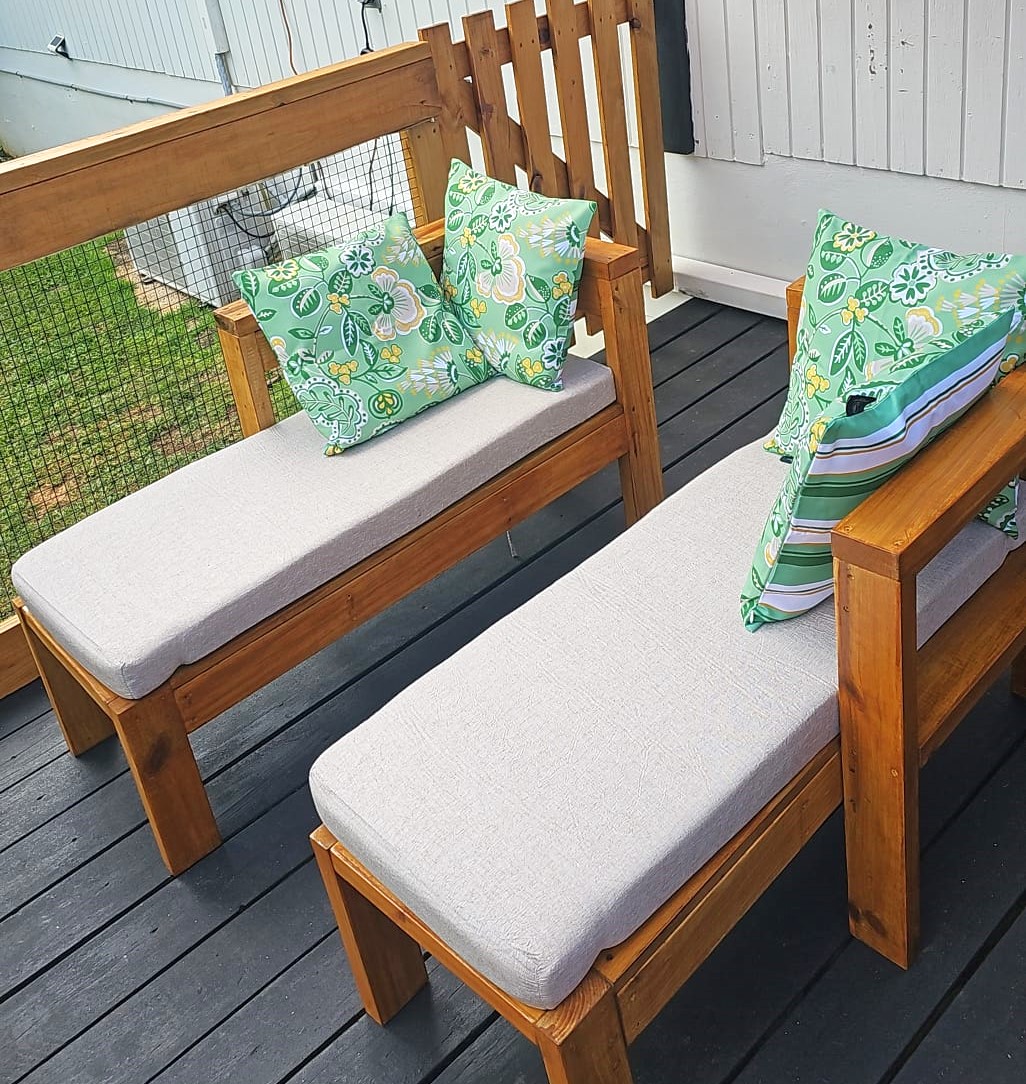
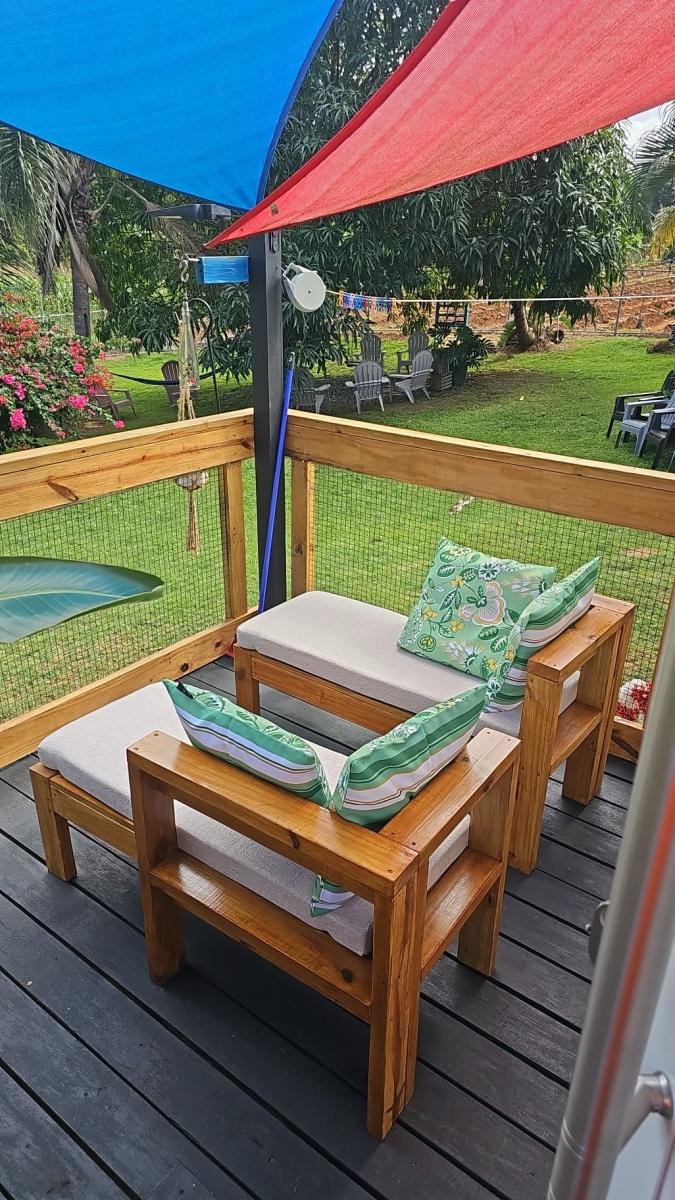
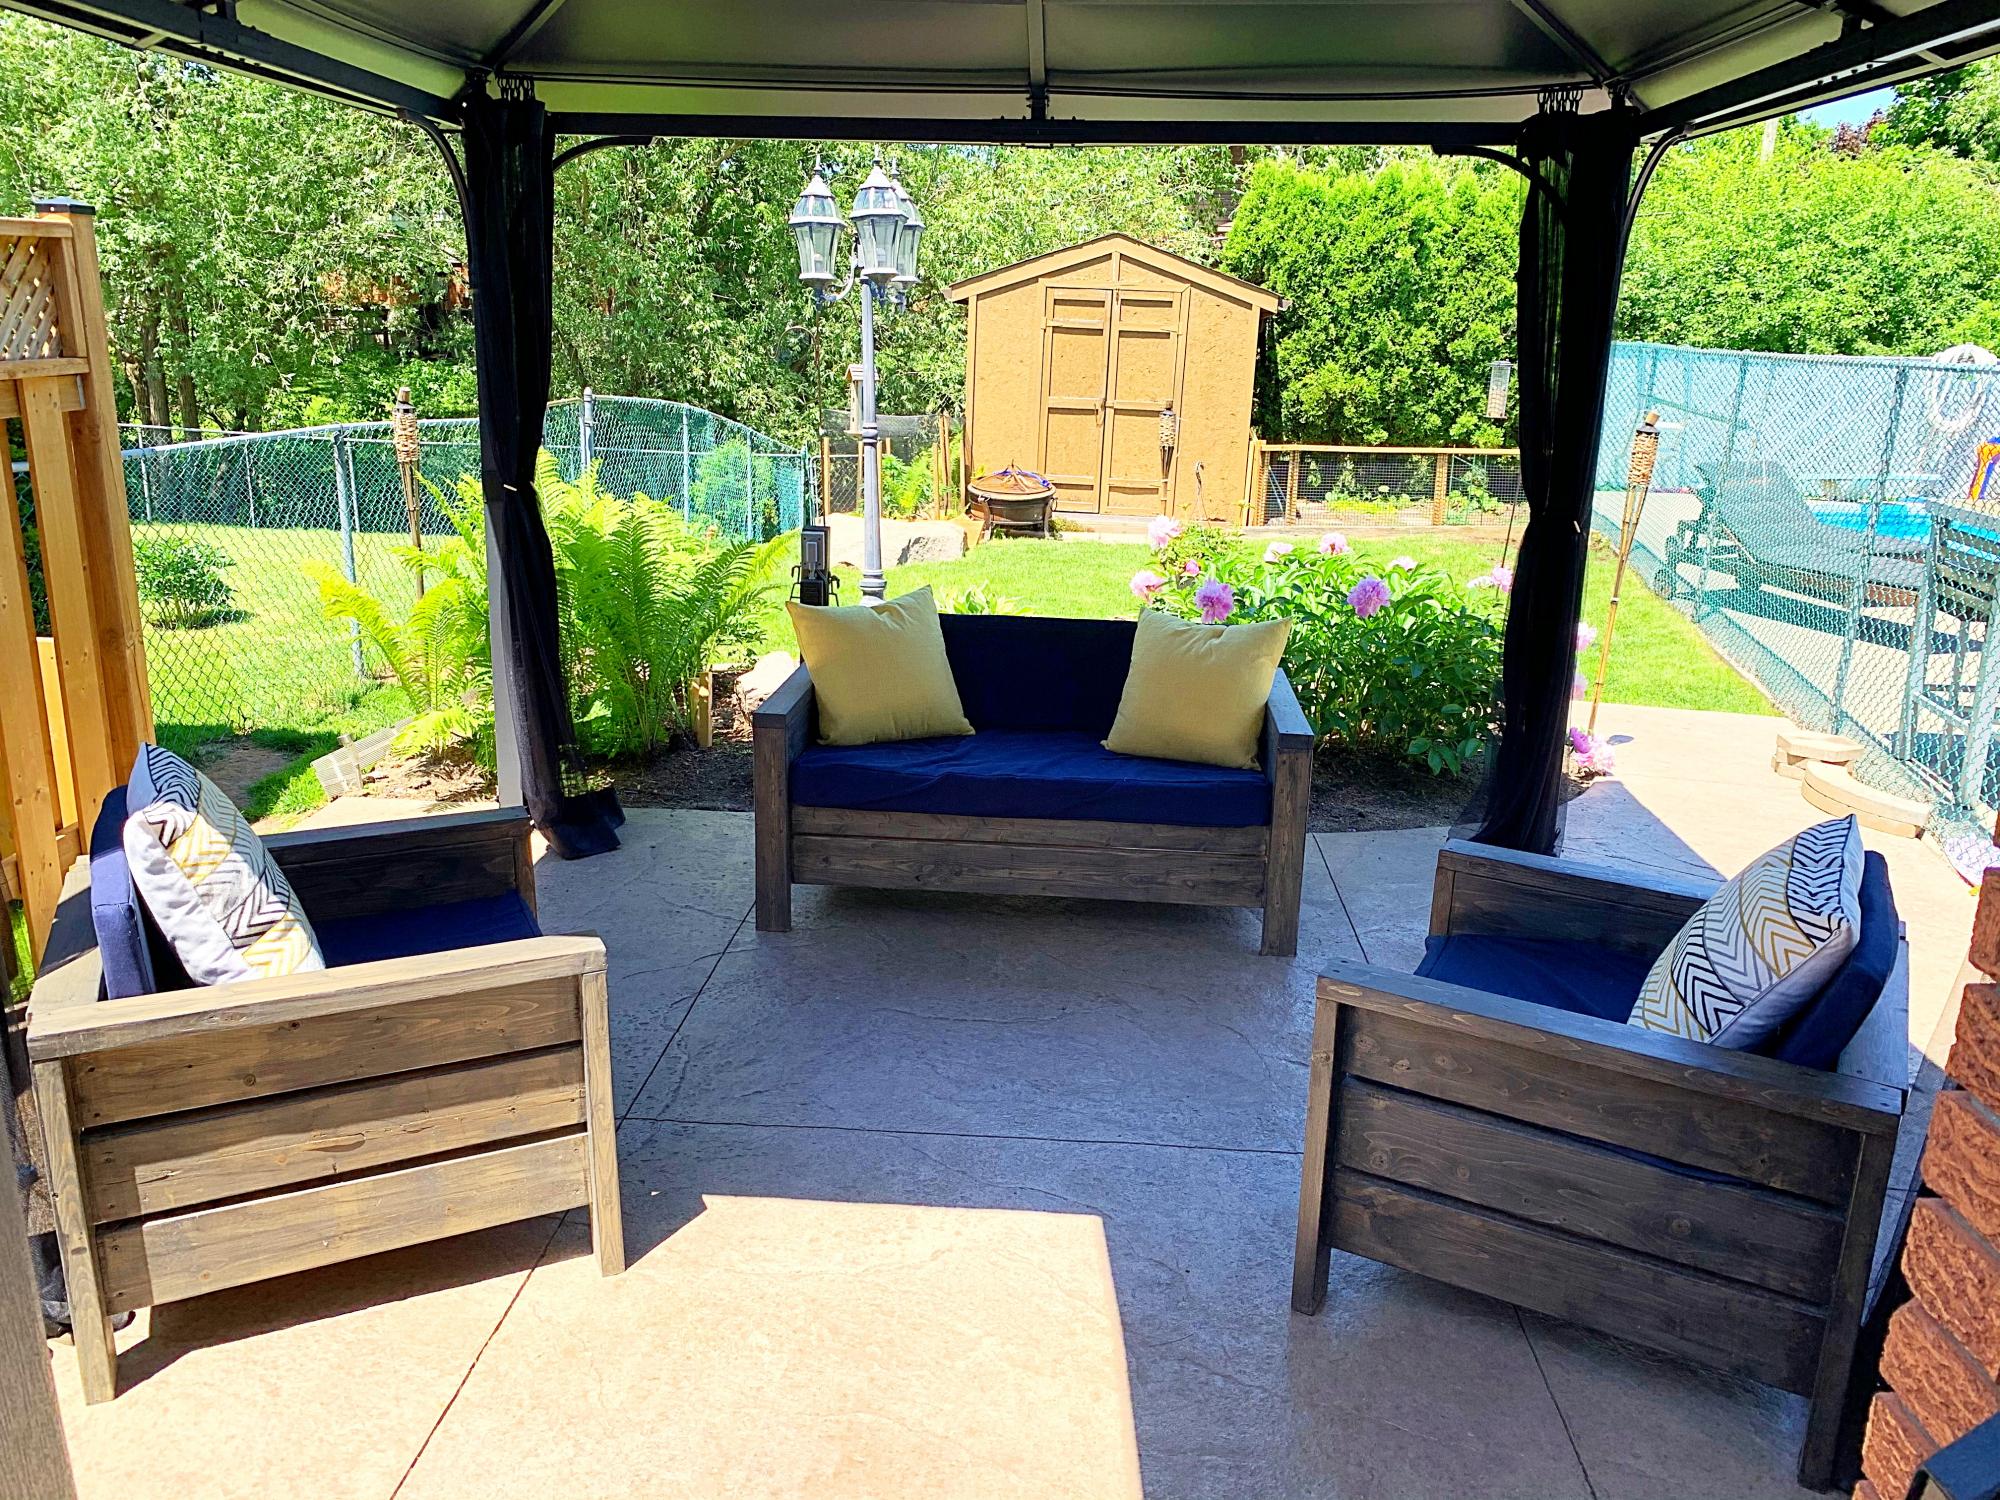
Loved this plan!!! It was my first furniture project (before all I did was mantels and shelving) amazing easy to follow build plans. Can’t wait to browse Ana White’s other posts! Thank you for providing this plan!

Estimated Cost
$120
Estimated Time Investment
Weekend Project (10-20 Hours)
Finish Used
Behr stain and sealer in slate
Recommended Skill Level
Beginner

Clara Table / Four Dollar Chairs

Submitted by ryanl on Tue, 06/03/2014 - 14:27

This was a seriously fun project to build. I am very pleased with the results. Painting is not something I usually do with my projects, and I learned a lot about spray paint in the process. I used the original plans, but double tapered the table legs, chamfer routed the top edges, and added v-grooves to the aprons. I incorporated v-grooves in to the chairs, and angled the tops.

There is a lot of pilot-holing and screwing involved with the chairs. I used pocket holes and glue to attach the seat slats from the bottom.

I would like to thank the site for making these plans available.

Estimated Cost
$40
Estimated Time Investment
Weekend Project (10-20 Hours)
Finish Used
Spray Paint/Primer
Recommended Skill Level
Beginner

Laundry Room Table

Submitted by TX Shaun on Wed, 07/01/2020 - 21:05

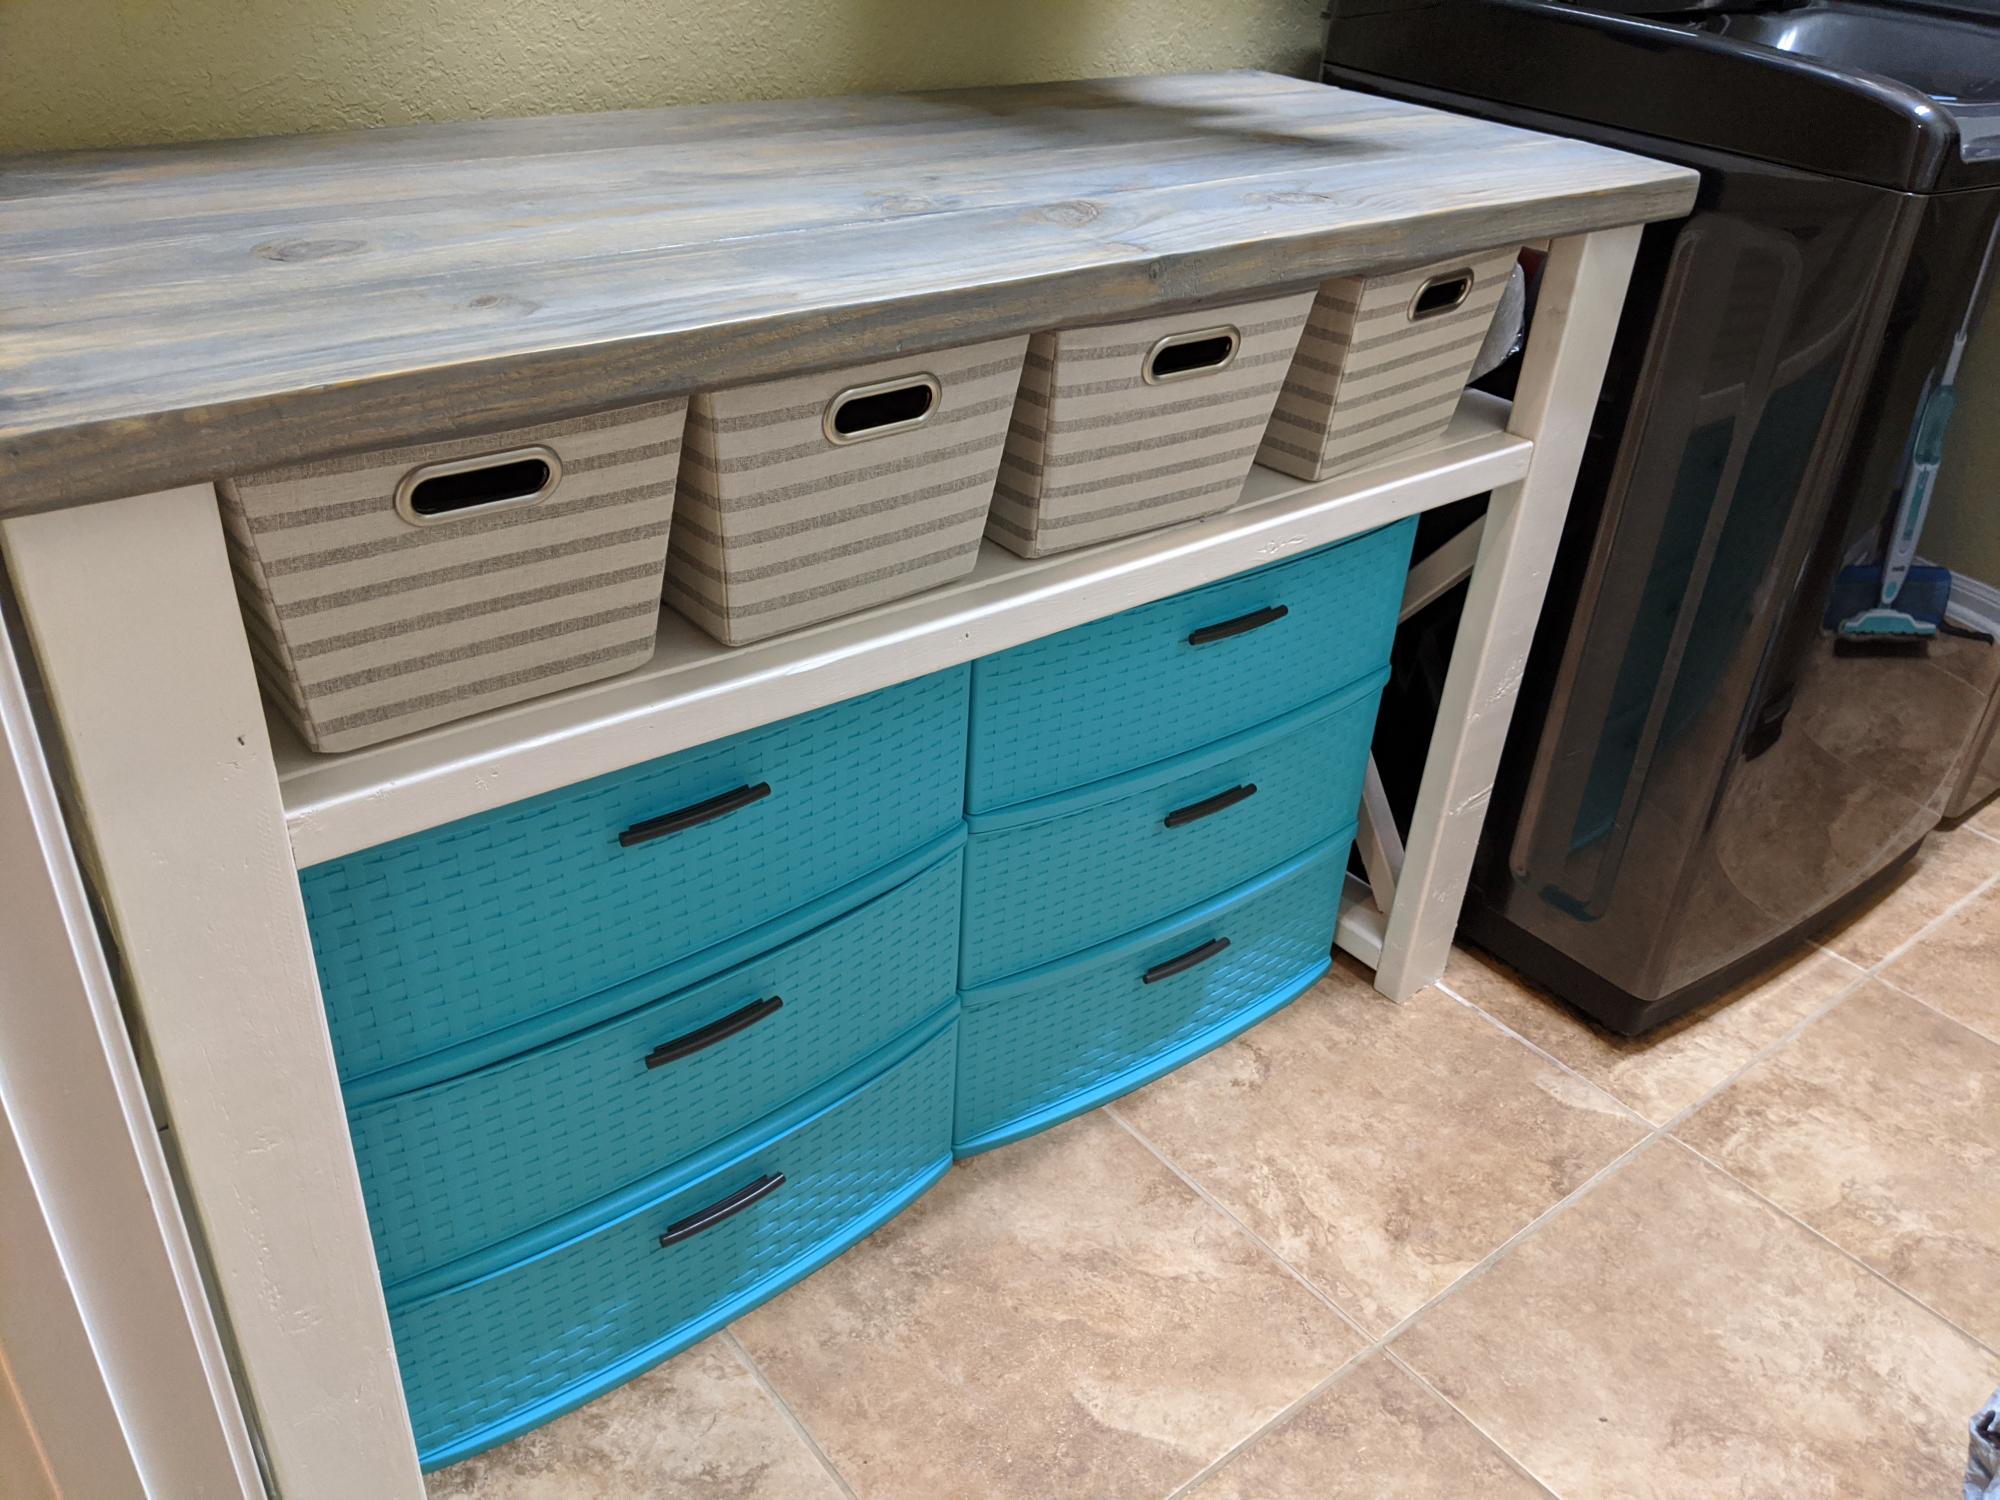
I modified the plans for the farmhouse console table to create a laundry room table. I changed the shelf height and used 2x4s running the entire length for the shelf.

Built from Plan(s)
Estimated Cost
$50
Estimated Time Investment
Afternoon Project (3-6 Hours)
Finish Used
Minwax grey stain and white paint.
Recommended Skill Level
Beginner

Barn Door Console with Drawers

Submitted by Anonymous (not verified) on Mon, 05/06/2024 - 13:27

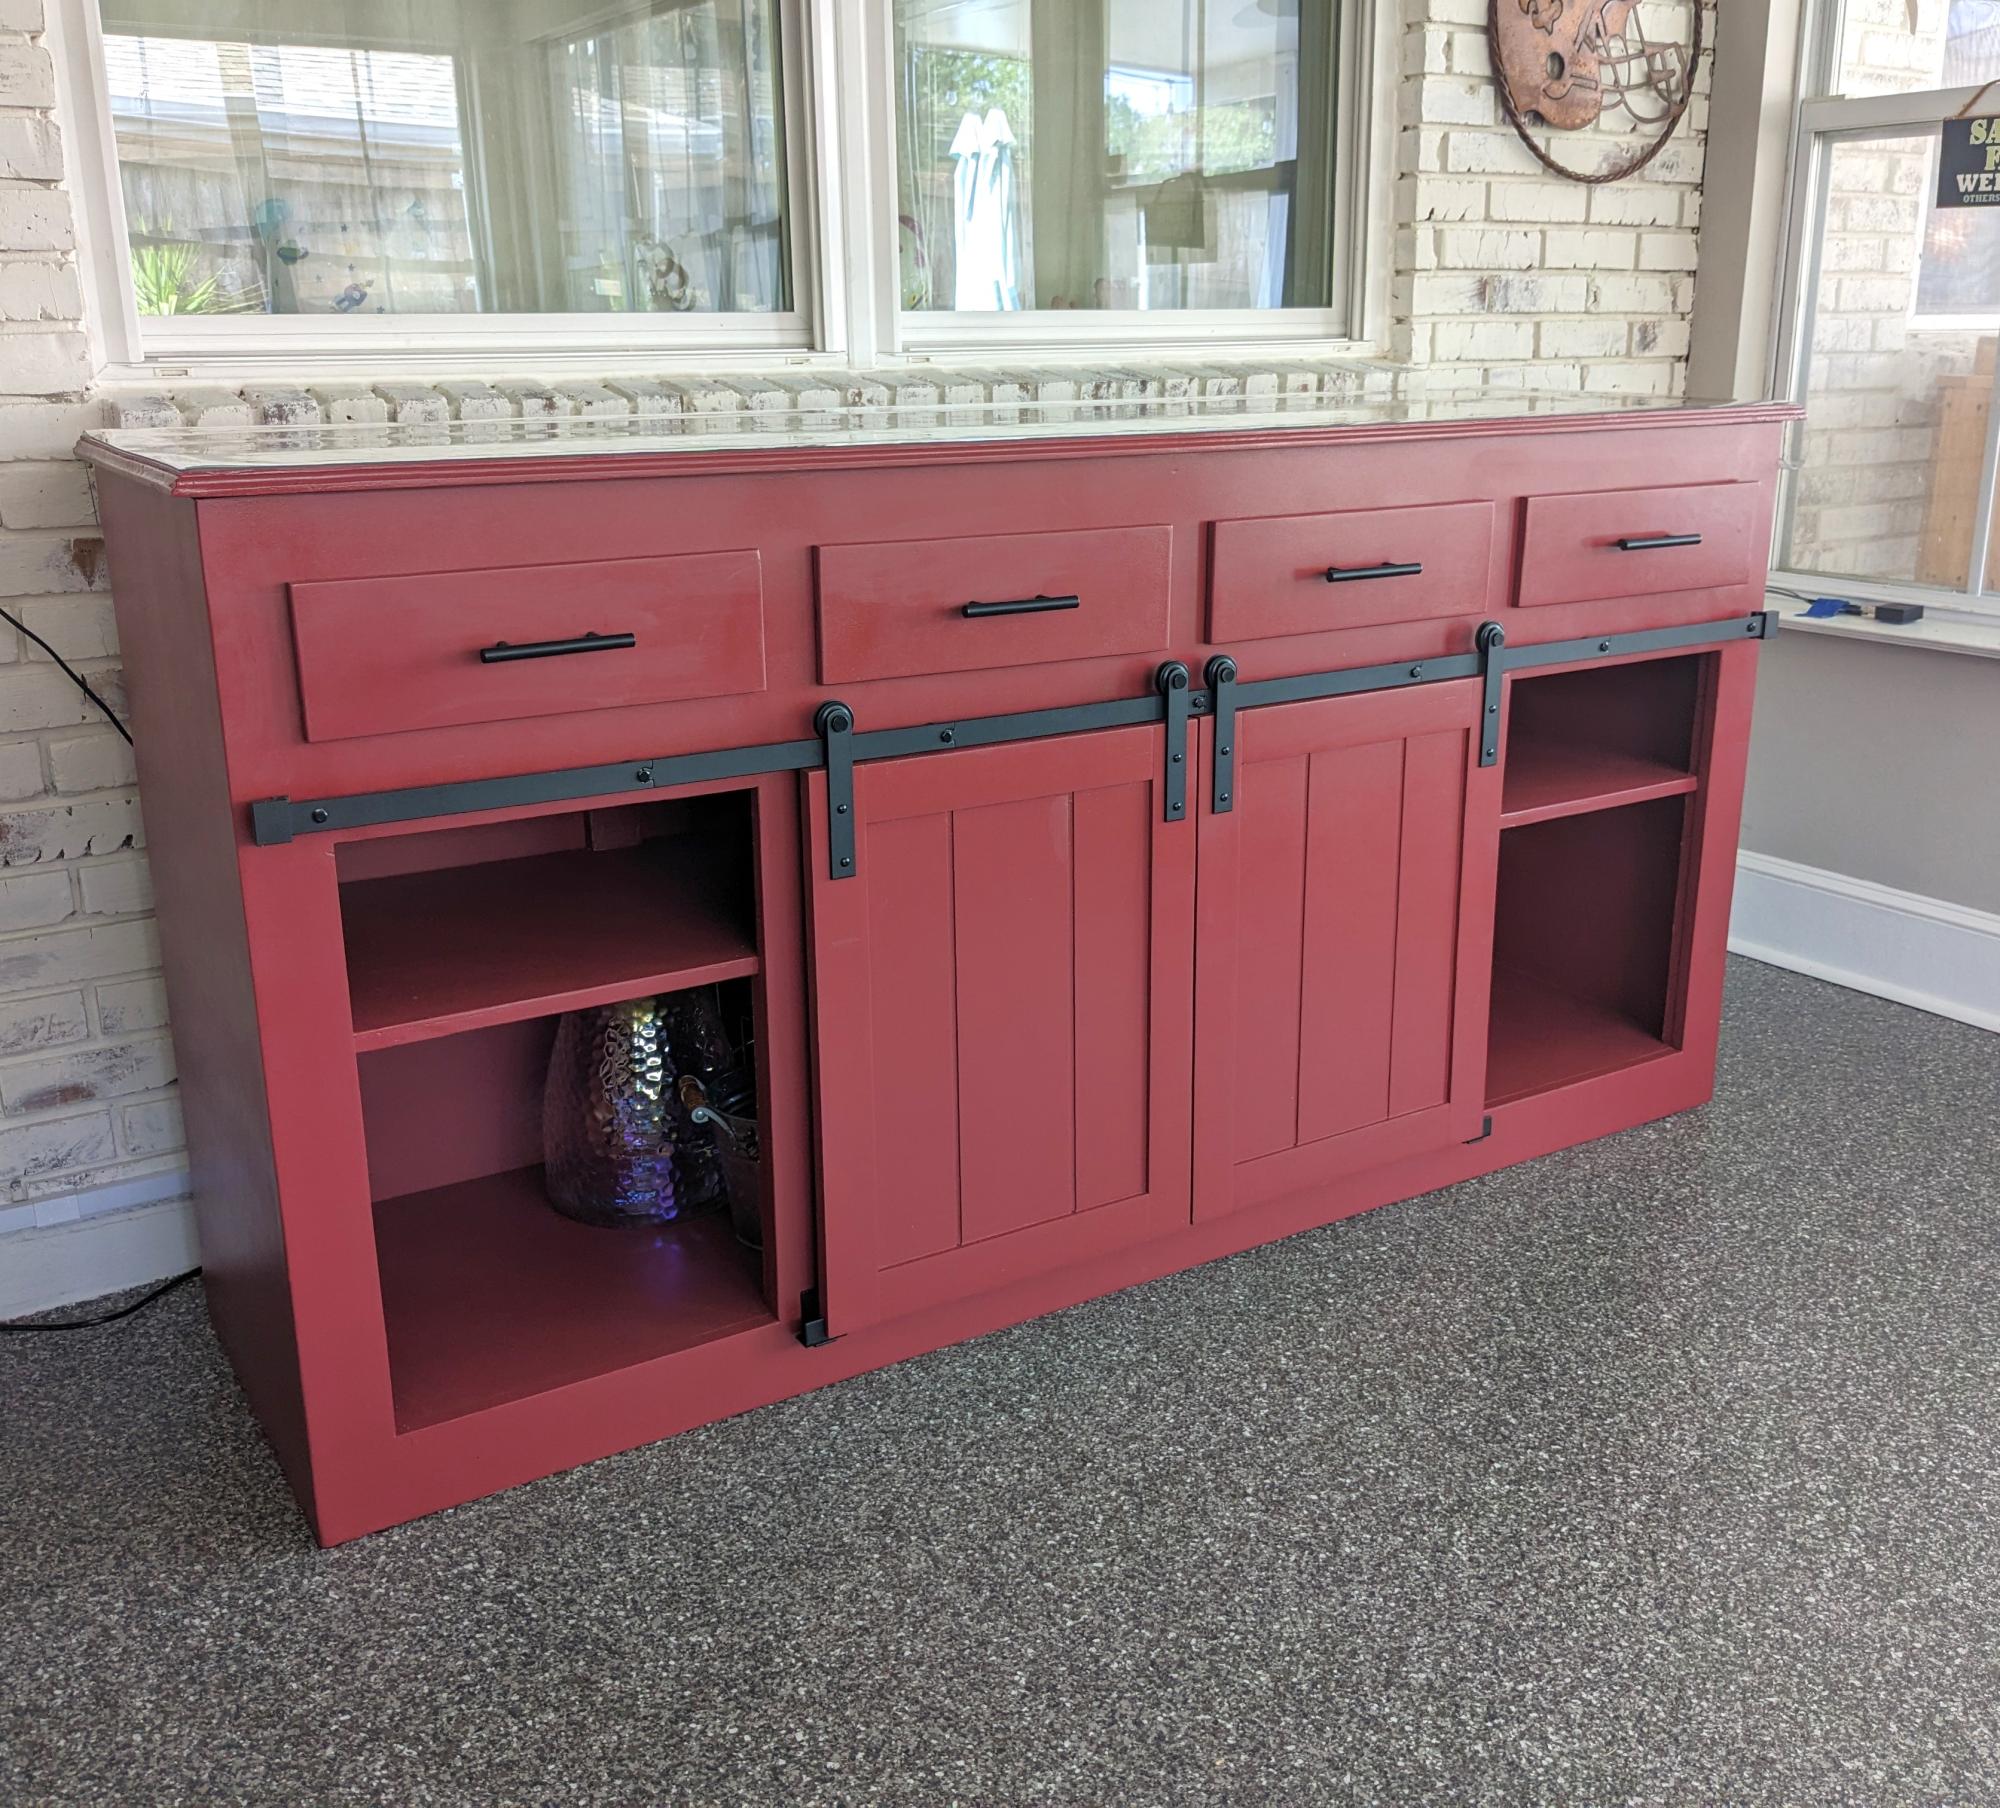
Being a newby to woodworking, I wasn't sure if I could tackle this build. I saw pictures on your website and decided to give it a try. However, my wife wanted drawers so I made the doors a little shorter in order to add the 4 drawers but keep the height at 36". Thanks for your inspiration. I'm getting more comfortable everyday.
 

Louis Villarrubia


4x4 truss dining room table and bench

Submitted by kruzie2 on Sun, 07/06/2014 - 13:49

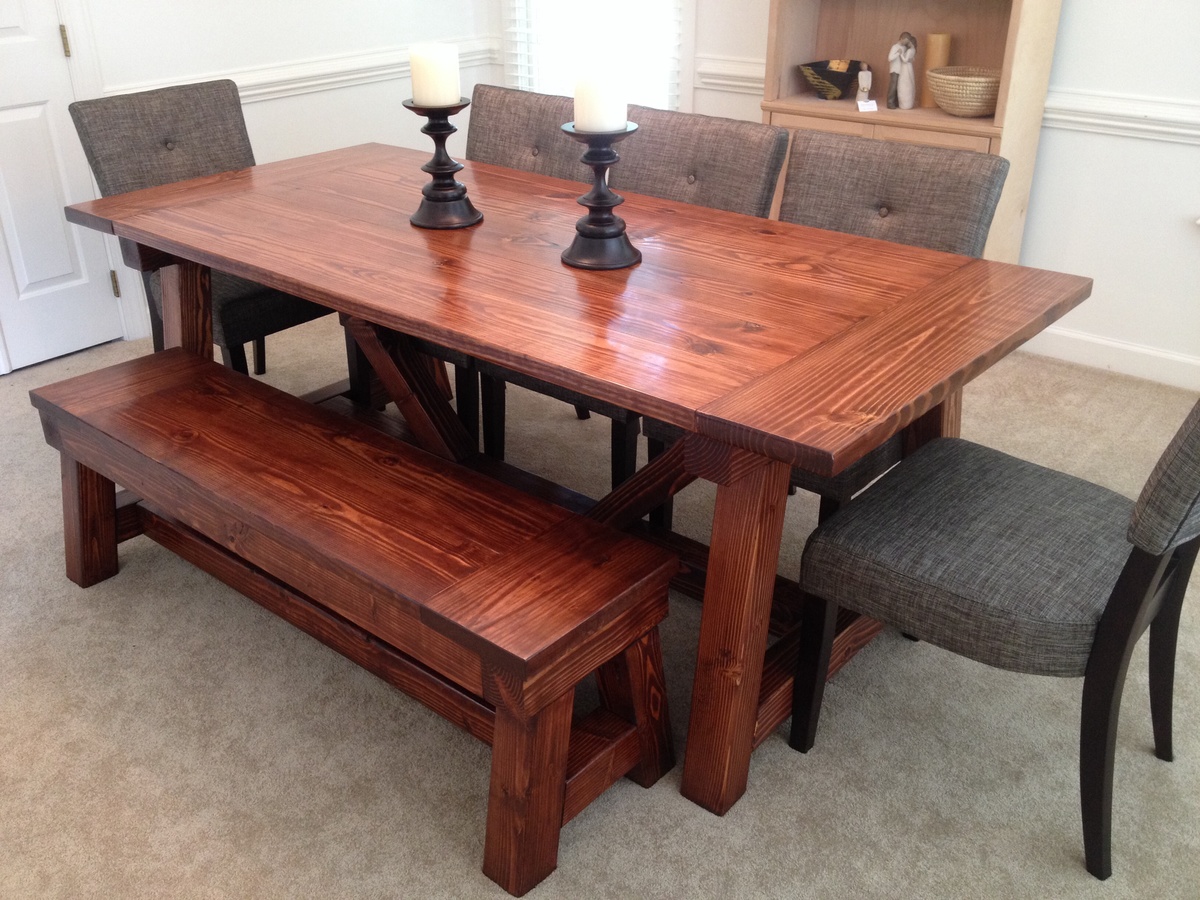
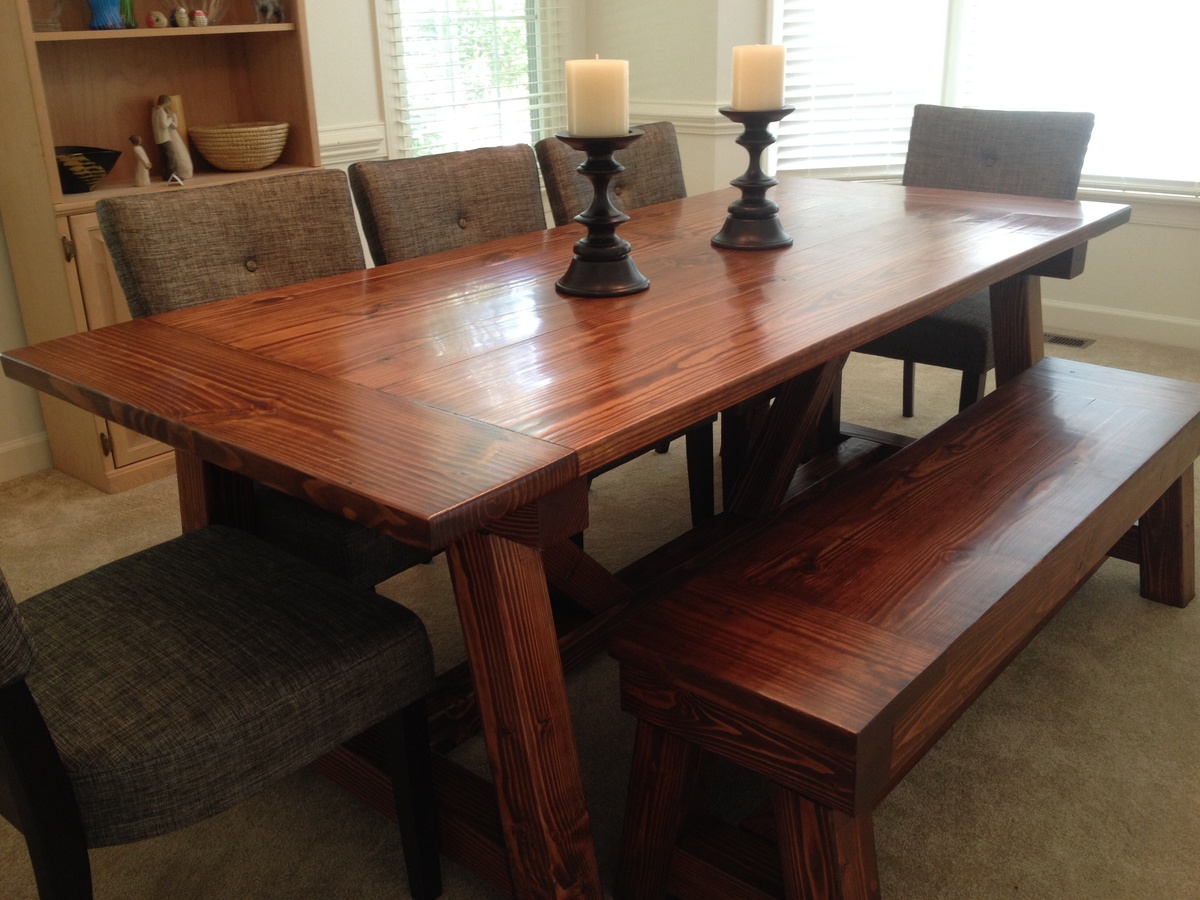
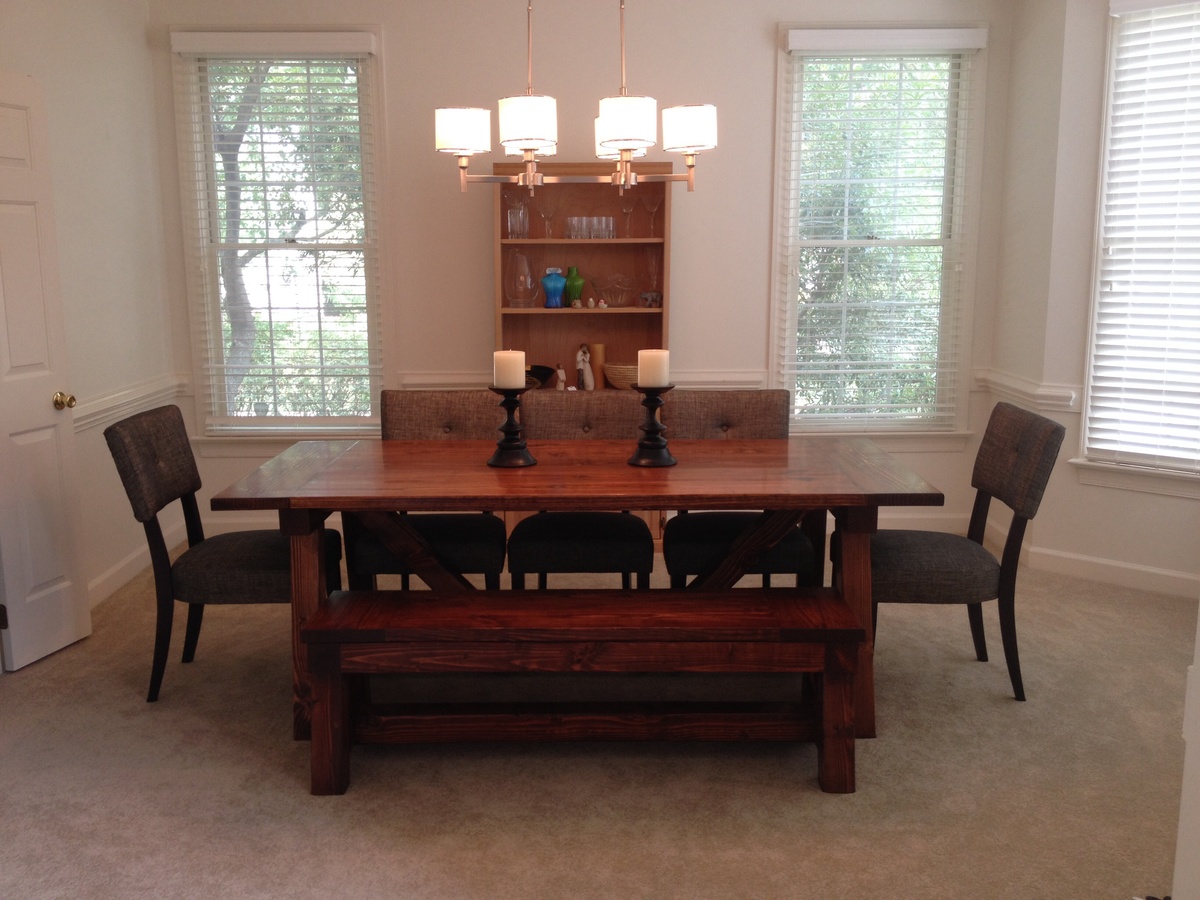
This project took a long time since it was my first and I had a baby boy in the middle of completing it. But finally it is finished. I had help with the construction and the plan was modified a little bit (83x38 inches) mostly since it needed to fit in the back of my father-in-law's van for transport to our new home. The finished product came out pretty well for my first foray into woodworking!

Estimated Cost
275 since I also bought the Kreg Jig and clamps
Estimated Time Investment
Week Long Project (20 Hours or More)
Finish Used
Prestained with Minwax Wood Conditioner to get the even color. It really is magic in a can. Then stained with 2 coats of Minwax English Chestnut and then a rub of Minwax Red Oak to give it a little more of a reddish tint to better match the chairs. Finished with 3 coats of satin polyurethane.
Recommended Skill Level
Beginner

Comments

kruzie2

Sun, 07/06/2014 - 18:26

Yes, we used the table saw to square all of the edges. This ensures a tight fit on the table top with no room for crumbs to get in!

Farmhouse Table

Submitted by mr pants on Mon, 09/24/2012 - 15:34

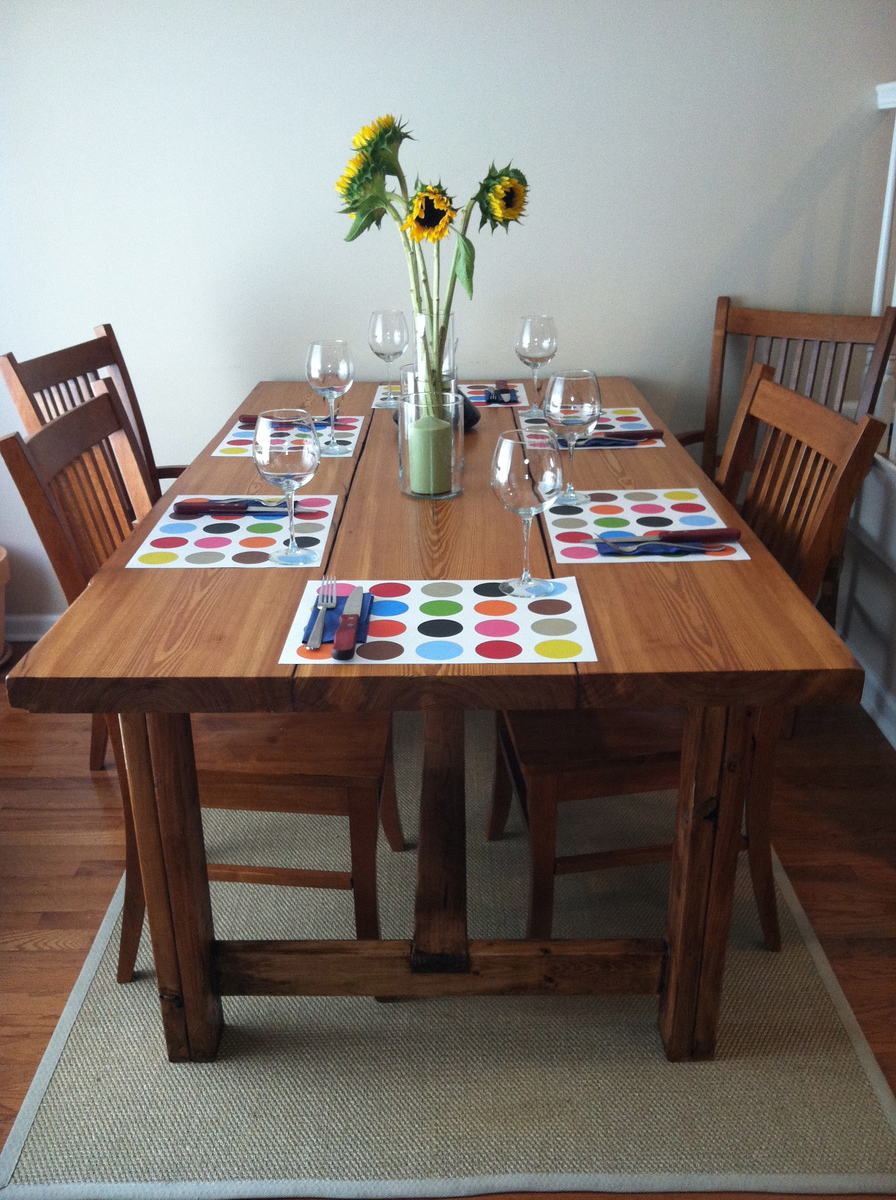
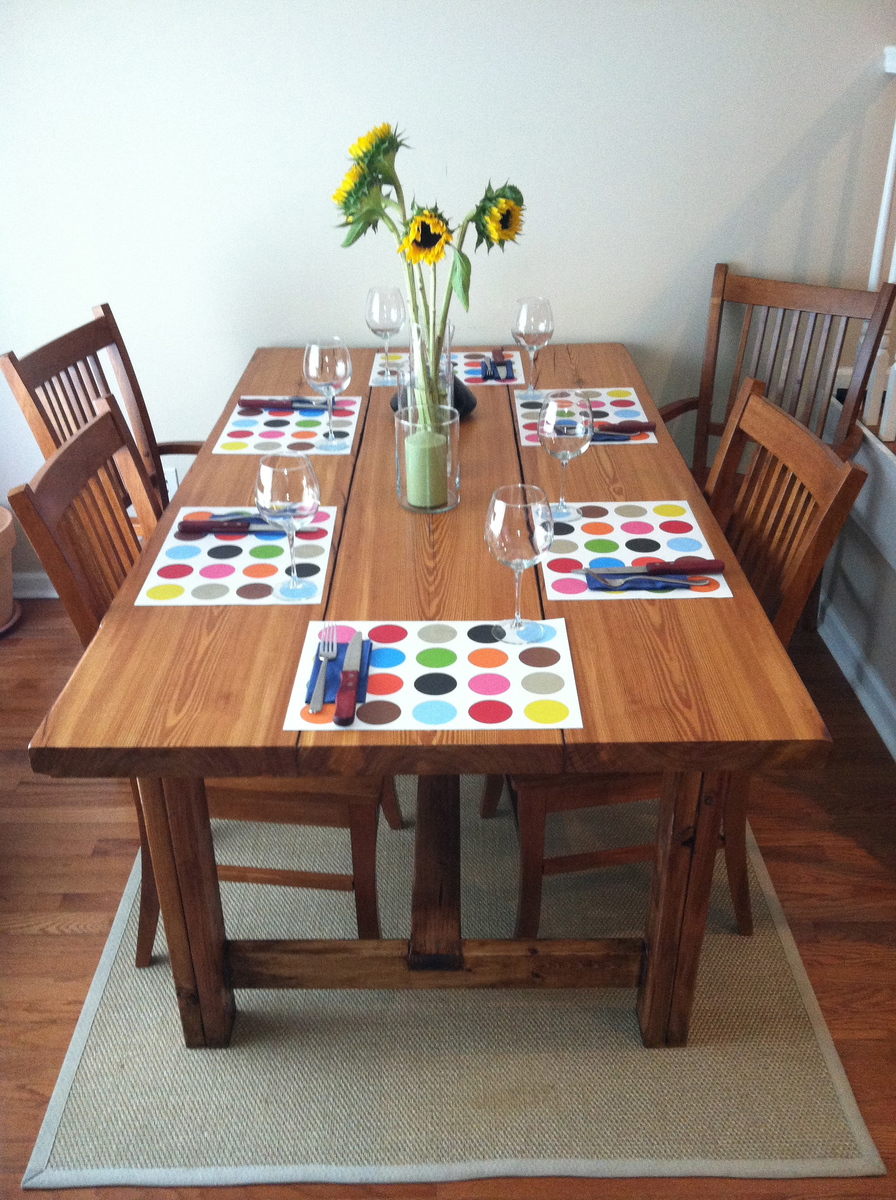
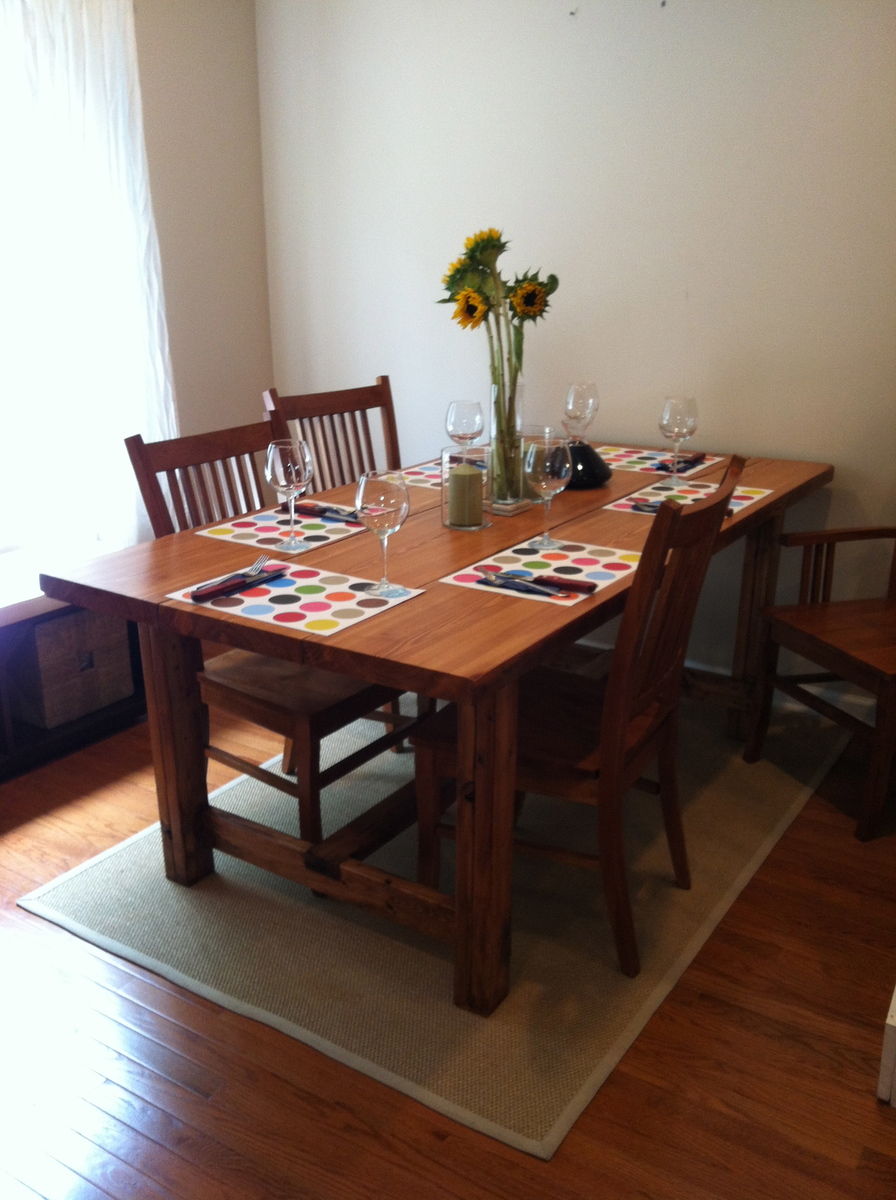
Farmhouse table. Tabletop is reclaimed from a church built in 1890 (bought at Manyunk Timer in Philadelphia). So glad we went that route (the knots, grain, etc match on the outer two pieces which you can see in the pic... it's really great, but it is expensive).

Top has only minwax polyurethane, there's no stain whatsoever. Frame is stained with Minwax "polyshades" (Mission Oak shade).

Chairs you see are the "Winslow" chairs from coaster. Highly recommend them. The match was luck.

Omitted the breadboard ends only because my tabletop pieces are 13 in (!) across: that would have been too wide for ends I thought.

Many thanks to this fantastic site for the plans. I am new at this and the table is KILLER; there's no possible way I could have expected it to turn out so well.
Estimated Cost
$360 for reclaimed longleaf pine tabletop pieces; ~$100 for the rest?
Estimated Time Investment
Week Long Project (20 Hours or More)
Finish Used
Minwax poly (only) on tabletop
Minwax Polyshades (mission oak) on frame
Recommended Skill Level
Intermediate

Comments

Full sized and off the ground

Submitted by Kayusiwok on Fri, 07/25/2014 - 13:19

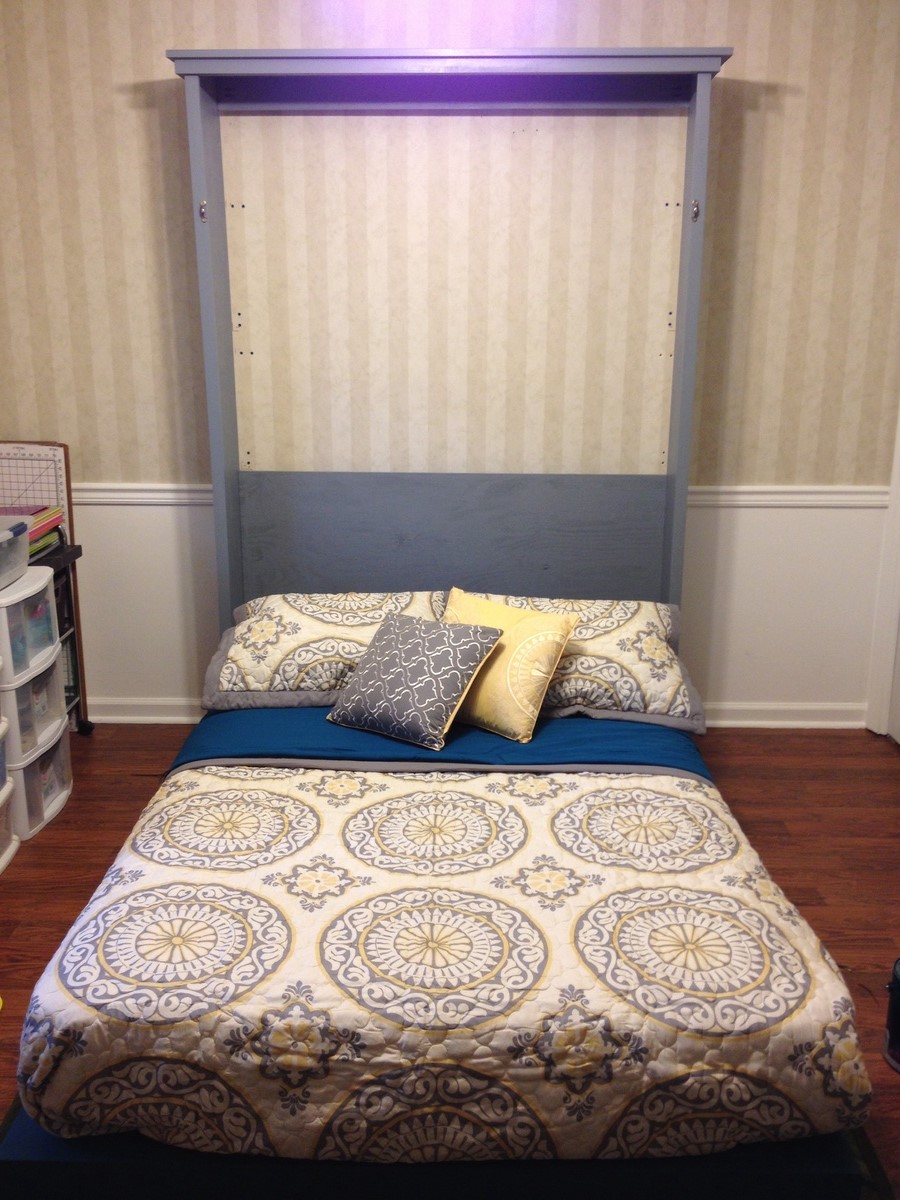
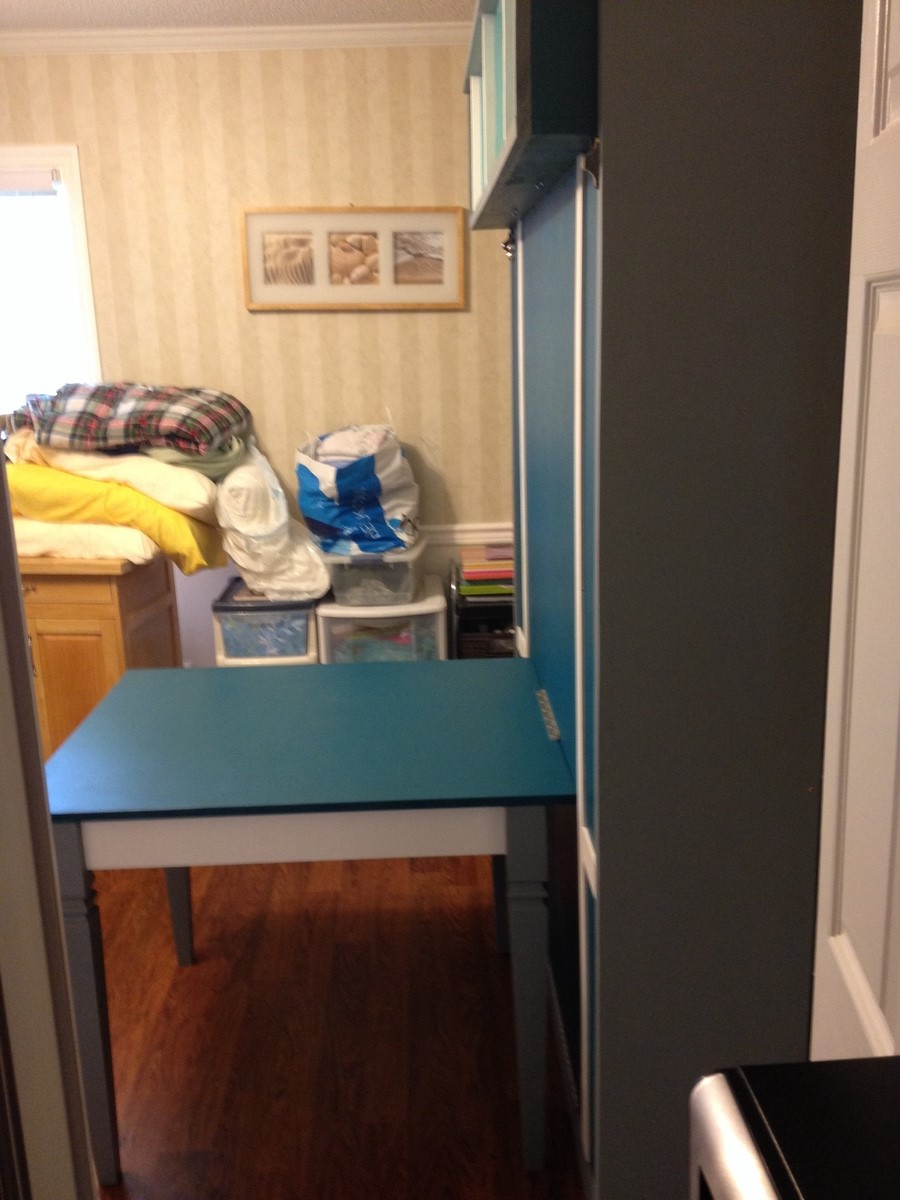
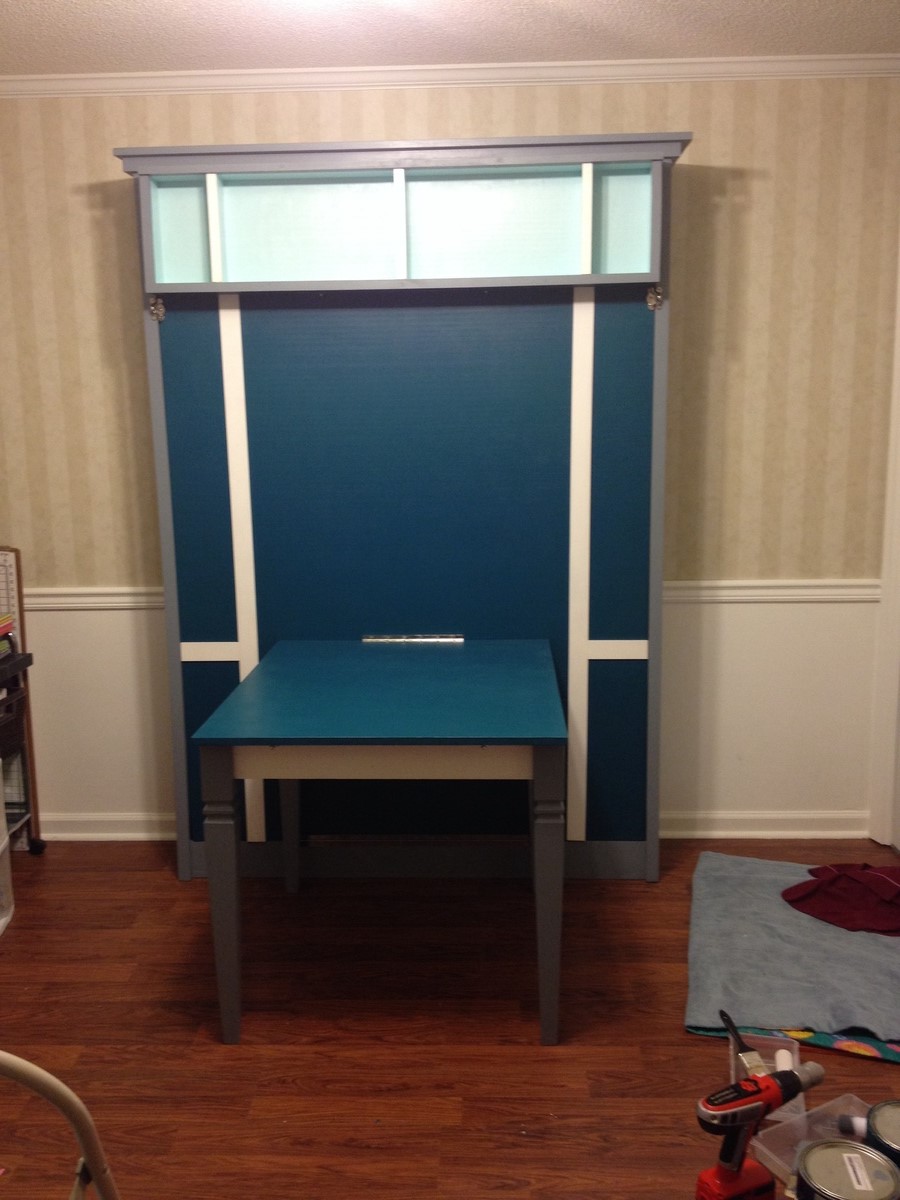
I followed most of the measurements with the Murphy bed with added dimensions for a full sized bed. I also added a shelf to provide support while the bed is down since I brought the platform off the floor. The table is also hinged to the bed platform so that it folds up and locks in place for a center support for the bed.

Estimated Cost
300
Estimated Time Investment
Week Long Project (20 Hours or More)
Finish Used
Cal spar gypsy teal, shark fin grey, and oyster all in satin finish.
Recommended Skill Level
Beginner

Comments

JoanneS

Fri, 07/25/2014 - 16:52

What an awesome project! Love how the added shelf at the top creates the "legs" at the end of the bed when it is lowered (looks like it keeps the bed about 4" off the floor?). Are those window sash locks for closure? Those will keep it in place nice and tight when it's closed. The fold down desk is brilliant also, and love the legs and the colors!

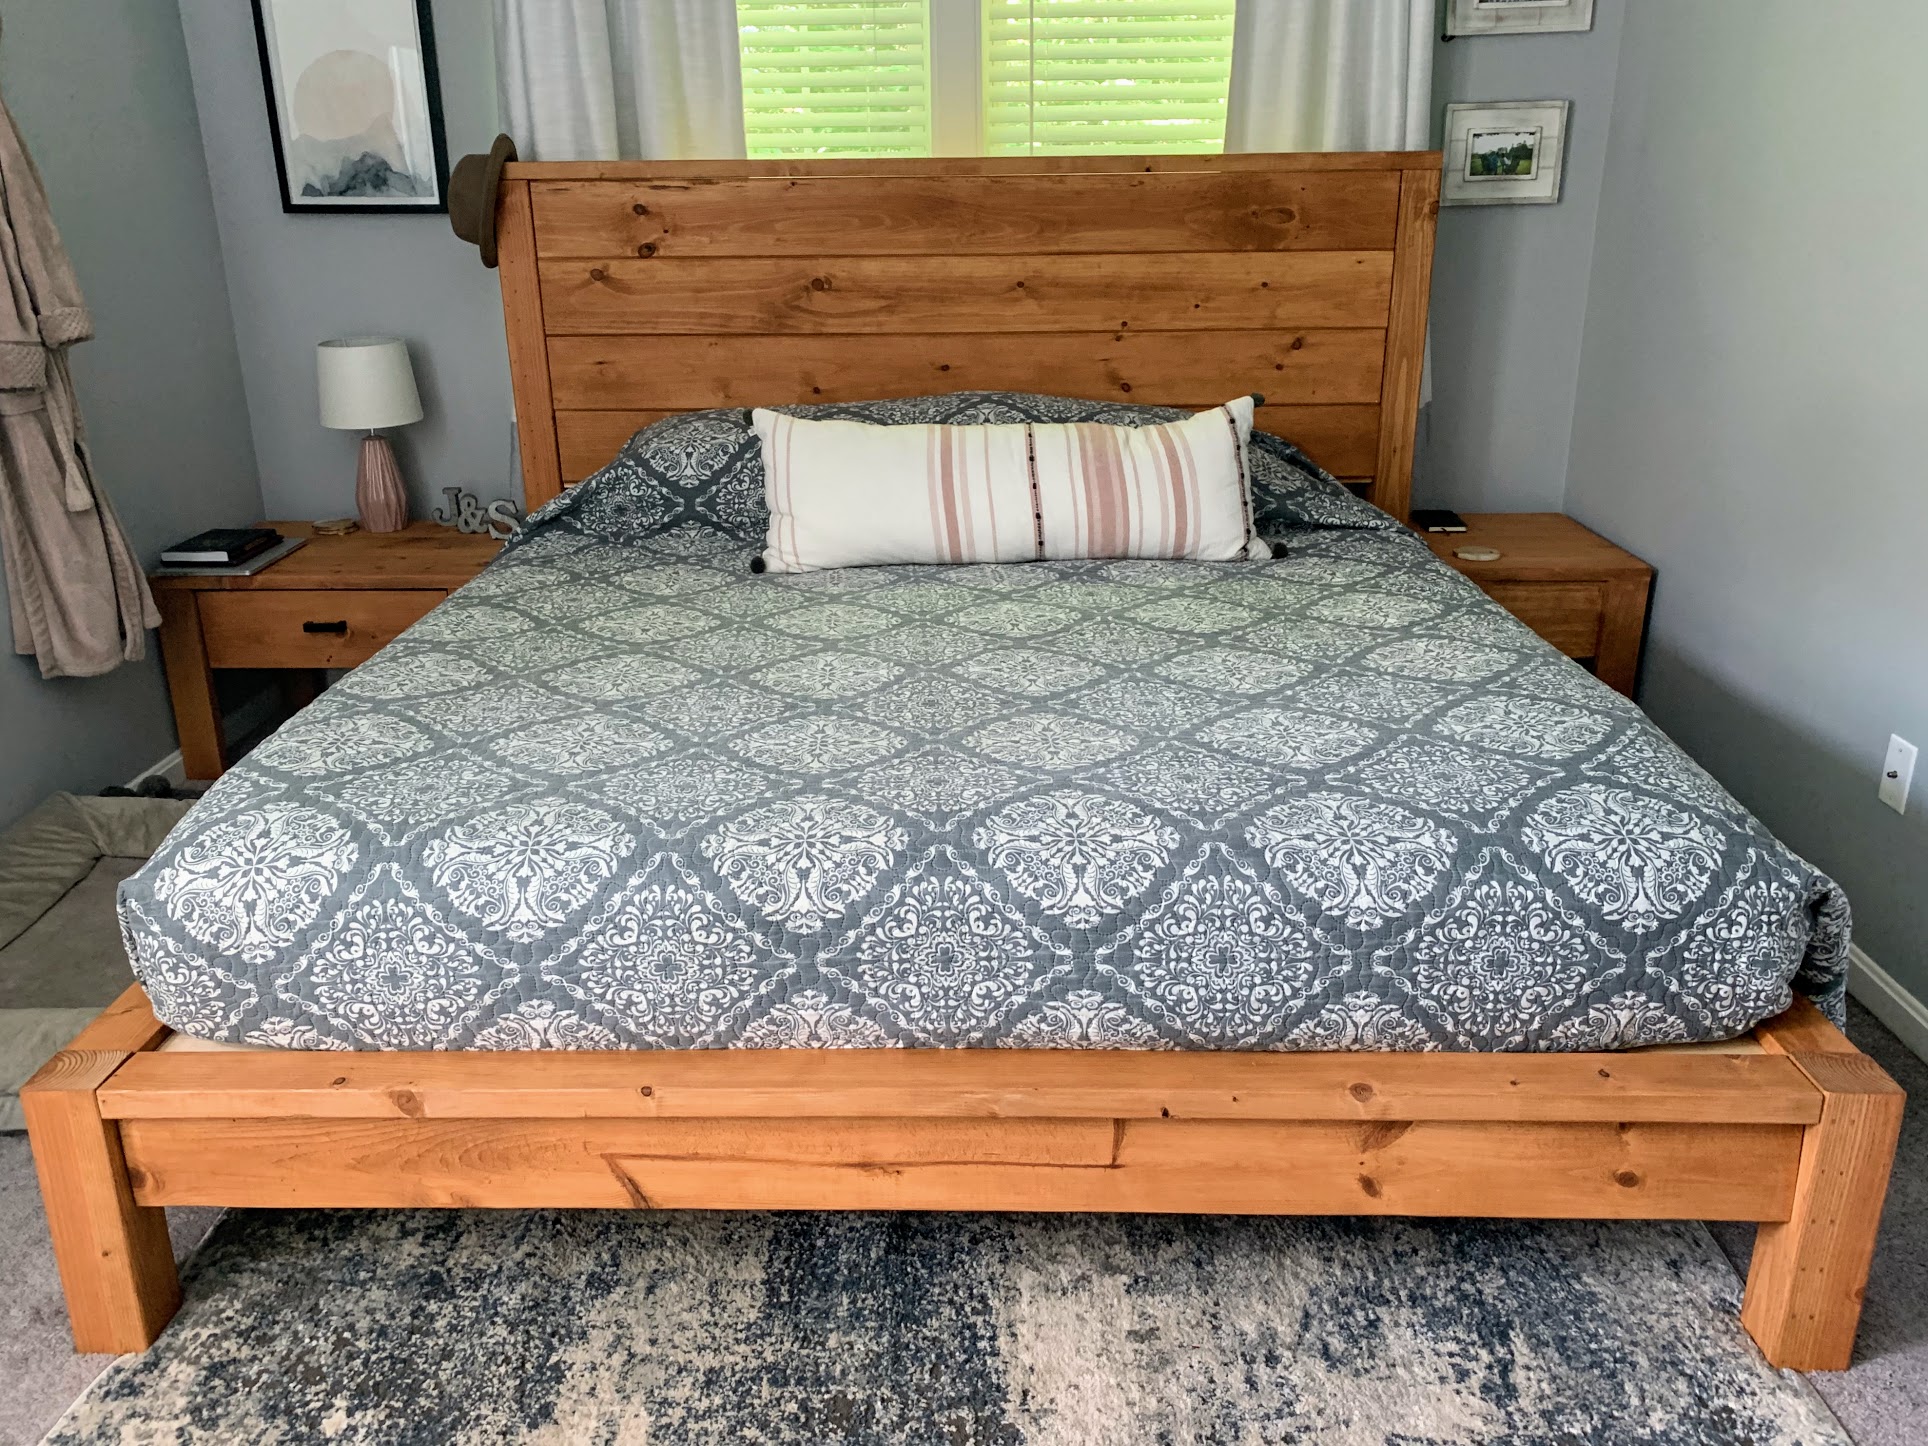
modern farmhouse bed frame with matching end tables

Submitted by Anonymous (not verified) on Thu, 07/30/2020 - 10:13

Bed frame - Husband and I built and assembled over a weekend. We love it!
Only variation from the plans were that we used 1x8 shiplap boards for the headboard (because the options were nicer at Home Depot).

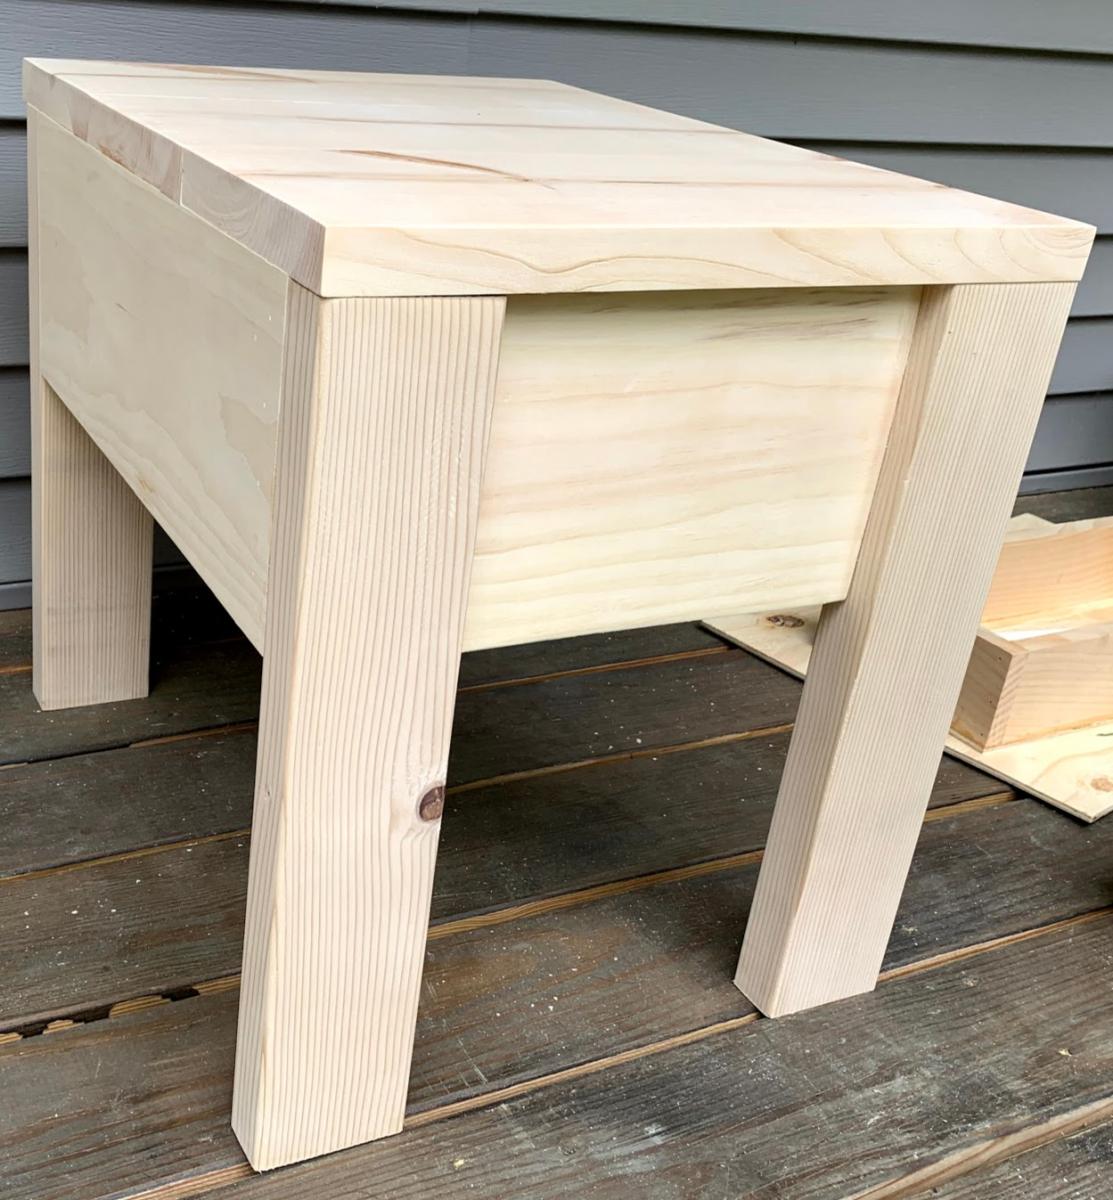
Nightstand 1 - This I built myself, it took about 5 hours.
Followed the directions and the drawer worked the first time!

Nightstand 2 - This I also built myself, took about 4 hours.
This one I had about 17" to work with. The only measurement that changed was the front and back cut to 10".

Estimated Cost
Not sure about the bed frame. We purchased some tools for this project.
about $70 per nightstand
Estimated Time Investment
Weekend Project (10-20 Hours)
Finish Used
Minwax Wood Finish
Semi-transparent
Ipswich Pine - 221
Recommended Skill Level
Beginner

Comments

okstout4

Mon, 10/19/2020 - 19:42

Very nice! I'll have to look into this color as Im loving it!

Sweet Pea Garden Bunk Bed Storage Stairs

Submitted by abbpim on Thu, 10/18/2012 - 14:55

Jenny from www.birdsandsoap.com became my hero when I saw her sweet pea garden bunk bed plans on here! I love these storage stairs and everything else about the bed. I decided to build the whole works. Here are the storage stairs. I added the last couple photos to show what my girls and I did with the scraps from the cut out hearts. We made a fishing game out of it... used screws in the "fish" to make them magnetic and we just used fridge magnets for the end of the fishing pole. Pretty fun! We'll get to making more fish and painting them later... right now I gotta finish this awesome bed house! (I just wanted to share that to let everyone know how creative I can be... normally I'm just a big style biter off ana white and Jenny from birds and soap and Pinterest lol... I bet if you went in my house right after Jennys house they would look pretty identical. I also made her version of the farmhouse storage bed, what can I say? She's got good taste!) YEAH!
Estimated Cost
$50
Estimated Time Investment
Weekend Project (10-20 Hours)
Finish Used
Paint and Polycrylic
Recommended Skill Level
Beginner

Comments

HollykmB (not verified)

Mon, 12/31/2012 - 08:50

Where did you find the plans for the stairs? I can't find them on this website or the Birds and Soap website.
HollykmB (not verified)

Mon, 12/31/2012 - 08:51

Where did you find the plans for the storage stairs? I can't find them on Ana White's site or the Birds and Soap site.

Double Trash Bin

Submitted by Anonymous (not verified) on Wed, 08/26/2020 - 08:32

This was based on the "Small Kitchen Island" Plans but needed to put 2 - 33 Gal Trash cans in. I used Select Square edged Pine. The depth remained the same as the plans but the width changed dramatically (52" wide). I also increased the height to match the other furniture (3' High). I added 4 - 1 X 2's to the top of the cabinet to secure the top.

Estimated Cost
$350-$400
Estimated Time Investment
Week Long Project (20 Hours or More)
Finish Used
The bottom was paint that matched the other furniture, the top is an Classic Oak Poly/Stain - 3 coats
Recommended Skill Level
Intermediate

Comments

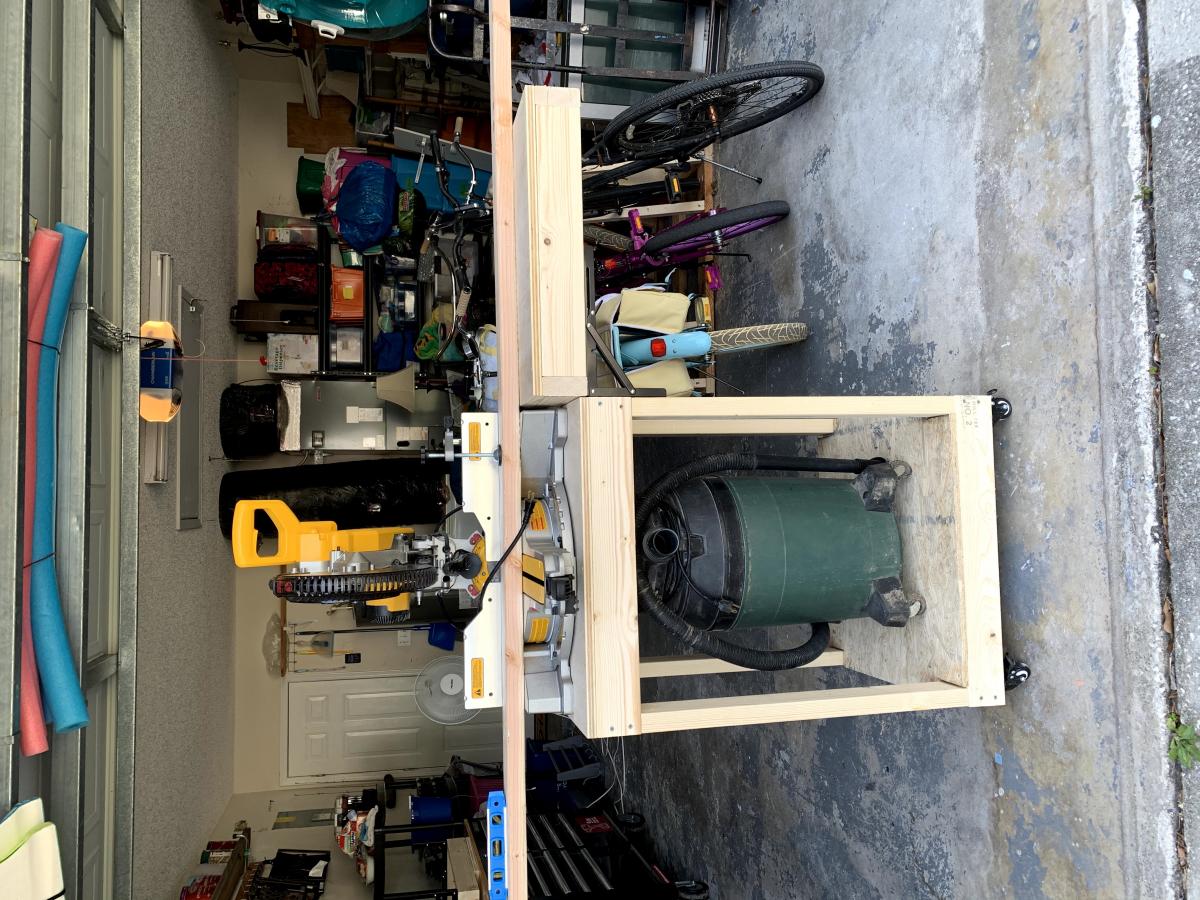
Miter Saw Cart

Submitted by ivyfamily5 on Sat, 09/19/2020 - 13:49

I love this Miter Saw Cart. The plans were easy to follow and tweak to work with what I had on hand. I love all of Ana White's plans, passion, and inspiration. Happy Building!

Built from Plan(s)
Estimated Time Investment
Afternoon Project (3-6 Hours)
Finish Used
I left it raw, but I might paint it later. I also plan to add a Stop Block to it soon.
Recommended Skill Level
Beginner

Comments

Back