Community Brag Posts

My wife built a bed.
We looked for a simple plan for a bed and found this one on Ana’s site. Easy to build in a weekend.
Built from Plan(s)
Estimated Cost
$140 with all lumber and stain.
Estimated Time Investment
Weekend Project (10-20 Hours)
Finish Used
Poly stain
Recommended Skill Level
Beginner
Comments

Mon, 06/03/2019 - 11:35
Thank you so much for…
Thank you so much for sharing a photo! I've been looking forward to seeing how the bed turns out! Great job!
Laundry Sort/Fold Station

A laundry room remodel is on the to-do list but by using the laundry station pattern as a base I made a few adjustments to complete my station.
Stain is Varathane Briarsmoke. Absolutely love the color!!
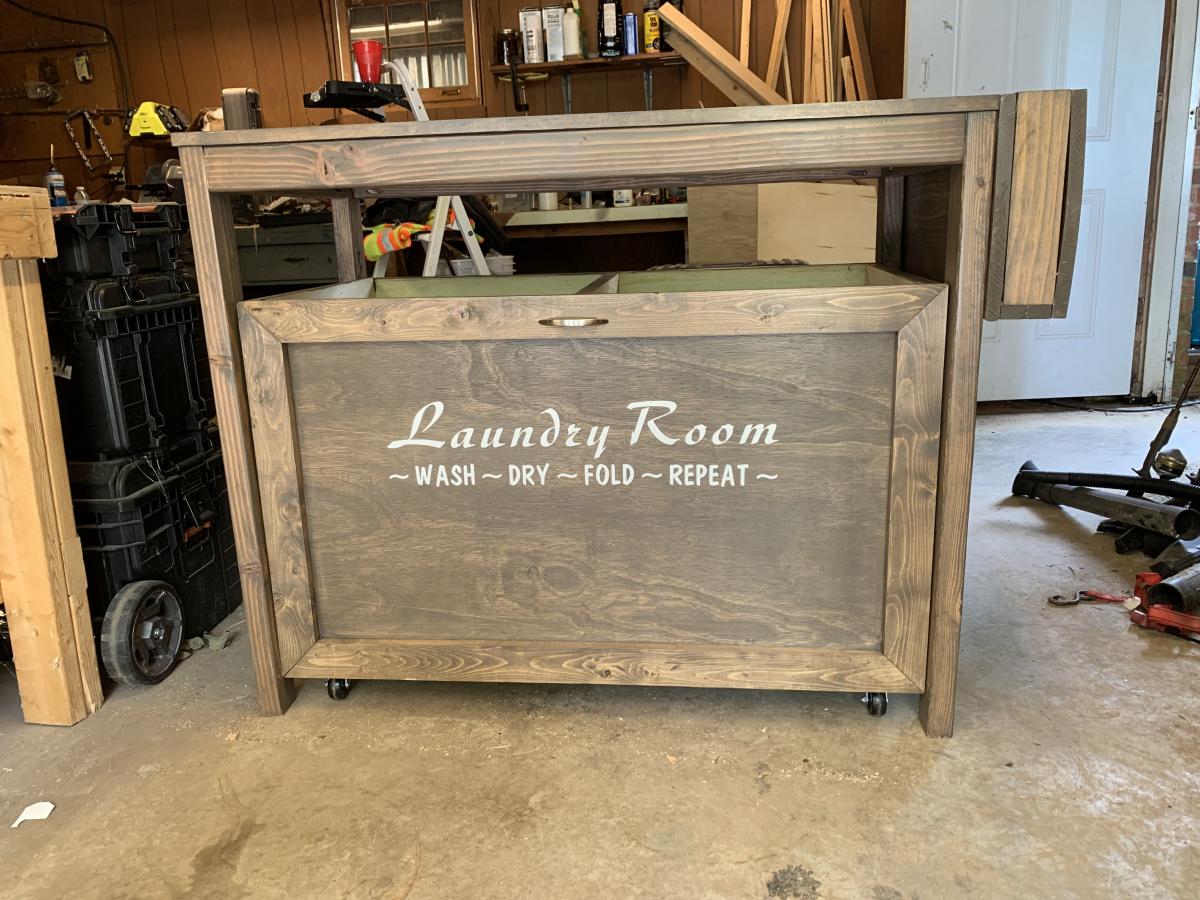
Built from Plan(s)
Estimated Cost
$100
Made from pine common board with a sanded birch tabletop.
Made from pine common board with a sanded birch tabletop.
Estimated Time Investment
Weekend Project (10-20 Hours)
Finish Used
Varathane Briarsmoke
Recommended Skill Level
Intermediate
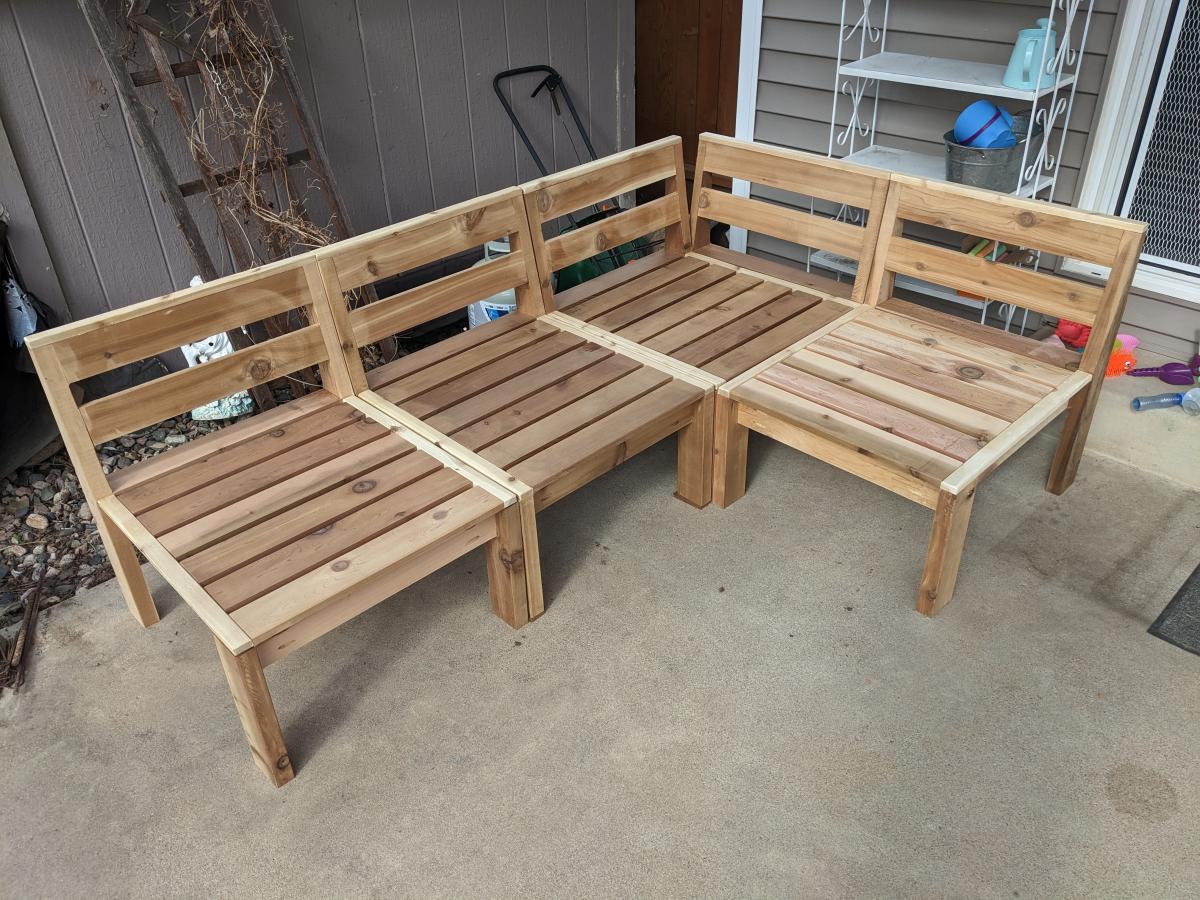
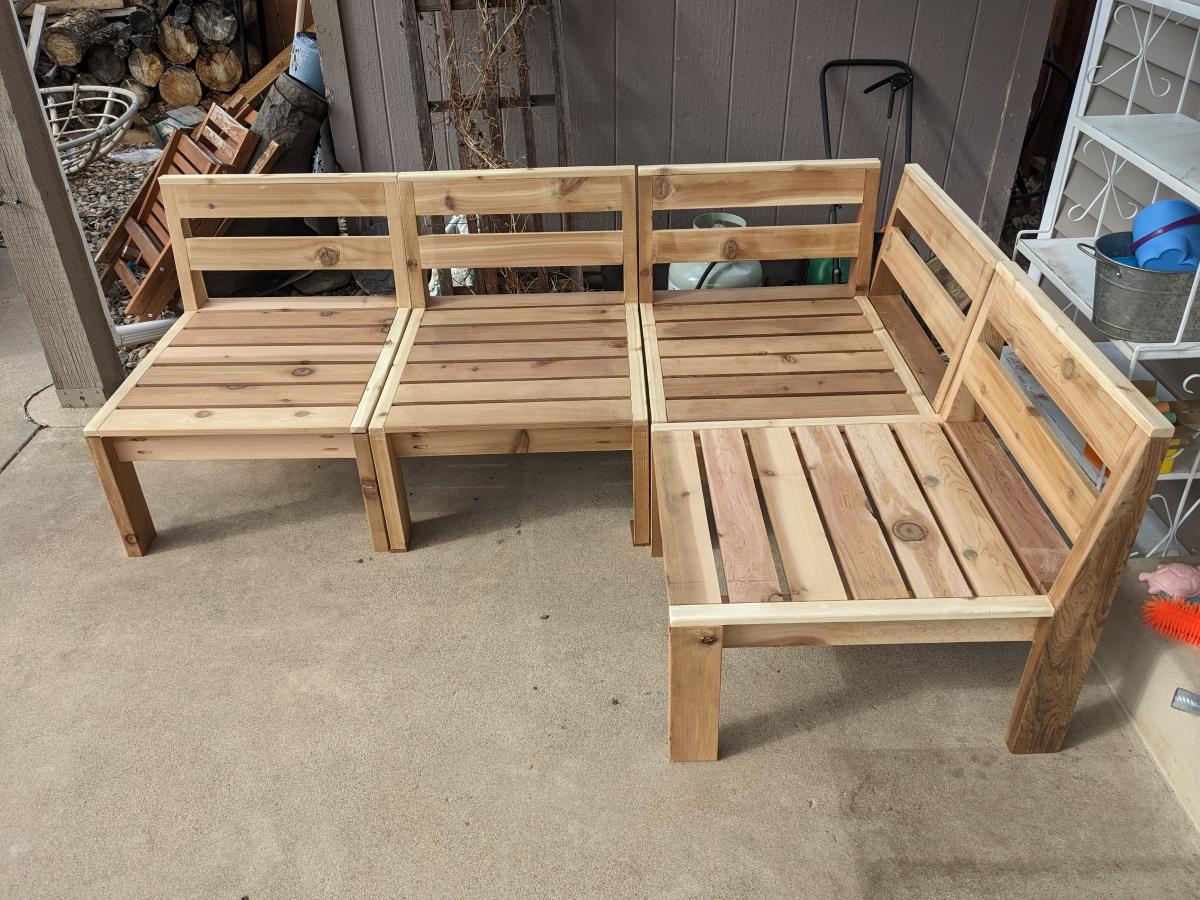
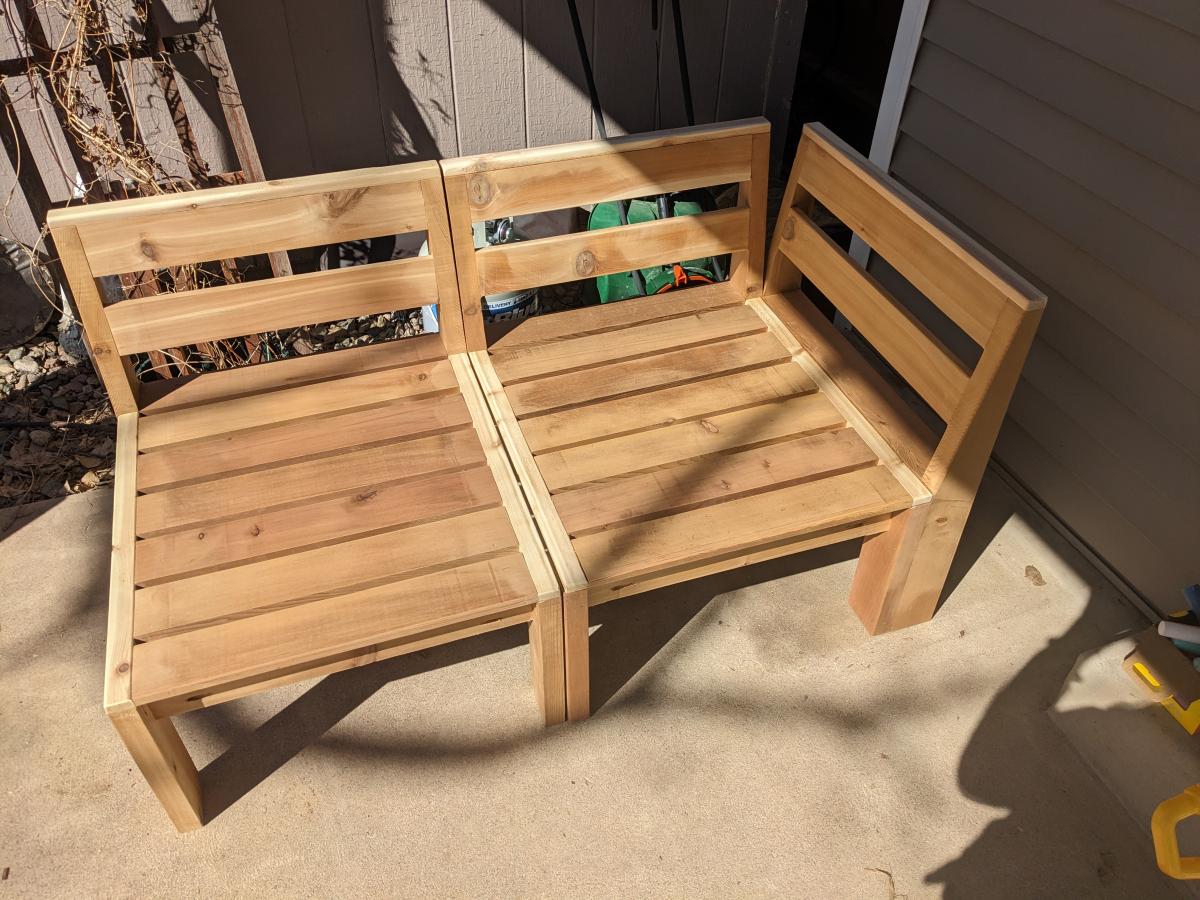
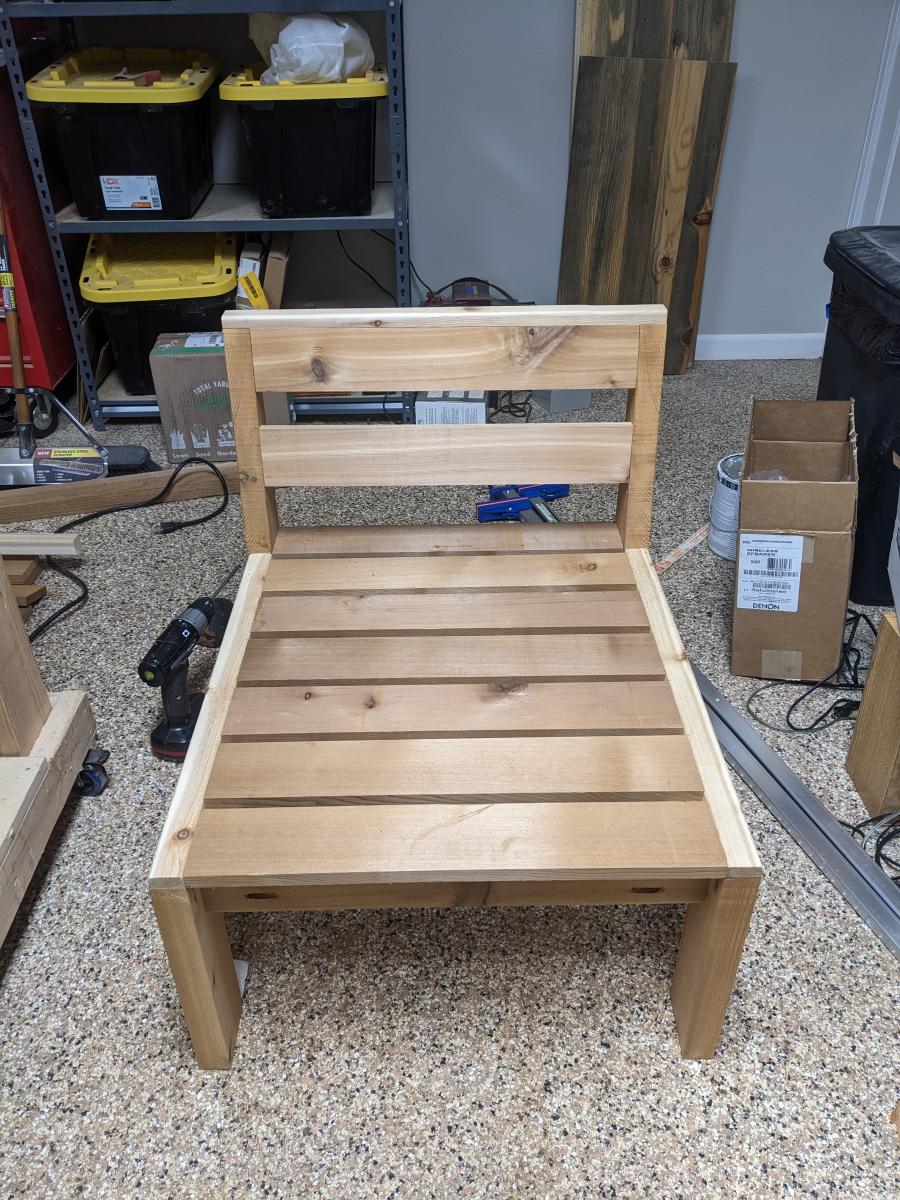
Outdoor Sectional with Slanted Back
Fun project! Started with rough western red cedar which I ran through a jointer and planer to get good lumber.
I made a few changes to the design. I used thinner seat boards and cut a leaning tilt in the backrests. I also added 2 boards on the back rests.
I used all pocket holes to hide the screws. Once they dry out I will seal the sectionals.
Got a full set of cushions on Amazon for $300. Total for this project was around $700. Not too bad!
Built from Plan(s)
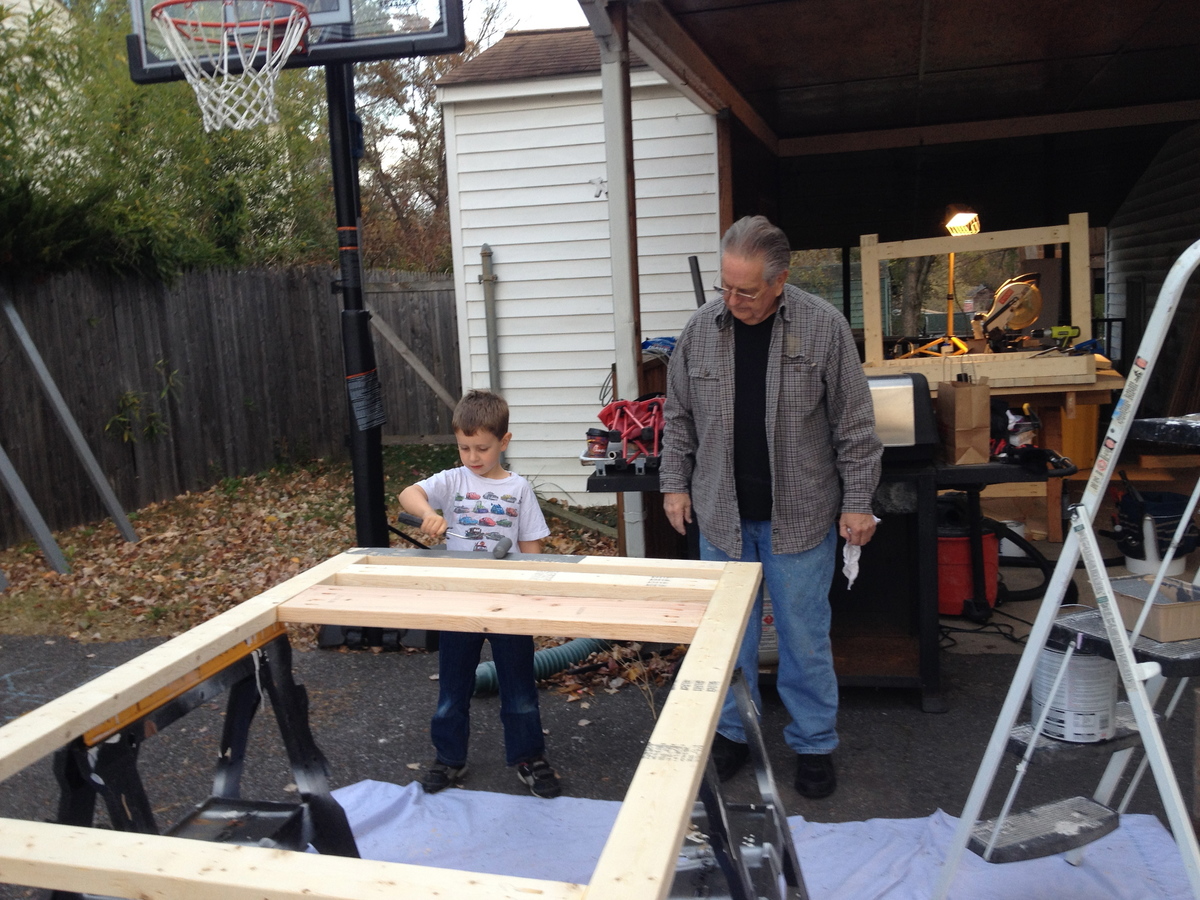
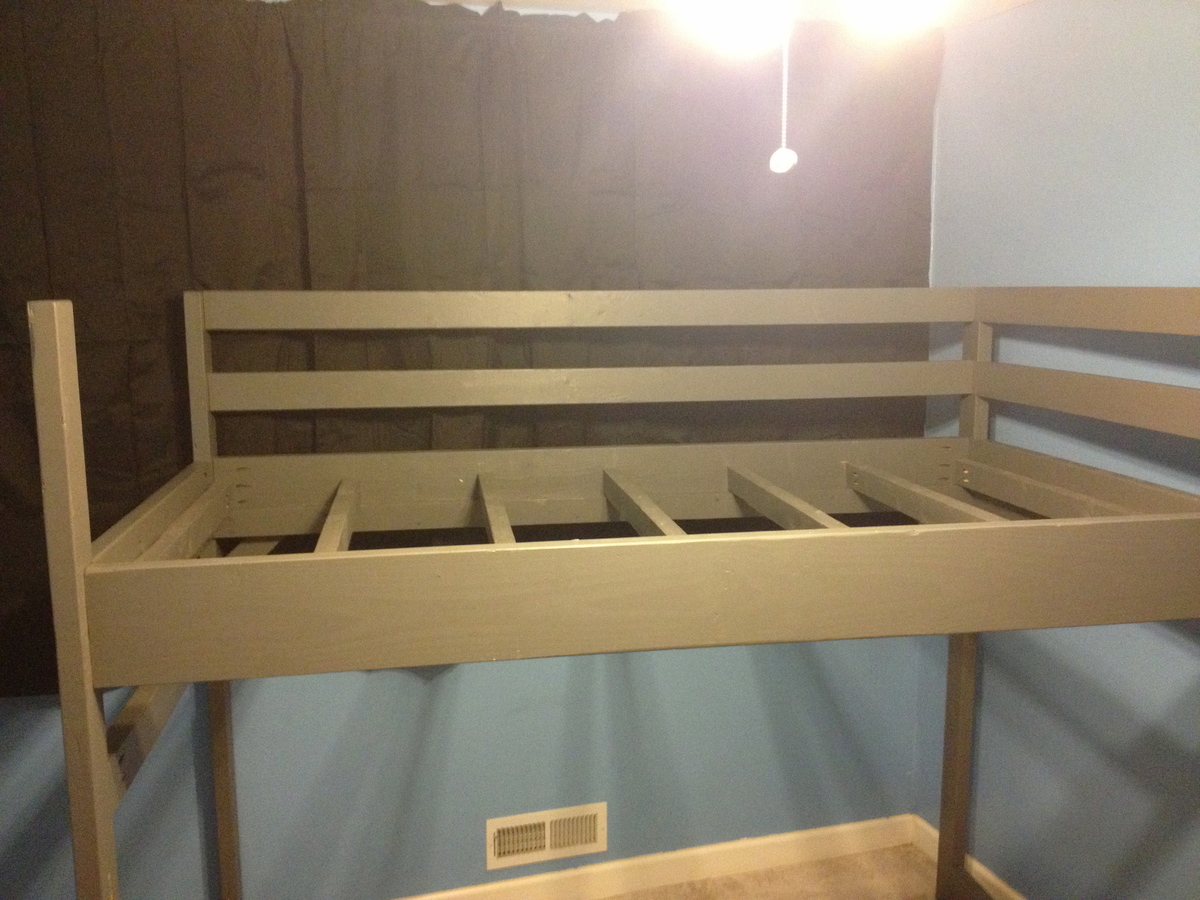
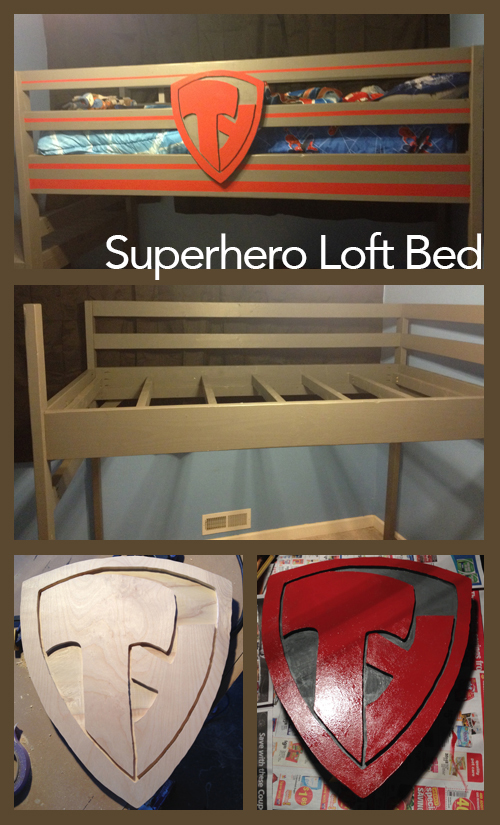
Superhero Loft Bed
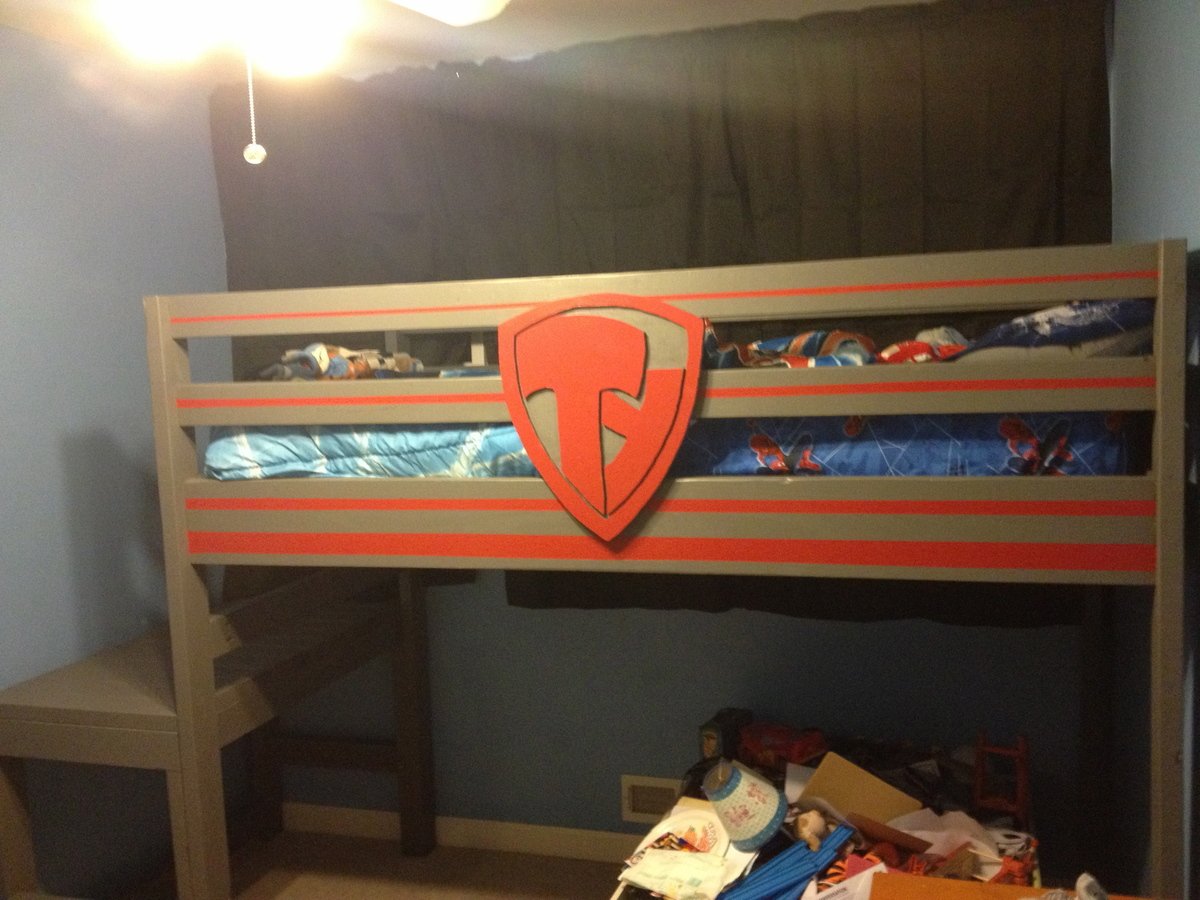
This was my first Ana White project and we had a blast putting it together. The plans were clearly explained and the end result is a sturdy loft bed for my son.
There were only a few modifications to this build from the suggested plans. First, I traded out the 2X6's for the bed supports and replaced them with 2X8's. I also replaced the cleats with 2X3's and used the same for the bed slats. Between the slats and the mattress is 1/2" OSB. We also did not use the steps as it took too much floor space for our needs. We added some 2X4's for a ladder step up to the landing.
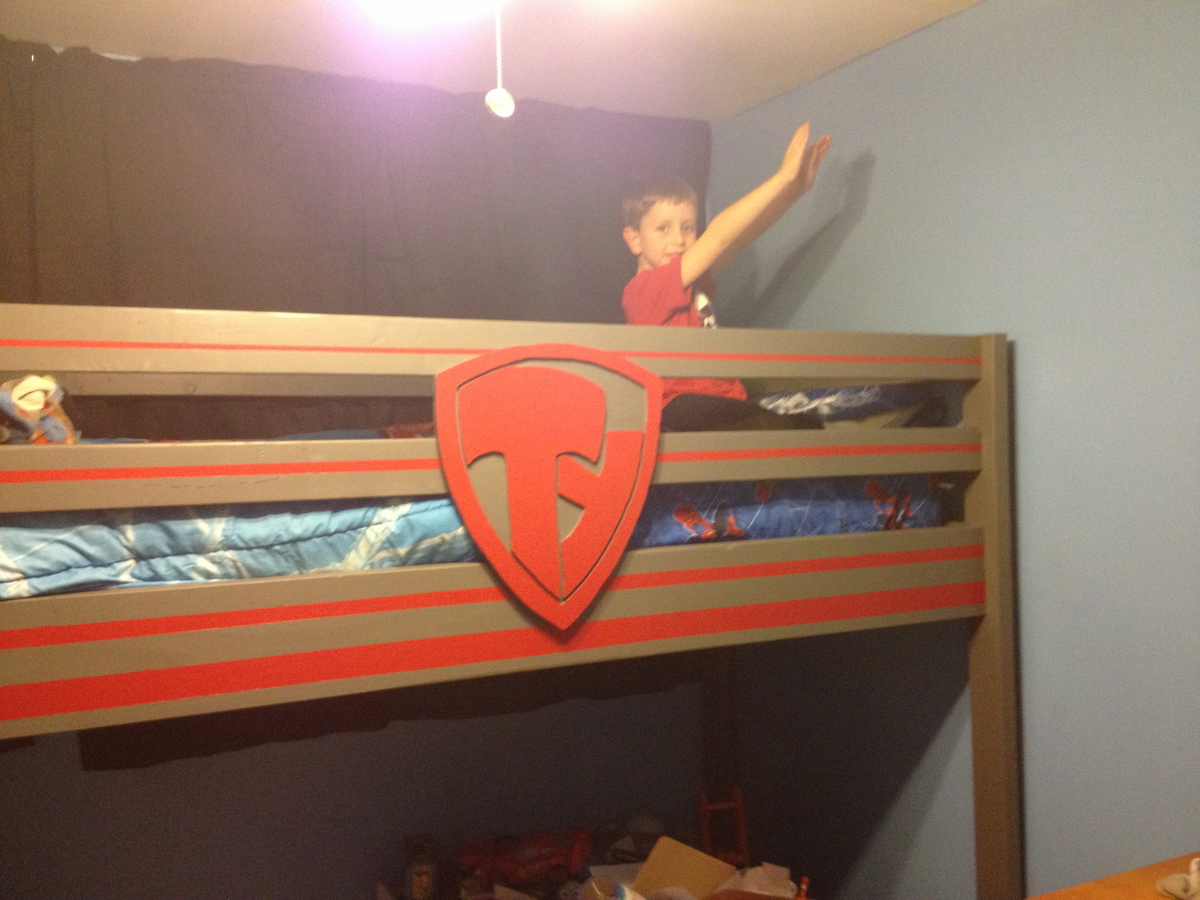
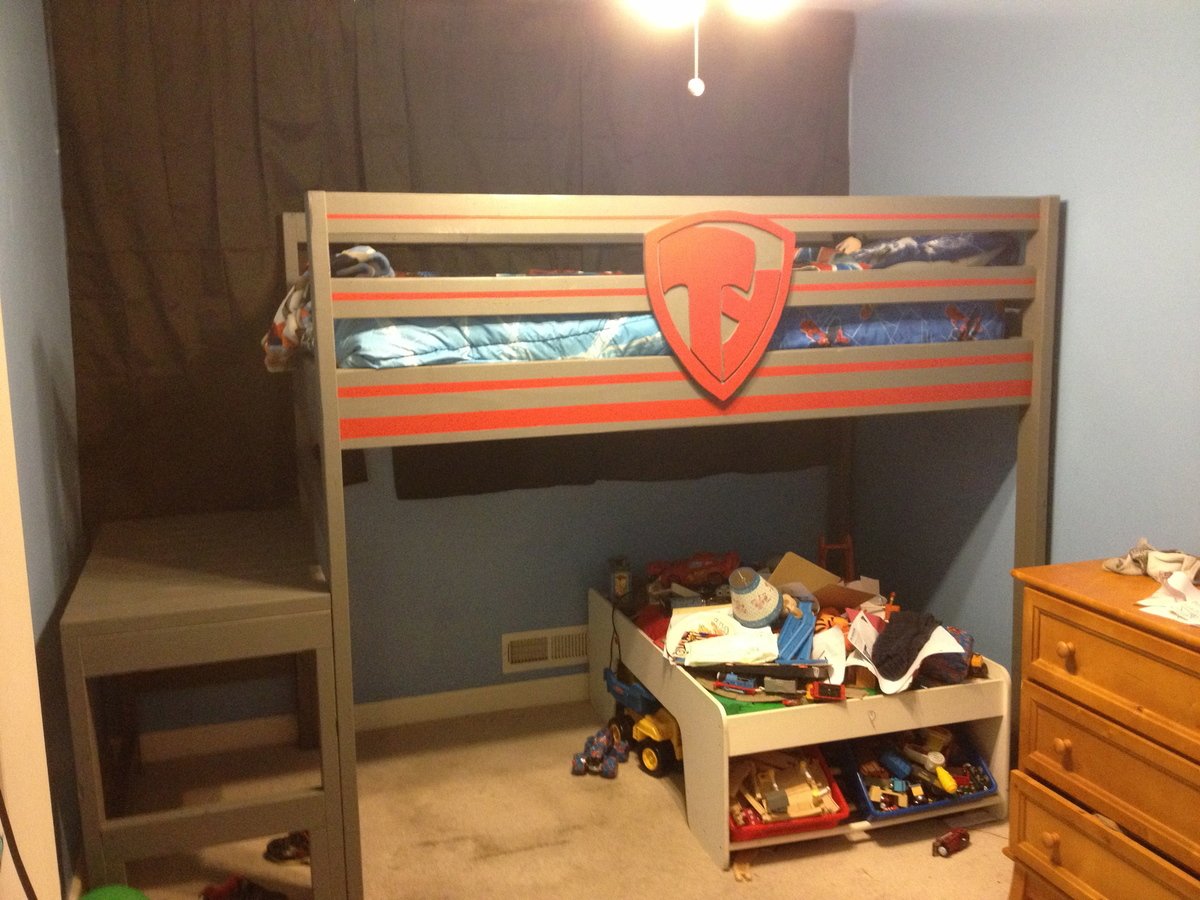
The theme is Superhero so I designed a custom hero logo in Adobe Illustrator, printed it out and carved it into 3/4" birch plywood with a rotary tool and router.
We're pretty much done with the bed. We now just have to arrange the room and add some lights underneath and maybe some extra storage under the landing.
My boy loves his new bed and I loved building it with him and my dad. It was a blast and will be one of the most memorable weekends of our lives! There's nothing like building with family.
Built from Plan(s)
Estimated Cost
$200 (including new mattress)
Estimated Time Investment
Weekend Project (10-20 Hours)
Finish Used
The finish is two coats of Clark-Kensignton paint + primer availabled at Ace Hardware. The red accents are from the "oops" pile of paints I rummaged through while they mixed my gray paint.
Recommended Skill Level
Intermediate
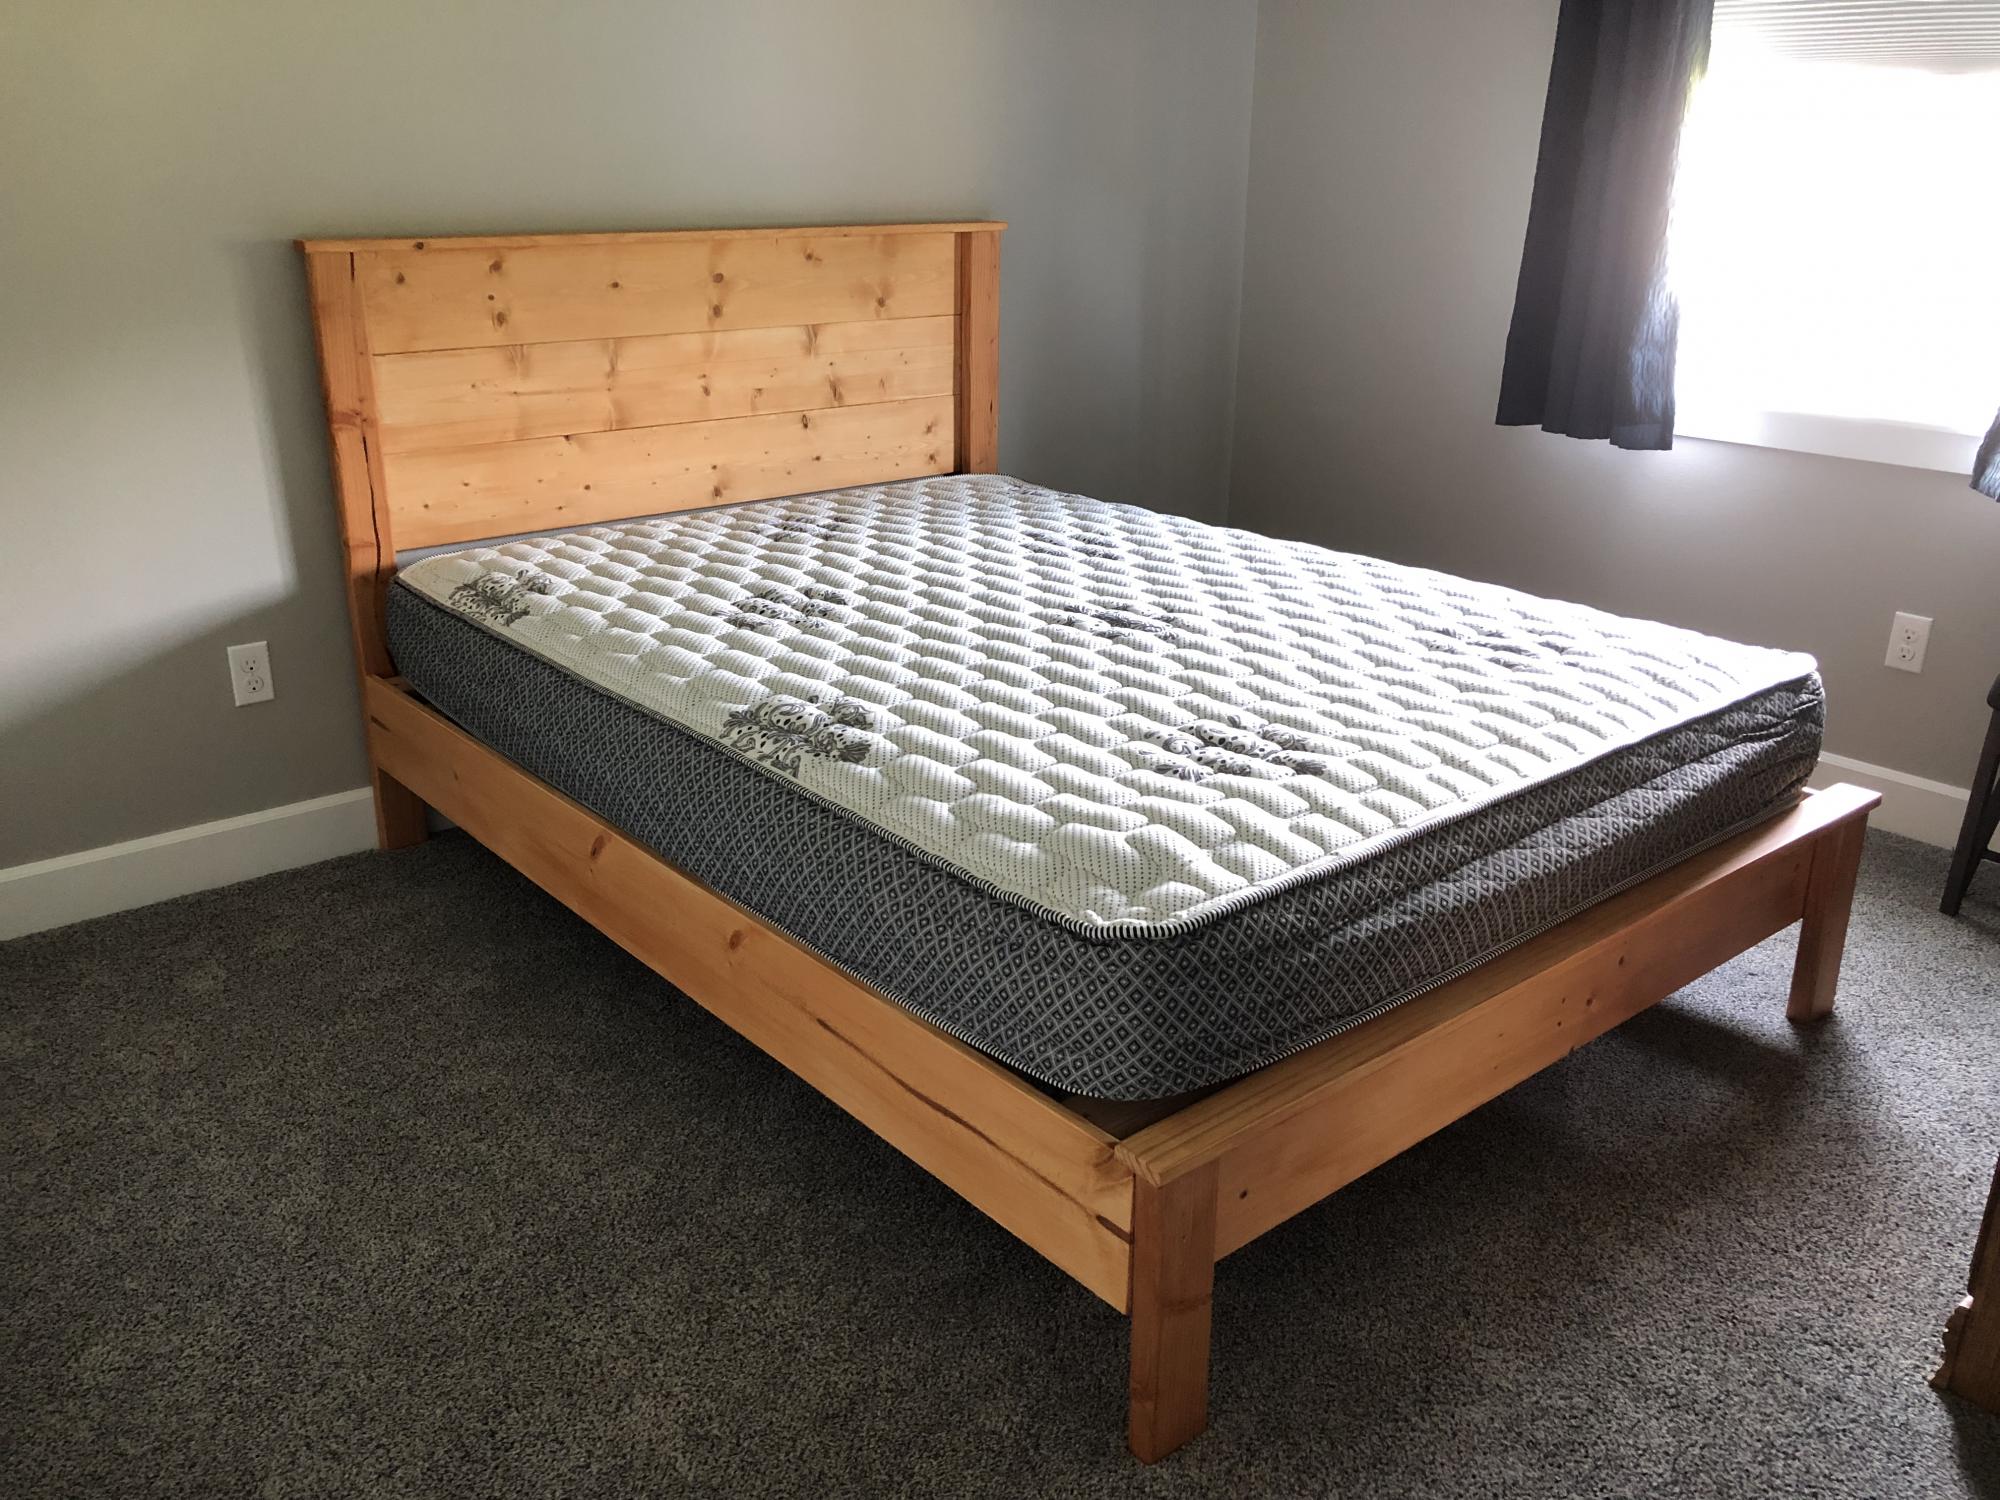
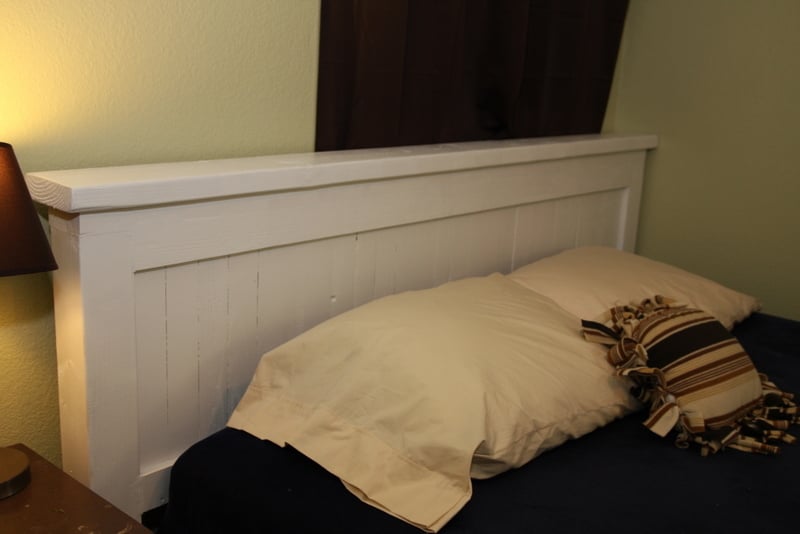
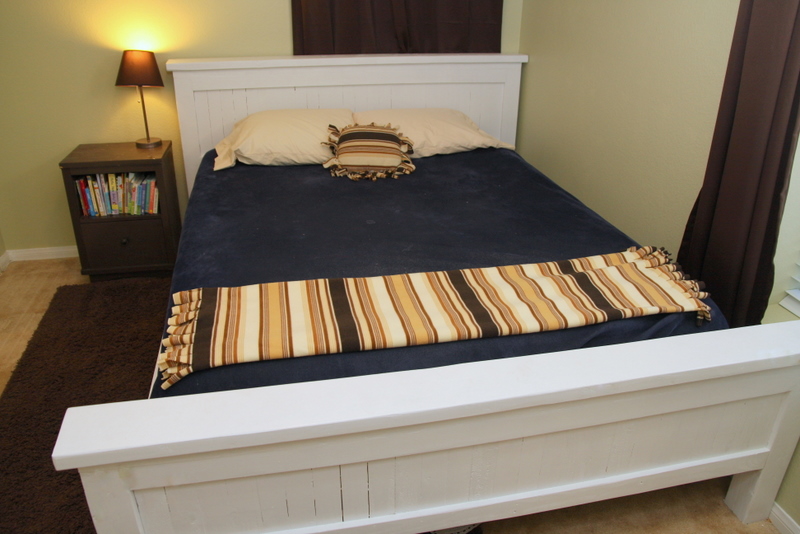
My Queen Farmhouse Bed

My little two year old is sleeping on this right now, hehe, which is so funny to see his little body take up only 1 square foot of it.
We got a queen mattress from a family member and I had been wanting to build this bed for a while so what better excuse. I had a TON of 1x3's from other projects so used those as slats instead of 1x6's as in the plan. I also used some other scraps up so my headboard part is shorter than in the plan which I also was fine with. It barely fits in his little 10 x 10 starter home room, but I am still pretty proud of it.
Built from Plan(s)
Estimated Cost
$70
Estimated Time Investment
Weekend Project (10-20 Hours)
Finish Used
Primer Plus Glossy White Paint
Recommended Skill Level
Beginner
Comments
Sun, 01/07/2018 - 11:13
Queen Farmhouse Bed
I am a beginner and I understand what to do until this point. I am confused by this. Can it be explained in another way: Thanks.
Construct the frame as shown, leaving a 3 1/2' overhand on the headboard end to secure the frame to the headboard. Predrill to at least 4 holes to in this overhang to ease attatching to the headboard.
Pallet Scraps Table
Had a bunch of scrap wood laying around from deconstructed and unused pallets. Great idea for a table top. NOTE: Table top will be uneven because of different widths and thicknesses of pallet scraps. Use a planer if you have access.
Estimated Cost
FREE
Estimated Time Investment
Day Project (6-9 Hours)
Finish Used
deep redwood stain on the top with a poly finish. Same stain on legs, then painted with white chalk paint, sanded down, and waxed with a dirty black paint rag.
Recommended Skill Level
Beginner
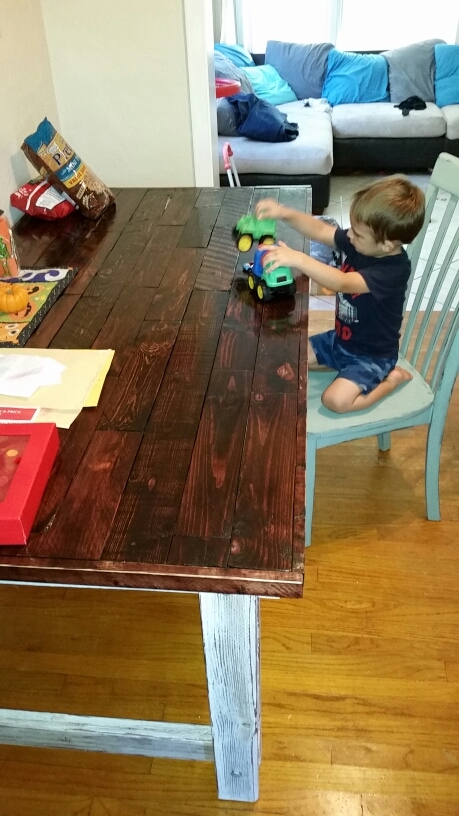
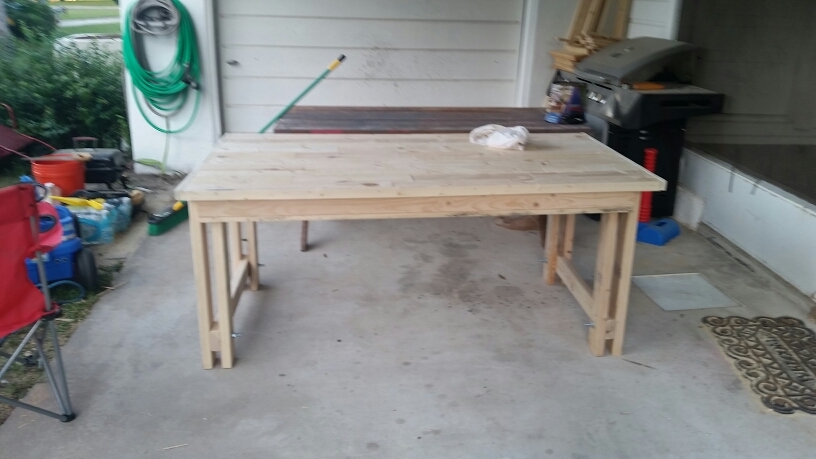
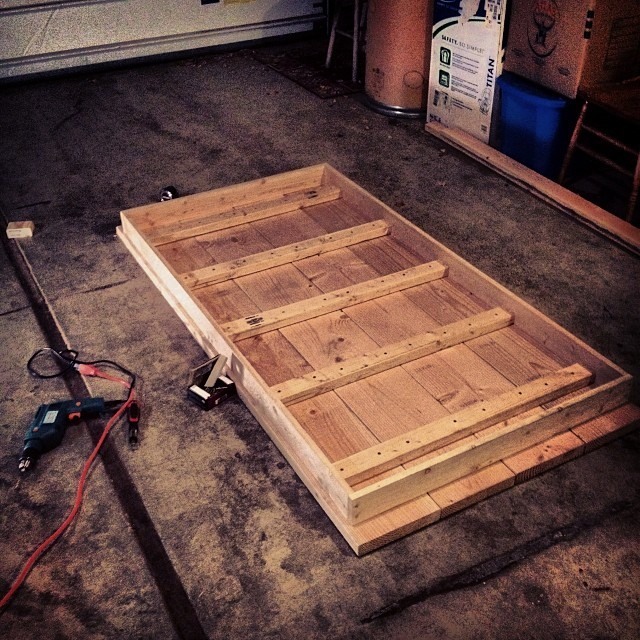
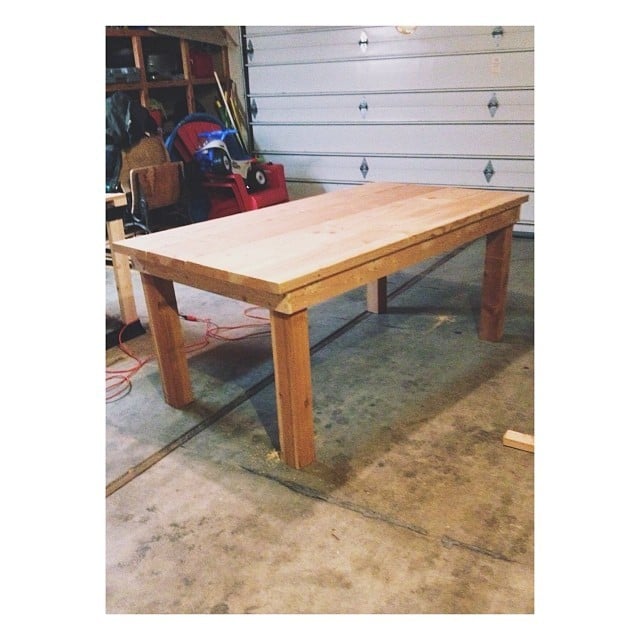
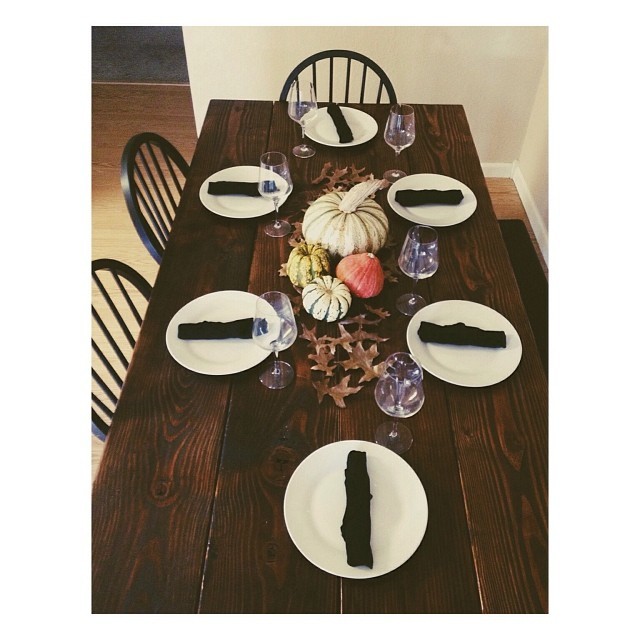
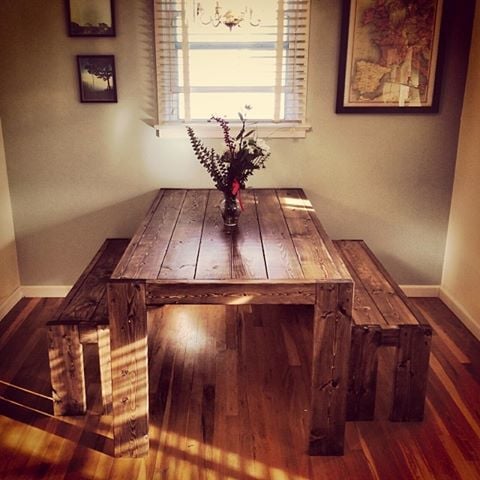
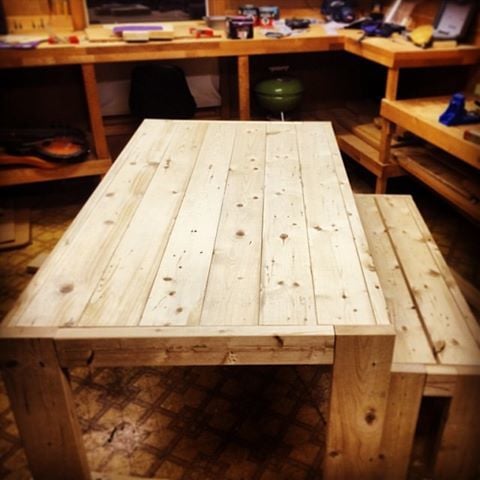
Farm house table based on "Rustic Table" plans
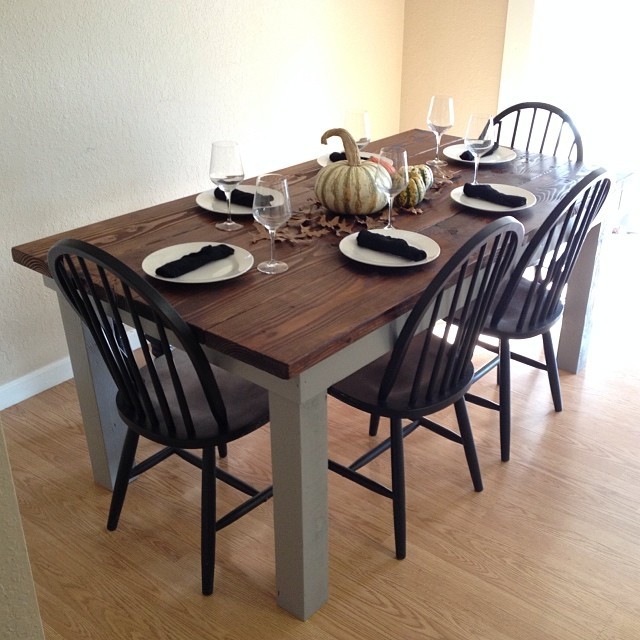
This was my first big project, so I opted to use these simple plans. I ended up making some changes on the fly at the lumber yard by switching the 2x4 legs out with 4x4s and the 1x10 top slats with 2x10s for added solidity. I also had to adjust the length of the table from 8' to 6' in order to fit into our dining nook. We painted the legs and skirts with Behr Anonymous Gray and the table top with Minwax Mission Oak Polyshades. We decided to use the 2 in 1 stain in the interest of time (needed to be done by Thanksgiving). The 2 in 1 didn't come out as well as I would've liked, but all in all it adds to the rustic feel of the table.... not to mention the process was an absolute breeze. The simplicity of the plans allowed me to make numerous easy adjustments to customize the table to our needs/wants.

Built from Plan(s)
Estimated Cost
$105
Estimated Time Investment
Weekend Project (10-20 Hours)
Finish Used
Two coats Behr Anonymous Grey paint on legs and skirts. One coat Minwax Mission Oak PolyShades 2 in 1 stain on tabletop.
Recommended Skill Level
Beginner
Comments


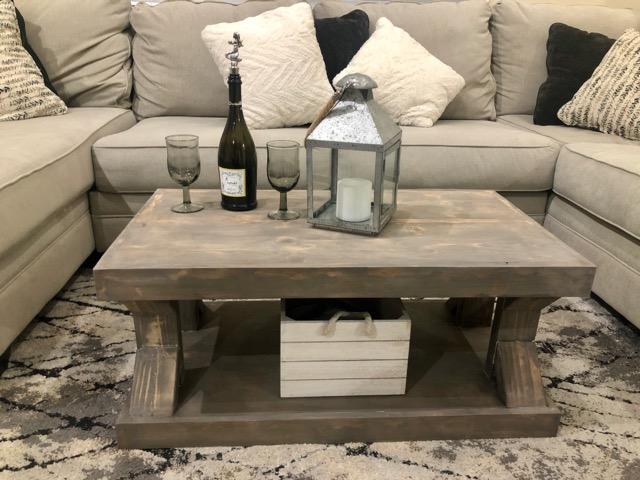
Farmhouse coffe table
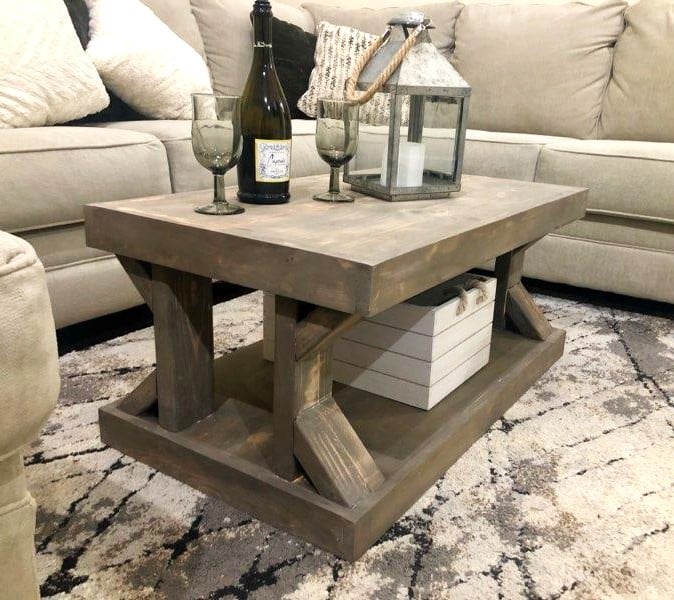
This was great easy project I could do for my wife while she was at work and surprise her before she came home. I use the same color recommended stain but added the valspar white glaze to makenit more gray and weathered look. Sealed with a matte finish.
Built from Plan(s)
Estimated Time Investment
Afternoon Project (3-6 Hours)
Recommended Skill Level
Intermediate
Comments
Fri, 10/04/2019 - 14:44
Awesome!!! Love how you made…
Awesome!!! Love how you made it the perfect size too!
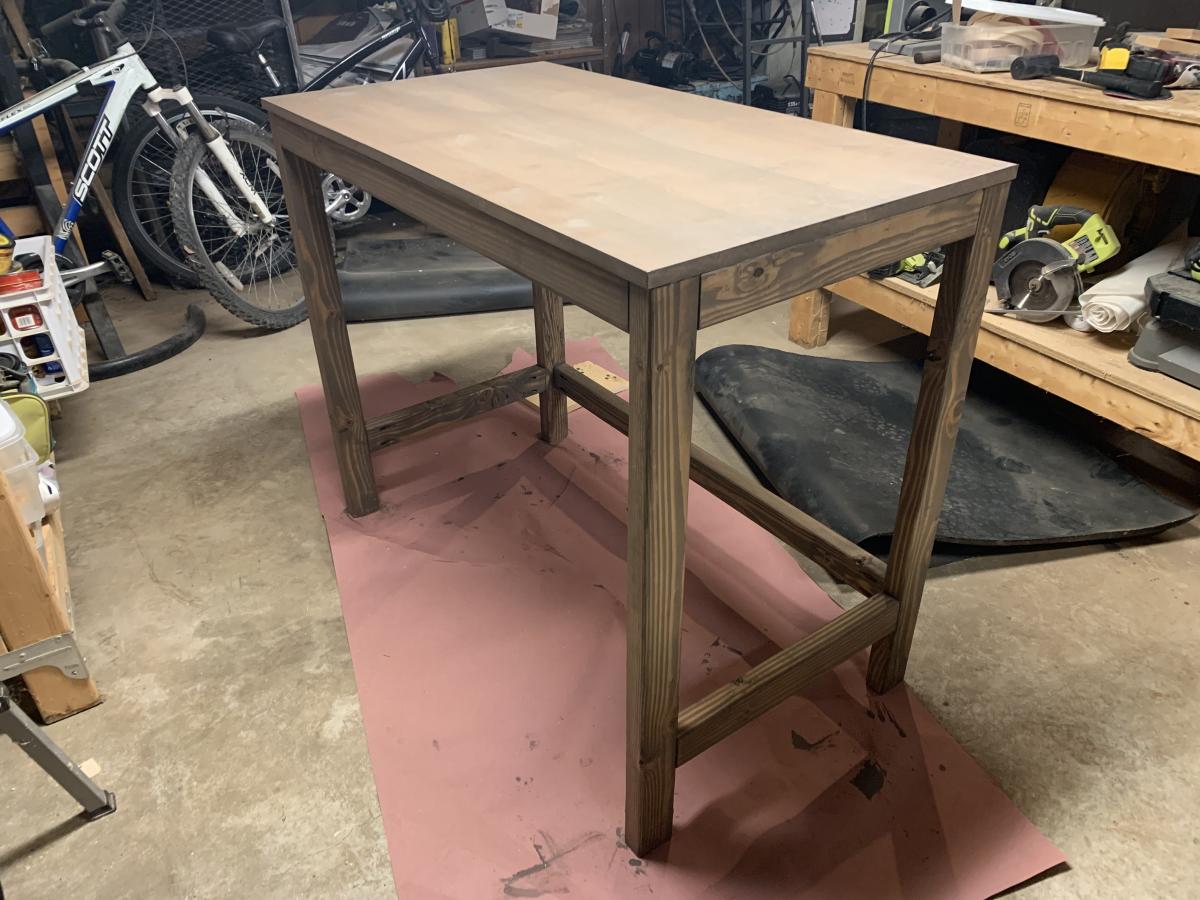
Modern Farm Table
First project! Modern Farm Table using a mix of the original and the updated pocket hole plans. Stained with vintage gray/brown on pine. Used Minwax® Fast-Drying Polyurethane in satin to finish. Table - 33" X 69"
Built from Plan(s)
Estimated Cost
$150
Estimated Time Investment
Weekend Project (10-20 Hours)
Finish Used
Vintage Gray/Brown
-Minwax® Pre-Stain Wood Conditioner
-Minwax® Weathered Oak
-Minwax® Special Walnut
-Minwax® Fast-Drying Polyurethane
One* coat of each.
*Be careful of air bubbles when applying polyurethane. Had to redo the top of the table! (Use less/thinner coat with long even strokes)
-Minwax® Pre-Stain Wood Conditioner
-Minwax® Weathered Oak
-Minwax® Special Walnut
-Minwax® Fast-Drying Polyurethane
One* coat of each.
*Be careful of air bubbles when applying polyurethane. Had to redo the top of the table! (Use less/thinner coat with long even strokes)
Recommended Skill Level
Beginner
Comments

Tue, 06/30/2015 - 19:07
Support question
I've been looking for a DIY table plan like this for a while! My only question is I have a long kitchen and was thinking of makig the table a little longer, so I can seat one more person on each side. With the extra length, will I need any additional support towards the middle?
Display/Picture Shelves
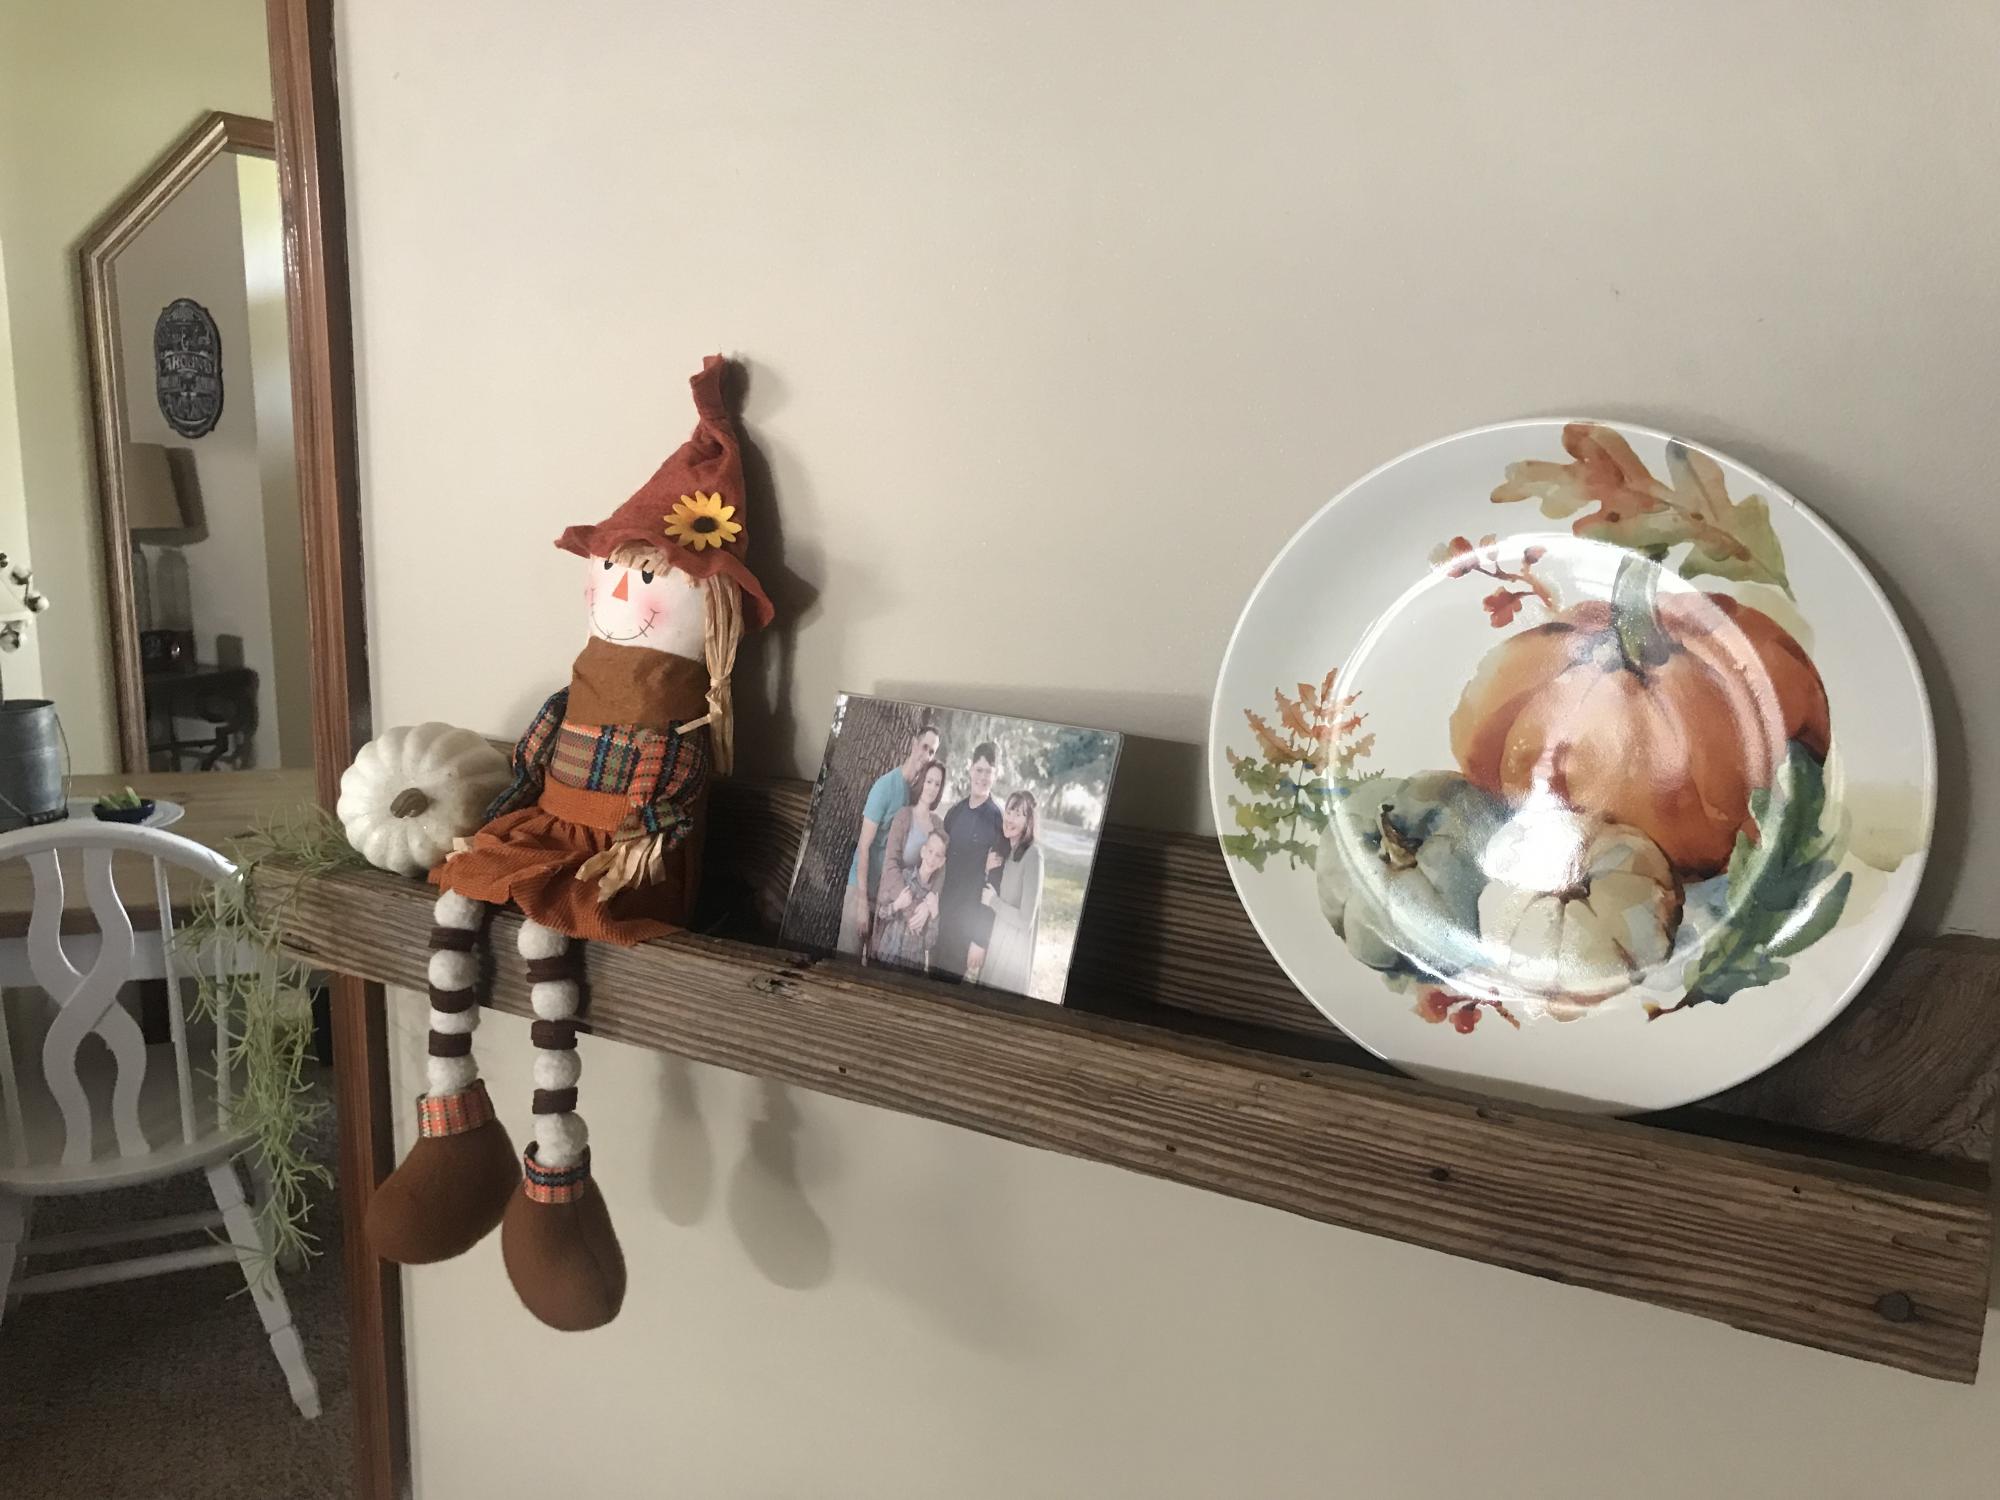
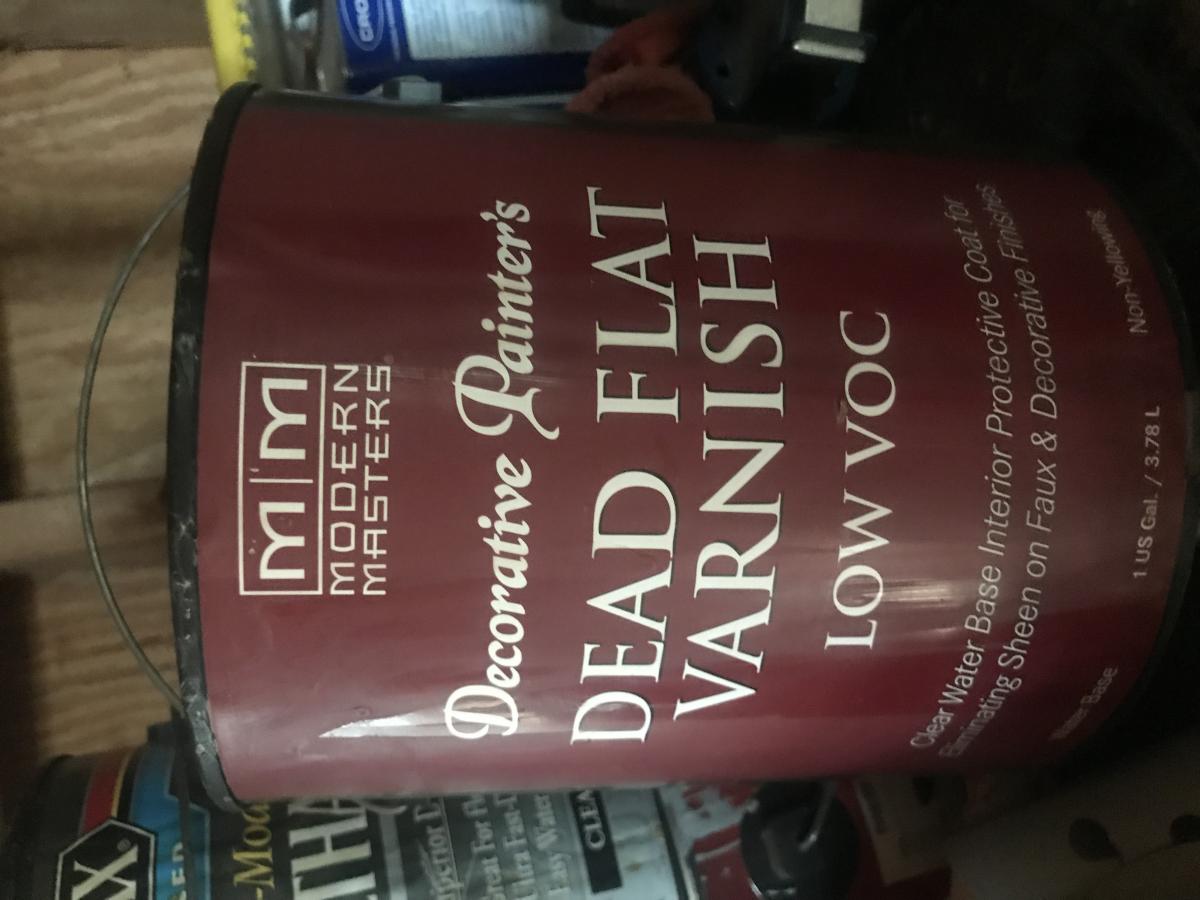
These were made from 50+ year old pine that we had from my husband’s late father’s shed. We used one coat of the dead flat poly. In total we made 6 shelves. 3 are 48” long and 3 are 32” long. This was a fun project and a great way to use my photos.
Built from Plan(s)
Estimated Cost
$20
Estimated Time Investment
Day Project (6-9 Hours)
Finish Used
Dead flat poly
Recommended Skill Level
Starter Project
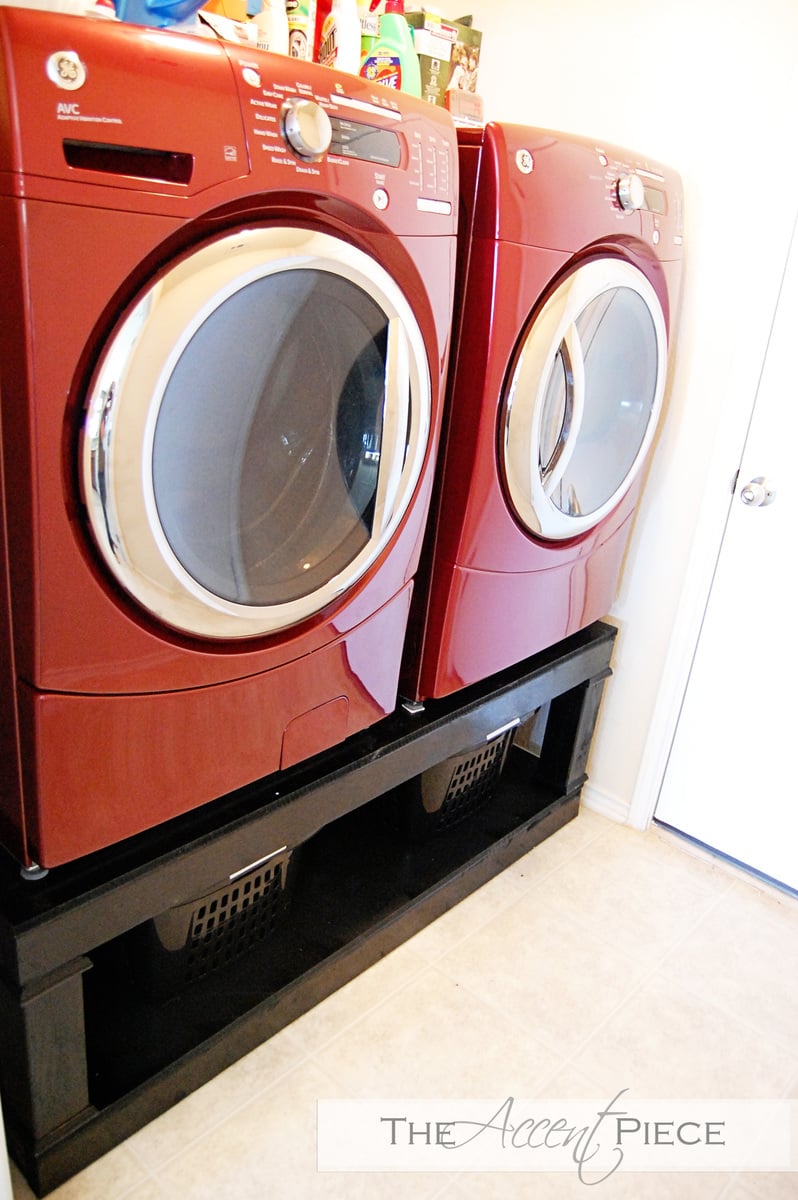
Laundry basket dresser
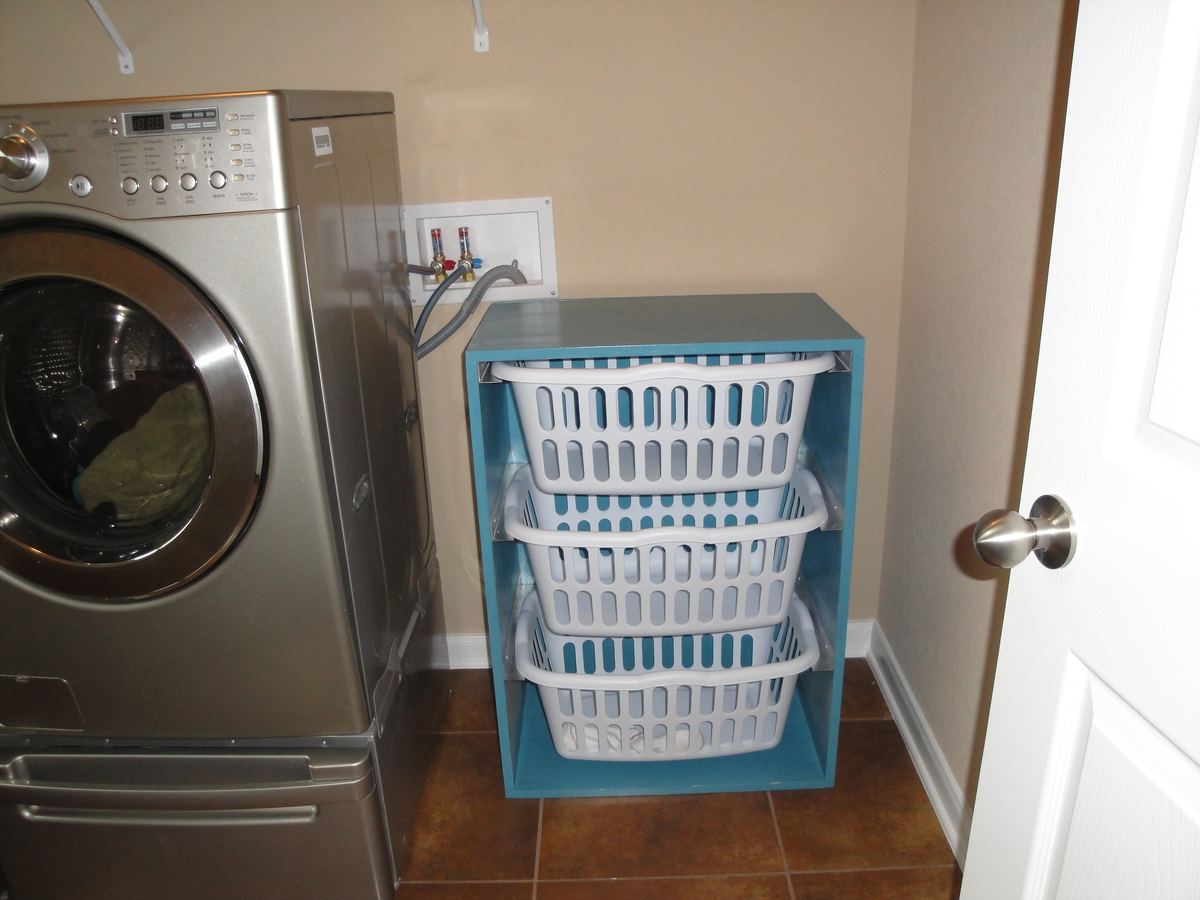
I love this for the laundry room! We actually had a pretty blue paint left over from a different project, so it was perfect. Thanks for the wonderful plans :)
Built from Plan(s)
Recommended Skill Level
Beginner
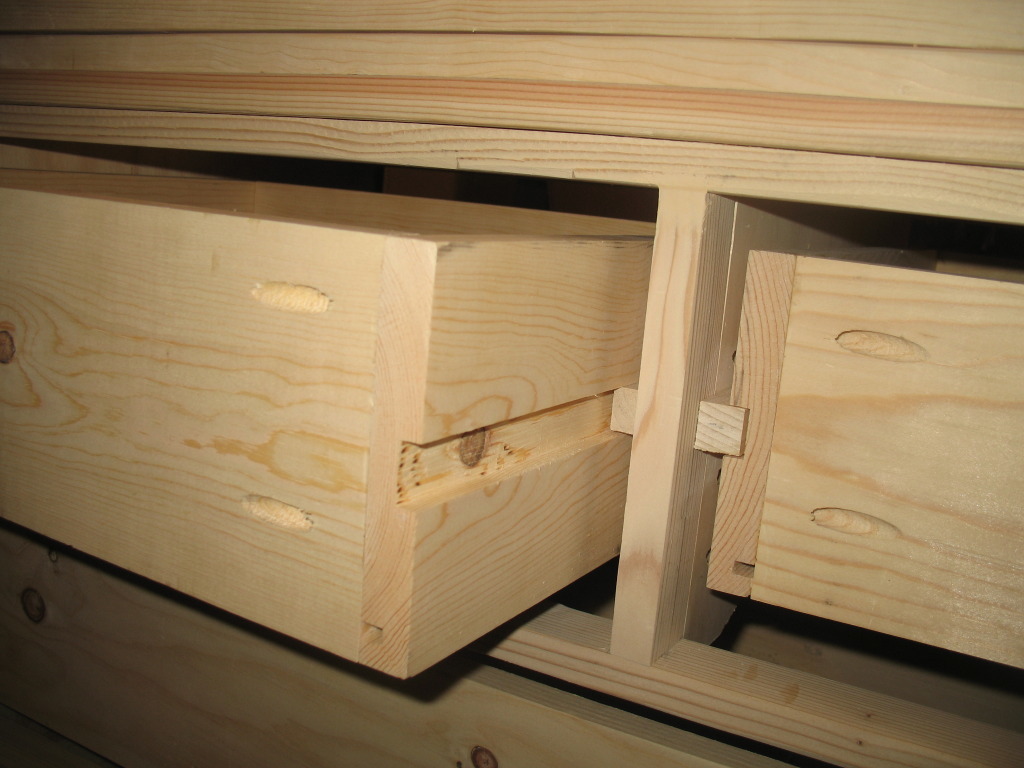
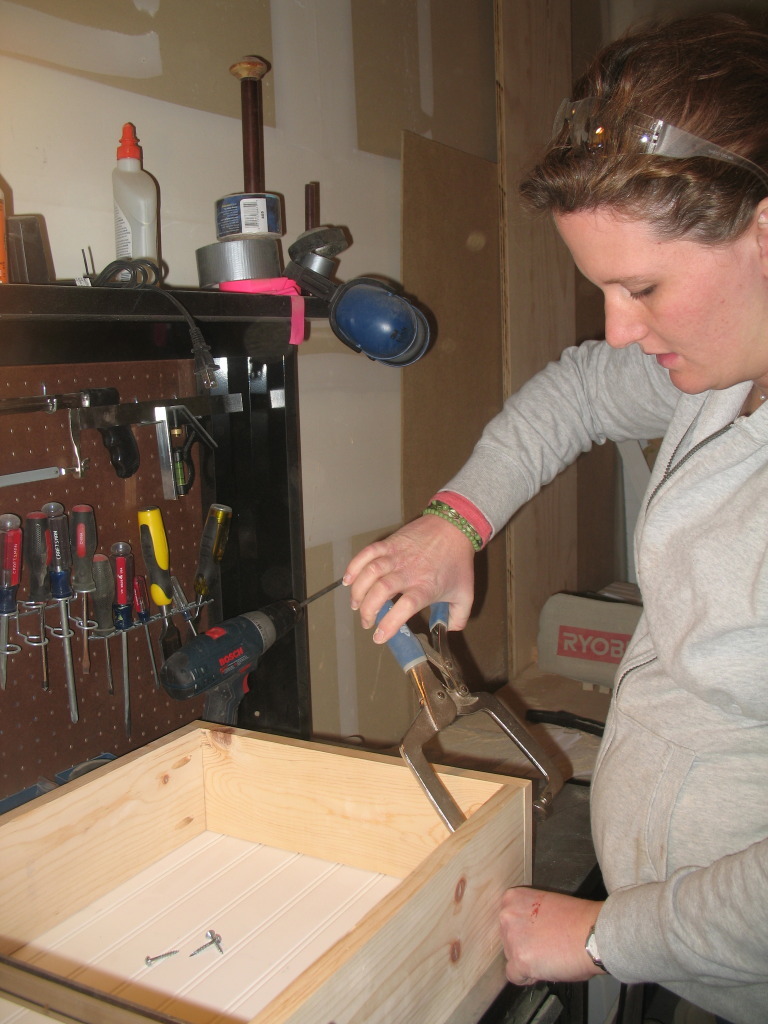
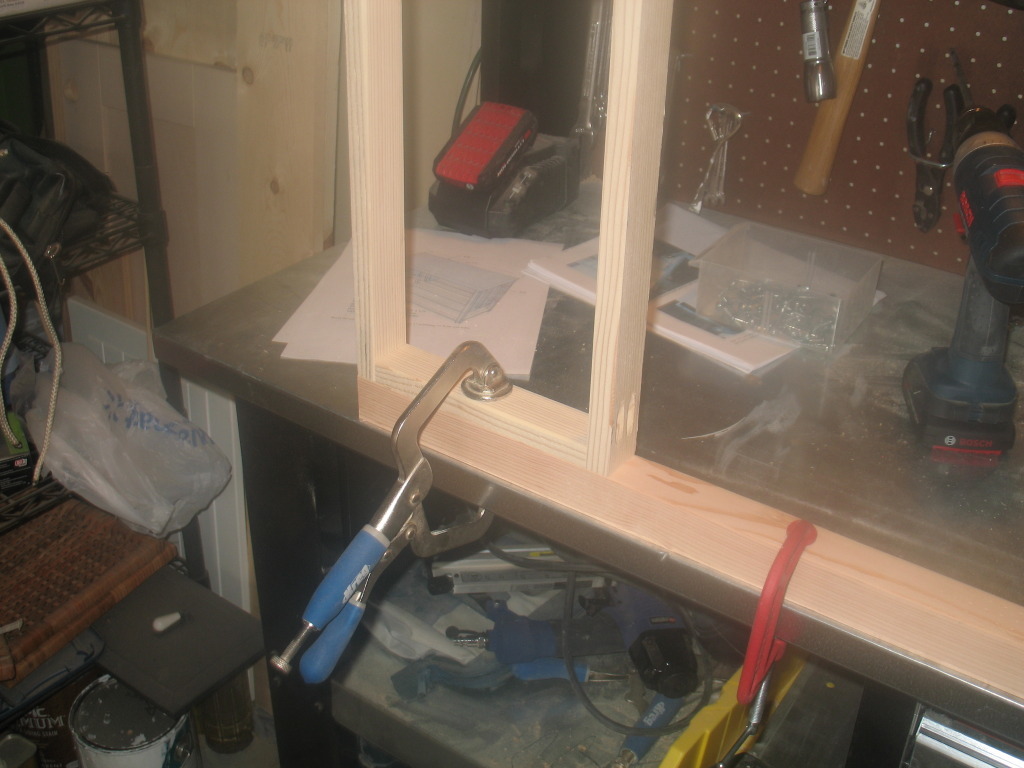
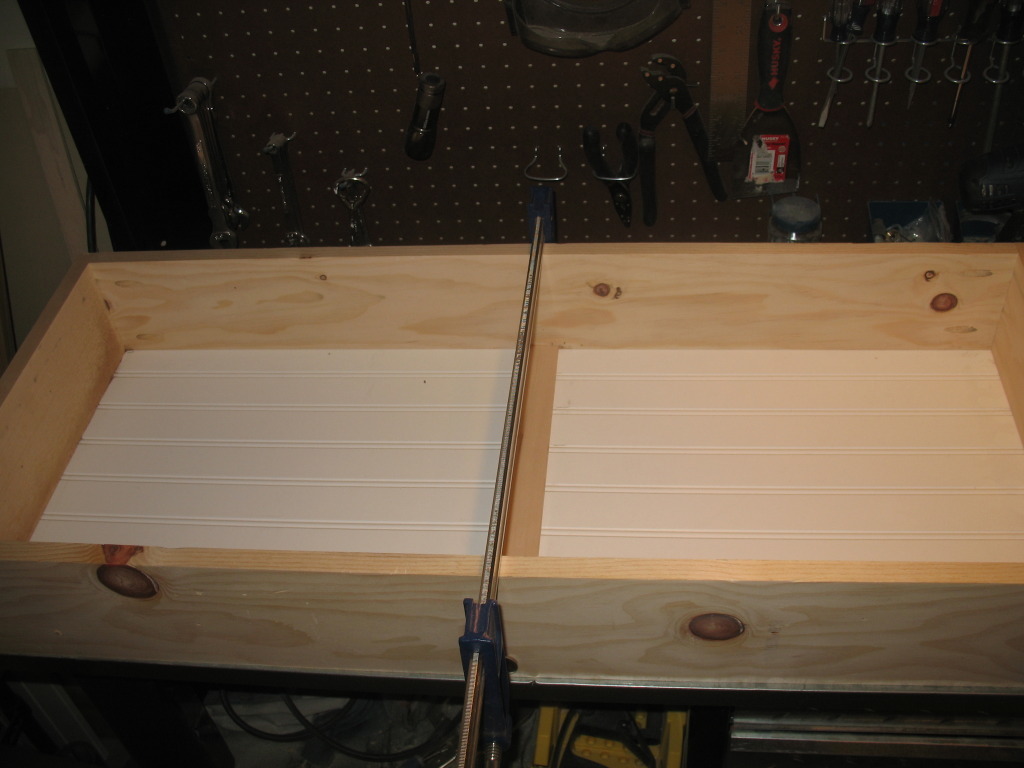
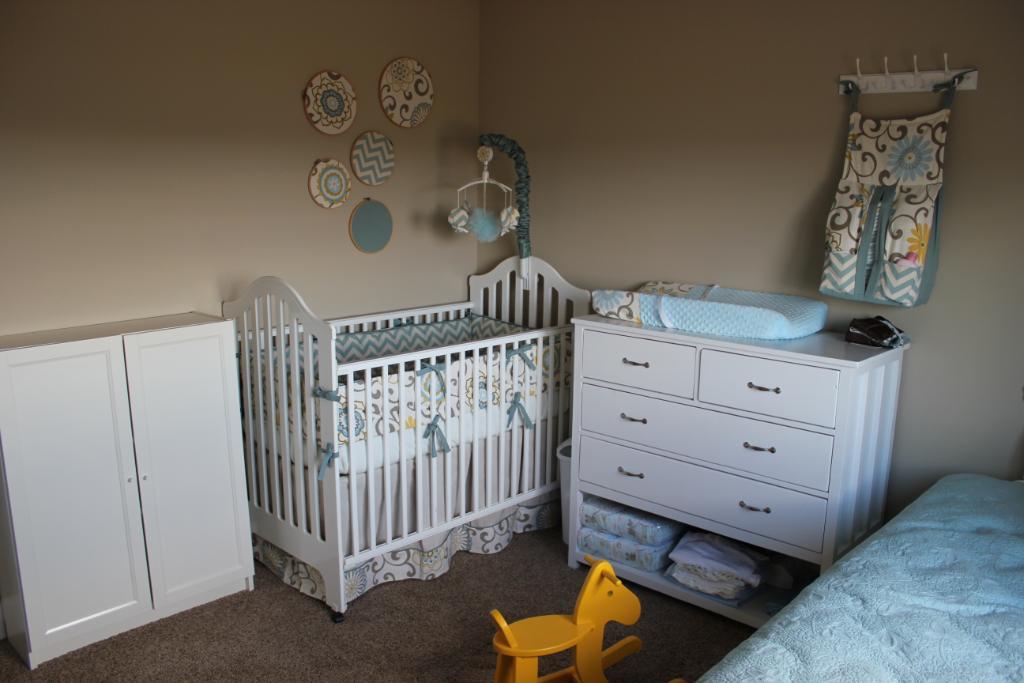
Small Dresser (cabin collection) turned changing table
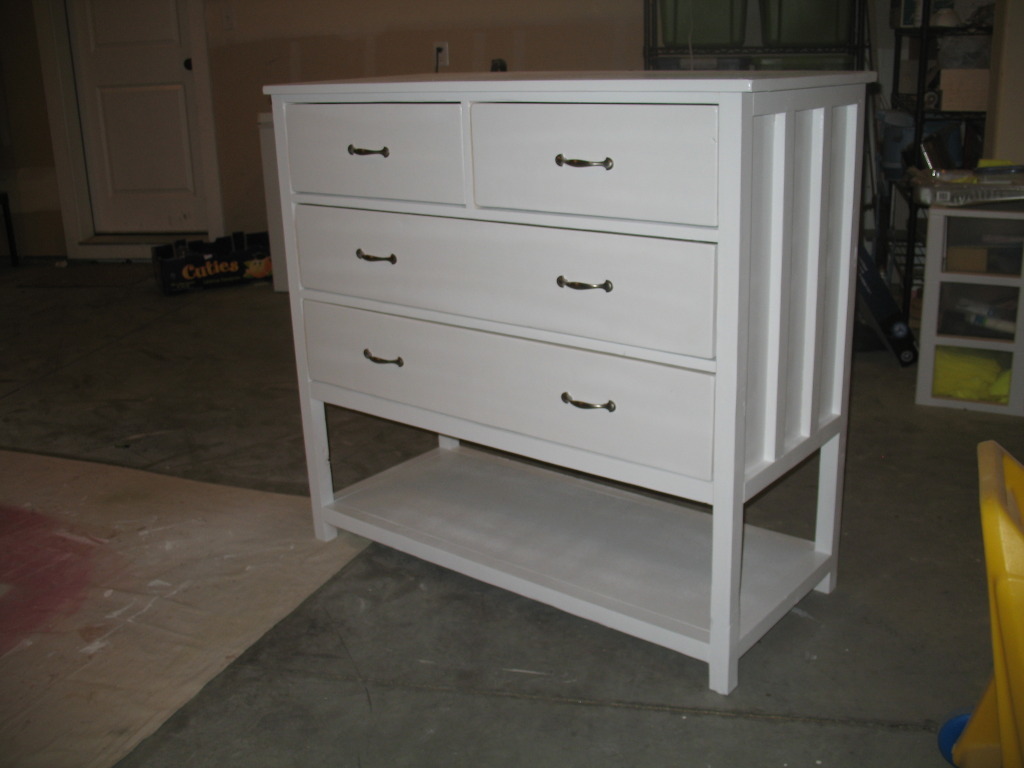
Saw this on Ana's site just in time to make it for a changing table for baby number 4. This was our most difficult plan to take on so far, but it turned out to be pretty straight forward. The details on the plan were a great help - using the spacers to make the drawer openings perfectly spaced, and attaching the drawer fronts on after attaching the rails were great tips. We also used dowel drawer slides for the top 2 drawers, which we really ended up liking.
Built from Plan(s)
Estimated Cost
165
Estimated Time Investment
Week Long Project (20 Hours or More)
Finish Used
white spray paint - Krylon primer, rustoleum paint in semi-gloss, krylon clear coat in satin.
Recommended Skill Level
Intermediate
Comments
Sat, 03/17/2012 - 01:15
? about the channels
Did you just use a router for the channels in the top drawers? If yes, what bit? If no, how did you do them?
Beautiful work! Your baby is very lucky! :)

Sat, 03/17/2012 - 03:04
Grooves
Those grooves are probably made with a dado stack on a table saw, but your could easily do it with a router and a guide. Table saw is easier though.
If you don't own a dado set already, don't buy the cheapest one you can find. I made that mistake, and wasn't overly happy with the results of the cut. When I bought a better dado blade set, I was a lot happier with the quality of my cuts.
That turns out to be generally true: I'm always more happy with the result of a better blade. I also needed to tune up my saw to make sure the blade was properly aligned with the guide slots, and that my fence was parallel to the blade. If you don't do that then the best blade in the world won't help. Also, buy full-kerf blades, not the thin kerf blades they sell at the home improvement store. The full kerf blades wobble less and give you cleaner cuts.
Sat, 03/17/2012 - 05:04
clay, kathy asked mollie a
clay,
kathy asked mollie a question, why don't you let her answer it?

In reply to clay, kathy asked mollie a by rob (not verified)
Sat, 03/17/2012 - 06:33
Let's All Just Be Helpful
This is a community, there's no need to be rude. Sometimes the authors don't know there are comments, and it's nice to hear more than one solution to a problem. So let's please just appreciate the contribution from all the members, yes?
Sat, 03/17/2012 - 14:56
Brookifer86, I can appreciate
Brookifer86,
I can appreciate where you are coming from, and I appreciate your kind suggestions.
I can also identify with Rob's comment directed at Clay. Which I did not find rude.
Clay tends to comment on nearly almost every post on Ana's site with a dismissive and know-it-all attitude, giving outdated advice and rude corrections. It has gotten pretty old. Obviously I am not the only one who sees this.
Remember, one person's authoritarian advice on how to do things isn't the only way or even the best way to approach a project. It is simply their experience and their own personal way of doing things.

Sun, 03/18/2012 - 12:16
take the best and leave the rest!
I'm grateful for all the help on this blog! When it comes to woodworking, there always seems to be more than one way to do things, and I want to hear EVERYBODY'S ideas; it makes me a more knowledgeable woodworker and helps me overcome planning obstacles I would otherwise not get passed.
Clay, I've read many of you posts and appreciate the wisdom you share. And to the complainers: sometimes our thoughts are not always conveyed on Internet discussions. Some personalities can come across as abrasive/arrogant unbeknownst to the author simply because of their writing style. I've seen it time and again on blogs and forums. I know what I want to say, but it doesn't always come across *quite right* when I'm typing it out.
Either way, I want to hear more about these drawer glides! Clay, you posted a great link on the original plan that suggest always using hardwood for drawer glides or at least a hard/softwood combo. Makes sense, any other want to chime in?
Sun, 03/18/2012 - 12:39
Just because I asked him to
Just because I asked him to let Mollie answer the question doesn't mean I was calling him rude. I just think it's common courtesy to let someone who is asked a question to speak first. I definitely appreciate Clay's wisdom and I agree that there are many ways to do something.
What if it were in person though? What if someone kept asking you a question but someone standing off to the side kept answering it before you? Sure they answer correctly every time and give credible insight but after getting cut off over and over, don't you think it might get annoying?
Don't you think the teacher gets a little piffed when that one kid in the back raises his hand and belts out the answer every time and doesn't let any of the other kids answer the question? Sorry for the rant...
anyway the issue isn't about good or bad insight. The issue is just manners. I'm sorry if that comes off brash, but let the person who actually built it answer first.
Sun, 03/18/2012 - 13:18
Lucky for us, we're not in
Lucky for us, we're not in person and we can just "scroll down," lol. I remember recently, one of the blogs I regularly read posted about just this. Her article was spot-on and amusing at the same time...partly because she describes these notorious commenters, and because I know I've been guilty of "thread dumping " myself. There are personalities that clash online and in the real world too. It's worth a glance for a little perspective-and a laugh. http://www.homestoriesatoz.com/2012/02/how-deal-negative-comments.html
Sun, 03/18/2012 - 16:30
Appologies
I seem to have stepped on some toes, and for that I'm sorry. I'll certainly take your points in mind in the future. I'm afraid that's distracted from the main point: this is a really amazing piece of furniture. Molly, your house must be pretty amazing if you're building furniture like this. I'll bet your children grow up to be pretty amazing if they've got a mom who builds their furniture.
Mon, 03/19/2012 - 12:44
wealth of knowledge
Beautiful changing table! I have only been building a little over a year and I always appreciate the advice on this site. Thanks for sharing so much Clay:-)
Sun, 07/29/2012 - 21:13
Sorry...
I just saw there were comments here on my brag post. So, Clay, thanks for answering for me.
We used our table saw - although we don't have a fancy blade. We should probably get one. My husband just ran it through the table saw several times to get it the exact right width. The blade was lowered so that it would only cut 1/4 inch into the wood. And the slides were hardwood - square dowels you get get at a home improvement store.
Wed, 08/08/2012 - 08:08
Beautiful!
I love the plans for this piece, to begin with. Great job on your build. I LOVE this in white! Especially for a baby room or a little girl's room. Thank you so much for sharing your pics and ideas!
Mon, 01/21/2013 - 20:45
LOVE this dresser!
Fantastic job on this piece! I think this would be perfect in an adult's bedroom also, with the bottom shelf for a blanket or quilt. I would love to make this.
Sun, 03/31/2013 - 16:01
Size / Dimensions
Hi,
I was wanting to do the same thing...make this for using as a changing table. What are the dimensions of your dresser? Did you change the size of the drawers (did you use something different than a 1x8)? At what measurement did you place the lower shelf relative to the ground and how much space is there between the top of that lower shelf and the bottom of the 1x2 that frames the bottom drawer?
Any help / details that you can give would be so appreciated!
Thanks!
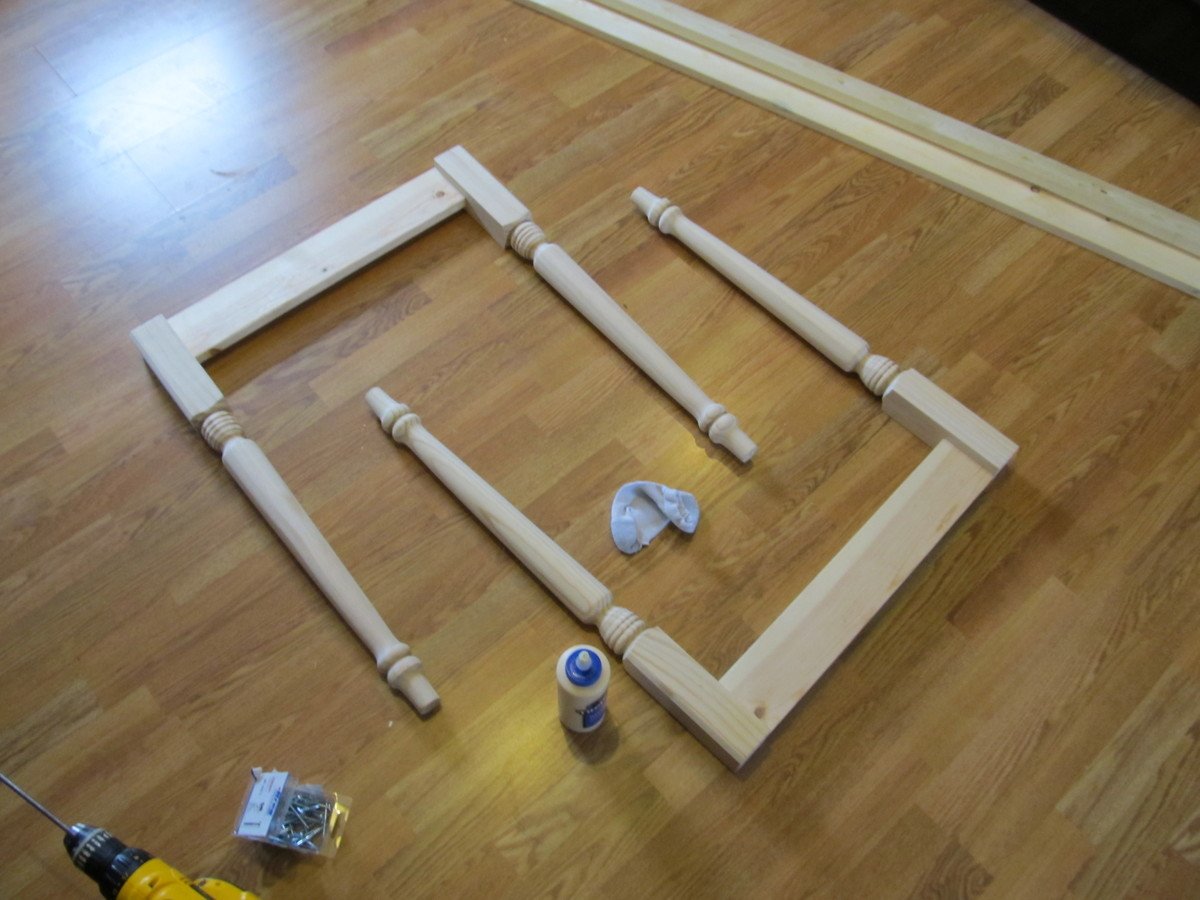
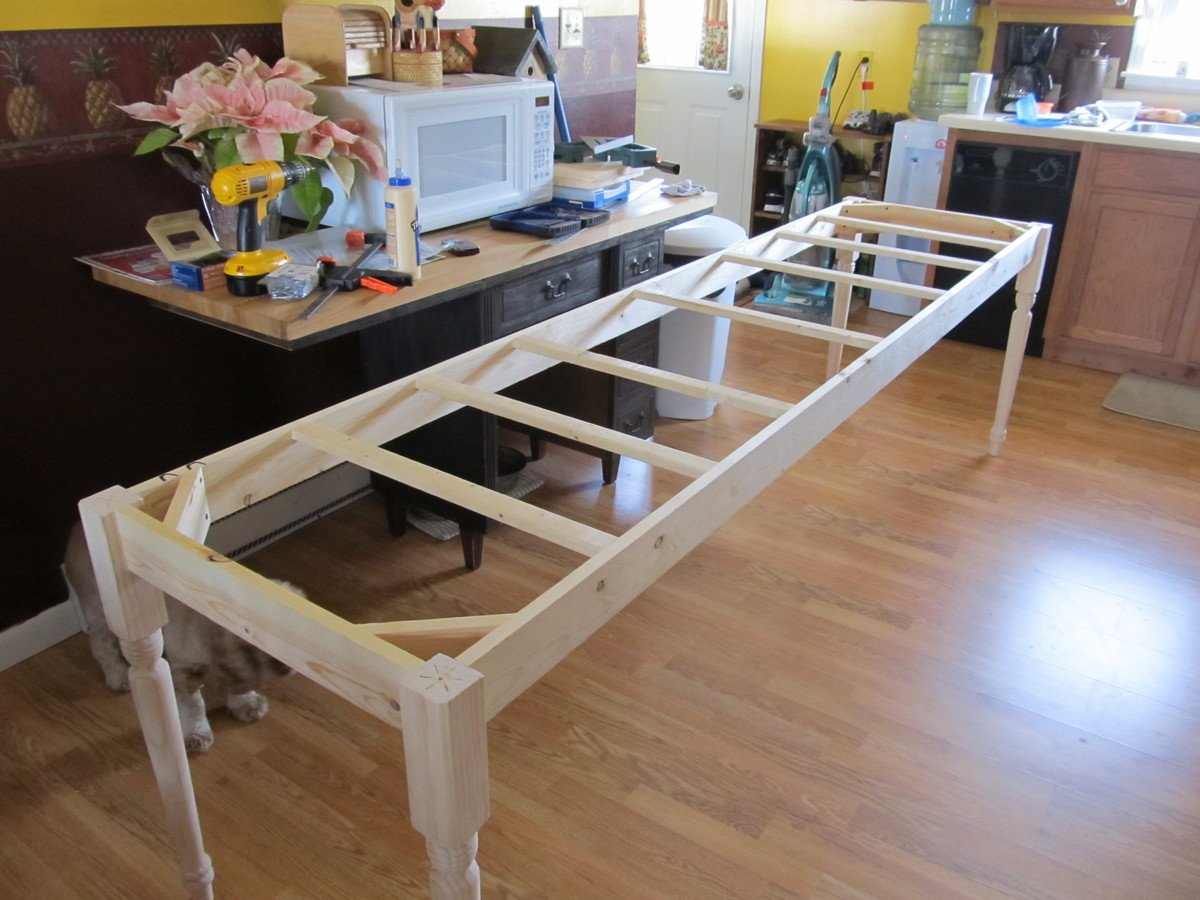
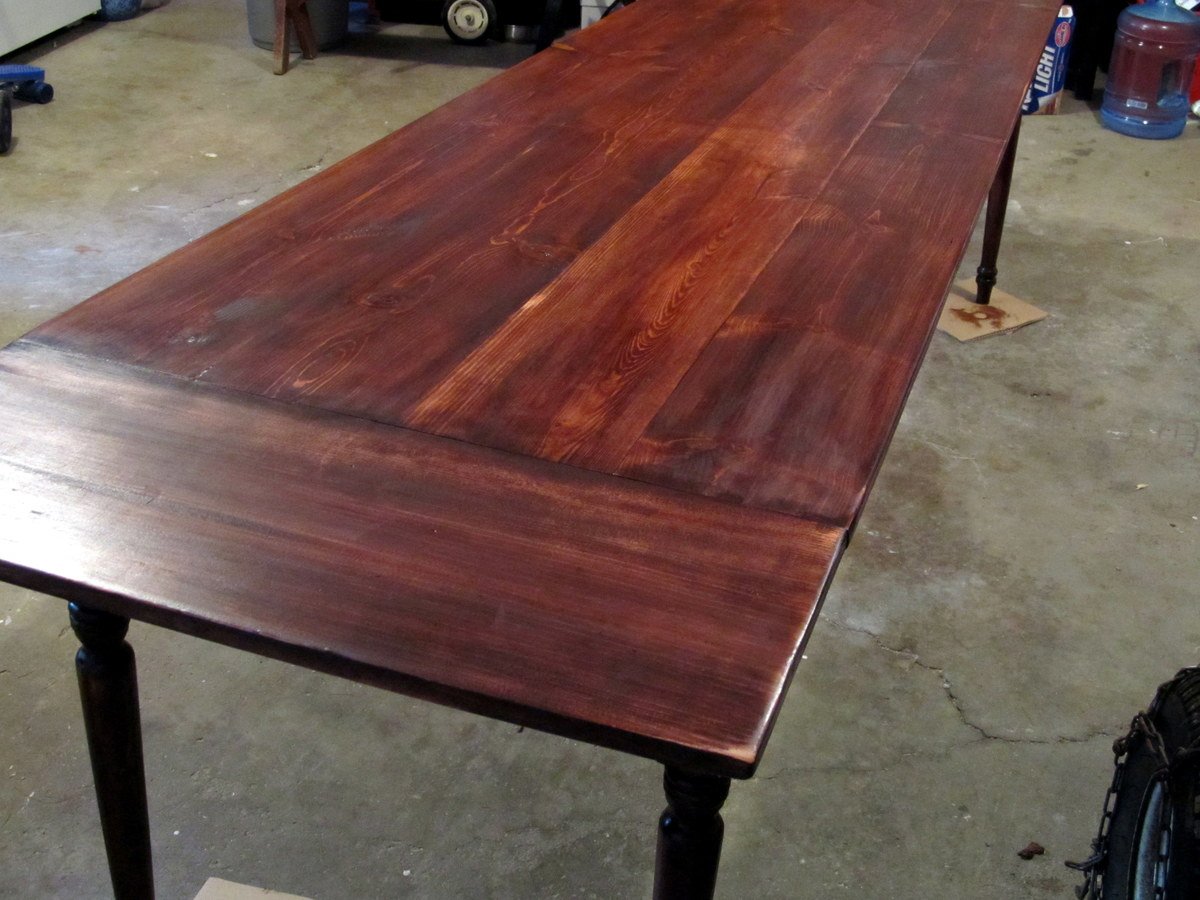
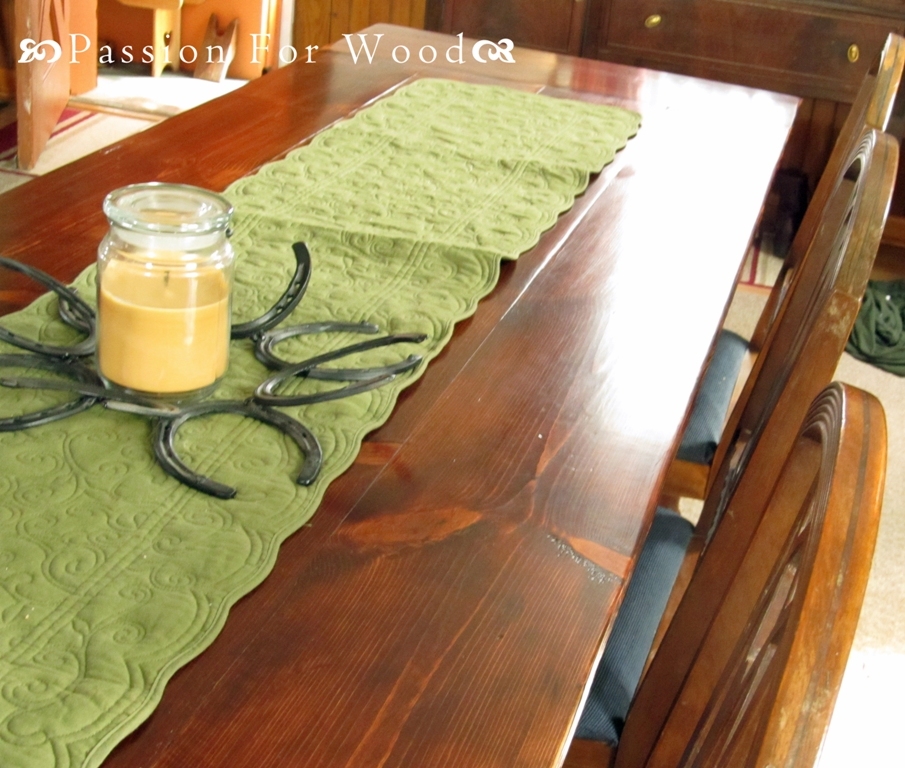
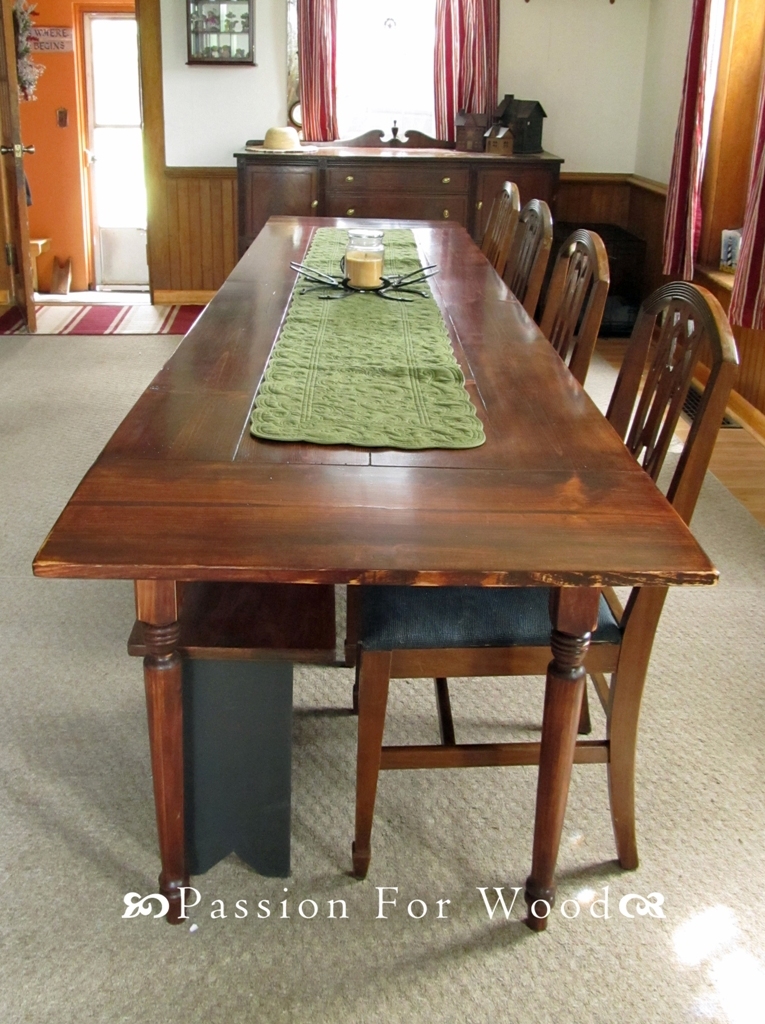
Whitney's Turned Leg Farmhouse Table
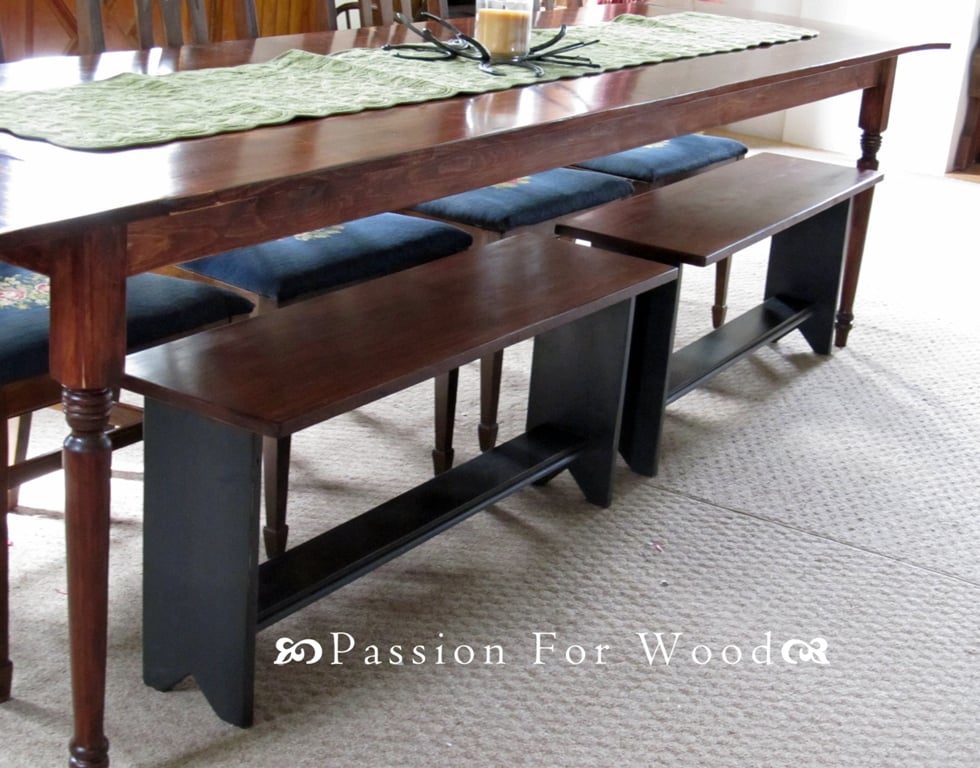
I worked up the plans in my head for about a year before my mother finally got around to having me build her 10 foot farmhouse table. That's right, this bad boy is TEN FEET LONG! And it was one of the simplest things to construct!. I used 8 foot 1x8's for the length of the table (used 4, making the table 29" wide) and 1x12's for the breadboard ends. We also splurged and purchased turned legs for $15 a piece at Blue. It really made the table extra special. Totally cost, with finishing supplies came in under $150.
Things I would change if/when I do a table of this size again:
1) I would never make a BB end so large again. I would stick to a 1x6 or smaller. With such a large size we worry about children putting too much pressure on the ends.
2) I will make the legs removable. It was a bear trying to get this table into the house. Thankfully the width was just narrow enough!
3) I won't tackle this in the winter months! Construction of the table took only a few hours but finishing in freezing temps took weeks waiting for warm-ish temperatures.
Built from Plan(s)
Estimated Cost
Less than $150
Estimated Time Investment
Weekend Project (10-20 Hours)
Finish Used
Sand, sand, then sand some more! 2 coats of Minwax Mahogany Gel Stain. 2 coats of poly on legs/base. 4 coats of poly on table top with 0000 steel wool sanding between coats
Recommended Skill Level
Intermediate
Comments
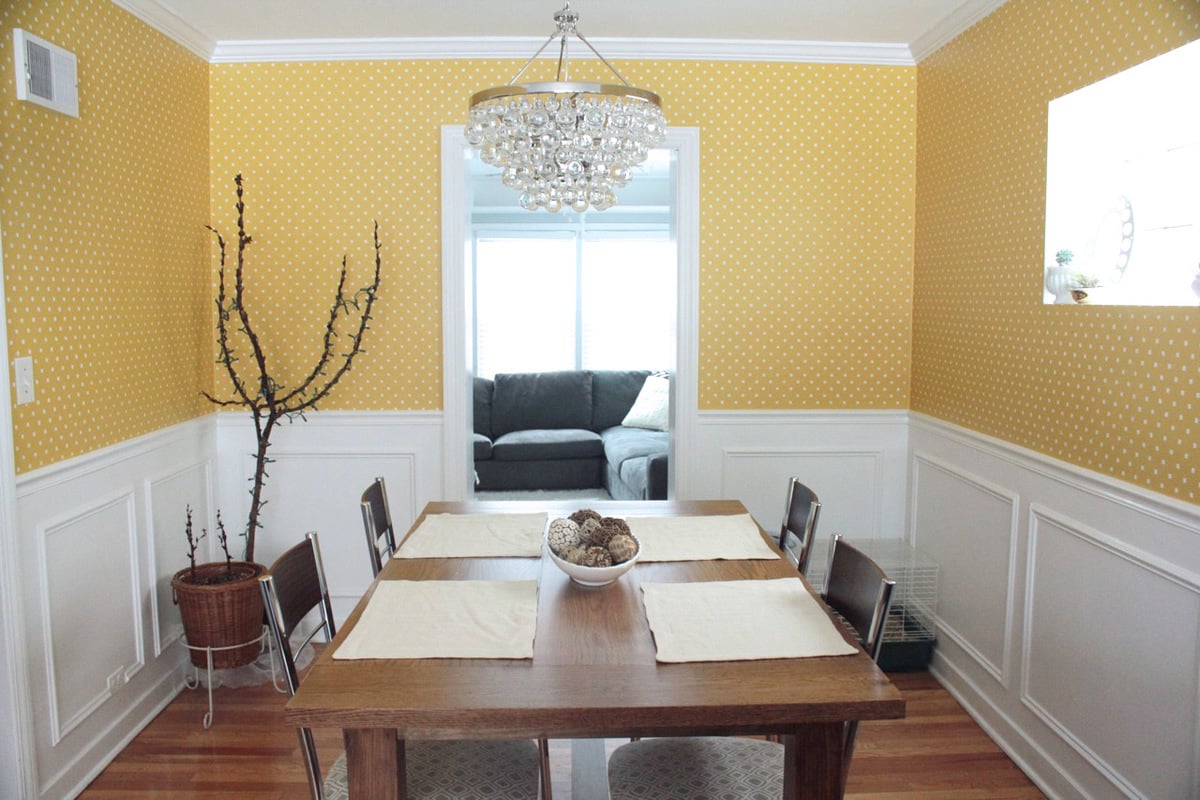
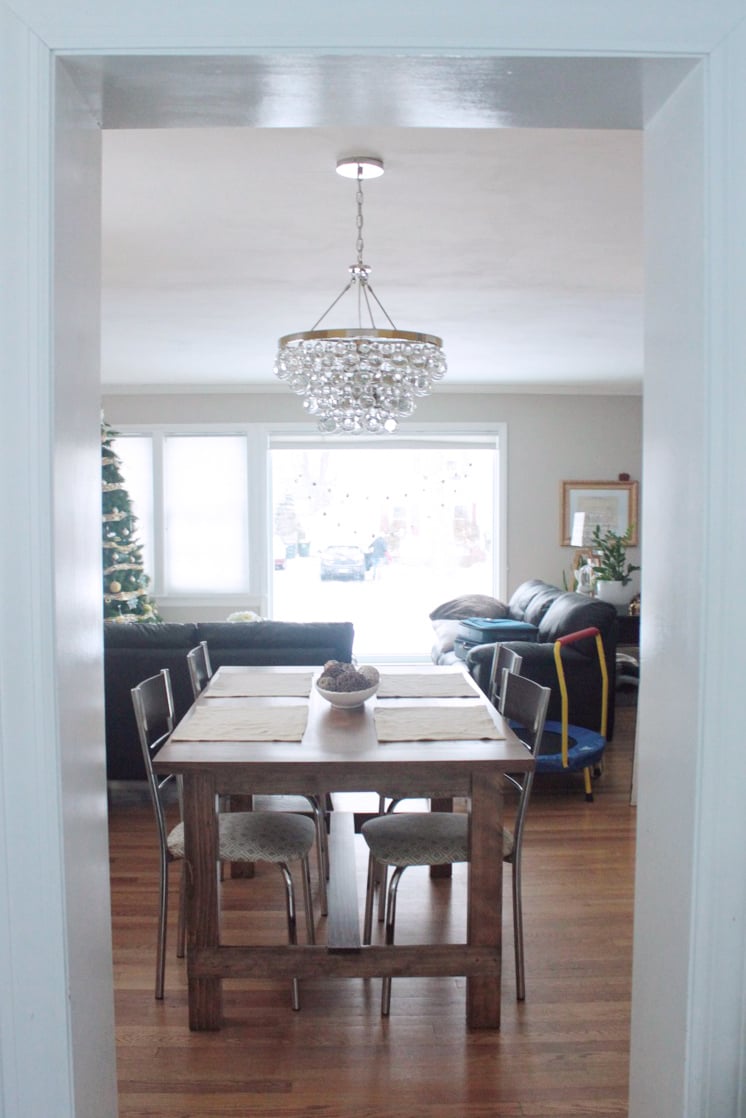
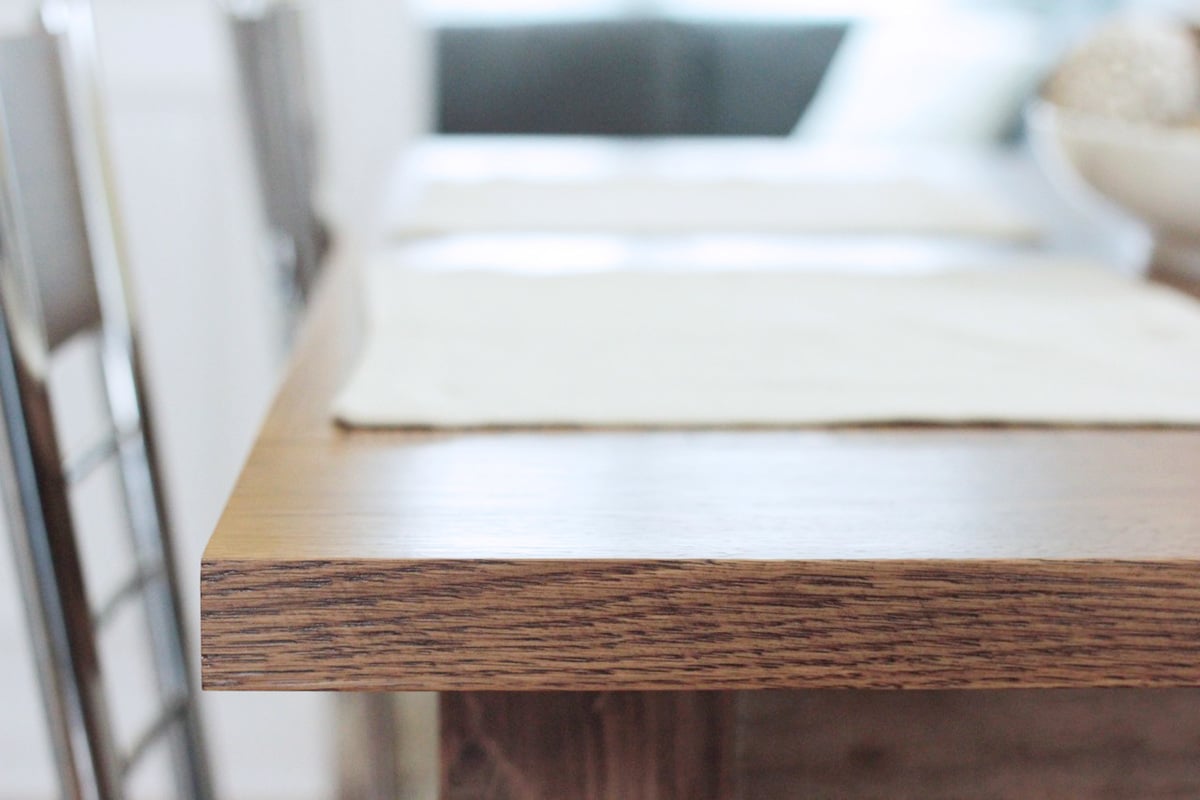
Farmhouse Dining Table

Fish made the tabletop from white oak and the base is pine. We still need to build a bench for one side and purchase new chairs, but we are IN LOVE with this table...and it somehow has allowed us to dine as a family more.

Built from Plan(s)
Estimated Cost
$300
Estimated Time Investment
Week Long Project (20 Hours or More)
Finish Used
Minwax Special Walnut, two coats
Recommended Skill Level
Intermediate
Comments
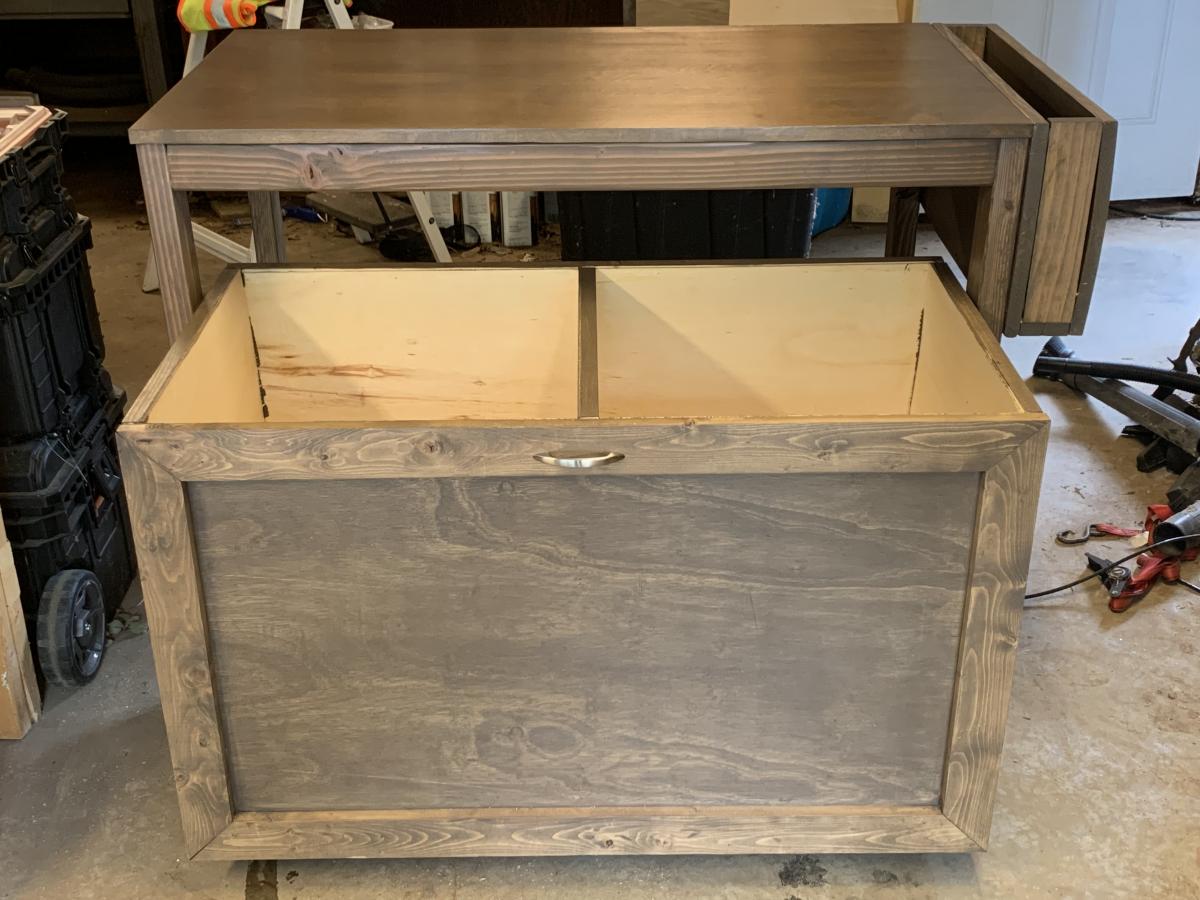
DIY Wooden Cooler Stand - Vintage Look
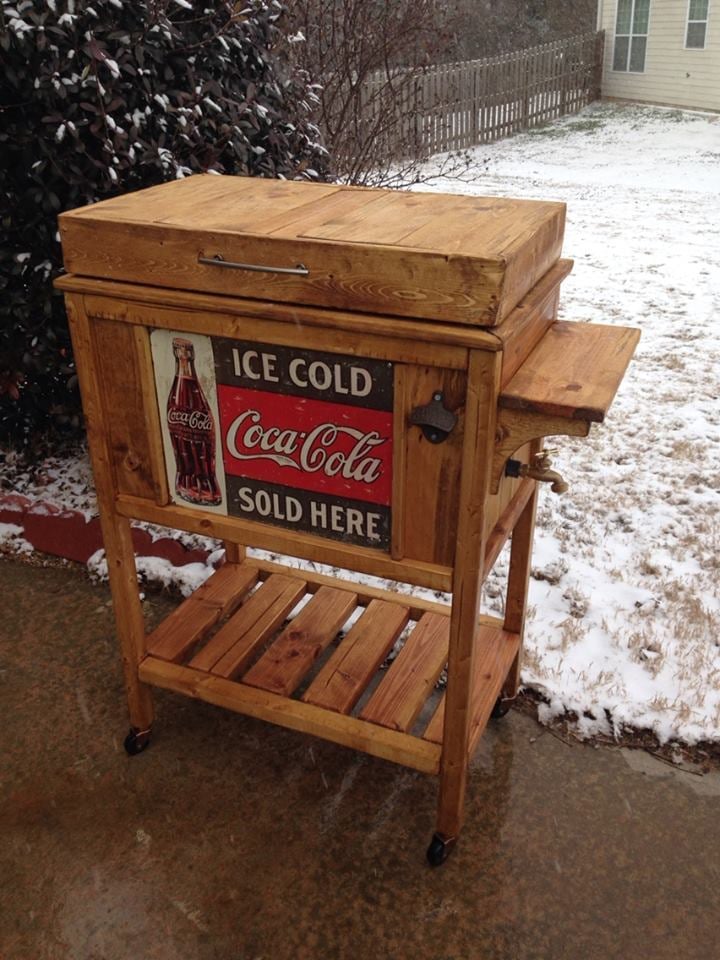
Got this idea from the blue cooler project - but decided to deck it out with vintage trimmings. Everyone who has seen it loves it! Very fun project.

Estimated Cost
70.00
Estimated Time Investment
Weekend Project (10-20 Hours)
Finish Used
Minwax Summer Oak - followed with polycryllc and johnson's furniture wax.
Recommended Skill Level
Intermediate
Comments

Tue, 02/04/2014 - 21:32
Very Nice!!!
I'm in the process of building one out of this plan too except I'm trying to use pallet wood. I love how your cooler turned out so I hope you don't mind that I use the same Coke sign. Awesome job!
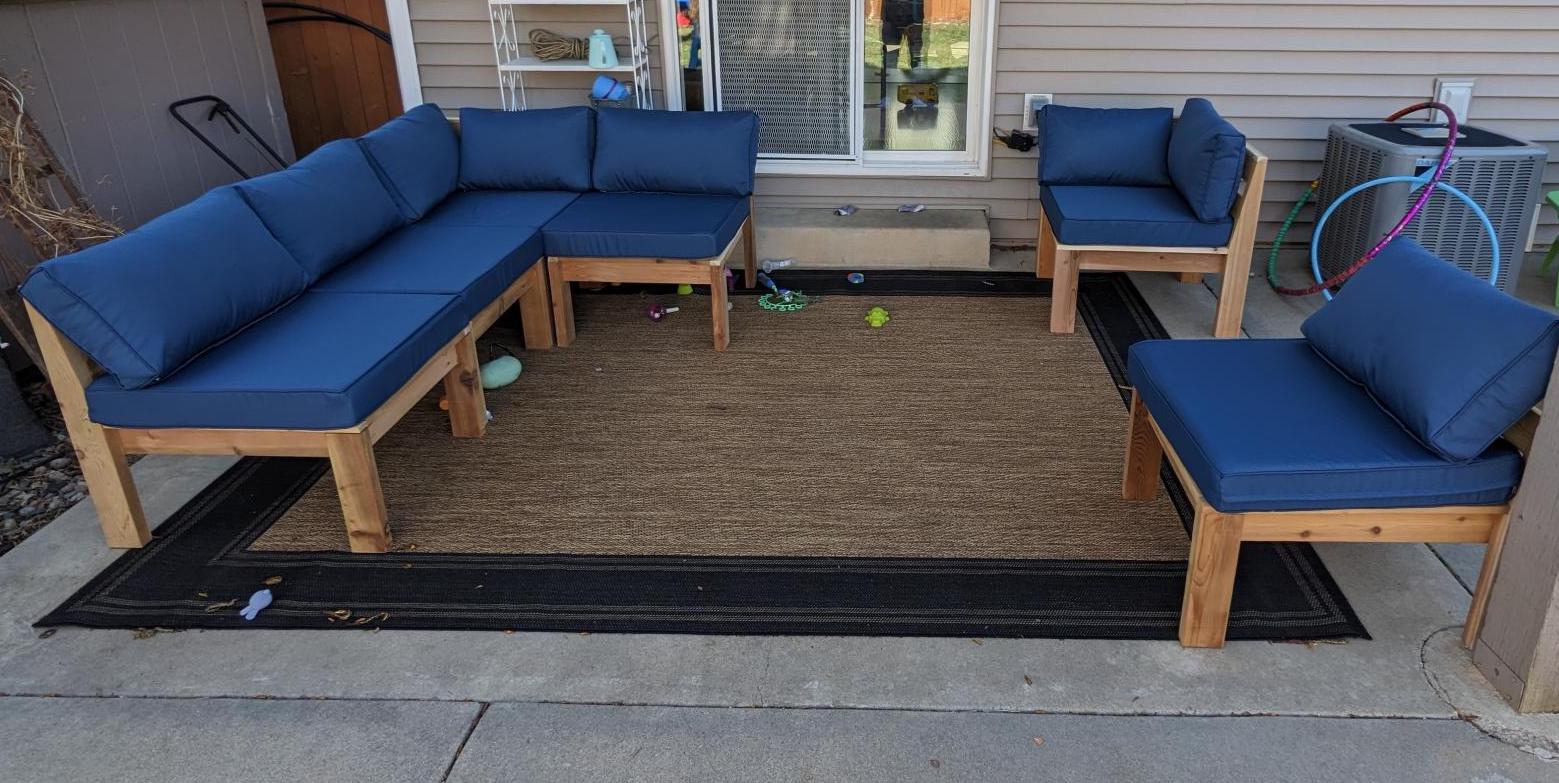
DIY Outdoor Living Room

This was so much fun to make and so relaxing to enjoy.

Built from Plan(s)
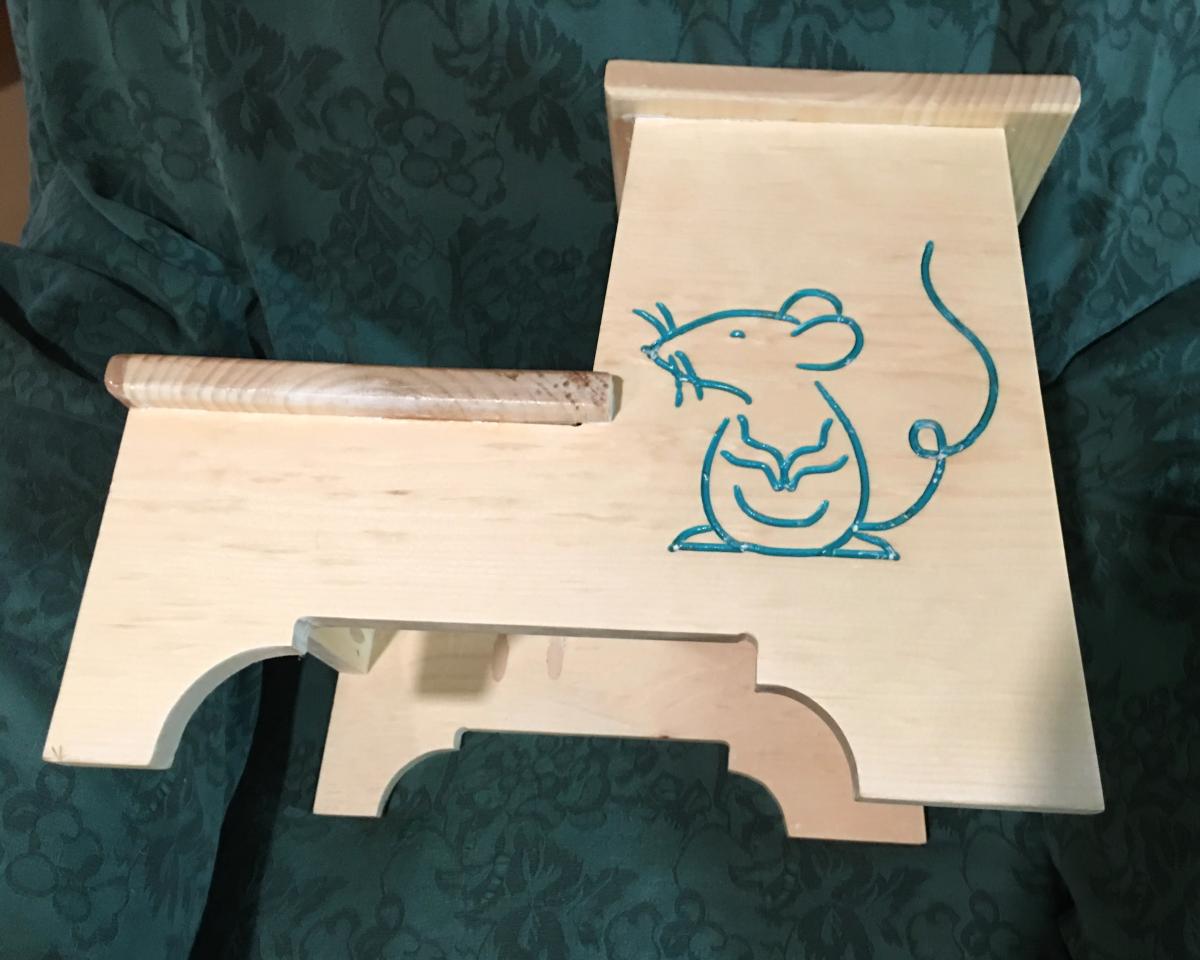
Customized Step Stool
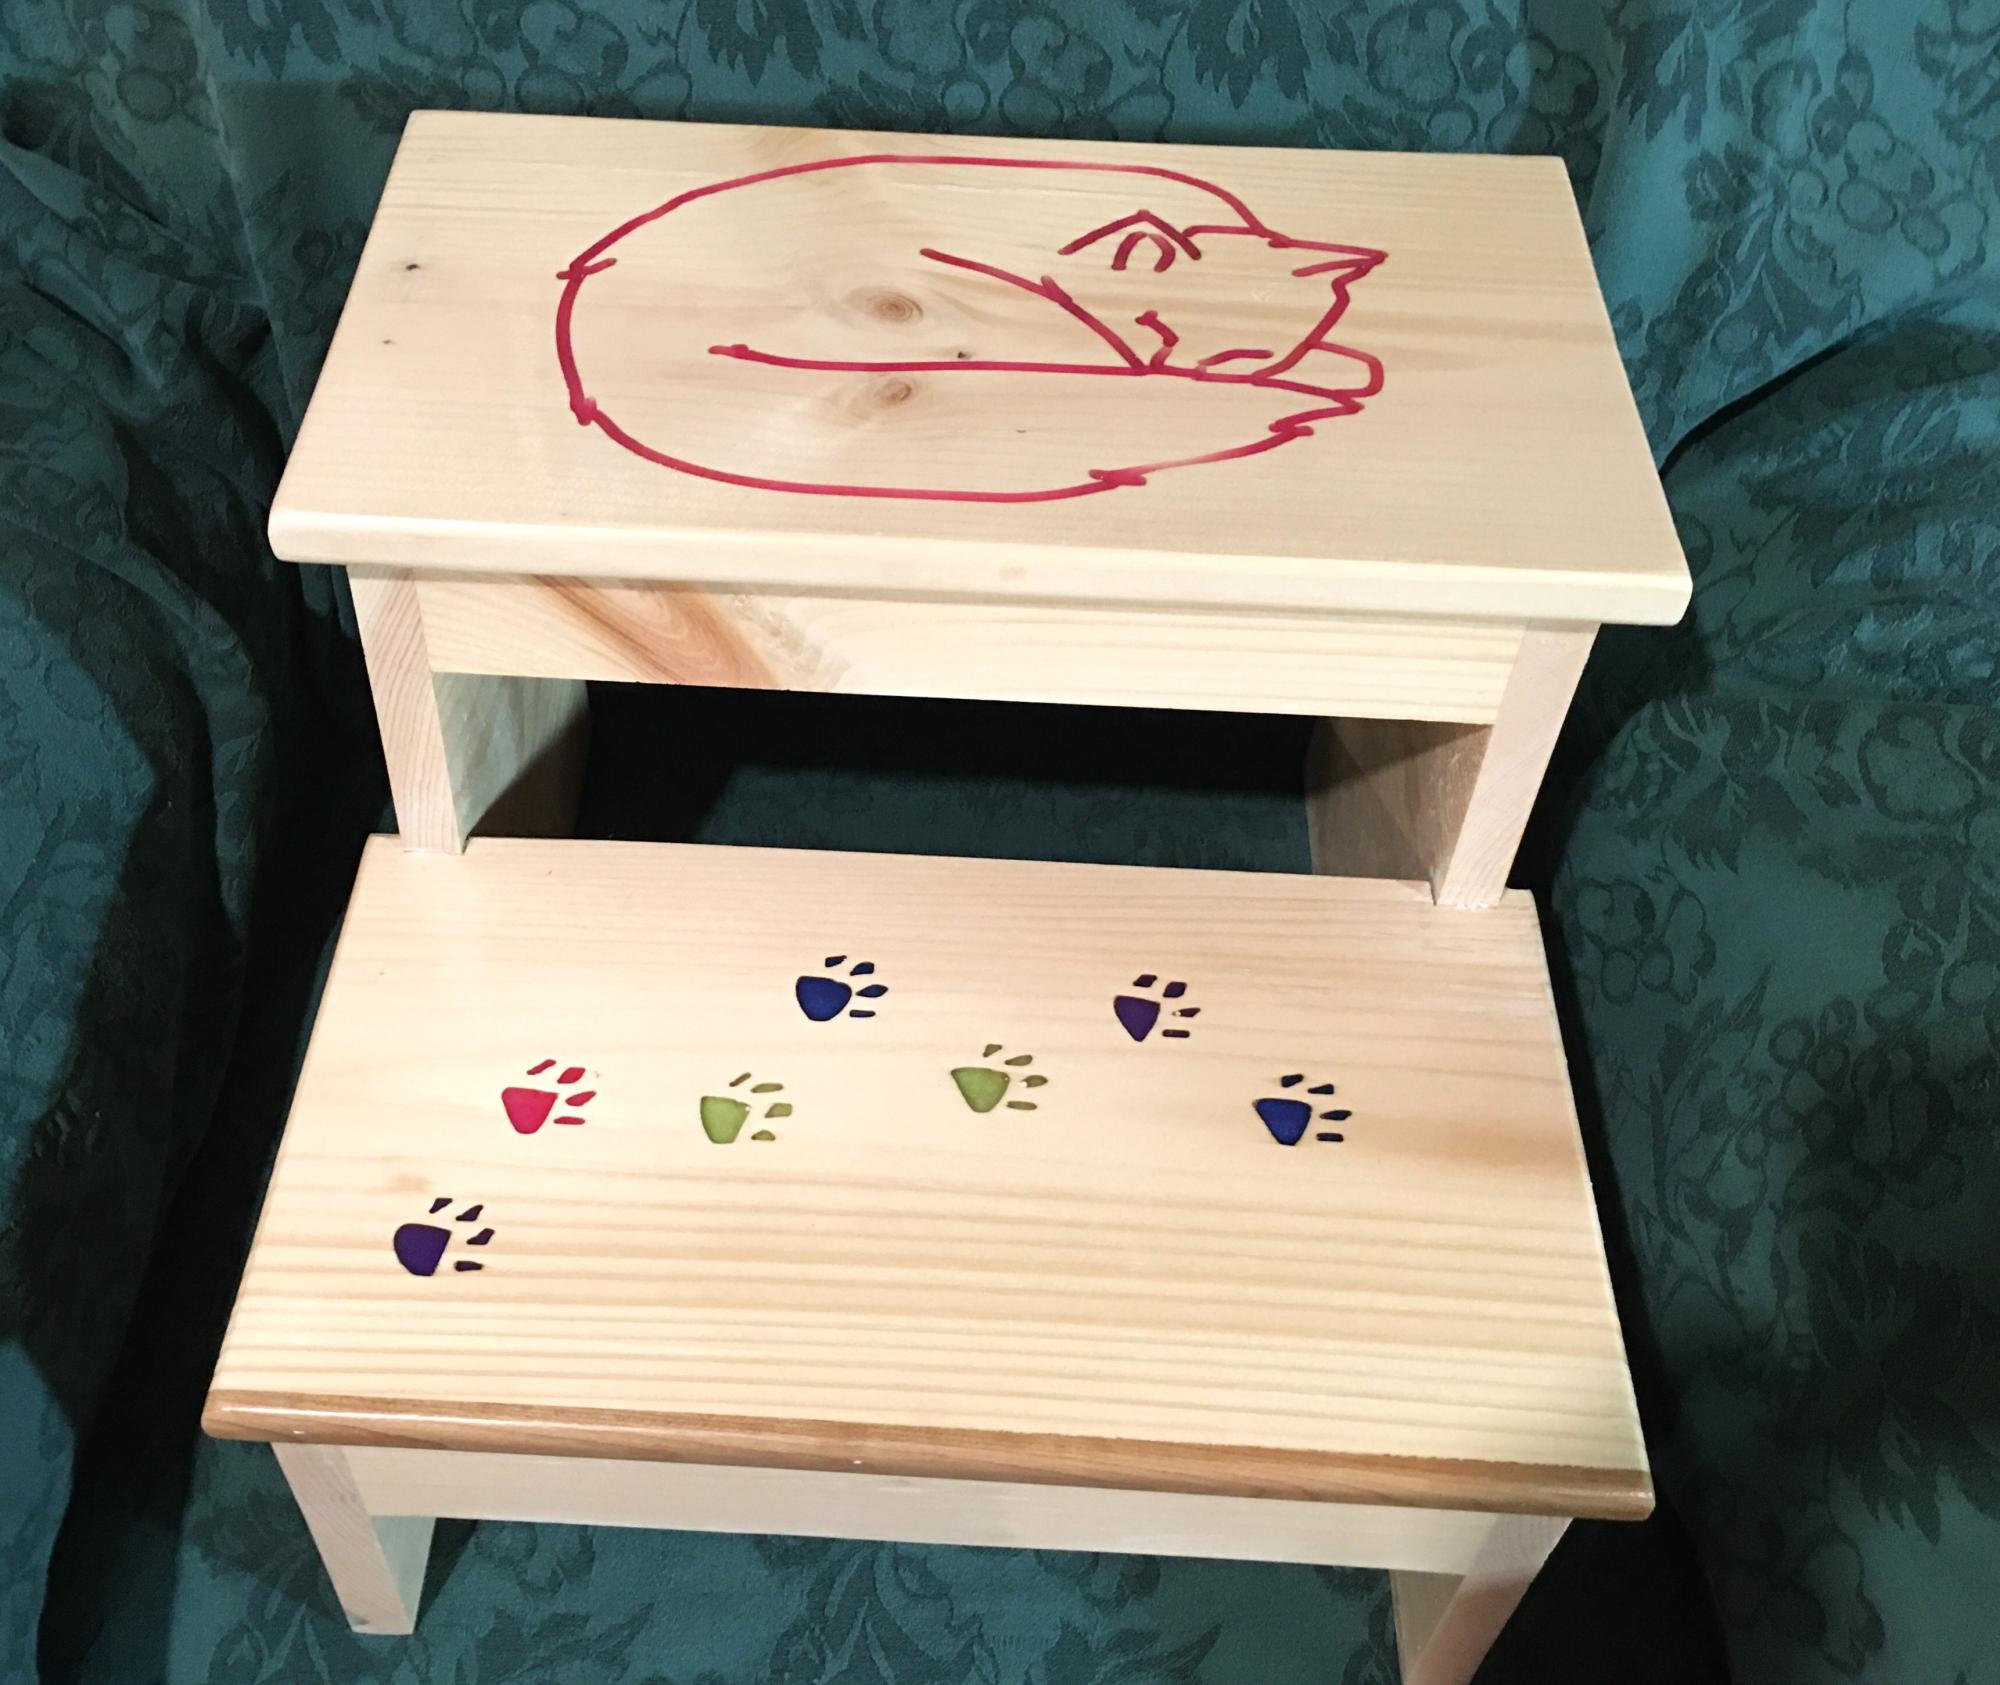
i took the step stool plans and using imagination and a CNC router put themin a new "catagory". John Ogren
Built from Plan(s)
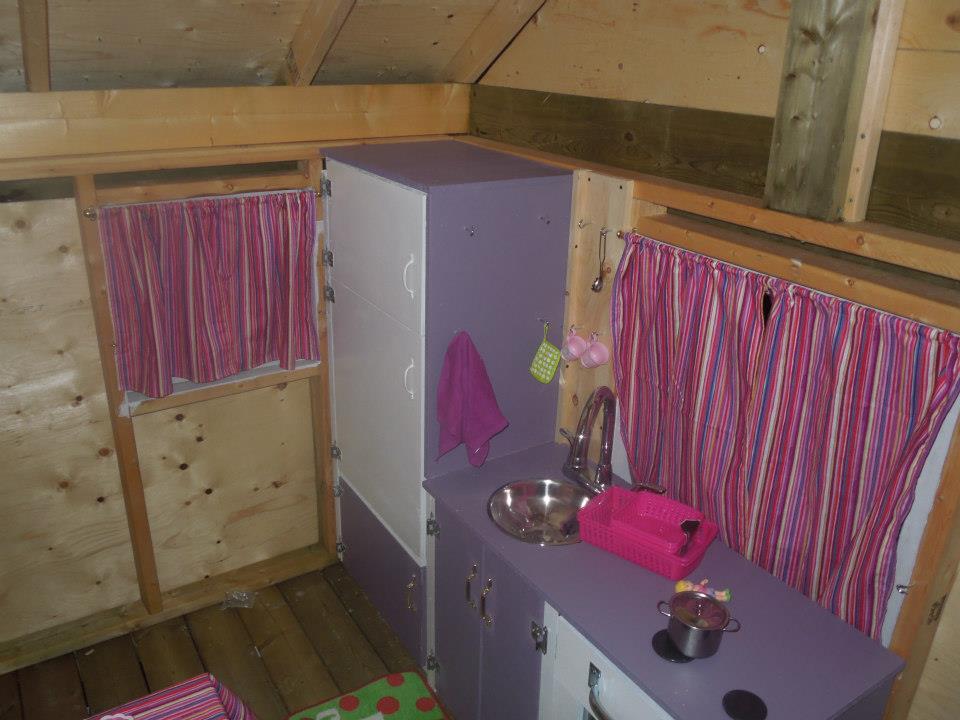
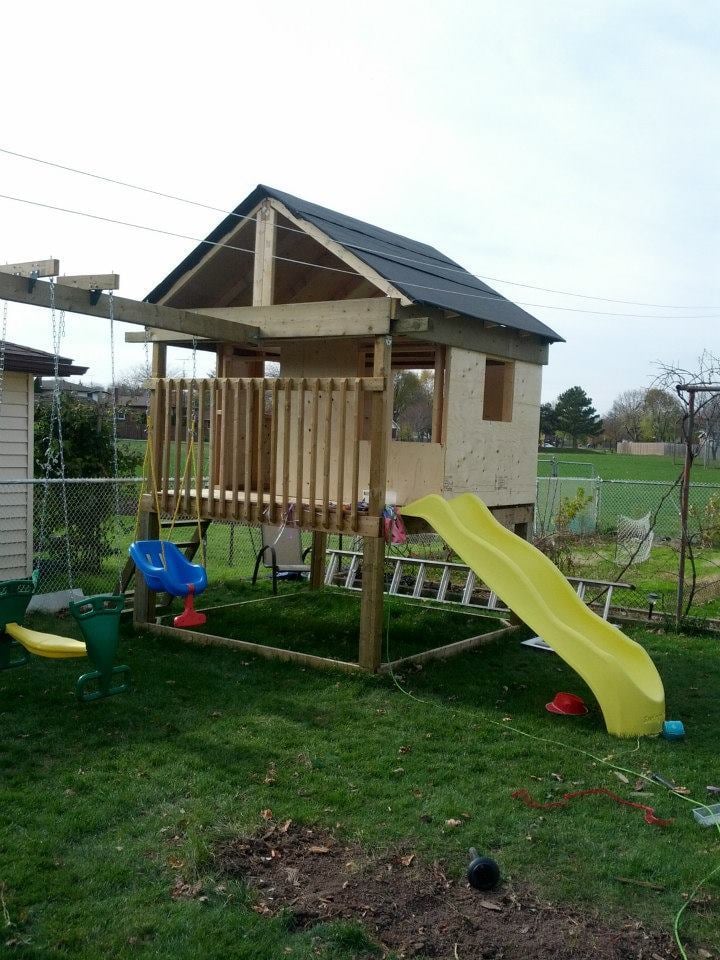
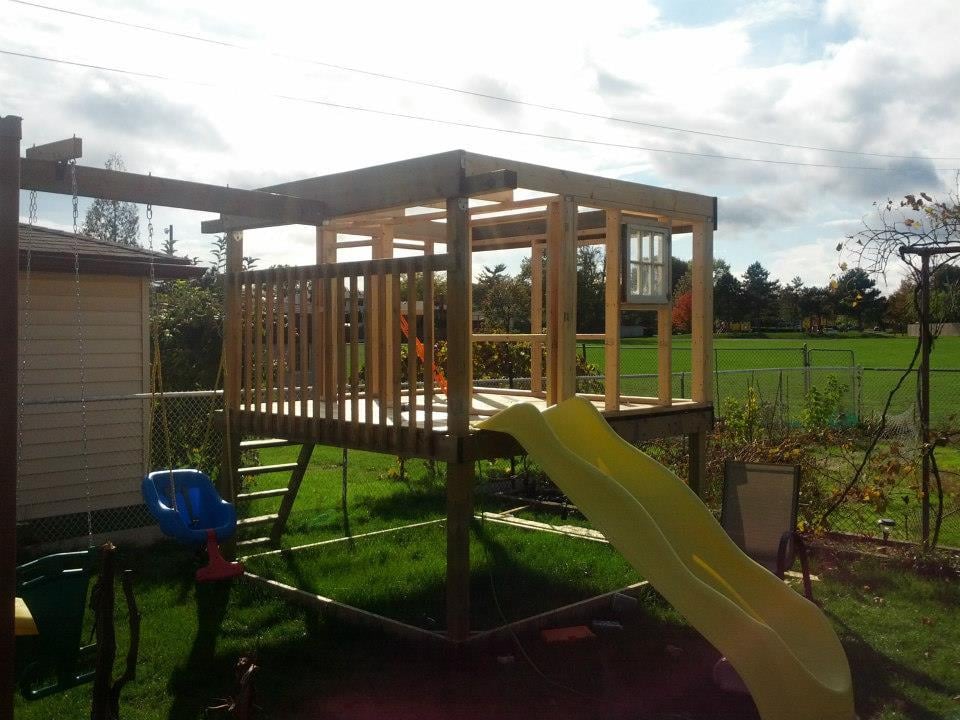
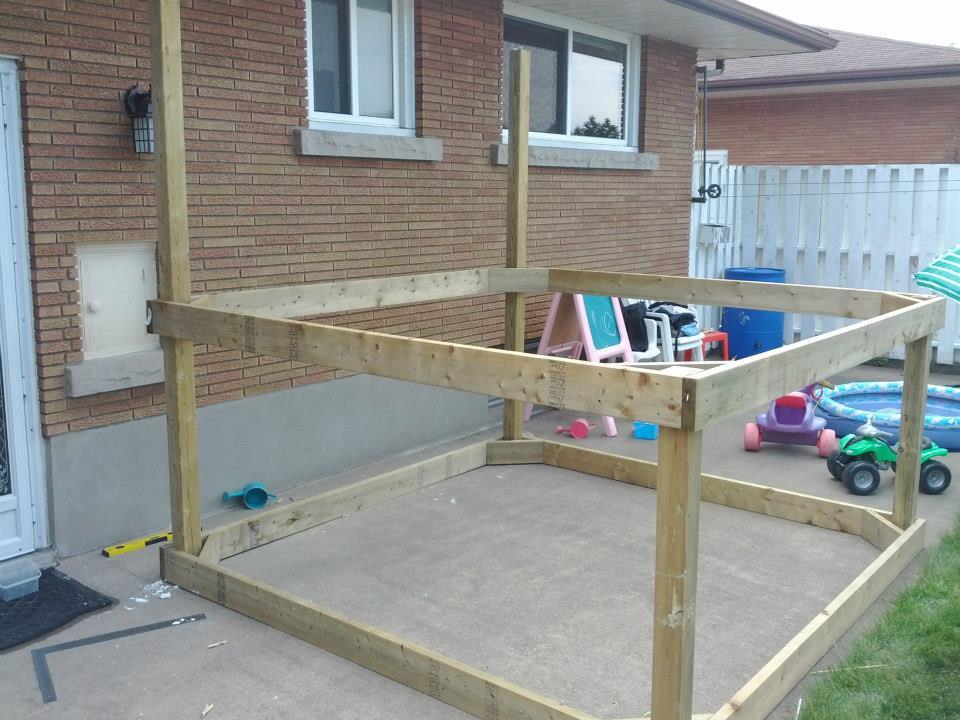
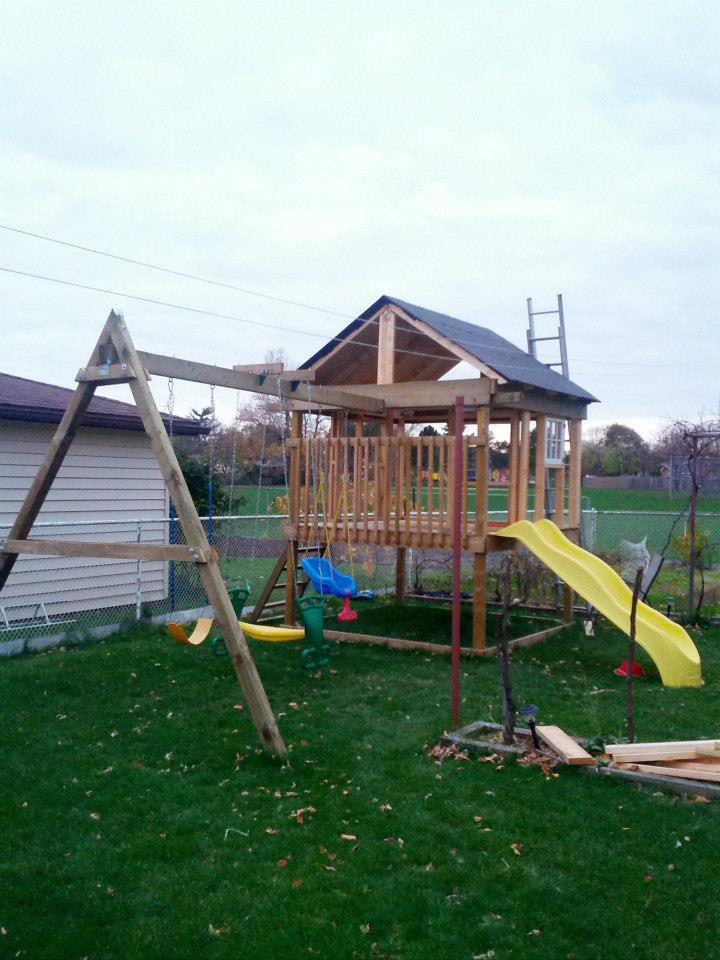
Playhouse with swingset
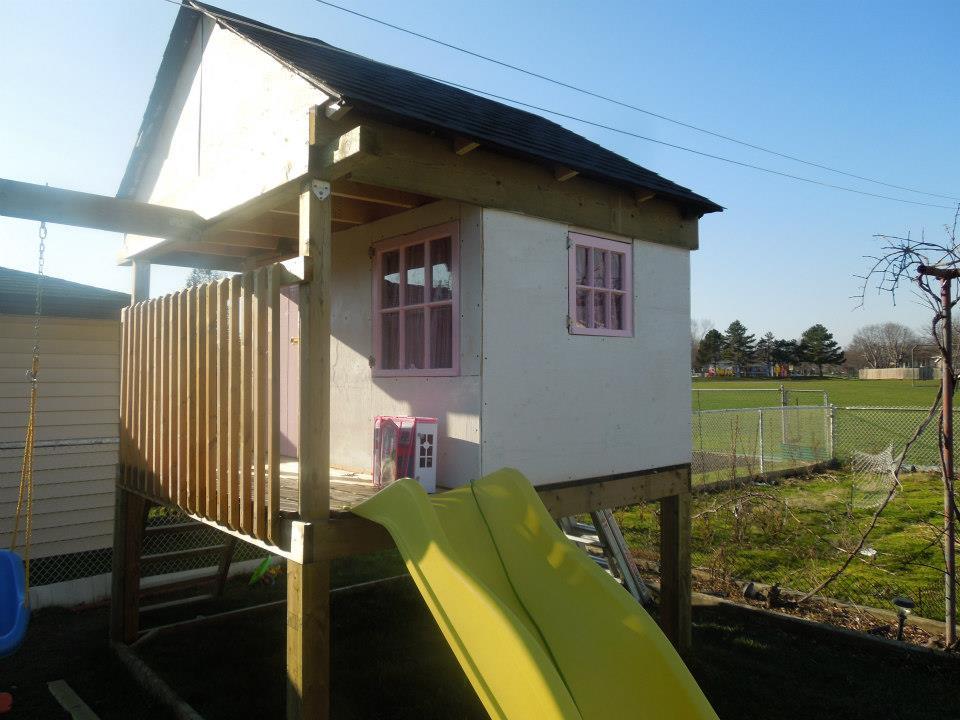
I combined a few different plans here, mostly the Playhouse deck, swingset.
I haven't finished it yet, this spring I want to finish the exterior as it's just primed plywood right now. Still going to add a window above the balcony (there is a loft up there).
I insulated the roof/ceiling and will insulate the walls when we finish it. In the bottom we'll be putting in a sandbox with a cover that folds up into benches.
It was a fun project and should give our girls many years of fun.
Built from Plan(s)
Estimated Cost
$1000
Estimated Time Investment
Week Long Project (20 Hours or More)
Finish Used
Right now the plywood is just primed, we'll be putting some sort of siding or other exterior sheets to finish it.
Recommended Skill Level
Advanced
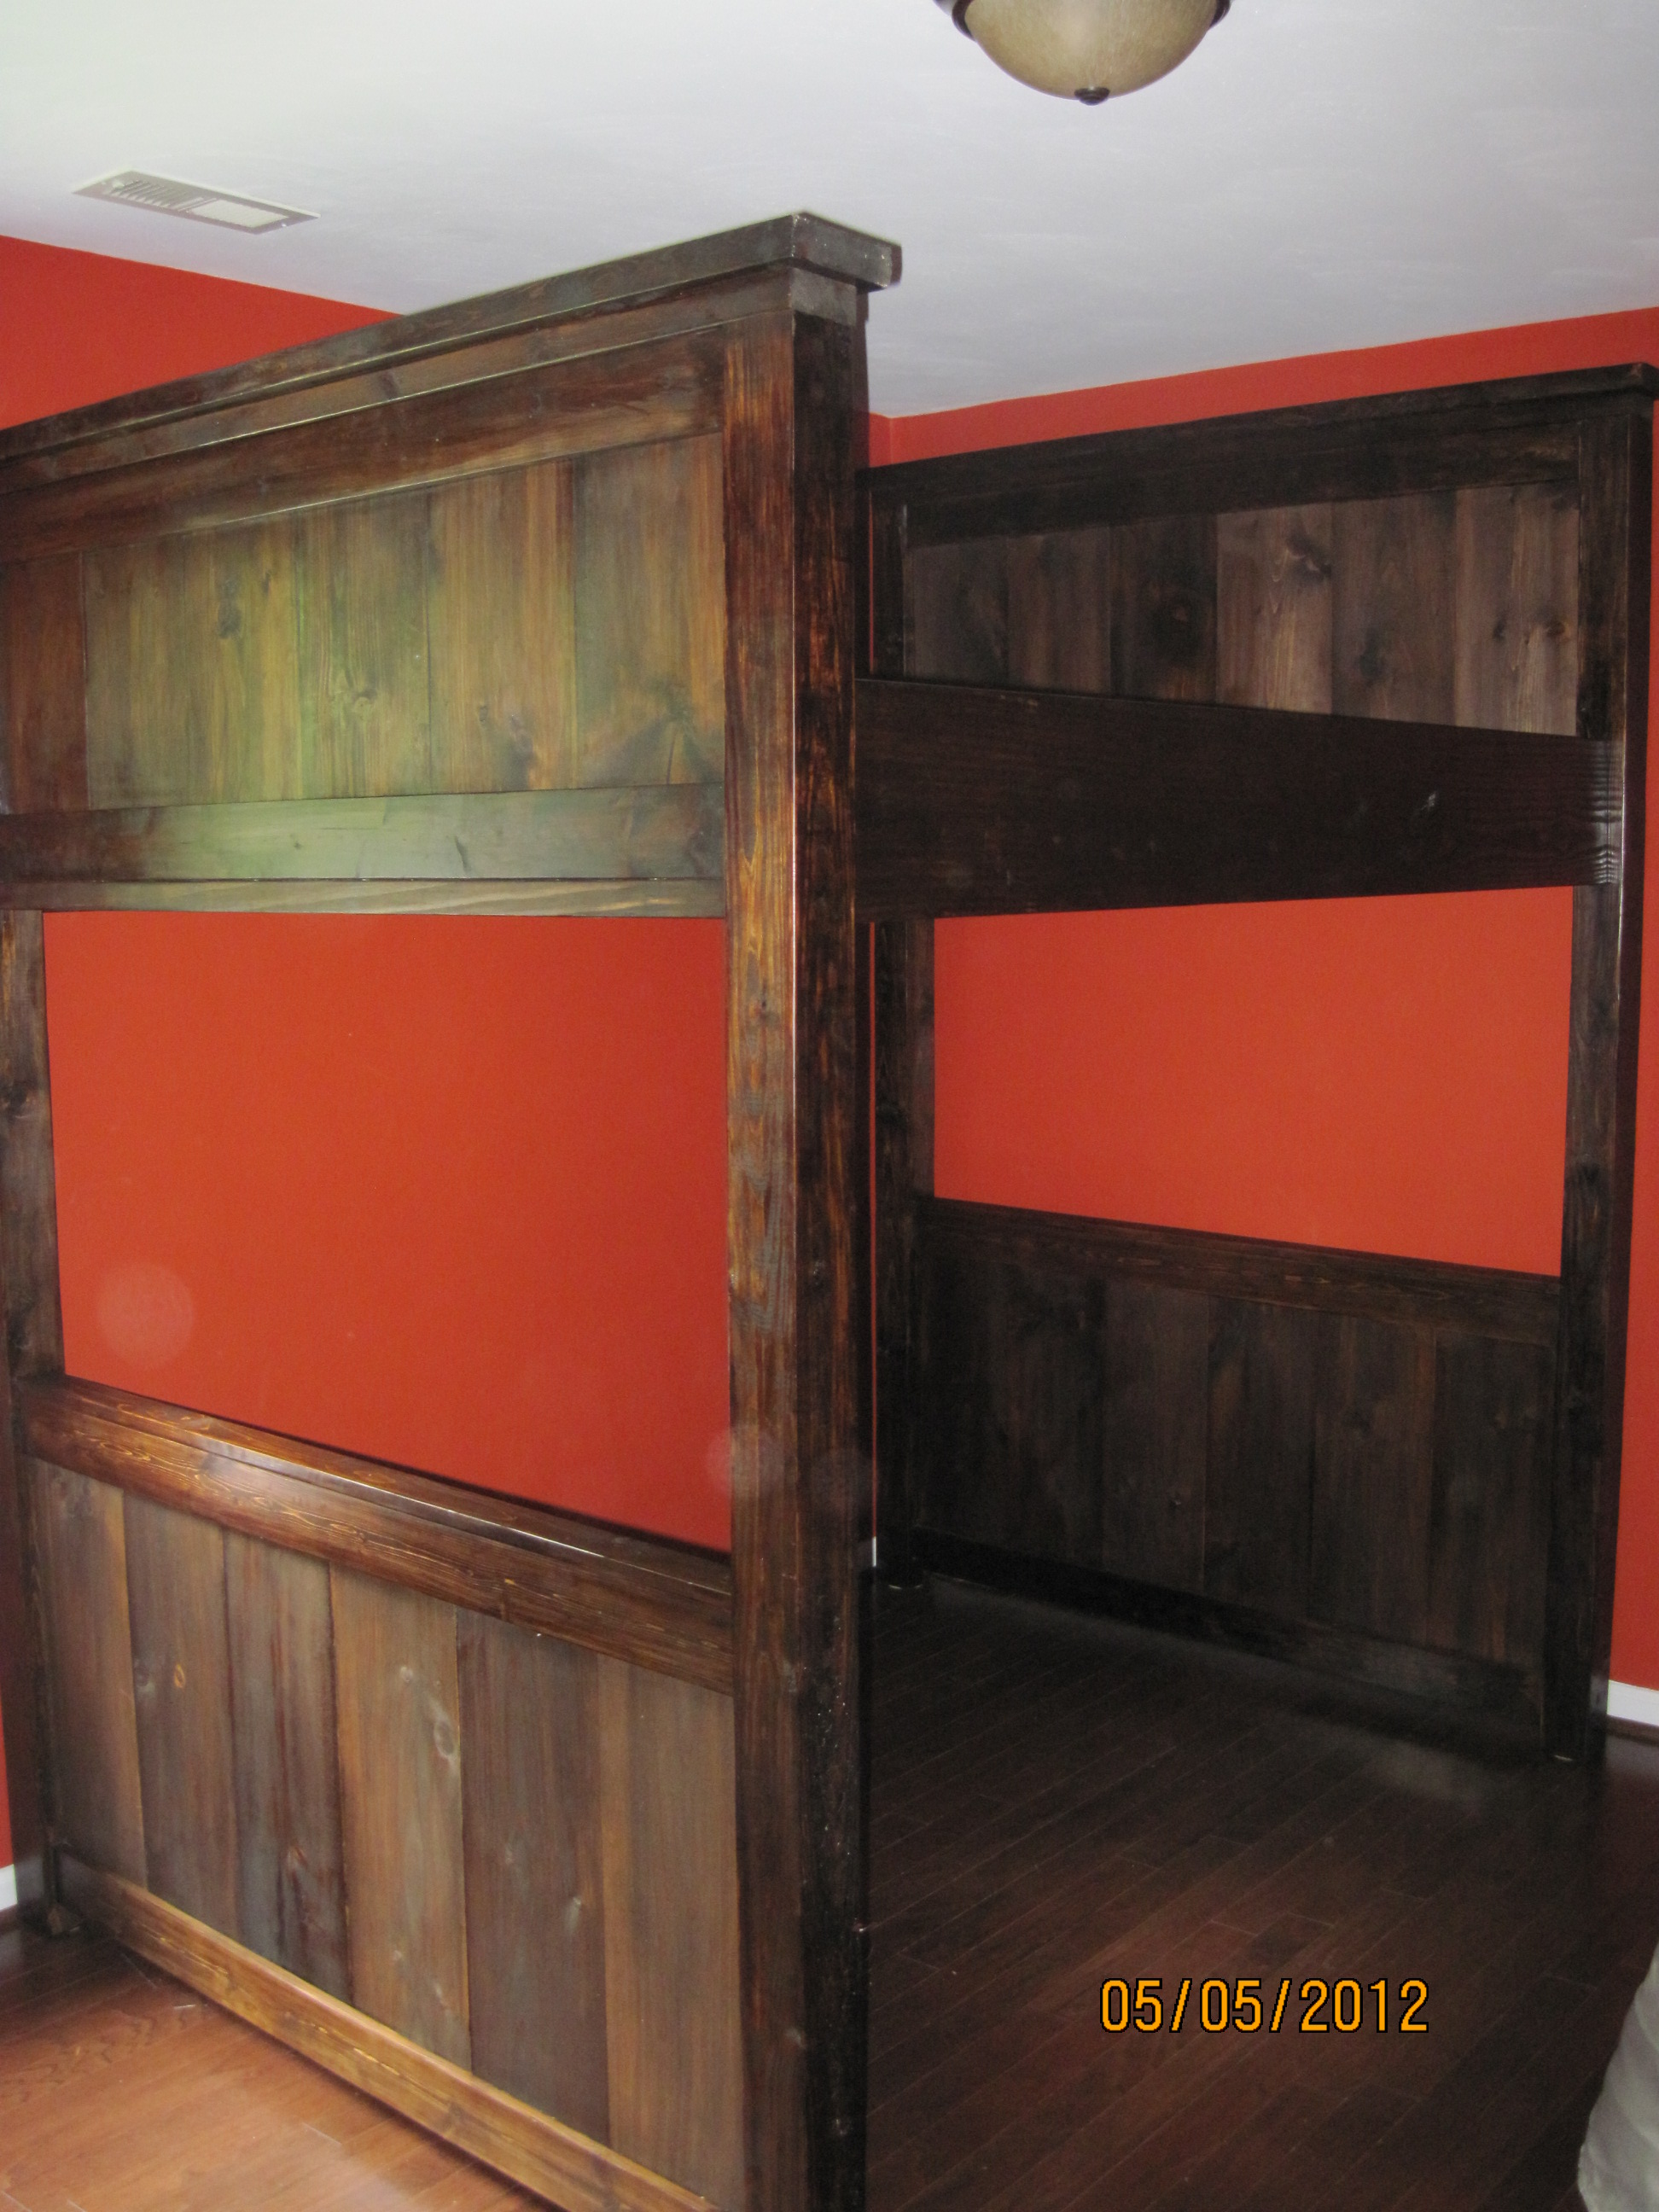
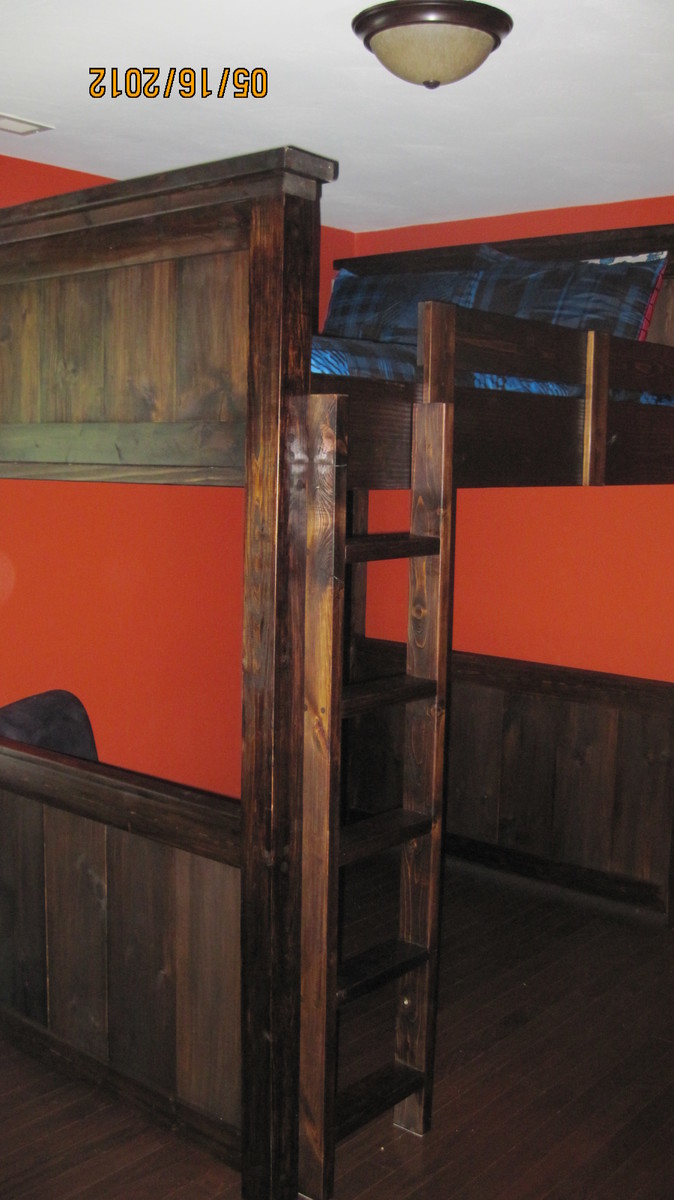
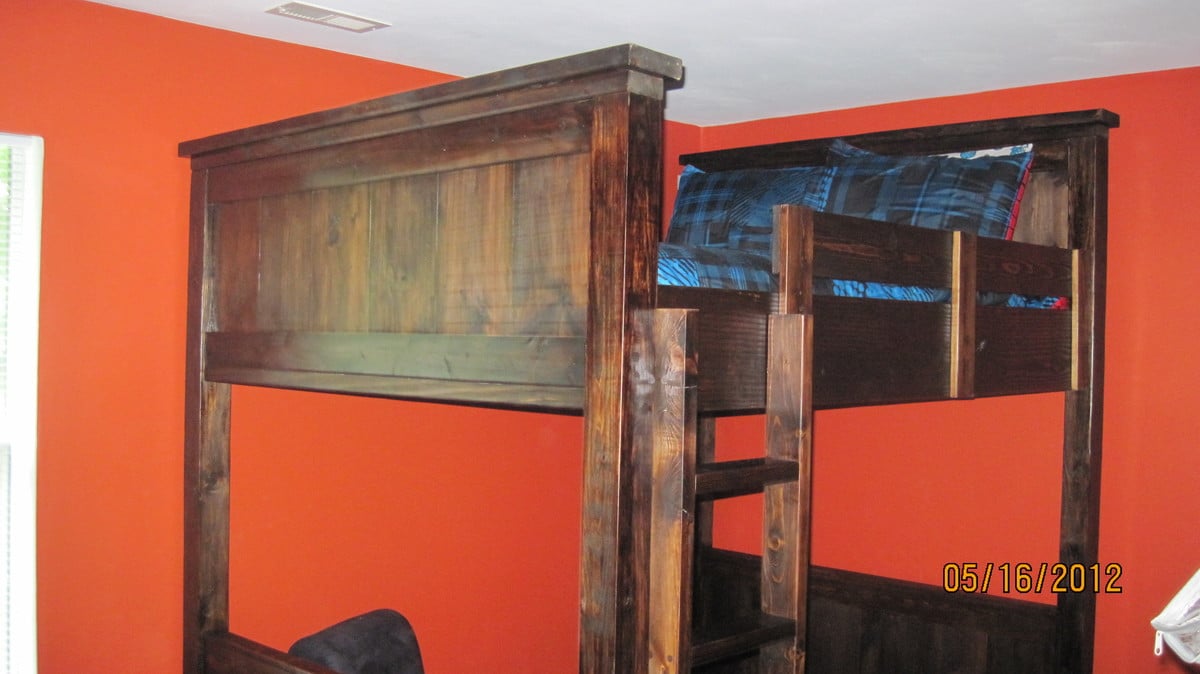
Farmhouse Loft Bed (Full)
HI all!
This is my first project and brag post. I really like this website and reading all the blogs and brag posts. The information is very informative and inspiring.
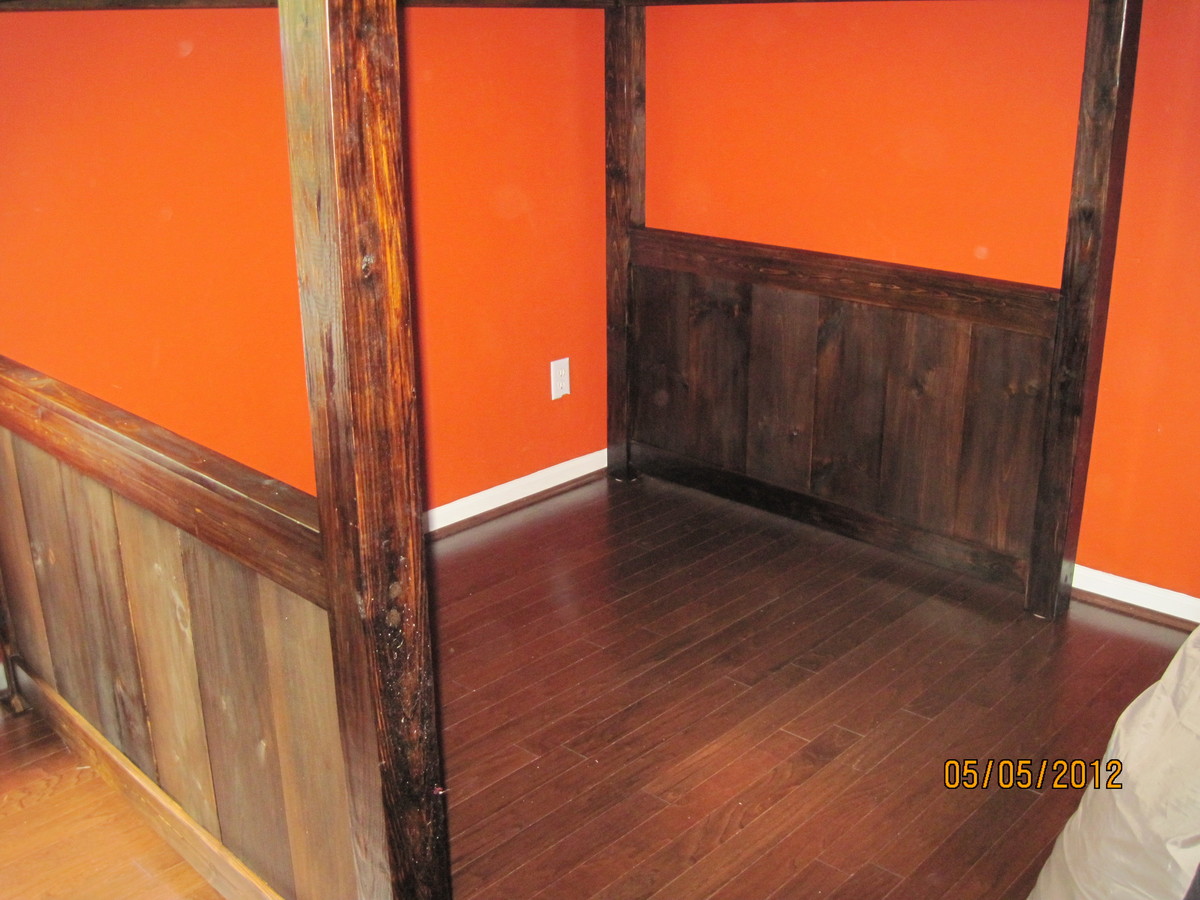
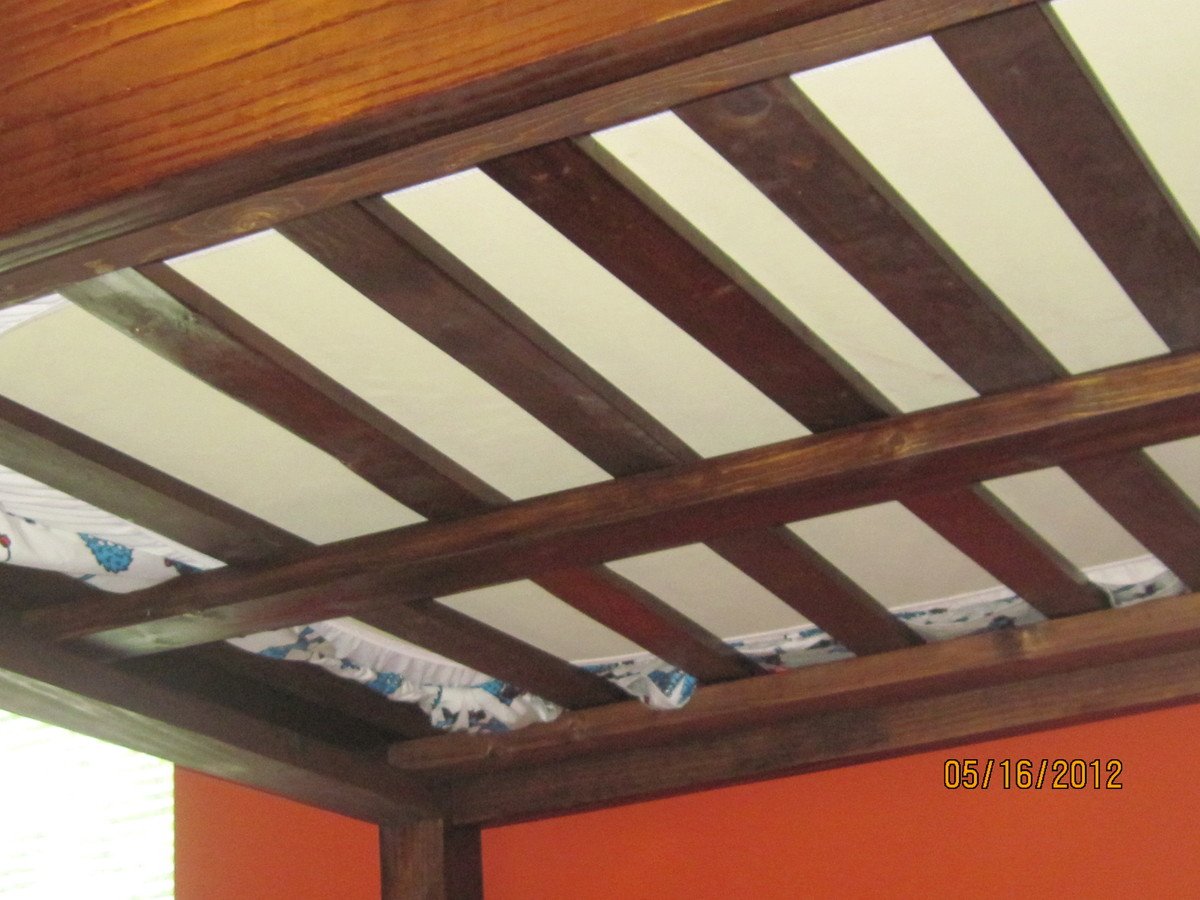
I really liked DirtSquirt's Loft Bed (Double Mattress), so I decided to give it a try! I contacted DirtSquirt to get a copy of the plans (Full size Farmhouse Bed and How to Build a Loft Bed) and the Google Sketch up. I pretty much followed the plans except I made the area underneath the bed taller (approx 58 inches), I chose to stain, and I did not secure the slats to the side rail as they are pretty were pretty snug. I'll probably go back and secure in the near future for uniformity in the spacing.
To be honest, I think the staining was the hardest part...LOL. I had never stained before so in hindsight I probably should started off with a way smaller project. Eventually, I got the hang of how to putty the holes with wood filler and then stain to get a consistent look and feel without the blotches!
My future plans are to build a desk to create a study area underneath.
Sugarpig1
Built from Plan(s)
Estimated Cost
$550-600
Finish Used
Minwax- Dark Walnut
Polyurethane
Polyurethane
Recommended Skill Level
Beginner
Comments
Thu, 06/21/2012 - 20:02
Perfect!
This bed is amazing! It looks so sturdy. I am in love with the farmhouse bed, but I have been looking to build a full size loft bed for my daughter. I just haven't found a design that I'm 100% in love with. This is the perfect melding of a farmhouse bed with another loft design that I really like. Love, love, love it! I'm definitely going to have to design this for her now. Thanks for sharing your work!
Tue, 08/07/2012 - 08:05
I couldn't really tell from
I couldn't really tell from the pics, but did you use mortise cuts?
Thu, 09/26/2013 - 08:17
farmhouse loft bed
I have contacted dirtsquirt several times to get the plans for this bed. Did they get back with you right away or did it take them awhile? If you have the plans would you mind emailing them to me? Lplus10 at yahoo dot com
thanks!
Sat, 05/17/2014 - 08:40
Could you share your plans?
I've also contacted dirtsquirt and haven't had luck getting the plans yet- could you share them with me? or does anyone else have a copy they can share? my e-mail is [email protected] - thanks!
Sat, 05/17/2014 - 08:40
Could you share your plans?
I've also contacted dirtsquirt and haven't had luck getting the plans yet- could you share them with me? or does anyone else have a copy they can share? my e-mail is [email protected] - thanks!
Fri, 07/04/2014 - 23:36
Farmhouse Loft bed
I would love a copy of the plans as well.
Thank you! [email protected]
Tue, 11/04/2014 - 20:26
Plans
I too would like a copy of the plans if you can send them to me at [email protected].
Thanks,
Mon, 01/26/2015 - 09:03
can you send me the plans??

Tue, 05/19/2015 - 02:00
plans
Not sure if anyone checks this blog post. But I have contacted dirt squirt too and have never been able to get the plans.
Please send me the plans you used to build this bed... I am dying to build it. Similar to yours with the bottom wood there, as it is for boys. But this is my first time building anything and I need plans....
Mon, 08/26/2019 - 19:25
Plans PLEASE
Has anyone ever been able to get dirtsquirt’s original plans for the loft house full sized bed? I’m in desperate search of them!!! Please, PLEASE, please message me and I’ll provide you with my email! PLEASE and thanks. :)