Community Brag Posts

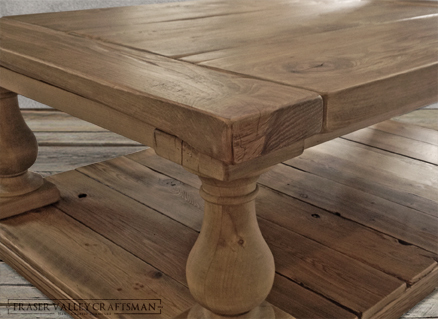
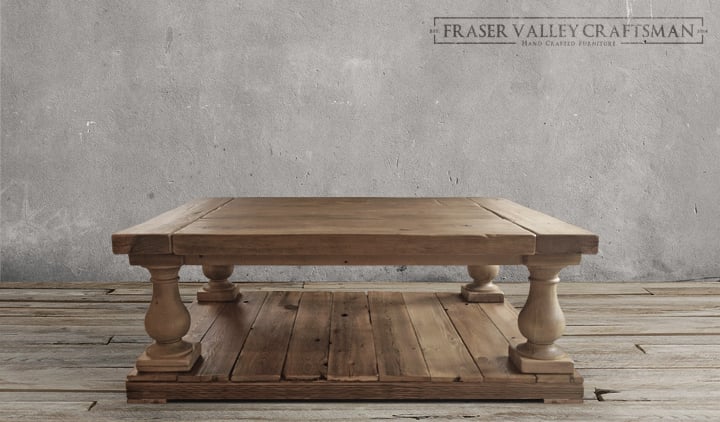
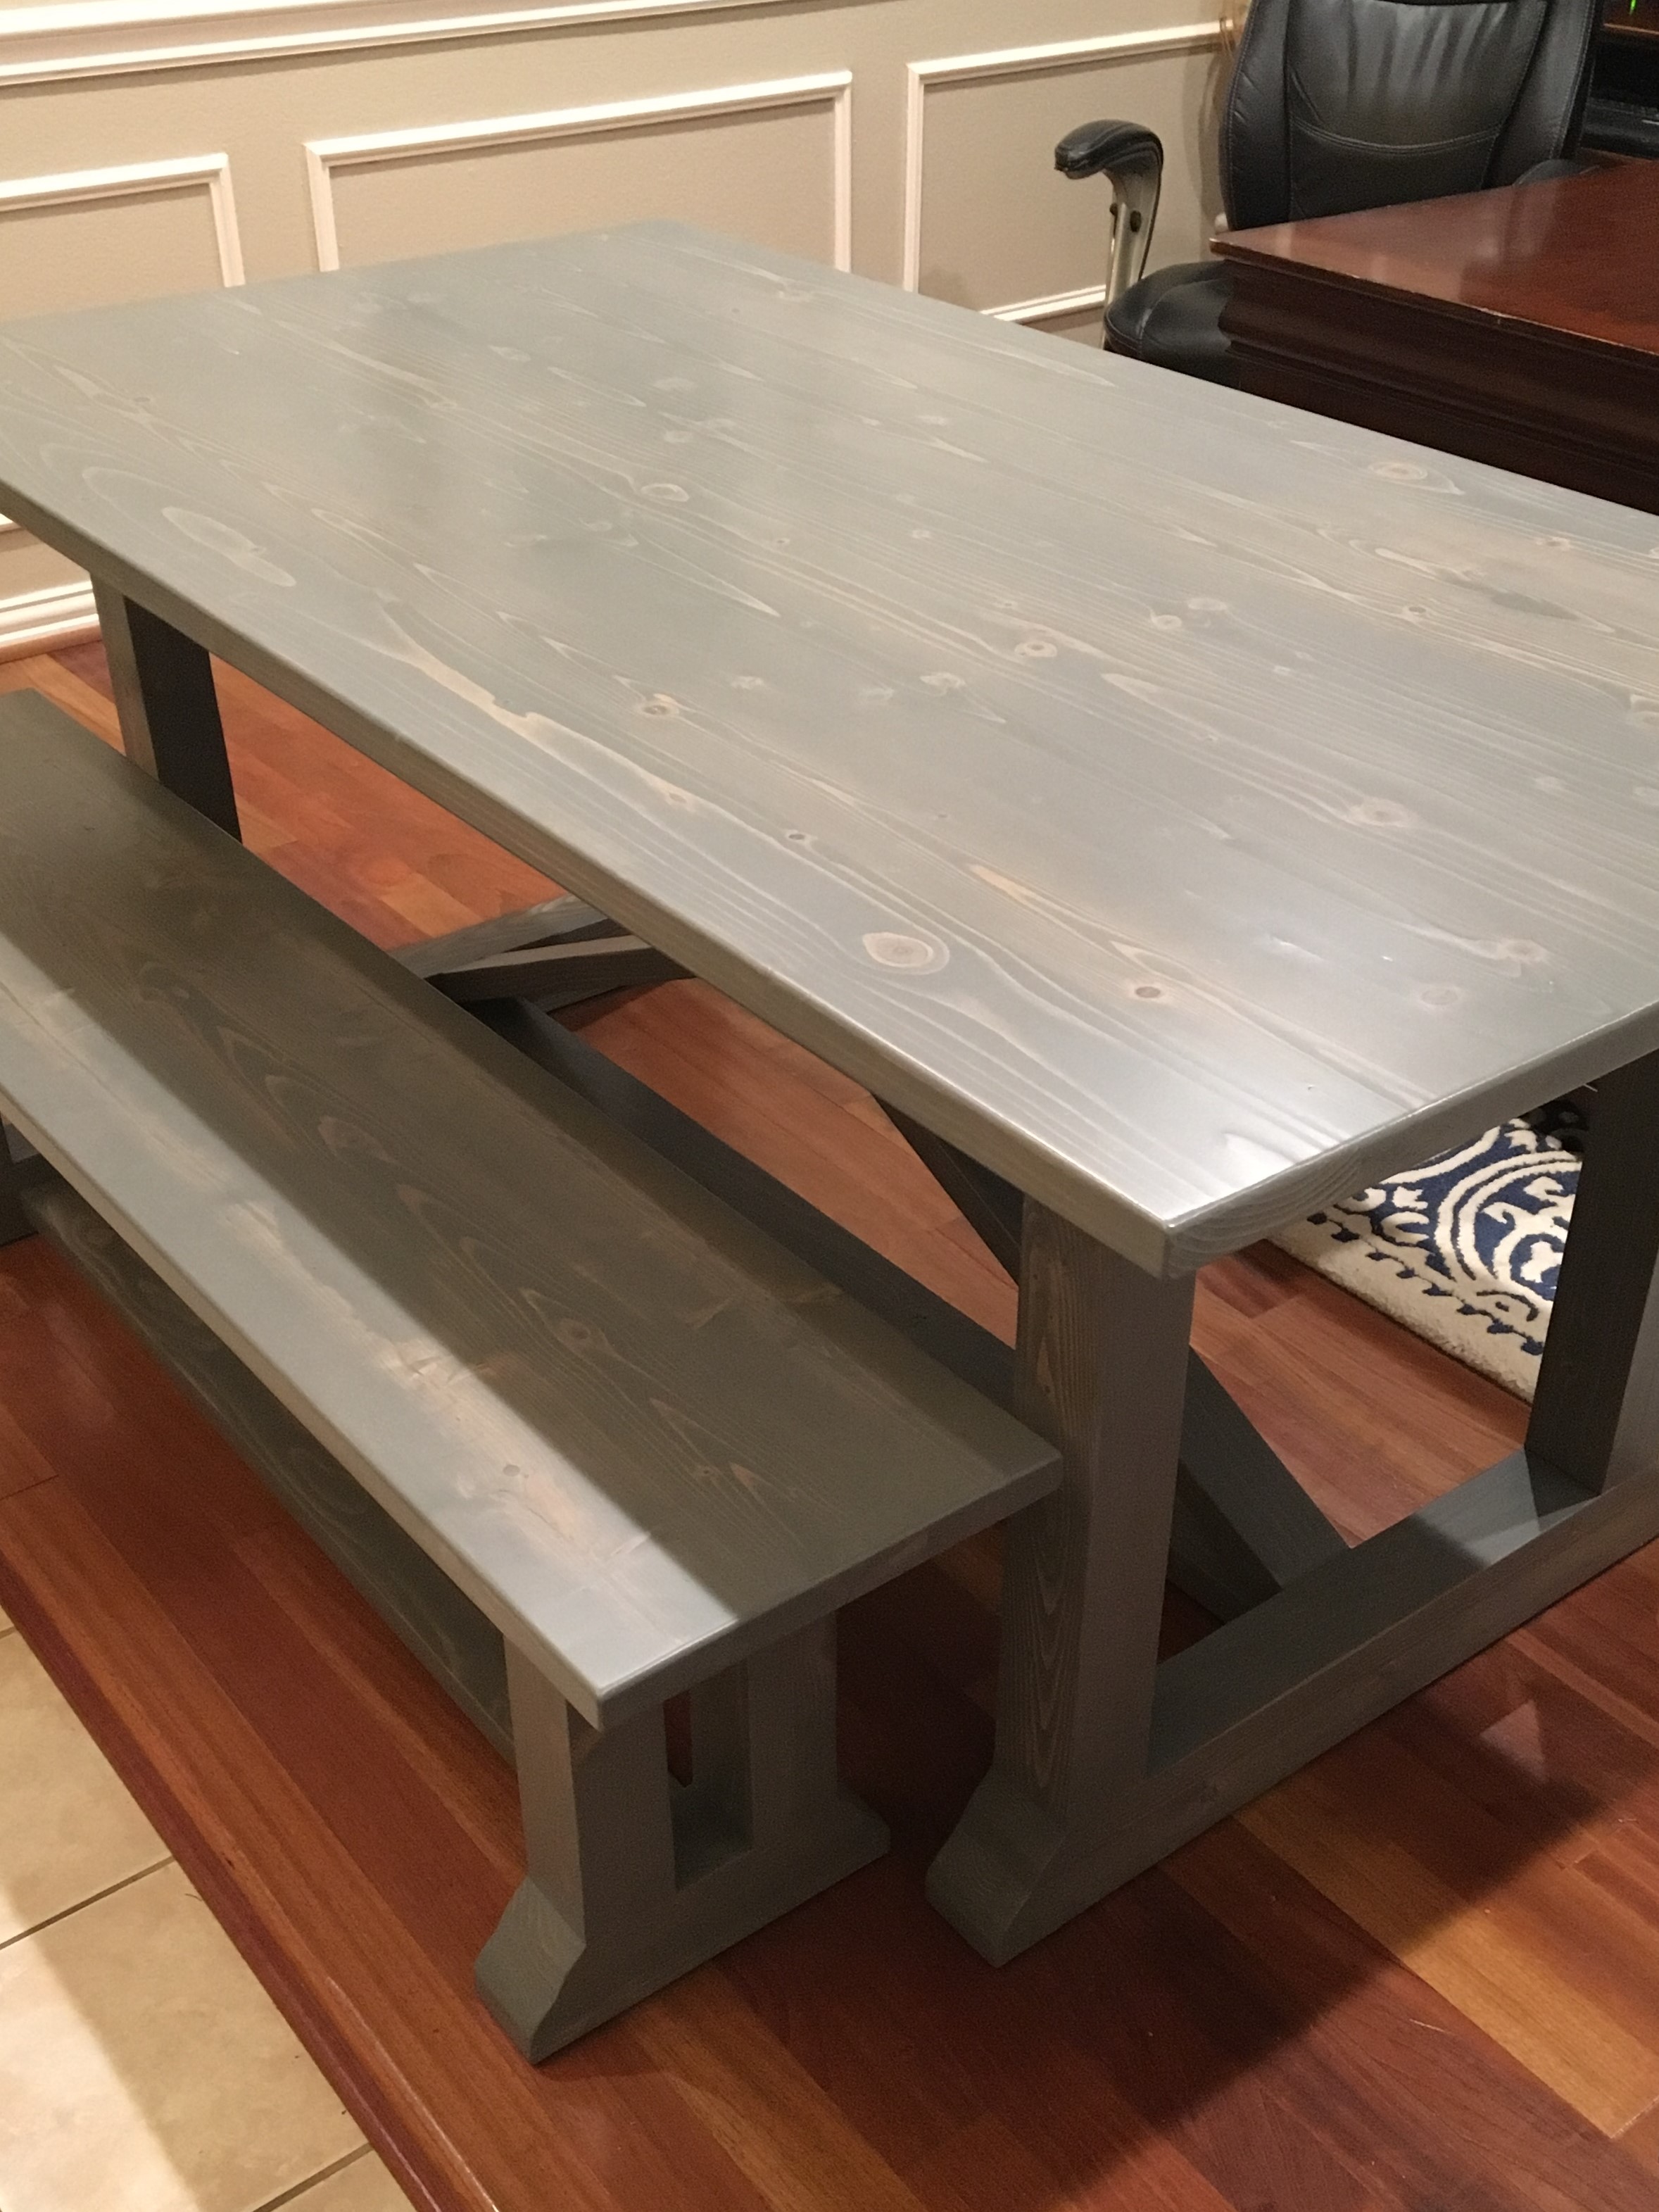
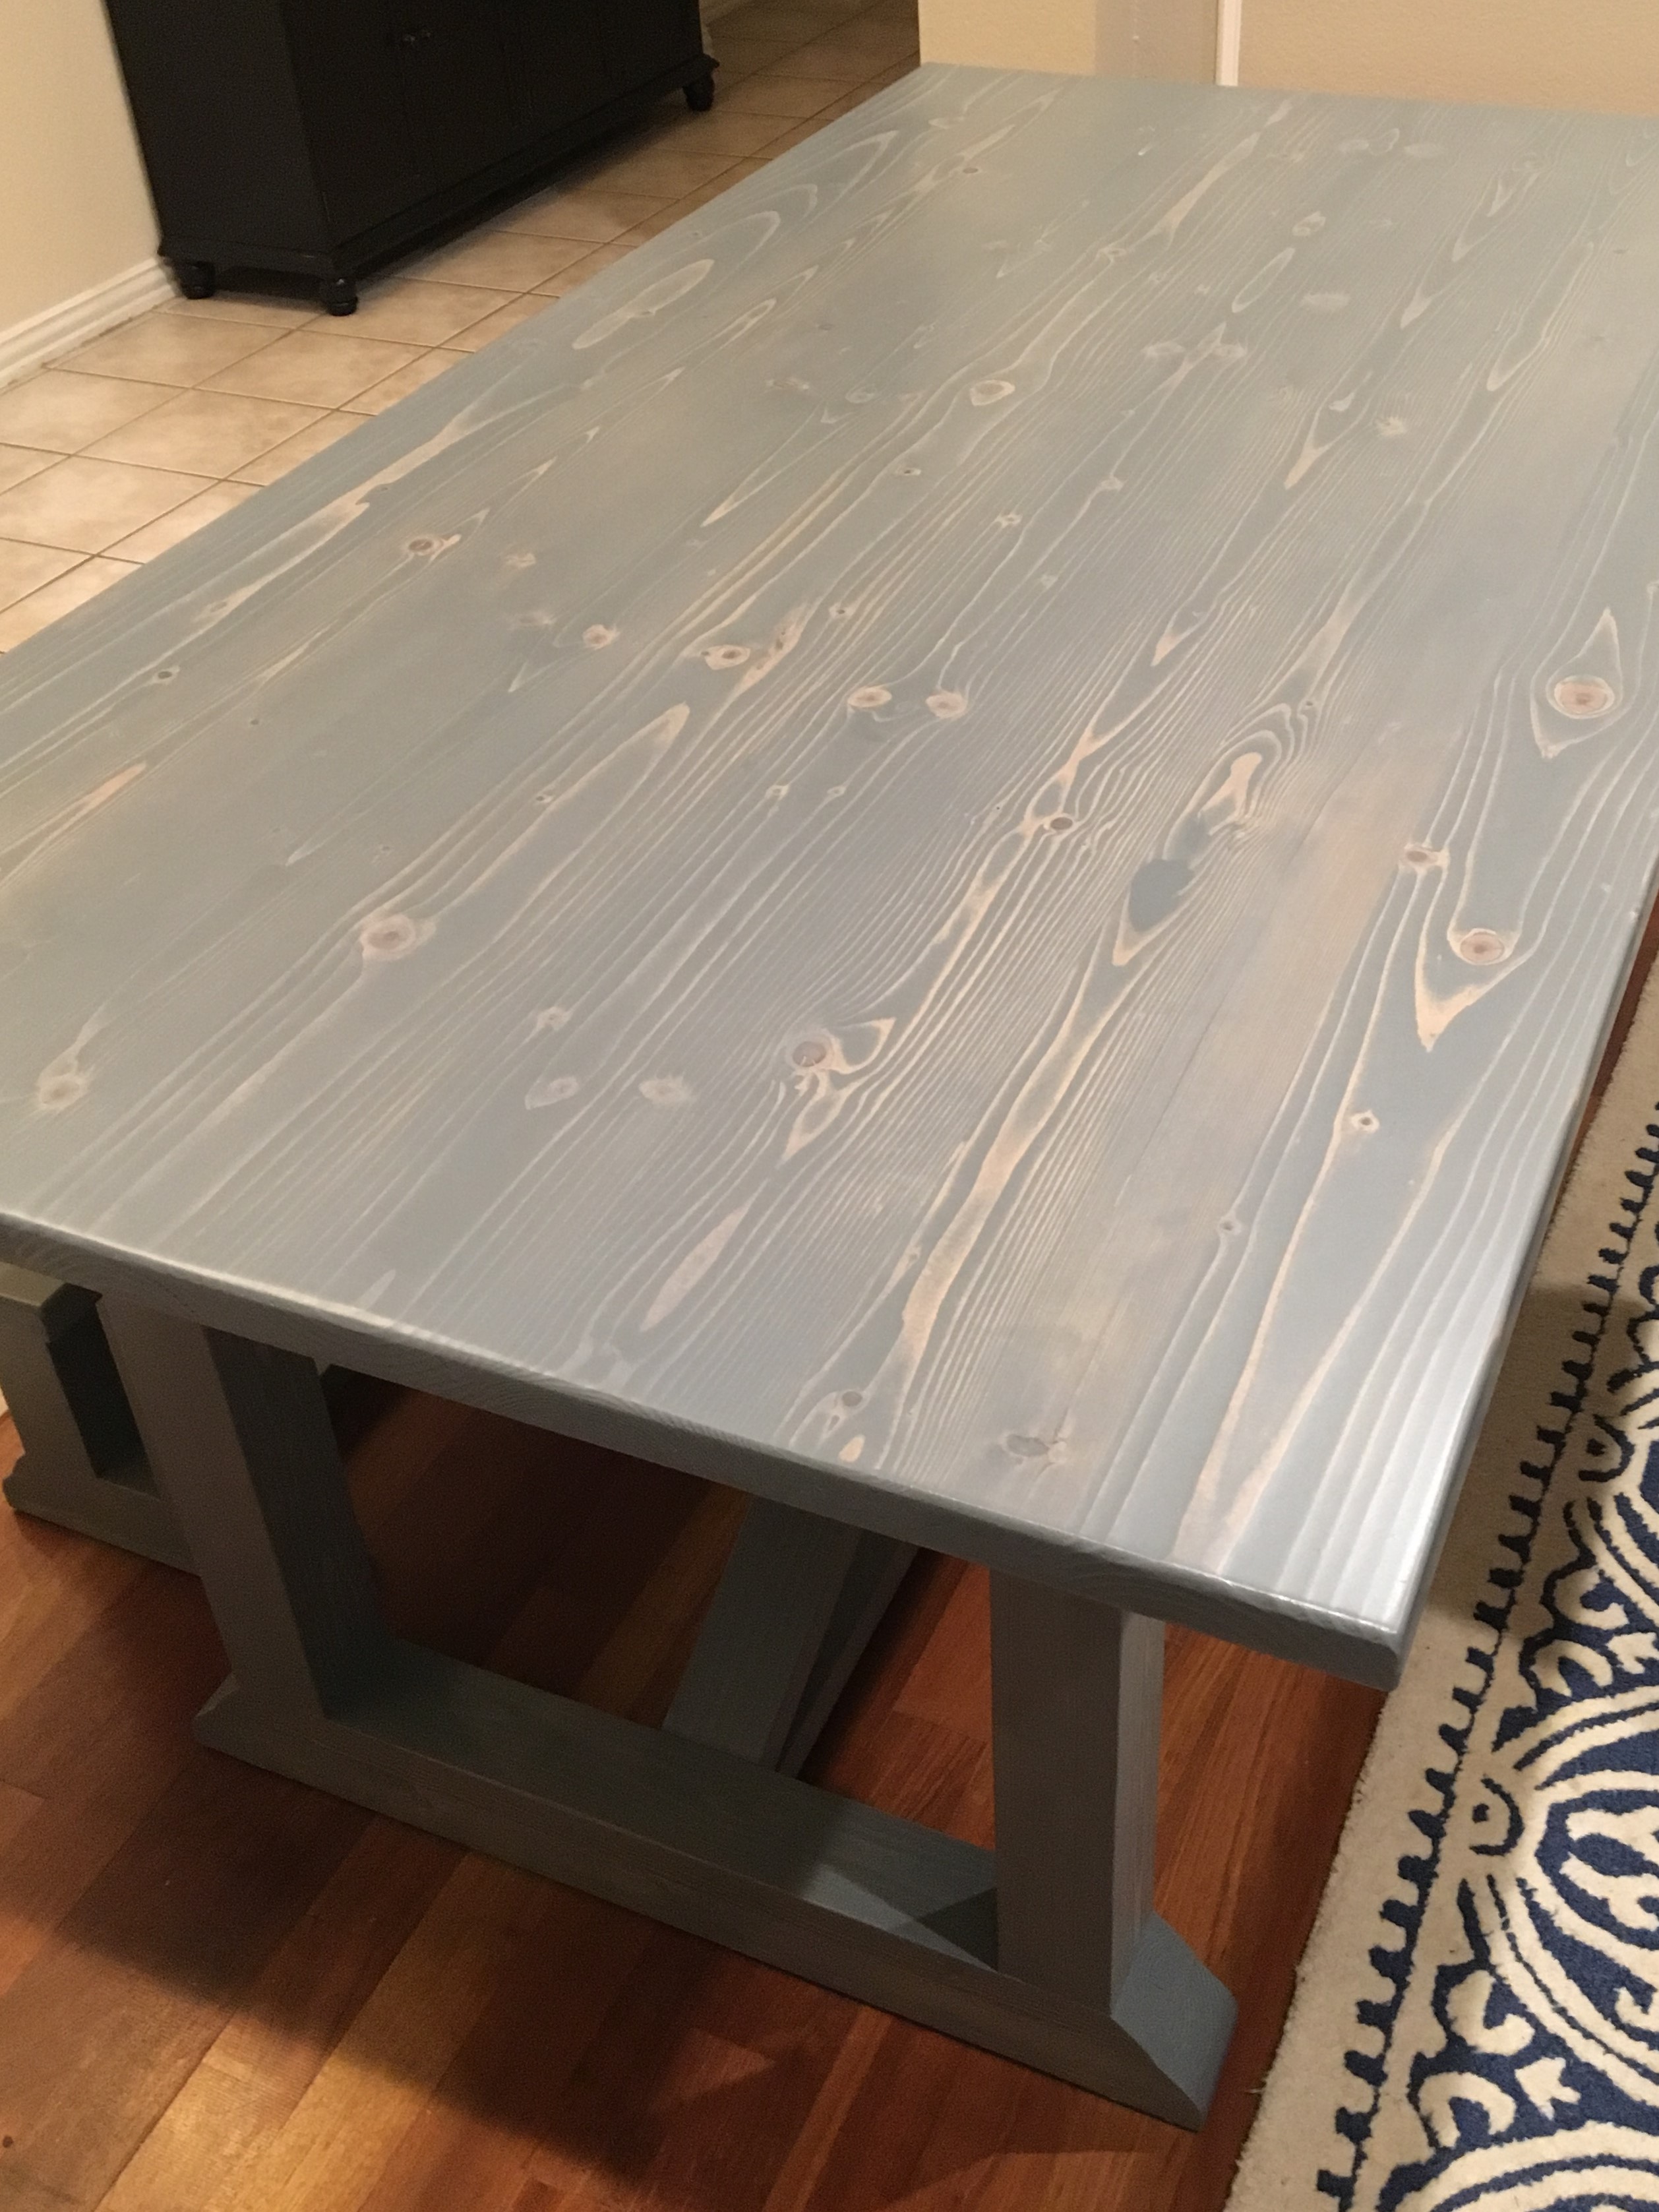
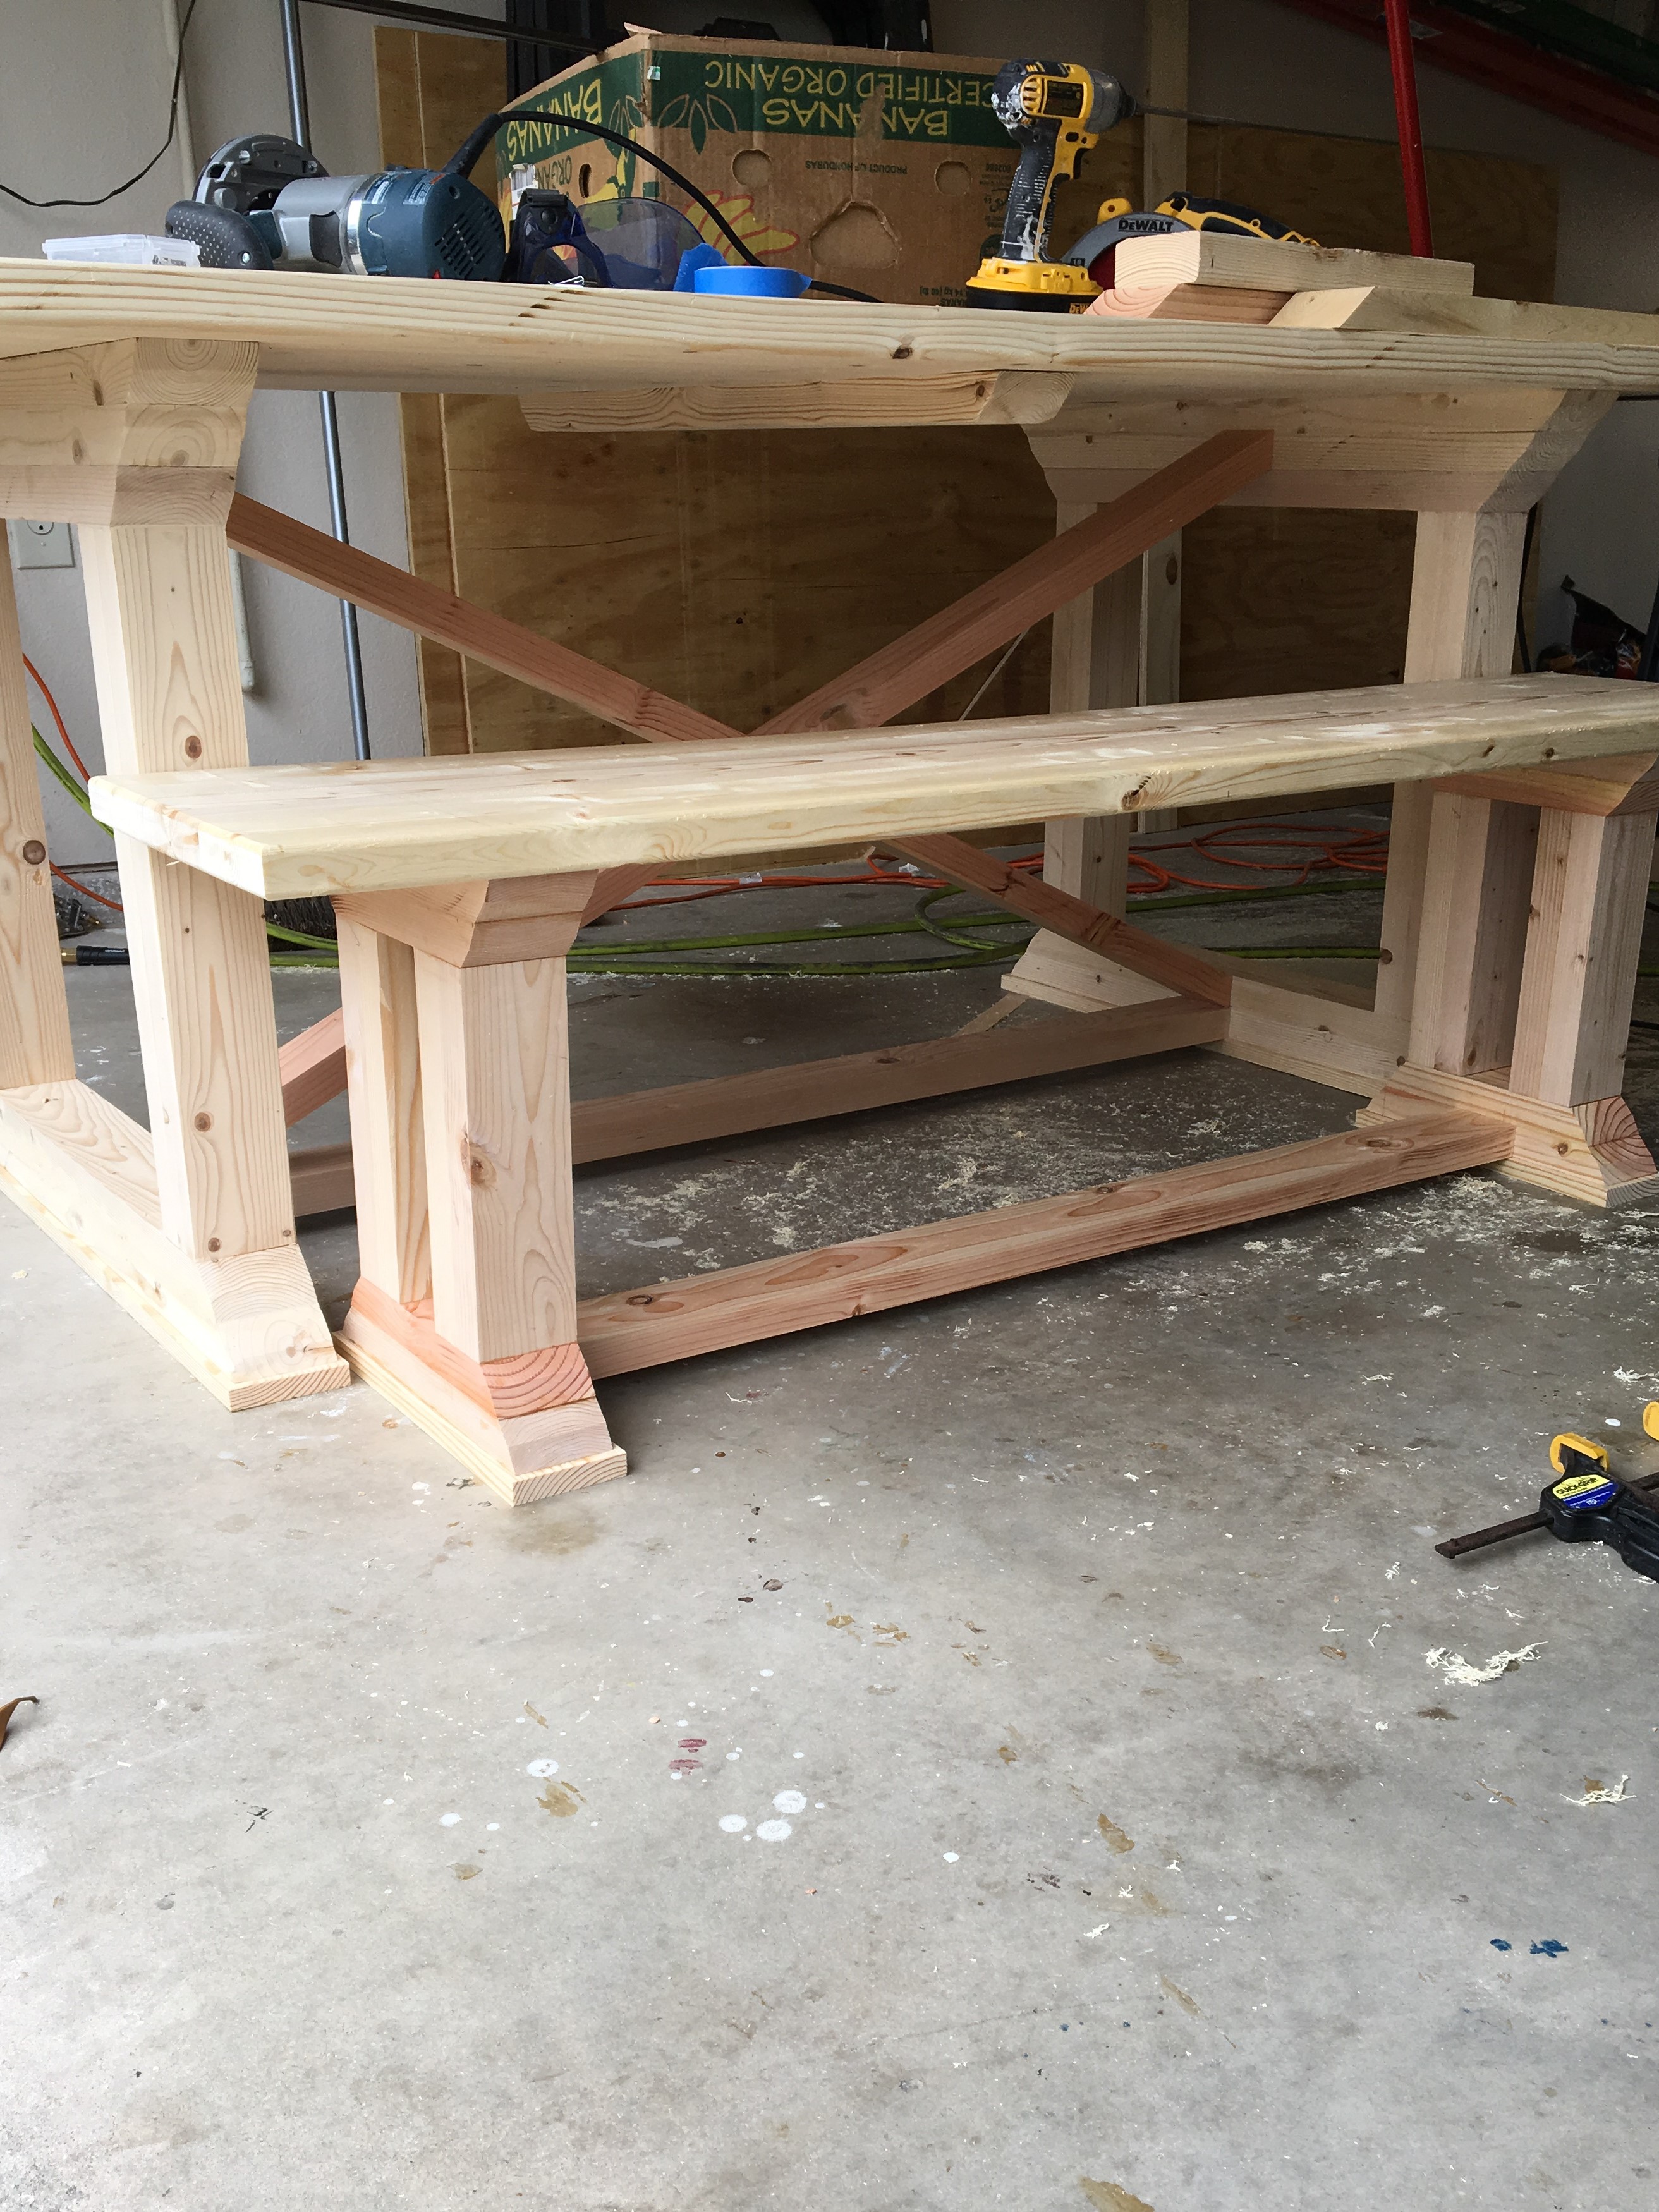
NEW Balustrade Coffee Table

Submitted by jhavinga on Wed, 02/25/2015 - 22:21

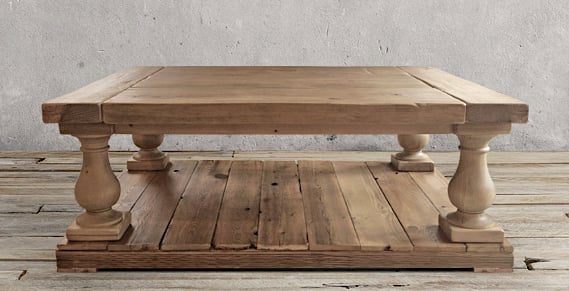
Here is the latest Table I have made. I cant get enough of this table design, the rustic bold feel blending with curved lines is awesome.

Built from Plan(s)
Estimated Cost
With reclaimed wood it was more than basic SPF at HD.
legs were $200 shipped to my door in Canada.
Wood was $125. Found from a local torn down barn! Very cool wood.
Stain/screws/glue $30.
Estimated Time Investment
Weekend Project (10-20 Hours)
Finish Used
My favourite combo! played with different levels of Weathered Oak and Special Walnut for each piece of wood so the whole table would flow together.
Recommended Skill Level
Beginner

Comments

I did it! A bench,

Submitted by Anonymous (not verified) on Thu, 05/25/2017 - 05:41

I've been doing only little projects here and there, so when I got an order for a bench, I was a little apprehensive, but of course I said YES!  I immediately started scouring the web for ideas on how to, and what the cost would be to build.  I came across Ana White's modern bench design and knew this was the one.  I priced out all the materials and gave my customer a quote which she, without hesitation, accepted.  The next day, I took a trip to the local lumber yard and purchased all I needed.  Now, here's where I messed up a bit. Like I said, I priced everything out before purchasing.  Well, I priced out the wrong 1x6s which threw me almost $35 over my original budget.  Womp womp, right?  I still made a little profit.  But this bench cost me $100 to build.  The customer ordered this bench for her garden and wanted it to be stained rather than painted.  So, the wood, the decking screws, waterseal, and the outdoor waterproof stain and sealer was my purchase for the build.  Totally worth it!  The bench turned out great!  I am delivering it to her in a couple of hours from now and I cannot wait for her to see it.  I think it turned out beautiful especially for my first!  Thank you, Ana, for making the design so easy to follow! 

Built from Plan(s)
Estimated Cost
$100
Estimated Time Investment
Weekend Project (10-20 Hours)
Finish Used
1 qt of BEHR Premium Padre Brown Semi-Transparent Waterproofing Stain and Sealer. I used a 2.5 inch stain/ paint brush to apply one coat. After 24 hrs, I then sprayed a coat of Thompson's WaterSeal Waterproofing Wood Protector on the entire bench.
Recommended Skill Level
Beginner

Potter Rack used for Coffee Mess

Basically, I was on the hunt for a bakers rack, but jumped on the site and saw this. I modified it a bit. Turned out cool with the decor.

Estimated Cost
150
Estimated Time Investment
Afternoon Project (3-6 Hours)
Recommended Skill Level
Intermediate

Comments

A Different Kind of Chunky

Submitted by TxDork76 on Fri, 04/12/2013 - 21:11

This was my first woodworking project.

The inspiration for the project came from the "Dark Mahogany Chase Chunky" headboard from World Market. At $300 (at the time) it was out of my price range. But after looking at it for a while, I decided I could do it myself.

I used and modified several of Ana White's headboard plans to come up with the final (rough) idea.

I used 3 2x3 boards for the frame, a 3/4" thick piece of plywood for the body (which I had cut at the hardware store) and a 1x2 to top the plywood. I was just going to paint the whole thing but I found these bamboo placemats and decided to incorporate them into the project. At $1 each why not? I used 3/4"x1/2" S4S Moulding for the grid.

the cost of materials was about $66 but I had enough plywood left over for another headboard.

Estimated Cost
About $55
Estimated Time Investment
Afternoon Project (3-6 Hours)
Finish Used
Rustoleum Painter's Finish 2x in dark walnut satin finish. Semi-gloss spray poly.
Recommended Skill Level
Starter Project

Comments

dinifam

Sat, 04/13/2013 - 10:07

Oh my goodness I so love this!!!!! Do you have more detailed directions/plans???? I want to make it!!

In reply to by dinifam

TxDork76

Mon, 04/22/2013 - 16:11

I really took a lot of ideas from different headboard plans from Ana's site and from what I could figure out about the headboard from World Market.

I used 1x3's at 48" for the sides and a 1x3 at 52" for the cross rail attached with glue and 2 2-1/2" PH screws (1 1/2" PHs) on each side. I also used a 1x2 at 52" to "cap" the plywood using just brad nails and glue

I had the 3/4" plywood cut to 52"x30" at the hardware store. The plywood started at 13.5" up from the bottom. It's attached to the side rails with 7 1-1/4" PH screws (3/4" PHs) per side.

The placemats I found were 18"x13" so 4 fit across just fine. I've also found other vinyl placemats w/ awesome designs that could work.

I used 3/4"x1/2" S4S Moulding to basically just cover the seems though I think any kind of small moulding could work. I used brad nails to attach them (next time I may do it from behind so there are no nail holes to fill).

Here's a picture of another headboard I'm making w/ a similar design but with a larger gap so the side rails are at 52" instead of 48". http://i.imgur.com/nGH369f.jpg http://i.imgur.com/N8ARznD.jpg

I'm painting this one as well. I think if I were going to stain it, I'd opt for a nice birch or oak plywood instead and do the wood conditioner first so the stain goes on a bit more even.

My woven backed bench

Submitted by jimboeri on Sun, 03/01/2015 - 16:32

My wife asked me to make a pair of these to go with the outdoor table I built

Built from Plan(s)
Estimated Cost
About NZ$300
Estimated Time Investment
Week Long Project (20 Hours or More)
Finish Used
Organoil, but I also used Metalex underneath to act as a preservative
Recommended Skill Level
Intermediate

Comments

MrCoffee

Fri, 05/15/2015 - 17:33

This bench came out great. I love the finish.

I am going to be building one of these soon. I have been trying to think of a clean way to attach the little "y" pieces without the back of the bench looking too messy. How did you attach yours?

Garden Enclosure with Custom Gate

Submitted by Anonymous (not verified) on Mon, 05/29/2017 - 09:54

I found the plans on the website last year but we never got around to building it.  So this year it was first on the list!!  I wanted a large enclosed garden because we had a hard time keeping our dogs out of our last boxed garden.  I followed the plans pretty closely, making minor changes to give us more room for planting. 


I did not use the corner wood pieces for bracing because I did not like how they looked.  Instead I used brackets made for decks that I can't see from the outside of the garden.  I also made a custom gate to mimic the custom railings I had made for our deck.  Added brackets to the outside for hanging baskets. Still needs to be stained and sealed.  Hoping to get that done next week.


Note:  I bought 22 2cubic feet bags of Miracle Grow Flower and Vegetable soil to fill the garden boxes.

Approximate costs were around $180.00 for wood/stain/gate hardware, netting and deck screws.

Approximate costs for the soil was $140.00.


I hope  

Built from Plan(s)
Estimated Cost
$180 for project
$140 for soil
Estimated Time Investment
Afternoon Project (3-6 Hours)
Recommended Skill Level
Beginner
Seasonal And Holiday

How to Build a DIY Garden Arbor with a Bench

Submitted by thediyplan on Fri, 06/18/2021 - 14:34

My brother-in-law planted a small grape plant in his backyard and wanted a trellis structure behind it for the grapes to climb on. He asked me to design and build it in the corner of his garden. After going through some designs, we decided to go with a corner arbor. When the project was complete, I created PDF plans on how to build a DIY Corner Arbor with a Bench that includes a trellis for the grapes to grow on.

See my website for additional pictures and how I've built it, TheDIYPlan.com

Estimated Cost
$850
Estimated Time Investment
Weekend Project (10-20 Hours)
Recommended Skill Level
Intermediate

She loves it!

Submitted by cnlhml on Sun, 04/14/2013 - 17:29

Took a weekend when I got time off of work. Would do things differently the next time and love the kreg jig. Will be buying the kreg jig clamps soon.

Estimated Time Investment
Weekend Project (10-20 Hours)
Finish Used
Stain and laquer
Recommended Skill Level
Beginner

Comments

Triple Bunk Beds

Submitted by hughes3627 on Tue, 03/03/2015 - 07:22

We needed a space saving alternative to individual twin beds...these were very simple to make. Our boys love them! We kept the same deminsions as the original plans and ended up having a little extra room on each bed for storage as well as toy storage under the second bed. Worked out very nicely and left space for the next project...a study station :)

Built from Plan(s)
Estimated Cost
About $230
Estimated Time Investment
Weekend Project (10-20 Hours)
Finish Used
Natural
Recommended Skill Level
Beginner

Comments

Tall Corner entertainment Unit

Submitted by Anonymous (not verified) on Thu, 06/01/2017 - 13:06

Loving this tall entertainment center to fit under my wall-mounted television!

The dogs cant knock over my photos anymore!!!!

Added some fancy trim pieces in the middle to match the trim on the bottom.  So sturdy and hides all my junk!

http://www.ana-white.com/2012/06/plans/tall-corner-media-console

Built from Plan(s)
Estimated Time Investment
Weekend Project (10-20 Hours)
Finish Used
fruitwood minsax stain
Recommended Skill Level
Intermediate

Entryway Bench and Storage Shelf with Hooks

My first project I made for someone else. My son and daughter in law needed this for their entry foyer. She knew I was making the shelf with hooks, but the bench was a surprise for her. Her reaction made it all worthwhile. She loves it!!

Estimated Cost
$120
Estimated Time Investment
Week Long Project (20 Hours or More)
Finish Used
Navy blue enamel
Recommended Skill Level
Intermediate

Comments

work apron

Submitted by vic b on Tue, 04/16/2013 - 18:59

I love this apron, perfect for hiding pencils from my husband.

Built from Plan(s)
Estimated Cost
$3
Estimated Time Investment
An Hour or Two (0-2 Hours)
Recommended Skill Level
Starter Project

Comments

My twist on the farmhouse bed.

Here is my spin on the Farmhouse bed.  I made the entire thing 8 inches taller, added a couple random pieces here and there, and stained it dark walnut.  I also modified the plans to use a box spring and bed rail fasteners to make it easier to take apart.

Built from Plan(s)
Estimated Cost
$250
Estimated Time Investment
Week Long Project (20 Hours or More)
Finish Used
I applied 2 heavy coats of dark walnut stain using a piece of cotton shirt as a rag. Just dip the rag in the stain and rub it into the wood going with the grain. I've found using a rag instead of brushes gets a more even coat of stain and goes is a lot faster. I didn't use any poly because I live in a log cabin in Alaska and wanted a more rustic look.
Recommended Skill Level
Beginner

Comments

Modified Clubhouse Bunkbed

Submitted by Anonymous (not verified) on Sun, 06/04/2017 - 18:39

I used the plan from the Clubhouse bunk bed and modified to look similar to a Mathy-by-Boles Treehouse Bunkbed.

Built from Plan(s)
Estimated Cost
$450
Estimated Time Investment
Week Long Project (20 Hours or More)
Finish Used
Primer and kid friendly paint. oh yeah...sanding. Lots and lots of sanding!
Recommended Skill Level
Intermediate

Full Length Mirror Sliding Beauty Storage Cabinet

Submitted by csihoratio on Tue, 07/20/2021 - 07:30

Great idea being my wife is not a hair person she really loves it.

Estimated Cost
$40
Estimated Time Investment
Afternoon Project (3-6 Hours)
Finish Used
primer and white paint
Recommended Skill Level
Beginner

Comments

Full Size Storage Beds - Extra Tall

Submitted by babysteps on Fri, 04/19/2013 - 17:43

When my sons outgrew their twin sized beds and primary colored room, I had already fallen in love with Ana's storage bed collection. I was happy to see that a full size bed was included in the plans. Building it yourself means you can adjust any plans to fit your room exactly, and I planned to squeeze storage out of every inch of their 11.5 foot wide room. The first adjustment I made was to make the headboard taller, so that their pillows would not rest against the small hutch with doors. I also added height to the cubby hutch, making it a 9 cubby unit. The entire bed unit is 92 inches tall. The center tall bookcase is actually two 47 inch tall units stacked. I have watched too many home improvement shows where tall units are built off site only to not fit up stairs or around corners. The center unit is 94 inches tall and 19 inches wide, filling the wall exactly with only an inch of wiggle room to spare. I also added drawers to the open cubbies in the bed base. This was my first time making drawers, but Ana has instructions on the site, so it was no problem.The sides of the bed base facing the walls are just open cubbies as in the original plan. Beadboard paneling faces the drawer fronts, cabinet backs and the face of the headboards. Did I mention how much storage these beds have? The hollow headboards are not accessible once the center bookcase was in place, but that didn't stop me from filling them up. I had 6 Rubbermaid bins (18 gallon) in our basement full of stored Hot Wheels, Little People and other sets. All of the contents fit in the headboards alone. I also put some large saved toys in the under bed cubbies that face the wall. Yes, the Little People Garage will fit! My favorite modification was added an extra crosswise 1x3 that ties together a large section of the slats that support the mattress. This makes an easy lid allowing that you can lift to access even more storage under the mattress. We store their camping gear and off season clothes under the mattresses. I can't total the hours, I worked on this project on and off for about 9 months. When the building was nearing completion I started looking for bedding so I could match the paint colors to the bedding. I painted all the plywood back panels before attaching them to the cabinets. This was especially a life saver with back of the 9 cubby unit, as there are four colors in this section. After painting, everything was glazed with Valspar Translucent Color Glaze in Mocha. When this layer was dry I coated everything with a protective coat of Minwax Polycrylic. If you are wondering about dark circles are at the top of the unit near the ceiling, I had a great idea to use solar landscaping lights up there for a soft lighting effect. It looked great for a few nights until the batteries wore out. There is not enough natural light in the room to charge them. They have since been replaced with a couple strings of cheap colored lights. They are shoved way back towards the wall where you can't see the wires, but are on a timer, so at night they give a nice glow on the ceiling.

Estimated Time Investment
Week Long Project (20 Hours or More)
Finish Used
All Paint by Valspar
Main Color: Homestead Resort Cameo White
Accent Colors to match Jacobson Bedding from JC Penney:
Gilded Pesto
Rusted Earth
Brown Velvet
Redstone Blue Spruce
Valspar Translucent Color Glaze in Mocha
Minwax Gloss Polycrylic
Gatehouse brand satin nickel hardware from Lowes
Recommended Skill Level
Intermediate

Comments

kelleer

Sat, 04/20/2013 - 07:42

This is AMAZING! I will be moving to HI soon and will not be able to take any of my furniture with me. Was concerned about storage and usability issues, but you have sent my concerns totally out the window. I also like the idea with the solar lights. Props to you !!!!!

Reclaimed modified providence bench

Submitted by Brad Wills on Mon, 03/09/2015 - 15:07

I have been holding a really cool farm pallet in the garage for 3 weeks.  I finally decided to use one of the slats with the 2x4 supports to make this bench.  Only 7.97 for a box of screws!

Built from Plan(s)
Estimated Cost
7.97
Estimated Time Investment
Afternoon Project (3-6 Hours)
Finish Used
Behr flat paint with varythane semi gloss
Recommended Skill Level
Beginner

Comments

Modified version of Rekourt table and bench

Submitted by Anonymous (not verified) on Thu, 06/08/2017 - 03:59

I'd built a table for my daughter and her roommates at college last year.  One of them is getting married this year and asked If I would mind building one for them.  They found a picture of this table someone had built and I tracked down your plans.  They needed it smaller so this one is 72" by 39" and I built the bench in a similar style.  


They wanted a smooth top (no grooves between boards) and no breaboard ends.  The table top wanted to warp a bit at the corners without the breadboards, so I imbedded some angle iron to keep it flat.

Estimated Cost
$200
Estimated Time Investment
Week Long Project (20 Hours or More)
Finish Used
Weathered grey stain from Varathane.. Minwax polycrylic water based
Recommended Skill Level
Intermediate

Outdoor Modern Sofa

Submitted by kazy on Sat, 07/31/2021 - 11:11

This was my first woodworking project. Ana made it look doable and I didn’t like any of the outdoor furniture offerings I could afford so I thought “why not”? I couldn’t find wood at any of the big box stores due to a severe wood shortage. Good timing on my part. As a result of the shortage the cost of the wood was higher (around $550 Canadian) but I did save around $200 by ordering from a local producer. And the wood I got was spectacular! I don’t think I’ll ever go big box again as there is no comparison. I ordered freshly milled pine which was air dried, from local Scierie Carson (Carson sawmill). I further air dried the planks in our barn, oiled them with boiled linseed oil and cut. I modified the plan slightly to add some posts in the arms and to lower the seat backs as the cushions I found were not as tall as Ana’s. I managed to find them on sale at Christmas time at a local Reno Depot (Quebec’s version of Rona, Lowe’s or Home Depot). The cushions cost $500 Canadian for 10 sets and believe me that was a deal. Over all it was not hard to do and I’m thrilled with the results. I have a gorgeous patio set that will adorn our farm deck for many years to come.

Estimated Cost
$1,000
Estimated Time Investment
Week Long Project (20 Hours or More)
Finish Used
Boiled linseed oil - easy to apply with rags. Repels water beautifully. Natural so not incredibly harmful to the environment. Brings out yellow tones in wood. Brings out fresh wood smell.
Recommended Skill Level
Beginner

Comments

Ana White Admin

Sun, 08/01/2021 - 11:20

Impressive to say the least, well done! Love your can do attitude and I know you are enjoying the fruits of your labor with this amazing set up!

Rustic Table Completed...just needs to be finished! So proud!

Submitted by Octlibre1 on Sun, 04/21/2013 - 16:51

Rustic table plans with slight modification of the width and the legs were mounted differently for a little added flair. So many finishes to choose from....

Built from Plan(s)
Estimated Cost
$115 for poplar wood and $100 for legs made by local artist from poplar
Estimated Time Investment
Afternoon Project (3-6 Hours)
Finish Used
None yet!
Recommended Skill Level
Beginner

Console with sliding doors

Submitted by skinnwork on Sat, 03/14/2015 - 01:05

I followed the Emersen Console plans, but with a few changes. The biggest in that I went with sliding doors because I didn't want the doors to open into the living room. This meant having the doors run between the face trim and a guide I tacked into the inside. I also adjusted all of the measurements to fit what I was planning on stuffing into it. I drilled a 3 inch hole in the bottom for all of the cords to run to the power bar and left a gap between the shelves and the back. I kept the wood light to contrast with my floor and painted the doors blue for a mid-century modern-ish feel.

Finish Used
Varathane Diamond finish and Behr paint (applied with a foam brush).
Recommended Skill Level
Intermediate

Comments

Karli

Thu, 07/23/2015 - 08:30

Hi , I've been looking a console with sliding doors , how did you install the guide? did you do it with a router?do the doors run in one same guide or there are 2 guides and one door runs behind the other? Thanks !