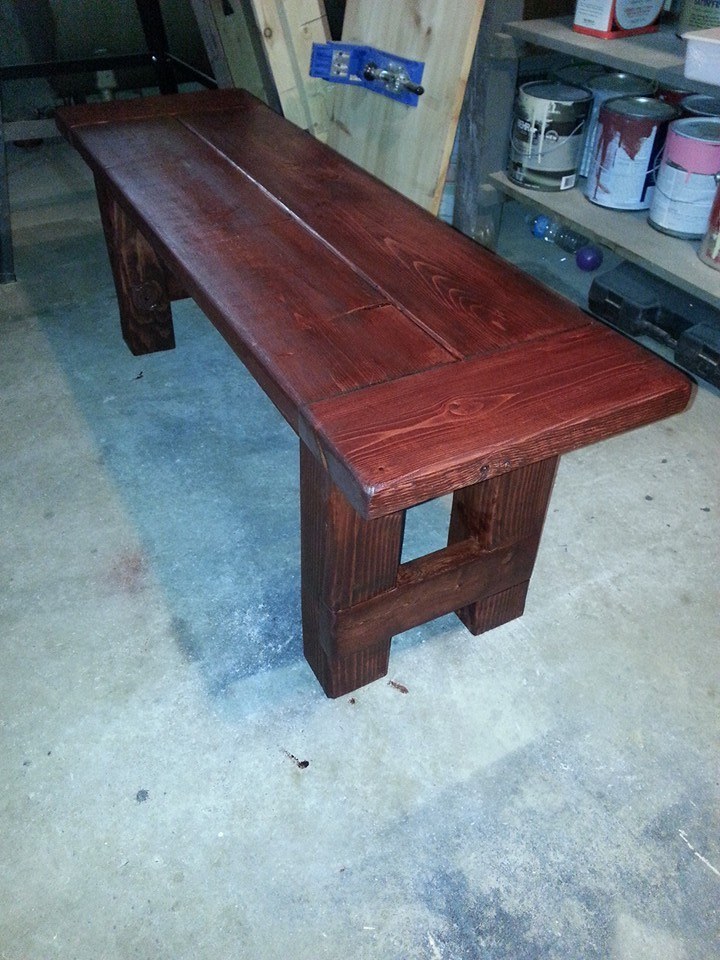
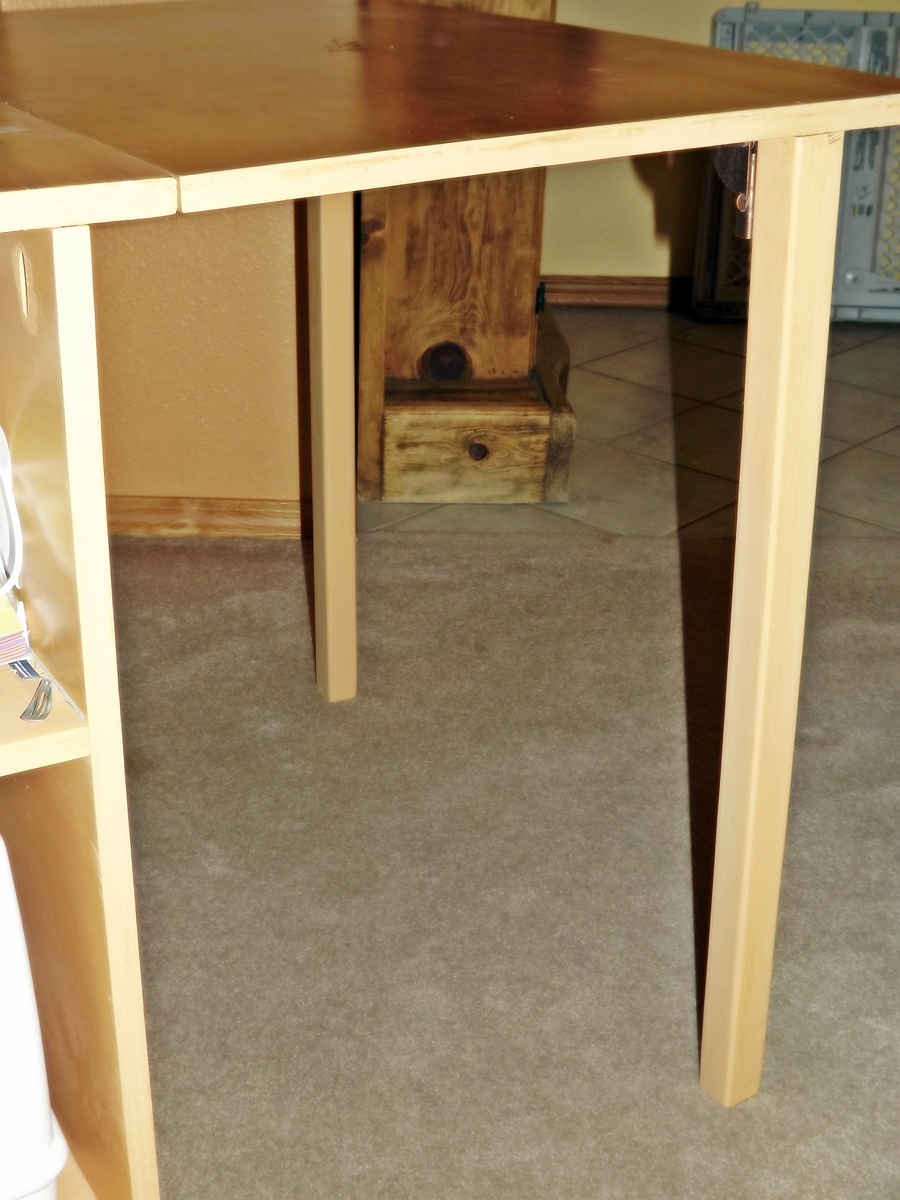
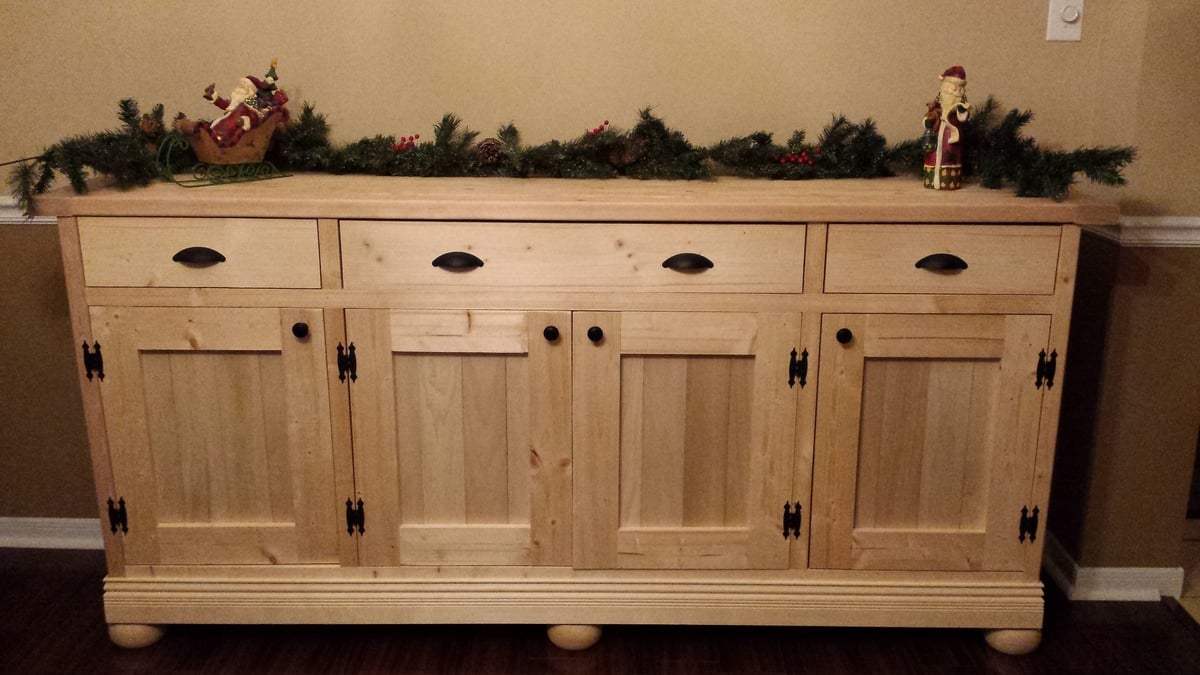
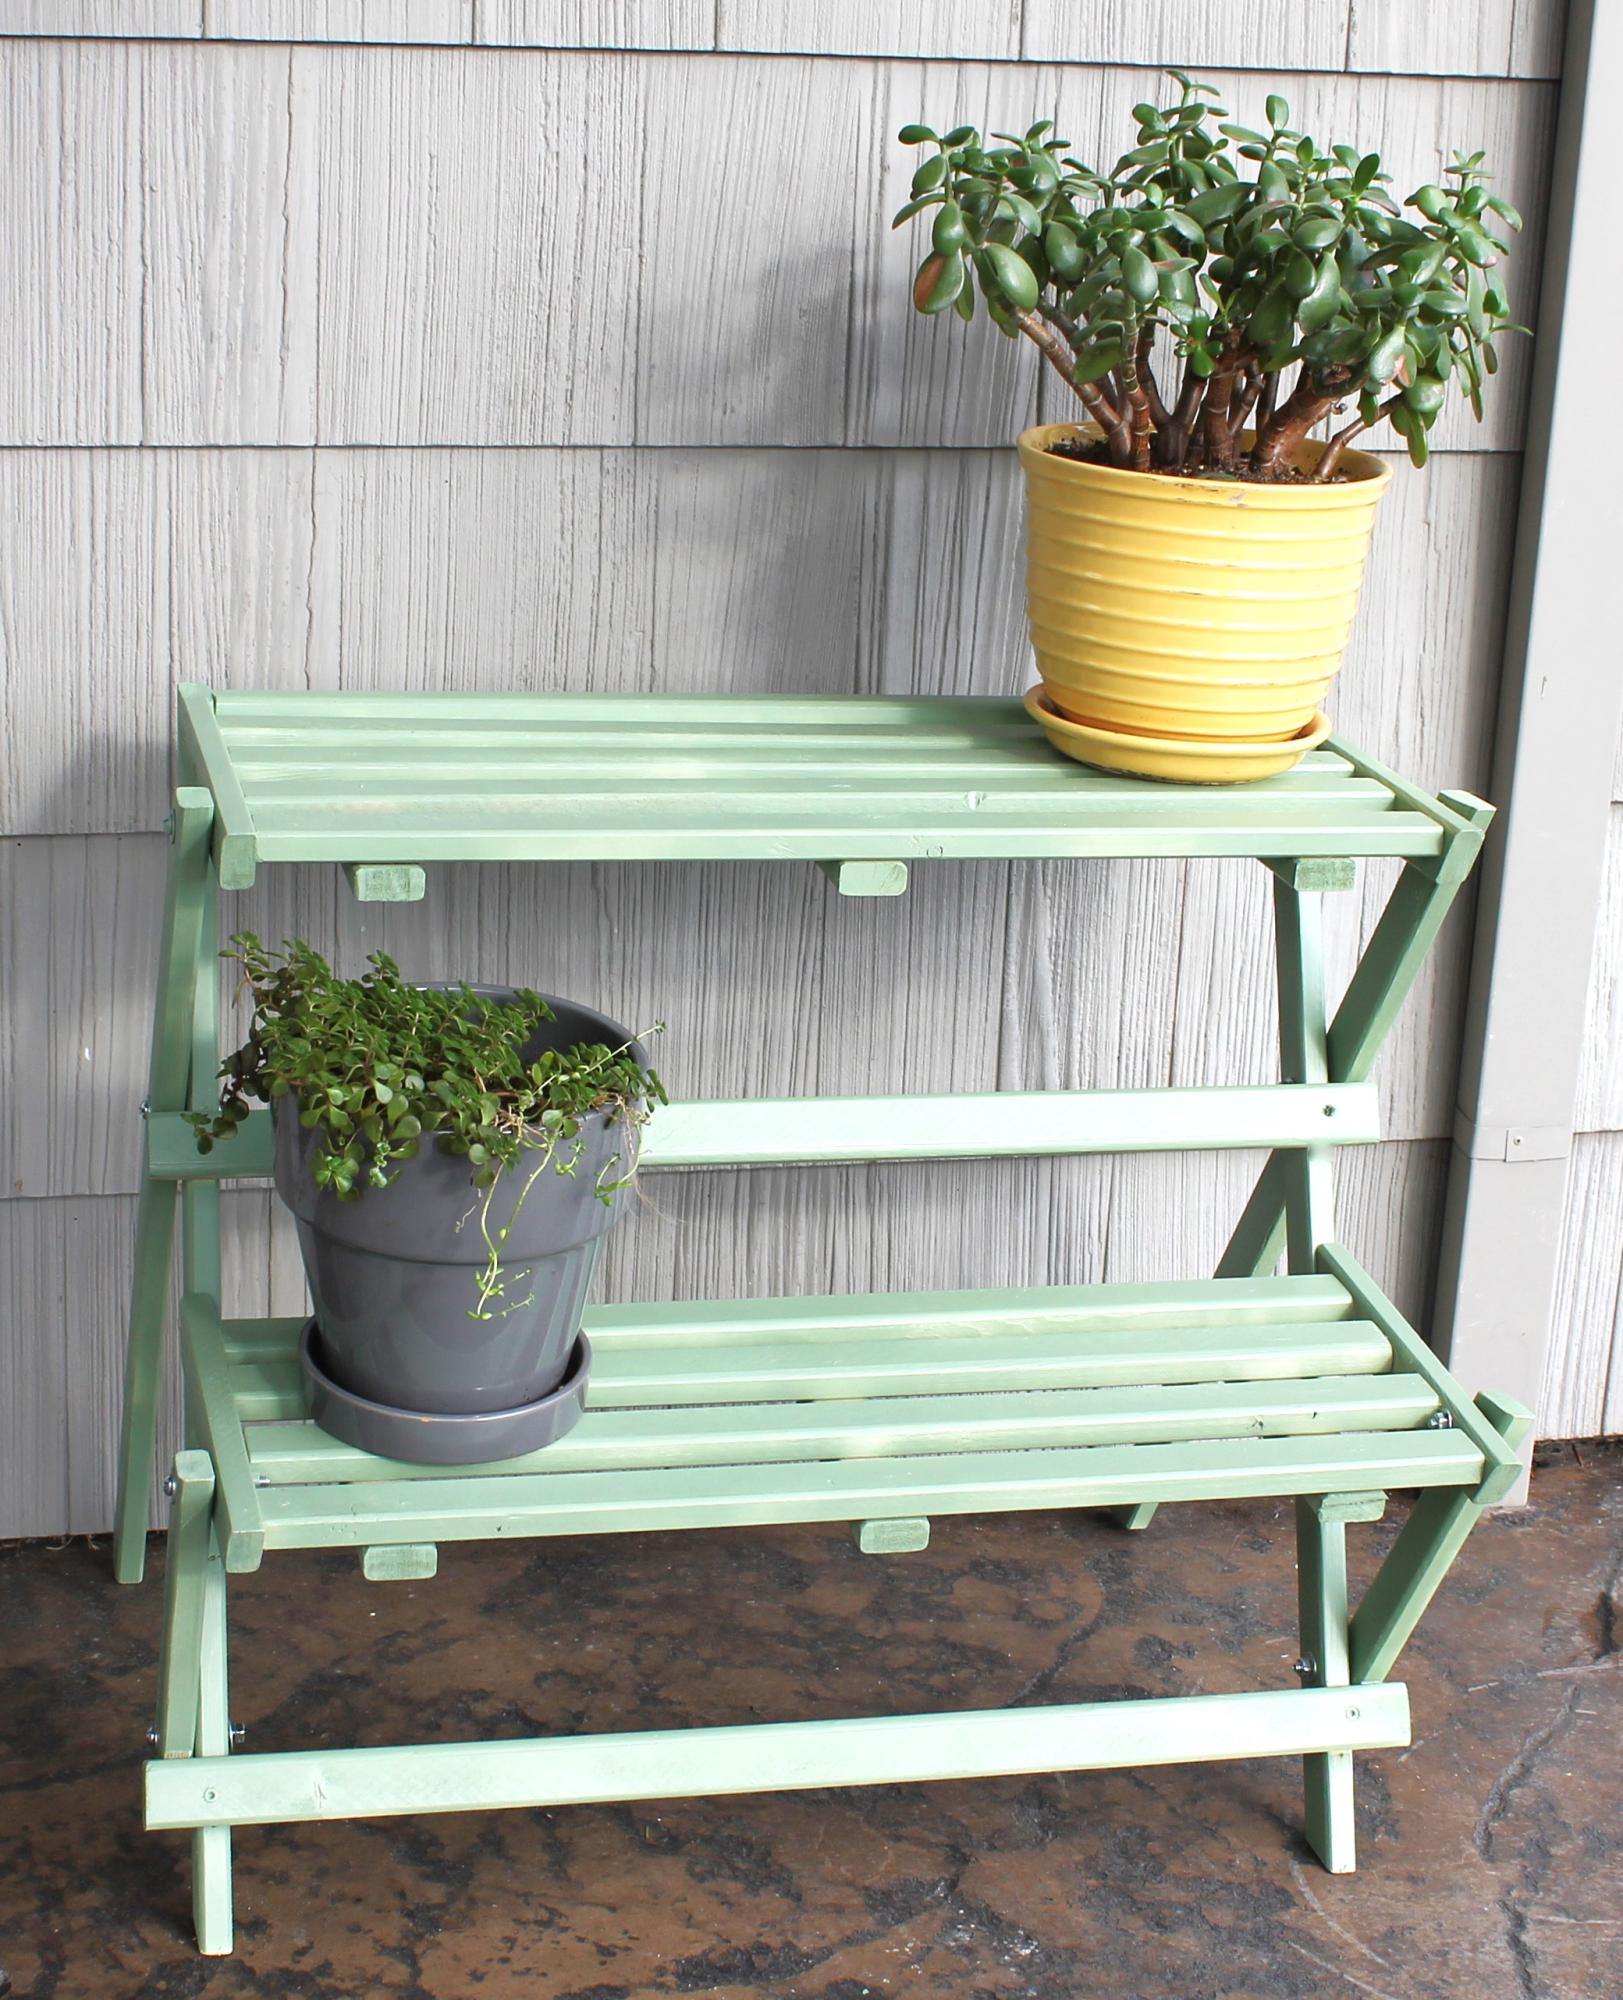
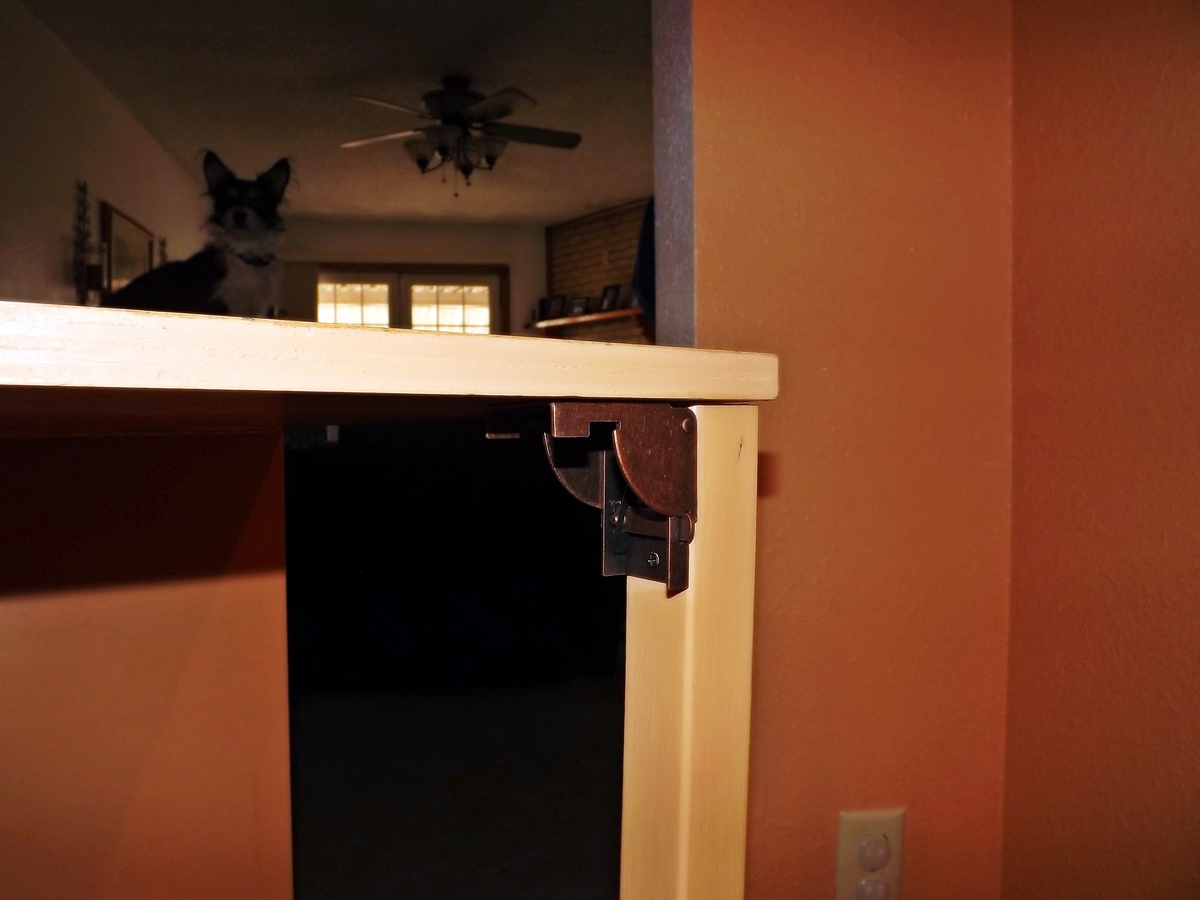
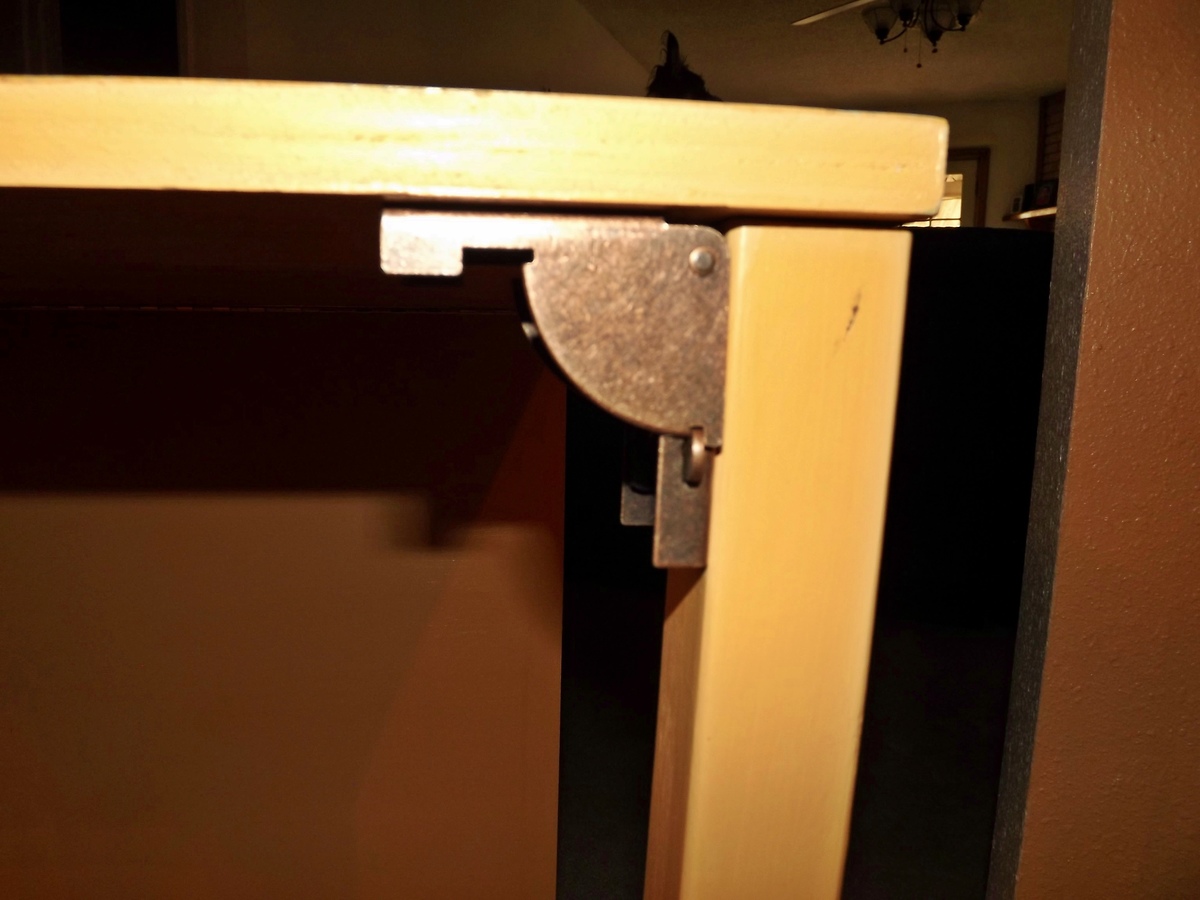
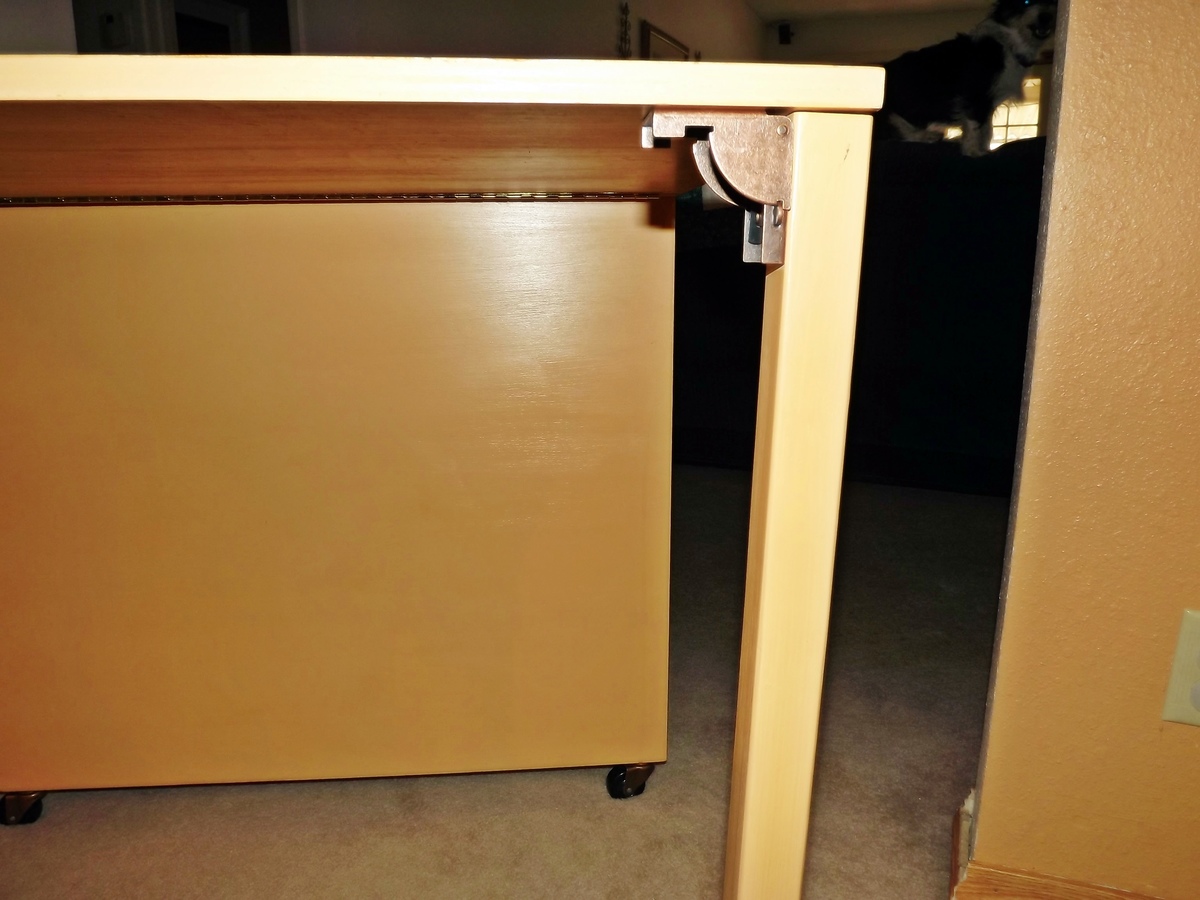
Community Brag Posts

Awesome Reclaimed Pallet Bench

Submitted by Me-go-Eco on Sat, 08/27/2011 - 11:01

Grabbed some pallets from a local tool shop which they were going to send to the landfill. Built us a pallet bench. We use it all the time. Very easy and fast to make. Just stacking like building blocks! Best part was it didn't cost a thing! Just a couple of screws and glue. Reduce, reuse, recycle, reclaim! You can do it too!

Follow my blog: http://me-go-eco.blogspot.com/

Follow me on Twitter: Me_go_eco

Estimated Cost
FREE!
Estimated Time Investment
An Hour or Two (0-2 Hours)
Finish Used
none
Recommended Skill Level
Beginner

Outdoor Side Table - Counter top

Submitted by mybartmart on Thu, 09/19/2013 - 01:27

This was made for a friend that wanted to cover a gas meter on the side of their house by their outdoor eating area. I built it counter-top high, with a faux hutch for the back. I really like the way it turned out, it covers the wall and works for serving food on all while looking great. I included a before picture and a picture of the table on its own.

Estimated Time Investment
Weekend Project (10-20 Hours)
Finish Used
Paint was provided to match their trim, the cedar was a custom mix I made.
Recommended Skill Level
Intermediate

Easy Heavy Duty Sawhorses

I build these from the plan for Heavy Duty Sawhorses. I preferred these for the thickness to match my butcher block desktop. 

Built from Plan(s)
Estimated Time Investment
An Hour or Two (0-2 Hours)
Finish Used
Navy Blue paint applied with roller and brush.
Recommended Skill Level
Beginner

My Rustic X Console table

Submitted by Anonymous (not verified) on Mon, 01/14/2019 - 11:11

I decided to give this a go after checking out the plans months before, and my kitchen table/floor and my foyer became my workshop and assembly area, and my dogs were absolute angels letting me do the work. This table completely transformed my living room from what it was before. I think it took me a total of two weeks to complete this table, after work and during the weekends.

Built from Plan(s)
Estimated Cost
Less than $100 in wood
Estimated Time Investment
Week Long Project (20 Hours or More)
Finish Used
Minwax weathered grey for the base and Minwax Old American for the top
Recommended Skill Level
Starter Project

Comments

Classic Adirondack Chairs - modified arms

Submitted by Anonymous (not verified) on Wed, 11/09/2022 - 19:53

I used plans from the classic Adirondack chairs and modified the arms for a wider width to place cups/glasses on them. I also curved the top as well. It was a fun project and took about a day and a half, off and on. Thank you!

Built from Plan(s)

Comments

Puppy's Toy Crate

Submitted by takahler on Wed, 08/31/2011 - 11:39

My brother announced a few weeks ago that he was going to be on the search for a new Golden Retriever puppy. Well the hunt is over and he gets to bring the puppy home today. I decided to make the puppy a "Welcome to the family" toy box. I wanted to paint it but was out voted by my kids. They liked the natural pine look, but I felt it needed a little something more. Therefore, a couple of days ago I purchased letters at Hobby Lobby, painted them and nailed them to the front of the crate from the inside out.

My sons and I also got the puppy some new toys to put in the box. We get to deliver it to her tonight. Can't wait to meet her! I posted a picture of the puppy at the bottom of this post. Isn't she cute?

Built from Plan(s)
Estimated Cost
$2.00--I on ly had to buy one 1x4. The rest I had in scraps
Estimated Time Investment
An Hour or Two (0-2 Hours)
Finish Used
just a coat of polyurethane.
Recommended Skill Level
Beginner

Comments

bcubed

Wed, 08/31/2011 - 12:16

Both the puppy and the crate.. What a wonderful idea for a new puppy.. will learn soon that thats where all the goodies are kept.. Best of luck to the new puppy "dad".. great work "auntie"..

StacieM

Sat, 09/03/2011 - 10:41

Our dogs toys are always all over the place and this is a great idea to have the toy box on casters! This will be going on my to-do list. Thanks for the post!

Farmhouse table- love it!

Submitted by DogDoc25 on Sat, 09/21/2013 - 13:26

I made this table because I have a very small house and needed a table that was more of a compact size. This table was perfect for that. I also love the farmhouse style. Originally, I didn't realize how much my screws were going to show on the outside, but I actually like how it looks, with the mix of hardware and wood. This table is very heavy and thankfully ended up sturdy! I used a compound miter saw (which I LOVE!) to cut the wood for this project which made it a lot faster than cutting with my jigsaw like I started out with. I bought the wood from home depot, and it took about a whole afternoon to cut the wood, sand, and construct and then about 2 more hours to stain and put the polycyrlic coats on. I did have a little trouble getting the legs on by myself since I had to hold them in place while I was screwing them on, and it was awkward and more difficult than if I had someone to help me hold them while screwing them on. But overall, not too difficult and love how it turned out!

Estimated Time Investment
Day Project (6-9 Hours)
Finish Used
1 coat of wood conditioner- let it dry for about 30 minutes
1 coat of minwax dark walnut, (which I loooove) let sit for 20 minutes then wiped off, let that dry overnight
2 coats polycrylic
Recommended Skill Level
Beginner

2x4 Desk

Submitted by new2wood on Sun, 11/29/2015 - 20:26

Modifications adopted from two other posters.

Built from Plan(s)
Estimated Cost
$37
Estimated Time Investment
Weekend Project (10-20 Hours)
Recommended Skill Level
Beginner

Farmhouse Bed

Submitted by Anonymous (not verified) on Thu, 11/24/2022 - 12:51

Using your plans, I built this king size farmhouse bed and console table.

Built from Plan(s)

Comments

Seasonal And Holiday

Bunk Bed from Simple Bed, modified

My husband modified the Simple Bunk Bed plan by Margjack and built this bed on weekends over the last month. He first built the four head boards and then went on to design his own railing and ladder. I liked how Margjack created more height and identical beds, especially if/when we use them as individual beds instead of a bunk bed.

After priming and painting all pieces, we assembled the bed in our sons' bedroom. A slide show of the assembly can be found at:

http://vimeo.com/27997563

Estimated Cost
$300.00
Estimated Time Investment
Week Long Project (20 Hours or More)
Finish Used
Primed and then painted.
Recommended Skill Level
Intermediate

Comments

river4250

Sun, 09/04/2011 - 09:13

Looks amazing, and I'm totally in love with that color! Great choice.

Tregg Istre (not verified)

Wed, 02/15/2012 - 06:11

I was wanting to know if you could get me the plans to this particular bunk bed? We really like it very much!

Tregg

Wed, 02/15/2012 - 06:24

We are interested in building this bunk bed for our girls is there any way we can get the plans?

Margaret Kubiszyn (not verified)

Wed, 03/14/2012 - 06:22

Tregg - I just used the Simple Bunk Beds plan from Ana (http://ana-white.com/2010/01/plans-how-to-modify-the-simple-bed-to-a-bu…) which is a modification of her Simple bed plan (http://ana-white.com/2009/11/plan-by-request-simple-bed-twin-sized.html)
I further modified it by making 4 headboards instead of 2 headboards and 2 footboards. I fashioned a ladder attached perpendicularly to the side instead of an angled one.
If you look at Ana's plans it should make sense.

Guest (not verified)

Fri, 03/30/2012 - 20:07

I love this, and like others I particularly like the extra height created by doing 4 headboards instead of 2 footboards for the top bunk...my question, though, is how high are your ceilings? I am afraid that if I do this there won't be enough room for the person in the top bunk in our house! Yours looks like it fits just fine, though! :)

Patricia Mandli (not verified)

Sat, 07/21/2012 - 12:49

I LOVE this color! Do you remember (or could look at the can) the name of it and where you bought it? Thanks so much!

wotto

Mon, 03/17/2014 - 08:59

link from vimeo isn't working. Is it still available?

Gaby Kitchen Island

After looking through Ana's plants for months (MONTHS), I finally decided to tackle a project that I desperately needed: a kitchen island. I have almost no counter space in my kitchen and couldn't bring myself to spend the money to put in a new set of lower cabinets or a kitchen island at the size I was looking for.

I found the door for just $20 at a local junkfest and debated turning it into a dining table or an island. I finally settled on island and took to stripping off the layers and layers of paint and stain. I modified the Gaby Kitchen Island plans to fit my nearly 8-foot door, and decided not to recess the 2x4 shelf supports (mainly because I didn't have a saw). However, I did buy a mini-Kreg jig and am shocked at how easy it was to use, and how great the seams look.

I had all of the wood cut to length by the lumber yard, so that saved me a bit of time, and no one charged me a cent to do all the cutting. And if you can believe it, everything was square!

For the legs, I used Minwax Wood Finish in Red Oak. I chose not to stain the top because I loved the color of the natural wood and wanted to see all the little flaws and defects. I then used 2 coats of Minwax Fast-Drying Polyurethane in Gloss on the top, and in Satin on the legs.

Finally, to add some support (the door is VERY heavy), I used L-brackets to attach the door to the frame.

Built from Plan(s)
Estimated Cost
$200 (wood, door, stain, finish, screws, sandpaper...)
Estimated Time Investment
Weekend Project (10-20 Hours)
Finish Used
Minwax Wood Finish in Red Oak
Minwax Fast-Drying Polyurethane in Gloss
Mixwax Fast-Drying Polyurethane in Satin
Stain was applied by rubbing it on with old towels. Polyurethane was applied using a good, natural bristle brush.
Recommended Skill Level
Intermediate

Dining room table and bench

Although I didn't use a plan from this site, I do have Ana to thank for giving me the confidence to go alone and build this from a drawing that my wife drew up. All of my previous builds were from plans on this site so to make this from scratch without any help makes this my favourite build to date.

Table

Top: 2x12s

Aprons: 2x6s. Trim purchased from Lowes

Legs: Purchased from Lowes

Fake drawers: 1x4 ripped to size. Knobs purchased from Lowes


Bench

Top: 2x12

End sections: 1x10 (may replace with 2x10)

Aprons: 2x4


Chairs were purchased separately. (I'm not that confident yet)

Estimated Cost
$200
Estimated Time Investment
Week Long Project (20 Hours or More)
Finish Used
Minwax Honey stain and 3 coats of polyurethane for the table and bench tops. 3 stage latex chalk and wax for the 'shabby chic" finish.
Recommended Skill Level
Intermediate

Comments

gpsmith

Sun, 12/06/2015 - 06:03

Hi,


This looks lovely, just what I'd like to do. Do you mind sharing where you found the plans or if you're a creative whiz, send some photos of the underside so I can see how you constructed it?


Thanks,

Mike Millington

Mon, 12/07/2015 - 07:38

I didn’t use any plans for this. My wife sketched out the design she wanted and I decided to go it alone. This is the first time I’ve built something from scratch without help and it was surprising easy to put together.

This is completely put together with the Kreg jig. The table top is made up of 3, 2 x12s attached together with pocket hole screws. I cut the 4 aprons and attached those to the legs also with pocket hole screws. To give extra support I attached 2, 2x4 cross braces between the longer aprons. The table top was then screwed in place with pocket hole screws through the aprons and 2” screws through the 2 braces.

For the fake drawer fronts, I cut them to size and routed the outer edges to round them off. I then attached the knobs and screwed the drawers in place through the back of the aprons. Finally, I attached trim to the bottom of the aprons. The knobs and trim were bought from Lowes.

The bench was made in a similar way. The top is made from a piece of 2x12, 2x4s for the aprons, the end sections are 2x10s and I used a jigsaw to cut out the arches. All attached together with pocket holes. I then added a 2x2 support beam through both ends and attached matching trim to the aprons.

Hope this helps.

end tables

Submitted by Anonymous (not verified) on Wed, 01/23/2019 - 17:07

I made the back the same as the sides, the top has router edge and the drawer has a front that was routered.

Recommended Skill Level
Intermediate

Comments

First Project- loft bed stairs/new rail

Submitted by Christa on Tue, 09/06/2011 - 19:04

Prior to this my only experience with any power tools was wood shop in middle school and to my recollection I don't think we ever used them.
My daughter really wanted a "big girl bed" that was off the floor. I needed more storage in her room, so the steps seemed like a great idea & her kitchen set is huge so putting it under the bed would give it a place. So I proposed to my husband that he could buy all the power tools he wanted if he would teach me to use them & help me build the bed. He also added that we should use the old ikea loft bed thats been collecting dust for over 5 years & we started.
We altered the plans so that the steps are free standing with only the top step bolted into the bed and each smaller step bolted into the larger one it is next to. The top step unlike the others isn't a flip top but a closet for all the dress up to stay in.
I admit I can not give a time frame for this project we started building at the beginning of the summer but things kept coming up so the steps spent most of their time collecting dust.
This past weekend we decided it needed to get done before the first day of school so we painted and bolted the steps which took about two days (because the paint needed some time to dry). We tackled the new railing rather quickly labor day morning when the hubby brought a piece of an shelving unit that has never been used out of the garage and showed me how perfect it would be for the new railing. He cut it to size then we bought a 12ft piece of poplar to fit into the precut groves in the unit for the slats. We used plastic screw pieces (sorry I have no clue what they were called) in the predrilled shelving unit holes to hold the slats in place. We screwed the new railing into the preexisting bed, hung some ikea flower lights and the wall and we were done.

Estimated Cost
200
Finish Used
For the steps we used white paint and the slats for the rails we found stain that were both in my mom's garage that she had no use for.
Recommended Skill Level
Beginner

Knock off Besta Burs Desk and benches

Submitted by c-e-fogus on Thu, 09/26/2013 - 06:05

My husband asked me to make a desk or table for a new co-worker at his office. Of course I started browsing Ana's plans. I came across this Ikea knock off table and thought the design was simple. He also wanted me to make a bench seat. But really, how many adults like to sit together on one bench? So I made two little benches of the same design as the table. I changed the plans up a bit to make it smaller and did not put in a drawer. But overall I was very happy with how it turned out. One major thing I learned on this project is that you have to be careful with products that claim they are stainable which really are not. I used some Elmer's wood filler on the first version of the table top to fix up the knots in the wood. I sanded it down and then applied the stain. Huge mistake. The wood filler did not take the stain even though the tube and the elmer's website claim it will. So I had to scrap that top and start over. Second time I decided to leave the knots as they were hoping the poly would fill them in a bit. It did fine.

I ripped down my 2x4's to 3 inches to get the squared corner look of the design. I used 1x4's for the apron and 1x6's for the top. Final measurement was 48 inches long, 22 inches wide and about 31 inches high. Bench was 18 inches long, 14.5 inches wide and just over 17 inches tall. Bench seat was 2 pieces of 1x6 with a 1x4 in the middle. I used only pocket hole screws and wood glue for the table (2.5 inch on legs 1.25 inch on apron and top, holes under the short bottom 2x4 piece and to attach the apron to legs and top to apron) For the bench I used pocket holes and screws for the frame but had to use finishing nails and glue to secure the top to the bench. (again, had to play with the wood filler mess.)

Estimated Time Investment
Day Project (6-9 Hours)
Finish Used
Minwax Dark Walnut stain and Minwax Satin Quick Drying Poly.
Recommended Skill Level
Beginner

Bristol Blue Jean Lounge Chairs

Submitted by Ekoed on Wed, 12/09/2015 - 11:13

This was my first build, and the instructions were great. I ended building two of them for our porch. The strength of the chairs following the plans is perfectly fine. We have used them every day for the past 6 months and have had no problems. The base cushions were re-claimed from an old couch someone was throwing away. We ripped the old covers off, and my girlfriends mother sewed $9.00 shower curtains over top of them. (Purchased at walmart) The backs are just 4 inch foam purchased from Hobby Lobby. The stain was "blue jean". We love these chairs. Thanks Ana.

Built from Plan(s)
Estimated Time Investment
Weekend Project (10-20 Hours)
Finish Used
Blue Jean
Recommended Skill Level
Beginner

Storage bed - Twin

Submitted by Anonymous (not verified) on Wed, 01/30/2019 - 12:41

I made this bed from Ana's http://www.ana-white.com/2011/09/farmhouse-storage-bed-storage-drawers.

We have an abundance of Ash wood here (result of Emerald Ash Borer). Although the bed is very heavy, it'll sure last! I made a few changes from Ana's plans only as I had dovetail jig etc for drawers.

Estimated Time Investment
Week Long Project (20 Hours or More)
Finish Used
Minwax Walnut stain and Minwax polycrylic finish
Recommended Skill Level
Intermediate

Shiplap Fireplace

Submitted by Anonymous (not verified) on Tue, 12/20/2022 - 19:10

We did the Easiest Shiplap Fireplace in a weekend, thanks to Ana’s plans. I convinced my husband to help me build this by upgrading to a 65” tv and adjusting the dimensions. We also built a shelf behind the tv to hold our receiver and Xbox that is hidden when the tv is in place. Ana’s tutorial was amazingly and gave us the confidence to finally build something that’s been on our list for 2 years!

Comments