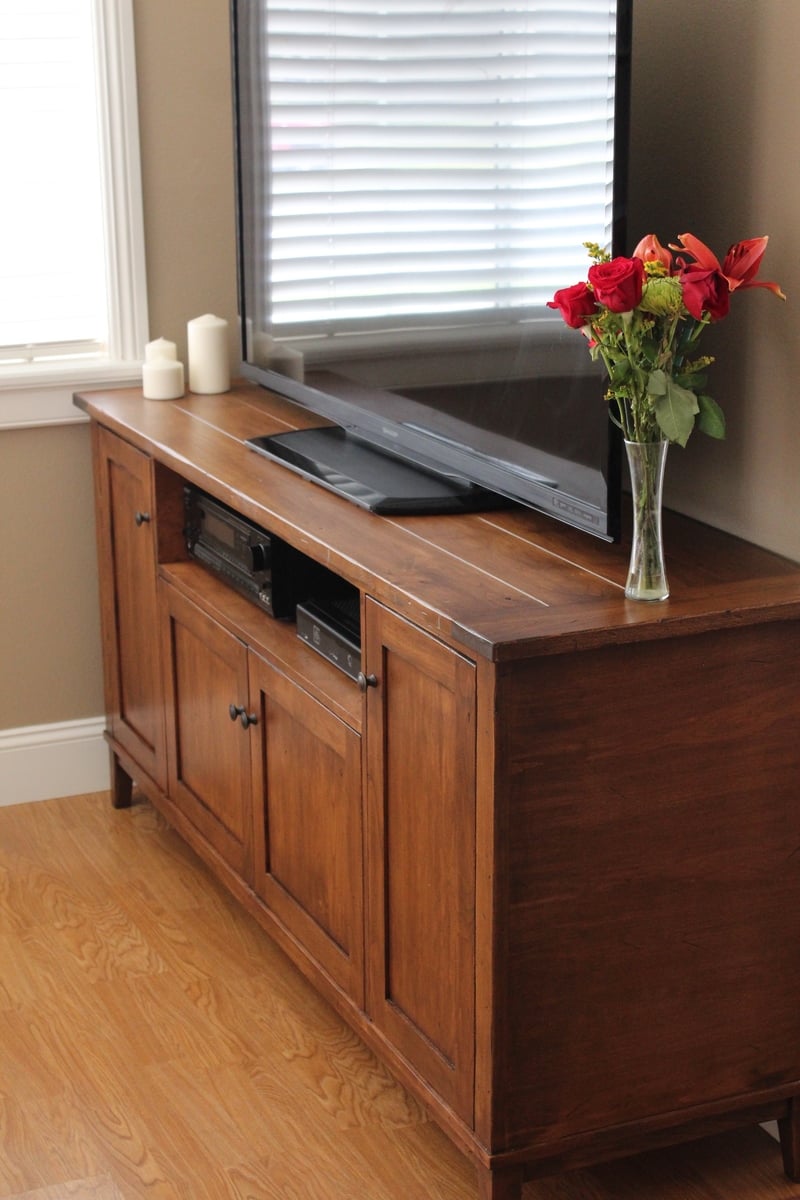
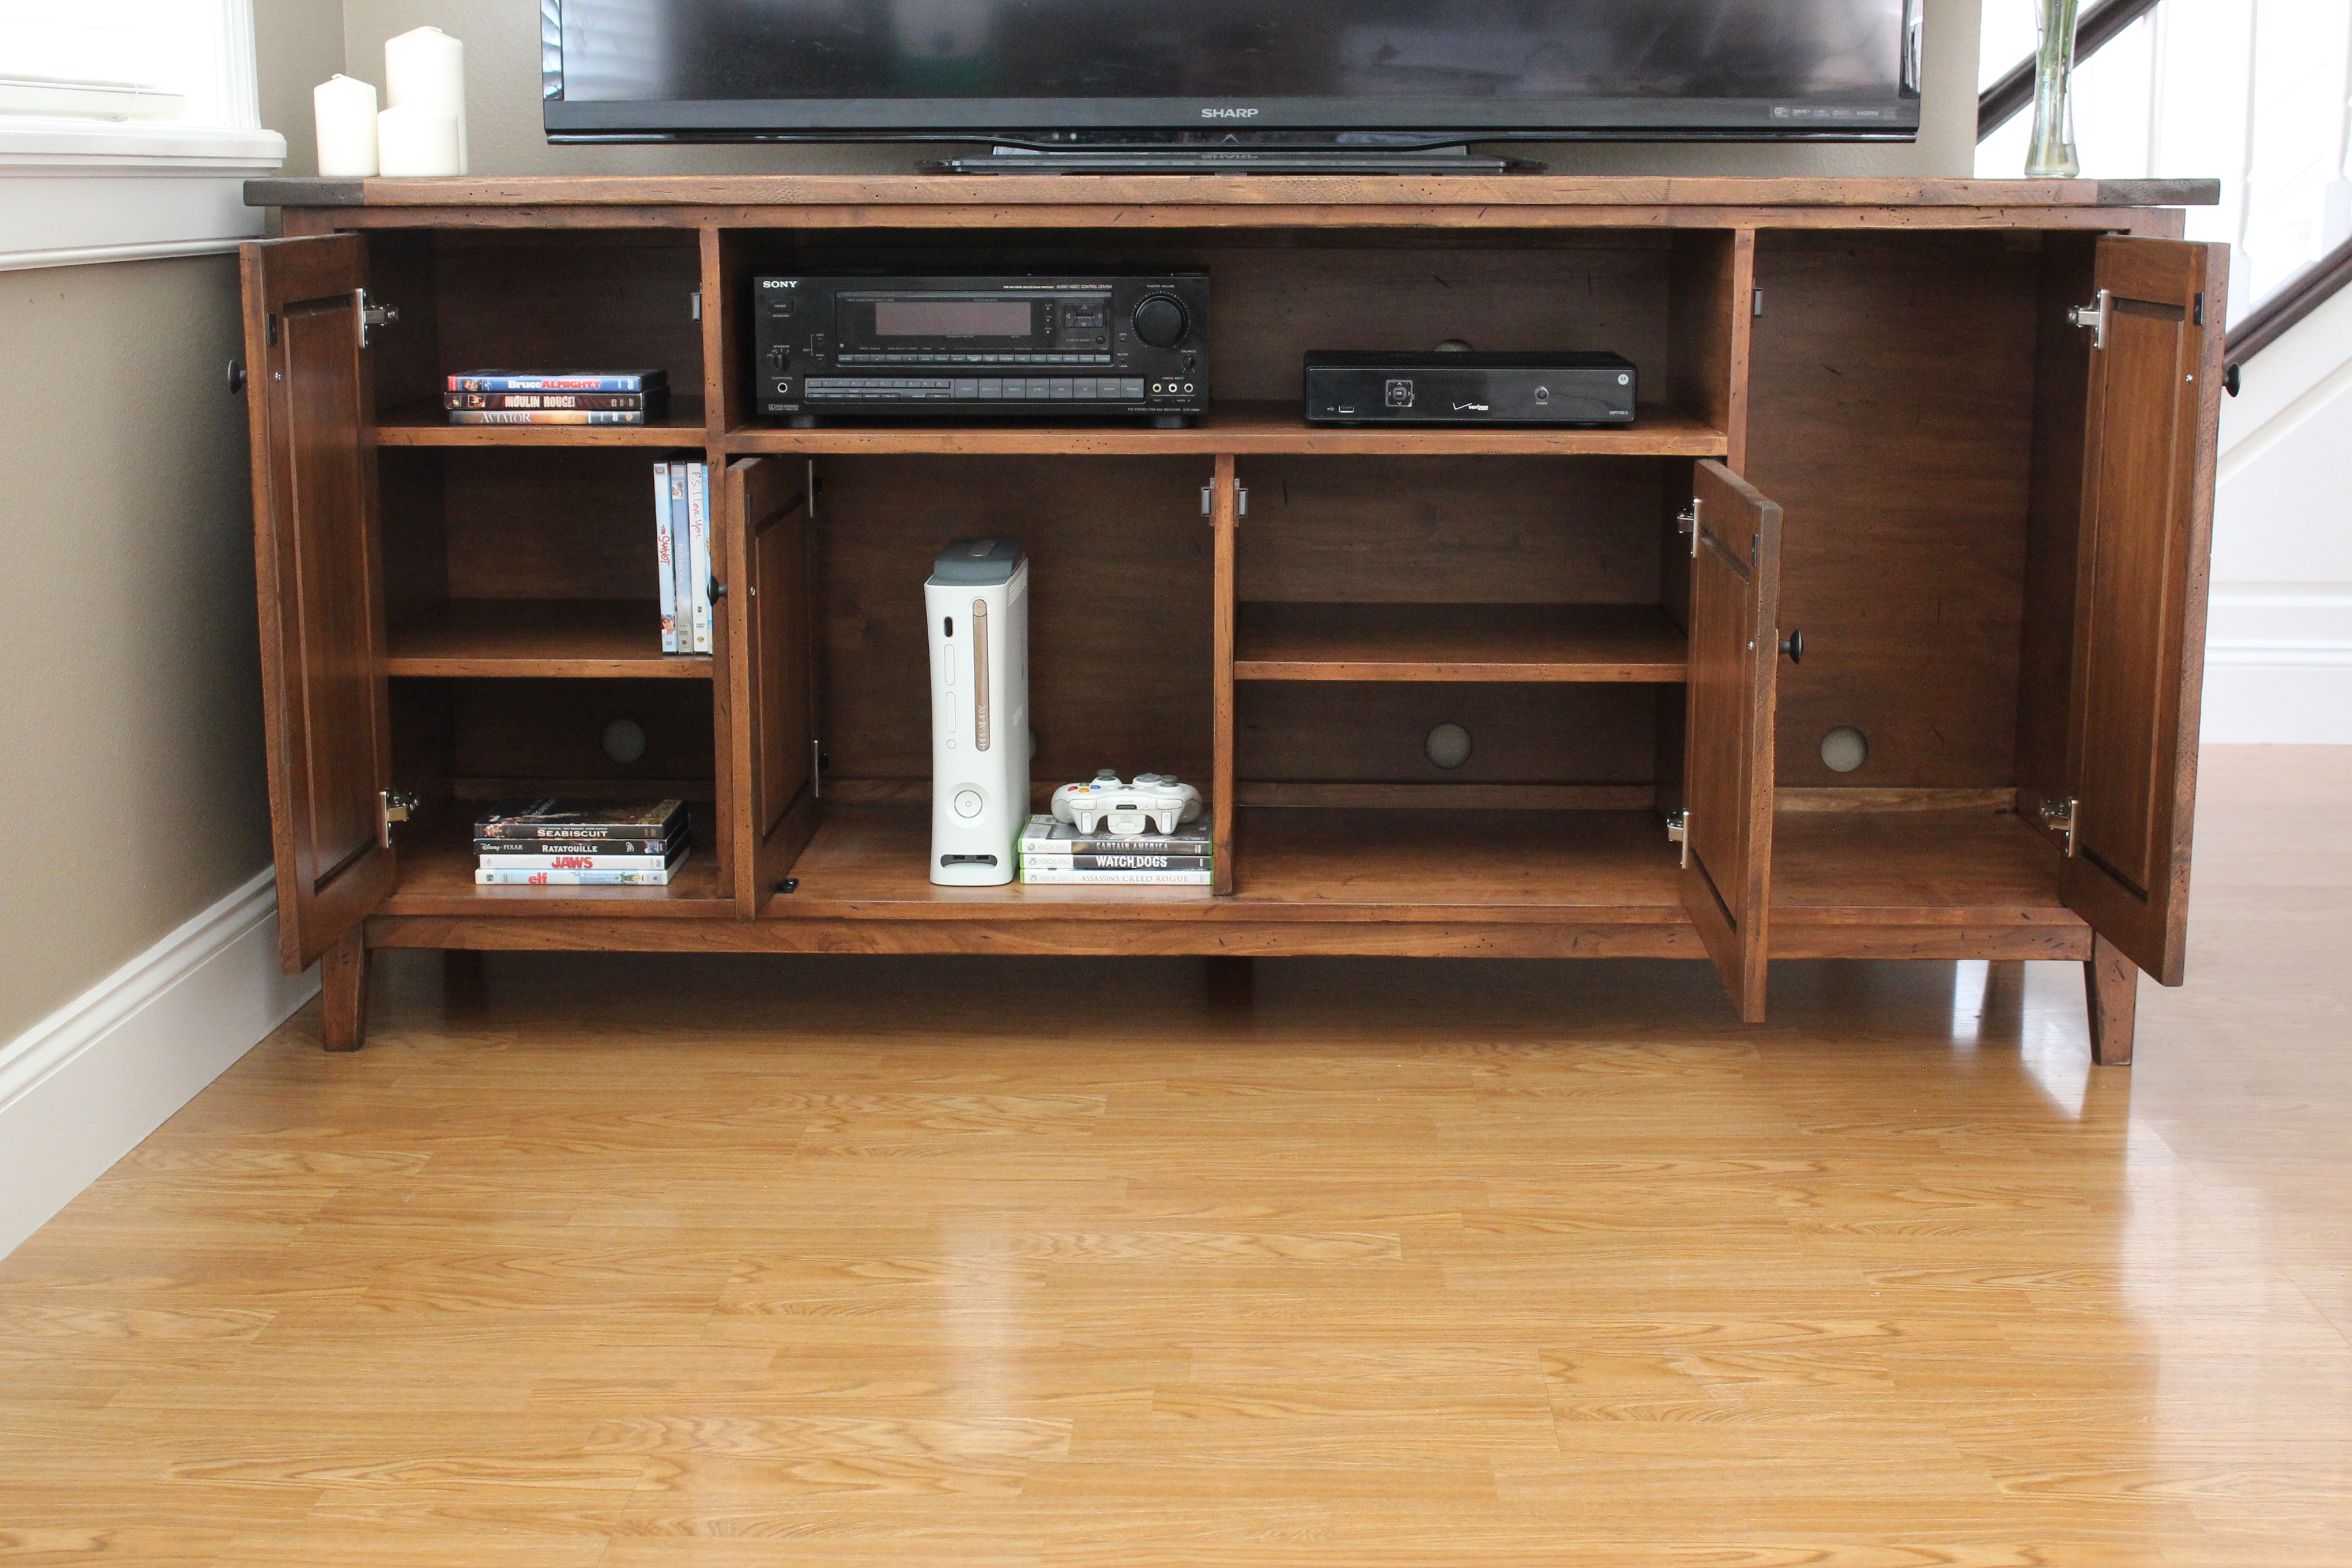
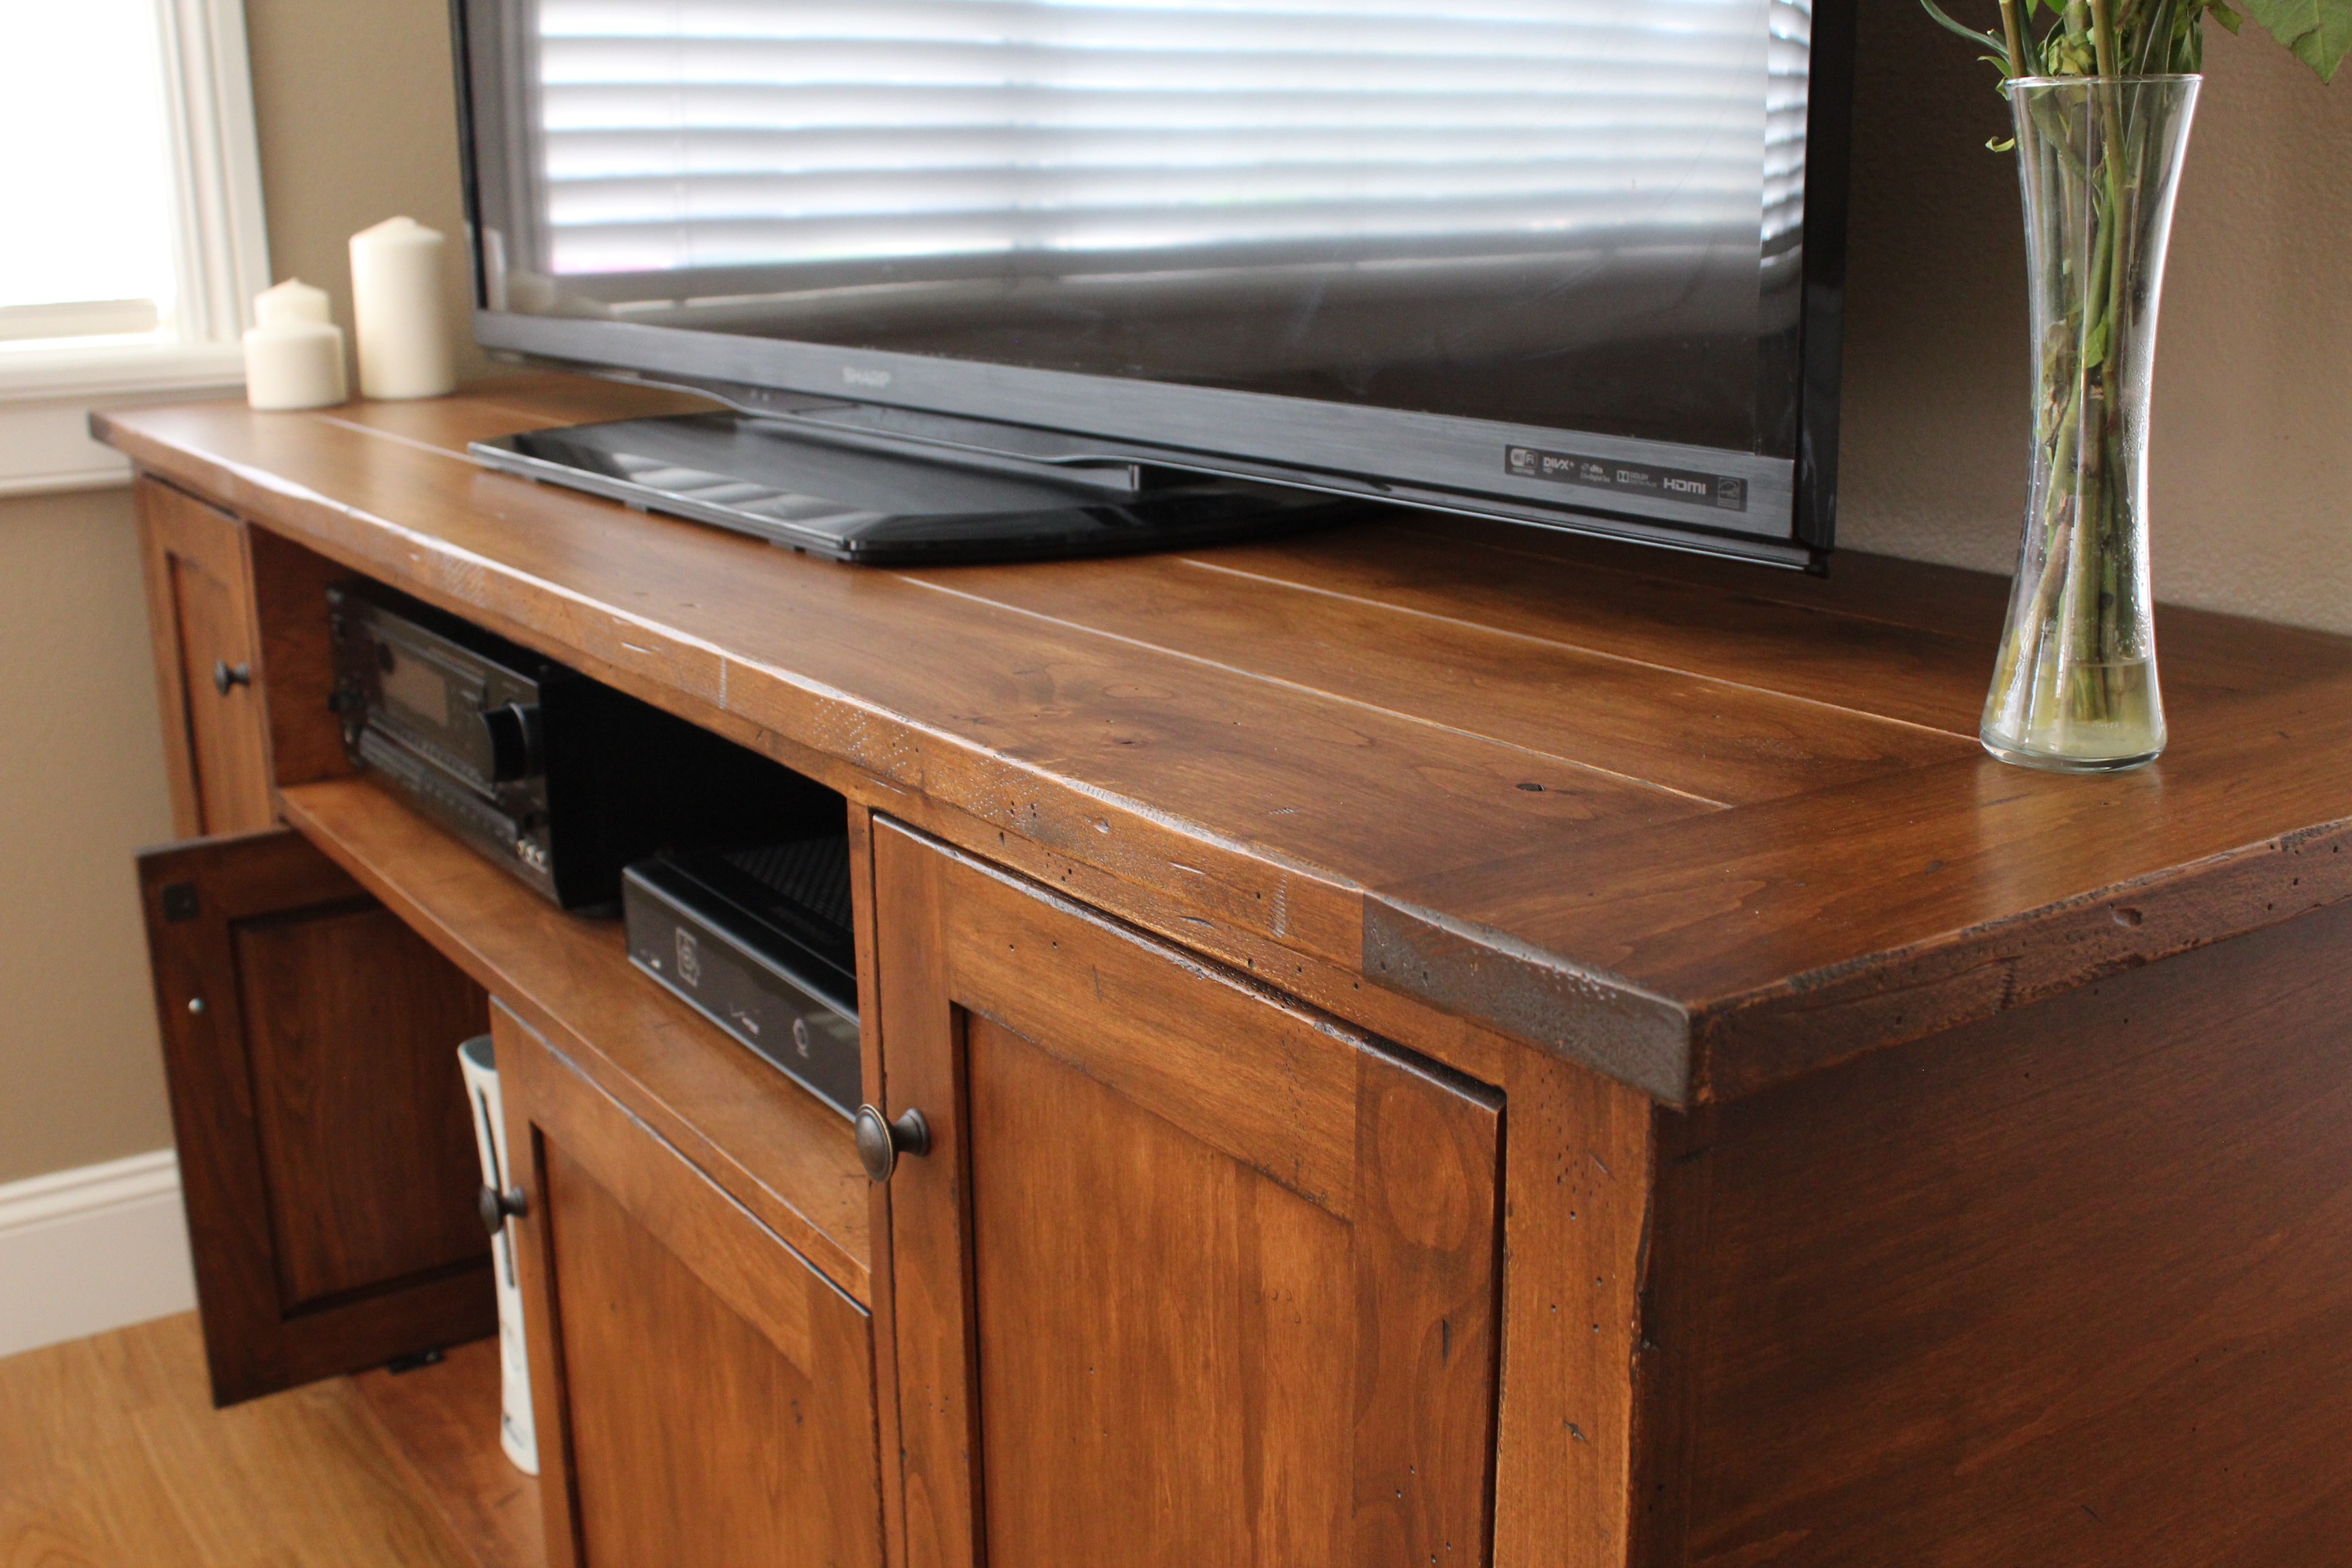
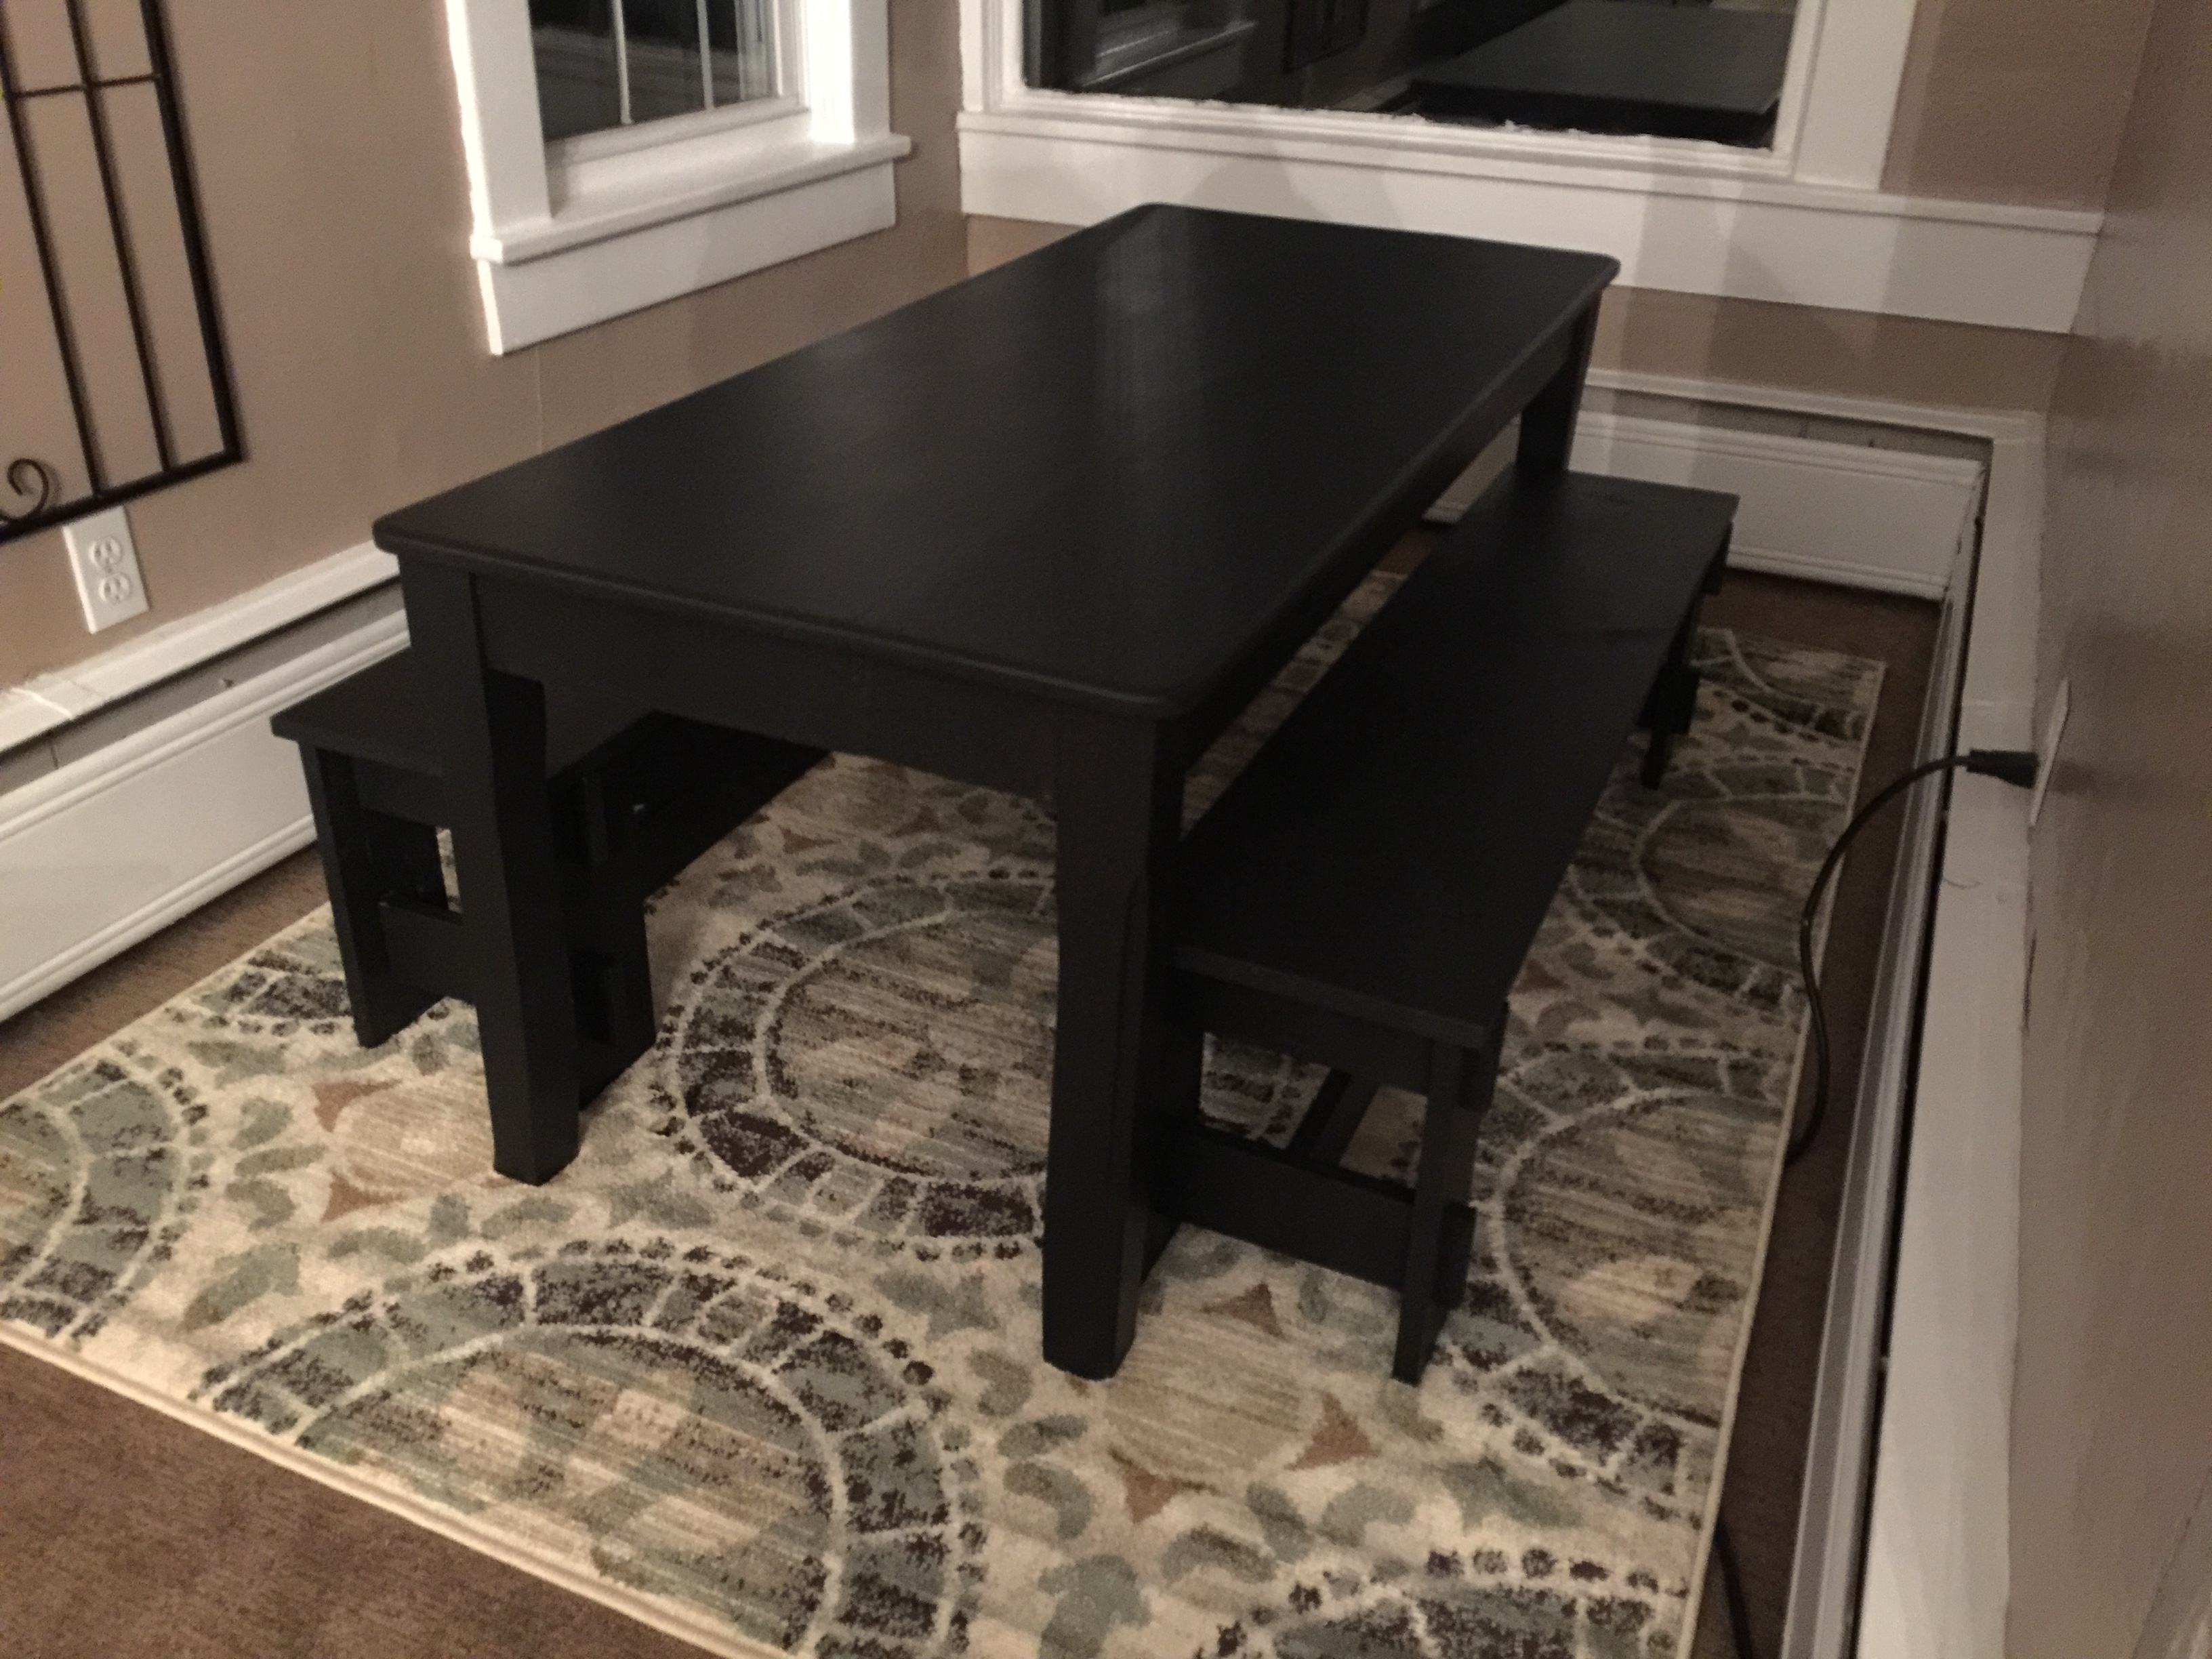
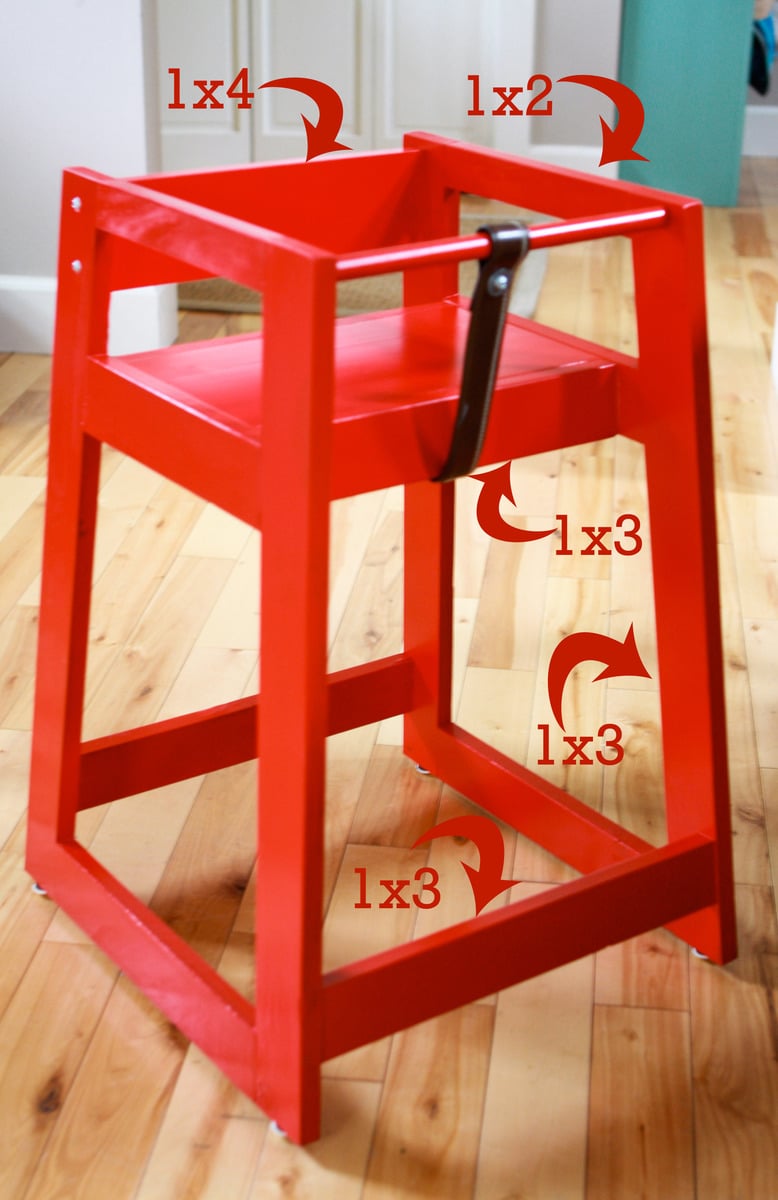
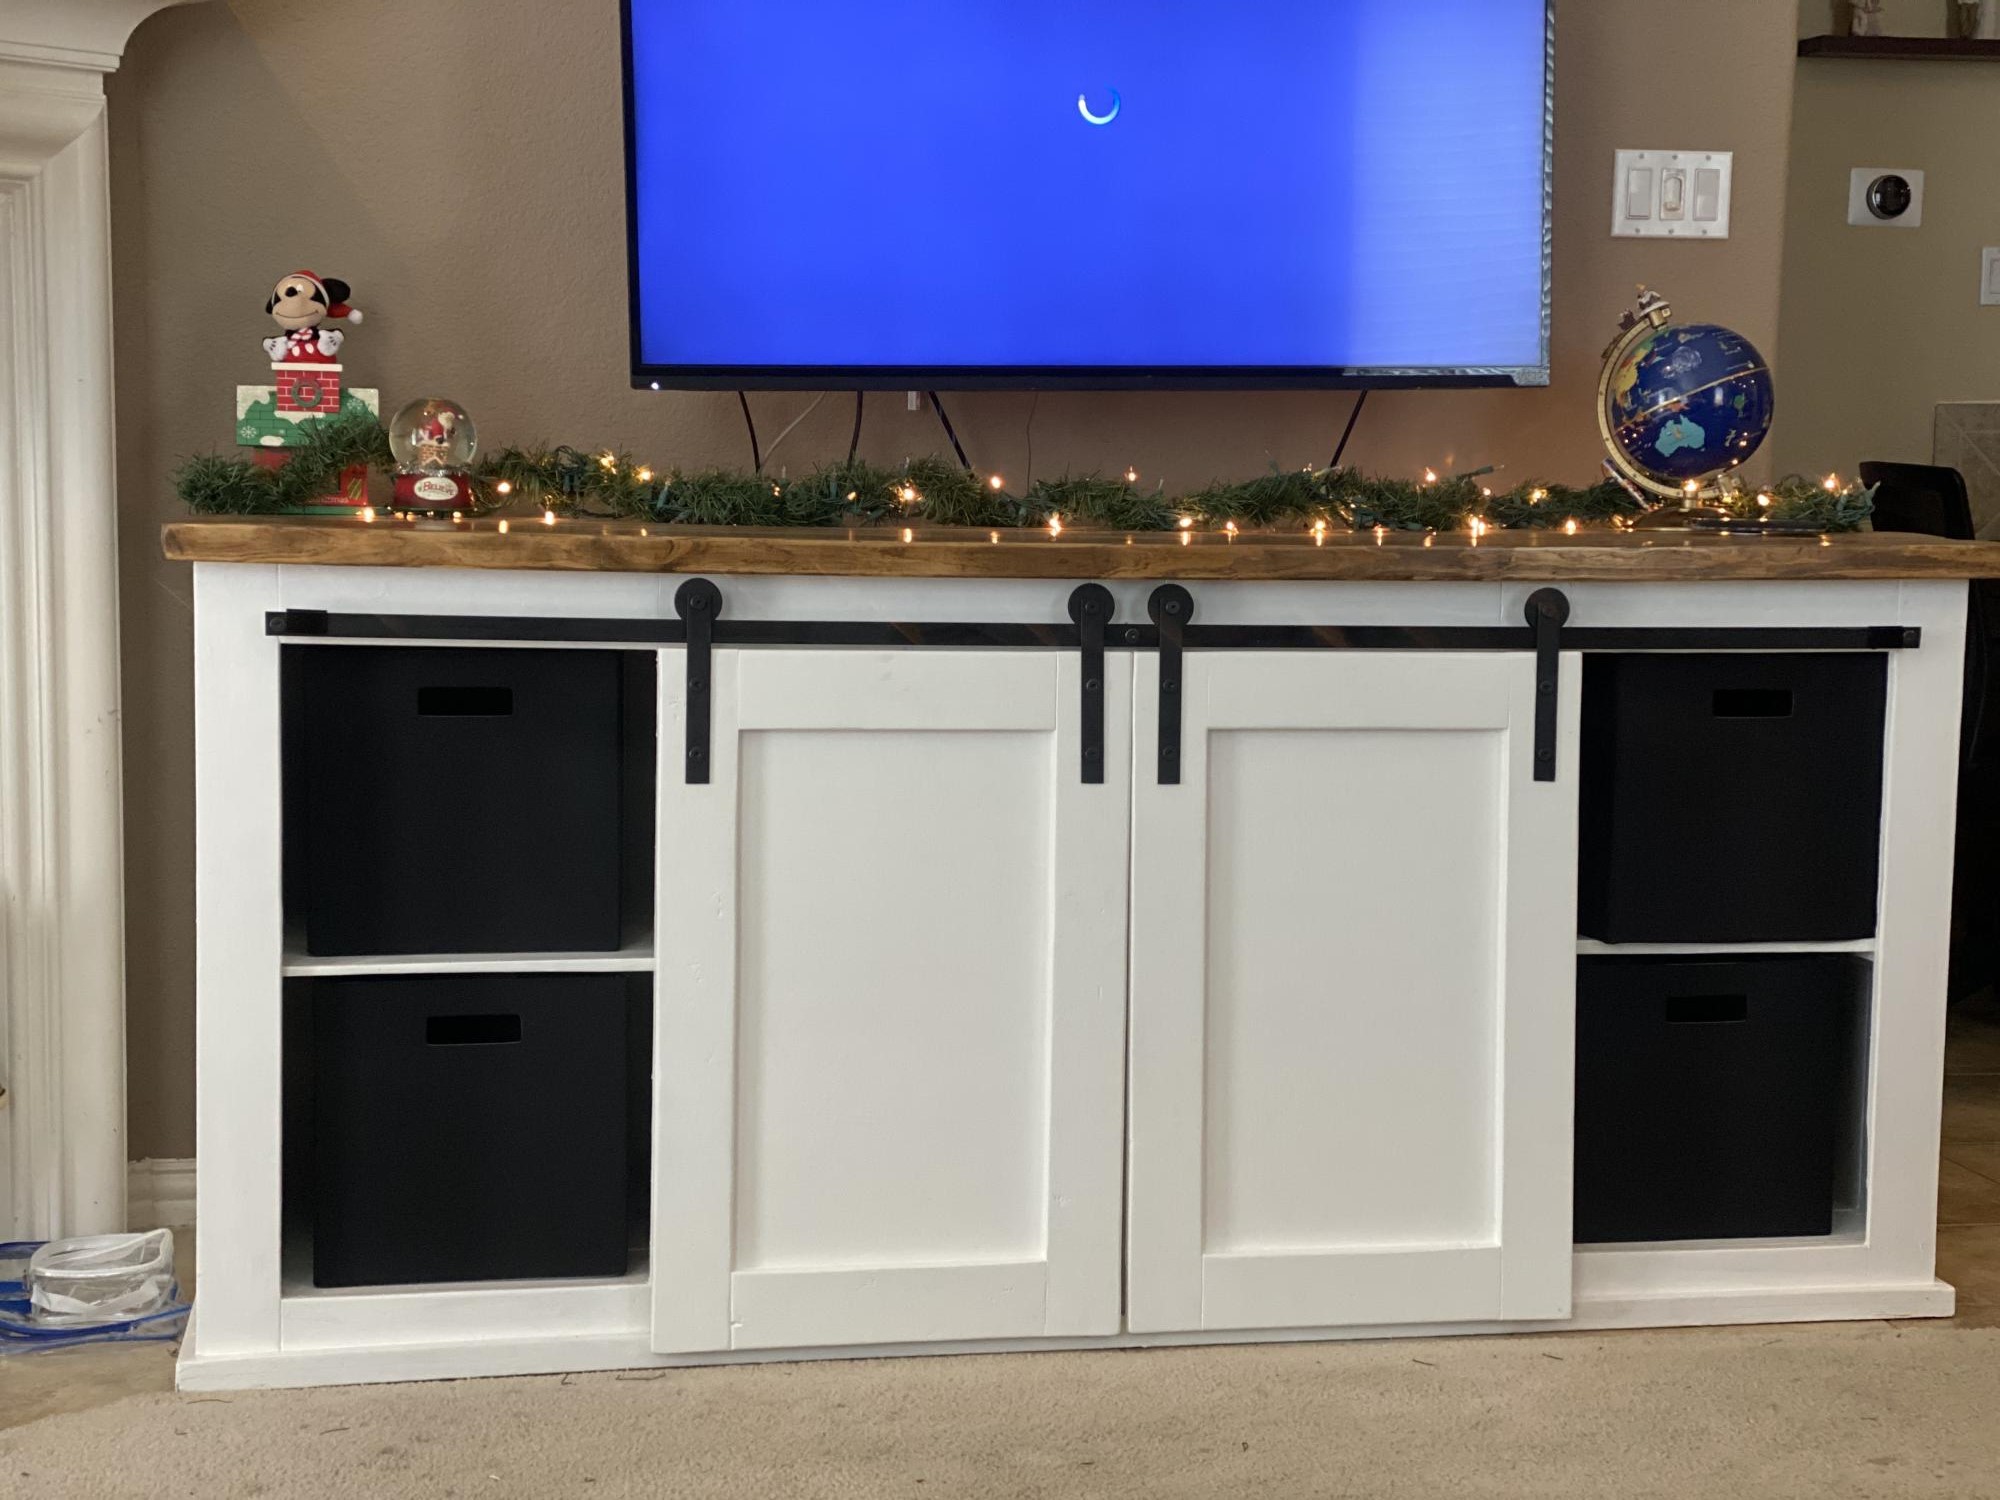
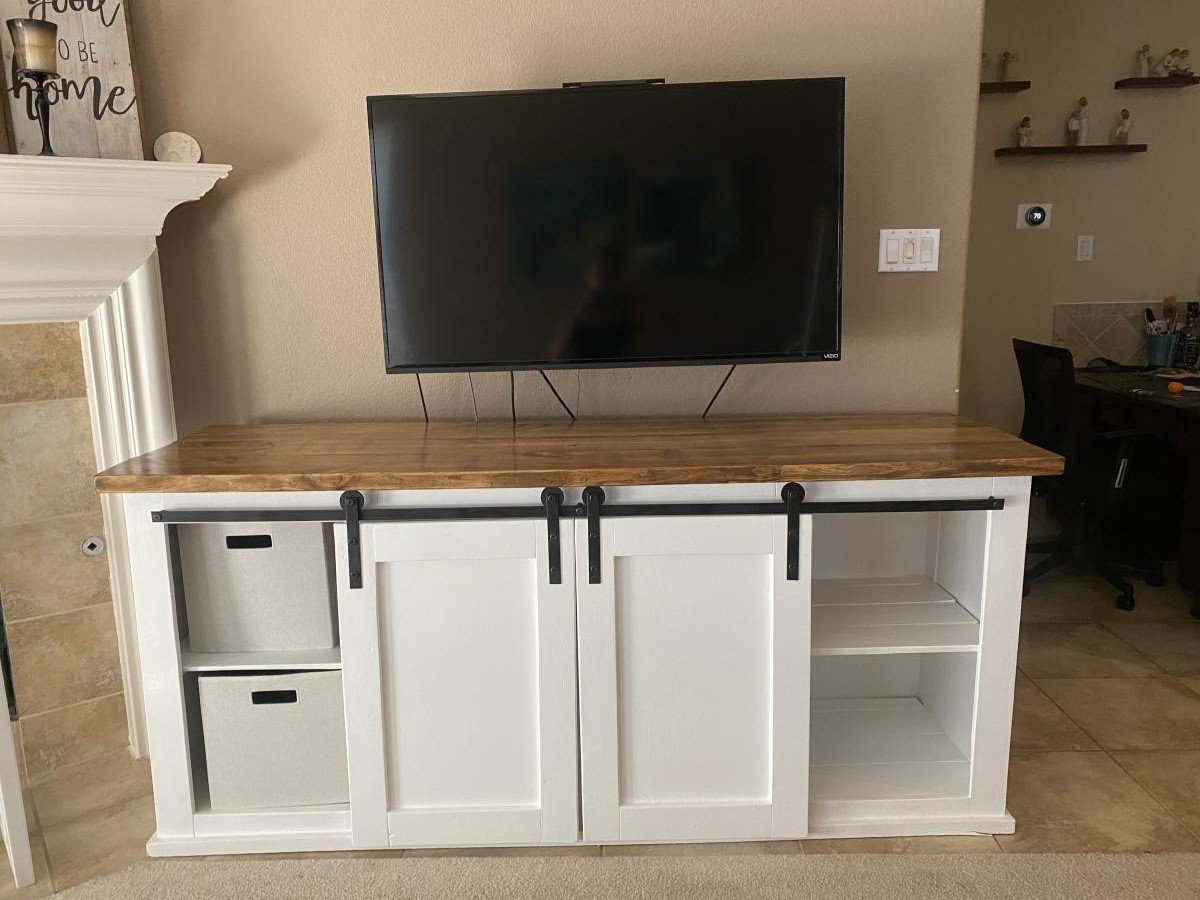
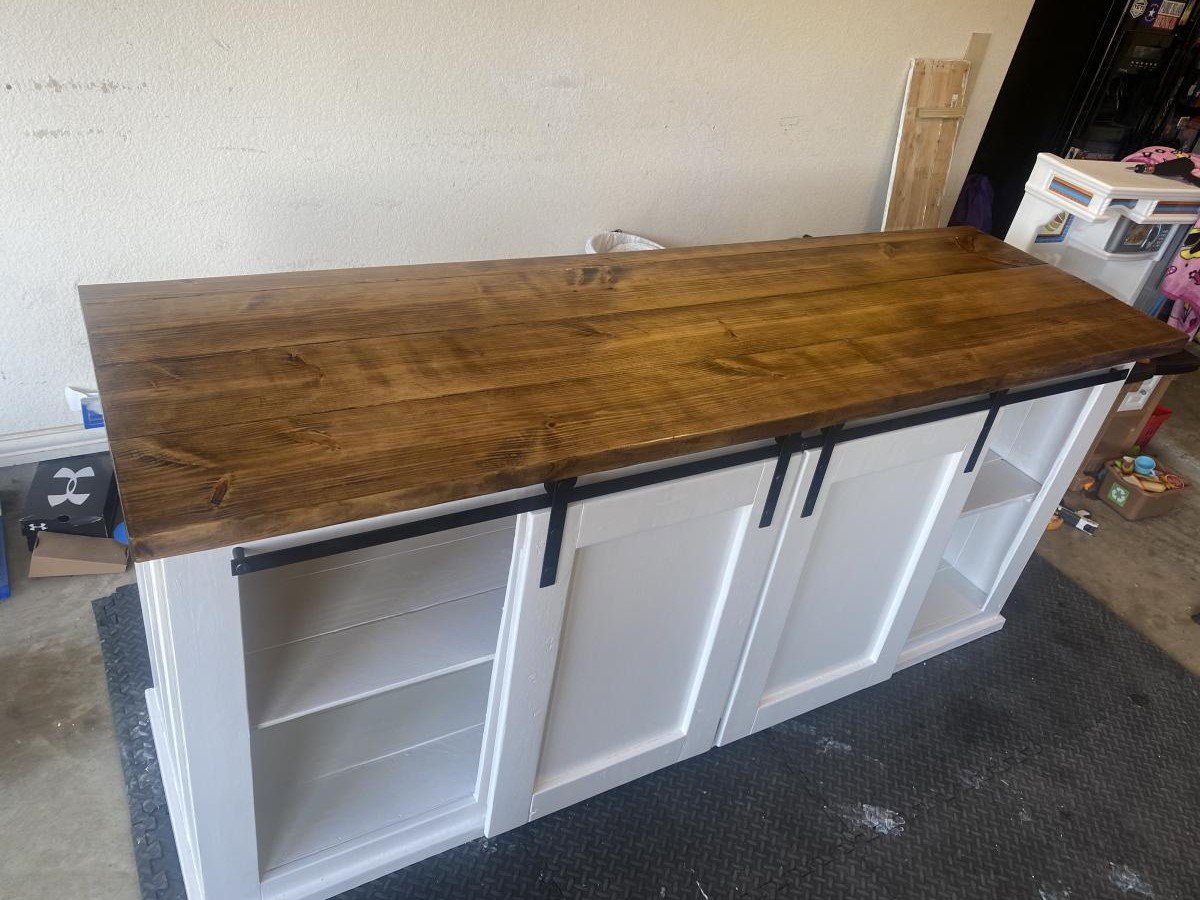
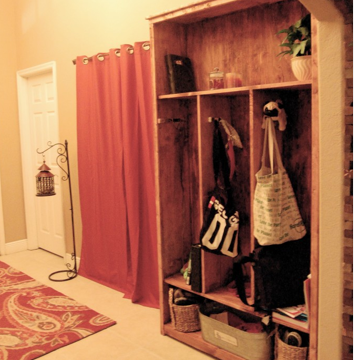
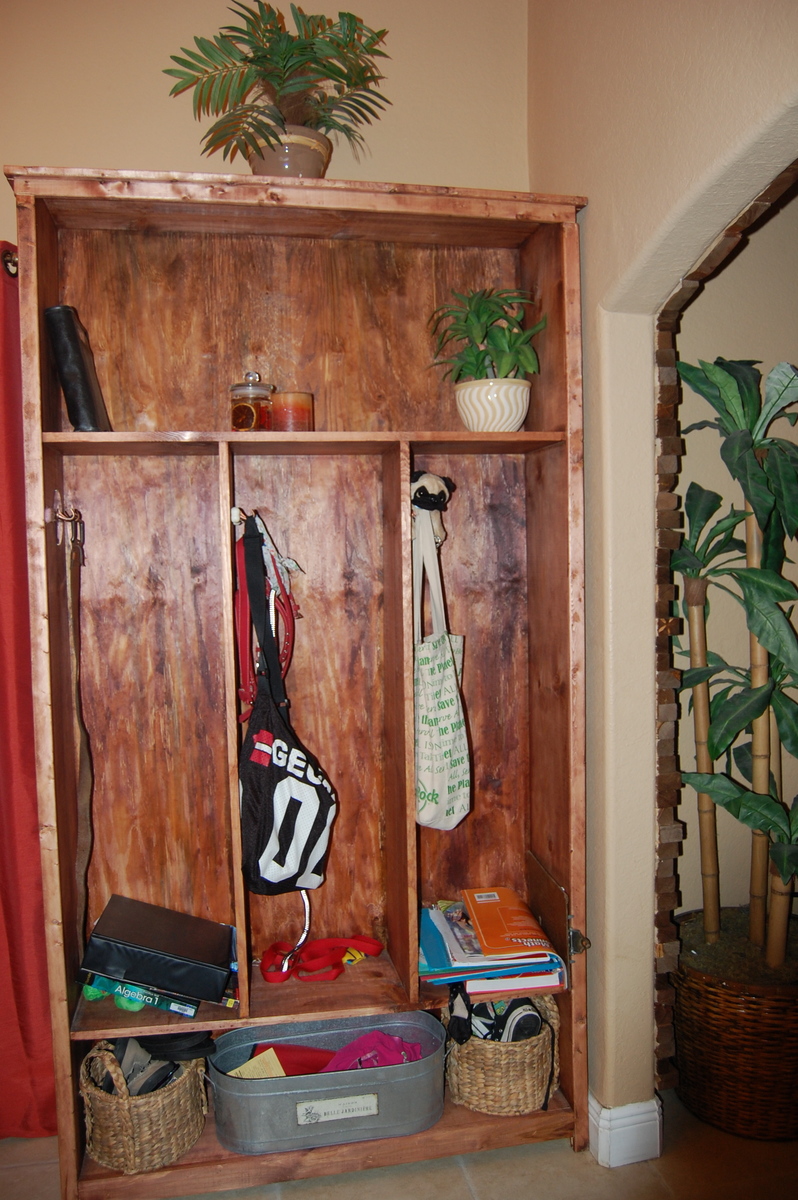
Pottery Barn Media Console
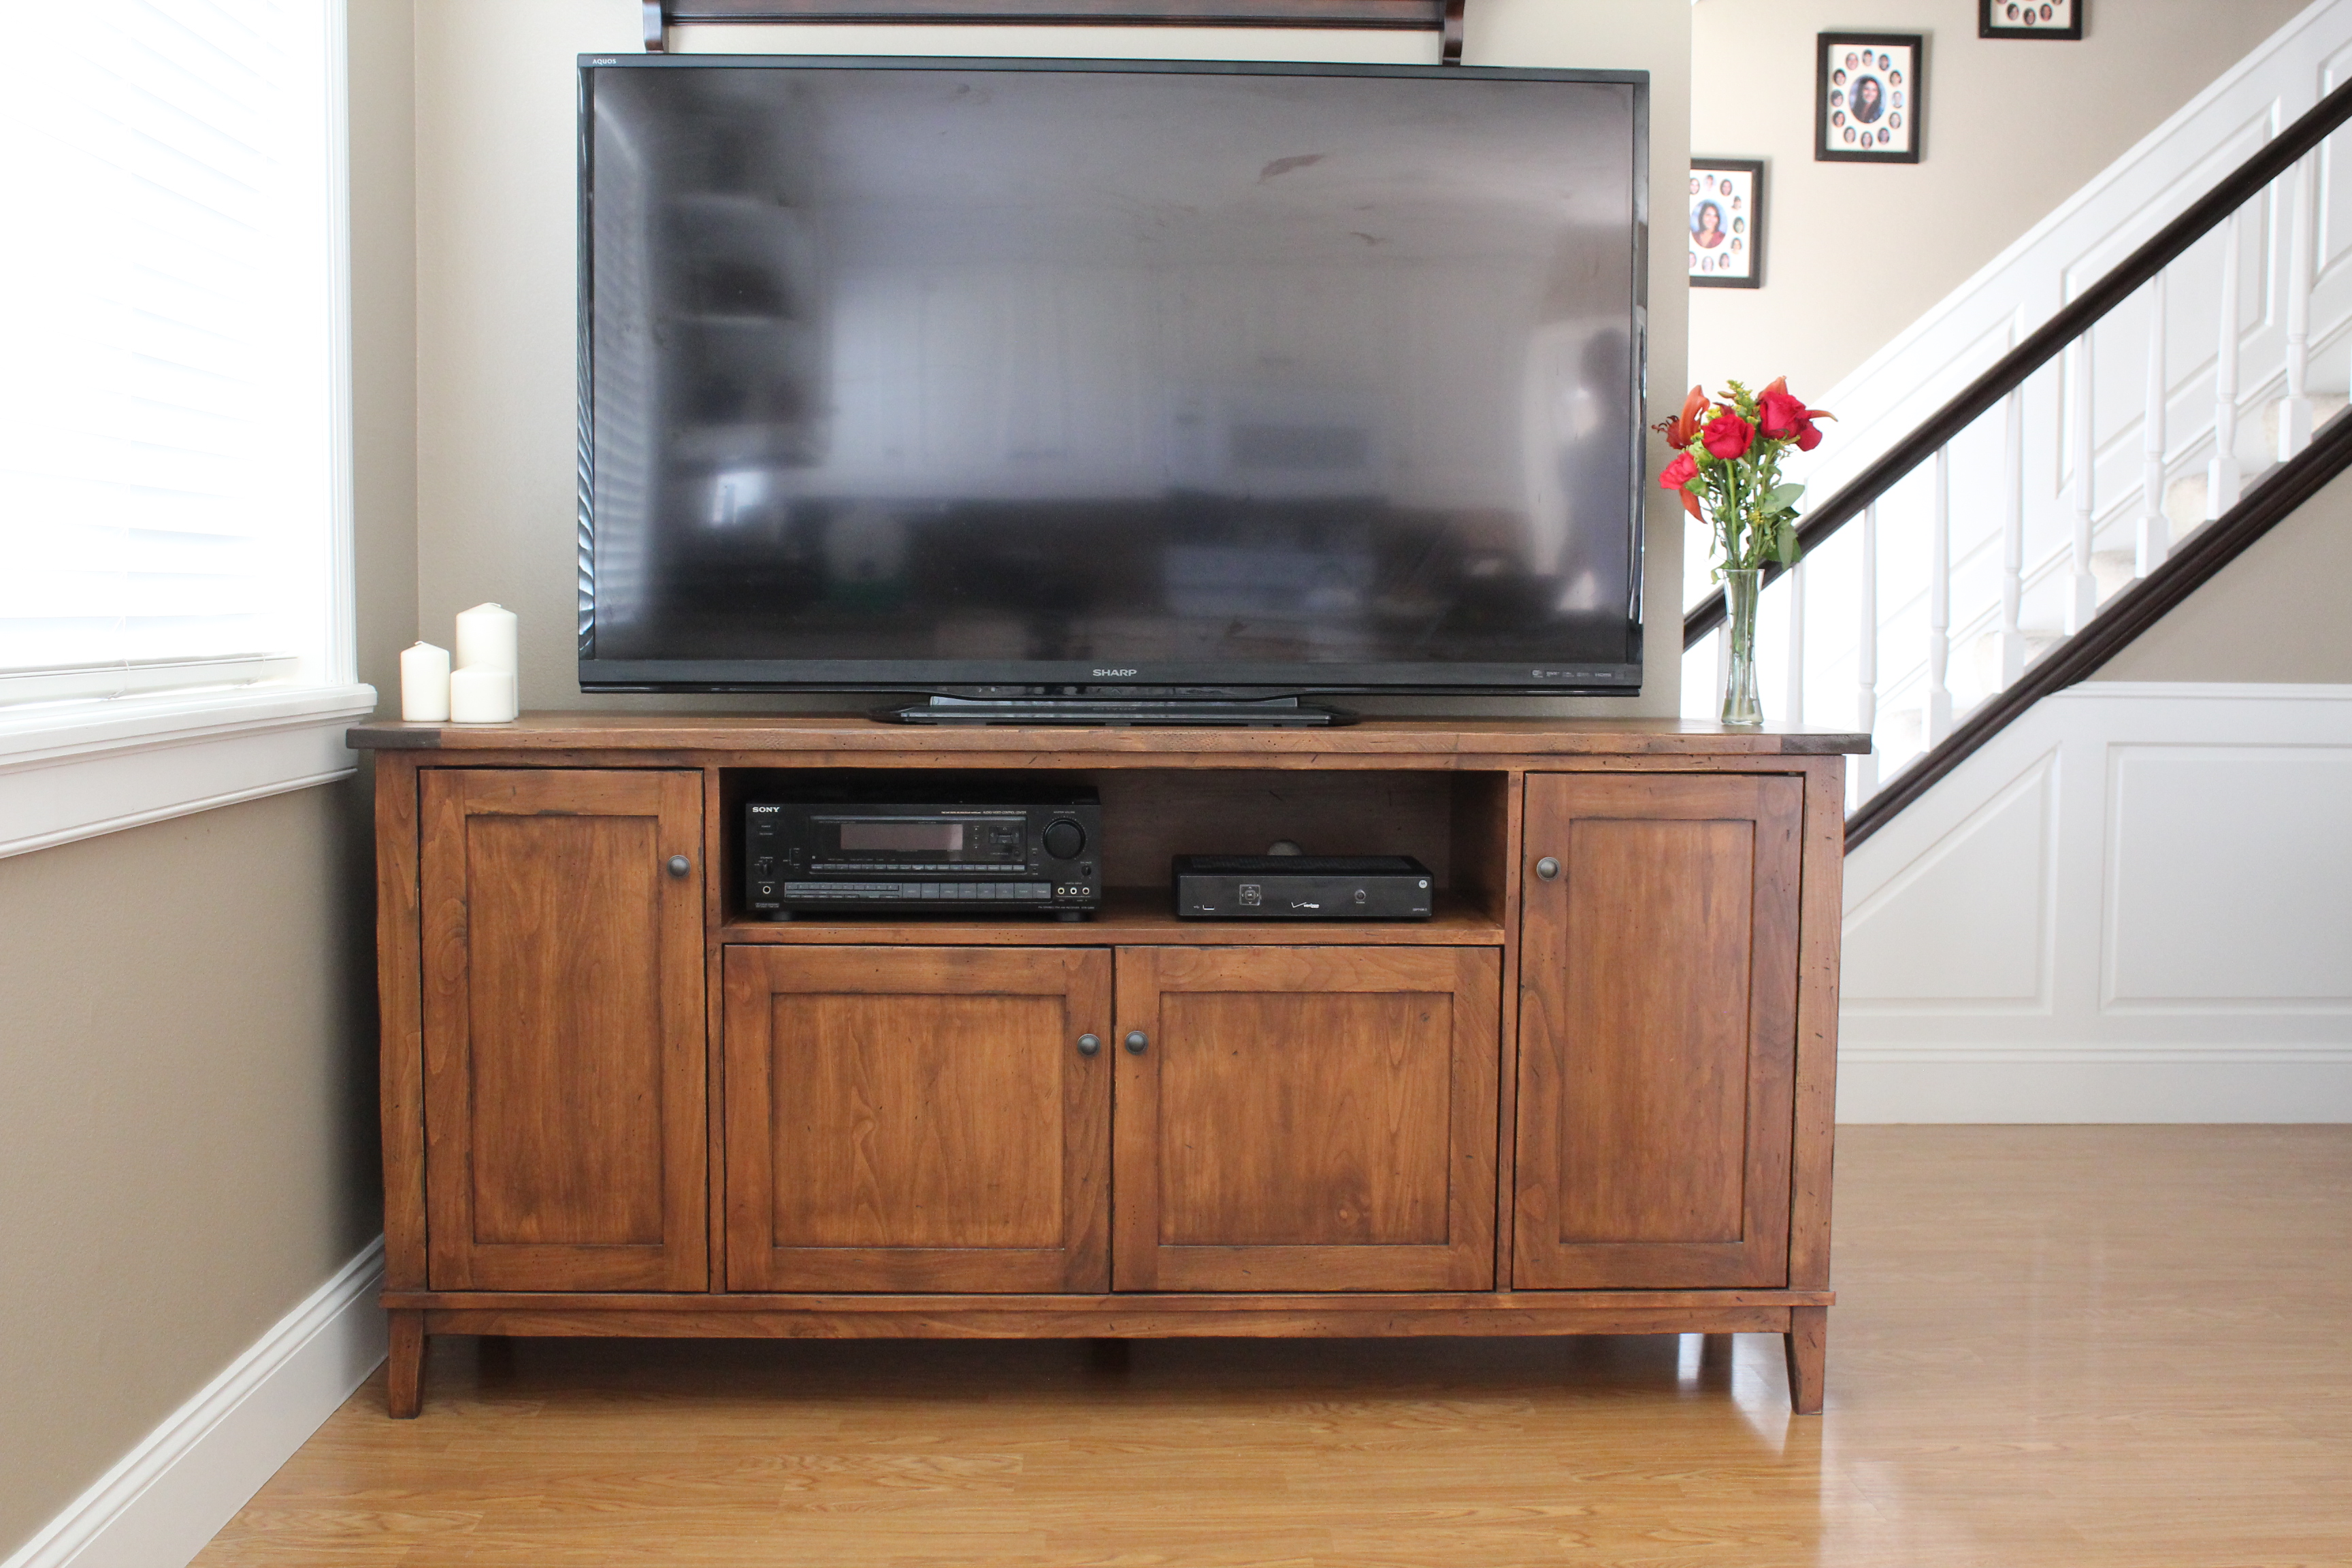
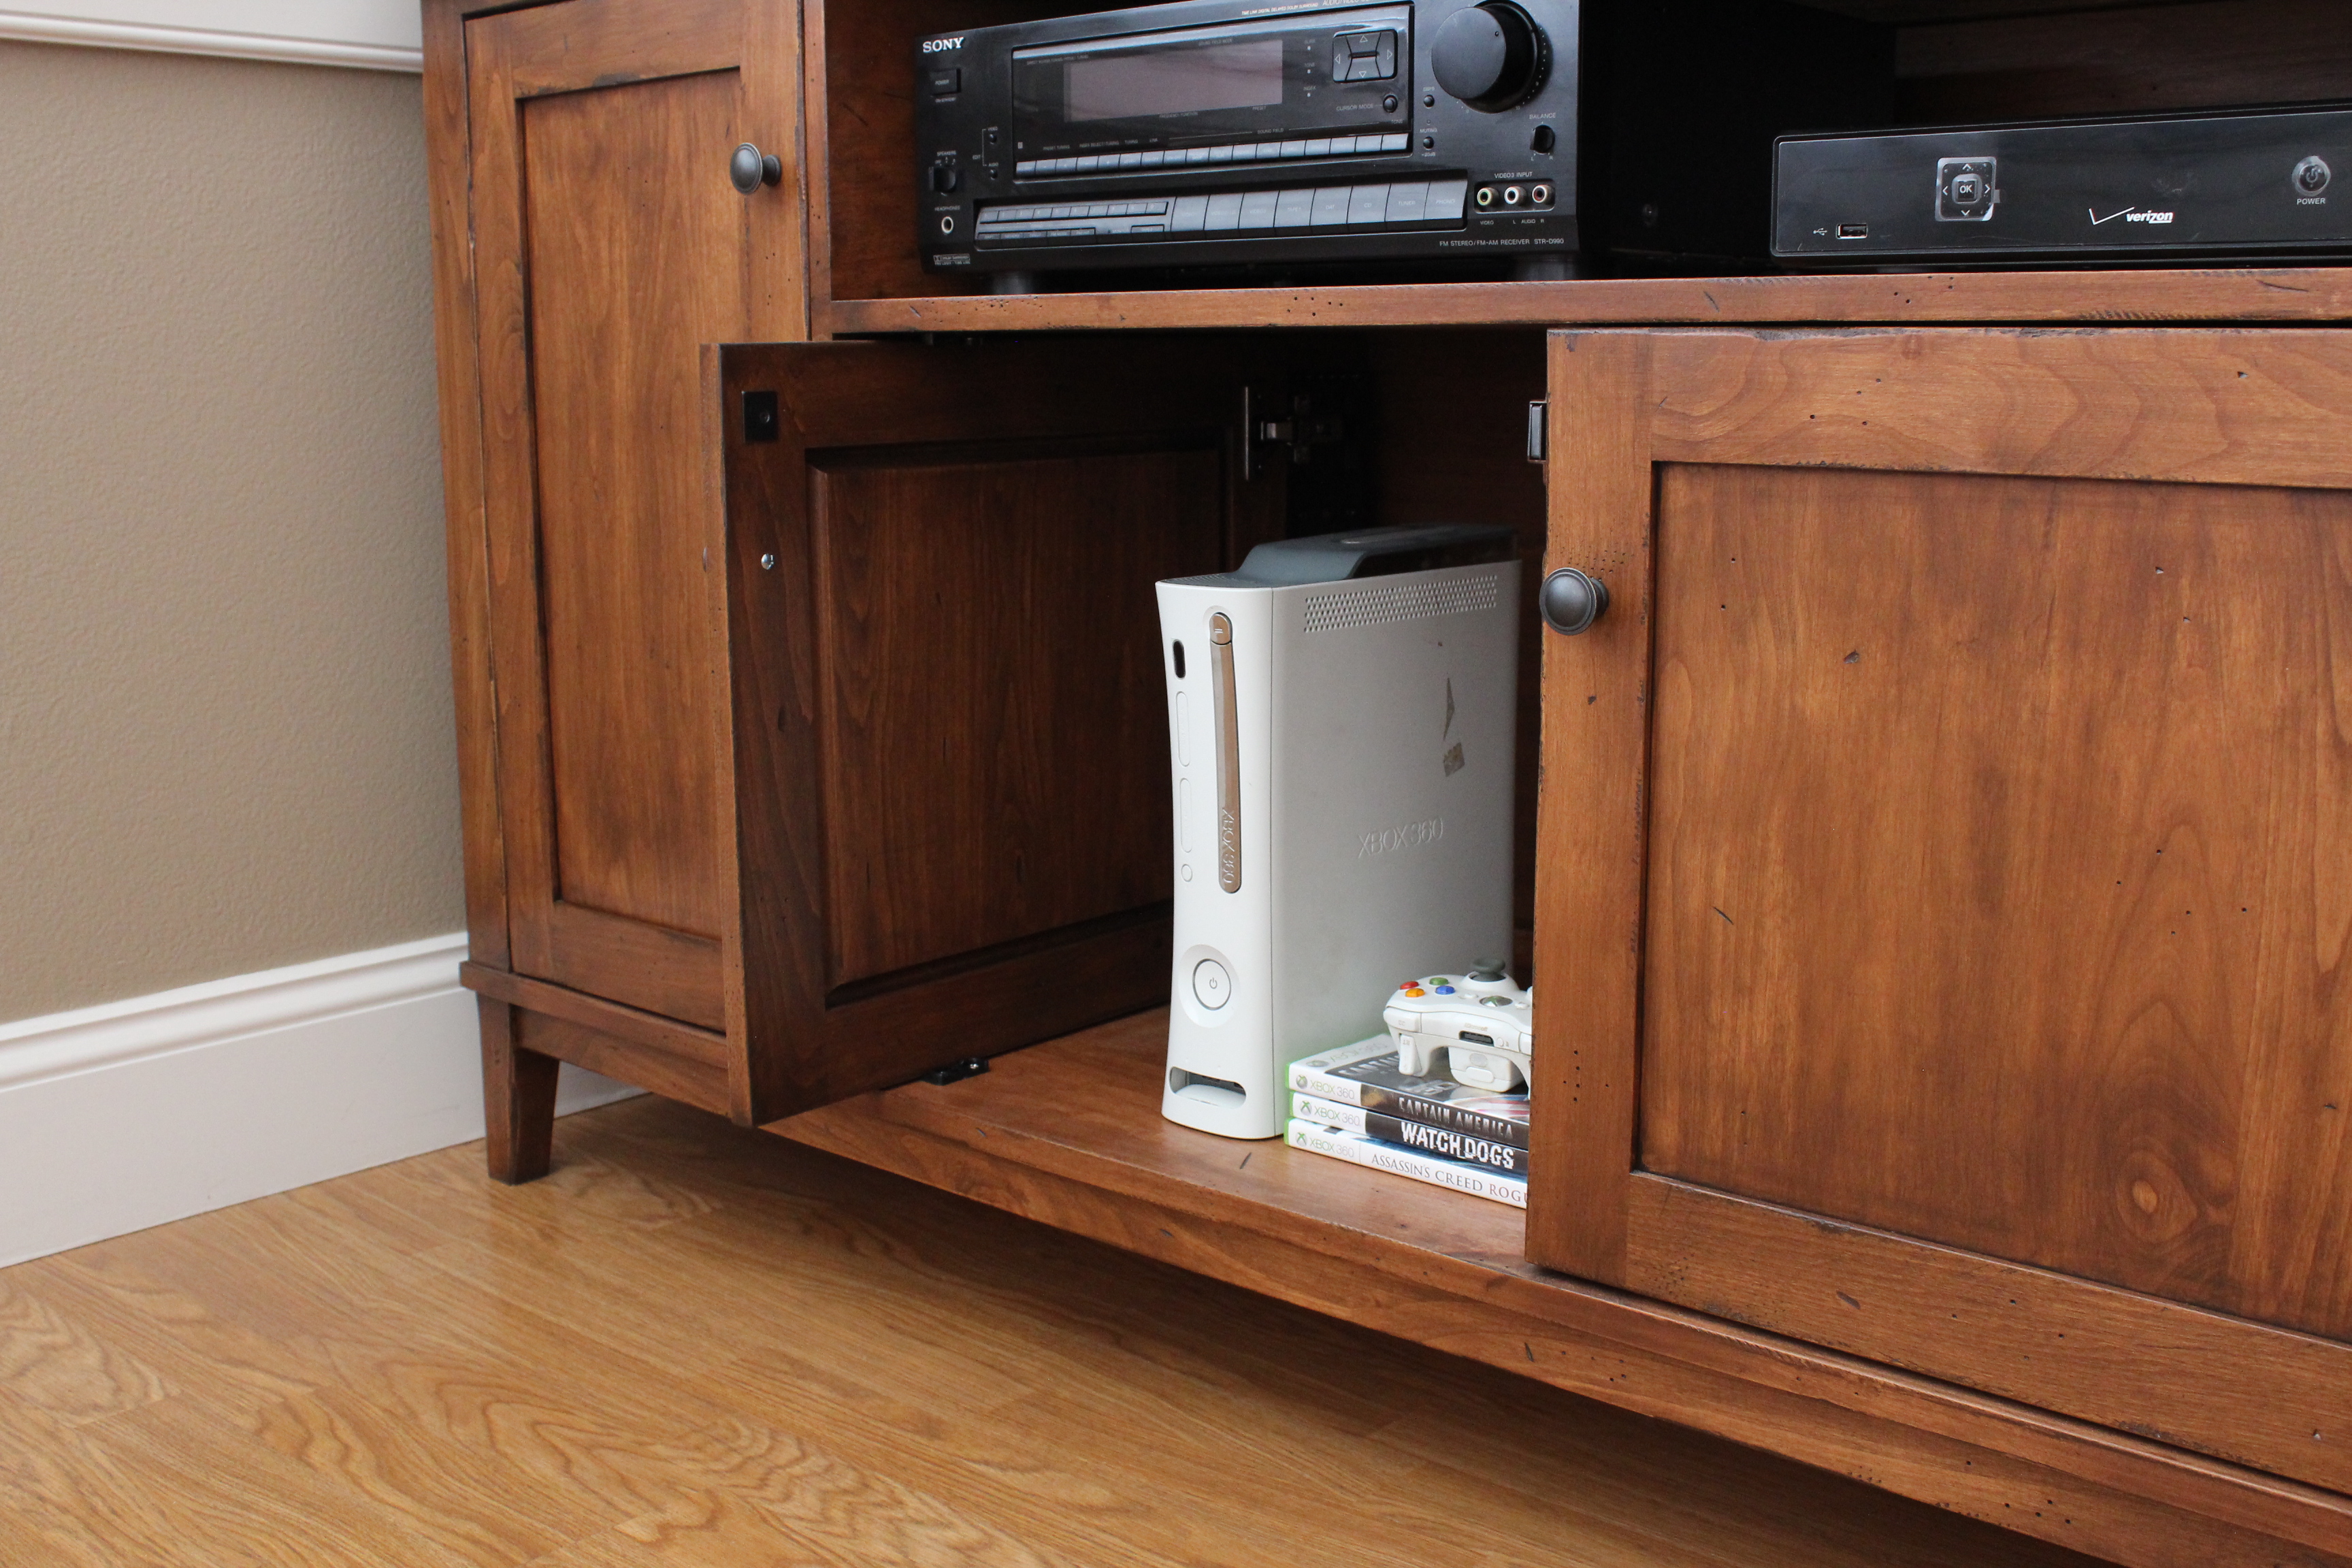
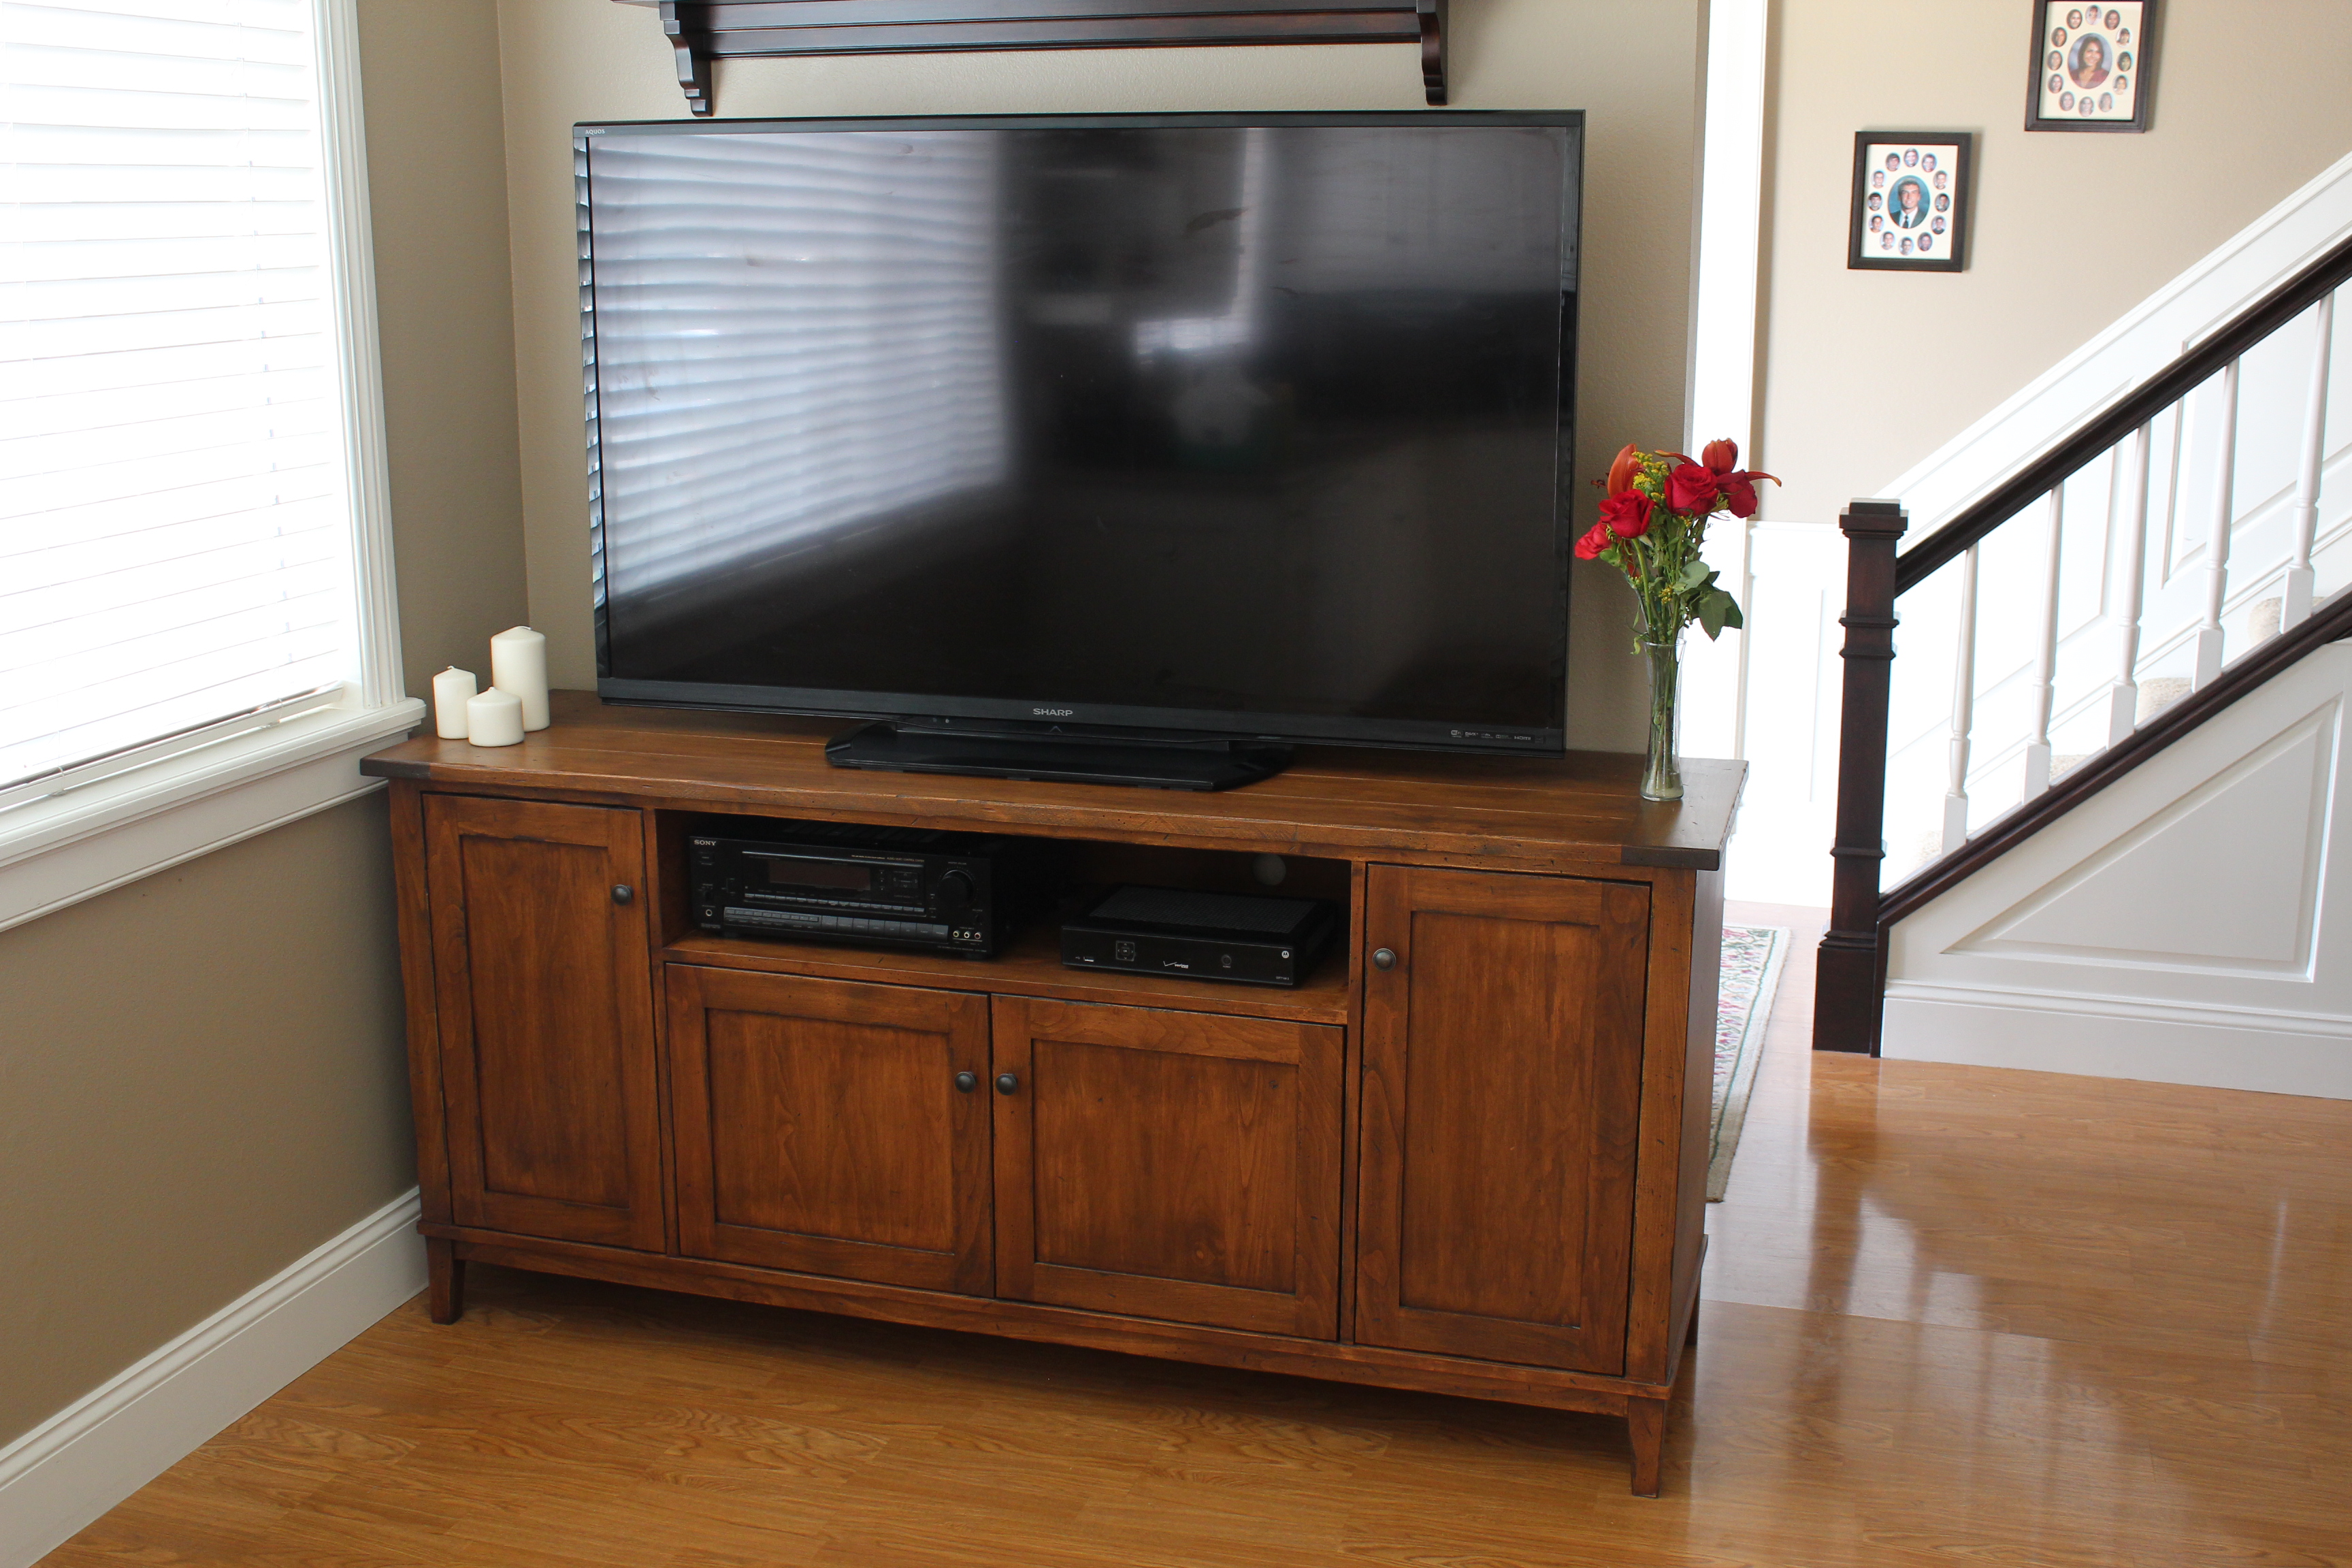
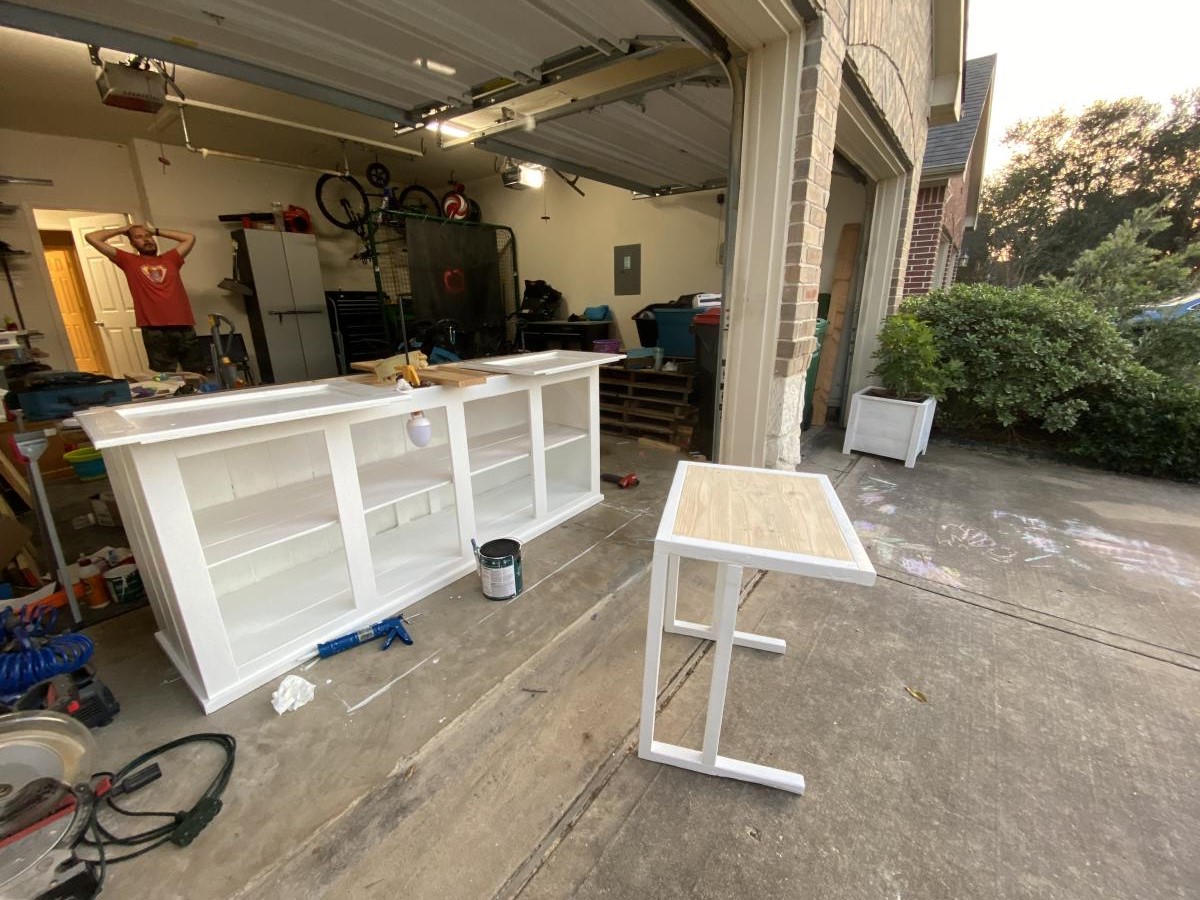
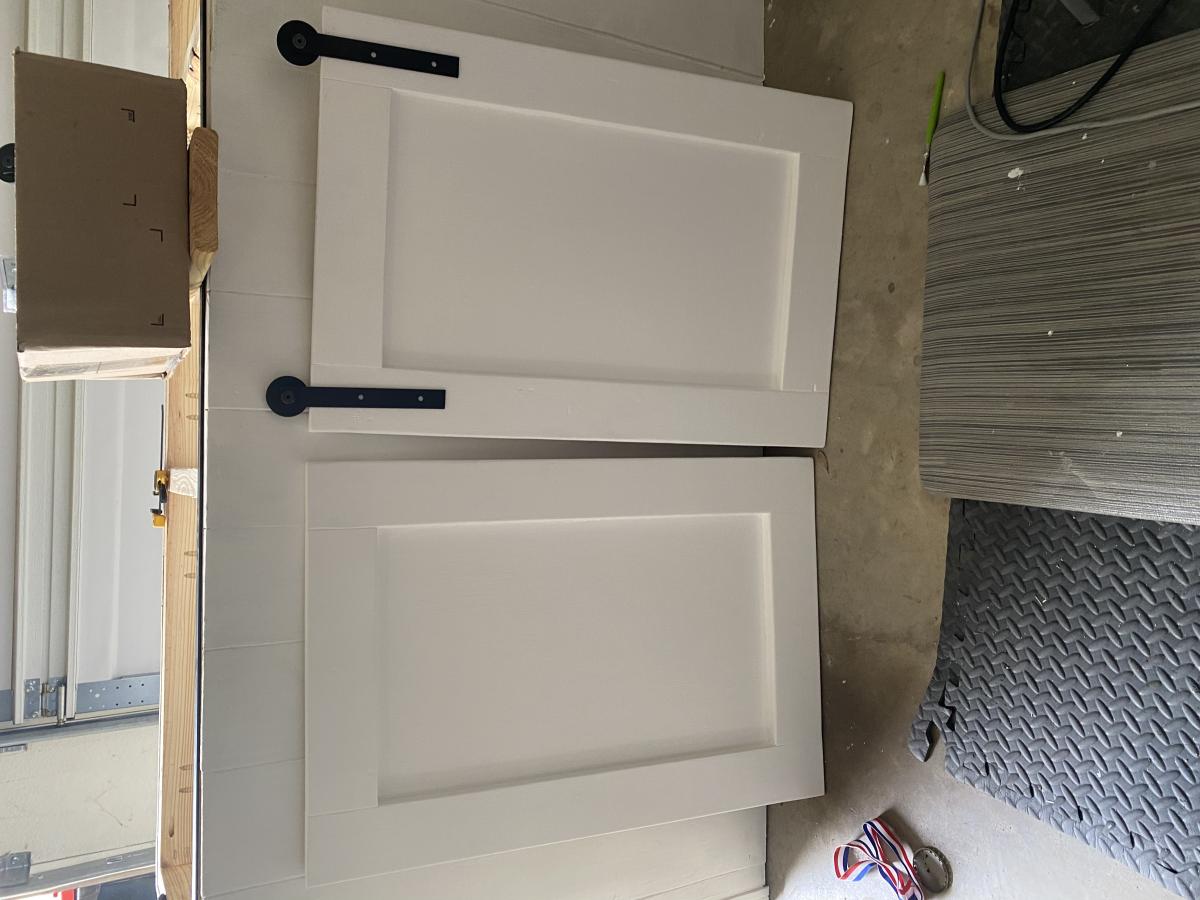
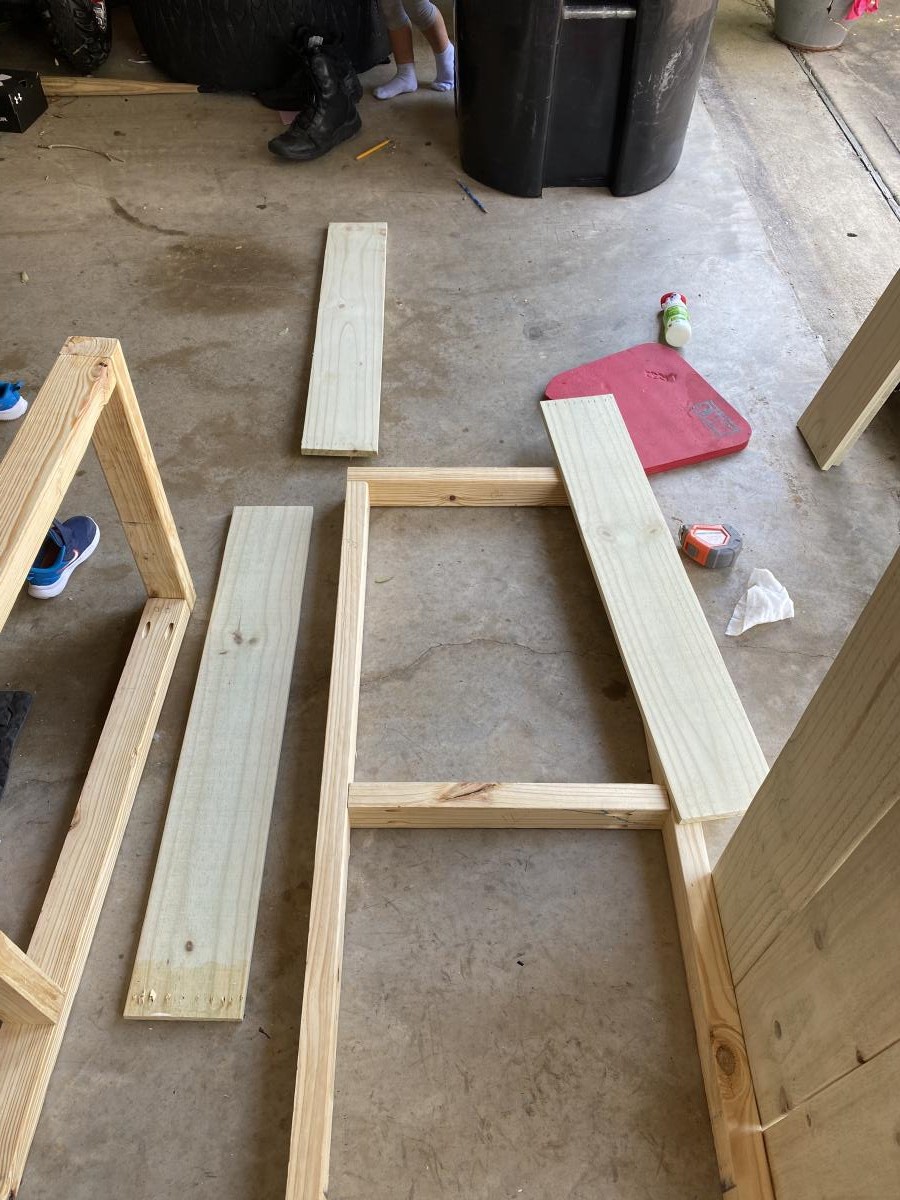
I have been wanting to build this piece for some time now. This is actually a Pottery Barn piece that is now discontinued that I modified here and there. I added a "flipper door" which opens and slides back into the cabinet. Adjustable shelves throughout. I used solid alder and alder plywood for material. - Brad @timberandsoul www.timberandsoul.com
Estimated Cost
$500.00
Estimated Time Investment
Week Long Project (20 Hours or More)
Finish Used
shellac, transtint dye, general finishes gel stain, poly
Recommended Skill Level
Advanced


Comments
handmadewithash
Sat, 05/16/2015 - 14:52
that looks great! I love
that looks great! I love seeing your brag posts! You make really great quality furniture. :) Hopefully one day I get to that point :)