Community Brag Posts

First project

Submitted by MadJack73 on Mon, 01/13/2014 - 12:34

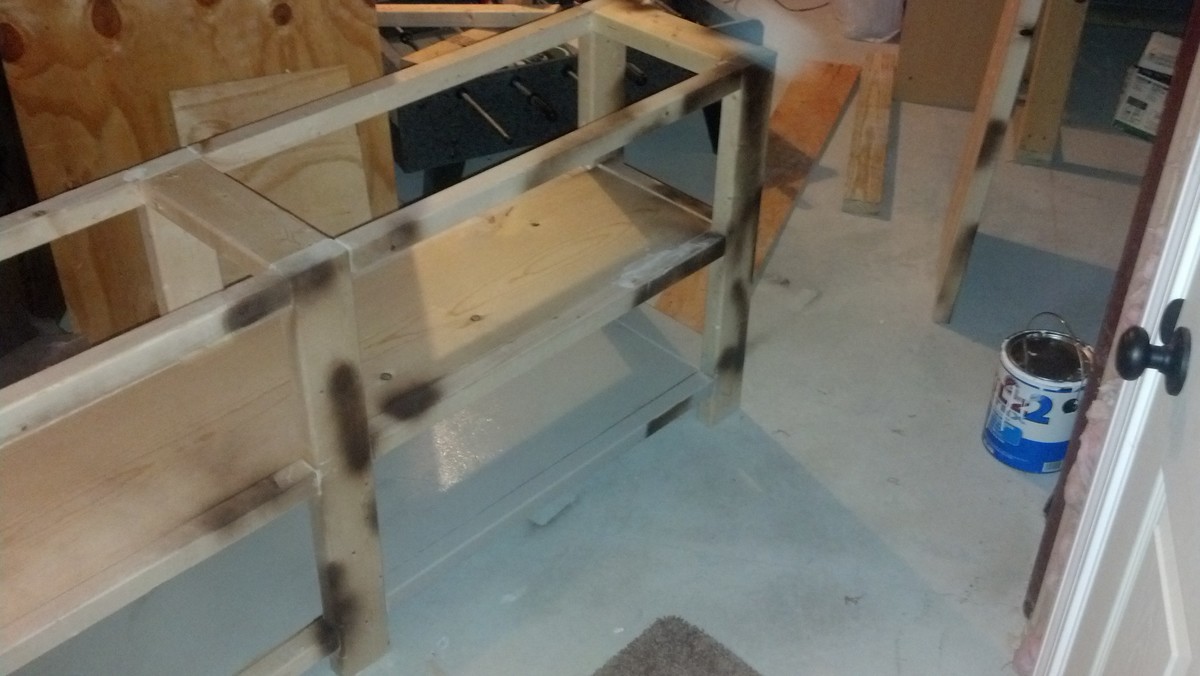
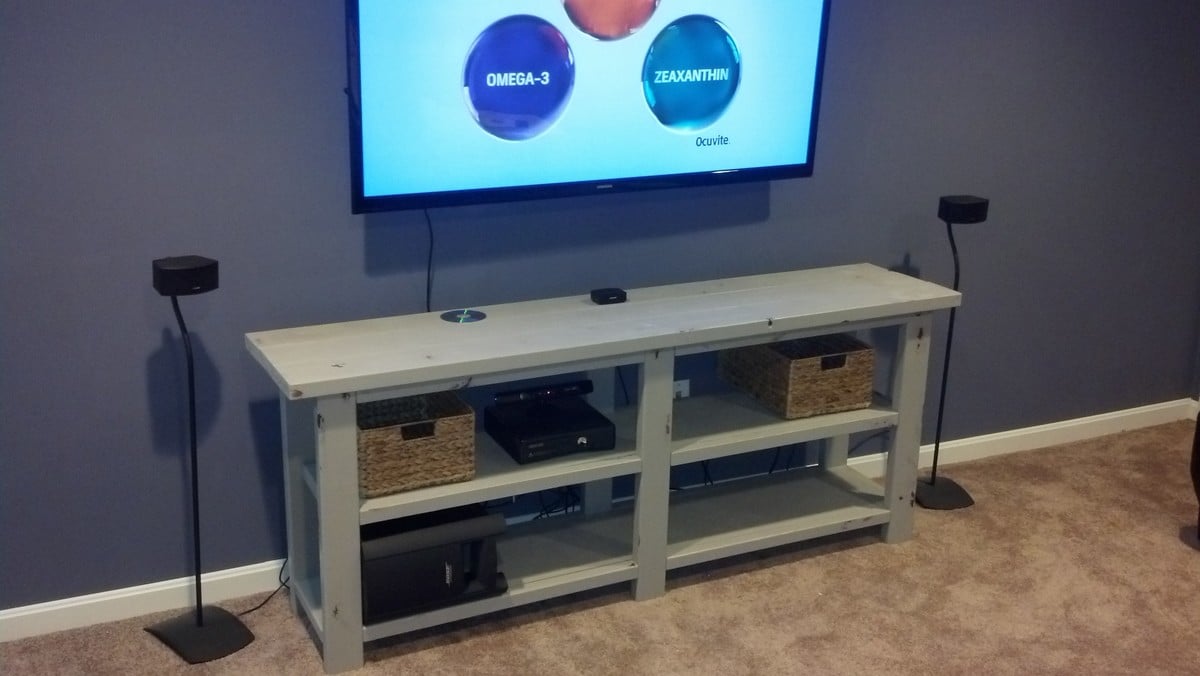
Rustic X Console, minus the X. And I used the finishing techniques from another project. I also built a bar before I found this site and we painted the bar stools the same color as this console to tie in the two spaces in the finished basement. I would say the most stress was that I couldnt find straight boards.. so being square was a challenge. Also when you follow the plans, it says to make both sides ( figure 8s) then attach the shelves.. I put the 2x4s on the top to connect and then did the shelves. I figured if all the pieces were right lenght, then it was best way of assuring the project would be as square as possible. I know it would be on carpet, so I wasnt too worried, but when I brought in into basement to paint, all 6 legs sat very flush on the ground with the slightest of wobble. So, I would say rest one side on the ground.. line up the 2X4s that connect the two sides at the top and then go from there, then do the shelves.

Built from Plan(s)
Estimated Cost
$217 ( including Kreg Master JIg set )
Estimated Time Investment
Weekend Project (10-20 Hours)
Finish Used
Krylon brown spray paint over the bare wood when assembled. Mostly along the edges and knots. Then vaseline over parts of the spray painted area. Then painted over this with Behr Satin Natural Gray.when it was all dried in 12 hours. I wiped off vaseline exposing some of the brown and then sanded lightly to rough it up. We wanted Beachie feel, so we avoided the X on the end. But I can see how it would be stronger with the X. We are mostly using it for a few light components and subwoofer and baskets.
Recommended Skill Level
Intermediate

fancy x farmhouse table-first timer!

Submitted by Anonymous (not verified) on Sun, 04/10/2016 - 22:31

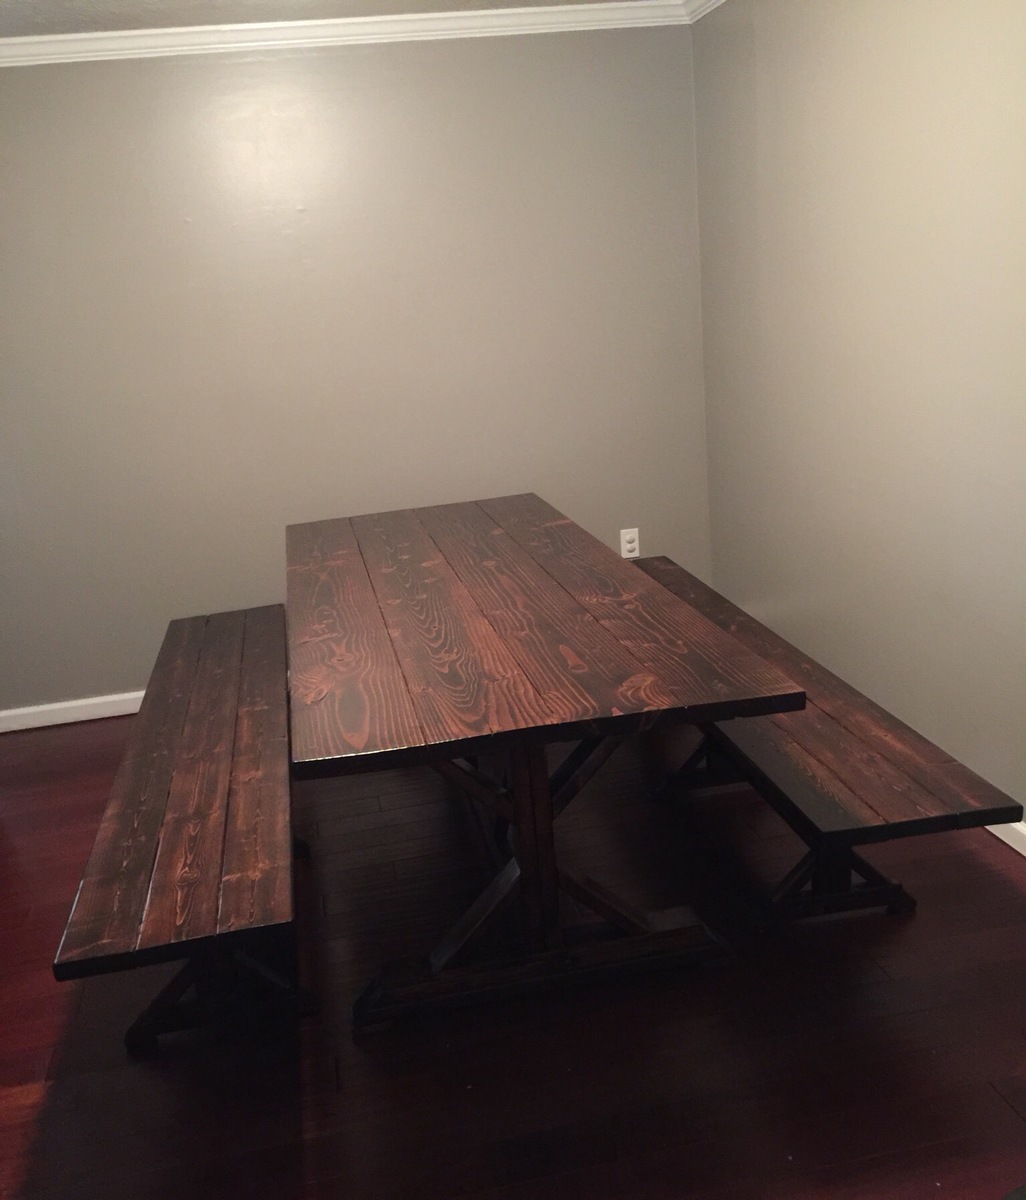
These wood plans were great! Easy to follow and an awesome first project for my hubby and I to build together. Only hitch for us was by choosing to make the longer bench we didn't check the placement of the feet before attaching it. When we were done we weren't able to push the benches under the table so we had to redo that step.

Estimated Cost
$120
Estimated Time Investment
Weekend Project (10-20 Hours)
Finish Used
We used two coats of minxwax red oak 215 stain and 3 coats of minwax semi gloss polyurethane.
Recommended Skill Level
Beginner

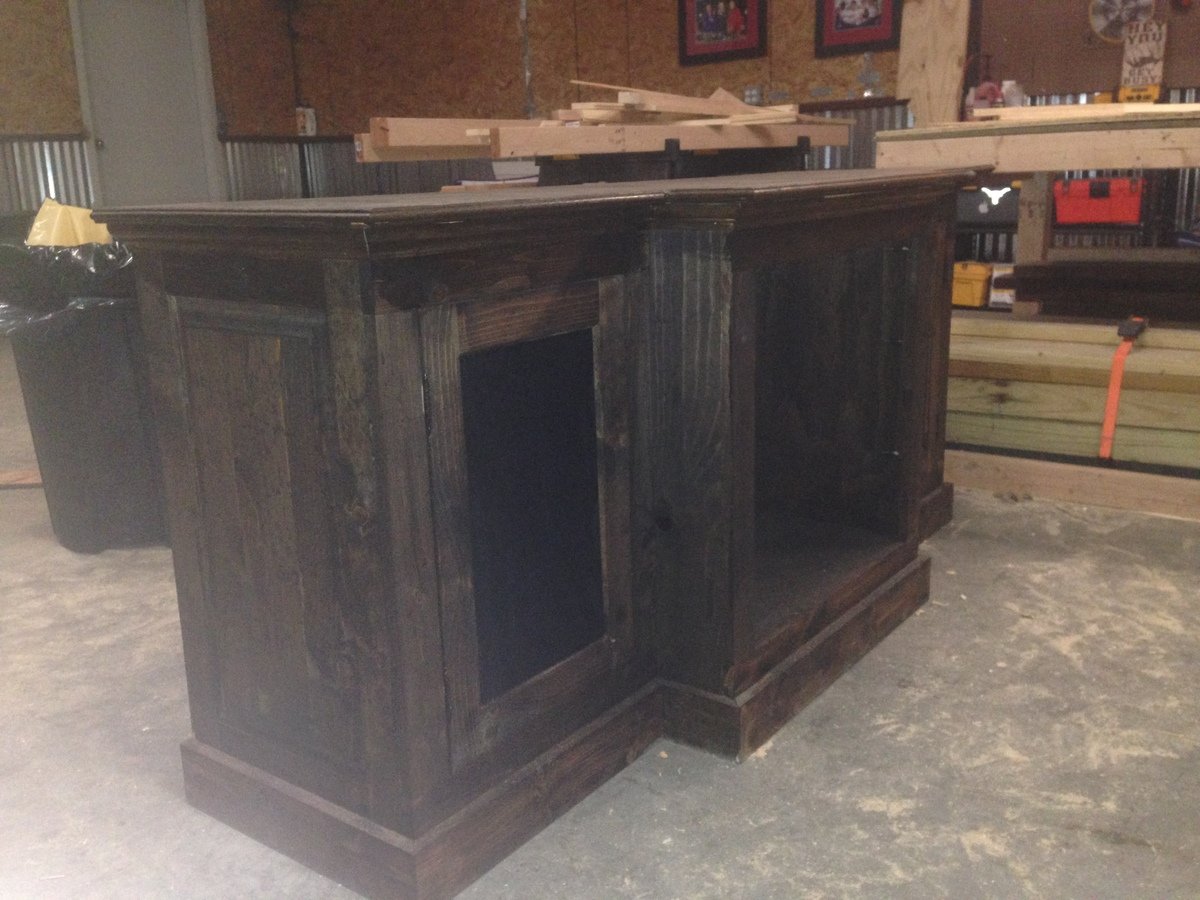
Restoration Hardware Inspired Media Console

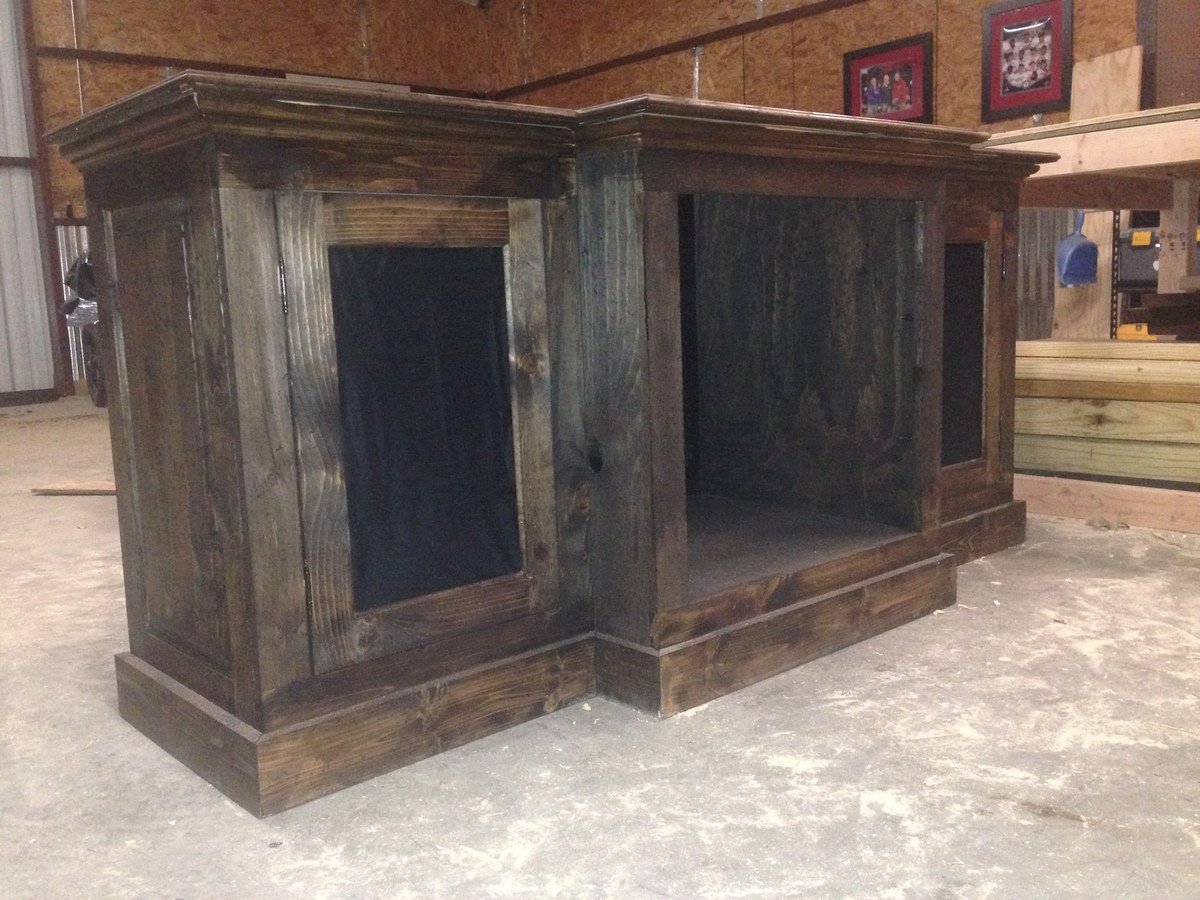
We got some new furniture and realized that the TV stand we currently have just wasn't going to work. We found a media console at Restoration Hardware that we really liked (http://www.restorationhardware.com/catalog/product/product.jsp?productI…). Well, we liked everything but the $1,300 price tag. With a couple sheets of 3/4 plywood, some 1x3's, 1x4's and 1x6's we built this for a fraction of the price. We even modified it so the two side doors have speaker mesh instead of solid panels so we can enjoy the sound without the eyesore of the speakers.

The stain is still drying so I don't have a final installed photo.

Estimated Time Investment
Weekend Project (10-20 Hours)
Finish Used
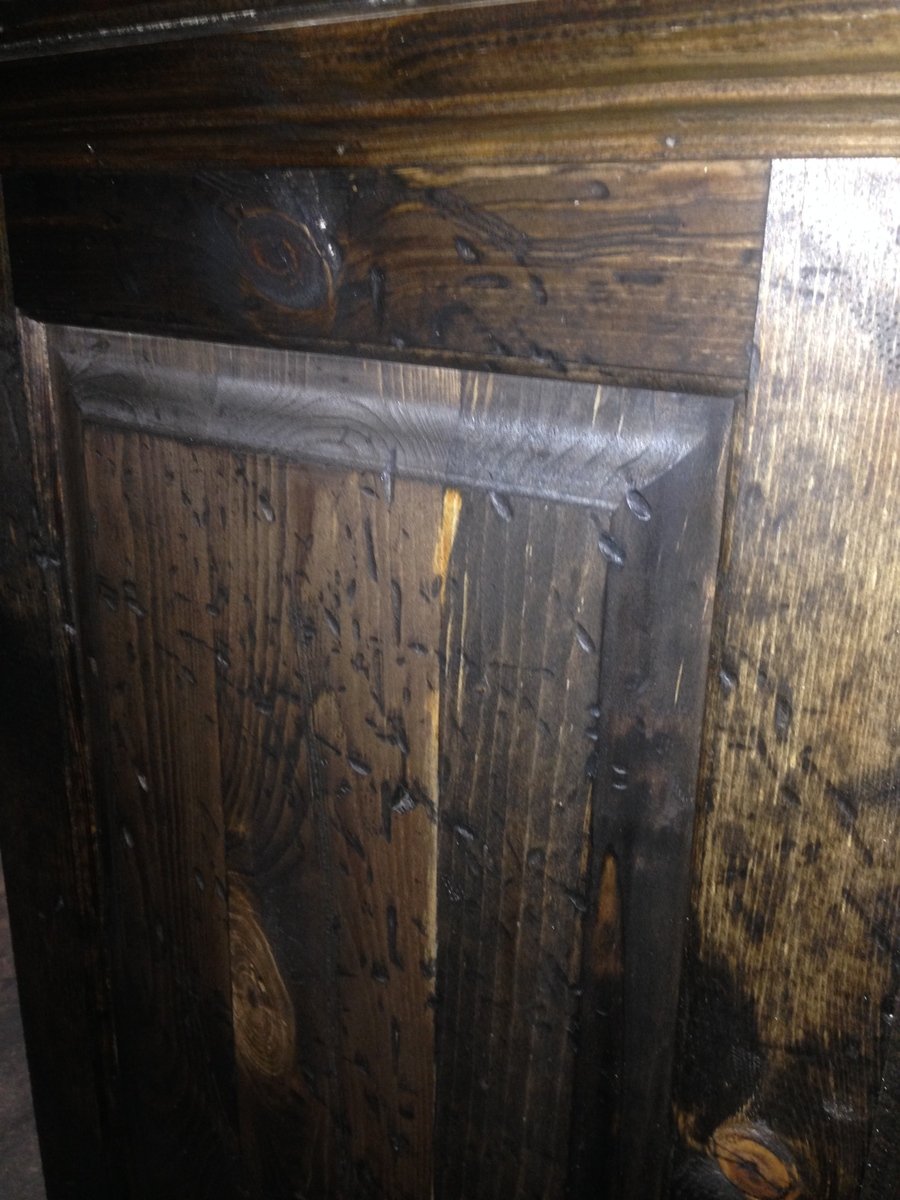
Once built, I beat it with chains, burned it with a torch and put one coat of MinWax Dark Walnut.
Recommended Skill Level
Intermediate

Comments

meggiefrue

Fri, 09/05/2014 - 11:23

I was curious if you had any kind of plans for this peice or if you could at least tell me what sizes of wood you used. I am very interested in building this!


Thnak you,


Meghan

szilvaierika

Sat, 03/14/2015 - 08:18

I am trying to build a similar style cabinet with the middle part coming out. Could you please let me know, since the middle section of the cabinet comes out, is the bottom and top cut out of one piece of wood? You can email me at [email protected]. Any help would be greatly appreciated. Thanks so much! Erika

shawnubis

Mon, 01/25/2016 - 08:33

I see several people have commented and asked for plans, but no one has responded :(
 

Jlplant

Sun, 10/16/2016 - 20:00

 Hello! This is a beautiful piece. Would love to see the plans, if they are available. Please let me know! Thank you! 

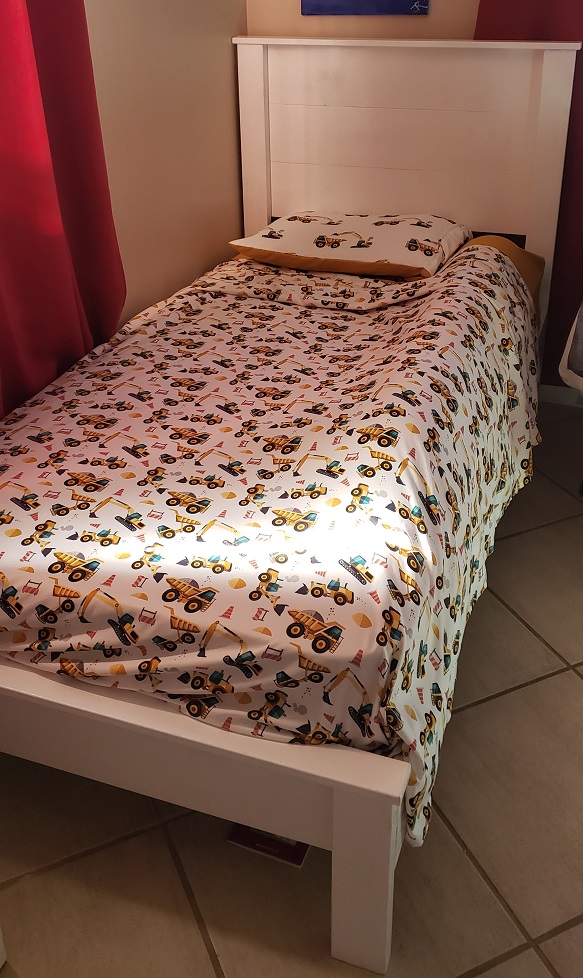
Kids Twin Bed

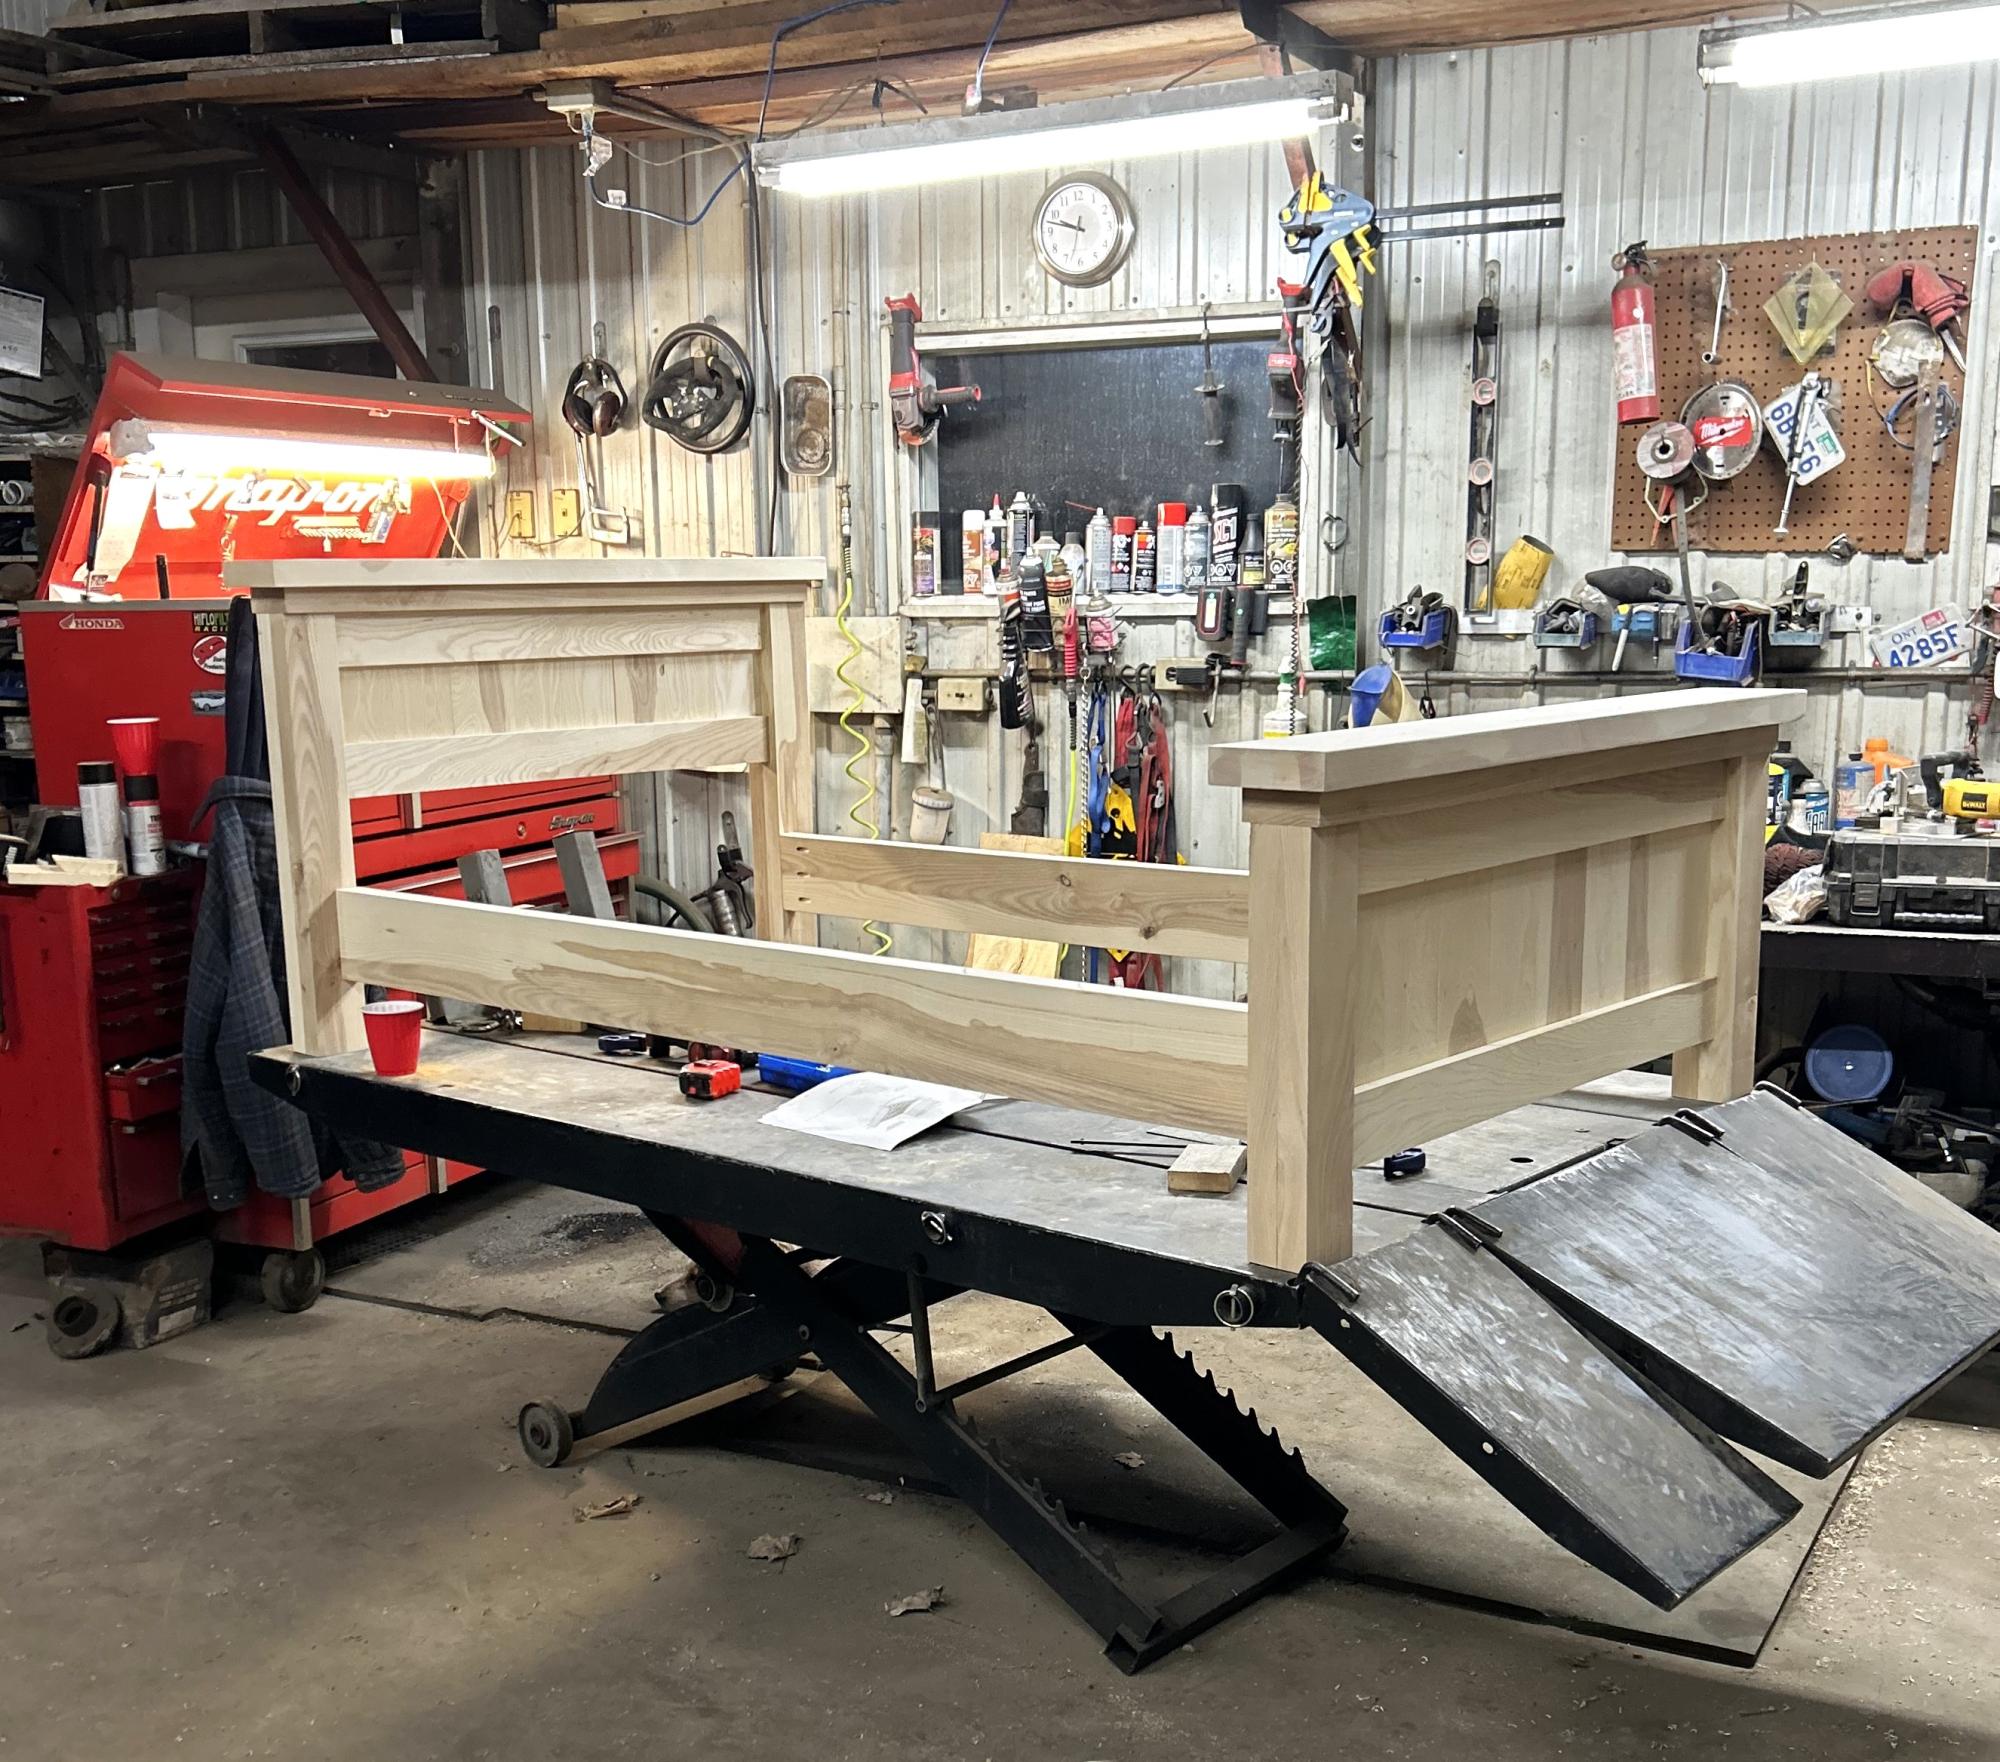
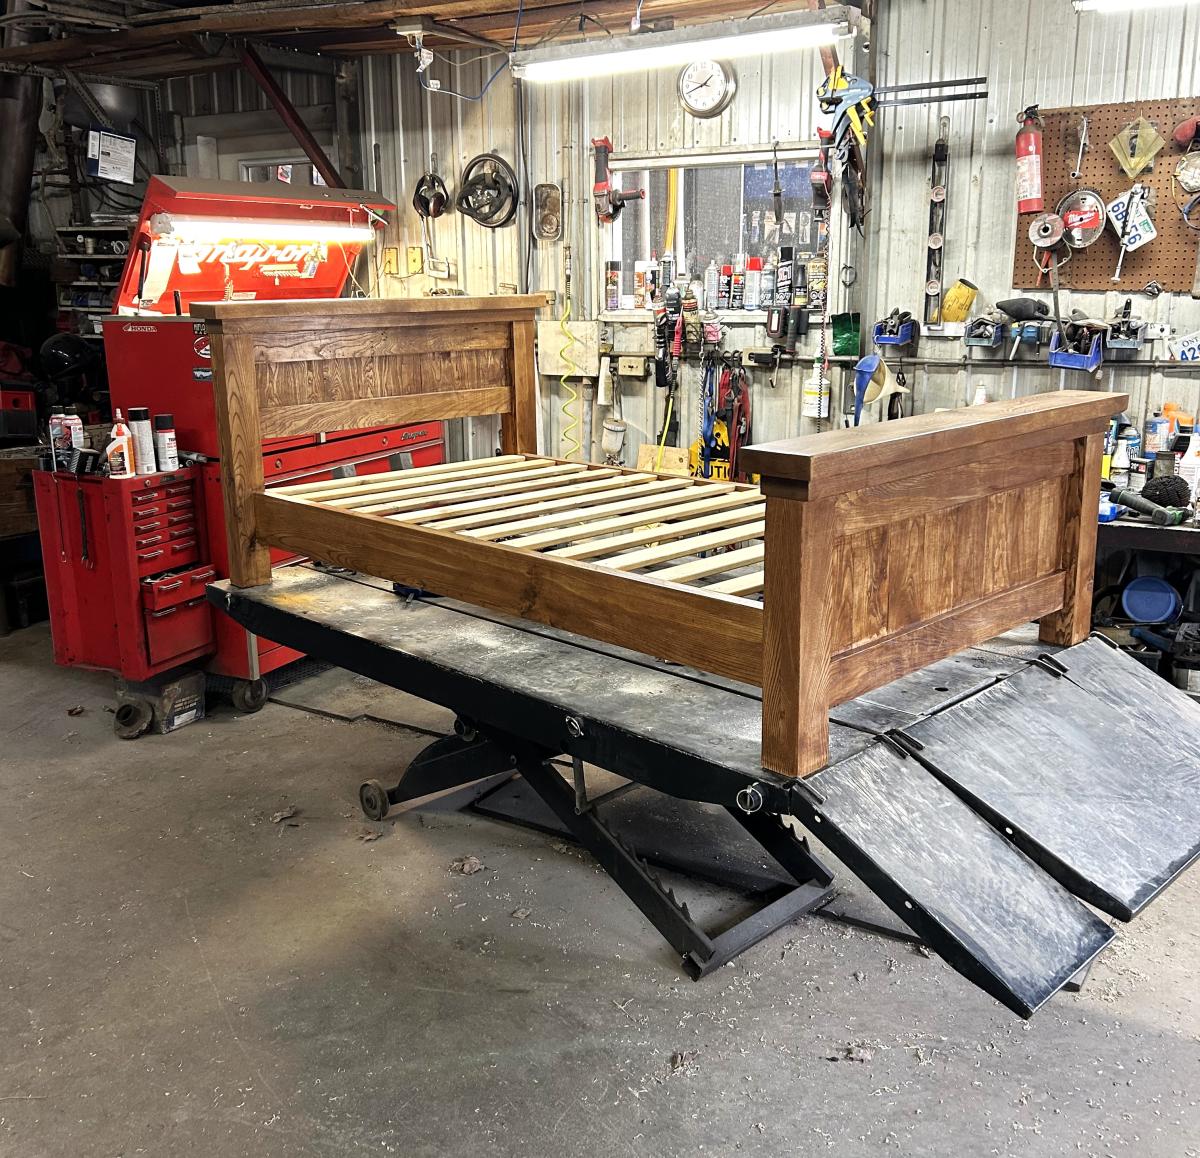
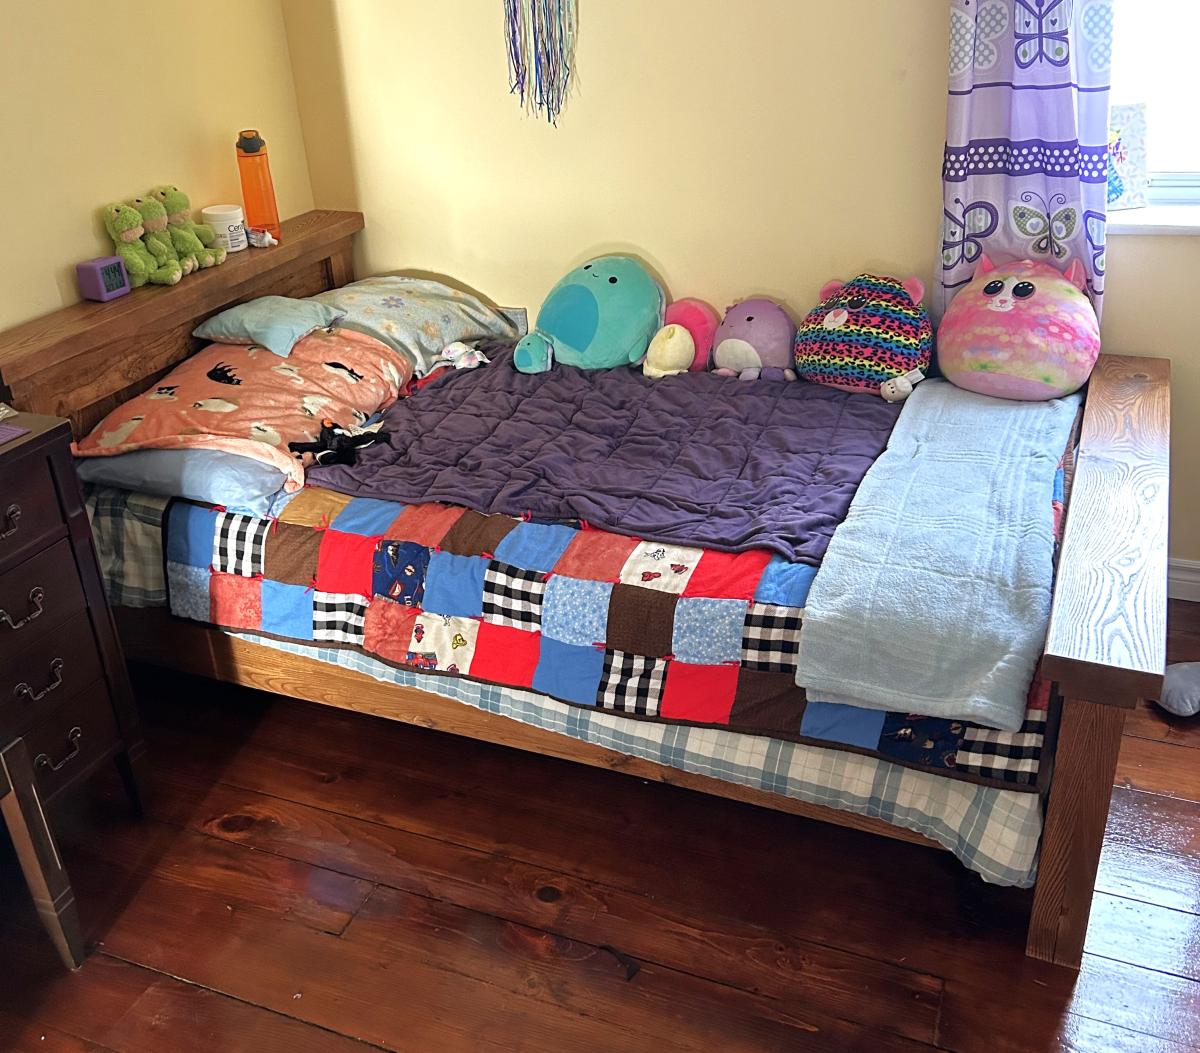
I built this for my second son who was tired of "being in jail", he's almost 3.  His older brother is now jealous!

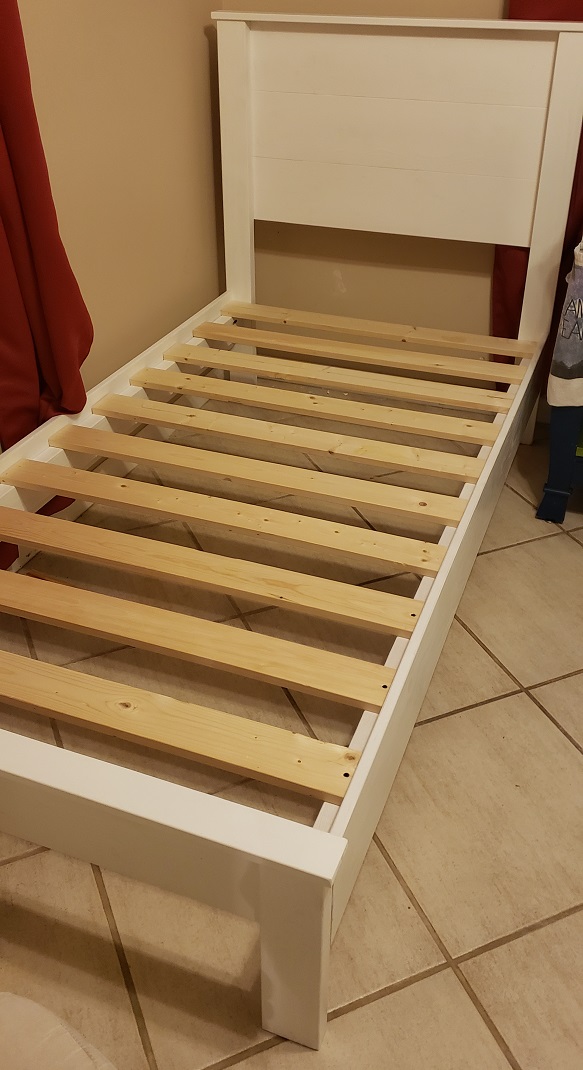
Was a nice easy build - the hardest part was paint spraying for the first time!  I would cut the slats pieces about 1/4" smaller to give a bit more wiggle room when lining up the pieces, and make sure to keep the headboard and footboard square when lining up.

The cost was higher for me being in the Bahamas. I used fir for the frame and spruce for the planks, why, I thought it would save some money but didn't really.

I used pocket holes to attach the bed rails to the headboard and footboard.

Estimated Cost
$250
Estimated Time Investment
Day Project (6-9 Hours)
Finish Used
Wonder-Tones interior primer/paint
Recommended Skill Level
Beginner

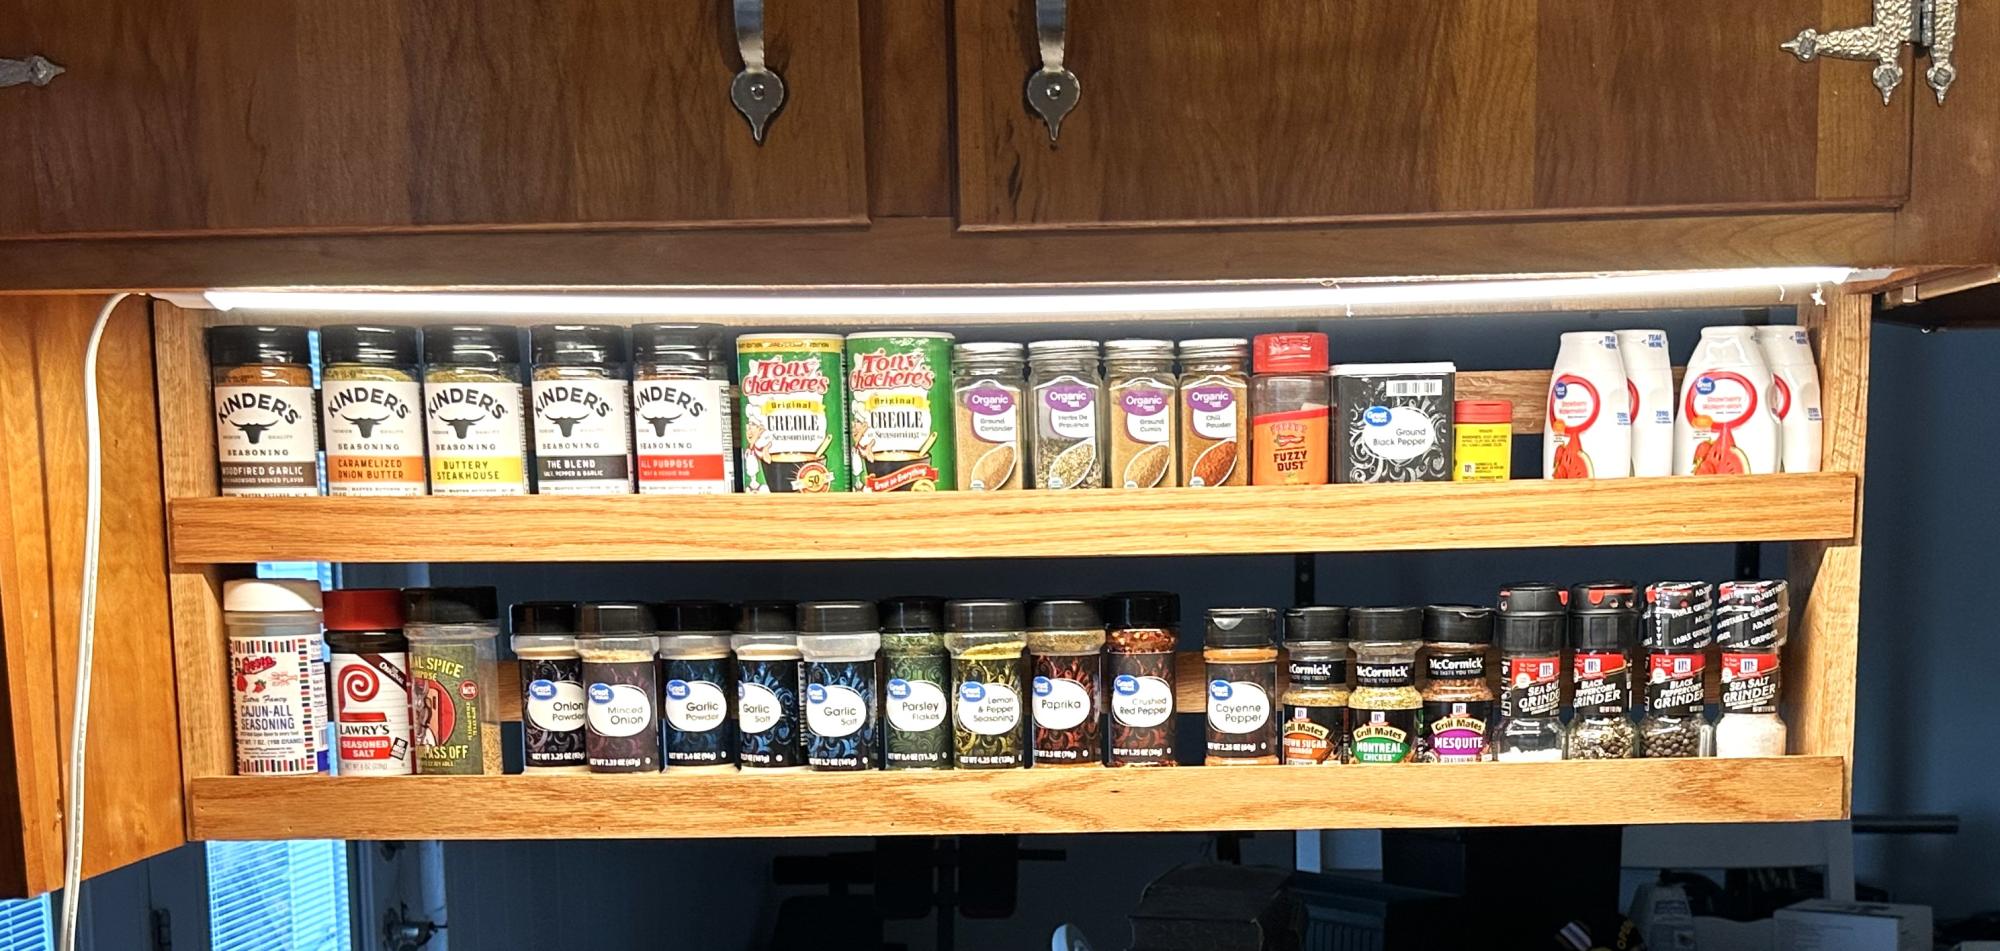
Under Cabinet Spice Rack

Submitted by Anonymous (not verified) on Mon, 09/11/2023 - 13:06

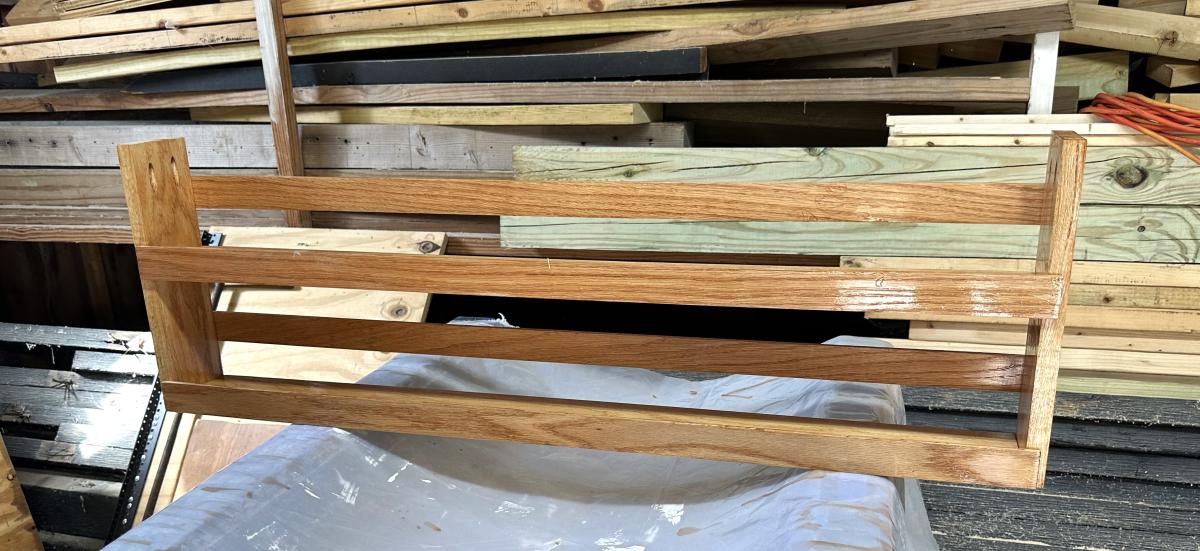
I needed to clear out a shelf in my cabinet and add a spice rack so I could actually see everything. This came out perfect! Made of Oak and stained with classic oak. Very simple to build and hung with pocket screws

James Breadbox

Built from Plan(s)

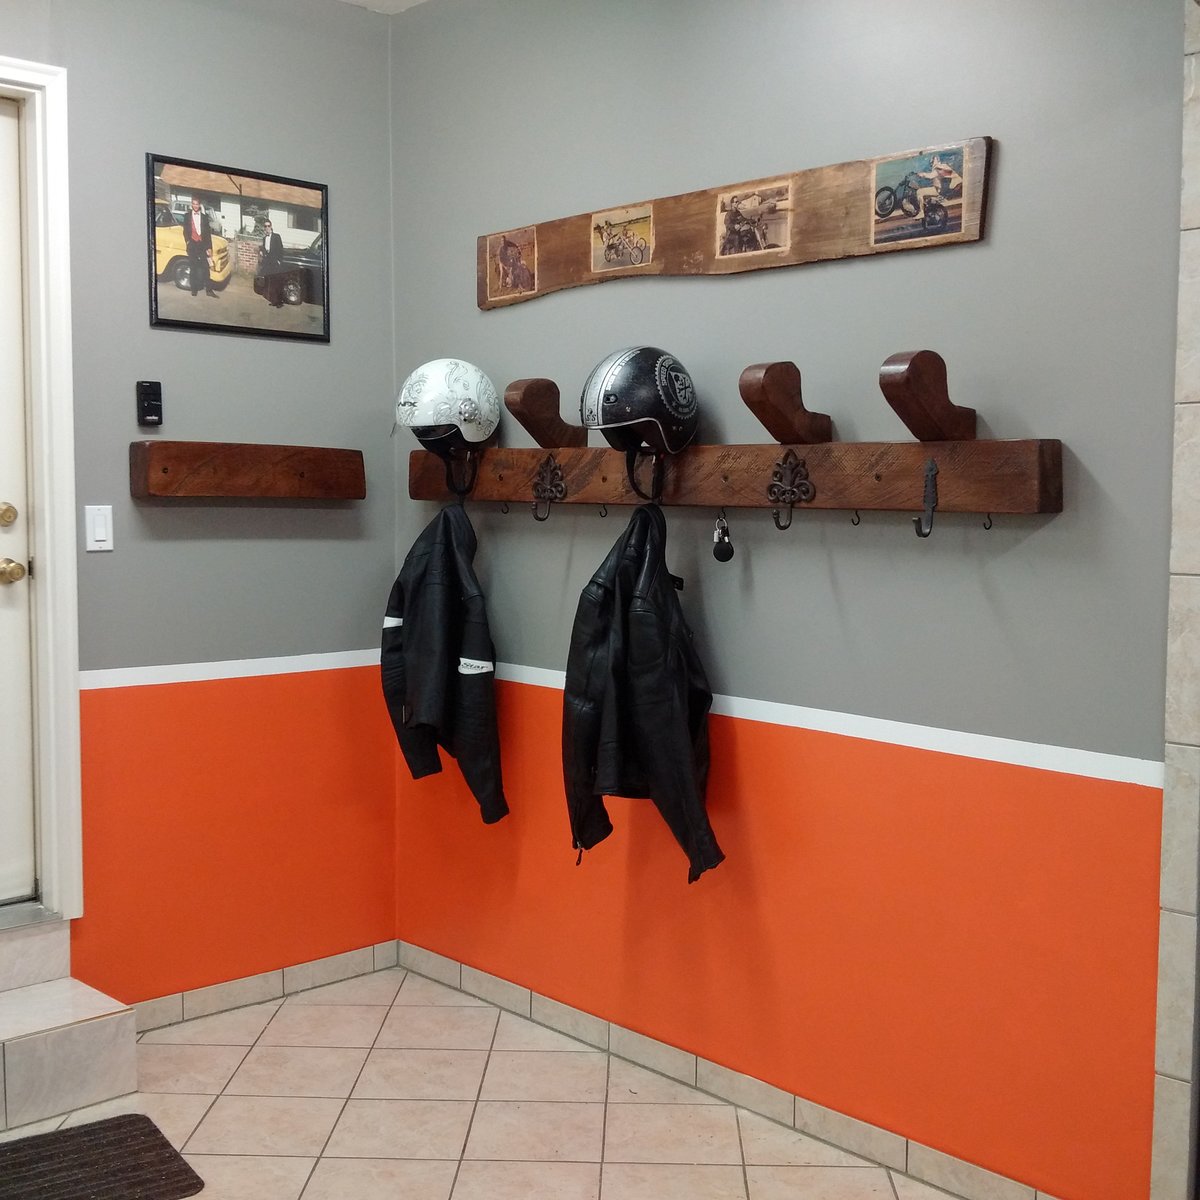
Motorcycle Jacket and Helmet Rack

Submitted by Anonymous (not verified) on Thu, 05/19/2016 - 10:52

Built from left over Rough Cut Maple.  Jaket, Helmet and Key Rack

Estimated Cost
$50
Estimated Time Investment
Afternoon Project (3-6 Hours)
Finish Used
Minwax Stain and Polyurithane
Recommended Skill Level
Beginner

Comments

Vintage pew bench alteration

Submitted by Wnolan on Mon, 03/17/2014 - 11:16

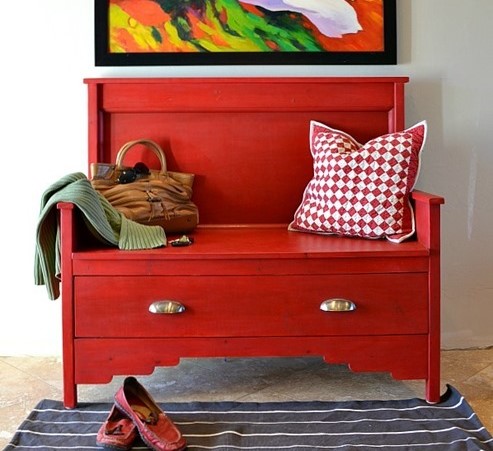
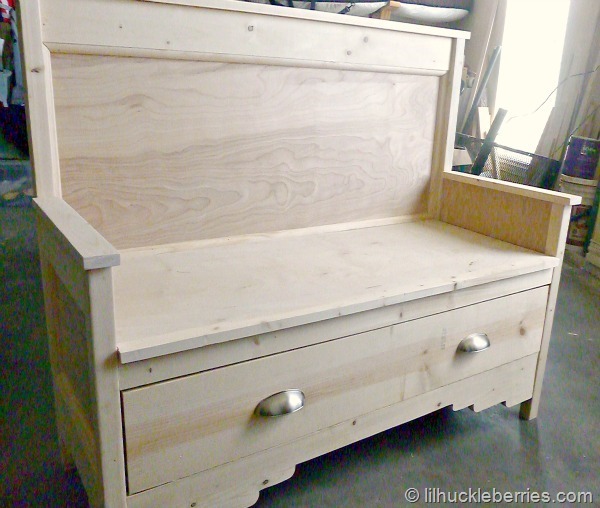
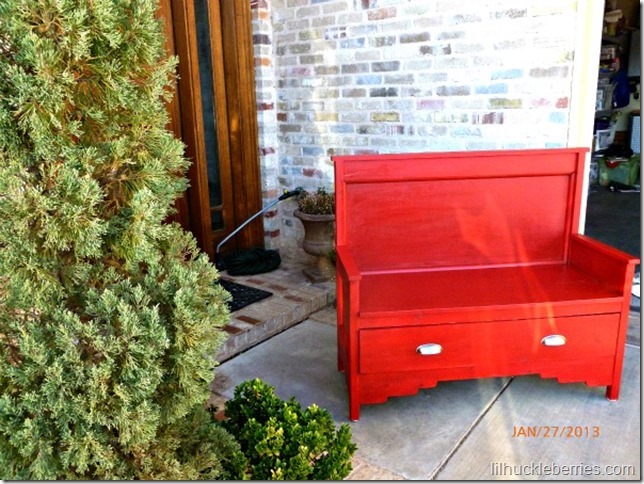
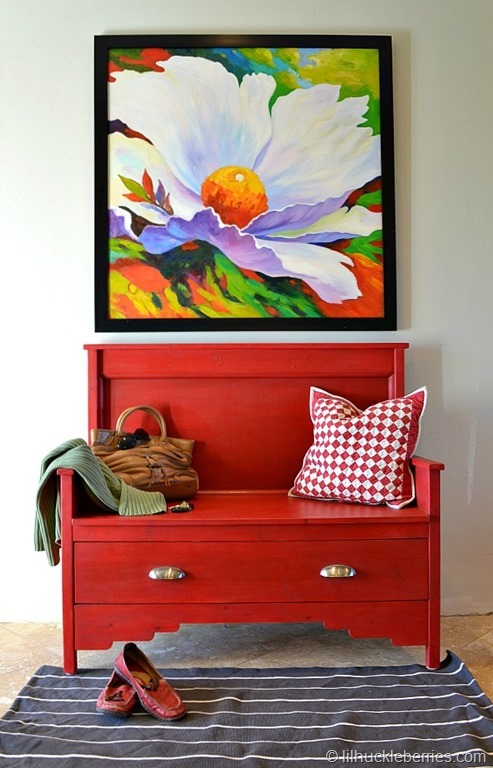
I needed additional seating for my dining room table and wanted something a little unusual. When I saw the vintage pew bench, I loved it. After looking at the plans, I determined I could alter the arm height so we could use it at our dining table. Now that we have moved, we no longer need it at our dining table, so it now sits in our entry. It has been a great multifunctional piece.

Built from Plan(s)
Estimated Cost
less than $100.
Estimated Time Investment
Afternoon Project (3-6 Hours)
Finish Used
Miss Mustards Seed's Milk Paint with a clear coat of wax and an antiquing glaze over that.
Recommended Skill Level
Intermediate

Comments

Ana White

Tue, 03/18/2014 - 10:44

Amazing Pop of Color, Love the Bench! Is that a print or painting, may I ask where you found it?

Wnolan

Mon, 03/24/2014 - 13:25

Thanks Ana! It is a painting. I bought it in South Korea while we were living there.

I may be able to track a canvas down for you, though. You would have to get it stretched...it would be too large to ship. I have a friend who is living there now. ;-)

Kae429

Sun, 09/20/2015 - 16:44

What's the new arm height? I'm going to TRY to adapt this to a 60" bench with two drawers, and the lower arms.

Seasonal And Holiday

King Size Platform Bed

Submitted by hawaiitara on Sun, 06/03/2012 - 20:09

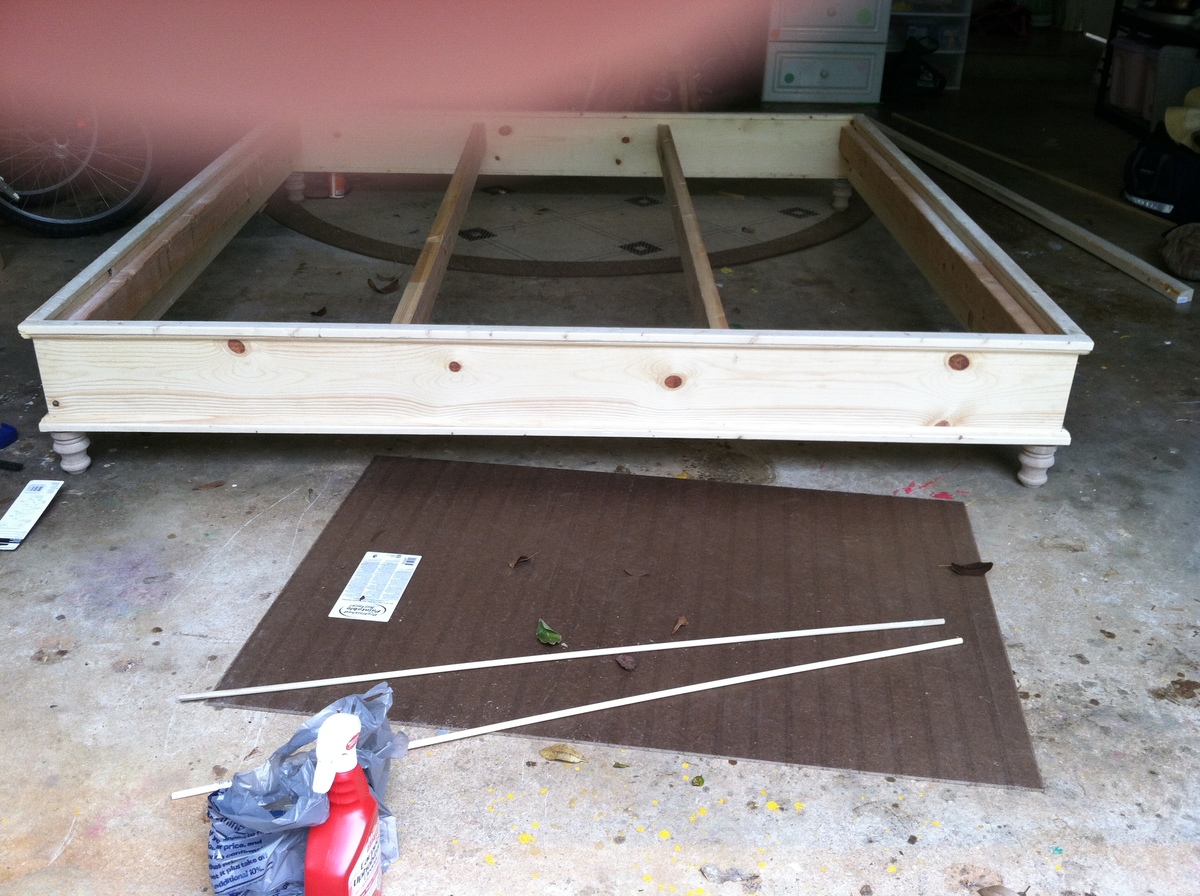
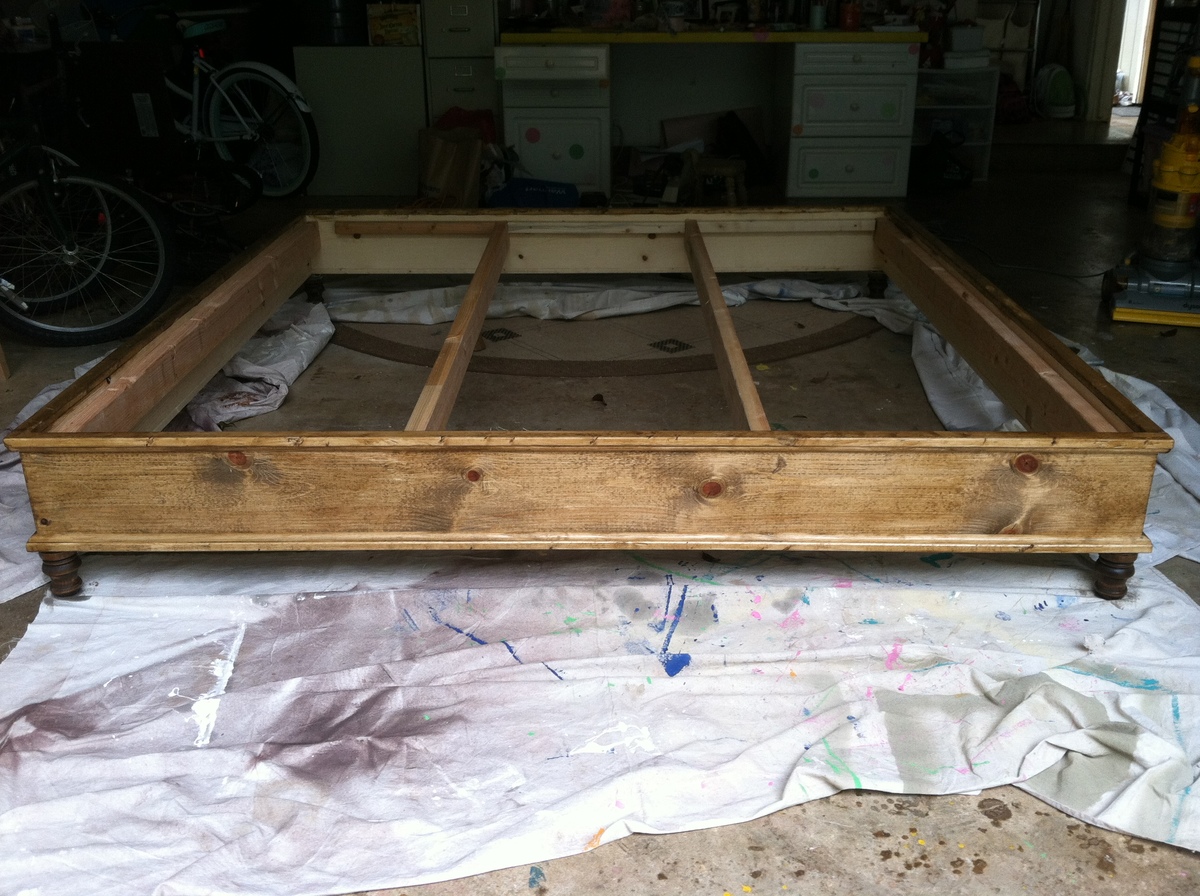
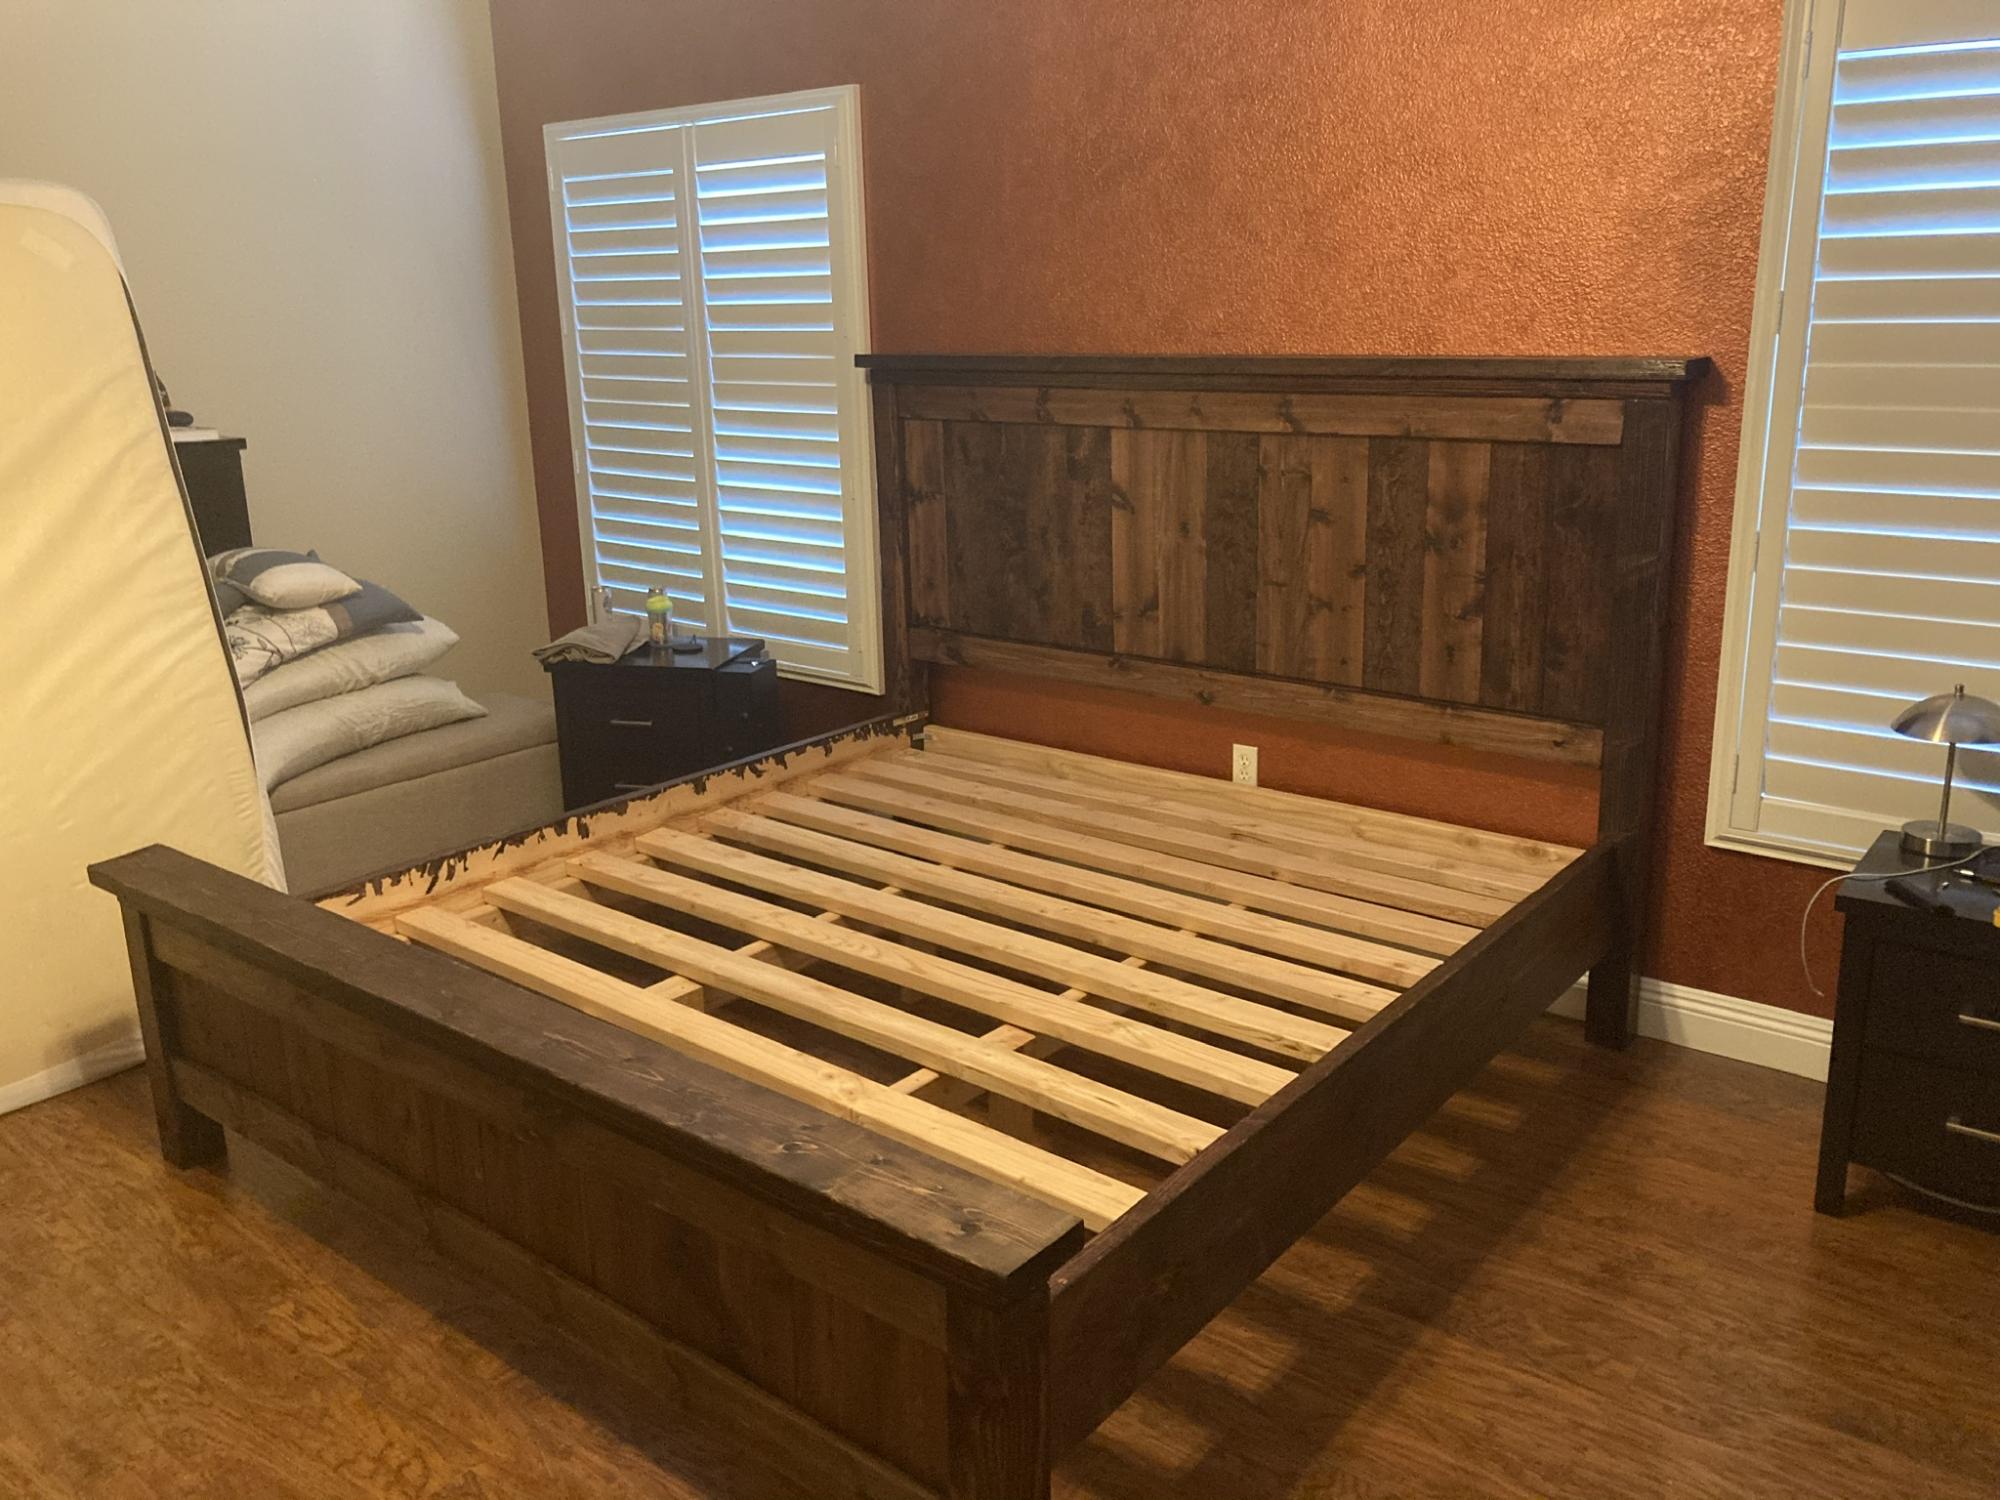
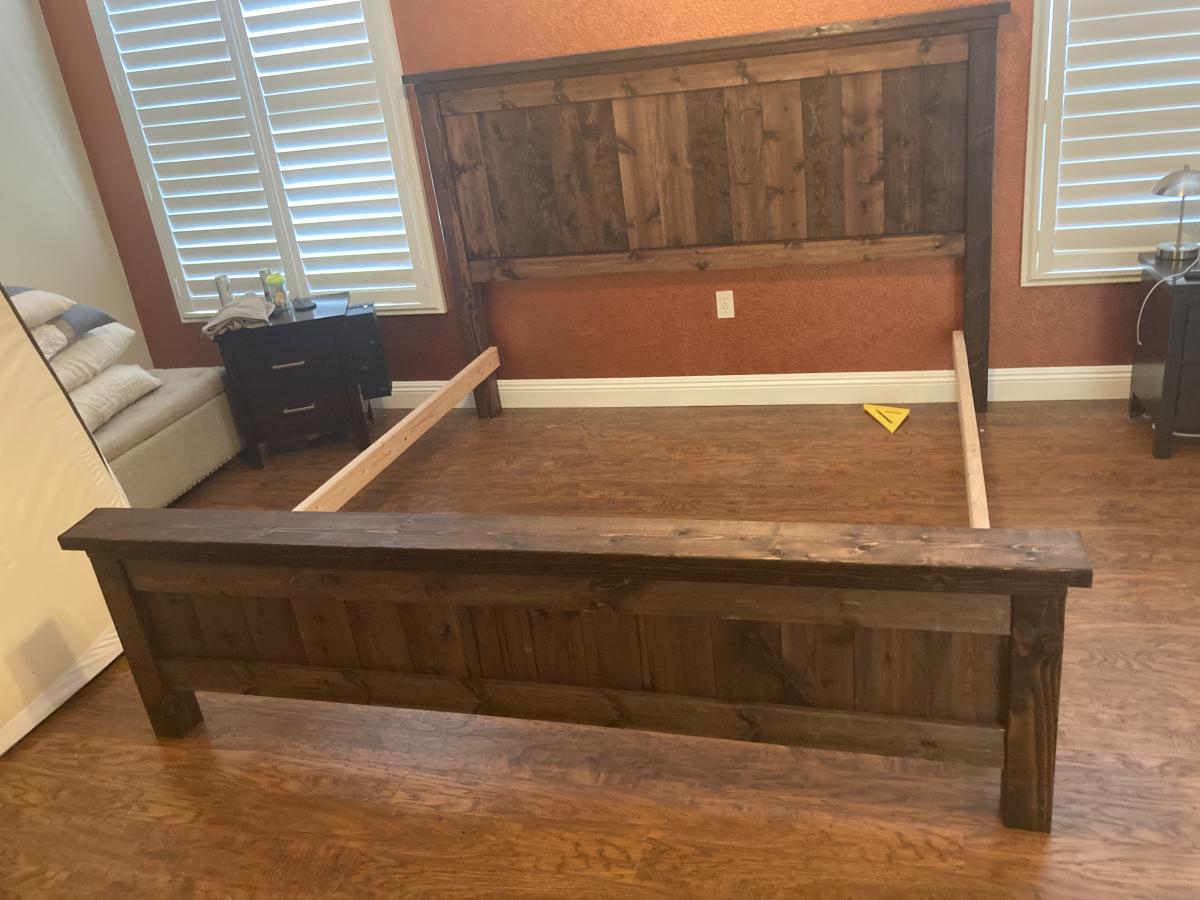
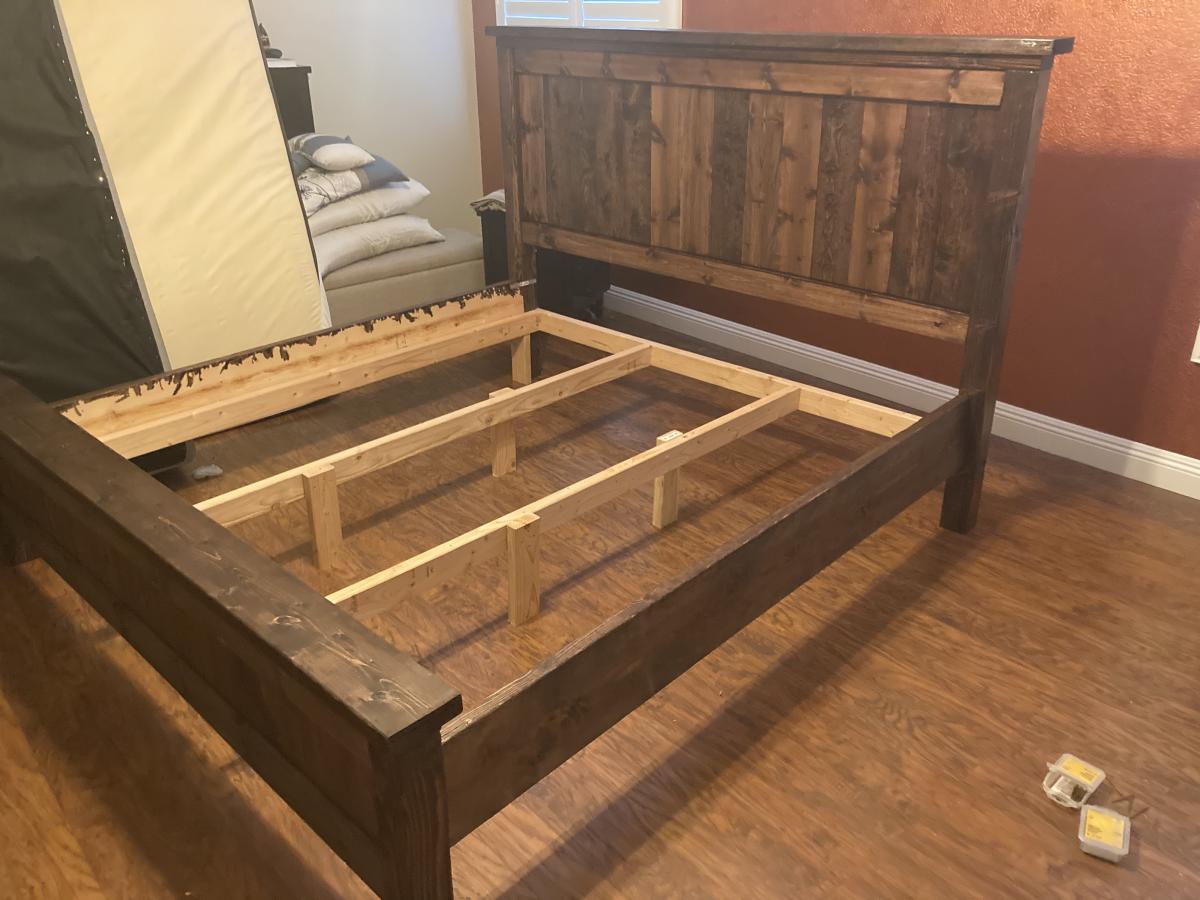
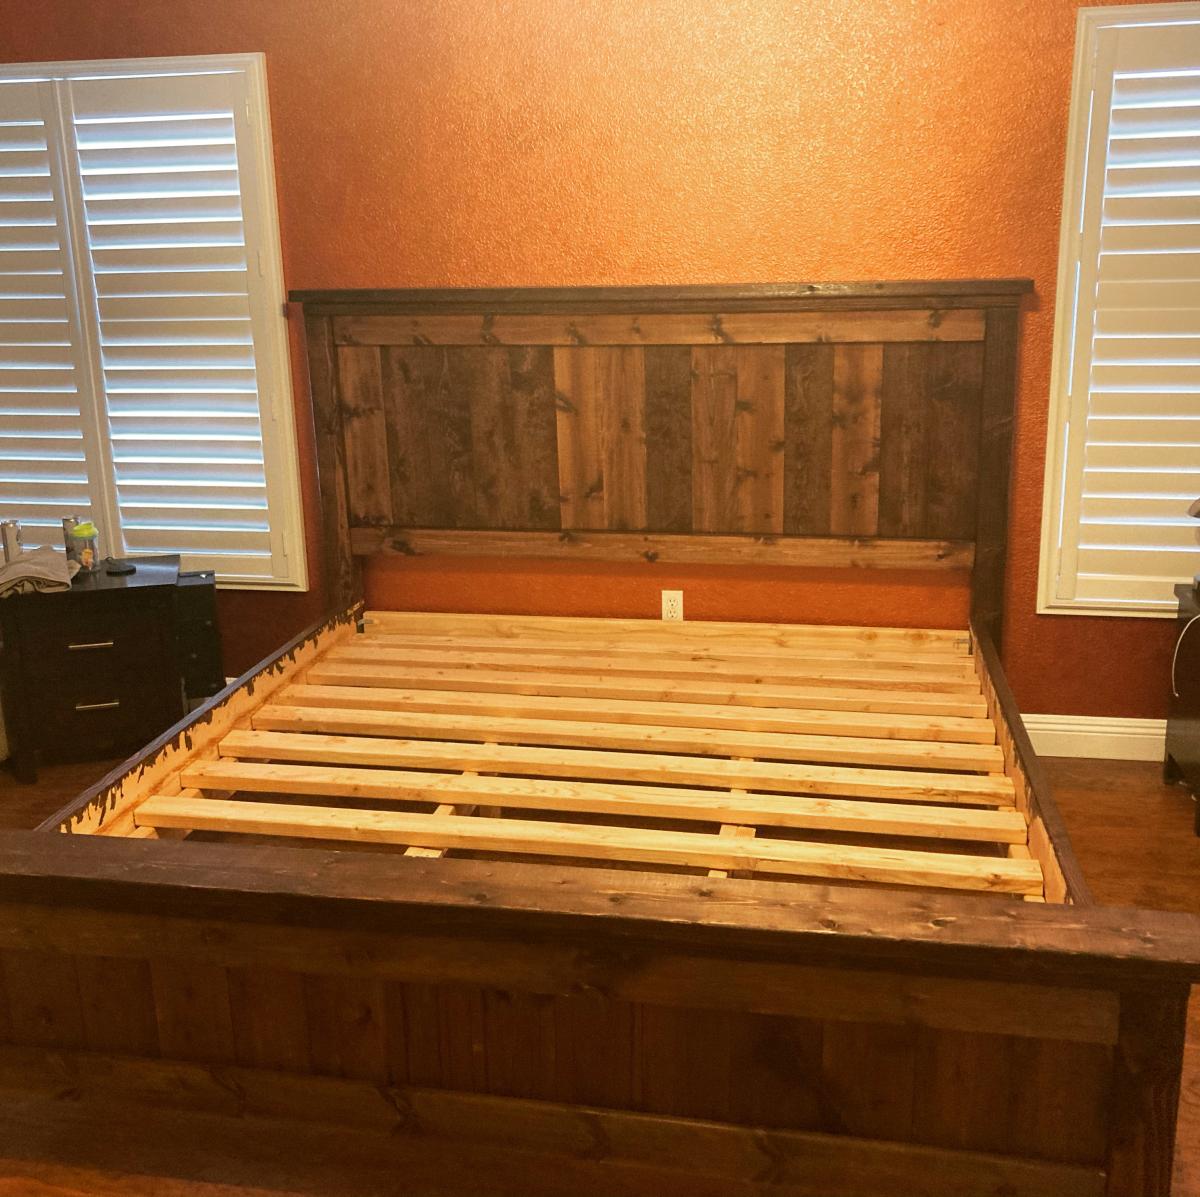
After building my daughter's beds and some outdoor day beds, I finally got around to building a bed for my husband and I. I altered the plans to a king size bed. I added a second 2x4 in the middle for support and around the inside edges as I used the box springs to make the bed taller. Using the kreg jig really made this project so easy. I also used 1x8's instead of 2x8's because I couldn't find those in Hawaii anywhere, except pressure treated wood. It still turned out great.
Thanks for the wonderful plans!

Estimated Cost
$125
Estimated Time Investment
Afternoon Project (3-6 Hours)
Finish Used
I used cabot stain in antique walnut with a cabot satin poly over it.
Recommended Skill Level
Beginner

Comments

Katie Saldivar (not verified)

Mon, 06/25/2012 - 19:40

I LOVE this bed! I'm asking my husband to build it and I was wondering if you could email me the dimensions for the plans of a king size Chestwick Platform bed? I'm pretty sure he could figure them out on his own, but I'd love to make it easier for him :) Love your work!

Larryshandywife

Wed, 08/22/2012 - 23:04

Whats the point of sharing projects with people when they dont leave the dimensions????............How stupid!!!

sgilly

Thu, 08/23/2012 - 08:25

For sharing. It's beautiful, and how smart you are to work from existing plans but be able to figure out the dimensions you need for your own bed!

Farmhouse Bed - King Size

Submitted by steezyken on Fri, 05/01/2020 - 10:30

Relatively simple project. Just follow the the directions step-by-step and there will be no issues finishing in a day. Have to start early if planning to stain and complete in the same day.

Estimated Cost
$250
Estimated Time Investment
Day Project (6-9 Hours)
Finish Used
Applied Dark Walnut Miniwax stain for 10-15 minutes followed by an Oil Based Polyurethane.
Recommended Skill Level
Beginner

A-Frame Chicken Coop (with modifications)

Submitted by anniejw17 on Mon, 07/02/2012 - 18:39

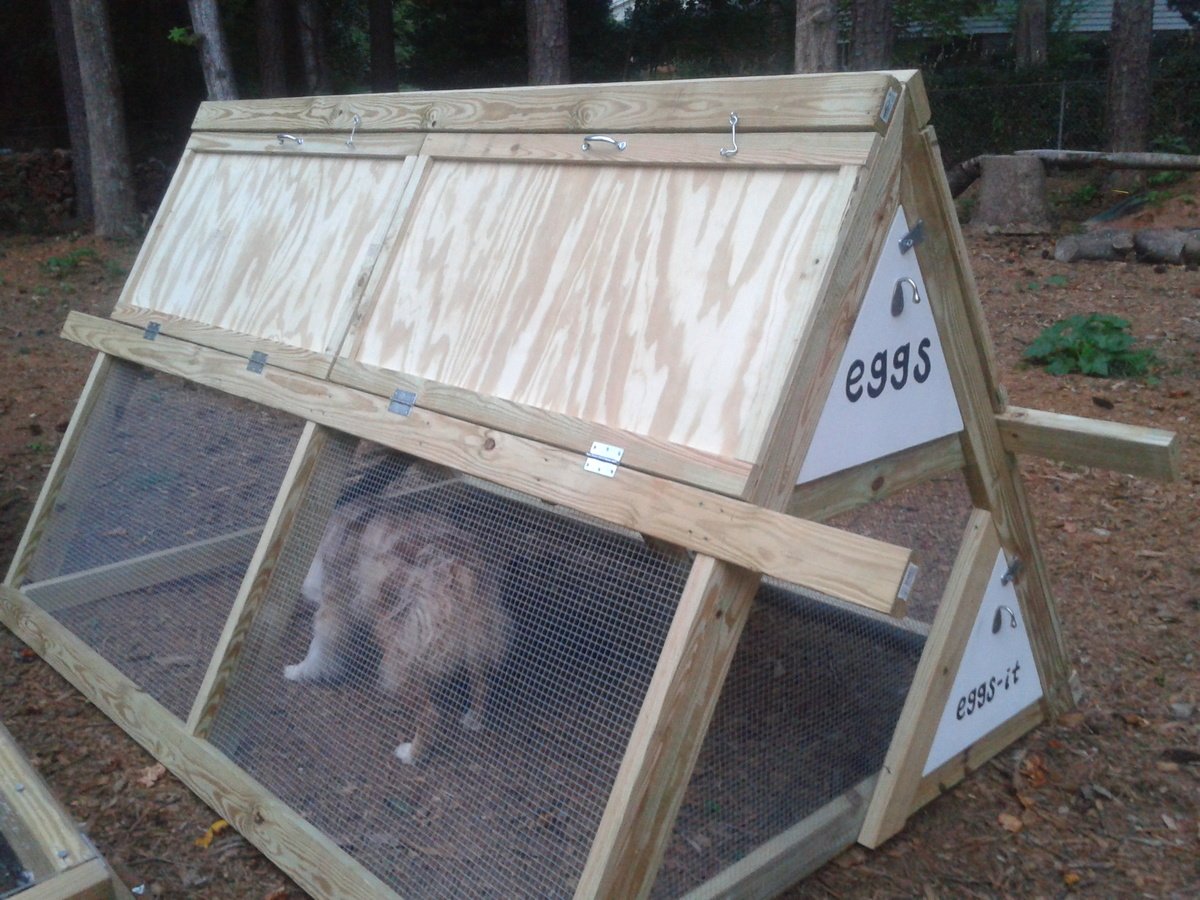
We followed the plans for the A-frame chicken coop very closely, and then modified it a bit at the end.

1. Trim was added to two doors on each side, as suggested. They are secured with latches at the top, more to keep them from falling open than to keep critters from getting in. We used 2x4x10's instead of 2x4x8's on the middle horizontal rail, giving us foot-long handles on each side. My husband and I are able to move the coop about 15 feet at a time, which is pretty good considering it is STURDY!

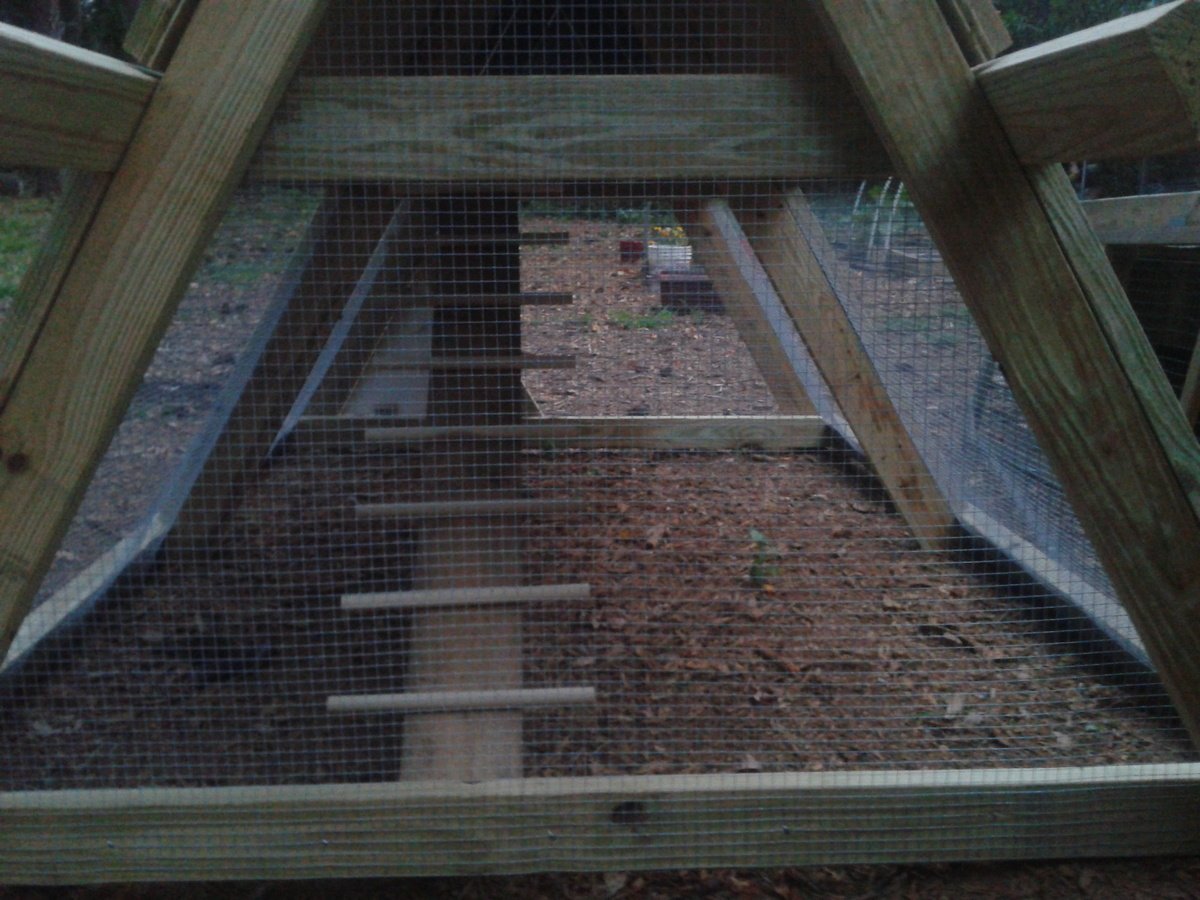
2. We used 1/2" galvanized hardware cloth instead of chicken wire, as suggested by one commenter (and lots of others in blogland).

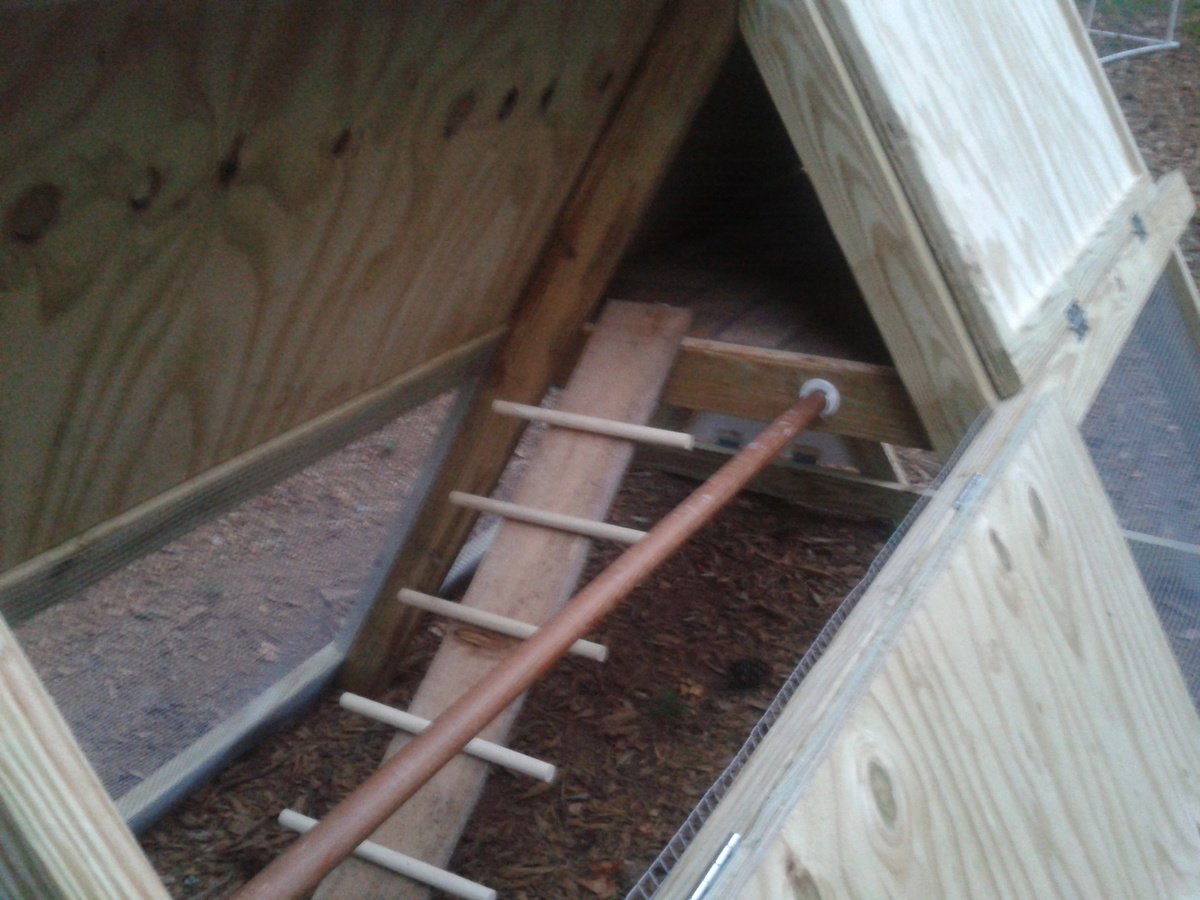
3. I cut 1/4" plywood to fit the loft space and coated it with vinyl stick-on tile. This should make it easier to clean. We didn't screw down the plywood, so if we have to, we can remove it to hose it off/scrub it.

4. I cut a triangle of plywood to make an egg door at the end of the roost. It hinges at the bottom (with a 2x4 ripped into a 1x4 to cover the hardware cloth and provide a mounting spot for hinges) and latches at the top. I plan to use cotter pins or something to secure the latch. There is also a piece of untreated 1x4 held in place with tabs at the egg door to prevent bedding from falling out once it's converted to the nesting box (I'm planning to get pullets, not ready to lay yet, so they won't even have a tempting nest box)

5. There was no bottom door in the plans (to allow free-ranging), so I cut a piece of 2x4 to make a triangle against the bottom (same size as the egg door). It folds out (just like the egg door) and will allow the chickens easy access to the yard. We do have hawks in our neighborhood so free time will always be supervised. We also have a dog (who I coaxed into the coop for the main picture, haha!) who will need supervising. She's been around chickens before but you never know what will make her turn on them!

6. There was also no roost in the plans (although if you look at Ana's coop, there is a 2x4 across the middle of the side walls). I had a leftover closet rod, so I mounted that in the covered section parallel to the ladder. The ladder was shifted to the side. For the ladder, I just used a piece of cedar fencing and cut 2 48" dowels into 4 pieces each, and secured those with screws from the underside. I hope my chickens will be able to get up the ladder!

7. I also made a tube feeder from PVC and a dog bowl, and am working on a nipple waterer. Will update post when those are finished!

Now I just have to get some hens! I've been searching craigslist and can't wait!
Built from Plan(s)
Estimated Cost
200
Estimated Time Investment
Day Project (6-9 Hours)
Finish Used
Unfinished except for plywood floor (vinyl stick-on tile) and plywood doors (white exterior acrylic paint)
Recommended Skill Level
Intermediate

Comments

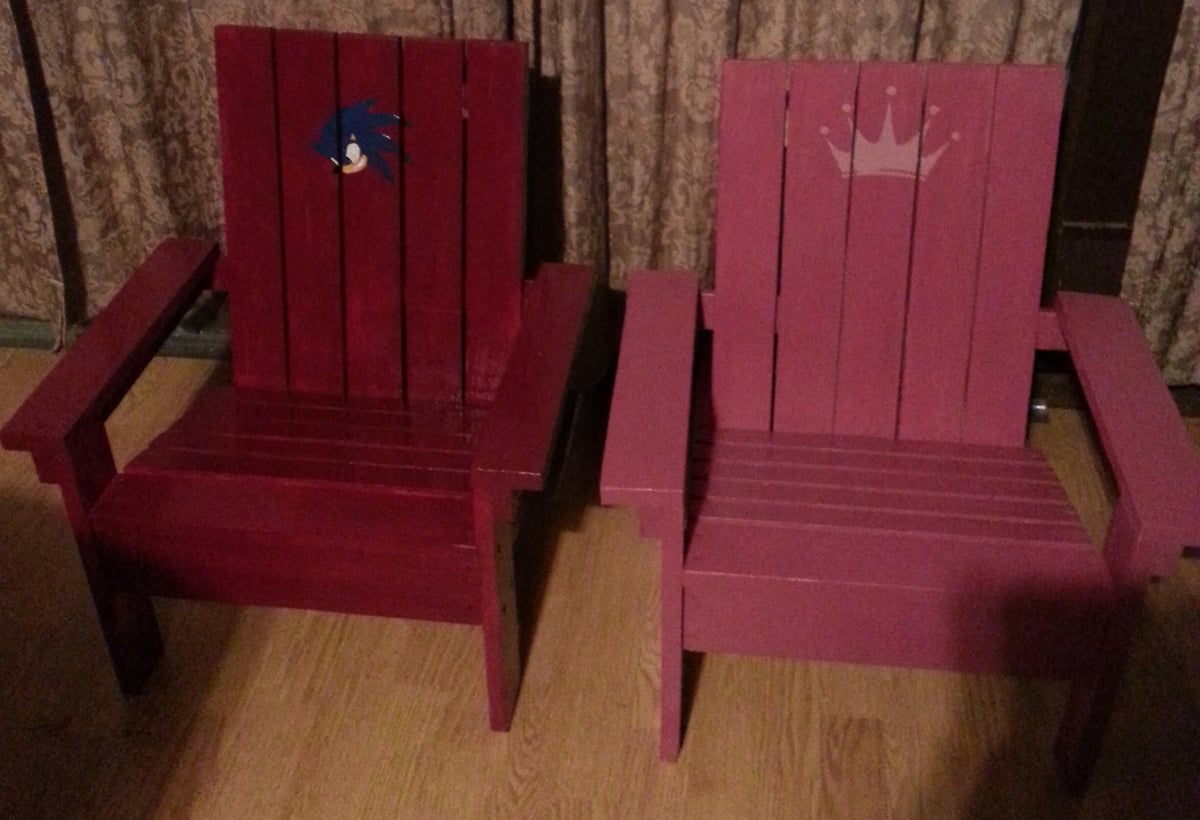
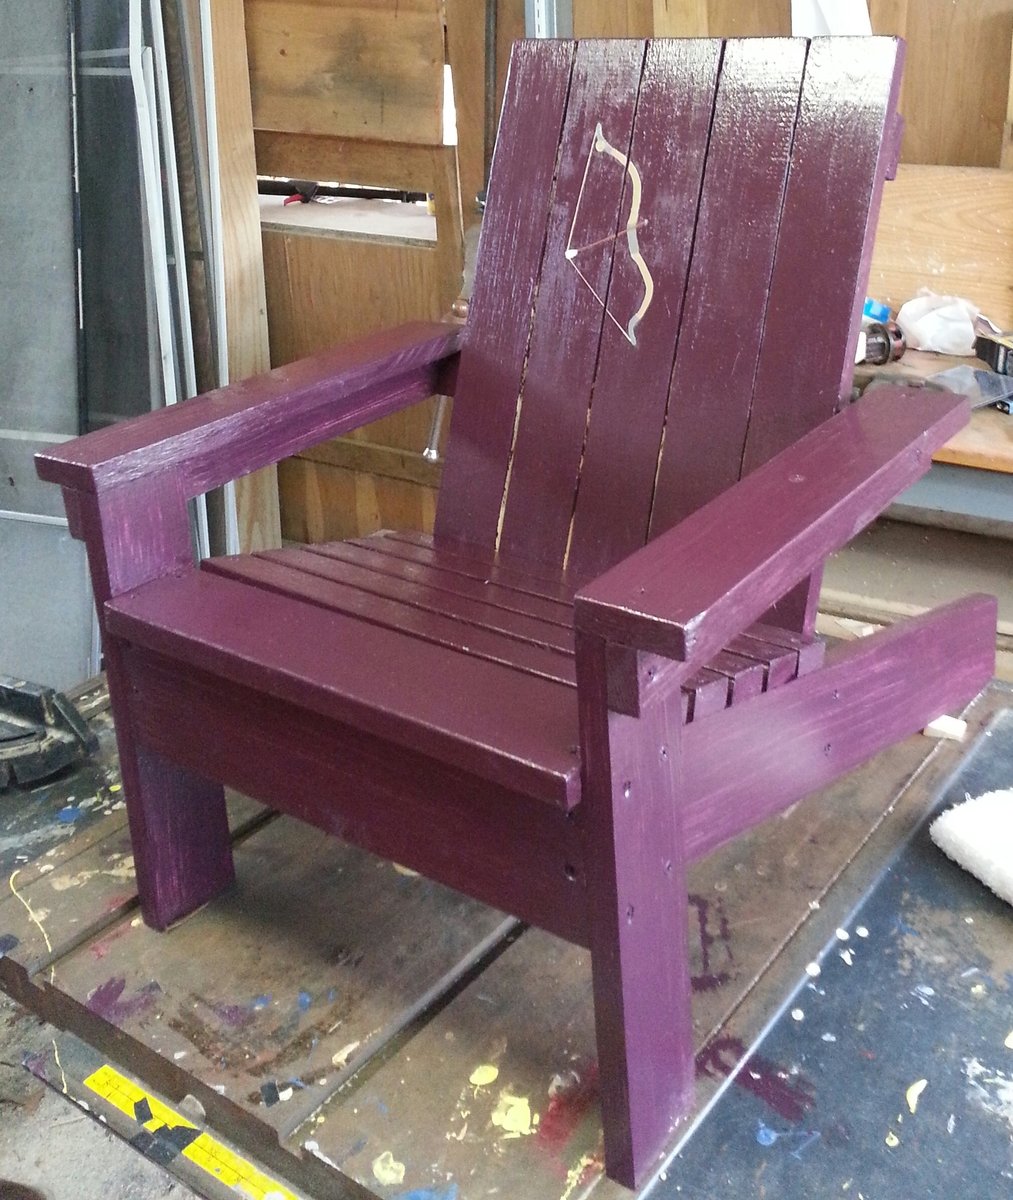
kids Adirondack

Submitted by jarsofclay on Mon, 04/28/2014 - 14:02

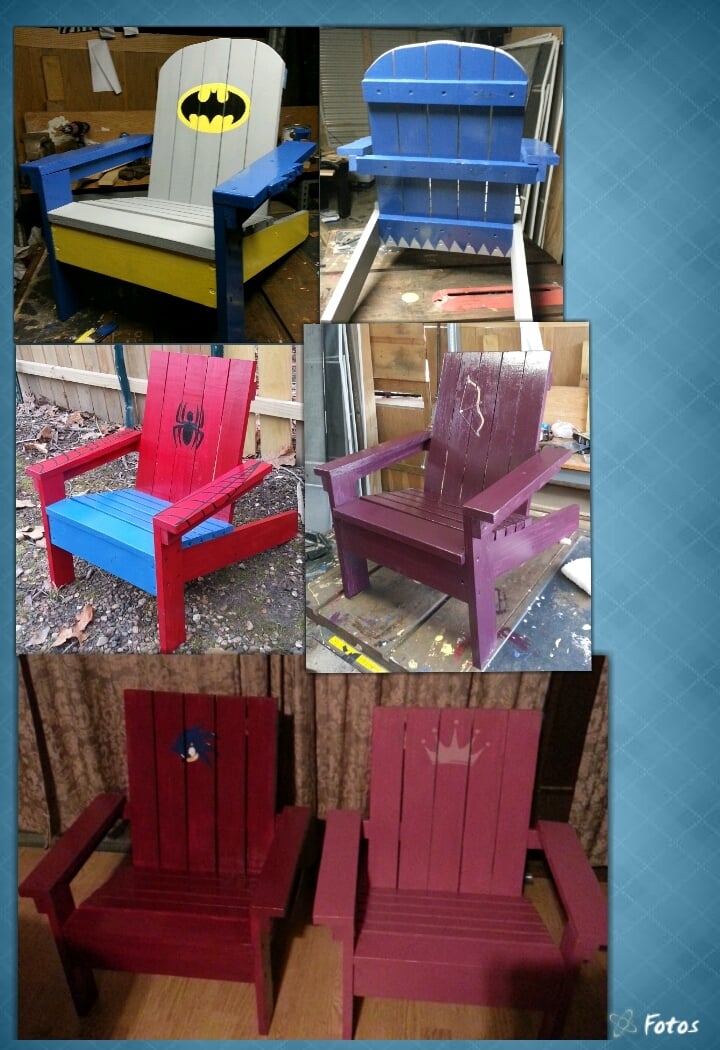
I started msking tgese for my kids and couldnt stop. first was the sonic and princess then spiderman then batman and last the brave chair.

Built from Plan(s)
Estimated Time Investment
Afternoon Project (3-6 Hours)
Finish Used
Paint lots of fun painting
Recommended Skill Level
Beginner

Comments

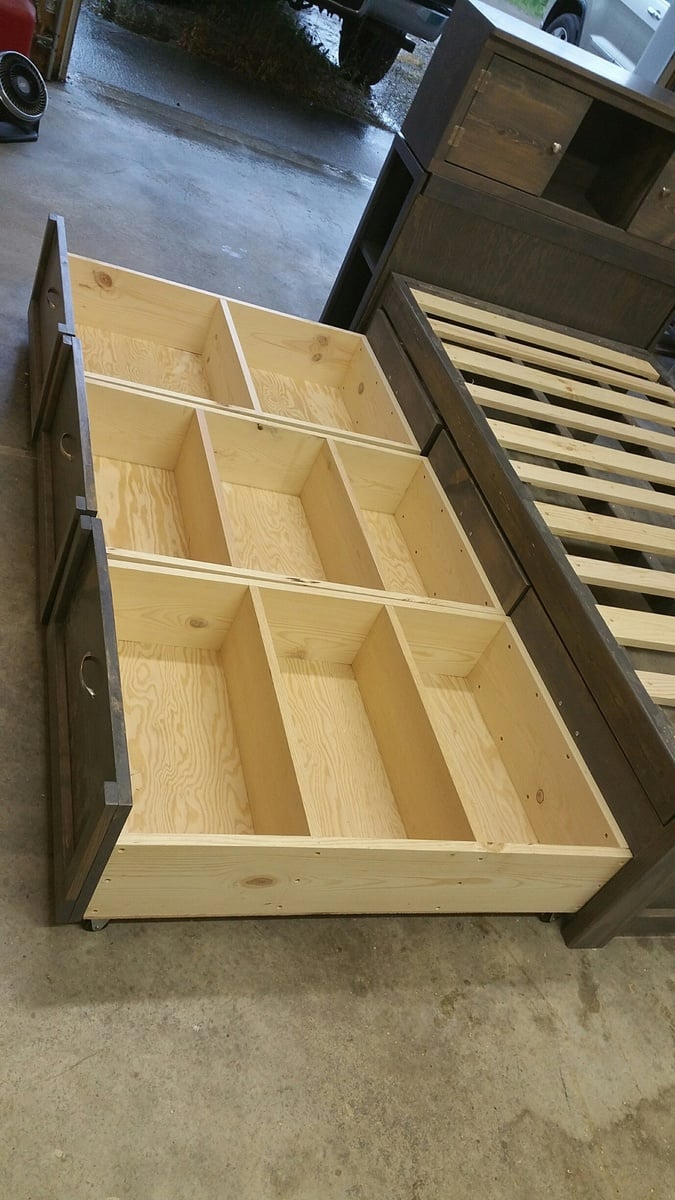
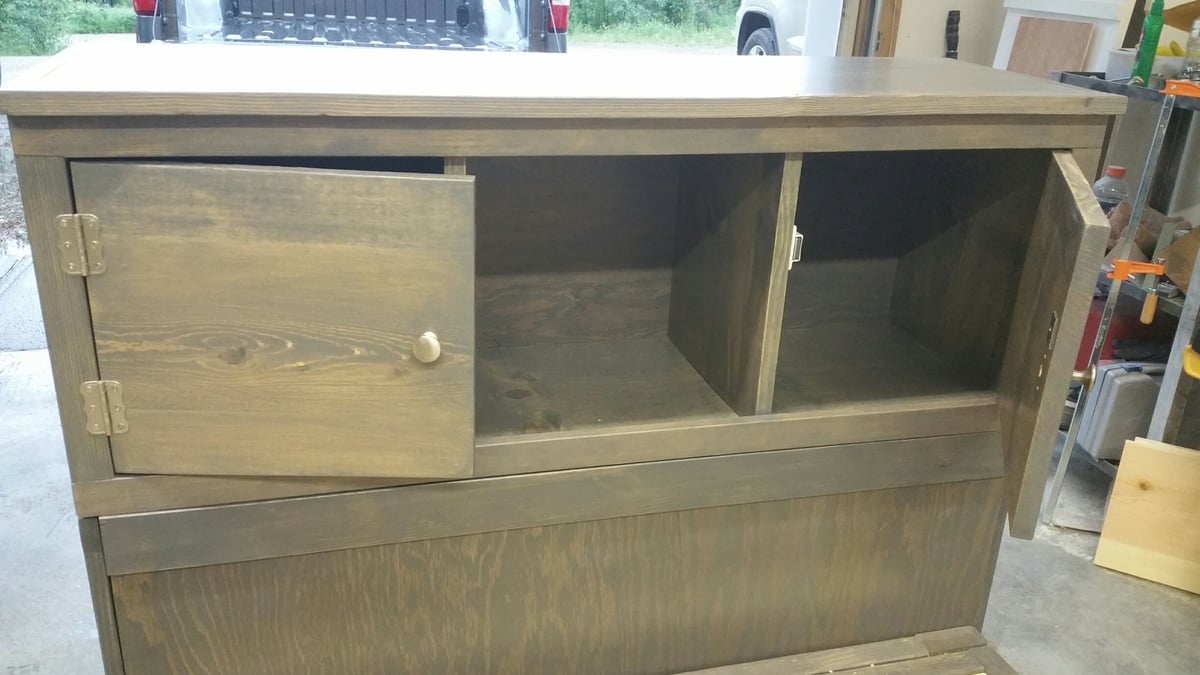
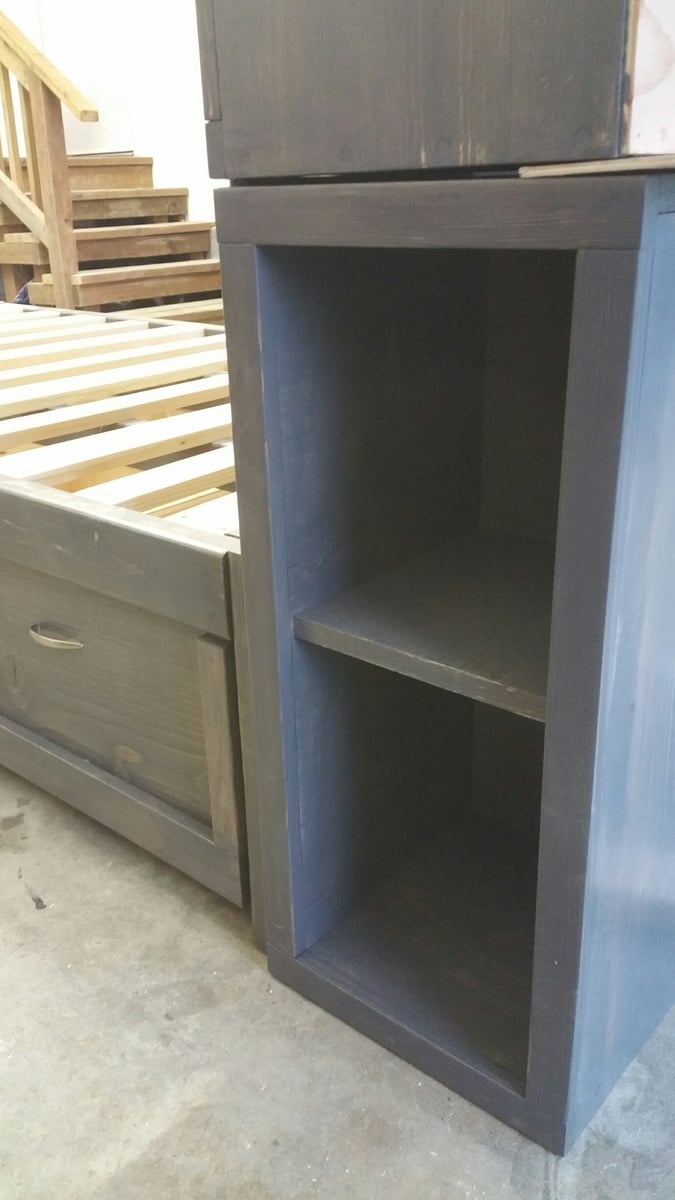
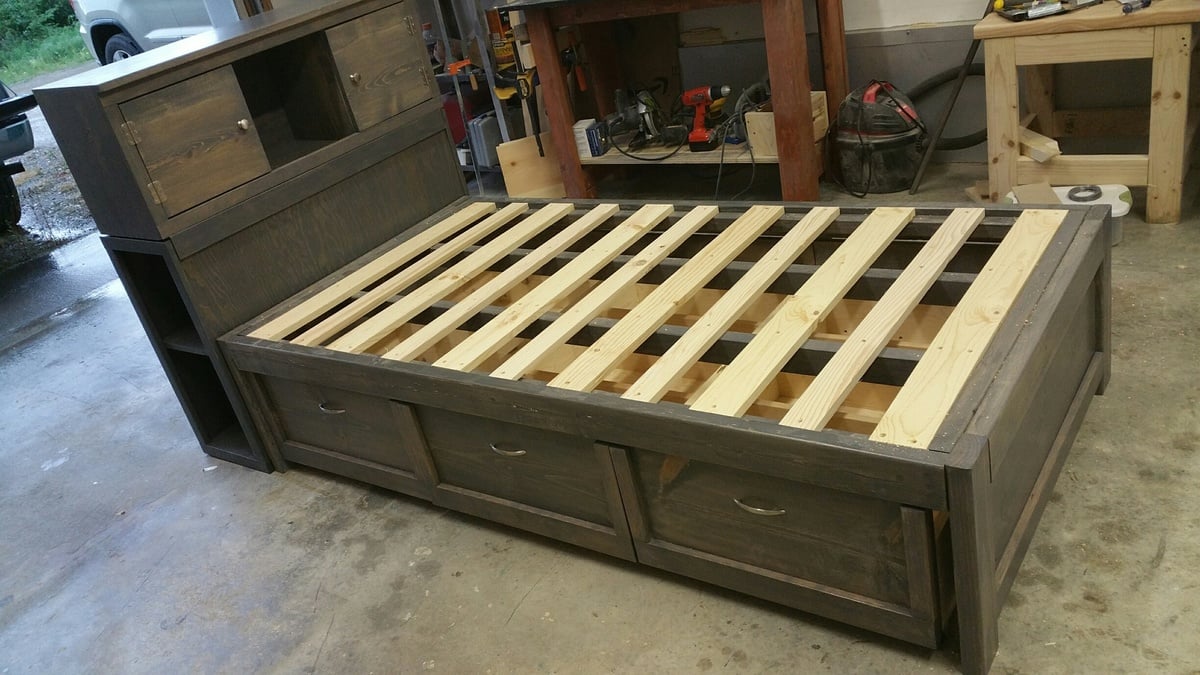
Storage Daybed with Trundle Drawers + Storage Headboard and Hutch

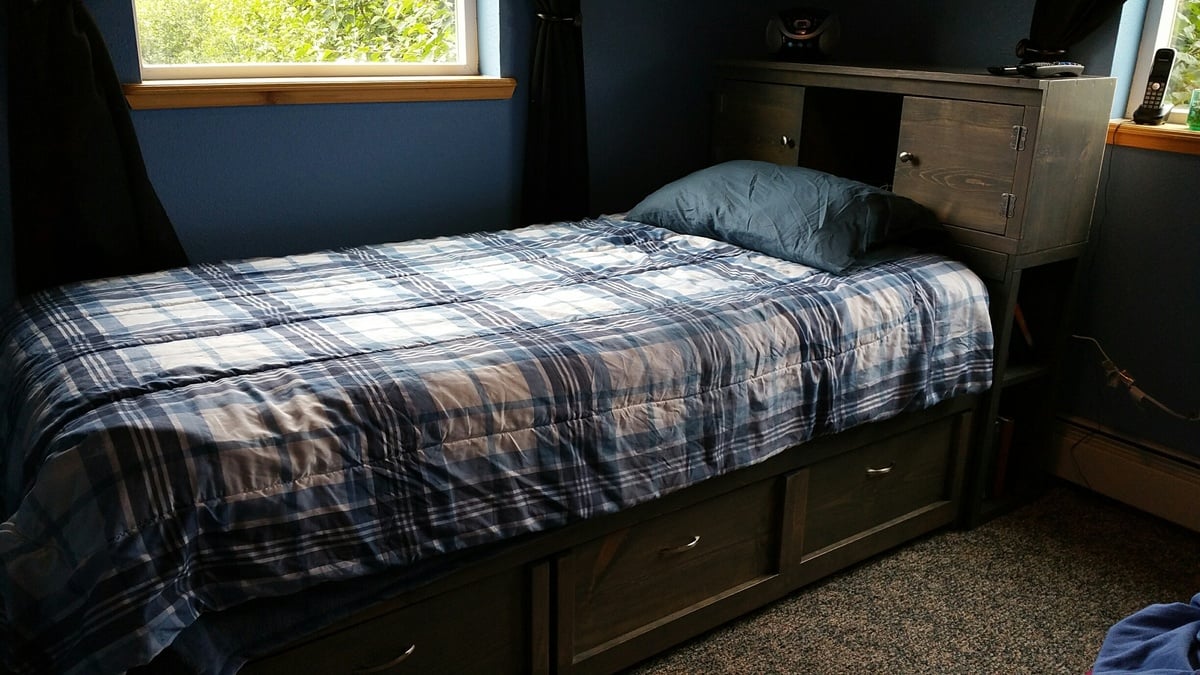
I combined Ana's plans for Daybed with Storage Trundle Drawers and a Storage Headboard with a Small Hutch.

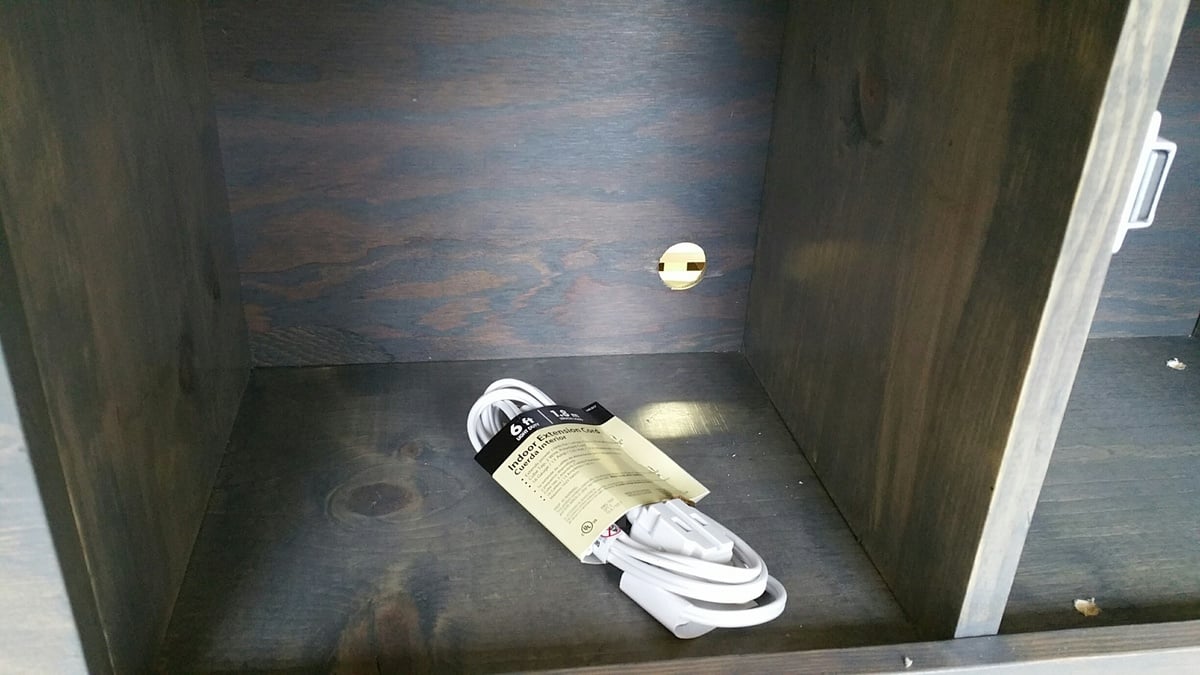
This is my 3rd daybed with storage drawers. It's such an easy build and gives so much extra space. The entire project took about 40 hours. I used Minwax stain in Classic Grey and three coats of polyurethane. For the drawers, I used 1.5" casters. I drilled a hole through the back of the headboard to feed cords through. Then I put the whole thing in the back of my truck and drove 500 miles for the final assembly. :)  In the provided photos, some of the pieces are flush because I hadn't permanently attached them. 

Estimated Cost
$450
Estimated Time Investment
Week Long Project (20 Hours or More)
Finish Used
Minwax Classic Grey
Recommended Skill Level
Intermediate

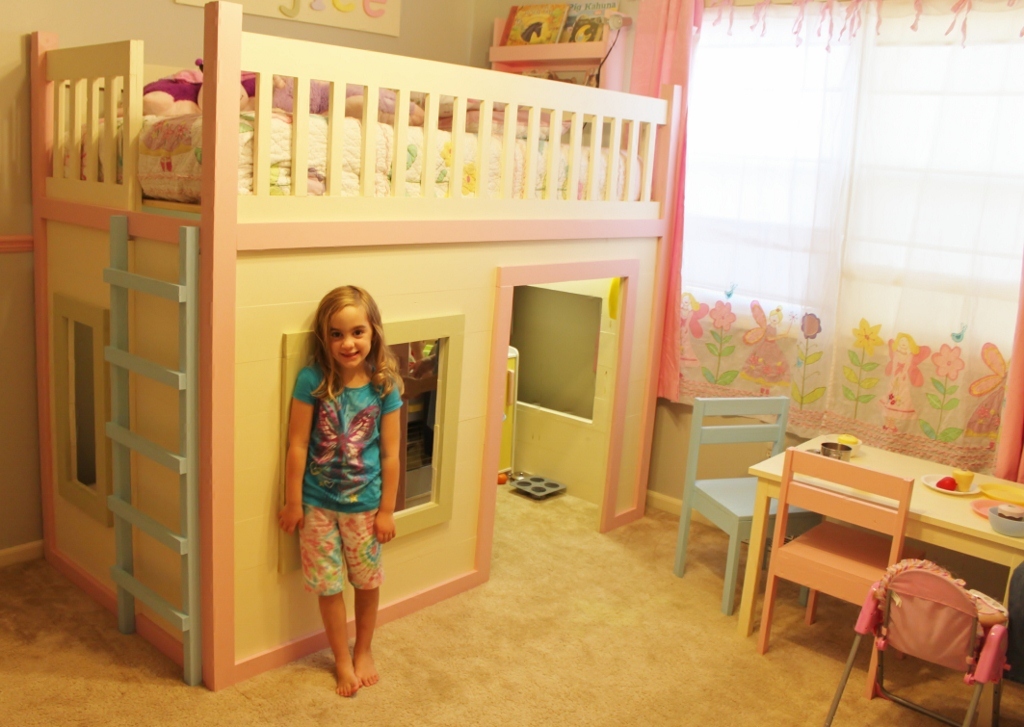
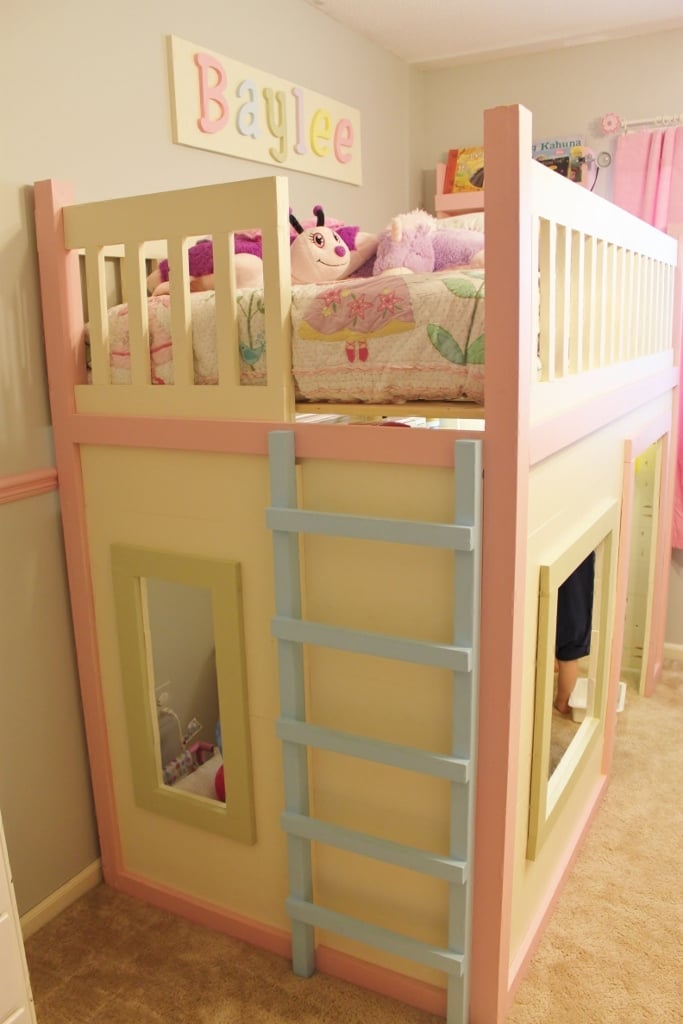
Playhouse Loft Bed

Submitted by BethStew5 on Wed, 07/18/2012 - 22:12

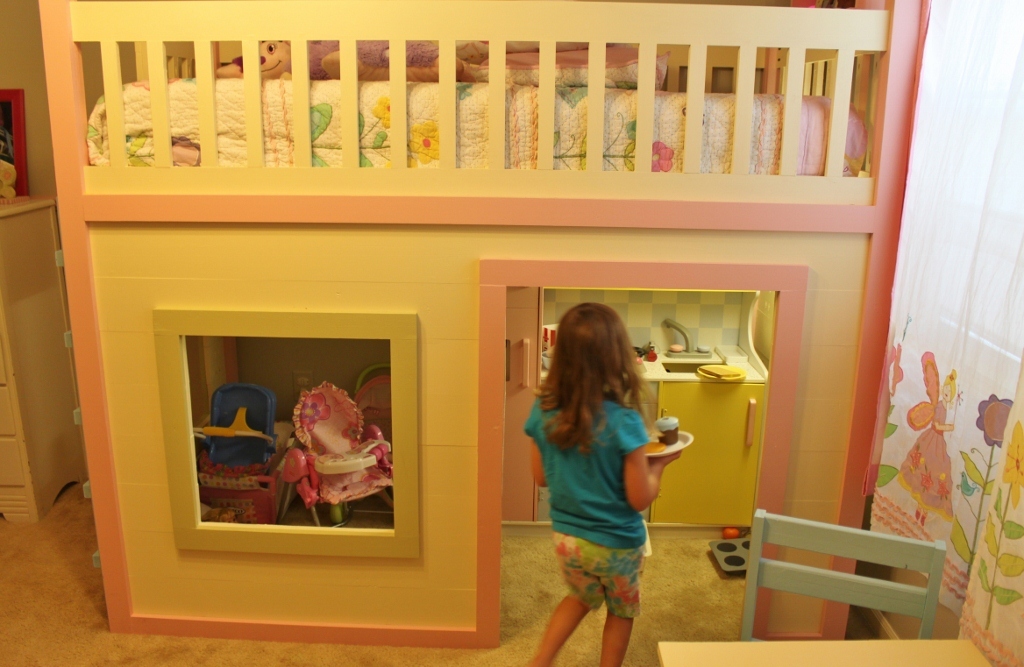
This is my first build from this site! I used 6" boards to give the siding a plank look rather than using plywood. To make the height work, I used 8" boards for both the top and bottom planks. I also made the door a little taller. Other than that, I followed this plan step-by-step. It was very easy to follow and I really enjoyed making this bed. My daughter (and my sons) really enjoy it!
Built from Plan(s)
Estimated Time Investment
Week Long Project (20 Hours or More)
Recommended Skill Level
Intermediate

Rustic Console - my first project

Submitted by loulie on Thu, 05/15/2014 - 09:51

Rustic console -first project..plan on adding X to ends

Estimated Time Investment
Weekend Project (10-20 Hours)
Finish Used
Top is the infamous steel wool vinegar solution with wipe on poly
Left the shelves as is since the wood was so pretty
The rest is a combo of vinegar stain, then a custom mix of gray paint wash and emerald green...♥love it!.
Recommended Skill Level
Beginner

Comments

Raised bed planter

Submitted by Anonymous (not verified) on Tue, 06/02/2020 - 16:36

Hey Ana,

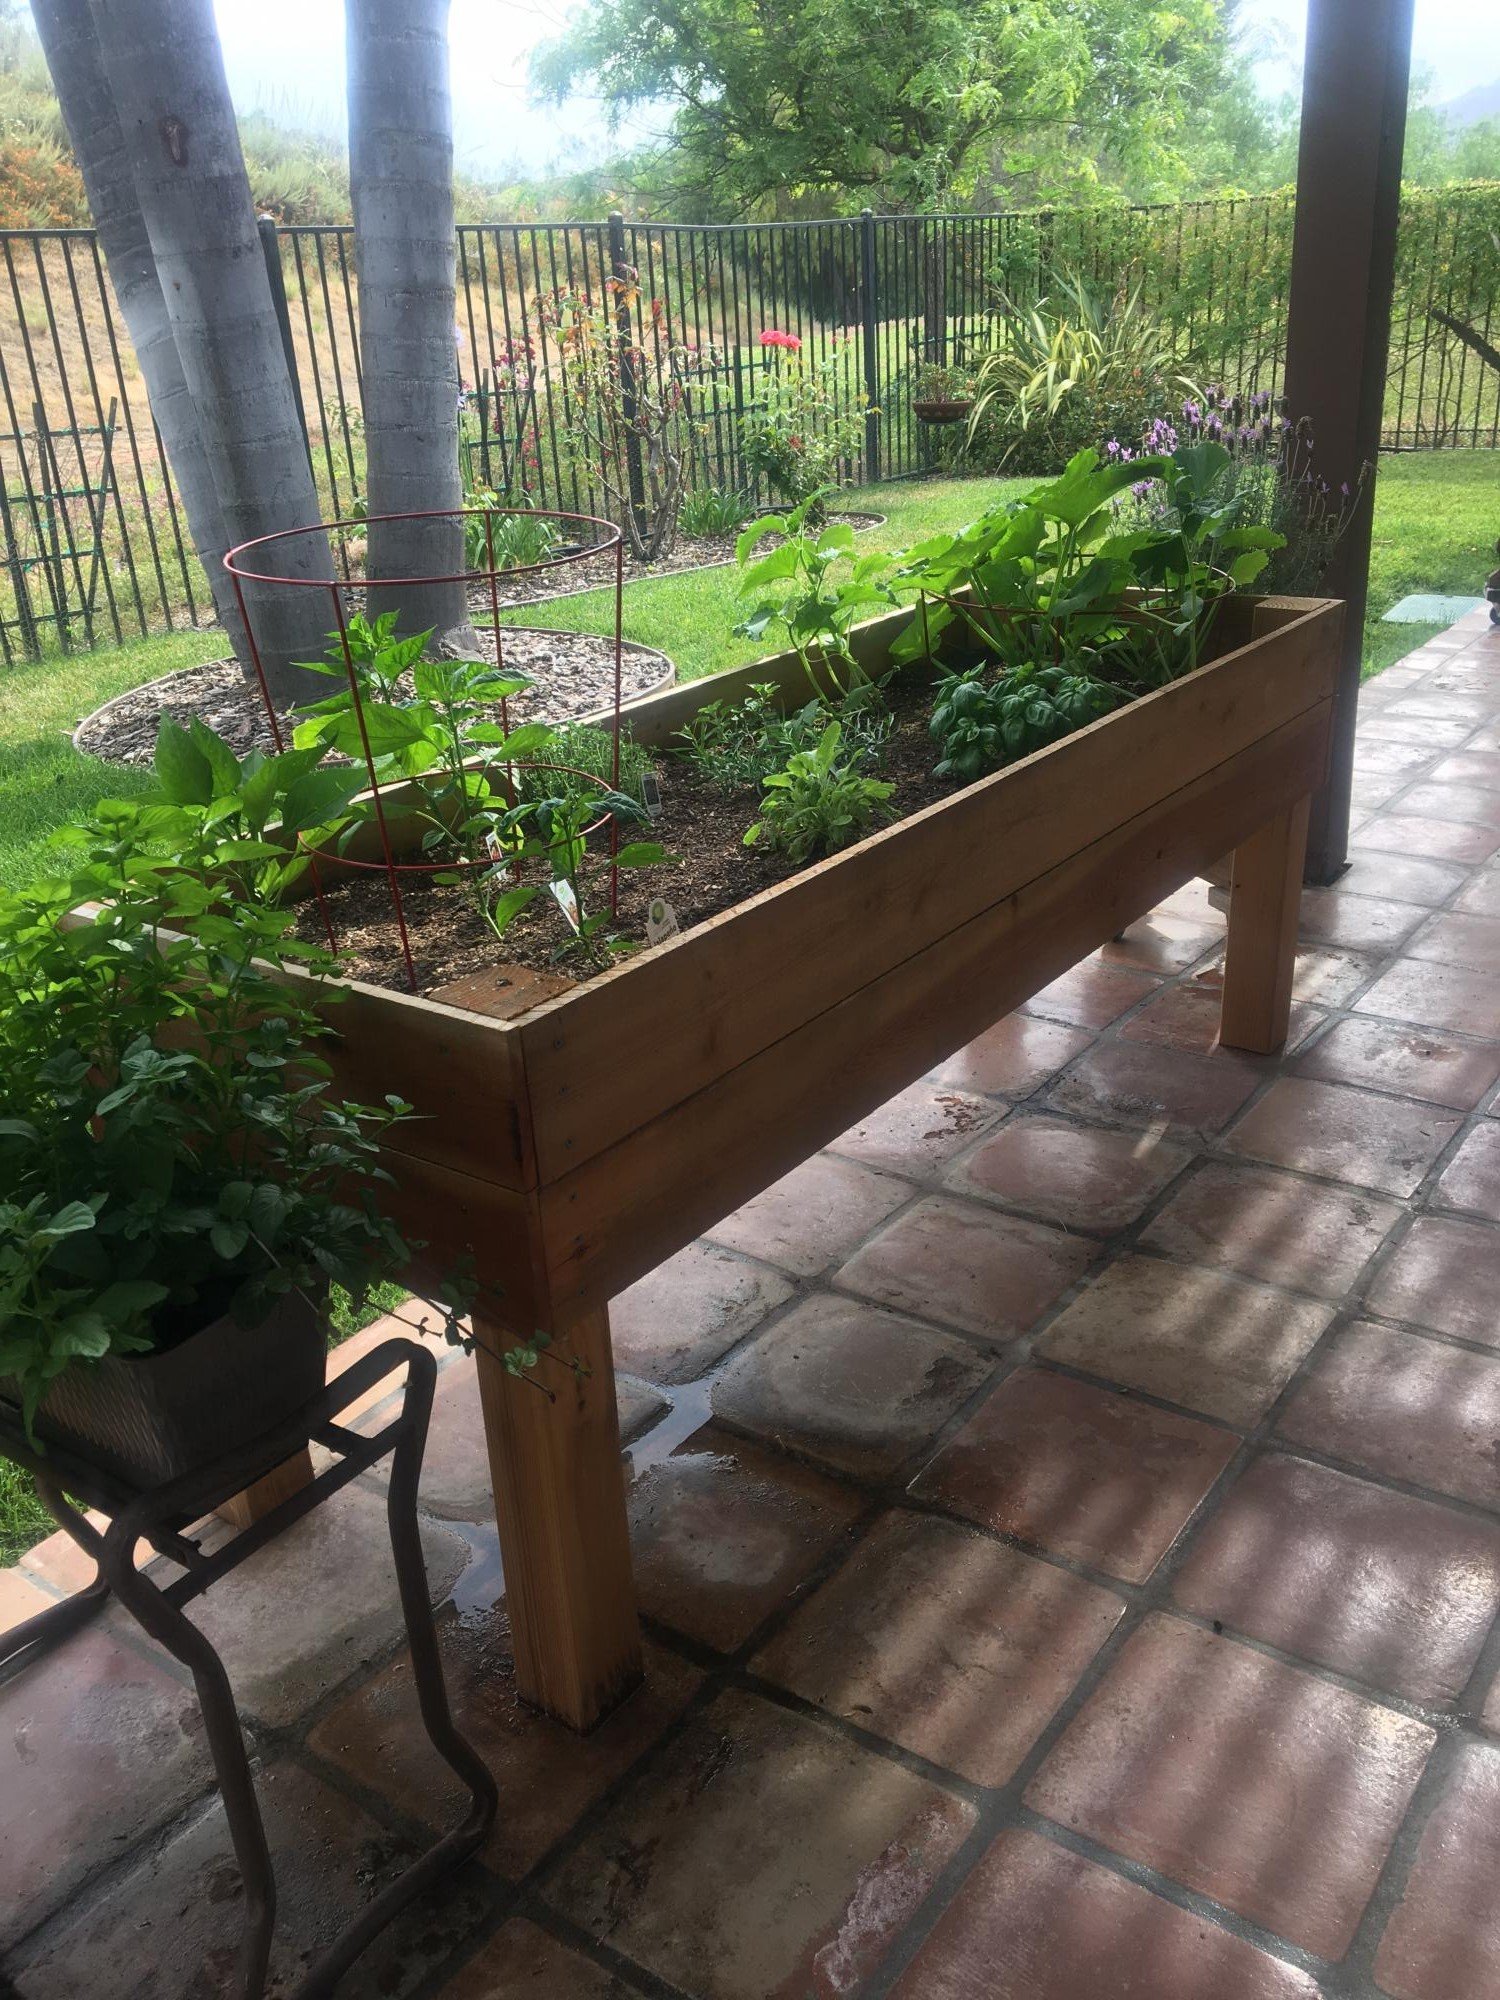
I saw your raised bed planter and decided to tackle it for ourselves. It measures 2'x8' and stands 28" to the bottom of the planter. I used redwood fencing for the sides and bottom at a cost of $1.79 each. I didn't use the wire mesh for the bottom but drilled 1/4" holes in the redwood fencing for drainage.

Thanks for the idea!!

Mike Howell

Estimated Cost
$45
Estimated Time Investment
Afternoon Project (3-6 Hours)
Finish Used
I left ours in it's natural state
Recommended Skill Level
Intermediate

Farmhouse Headboard and Planked Wood Bedside Tables

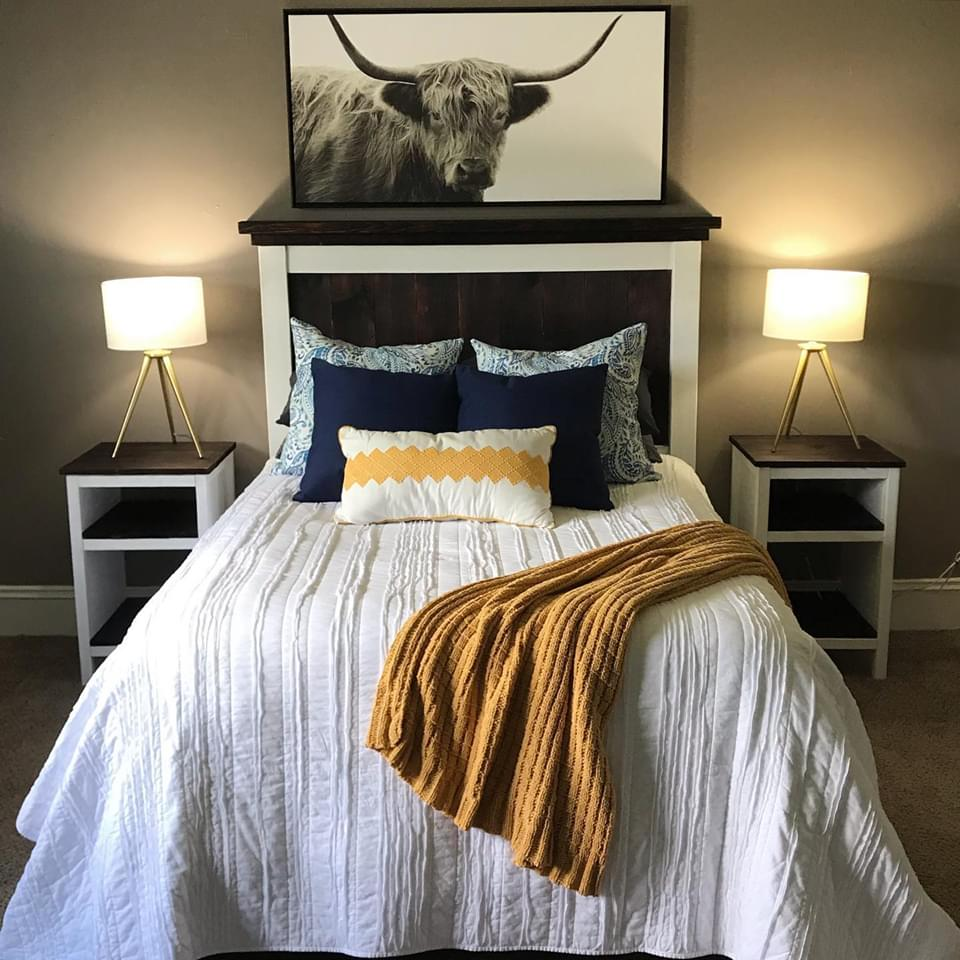
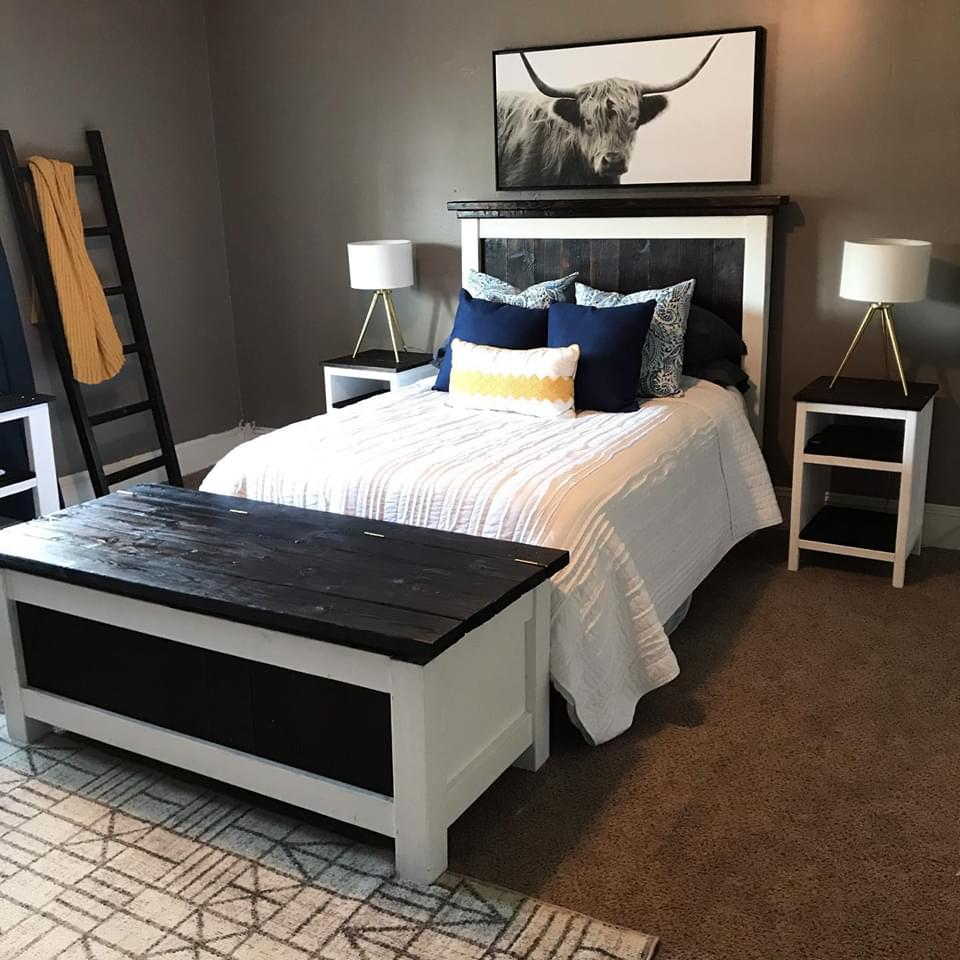
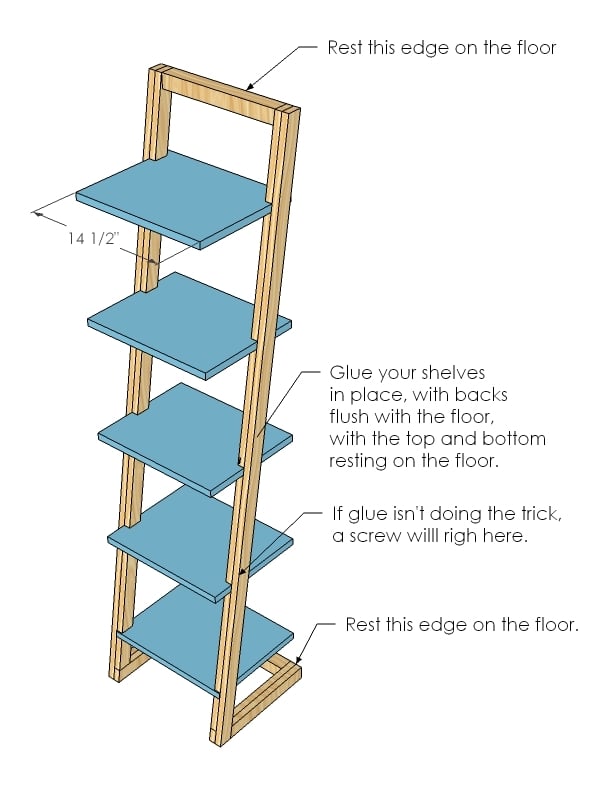
For this project, I made the headboard from the Farmhouse Bed plans. I omitted one of the 1x6 slats to fit to my metal frame. I made two planked wood bedside tables with shelves and I created a lift top bench that was inspired by both the bed, and the side tables. Finally, I threw together a blanket ladder using 2x3s.

Estimated Time Investment
Weekend Project (10-20 Hours)
Finish Used
Behr off the shelf white in Satin, and shou sugi ban with Maker Brand simple finish.
Recommended Skill Level
Intermediate

Tall Farmhouse Headboard

Submitted by Anonymous (not verified) on Sat, 03/02/2024 - 11:34

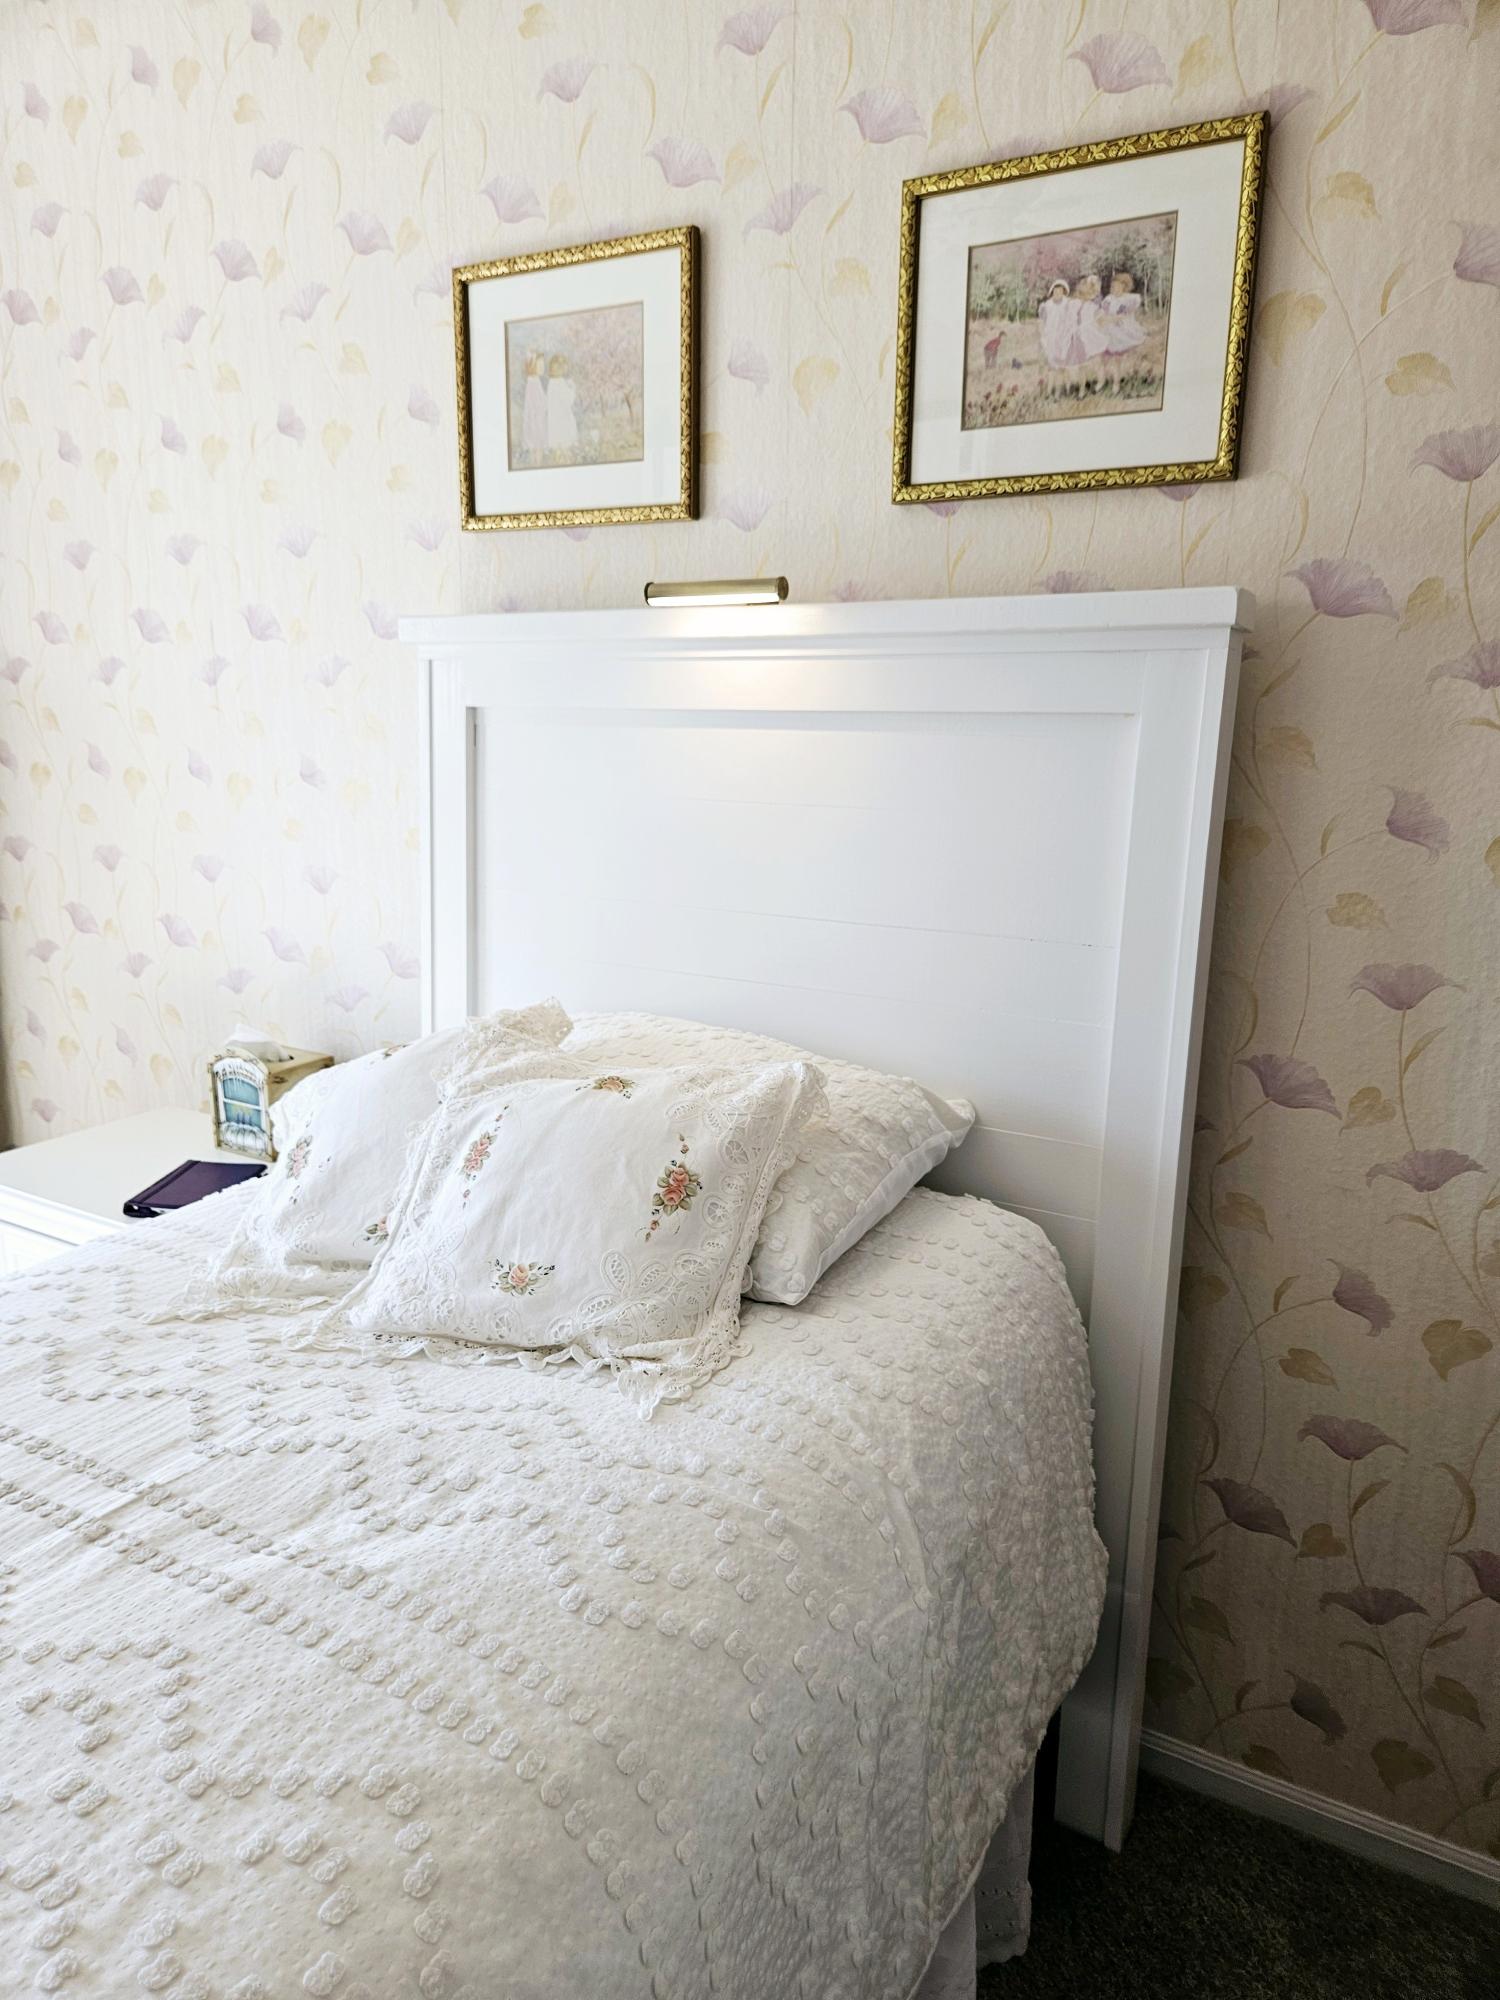
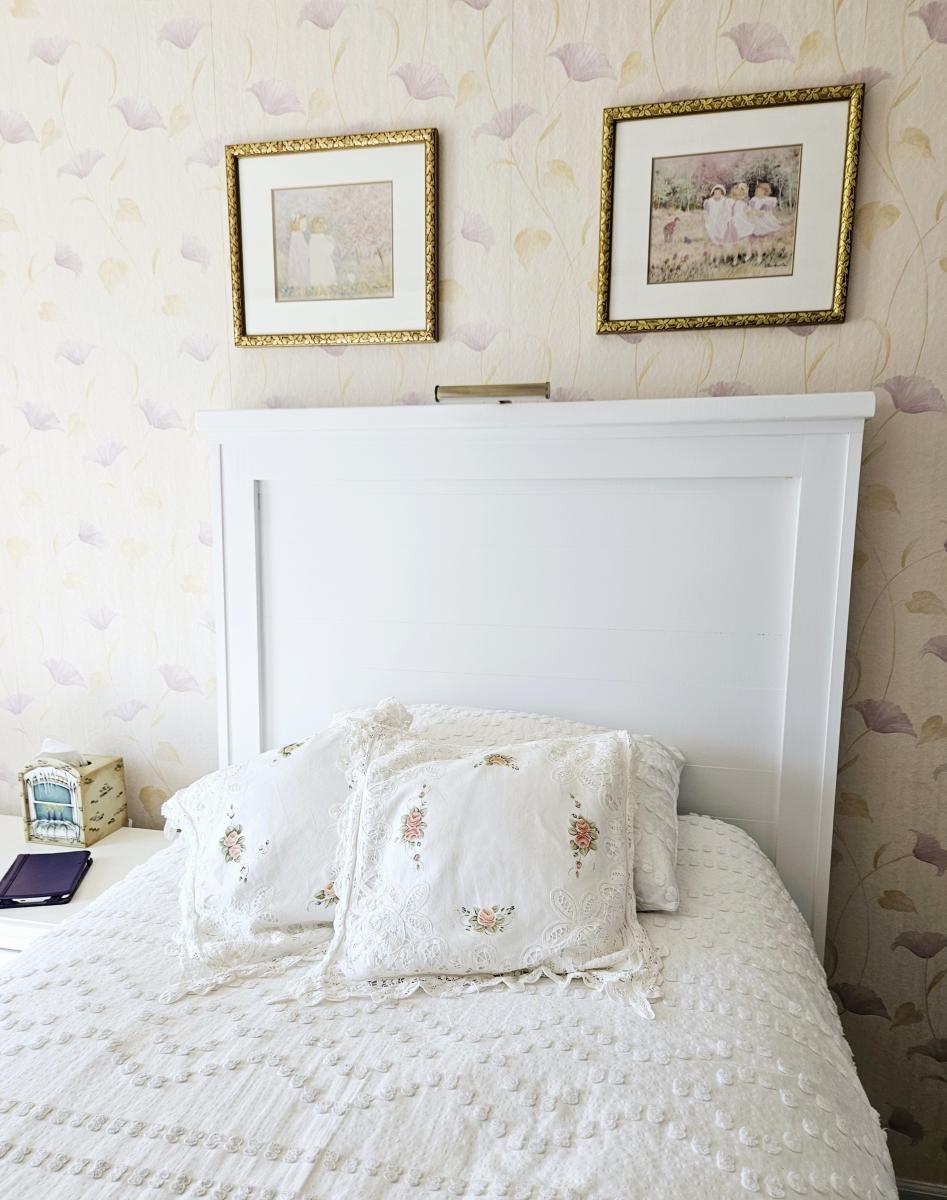
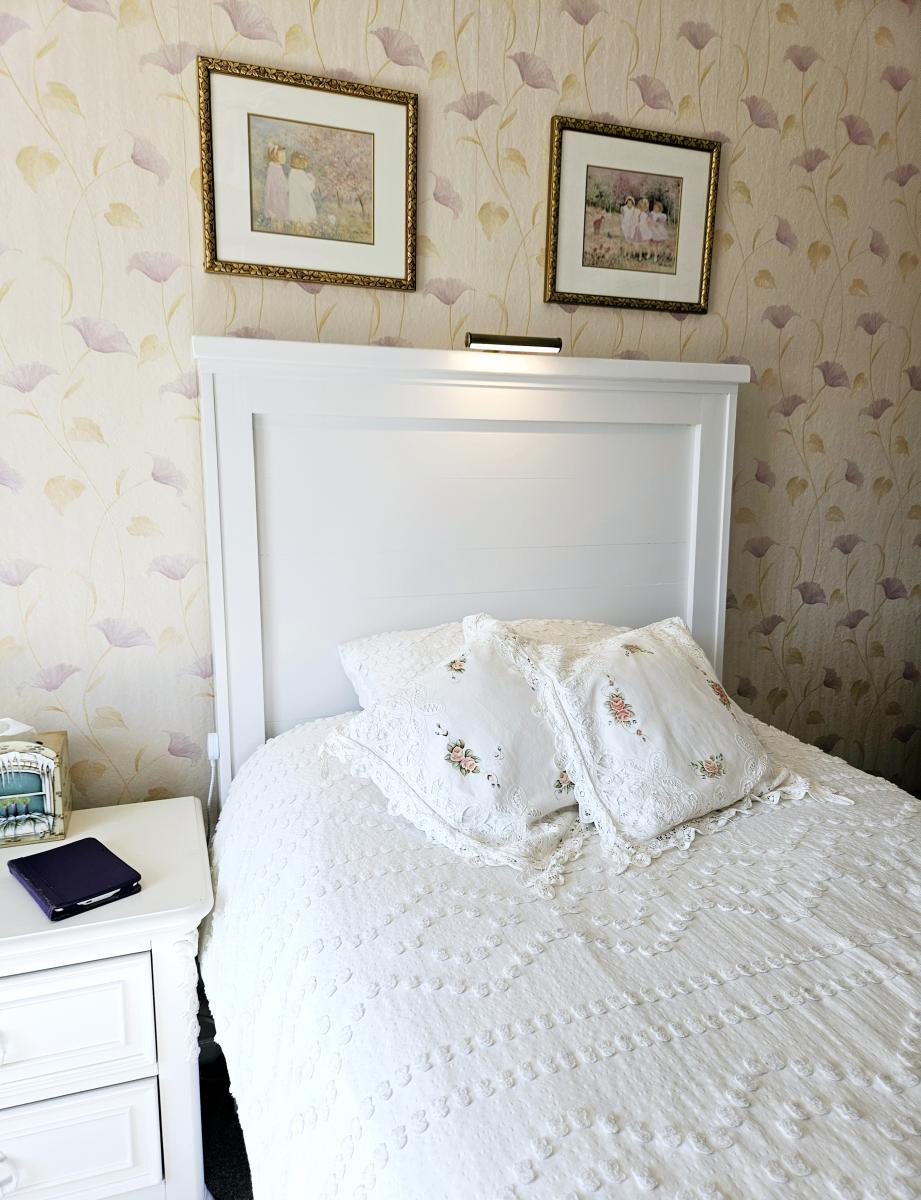
 am thrilled with my new headboard. The plans made every thing about this project FUN and DOABLE. I'm a 70 year old Granma who loves to DIY. SO fun to show my photos of what I did ALL BY MYSELF! THANK YOU FOR YOUR WONDERFUL PLANS! With out them my pretty new headboard would never have happened. WHAT FUN. I mounted an LED picture light fixture on the top for reading in bed and mounted the corded on off extension cord switch to the side of the leg for easy on off ! Again, THANK YOU!

Cheryl King

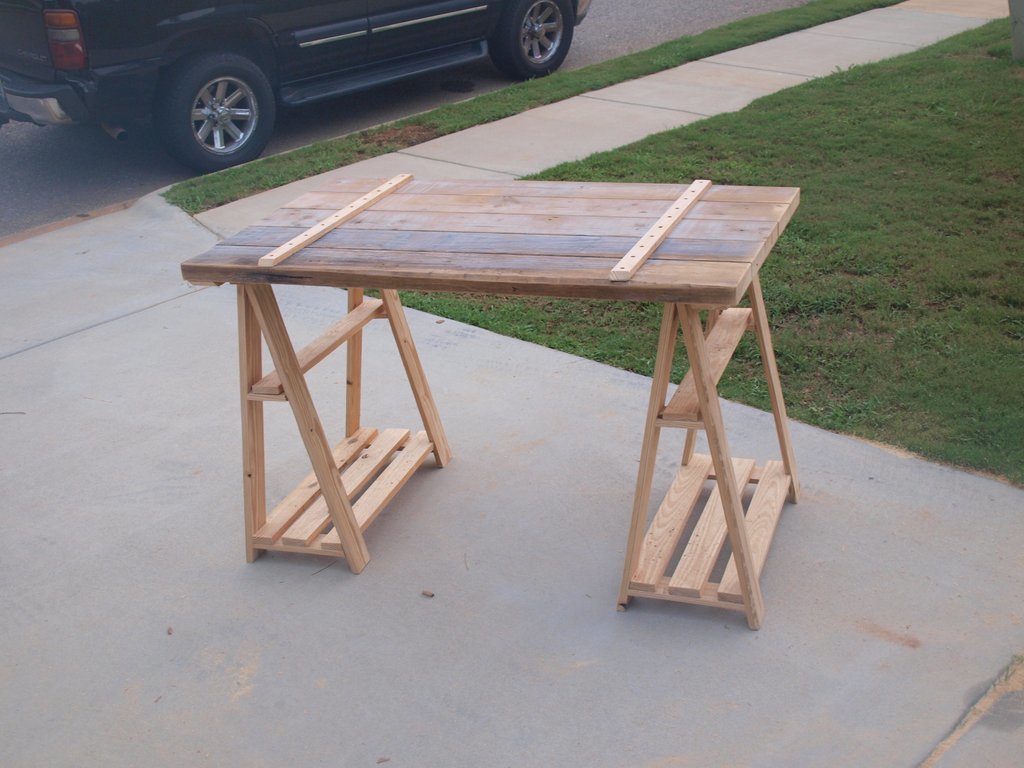
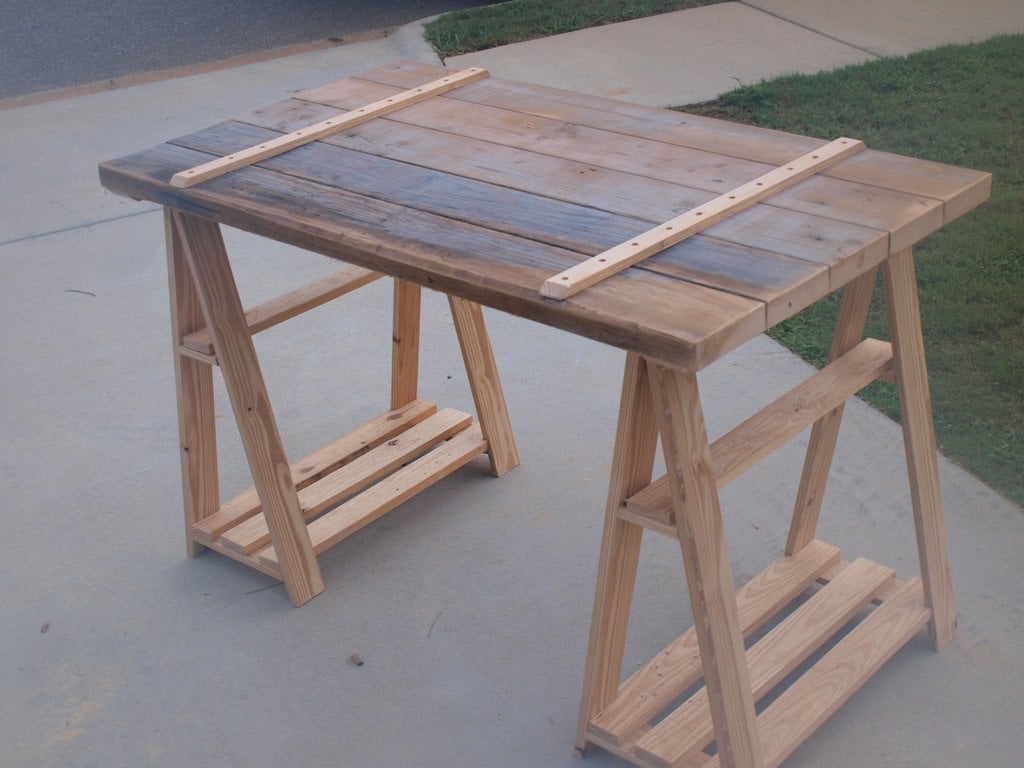
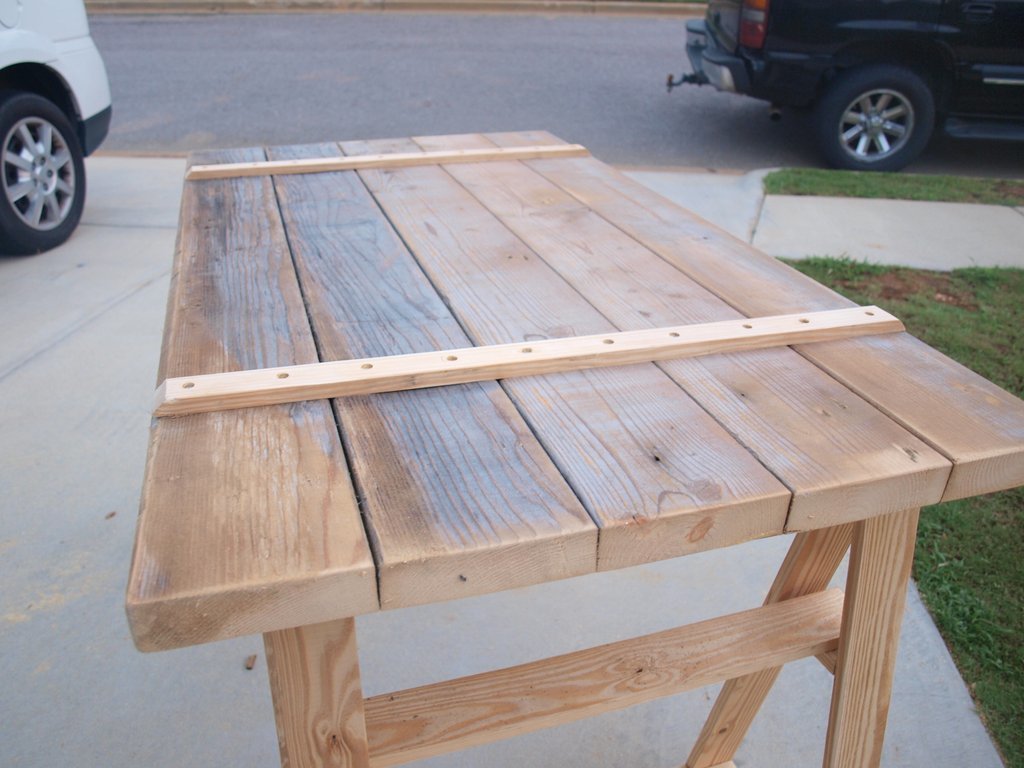
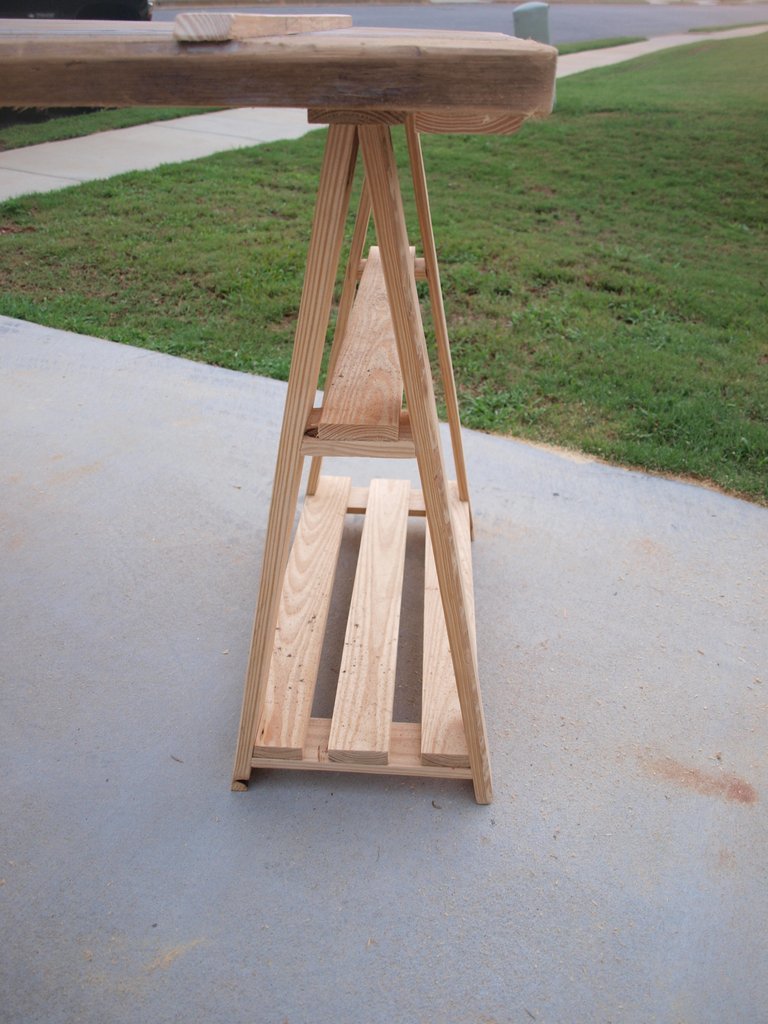
Sawhorse Writing Desk

Submitted by EndGrain on Thu, 08/02/2012 - 19:53

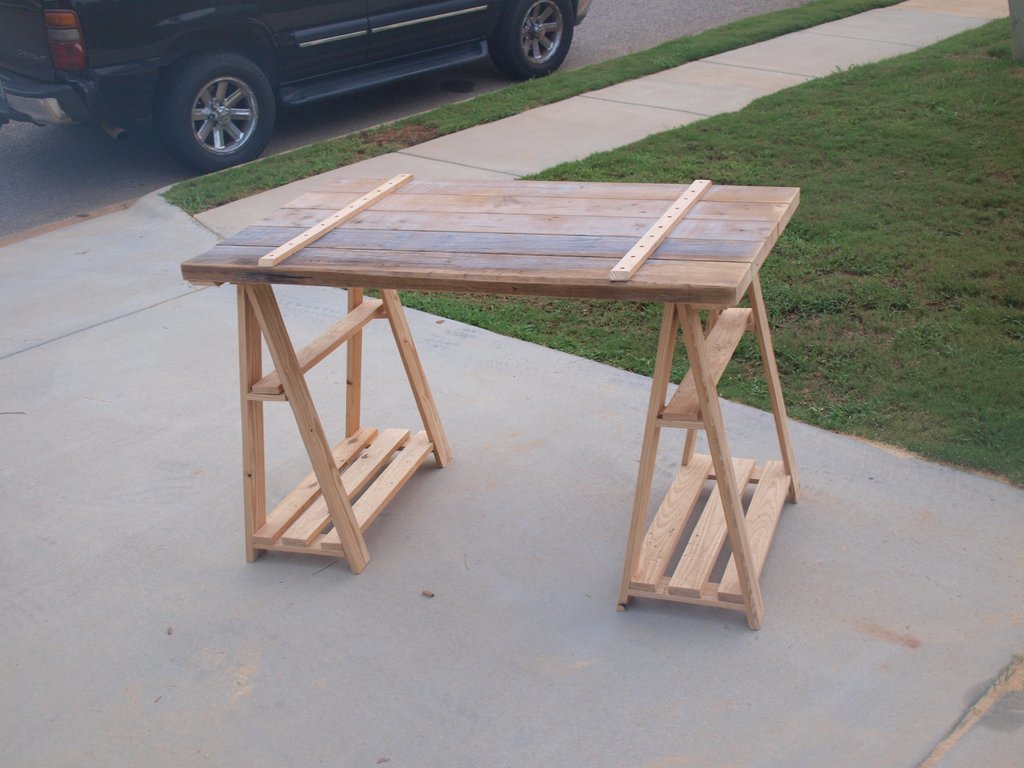
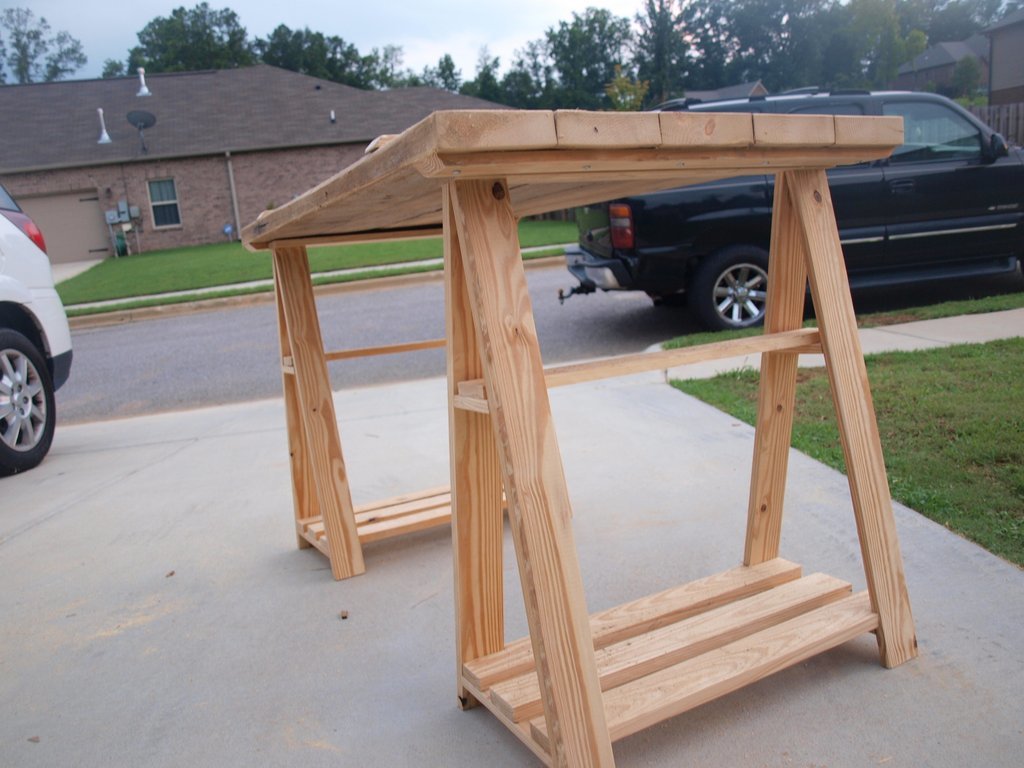
This was a fun project to do. I am going to add a piece of 24 x 24 sheet metal to the top of it to serve as a smooth flat area to write on. I didn’t have any 1 x 3′s on hand so I ripped several 2 x 4′s down to 1 x 3 which is where I came up with the 1 x 2′s that are running across the top. I’m working on imagineering a chair to go with it, I will post pictures of that as well when I get it put together. If you have a questions or comments feel free to post.

Built from Plan(s)
Estimated Cost
$70
Estimated Time Investment
Afternoon Project (3-6 Hours)
Finish Used
none
Recommended Skill Level
Beginner

Garden Shed

Submitted by Deborah on Sat, 08/18/2012 - 23:01

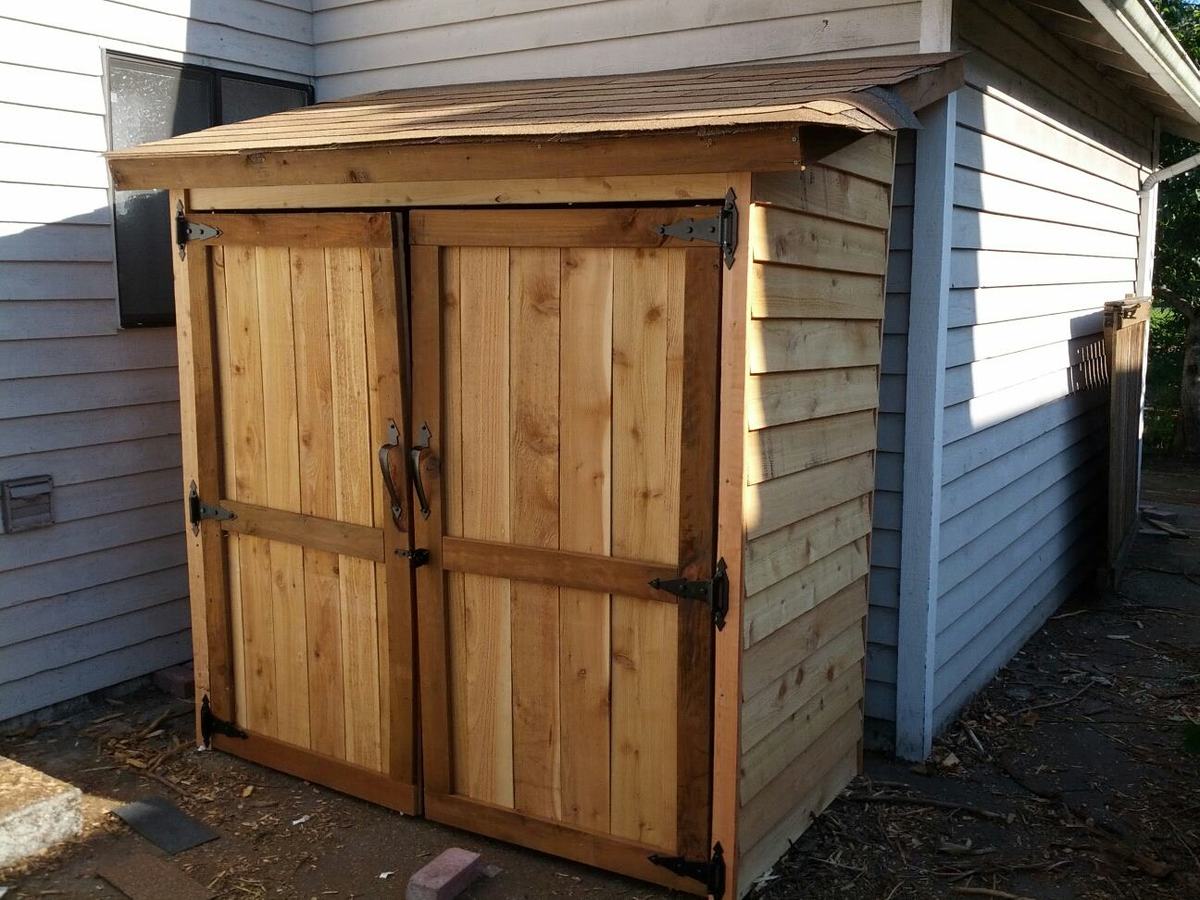
I have been dreaming about building so many things featured on this website, and I finally buckled down and built something. I figured that an outside garden shed would be a bit more forgiving than a project requiring a bit more precision, and from the picture, you can see that it's not perfect! I'm still working on trimming the shingles and I still have to stain/seal it. I've got to admit, when I first picked up the wood for the project at the store, I wondered what I had gotten myself into. But I just jumped in, and here it is.
Built from Plan(s)
Estimated Cost
$300
Estimated Time Investment
Weekend Project (10-20 Hours)
Finish Used
Plan to stain it with some sort of deck stain.
Recommended Skill Level
Beginner

Comments

Back