Community Brag Posts
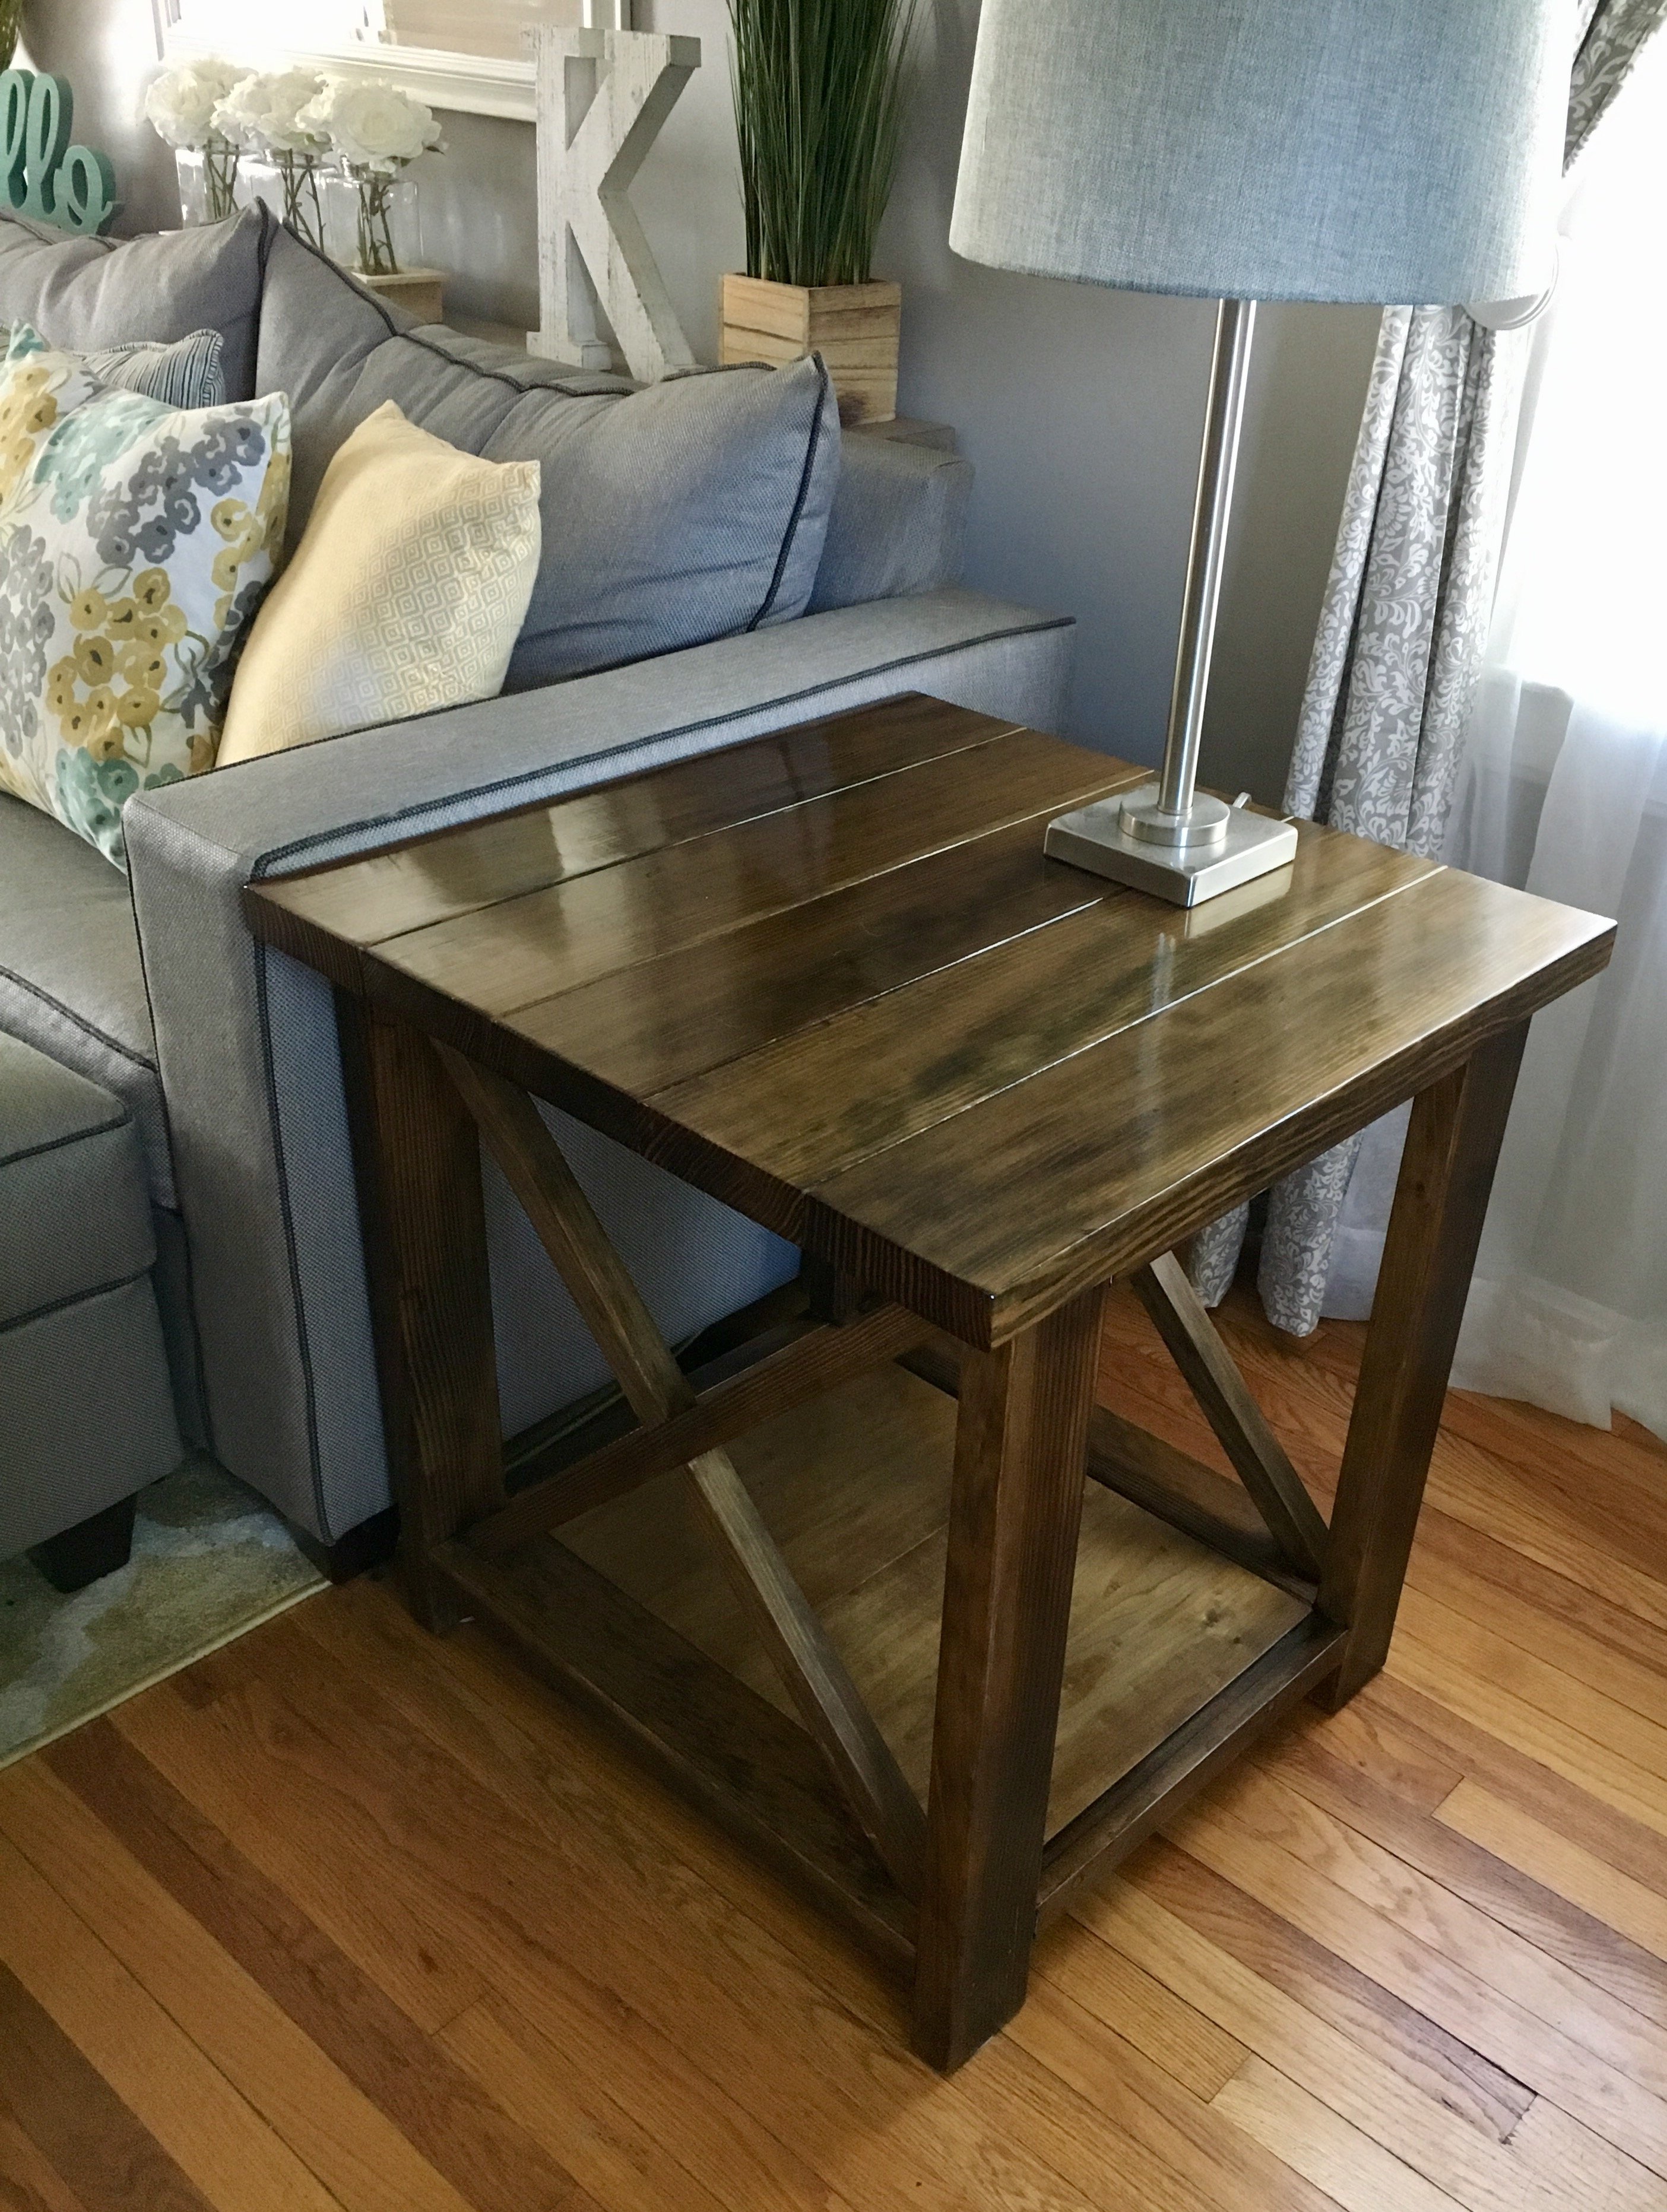
First ever project
The one on the left was my first try. I had so much fun making these!
Estimated Cost
113
Estimated Time Investment
An Hour or Two (0-2 Hours)
Recommended Skill Level
Beginner
Comments
Sun, 07/18/2021 - 12:27
Great first project!
Awesome job, thank you for sharing! Can't wait to see what's next:)
Pergola
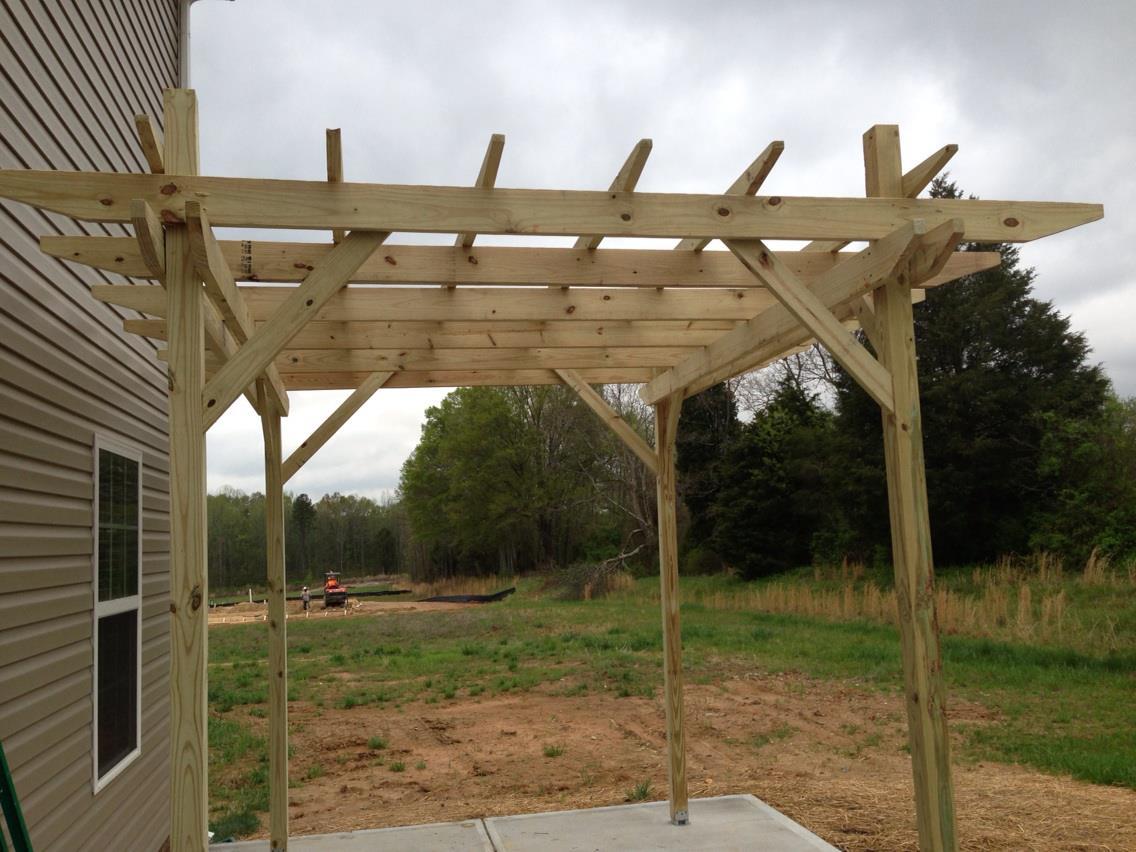
I have wanted a pergola for years and since we moved into our new construction in Dec. '12, I decided to finally go for it and add it to our new backyard plans. When I stumbled onto the plan on ana-white.com, I couldn't be more thrilled to see how simple of a project it was. I do not mean that it was an easy build by any means. I wanted a "beefier" look to it so I used 2x6 and 2x4's. The 4x4 posts are 10ft long (I was going to use 12 ft until I realized just how tall they were!). I stole the steel anchor post idea from the Popular Mechanics site and the "look" of the pergola from the Weatherly plan. I decided not to notch each beam due to time constraints and I just didn't think I need to. I did use zinc L brackets to secure the 2x6s to the support beams (also 2x6s). The top is stiff as can be but the bottom has a slight give to it since it is only four 4x4s sitting on post anchor brackets. I am planning on adding about 6 inches of concrete around the base of the posts (after my HOA "approves" the pergola) to stiffing the structure and then trim around the base for a more "custom" look to it. It will be similar style to the Weatherly except wider around the base so that I can set drinks on it. It took about 8 hours total and about an hour of that was setting the steel anchor posts (measuring and installing 2 1/4" red head screws into the 4" concrete slab patio).
I will stain it with a semi-transparent (BEHR brand) redwood-ish color in a few months after the PT pine dries.
Built from Plan(s)
Estimated Cost
$400
Estimated Time Investment
Weekend Project (10-20 Hours)
Recommended Skill Level
Intermediate
Sand box
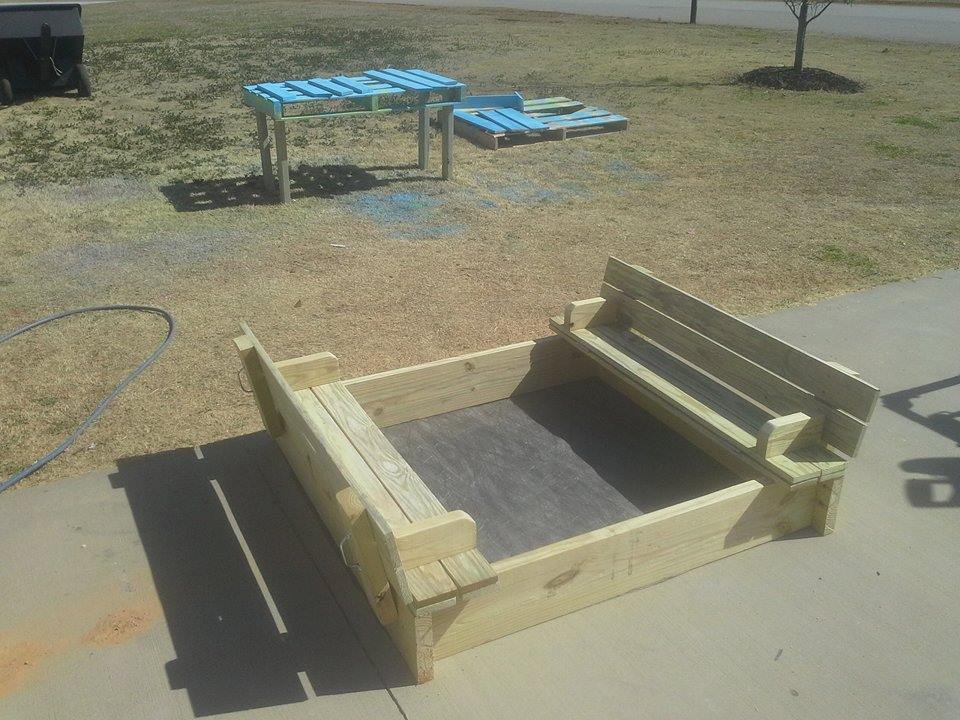
I followed this easy plan. Only thing I changed is rounding the arm rest as a safety feature. Added weed barrier on the bottom
Built from Plan(s)
Estimated Cost
$67.00
Estimated Time Investment
An Hour or Two (0-2 Hours)
Finish Used
Sanded only
Recommended Skill Level
Beginner
Comments

Tue, 03/10/2015 - 18:46
There's going to be some
There's going to be some happy campers in there! Nice work!
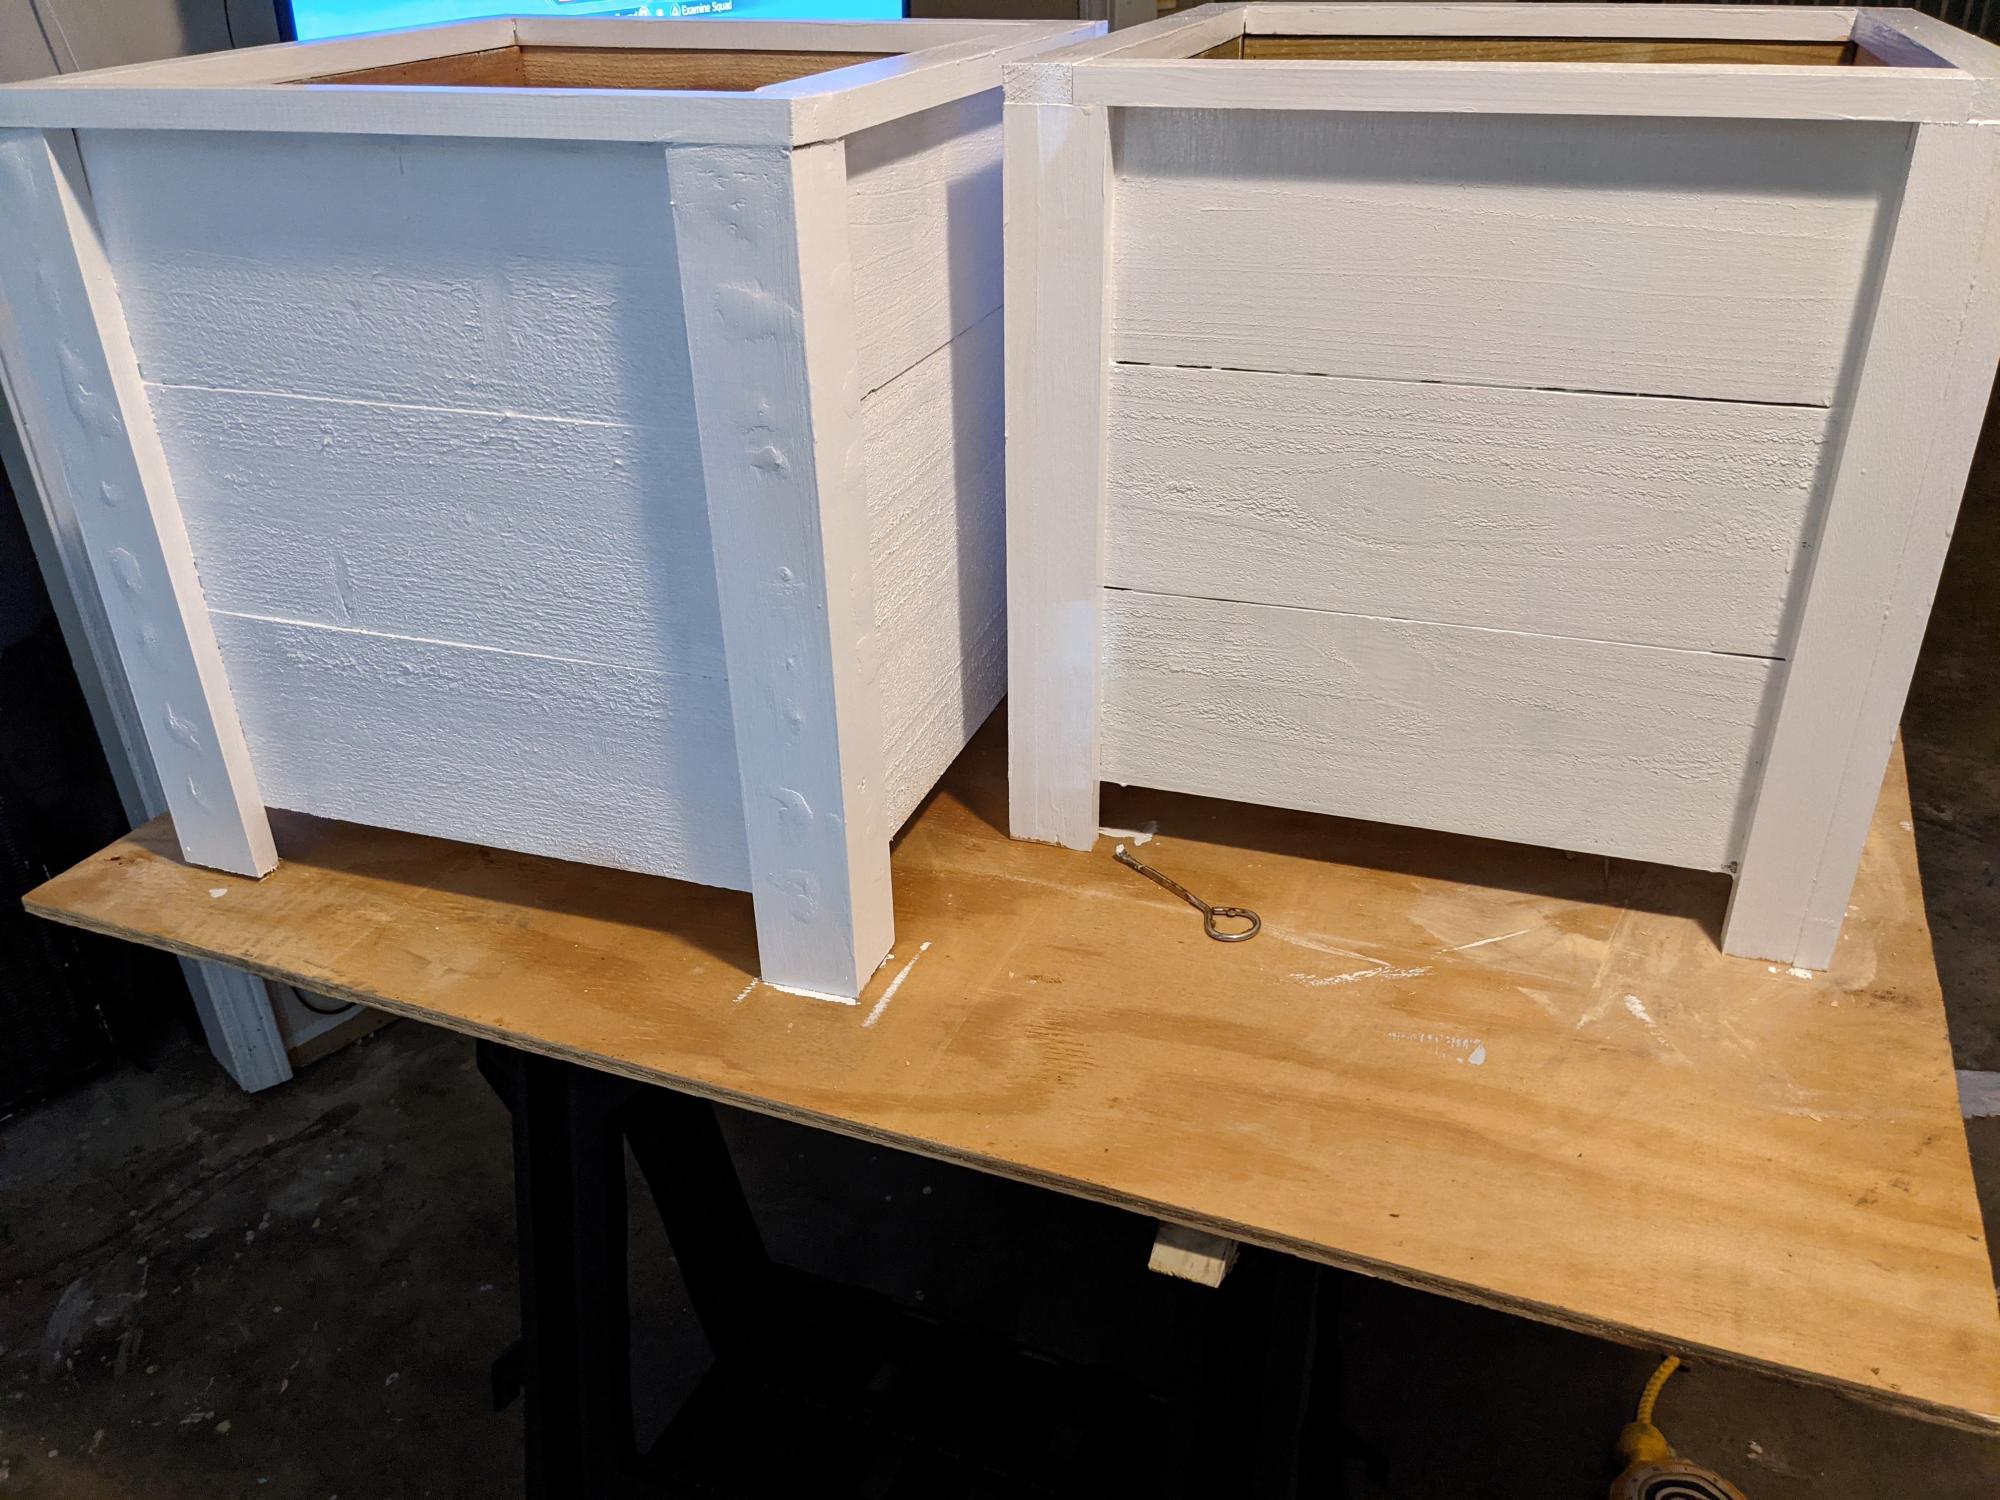
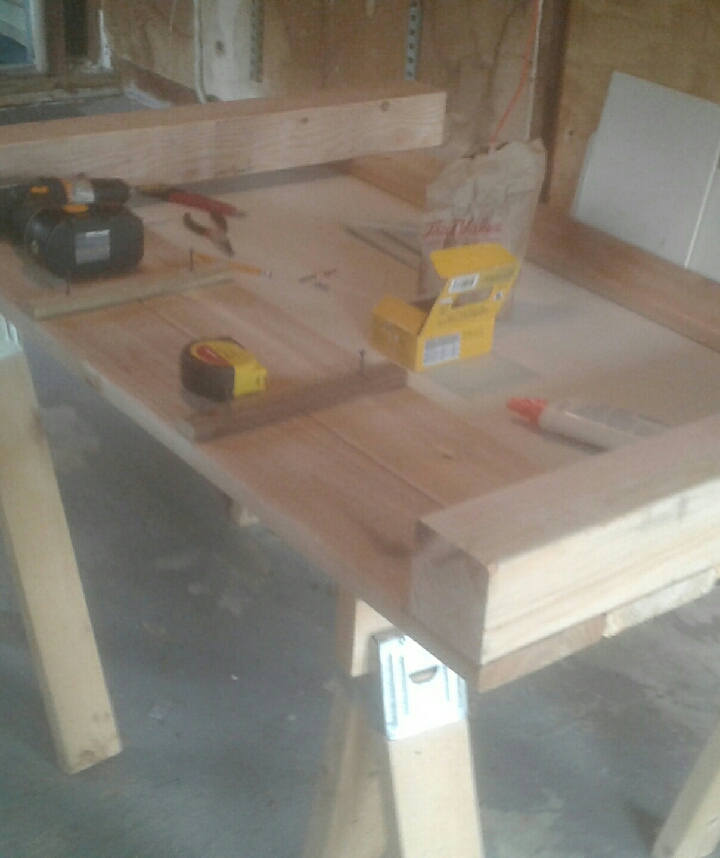
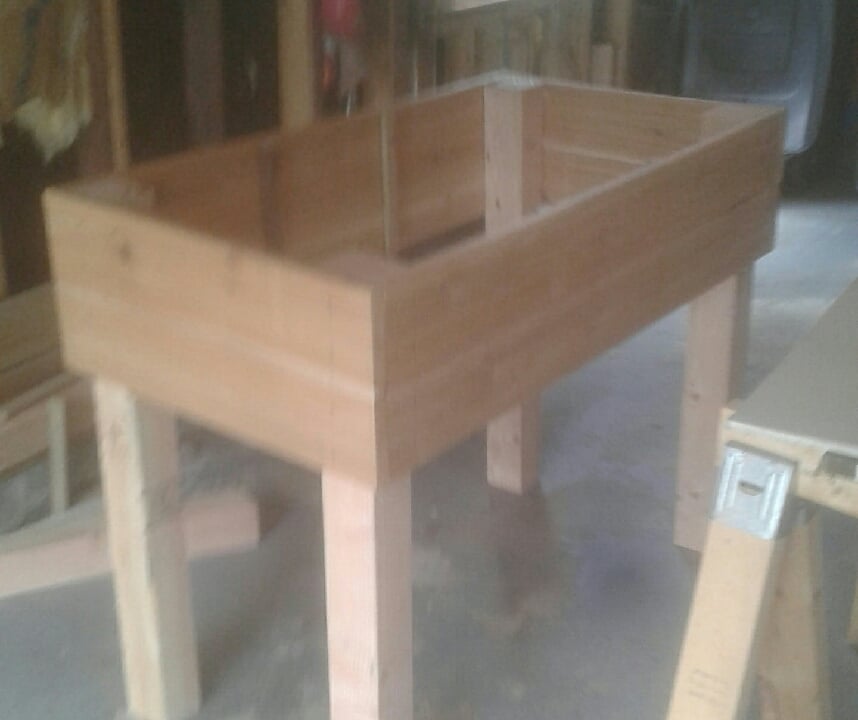
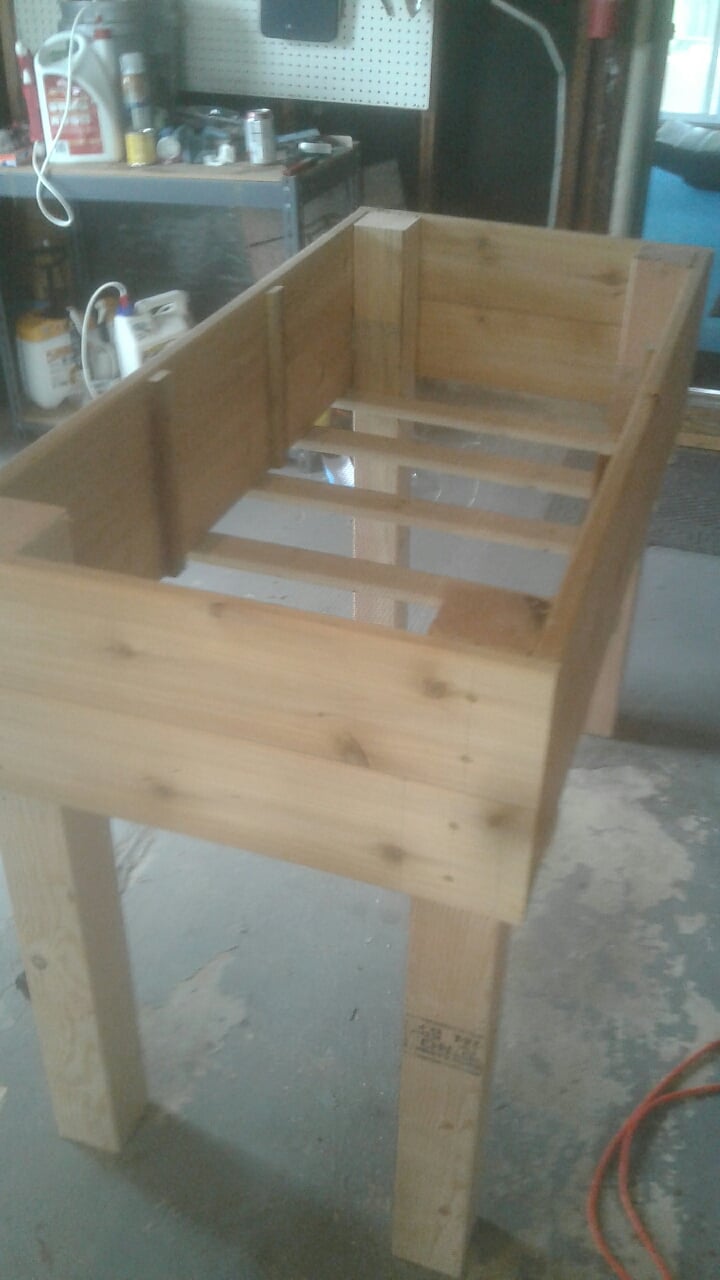
Counter Height Garden Boxes
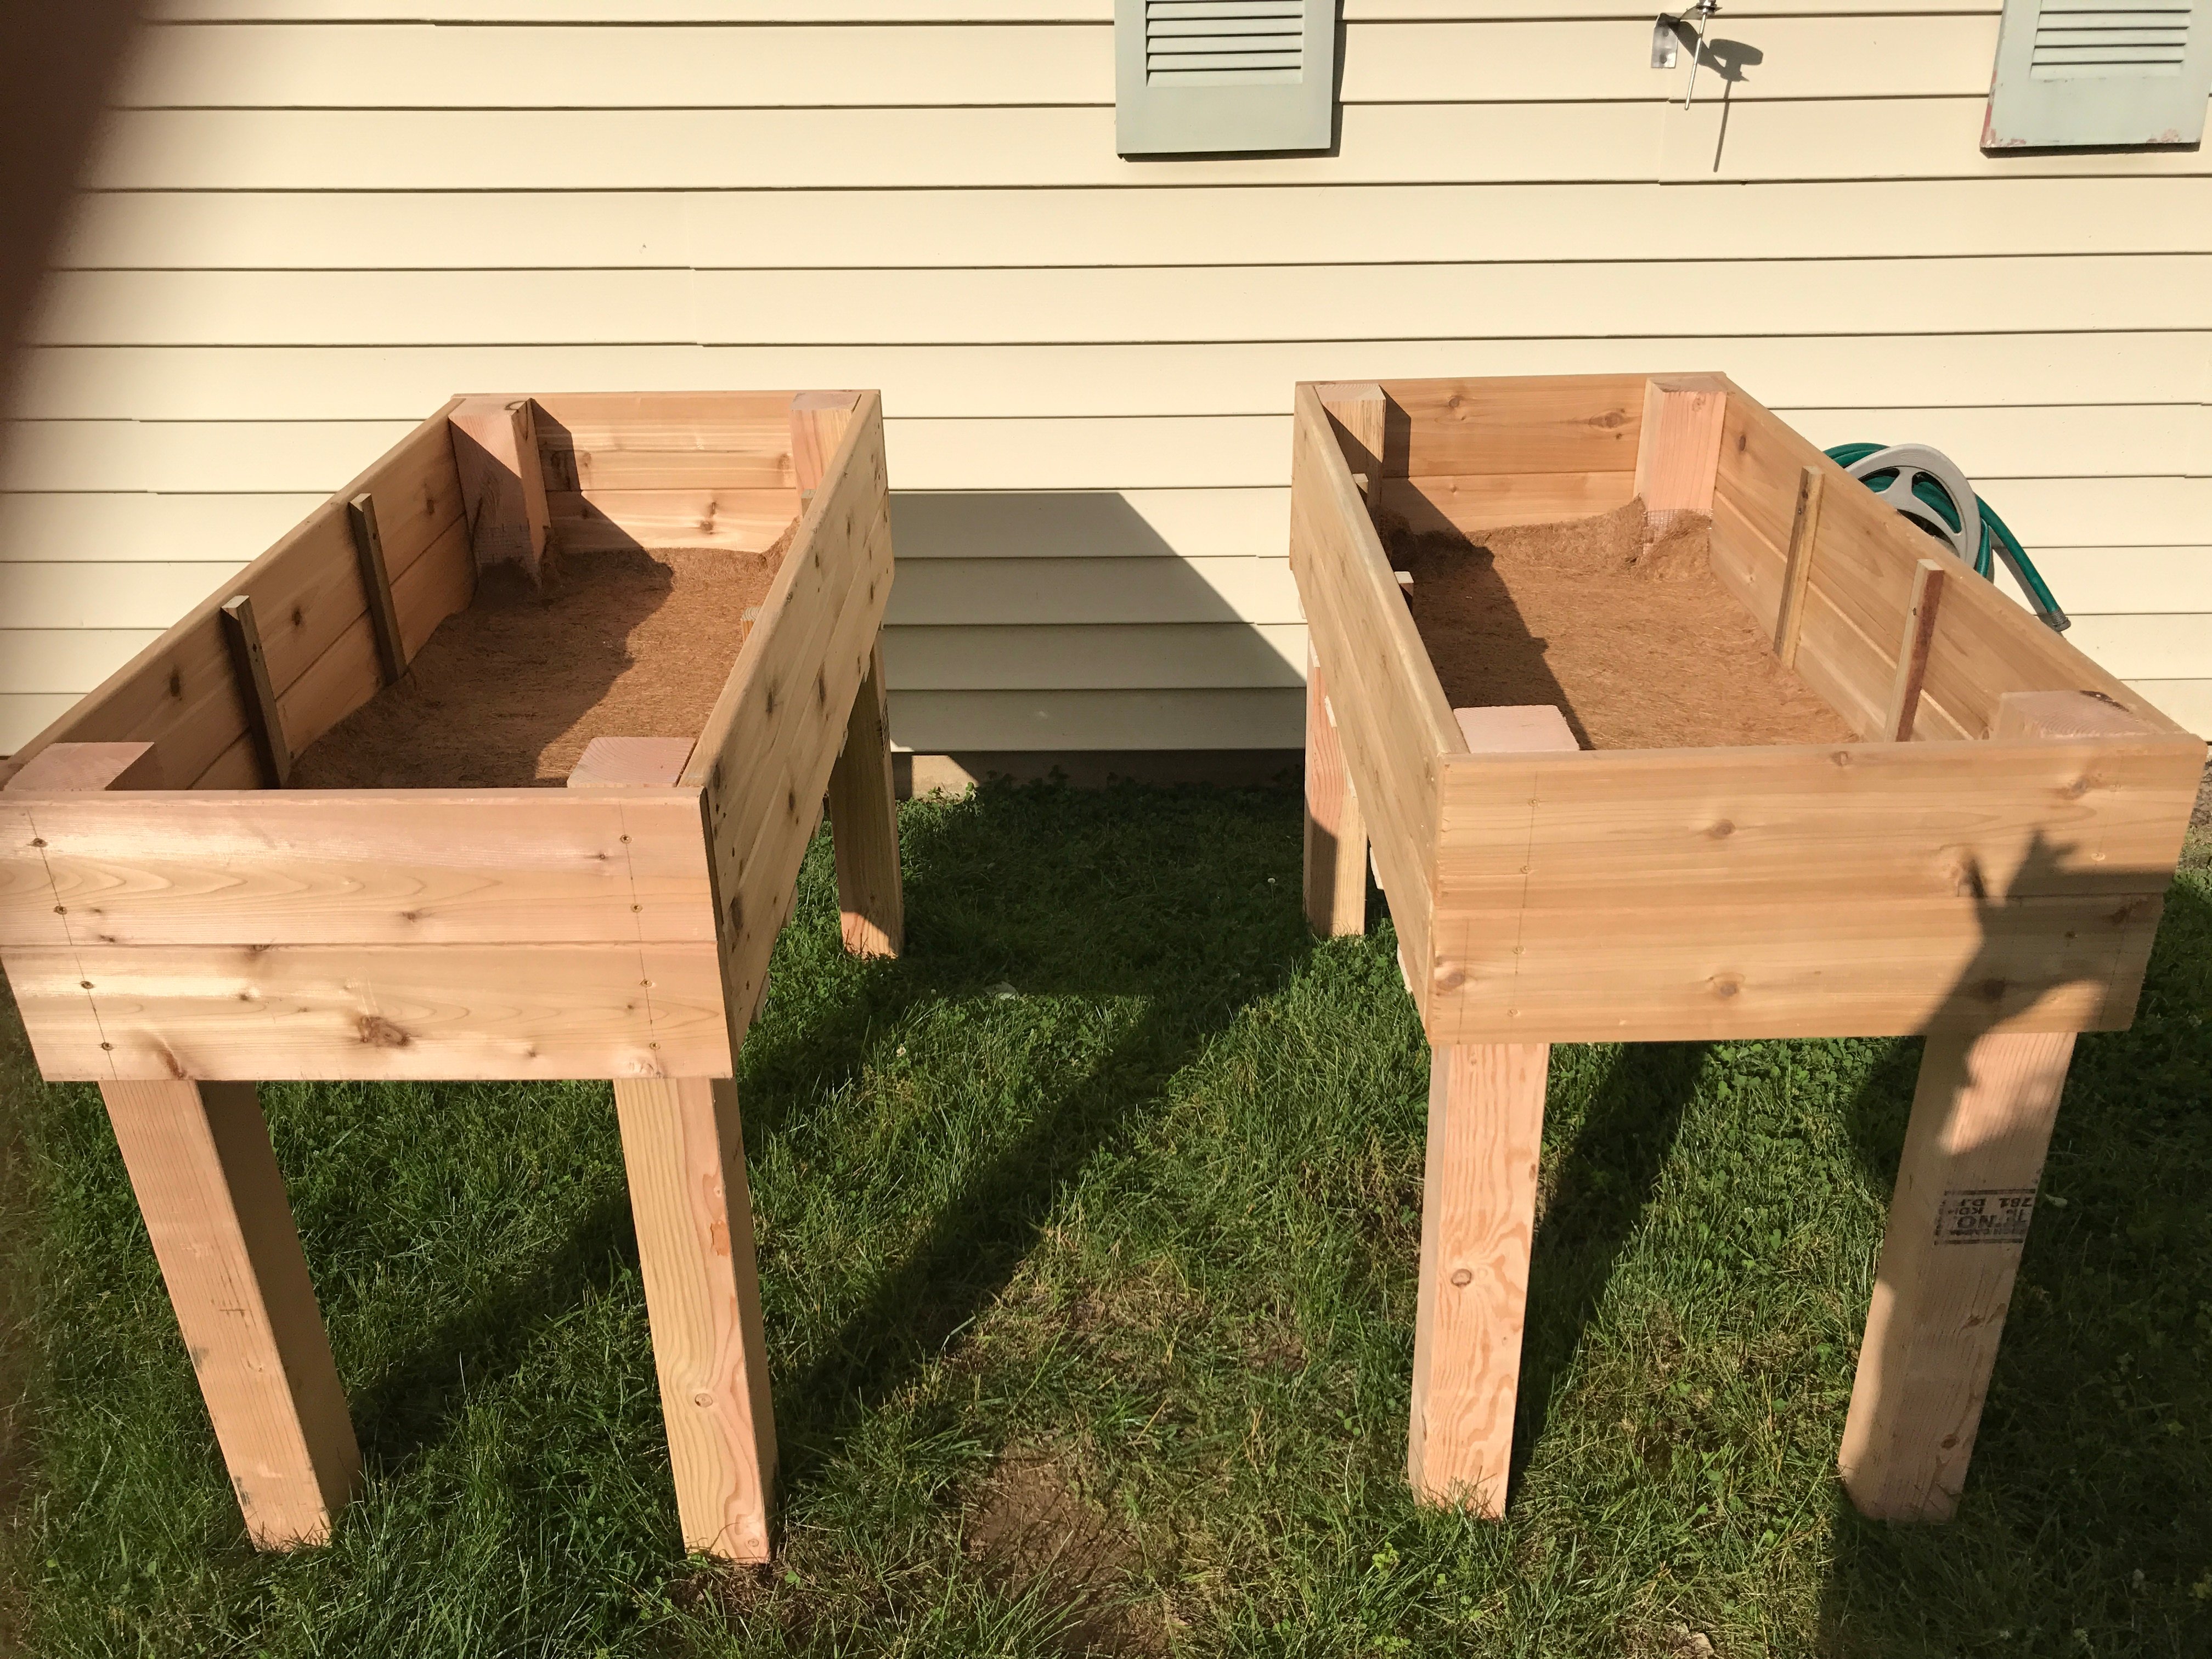
Used 36 inch legs instead of 32".
Also used two 6x1 inch boards for each side of the box.
Built from Plan(s)
Estimated Cost
$100 a box
Estimated Time Investment
Afternoon Project (3-6 Hours)
Recommended Skill Level
Beginner
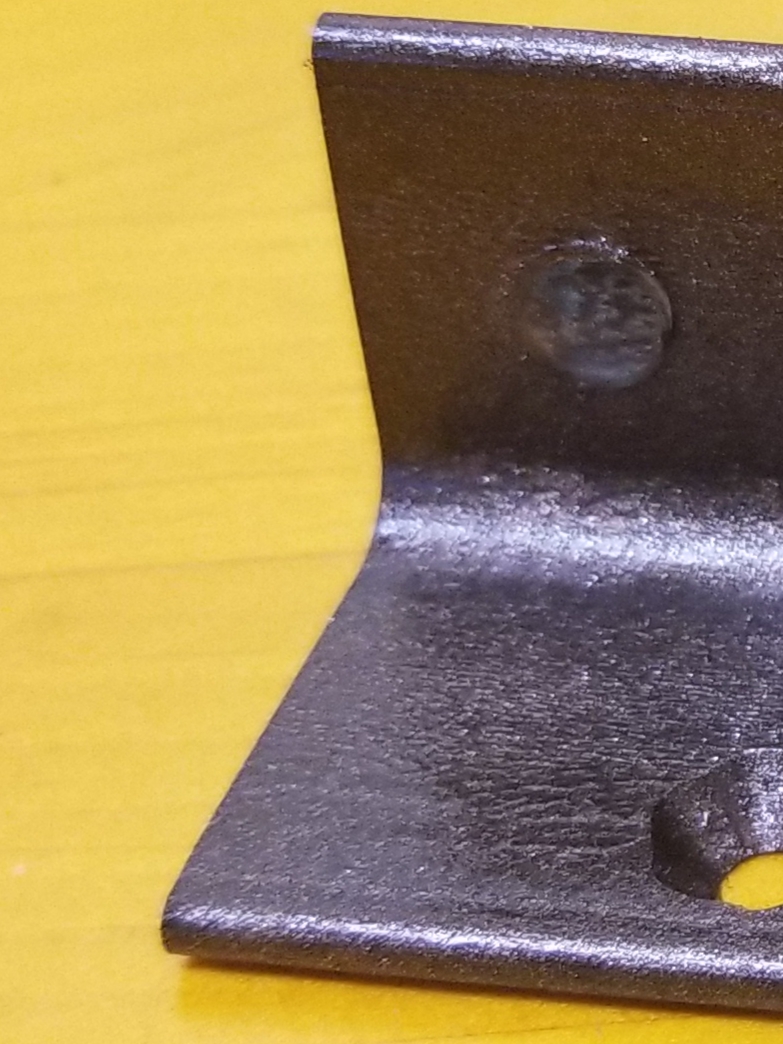
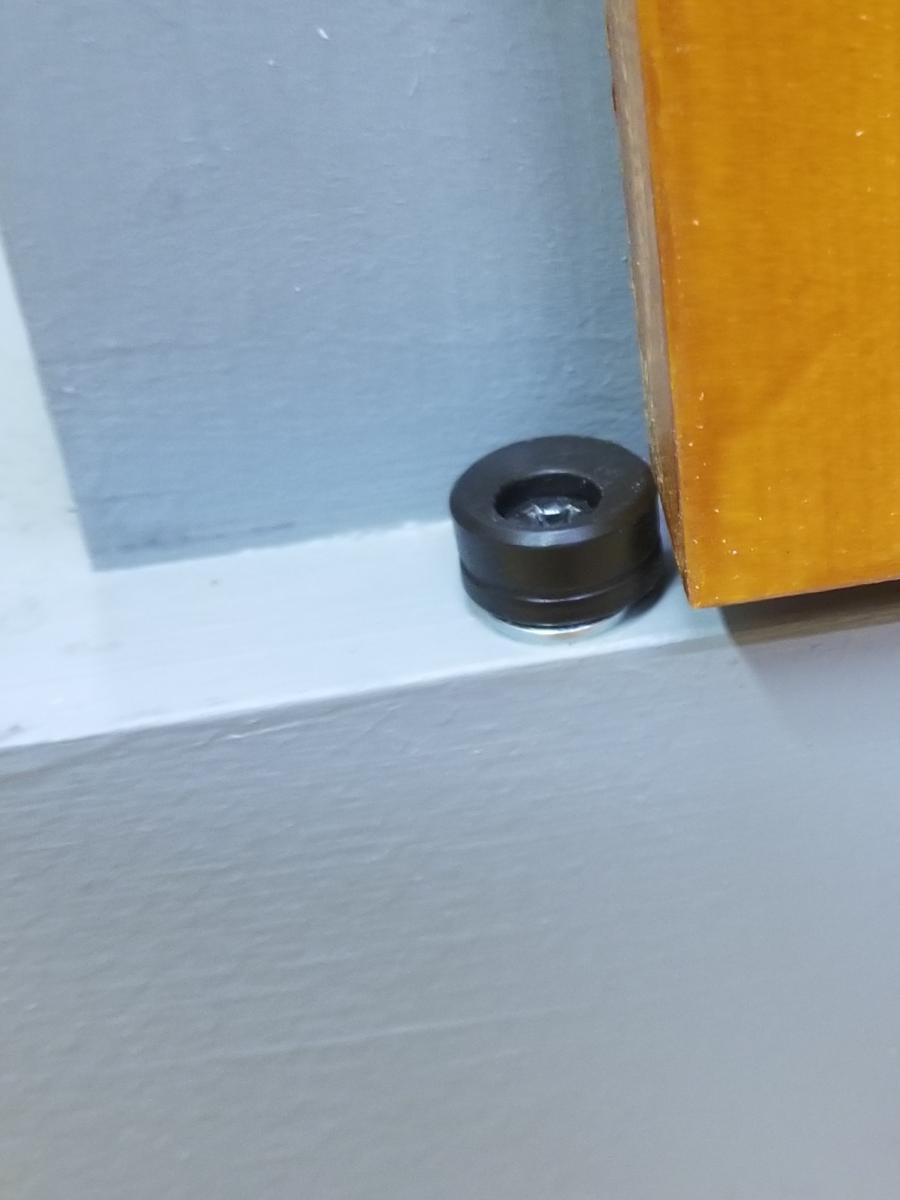
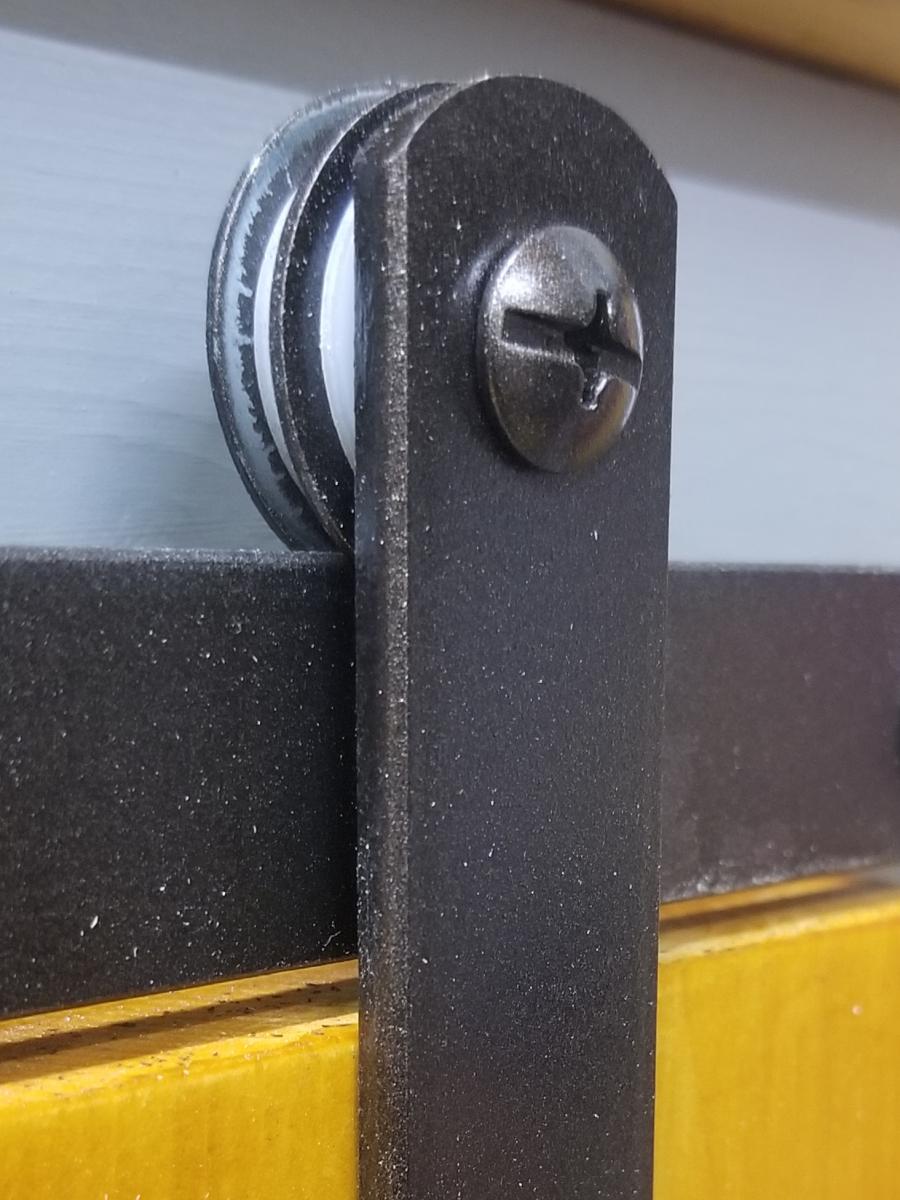
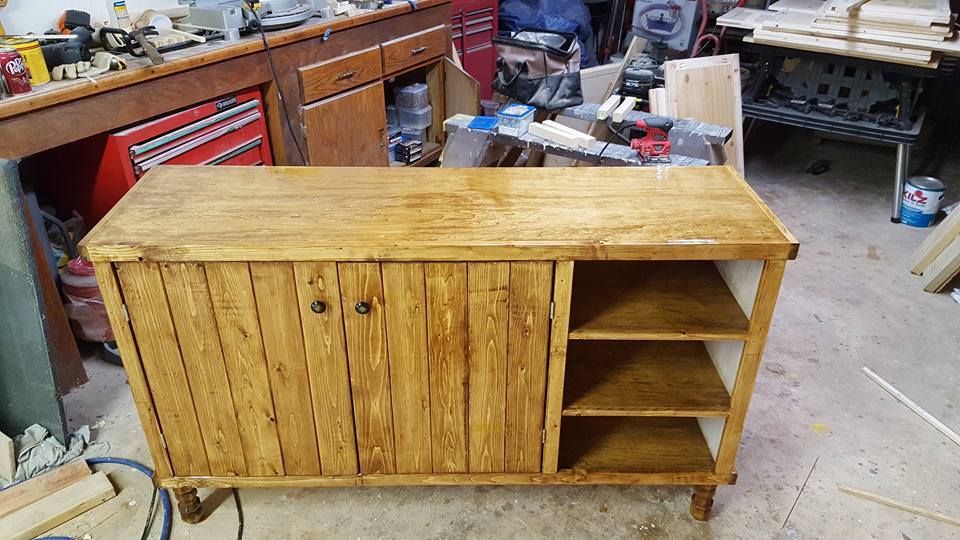
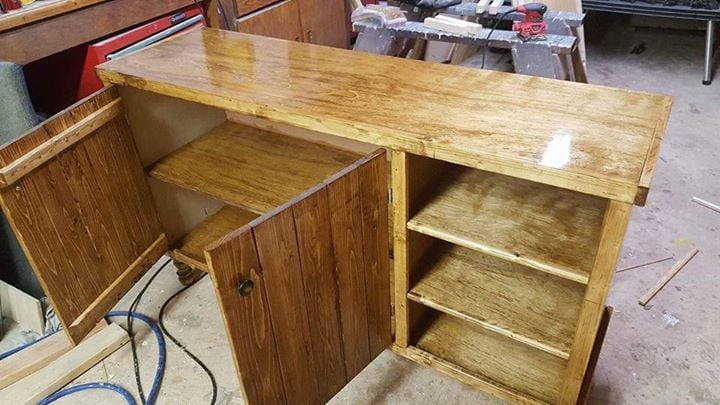
Rolling Barn Door Cabinet
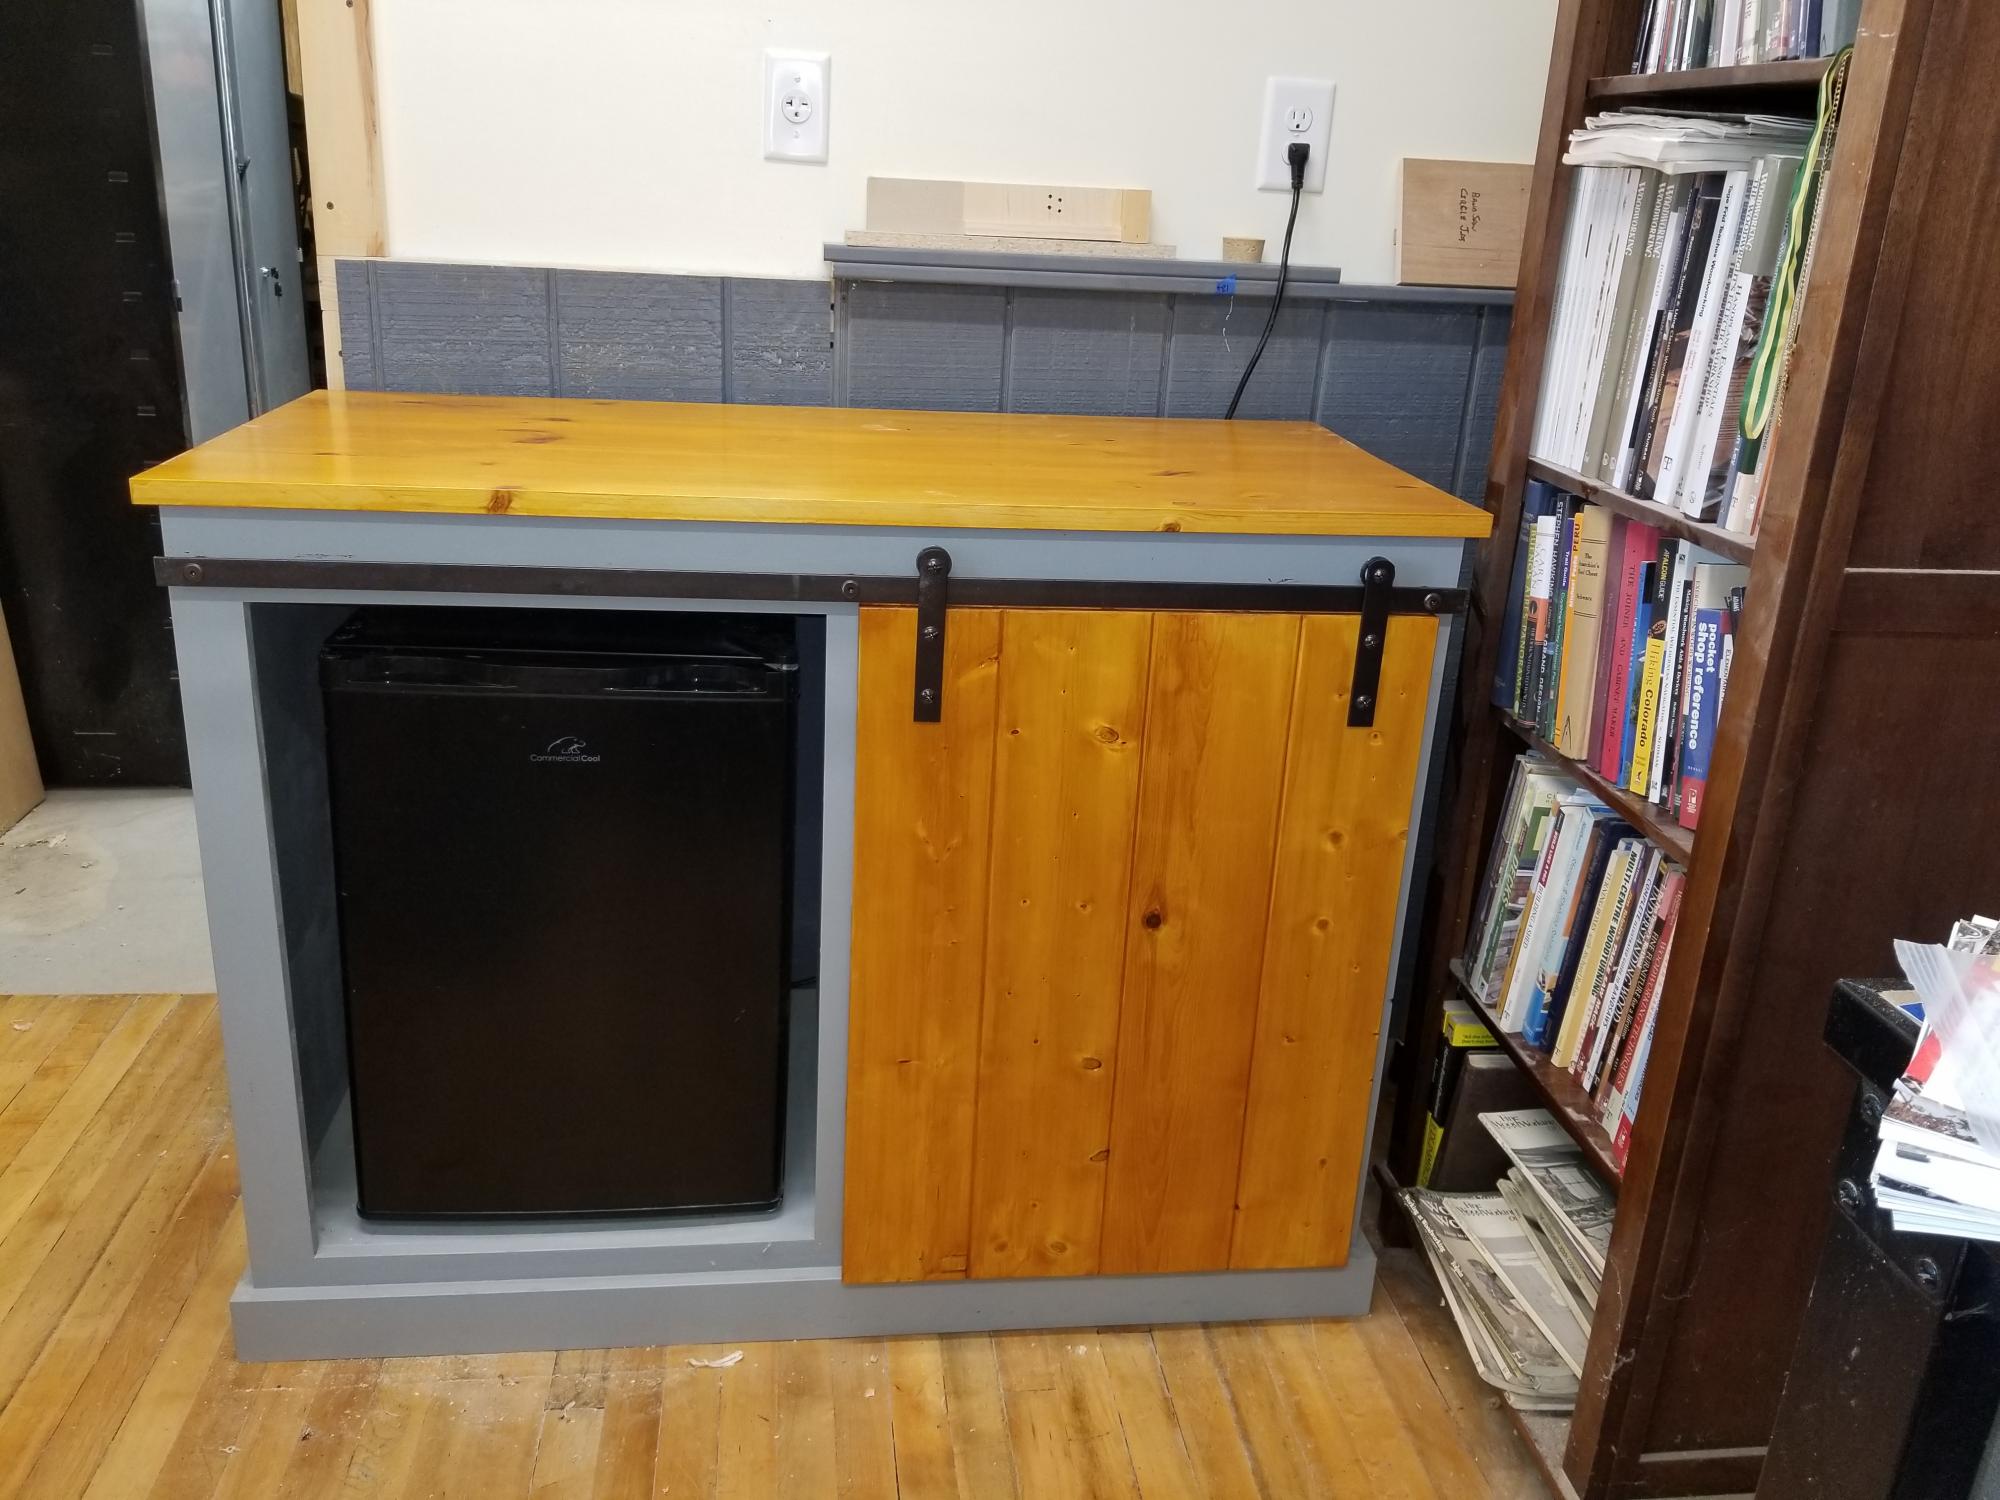
This is my version of the Barn Door Snack Cabinet. I made it for my shop/office and was just what I was looking for to add storage space. For the most part I used the published dimensions, but changed the construction method by notching the center divider and using a cutoff from the plywood panel as front and rear stretchers for attaching the top and the face frame. I also used nylon washers for the rollers to make the slide smoothly and quietly. I installed door stops to make sure the door wouldn't slide off the track, I added silicone door bumpers to the lower door guide to avoid wood to metal contact and finally, I ground a radius on the door straps to match the rollers.
Thanks Ana for the inspiration!
Built from Plan(s)
Estimated Cost
$200
Estimated Time Investment
Weekend Project (10-20 Hours)
Finish Used
Latex paint, amber shellac, wipe-on poly
Recommended Skill Level
Intermediate
Comments
Cubby Desk
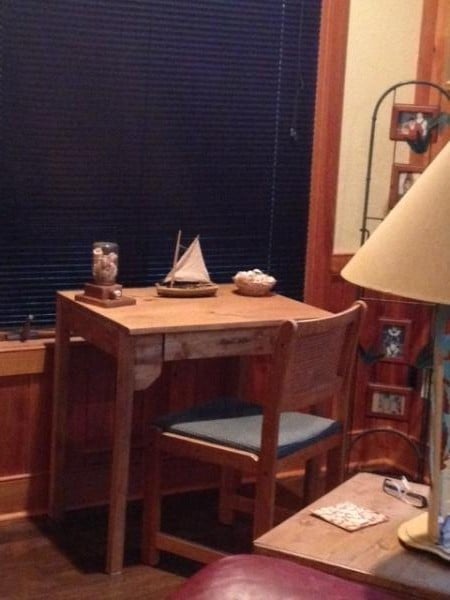
Made from pine boards. Had to add 2 2x4's underneath to hold the drawer.
Built from Plan(s)
Estimated Cost
50.00
Estimated Time Investment
Day Project (6-9 Hours)
Finish Used
Minwax golden oak and wax.
Recommended Skill Level
Intermediate
Console Table
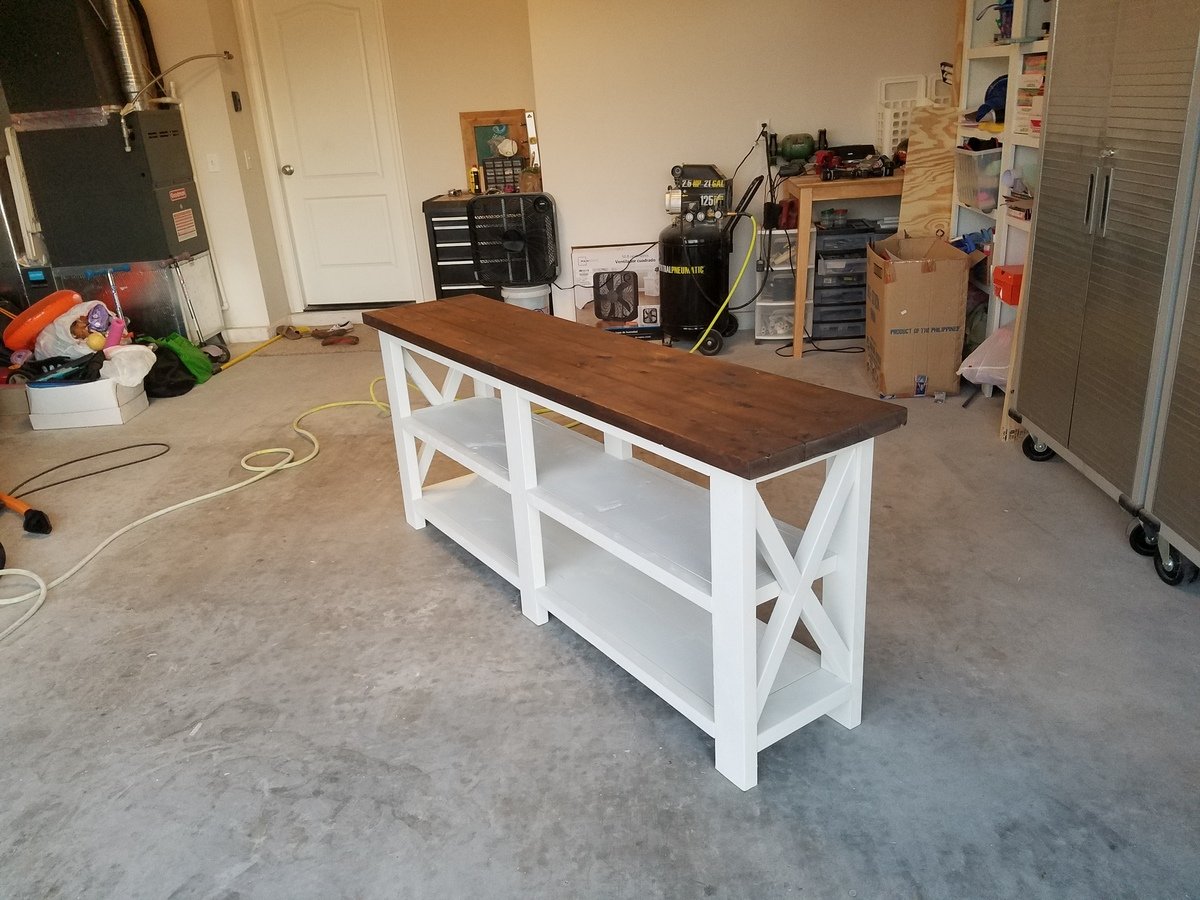
Quick and easy to follow plans. Only issue I ran into was that my miter saw only cuts up to a 50° angle. I set up a jig to hold the 2x2 perpendicular to the saw and set the miter to 30°. Viola, easy 60° angles! Pic attached for reference.

Built from Plan(s)
Estimated Cost
$80
Estimated Time Investment
Afternoon Project (3-6 Hours)
Recommended Skill Level
Beginner
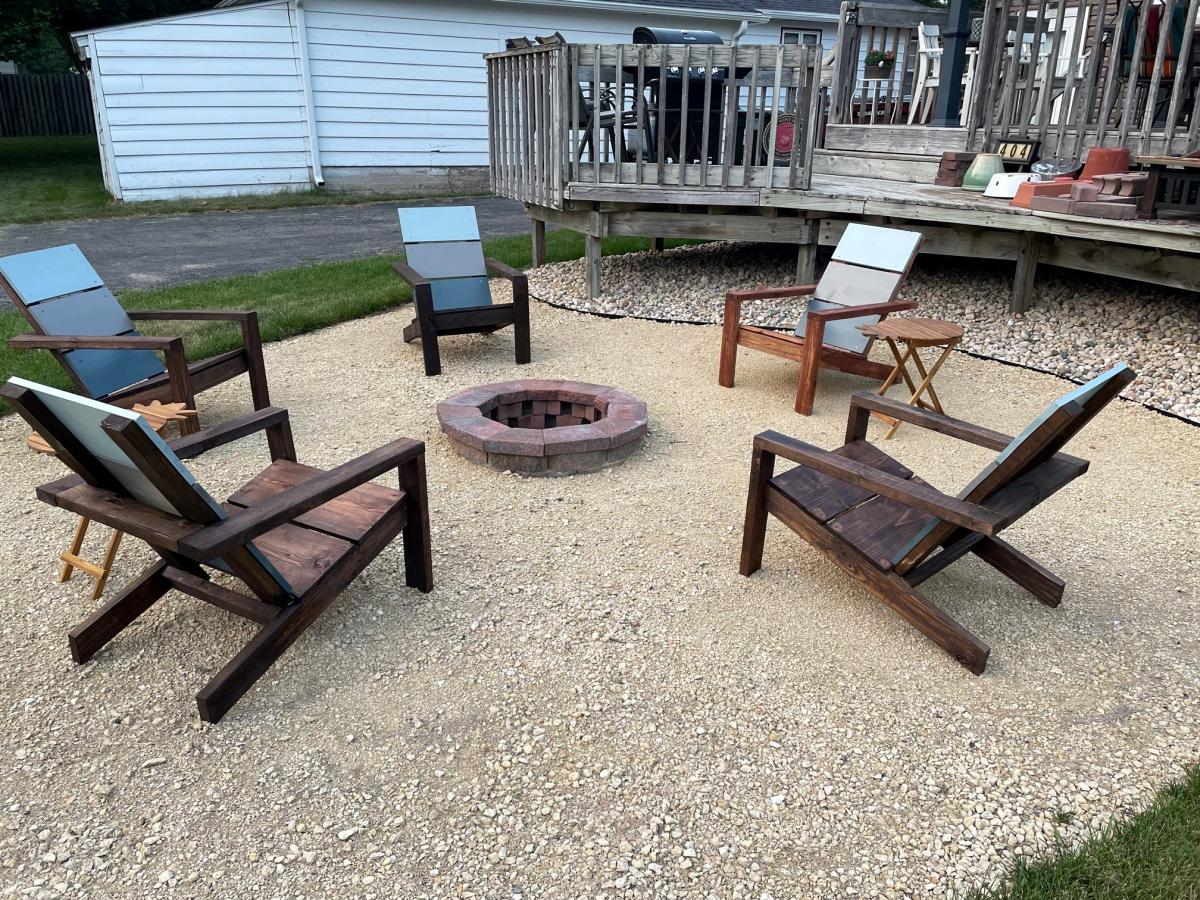
Paint and Stain 2x4 Adirondack Chairs
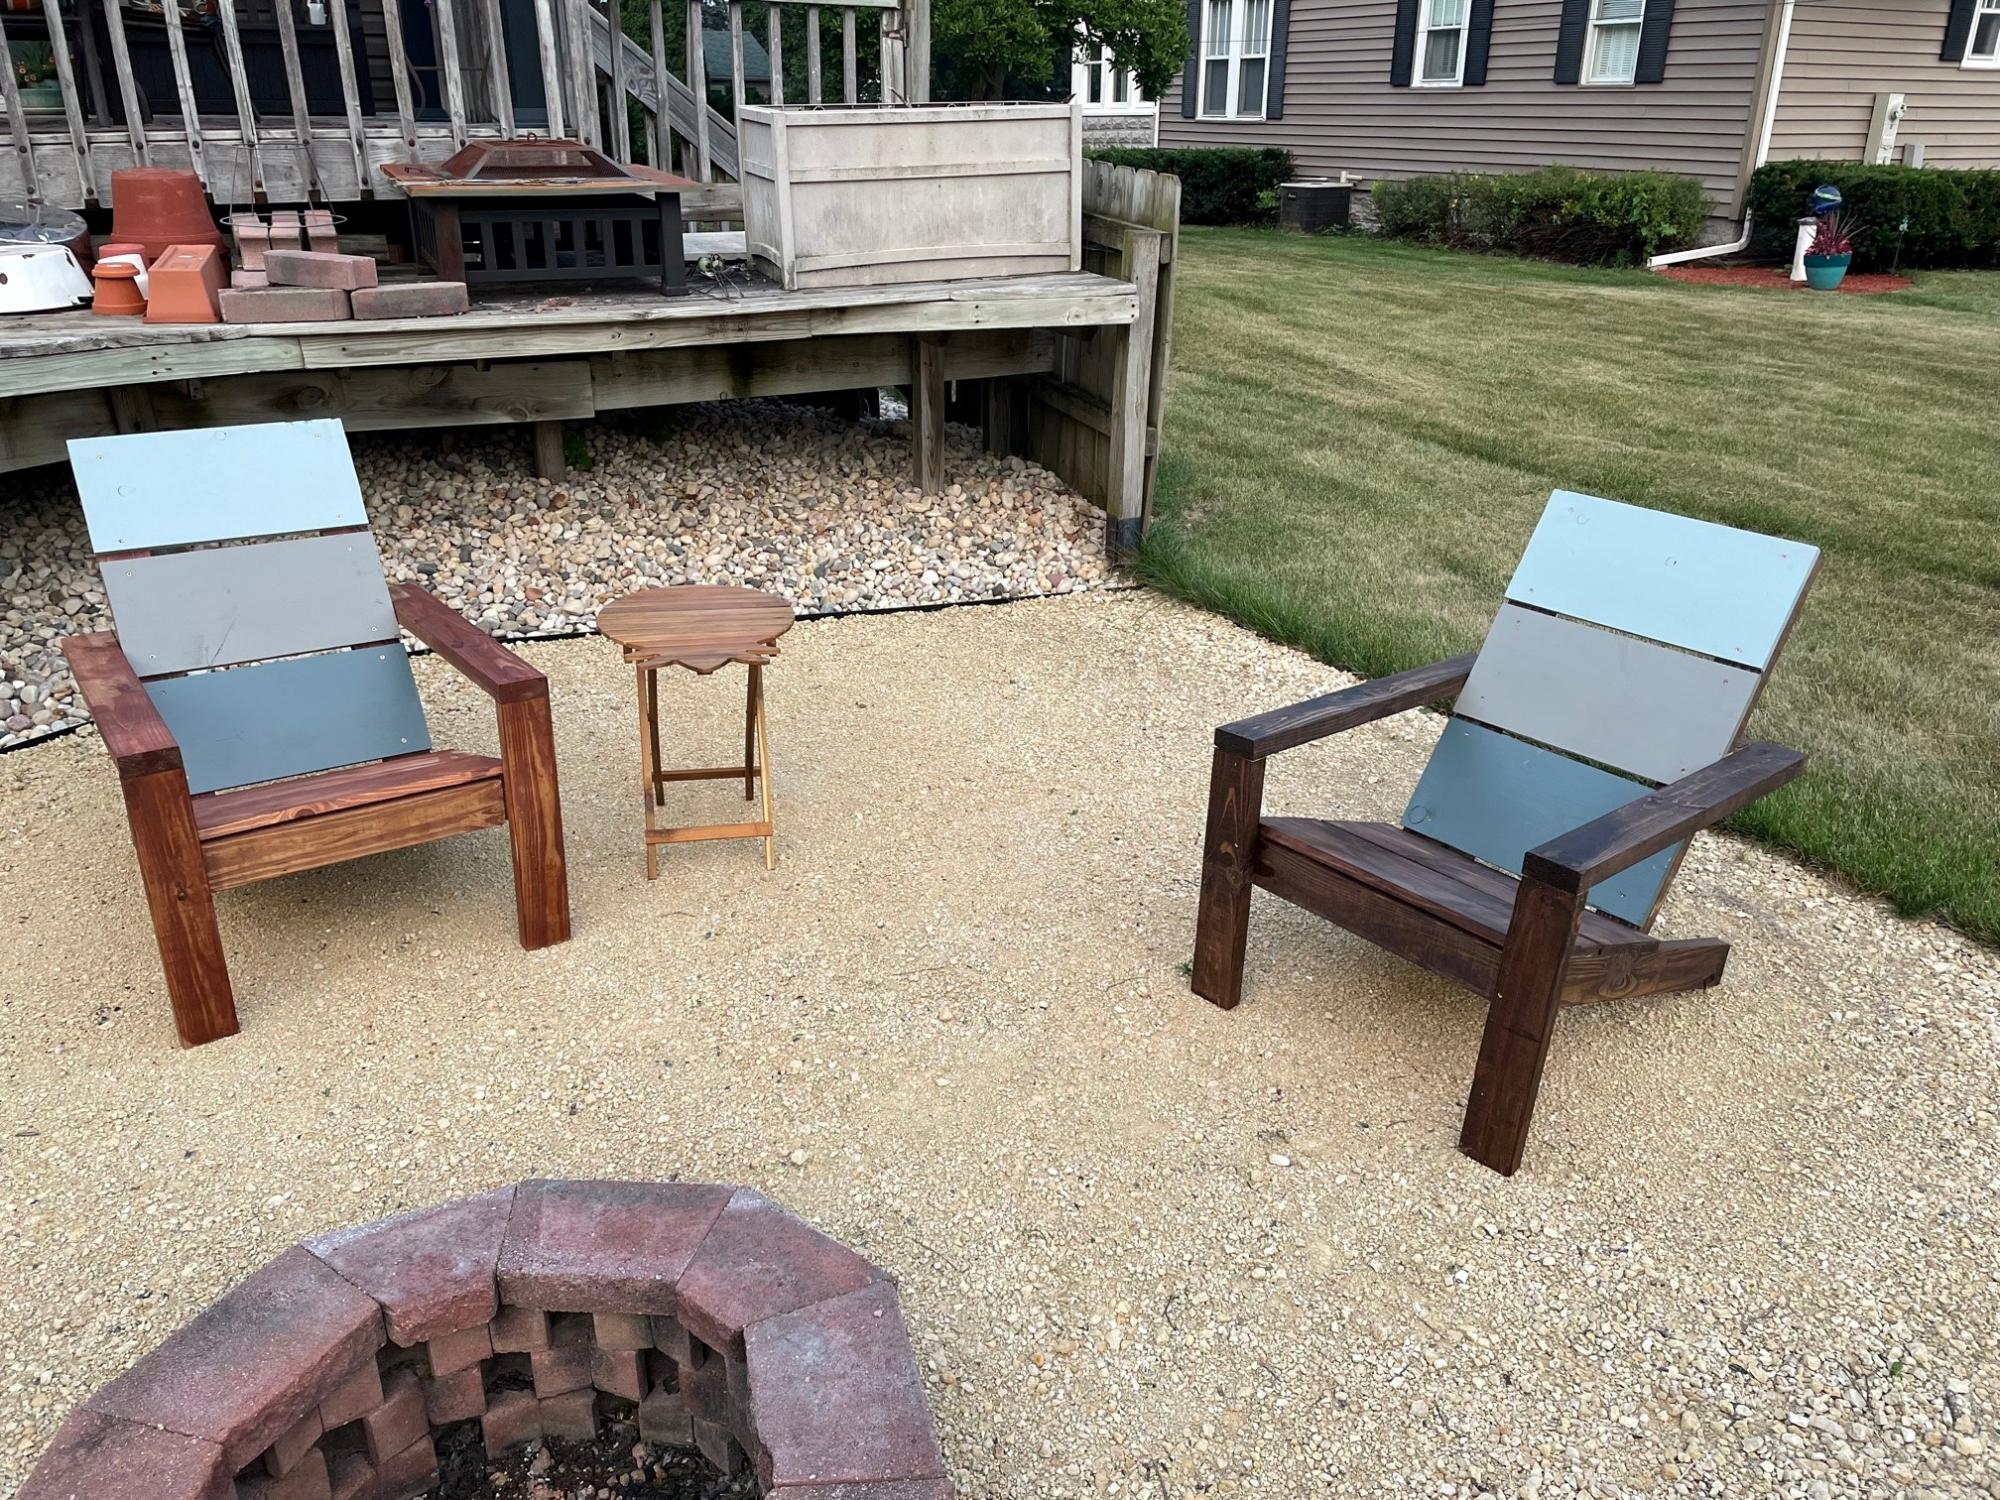
Built for our Firepit.
Built from Plan(s)
Estimated Cost
$40 per chair
Estimated Time Investment
Weekend Project (10-20 Hours)
Recommended Skill Level
Intermediate
Comments
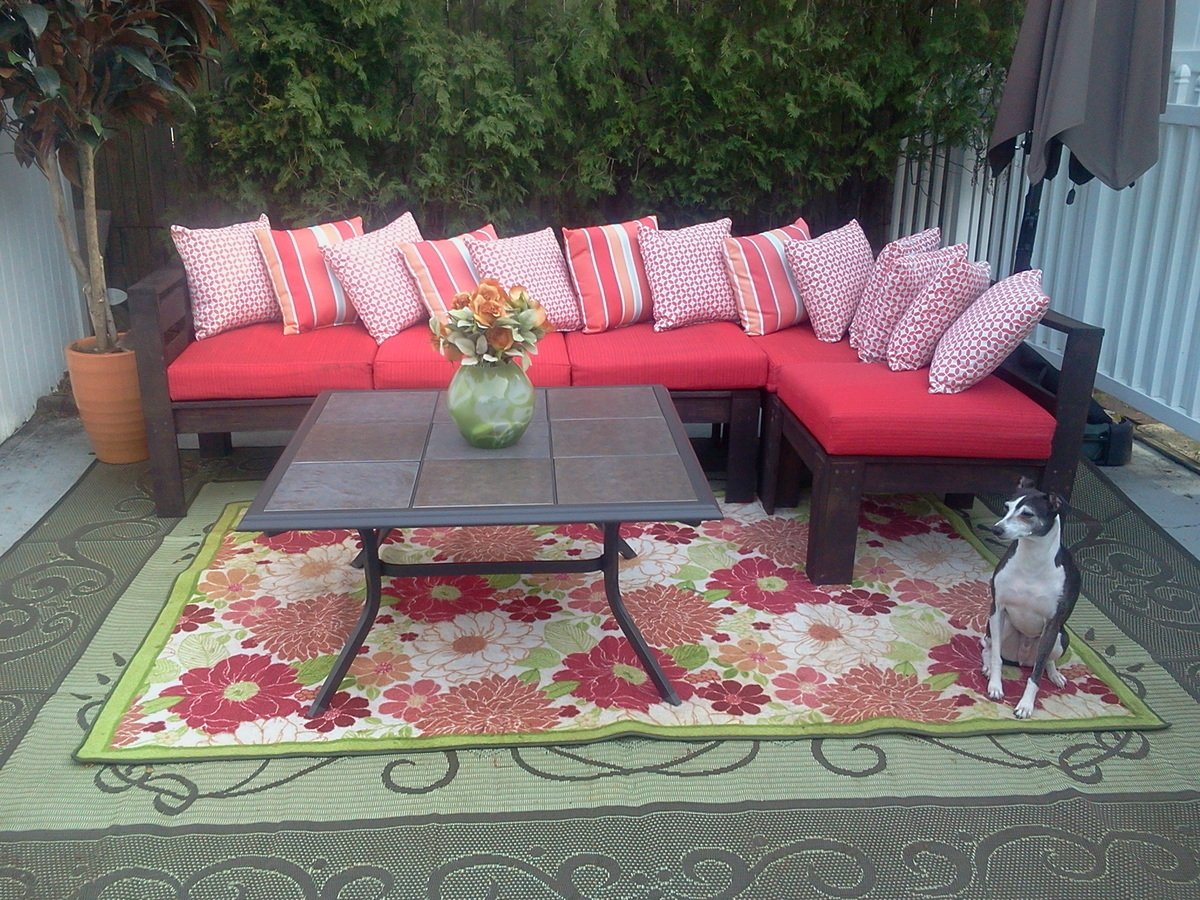
Outdoor Sectional
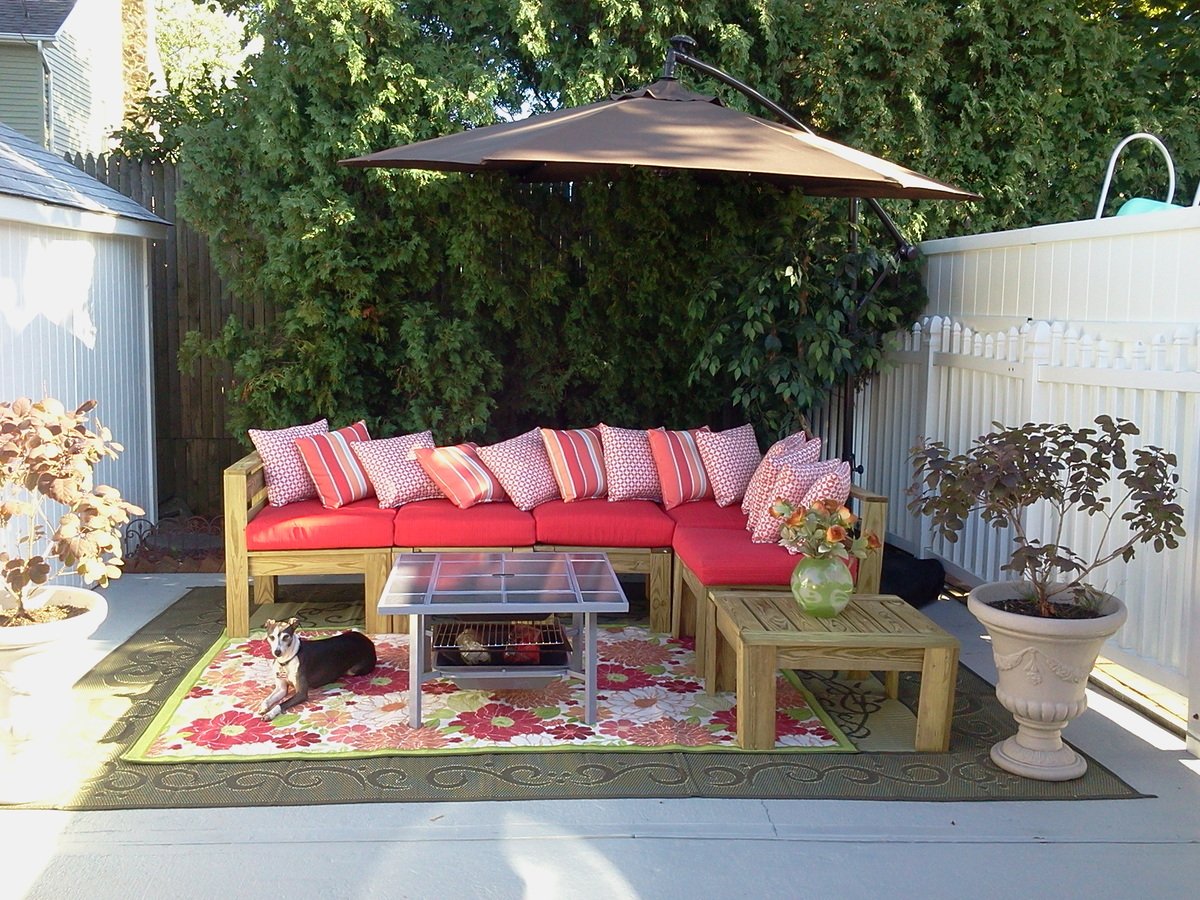
Thank you Ana White!!! This website is Awesome!!! I started my outdoor sectional project last summer and used the "Modern Outdoor Sectional" plans for my project....it really was easy....In fact, I went to Lowes and had all my sizes cut for me and all I had to do was use the kreg jig as recommended and a drill and "Wa La!"....my sectional didn't cost me more than $350! This year I am going to paint it since it is pre-treated wood, I needed to wait the season!!! So, I will upload another picture soon to show you what it looks like painted......

Estimated Time Investment
Week Long Project (20 Hours or More)
Finish Used
Nothing Yet.
Recommended Skill Level
Beginner
Comments

Mon, 04/07/2014 - 21:58
my outdoor sectional
Thank you so much! Sorry, I never knew how to check if I had any comments and I am starting a new project and seen that you commented. Thanks again!
Mon, 04/07/2014 - 21:59
my outdoor sectional
Thank you so much! Sorry, I never knew how to check if I had any comments and I am starting a new project and seen that you commented. Thanks again!
Mon, 04/07/2014 - 21:59
my outdoor sectional
Thank you so much! Sorry, I never knew how to check if I had any comments and I am starting a new project and seen that you commented. Thanks again!
Thu, 04/25/2013 - 11:52
Awesome Job!
I can not wait until the Hubs and I can get started on ours! :) Looks great!
Mon, 05/06/2013 - 11:18
Love how everything works together
I've been looking at this project to build for awhile. I love how all the colors in the area work together. This looks like something you'd spend thousands on in a store somewhere. Nice!
Mon, 04/07/2014 - 22:00
my outdoor sectional
Thank you so much! Sorry, I never knew how to check if I had any comments and I am starting a new project and seen that you commented. Thanks again!
Wed, 02/03/2016 - 06:37
Outdoor sectional - cushions/pillows
Love the colors you used. Are the cushions handmade?
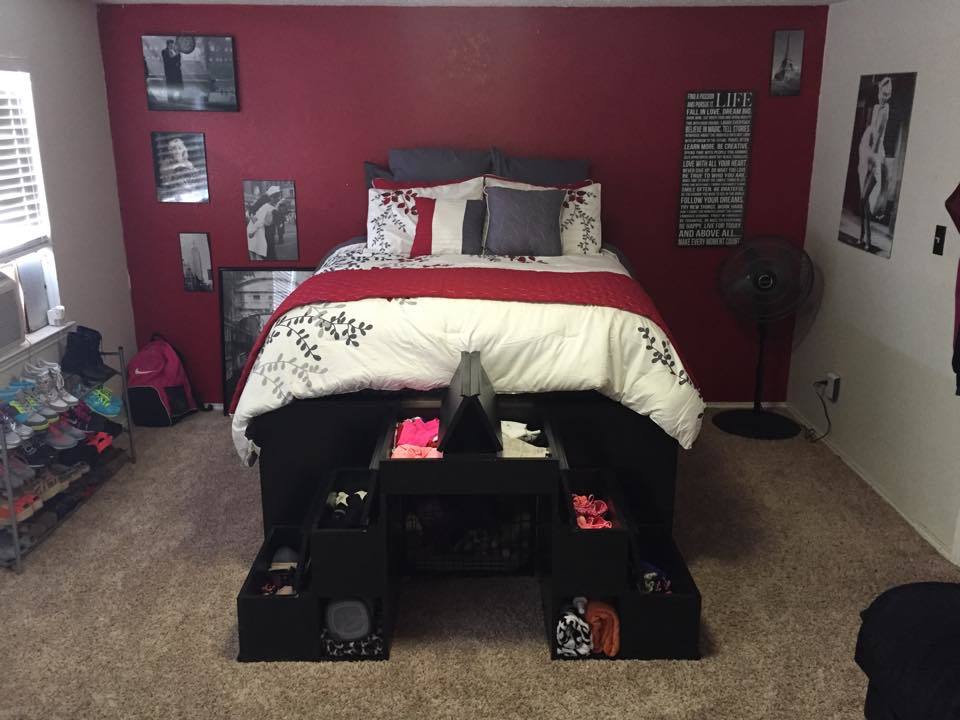
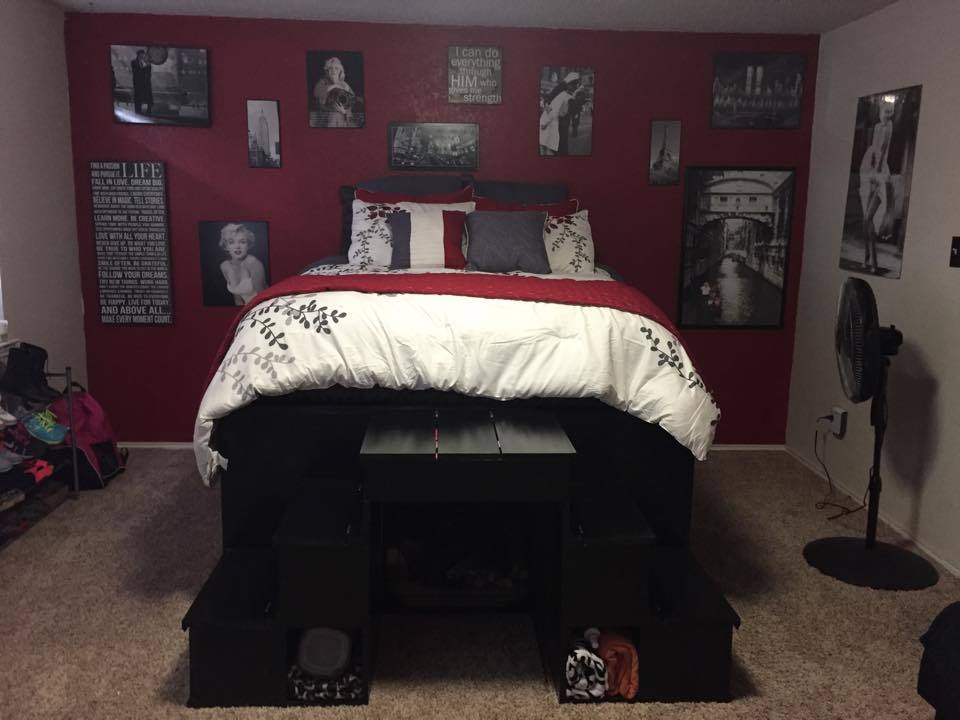
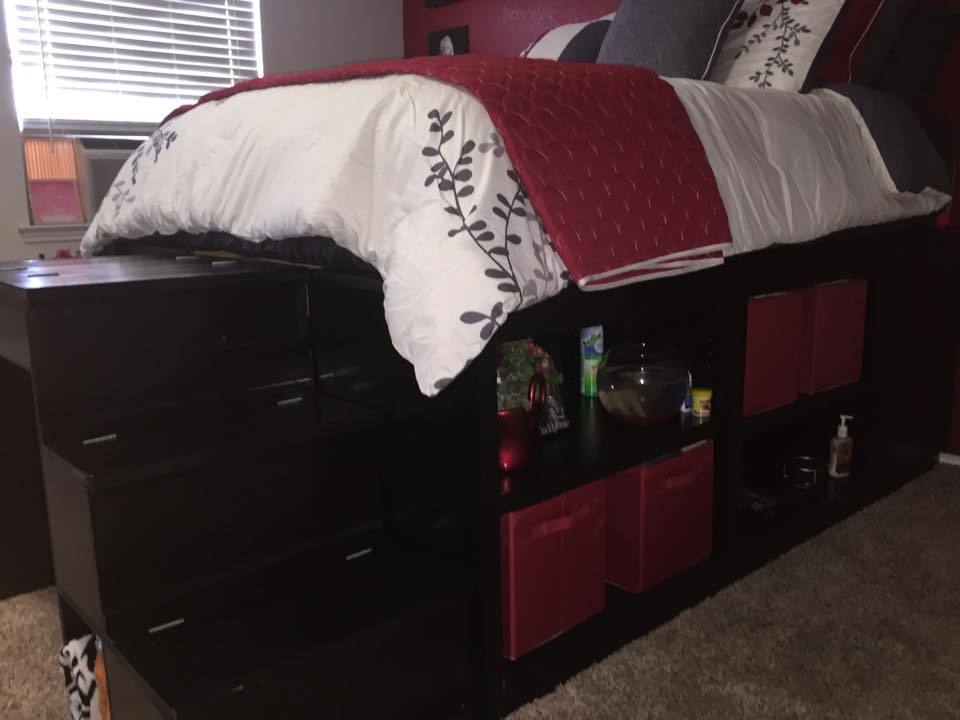
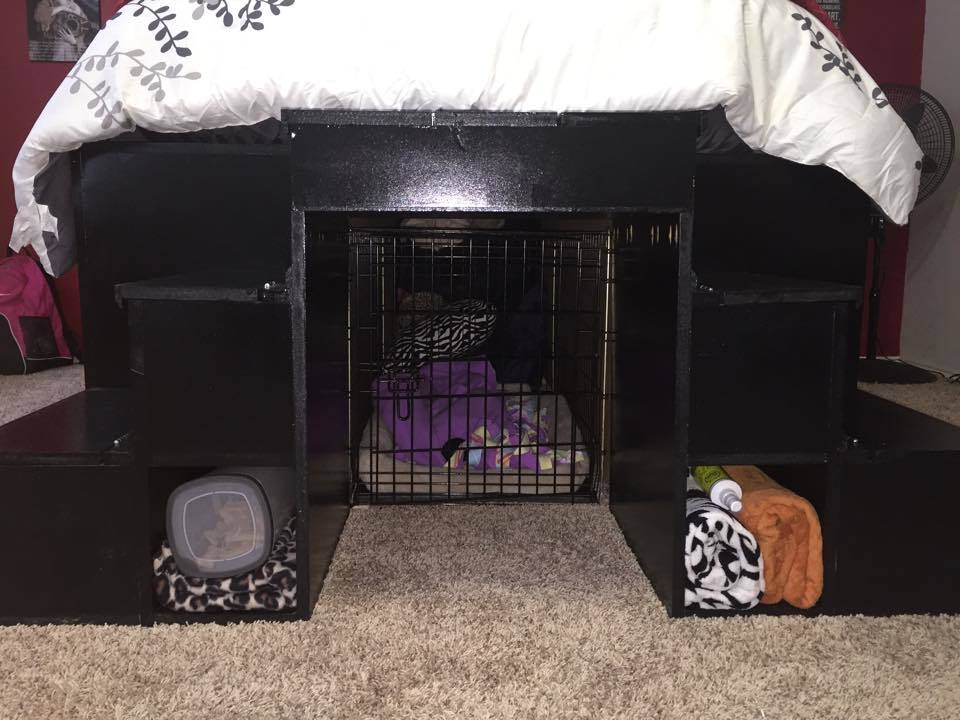
Extra Large Storage Bed with Stairs
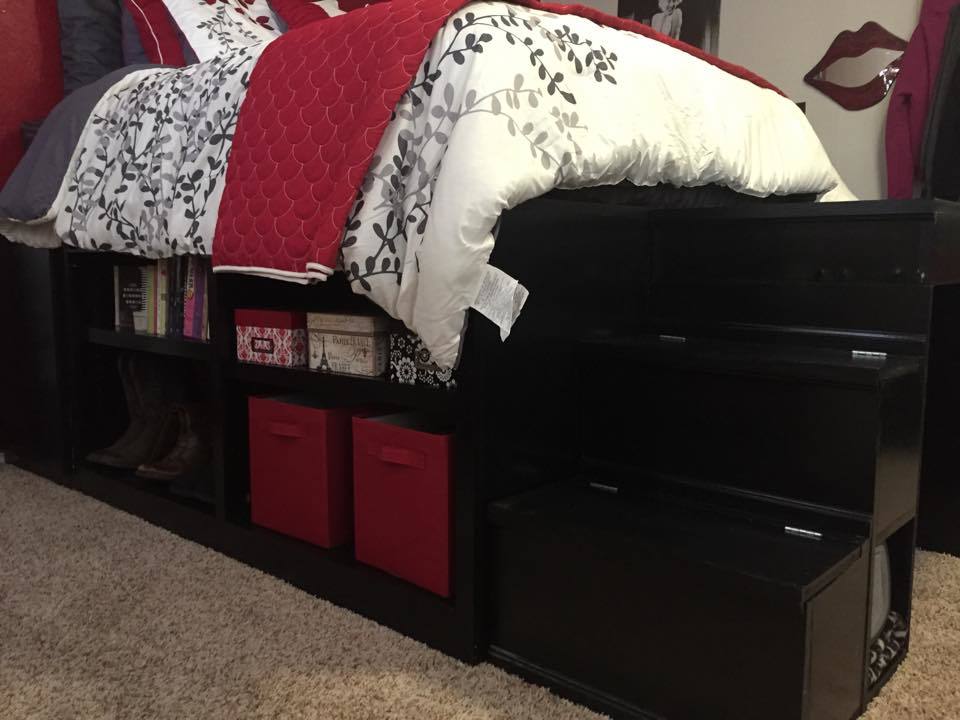
My daughter wanted a bed with lots of storage so searched on here and found the queen and king storage beds, but she wanted something taller. So, I modifed the plans for the bed and made it slightly larger than a queen storage bed, but not quite as big as the king, and almost twice the height. I then built a set of stairs (modified the plans for the stairs as well so she would have 2 sets that created a bridge for her dog's kennel to go under her bed hidden away slightly. This was by far my biggest and most challenging project to date, but we were thrilled with the way it turned out. She loves the bed and I loved the time I was able to spend with her while building (she is 20 so time like that is far and few between)

Built from Plan(s)
Estimated Cost
$500
Estimated Time Investment
Week Long Project (20 Hours or More)
Finish Used
high gloss black paint and polyacrylic
Recommended Skill Level
Intermediate
Comments
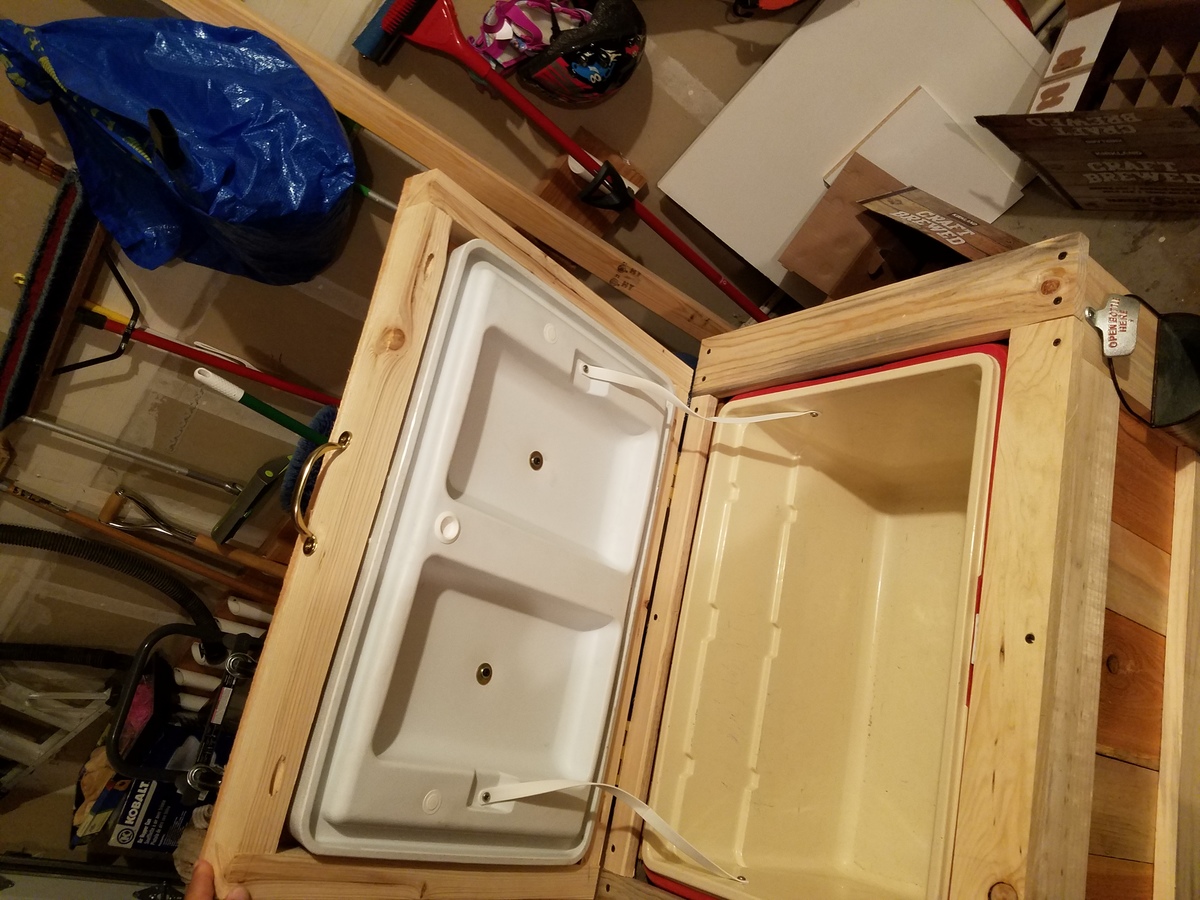
Cooler chest
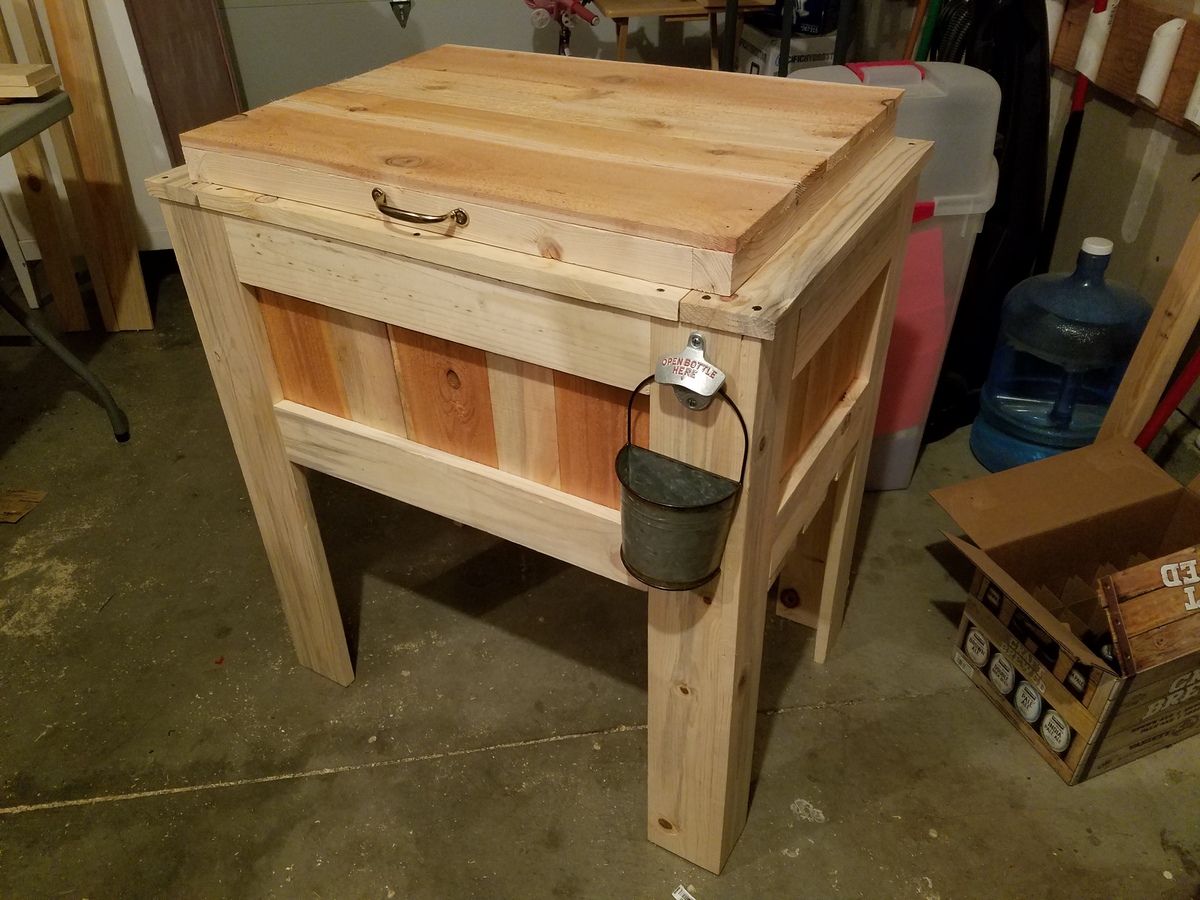
I'll be honest I didn't use these plans to build this cooler chest but this was the first place I saw the concept of building a box around a cooler to make a cooler chest so I give anna props for inspiring me I already had an old cooler to use so it helped keep the cost down I also used 1x4 blue pine and cedar fence picketts and repurposed the bottle opener from a growler carrier (in hindsight the bottle opener on a growler carrier doesnt make sense) all told this cost me about $45
Estimated Cost
$45
Estimated Time Investment
Afternoon Project (3-6 Hours)
Recommended Skill Level
Beginner
Coffee table
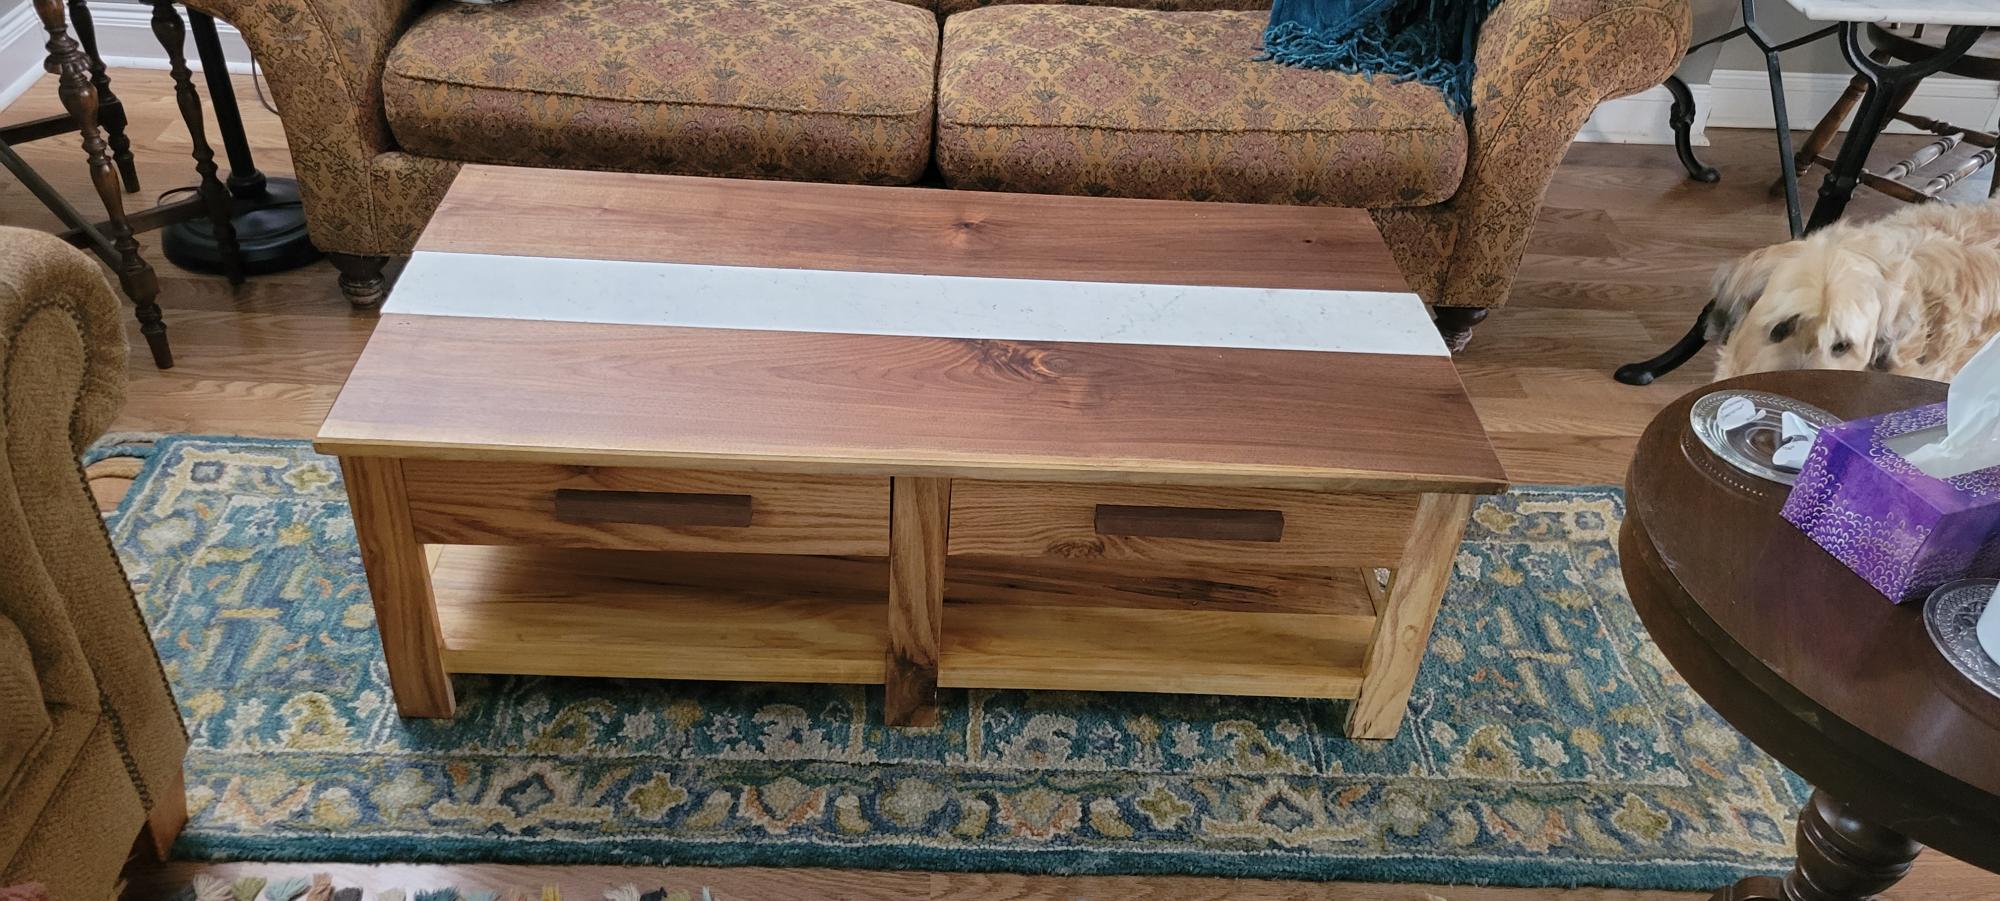
I modified the plans and used oak instead of pine. I used black walnut on top is guangzhou on top with white granite strip in the middle
Built from Plan(s)
Estimated Cost
I had all the materials in my shop except for the black walnut. That cost $100
Estimated Time Investment
Weekend Project (10-20 Hours)
Finish Used
3 coats of polyurethane
Recommended Skill Level
Advanced
Comments
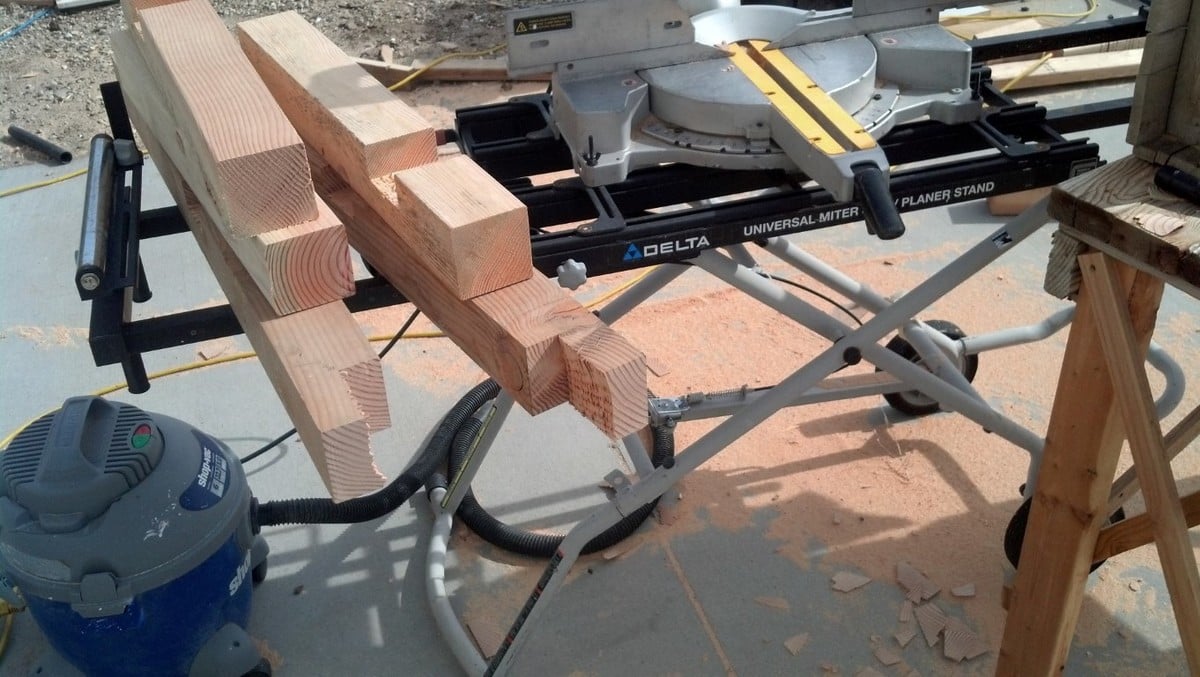
Farmhouse Table
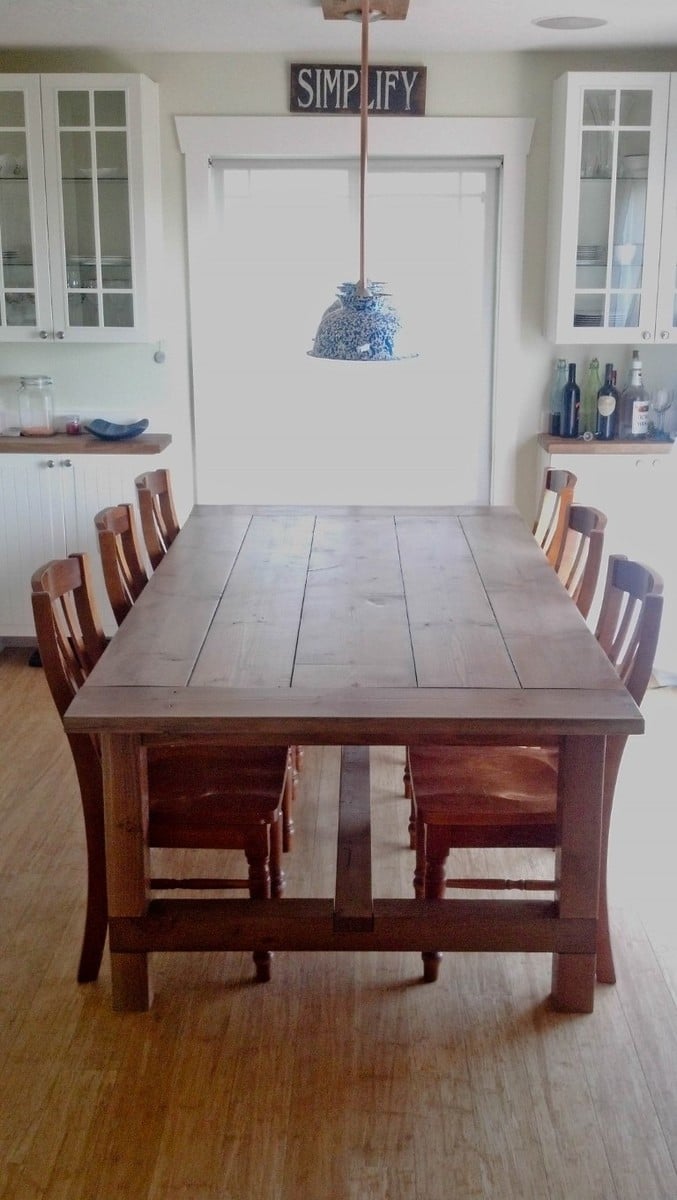
My wife and I really love the farmhouse look and feel. We saw one of these tables at a furniture store for $2000 with no chairs. I had already bought the Kreg Tool, something that I cannot believe I have done without for so long, when I went to build some $10 Shelves that Ana has on her site. My wife asked me how hard it would be to build the table and I told her I have never done anything like it. I also told her if she didn't like the end project, we could use it as a picnic table outside. It was fantastically easy with the plans and Kreg Jig. Thanks to Ana for all the helpful tips!
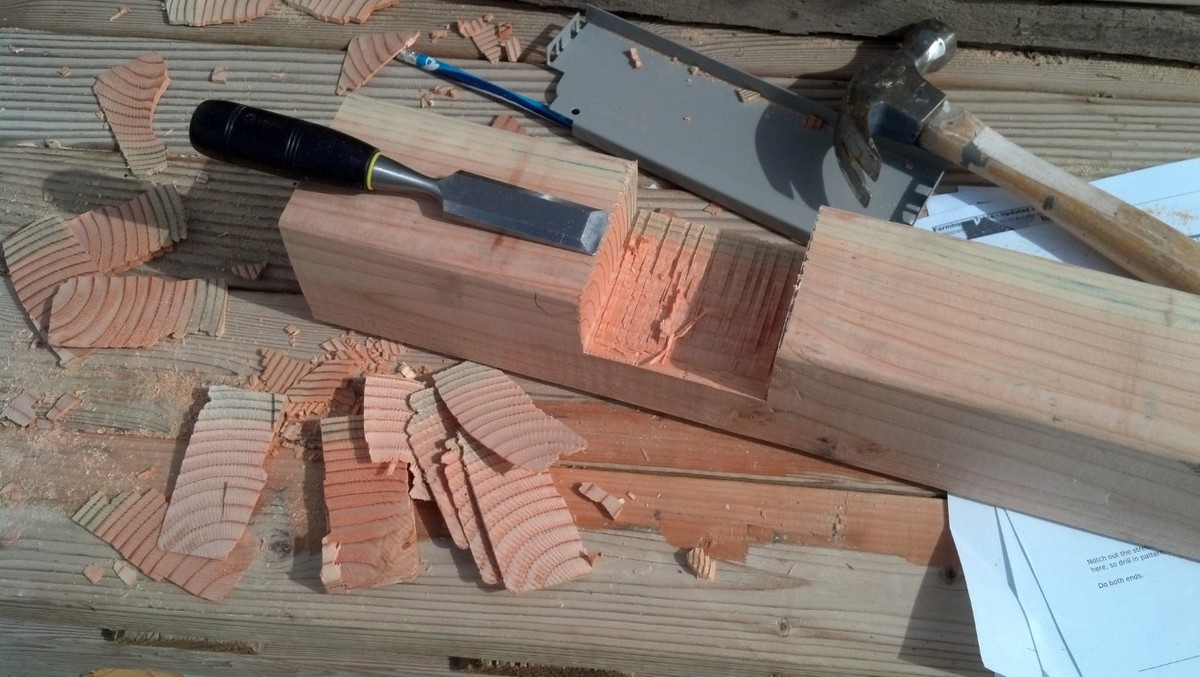
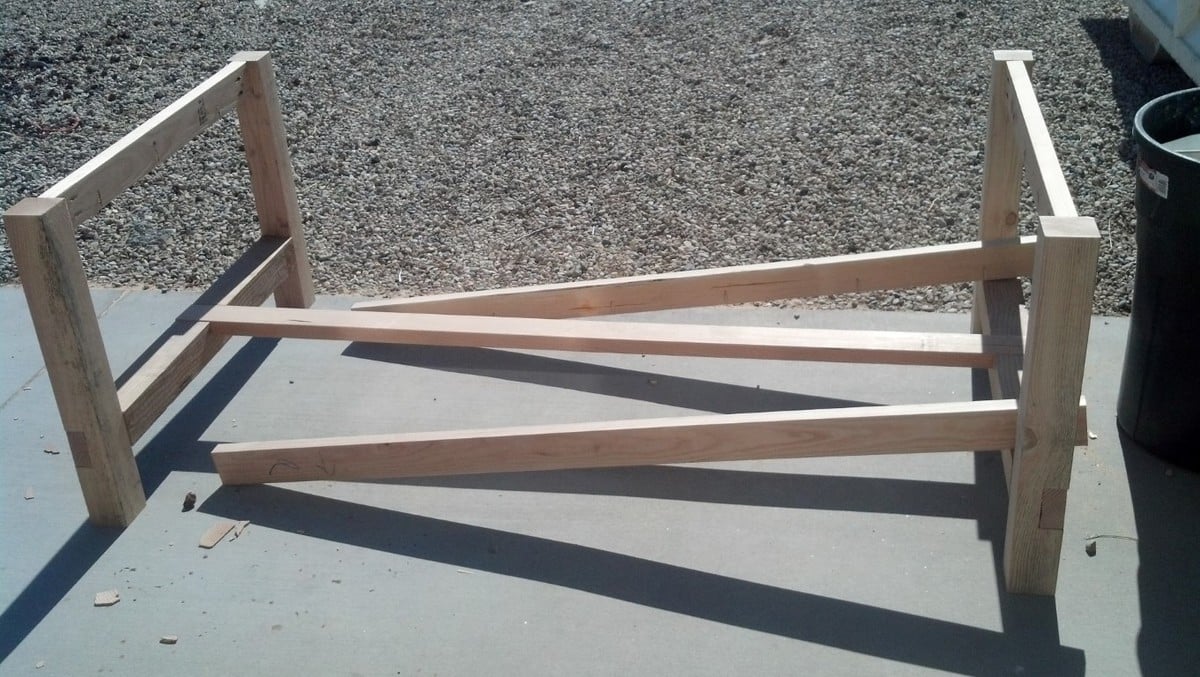
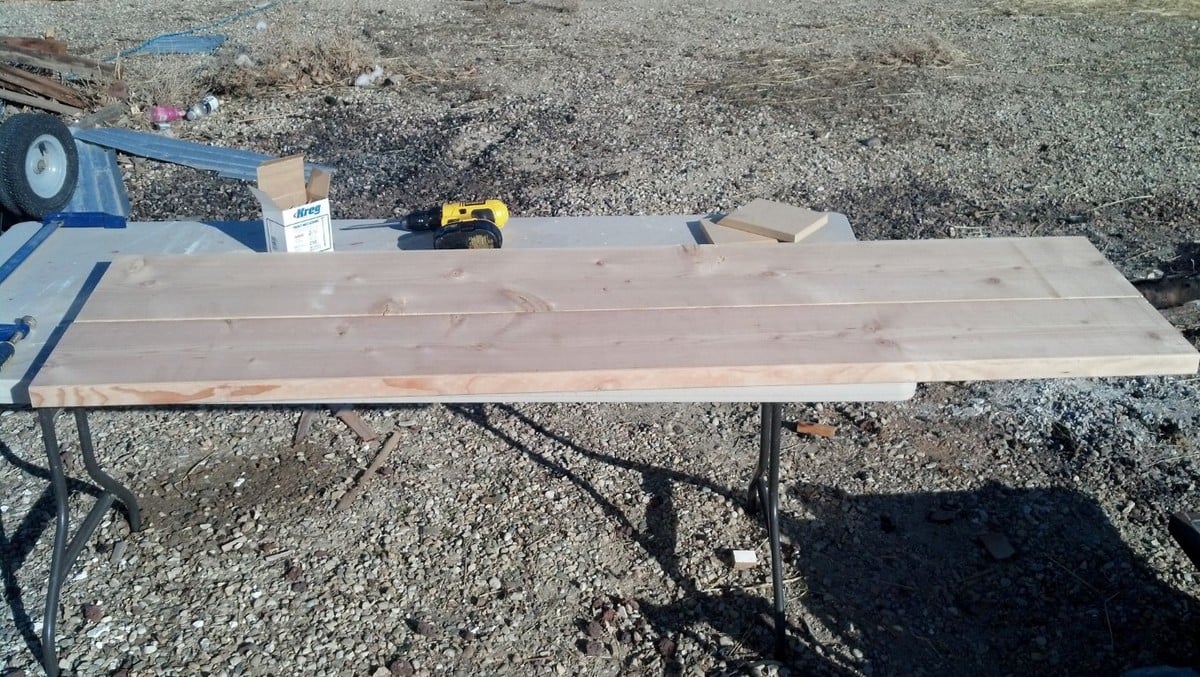
Now to the build. We decided that the table needed to be a bit wider and longer for our needs, so I adjusted the plans. It came out to 90"x48". The center board is a 2x12 with the other 4 being 2x10s. The end pieces are 2x8s that I had from building garden boxes. The benches that I also built were from scrap lumber, they are not pictured here as they need one more coat of stain and then three coats of polycrylic. They are 52" long and go on the ends where the kids can use the cross beam as a foot support.
Building this project was rather quicker than I thought. Of course, borrowing a radial arm saw helped out a bunch with the legs. Once it was all together, I sanded the table three times. I used 80, 150 then 220 grit. The palm sander got a real workout over the space of about a week and a half.
Finishing the project, I decided to follow the plans and went with Minwax Weathered Oak and topped that with Minwax Polycrylic. The legs and underside of the table received 2 coats of each, but the top I gave 3 coats of stain and 2 coats of the Poly with a very light sanding in between each coat.
The table then sat completed in the garage for 3 weeks as I had to find enough help to get it into the house. This is one heavy bugger. If we ever sell the place, it stays! There are ~150 screws and all but 12 of those had pocket holes.
Fantastic build and now I am going to build the farmhouse king size bed. And a murphy bed. And more shelves. And a shoe cubby with coat rack. And a wine rack. And a greenhouse... the list goes on and on...
Built from Plan(s)
Estimated Cost
$80 for Lumber
Estimated Time Investment
Week Long Project (20 Hours or More)
Finish Used
Minwax Weathered Oak and Minwax Polycrylic
Recommended Skill Level
Beginner
Comments

Fri, 04/26/2013 - 12:50
great step by step pictures
thanks for posting some step by step pictures they were really helpful. Great table. Really suites your space.!
Fri, 04/26/2013 - 14:09
Just love this!
Could you have used heavy duty steel leg braces? These could slipped into saw kerfs on adjacent sides of the apron. Then used hanger bolts to fasten the legs. This would allow the legs to be removed if needed.
Fri, 04/26/2013 - 15:09
Thanks everyone!
I thought about making the legs removable, but really, it was much easier this way and very sturdy. I had a lot of fun building this.
Fri, 04/26/2013 - 18:17
So detailed...Thanku
I looks amazing and you have been so detailed with your finishes, it is amazing ... Your wife is one lucky girl!!!
Sat, 04/27/2013 - 18:55
Great Build and Now Addiction
You have just joined the league of addict builders. You really did a great job on this table. Did you get the lumber from big orange or blue and have it jointed? The boards look really good and the fit is tight. Anyway I am sure we will see more of you in the future.
Wed, 05/01/2013 - 07:19
Chairs and boards
Hey everyone!
Thanks for your kind words. The chairs were from our previous table we bought some years ago. I was astounded to find that Ana's plans were the same height as our previous table. Great fit for the chairs.
As for the lumber, I got it from a local building supply company (one of the last, sad to say) and they were only a bit straighter. I got them tight by using clamps. Clamps and LOTS of pocket holes.
George
Thu, 08/08/2013 - 11:08
Pocket Holes and Minwax Polycrylic
This table looks great and I've decided that its going to be my first project, I just have two questions.
1. What version of the Kreg Jig did you use for the pocket holes?
2. Did you use satin or semi-gloss for the Minwax Polycrylic?
Thanks
Wed, 08/26/2015 - 10:53
Type of wood?
Hi! You did a wonderful job on this table. I would like to attempt it but am having trouble figuring out what type of wood to use. The only wood I could find in the 2x8 and 2x10 dimensions was contruction lumber fir. Is that right?
Thank you!
Fri, 01/01/2016 - 11:03
Sorry about not answering...
Sorry about not answering... my wife told me this has been pinned over 17k times on pintrist and that there are still some questions...
I used pine, but fir would be great too. The lumber dimentions for the top were 2x10s and a single 2x12 for the center piece. 2x8s for the ends. Really, though, any dimemtion works. Just keep going until you get the size you want.
George
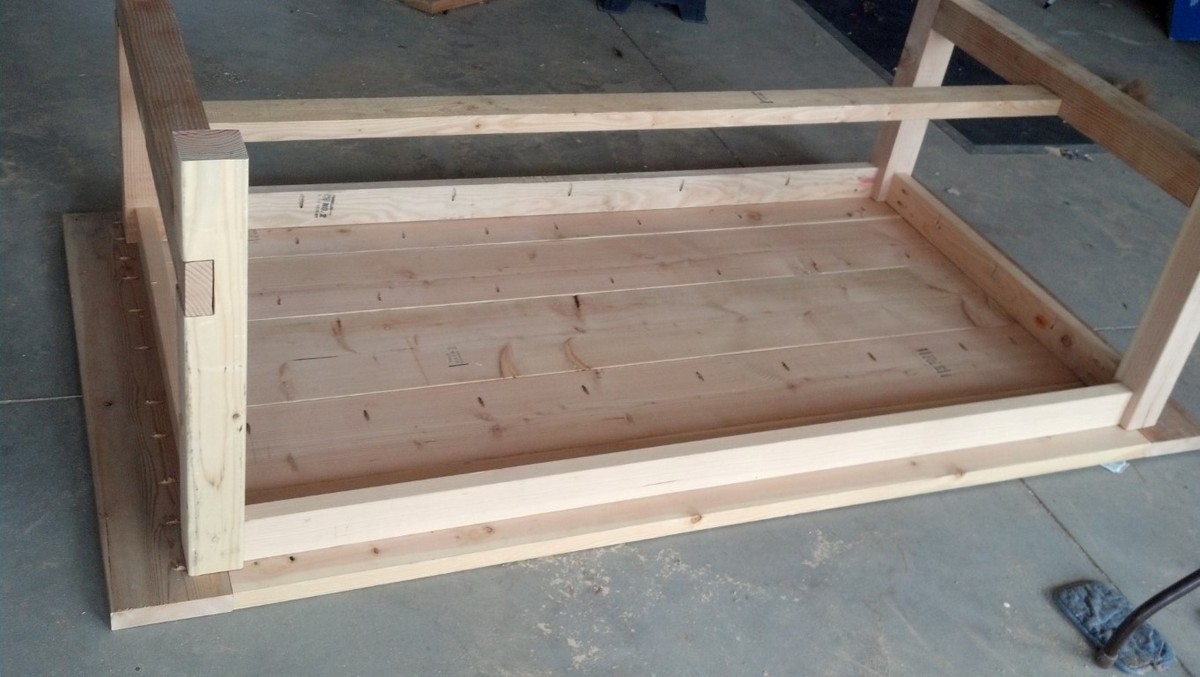
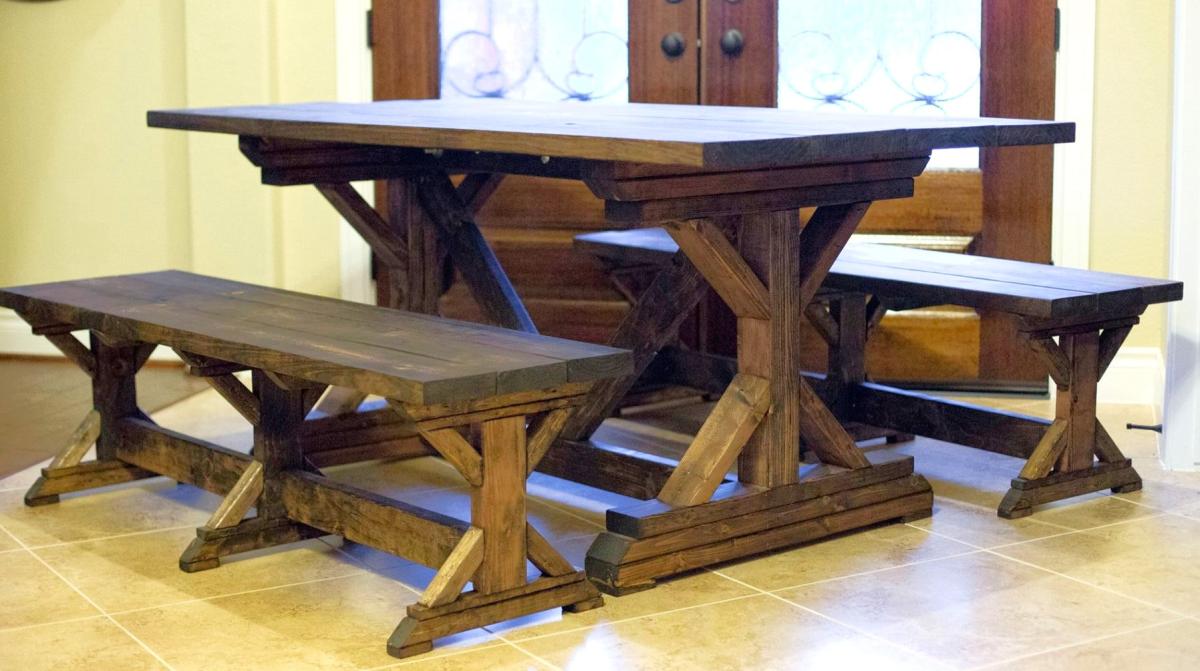
Farmhouse Dining Set
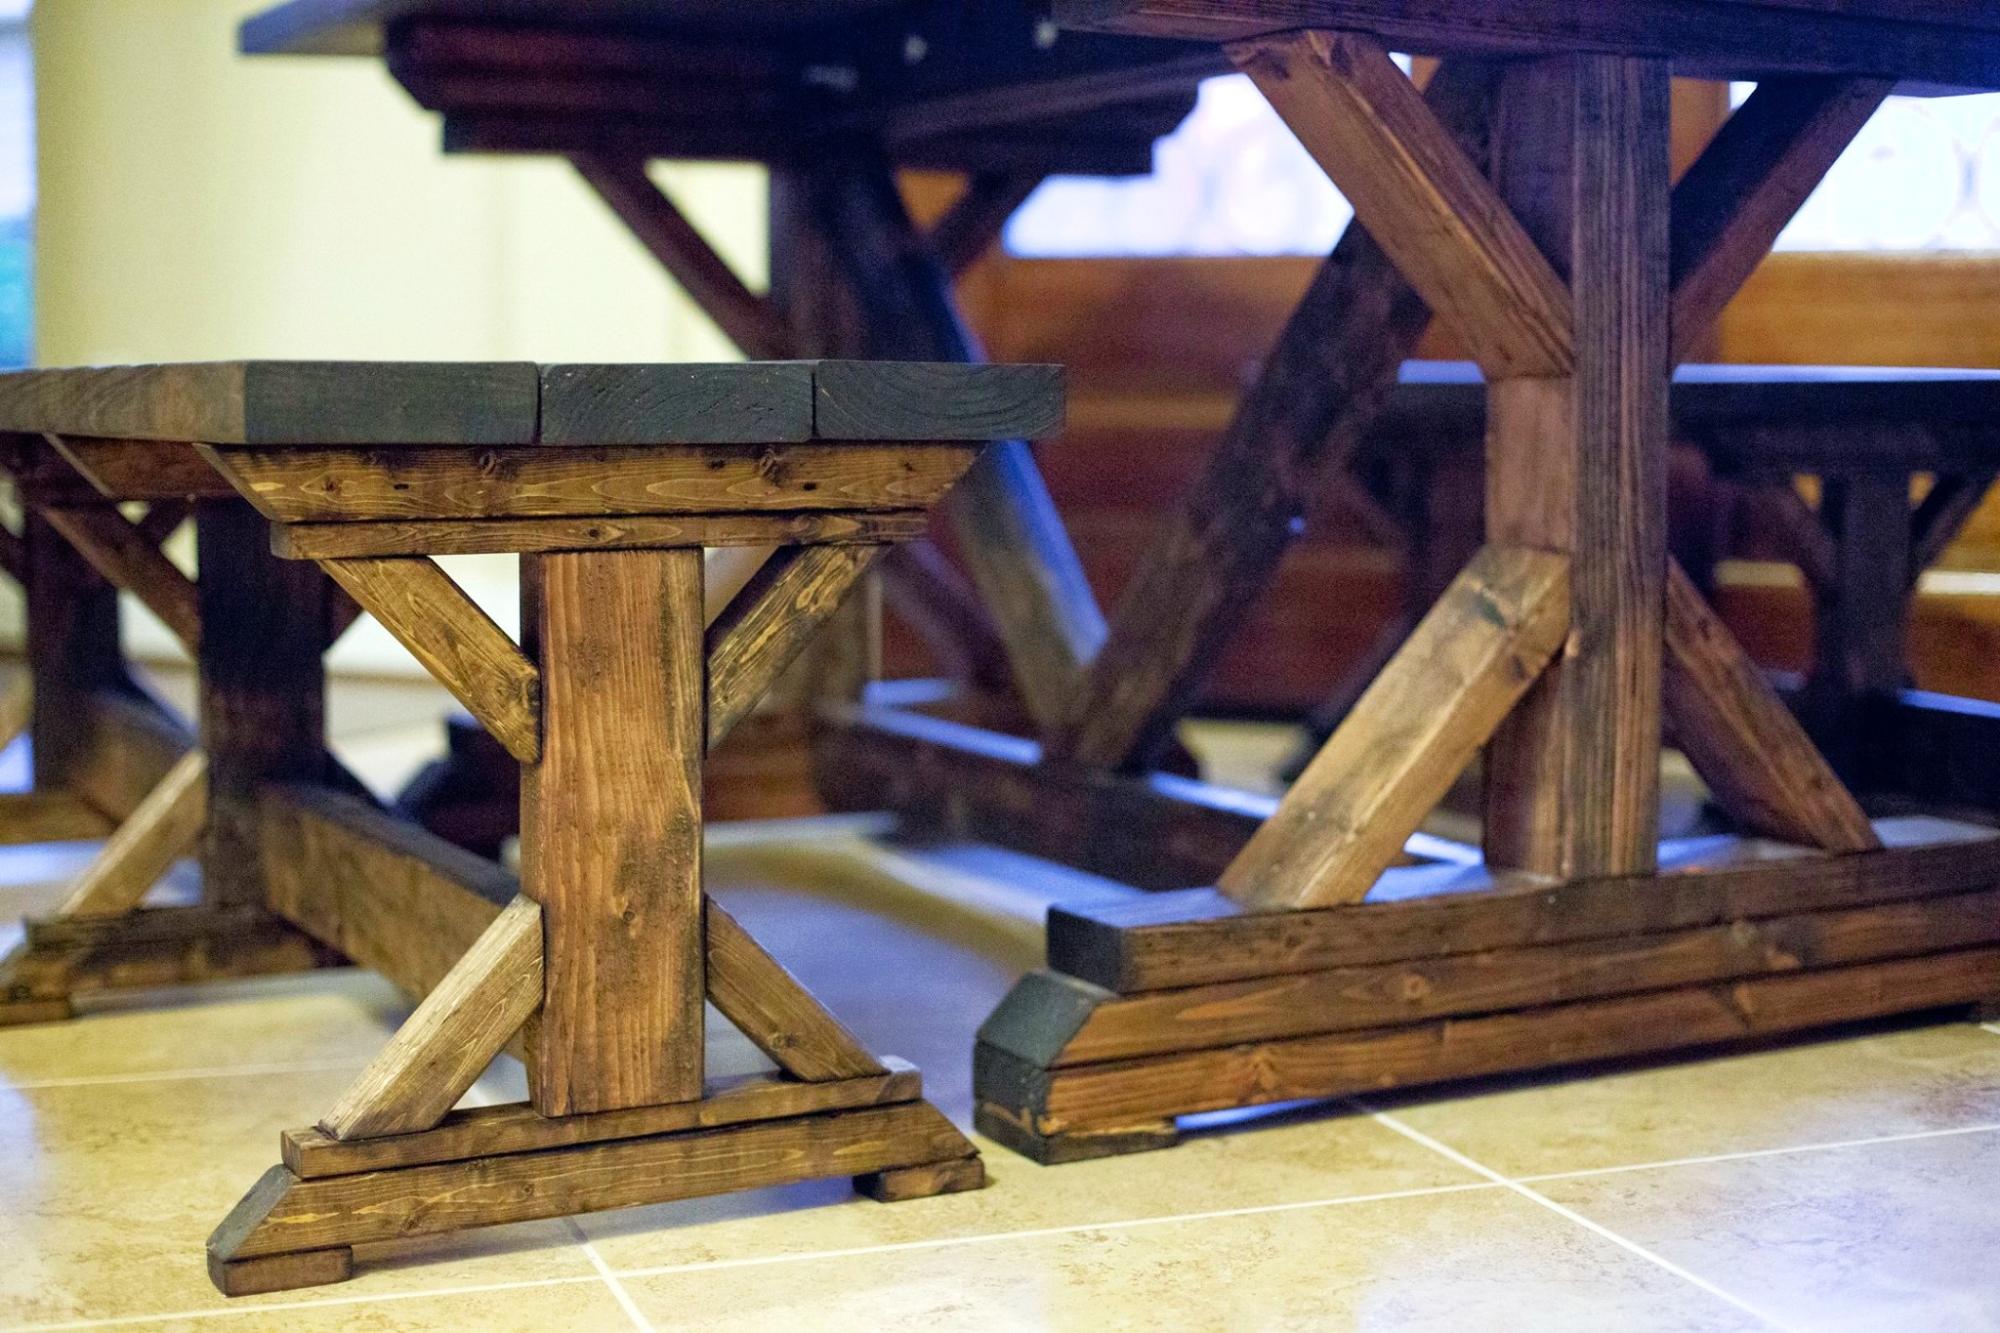
This was a bit more work than I anticipated but I think it turned out great. The quoted buy list was a little off so I had to make an additional trip to the hardware store.
I used the Fancy X Table plan and the Fancy X Bench plan to make this set. Since I wanted it only 6' long I had to do some modification to the plan but not much.
I also designed the table top into two pieces that fastened together through the center piece so I could take it apart easily and fit it though a standard door.
Built from Plan(s)
Estimated Cost
$120 (since there were two benches and the table). I found the wood in my area to be a little more expensive than quoted on the plan. Particularly the 2x10's.
Estimated Time Investment
Week Long Project (20 Hours or More)
Finish Used
MinWax - Dark Walnut. To get the finish even I had to invest ALOT of time into sanding. I had to use 60 grit in some spots to even out the factory cuts but most of it I was able to go over with just 220 grit. DON'T FORGET TO SAND THE ENDS!
Recommended Skill Level
Intermediate
Comments

Emersen Buffet-First Brag
I've built several things from the page but this is the first that I have posted about. I love this site. Everything I have built has been so easy because of the way the plans are laid out. I added my own little touches to the buffet but for the most part I followed the plans as they were.
Built from Plan(s)
Estimated Cost
$100
Estimated Time Investment
Day Project (6-9 Hours)
Finish Used
Minwax Early American stain and clear gloss poly.
Recommended Skill Level
Intermediate
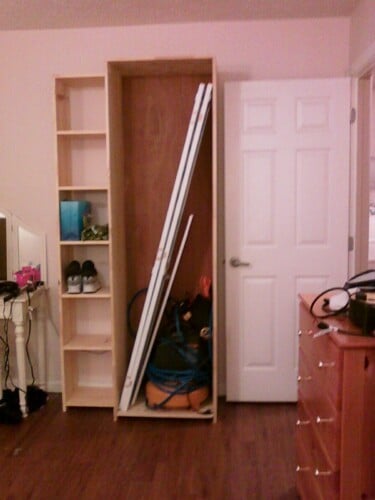
black Tall wood planter
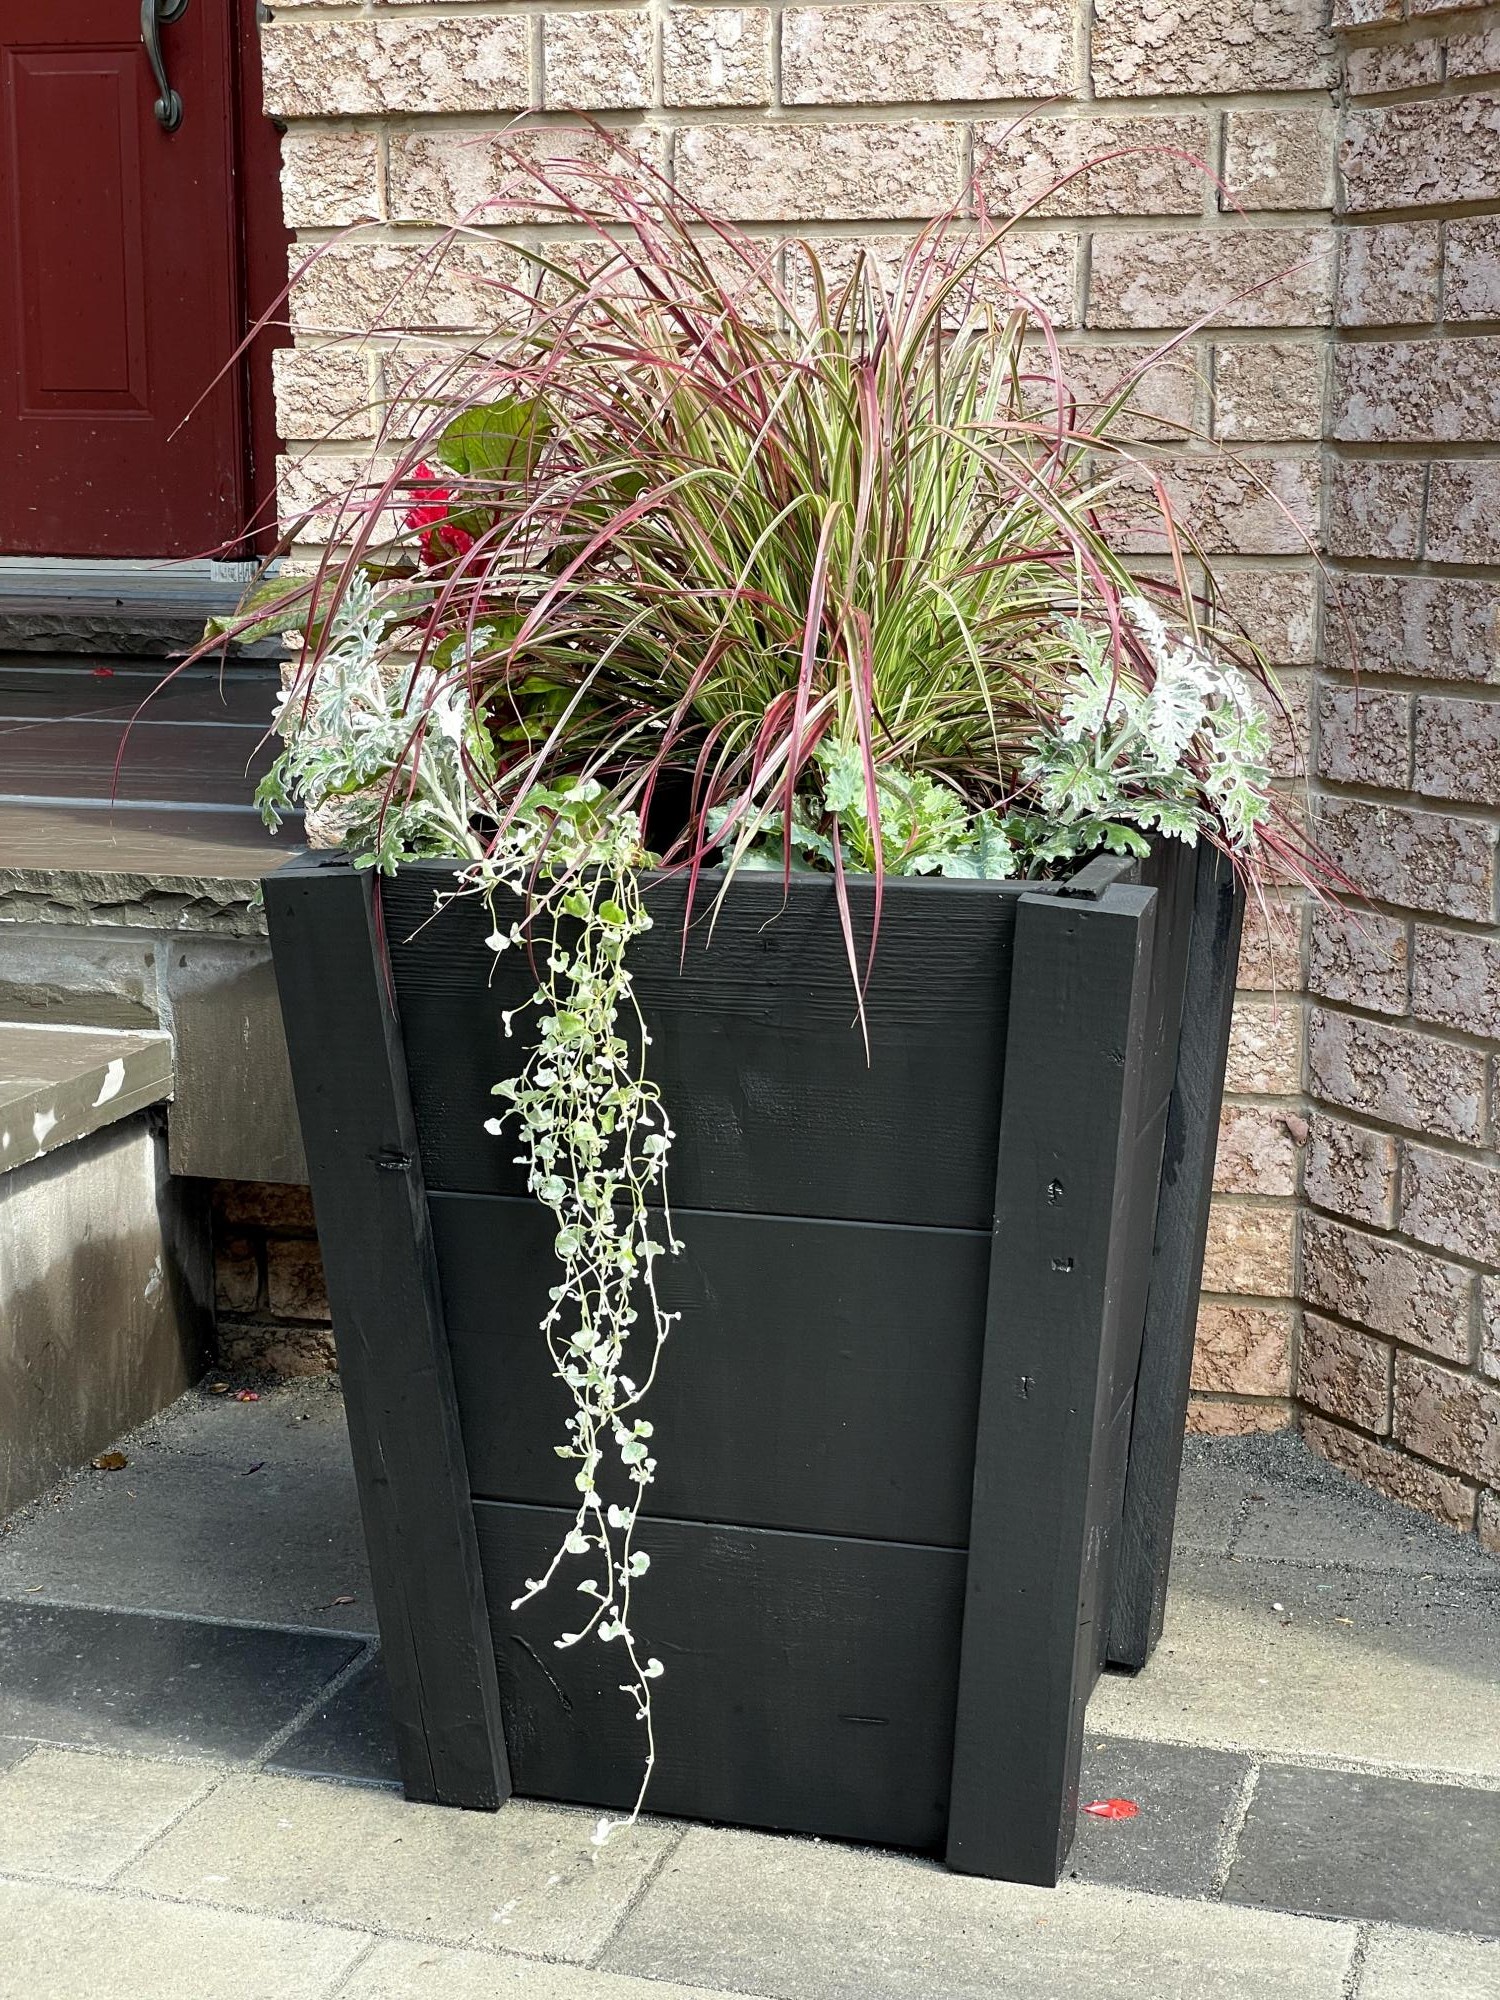
plan was easy to follow! super cost effective because I just used scrap wood found in local stores and nails. It took me longer than expected since scrap woods are not as long so need to do time in sections at a time, but all worth it.
Built from Plan(s)
Comments
Kids Adirondack chair
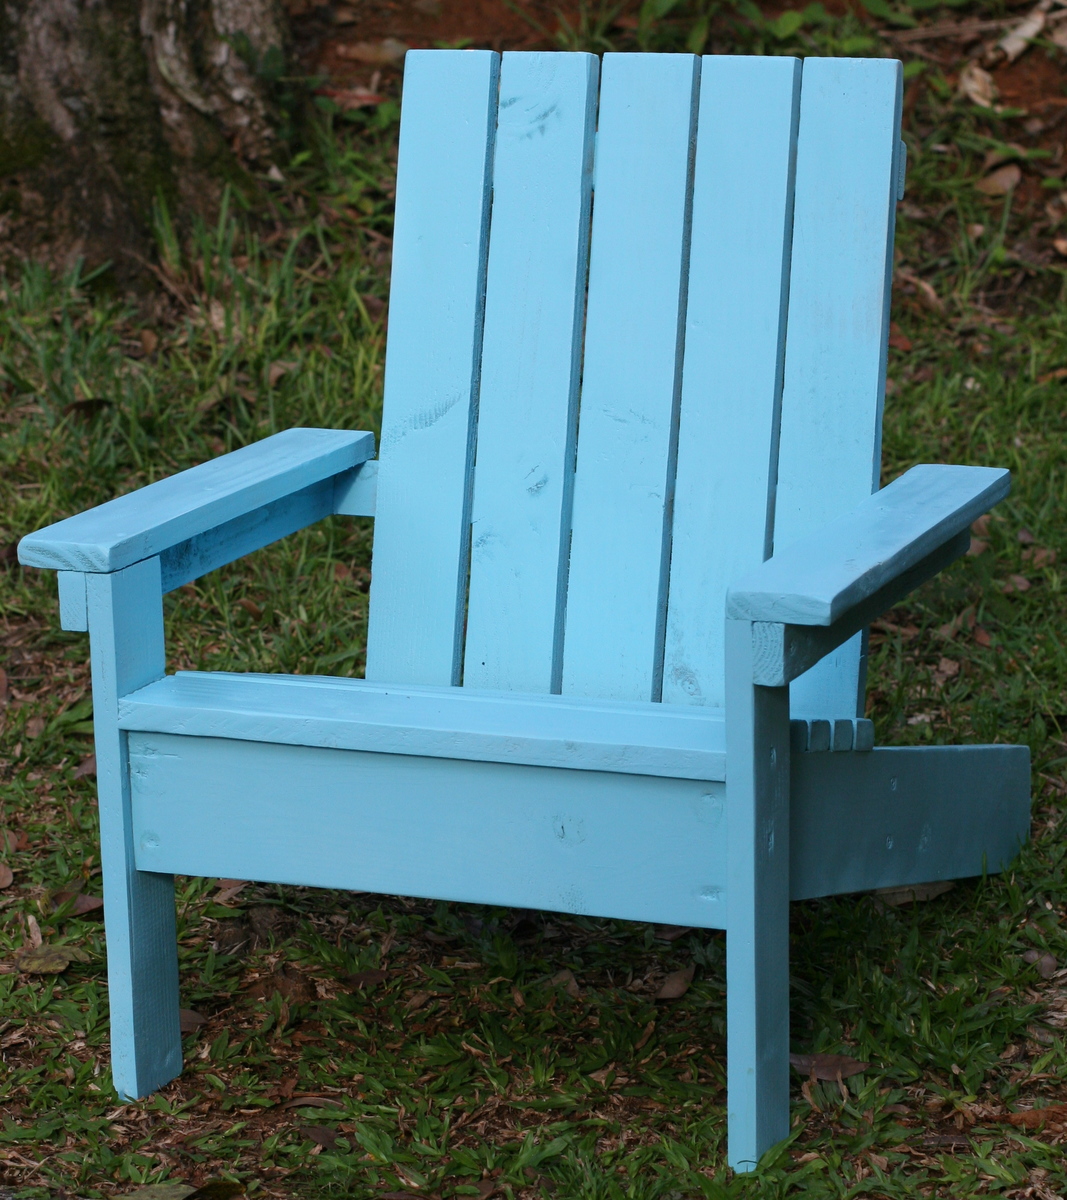
I had leftover scraps from some other projects so I decided to use Ana's plans to build this easy adirondack chair. It was built in a just a couple hours. It's the perfect size for my 4 year old!
Built from Plan(s)
Estimated Cost
leftover project wood - but would be $10 or less.
Estimated Time Investment
An Hour or Two (0-2 Hours)
Finish Used
I primed it, then used spray paint in satin aqua. I followed it up with a marine finish to protect it from the Hawaiian elements.
Recommended Skill Level
Starter Project
Garage Storage
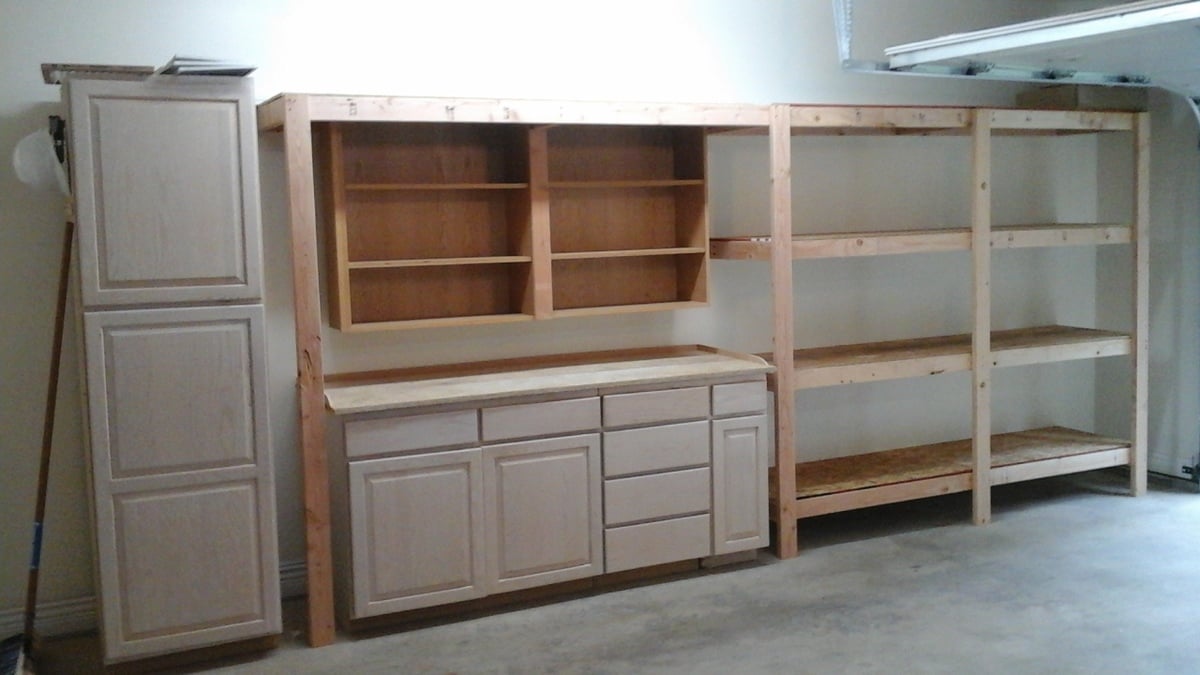
Thanks to Ana's 2x4 storage plan and a neighbor's discarded kitchen cabinets we now have a very clean and convenient storage area in our garage. It even features a work bench and sorting area.
Built from Plan(s)
Estimated Cost
40-50 dollars
Estimated Time Investment
Afternoon Project (3-6 Hours)
Finish Used
None
Recommended Skill Level
Starter Project
Comments
Little Cottage Loft Bed - Revised :)
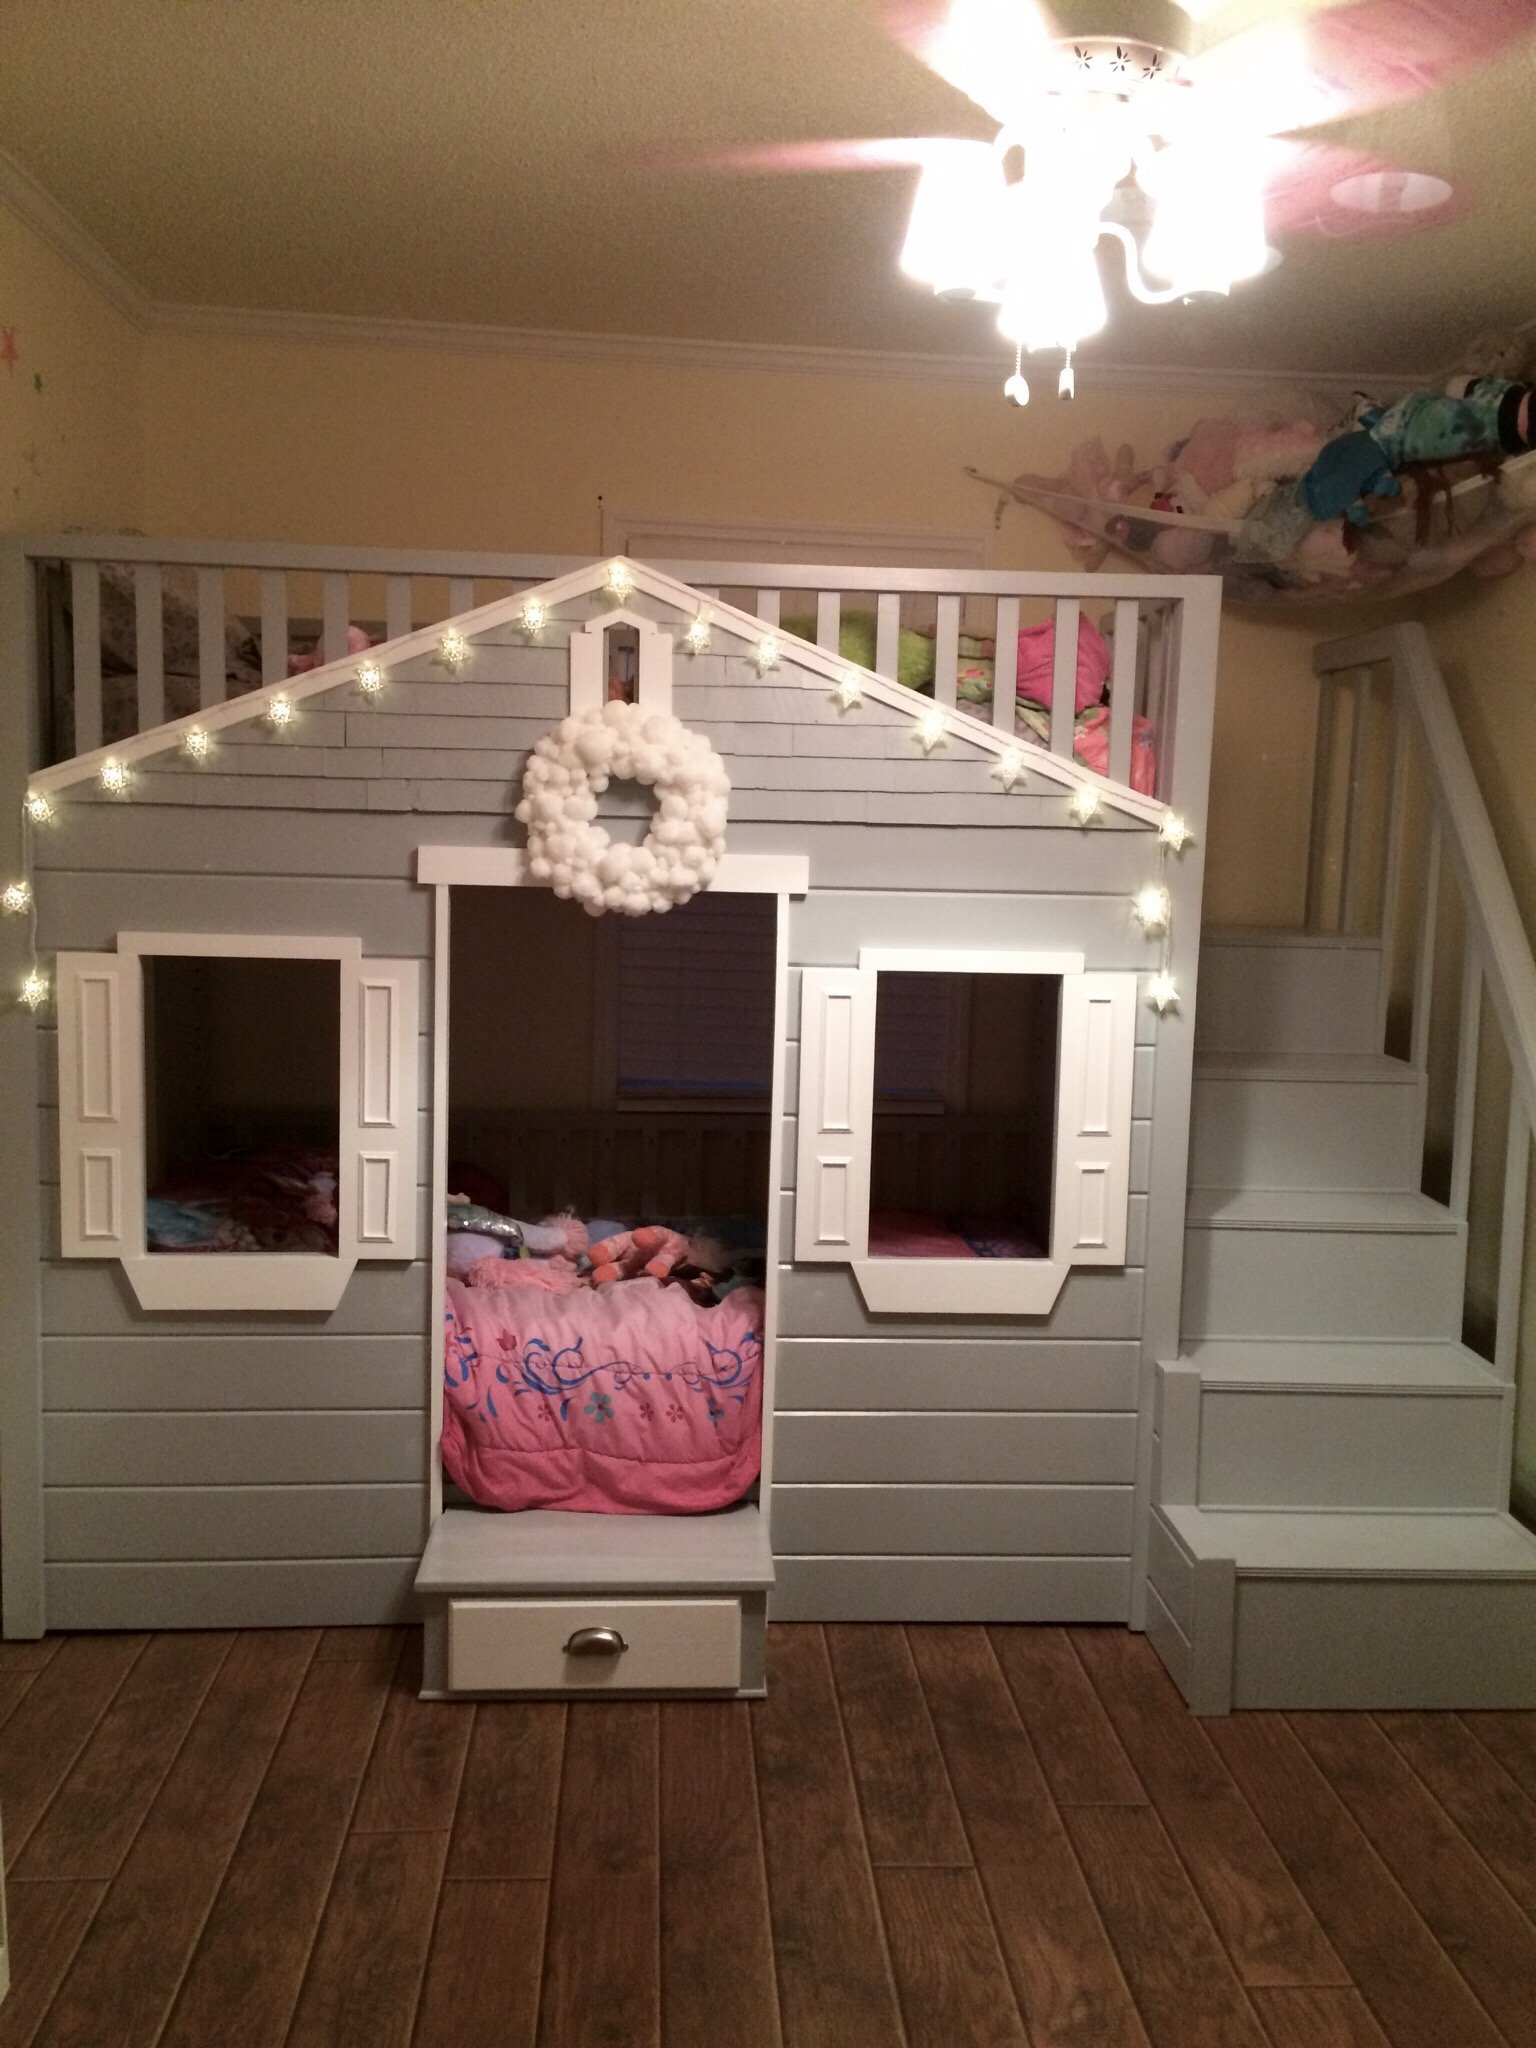
My 2 grand girls wanted a cottage bunk bed. Not wanting to disappoint, I took the plans from the cottage loft bed and modified them, adding a lower bunk. I also added the steps, with storage on the side instead of the ladder, and made a drawer for the front step for the little one.
I made the wreath from Pom-Poms purchased from Jo-Ann's and battery operated string lights.
I opted for a cedar shake roof, which was purchased from Home Depot, then painted.
Needless to say, they love it!
Built from Plan(s)
Estimated Cost
Maple T & G - left over from remodeling project
Additional wood and hardware - $275
Additional wood and hardware - $275
Estimated Time Investment
Week Long Project (20 Hours or More)
Finish Used
Painted using One of Pottery Barn's grays from Sherwin Williams
Recommended Skill Level
Advanced
Comments

Tue, 06/20/2017 - 20:13
this looks super awesome! :)
this looks super awesome! :) I love the cute little shutters and all the nice attention to details :)
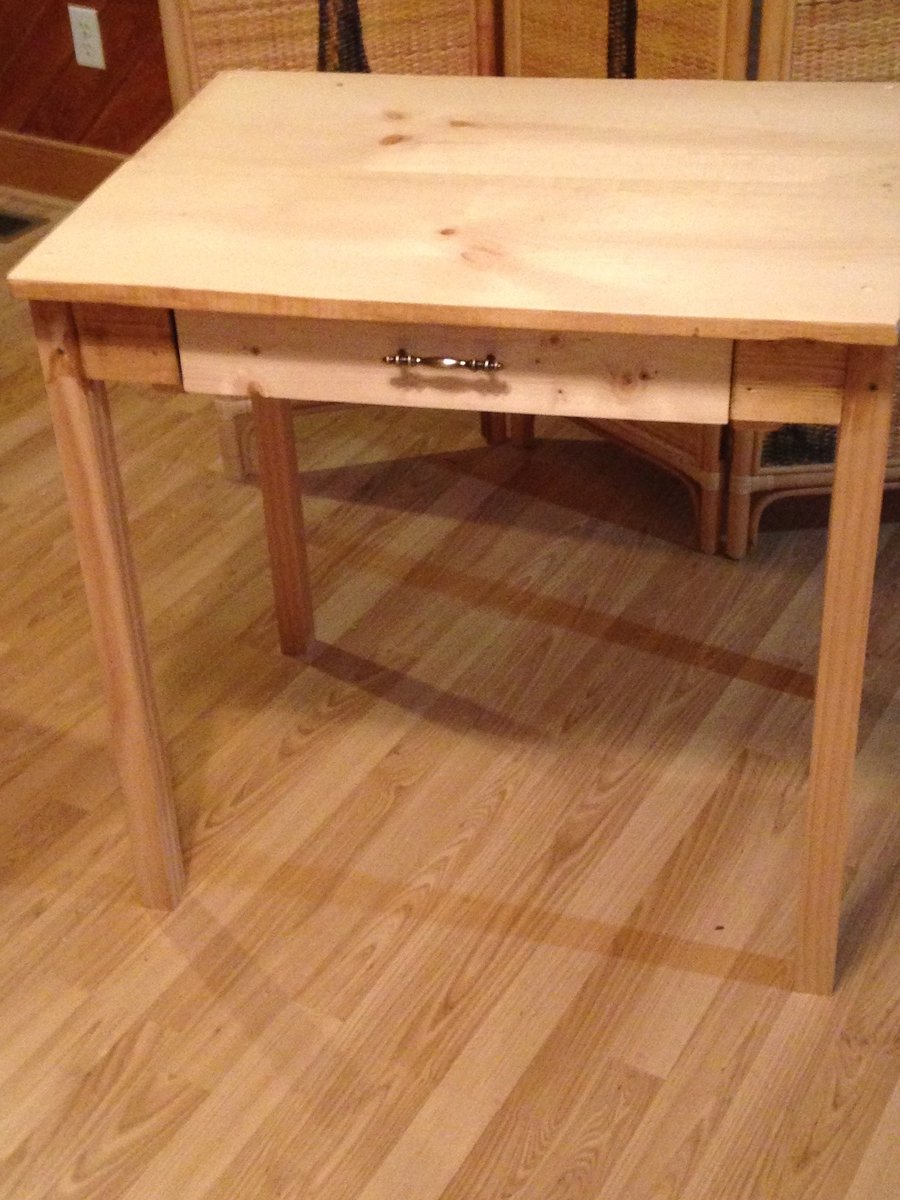
Rustic Desk
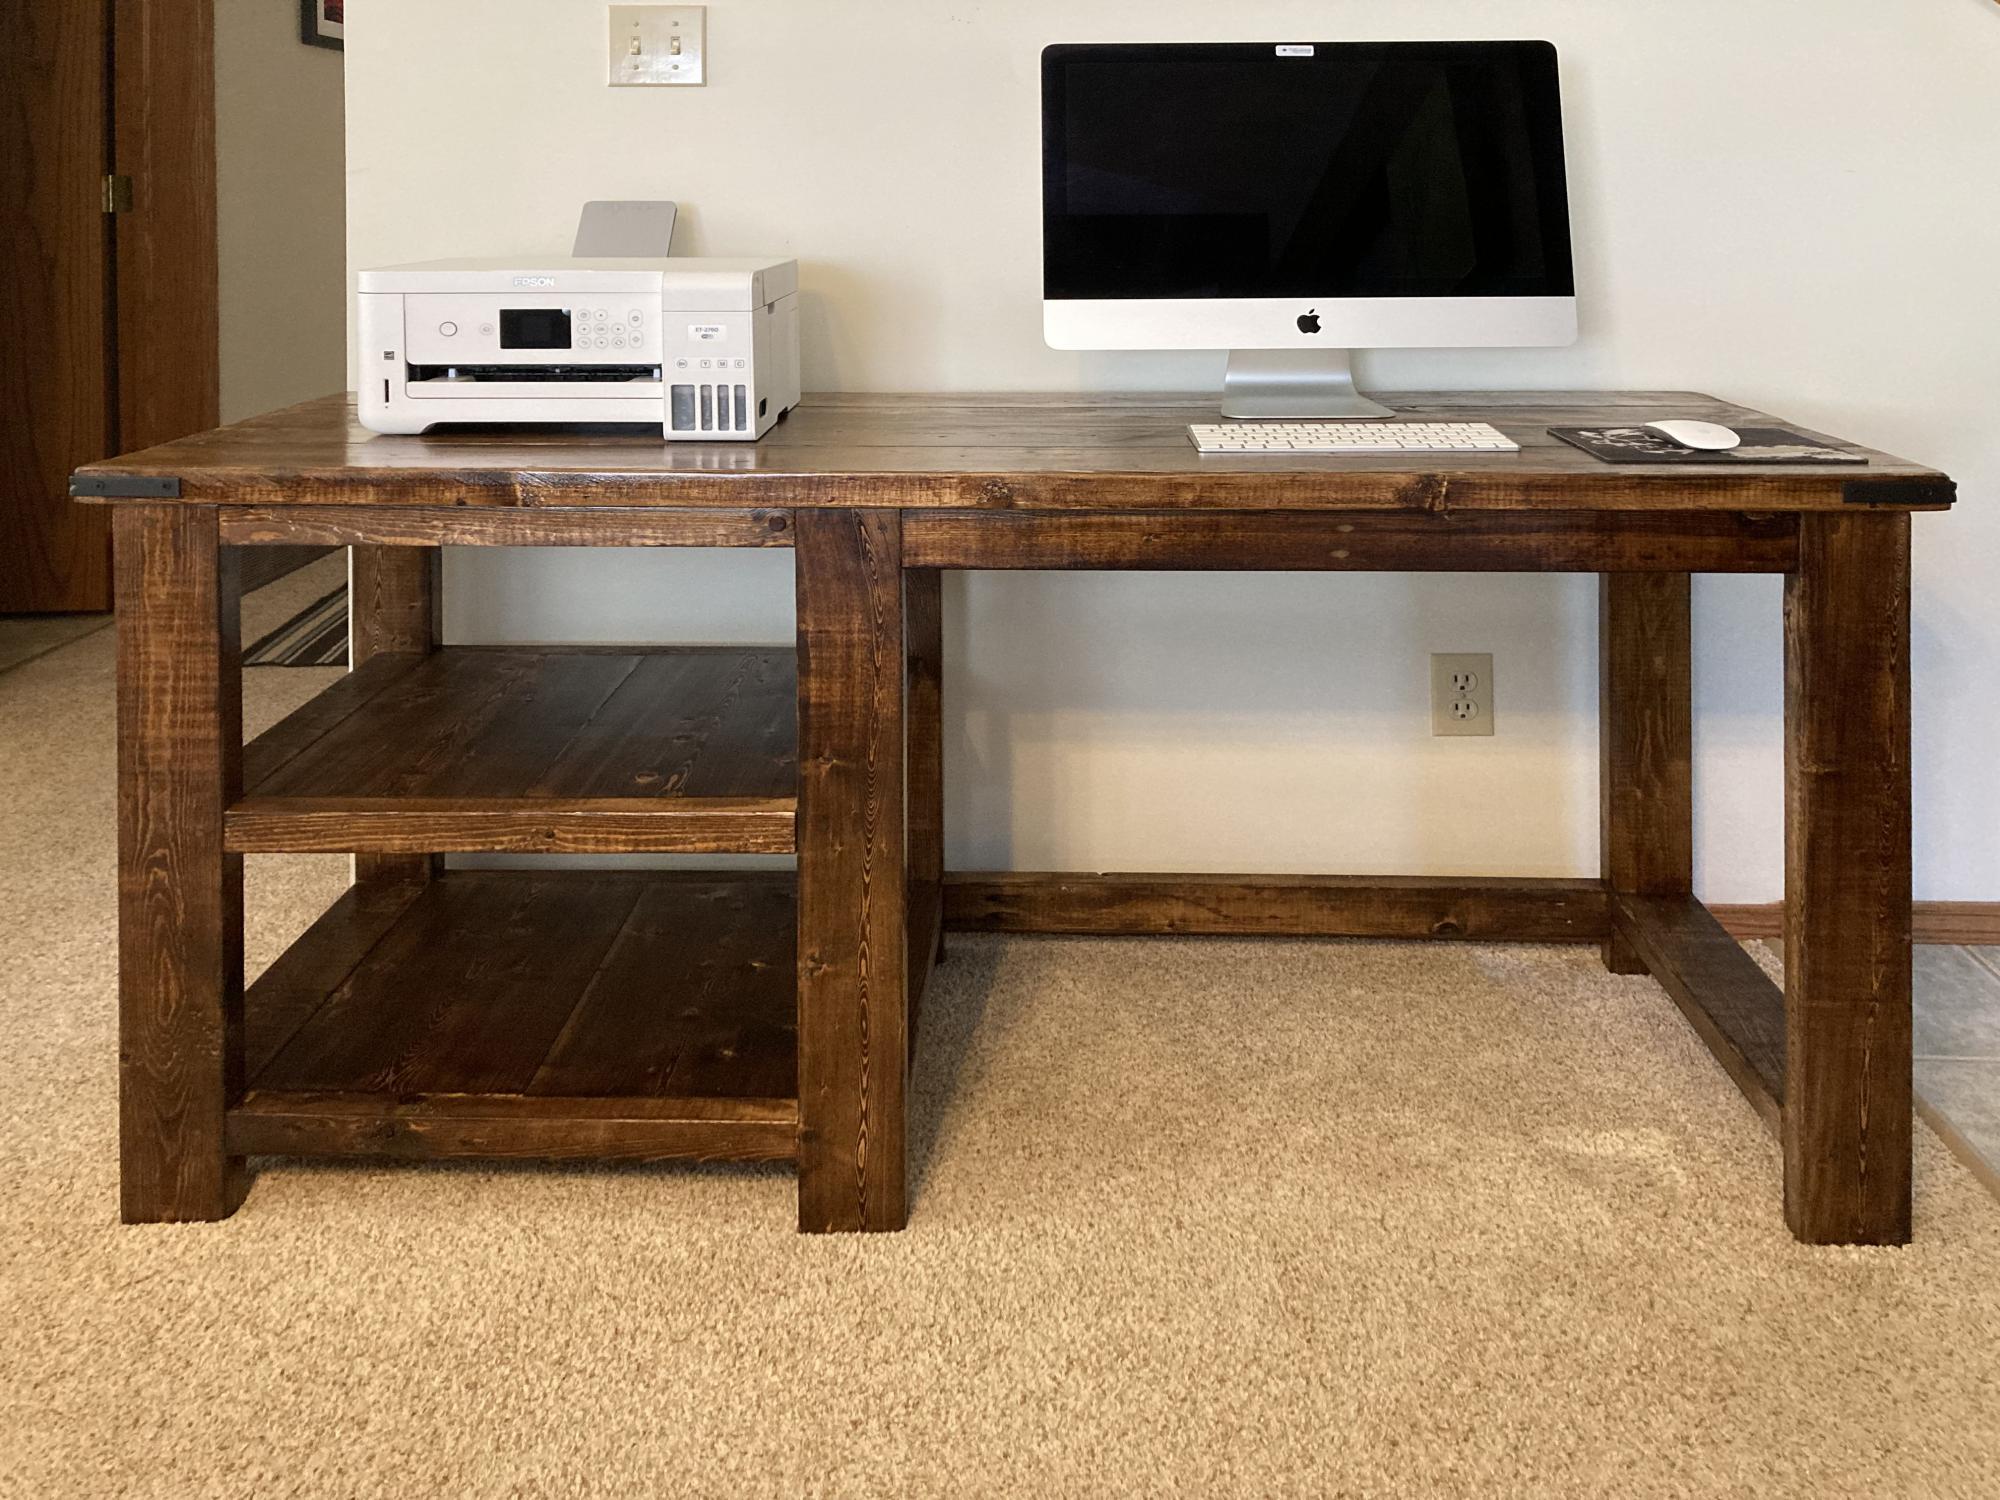
I have build several of these rustic desks. I left the "X" off of this one as I had trouble getting it to fit properly. My last desk I had no issues but not this time. I use MinWax "Provincial" stain followed by three coats of Varathan 3X glossy finish on the top and two everywhere else. I also added a cross piece between the two end sections to better secure the top to.

Built from Plan(s)