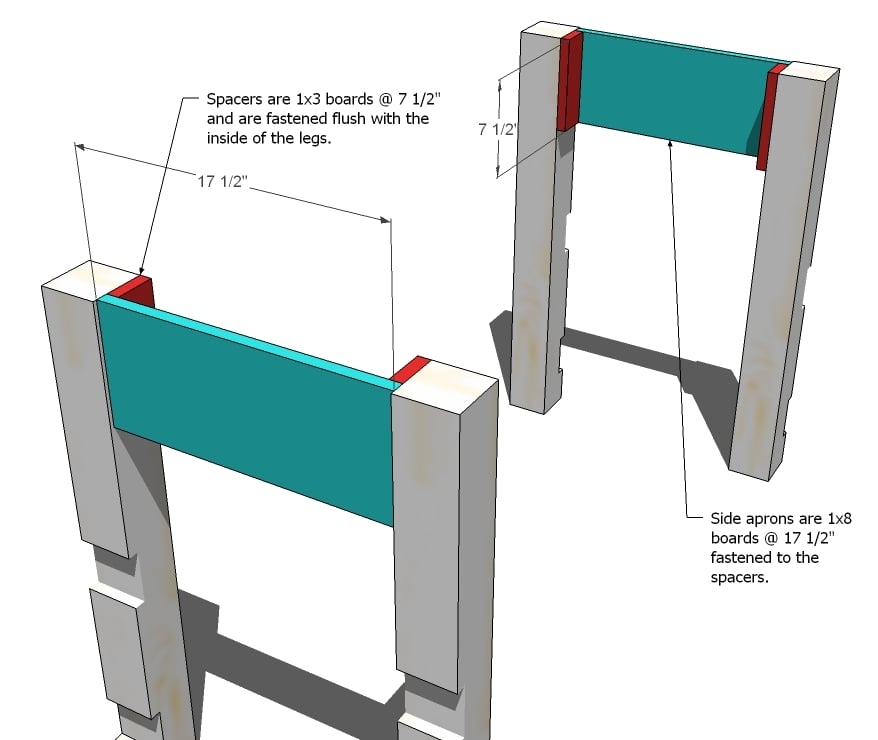
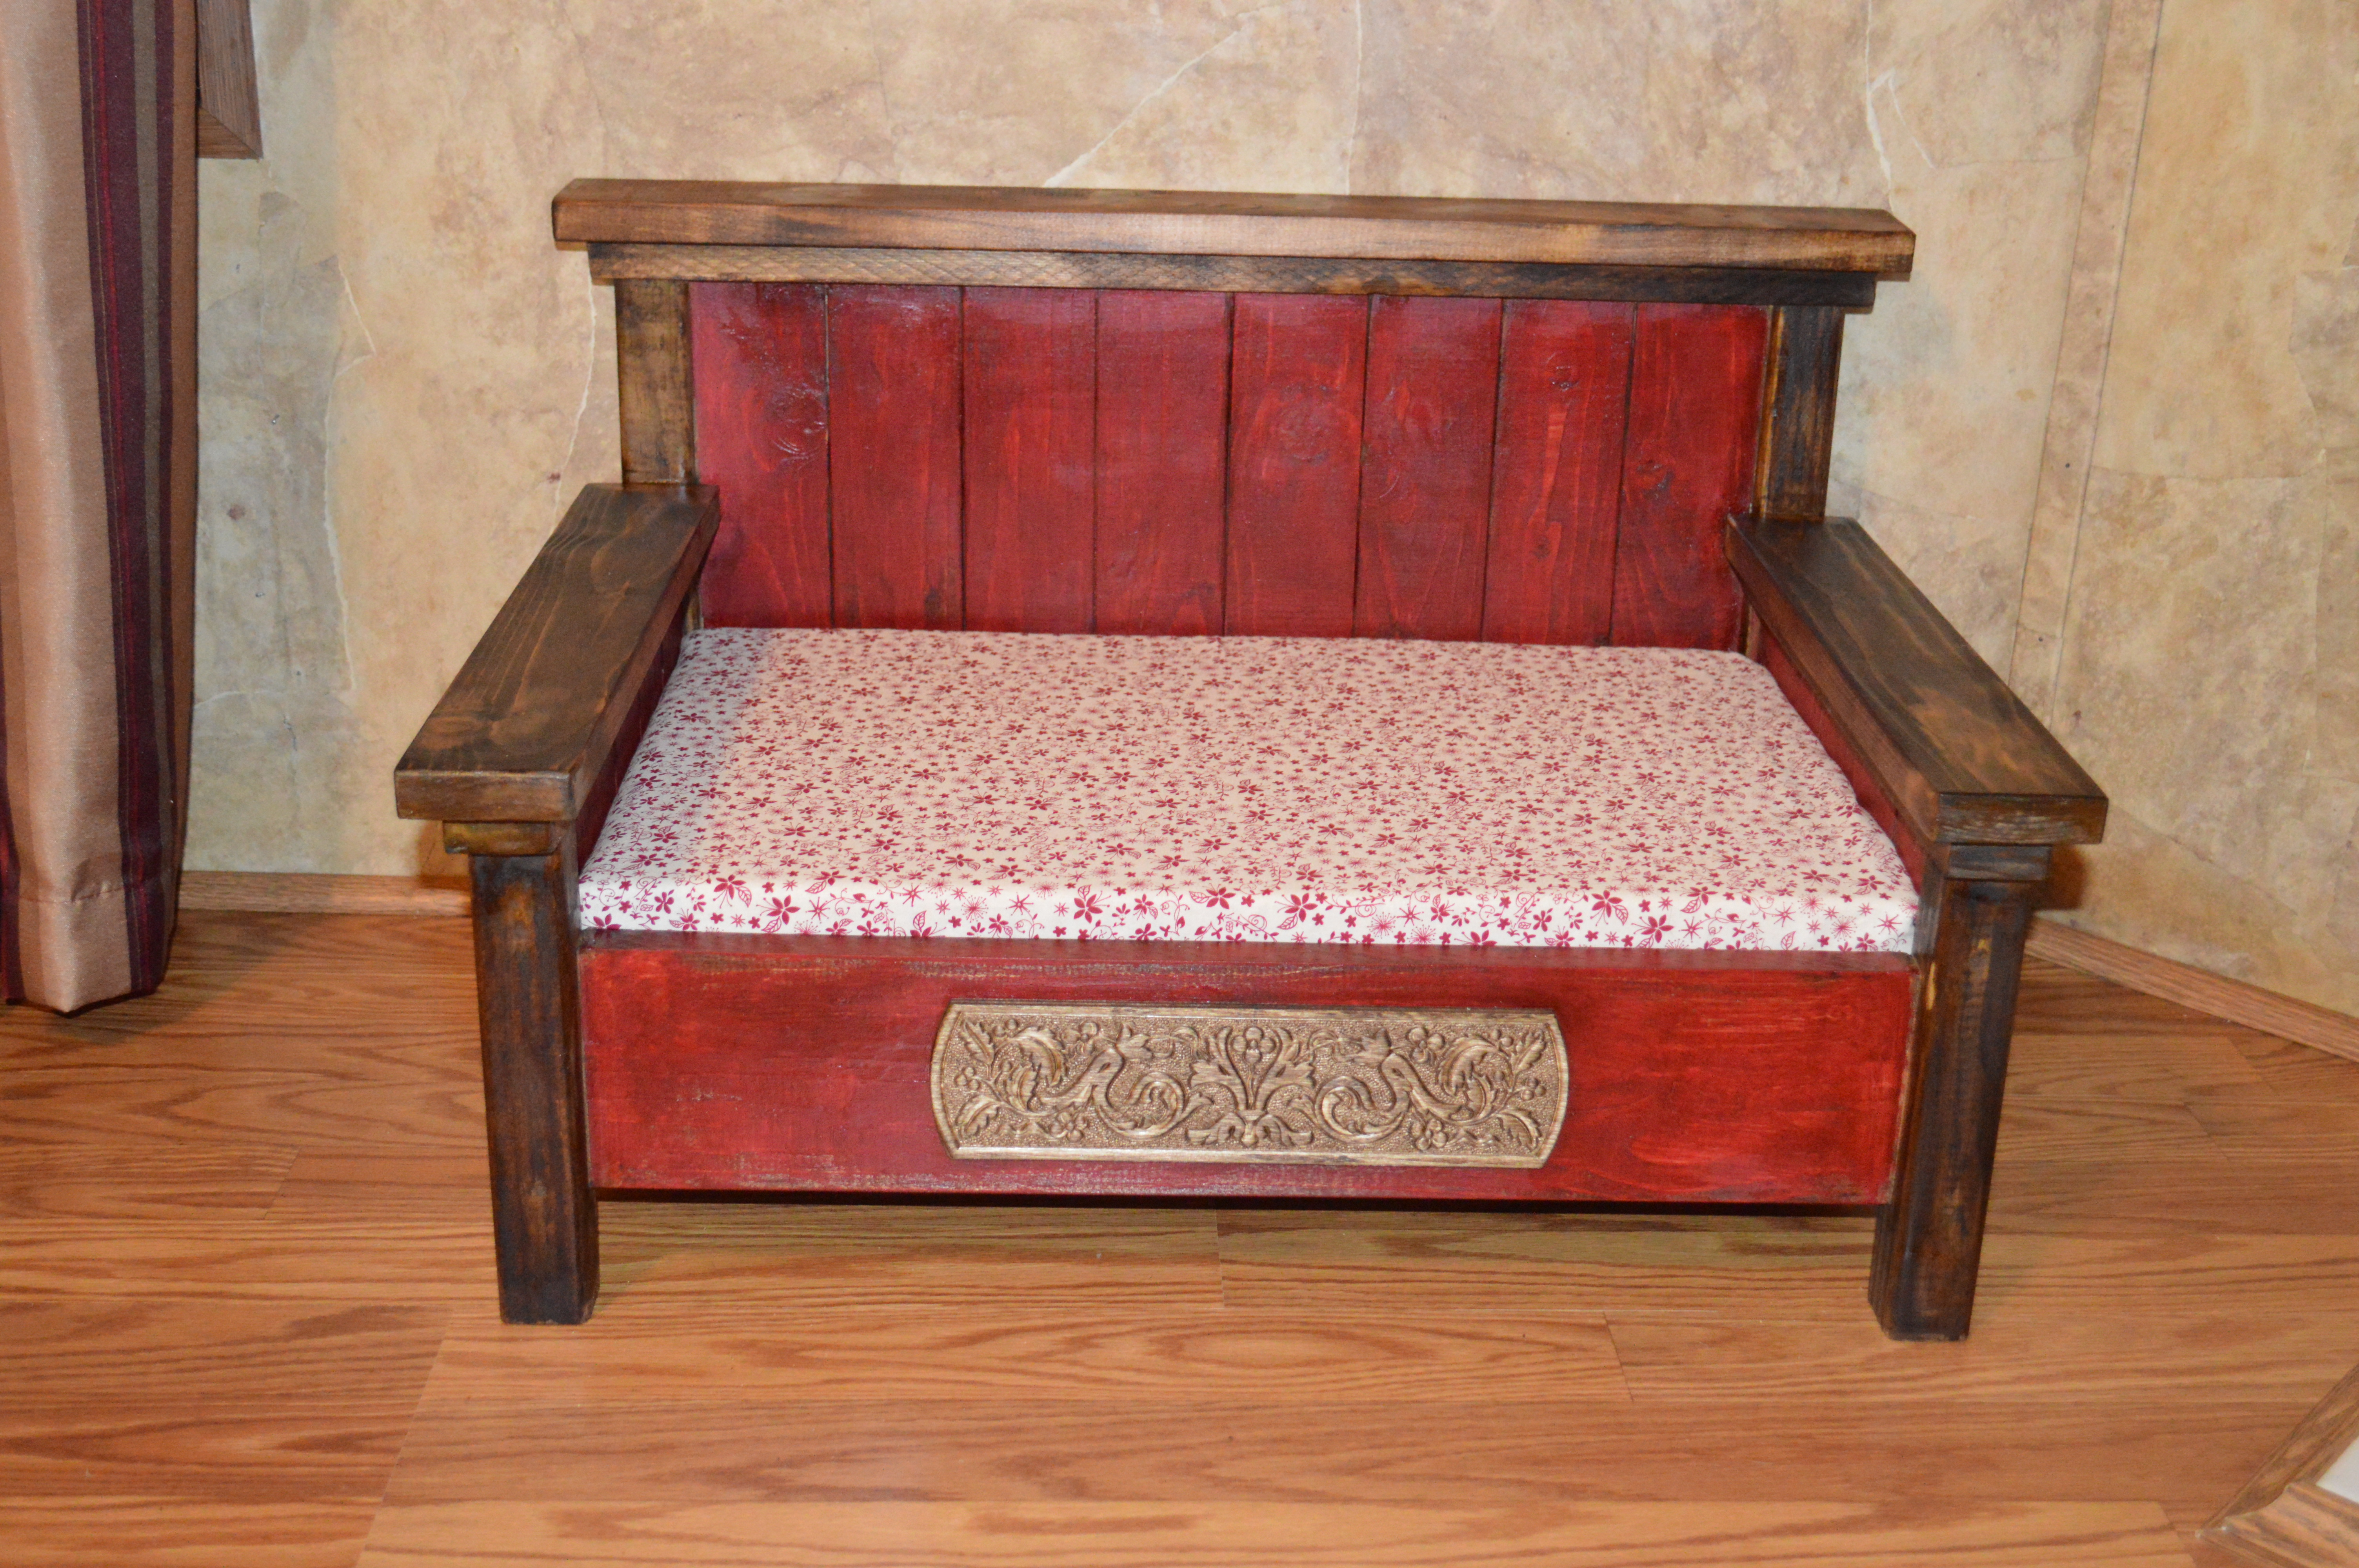
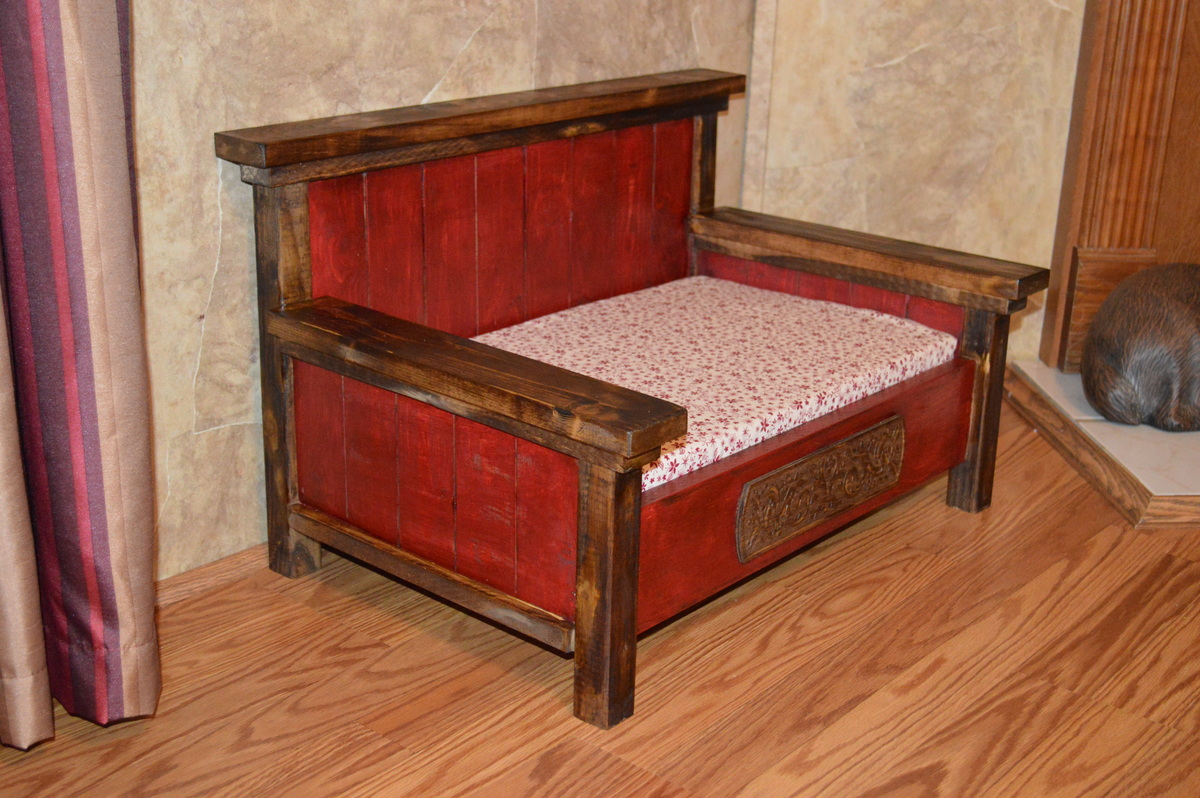
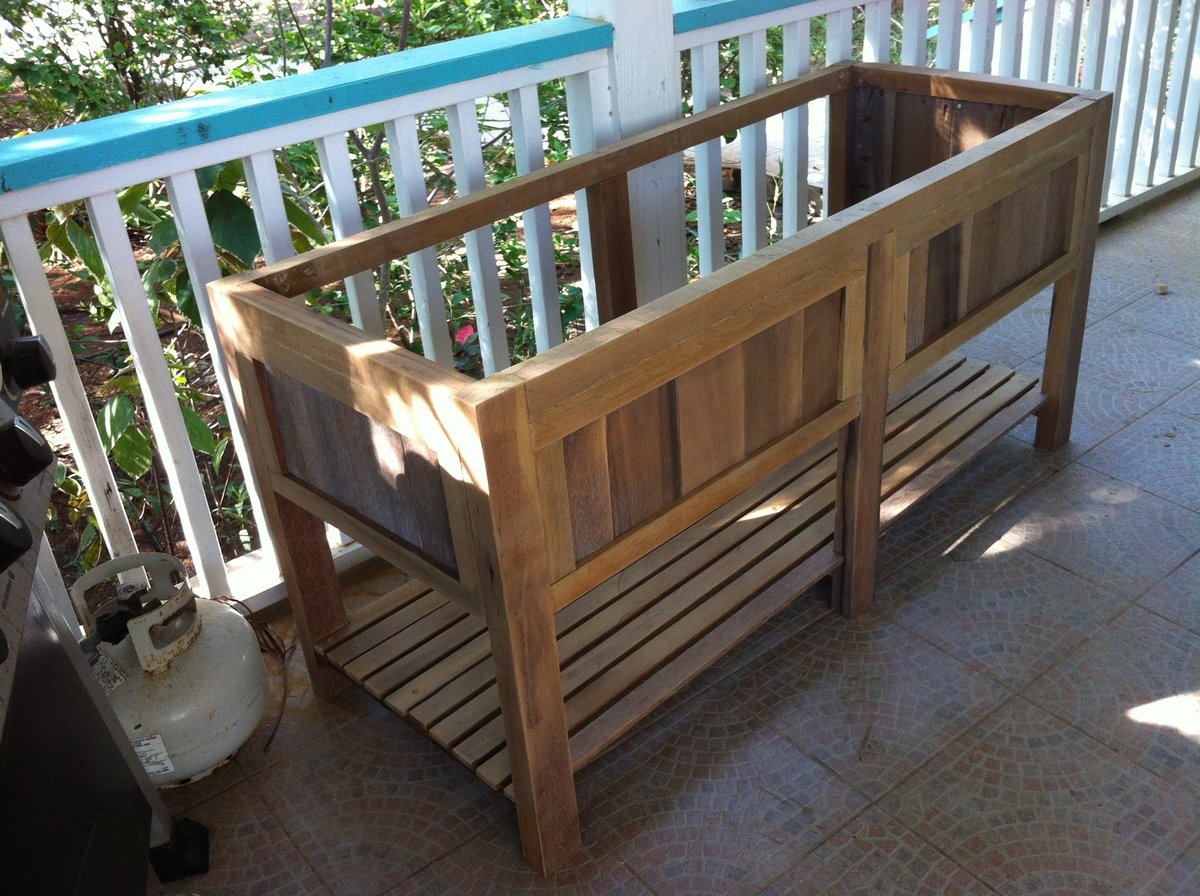
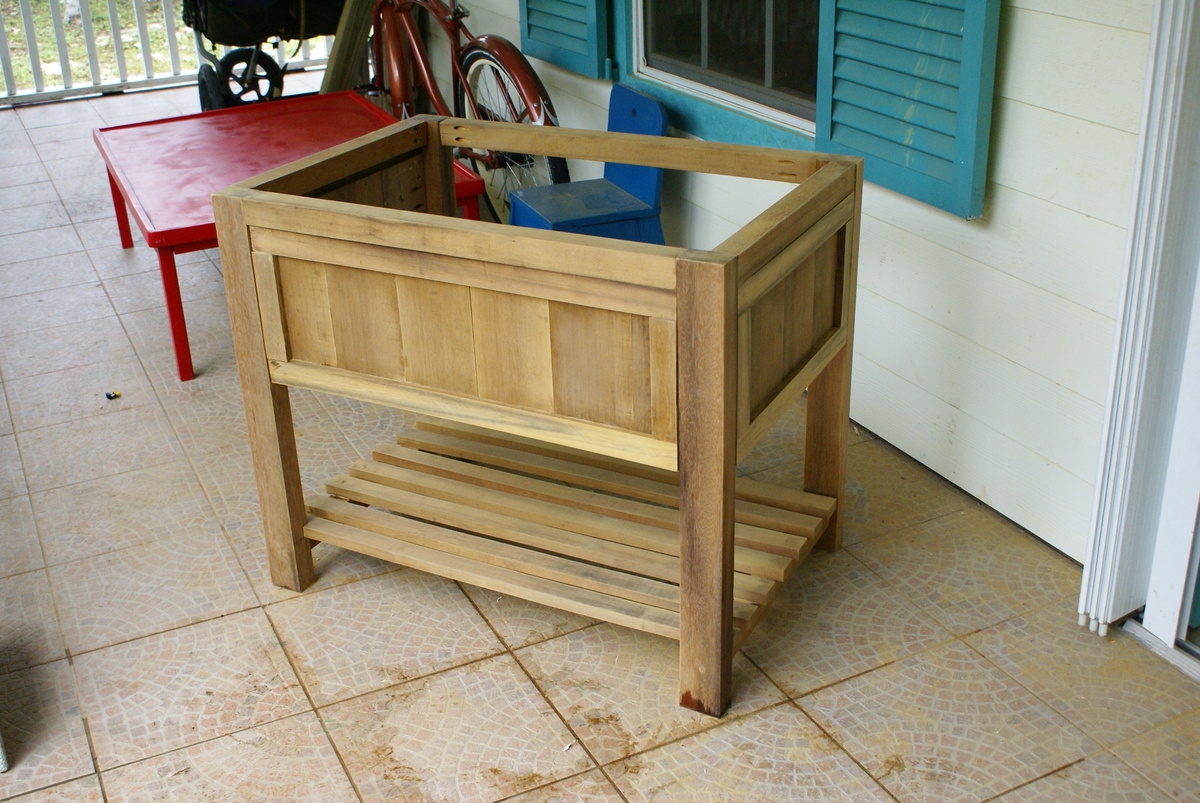
Community Brag Posts

Rustic X coffee table with Minwax Classic Gray stain

Submitted by cariaw123 on Thu, 11/21/2013 - 07:54

This project was quick and painless. I recommend for a beginners project (but expect to get frustrated over building the x's into the side though). I stained our table with the Minwax Classic Gray stain and used the Minwax water-based polyurethane to seal it. I realize that the stain is difficult to see but it is a beautiful stain that has turned into my go-to stain. The stain is not too gray and you can see the natural color of the wood through it. The photo gives the impression a glossy finish. In reality, it is more matte.

Built from Plan(s)
Estimated Cost
$80-90
Estimated Time Investment
Afternoon Project (3-6 Hours)
Finish Used
Minwax Classic Gray stain with Minwax Water-based Polyurethane.
NOTE:The stain goes on pine and whitewood VERY differently. The pine pieces come out very dark with the stain being brushed on and immediately wiped off. For the whitewood, you can leave it on for 10 minutes and it'll reach a threshold for the amount of stain it will accept. I just sanded the darker pieces down a little bit to match the lighter pieces. (Does that make sense?)
Recommended Skill Level
Beginner

Custom flller cabinet

Submitted by Anonymous (not verified) on Sun, 02/07/2016 - 12:02

I replaced my gas stove, and could not find a 36" wide stove that was affordable, and had the features I wanted. I bought standard 30' stove, but had a gap to fill. Found this site; adapted the filler cabinet to 7 3/4 inches and found the pullout shelving unit. Added a drawer front with a pull, and it is great!

Estimated Cost
$220
Estimated Time Investment
Weekend Project (10-20 Hours)
Finish Used
Minwax polyshades in Honey Pine for cabinet front only.
Recommended Skill Level
Advanced

Comments

First Solo Project- Farm Bench

Submitted by Anonymous (not verified) on Fri, 08/30/2019 - 17:34

My 6 and 8 year old boys helped me build this bench because I couldn't stomach paying $200 for one with 3 little boys. It cost about $40 and it was so easy to do. We are all so proud of the end result.

Estimated Cost
40
Estimated Time Investment
An Hour or Two (0-2 Hours)
Finish Used
Premium wood stain-Kona
Recommended Skill Level
Beginner

Comments

Maple Console Table

Submitted by Anonymous (not verified) on Wed, 05/10/2023 - 17:24

Table was made from curly maple that was glued into 12" widths to match the panel widths of 12". Client loved the look.

Built from Plan(s)

Comments

Helper Tower

Submitted by cfgenie on Fri, 01/06/2012 - 12:28

I saw a stand like this in a catalog for over $250 and knew I could build it instead for way less! I used the hinges so it collapses and both my daughter and I LOVE this stand :-) It is sturdy enough that my 4 yr old daughter and her 7 old brother can both be on it at the same time, wiggling and giggling.

Built from Plan(s)
Estimated Time Investment
Afternoon Project (3-6 Hours)
Finish Used
Bright pink first rolled on and then sprayed additional coats through my HPLV sprayer. 2 coats of clear top coat.
Recommended Skill Level
Beginner

Comments

4x4 Truss Beam Table

Submitted by adkates on Sun, 11/24/2013 - 07:56

We needed a dining table. We saw this plan and fell in love. It didn't look like it would be impossible for two people who have never made furniture, so we gave it a shot! We finished it over three weekends and couldn't be happier with how it came out. Thank you for the plans!!!
Tips: we were initially skeptical about using regular old lumber, but it came out amazing.
Rustoleum stain and polyurethane...use it!

Built from Plan(s)
Estimated Cost
$150 (we bought a new sander too)
Estimated Time Investment
Week Long Project (20 Hours or More)
Finish Used
Rustoleum Ultimate Stain in Dark Walnut (single coat) and Matte Polyurethane.
Recommended Skill Level
Beginner

Comments

speerman86

Sat, 10/11/2014 - 15:56

Hi there! Beautiful table.

This is my first time doing any sort of woodworking. Do you recall the type of wood you used? I'm not sure what kind would be best. Any help would be great :)

Derek

DSRIFFE

Sat, 11/12/2016 - 09:38

I want to make this table for my son's dining room.  Home Depot Yellow pine has curved edges so my question is.  How did you get the tabletop so flush without the curves showing on all the wood piece edges?  This flat no edge appearence is what I want to make it look less like a pic-nic table.


Rustic Coffee Table

Submitted by Mitch3088 on Tue, 02/09/2016 - 10:09

Handmade coffee table base on Corona plans. Bottom shelf was chagned to wooden slats instead of solid plywood. 

Built from Plan(s)
Estimated Cost
$200
Estimated Time Investment
Weekend Project (10-20 Hours)
Finish Used
Minwax Jacobsen Stain
Behr White Paint thinned with water
Recommended Skill Level
Intermediate

Camp Loft Bed Modified & Modern Kids Bookcase

This build was super fun and easy.  I modified it slightly with a bottom bunk and outdoor grade slide for my two grandsons.  The room is only 10x10 so it pretty much takes up all the space, but I left a good amount of space under the bed (11”) for storage or for the dog to hide.

I attached hinges to the stairs for easy access to underneath, maybe for a hidden fort or more storage.  To gain extra support for the beds, I added angle irons to the top bunk legs and 11" 2x4s to the bottom bunks legs for the cross bars to sit on.  Both my husband and I tested, and they're not going anywhere, pretty solid.

Thanks Ana & Jared for sharing your talents with the rest of us!!  I wish I had room in my home to make every single one of your projects!

🥰,

Alexis 


Estimated Cost
$260 (w/slide)
Estimated Time Investment
Weekend Project (10-20 Hours)
Finish Used
Varathane Provencial
Behr Marquee in “Inked”
Recommended Skill Level
Beginner

Farmhouse Bed

Submitted by Anonymous (not verified) on Wed, 05/17/2023 - 07:49

Easy to make. I’m in love. Thanks for the super simple plan to follow.

Built from Plan(s)

Comments

Twin over Full Bunk Beds

Submitted by bohman825 on Sun, 01/08/2012 - 15:47

I wanted my kids to have more space in their shared room, but I did not want to pay a ton of money for a new bunk bed. My husband and I found a plan for this bunk on Ana-White and fell in love with the design. It turned out so great that we will still be using it in our next home whether it's needed or not. We did change a couple of things on the plan that we didn't care for. The first is that we added a side rail for safety. Secondly we also traded the 1x6 boards on the head and foot boards for 1x4s on the top but kept the 1x6s on the bottom.

Estimated Time Investment
Weekend Project (10-20 Hours)
Finish Used
Stain: Colonial Maple and polyurethane.
Used a sponge brush to apply stain and dry cloth to wipe off. Used a brush to apply poly.
Recommended Skill Level
Intermediate

Comments

Tony (not verified)

Mon, 01/09/2012 - 06:31

The guardrail looks great. How did you attach it to the corner post?

bohman825

Mon, 01/09/2012 - 17:39

With pocket screws on the bottom and then one screw through the 1x4s into the post before the 2x4 on the top goes on. And then the 2x4 is screwed onto the 1x4 and post with trim screws.

NicoleS (not verified)

Fri, 03/23/2012 - 04:36

How much did it cost you to build this bunk bed? I'm wondering if we can build this one as it turned out great looking!

NicoleS (not verified)

Fri, 03/23/2012 - 04:37

About how much did it cost to build this bunk bed? I'm wondering if we can build it since it turned out great looking!

Jillian (not verified)

Wed, 03/28/2012 - 13:02

Cost us about $300 and over an entire weekend of time spent on this project.
It's not for beginners. My husband has had many many years of experience in carpentry and woodmaking.

Good luck to you.
Also, he changed a few things in the plans we found in order to make it look better.

Thank you

Jillian

Jillian (not verified)

Wed, 03/28/2012 - 12:59

Cost us $300.00 to make and almost non-stop making it for the whole weekend. And then stained for hours.
This is with many years of experience in construction and woodmaking.

This is not a beginners project and then expect it to look amazing.
My husband changed these plans a bit to make it look better than the other ppls that we've seen on here.

But, good luck to you and make sure to have plenty of room and time.
Also, we had to make this bed in 10-15 different pieces and put together in the bedroom we wanted it in. There is absolutely no way it will fit otherwise.

Jillian

bohman825

Sun, 04/08/2012 - 15:26

Yes you'd just have to change measurements for queen instead of a full.

rdaneel

Sat, 10/25/2014 - 22:25

I don't see how you could put the fill/twin over a queen since the queen is longer.  Obviously you could spin the queen around and make it an L-shape but then you are looking at a different build.

Jesse and Jillian (not verified)

Thu, 12/06/2012 - 09:53

Yes any size would work as long as you have the room and the extra materials.

rdaneel

Sat, 10/25/2014 - 22:28

I really like the look of this ... I'm going to try to replicate!

What does the bottom of the guard-rail look like?  Did you space out your slats a little more than the original design?  I like the 2x4 topper instead of the 1x6.

hmagnani

Sat, 02/28/2015 - 16:46

We made this bed over the course of a week, both of us have extensive experience in woodworking and building. Ours is very wobbly on the long axis. We had a friend who is a structural engineer come in and take a look. He offered suggestions to shore it up and nothing really worked. The 3/4" overlap is not enough to secure the side rails, imo, and we used a variety of brackets to make it not wobble, to no avail.

This bed is coming apart in a few weeks and will be stored. If it is ever used again, it will be as two separate beds. I spent about $400 on this. My son never felt safe sleeping on the top bunk and has slept on the bottom exclusively.

Just my $0.02.

Farmhouse Table

Submitted by mtlkvm on Tue, 11/26/2013 - 13:00

I loved doing this project and the table came out awesome. But recently with the cold weather Ive noticed splits in some of the wood. Also where the beadboards meet the table top there is shrinkage...any idea how to fix it. I used non treated lumber from lowes.

Estimated Time Investment
Weekend Project (10-20 Hours)
Recommended Skill Level
Starter Project

Comments

jay678

Tue, 11/26/2013 - 18:49

The moisture content in big box 2xx lumber is relatively high, which is why it's mainly used for framing. Letting the lumber dry and acclimate is the best way to limit movement. Also, if you just screwed the top to the apron without allowing for movement, you will have splits as you're experiencing. It's best to use z-clips, or if you use pocket holes make sure you elongate the holes. As far as fixing the gaps, I'm not sure of a good way that will last.

DIY Dollhouse for American Girl Dolls

Submitted by Anonymous (not verified) on Fri, 02/12/2016 - 12:11

Using Ana's three-storey dollhouse as a foundation, I amended the measurements to create a narrower dollhouse (36" wide) to fit our space.

Estimated Cost
This dollhouse - using MDF and 1 x 6" boards for the roof, came in at $100 Canadian. (Less wood since my plan was both narrower and didn't include the centre dividers. Remember when buying castors to choose ones that will hold at least 150lbs - this sucker is heavy!
Estimated Time Investment
Day Project (6-9 Hours)
Finish Used
I used some small mis-tint containers from our local Home Depot which came in at $1 per container. The flooring is peel-and-stick tile which range in price from about $0.60 to $1.34 each.
Recommended Skill Level
Beginner

Farmhouse tables!!! Made from Ana's plans!!!!

Followed Ana's plan for the easy ~8 ft Farmhouse table and then I made the counter height for 4 Farmhouse table! I LOVE THEM!!!!!!!!!!!!!!!!

Recommended Skill Level
Beginner

Comments

Modern Outdoor Chairs and Simple Seacoast Tables

Submitted by Anonymous (not verified) on Mon, 05/22/2023 - 17:08

Great sturdy outdoor furniture to spruce up a small deck space with lots of afternoon sunlight and coastal breezes!

Comments

Simple Outdoor Bench

Submitted by moldah on Wed, 01/11/2012 - 14:57

About a year ago, I stumbled across your site, I was a lurker for awhile, finally joined, and can finally post the projects I have done so far. This was my second build from your site. It works perfectly on the front porch.

Built from Plan(s)
Estimated Time Investment
Weekend Project (10-20 Hours)
Finish Used
Cherrywood by Minwax
Recommended Skill Level
Beginner

Comments

moldah

Fri, 01/13/2012 - 15:44

Thank you very much, I can't wait to start my next project, new night stands to match the bed. Yep, I'm hooked :)

Paul Ferrario (not verified)

Thu, 05/31/2012 - 14:59

I really like this plan - re the wood choices and finish: How is the wood, especially the white wood, holding up against the elements? Great job on this btw.
Thanks
Paul

Farmhouse Table and Bench

Submitted by Anonymous (not verified) on Mon, 02/15/2016 - 11:31

Here is our first stab at building funiture...not too shabby. We built 2 benches with the table!

Built from Plan(s)
Estimated Cost
$125
Estimated Time Investment
Weekend Project (10-20 Hours)
Finish Used
Used Minwax Jacobean Stain!
Recommended Skill Level
Beginner

Nightstands

Submitted by Anonymous (not verified) on Tue, 10/01/2019 - 20:09

My husband built us new nightstands for our bedroom. Up next is a bed frame.

Built from Plan(s)
Estimated Time Investment
Weekend Project (10-20 Hours)
Recommended Skill Level
Intermediate

Barn wood frame

I made the barn wood frame for less than $30 (the plexiglass alone was $23!). It's better than the $80 they were going to charge me at the frame shop for the same style! I used an opaque black stain to both hide my not so accurate miter cuts and give it a modern feel. I'm very satisfied with the results!

Estimated Time Investment
Afternoon Project (3-6 Hours)
Finish Used
Cabot solid color acrylic deck stain in black. This stuff takes forever to dry, but I prefer this to black paint.
Recommended Skill Level
Starter Project

Comments

Guest (not verified)

Sat, 02/18/2012 - 09:24

I need a large frame for a family photo. I cant spend the money right now. This has been very helpful. Great job

Toddler Bunk Bed

This project cost around $75 dollars for all the materials and paint. It took about 10 hours to complete. It is costructed of pine 2x4 with the exception of the slats which are 1x3.

Built from Plan(s)
Estimated Time Investment
Weekend Project (10-20 Hours)
Finish Used
Latex Semi-gloss Interior/Exterior Paint
Recommended Skill Level
Intermediate

Comments

chalip2

Wed, 06/22/2016 - 18:45

Love the bunk bed, its looks perfect for my needs.

Is there anyway you can send me the plans for this?

Cottage Bench

Submitted by Anonymous (not verified) on Wed, 02/17/2016 - 18:37

My first project using Ana White's plans.  Love how easy the plans are and how great the bench turned out.

Estimated Time Investment
Weekend Project (10-20 Hours)
Finish Used
White Chalk Paint with Dark Brown Wax then sanded for a distressed look
Recommended Skill Level
Intermediate

My first attempt

Submitted by Tricia H on Thu, 12/05/2013 - 11:04

This is my first attempt at woodworking. There are plenty of mistakes, but I'm happy with the finished project

Built from Plan(s)
Estimated Time Investment
Day Project (6-9 Hours)
Recommended Skill Level
Intermediate