Community Brag Posts

My first Easy Build Headboard, King Size

Submitted by andreak on Thu, 05/12/2011 - 16:15

This was my first project and it come out beautifully. I did learn a valuable lesson - if you are going to build something in the basement, make sure it fits up the stairs. Not sure if you can tell from the picture but this ended up 6 inches shorter than the plans. Can wait to find my next project!

Estimated Cost
$150
Estimated Time Investment
Day Project (6-9 Hours)
Finish Used
MinWax Wood Finish Red Mahogany 25 - Minwax Polyurethane
Recommended Skill Level
Beginner

Coffee Bar with diy barn door

Submitted by dnieves33 on Tue, 01/11/2022 - 08:57

Built this coffee bar with the diy barn door hardware. Wife loves it. This is made of about 80% reused / repurposed wood. Thank you Ana for the great videos and simple to follow plans.

Comments

Pottery Barn Benches with X Table...Modified

Submitted by AJW on Thu, 05/19/2011 - 13:18

Pottery Barn Bench: Length Modified and utilized 2-1x6s for seat. X Table: Length Modified, utilized a 6x6 for the stretcher and drilled a hole through both the 1 top material and 6x6 stretcher beam. Holds the Pottery Barn umbrella real well. All made of Cedar and painted for good measure. Everything counter sunk and plugged, sanded to high heavy and ready to last.

Estimated Cost
$350
Estimated Time Investment
Week Long Project (20 Hours or More)
Finish Used
Oil based primer with 2 coats of acrylic over top.
Recommended Skill Level
Intermediate

Doll Picnic Table

Submitted by dhrider33 on Sun, 05/22/2011 - 18:09

My 10 yr old son and 8 year old daughter really loved helping make this for their cousin. They've never been so excited to give a gift!

Built from Plan(s)
Estimated Cost
~ $15 ... although I had various scrap wood laying around from other projects
Estimated Time Investment
Afternoon Project (3-6 Hours)
Finish Used
Sanded / Primed / Painted
Recommended Skill Level
Beginner

Chunky Coffee Table with Turned Legs

Submitted by danicarby on Sun, 02/18/2018 - 06:53

I turned my legs (woot woot!) but you could buy legs that are 3x3" @ 18".  This was a simple build using pocketholes + glue joinery and using glue + nails for the shelf and tops.  To allow for seasonal expansion of wood I spaced the wood on shelf and top slightly because I built it in the dry winter.


I used a Dark Walnut stain first and went back over with a light coat ("dry brushing") of a sage green paint.  Lightly distressed edges.


I have more pictures and details on my website: http://www.theprojectlady.com/2018/02/diy-tutorial-chunky-coffee-table-…


Happy building everyone!  It's so rewarding, right!??

Estimated Cost
$50 for wood
$20 for finish
$5 for screws/nails
Estimated Time Investment
Day Project (6-9 Hours)
Finish Used
Dark Walnut Stain
Behr Premium Plus Indoor Paint
Recommended Skill Level
Beginner

Simplest Stool

Submitted by DWeen on Tue, 08/11/2015 - 17:34

I modified the Simplest Stool plan for this project to use some old threshing floor boards that I had leftover from another project. I like the blocky and chunky look it gives it. We chose to distress these stools to make them look as though they've been around for awhile. The stools didn't take long to build, but since the finish needed time to cure between coats, the overall length of time for the project was about a week. 

Built from Plan(s)
Estimated Time Investment
Afternoon Project (3-6 Hours)
Finish Used
Minwax 'Early American' with two coats of polyurethane. The legs and rungs were painted with Behr semi-gloss white paint, and distressed using Minwax 'Early American' stain.
Recommended Skill Level
Beginner

Comments

Home is Where the HEARTH is (Faux Fireplace)

Submitted by cbeach1717 on Fri, 07/08/2011 - 14:11

Only about a month before Ana published her Christmas plan for a faux fireplace, the hubby and I built one of our own out of a sheet of quality plywood, 1x12's, crown moulding, and a little trim. Originally we simply wanted a place to hang our stockings over the holiday season, but now our HUGE faux fireplace is the HEART(H) of our home.

Built from Plan(s)
Estimated Cost
$150
Estimated Time Investment
Weekend Project (10-20 Hours)
Finish Used
We just primed and painted white! So easy :o)
Recommended Skill Level
Intermediate

Comments

Pug Bug (not verified)

Fri, 07/08/2011 - 15:22

Wow...that's gorgeous! Nice attention to detail, too! Just a suggestion...have you considered painting the inset of the "fireplace" black? I painted the inset of my fireplace with a flat black paint and it made ALL the difference in the world. Just something to consider. Either way, job well done!

In reply to by Pug Bug (not verified)

cbeach1717

Mon, 07/11/2011 - 08:28

Thanks so much! Would you believe that I am not as brave as I would like to be when it comes to painting anything black? We are planning to have faux logs made and stacked in the faux fireplace! We think that will do the "trick"--pardon the pun :o) Thanks again!

jharm

Tue, 07/12/2011 - 13:06

Have you considered trying a faux marble paint treatment? Or, marble-look wallpaper might be a little more fail safe and could even be applied in squares like marble tiles.

I love the proportions you chose. I think a foundation would really sell it, and would increase the safety if using candles.

Allison Byles (not verified)

Thu, 10/27/2011 - 10:07

Do you have the plans for your fireplace? Love your design and clean lines, I am planning to make one!

Guest (not verified)

Fri, 11/25/2011 - 13:22

Love this fireplace, very beautiful but very disappointed that there isn't any plans and just pictures lol a little bit of a tease.

cbeach1717

Sun, 02/26/2012 - 04:44

Hello Everyone,

I am so sorry I have not responded sooner, but I wasn't even aware that there were any recent comments on this post :o)

Now that I do know, I just wanted to let you know that I will try to get something drawn up and post it here. I am not entirely well suited for design drawing software, but maybe you all wouldn't mind if I literally draw them out for you and post pictures of those drawings, yes?

Thanks for your kind comments, and I promise to have something soon! This project really is so simple, I just know you'll love the finished product :o)

In reply to by Wendy T (not verified)

cbeach1717

Mon, 06/25/2012 - 06:17

Hello Everyone,

I apologize for the delay, but we have been out of the country for six months and don't have any way of knowing the dimensions of the faux fireplace without measuring it personally. But we will be home within the next few weeks and I will try to measure and draw up some simple plans for those of you would like to see them.

Thanks :o)

srush (not verified)

Thu, 10/11/2012 - 10:35

Hi!
I love this room, do you know who makes the paint and what the color is called?

Thanks so much! Great job on the fireplace!

srush (not verified)

Thu, 10/11/2012 - 10:36

Hi!
I love this room, do you know who makes the paint and what the color is called?

Thanks so much! Great job on the fireplace!

Tall Farmhouse Queen

Submitted by chbowman on Fri, 07/15/2011 - 19:41

This bed is our first build. We added 4 inches to the height of posts on headboard and footboard. We also used brackets rather than screwing directly into footboard to make the bed easier to move if we ever need to.

Built from Plan(s)
Estimated Cost
$175
Estimated Time Investment
Weekend Project (10-20 Hours)
Finish Used
Two coats of Bin primer followed by two coats of Behr Premium Plus Ultra Heavy Cream.
Recommended Skill Level
Beginner

Comments

Brandon R. (not verified)

Sun, 07/15/2012 - 01:43

I just finished building this same bed and I'm looking for
an easy way to mount it together invade I new to move it. Where did you find brackets for the head and foot board? Could you post a picture of them?

Thanks,

Brandon

Mrs Johnson (not verified)

Mon, 10/01/2012 - 00:42

How tall is the bed from the ground to the bottom of the side rail? I'm wanting 14" so I don't need a box spring {we're both tall so I don't want to feel like I'm on the ground}

Ten Dollar Ledges Fancied Up

Submitted by ipassat100 on Fri, 07/29/2011 - 22:55

I added crown molding to the bottom of my ten dollar ledges to add a little fancier look.

Built from Plan(s)
Estimated Time Investment
An Hour or Two (0-2 Hours)
Finish Used
White Paint
Recommended Skill Level
Intermediate

Comments

Ramie (not verified)

Sat, 07/30/2011 - 14:38

I have two that are ready to hang, but need to paint the wall first. Might add to them before I do.......thanks for sharing!

Guest (not verified)

Sat, 07/30/2011 - 16:00

so cute!! I want to make these!

loniwolfe

Tue, 09/20/2011 - 19:54

This looks great! What a wonderful idea! I have a question, Other than the moulding on the bottom, did you follow the plans exactly (Like used the same dimensional boards Ana said to use)? Just asking because yours came out looking so much better than mine (which very well could be the paint job and moulding fooling my eyes into thinking the other boards look smaller, lol)

Great job and thank you for sharing!

Becky Darrington (not verified)

Wed, 09/21/2011 - 10:16

I did use the same size boards that Anna said they just might be a different length.

Merbear (not verified)

Fri, 01/13/2012 - 12:15

I love the finished look! So classy!
Is there an added piece on the bottom of the moulding?

Guest (not verified)

Thu, 01/26/2012 - 20:02

wow that's amazing. I so need those. LOL everything you post is very stylish and functional. You know I work at a high school. I could see getting the art class (which makes projects like these) to do these for my classroom :)

Guest (not verified)

Thu, 02/02/2012 - 08:50

Where are the instructions posted?

mparks100 (not verified)

Wed, 02/15/2012 - 11:23

This is great as I am a photographer and love to switch up my photos often. Saves the walls from holes and is just a great idea! I also did not see all the instructions but will have my husband duplicate.

Charmaine (not verified)

Wed, 04/11/2012 - 15:07

This is great. I made the ledge and plan on adding the crown molding. How exactly did you hang them?

Gradyne (not verified)

Tue, 07/17/2012 - 13:11

I have high ceilings. I have been trying to figure out what to put at some of the windows to dress them up a bit. I think I may add them to the den area. Photos would be out of the reach of all the grandchildren, but photographs could been seen without cluttering tables.

sdaguinsin

Sat, 09/08/2012 - 09:00

Has anyone tried using a 1x3 for the back instead of a 1x4? Can anyone think of any reason it would not work?
Also thinking of making it deeper since the crown molding will provide extra support. I want to add more depth so that I can install a power strip under shelf, behind molding so that I can turn it into a charging station. Any thoughts on this? Would love to hear other opinions on this before I start building and then realize the problems that may exist in my plans.

Emmy Soren

Thu, 09/15/2016 - 18:54

I feel so stupid... I have never used any sort of molding before. How do you use it? I went to lowes tonight and I don't know where you get the edge piece. My husband (who doesn't build things except for computers) says he thinks you just use part of the long strip and cut at a 45° angle. Is that how?

then what do you use for the bottom portion to cover the gap?

sandy.p56

Sat, 08/12/2017 - 10:50

I found Ana's site a few years ago and have been dreaming about things I want to build for just as long.  I'm finally ready to get started, and I thought these ledges would be a great way to start.  I love the moulding on the bottom, but I have no idea what combination of pieces to use to get this look or what sizes of moulding to use with the 1x4 and 1x2 boards.  Can somebody help me?

Tsu Dho Nimh

Tue, 08/15/2017 - 13:21

Sandy - take the picture to any lumber molding department ad start trying combinations.


The original pic was using some crown molding, but a fancy baseboard or other molding would look good too.

Free Standing Barn Door Cabinet

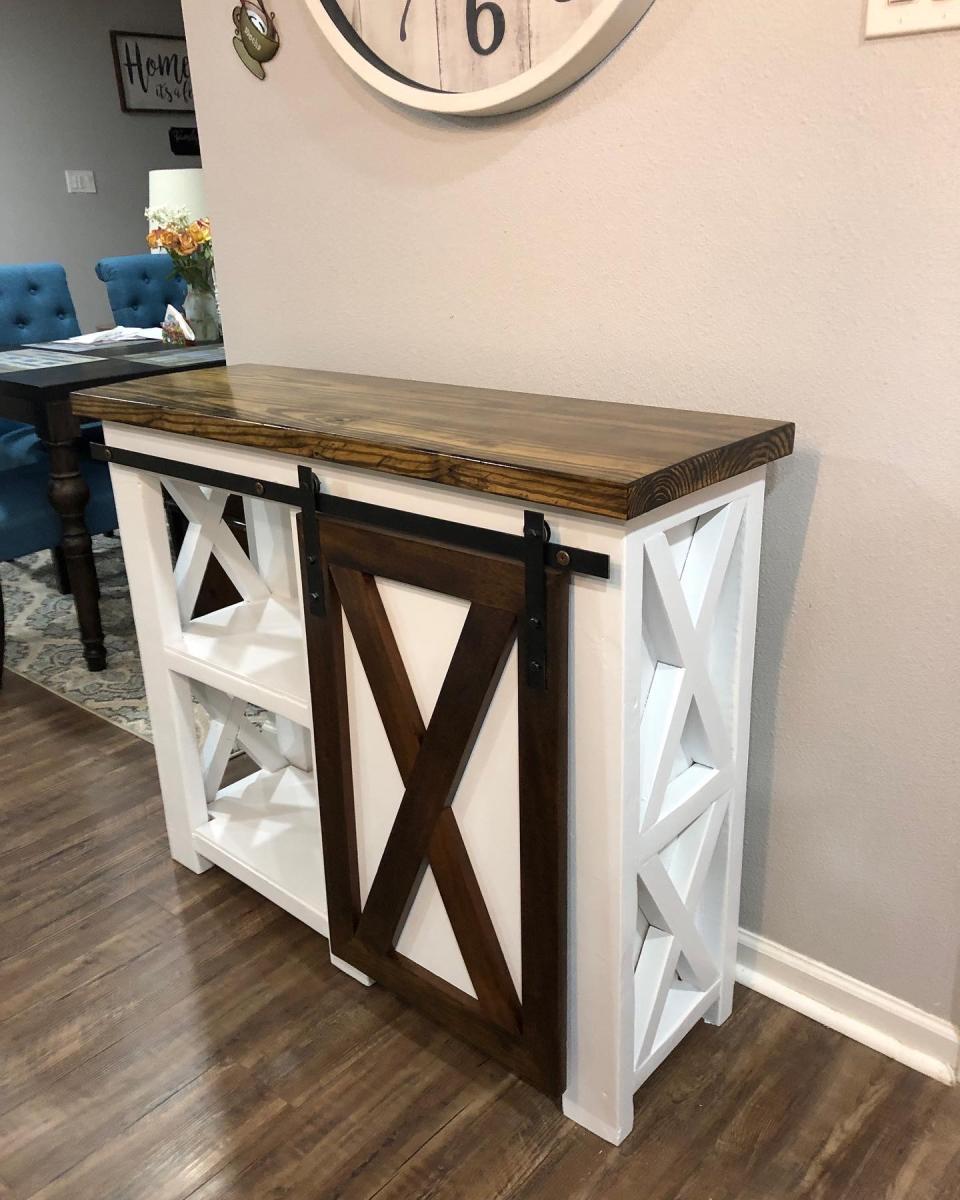
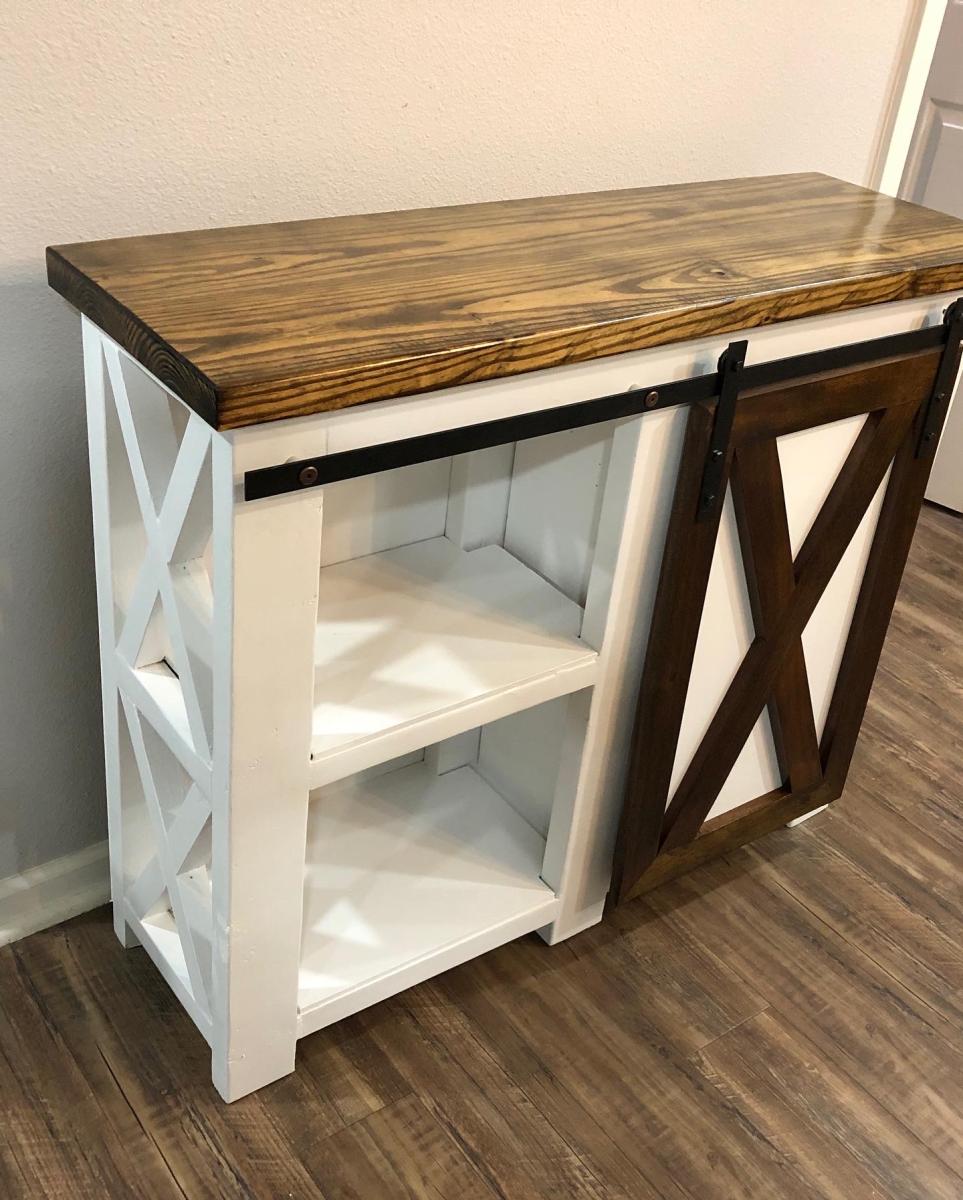
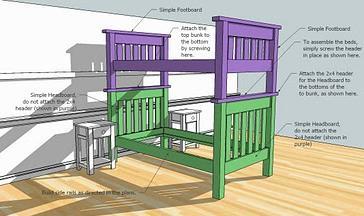
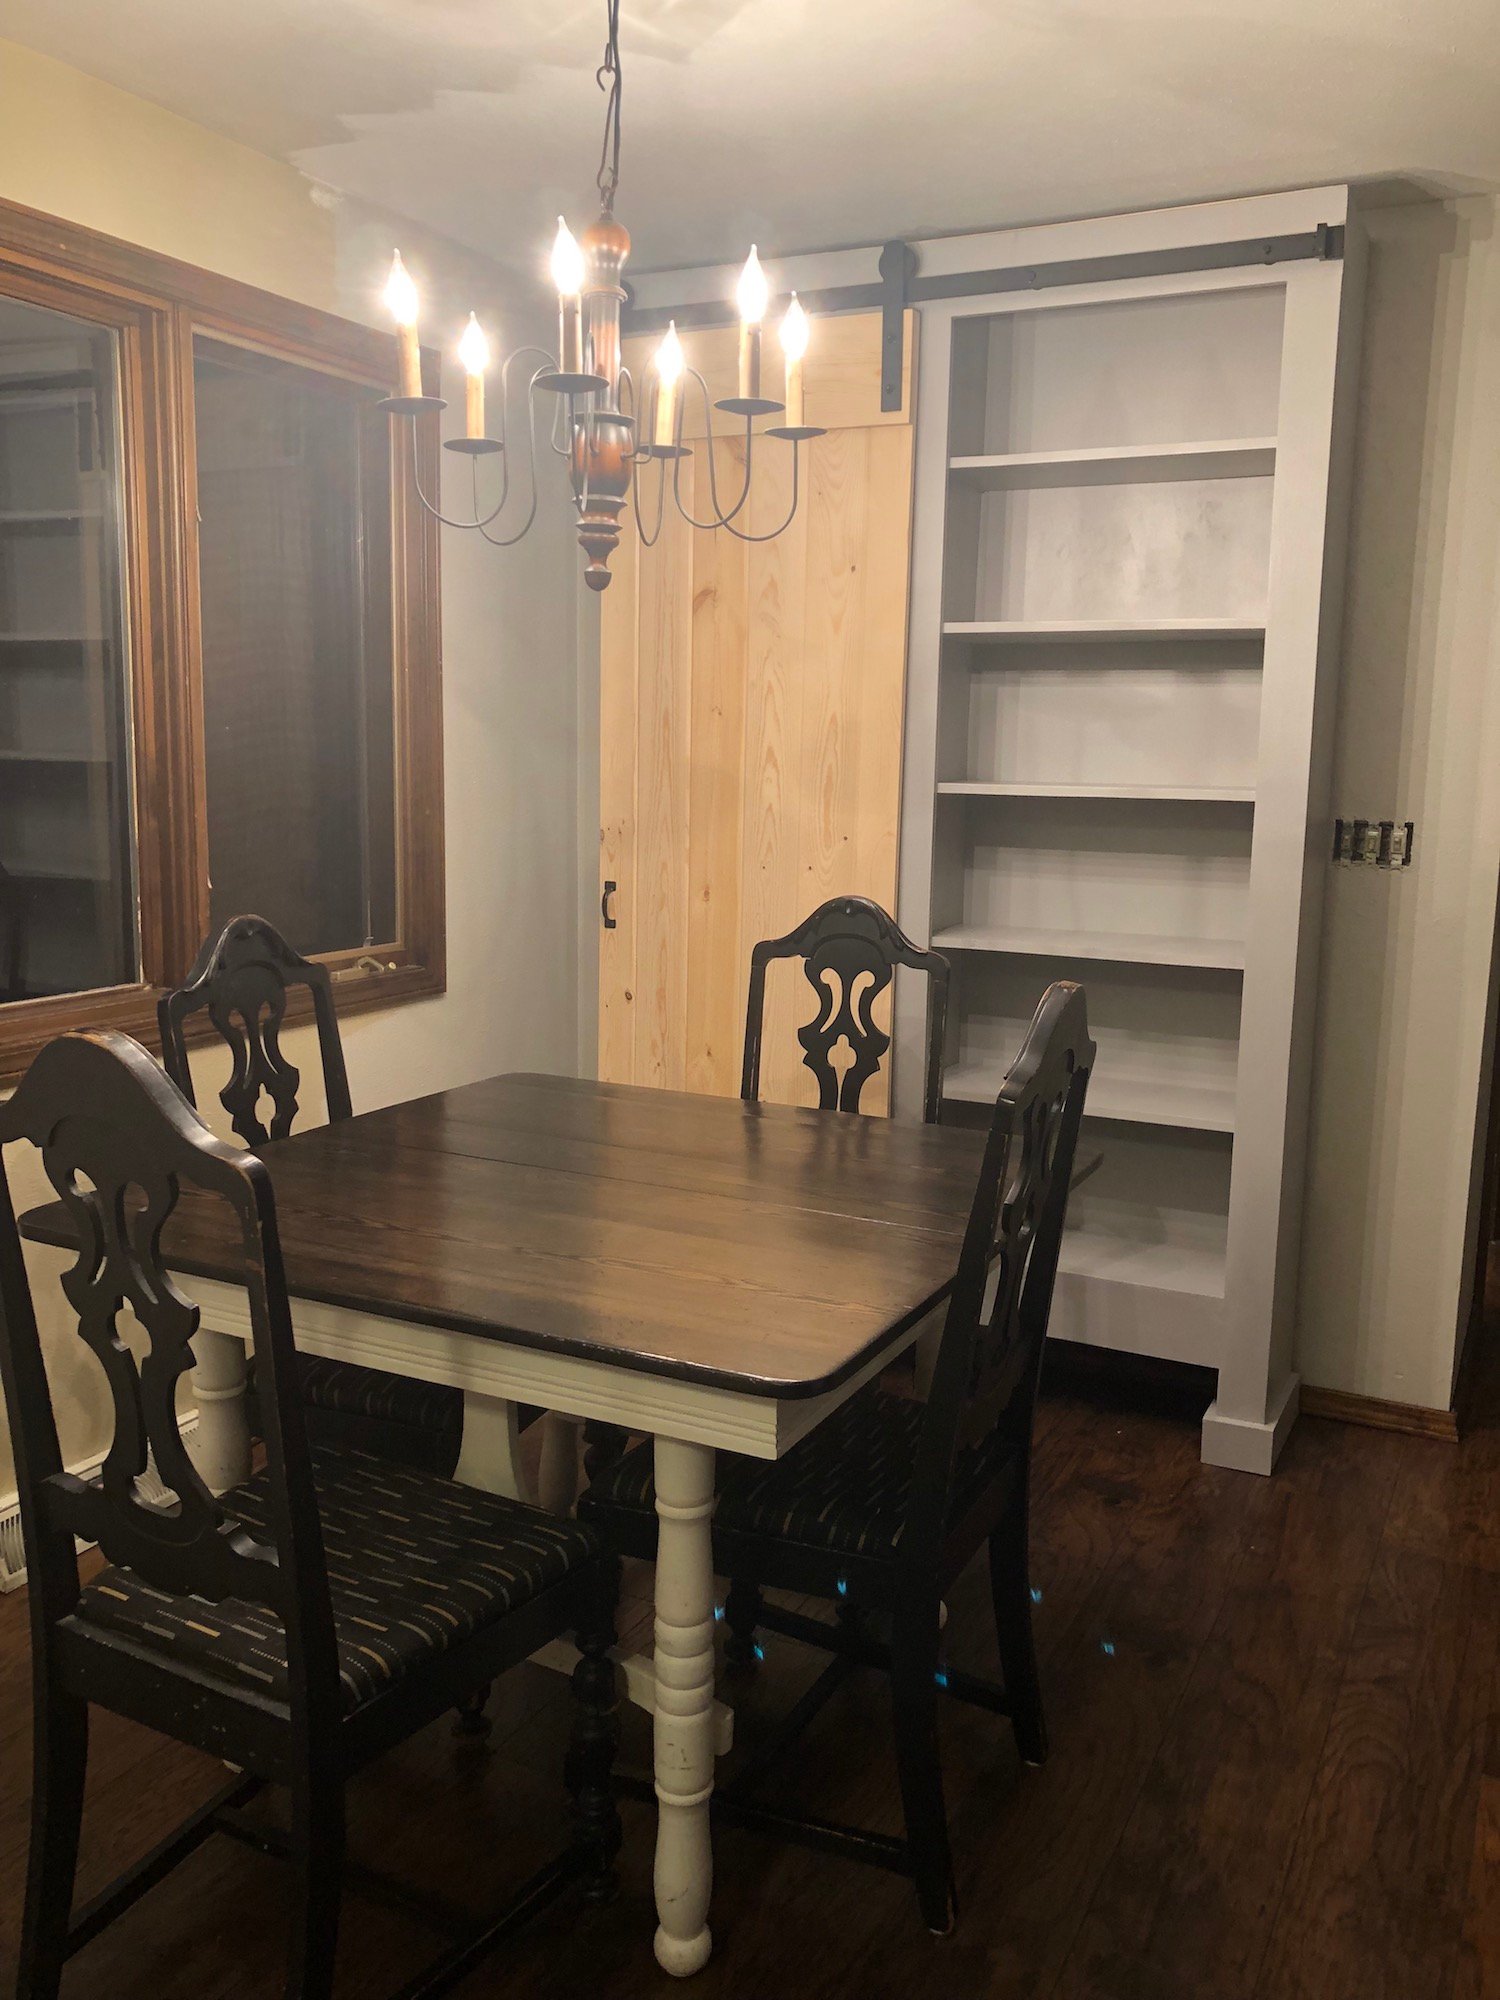
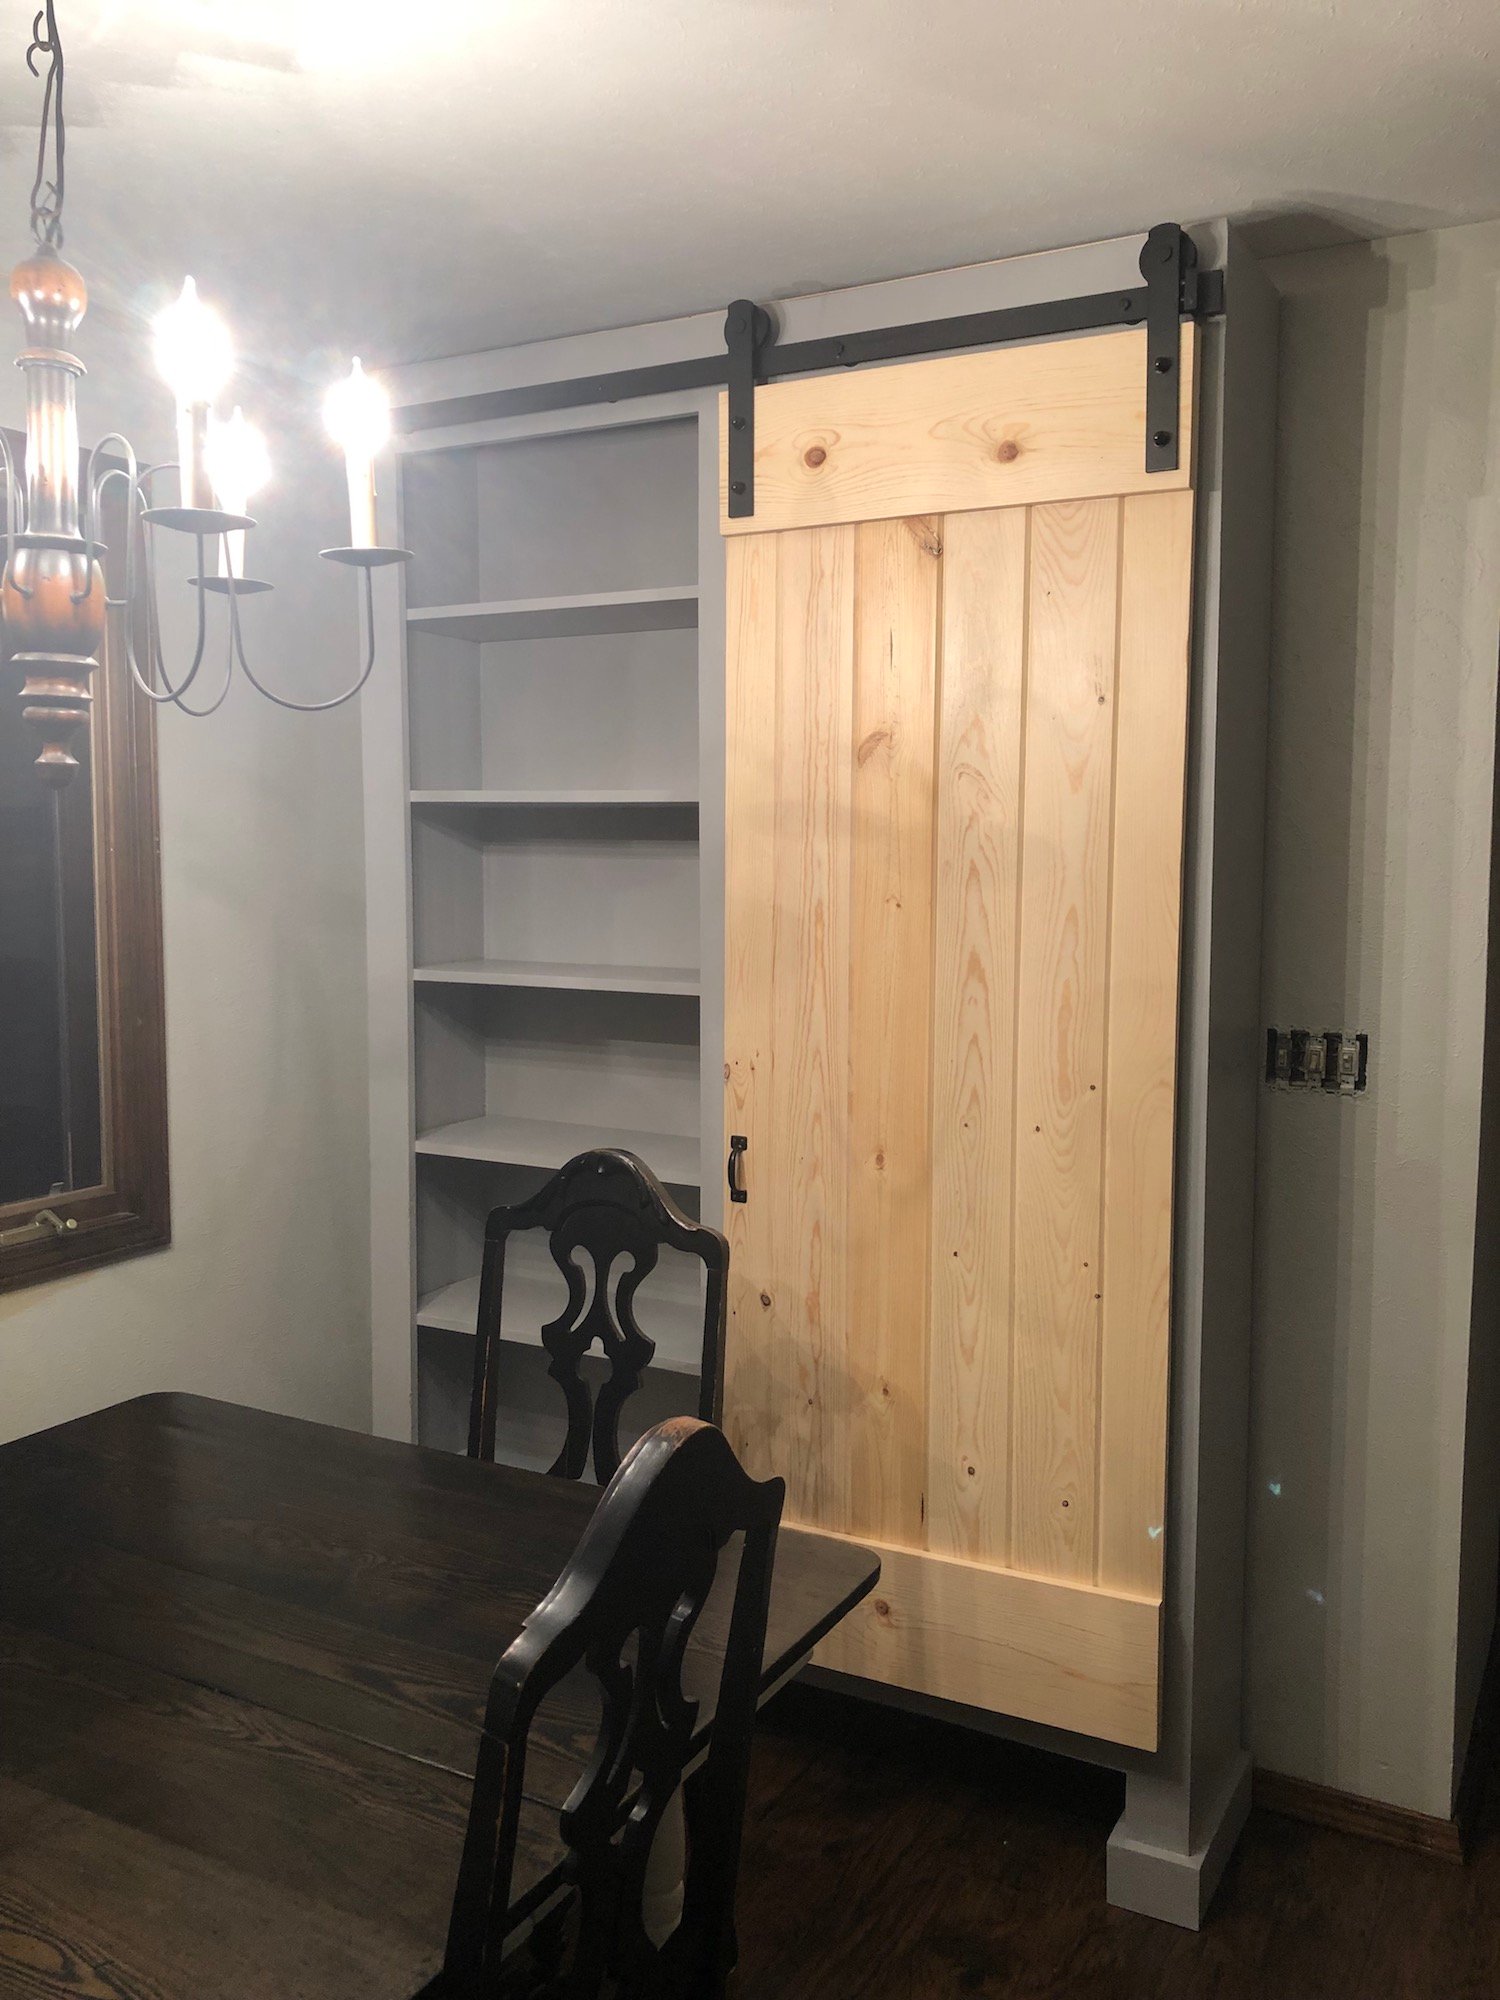
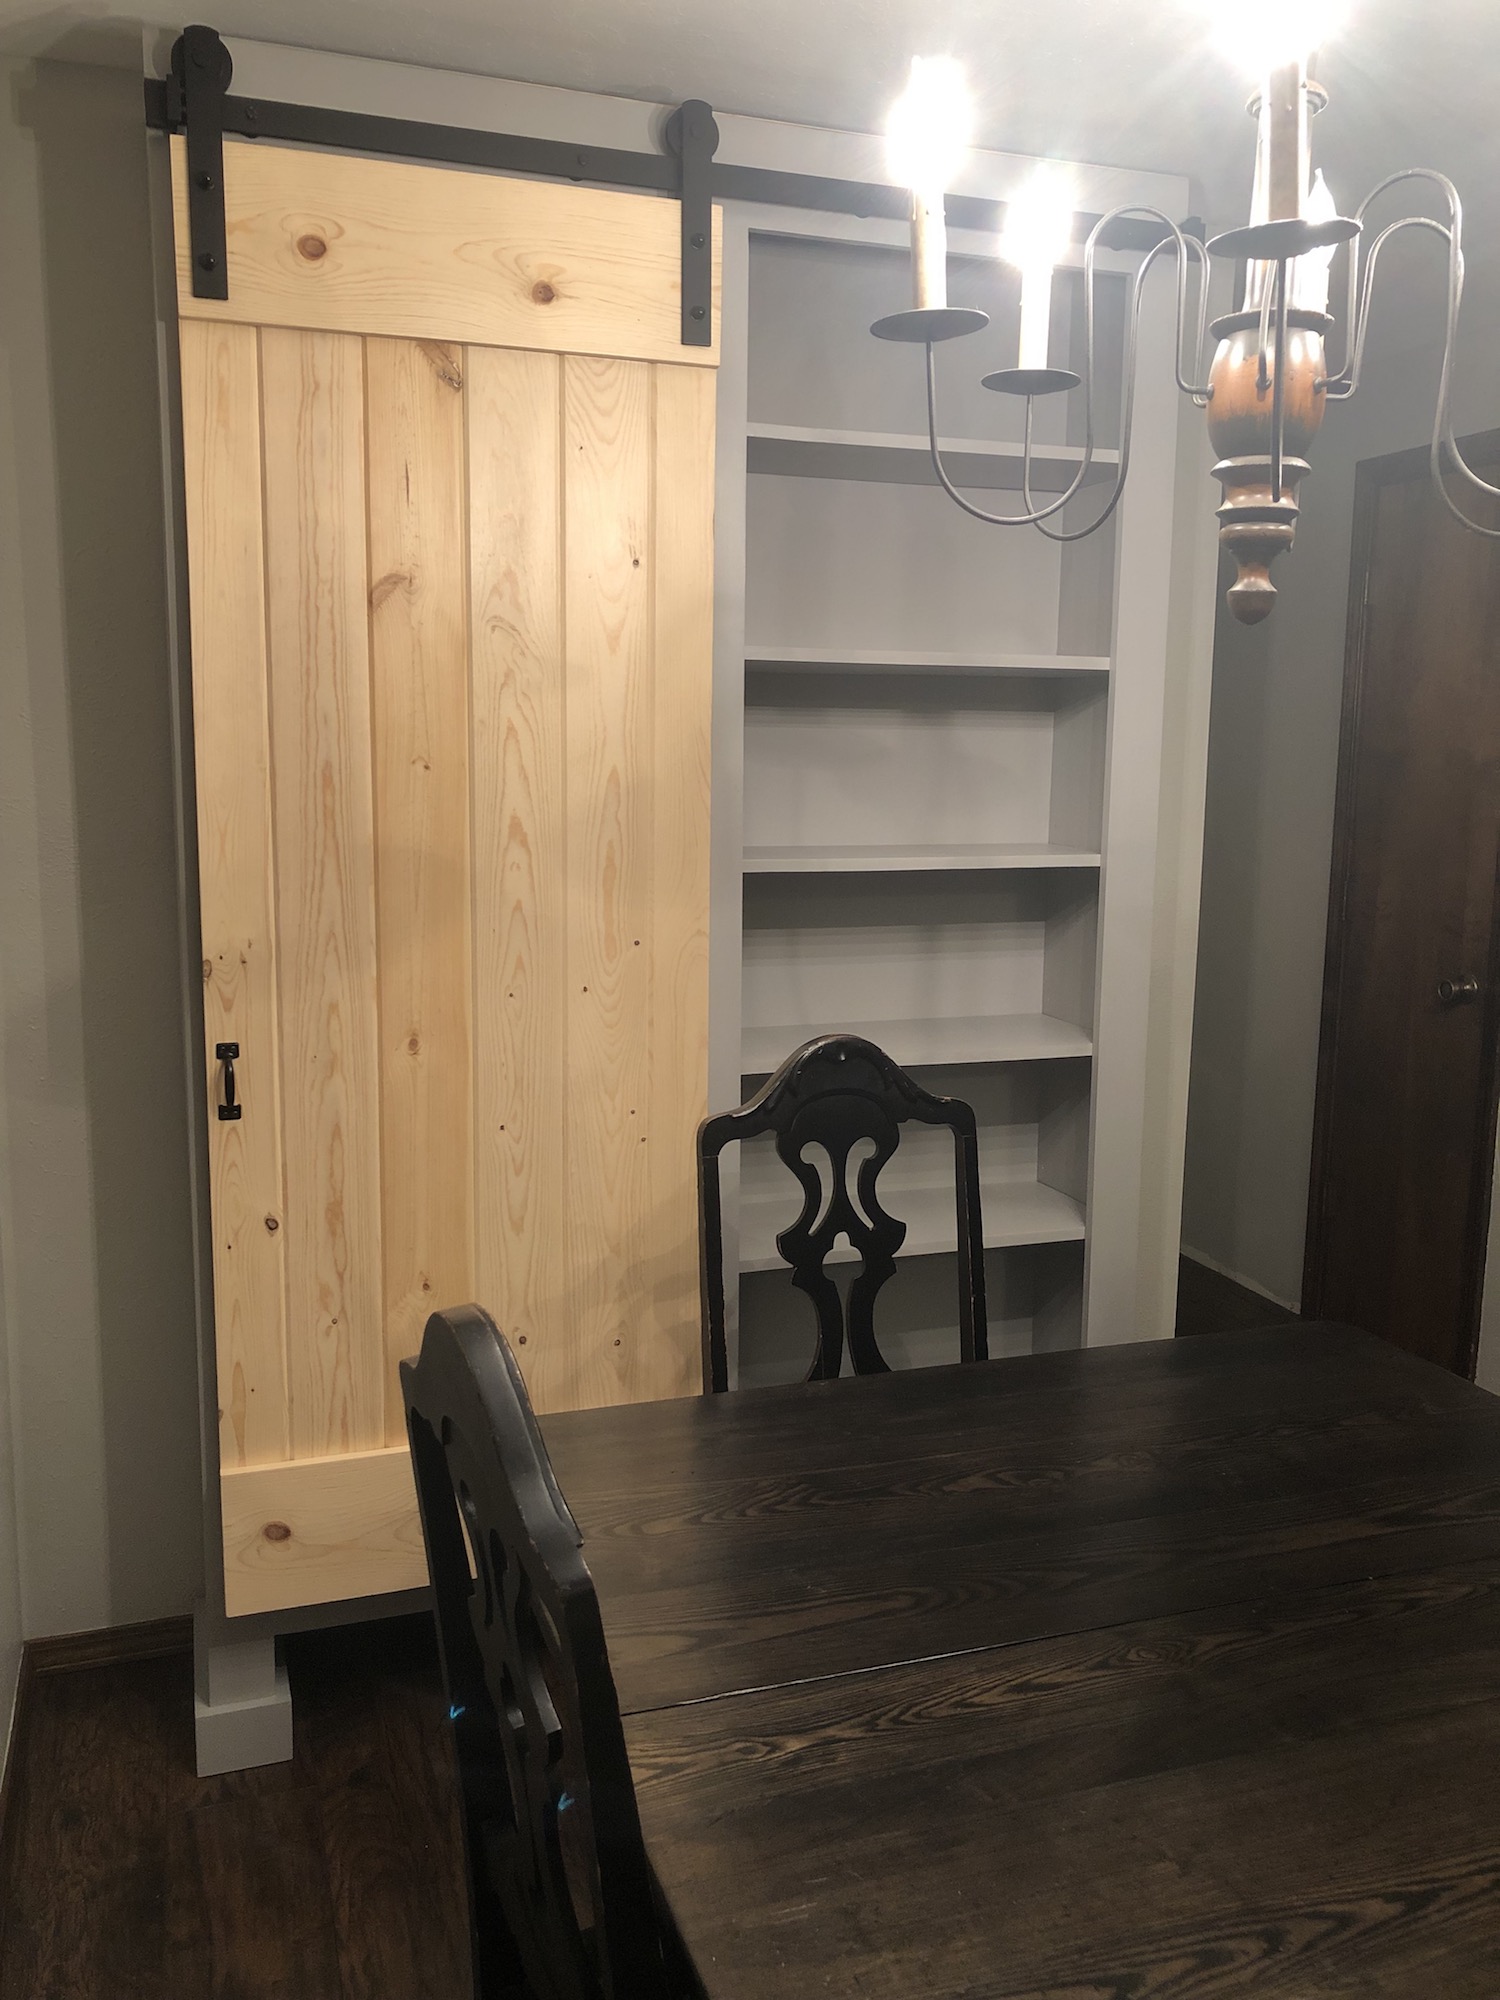
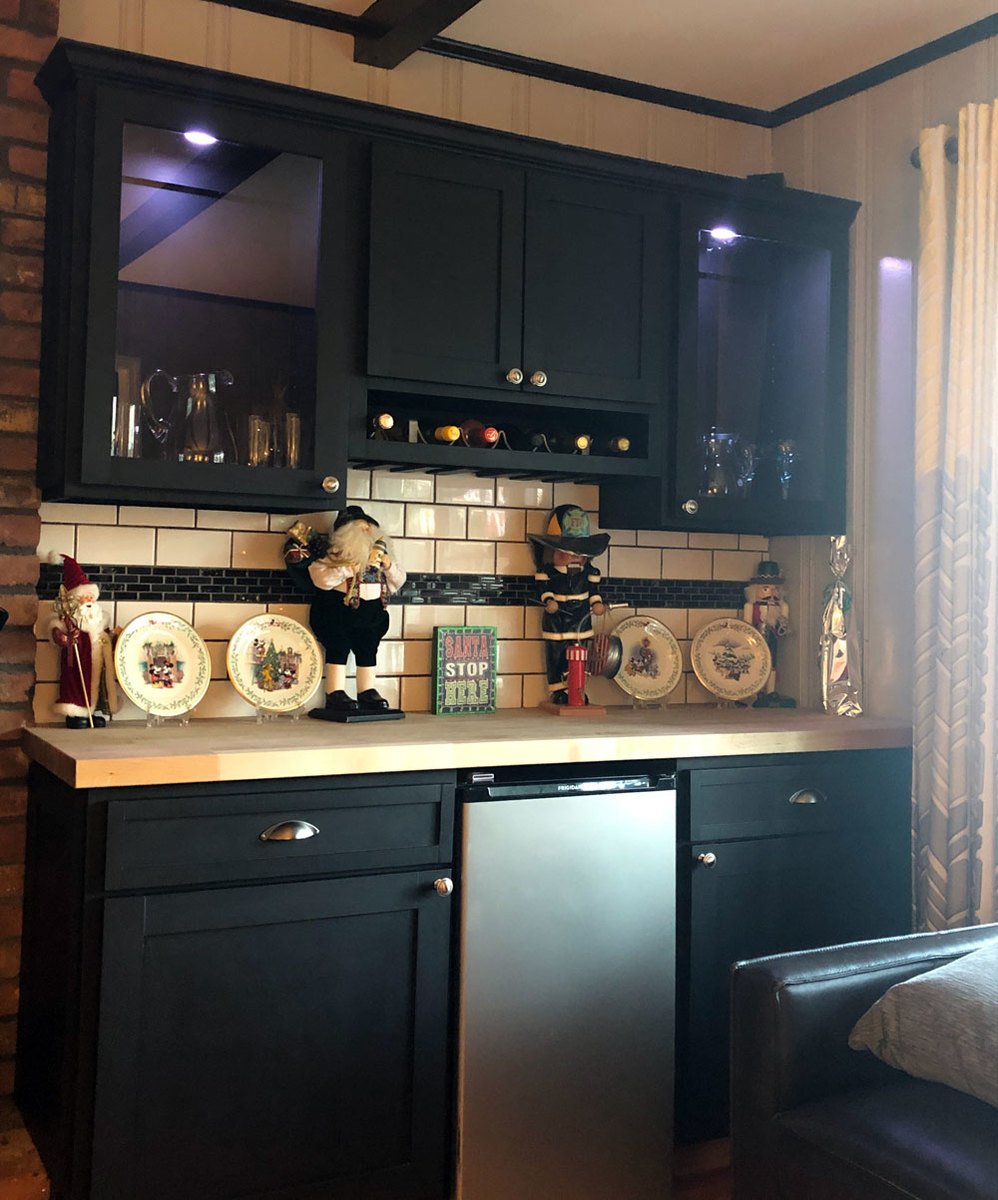
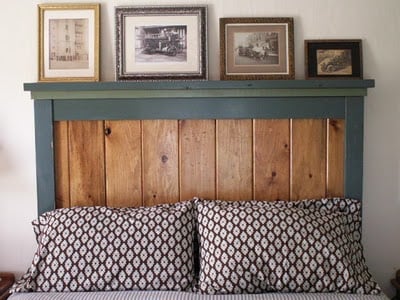
I needed a pantry cabinet for my walk through kitchen (I have a generic 1970's ranch with a walk through kitchen--10' wide and the dining area is small, so I wanted lots of storage with minimal depth) and I am a big fan of cabinetry that looks like furniture--when I saw this project, I knew I had to make it.  


I enlisted the help and guidance of my 73 year old Mom----she has been making things for years and has an entire basement full of all the woodworkig machines I will ever need.  We started this project about a month ago and have been working at it on and off since (my Mom is a thinker and has lost sleep over a few issues we ran into, but the final design is AWESOME!  Thanks Mom!).


I would have loved a much wider cabinet, but the wall I will be putting it on had a few items that I did not want to move or cover up (light switches & a cold air return).  I ended up making the cabinet 89" tall (my ceilings are only 91") and 57.5" wide (I'm a stickler for symmetry and I wanted the white space on either side of the cabinet to be the same.  This project took a couple of weeks to complete due to work, kids, pets, etc).  I just had my son and better half carry it in tonight and it fits perfectly----now to clear out all my upper cabinets and start taking them down so I can fix my ceiling and start making my kitchen cabinets!  

Thanks Anna!

Built from Plan(s)
Estimated Cost
Total cost for materials, paint, hardware - $250.00
Estimated Time Investment
Weekend Project (10-20 Hours)
Finish Used
Rustoleum Chalk Paint - Aged Grey
Recommended Skill Level
Beginner

Comments

Lumber Storage

Submitted by Anonymous (not verified) on Sat, 08/20/2022 - 15:44

We are so excited about have an organized way to store our lumber and scraps. We only had to purchase 4 2x4’s for this project and were able to use a lot of on-hand scrap pieces. The plans were so clear and easy to follow. Thank you for sharing!!

Comments

Connor Side Table

I built this as a way to stay busy on a three day weekend, and it turned out so well my wife wants two more for our night stands.

Built from Plan(s)
Estimated Time Investment
Day Project (6-9 Hours)
Finish Used
I used Chalkboard Paint for the top and Minwax Early American stain. If I were to do it again, I would use a lighter stain color. I sprayed a cheap clear coat over the top of the black.
Recommended Skill Level
Beginner

Built in dry bar

Submitted by releematt on Fri, 12/28/2018 - 14:16

My husband and I worked on this for a few months, no rush. This is the outcome and all we need to do now is get one glass shelf for each cabinet. This is a great place to store all liquors and glassware. The drawers are a nice addition. The paint it black chalk paint with wax finish. All materials were purchased at Lowes or Home Depot. 

Estimated Cost
$800.00 including butcher block top, glass, back splash and lights.
Estimated Time Investment
Week Long Project (20 Hours or More)
Recommended Skill Level
Beginner

Harriet Higher Chair

Submitted by aerialc on Tue, 11/10/2015 - 09:33

I made this chair for my almost three year old and it is perfect for him to reach the dining table.

Built from Plan(s)
Estimated Time Investment
Afternoon Project (3-6 Hours)
Finish Used
Minwax Honey Stain
Recommended Skill Level
Beginner

Easy plan

Submitted by Anonymous (not verified) on Sun, 01/06/2019 - 10:58

Easy plan to build. Used scrap 3/4" maple plywood for lower shelf instead of 1x12. Finished top with Minwax Gel Stain in Coffee color and top coat with Minwax matte poly. Painted bottom with primer and 2 coats of SW ProClassic in Soji White. 

Built from Plan(s)
Estimated Time Investment
Weekend Project (10-20 Hours)
Finish Used
Mini wax Gel Stain and SW Proclassic
Recommended Skill Level
Starter Project

Comments

Small Cedar Fence Picket Storage Shed

Submitted by Pembat on Sun, 10/06/2013 - 20:37

Built this in a weekend, took about 1.5 days. I ended us using 2x4's instead of 2x2's, I think it resulted in a much stronger frame. I also built a base for it to sit on. I got pre-stained cedar fence boards, and overlapped them 1" instead of a 1/2". Pretty easy project, I ended up siding the back on the ground, installing it, and then adding the side walls without the siding (just the framing), and then sided them in place. The doors work perfectly. I took my total inside dimension between walls, made sure the opening was square, and then divided that by two to get the width of each door. I then took another 1/4" off that, so each door had an additional 1/8" gap, it worked perfectly. When I set the doors, I put them on a piece of roofing closed as I screwed in the hinges, and then opened them and removed the roofing. I opted to run the door siding horizontal to use up a bunch of waste wood. I'm happy with the outcome. I also found some 6" self starting lag bolts and lagged through the back of the shed into studs (through the siding) into the garage behind it.

Estimated Time Investment
Weekend Project (10-20 Hours)
Recommended Skill Level
Intermediate

Indoor Playhouse

Submitted by Alaskagirl on Thu, 02/28/2019 - 12:47

Husband and I built this beauty over a rainy weekend. He had cut the wood a few weeks before, then we had to wait for a free weekend to assemble. We switched the placement of the walls around so the bed wouldn’t go over a heat vent and had to trim a few inches off the legs to fit with our lowers ceiling. I painted the back wall with chalkboard paint and we added shelves to the side like shown in the blogpost linked on the build page. We added a light above and Christmas lights below to brighten things up. A book sling and pulley with basket added the perfect finishing touches. All our boys love this magical new addition to our youngest son’s room and gave already spent many hours playing there. 

Built from Plan(s)
Estimated Cost
$200
Estimated Time Investment
Weekend Project (10-20 Hours)
Finish Used
Haven’t finished yet, waiting for drier weather, then will add two coats clear polyurethane to keep the natural look.
Recommended Skill Level
Intermediate

Reclaimed wood and hardware pergola

Submitted by Anonymous (not verified) on Fri, 03/08/2019 - 12:39

100% reclaimed wood and hardware used for this custom pergola.  Designed to be more modern and simple cuts.

Estimated Cost
0.00
Estimated Time Investment
Day Project (6-9 Hours)
Finish Used
None
Recommended Skill Level
Starter Project

Queen Farmhouse Headboard

Submitted by sharon-l on Sat, 10/22/2011 - 04:54

We eventually will build the rest of the bed, but for now we needed a headboard. Hubby helped me with this one, since it was large, I loved having an extra pair of hands. This headboard is reversible, so if our tastes change, we can unbolt it and flip it over to the side that is just stained and polyurethane. Pretty neat! This headboard is extra tall, because we have our bed frame up on risers, and we wanted a picture shelf but didn't want it interfering when we sat up in bed to read or what-not. Hubby used the router to make grooves in the top before we attached it, so our pictures wouldn't be crashing down on our head! Our metal bed frame comes just shy of the outer edge of the legs of the headboard, so when we build the rest of the bed, the side rails will meet the edge exactly. We placed the headboard behind the bed frame to mark where to drill the bolt holes and attached the headboard to the frame with 4 inch long, quarter inch wide bolts with washers and nuts. Two on each side.

Built from Plan(s)
Estimated Cost
$50-$60 just paint and lumber. We had some supplies left over from previous projects, including screws and the ship-lap boards.
Estimated Time Investment
Weekend Project (10-20 Hours)
Finish Used
We painted and distressed the boards, then applied stain to the distressed parts. We coated the entire thing with three coats of polyurethane.
Recommended Skill Level
Intermediate

Comments

Outdoor Providence Table

Submitted by splout on Thu, 10/17/2013 - 20:11

This was my first attempt at building a piece of furniture. It's an outdoor table based on the providence table plans. I used old 4x4 pressure treated posts from part of my fence that was no longer needed for the base. The posts were fit together using lap joints and secured using fastenlok screws. The base was then painted with french grey chalk paint (first time experimenting with chalk paint) and then covered with a thin coat of brown briwax. The top is made of 8 foot by 1 inch ipe boards that are 4 different widths but the overall width is about 42 inches. The ipe was purchased rough sawn and needed to be planed to uniform thickness. I used a natural stain meant specifically for ipe and other tropical hardwoods.

Built from Plan(s)
Estimated Cost
$220 for me - 200 for ipe boards, 20 for paint, 4x4 posts free
Estimated Time Investment
Weekend Project (10-20 Hours)
Finish Used
French grey chalk paint and briwax for base. Natural tropical hardwood stain for top.
Recommended Skill Level
Beginner