DIY Shed Chicken Coop
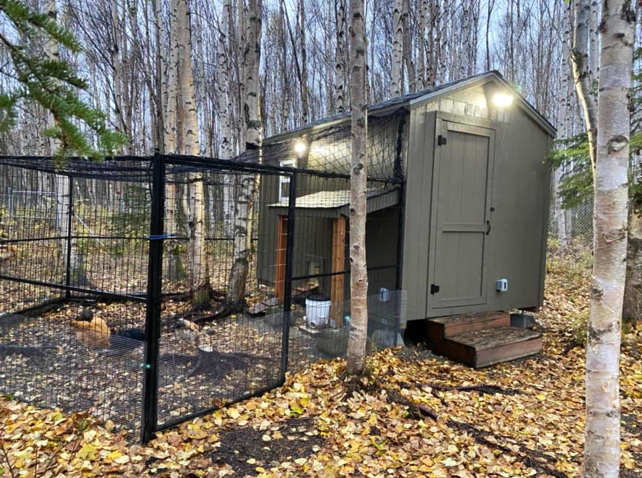
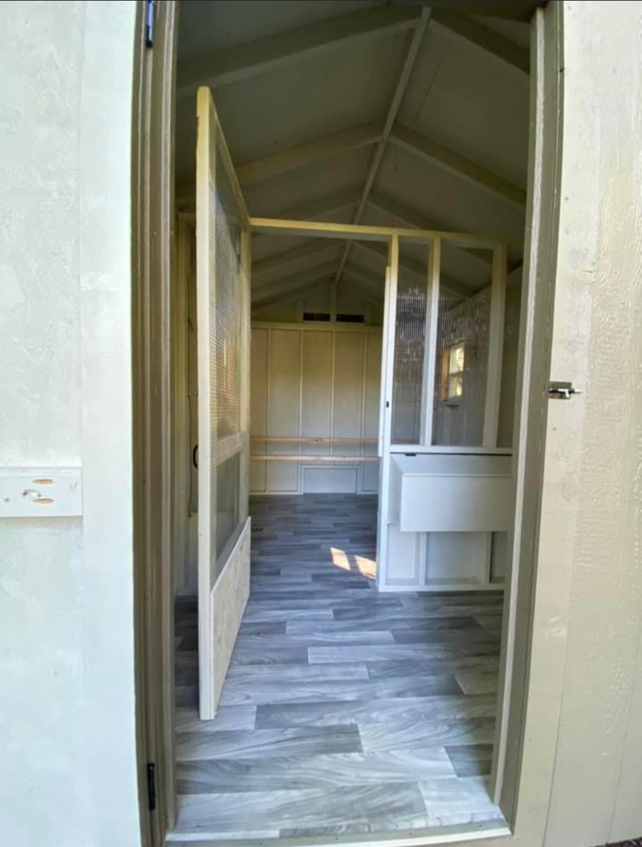
8x12 coop modified from your classic shed plans. 2/3 for the chickens, 1/3 for storage.
by Harmony Munson
Built from Plan(s)
8x12 coop modified from your classic shed plans. 2/3 for the chickens, 1/3 for storage.
by Harmony Munson
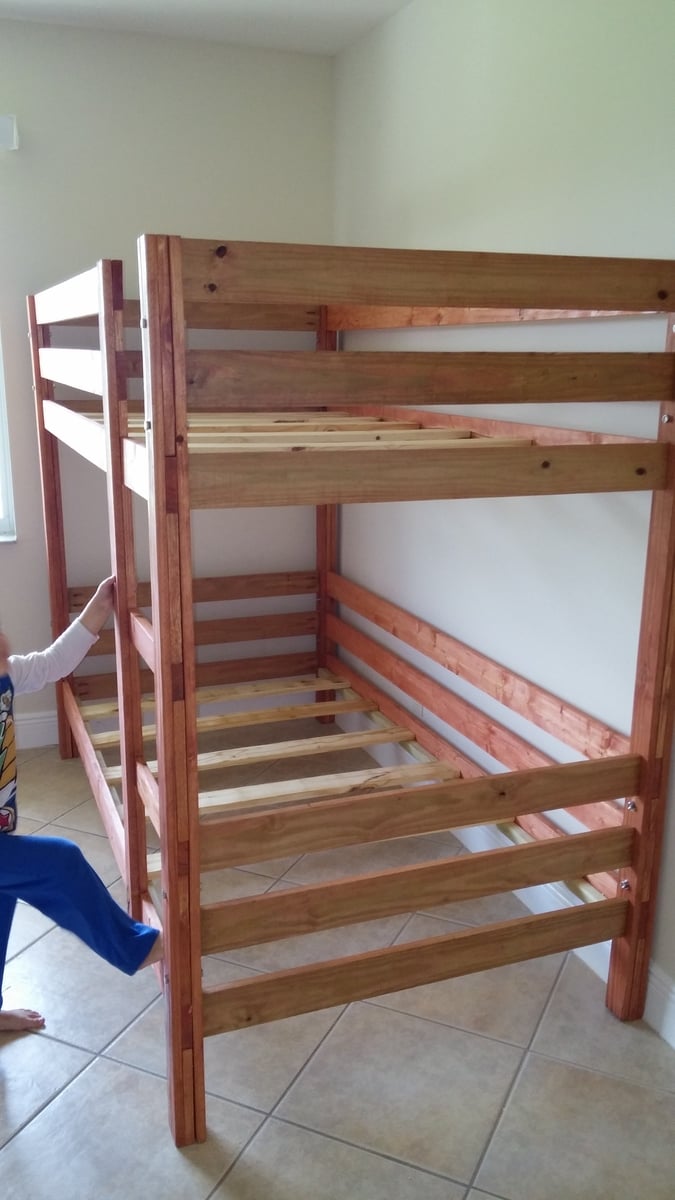
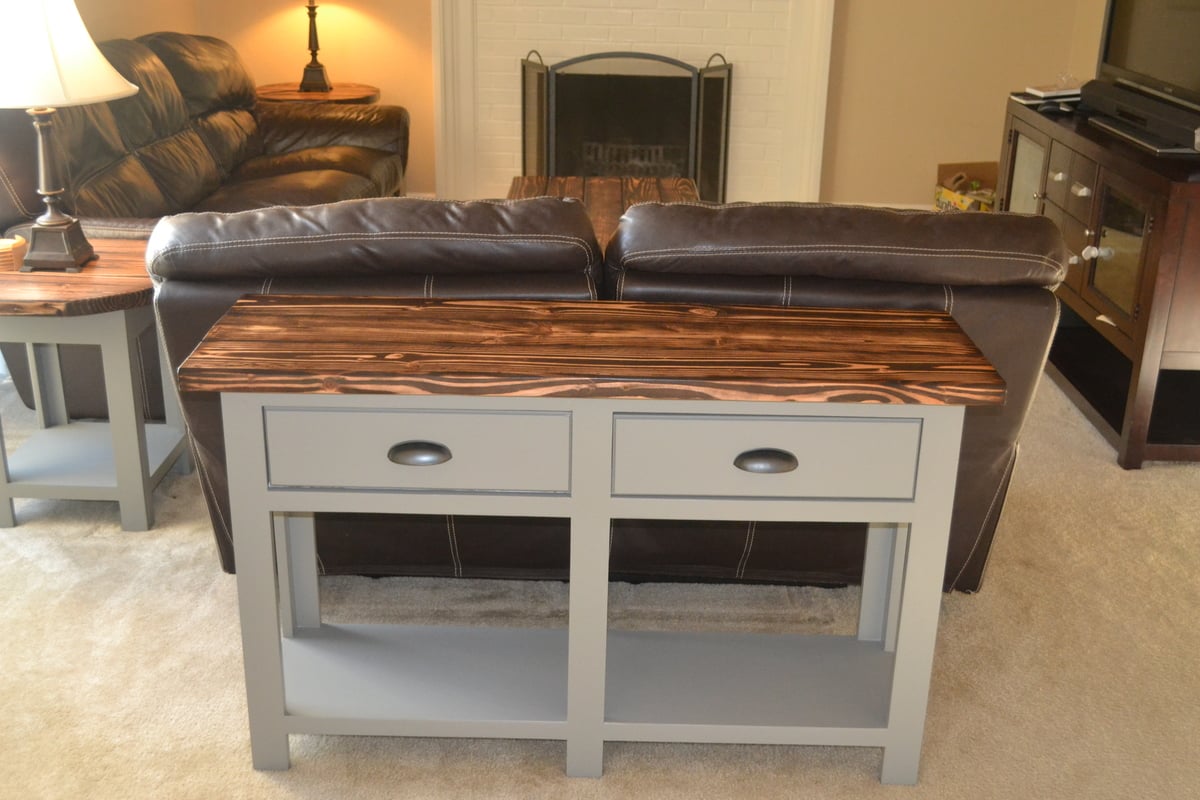
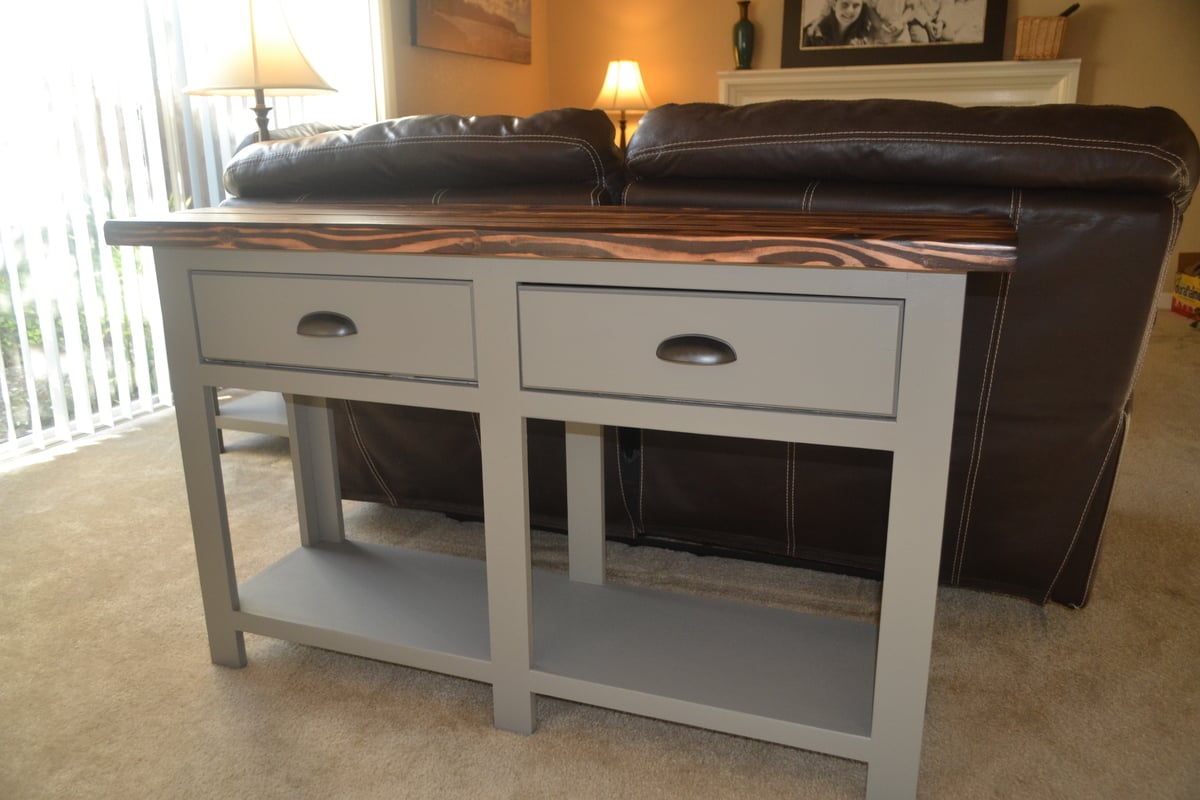
My 15 and 12-year-old sons made two of these for me. Super easy, they followed the step by step instructions which were perfect, easy to read. They made two in only a few hours!

A white spruce base painted with hessian chalk paint and waxed with furniture wax over the top. Topped off with a section of oak block kitchen counter waxed with dark oak wax
Sat, 08/14/2021 - 08:26
Love the table top, with beautifully done corners.
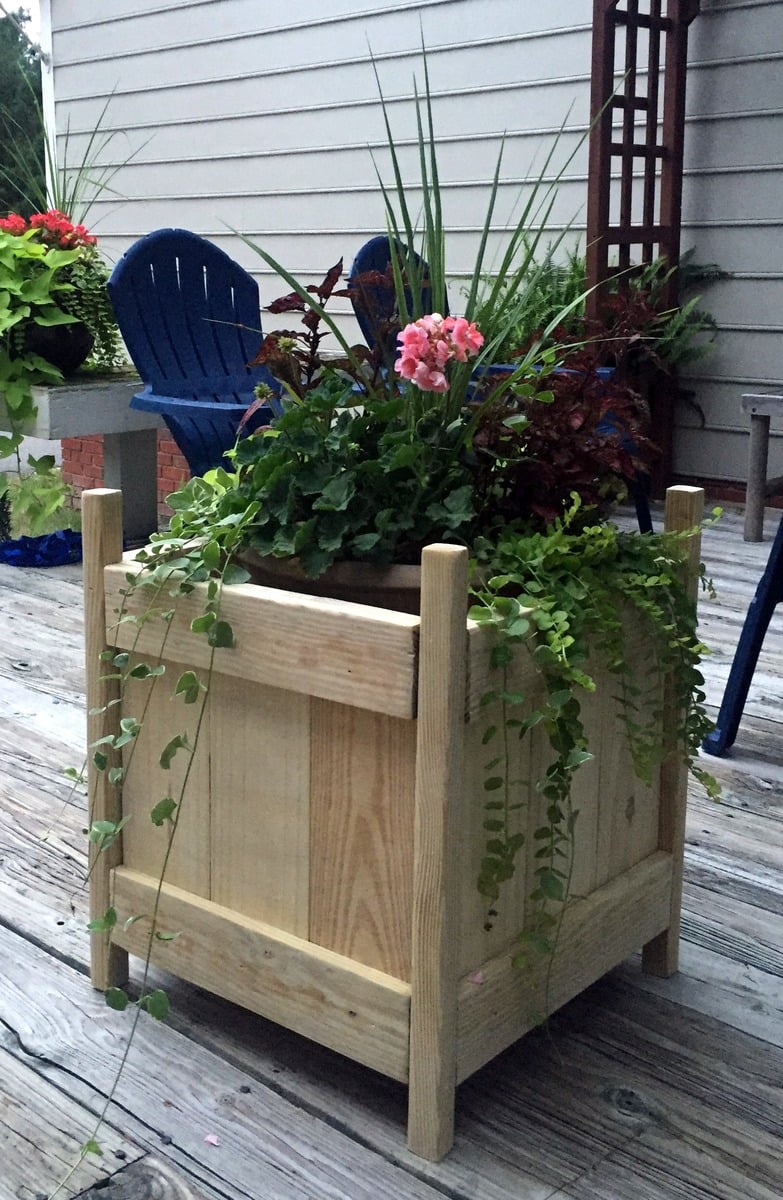
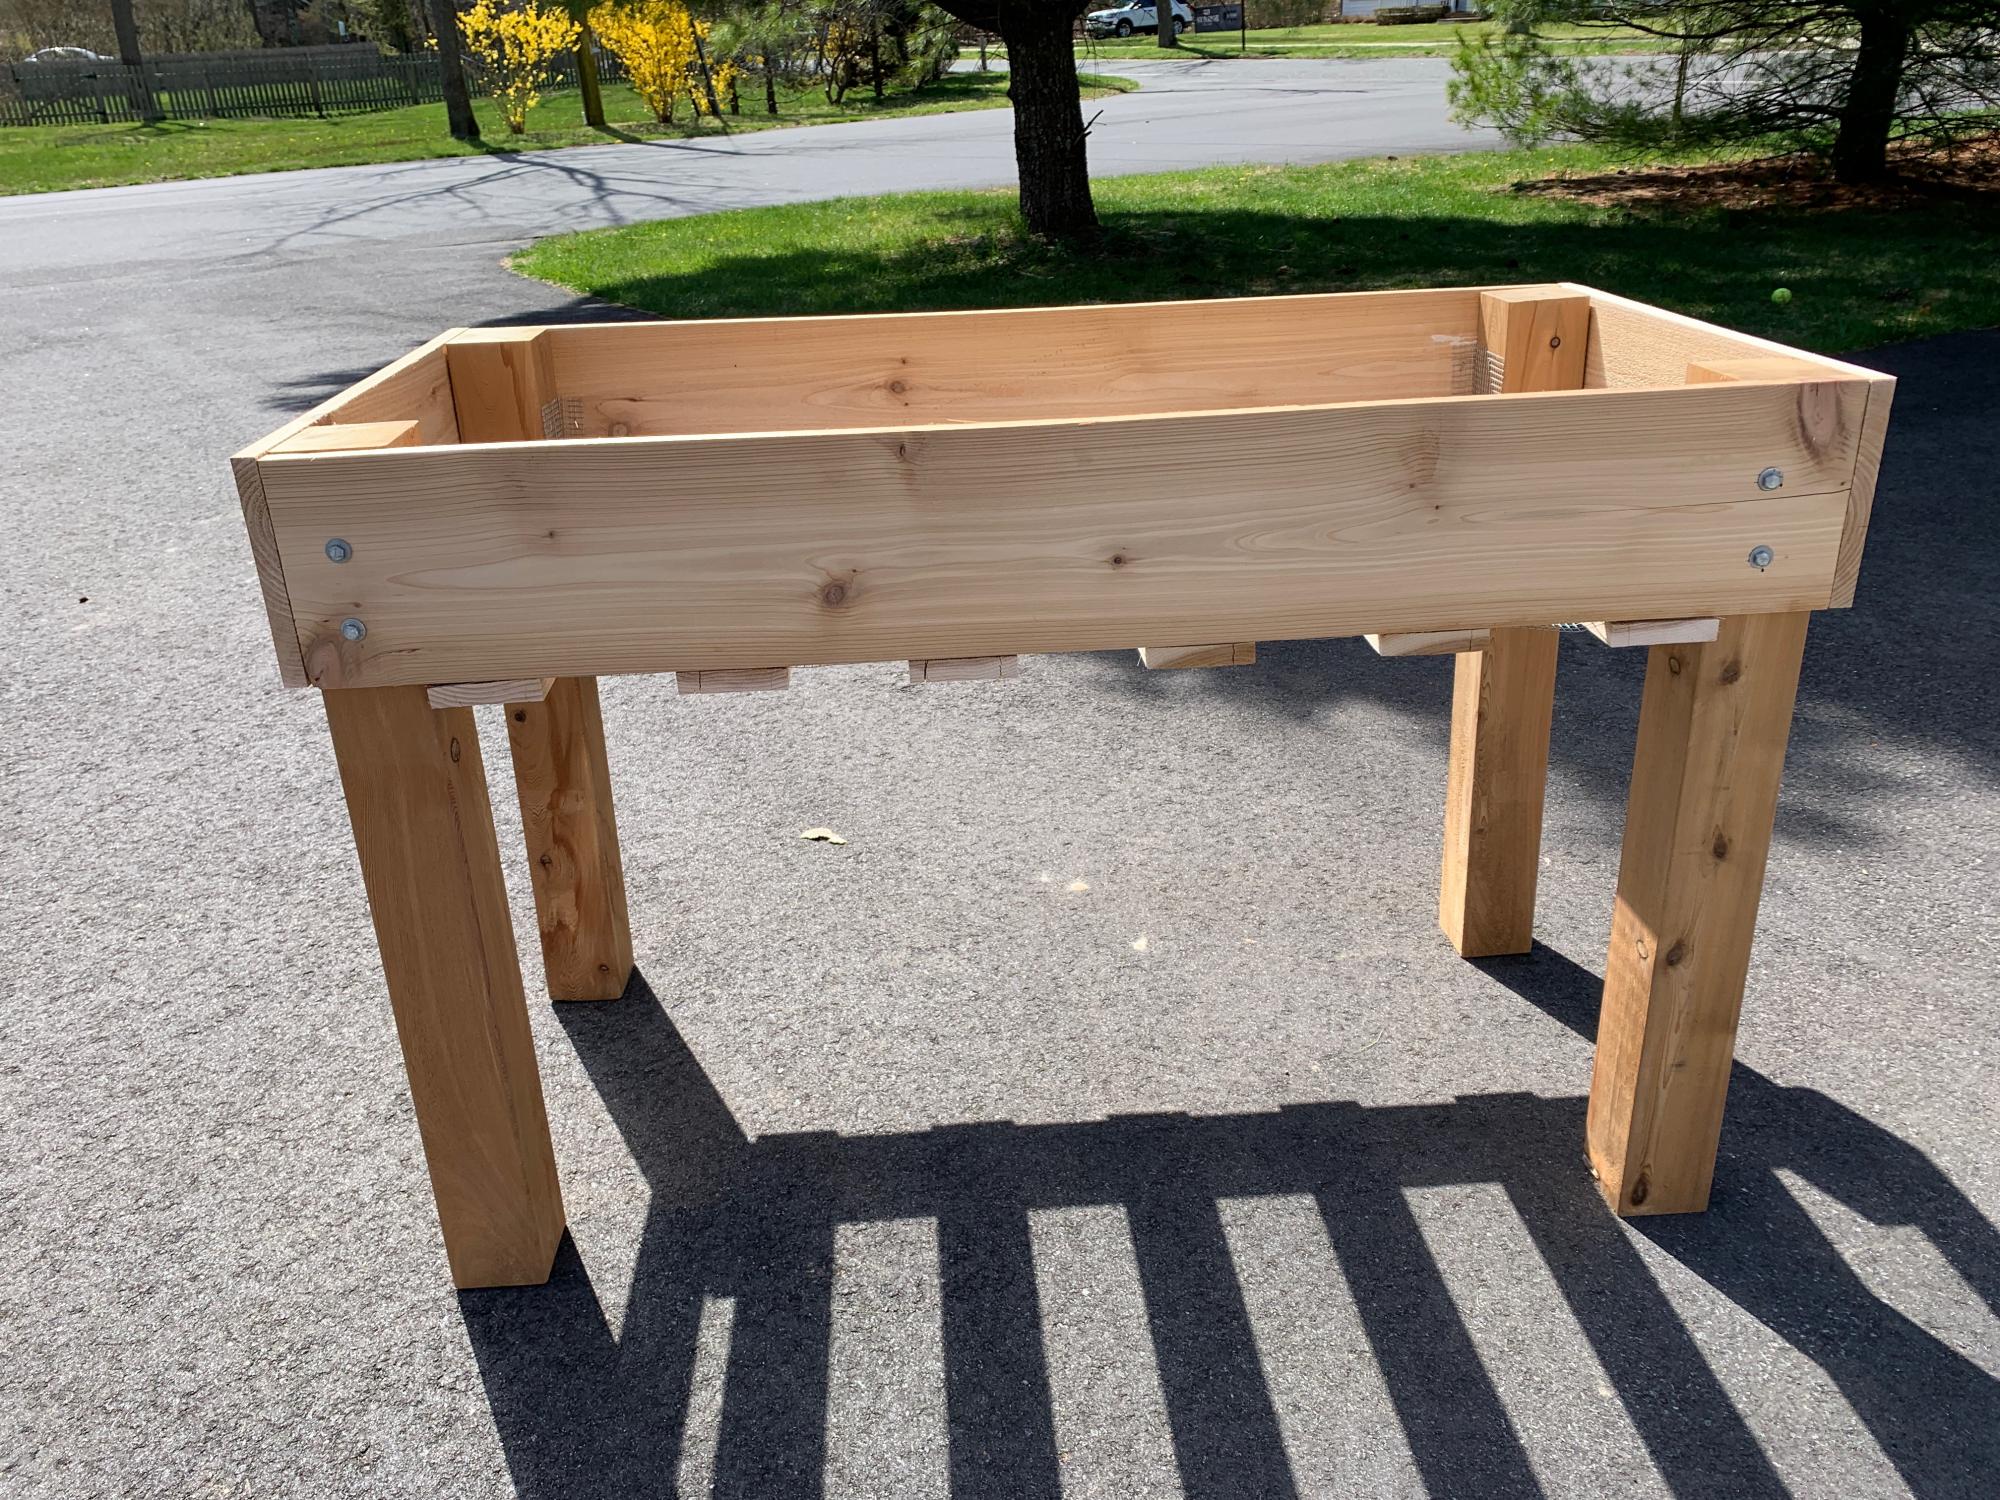
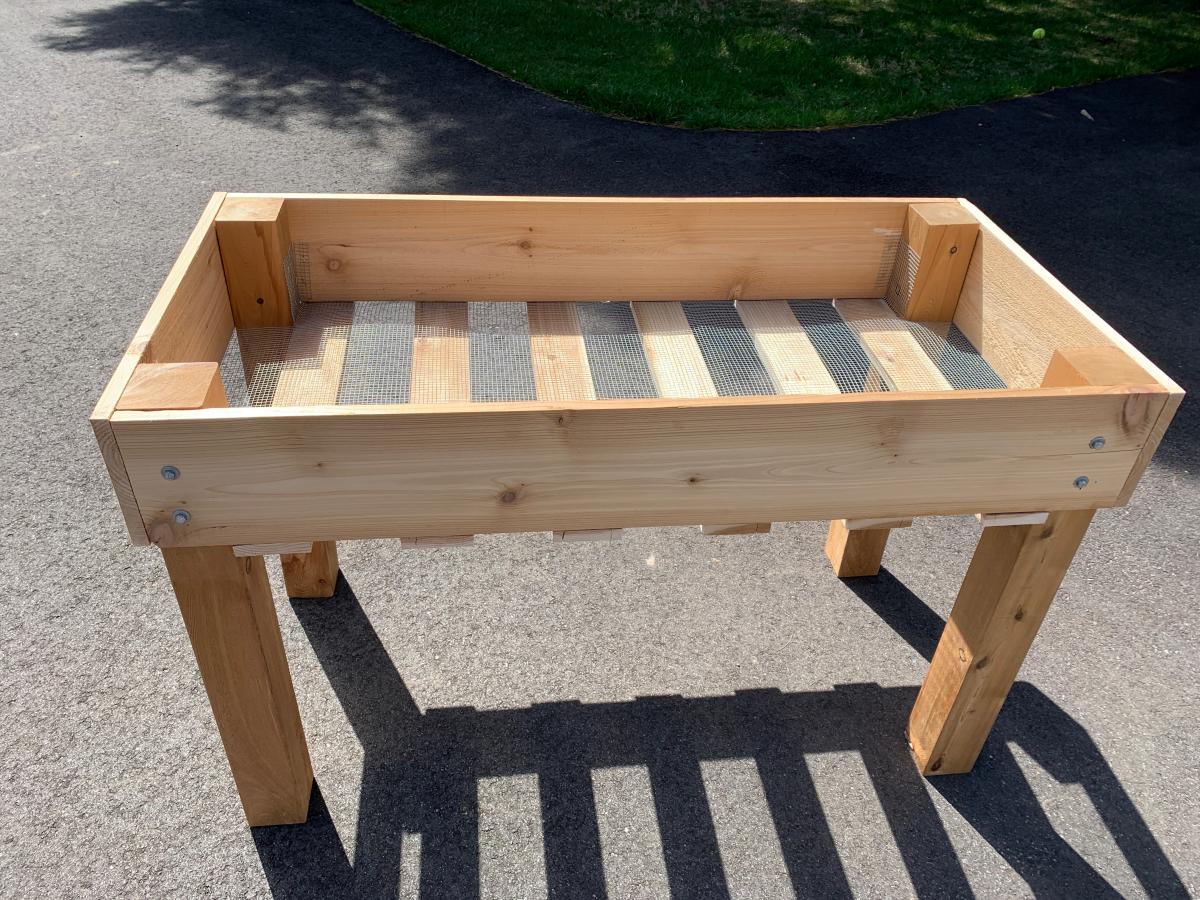
This planter box turned-out looking great! I put it together the first go-round using all kreg-jig screws, but couldn't get the pieces to sit flush with each other, so I took everything apart...and used star-drive screws instead of nails). I have decided that I hate nails.
I used the kreg jig to attach the 4 posts, but then used brackets to attach the rest of the panels -- this worked well! Once I put the slats in the bottom, it was very sturdy.
TIPS: don't be afraid to alter the plan. If you like working with brackets, use them!
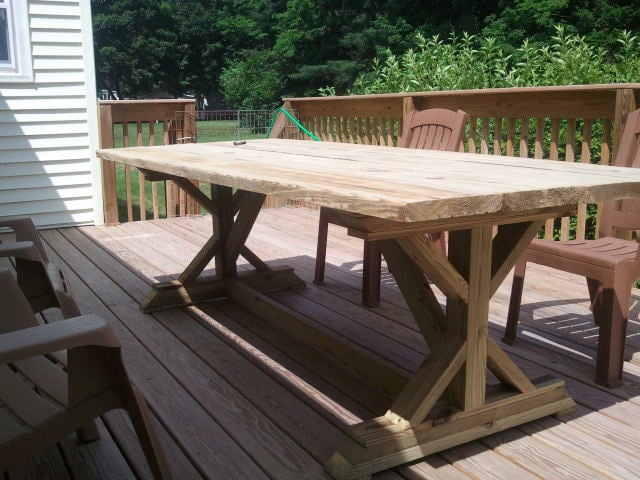
Needed a table for our deck, but didn't want to spend the $400-500 on sets at the store. Followed the plan for the most part and it was fairly easy to build. The only thing I did differently was in building the ends was put the "X" supports in after making the "I" shape in case I was off with my cuts.
Spent an hour cutting all the pieces on a Friday night and about 3 hours assembling Saturday morning. Table was ready to eat lunch on!
Wed, 06/20/2012 - 12:12
This is amazing! I really want to build this, but the plans seemed really confusing to me. Did you use a kreg jig for this?
In reply to This is amazing! I really by benfoldsfivealive
Thu, 07/05/2012 - 12:05
I did not use a Kreg jig because i dont havd one and I didn't try to hide my screws. I did pre-drill all my holes so that I didn't split any boards... and my dad is a carpenter so he helped me attach the 2 cross pieces (which is the only part I had trouble with) to the ends, which we did by just angling the screws in. I will try to take a few more detailed pics in the next few days so you can get a better idea of how I did it.
In reply to This is amazing! I really by benfoldsfivealive
Wed, 06/20/2012 - 19:15
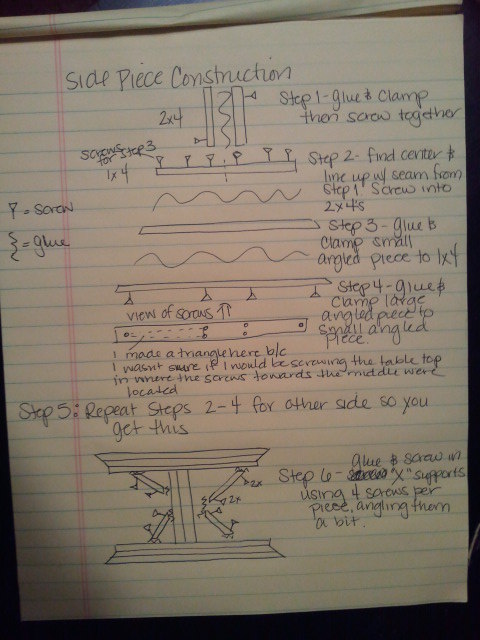
Posted an explanation of how I made the side pieces. Hope it helps!
Mon, 07/02/2012 - 03:37
Hi, great build !
Could you please explain how and from where did you screw the curved pieces at the bases ?
same question for the table top boards ?
Thank you!
In reply to Quick question by I Rub (not verified)
Thu, 07/05/2012 - 12:03
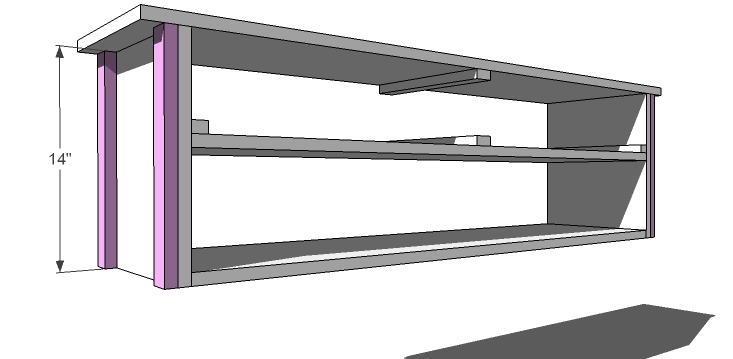
If you look at the first drawing I have attached it will show you where to screw the curved pieces in. I screwed through the 1 x 4 to attach the smaller curved piece. Then I would screw through the larger curved piece into the smaller curved piece to attach it.
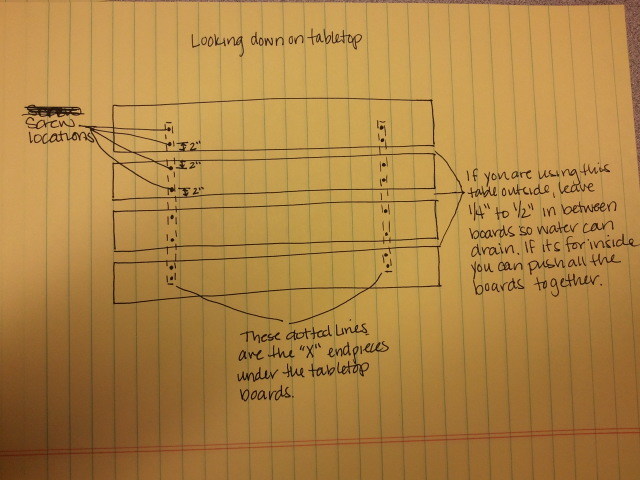
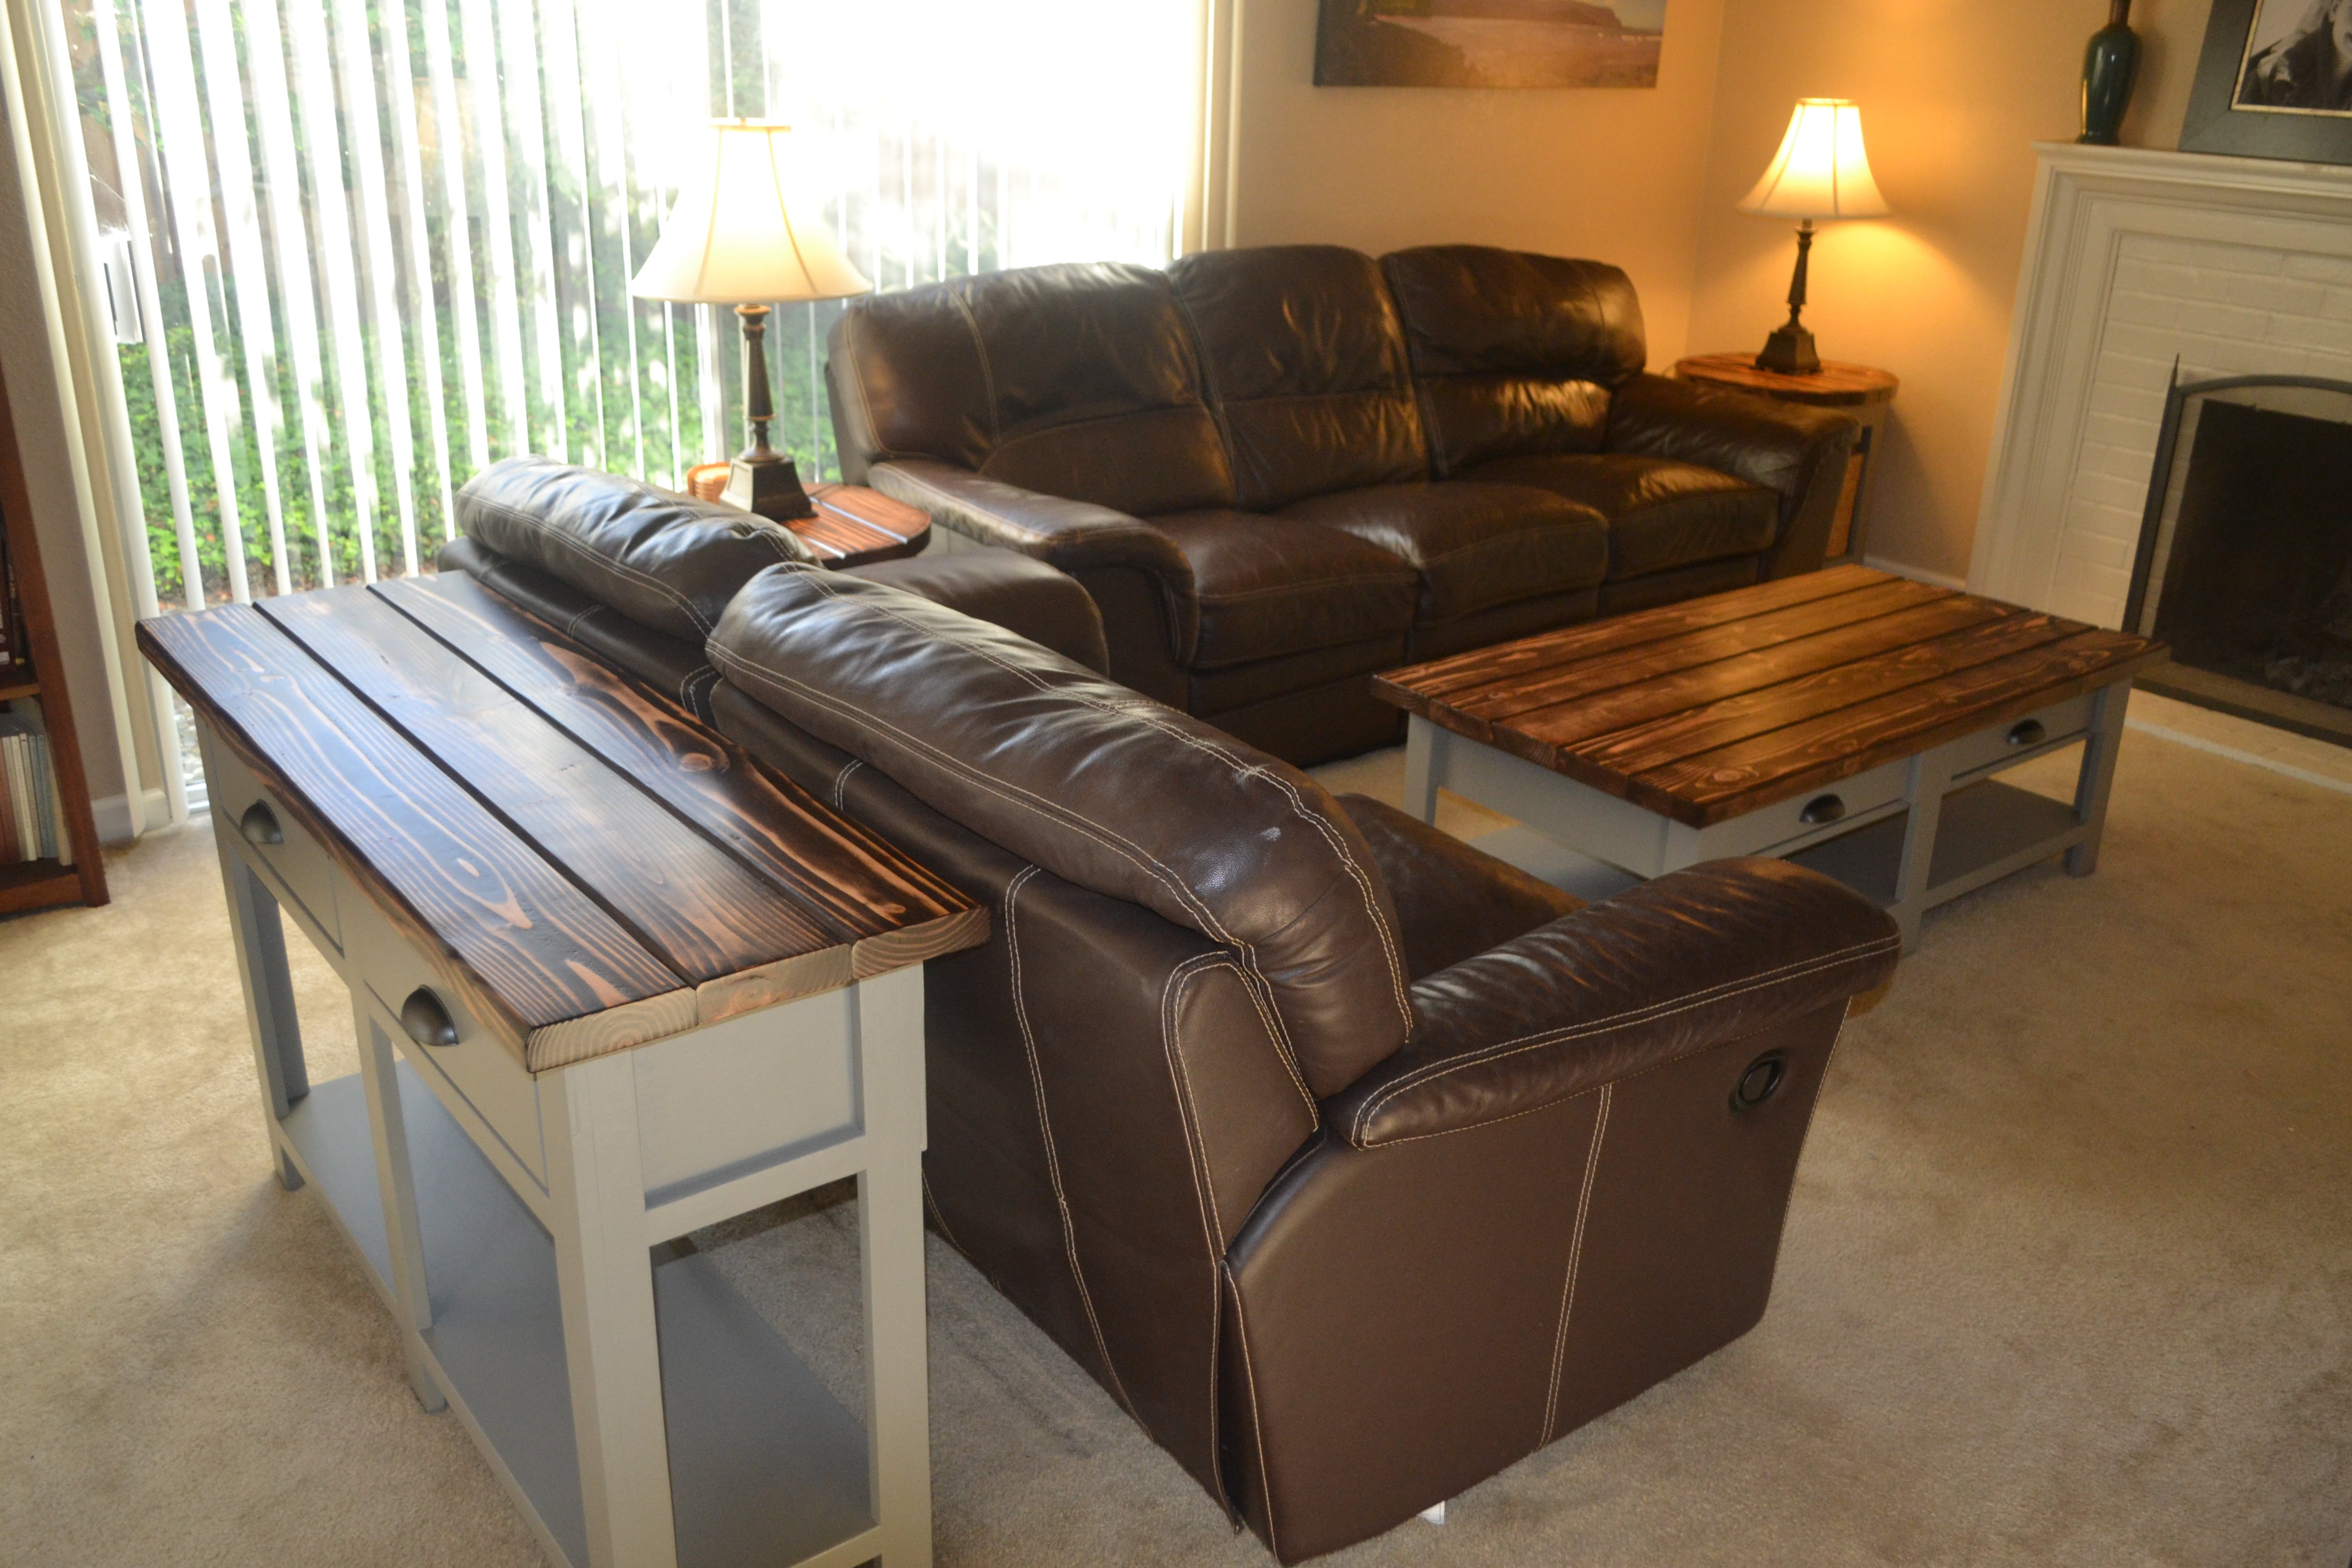
The table top pieces I screwed in from the top into the side pieces that you build first. I used 2 screws per board per side. The 2 boards in the middle should have screws at least 2 inches in from each side. The 2 boards on the end will have one set of screws 2 inches from the side that is next to the boards in the middle. The second set of screws will end up in about the middle of the outside boards. I'm going to attach another drawing to explain. Let me know if this helps.
Mon, 07/09/2012 - 11:22
I plan on building the table this week, will use your advice. Much appreciated.
Sun, 07/15/2012 - 16:20
Thank you for posting this. I started the project yesterday and I started with putting the cross braces on first and it did not turn out leveled. I thought that I would try to put it together first and then add the cross braces but was scared if it would hold. Thanks to your post I feel more confidant about it. I am going to make a run to the big box store and start over. Its okay because this is my very first build and I am just happy with my first 45 degree cut with my new circular saw ;) I guess its a learning process.
Thanks again for your post,
Gus
In reply to Thank you for posting this. I by Gus (not verified)
Thu, 07/19/2012 - 07:58
Glad I could help! Good luck with your build!!!
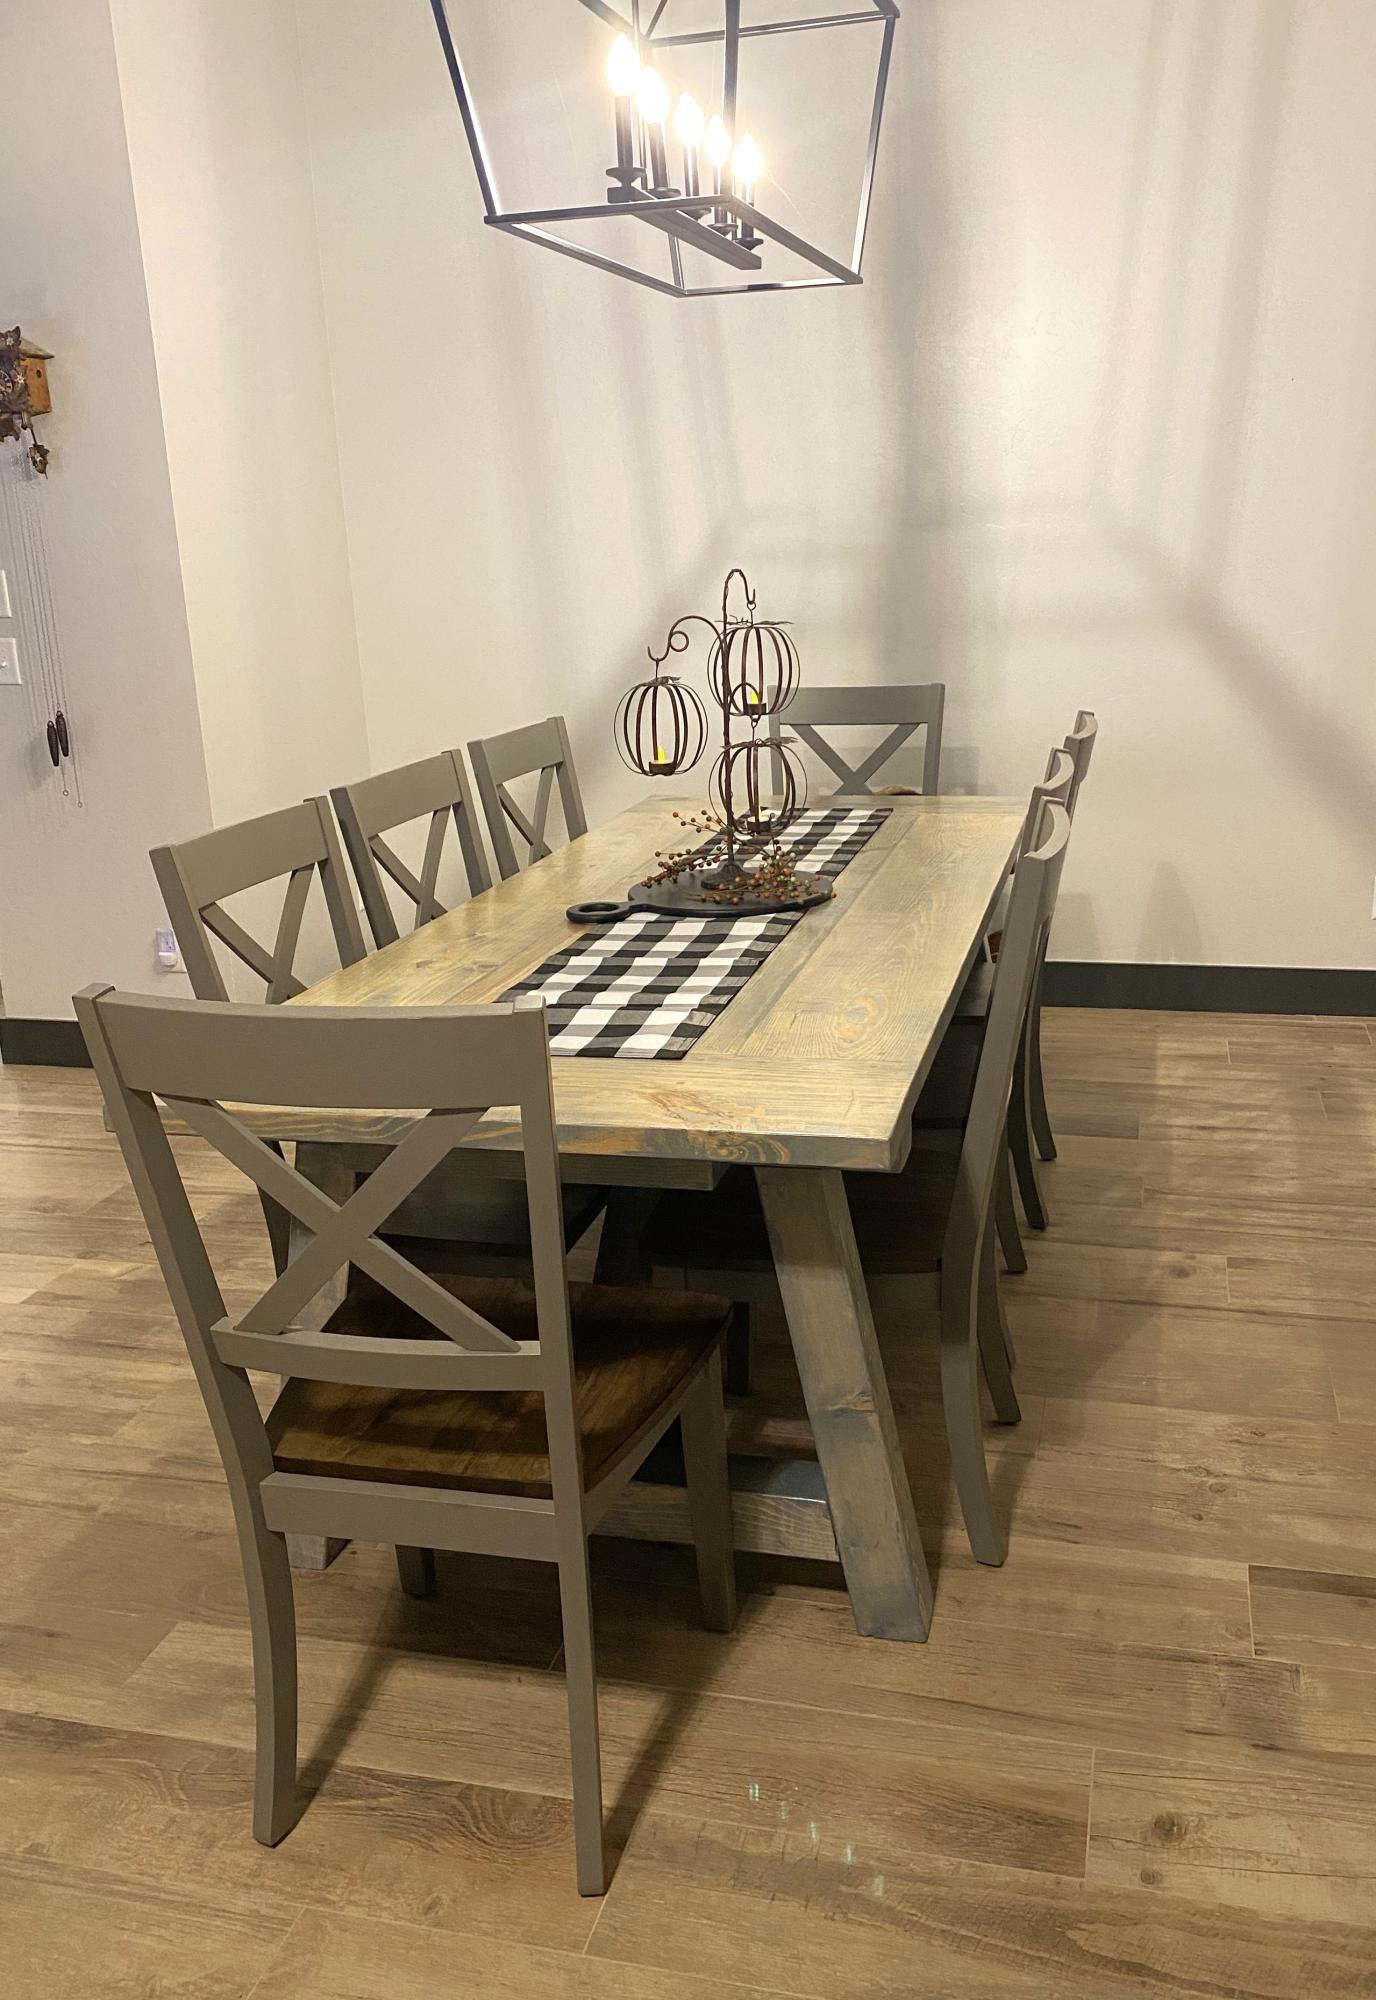
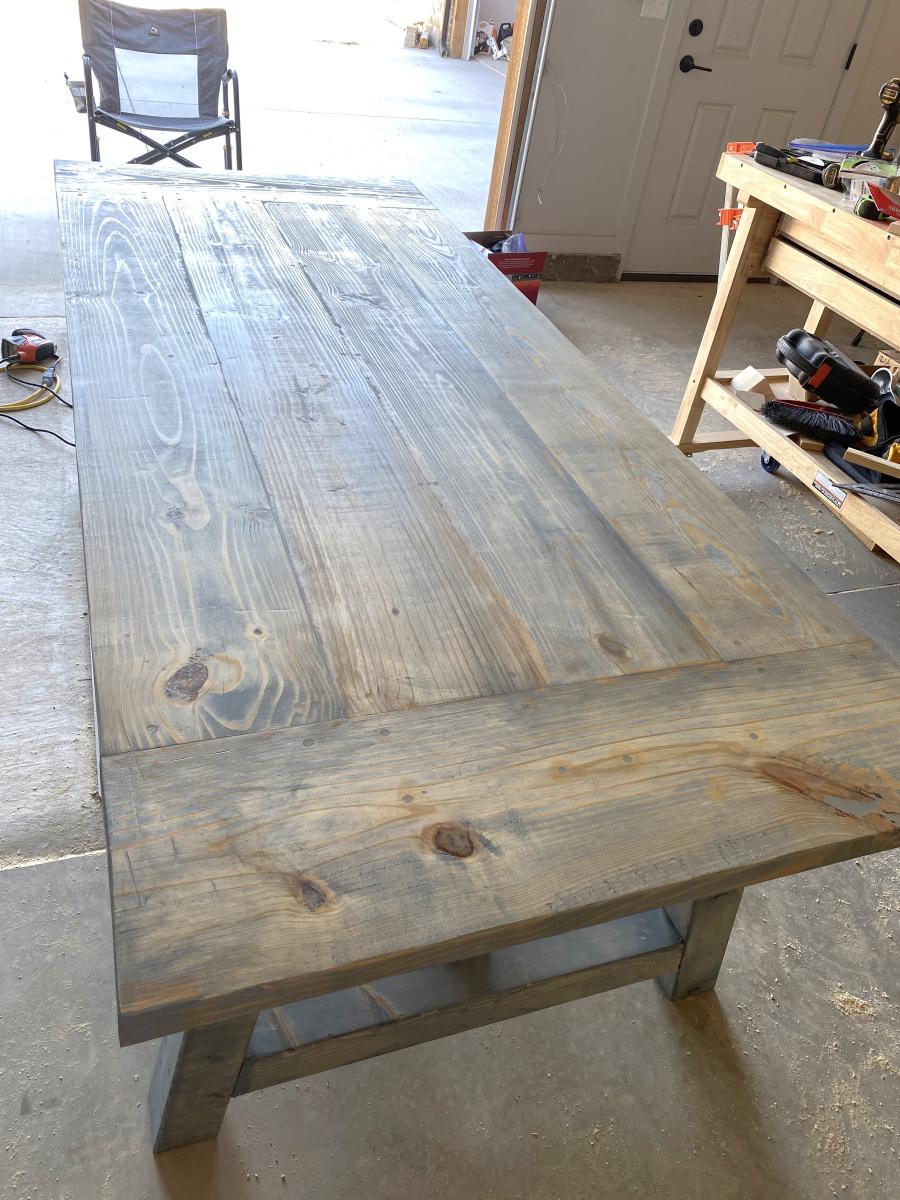
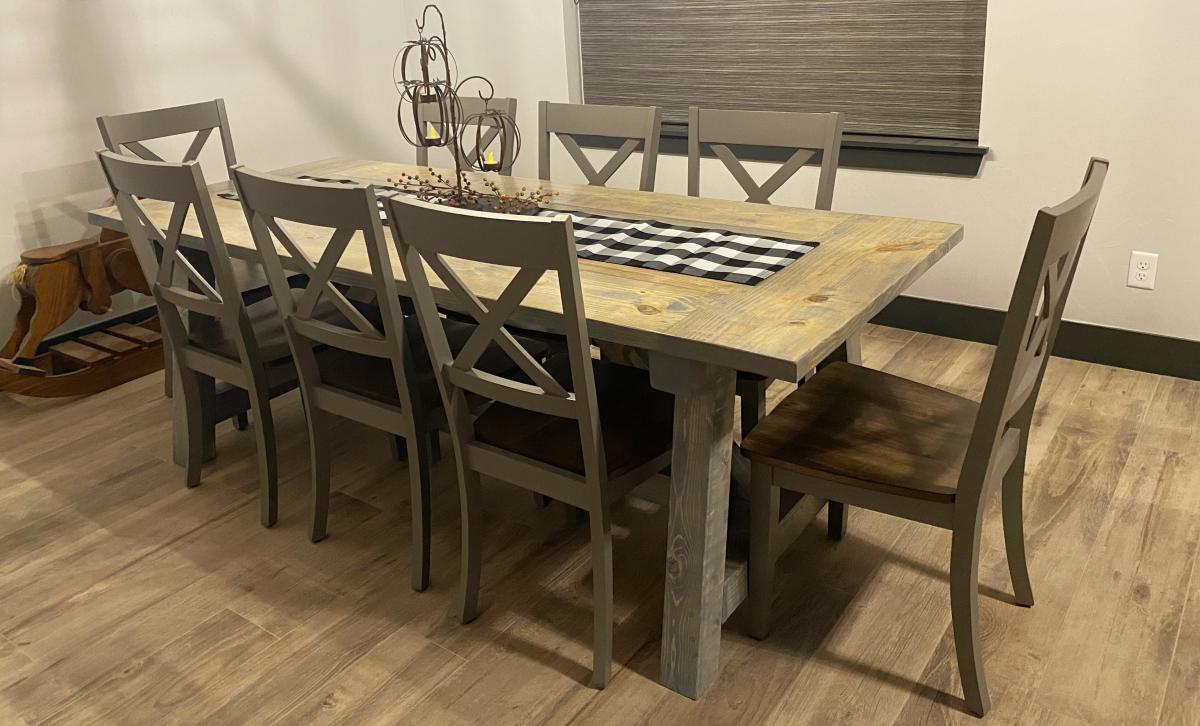
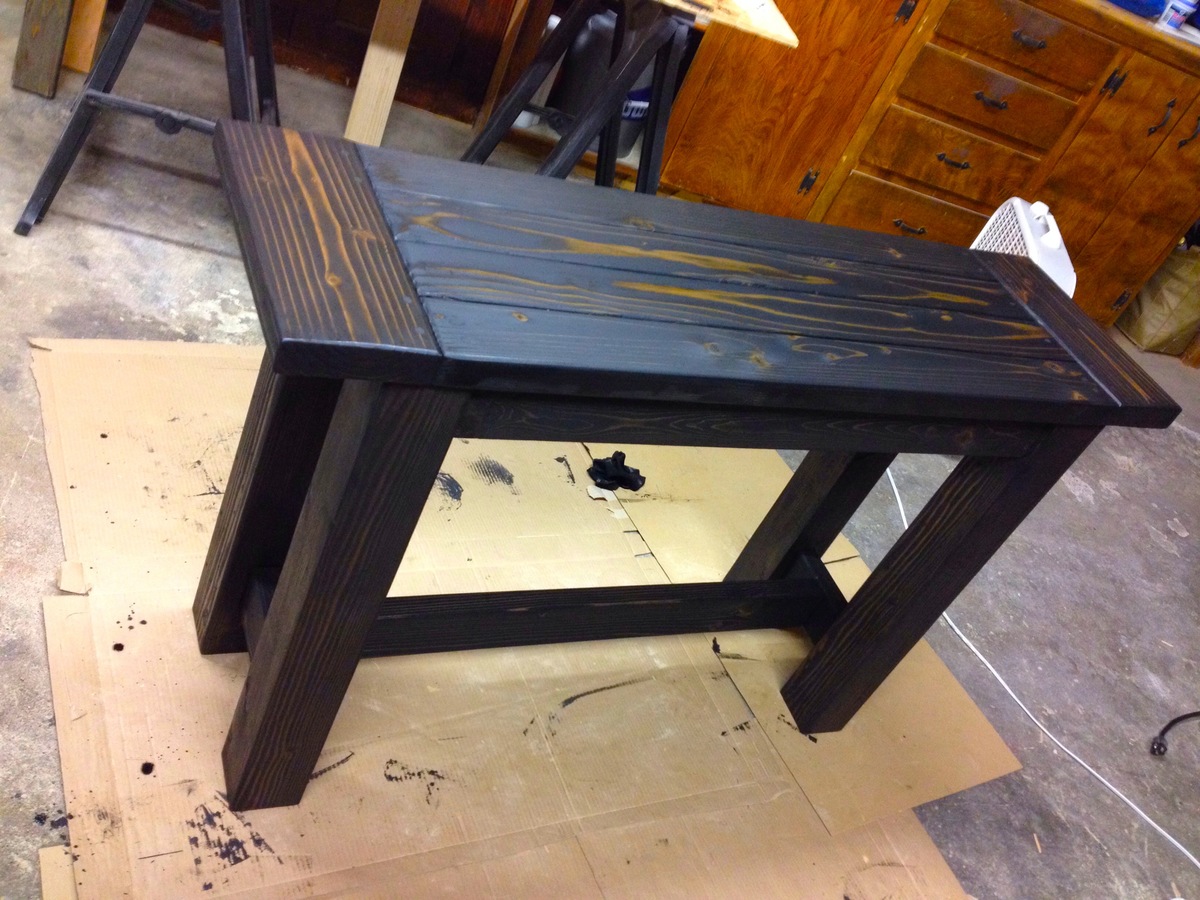
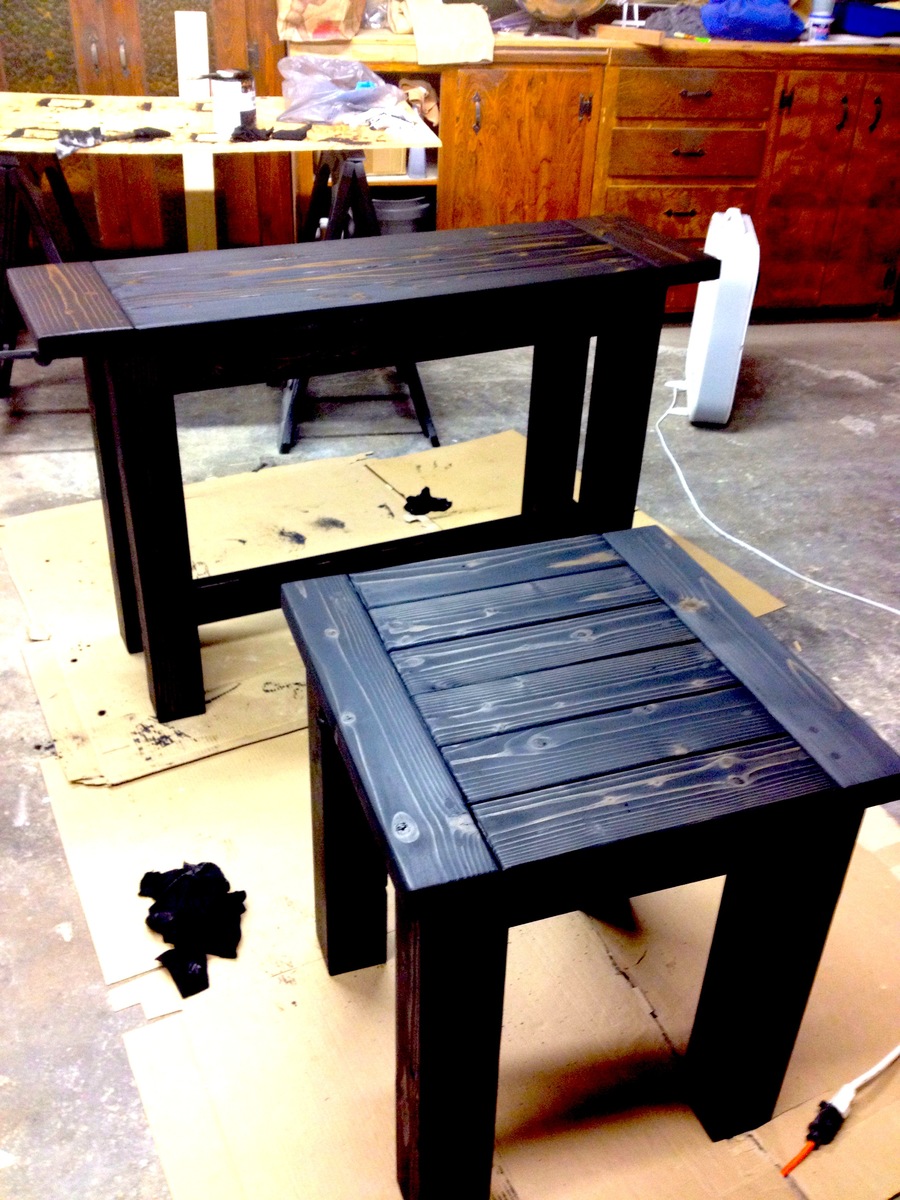
Our 4x4 Truss Beam Table made by my husband for our new house. Stain is Minwax slate gel stain.
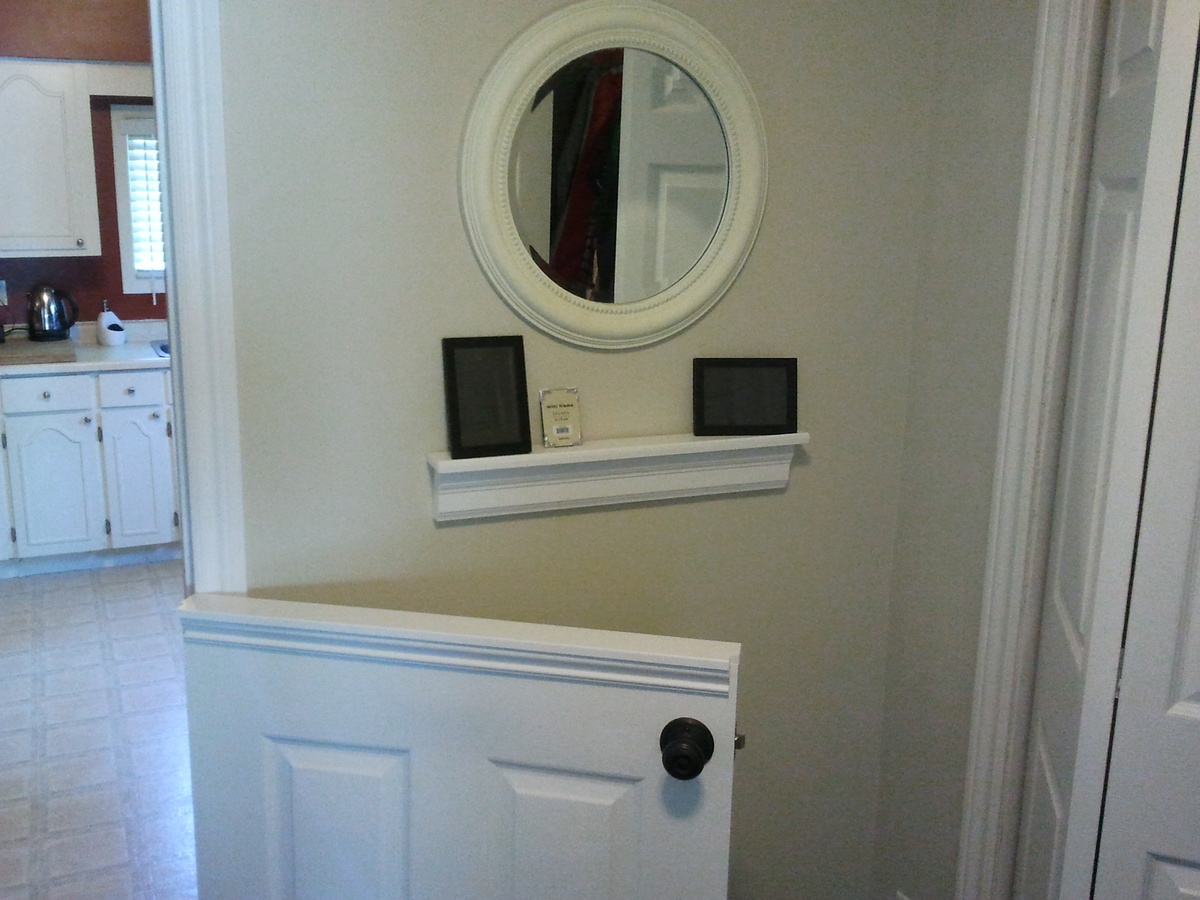
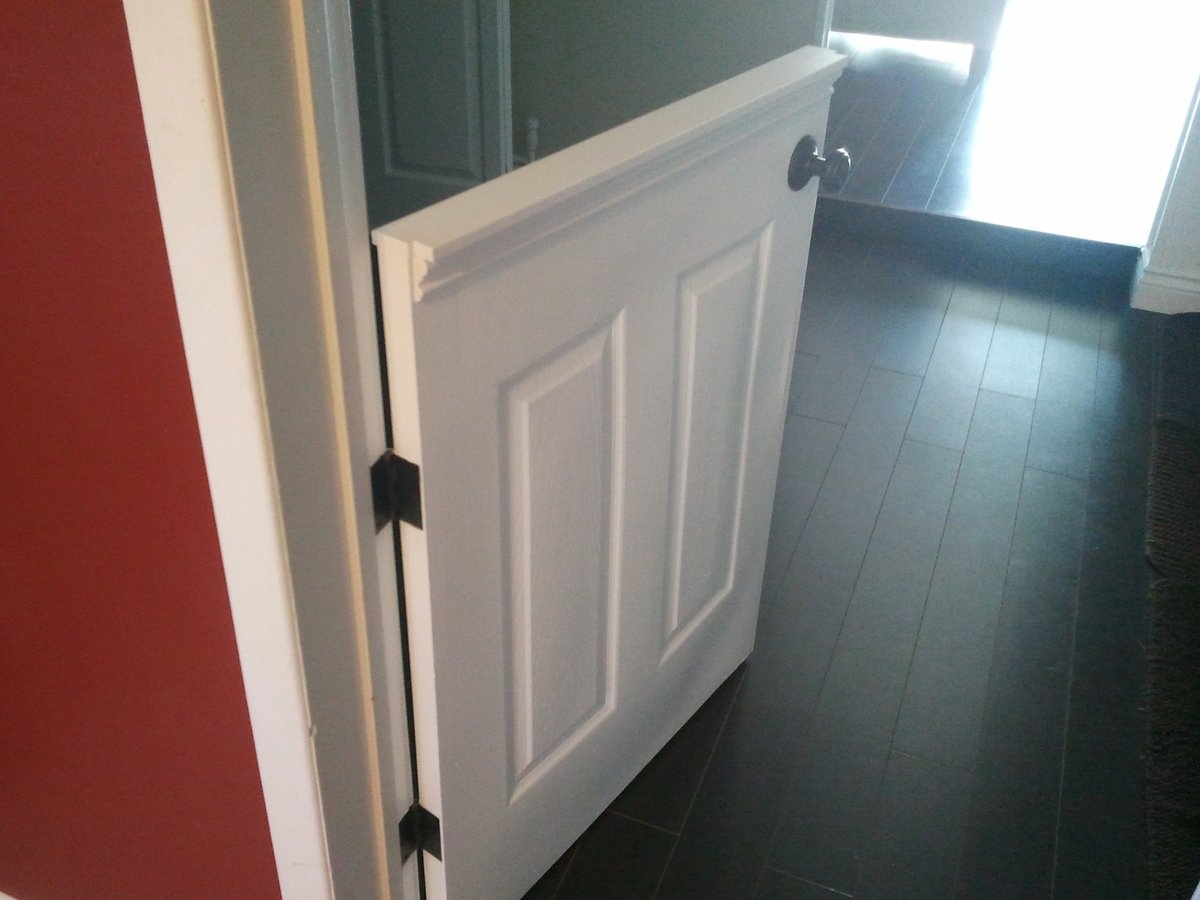
I installed a half door to isolate our dog from the laminate flooring when he sleeps at night.
It was only $25 for the hollow core 6 panel door from HD, which got cut in half.
$25 for the passage knob.
$10 for top plate and trim
Less than $5 for the hinges.
Not having to replace the laminate flooring priceless!
Some Tips:
The $25 door is not prehung. Buy the $14 dollar irwin door jig to install the door "http://www.homedepot.ca/product/door-lock-installation-kit-carbon/904157" It will come in handy if you are remodeling and installing new doors to replace those old flat panel doors. You will also have to chisel out the hinges.
When installing and marking the hinge locations in the door frame shim the door a 1/4" off the floor.

A great weekend project...the "love swing"! I used the plan from Ana for the swing seat and added two arm rests from left over 1x6, rounded them off and sanded.
I cobbled together an A-frame to hang everything, made from five 8 foot 4x4s and two 8 foot 2x6s laminated together for the stretcher. Assembled with 1/2" galvanized carriage bolts and hung with 1/4" chain.
Definitely going to want a good miter saw for the A-Frame angles (the top ones are a bit tricky to get everything lined up)
Love it! Thanks for another great plan Ana..and of course..Shanty2Chic!


Kinda new at working with wood but I enjoyed this one and did it in under a day. I also just recently built a complete wooden fence before I did this so building frames was fun.
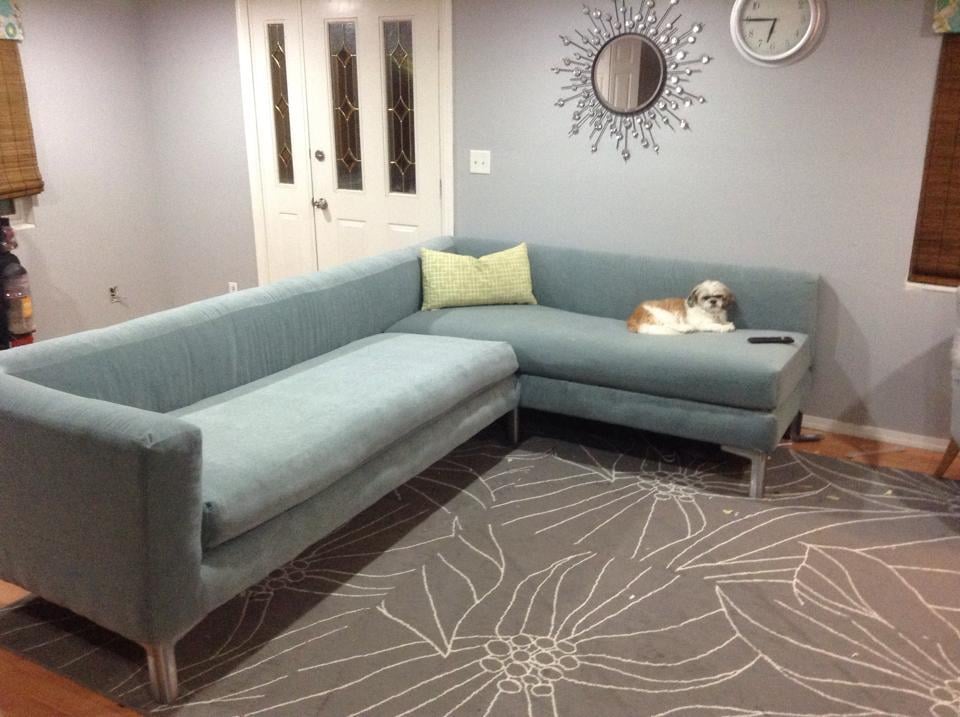
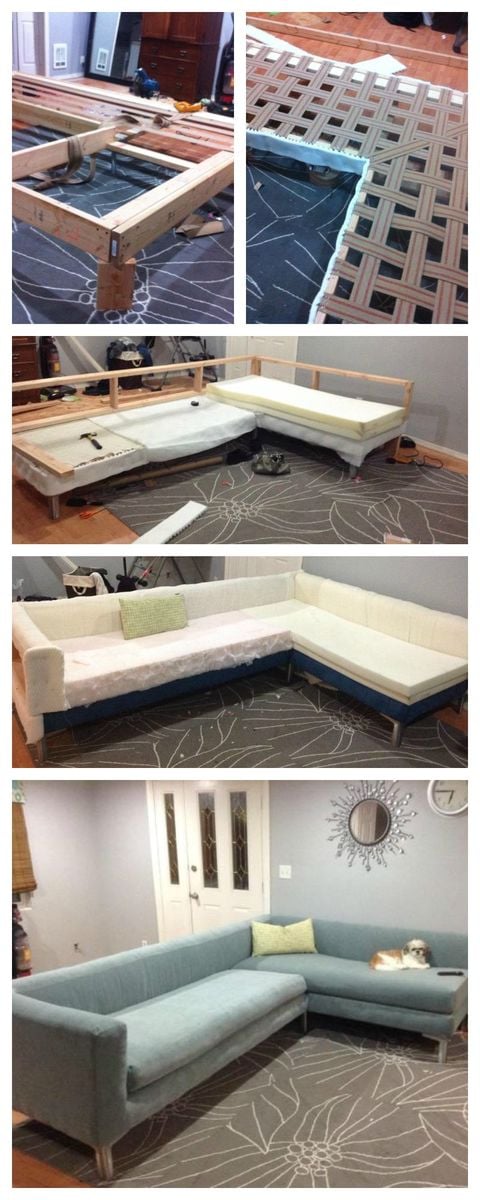
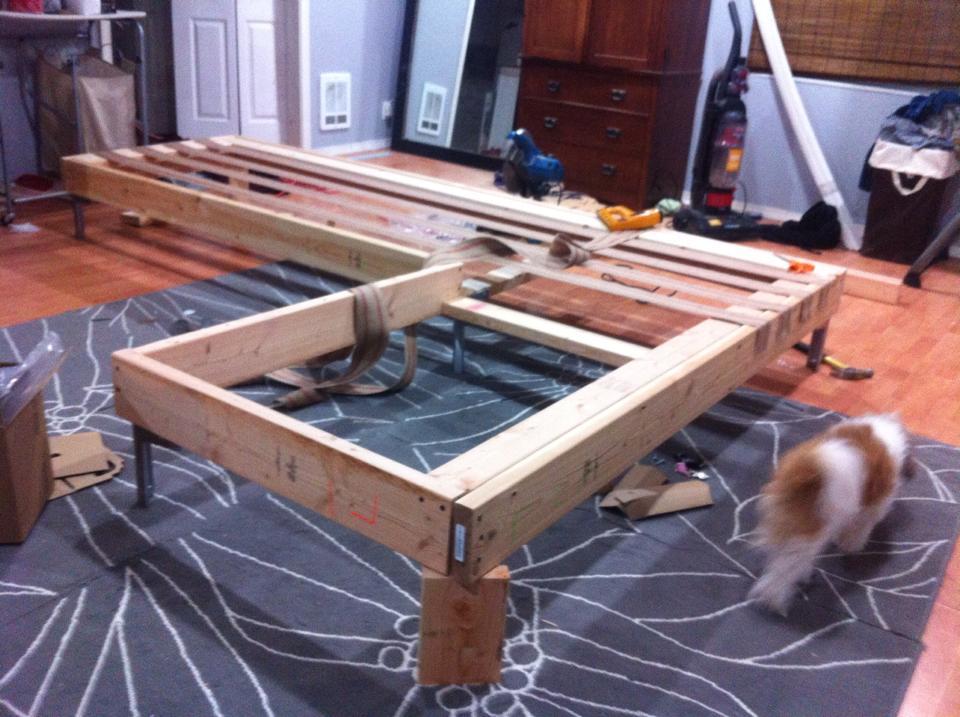
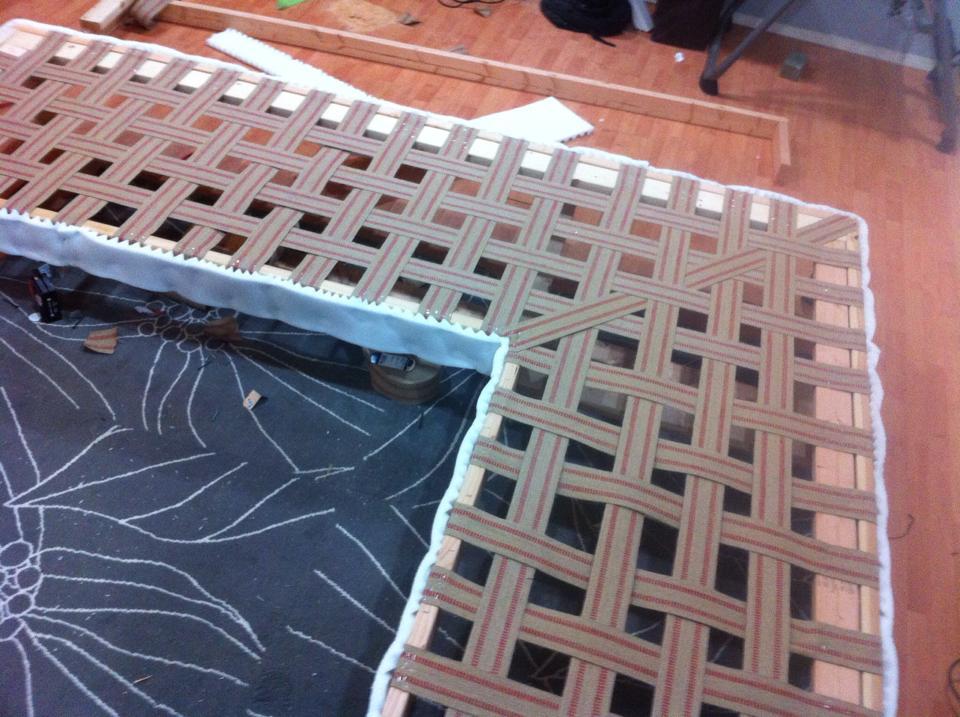
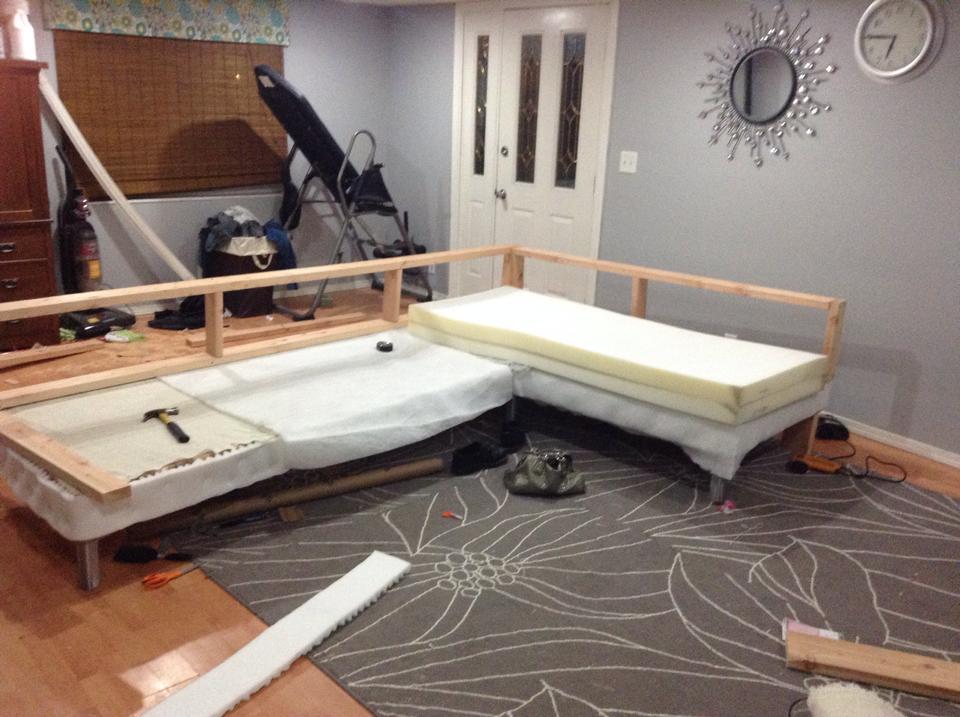
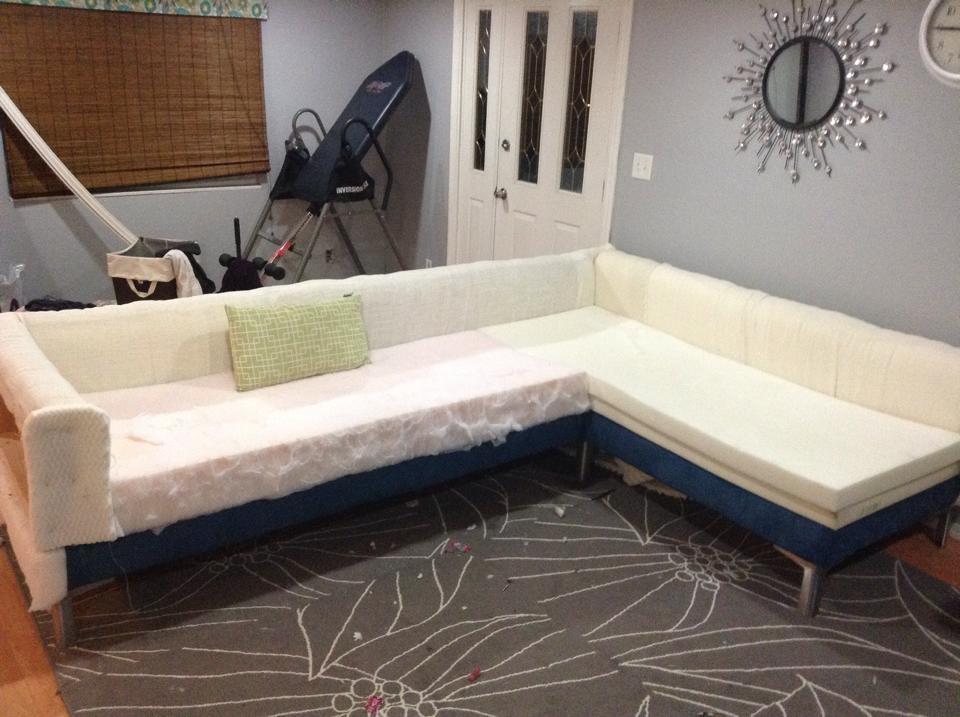
I looked all around my town for a sofa that meet my needs. I wanted something with tall legs, modern lines and fit my living room. I did not have $3,000 to buy one online so I said to myself why not???

Sat, 07/25/2015 - 12:28
You are my hero ! Your modern diy sectional is amazing, love the blue fabric! Thank you so much for sharing! Ana
Mon, 08/03/2015 - 14:52
I've been looking for plans for a big sectional this would be perfect!
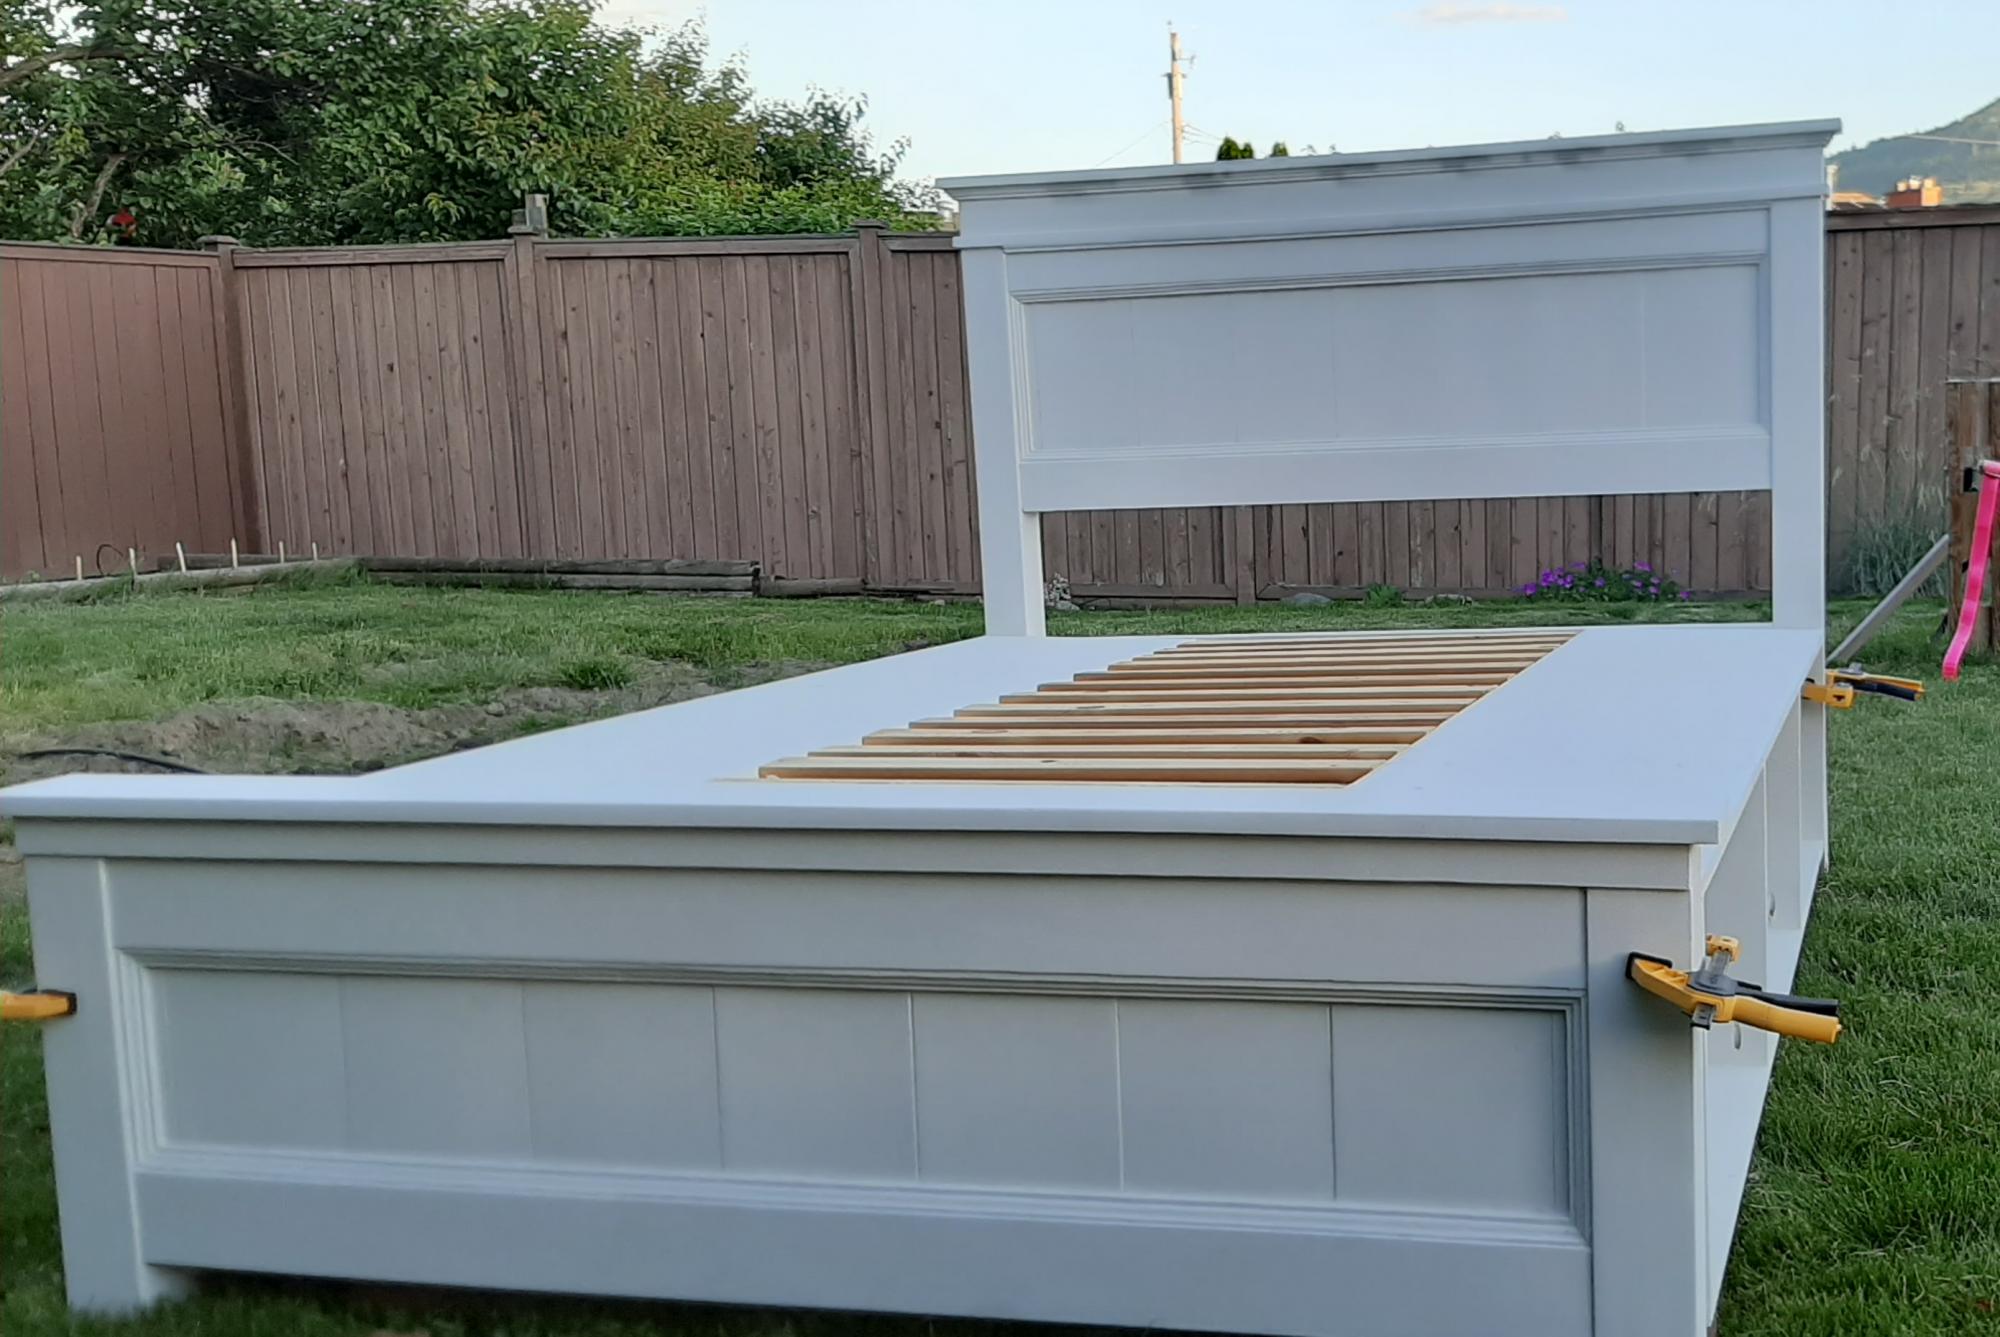
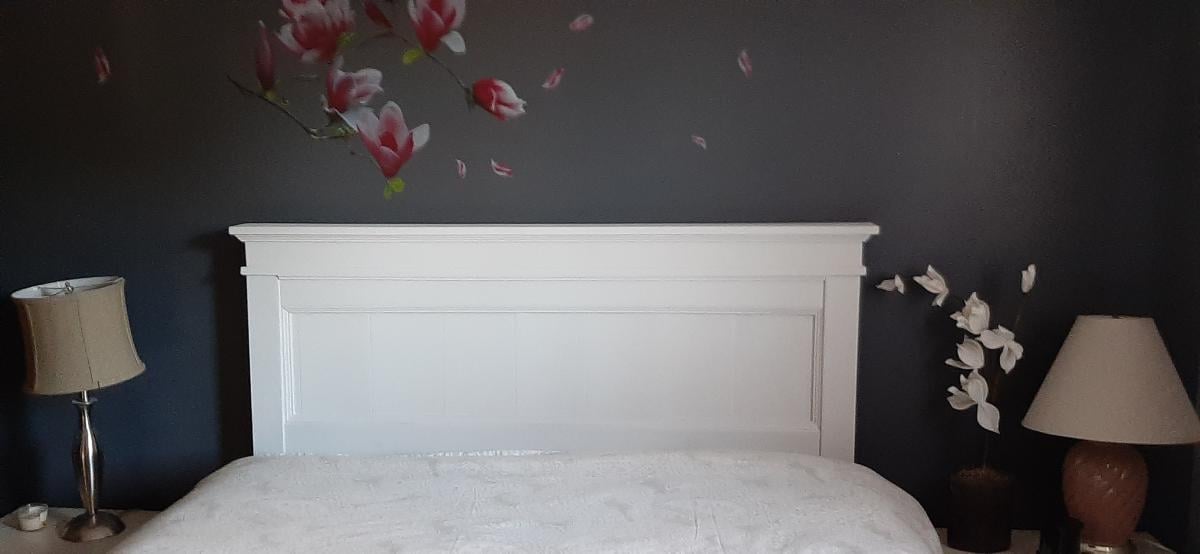
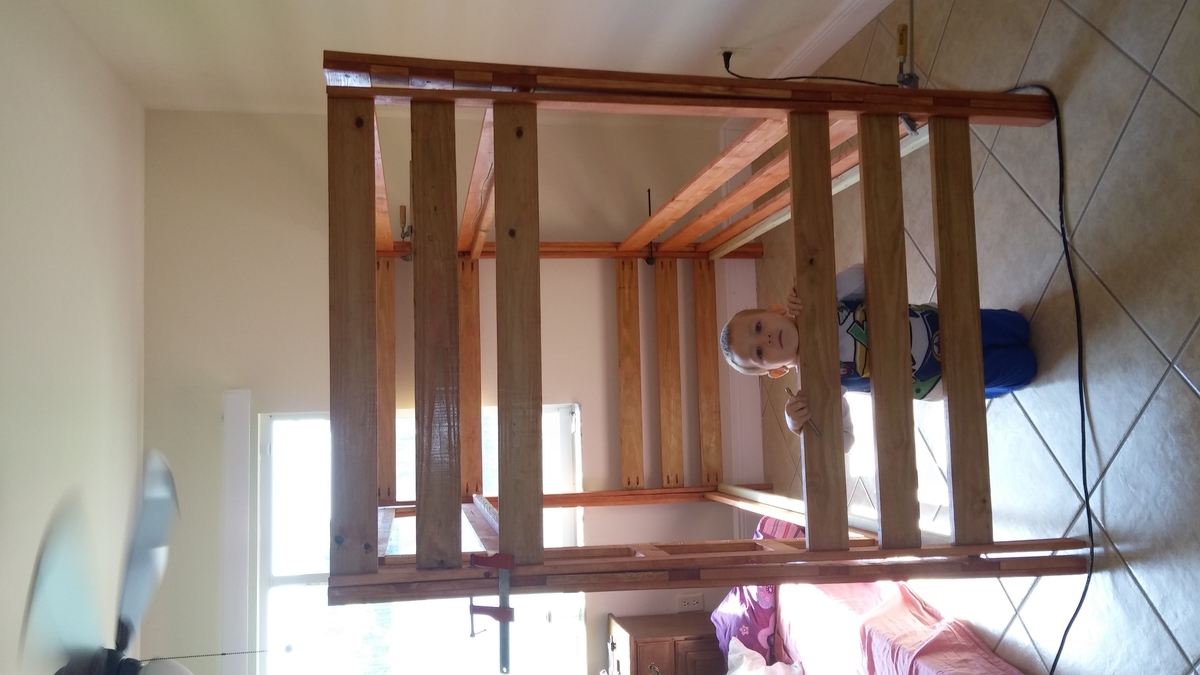
I used wood from an older Ana white project of a loft bed my daughter had out grown. I liked the look of Ana's Mom bed but wanted storage so I modified the plans slightly. I will add drawers later.

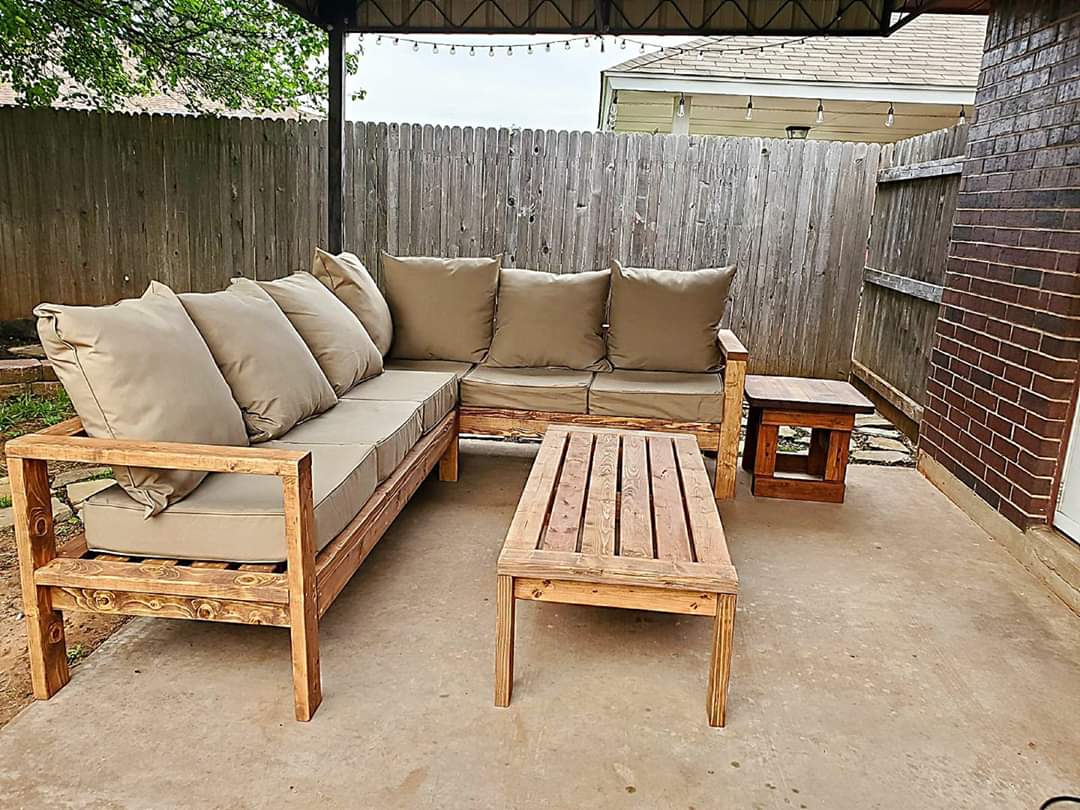
Loved these plans! Was my first project I tackled trying my hand with a new hobby of wood working to stave off quarantine craziness :-) finished project looked awesome and got me started working on other plans on the site.
**note**
Side table was just sanded and refinished, wasn't built just tried to match.
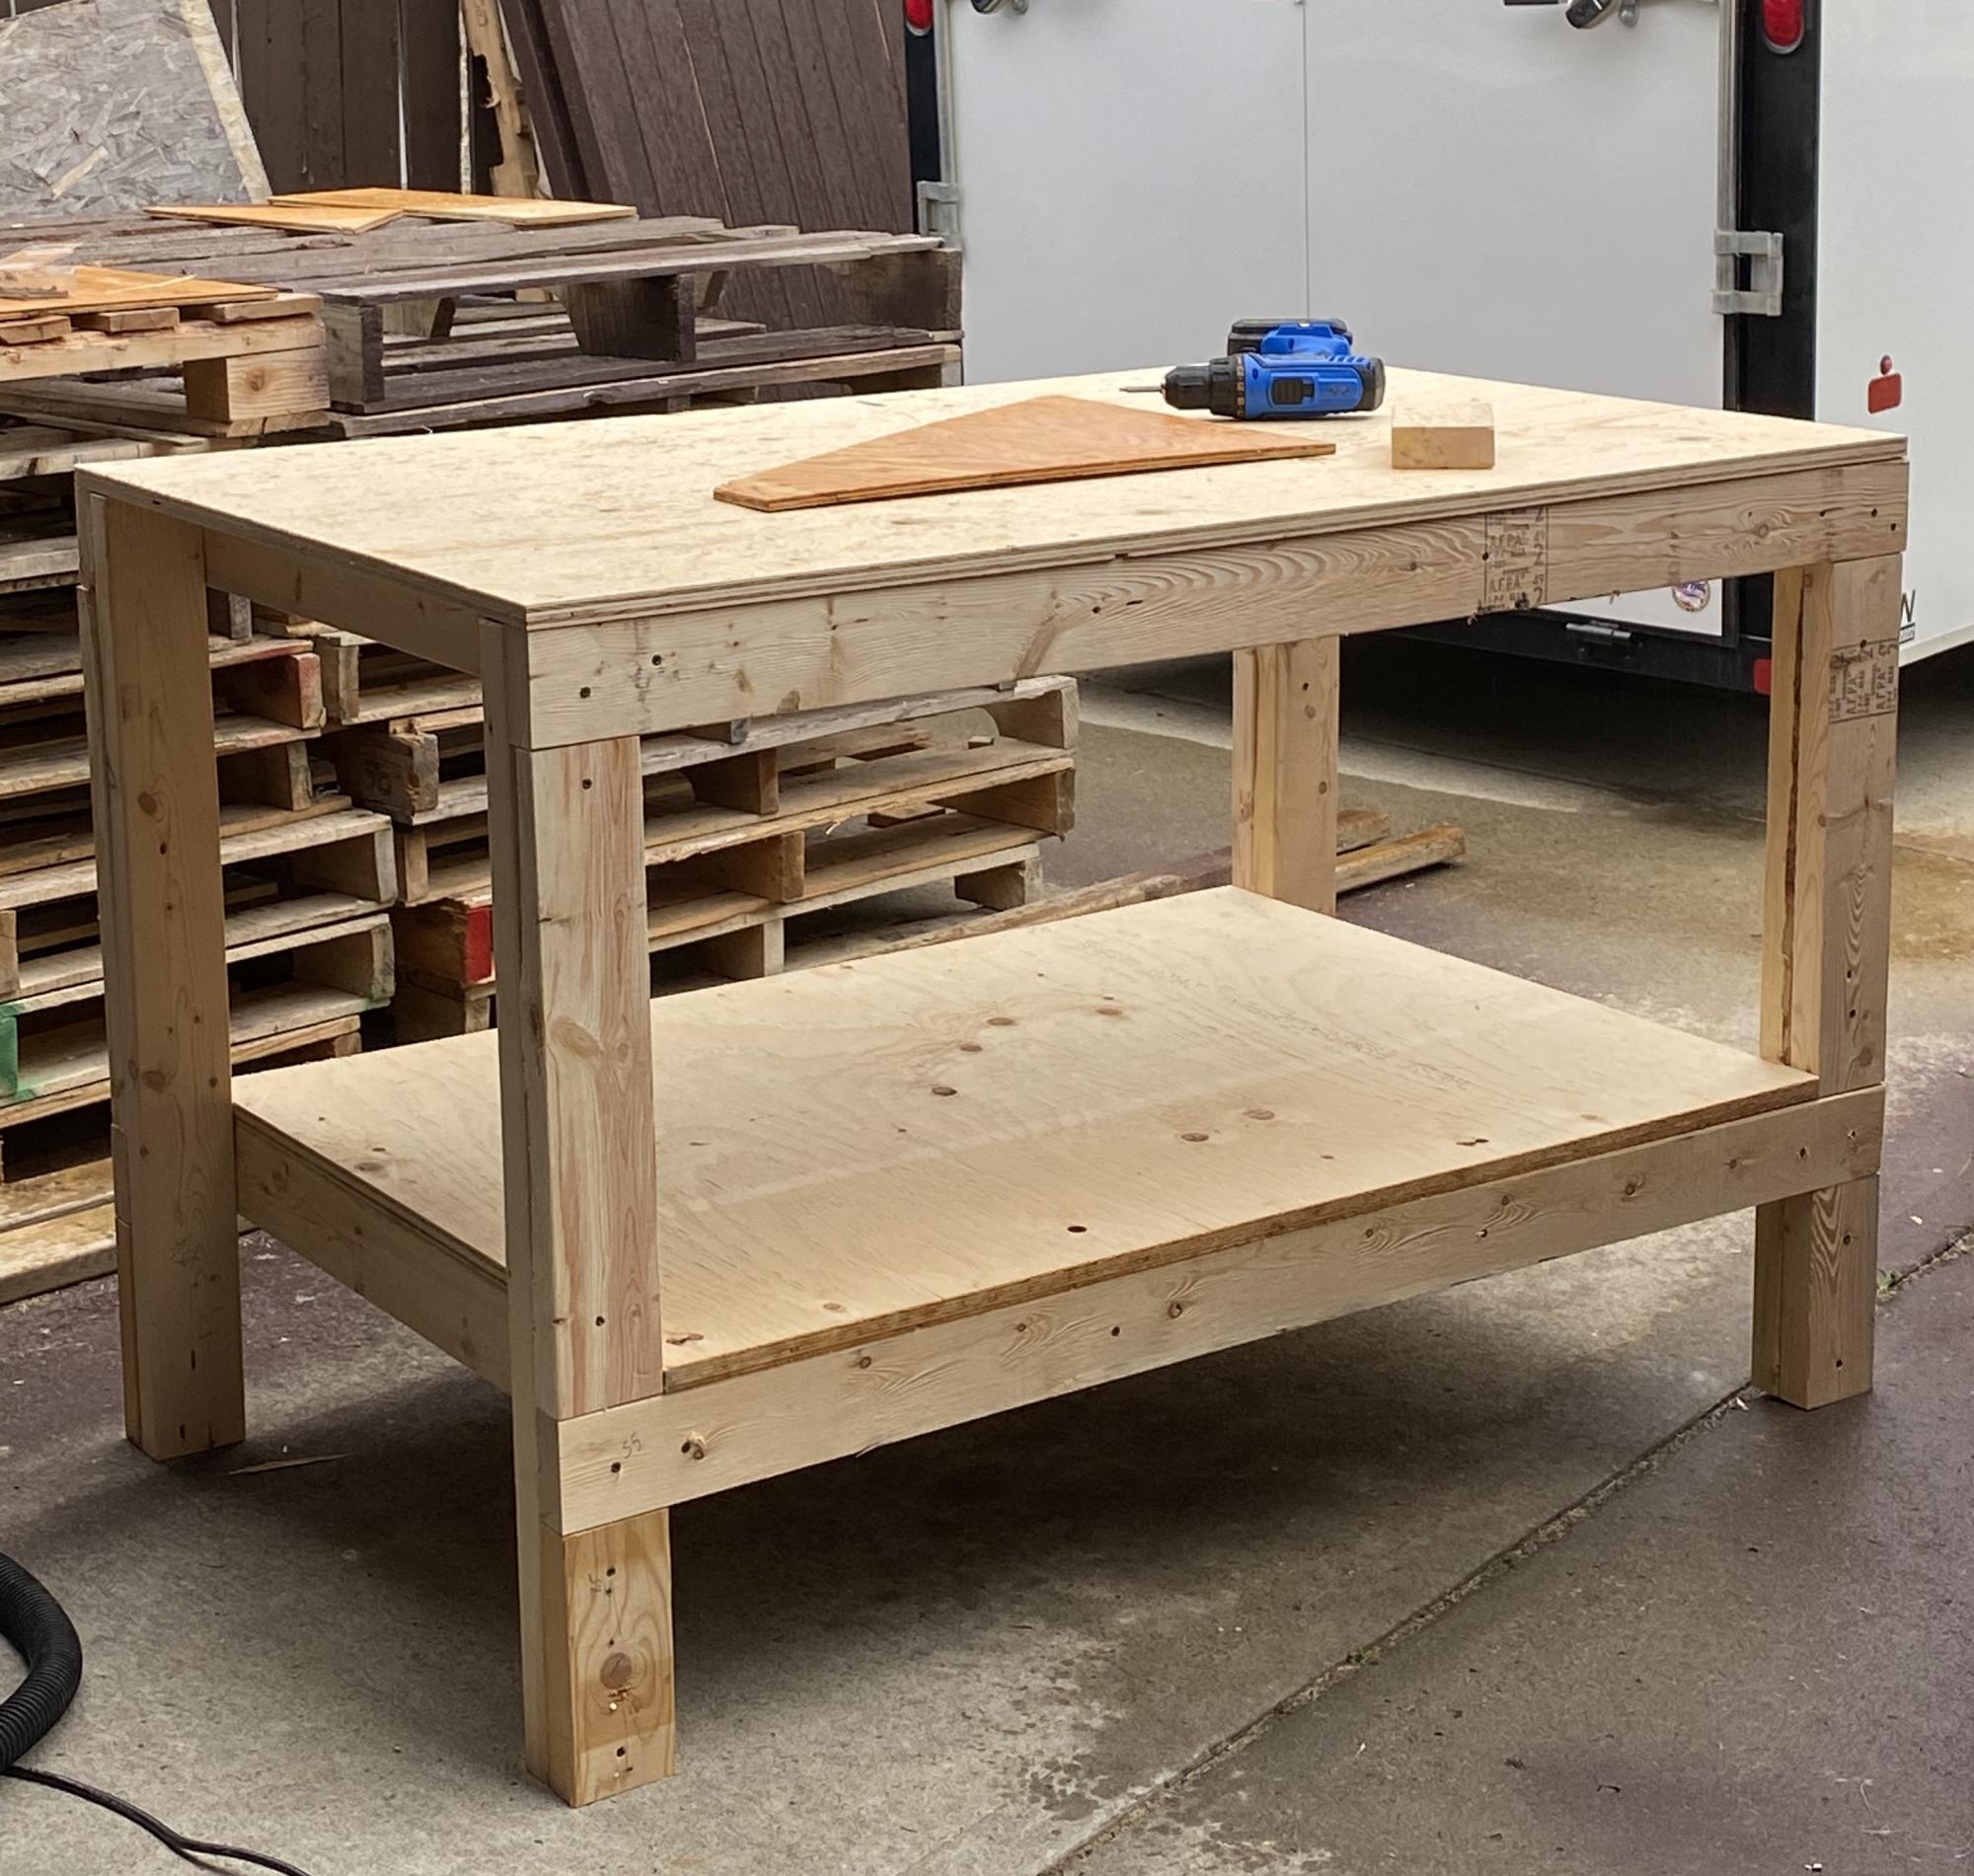
Started to renovate hubby’s bathroom, got annoyed with lack of space on his work bench, built my own. Since this pic, I’ve added locking casters, a power bar up one leg, and a plain metal tool holder on one side. Still have some thoughts rattling around in my head about various other upgrades. Super plans, easy one-woman job.

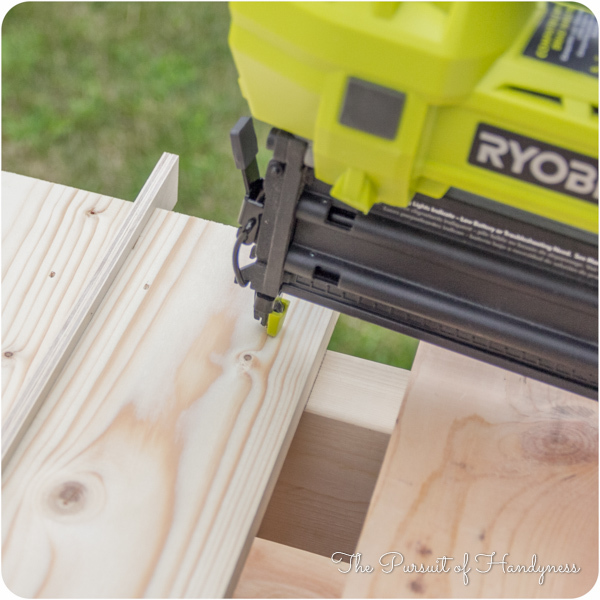
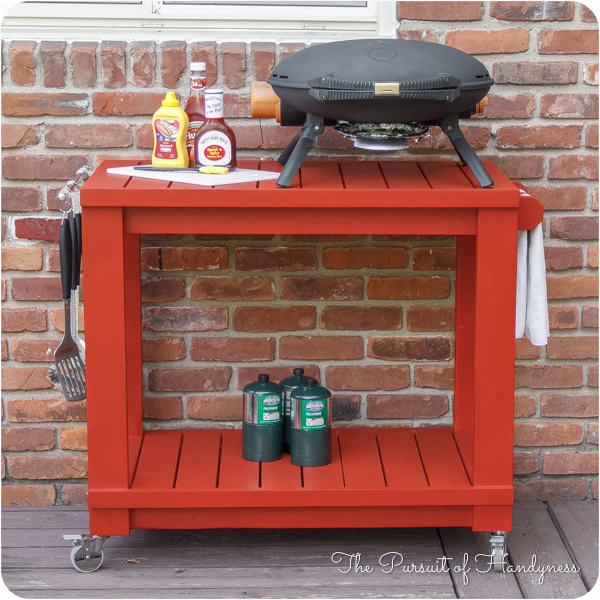
I honestly think Ana is a mind reader. Whenever I need plans for a particular piece of furniture, they magically appear on her site. Of course if she was a true mind reader, everything will be exactly as I need it requiring no modifications. That's what makes her plans so amazing. I can build bigger and better because I've learned to modify her plans to fit my current needs.
This Cart was no exception. I had to make mine a few inches deeper and change the height of the legs and it was a piece of cake. I put this together in less than 2 hours and finishing was easy too.
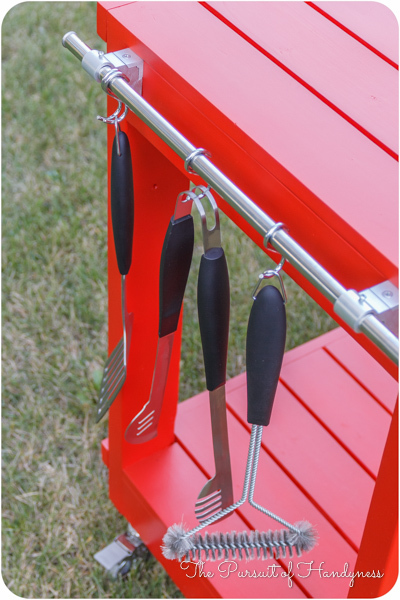
I did a blog post all about what I did differently including how I constructed a towel bar instead of the pipe. Check it out at www.thepursuitofhandyness.com


We recently moved to across country and couldn't fit all our belongings in our moving van so I am on a slow but steady quest to my own "hand built home"! While my husband works with his computer genius types, I am pulling out my tools......rather basic and simple tools because none of my good ones fit in the truck either!
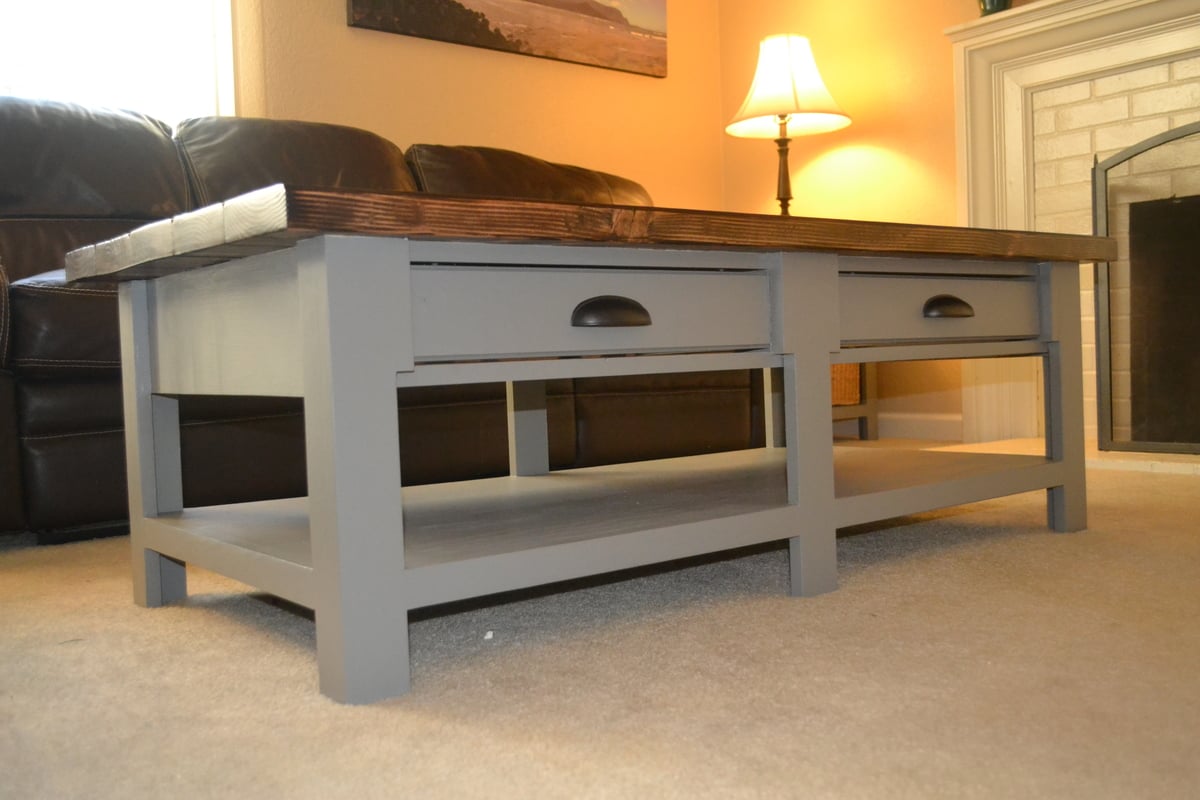
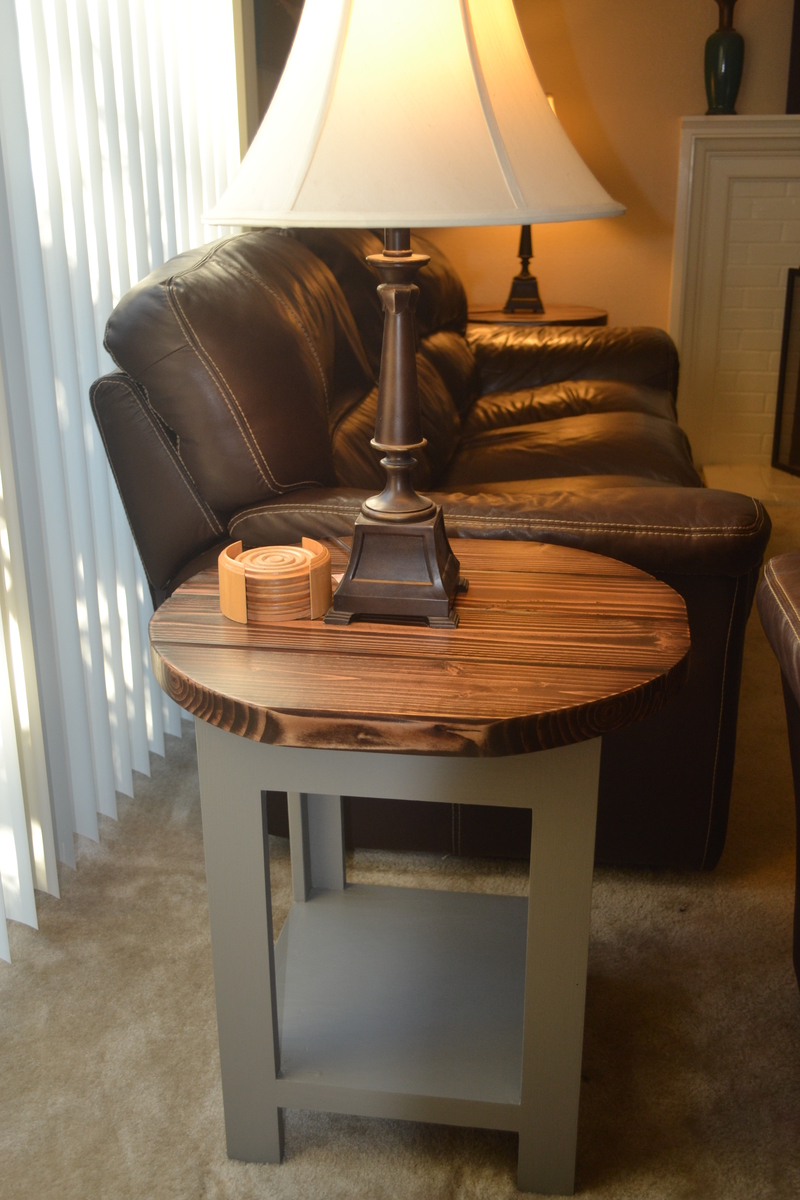
We liked the look of the PB Benchwright living room collection but wanted to make a few modifications. The side table tops were cut a little larger and not perfectly round as we wanted to have a small flat surface on each side. We also wanted to have the same look among all pieces so rather than angle the legs on the side tables, we cornered it so it matched the other pieces. Table tops are 2x6 Douglas Fir boards that we added a 'V' groove in each of the seams and sides.


Wed, 08/27/2014 - 14:21
What a marvelous build! Absolutely love your finish colors and the coordinated details on each piece. You did an awesome job!
Easy to build! Some woodworking experience is definitely a plus when completing it over the weekend.
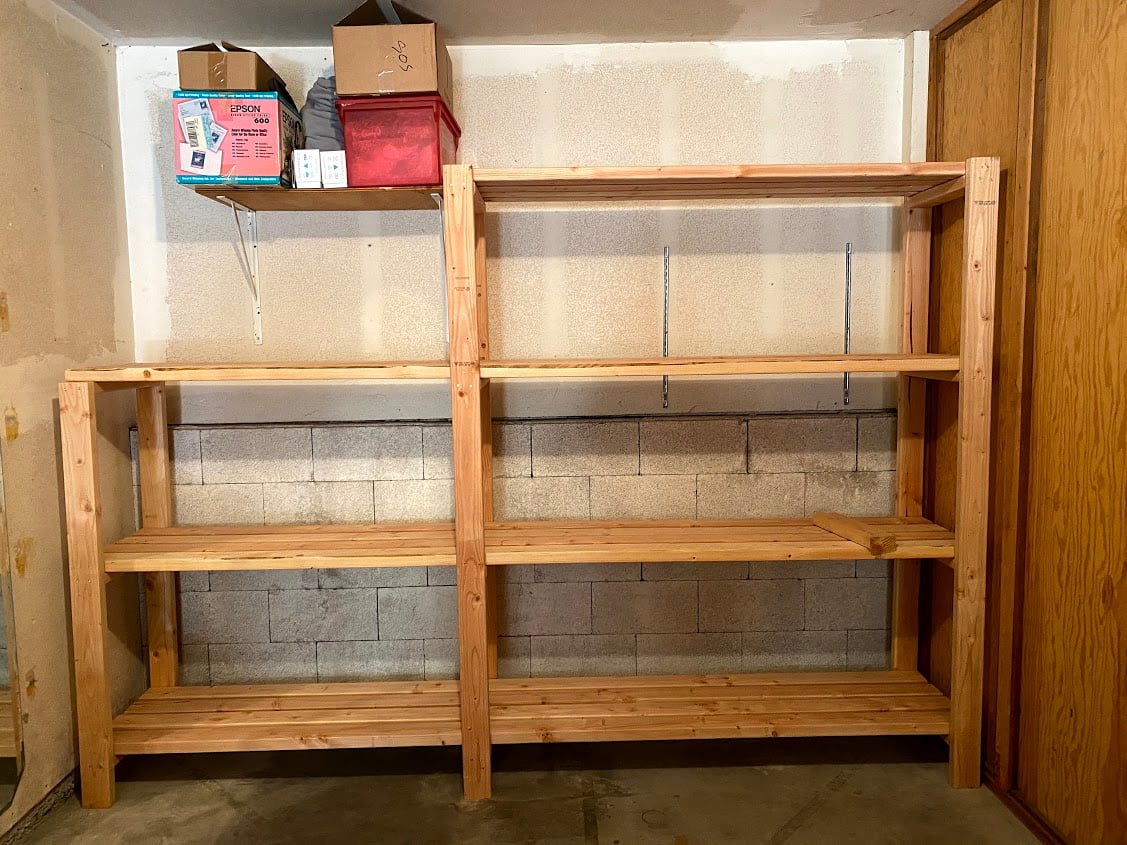
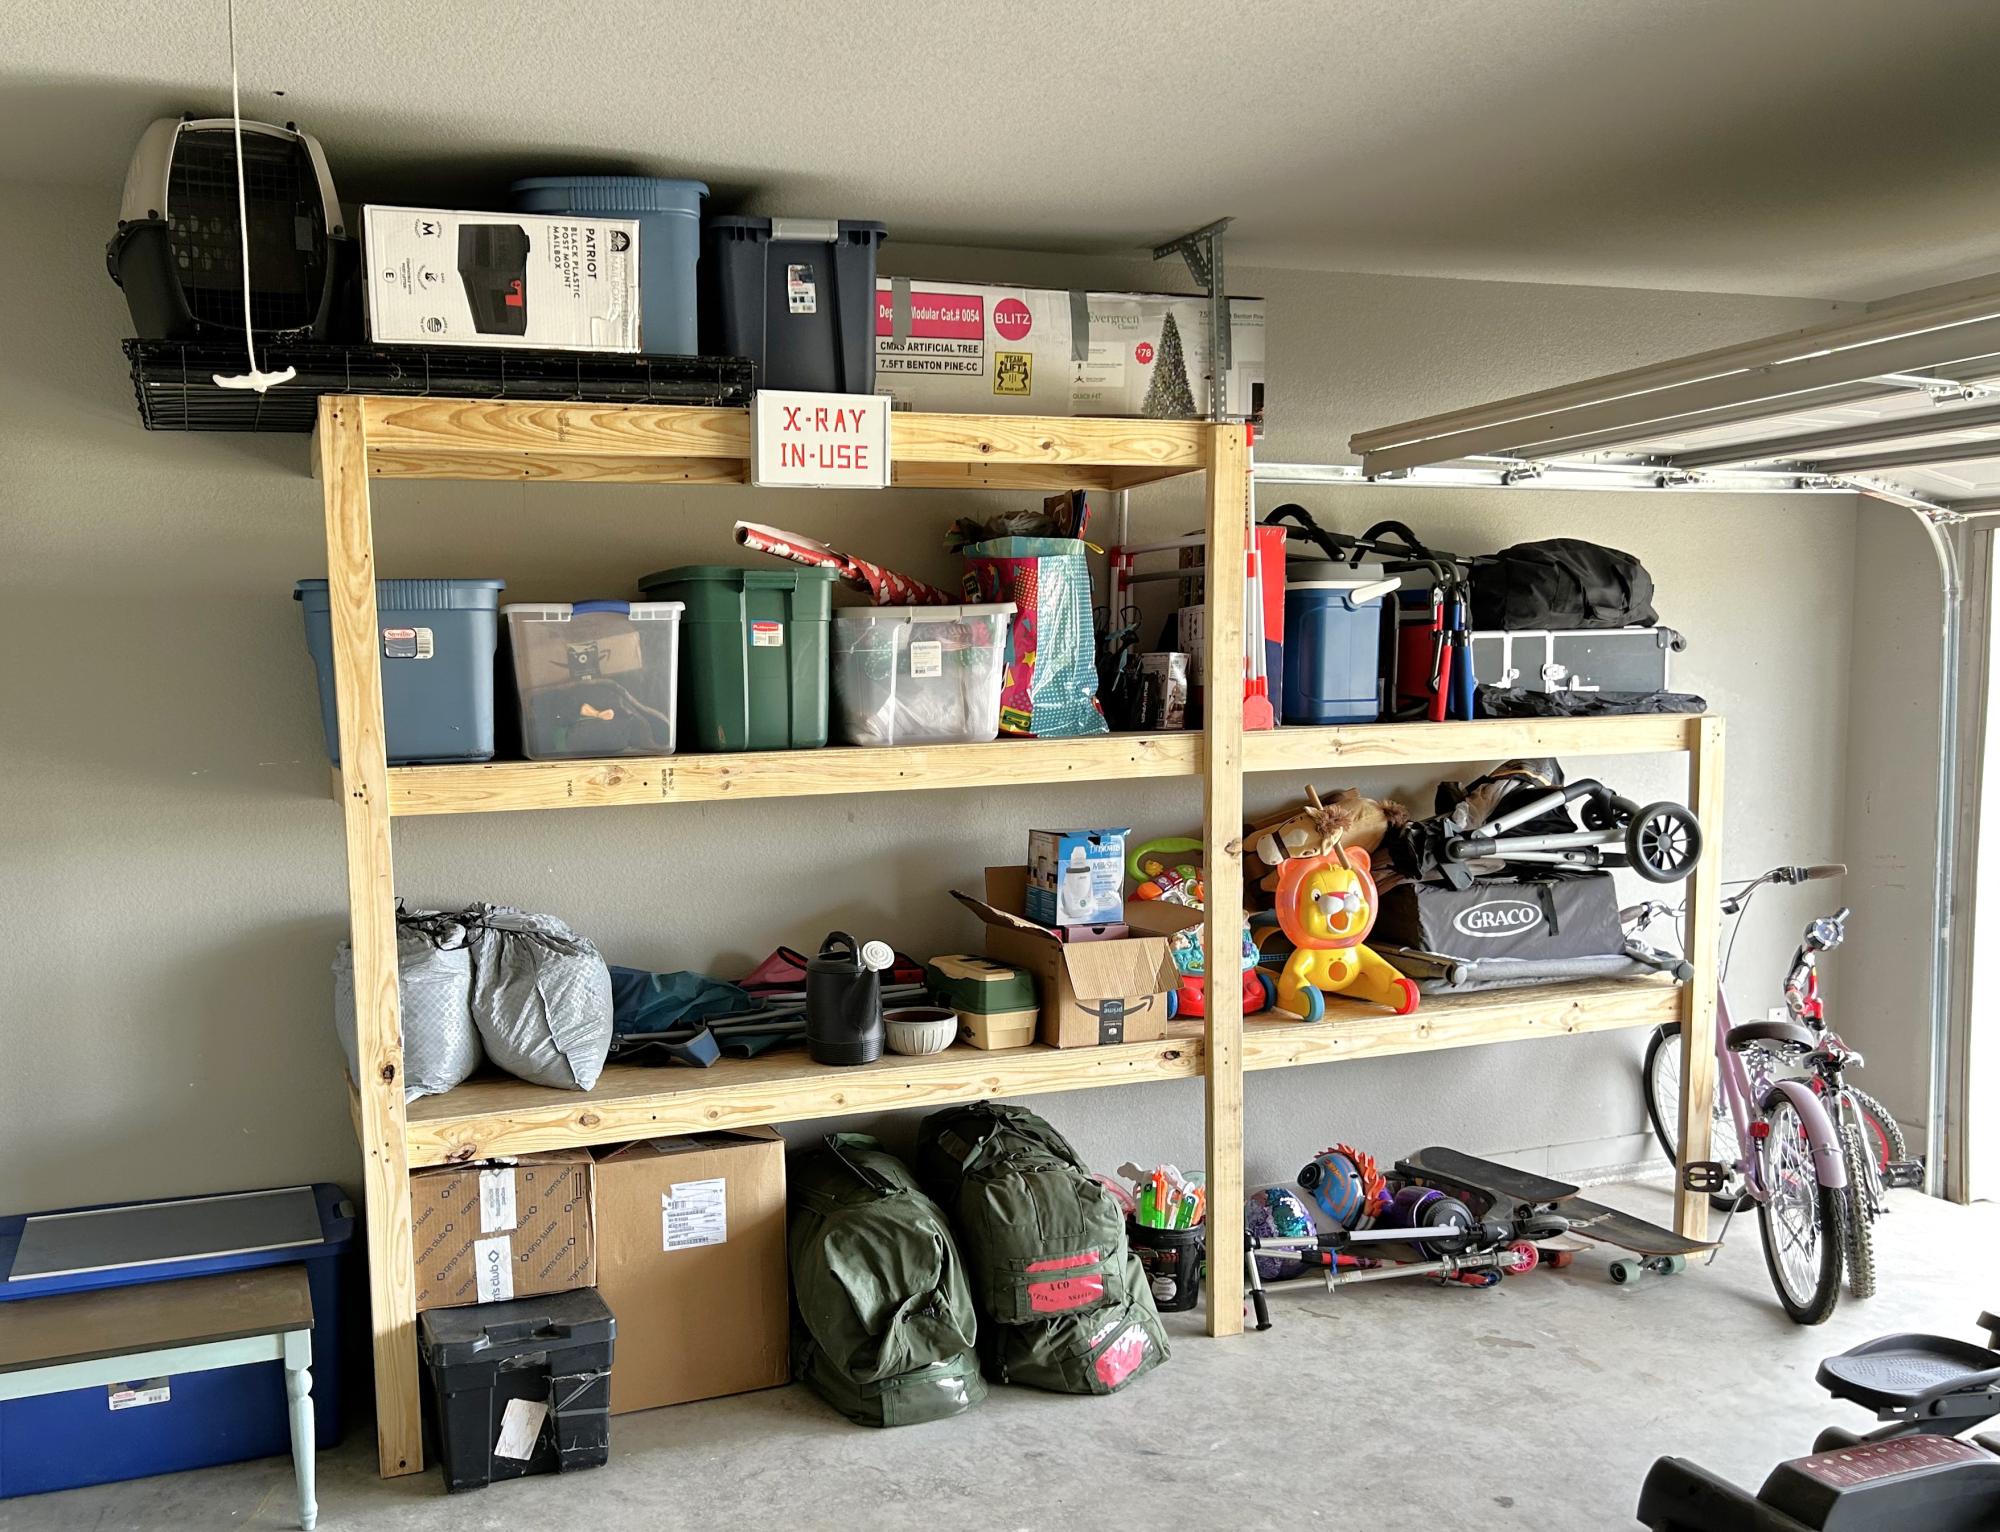
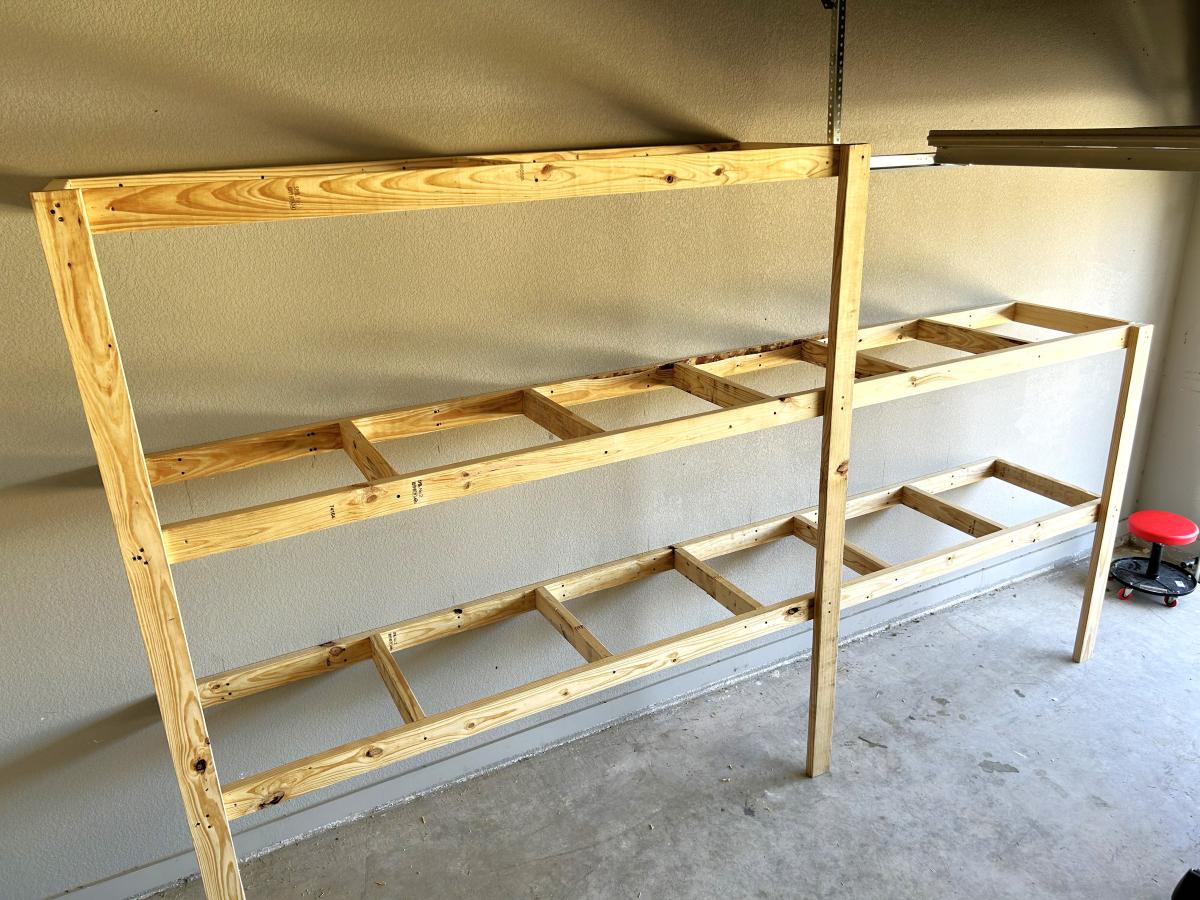
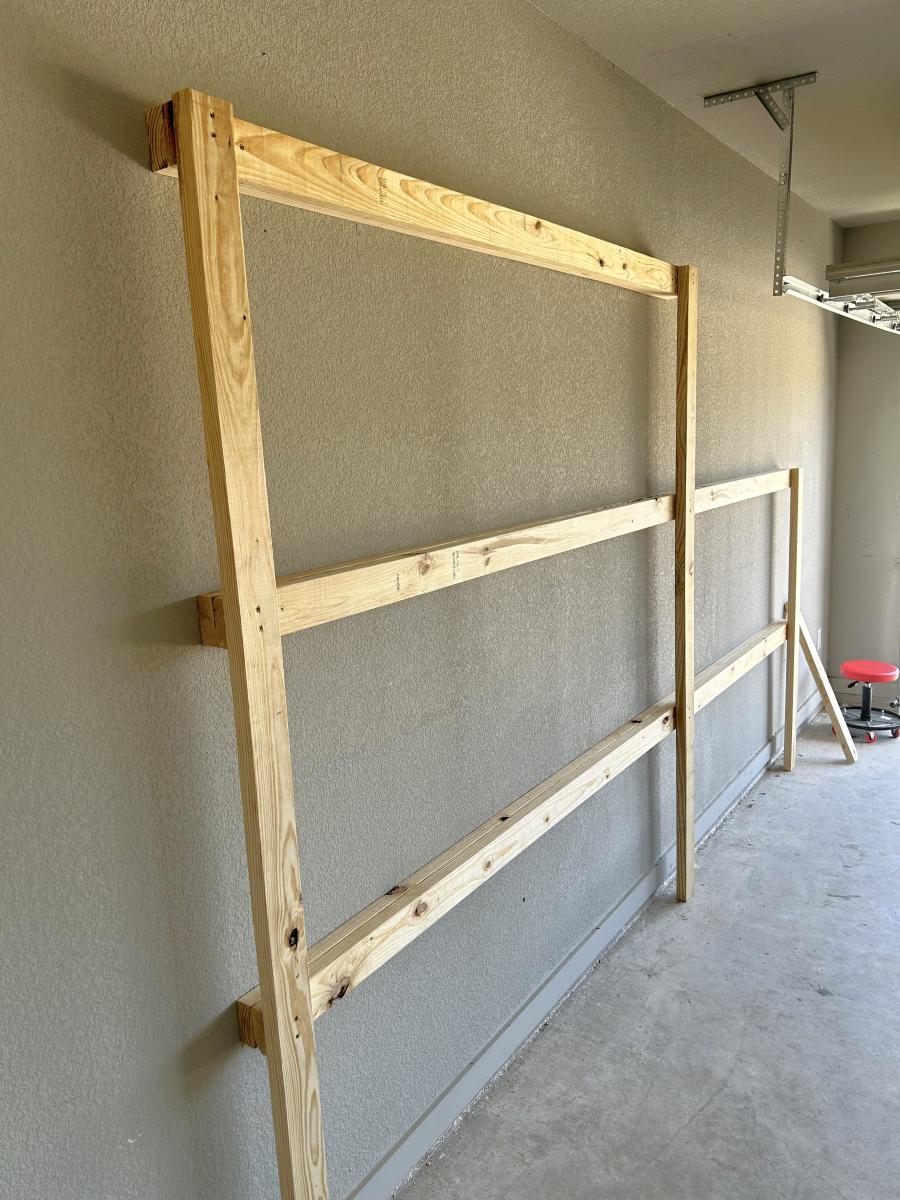
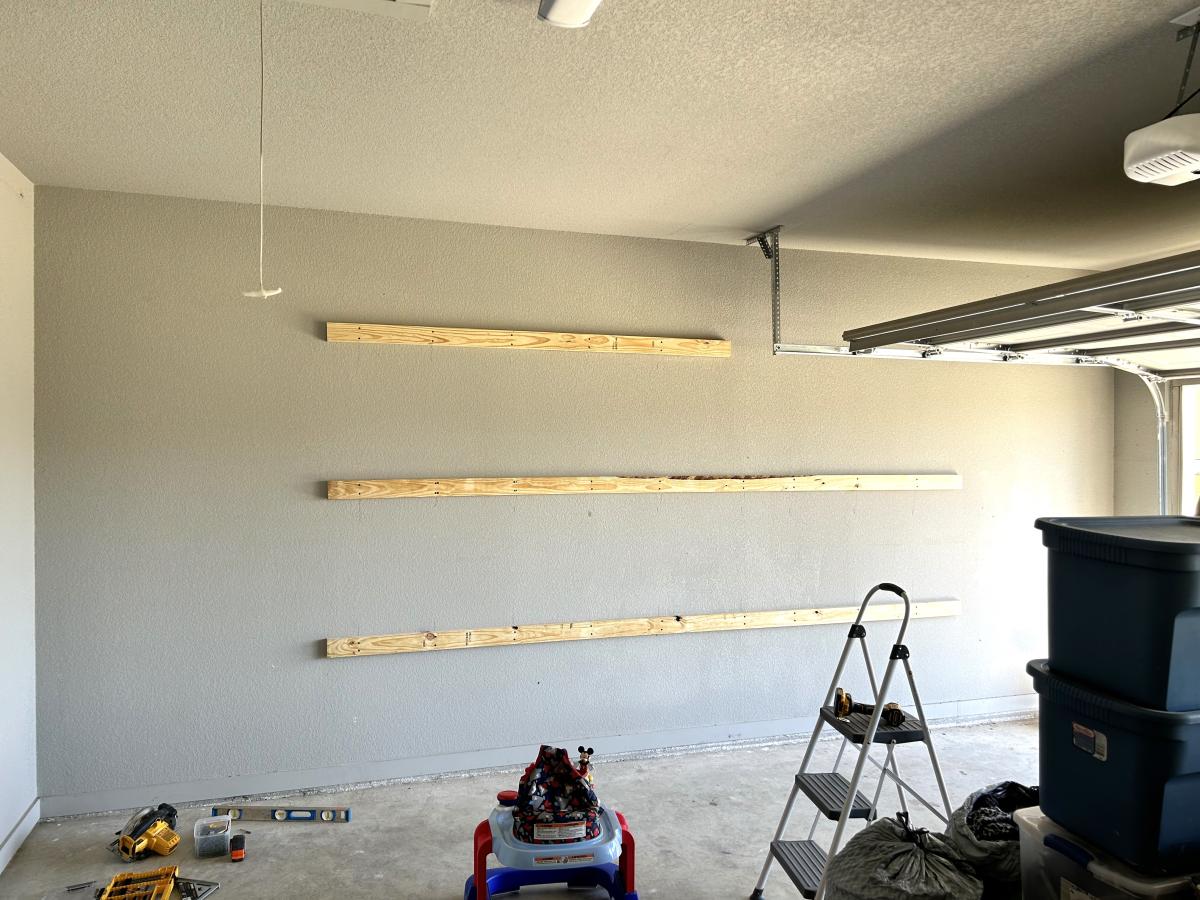
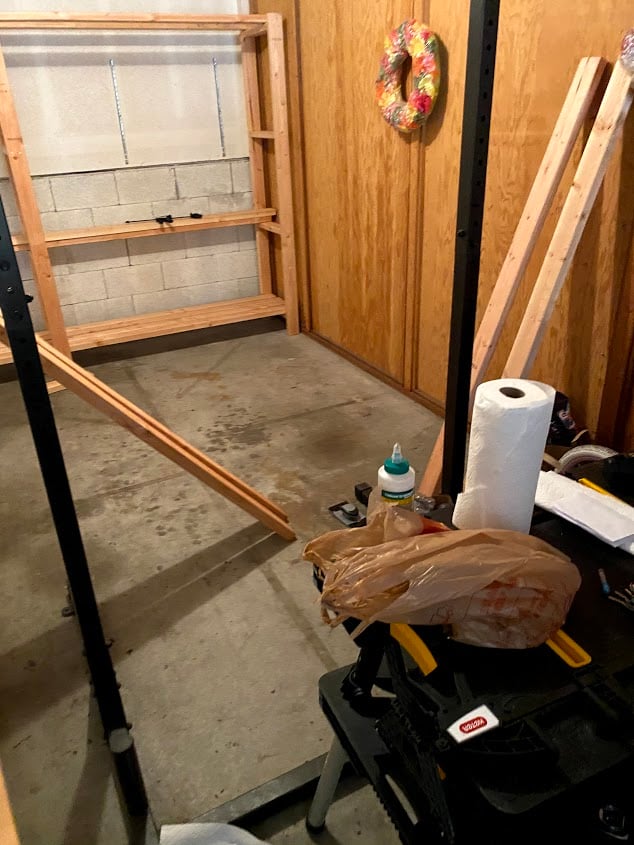
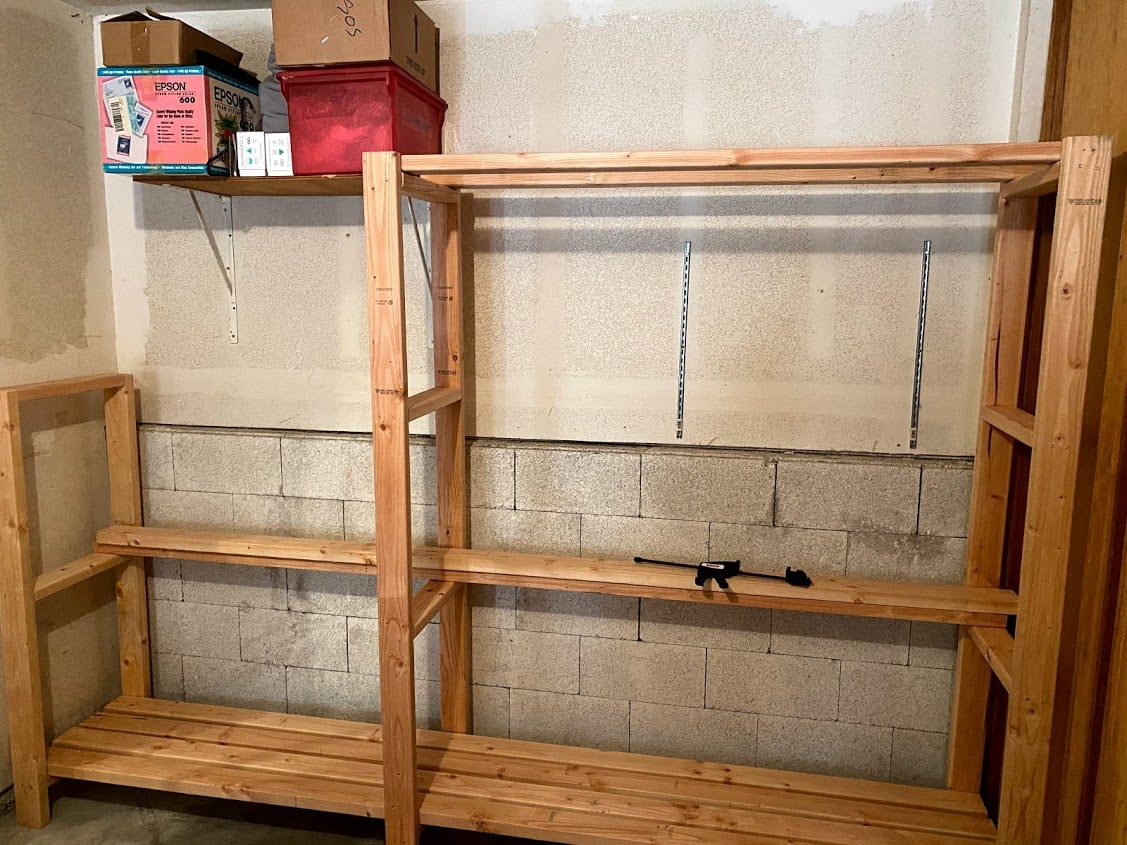
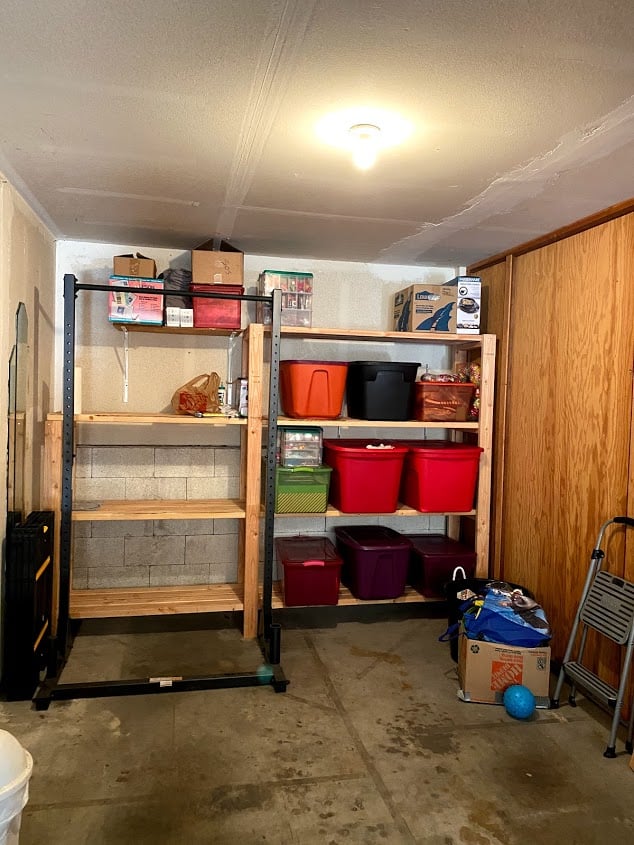
First project ever! I have been planning to build this for at least a year, and I finally did it! I had to modify the plan to fit my space, but it worked out well. They cut the wood for me at the store, so I did not make any cuts myself, just assembled all of the pieces together. I used all 2x4s, 8' and 10', cut down to my measurements. I did not finish the shelves since it is just for the garage, but I did sand rough board edges and some of the faces. I just used an palm sander and coarse sandpaper (80 grit). Please double check all measurements and lists because I forgot to add my shorter shelf supports to the list and had to go back to the store. I also forgot to add the width of the top shelf to those two shorter supports, so the shelf boards are resting on the top instead of nestled into the supports. It turned out not to be a functional problem, but a good lesson to learn. I also learned to make sure my driver battery is charged fully before starting - that took a large chunk out of my first day building and I had to finish the next day. My husband helped with some lifting and holding, but I mostly did this on my own in one weekend, so you CAN do it! Don't wait like I did - it is soooooooo useful and it looks great! All of my friends are really impressed and it feels so good to have made something like this! Thank you Ana!!
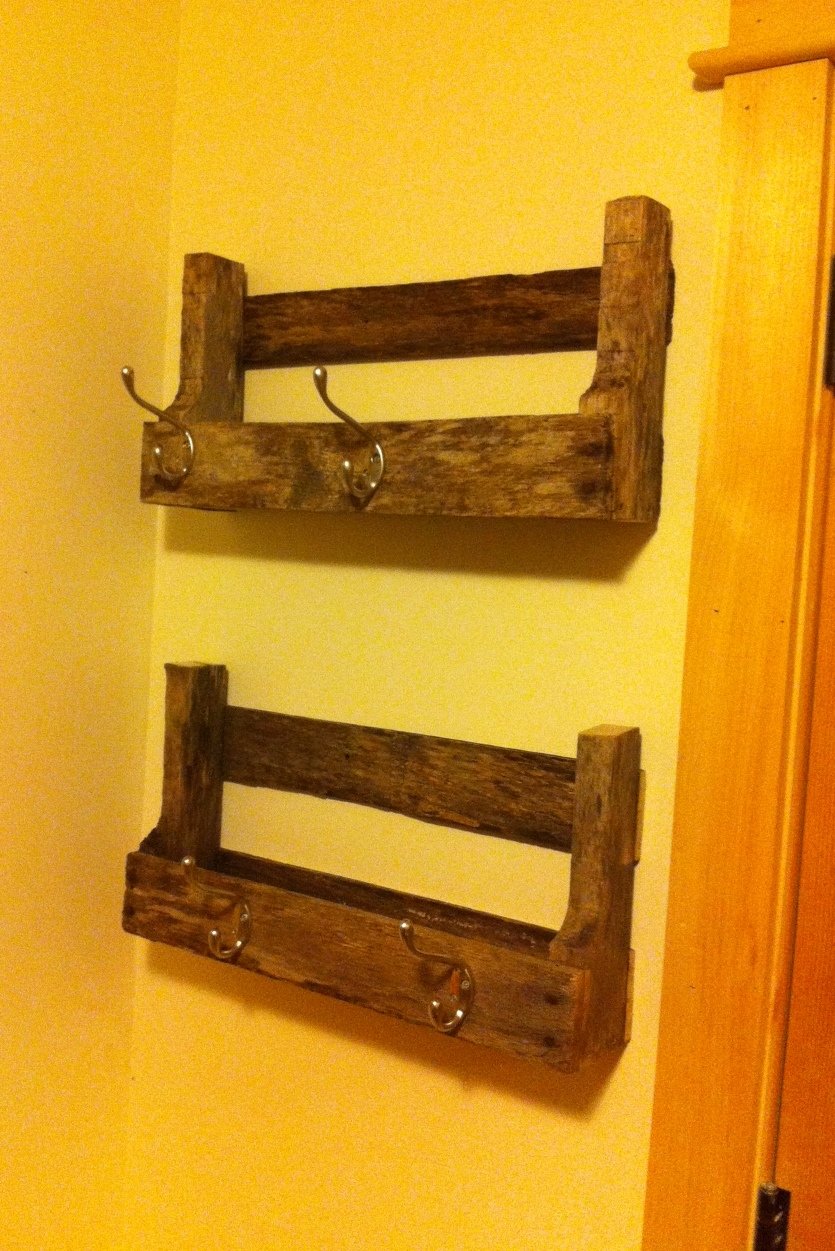
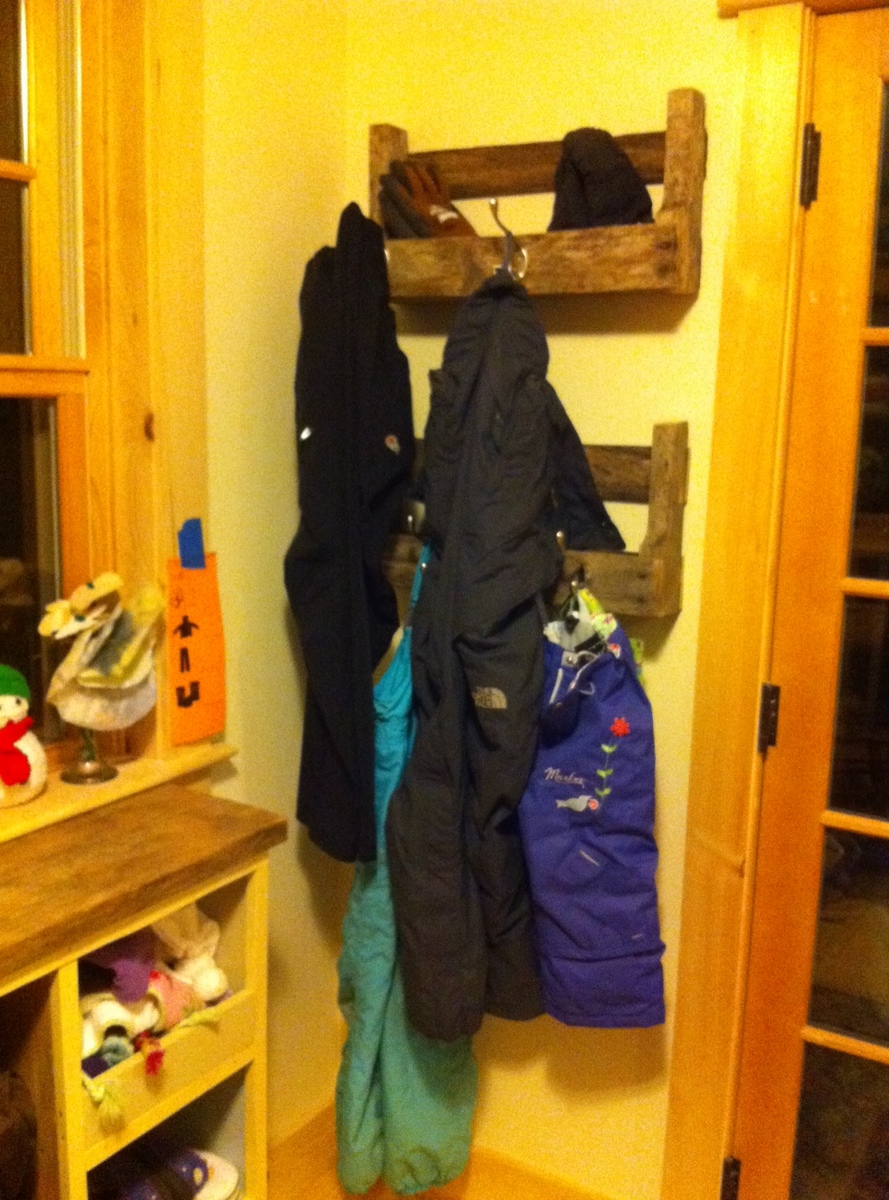
The first time I saw Ana's pallet shelves I knew I had to build them! It took a while but I found the perfect application. A place to hang the kids bibs and our snow pants that are a bit too long for the coat rack, and the bonus shelf for wet hats/mittens or chicken gloves that you don't exactly want in with your clean stuff ;>

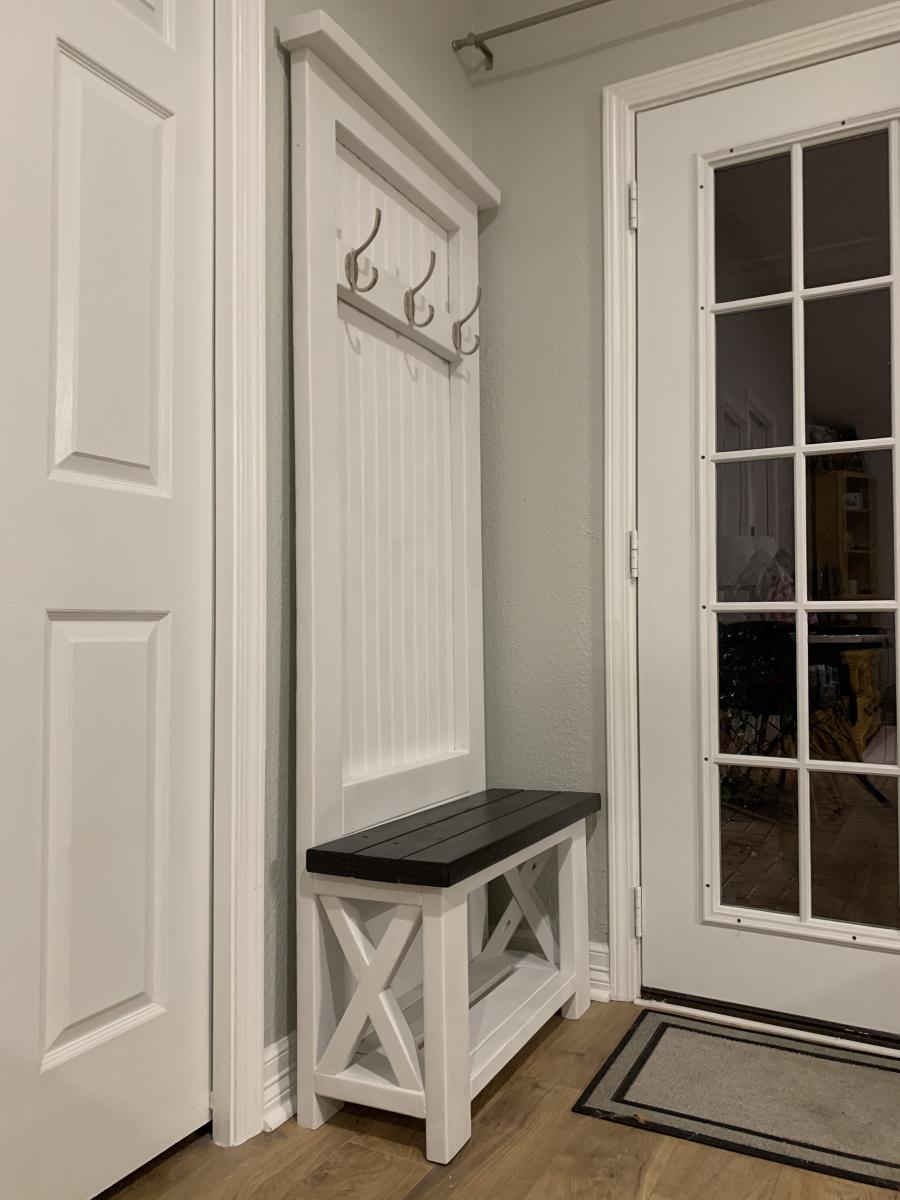
Using Ana's Rustic X Hall tree - I modified the size to fit this small space in the cottage in my backyard. It was impossible to find something to fit this space -- and this is one of my first indoor projects; I am a beginner. It was so much fun building! I used pine from a big box store mostly but opted for Bead board for the backing to achieve a farmhouse type look. My daughter lives in the cottage and loves it!! Thanks Ana for the sweet plans!!
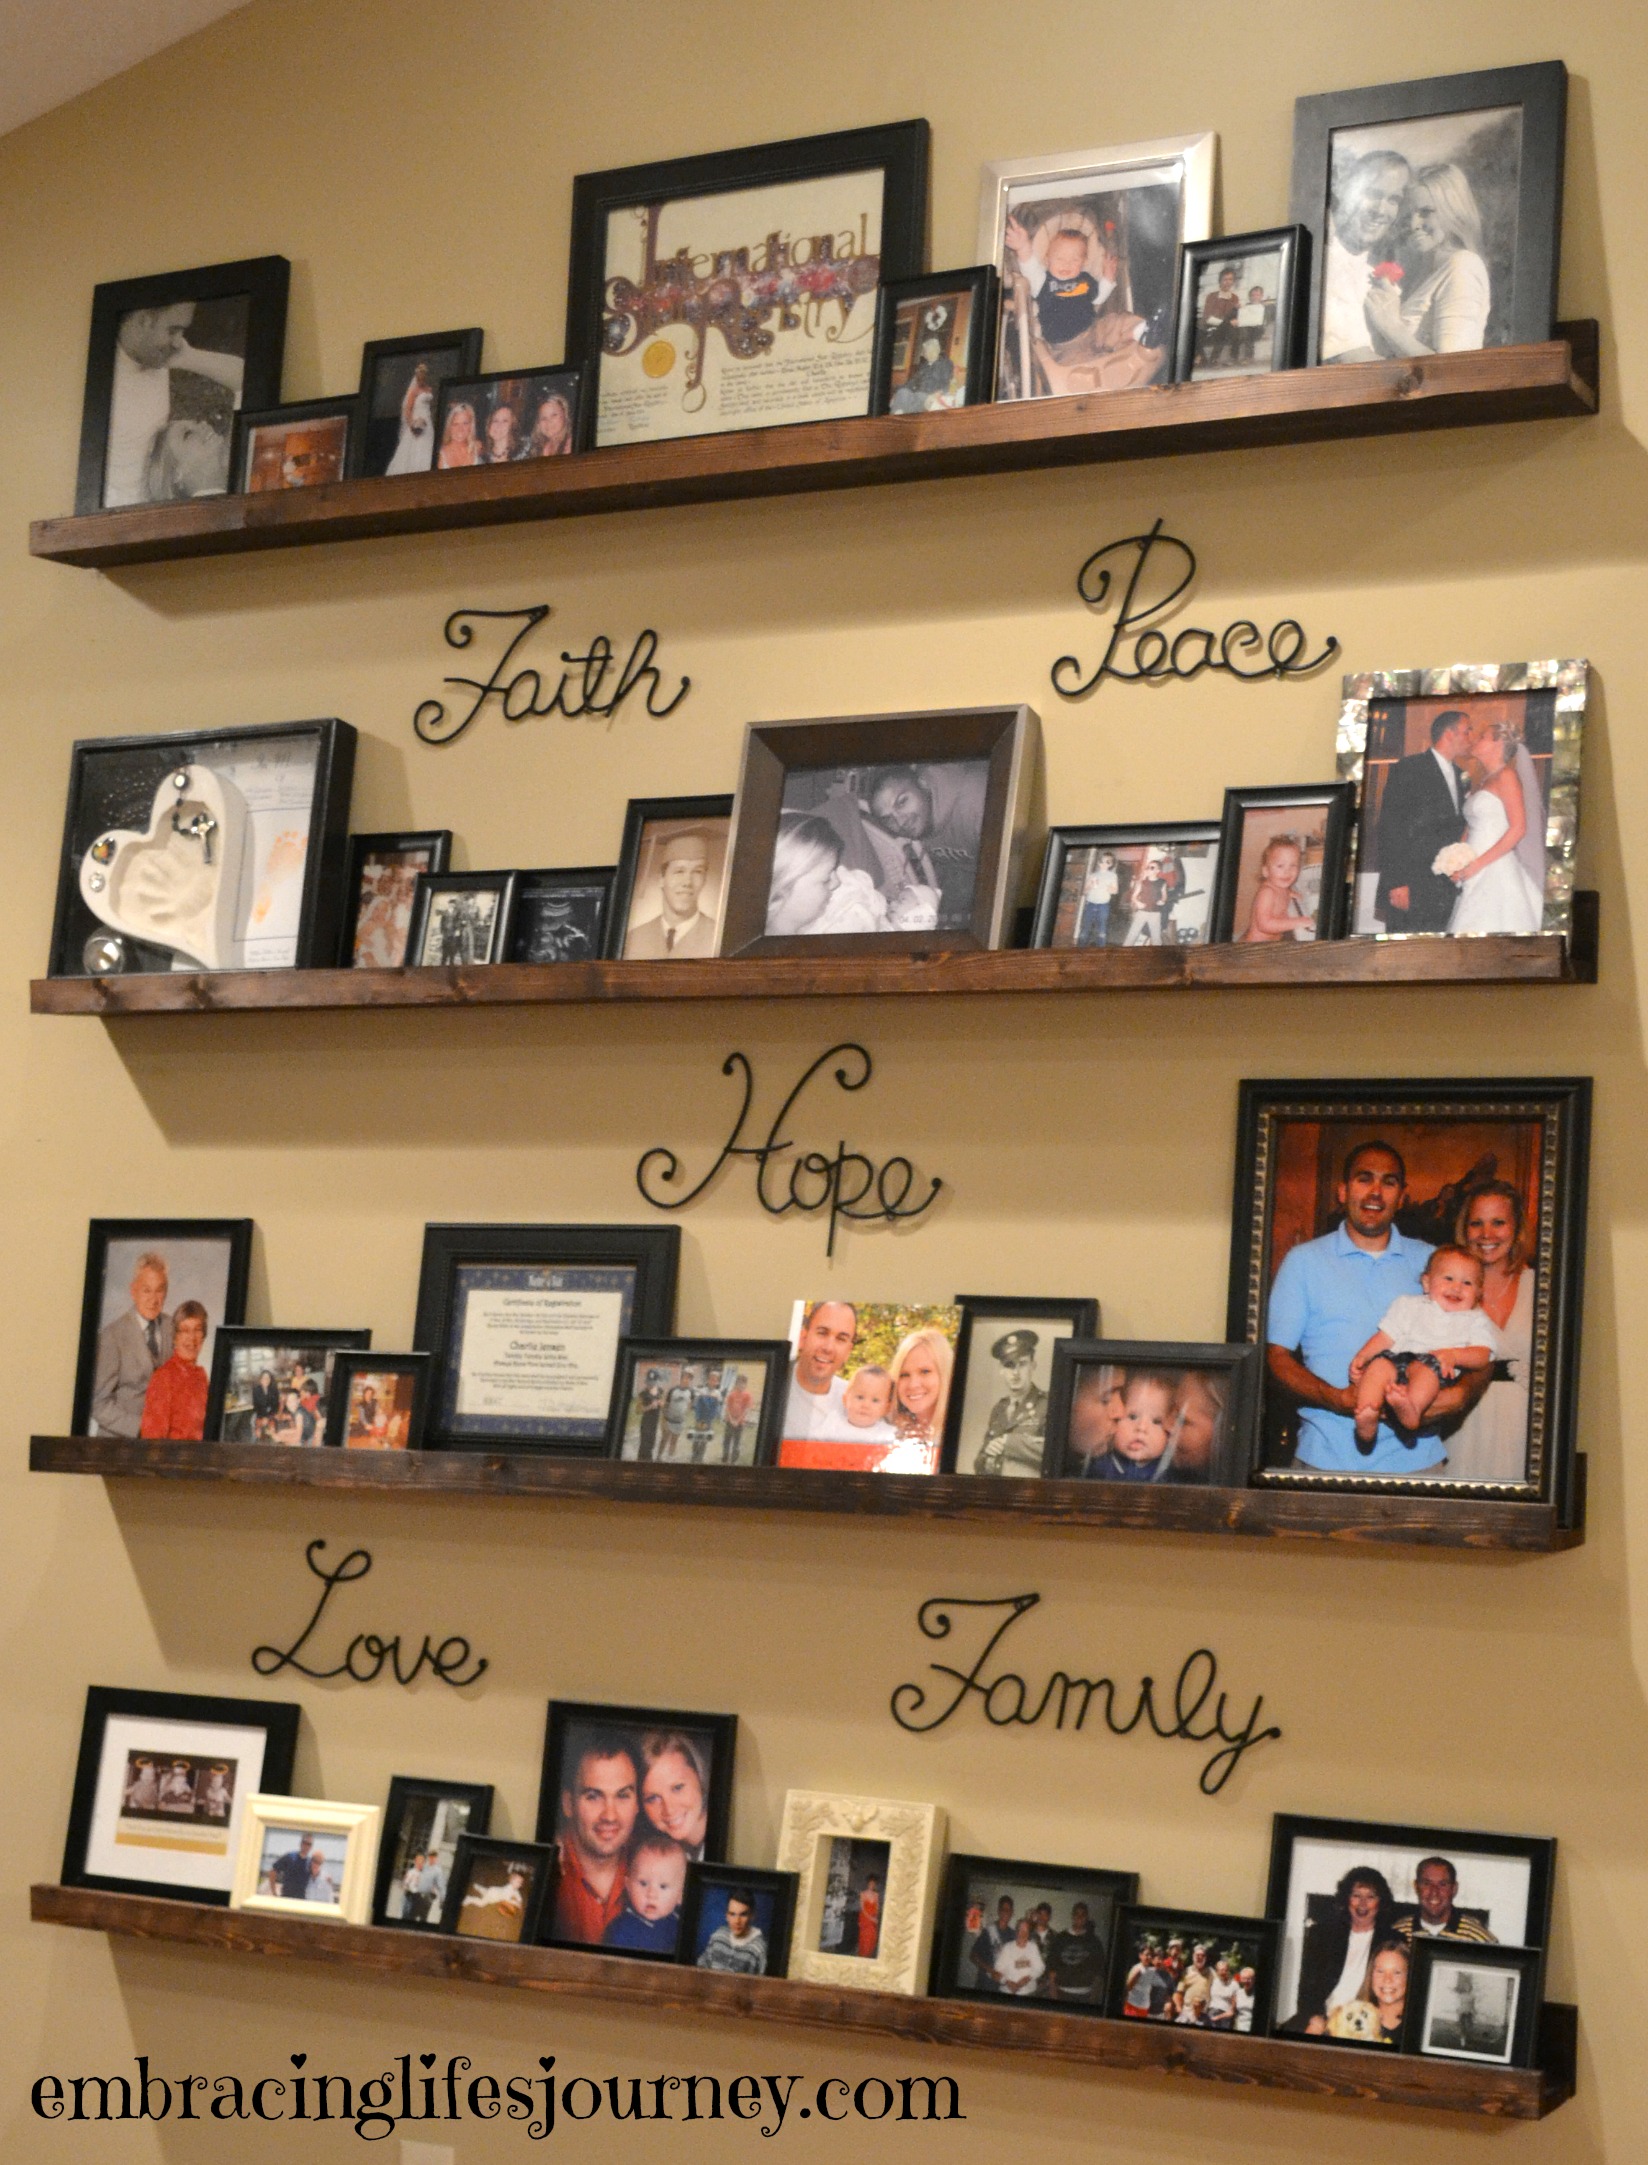
I did 4 shelves spaced 18 inches and made with 12ft long pieces cut in half. The total for my project was $26. I already had the stain and tools on hand.


Comments
Ana White Admin
Mon, 10/16/2023 - 10:48
Great Coop!
Fabulous job on this project, love the color choice and functionality!
hayley3
Fri, 10/27/2023 - 11:54
Look really roomy plus a…
Look really roomy plus a place for storage in front for feed.