Community Brag Posts

My floral chicken coop

Submitted by Anonymous (not verified) on Mon, 04/26/2021 - 19:25

I’m so thankful I found Ana White’s site, like, 10 years ago. She’s inspired me so much and helped me to know I could build stuff! This is far from the first thing I’ve built but it’s absolutely the most complex! I was able to find a bunch of wood free locally from a construction site (they posted it online) and some friends had some old plywood they were kind enough to give us. Even with most of the wood covered, the cost of hardware and other supplies still took us over $200. I worked on it during the day for the last few weeks around our homeschooling schedule, so it did take quite a bit of time. I also had to modify it to work with the wood I had and I wanted to make it bigger inside. But it’s finally finished and our little chickies seem quite happy so far!

Estimated Cost
$250
Estimated Time Investment
Week Long Project (20 Hours or More)
Finish Used
Exterior white paint, honey colored sack stain
Recommended Skill Level
Intermediate

Comments

Farmhouse Table

Submitted by rangers_31 on Wed, 03/27/2013 - 21:18

This is my first ever wood project. I helped my dad frame his basement a couple years ago and figured that a hand built table would be a nice piece of furniture to have as my wife and I begin to start a family. I've been gathering tools for a few months to begin making furniture and I chose to start with this piece.

I had read that a few people found that the 2x6's on the table top caught crumbs so I picked up a cheap, used table saw and squared off the edges so that the table top would be more consistently flat.

For the legs, I wanted to use 4x4 untreated posts but could not find them so I used the table saw to cut down the 2x4's so that, when screwed together, they formed 3x3 legs. I then used a 0.25 inch round router bit to sound off all the edges on both the legs and all exposed edges around the outside of the table.

I finished with two coats of early american stain and in between applied a distressing technique I picked up from one other blog post.

I am 95% happy with how the table has turned out. Structurally is it very sound. If I was to do it over I would have screwed the entire tabletop in with pocket hole screws to eliminate holes on the surface.

Estimated Time Investment
Week Long Project (20 Hours or More)
Finish Used
Early American (2 coats)
Vintage Photo Distressing Ink - rubbed on between coats to accentuate the grain
Recommended Skill Level
Beginner

Comments

Full over Full Bunk

Used the Farmhouse Style bed plan and stacked them, two headboards for the bottom bed, two footboards for the top bunk bed

Estimated Time Investment
Weekend Project (10-20 Hours)
Recommended Skill Level
Intermediate

Comments

Rustic X Sofa Table

Submitted by Anonymous (not verified) on Mon, 05/08/2017 - 09:28

Was very simple and the plans we very well laid out!

Estimated Cost
$30
Estimated Time Investment
Day Project (6-9 Hours)
Recommended Skill Level
Beginner

Do not test the seating until all table is comlete (humor at my expense)

Fun build. Thanks Ana. I made the mistake of installing one set of seat boards and testing the strength. I weigh over 300lbs. No harm no foul but you can probably figure out the rest. On my backside soon after.

Looking forward to building my next 2 without this mishap.

Jim

Built from Plan(s)
Estimated Cost
200
Estimated Time Investment
Weekend Project (10-20 Hours)
Finish Used
behr stain mentioned in plans and spar urethane poly exterior by minwax

Comments

Loft beds

Submitted by marquez313 on Fri, 11/15/2019 - 10:55

How I Spent My Spring Break Well, it was a long week but I finally finished. I made 2 complete sets of loft beds for my oldest son and my daughter. The plans were great and easy to follow. A few notes; the actual width of a 1 x 8 is 7.25 inches (not 7.5) and a 1 x 12 is actually 11.25 inches (not 11.5). I noticed this when constructing the legs and putting the optional shelf supports on the large bookcase. It's not a huge deal, it's only a quarter of an inch. Also, if you are going to assemble and paint in the room, paint the interior of the bed area BEFORE attaching the slats. That added a lot of extra painting time for me. I made a few modifications as well. For the desk, my wife suggested that the width of a 1 x12 was a bit narrow, so I cut a 1 x 6 and biscuit joined it to the desk front. I cut a 22.5 degree angle on the end that meets up with the small bookcase that is attached to the desk. The straight edge lines up with the face of the other small bookcase, like a puzzle piece. I then covered the desk top with a piece of plexiglass to make the surface smoother and to hold picture (slide under the plexiglass). In addition, I bought an LED light system (about $40 from IKEA) and installed under the 2 top shelves of the large bookcase. Really cool effect and the kids love it! Overall, I am very happy with the project results. Looks great, very solid and lumber on cost about $400 for 2 complete sets. Just need to put in some sweat...

Estimated Time Investment
Week Long Project (20 Hours or More)
Finish Used
Satin finish latex paint
Recommended Skill Level
Beginner

Slatted double vanity - FINALLY finished!

I was a bit over my head with this one but I am so far very happy with the project. It is not quite finished. The marble was installed last week and we are awating the plumber to come back to hook up the sinks. I will install the second slatted shelf once the plumbing is in. Will post finished pictures soon. The mirror is made from 6x6 posts from the lumber yard. We had a friend cut them to size using a band saw. We made the mirror frame based on a picture I found on Houzz.com. The mirror glass was something I picked up off of craigslist for next to nothing and removed from the original frame. It is HEAVY (~200lbs) and attached to the wall with metal brackets. We purchased the sinks/faucets on ebay. 


Estimated Cost
For the vanity alone: $200-250
Estimated Time Investment
Weekend Project (10-20 Hours)
Finish Used
I used Hilary's vinegar/steel wool solution to age the wood, then sanded and finished with the vermont natural coatings polywhey in satin.
Recommended Skill Level
Intermediate

Comments

Truss beam table and benches

Submitted by Anonymous (not verified) on Thu, 05/11/2017 - 10:39

We added Ana's truss beam base to an already-existing table top that we had DIY'd years ago (our very first project!). We made the benches per her plans as well and now we all just love it! The whole thing is big, sturdy and beautiful. The only thing we didn't do were those two pretty beams that come down in the center - my hubby liked how simple it looked without it :) Loved this project! (And love how my three kids crawl all over it! Memories!)

Built from Plan(s)
Estimated Cost
$100
Estimated Time Investment
Weekend Project (10-20 Hours)
Finish Used
Rustoleum Dark Walnut stain and then a weather proofing varnish
Recommended Skill Level
Intermediate

Pallet Shelf

This was my first time using my jigsaw. Easiest project ever, and I love the result!

Estimated Time Investment
An Hour or Two (0-2 Hours)
Recommended Skill Level
Starter Project

Comments

Lily-Mae's Changing Table

Submitted by Charles R on Sat, 02/14/2015 - 20:11

Made whith Pine, Changing Table fitting with Kendal wide dresser.

Estimated Cost
100-140
Estimated Time Investment
Week Long Project (20 Hours or More)
Finish Used
Primer + white semi-gloss paint
Recommended Skill Level
Intermediate

Comments

Kitchen cabinet project using ShelfHelp

I had an area in my kitchen I wanted to add cabinets to and get rid of the open shelves. I built the lower cabinet from the Tilt Out Garbage Cabinet plans with my own modifications. I ordered the upper cabinet carcass from ShelfHelp, to create a cabinet to showcase my vintage dinnerware I inherited from my Mom. The cabinet went together great! I built a vertical plate rack and another free standing rack for the interior of the cabinet. Added a beadboard back and salvaged antique cabinet doors. Now the back corner is a functional area of the kitchen and fits in perfectly with the original 1937 cabinets. I can't say enough good things about ShelfHelp! Great quality, hassle free ordering, fast shipping and a reasonable price. I will definitely be using Shelf Help again!

Estimated Cost
$500 counting the antique doors
Estimated Time Investment
Week Long Project (20 Hours or More)
Finish Used
Upper cabinet: Benjamin Moore paint Mountain Peak White in semi gloss. Cabinet interior and lower cabinet: Clark & Kensington Garden Gnome in semi gloss.
Recommended Skill Level
Beginner

Comments

Bird House Kid's Kit

Submitted by Lady Goats on Fri, 04/05/2013 - 07:49

The Big Kid and her friend were standing behind me when I pulled up Ana's birdhouse kit plans and they begged to build one, too. Initially, I wasn't wanting them to use my nail gun, so I predrilled the holes for all the brad nails. Details are on my blog.

I was able to get three birdhouses from two 6' fence pickets (had to make one about a half inch smaller all around, but it's barely noticeable!)

Thanks, Ana!

Estimated Cost
$4 for 3.
Estimated Time Investment
An Hour or Two (0-2 Hours)
Finish Used
They're left au naturale
Recommended Skill Level
Starter Project

Wide Cabin Dresser / Change Table

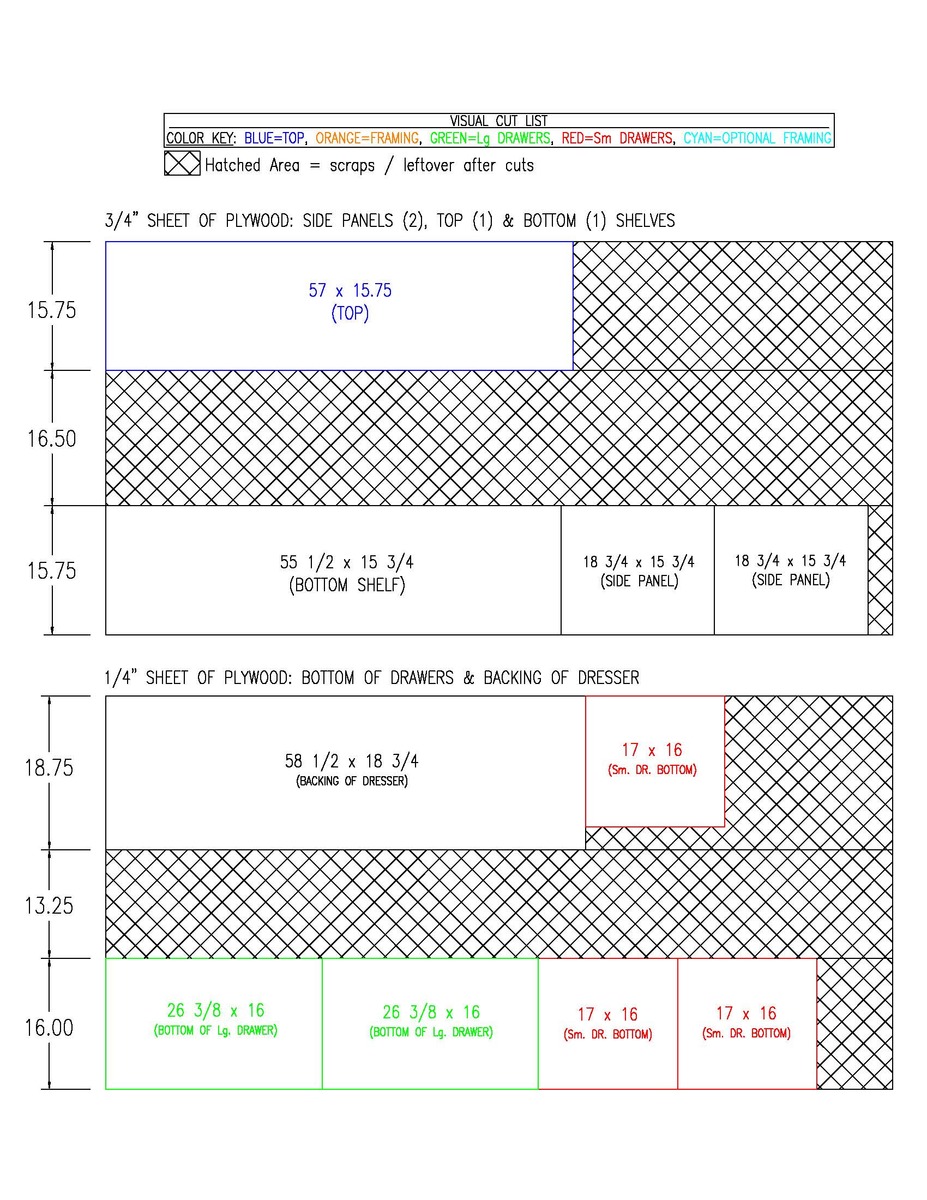
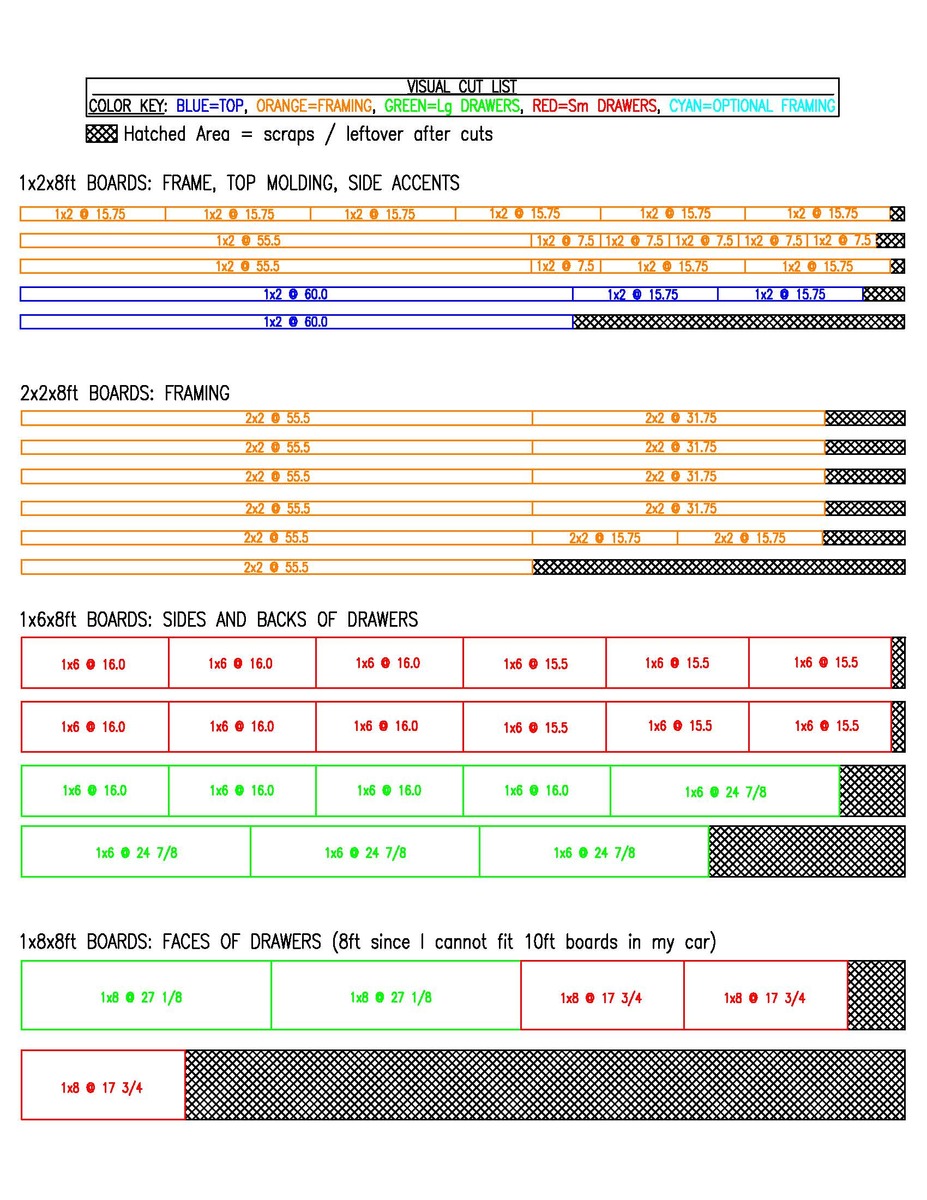
Since I am a very visual person when it comes to drawings and 2D/3D renderings, I have included pictures of the cut list shown on the boards you will need to use.  I hope this helps some people!  Keep in mind, if you use side mount drawer slides like I did, you need 3 extra 15.75" pieces for the slides to mount to.  I just used extra 1x3 boards I had hanging around.

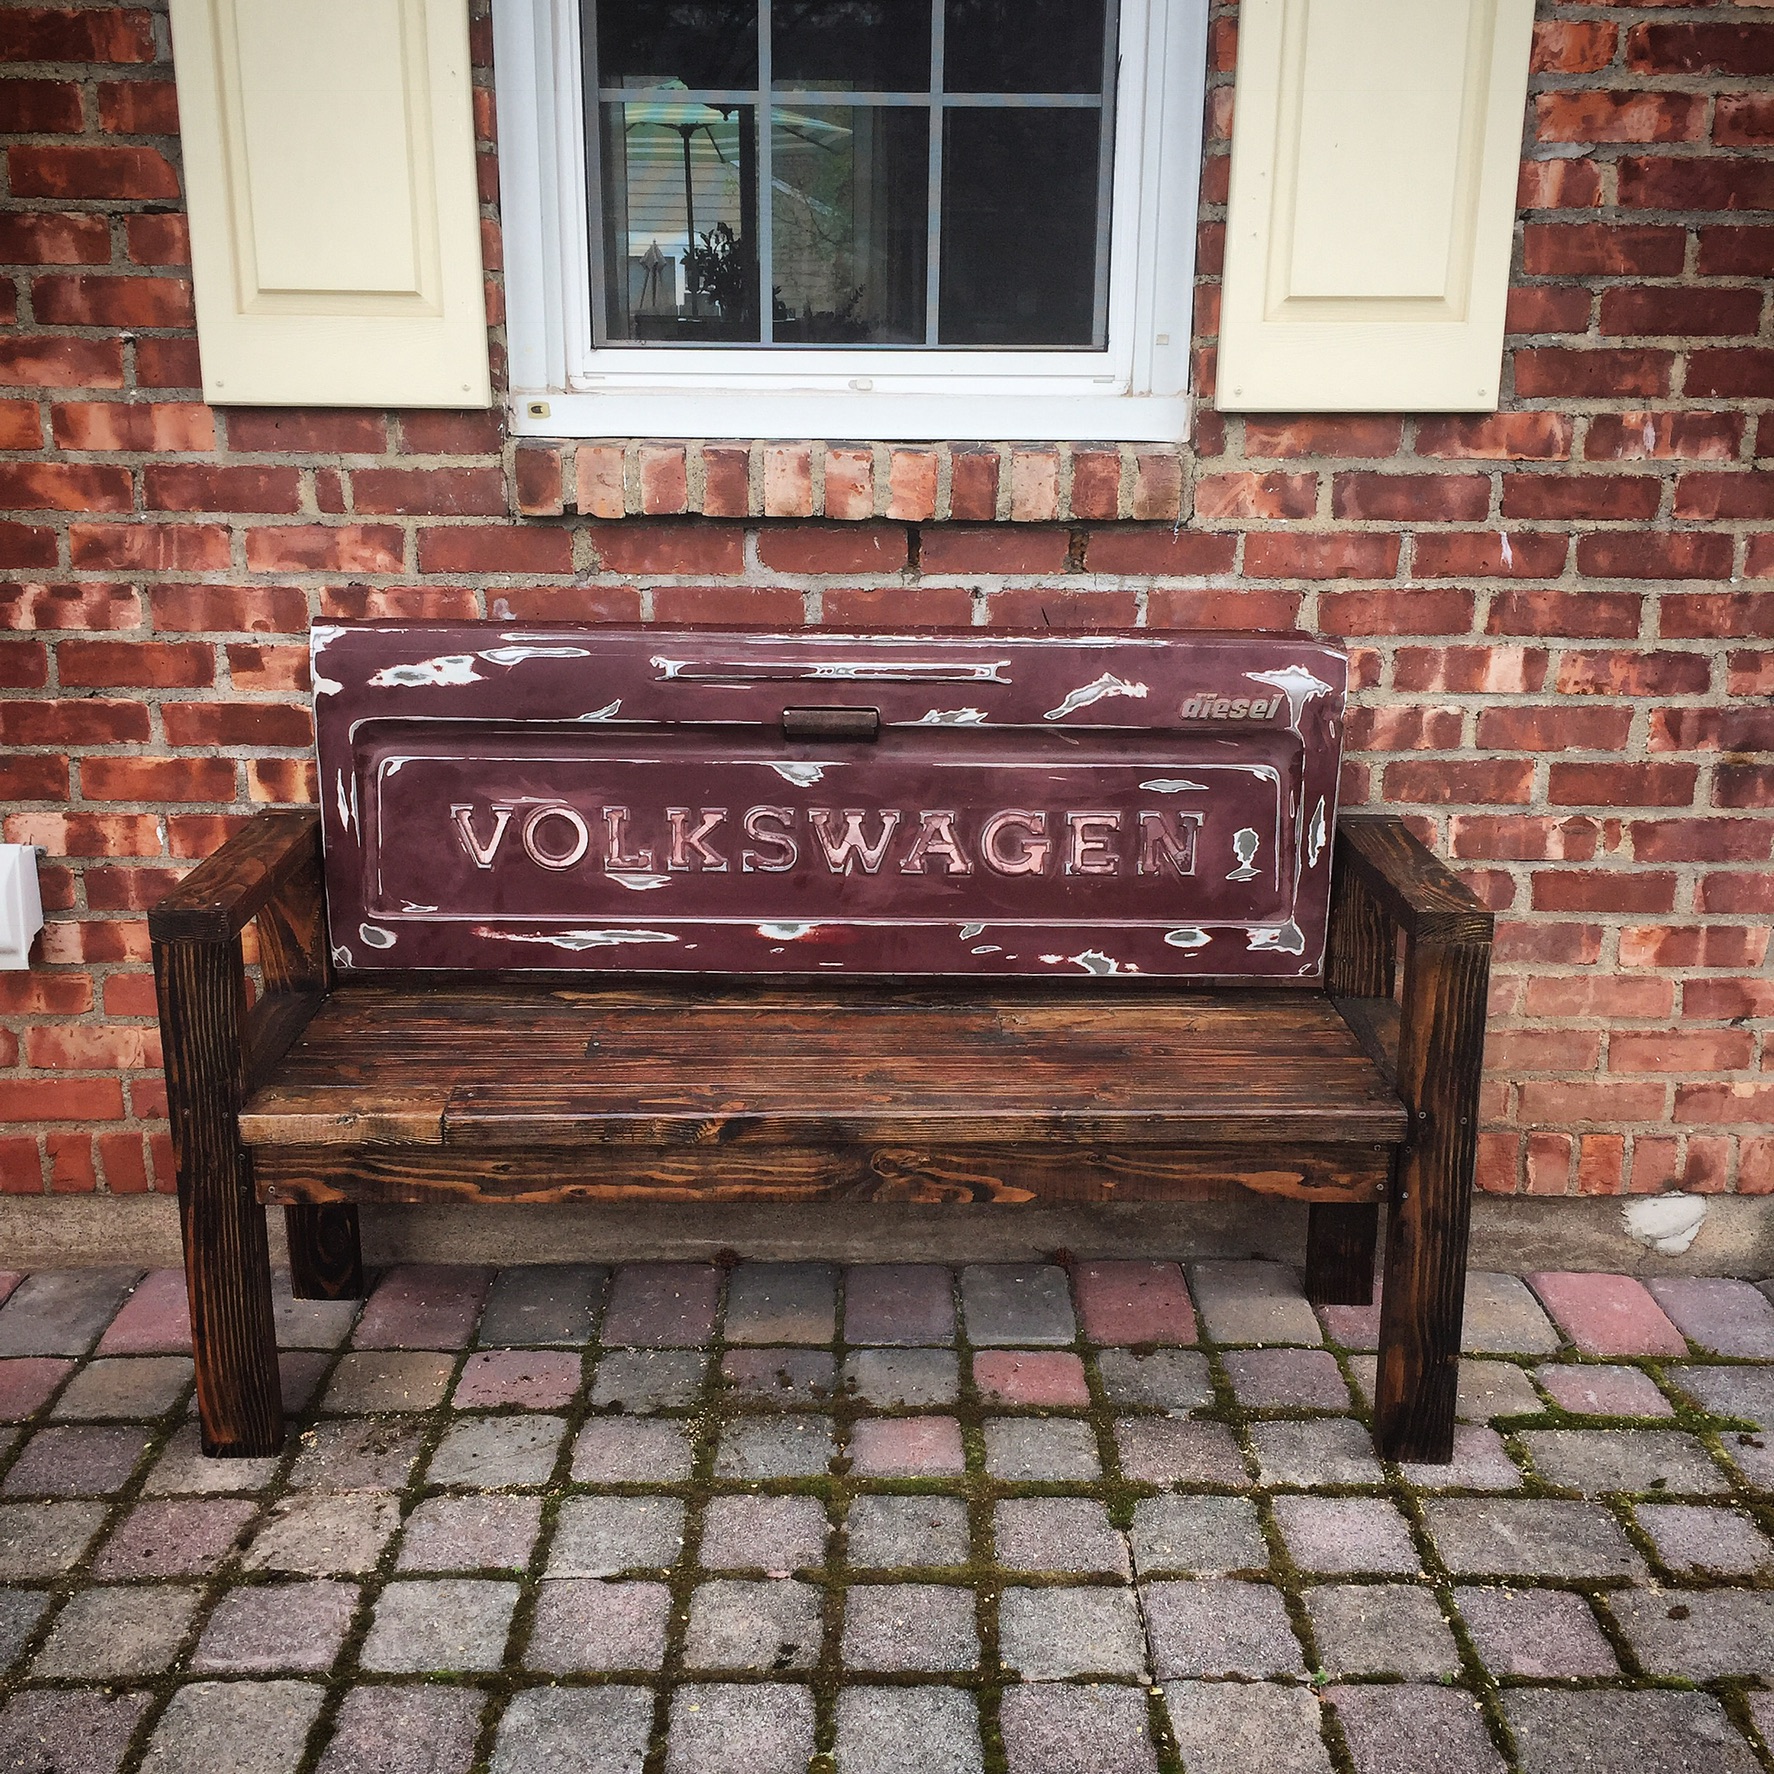
We built this dresser plan to be used as a dresser / change table combo.  The guy at the home improvement store said to use oil based polyurethane so that it was more resistant to change table spills and traffic/wear over the years.  The oil based poly also added a nice amber color to the stained wood which I really liked.

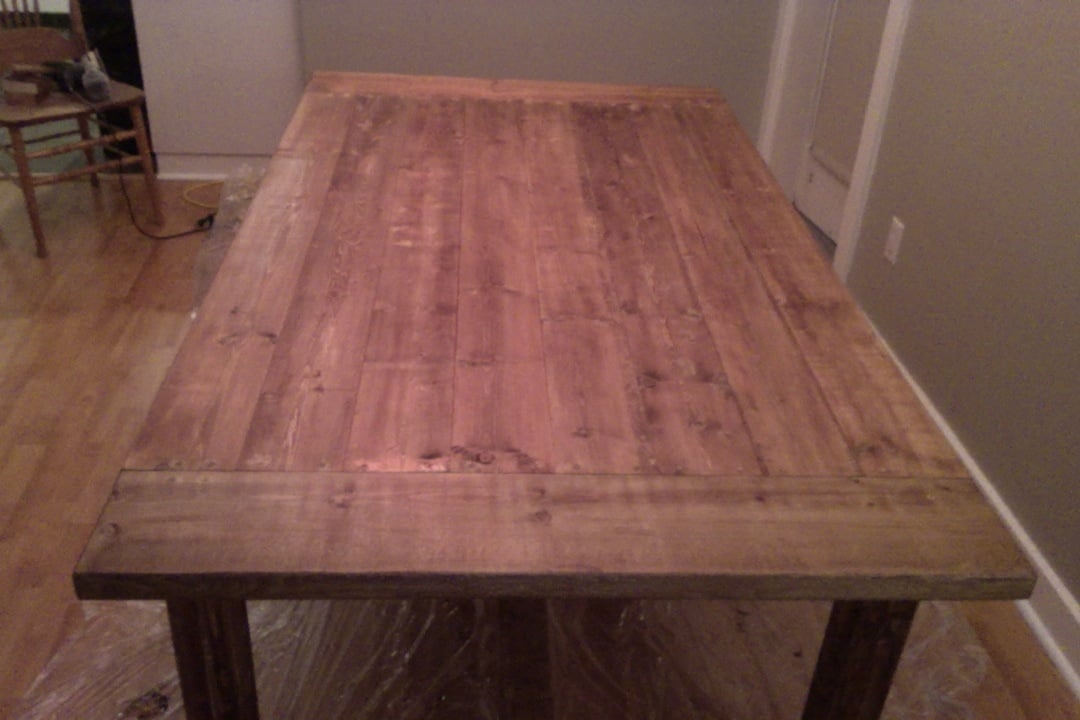
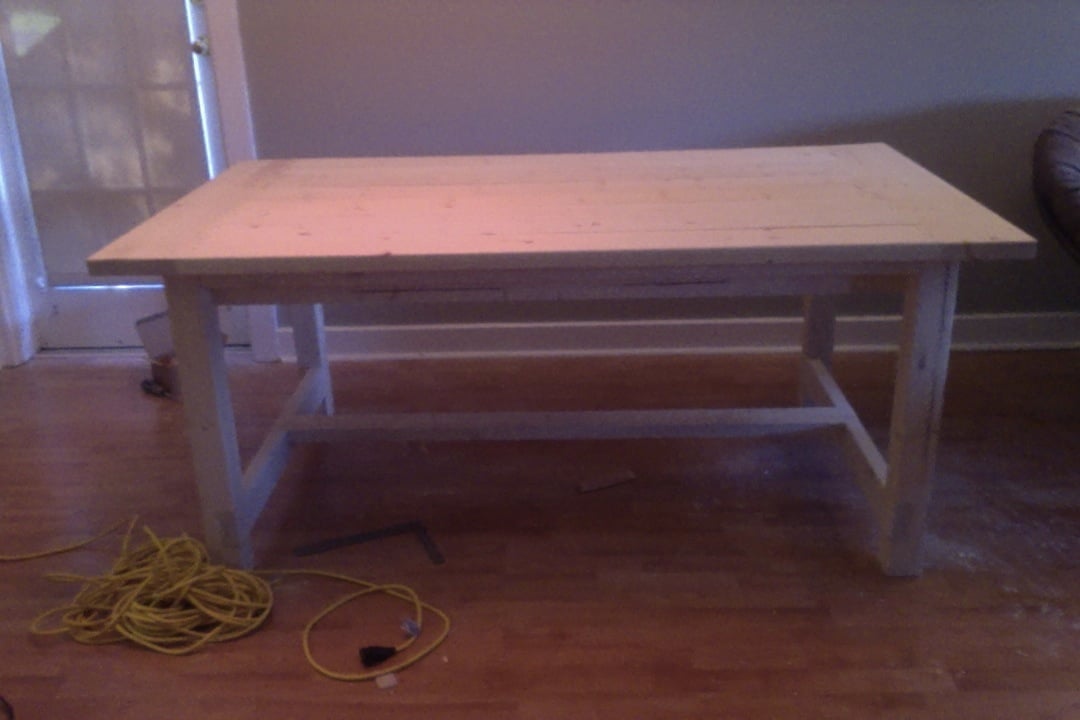
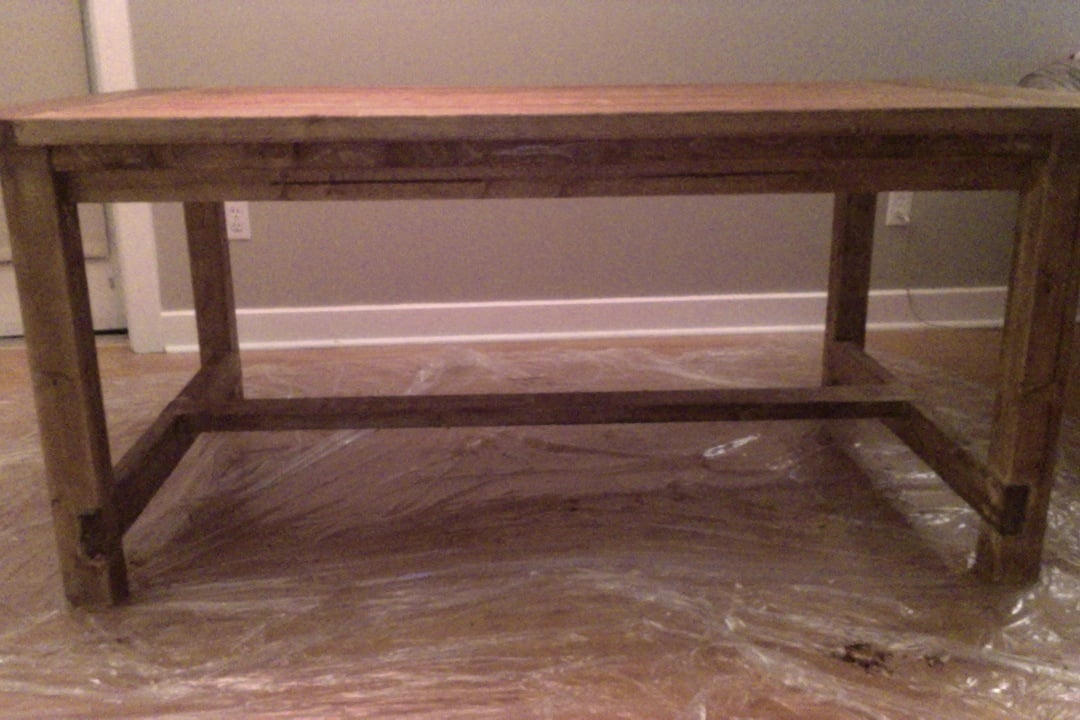
This is the most complicated project I've made so far (because I've never made a plan with drawers), but after a couple tables and a desk from Ana's site (and referencing Shanty-2-chic also) I was confident that it would turn out well.

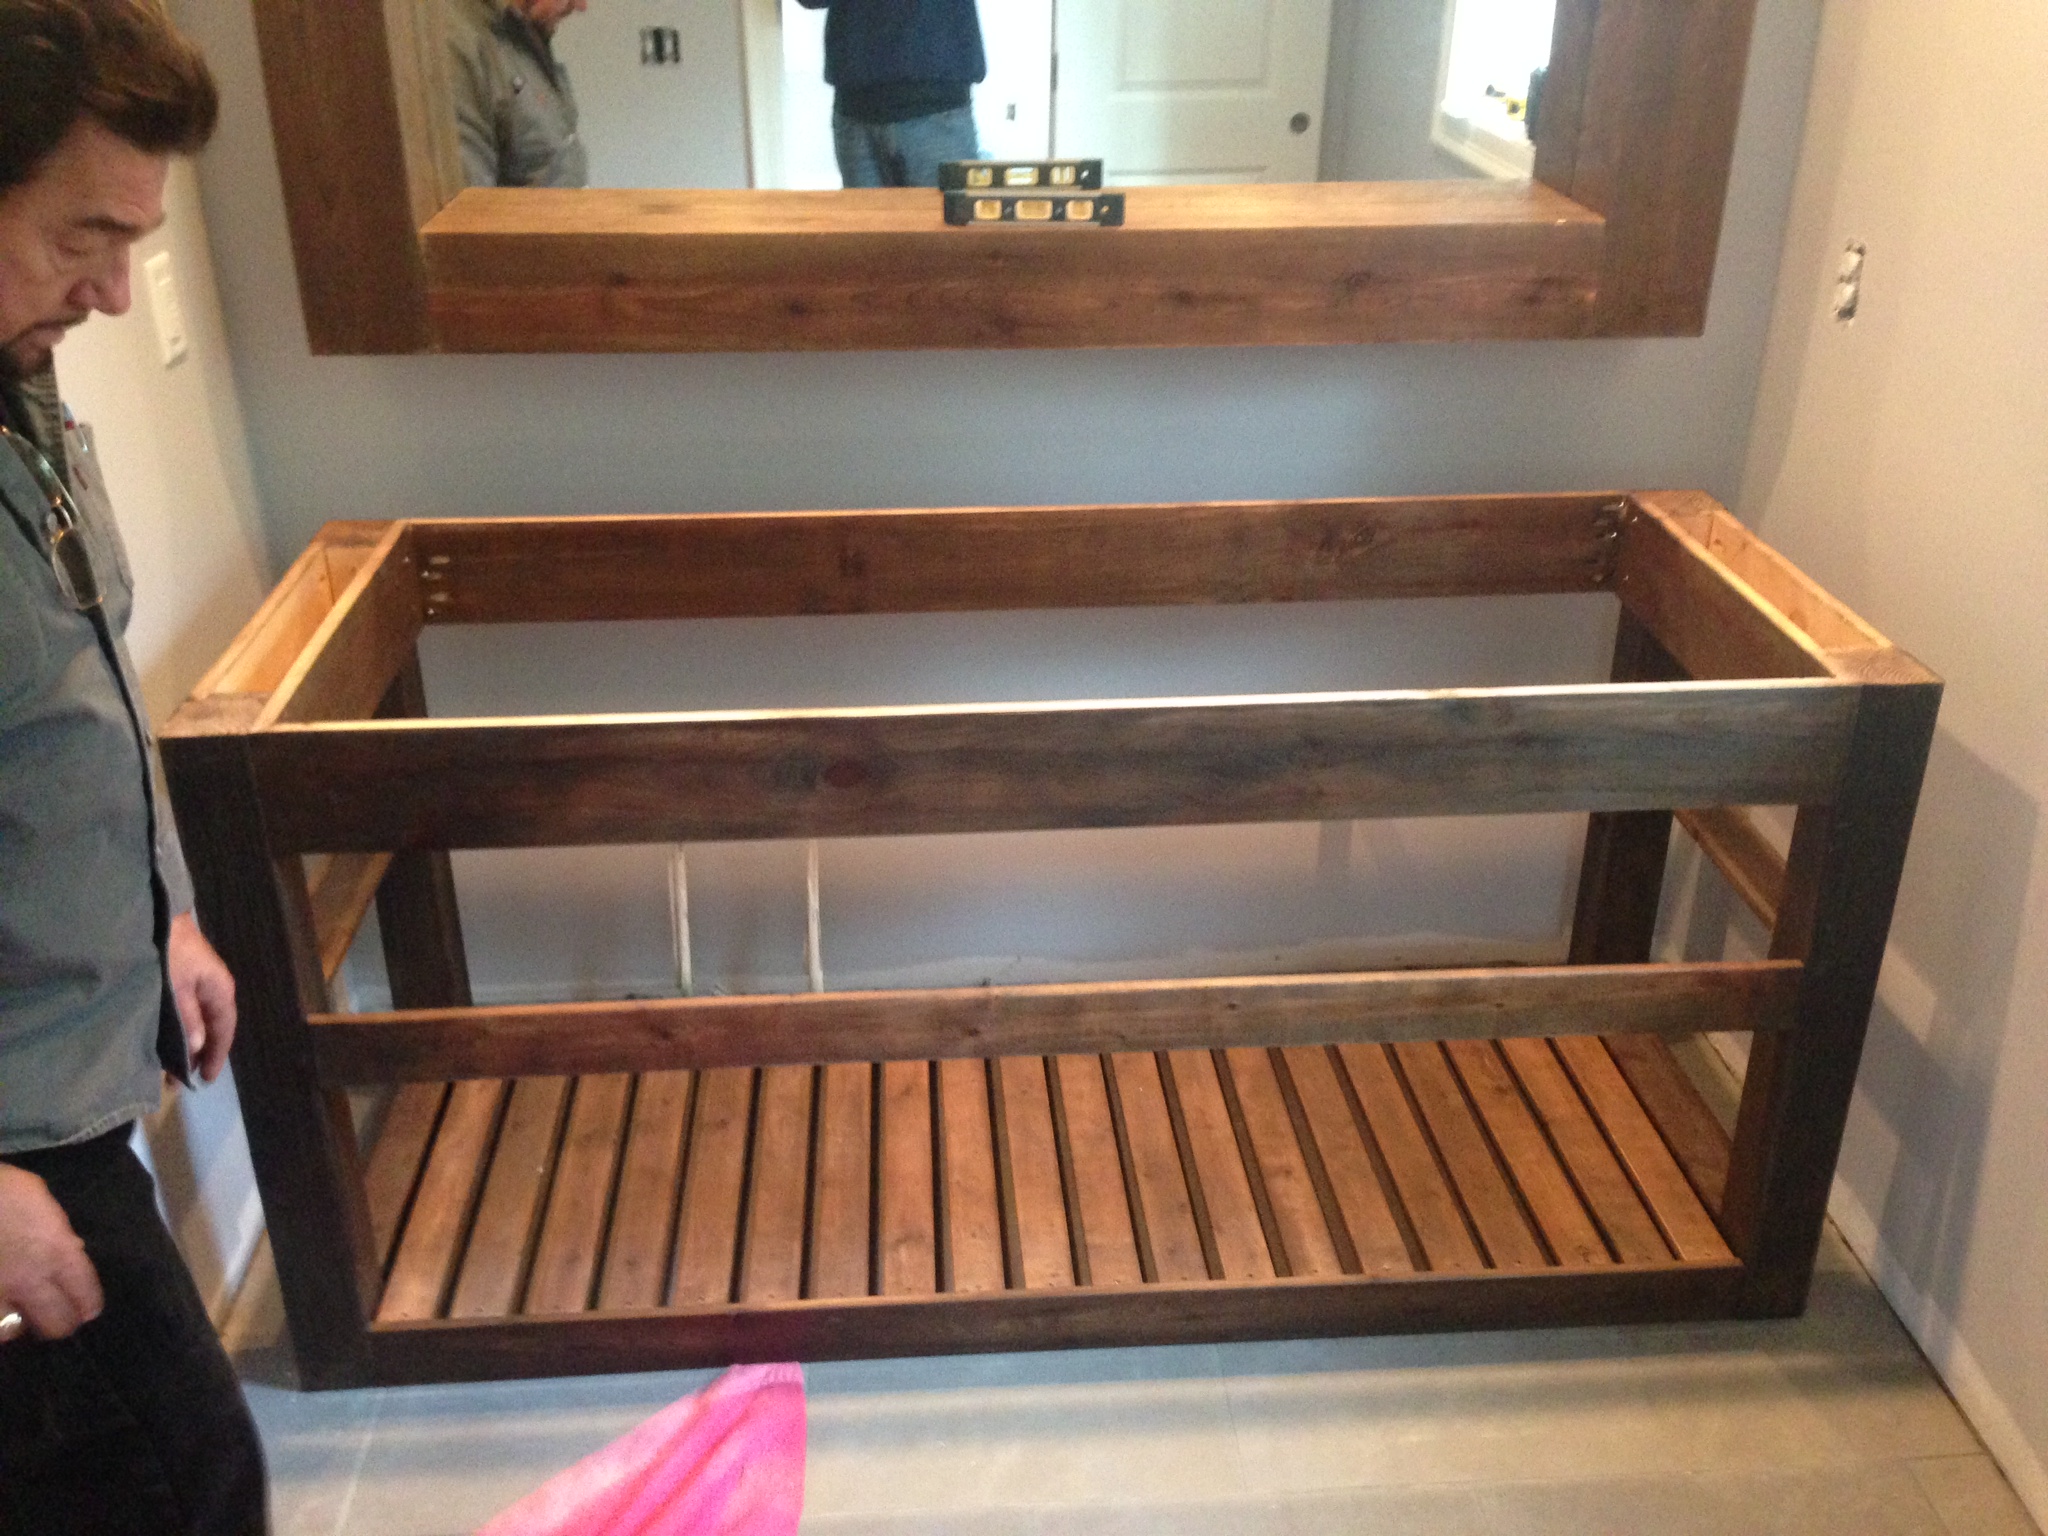
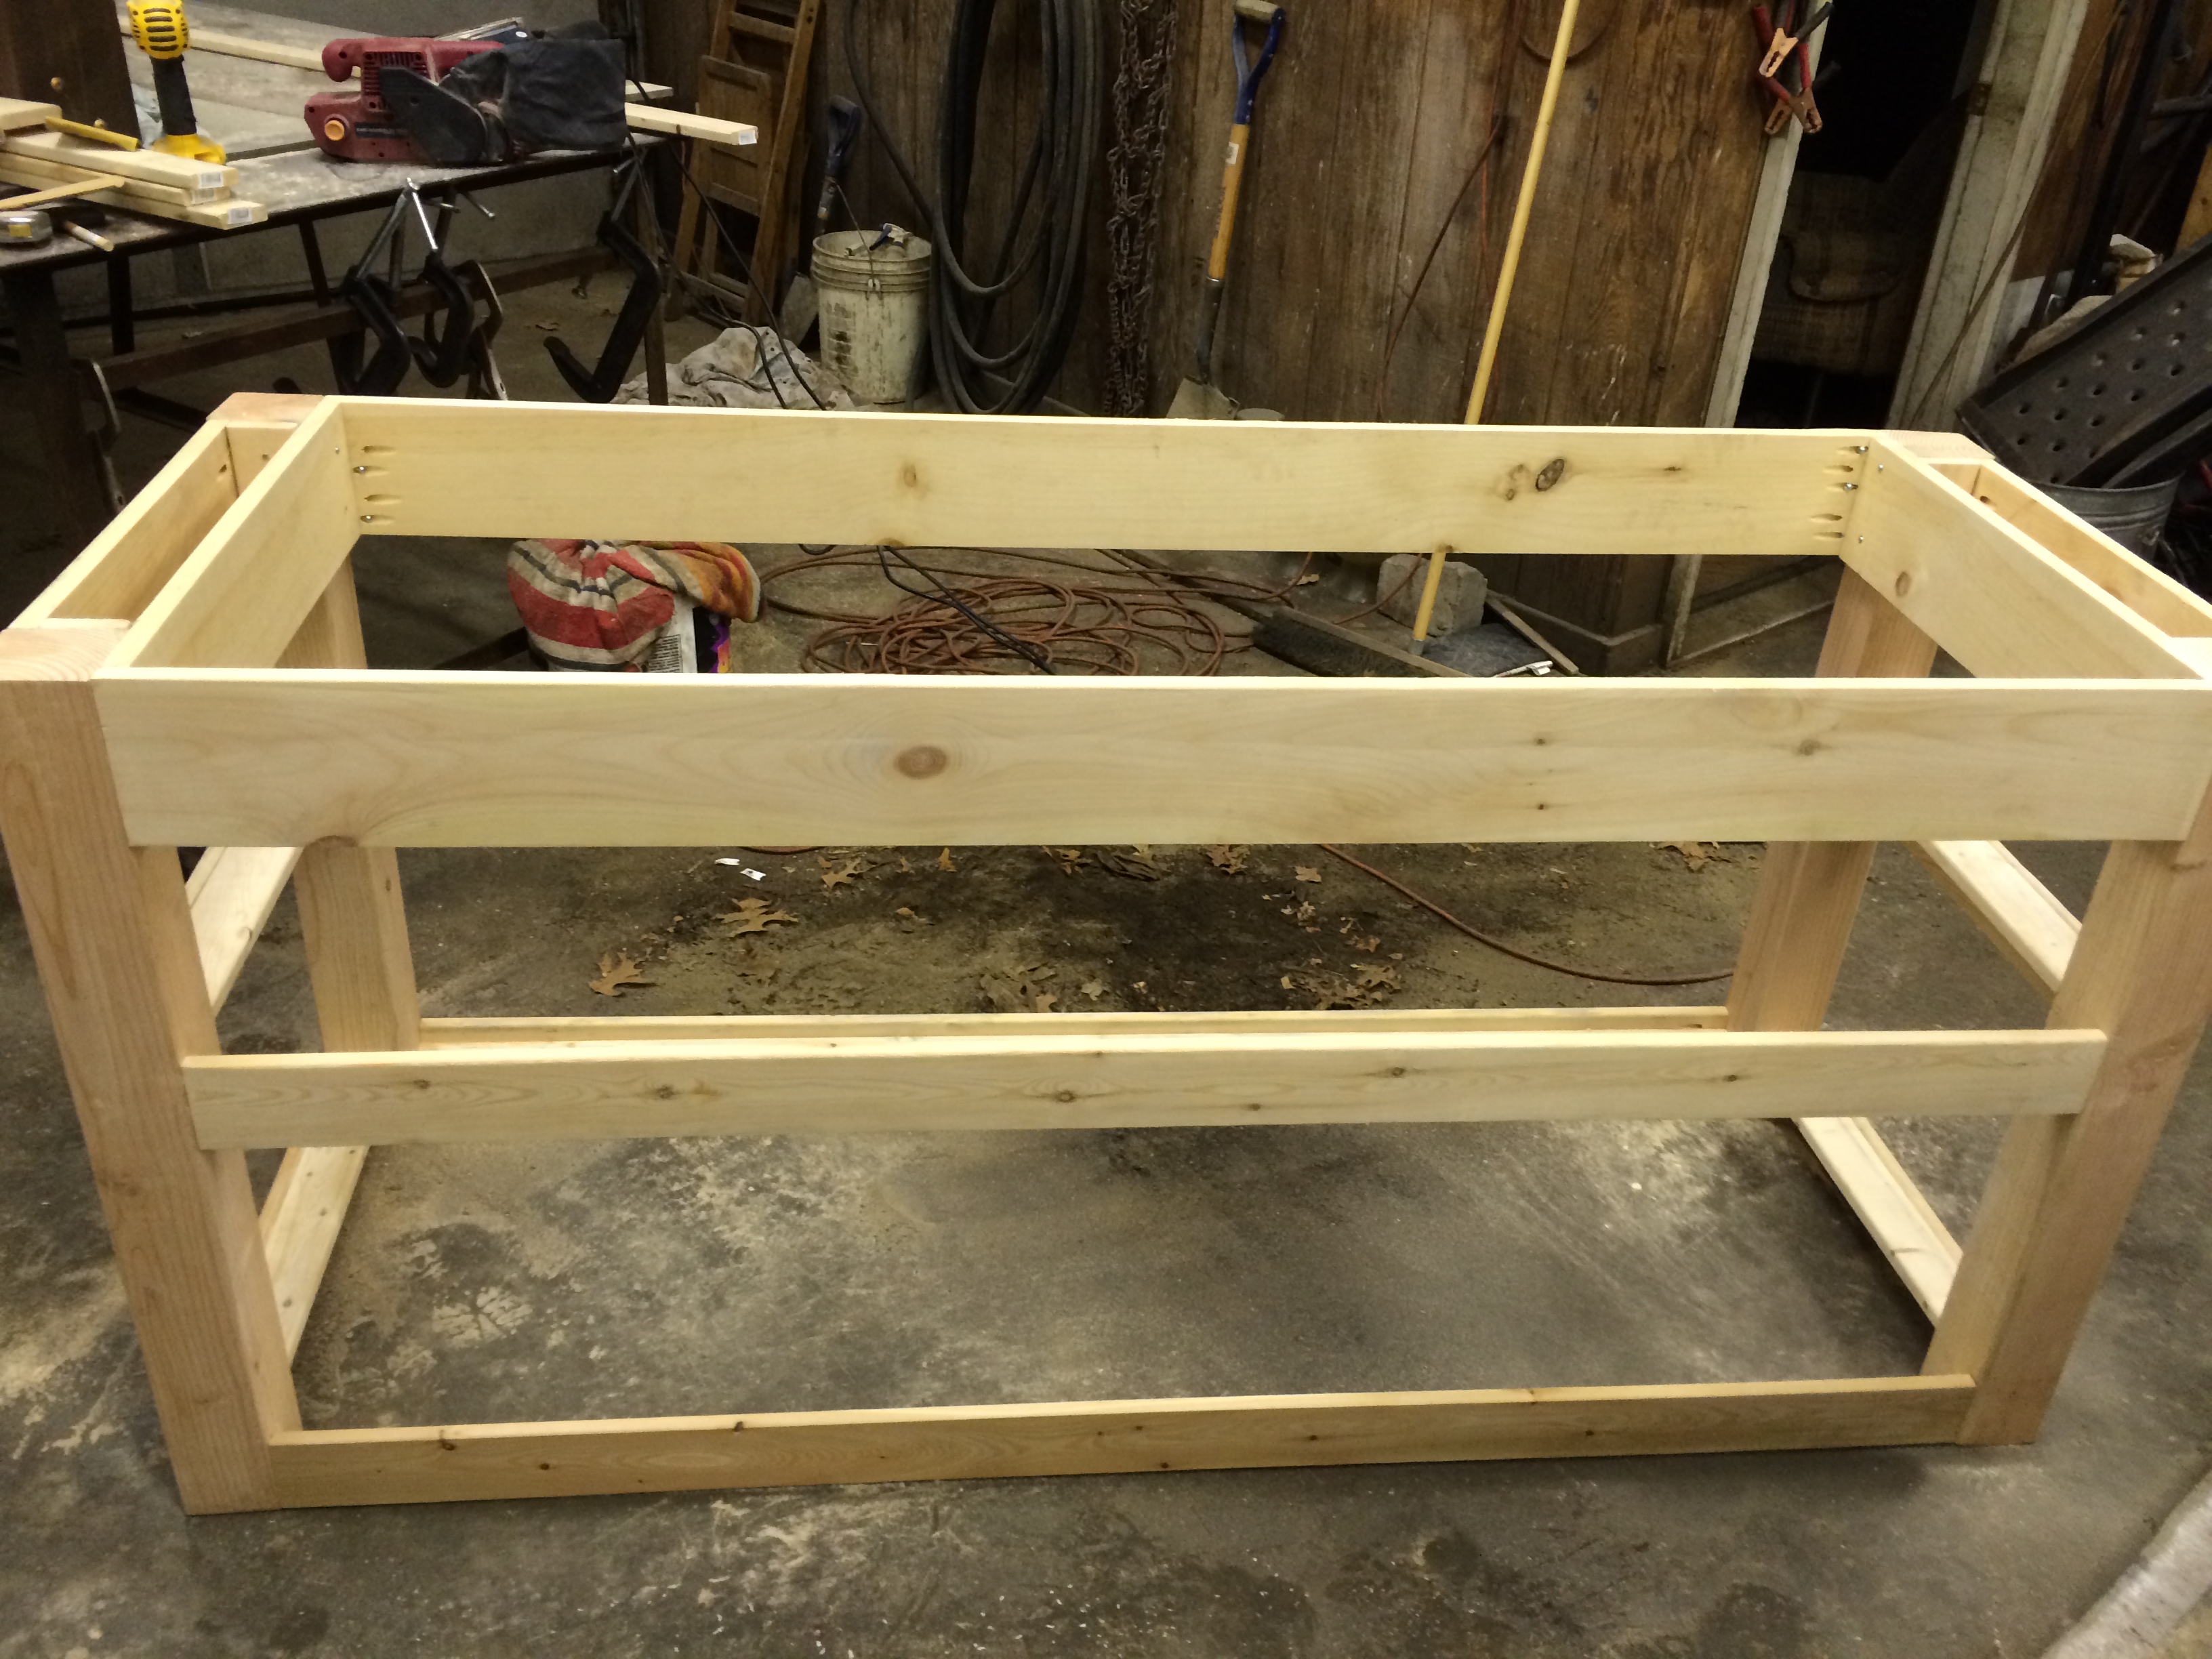
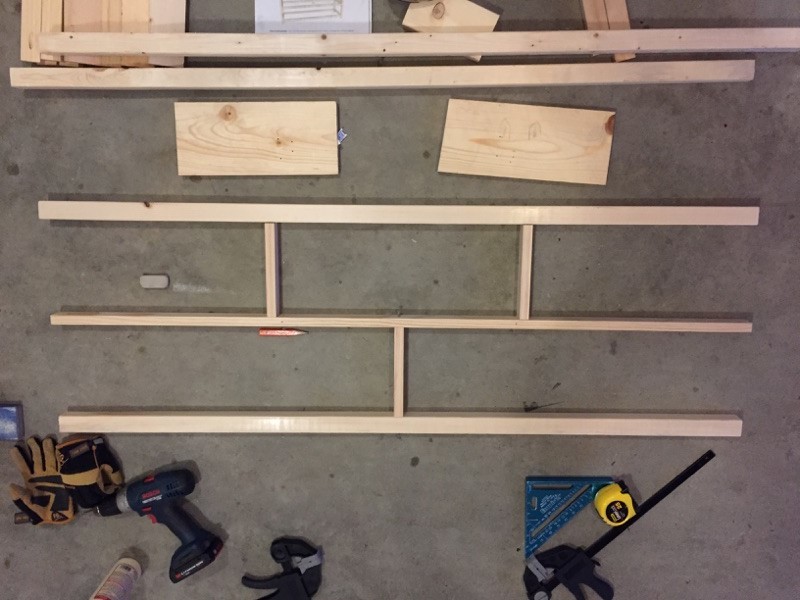
Change from the original plans --> We used 16in ball bearing "soft close" side-mount drawer slides instead of the euro style bottom corner mount ones mentioned in the plans. This requires adding the supports shaded in blue on the plans near step #7 pictures.  Getting the exact spacing width for those slides was a bit tricky and the drawer boxes had to be within 1/16" for them to work, so if you want simple you might want to stick to the euro style ones.  They allow for more "play" in the operation. 

Tip for attaching drawer faces:  For one thing, make the attahcment of the top and back of the dresser the LAST two steps you do on the whole project since it makes installing drawer slides and drawer faces a breeze.  That said, when it cam time for attached the front of the drawers I used 1/8" tile spacers all around the sides to make sure that gap was uniform and correct (see pic #4).  It was the simplest way I thought about of going about it.  Mounting the drawer boxes to the slides needed to be done before attaching the face boards for me.  And instead of nailing the faces on from the front and then screwing from behind; I put glue on the drawer box, put the face board in place using the tile spacers, and then added screws from the inside of the frame side.  It was a breeze. 

As the plans stated, I attached the top with PH screws through the side panels and six countersunk screws in the 2x2s along the width of the top using 2" screws.  It would have been a lot simpler to install the countersunk ones if I had a right angle drill or short handles screw driver, but I did not, so I made a normal one work.

If you have any more specific questions about my version of this project please let me know.  I was hoping to get to share more than 5 pictures, but that seems to be all the posts let you put up so I tried to included the most helpful ones.

Estimated Cost
$250.00

Break down: $166 (lumber) + $80 (5 - ball bearing drawer slides, $16/pair) + finishing materials if you don't have (sand paper, wood filler, stain & polyurethane) + drawer handles ($8)
Estimated Time Investment
Week Long Project (20 Hours or More)
Finish Used
•Minwax wood conditioner (I highly recommend this for even absorbtion of stains if you plan to stain anything -- plywood after sanding especially absorbed a lot of stain if it's not treated and wiped off rather quickly)

•Minwax "dark walnut" stain

•Oil-based Polyurethane -- better for our application since ours will double as a change table. The man as the home improvement store said oil based was better against wear and tear and the chemicals/fluids a change table might encounter.
Recommended Skill Level
Intermediate

Tailgate Bench

Submitted by Anonymous (not verified) on Wed, 05/17/2017 - 18:02

I used the plans for the outdoor sofa and just changed the measurements to fit the tailgate back. 

Estimated Time Investment
Weekend Project (10-20 Hours)
Finish Used
Miniwax Espresso
Recommended Skill Level
Beginner

Outdoor Entertaining Space

Submitted by ikeymedesu on Sun, 05/30/2021 - 06:09

A 2-month long project to create an entertaining space in our small backyard. I started with a dining set for 6, then went on to seating around our firepit. I actually doubled the size of the Modern Outdoor Loveseat and built a 4-seat couch (added a center section for support. I also built 2 loveseats, 2 small side tables, and took some creative liberties to design a coffee table/foot rest combo. The major modification I made to the couch and loveseats was adding a back for some additional height. This really improved the comfort when leaning back. Had a great time completing this project! When lumber prices come down I'll continue the build. (2 pictures keep uploading and converting to an upside down image - no idea why, but sorry for the weird view)

Estimated Time Investment
Week Long Project (20 Hours or More)
Finish Used
Behr Premium Transparent Natural Cedartone Weatherproof
Recommended Skill Level
Intermediate

Comments

Ana White Admin

Sun, 05/30/2021 - 09:58

Love the coffee table foot rest, would love to see more of the outdoor table as well! It all looks amazing and came together perfectly! Thank you for sharing, check out our Facebook page, just shared!

Seasonal And Holiday

Spa Bench - My First Project!

My first attempt at this type of project. We needed a good place to store the pool towels. My wife asked me where I bought it from!

Built from Plan(s)
Estimated Time Investment
An Hour or Two (0-2 Hours)
Finish Used
Minwax Red Chestnut
Recommended Skill Level
Beginner

Comments

Printer table (with fold down top door for VCR)

Submitted by zmurah on Sat, 02/21/2015 - 23:17

I needed a custom built printer table for the massive printer I just bought.  I figured if I was going to custom build it, I might as well add a couple storage areas.  Then I thought, I'm tired of having this VCR sitting on a TV tray to dub home movies to digital. So, I turned the top drawer area into a fold down face droor for easy access (and hiding) of the VCR.  Turned out great. 

Built from Plan(s)
Estimated Cost
~$85
Estimated Time Investment
Weekend Project (10-20 Hours)
Finish Used
Cherry wood stain with a polyurethane finish
Recommended Skill Level
Beginner

My pretty turquois bench

Submitted by ltjjones on Mon, 05/22/2017 - 17:01

Made this for a fund raiser auction.  Highest bid of the event.   :)

Estimated Time Investment
Day Project (6-9 Hours)
Finish Used
Spray painted
Recommended Skill Level
Beginner

2x4 Outdoor Chairs and Side Table

I built the 2 chairs and side table using Ana's plans. Wood in the UK is perhaps not as cheap and ubiquitous, so I managed to get hold of some rough siberian larch to build them. After what seemed like a lot of sanding I started cutting. I've used stainless steel screws and have used a plug cutter on a mahogany board I had to plug the screw holes. I really liked the contrast and neatness that this has given the project. I also used some rubber feet to raise it off the ground and try and reduce any water damage. The side table is reduced in size from the 2 foot version in the plans, this was easy enough once I'd worked out the impact on all of the other measurements. My wife has commented that I should have used less wood in my next project as they are very heavy, they certainly aren't going anywhere! My wife did produce the lovely grey cushions that you see in the pictures.

Estimated Cost
120
Estimated Time Investment
Weekend Project (10-20 Hours)
Finish Used
Used a wood preserver followed by a coat of stain to obtain the light finish seen
Recommended Skill Level
Intermediate

Comments

Workbench Console with Hutch

Submitted by Jamaunzie on Tue, 04/09/2013 - 06:11

When I first saw this and showed it to my wife it became number one on my Honey Dew list. I did not like the open space between the bottom shelf and top, saw on this site where someone put a wine rack of shorts as a second shelf. So I did the same I used 1x4 instead of the 1x10 used on bottom shelf. I also used 1x4 for the top to help eliminate the gaps between the boards that the 2x4’s would cause. To help give something for the 2x4’s and the 2x6’s to attach to I screwed 2x2’s to the 1x4’s around the edge. Gives the illusion of 2x4’s and makes for a very smooth and flat surface for the top. The Hutch I made it taller to be able to put taller things under the first shelf. I also installed lights on the top shelf and trim.

Built from Plan(s)
Estimated Cost
200.00
Estimated Time Investment
Week Long Project (20 Hours or More)
Finish Used
Sanded and Sanded started with number 60 grit and worked to 220 grit then used 320 grit by hand. I used one coat of Miniwax English Chestnut hand rubbed I put three coats of Ploy hand rubed with steel wool between each
Recommended Skill Level
Intermediate

Comments