Community Brag Posts

First Piece of Furniture Ever

Submitted by Anonymous (not verified) on Sun, 12/13/2020 - 20:51

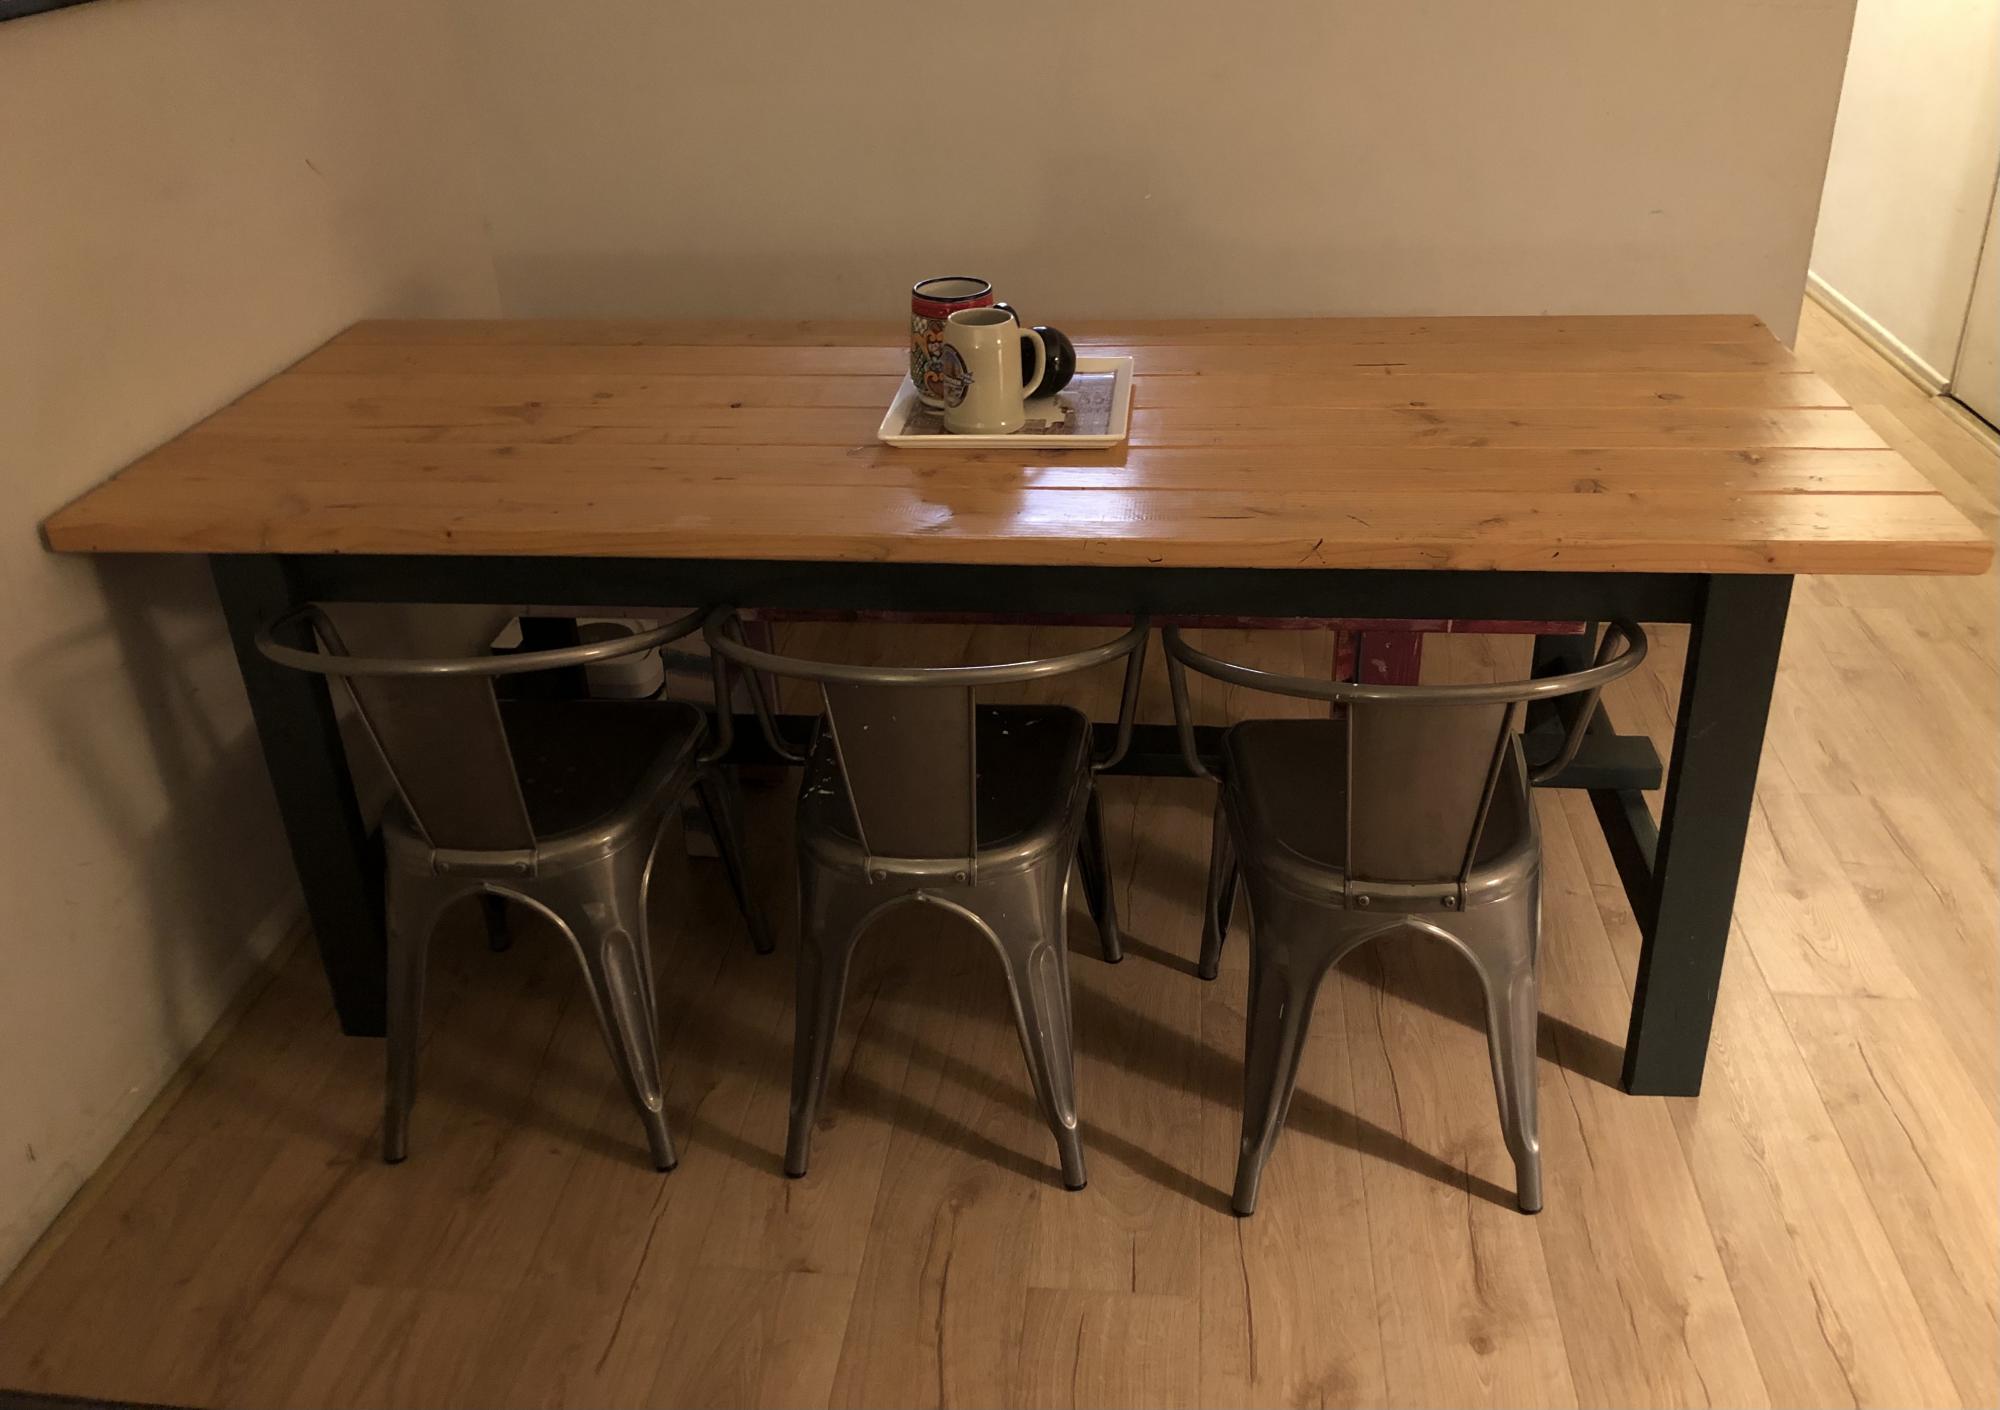
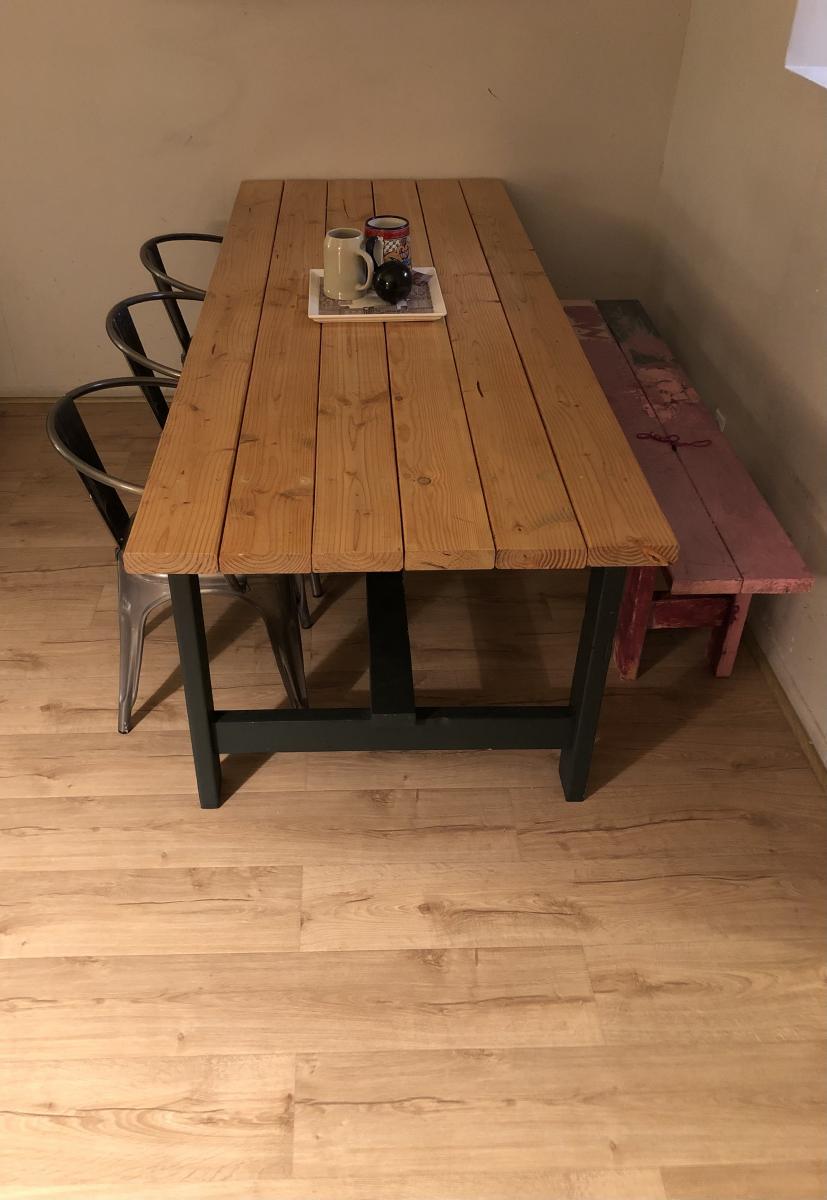
So, my skills have been as a cobbler, handy kind of guy for decades. Rough shelving for shop/garage basement storage etc... I've always done all my home maintenance and repairs so I'm familiar with a lot of stuff in and around the house. However I've never attempted a finished piece of furniture before. As always, I love the build and hate the finishing process.

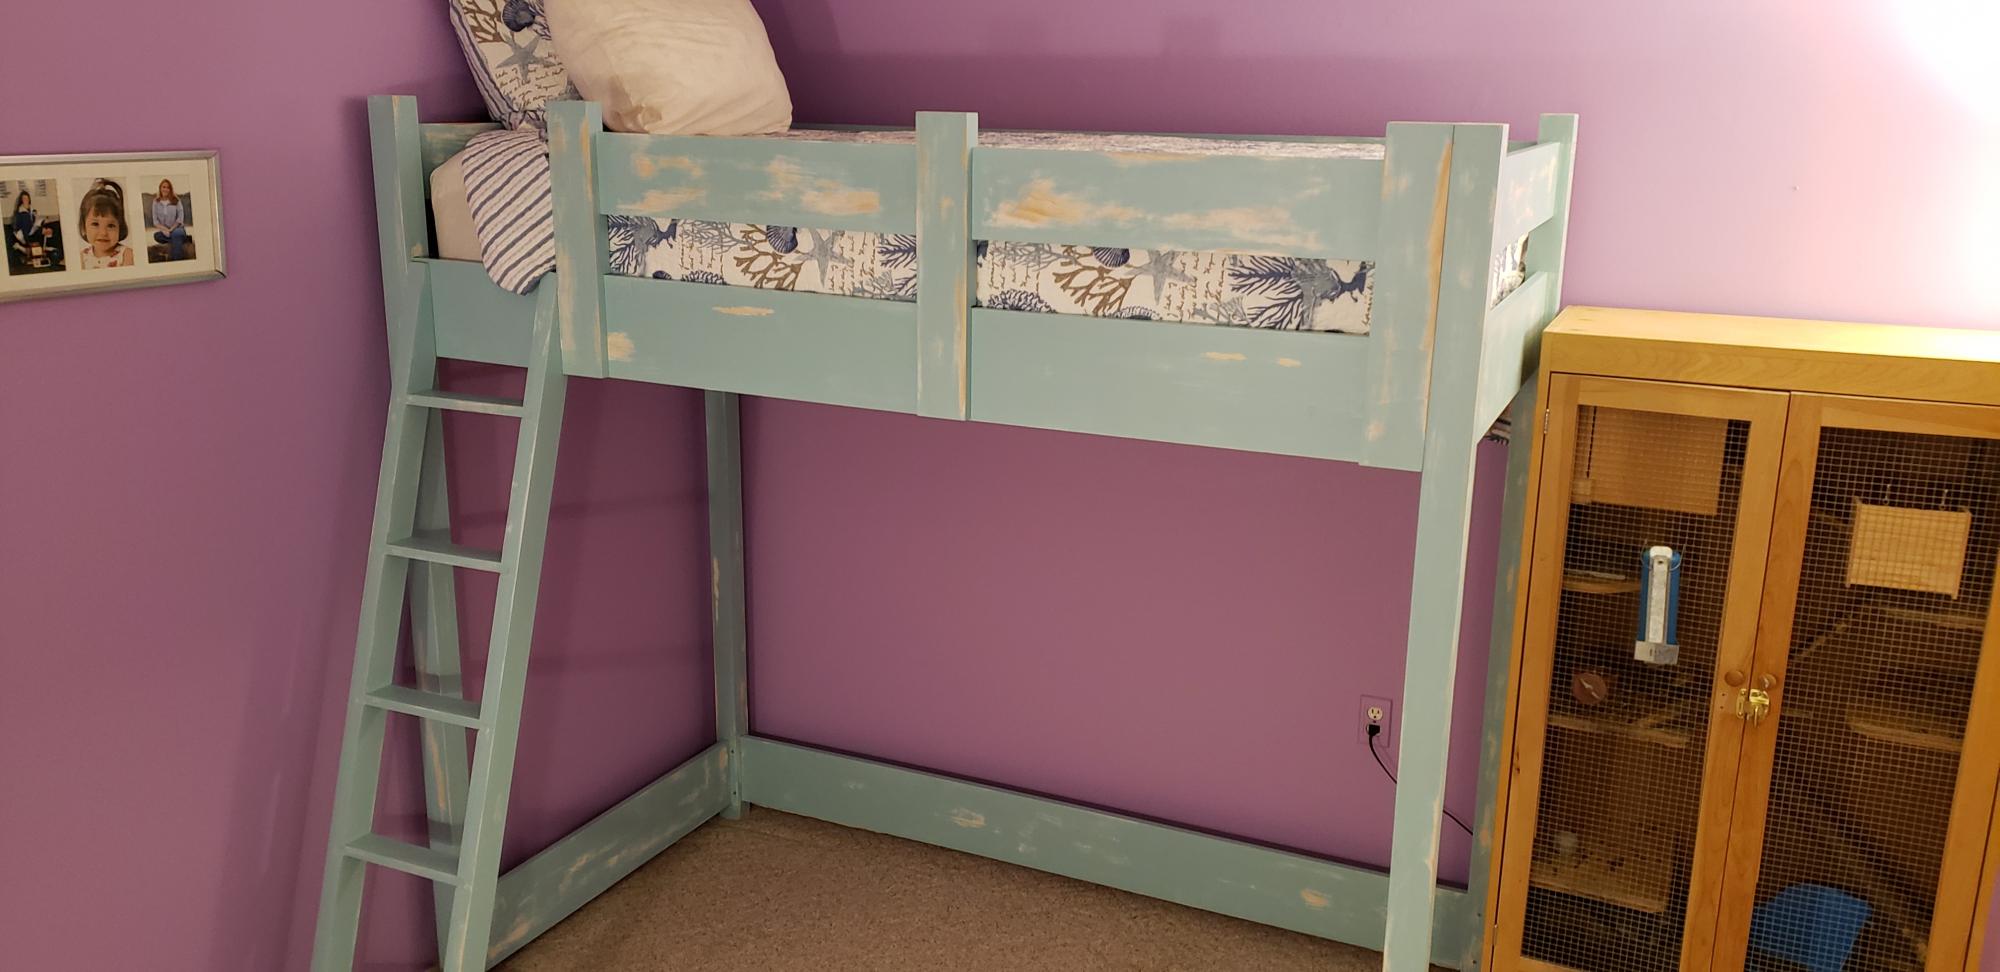
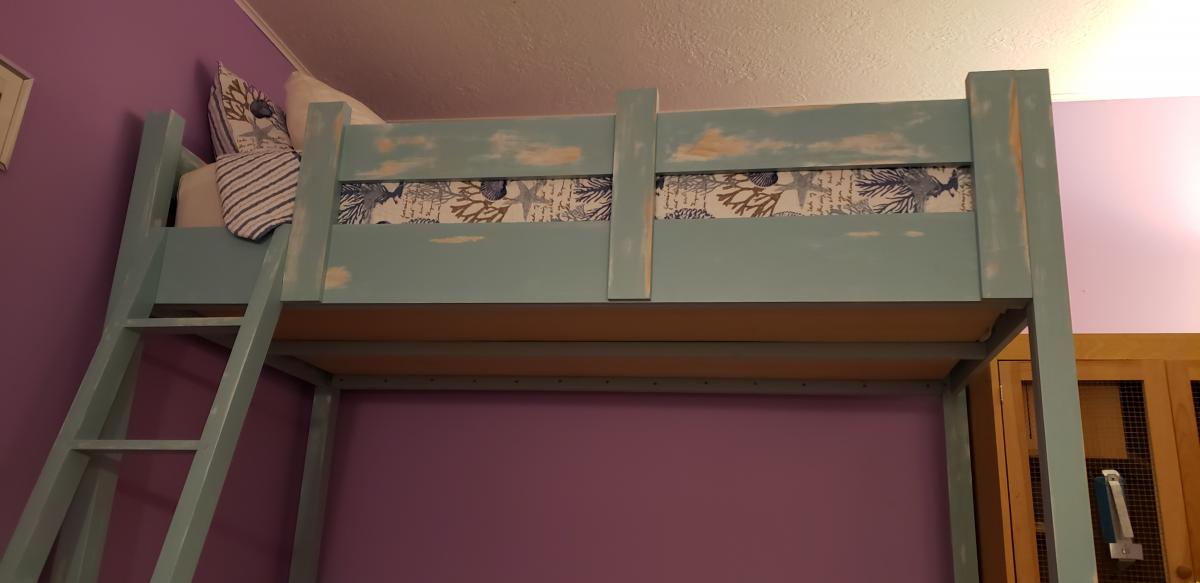
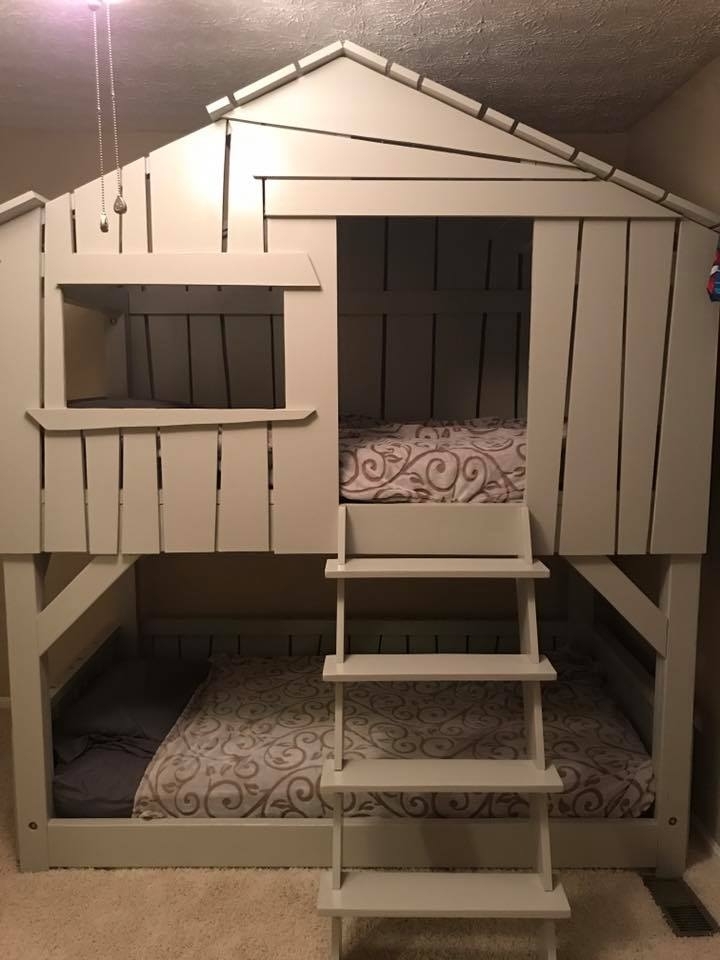
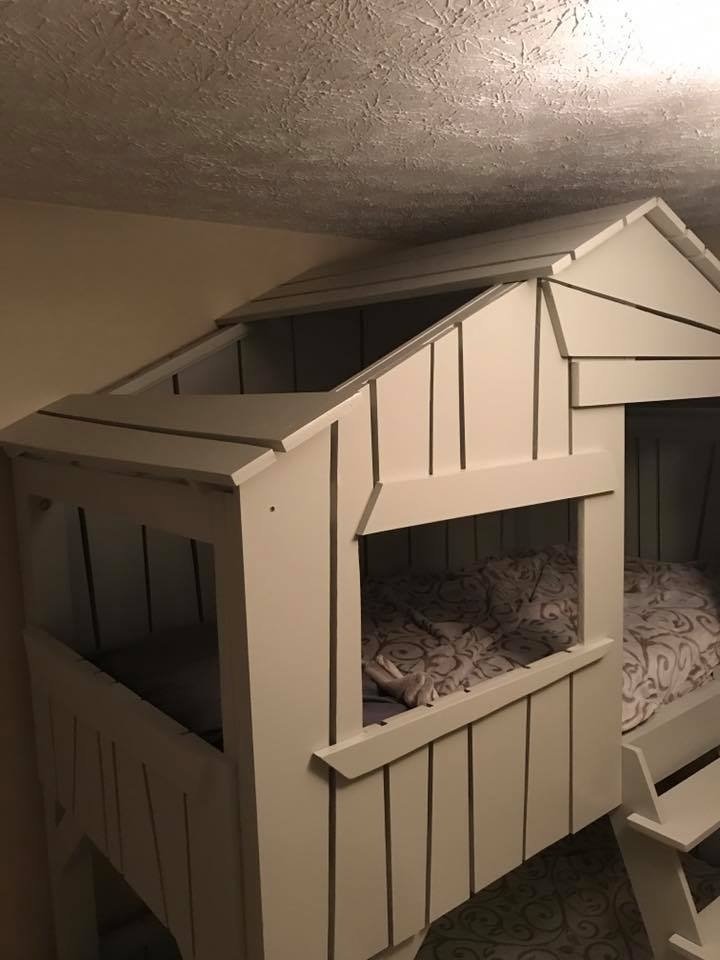
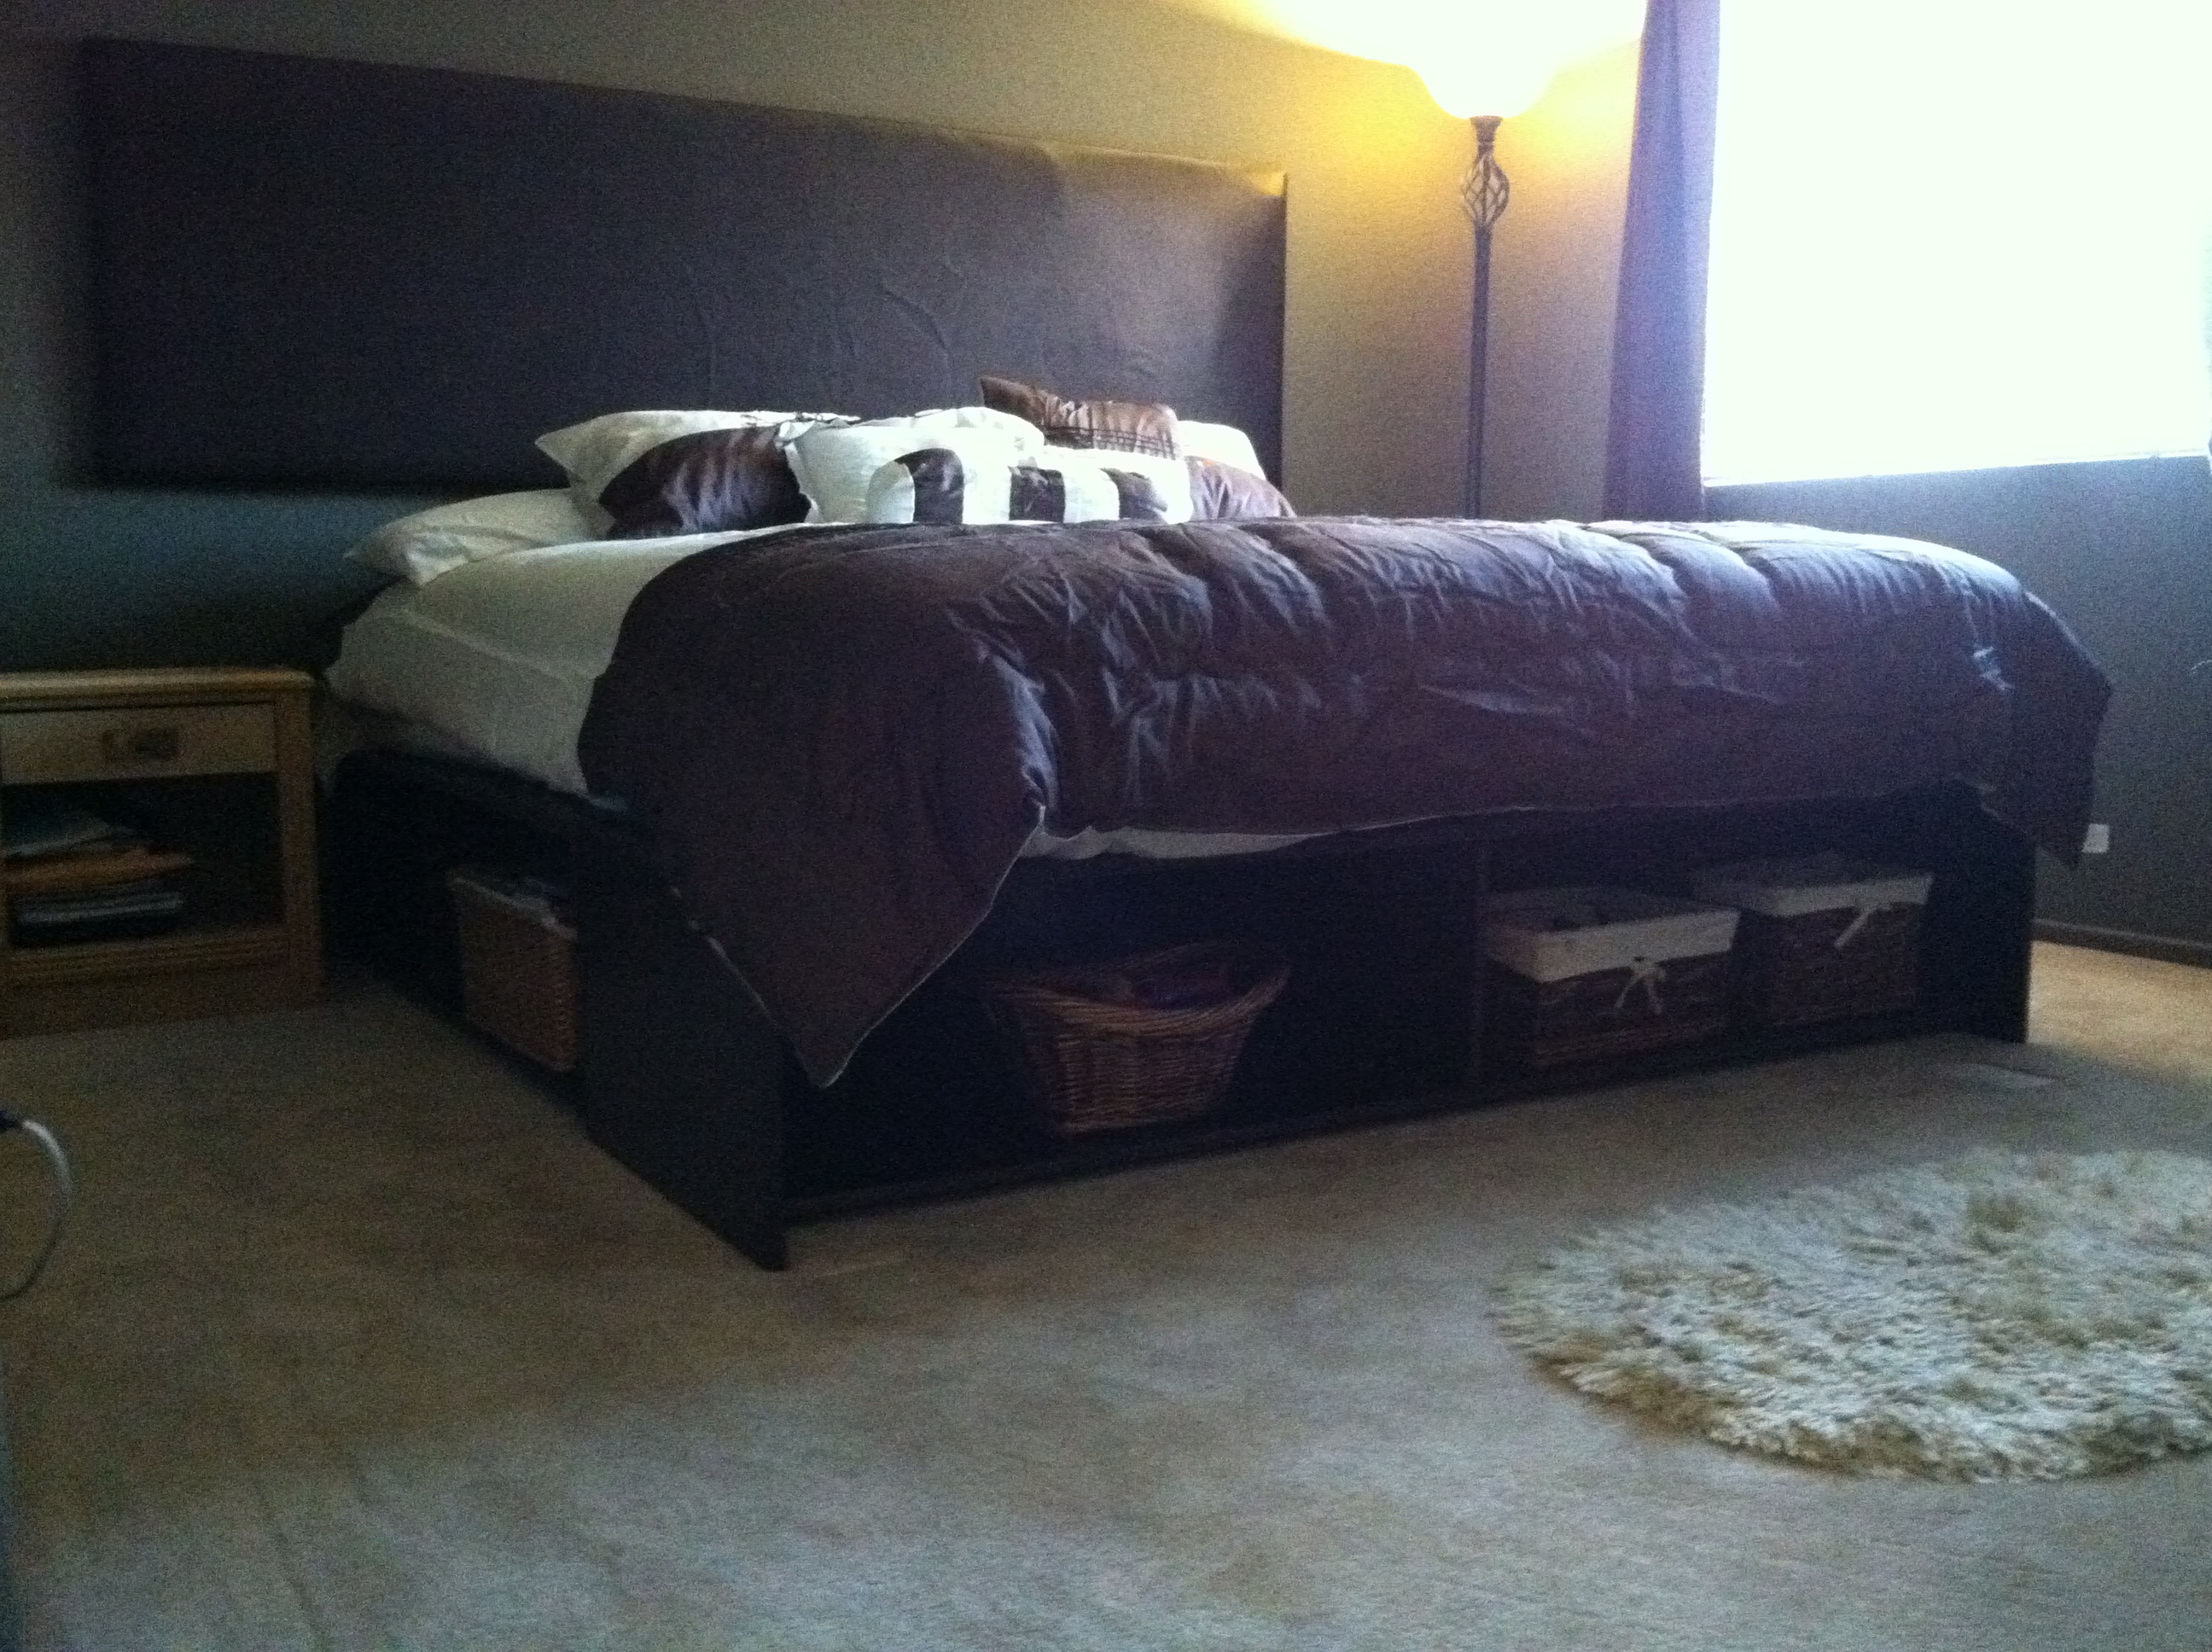
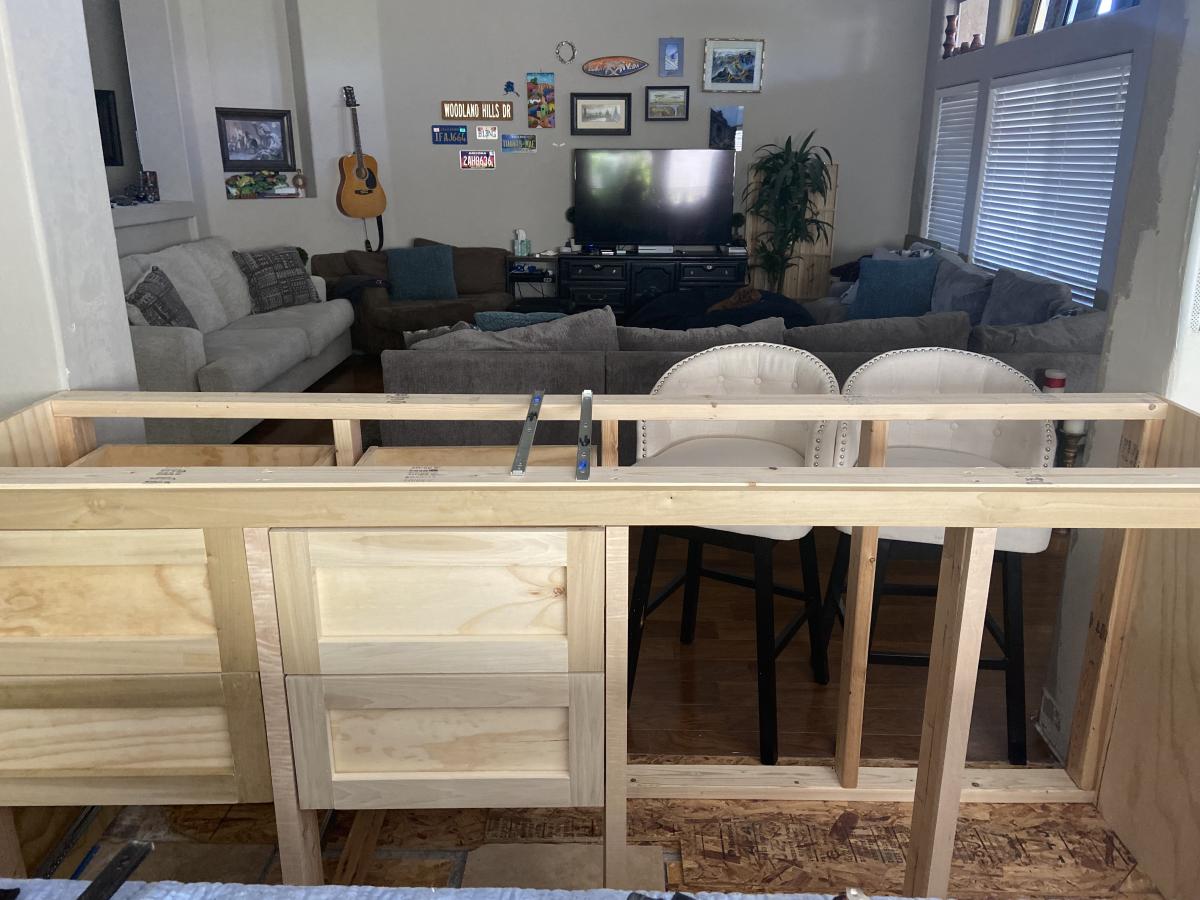
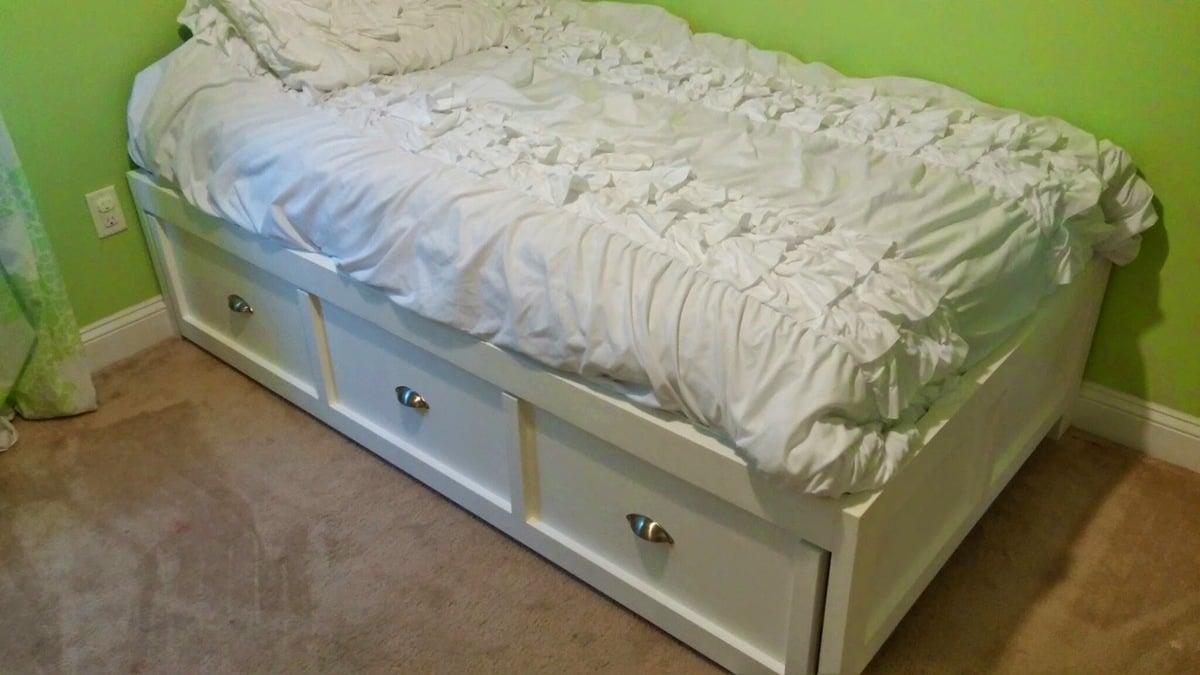
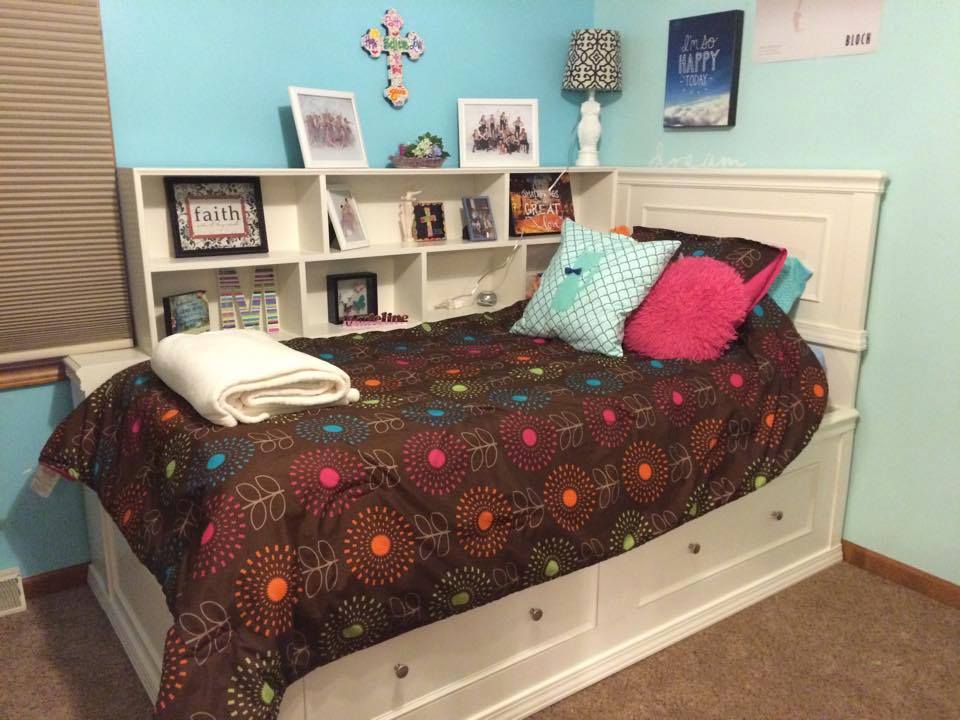
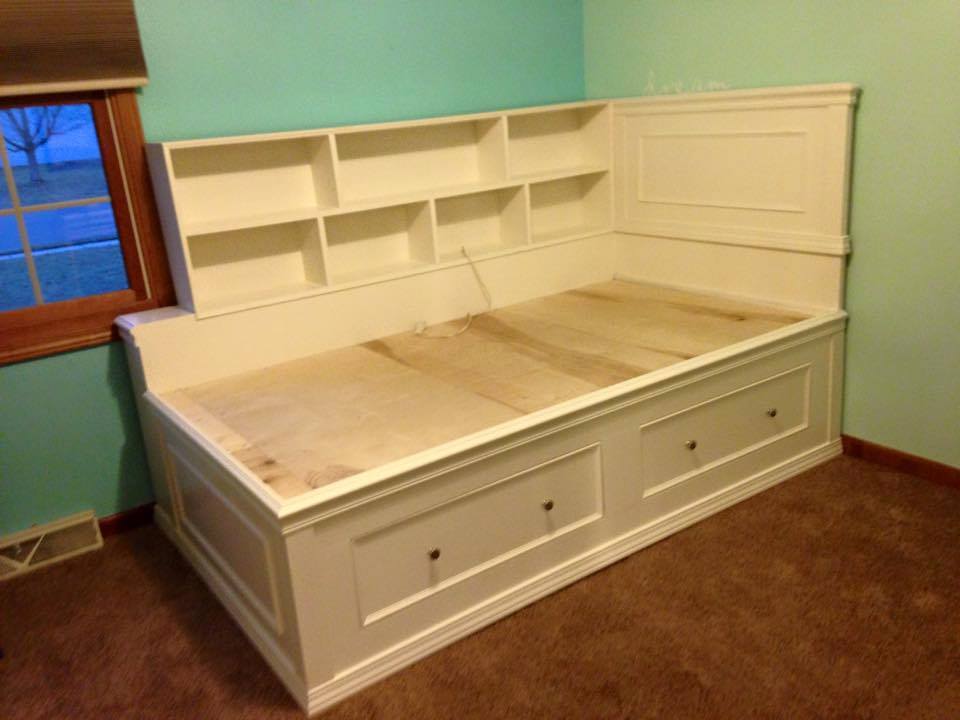
My daughter had a pretty new mattress that she loved which was 13 inches thick and her celling is the standard 8 feet. Consider these kind of things before you build this design. We did and the plans were altered a little bit. We'll be building the bookcase later and either buying or building a desk as well. She can set up in bed with several inches above her head and there will be plenty of room over her head in a standard height office/computer chair underneath. All I basically did was; add a few inches to the height of the legs and uprights for the guard rail (4" I think), increased the head, foot, back and guard rail top planks from 1X4s to 1X6s. Which changed the dimensions of some of the spacers too. She isn't sure she wants the top rails on it but I think I'll put them on later.

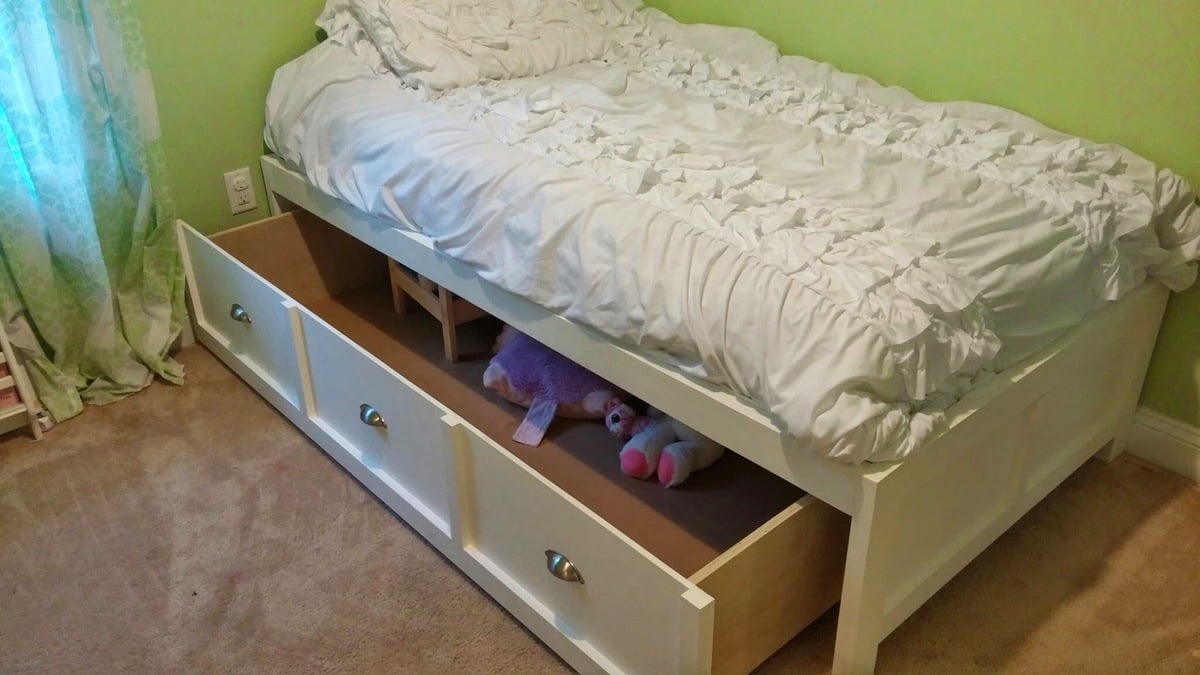
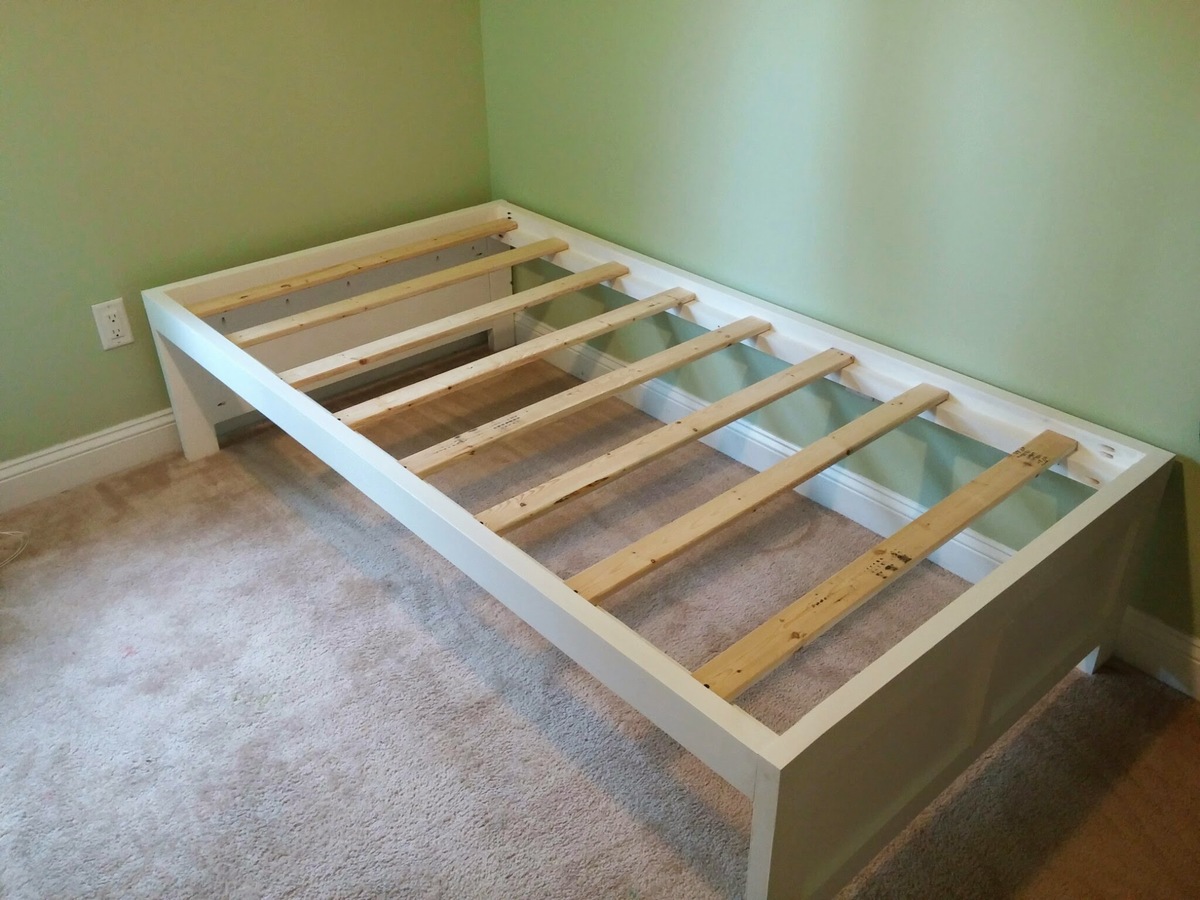
We made our own bunkie board for firmer support, which also raised the thickness about 1/4" over just slats.

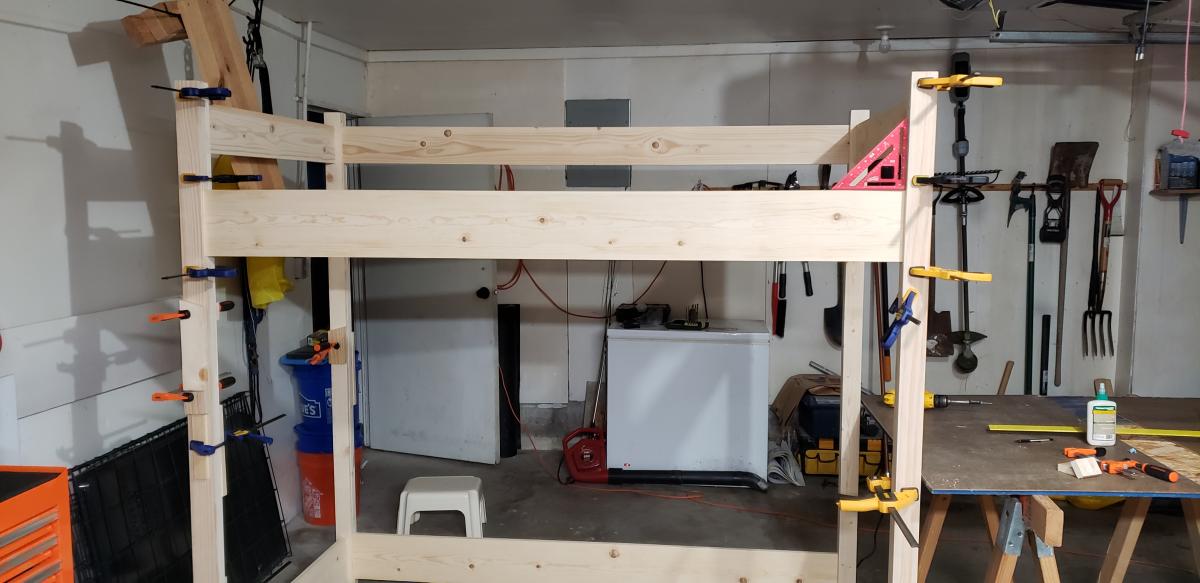
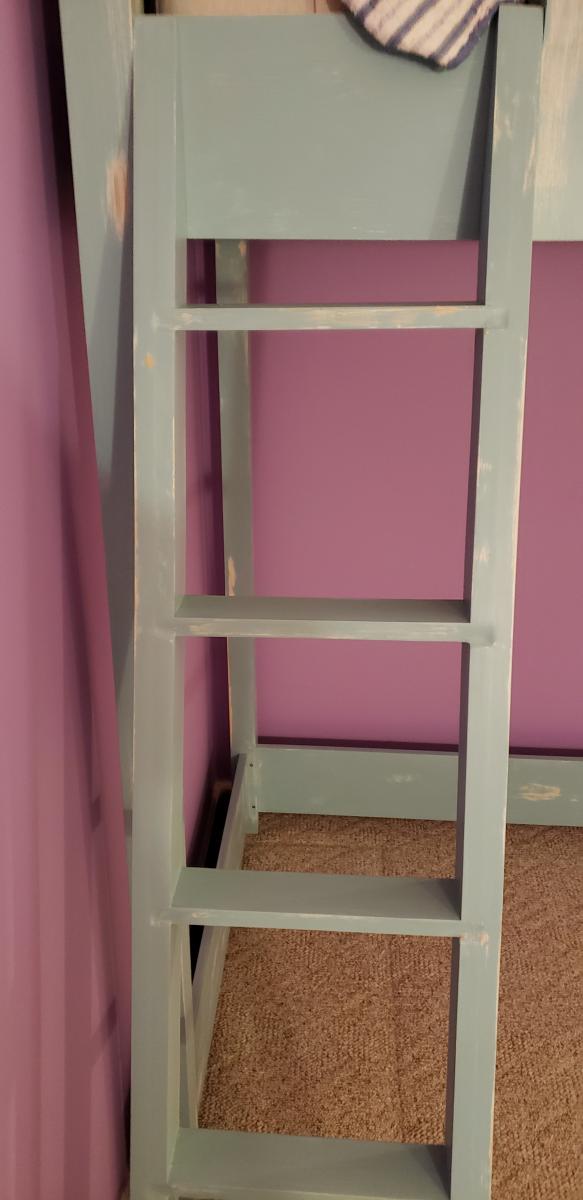
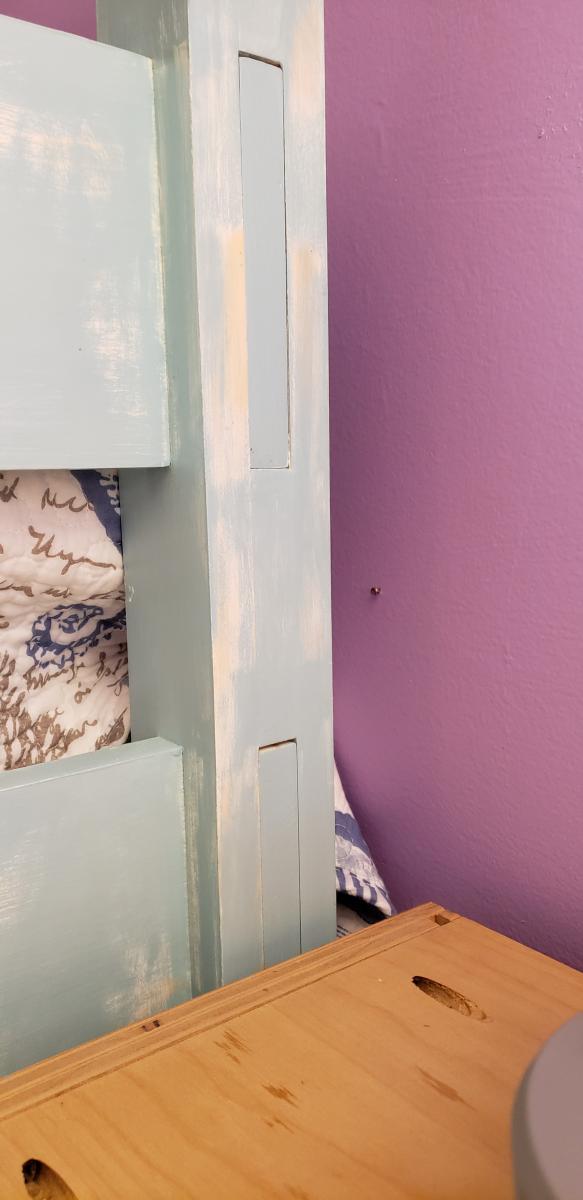
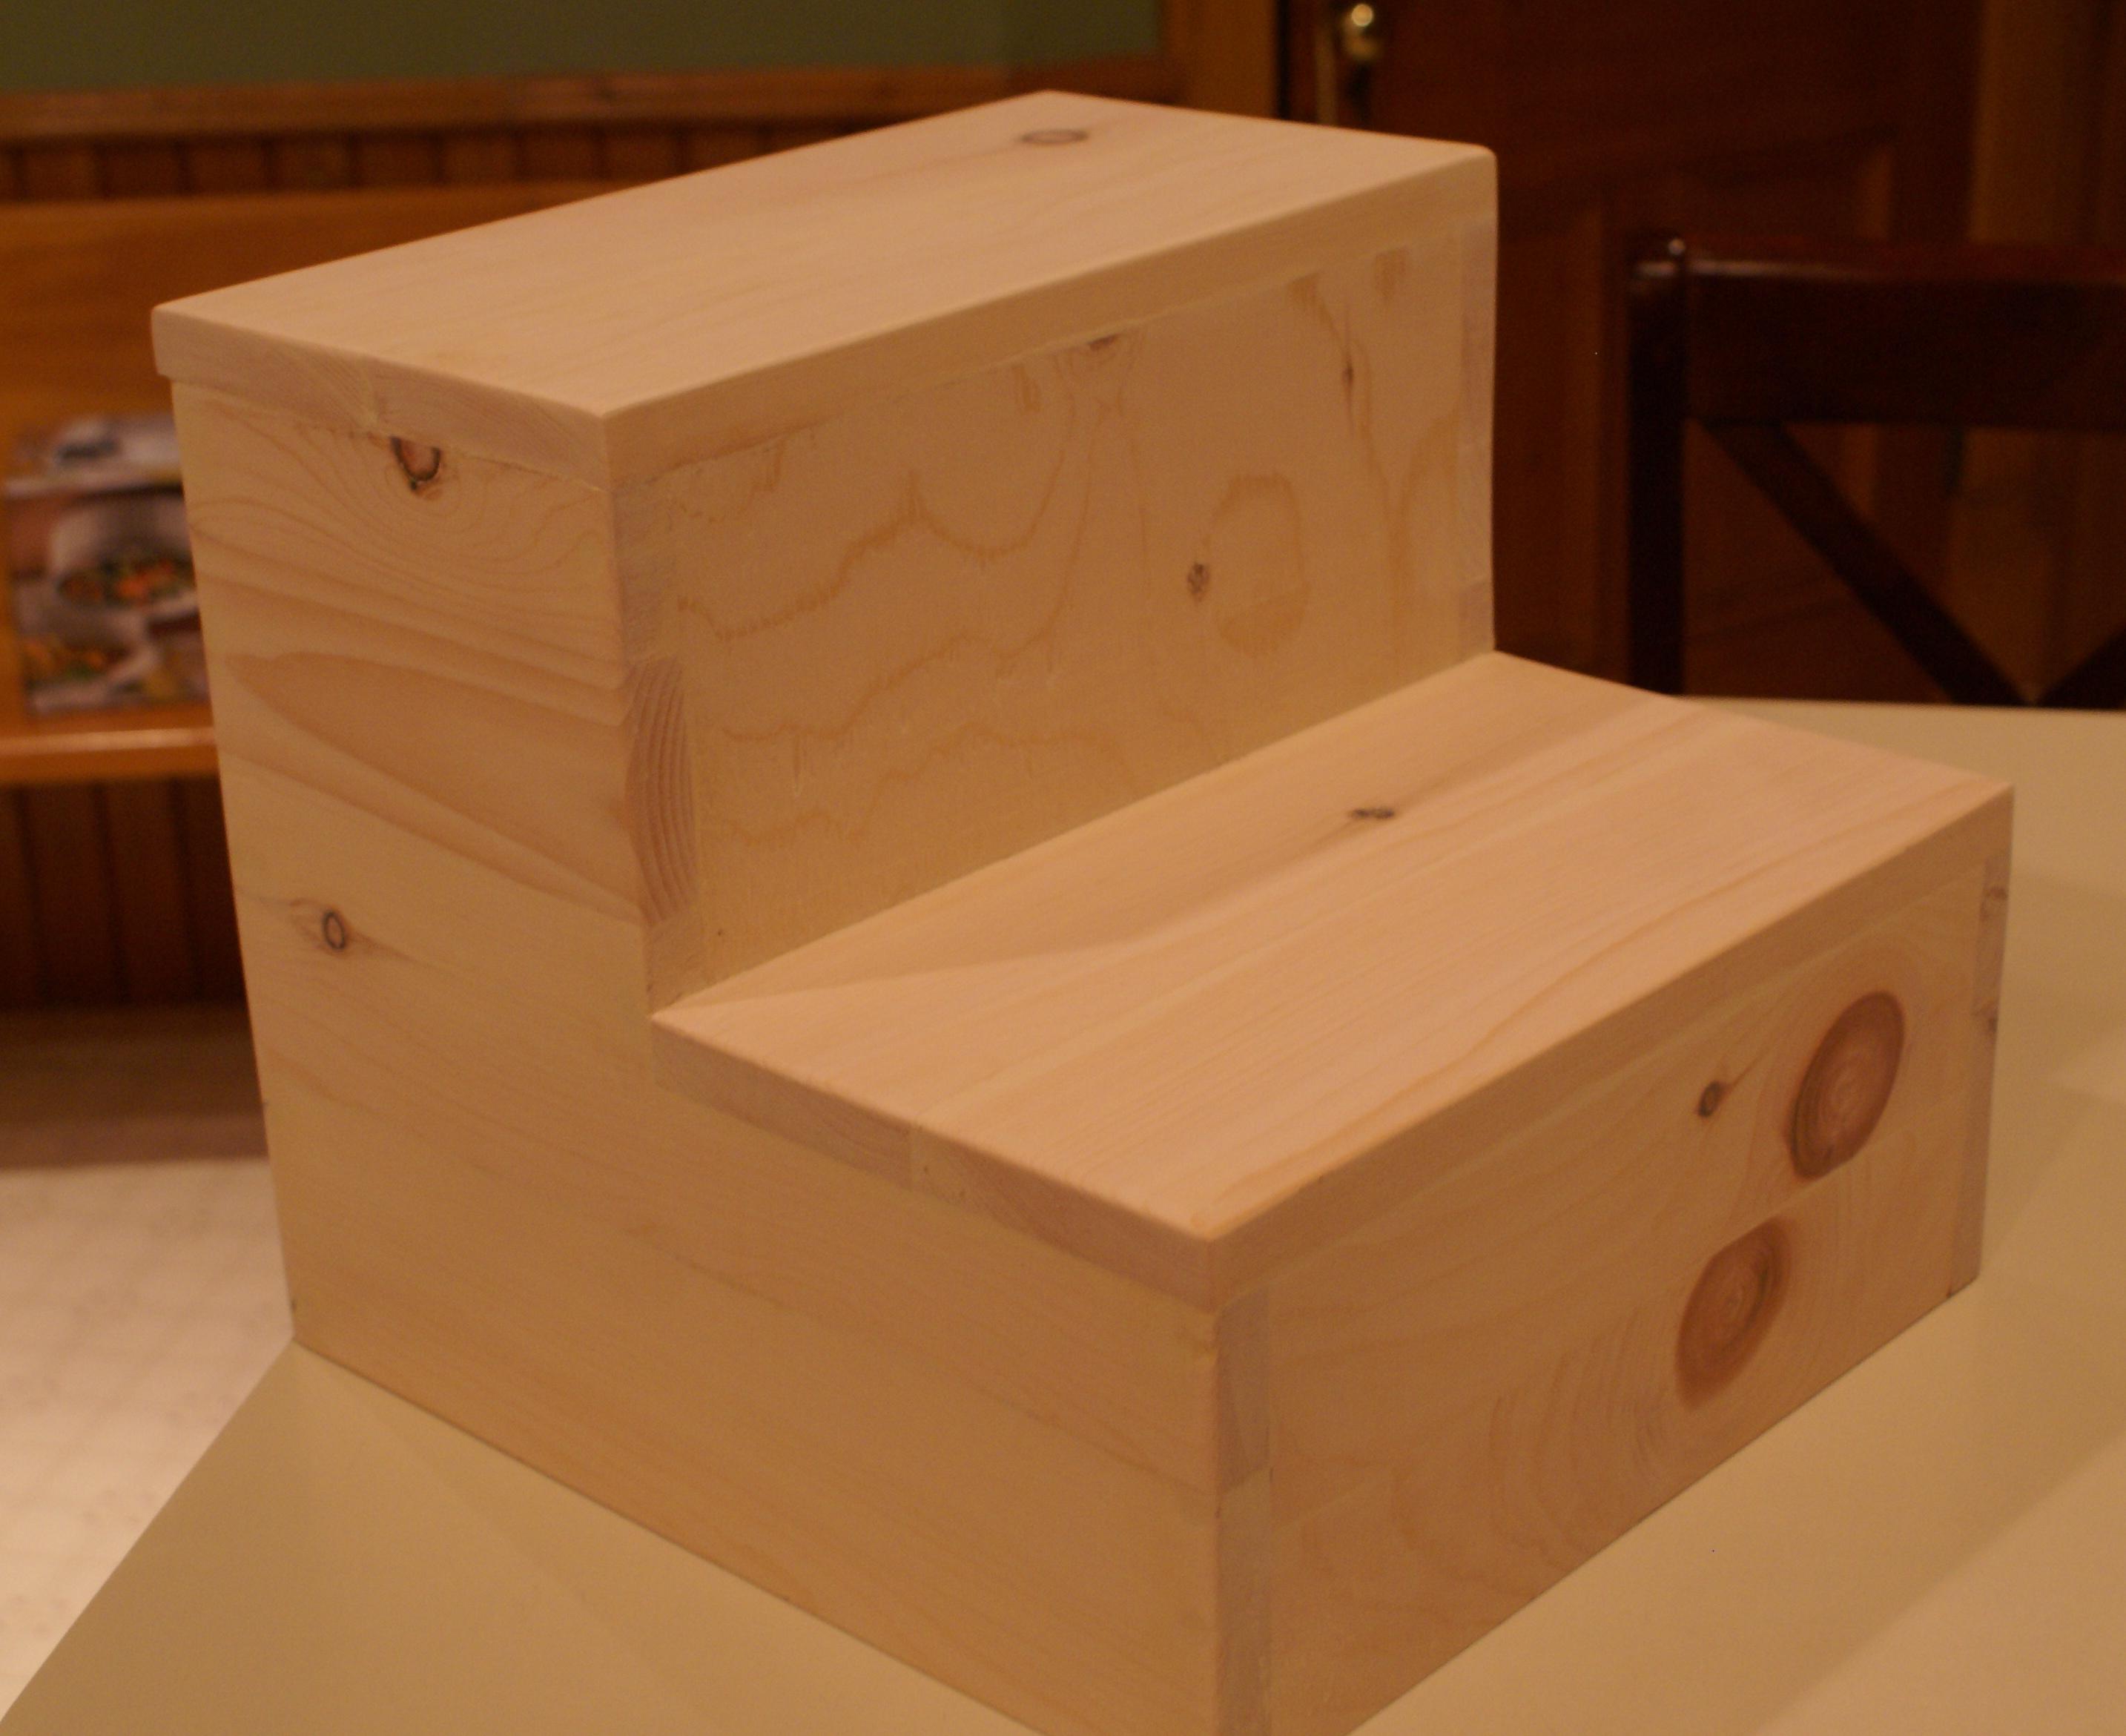
Details: Ladder fits tight between the leg and the guard rail. Glad I got those dimensions right. We'll be using Velcro to fasten the ladder to the bed (it's that tight, it'll be fine and she's 14yrs old). This way we can take it off easier to clean, move etc. Glue and screw everything you can except the long boards that will allow it to be broken down. Glue them and you'll never get it apart without breaking it. I used Titebond III on everything else with lots of clamps along the way.
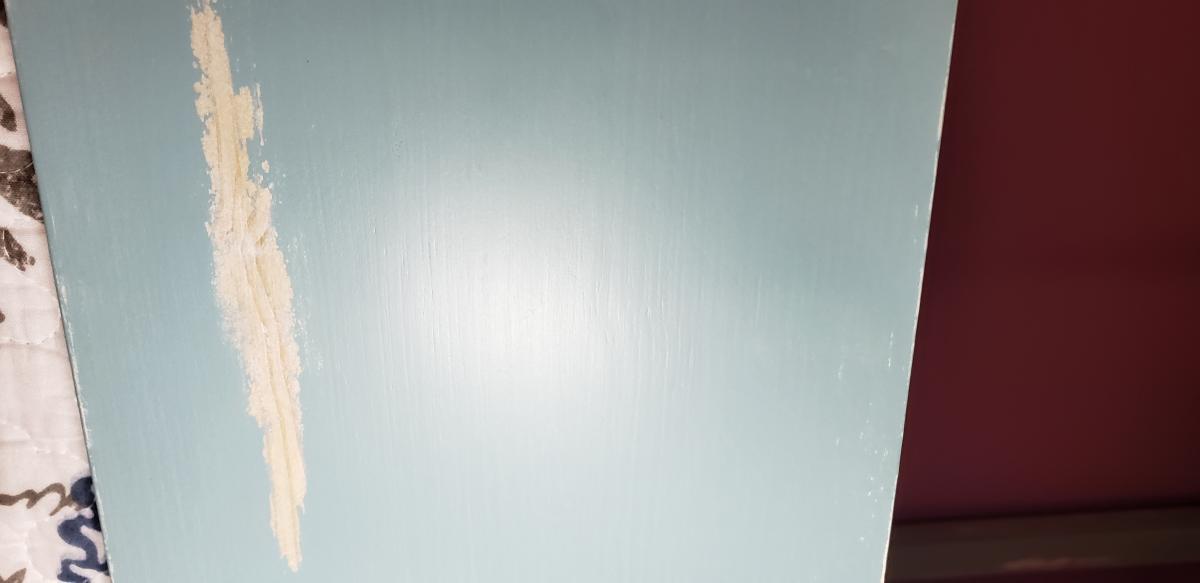
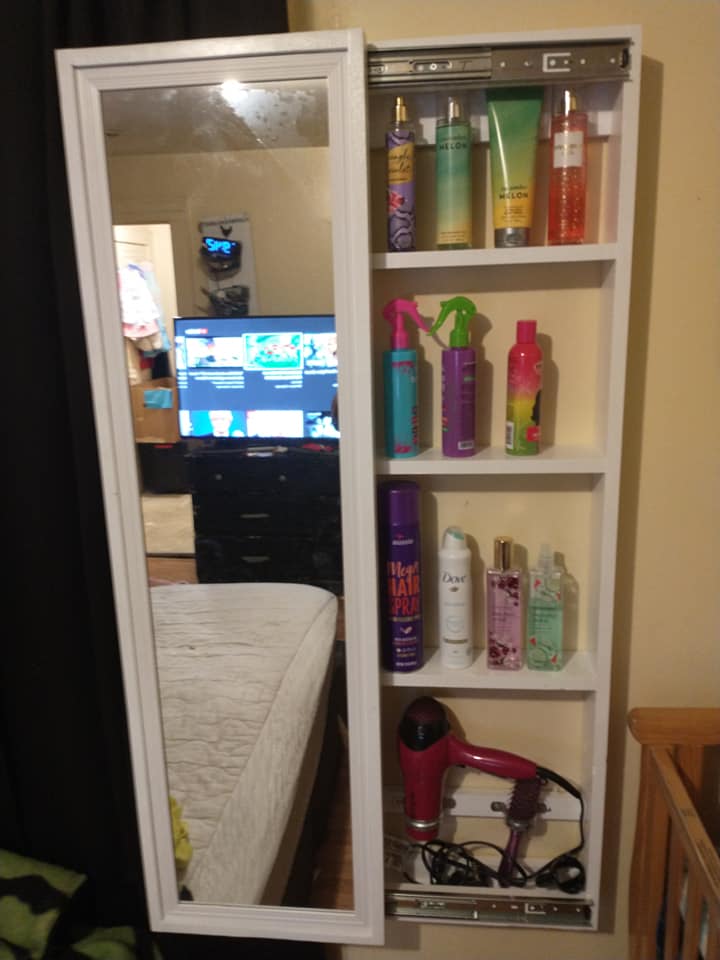
On the front and back of the ladder treads I simply smeared some filler in the joints to smooth them out. You can see the result in the pictures. There is one closeup of the finish so you can see how it turned out doing it the way I did. If you want is smoother then a 220 sandpaper finish is what was called for on the clear finish, which I didn't do.
I also said it was a weekend project 10-20hrs. Had I bought better wood and did an easier finish it would have been. My learning experiences/errors made it longer than that for me.

Lessons Learned:
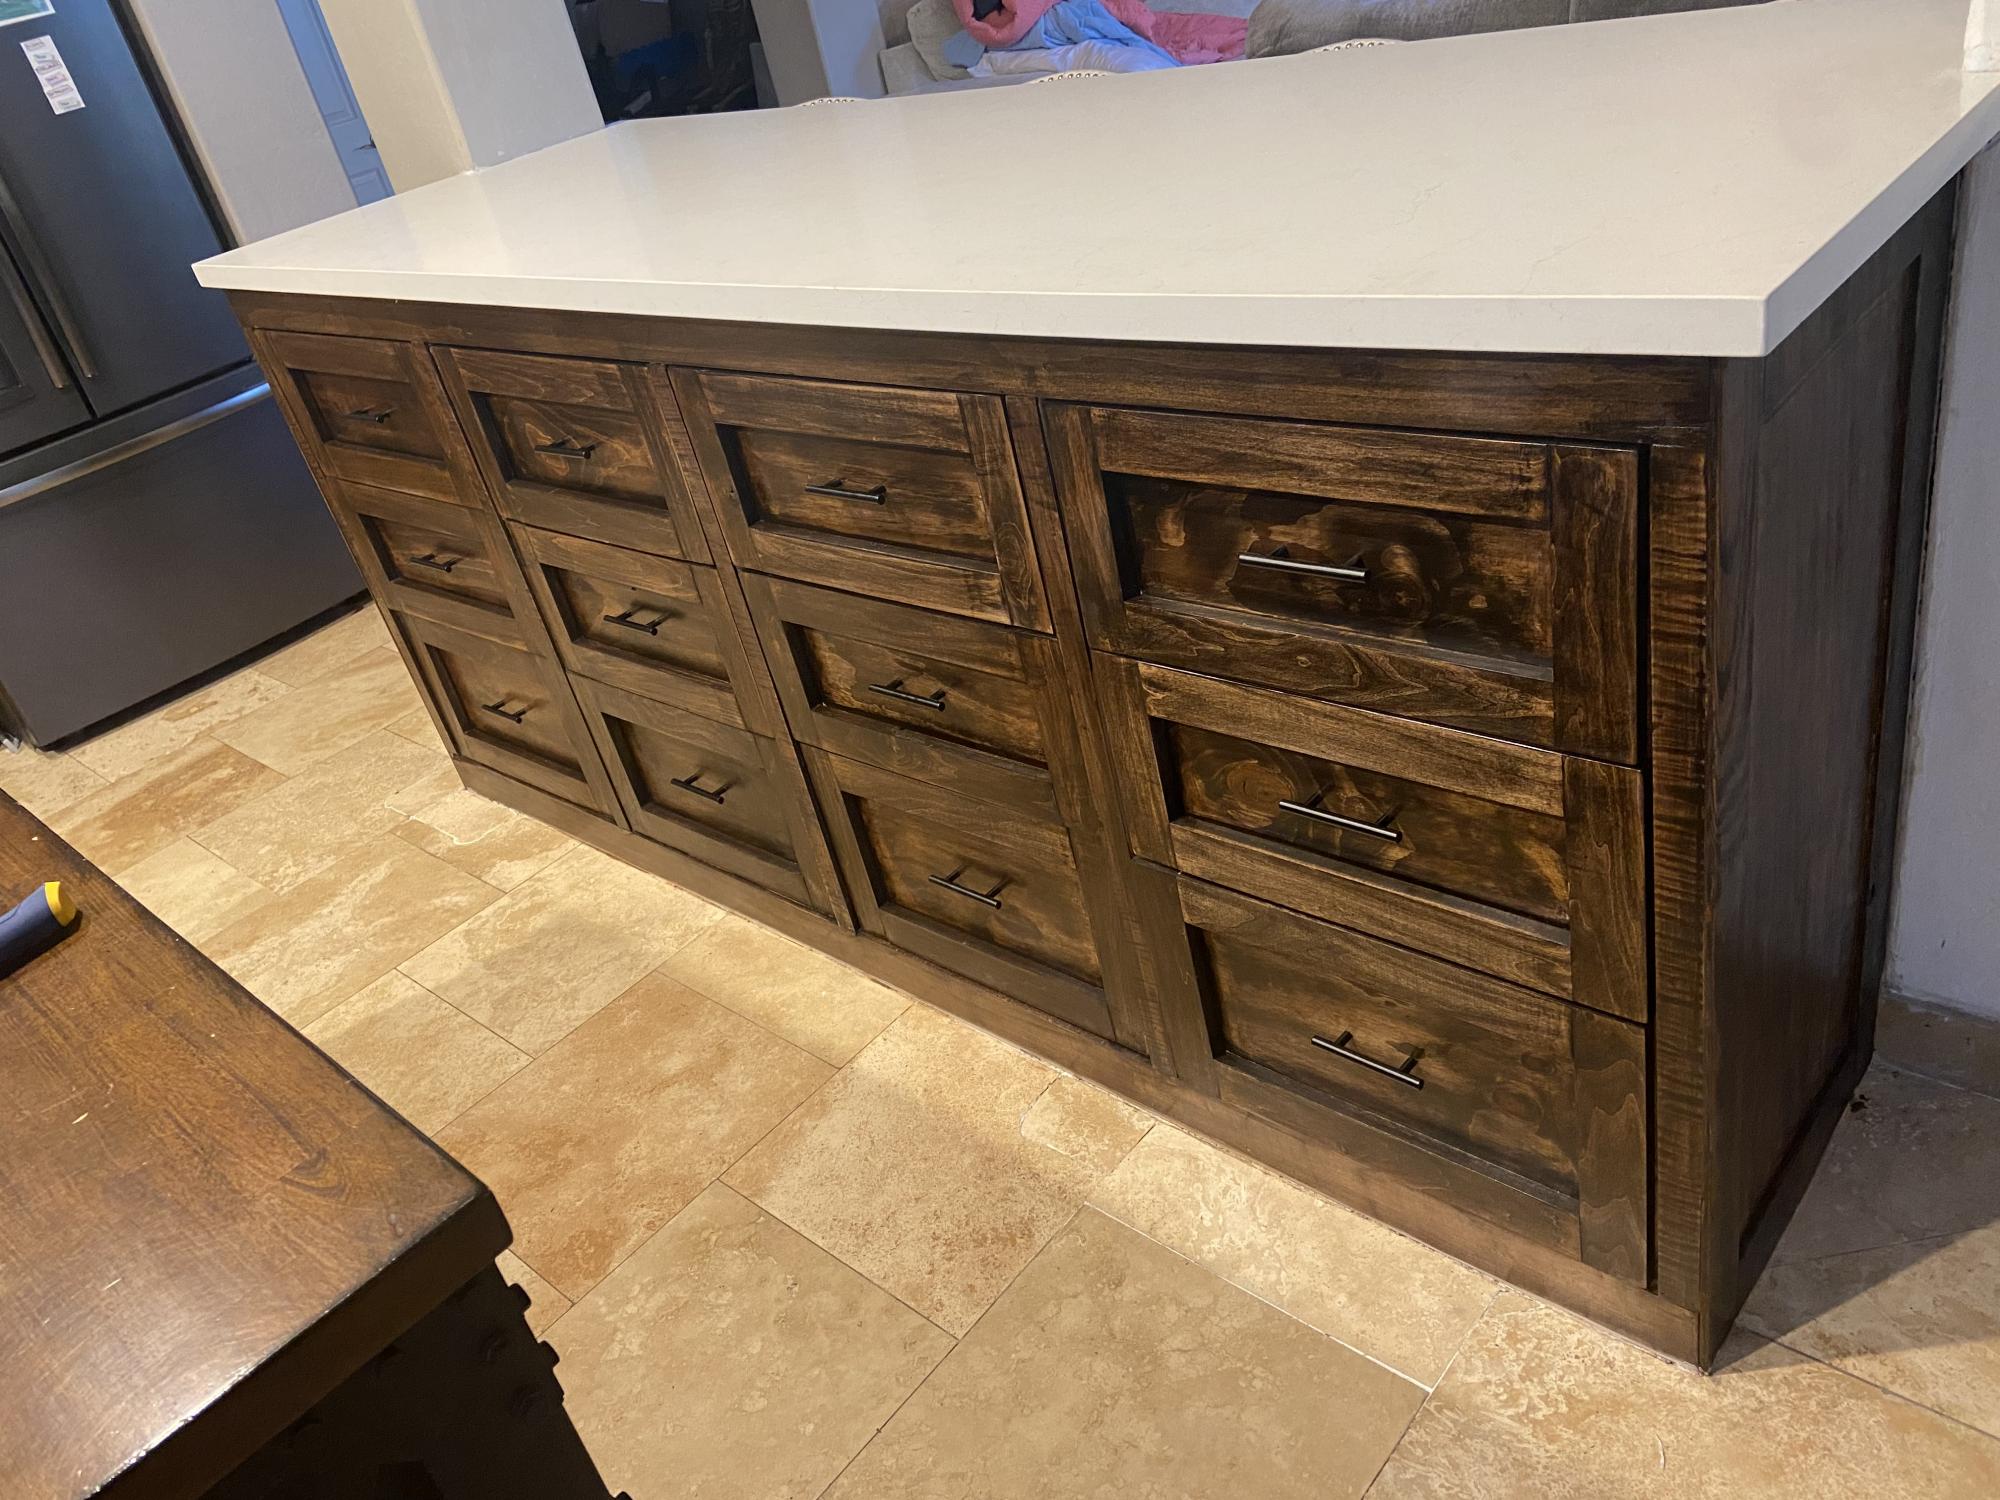
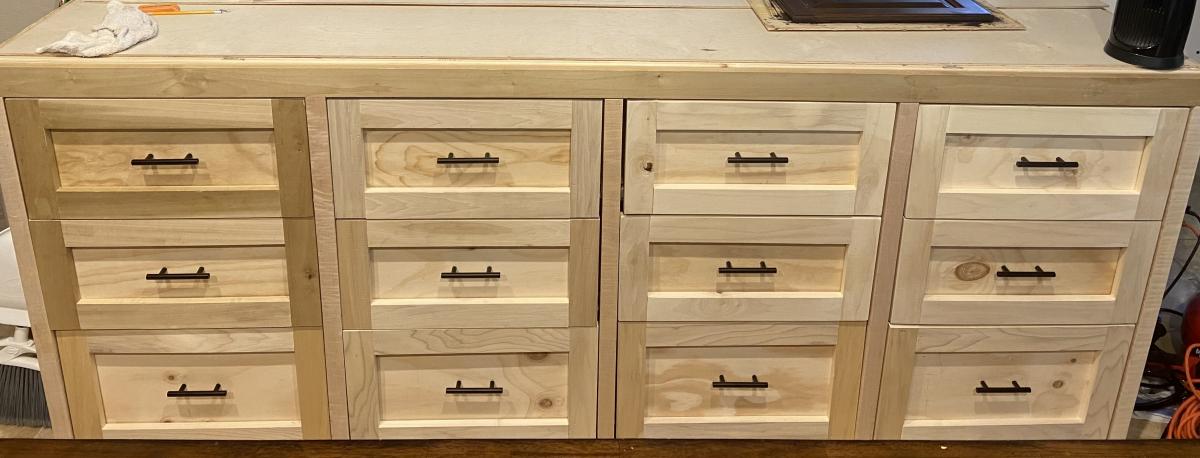
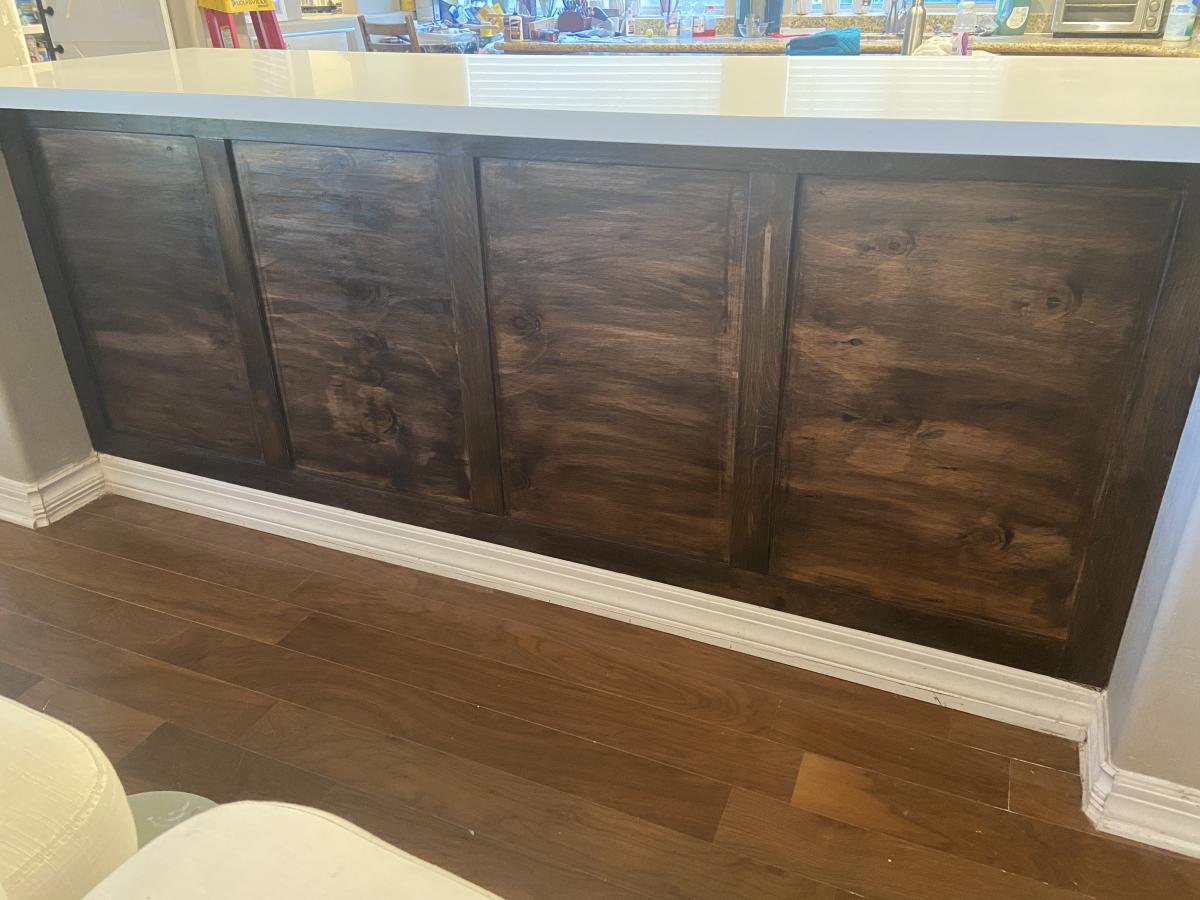
1. Buy better wood! If you want a better finish buy better wood. By the time I was finished filling, sanding, filling again, sanding some more... I used almost a whole quart of filler to make knotty pine smooth. Just buy smooth wood, I'm tellin ya! Hours of work and dry time. Again, if you want a good finish, then you need to shellac knotty pine so the resin from the knots doesn't bleed through. Better wood might have added 5-10% to the materials cost but saved several hours and would have looked even better that what I achieved. Better wood and you could cut the shellac ($15 per quart) if you didn't want the two tone distressing.

2. Check the actual board dimensions. For outer facing pieces I bought some better wood with no knots (radiata pine). These were for the outside pieces on the legs. They were just a bit wider than the common boards that were sandwiched between them... more sanding and filling to get a nice square smooth finish. It also made clamping and gluing them together harder before the filling and sanding could even begin. See number 1 above. lol

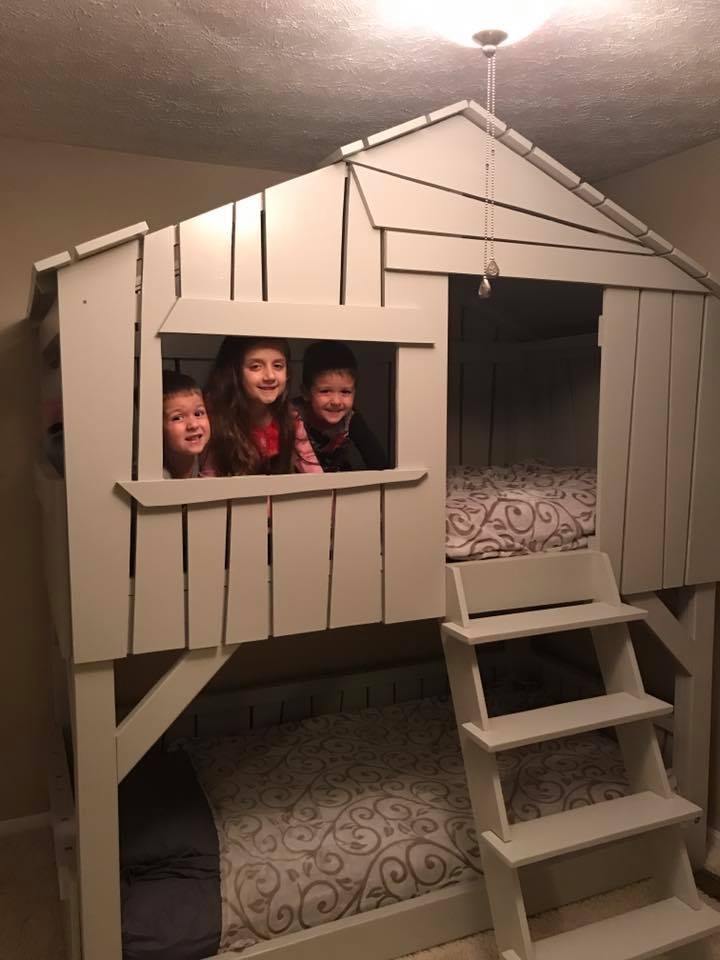
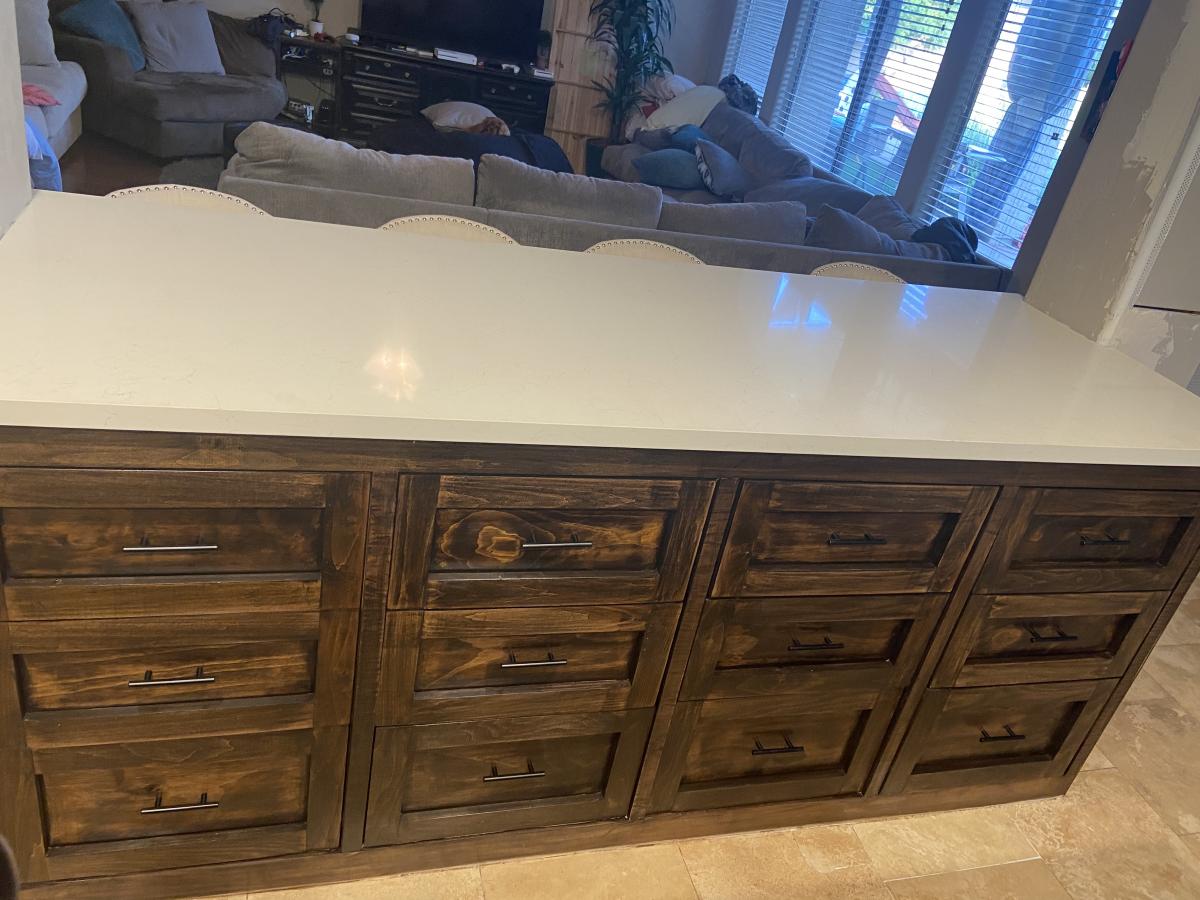
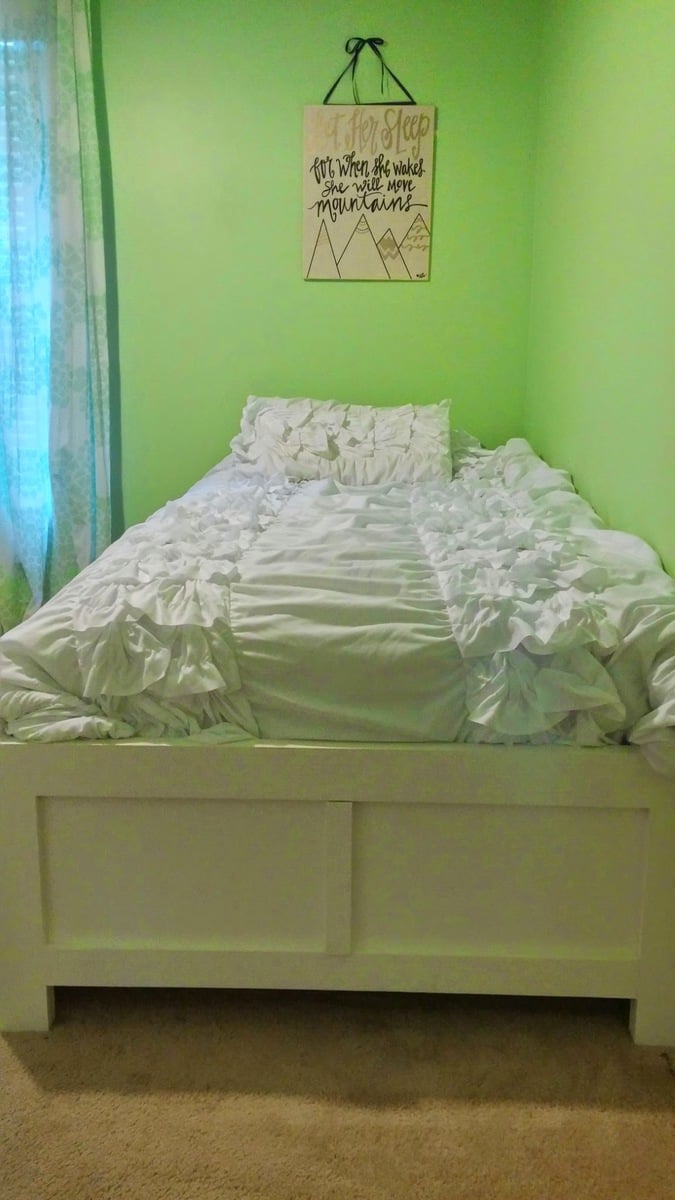
Anyhow, I'm not afraid of building furniture anymore and my daughter loves it. OH, yes now we have to repaint her room and accessorize for the ocean cabin look. More projects with my daughter. YAY!!!!

Thanks Ana

Built from Plan(s)
Estimated Cost
$400-500
Estimated Time Investment
Weekend Project (10-20 Hours)
Finish Used
In order of operation: Wood putty for knots and filling in marks. 120 grit sanding each coat. B-I-N Shellac-Based White Interior Primer and Sealer, for sealing knots and prepping for even paint application. Light sanding again with 120 grit. Behr Designer Collection Chalk Decorative Paint (color: ocean boulevard). 220 sanding thru to wood in some places for distressed look. One thick coat of Varathane Triple Thick Polyurethane (clear matte). The matte did preserve the chalk look while making it smooth and easy to clean. I didn't sand after the Varathane though it called for light sanding with 220 grit between each coat (if you use more than one) and a light sanding after the final coat.
Recommended Skill Level
Intermediate

Comments

My wooden magazine files

Submitted by NeoMoses on Wed, 02/13/2013 - 20:17

These are my wooden magazine files made after looking at Ana's plans. I chose to paint these to match my bathroom.

See more of my build process at http://www.bryanpryor.com/2013/01/26/magazine-holders/

Built from Plan(s)
Estimated Cost
$2
Estimated Time Investment
An Hour or Two (0-2 Hours)
Finish Used
Semi-Gloss Latex Interior Paint (ColorPlace) brushed on by hand. Two coats of paint for full coverage.
Recommended Skill Level
Starter Project

Comments

Truss harvest table with white stain

Submitted by Anonymous (not verified) on Fri, 04/07/2017 - 14:30

Absolutely love the finish on this table.

Estimated Time Investment
Weekend Project (10-20 Hours)
Recommended Skill Level
Advanced

Comments

Rustic Kitchen Island DIY

Submitted by kstruthers on Fri, 01/16/2015 - 07:57

Modified the plan in order to use 12 inch drawer slides and to fit the 1X24x48 project panel found at Lowes. The 2 inch swivel casters and drawer hardware were found at Home Depot.

Built from Plan(s)
Estimated Cost
$150-$200
Estimated Time Investment
Weekend Project (10-20 Hours)
Finish Used
Behr Premium Plus Ultra in snowfall with Minwax dark walnut stain for top. Sealed with General Finishes High Performance topcoat in flat.
Recommended Skill Level
Intermediate

Comments

Miter Saw Cart named Dolley

I made the miter saw cart today. It took me about 2.5 hrs, but I was going slow and taking lots of breaks.

Built from Plan(s)
Estimated Time Investment
An Hour or Two (0-2 Hours)
Recommended Skill Level
Starter Project

Comments

Balin Console With Some Changes

We made this table from the original Balin Console table plans, but faced out the drawer fronts with some mitered trim and added some drawer stops inside to keep the drawers from falling out when pulled all the way.

The drawers were made with a cabinet grade plywood along with the sides and bottom of the table. We used 1x8s on the console top to get that nice wood look, where all corners and ends would be showing, but for the sides and bottom of the table, since the edges were all trimed out, the plywood worked out nicely. 

The legs seemed plenty sturdy without the extra trim, so we skipped that to get a more simple look.

Drawer handles were found at our local Home Depot.

For the finish, we stained (with Minwax ebony) the edges where we wanted distressing, then wiped on vaseline along edges and painted over in Behr Swiss Coffee (white) in matte. After drying we took sandpaper to the edges to show the dark stain through. Because we used matte paint, after everything was finished, we waxed with a clear wax and buffed for a nice shine and a smooth texture.


Pin For Later! 

Balin Console With Some Changes

Built from Plan(s)
Estimated Cost
$125 for plywood, wood pieces and knobs. We already had paint and stain.
Estimated Time Investment
Day Project (6-9 Hours)
Finish Used
Minwax ebony stain, vaseline where you want distressing, then paint Behr (matte) Swiss Coffee on top. Sand all surfaces to distress and smooth, then wax with clear wax to add shine.
Recommended Skill Level
Intermediate

Modified Clubhouse Bunkbed

Submitted by Anonymous (not verified) on Sun, 06/04/2017 - 18:39

I used the plan from the Clubhouse bunk bed and modified to look similar to a Mathy-by-Boles Treehouse Bunkbed.

Built from Plan(s)
Estimated Cost
$450
Estimated Time Investment
Week Long Project (20 Hours or More)
Finish Used
Primer and kid friendly paint. oh yeah...sanding. Lots and lots of sanding!
Recommended Skill Level
Intermediate

Full Length Mirror Sliding Beauty Storage Cabinet

Submitted by csihoratio on Tue, 07/20/2021 - 07:30

Great idea being my wife is not a hair person she really loves it.

Estimated Cost
$40
Estimated Time Investment
Afternoon Project (3-6 Hours)
Finish Used
primer and white paint
Recommended Skill Level
Beginner

Comments

DIY Closet shelving

Submitted by Ruiz1323 on Sat, 08/07/2021 - 10:22

Closet

Built from Plan(s)
Estimated Cost
180
Estimated Time Investment
Day Project (6-9 Hours)
Finish Used
Spray paint
Recommended Skill Level
Beginner

Comments

Cal-King Storage Bed

Submitted by Chris 1975 on Thu, 04/25/2013 - 12:03

I loved the bed by plan, and now love it more that I have built it.

Estimated Time Investment
Weekend Project (10-20 Hours)
Recommended Skill Level
Beginner

Beginner farm table

Absolutely love how this table turned out! I slightly modified the length to accommodate our space. Definitely a beginner friendly project. I used farrow and ball studio green for the base and just poly on the top.

Comments

Kitchen Bar with Drawers

Submitted by Anonymous (not verified) on Sun, 09/12/2021 - 16:30

I decided to demo our old pantry and build a counter height bar in its place. I used Ana’s mudroom bench plans and added an additional drawer to the length and 2 more drawers to the height, making a total of 12 drawers. I also used Ana’s video on sizing drawer faces https://youtu.be/AlvlrPxXGUw
—at least for the bottom 4 drawers. I didn’t find that video until I’d completed the first 2 rows of drawers and they definitely require some tweaking still.
I added some moulding to the back and sides with 1/2” plywood ripped into 2.5” strips to complete the shaker look. Then I had a quartz top fabricated and installed.

Built from Plan(s)

Comments

An Unexciting Step Stool

So, here is my unexciting step stool. It became a hodge podge of material because I didn’t have practically ANYTHING on the cut list in my shop! So the sides are made of 2 1×4′s a 1×3 and a 1×2 pocket holed together! The bottom kick is two 1×3′s and the top is a piece of 5/8″ plywood. The back is plywood too, and the treads are two pieces (each) of 1×4! Talk about a weird way to build Ana’s simple plan!

I decided not to do the storage step since I really didn’t need it, and I was tired of scrounging for wood too! It still needs a touch-up of putty (especially the opposite side because I forgot to mirror the pieces and all the pocket holes are on the outside! whoops!) and then some sort of easy to clean paint.

Took me a couple hours to put together on a cold Christmas afternoon while my son was sleeping and my mother-in-law and guy were watching Shrek on tv.

Very unexciting. Not nearly as exciting as the lockers I’ve been coveting…

Except…. when you see just how happy my lil guy was when he got up from his nap….

… and then it becomes a WHOLE LOT more exciting!

Merry Christmas everyone!

Built from Plan(s)
Estimated Cost
Made from Scrap Pine and a bit of plywood plus some Kreg Screws
Estimated Time Investment
An Hour or Two (0-2 Hours)
Finish Used
Eventually painted it with a melamine paint and some non-skid silica sand sprinkled in the paint.
Recommended Skill Level
Beginner

Patio chair

Submitted by Anonymous (not verified) on Mon, 10/04/2021 - 16:56

I chose to make the chair which came out great although the plans were only for one chair I thought it waa easy to do.

Comments

Seasonal And Holiday

Farmhouse table and benches

Submitted by AttyGuitar on Wed, 08/16/2017 - 12:23

Farmhouse table and benches

Estimated Cost
$400
Estimated Time Investment
Week Long Project (20 Hours or More)
Finish Used
Provincial MinMax and gloss clear coat
Recommended Skill Level
Beginner

Daybed with storage

We wanted to build my daughter a smaller bed with lots of storage. I really liked the Daybed plans on here, so we used those and made a few minor adjustments. First, we wanted the bed to sit inside the frame of the bed, instead of just sitting ontop the frame. This will prevent the matress from sliding around. We did this by adding 3 inches on both the length and width of the bed. After building the bed you probably only need to add 1-2 inches, but it still turned out fine. I glued and screwed strips on the side rails a few inches down and then attached my 3" strips to the rails. I also increased the height of the bed slightly by addinga few inches to the 2x4 sides. Also, instead of using 1x12 boards for the construction of the bed, we used 3/4 plywood. This let me make the sides and drawer taller than 12" and also saved a lot of money. I was able to make the whole bed from 2x4s and one sheet of plywood, plus I bought a sheet of MDF for the bottom of the main drawer. This brought the entire cost of the bed to around $150 in materials.

For the bottom drawer we wanted one large storage area instead of 3 seperate drawers. The main reason for this is so we would use it as a trundle in the future if we wanted to. I build the drawer bottom out of a large piece of MDF, and maded the sides out of 3/4 plywood. I cut a 1/2" rabbit on the bottom of the drawer sides so the bottom sits flush. My main reason for doing this was because the boards are different colors (MDF and plywood) and I knew I was not going to be painting the drawers. The drawer sides and attached by pockethole screws which are hiddle. The front pocket hole screws are hidden by the front drawer face and the rear screws could only be seen if you look behind the bed.

I used homemade chalk paint and put about 4 coats on the entire surface. The finish was done with a high quality paste wax which was put on, let dry, and then buffed. I put 3 coats of wax on the finished project.


The bottom of the drawer has 6 straight casters on the bottom for easy pull out.

The contruction of the bed was done in about a day, but the finishing took longer due to the multiple coats and letting the wax dry.

Estimated Cost
$150
Estimated Time Investment
Weekend Project (10-20 Hours)
Finish Used
Home made chalk paint. 1/3 cup of plaster of paris mixed with 1/3 cup of water. Mix that with 1 cup of white latex paint. Make small batches at a time as the chalk paint can not set out for a long time after mixed. Chalk paint goes on thick and will need 3-4 coats for a perfect finish. A wax must be used to seal the paint as poly will yellow the color. 3 coats of wax will work fine. When putting on the wax, use an old shirt to apply the wax generously, then wipe off the excess before you leave to dry. Let the wax dry 8-12 hours before each coat, and buff in between coats and on your final coat.
Recommended Skill Level
Intermediate

Bedside night stand

Submitted by Zacharary on Sun, 06/09/2013 - 15:13

Made from farmhouse plans

Estimated Cost
$60
Estimated Time Investment
Day Project (6-9 Hours)
Finish Used
Paint and stain
Recommended Skill Level
Beginner

Comments

Twin captain bed

Submitted by meckylang on Sun, 05/17/2015 - 09:02

This bed was built custom for the girl who ordered it. She wanted both a bookcase headboard on the long side and a traditional headboard. The bookcase headboard could not block the window and needed to have access to the outlet behind the bed. The bed was designed to match a dresser that had already been purchased. The drawers below give additional storage.

Estimated Cost
$550
Estimated Time Investment
Week Long Project (20 Hours or More)
Finish Used
Primed and painted with 2 coats of flat latex paint.
Recommended Skill Level
Advanced

Comments

kevin2117

Mon, 02/13/2017 - 10:23

Hi there - you don't happen to have plans you can share for this bed, do you?

Thanks! ~ Kevin

Console Media Center

Submitted by katonley on Fri, 12/22/2017 - 08:44

This was my third project, and the first one with doors (boy do I have some great opportunity for growth there!). I left off the bottom trim because I wanted a slightly more contemporary look. Thanks for this plan, Ana. It was the perfect size for this space. Things I learned doing this project: next time cut an extra 1x4 to tack in to do the doors, hinges require math, be sure to get the kind of wood filler that dries—not wood putty (sigh), I need a workbench. 

Estimated Cost
$150
Estimated Time Investment
Week Long Project (20 Hours or More)
Finish Used
Olympia enamel tinted to match Valspar’s discontinued “Secluded Garden.” Everbrite hinges and Liberty pulls (stock) from Home Depot.
Recommended Skill Level
Intermediate

Comments