Community Brag Posts

Bookshelf and Bench Built-in

Submitted by Anonymous (not verified) on Fri, 02/23/2024 - 10:39

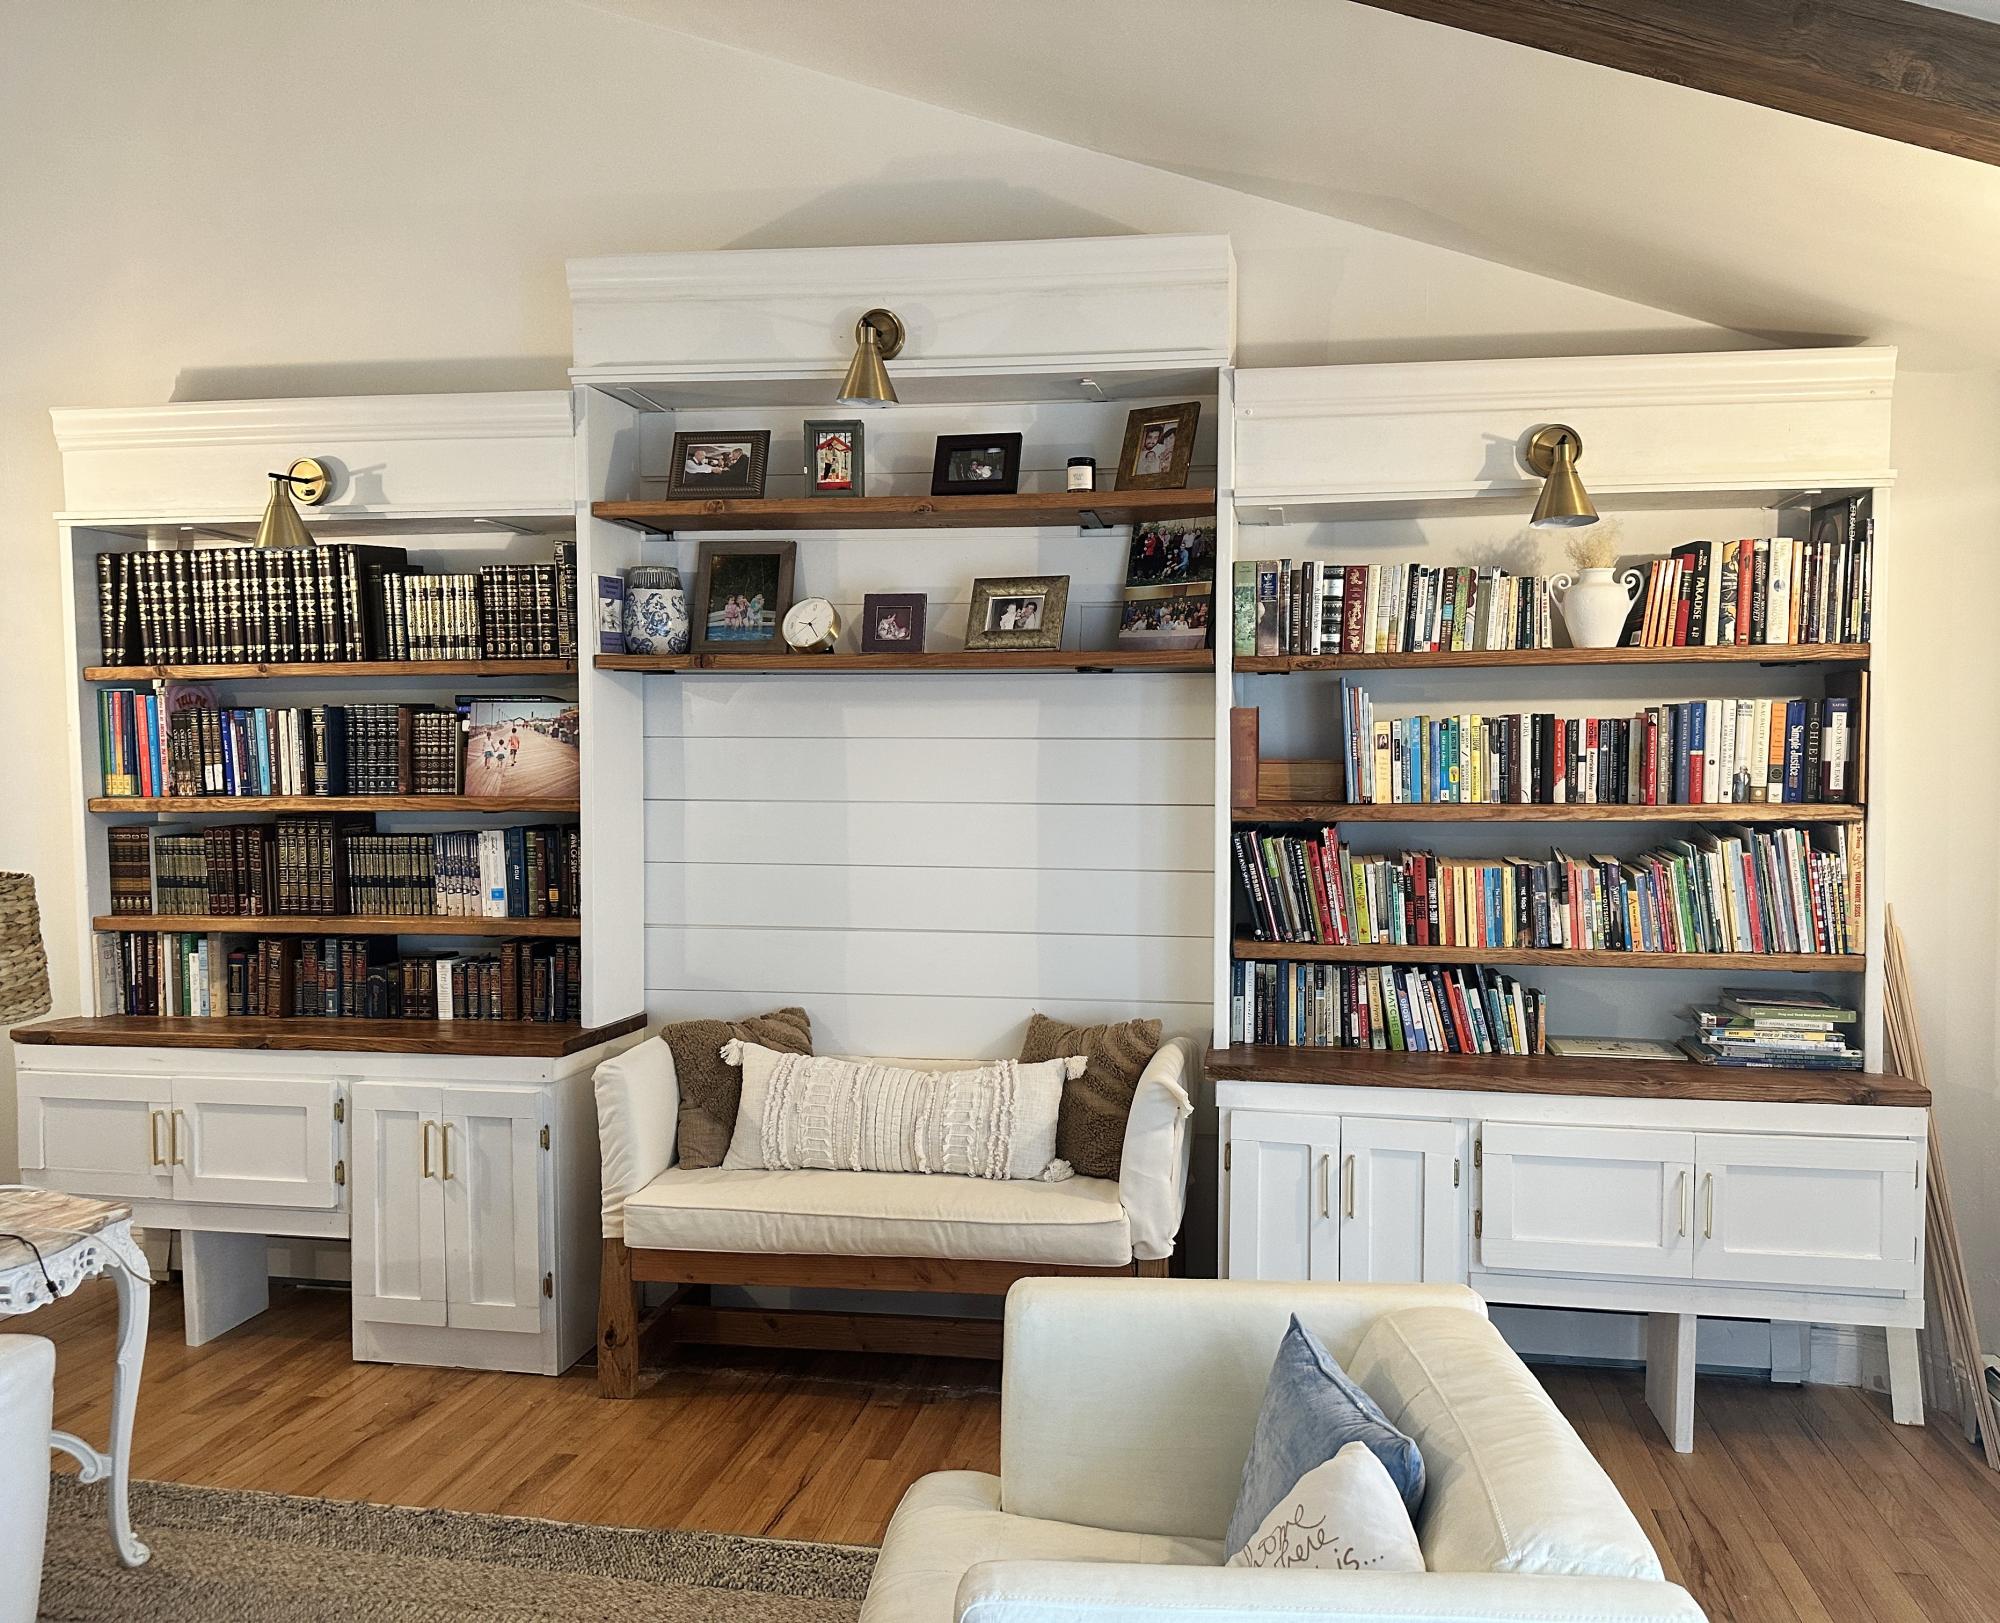
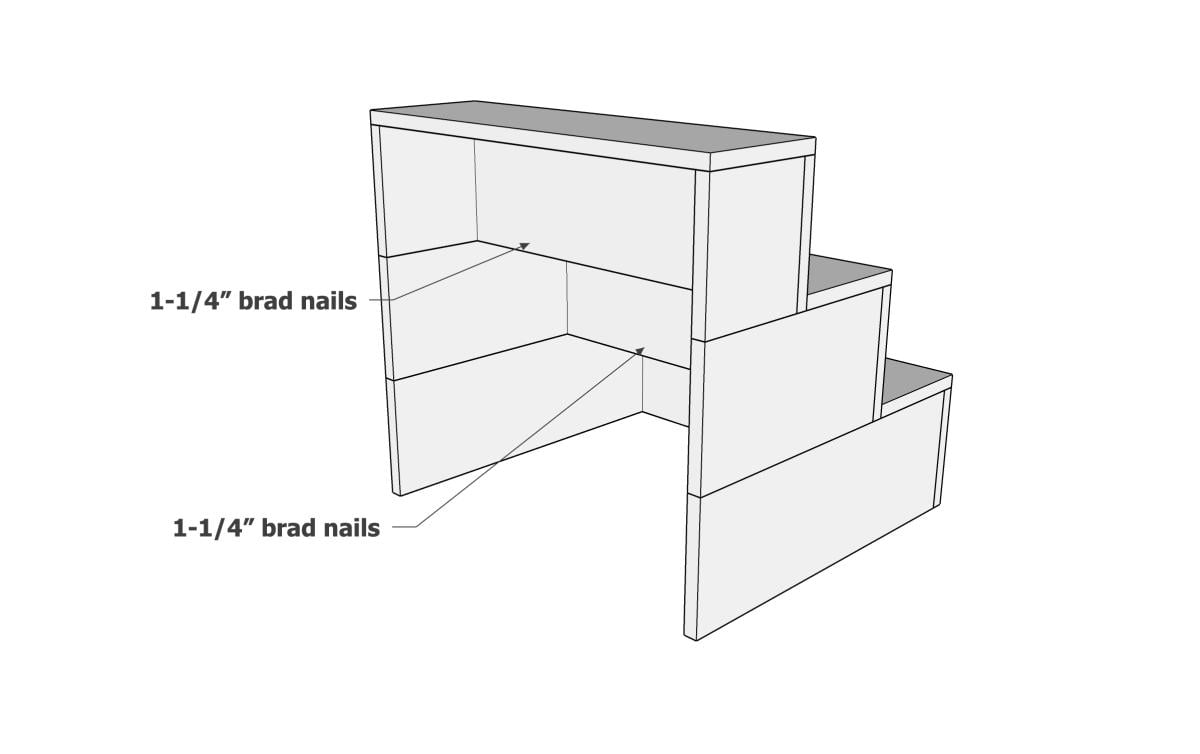
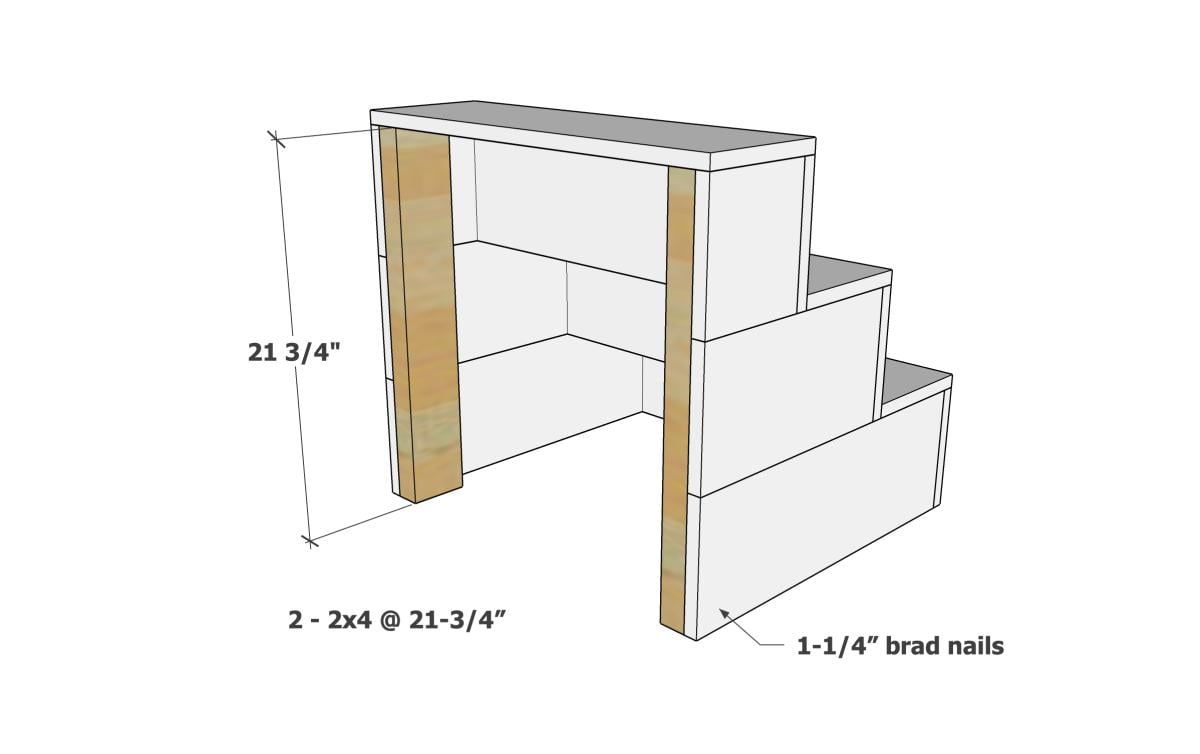
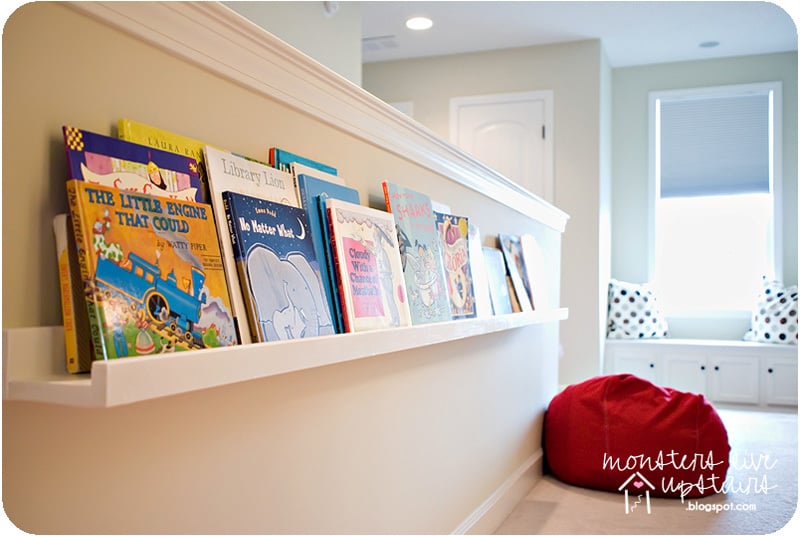
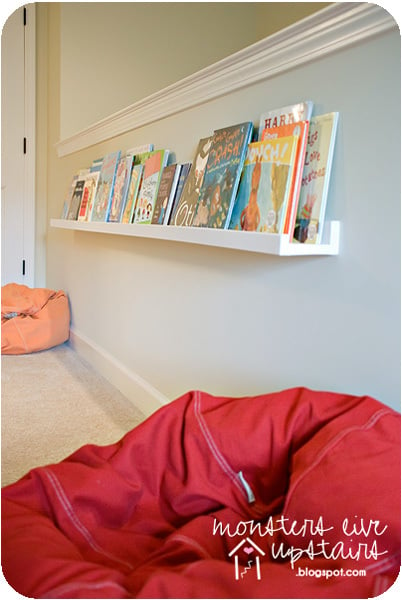
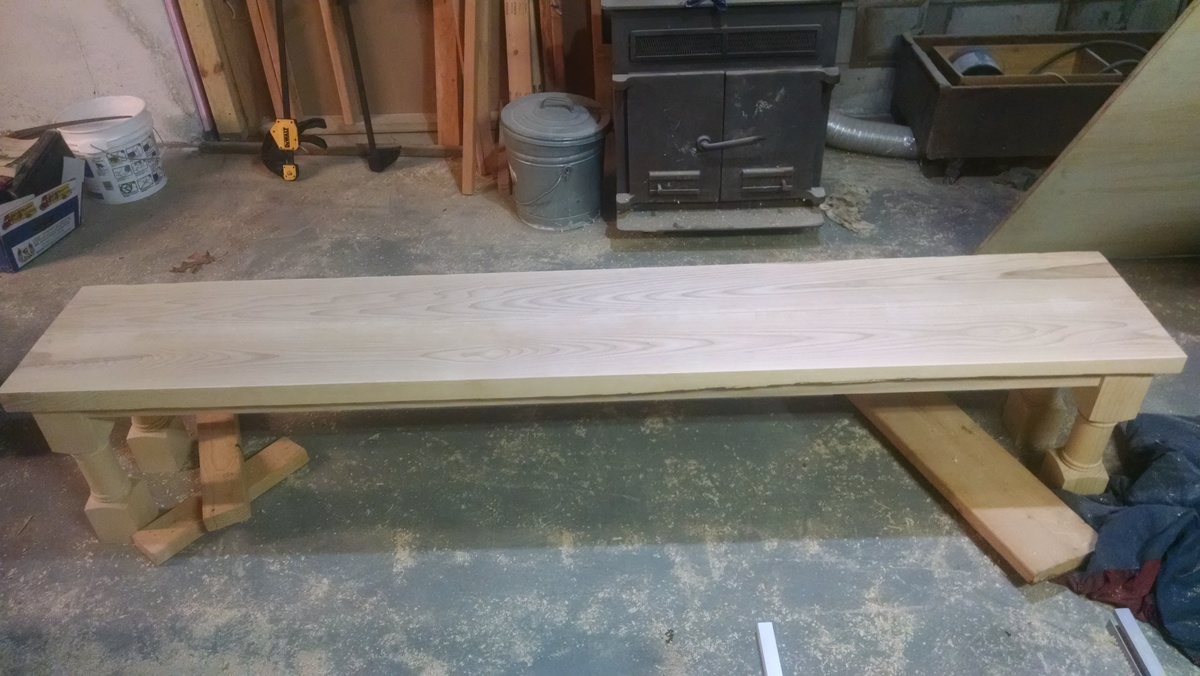
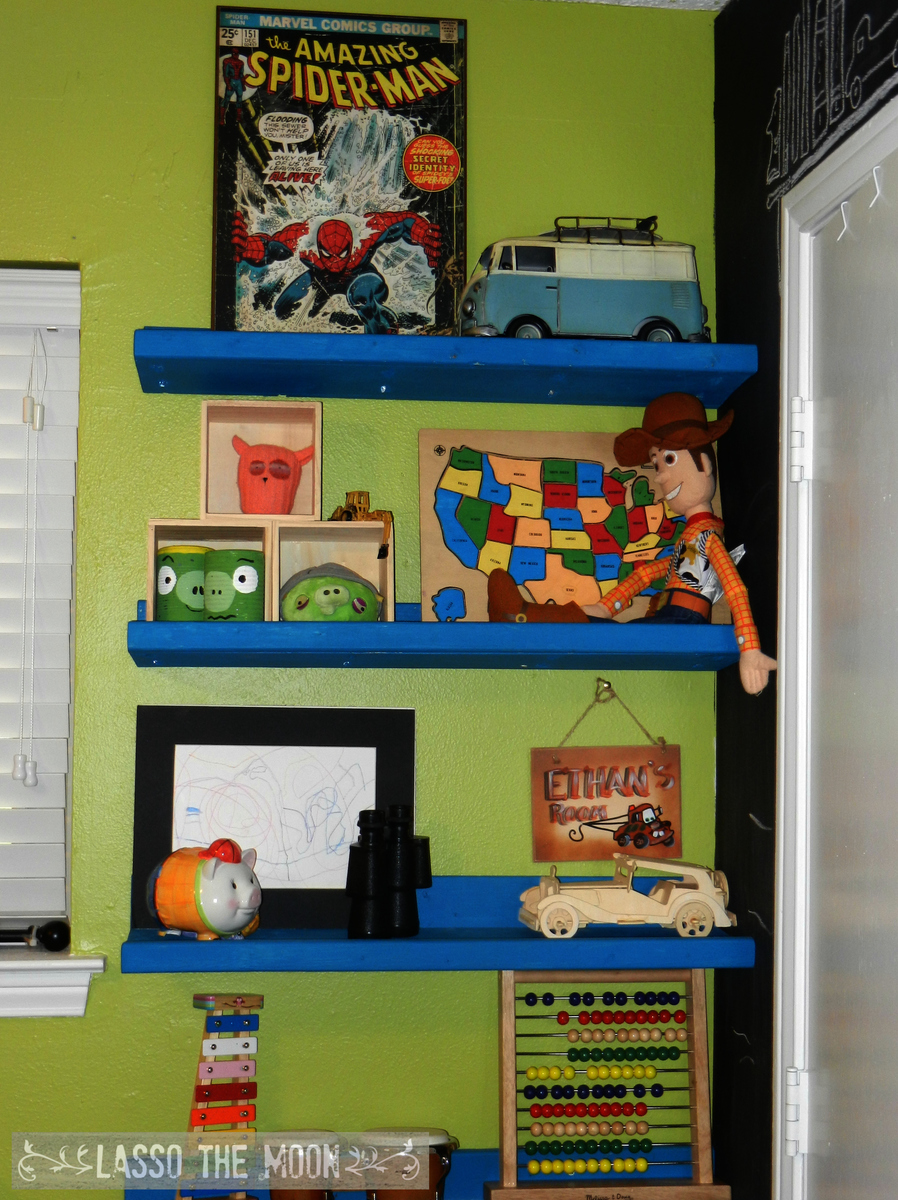
I apologize for not having before and after shots from the same perspective, but this is the bookcase I built to replace the very poorly sized and very poor quality bookcase that was in this room before. The room has a slanted ceiling that goes from 8' to 16,' and has baseboard heaters that got in the way of cabinetry. I worked around it. These were my first cabinets, and they didn't come out exactly has I had envisioned, but they're pretty darn close! The shelves are all on brackets that are screwed into studs in the wall, and the boards that make the sides of the bookcase aren't even screwed down. I wanted something that would be sturdy and yet easy to take down or change. I left space in the middle because we'd like to put in a fireplace one day...

MelissaLeigh144

Farmhouse Bench in 1 day

Submitted by vickitee on Wed, 06/25/2014 - 08:27

This was my first build from your site! Farmhouse bench.
I was a little confused with the miter saw instructions "bevel cut at a 10 degree angle off center". I had to google to figure out what you meant. In the end the bench looks awsome and I feel very empowered with my tools.
(still need to stain the finished project, bought all the wood and built in 1 day)
Thank you Ana for sharing your plans!! I love your site and I love my Kreg Jig!
Vicki
(Canada)

Estimated Time Investment
Day Project (6-9 Hours)
Finish Used
going to use walnut stain.
Recommended Skill Level
Beginner

Comments

6' Square Sandbox

I've been wanting to buy or make a sandbox for my son for a couple of years now. Since seeing this on Ana White I knew I had to make it. My son is 4 yo and I didn't think the 4' square sandbox would be big enough for him, so I made it bigger. Ours is 6' square.

Materials:
4@1x8x6'
12@1x6x6'
2x4 - used leftovers from another project
8 hinges
4 handles
decking screws

Cut lengths:
2@1x8 cut to 71.5 (long sides of the box)
2@1x8 cut to 70.5 (short sides of the box)
did not cut the 1x6 boards (top planks) - actually designed the other boards to fit their length to prevent cutting (saving time) (note that original plan uses 1x4 planks - I used 1x6s so I could use the same number of planks but cover a larger area)
4@2x4 cut to 11.5 (arm rests)
4@2x4 cut to 18.5 (back supports)

followed instructions for assembly otherwise. At my husbands suggestion we put the handles on the sides and can easily open from either side - prevents having to lean over to the middle to open (back saver)

I finished the project in 4 hours including clean up and a couple of small breaks. This is my first Ana White project. It was a lot of fun to build and I hope my son will enjoy it for years to come!

Built from Plan(s)
Estimated Cost
$190
Estimated Time Investment
Day Project (6-9 Hours)
Finish Used
Sand and stain with sealer included
Recommended Skill Level
Beginner

Comments

Mrs. Chellebelle

Sat, 09/01/2012 - 20:59

Wow, this is just what I need! I've been wanting to make a sandbox for under the playhouse but the other plan was too small. This would be great for the little guys. Thanks!

Farmhouse King Bed

Submitted by JD-LIN on Thu, 08/21/2014 - 09:18

First big build with my boyfriend. We wanted to build this bed for his daughter's 14th birthday, so she would have something hand made from us to keep for a long time. This bed is solid and turned out amazing. The pictures don't do it justice as you cannot see the paneling on the head and foot boards. We used the kreg jig on the side panels attaching the head and foot board in order to make it easy to take apart and move when she goes away to college.

Estimated Time Investment
Weekend Project (10-20 Hours)
Finish Used
Primer and 2 coats of black flat paint
Recommended Skill Level
Intermediate

Big Sandbox with Lid

Submitted by flinchball on Mon, 09/21/2020 - 13:18

Made the sandbox 6x6. Recessed it so it sits flush with the timber’s around our fire pit area. I added extra armrests in the middle that double as supports when the lid is closed in case anyone wants to walk on it. Filled the sandbox full enough that the armrests sit on the sand when closed. It’s very sturdy now for walking on and the kids have tons of room to play. Thanks for a great plan to work from.

Built from Plan(s)
Estimated Cost
$100
Estimated Time Investment
Day Project (6-9 Hours)
Finish Used
Boiled linseed oil.
Recommended Skill Level
Beginner

Comments

Wood Wagon

Submitted by tnaudio on Thu, 12/18/2014 - 06:52

This is a variation of the wood wagon design http://ana-white.com/node/13430. I wanted old 2 year old to be able to use it in the lawn so I changed the wheels and steering over to a more traditional wagon wheel. We will be giving to him for Christmas. I had a lot of fun building this for my son. I hope he loves it.

Built from Plan(s)
Estimated Cost
75 dollars
Estimated Time Investment
Weekend Project (10-20 Hours)
Finish Used
Minwax Early American
Minwax Satin Polyurethane
Recommended Skill Level
Beginner

Comments

Joey Oc

Mon, 12/14/2015 - 12:41

Love the plans. I would, however, like to follow the modified plans to make it suitable for outdoor/grass areas. If any one could help me with that I'd be very grateful. 

Dog Gate

Submitted by shellyward on Tue, 01/20/2015 - 13:20

We needed a way to confine the dogs in one room when not supervised to protect our new living room furniture.  I wasn't willing to pay the price it would cost for a gate large enough (if I could even find one), so I started the hunt for a plan. I couldn't find exactly what I wanted so I took ideas from several and this is the result. This folds into itself and against the pass thru bar when not in use.

Estimated Cost
$75
Estimated Time Investment
Weekend Project (10-20 Hours)
Finish Used
Minwax Red Oak Stain and black spray paint for the rungs
Recommended Skill Level
Beginner

Comments

shellyward

Thu, 01/22/2015 - 09:39

Thanks! I will try to get something written up in the next few days and add it to the post.

Rustic Lanterns

Submitted by naomi on Fri, 06/23/2017 - 06:17

I always have heaps of scrap wood so I decided to make some lanterns.

These lanterns are larger than the last lanterns I made.

They are huge and they make a great statement.

I used old rusty fencing wire for the handles.

I also added some alluminium sheet to the 'ceilling' of the lantern so that there is no risk of burning.

The only cost was for the candles.

Estimated Cost
$0 made from scrap wood.
Estimated Time Investment
An Hour or Two (0-2 Hours)
Finish Used
walnut stain
Recommended Skill Level
Beginner

Platform bed for my toddler

Submitted by Livvyhill on Mon, 06/03/2013 - 05:10

This is the first thing I've ever built!! My 2.5 year old son was ready to move out of his crib, so I wanted to build him a bed low to the ground. He loves it!! I'm very proud of myself for being able to do this:) Perfect plans!!! If i can do this, anyone can:)

PS I made the headboard from plywood and screwed planks in, stained them with the same stain (used vinyl letters for a stencil when staining) and attached to bed-- really easy.

Estimated Time Investment
Day Project (6-9 Hours)
Finish Used
Dark Walnut Rustoleum
Recommended Skill Level
Starter Project

Ice cream cart

Submitted by Markb25 on Mon, 11/22/2021 - 23:52

A friend wanted a tatty old chest freezer turning into a traditional looking ice cream cart for her business. The freezer itself was way to heavy and not really fit for purpose but, after a week of tinkering about with a couple of design changes here and there to accommodate the weight, I don't think I've done too bad a job.

The internal frame is Nordic fir, half lapped at the joints and secured in place with 38mm oak dowels, the cladding is 6mm birch ply finished with paint from the French chic Al fresco range, the writing proved a little challenging on the the eyes and my hands aren't as steady as they used to be but she's happy.

Comments

Farmhouse Queen Bed

Submitted by Anonymous (not verified) on Sun, 12/05/2021 - 06:07

I saw the Ana White Farmhouse king bed and used it as inspiration. I made a few modifications and adjusted the measurements to fit a queen bed.
Thanks for the inspiration!

Comments

Pet Stairs

Submitted by alli2410 on Tue, 03/13/2018 - 06:26

I needed sturdy stairs for my 2 60lb dogs.  My bed is 33 inches from floor to top of mattress.  So, this is my very first project completed by myself!  Custom size pet stairs 24inx24inx24

Estimated Cost
$40-50
Estimated Time Investment
Afternoon Project (3-6 Hours)
Finish Used
Minwax polyshades Espresso gloss (3 coats)
Recommended Skill Level
Starter Project

Comments

$10 Ledges Reading Nook

Submitted by kelli224 on Wed, 06/29/2011 - 15:22

We needed something to help with our book storage problem - something easier for the kiddos to get to and also clean up. We've made the ten dollar ledges before for our kitchen, but this project was way more fun!

Built from Plan(s)
Estimated Cost
$10
Estimated Time Investment
An Hour or Two (0-2 Hours)
Recommended Skill Level
Starter Project

Comments

Jewelry/Makeup Storage Cabinet

Thank you Anna for providing the template plans for this project. My wife had a mirror leaning on the wall in our bedroom that rarely got used and jewelry all over the dresser. So thanks to you I was able to turn this cheap mirror into useful storage and organize her jewelry.  Thanks! 

Estimated Cost
$80
Estimated Time Investment
Weekend Project (10-20 Hours)
Finish Used
Glossy spray paint
Recommended Skill Level
Beginner

Comments

Ana White

Wed, 10/07/2015 - 10:18

Thank you for building!!!  Your post just made my day, I'm so happy to see your build! I love the customization with the jewerly holders too!  Thank you so much for sharing!

Cedar deck box

Submitted by JMG on Wed, 07/06/2022 - 19:47

I had to modify these plans to use what I had on hand. I used left over cedar fence pickets (planed down and sealed) and adjusted the size to fit all my outdoor cushions. Overall dimensions are 49" wide x 28" deep x 26" high. I also used 2x4's instead of 2x2's because that is what I had in my shop. I added 1x3's around the top to fit snugly instead of using hinges (again trying to use what I had on hand). We get A LOT of rain in the summer so hopefully the cushions will stay dry. I also added some screen left over from the screened in porch to the bottom before adding the "floor" to keep bugs out. I just stapled it to the frame before adding the floor boards. I did add a piece of treated 1/4" plywood under the top in hopes of keeping the rain out.

Built from Plan(s)

Comments

Farmhouse Dining Room Table and Bench

Submitted by dpero on Sat, 10/10/2015 - 18:46

This table is massive with the top being 96" x 42" and 2" thick and sitting 31" high.  The table can be done in a weekend and the bench was assembled the same way as the table out of scraps and was finished in about 4 hrs.  

Built from Plan(s)
Estimated Cost
$700
Estimated Time Investment
Weekend Project (10-20 Hours)
Finish Used
Miniwax Cherry for the tops and white paint with faux glaze for the distressed aprons and legs.
Recommended Skill Level
Intermediate

Comments

High chair

Submitted by Anonymous (not verified) on Sun, 10/28/2018 - 21:34

Thanks so much for the plans. Built it for my visiting nephew. Had a hard time with wood splitting, definitely predrill once you have the pocket holes lined up. I finished with food grade mineral oil, may go over it with beeswax.

Built from Plan(s)
Estimated Cost
$15
Estimated Time Investment
Afternoon Project (3-6 Hours)
Finish Used
Mineral oil
Recommended Skill Level
Beginner

Boys Room Display Shelves

My new thing is hiding a stack of shelves behind an open door. There are so many rooms in my house that have this little piece of wasted space!

For my son Ethan's shelves, I made the 10-dollar ledges, but only 30 inches long. Also, because I used pocket holes to put them together, I made the "shelf" part from a 1x6, so they would have a little extra depth for showing off his treasures and lego projects.

These changed the entire look of the room. I love how they are out of the way, and are adding design to his room as well.

These were so easy to build!

Learn more on the blog post:
http://lassothemoon.typepad.com/lasso_the_moon/2013/08/boys-room-behind…

--Anna

Built from Plan(s)
Estimated Cost
$20
Estimated Time Investment
An Hour or Two (0-2 Hours)
Finish Used
behr havasu blue paint
I didn't need it to be smooth or shiny, so I used a $3 pot of test paint for all five shelves. A great way to save some cash!
Recommended Skill Level
Starter Project
Back