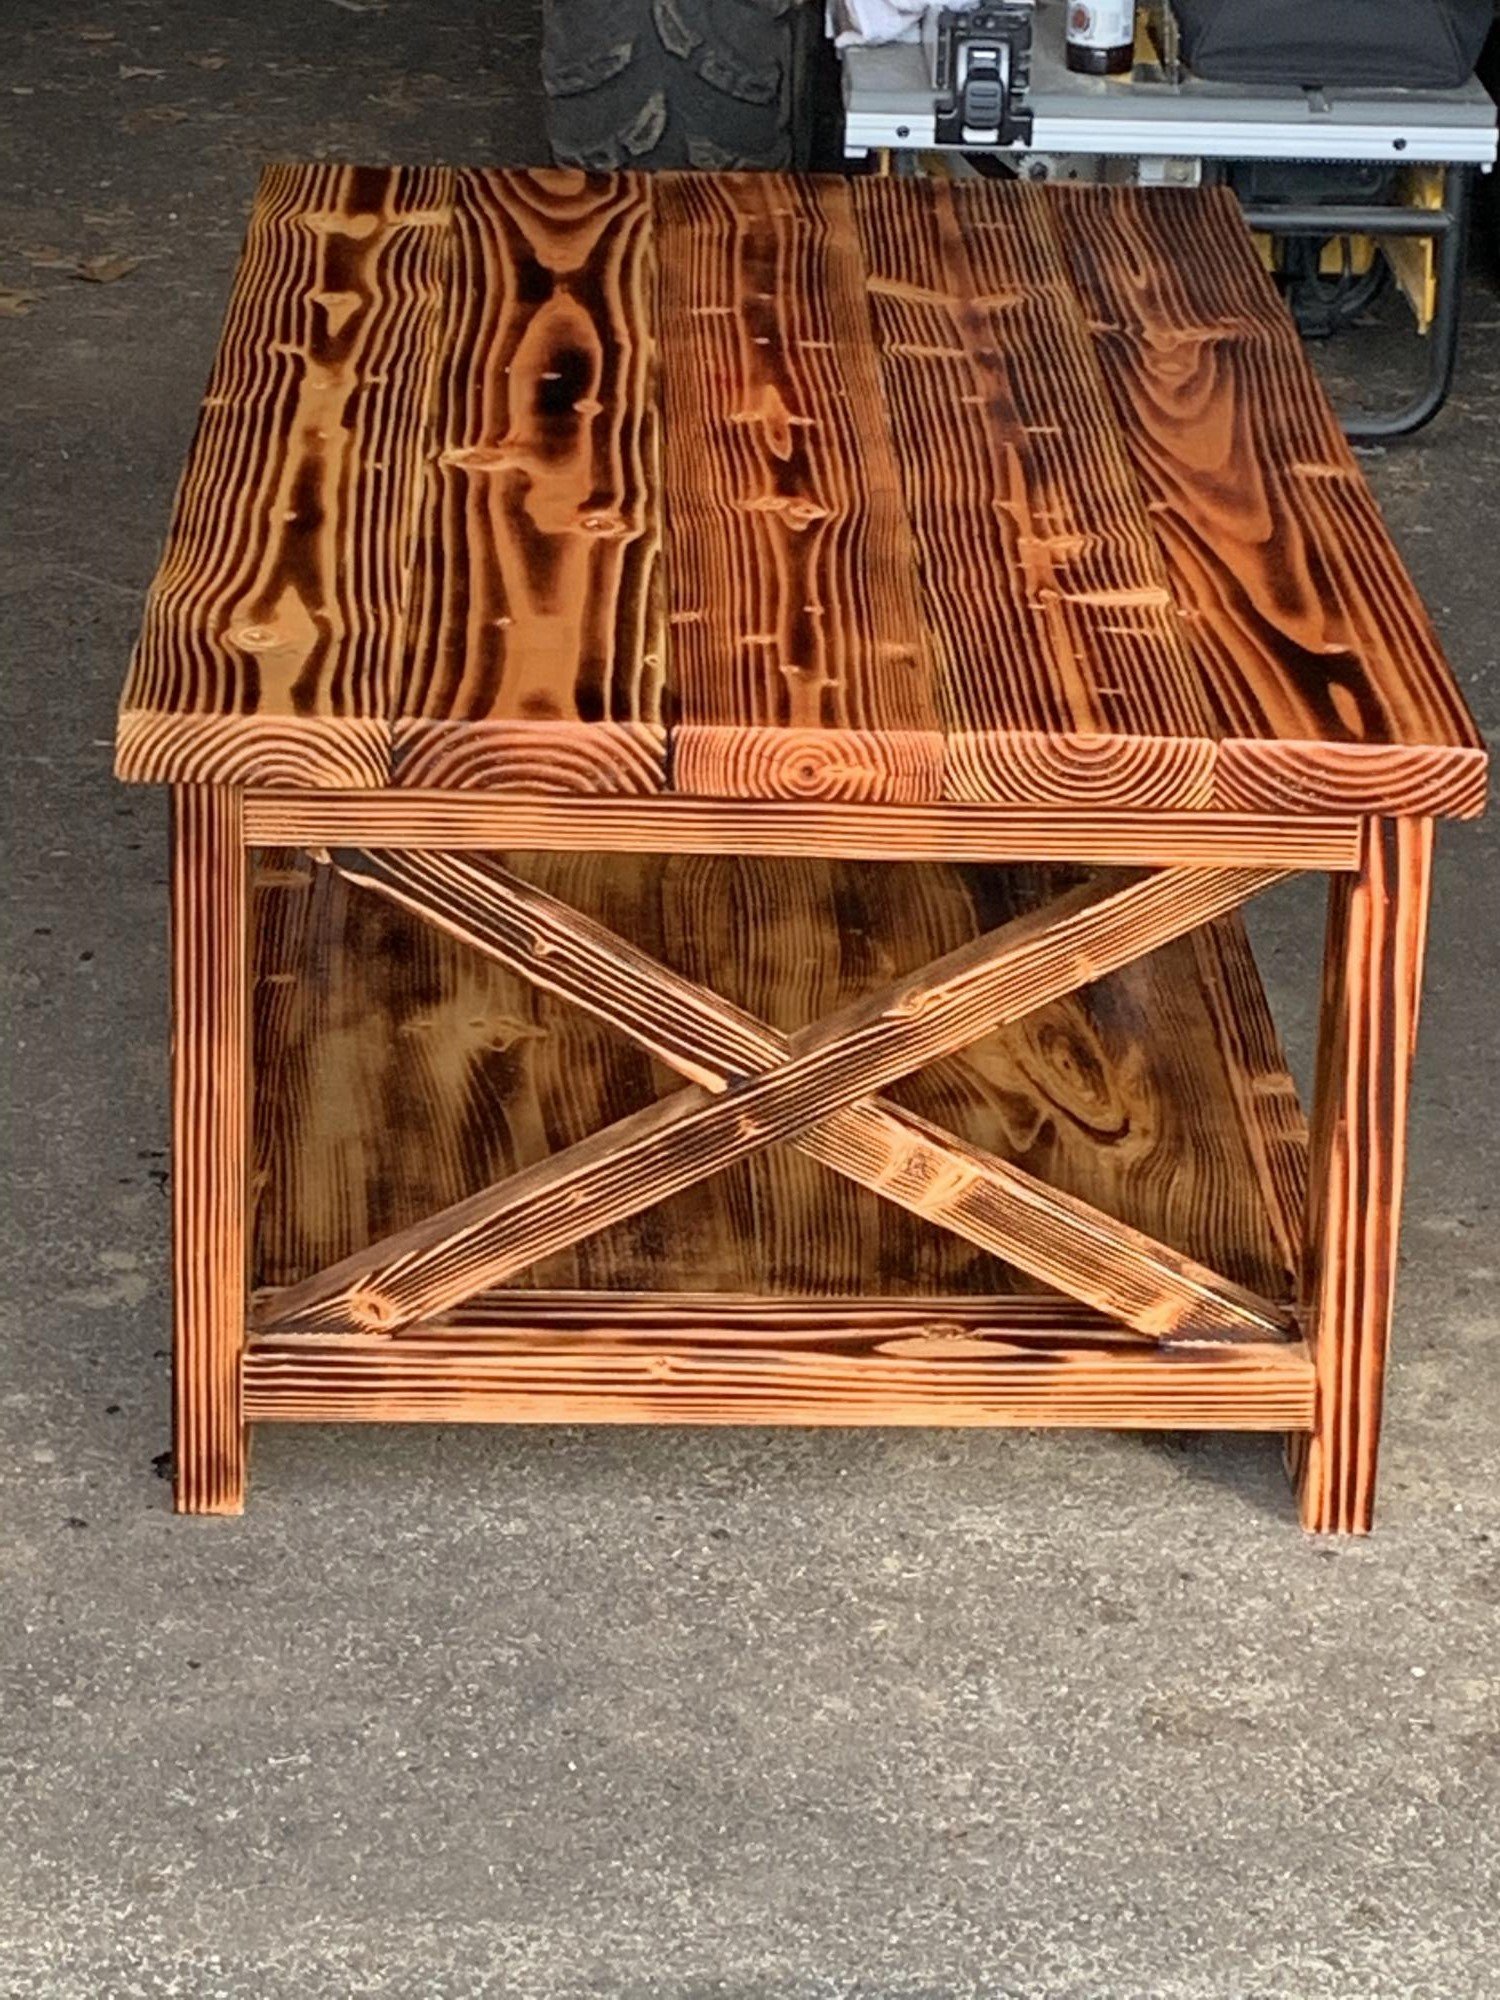
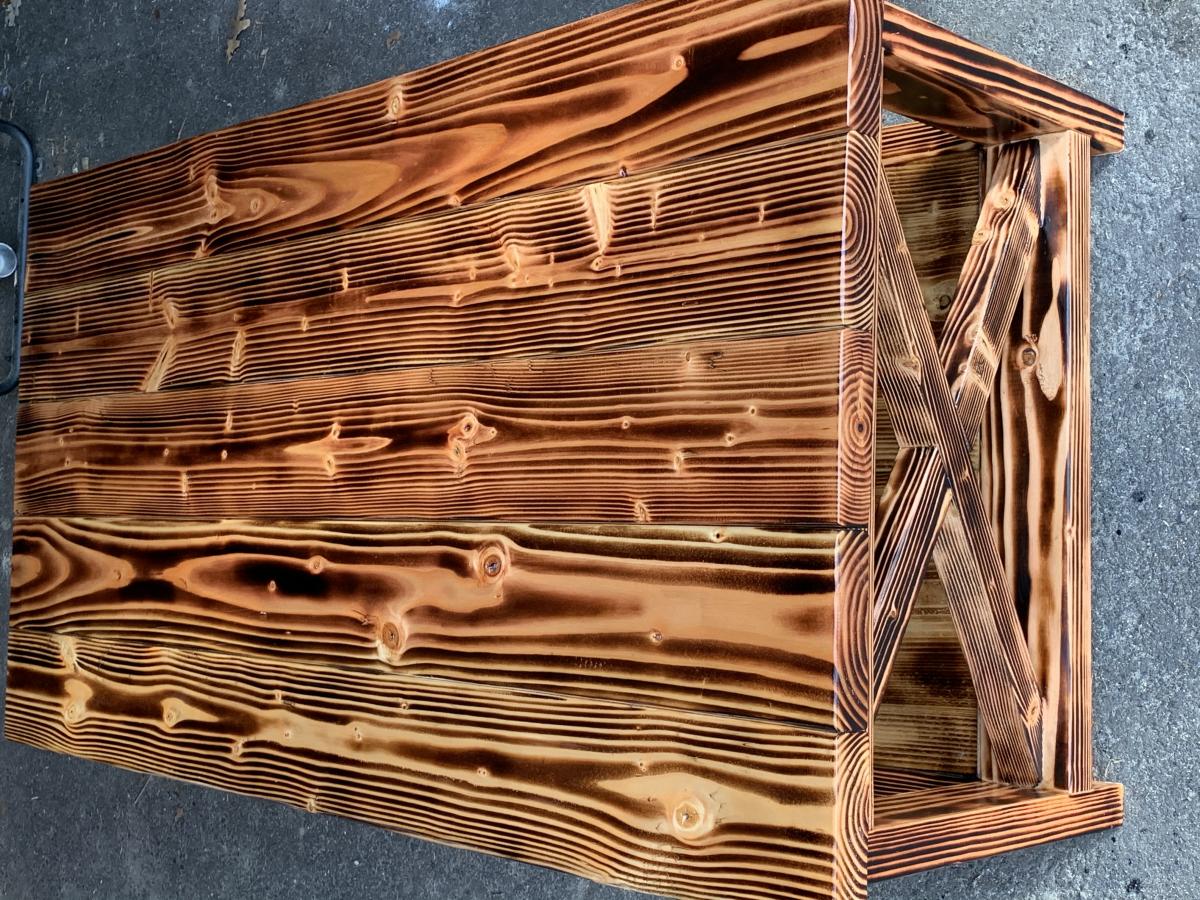
tv stand and side tables (night tables)
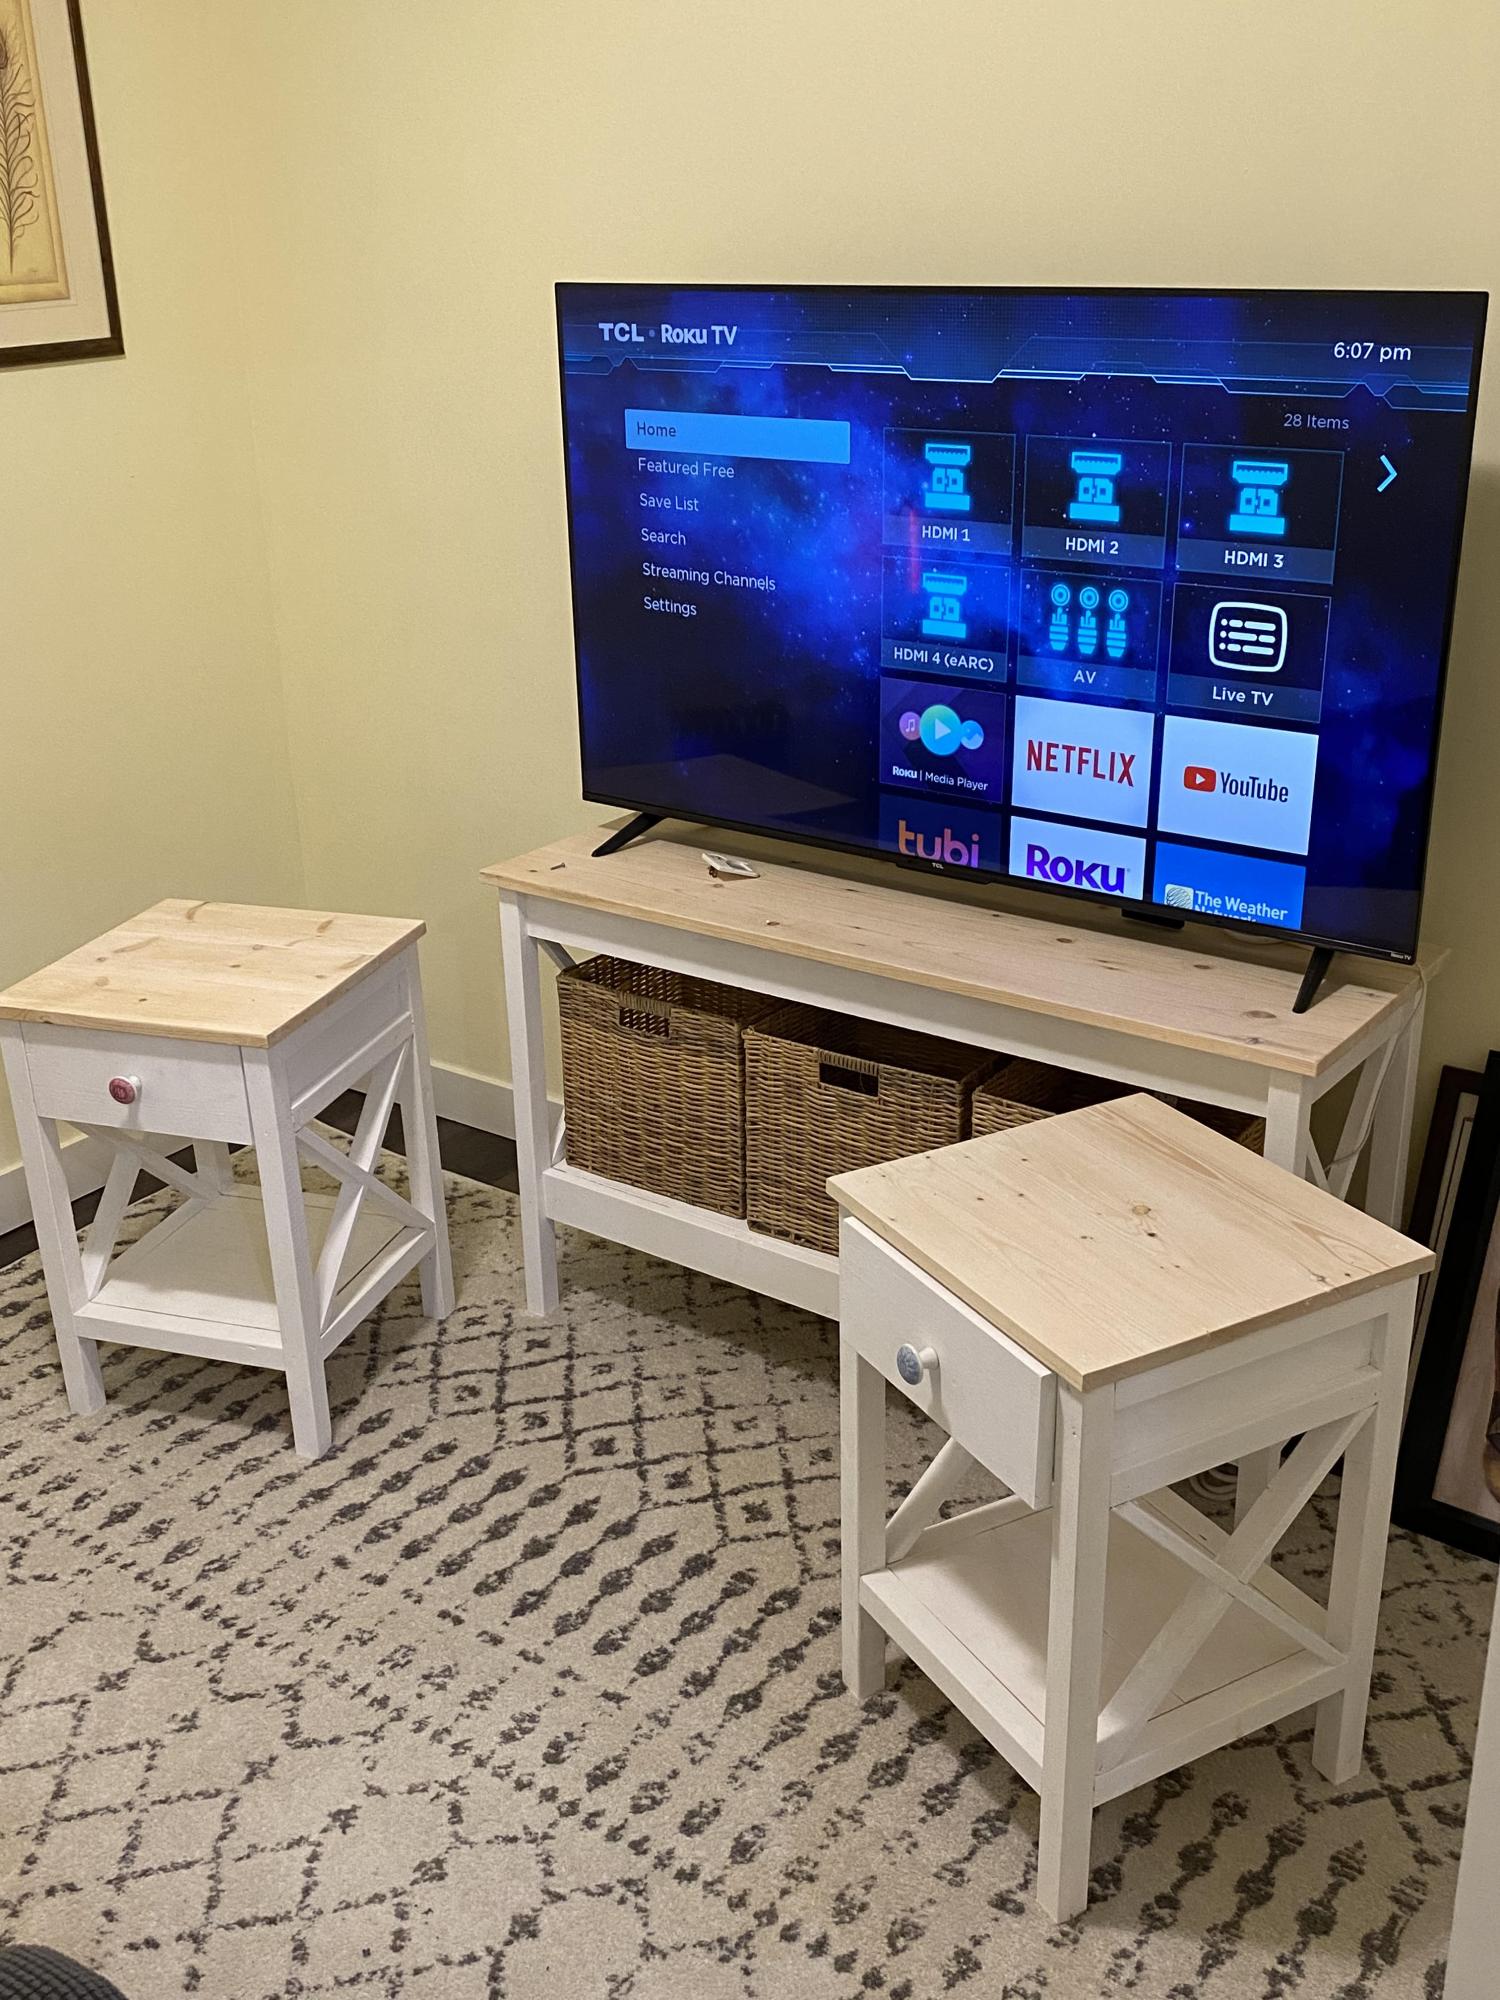
I needed some furniture for a summer tv room ( cooler downstairs) I was making. These sidetables and tv stand are loosely based off Ana's work.
Built from Plan(s)
I needed some furniture for a summer tv room ( cooler downstairs) I was making. These sidetables and tv stand are loosely based off Ana's work.
Made this with pallet 4x6 and 4x4 posts, and construction lumber.
Fri, 05/05/2023 - 11:44
It is masterfully done, I love your use of material! Thanks for sharing.

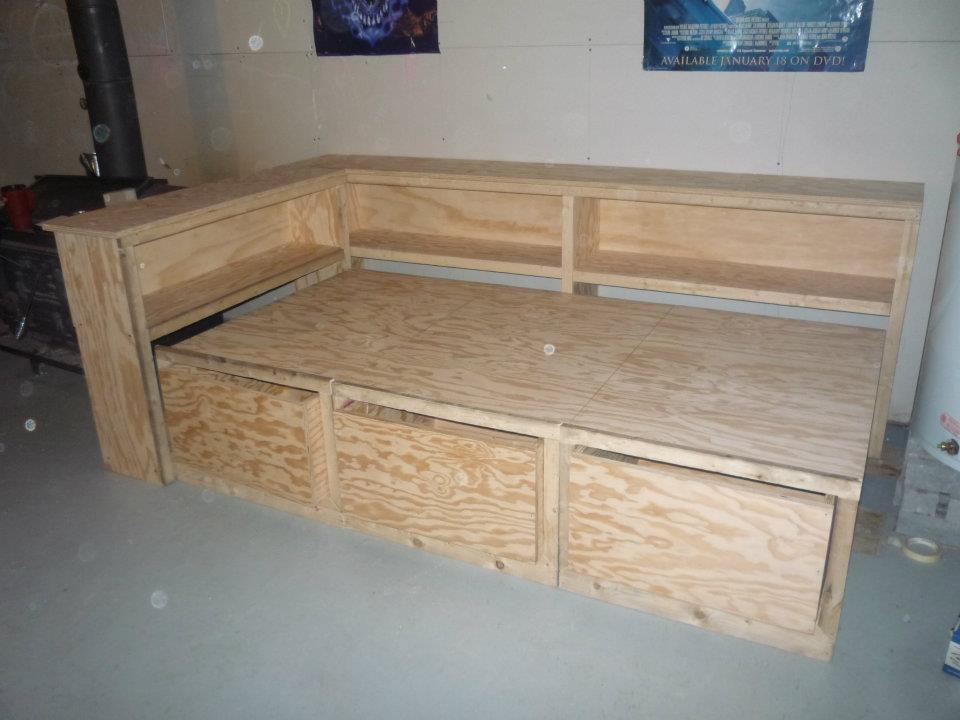
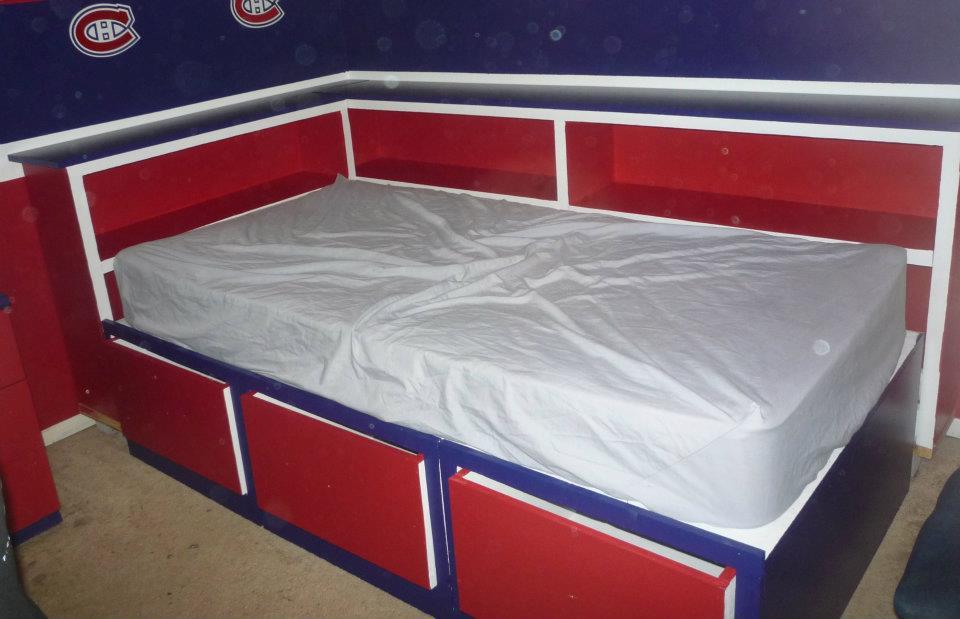
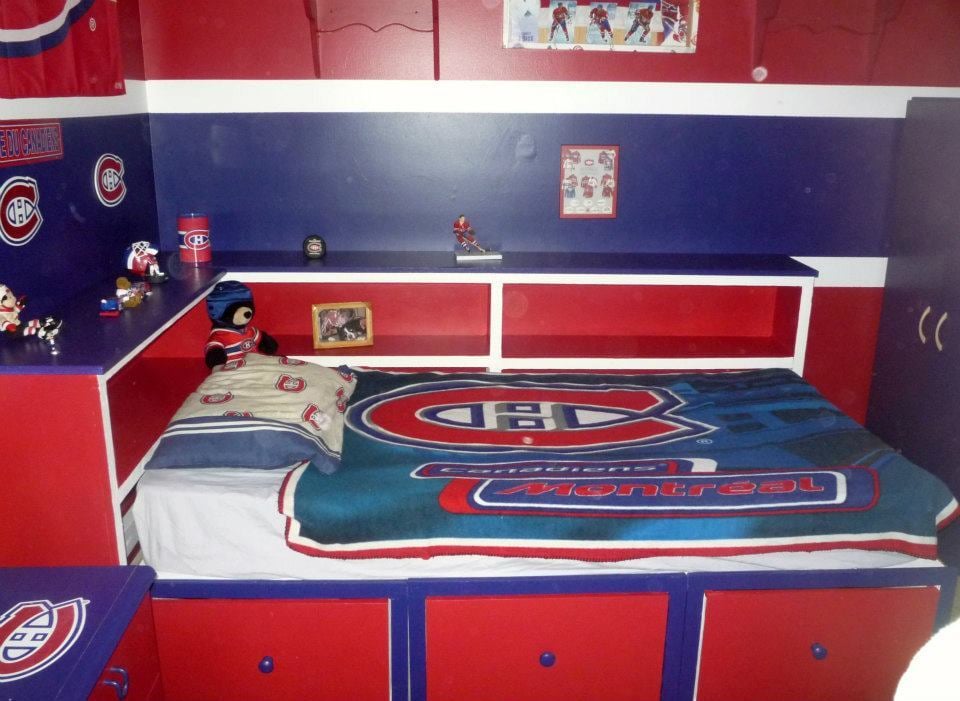
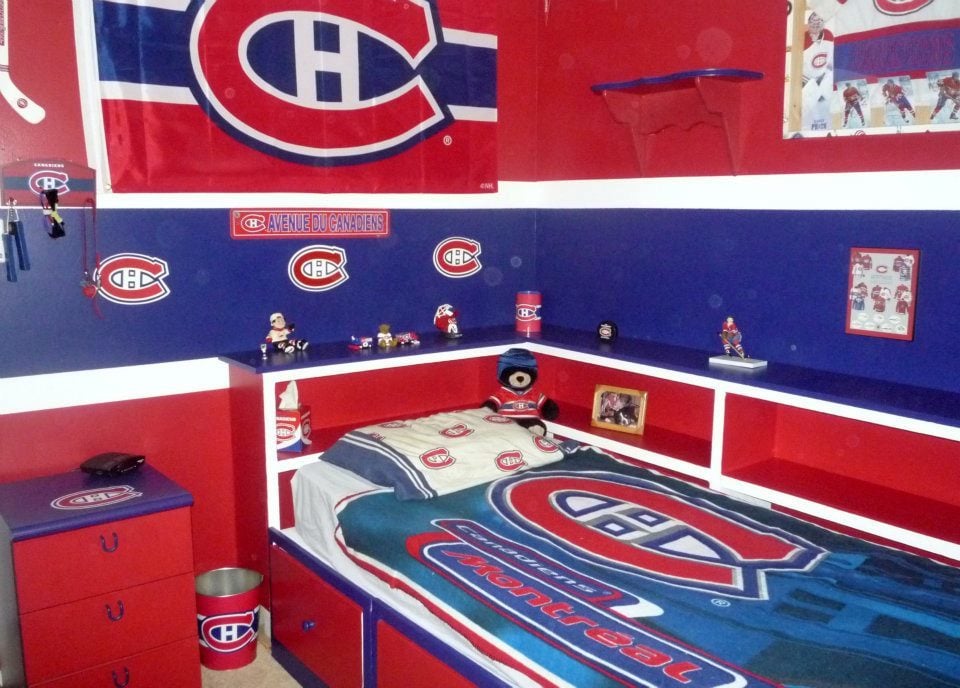
Our nephew Nathan really wanted a captain's bed like his friend. We built him one even better for Christmas this year. I couldn't find one plan with everything we wanted to I used the plans for the Storage Daybed for the base, and used the plans for the Cozy Corner twin bed collection wide bookcase unit. We combined both the headboard and sideboard into one unit (by extending the top to the short end) giving him an L shaped headboard for all his hockey stuff :) The only thing we messed up on was the height of the bookcase. He wanted it higher so it's on blocks for now to raise it. My sister did all the final painting to match his room and it looks AWESOME!!!
Steve had everything cut at work and we put it together in one 12 hour day! Nathan LOVES his new bed. Thank you Ana!

Fri, 01/06/2012 - 16:52
That is one nice, cool looking bed. Interesting colors, is it his school colors? I've never thought of painting plywood, you've given me some ideas.
Fri, 01/06/2012 - 21:24
The colors are the official Montreal Canadiens hockey team's colors, My son is a HUGE fan! Nathan LOVES his bed. and it is very solid.
Fri, 01/06/2012 - 20:29
Ummm... The bookcases were too short because you didn't take the mattress height into account. Looks really good though.
My very first woodworking project and could not have done it without you!!
Mistakes were made and lots was learned but pretty happy with how it turned out in the end.
Wed, 05/24/2023 - 19:54
Absolutely beautiful, can't wait to see what you build next!
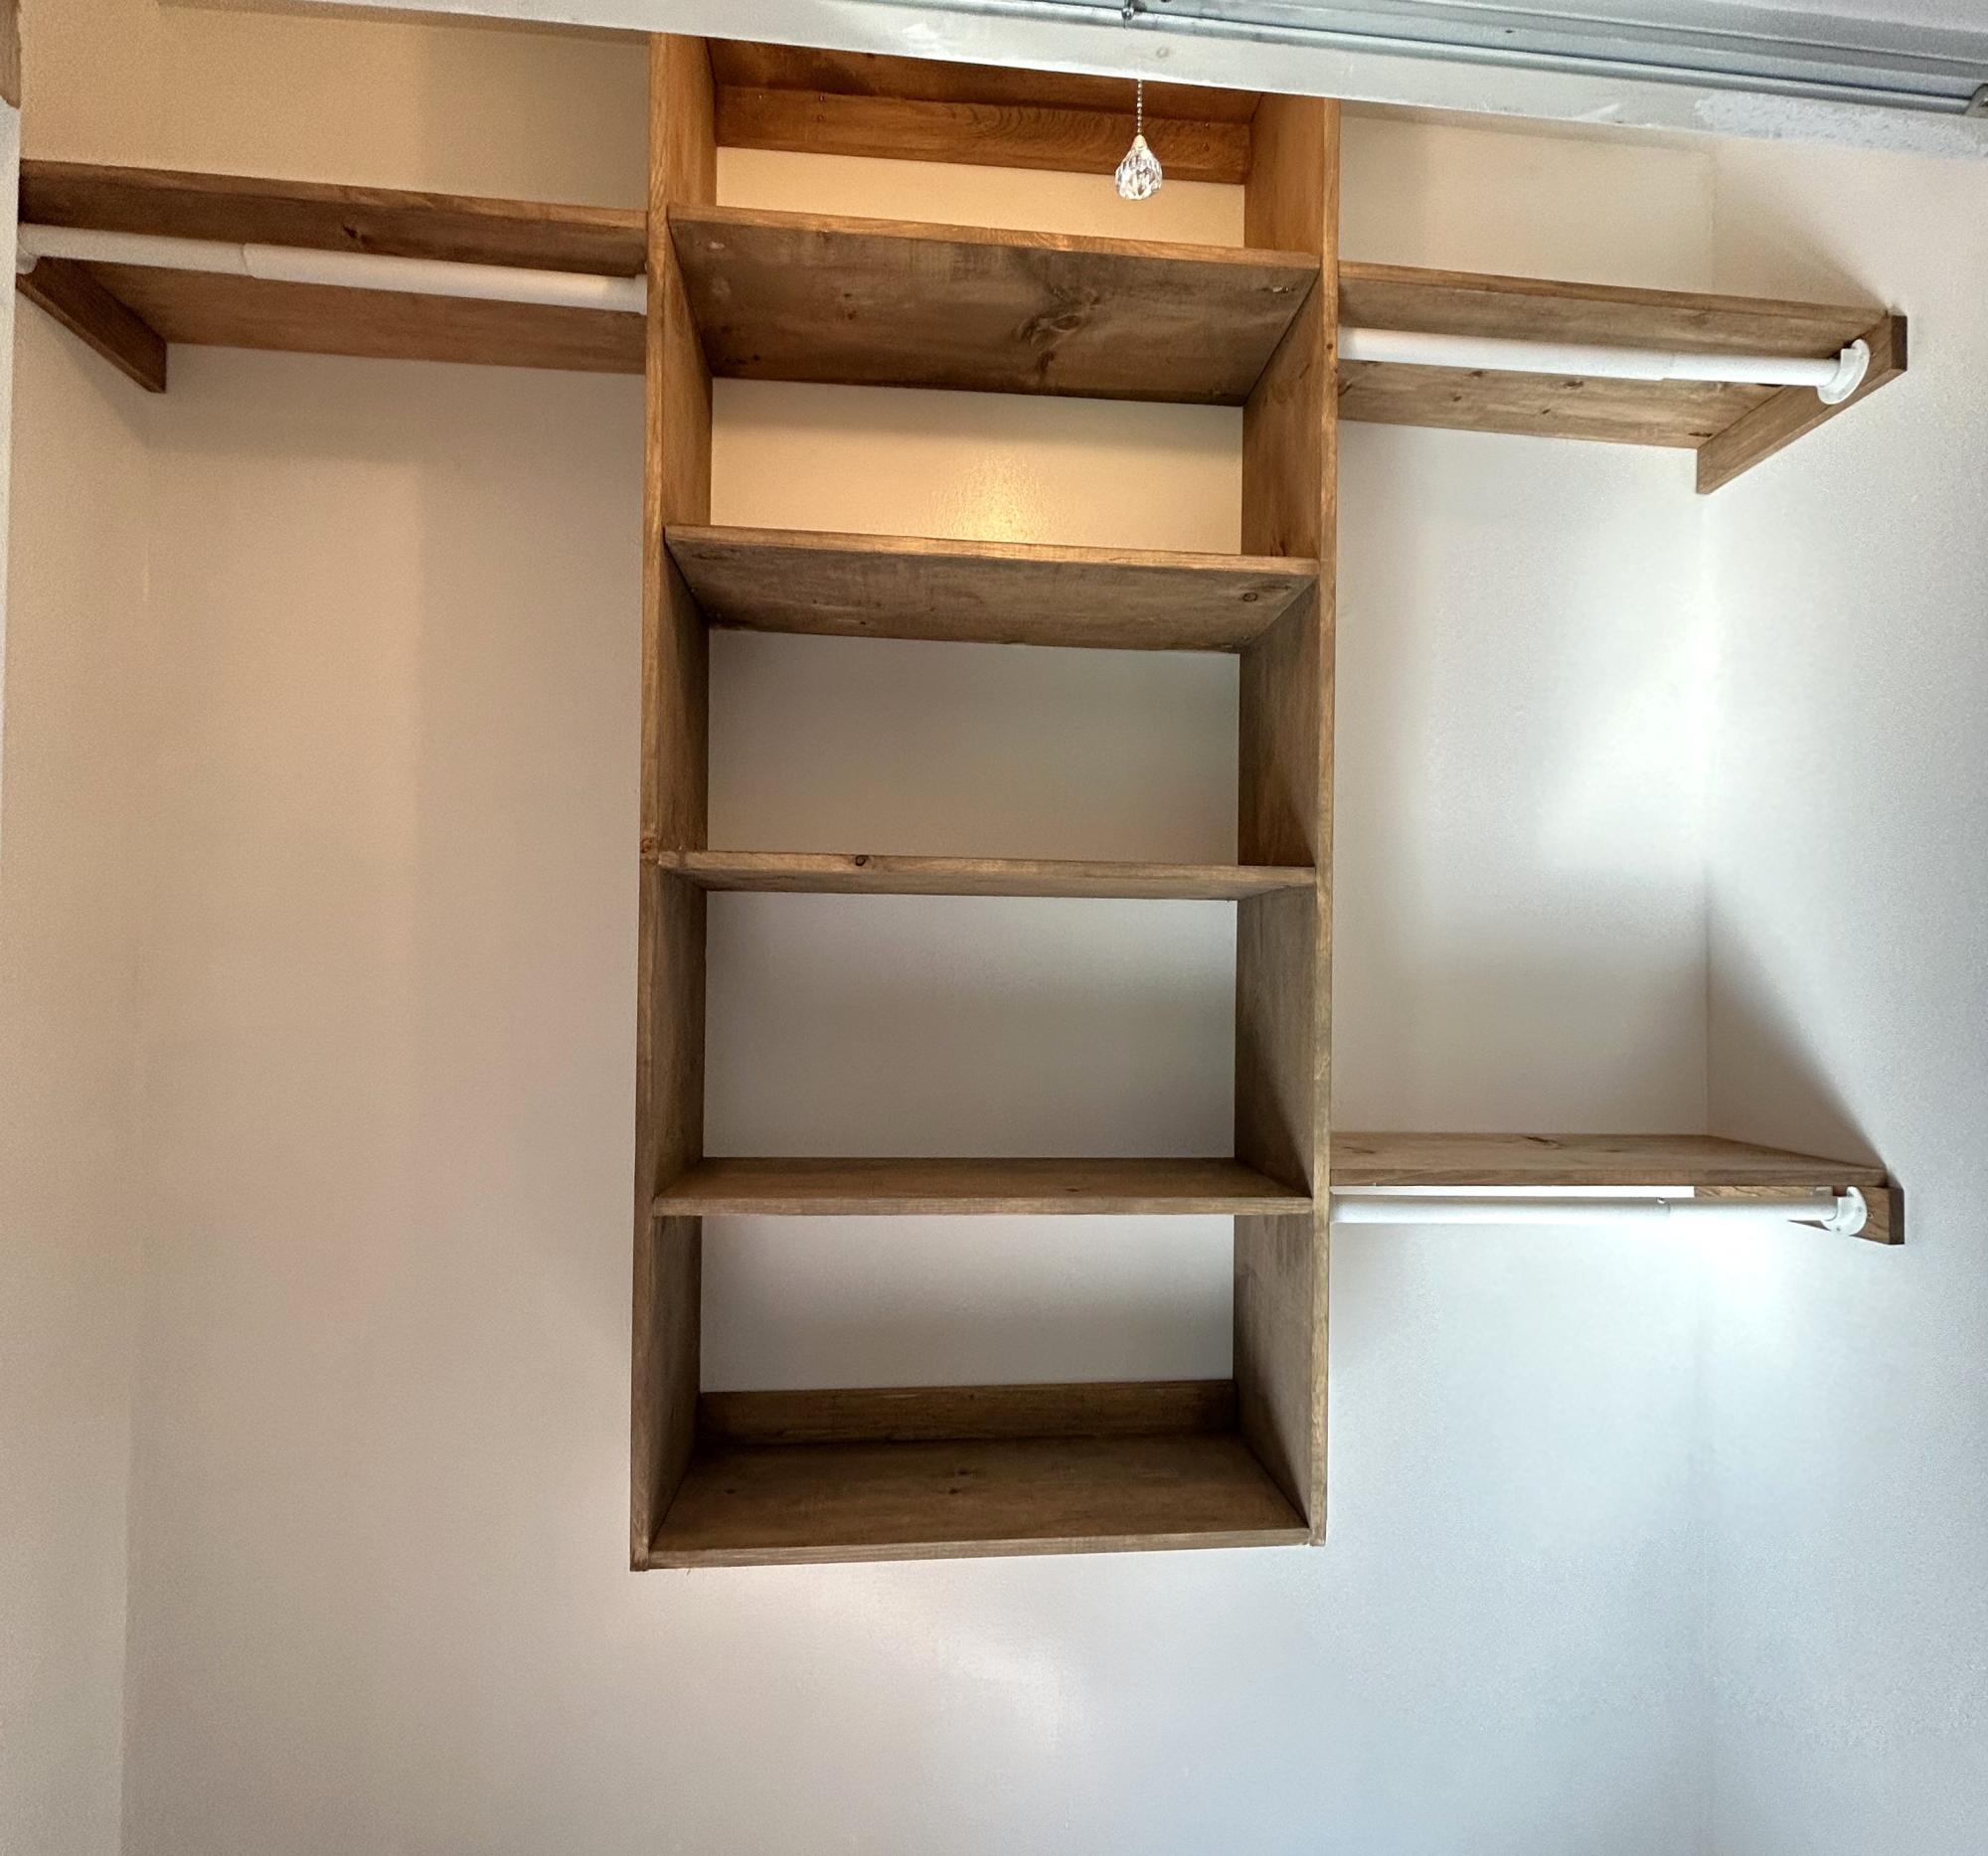
Closet by Joanie

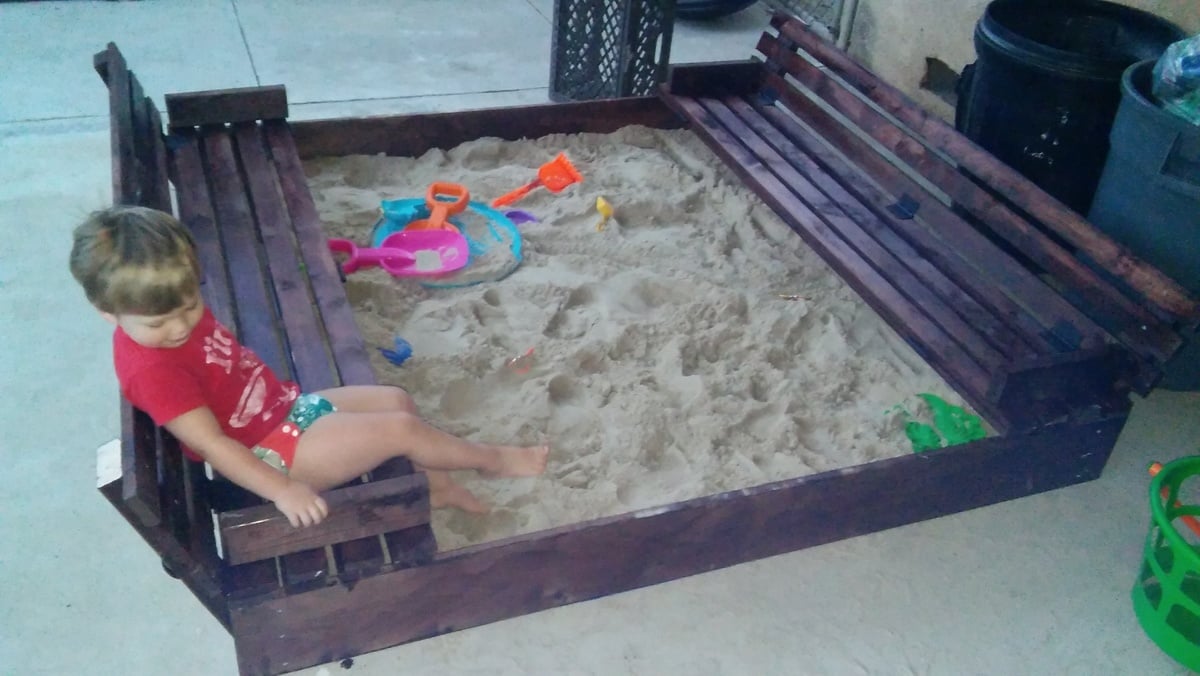
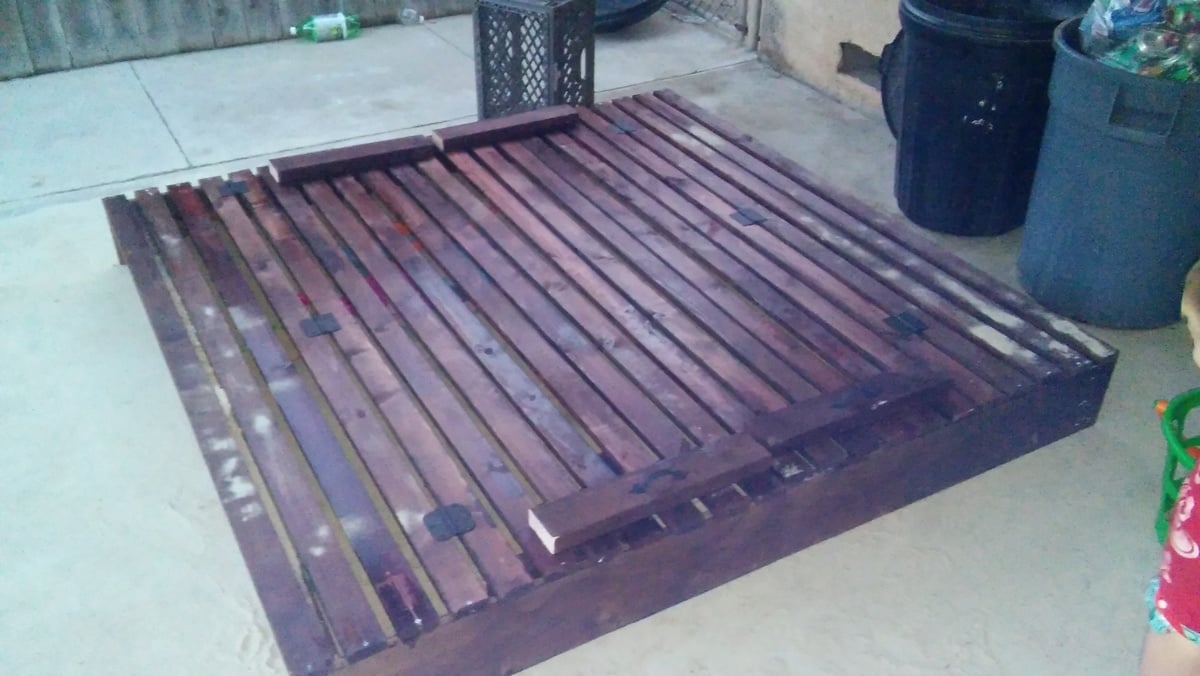
This was our first attempt at making a woodworking project but knew it had to be done to save our plants from our son digging in them. It took us all weekend (mostly because of the staining) but we completed the project in 2 days. We went a little bigger (made a 6 x 6 box) to give our son some room and allow for friends. I loved putting the project together and look forward to many years of use from this box. Thank you for such simple plans!
This was our first build from wood to finished product! I had done some refinishing furniture project, but never a project from raw wood like this. It was easy to do, the hardest was installing the smart lights and making sure they worked!

This is another piece for my living room to go along with the console table I've already finished. My hope is to replace all of the furniture in the living room with matching pieces to finally have a house that doesn't look like it was decorated through the Salvation Army.
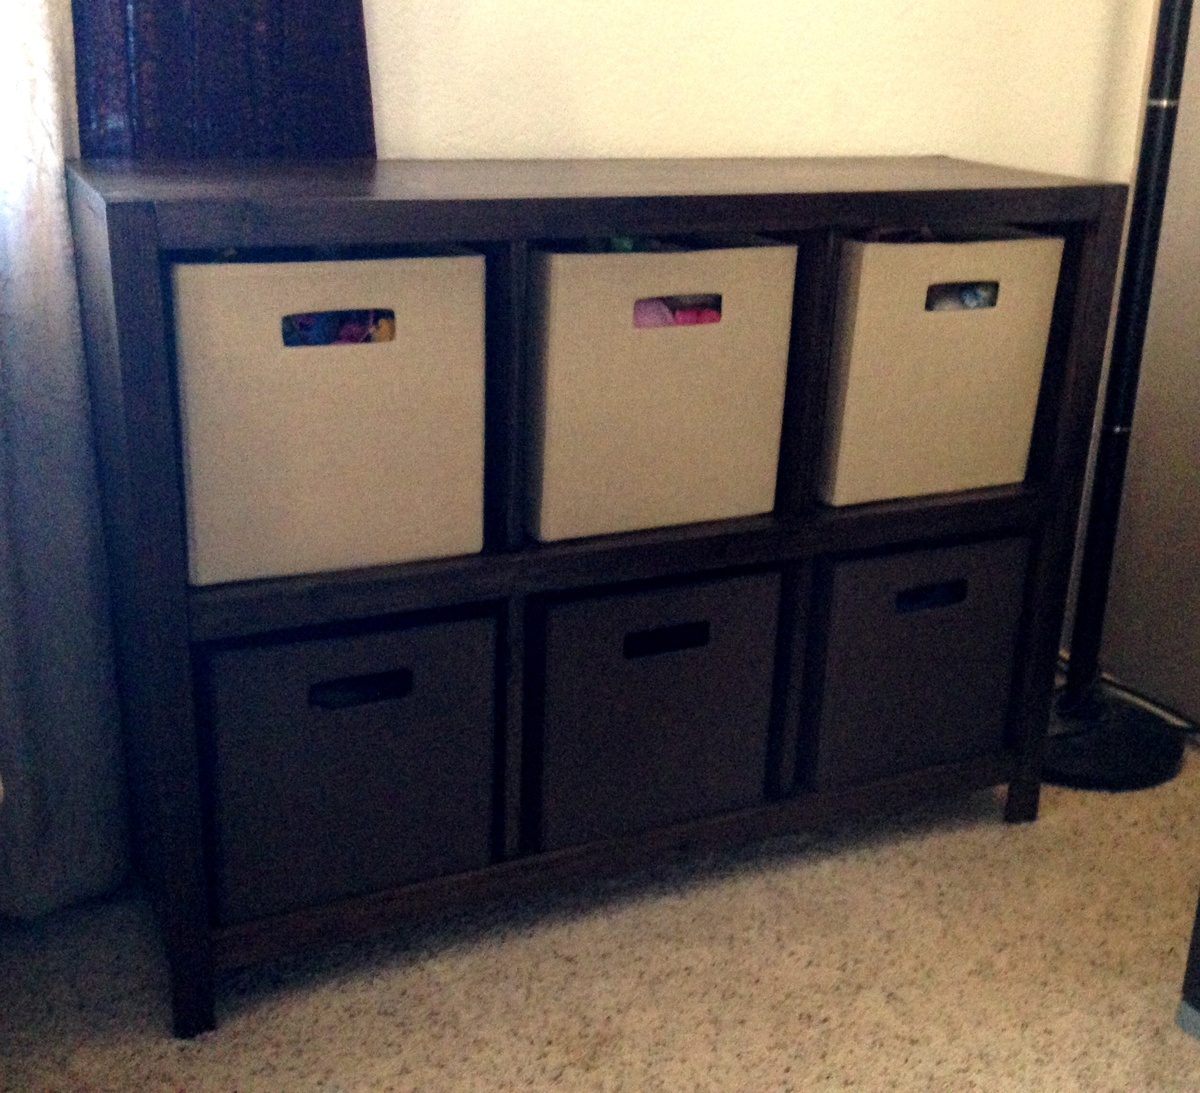
This one has the specific purpose of a toy box for our two year old. Now she has a place to store her toys that she keeps in the living room instead of just piling them up in that corner. It's based on the 6 cube bookshelf design and finished with three coats of Varathane's Kona poly blend over regular pine.
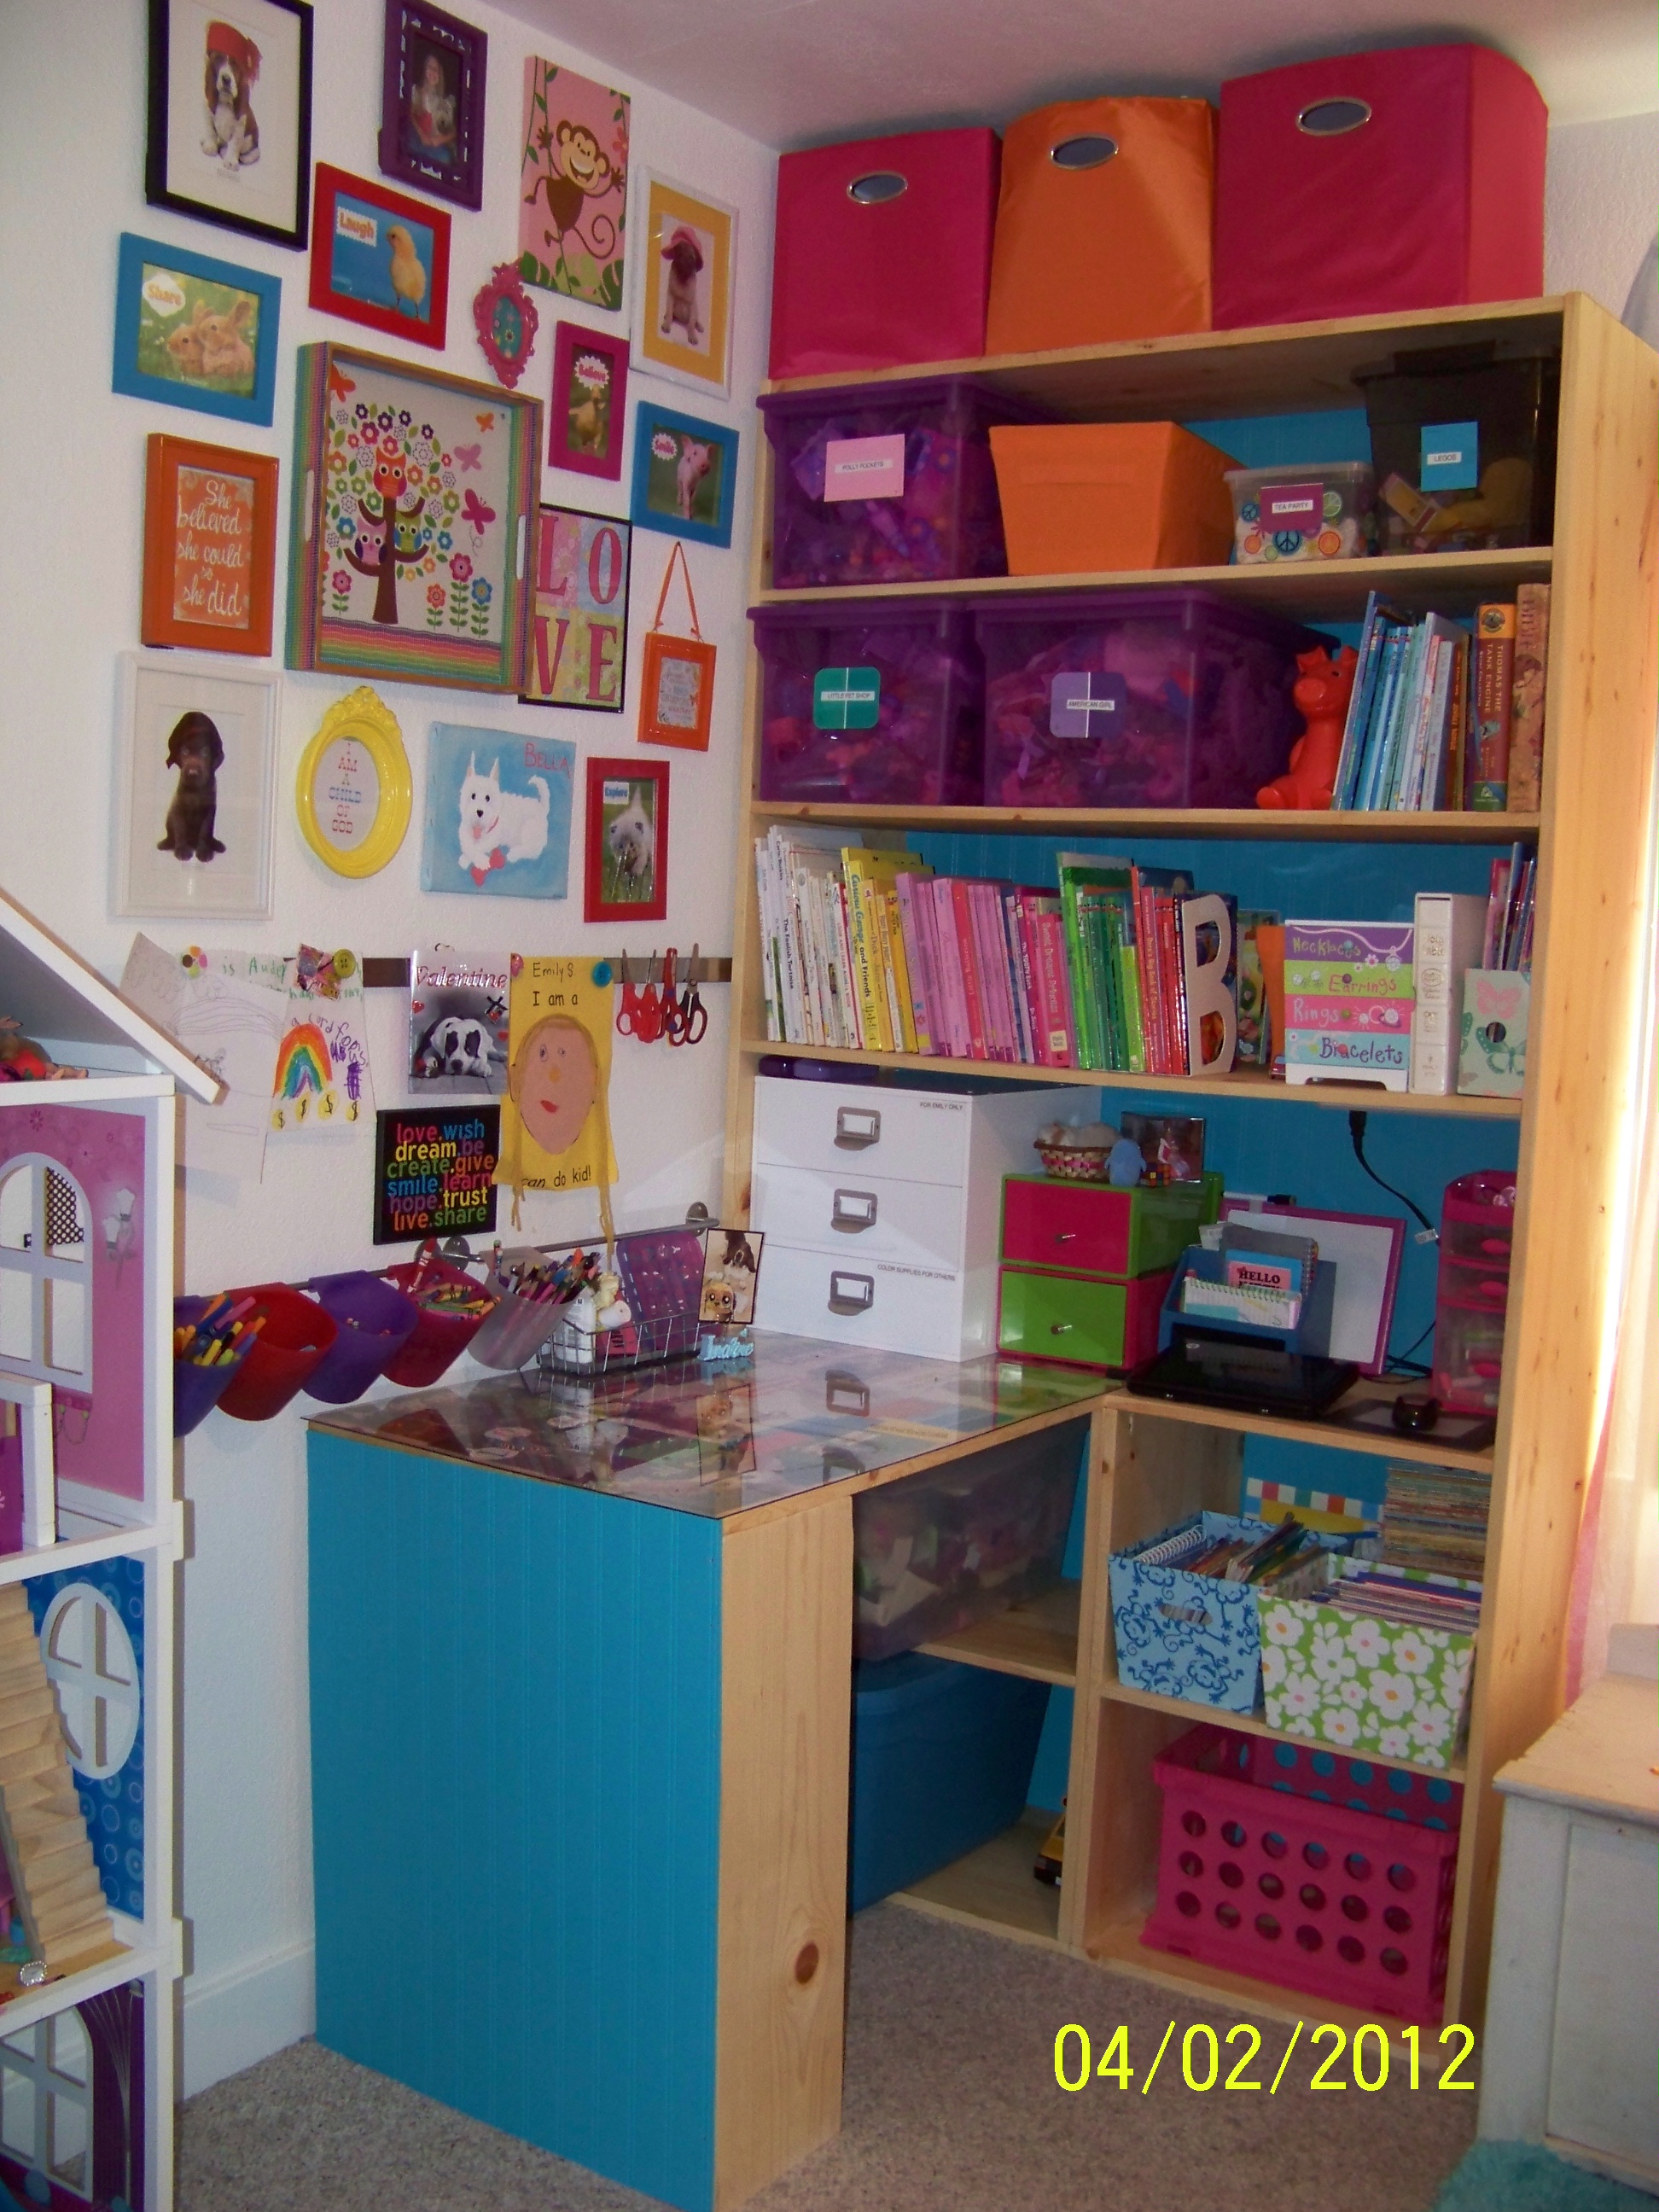
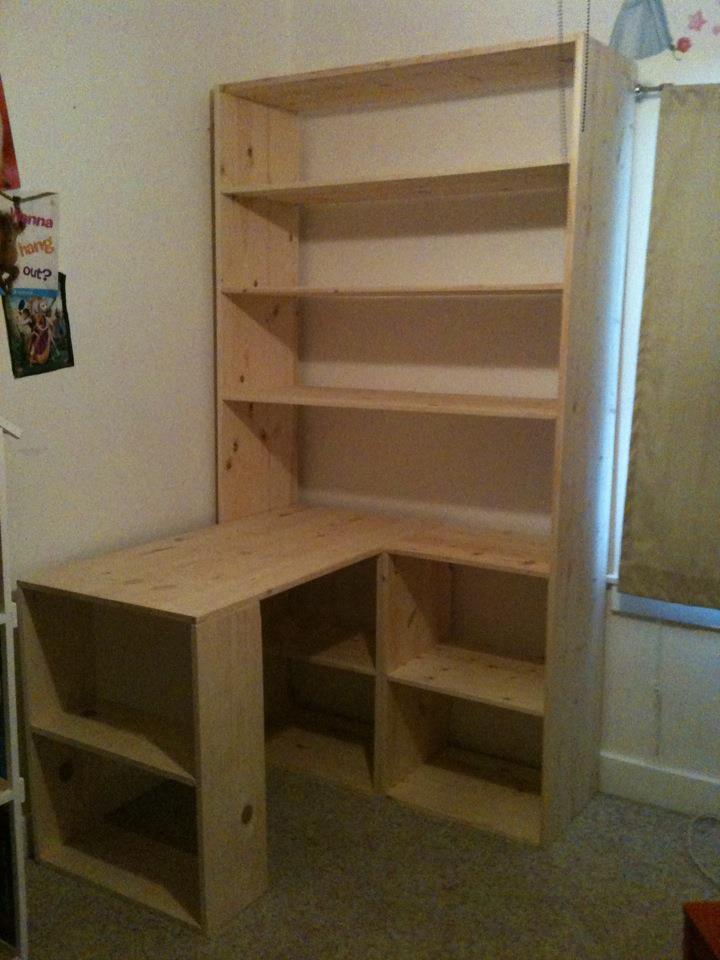
If it was not for this site I would not think we could do this. Inspiration was from the IKEA LACK bookshelf and varioous craft desk tutorials on here. Bookshelf is 7 ft tall, 4 ft wide and shelves are 16 inches deep. Writing desk area is 3 ft long 2 ft wide. It could be done cheaper but it needed to hold all my daughters toys in bins so we paid more for the 16 inch deep boards. It only took a Saturday afternoon to build, but more time in decorating, clear coat of stain. It has a acrylic top writing surface.

Mon, 04/02/2012 - 23:01
Oh I love it! What a huge amount of storage!!!! I love the bright colors and wood grain too! Thank you so much for sharing! Very inspiring!
Fri, 07/11/2014 - 11:35
my brother saw this on line picture and he would like to make it for his little girl. Like to get the plan from you if you have it.
These are simple, cheap, easy, and effective.
I modified the top so that I could just use the left over 2X6s I had and it would somewhat match my table. I felt it worked. There is probably something like $5 in wood in each chair about about 20 screws...that's it.
Word of warning, because you are using 2X2s these chairs will twist a little. Can't change physics but for $5 what do you want...
This is a fun little project that is quite easy but will make you think about how you can modify it and how/where you should use all your screws both to make it strong as well as to hide them.
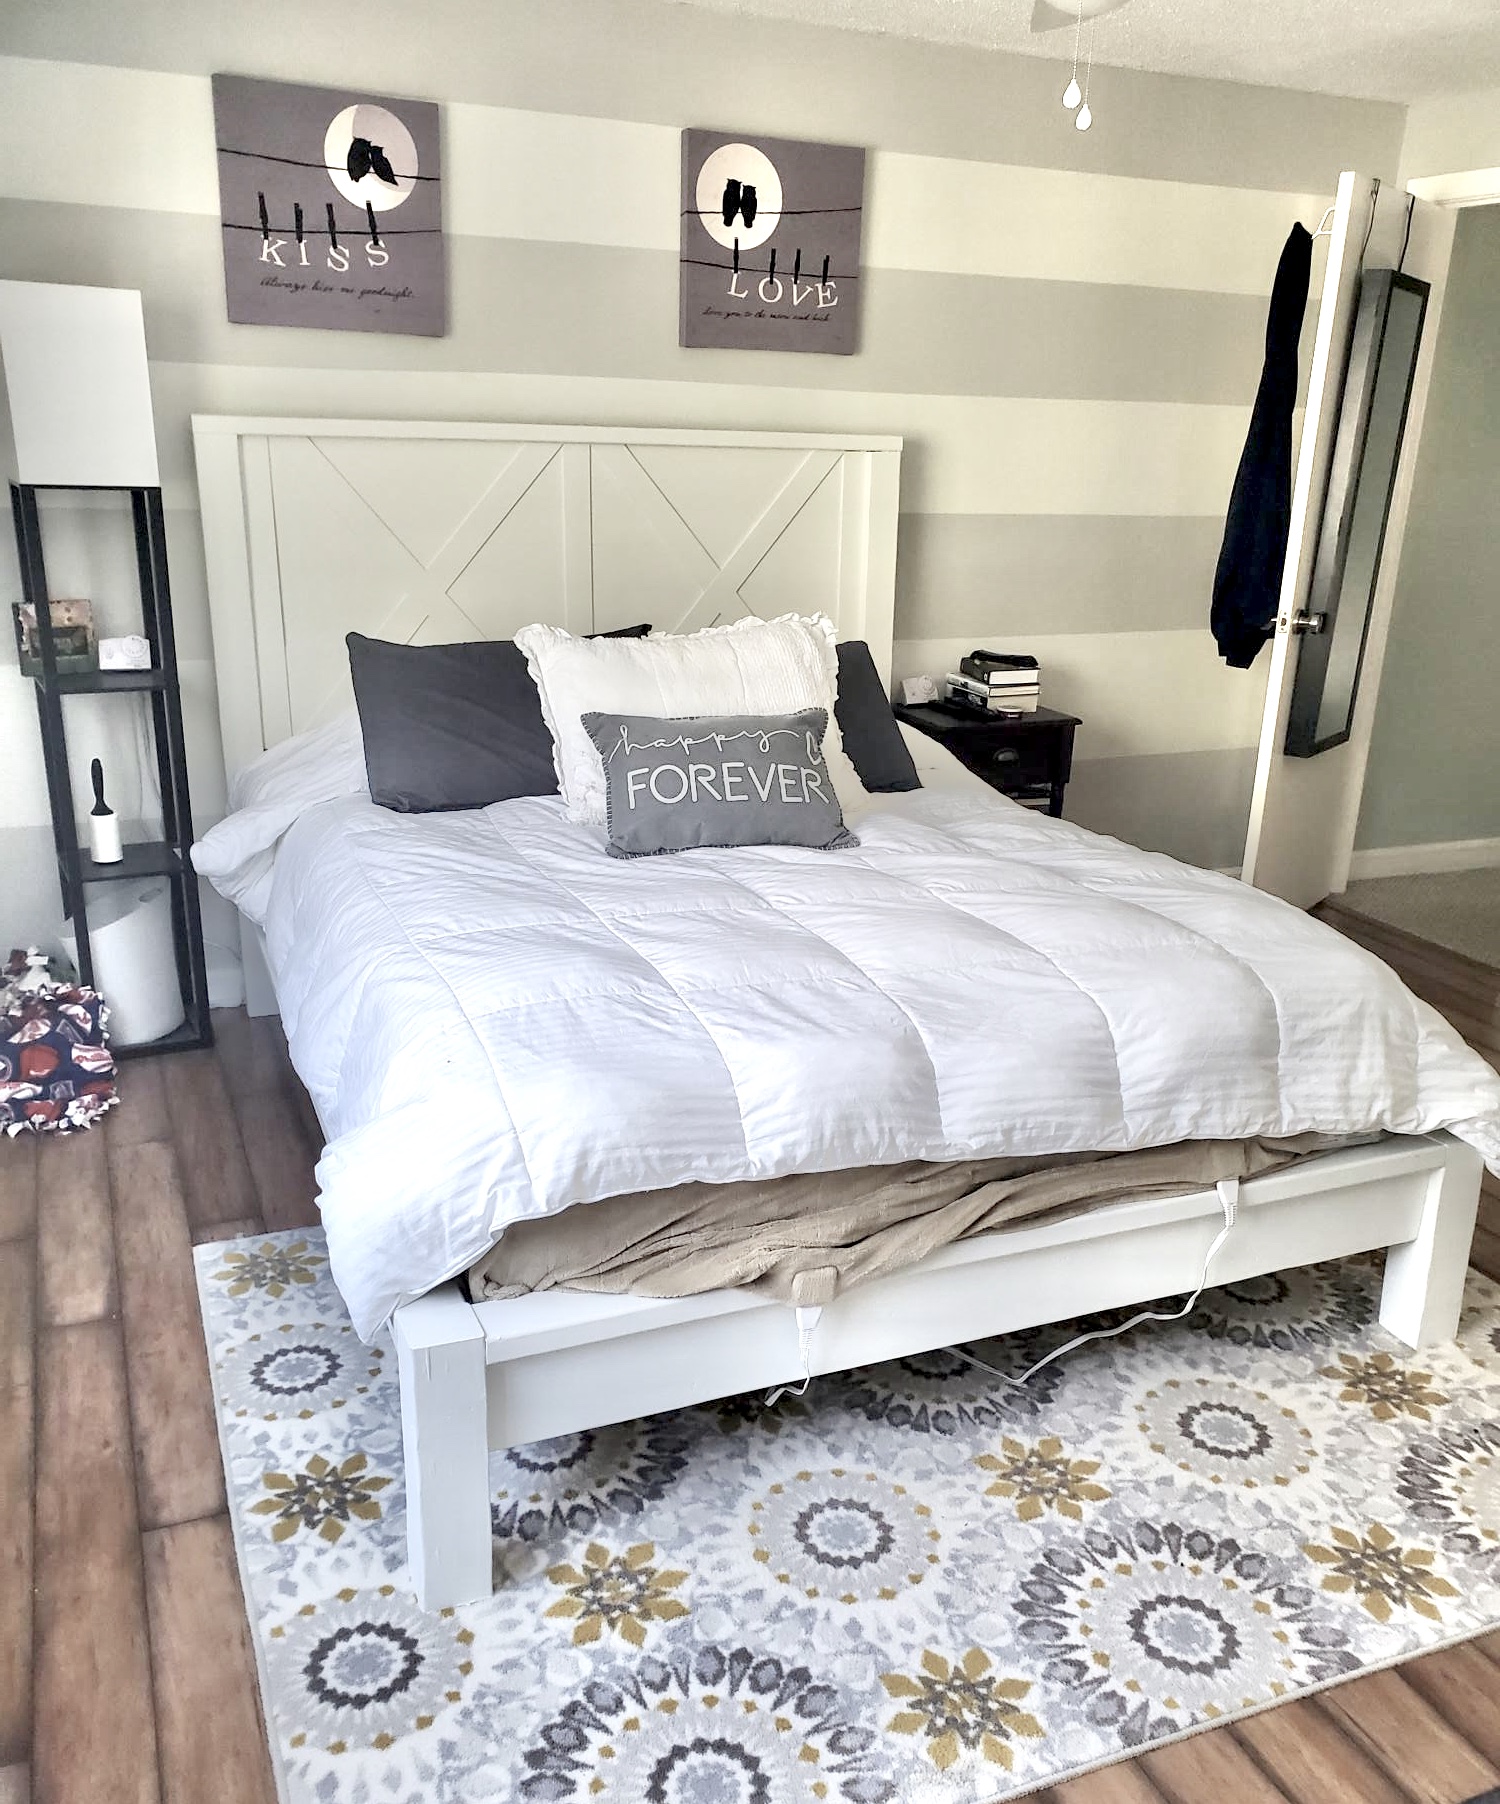
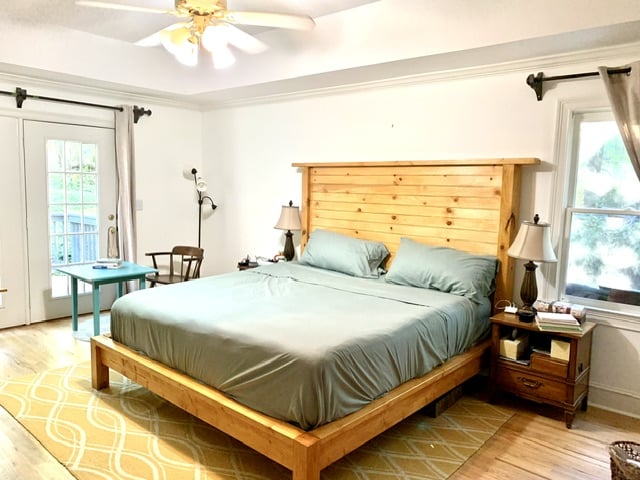
Modern Farmhouse Bed Frame - with some added accents to match some other elements in the house - plan was so easy to follow and came together so well!! Thank you so much!!!!!
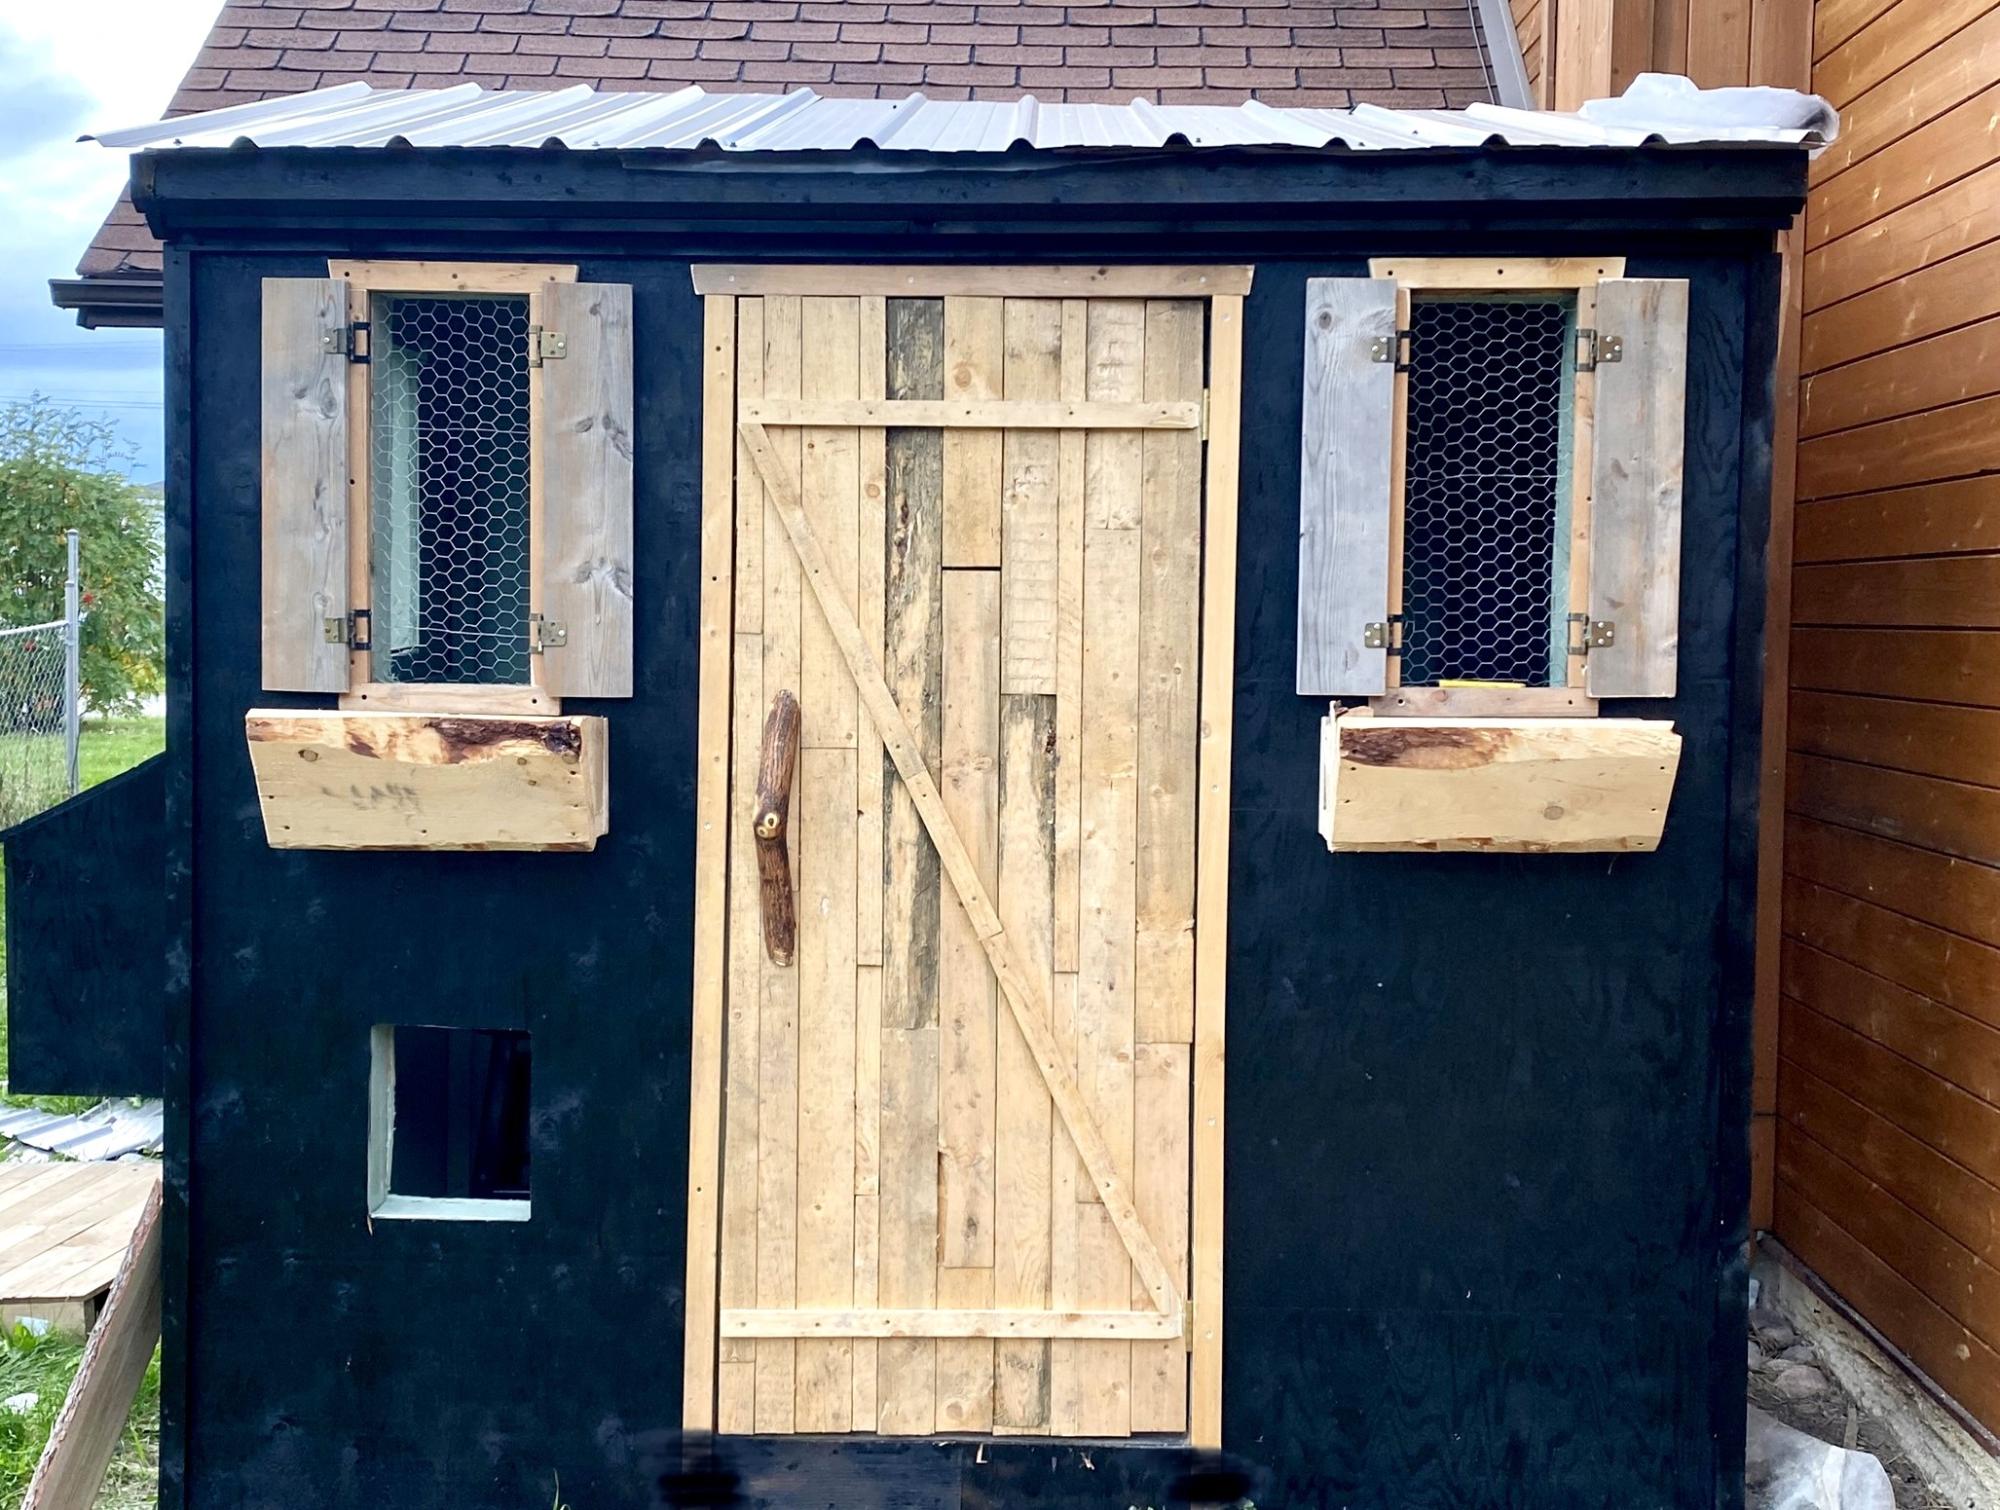
I’ve wanted a chicken coop for a while, and I wanted it cute. I love how it turned out!
Aj
I love it. Originally wanted to build the lift top coffee table but by the time it was ready to do it we realized the sides weren’t wide enough to for a hideaway storage. Wish it was a little bit smaller but for the first project of many it was great

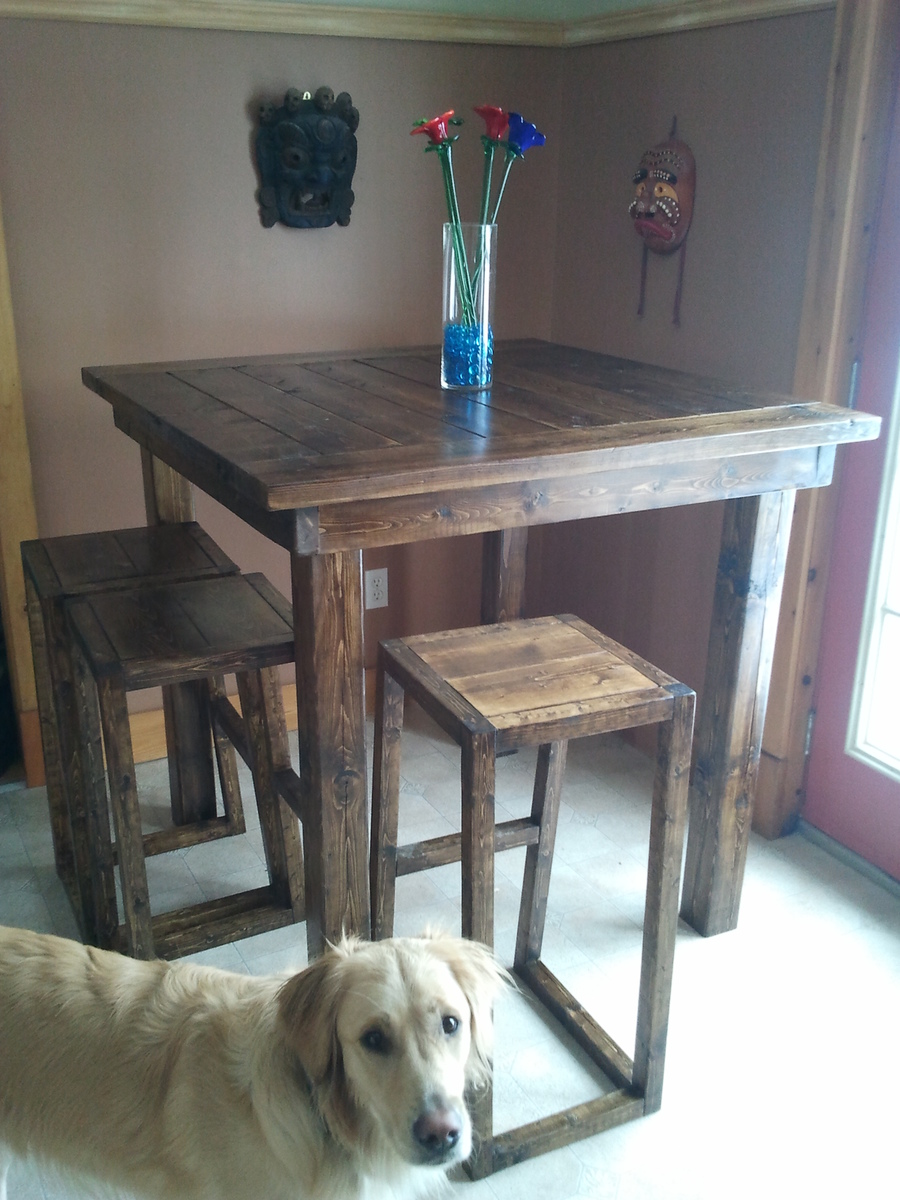
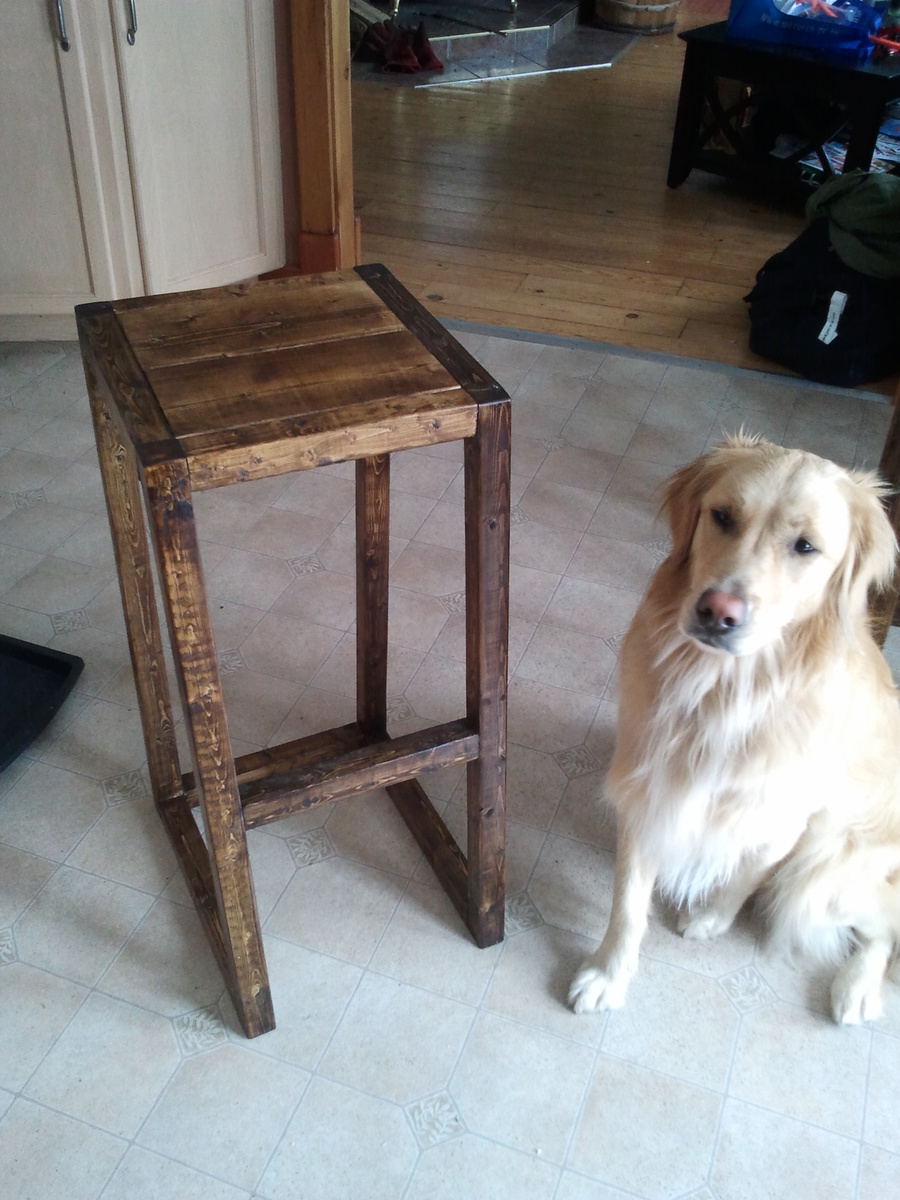
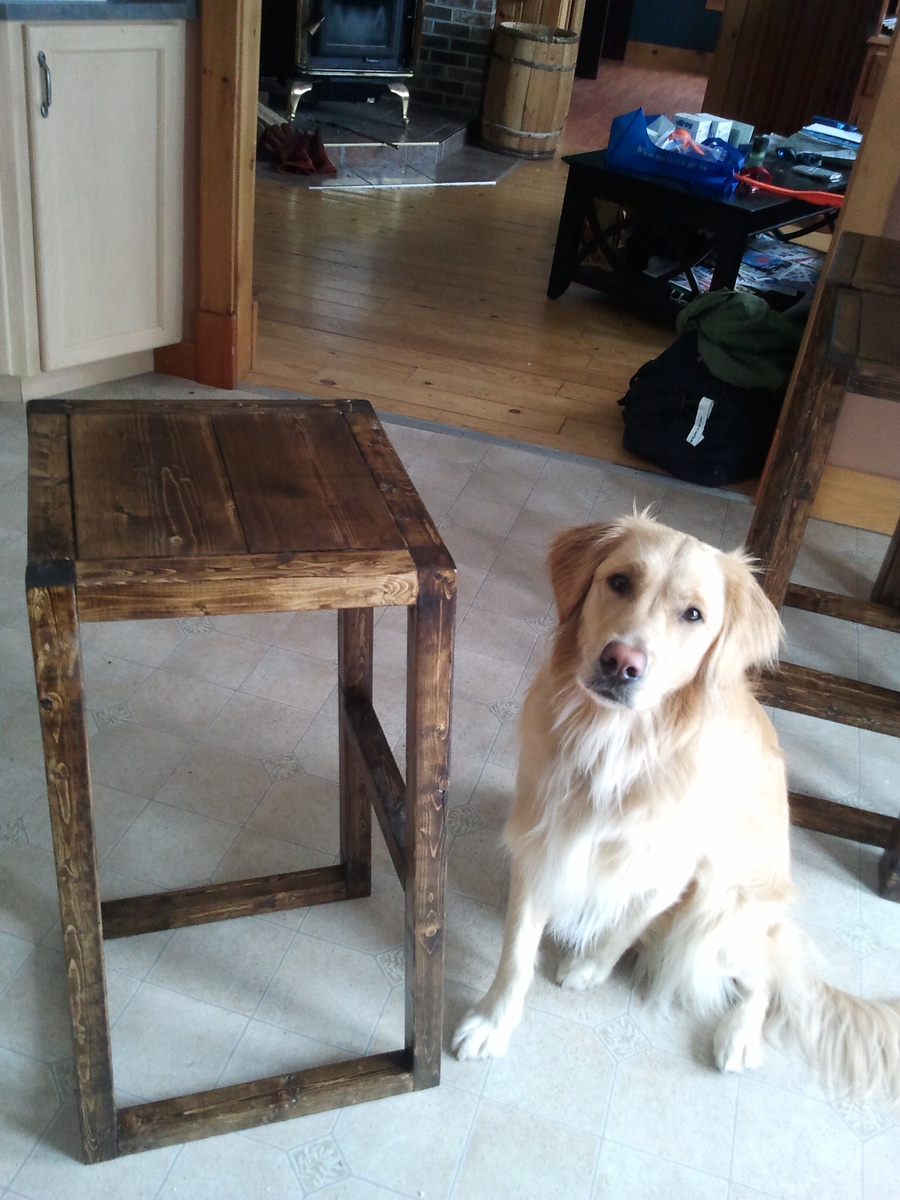
A 30" tall bar stools inspired by the plan simplest stool.
Fri, 07/20/2012 - 05:32
I like your design. Finally made an account and will be making matching ones. Thanks for the inspiration. If the better half doesn't like the first one I will have a new stool for my workbench
Tue, 09/04/2012 - 15:20
by adjusting circular saw depth and using chisel and hammer and lots of sanding :)
We decided to put my husband to work during a hot Oklahoma summer! After about a month's worth of procrastination, he finally built the chair! It was very detailed but easy to follow. I was the one who stained it (in the dark - so don't judge) and got the cushion from Garden Ridge.
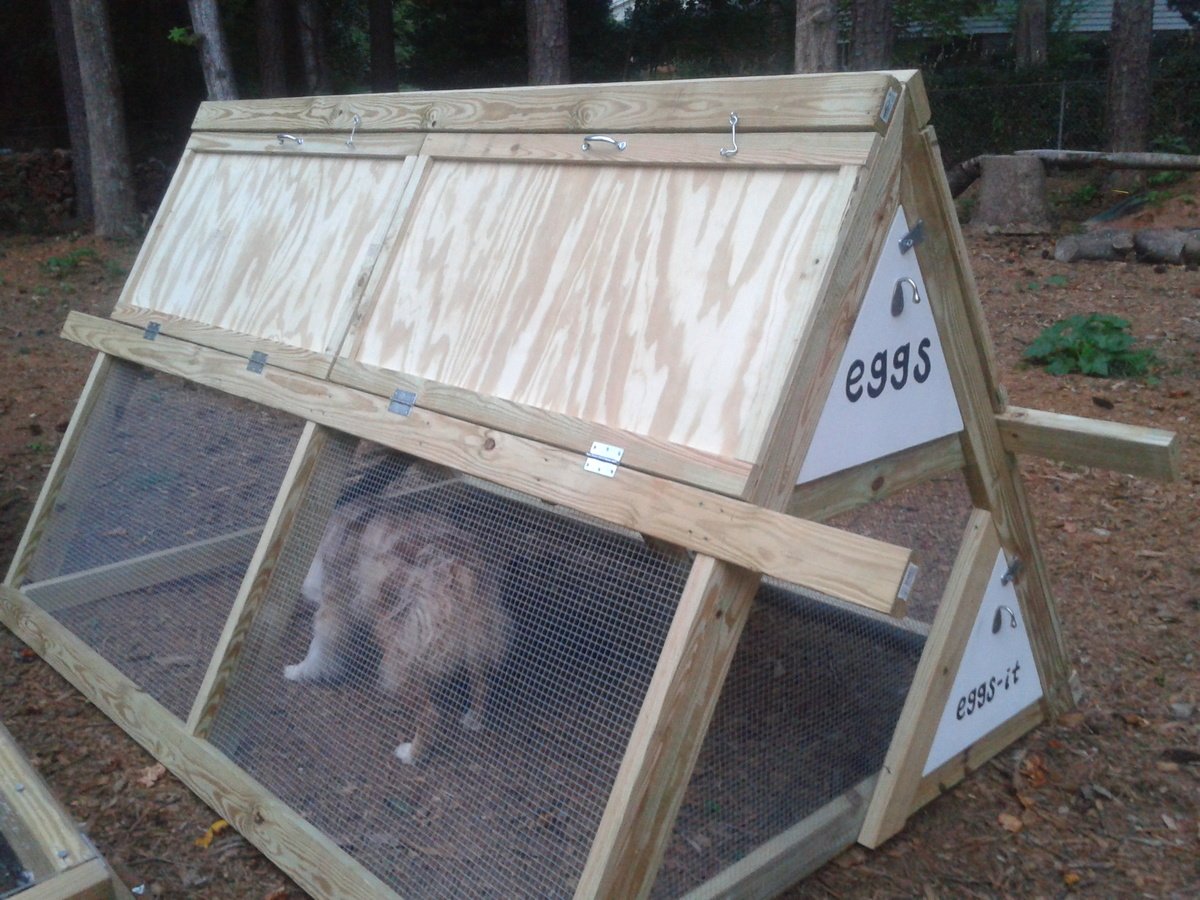
We followed the plans for the A-frame chicken coop very closely, and then modified it a bit at the end.
1. Trim was added to two doors on each side, as suggested. They are secured with latches at the top, more to keep them from falling open than to keep critters from getting in. We used 2x4x10's instead of 2x4x8's on the middle horizontal rail, giving us foot-long handles on each side. My husband and I are able to move the coop about 15 feet at a time, which is pretty good considering it is STURDY!
2. We used 1/2" galvanized hardware cloth instead of chicken wire, as suggested by one commenter (and lots of others in blogland).
3. I cut 1/4" plywood to fit the loft space and coated it with vinyl stick-on tile. This should make it easier to clean. We didn't screw down the plywood, so if we have to, we can remove it to hose it off/scrub it.
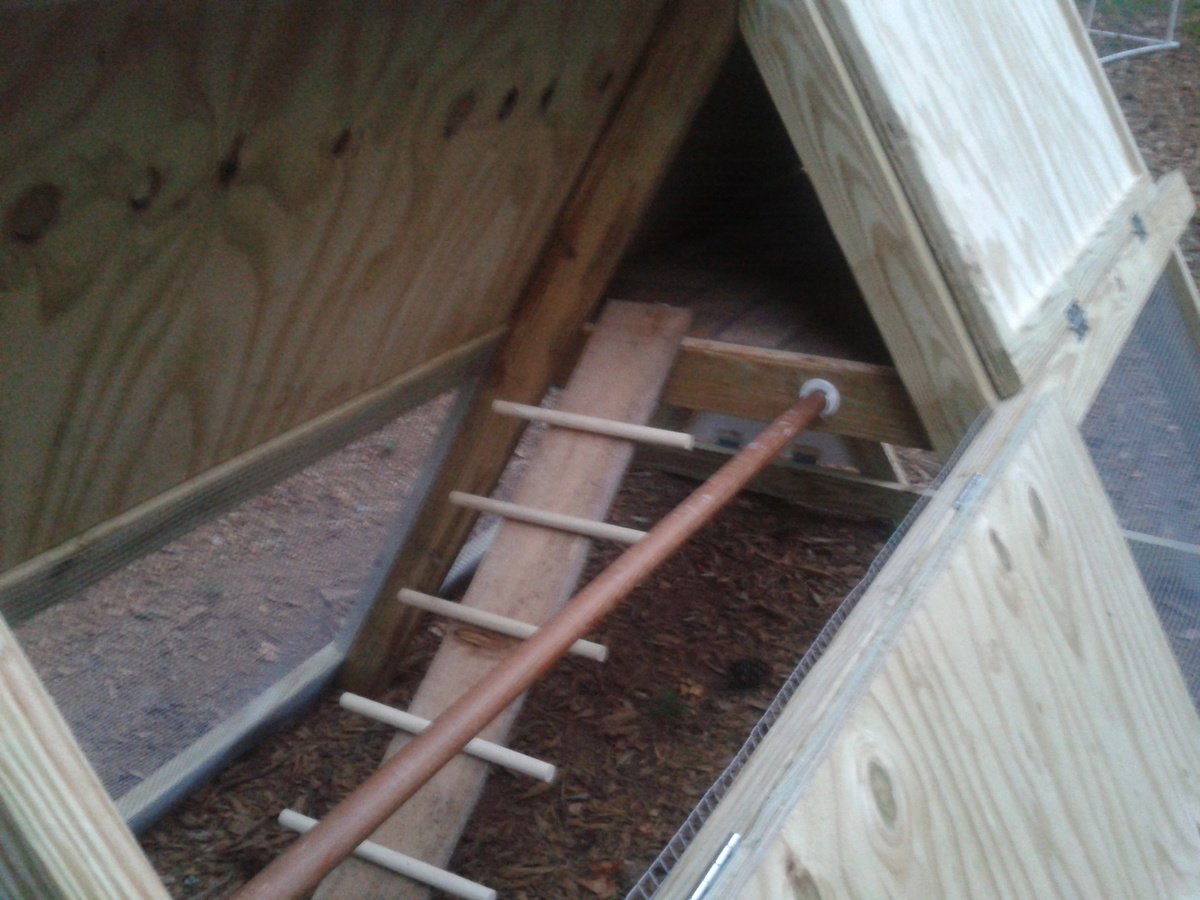
4. I cut a triangle of plywood to make an egg door at the end of the roost. It hinges at the bottom (with a 2x4 ripped into a 1x4 to cover the hardware cloth and provide a mounting spot for hinges) and latches at the top. I plan to use cotter pins or something to secure the latch. There is also a piece of untreated 1x4 held in place with tabs at the egg door to prevent bedding from falling out once it's converted to the nesting box (I'm planning to get pullets, not ready to lay yet, so they won't even have a tempting nest box)
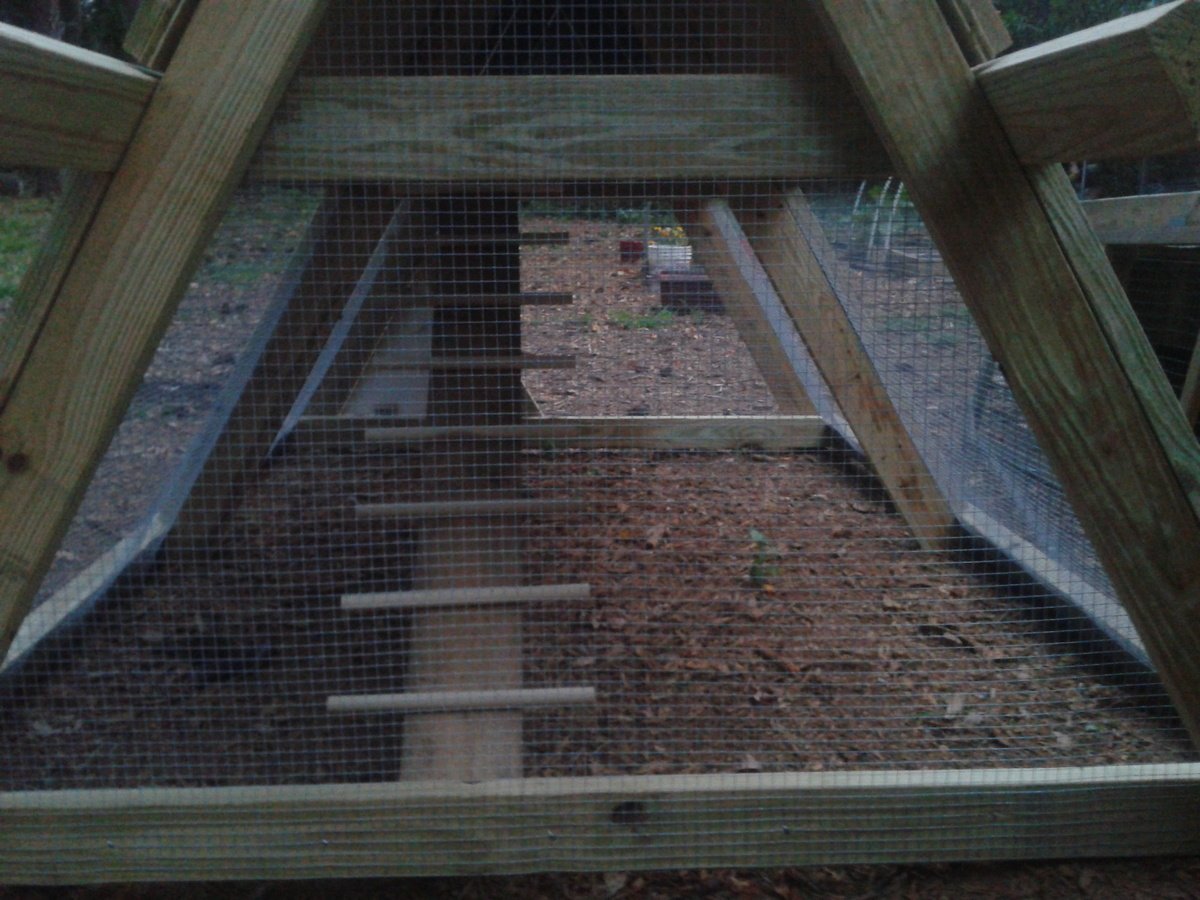
5. There was no bottom door in the plans (to allow free-ranging), so I cut a piece of 2x4 to make a triangle against the bottom (same size as the egg door). It folds out (just like the egg door) and will allow the chickens easy access to the yard. We do have hawks in our neighborhood so free time will always be supervised. We also have a dog (who I coaxed into the coop for the main picture, haha!) who will need supervising. She's been around chickens before but you never know what will make her turn on them!
6. There was also no roost in the plans (although if you look at Ana's coop, there is a 2x4 across the middle of the side walls). I had a leftover closet rod, so I mounted that in the covered section parallel to the ladder. The ladder was shifted to the side. For the ladder, I just used a piece of cedar fencing and cut 2 48" dowels into 4 pieces each, and secured those with screws from the underside. I hope my chickens will be able to get up the ladder!
7. I also made a tube feeder from PVC and a dog bowl, and am working on a nipple waterer. Will update post when those are finished!
Now I just have to get some hens! I've been searching craigslist and can't wait!
Thu, 09/20/2012 - 19:31
I really like the addition of the roosting bar and how you made the ladder. Your little chickens will be so happy! Good luck!
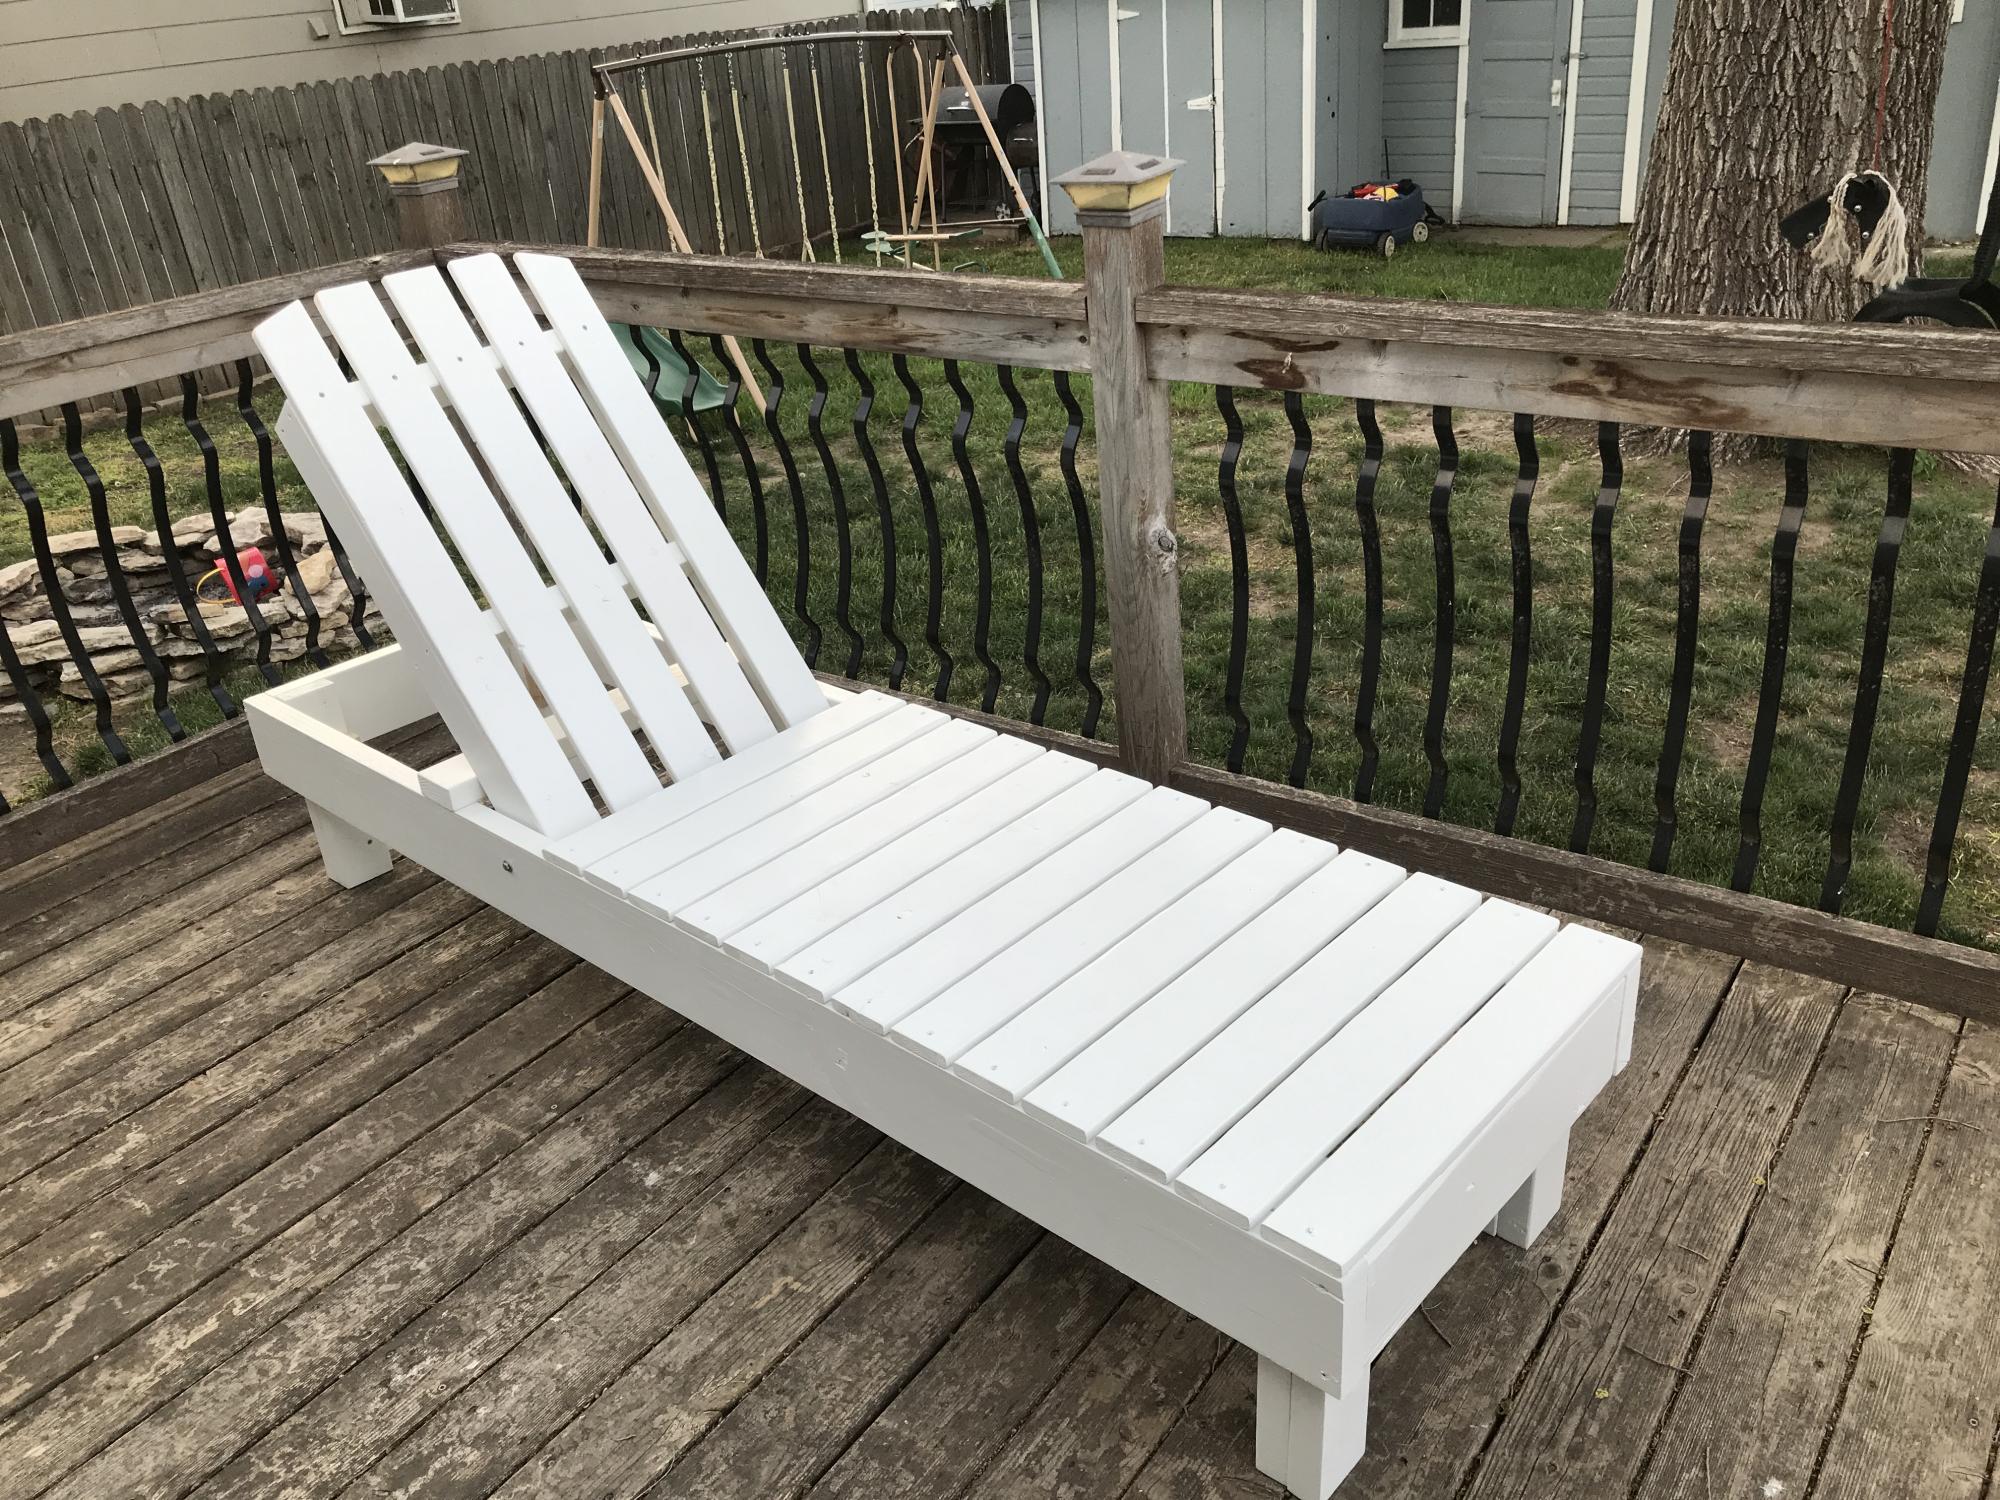
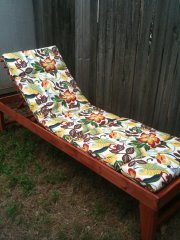
This took way longer than anticipated. I didn’t account for how much time would go into sanding, priming and painting the wood. Also, the plans were changed to use 2x6’s but didn’t take that into account for the stop block. Still trying to figure that part out when fully reclined. Other than that, it turned out really good.

Built this for my daughter. Plans were excellent and I needed them because I am not an advanced woodworker. Going to try for a matching end table. If you have plans that would be greatly appreciated.
Jim Carr
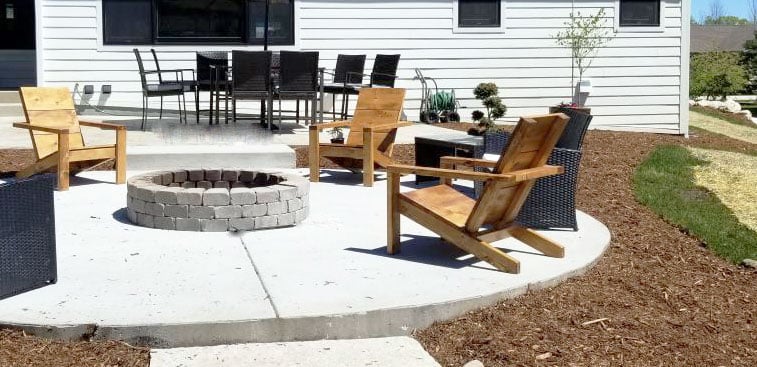
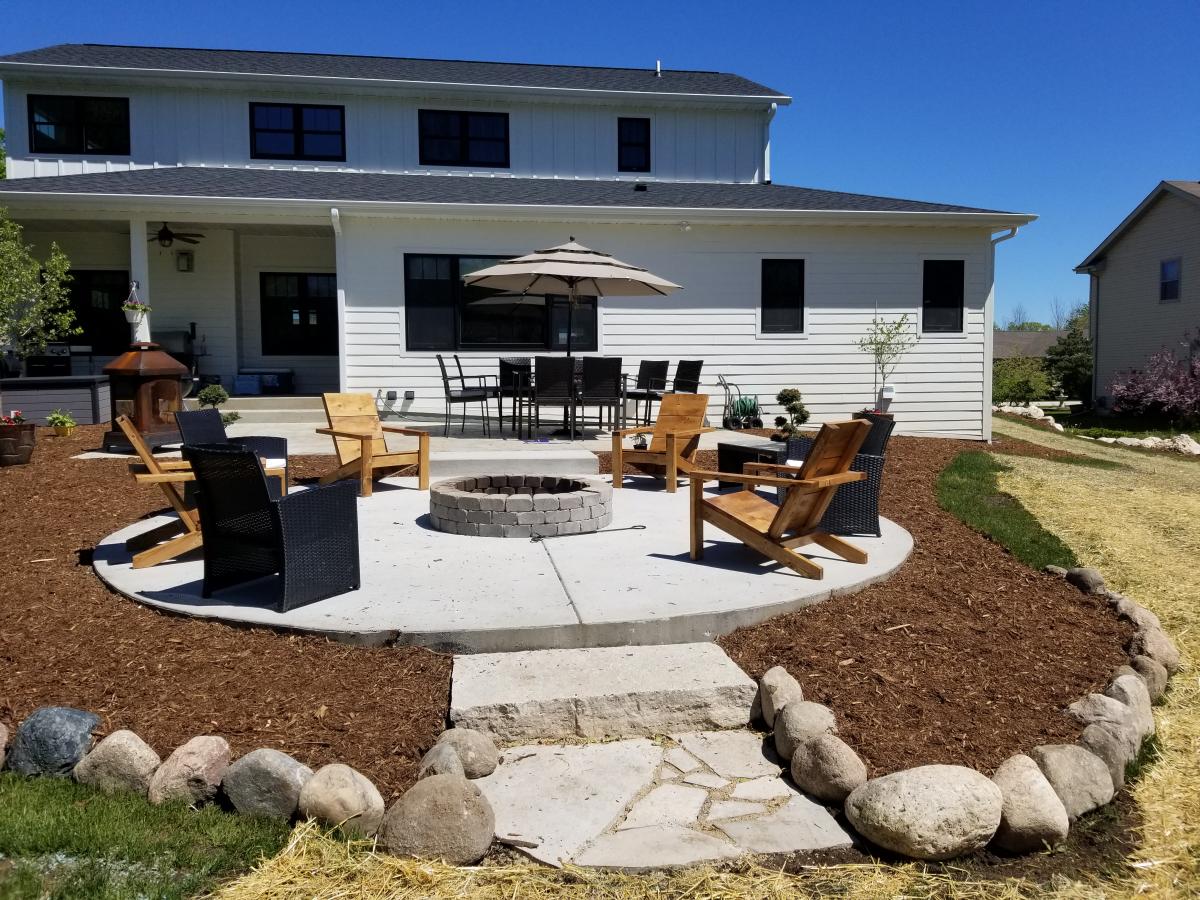
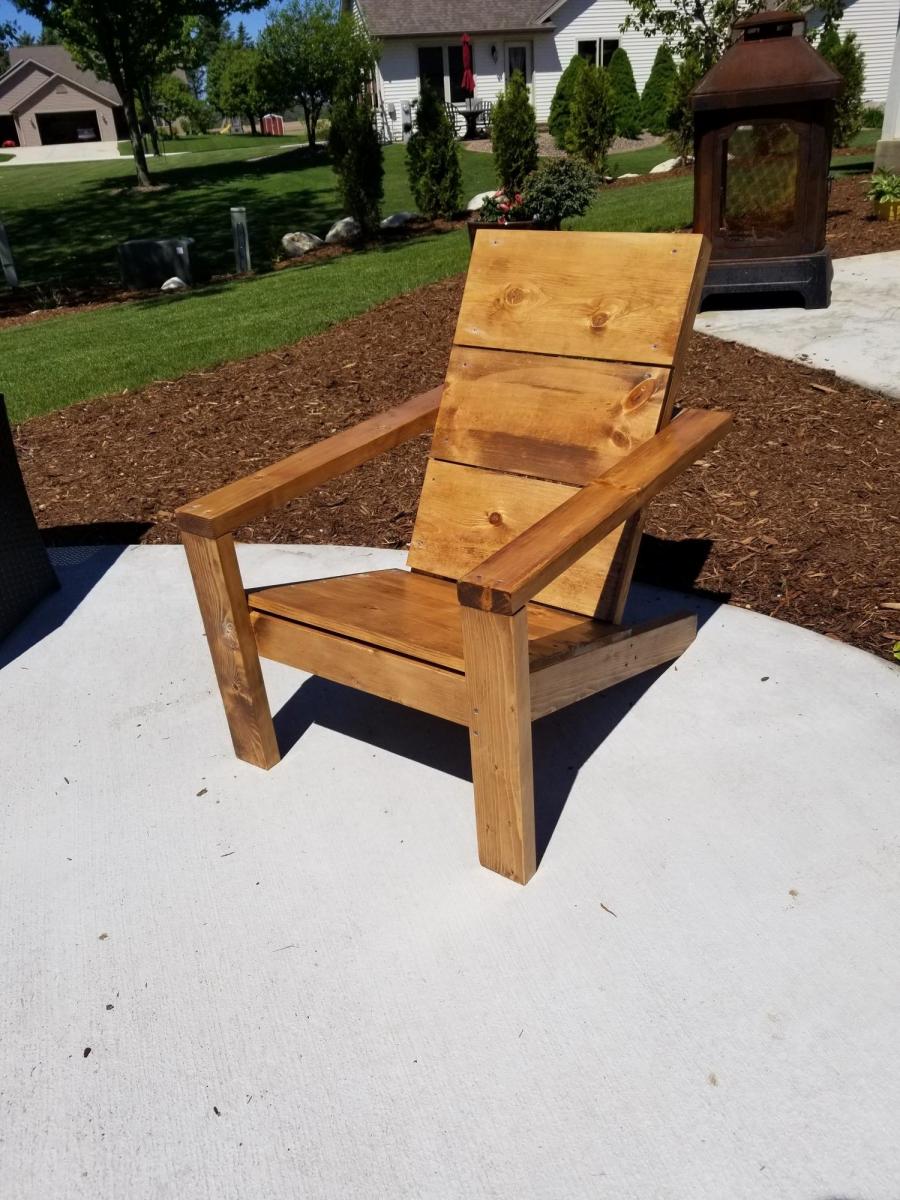
I made 4 of these chairs for around our fire pit. I chose to sand stain and poly before assembling and plan to add another coat of poly now that they are assembled. Sanding was the longest part of the process for me, but if you aren't as particular as I was about the finished project the time investment would be substantially reduced. I also of course had drying time for the stand and poly. Assembly itself was simple and the finished chairs are comfortable and sturdy without being overly heavy and bulky.
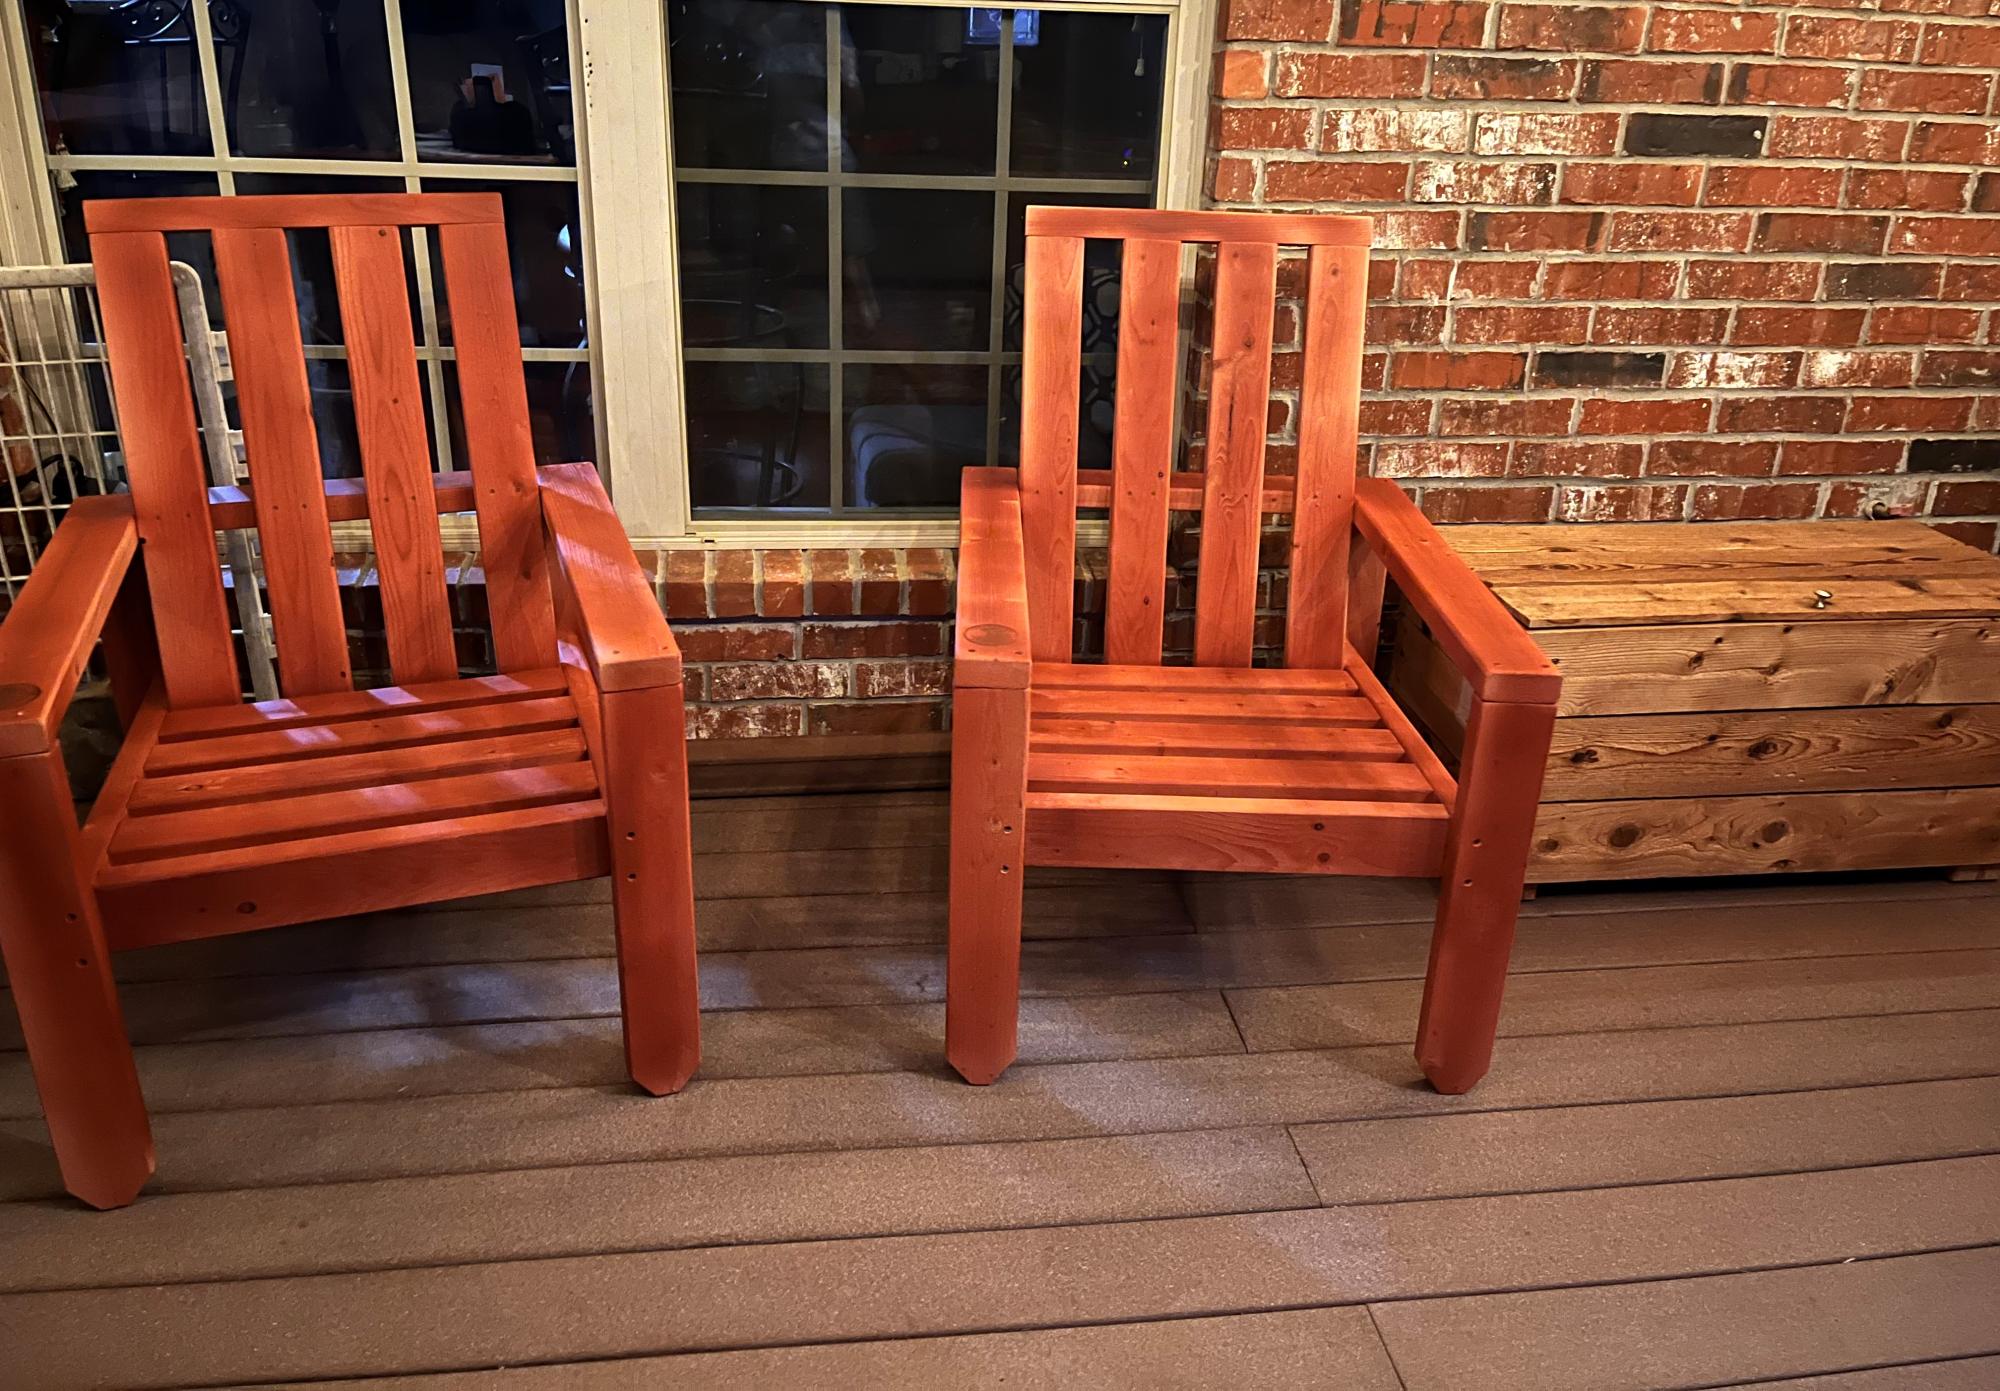
Ana White chairs along side my Ana White cedar storage chest (one of my 1st builds). Ana, thank you for the plans & for inspiring us to build!
Keith from Springdale, AR
All scrap lumber was used on this, cost was $0
3/4 plywood 2'x4'
1x6x24"
1x4x24"
1x2x13" front trim
Mon, 08/29/2016 - 08:29
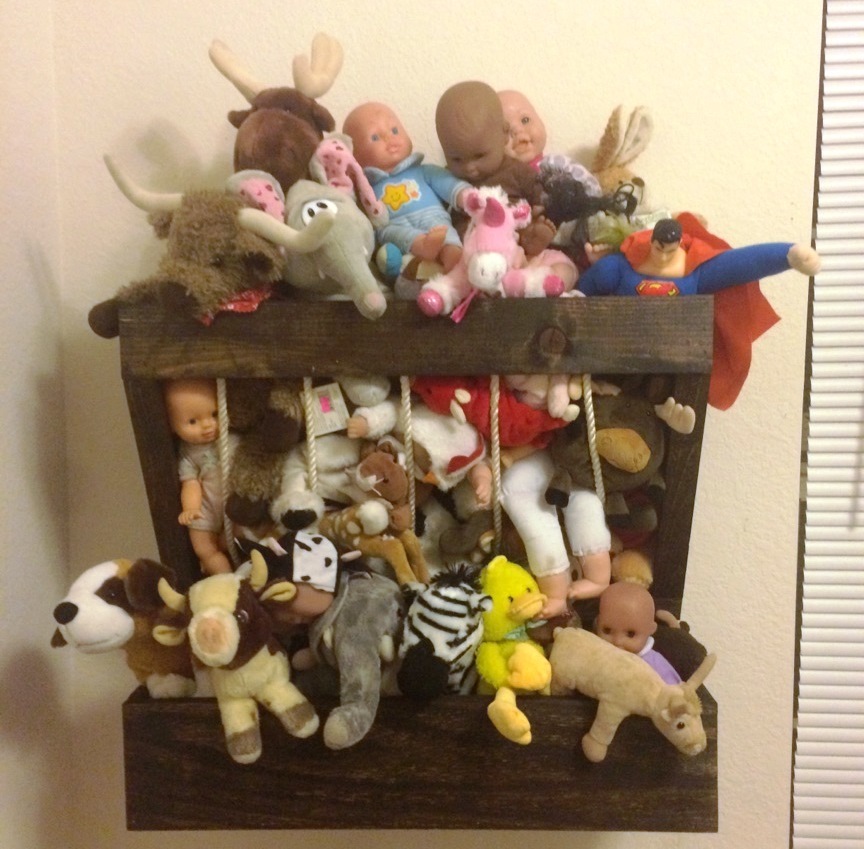
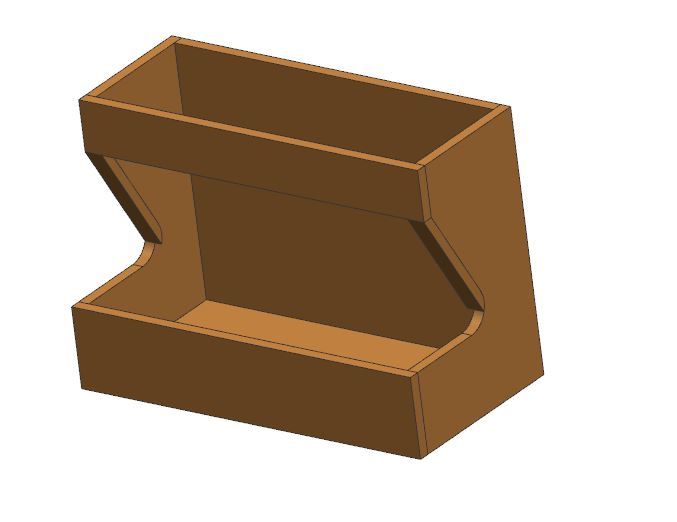
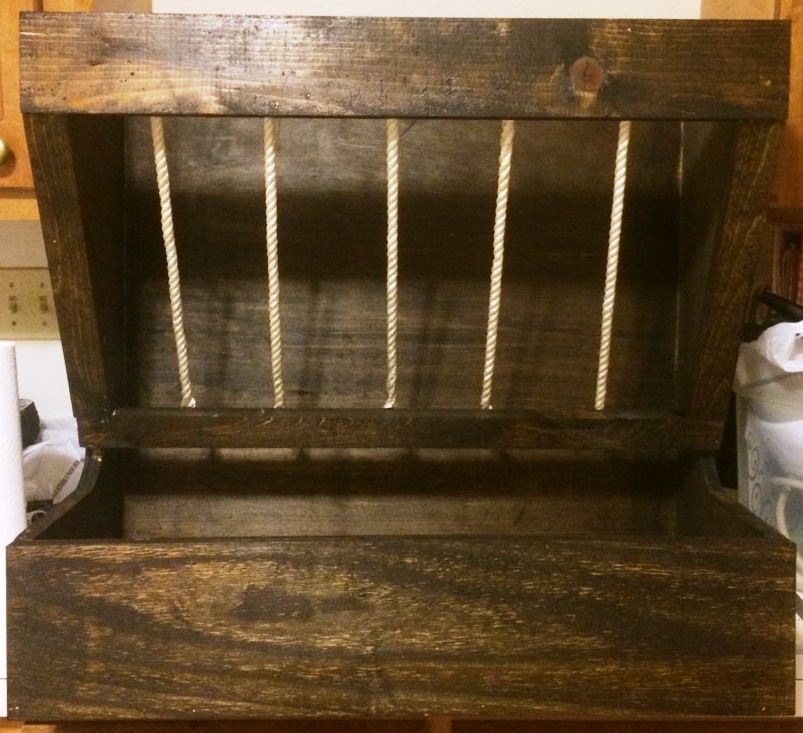
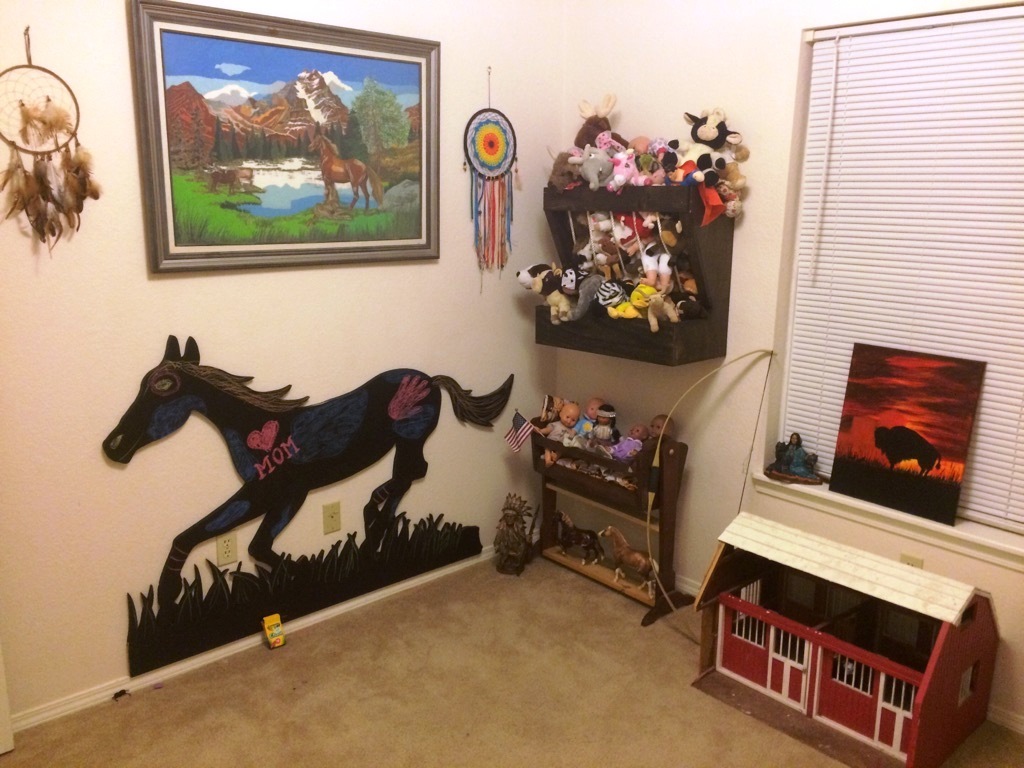
My son loves horses, so I made him this Horse Wall Hay Feeder to keep with the theme but where he would have a place to put his babies! :)


Comments
Ana White Admin
Mon, 05/01/2023 - 08:23
Very pretty set!
These looks so great, thank you for sharing!