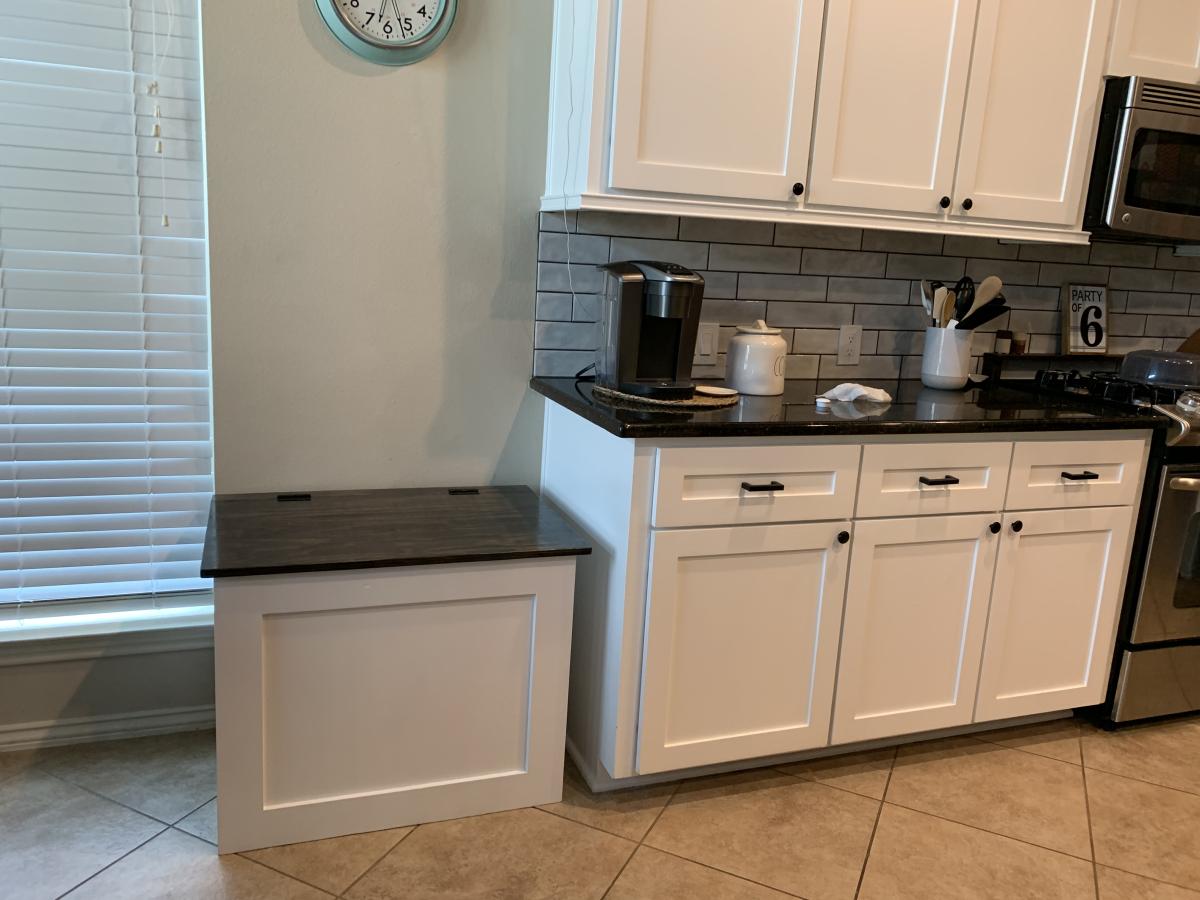
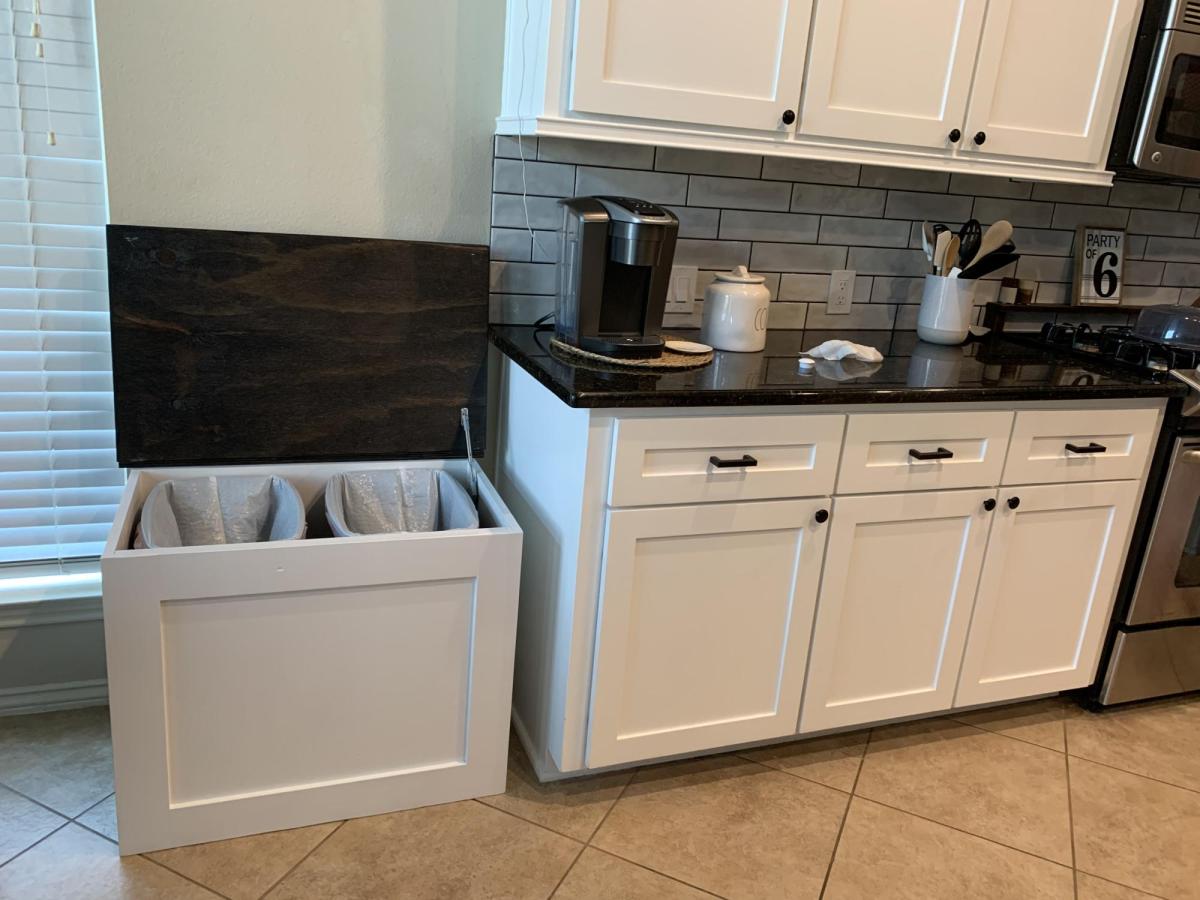
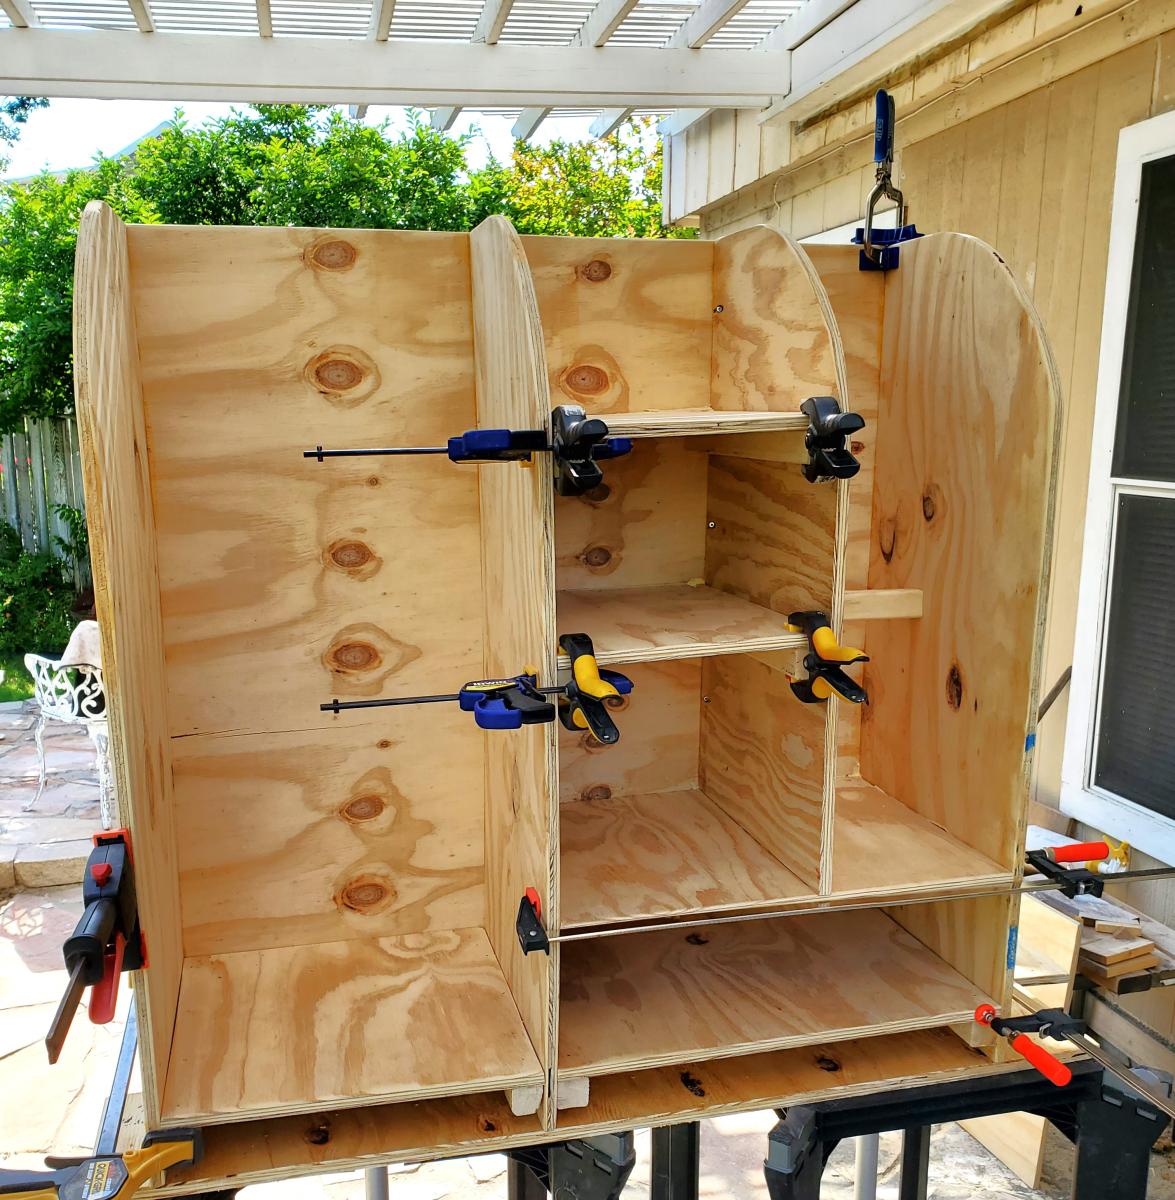
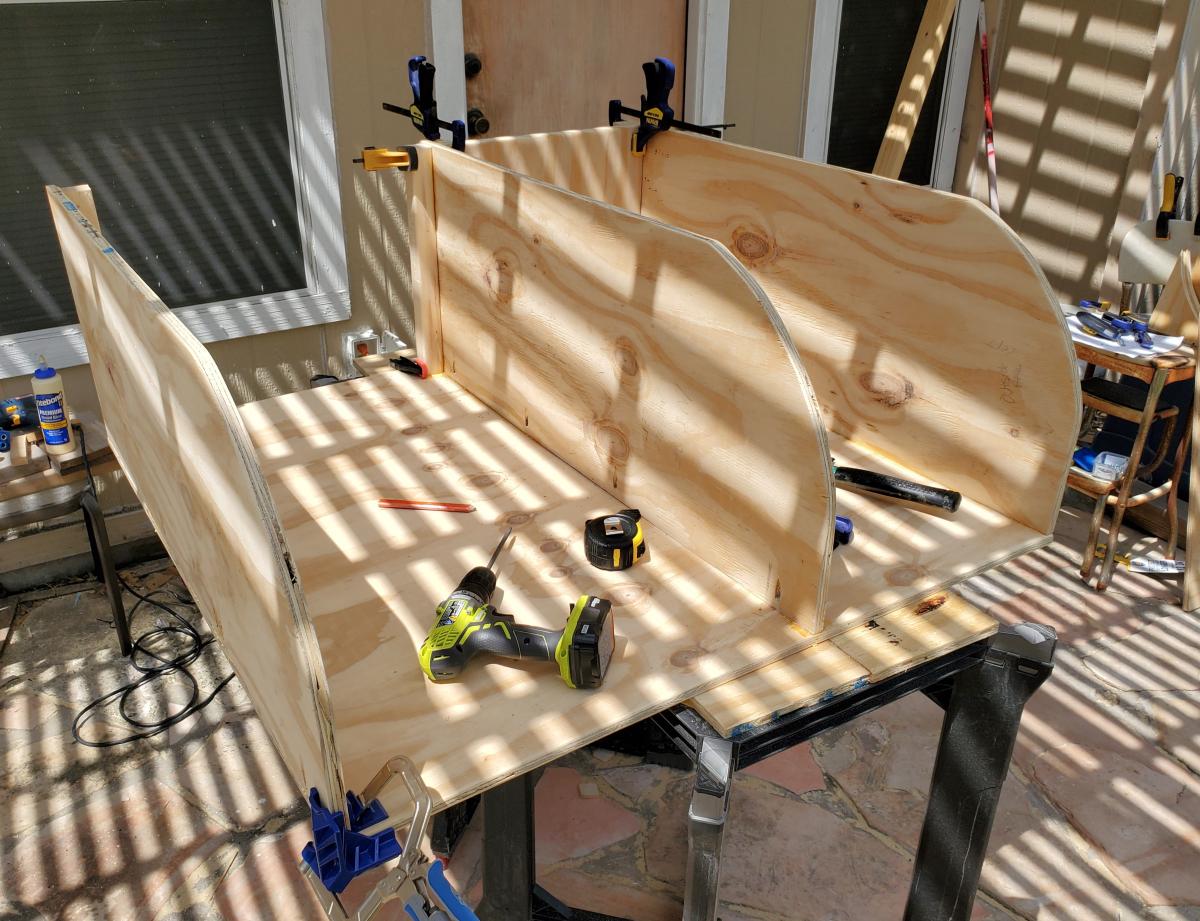
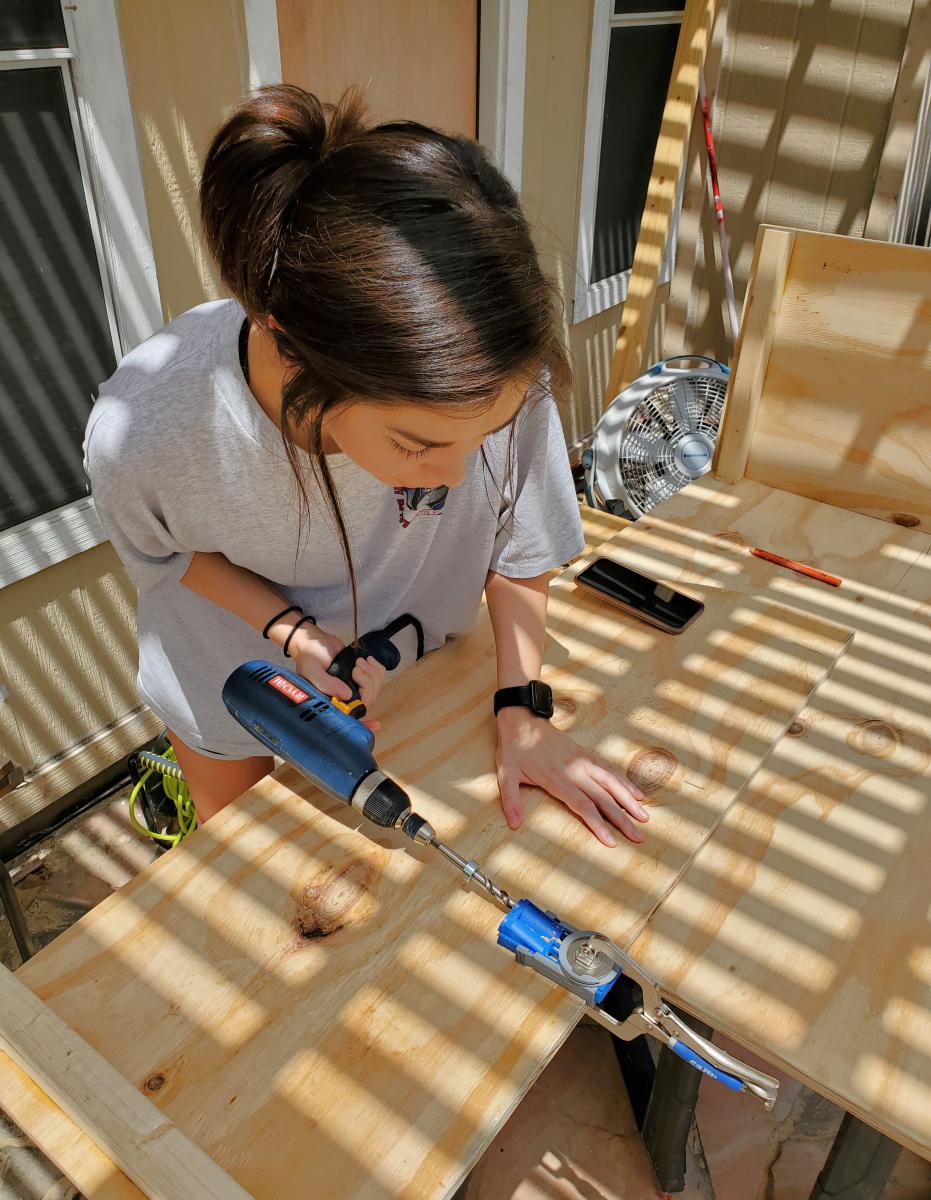
Double trash can cabinet
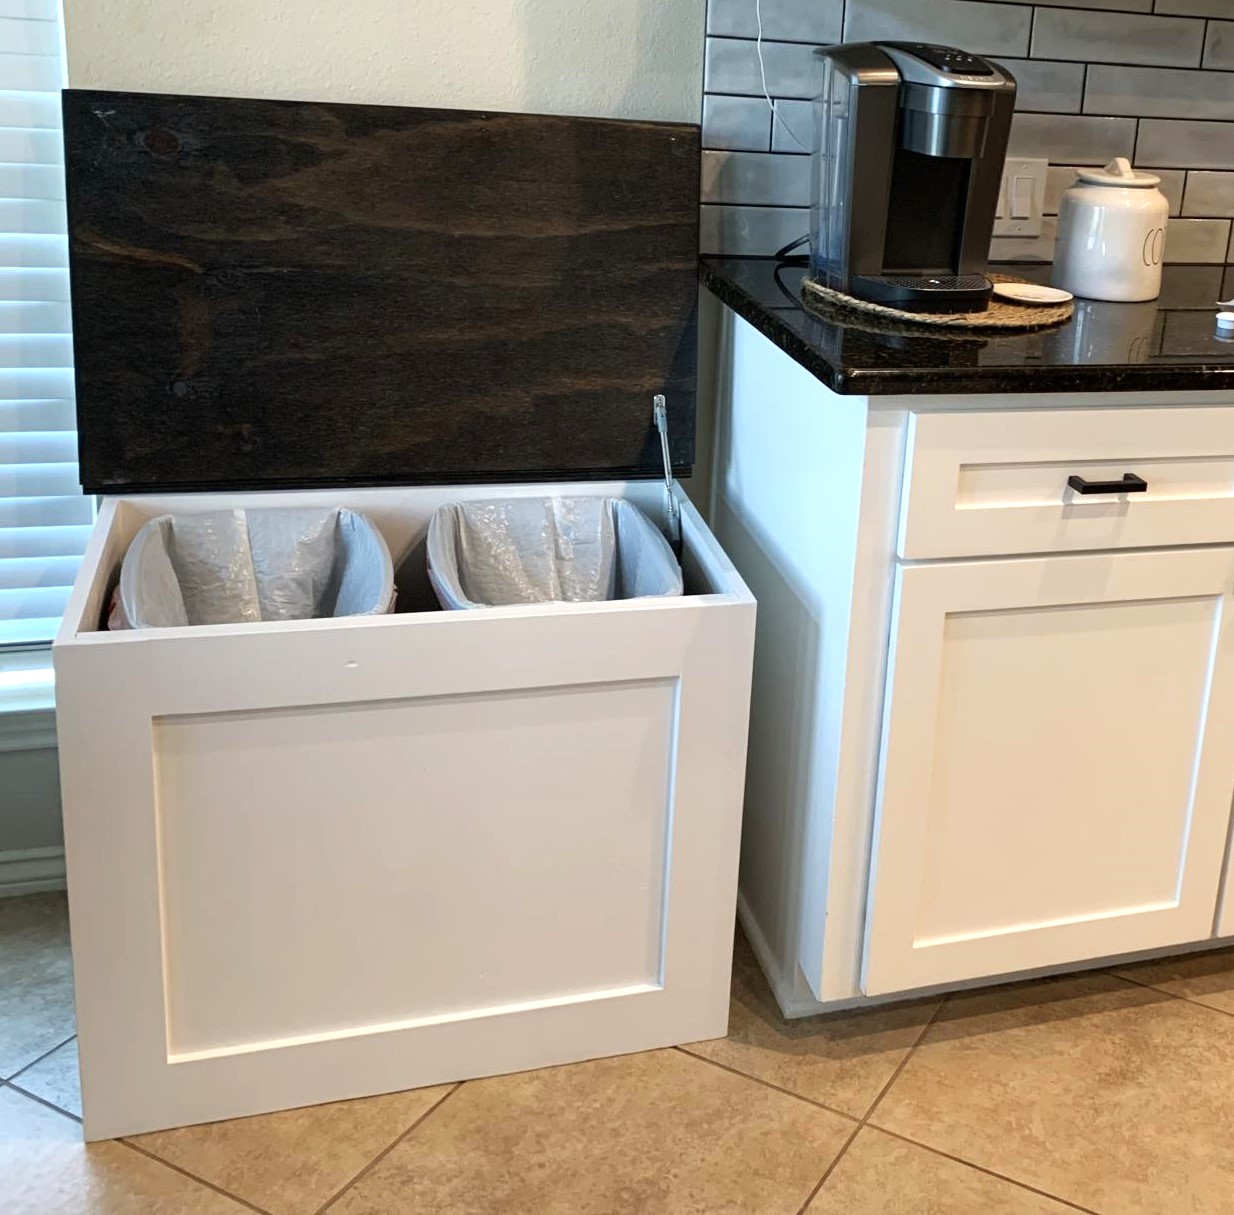
Double trash can cabinet made of plywood. Included soft close hinge. Holds 2 13 gallon cans.
Built from Plan(s)
Double trash can cabinet made of plywood. Included soft close hinge. Holds 2 13 gallon cans.
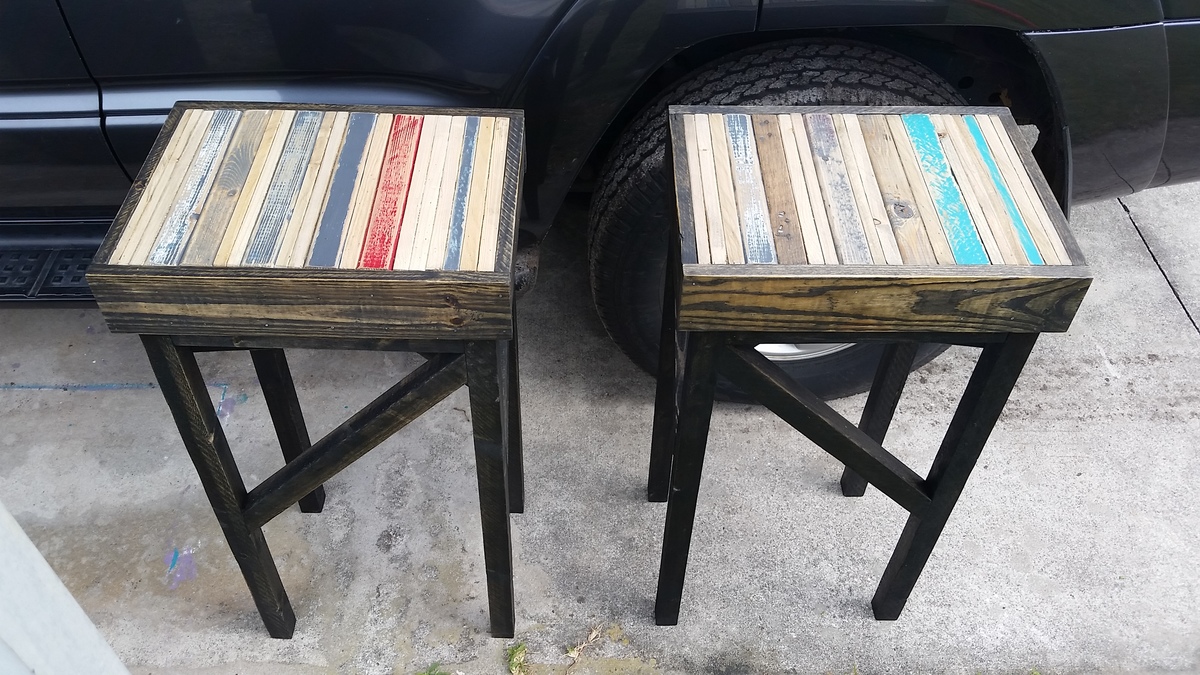
Wife wanted me to throw out all the scrap wood I had lying around. Instead I made some killer barstools. Fun look.
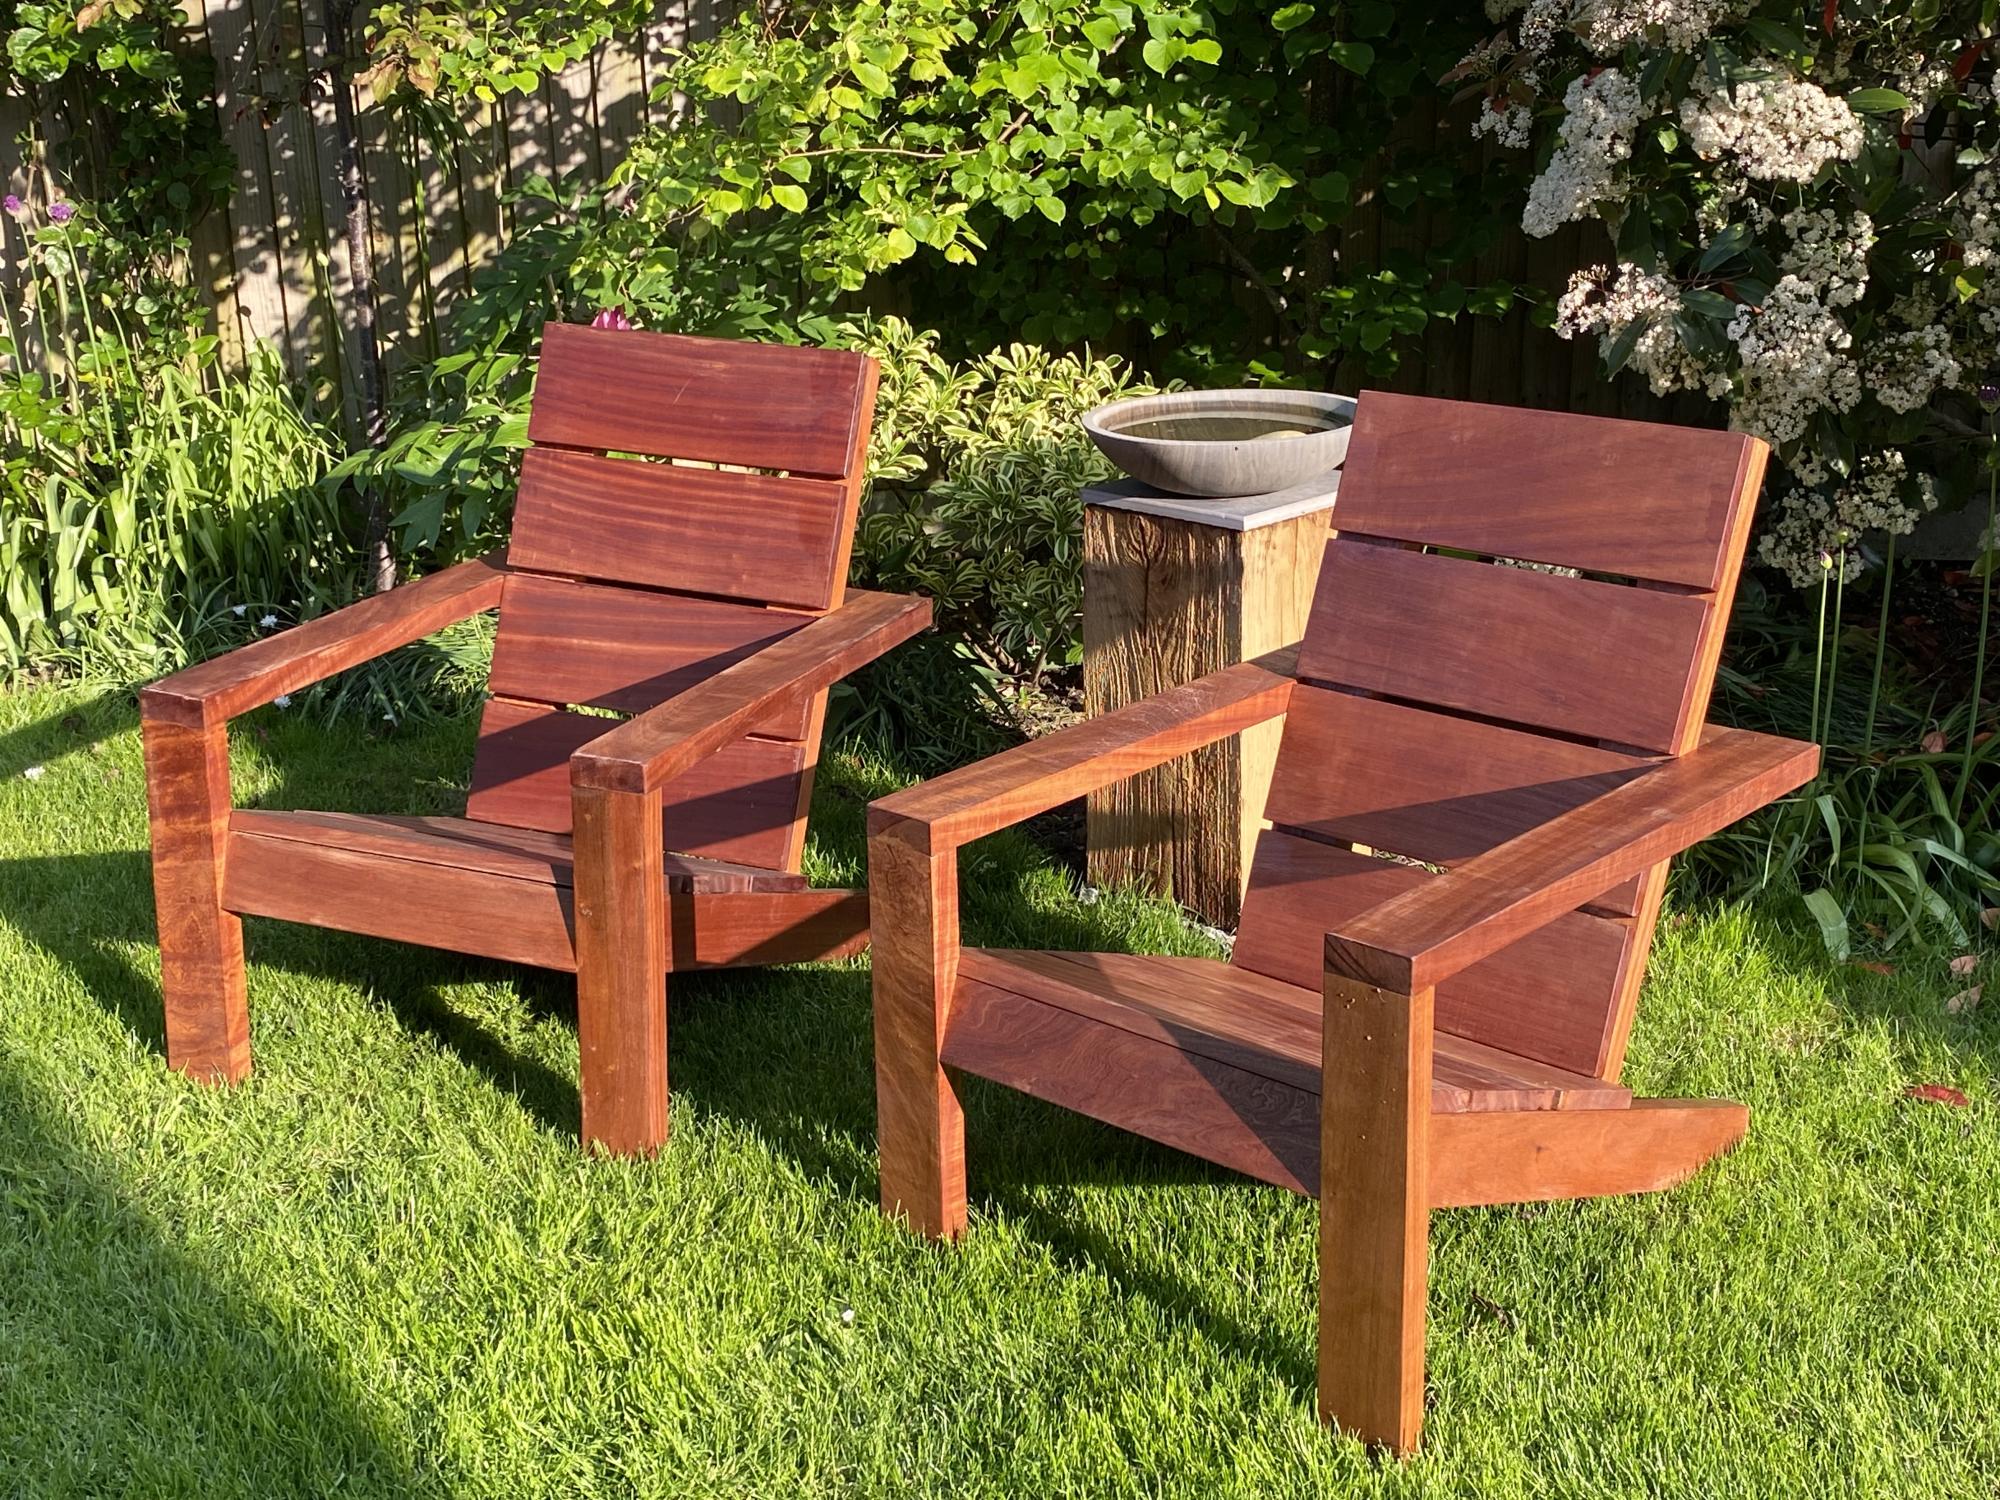
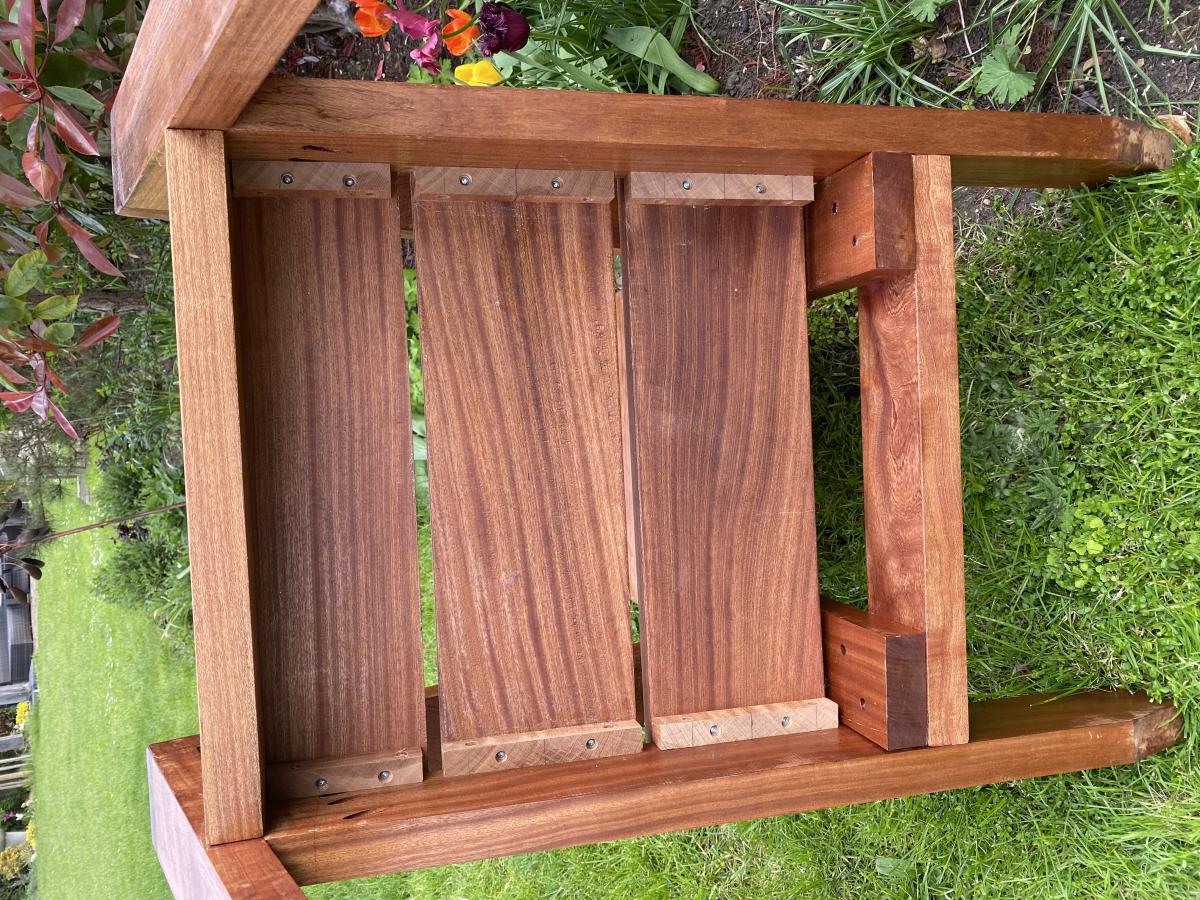
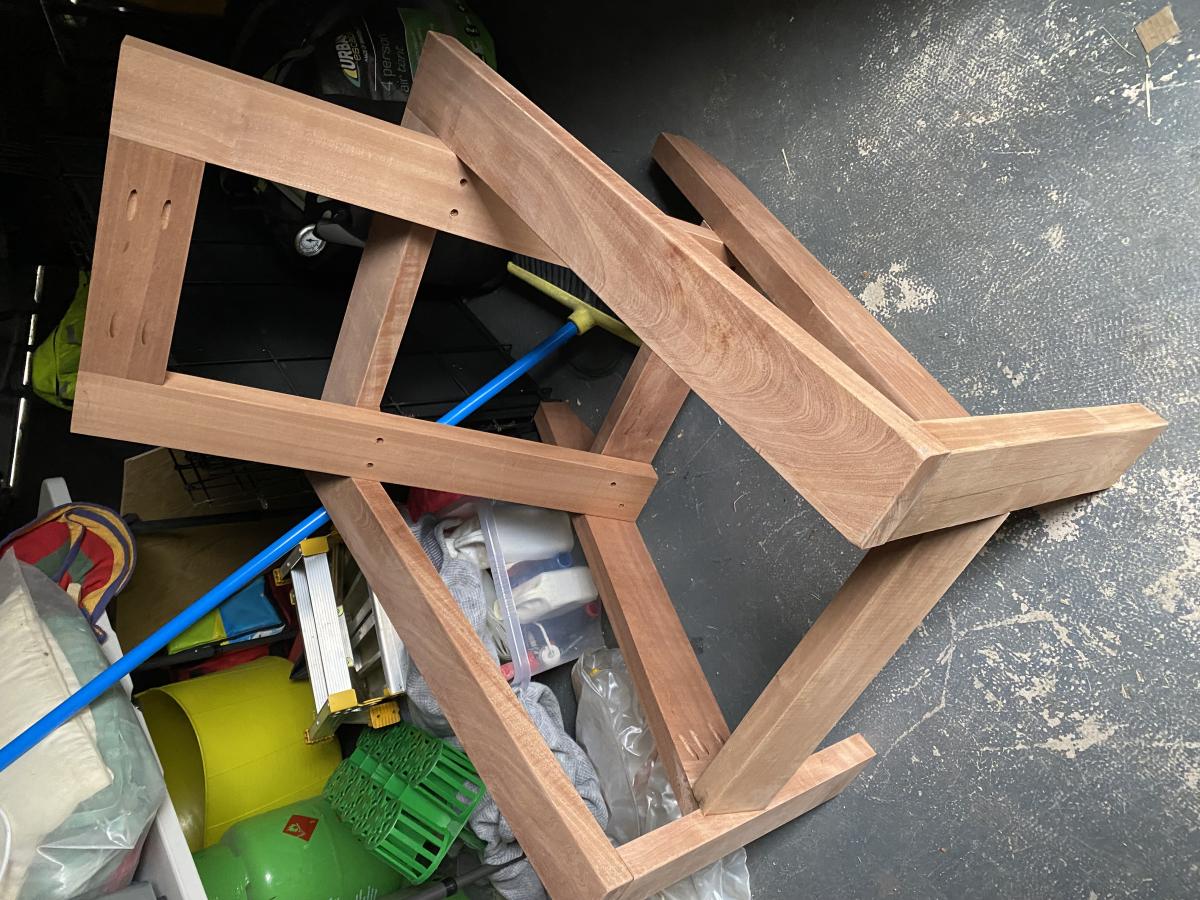
Loved design so decided on hardwood and no visible screw heads….. took a while but loved the result
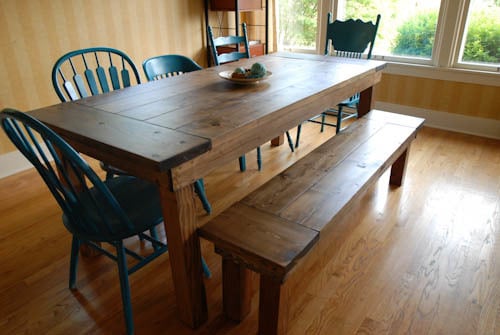
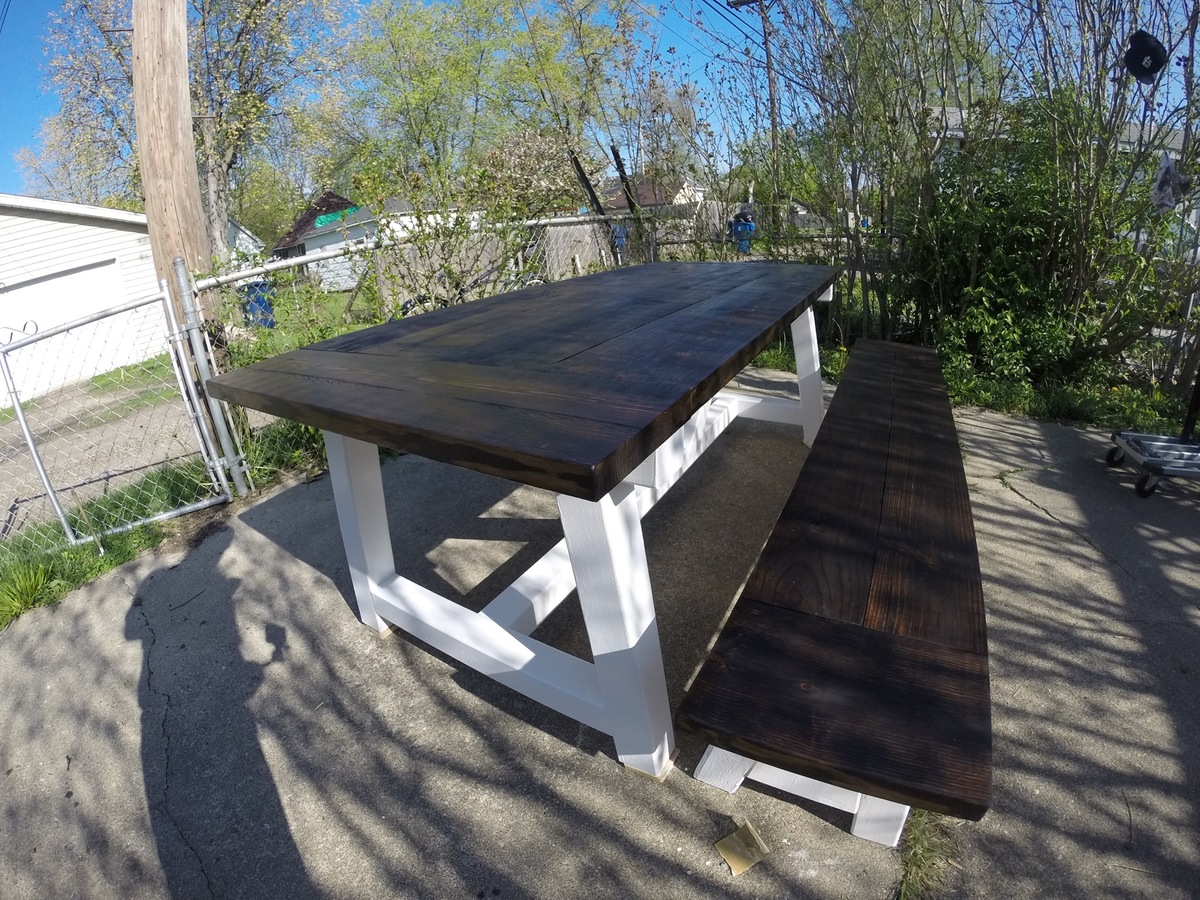
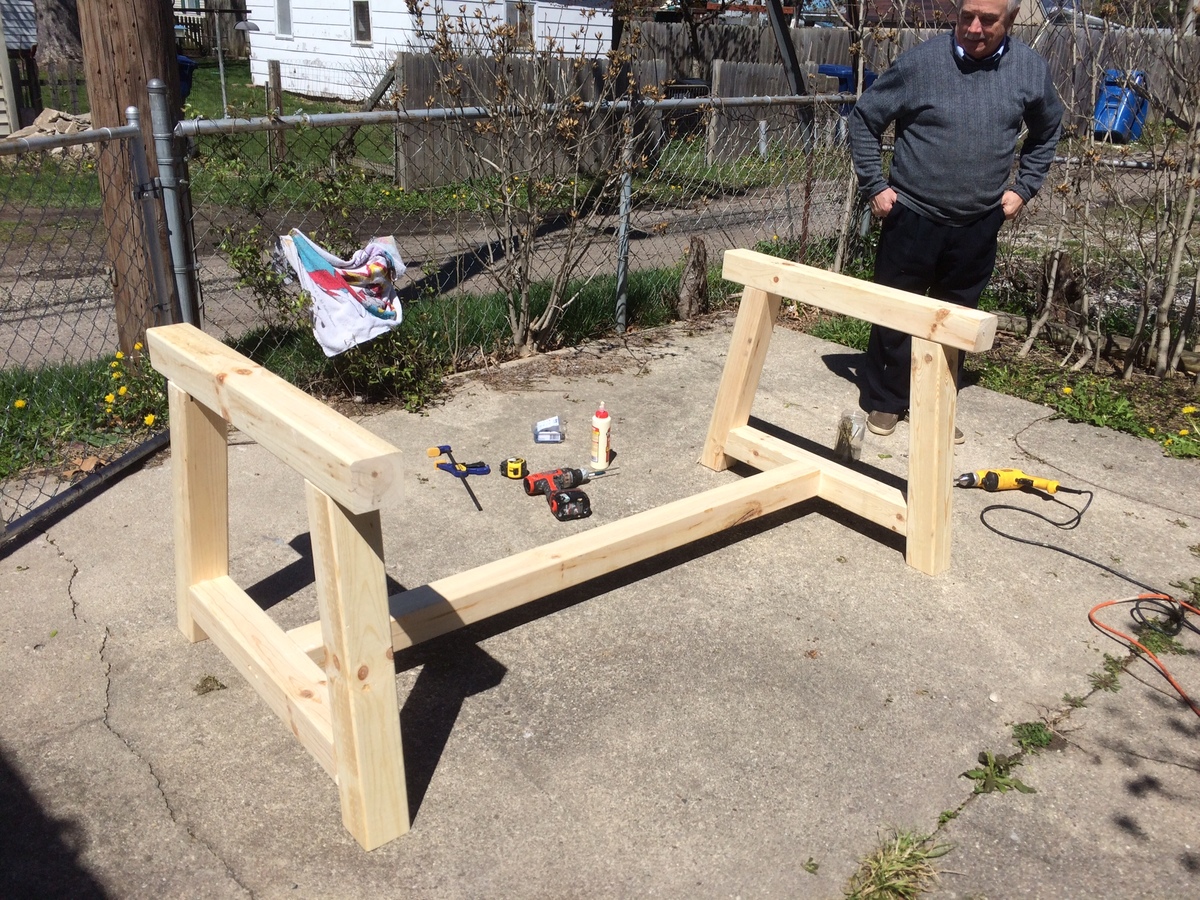
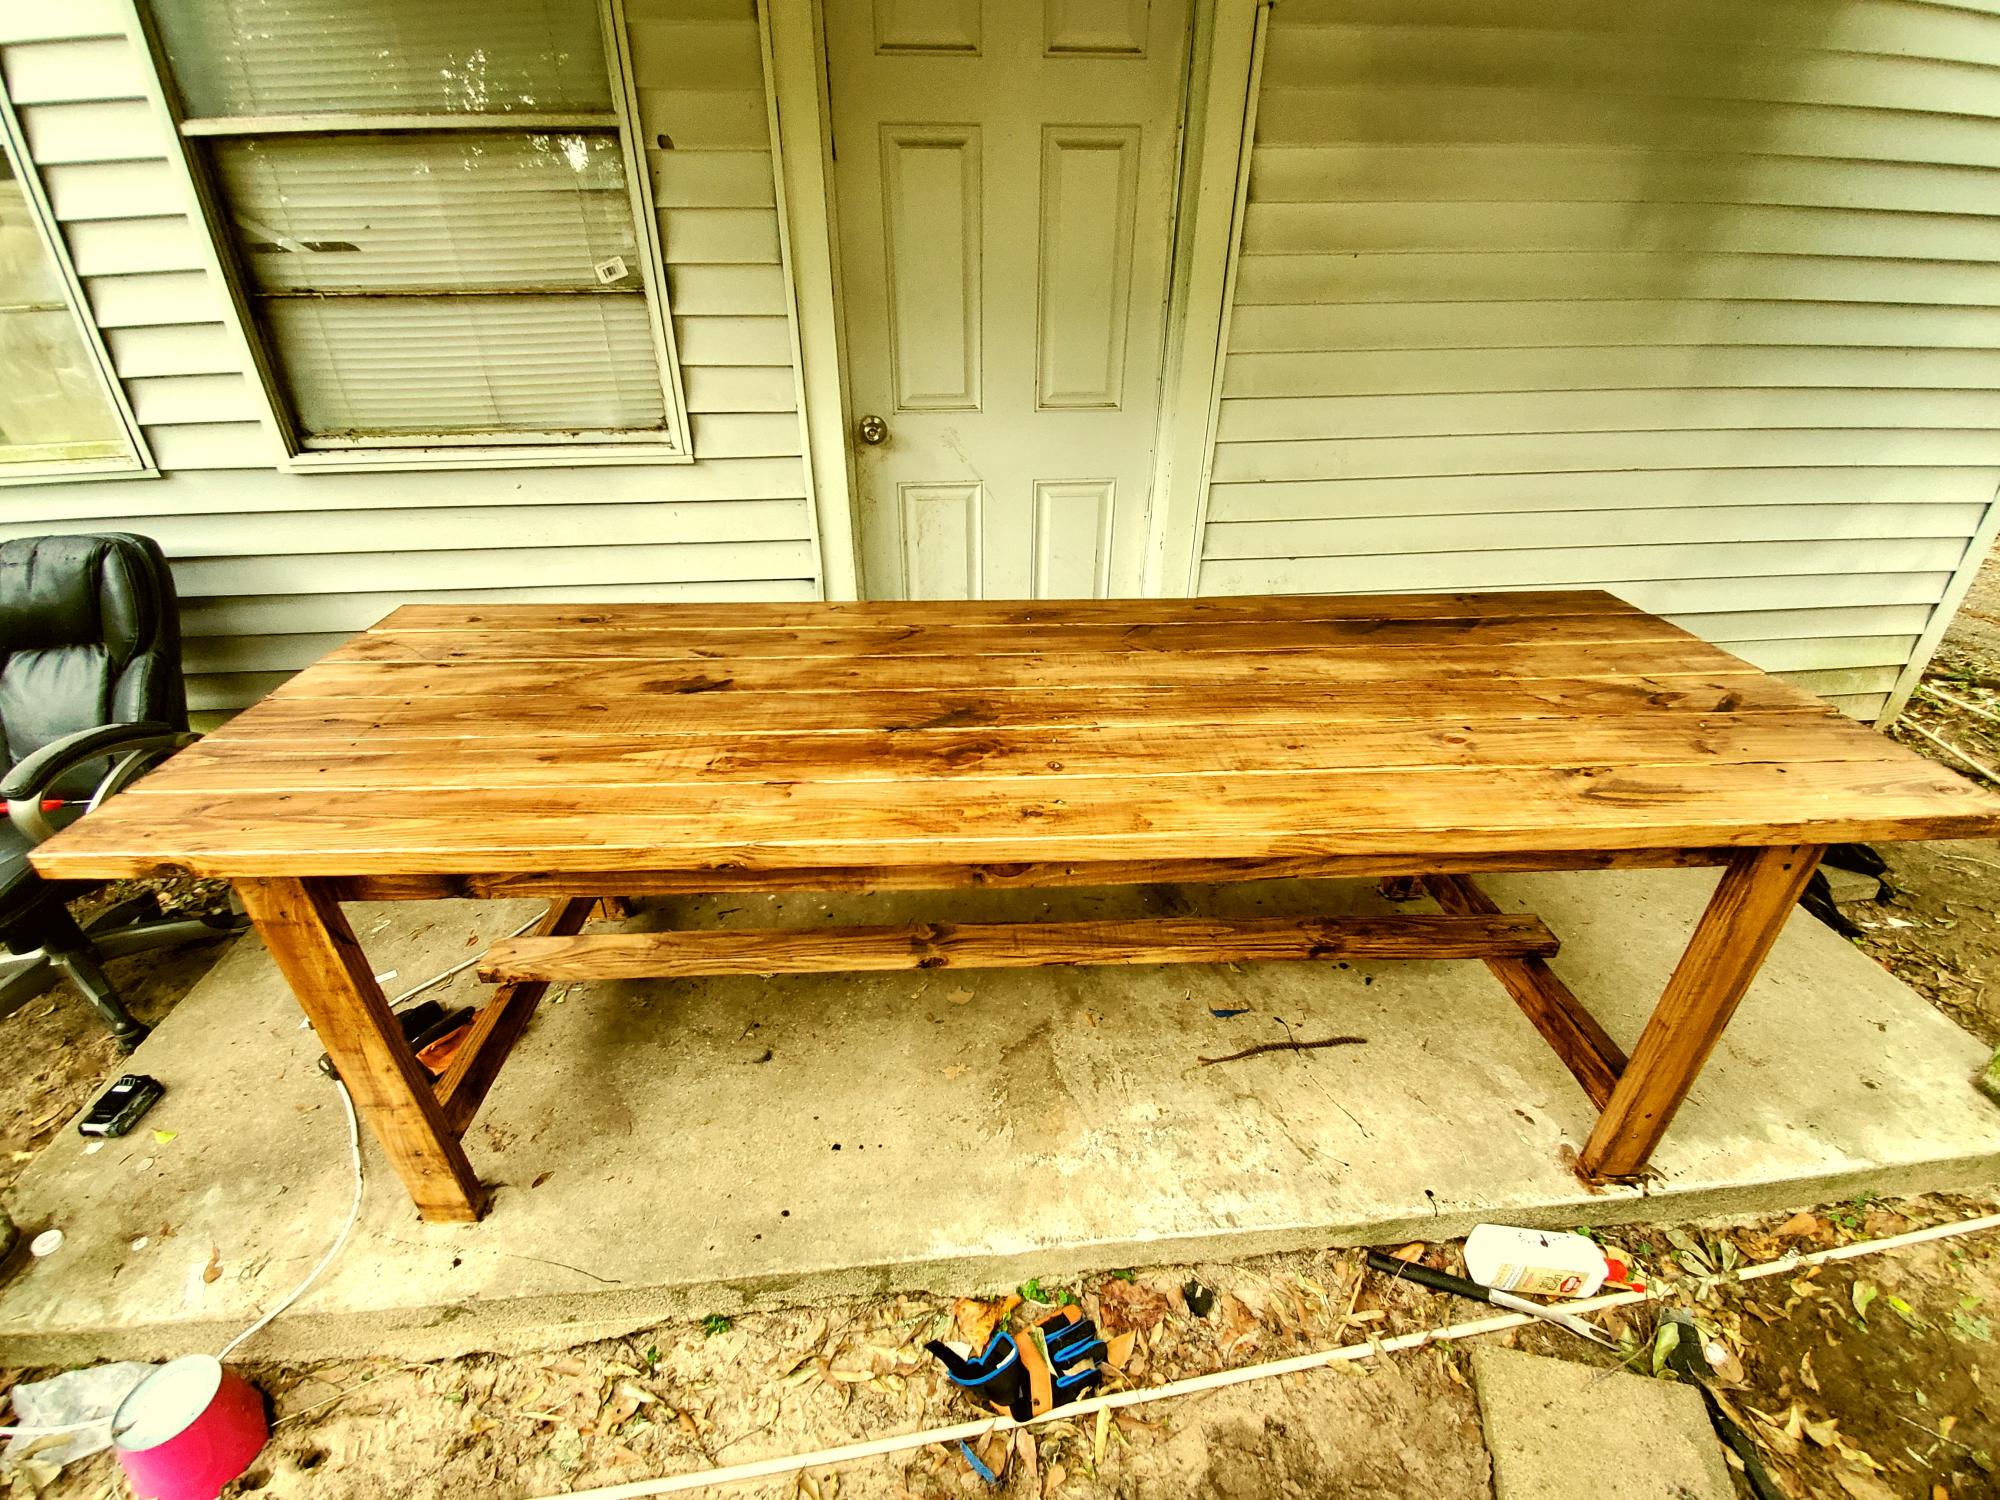
Nothing was bought for this table. I allocated $5 as cost for the screws and sandpaper. 2 x 6 legs & 2 x 4 rails used wood recycled from material removed during alterations to our 1930's barn. Supports were extracted from the woodpile. Nails were removed where possible, or cut off and punched below the surface where they were not removable. Because the wood was very old and splintery an enormous amount of time was spent sanding.
The top is an Ikea counter thrown out from a kitchen remodel and rescued from the roadside, still in its cardboard box. Score!
I am very pleased with the design and plan to make another using better lumber. The table is very sturdy and will be used as a sewing/crafts table.
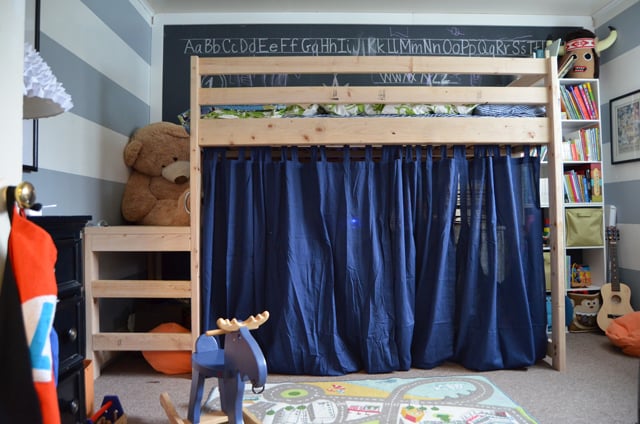
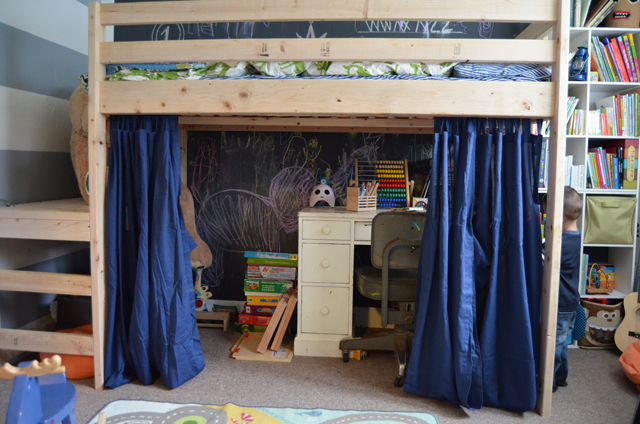
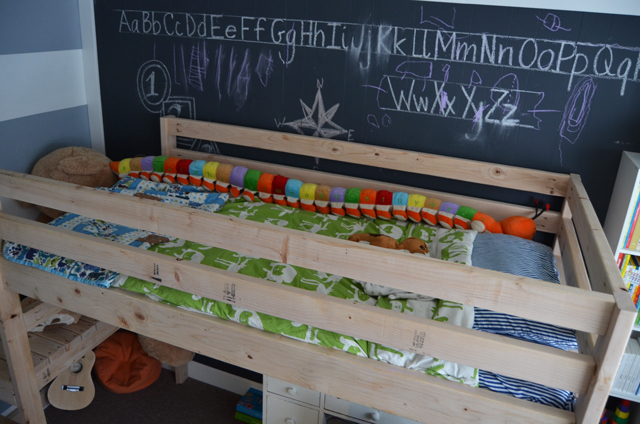
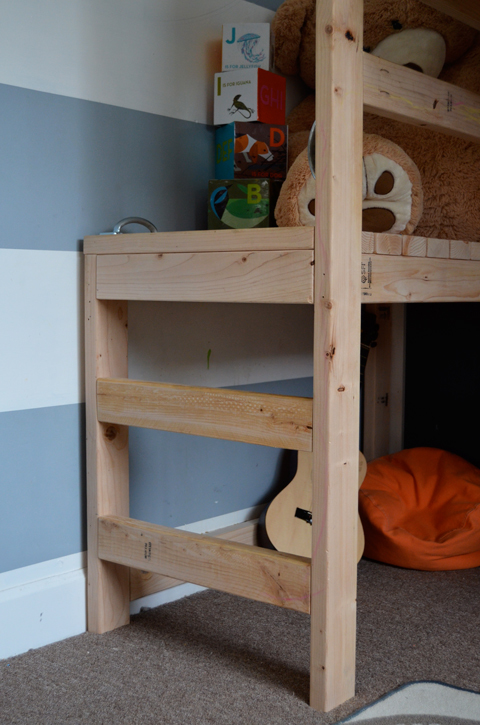
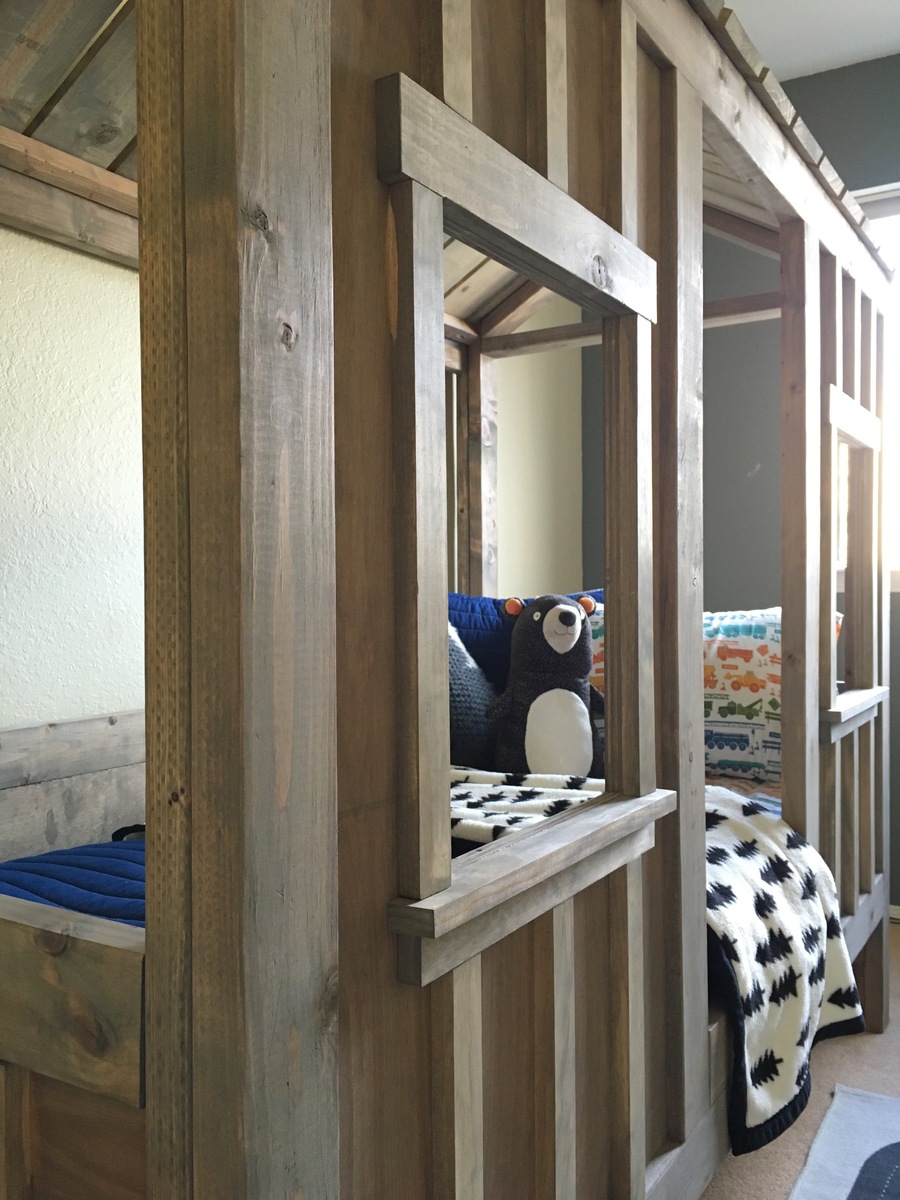
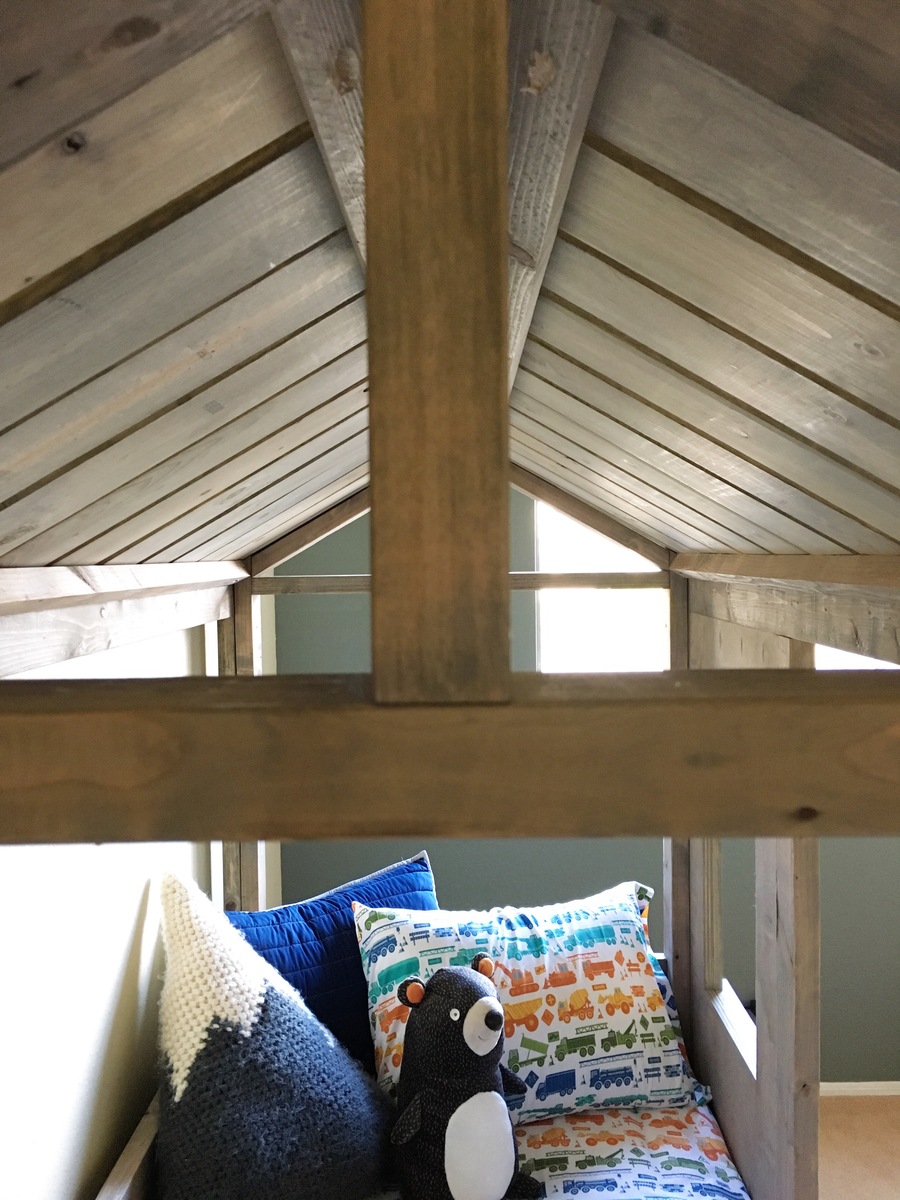
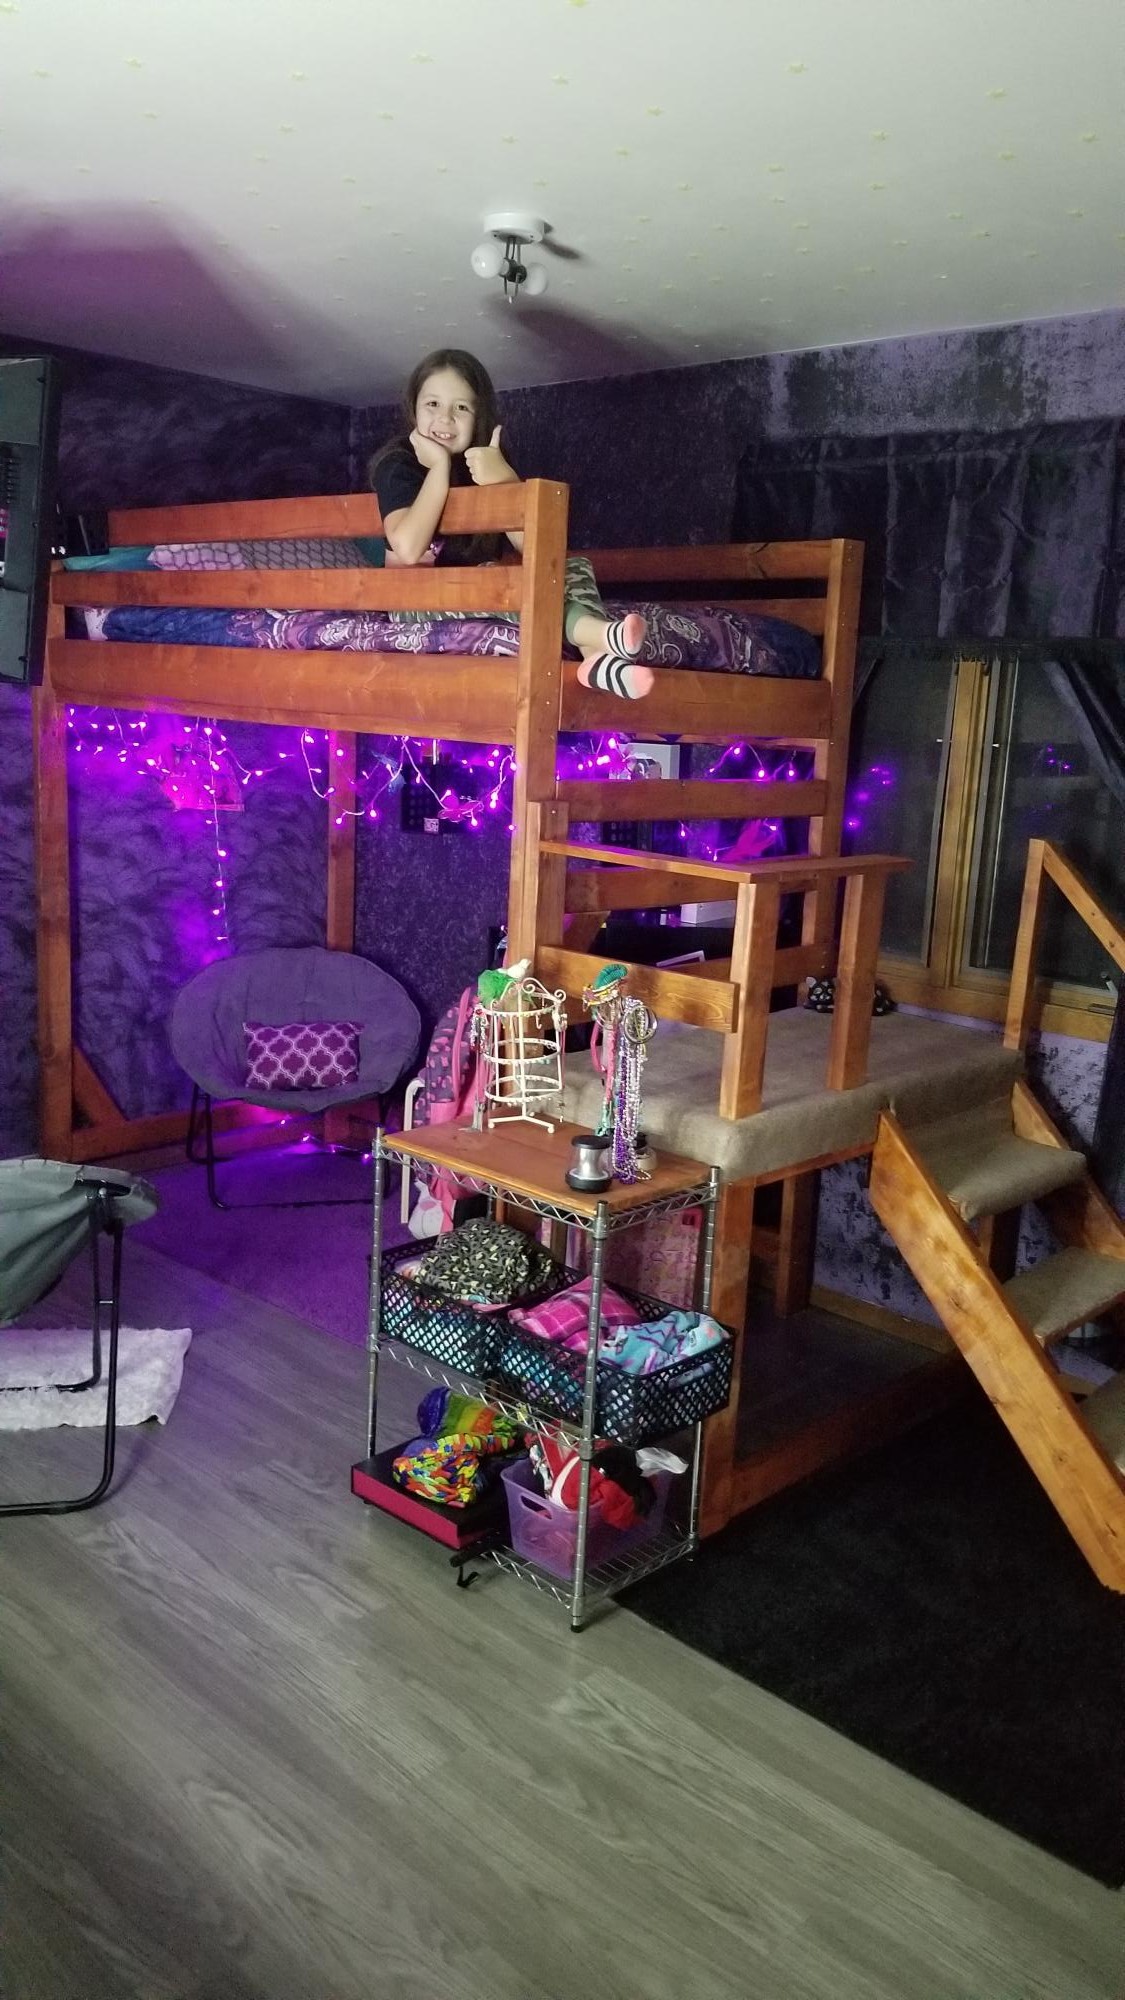
We adjusted the plans slightly to better fit our room. Rather than an angled set of stairs leading to the platform, we replaced it with a short vertical ladder. We also increased the height of the bed to allow for another bunk in the lower section for when Callaghan outgrows his crib. Plus, we added handles to the bed which made it easier for Luke to get up and down.
Thu, 12/12/2013 - 08:20
This looks great! Love the mods and the play area underneath.
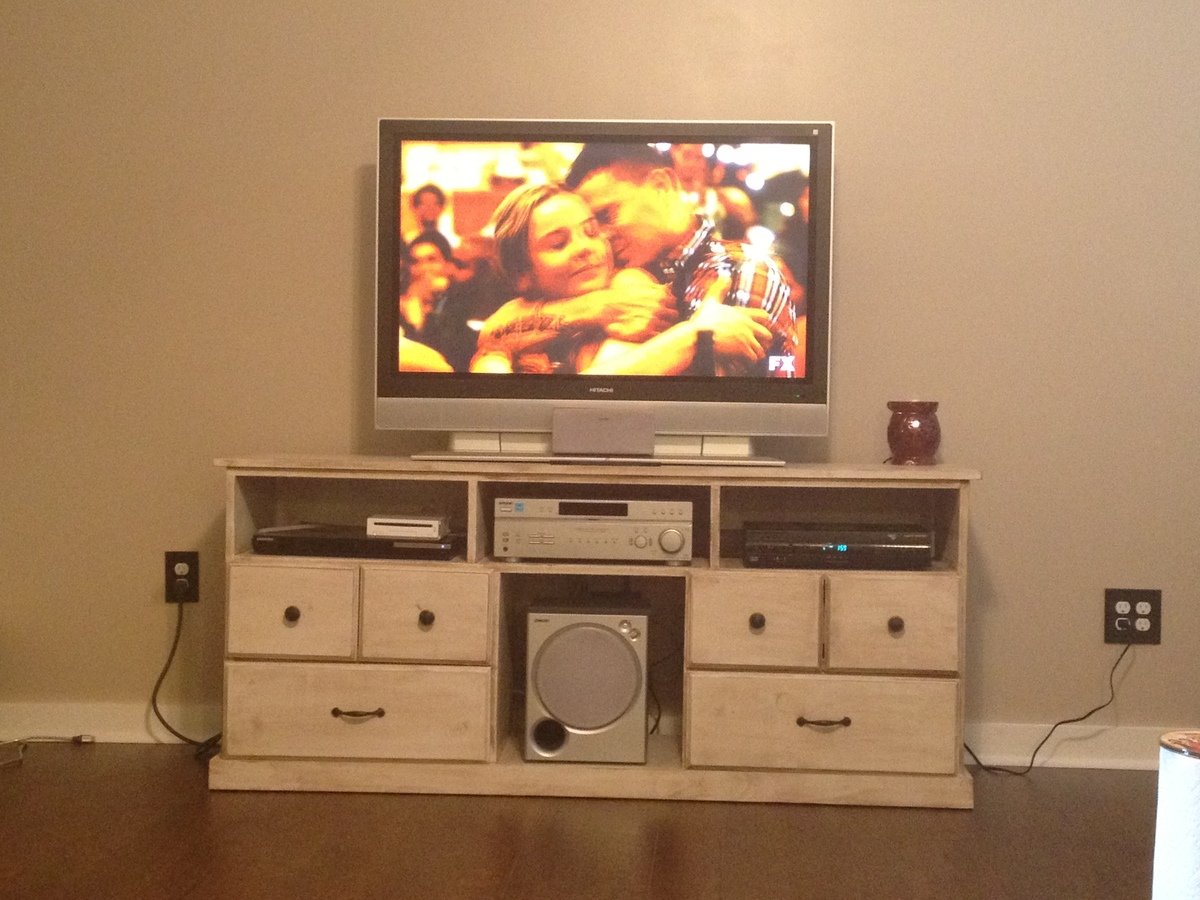
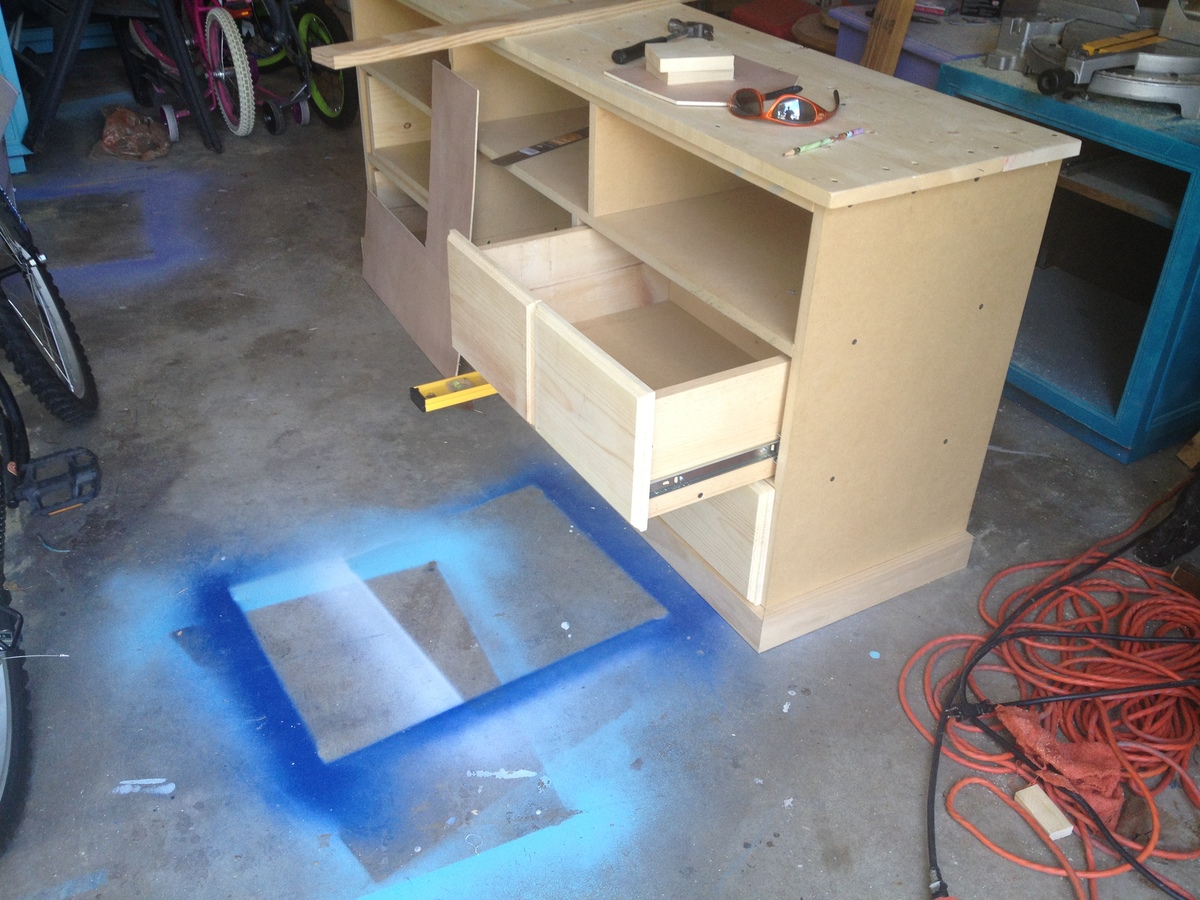
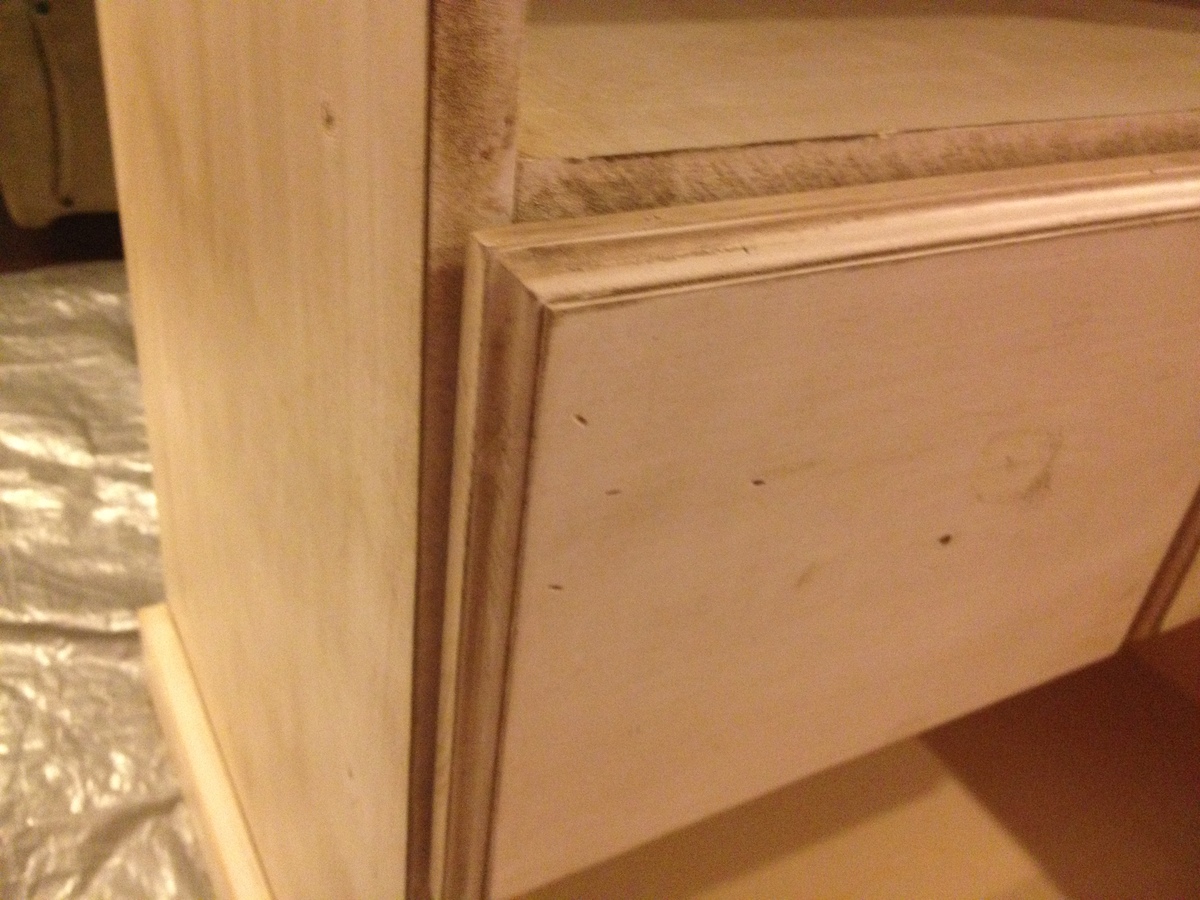
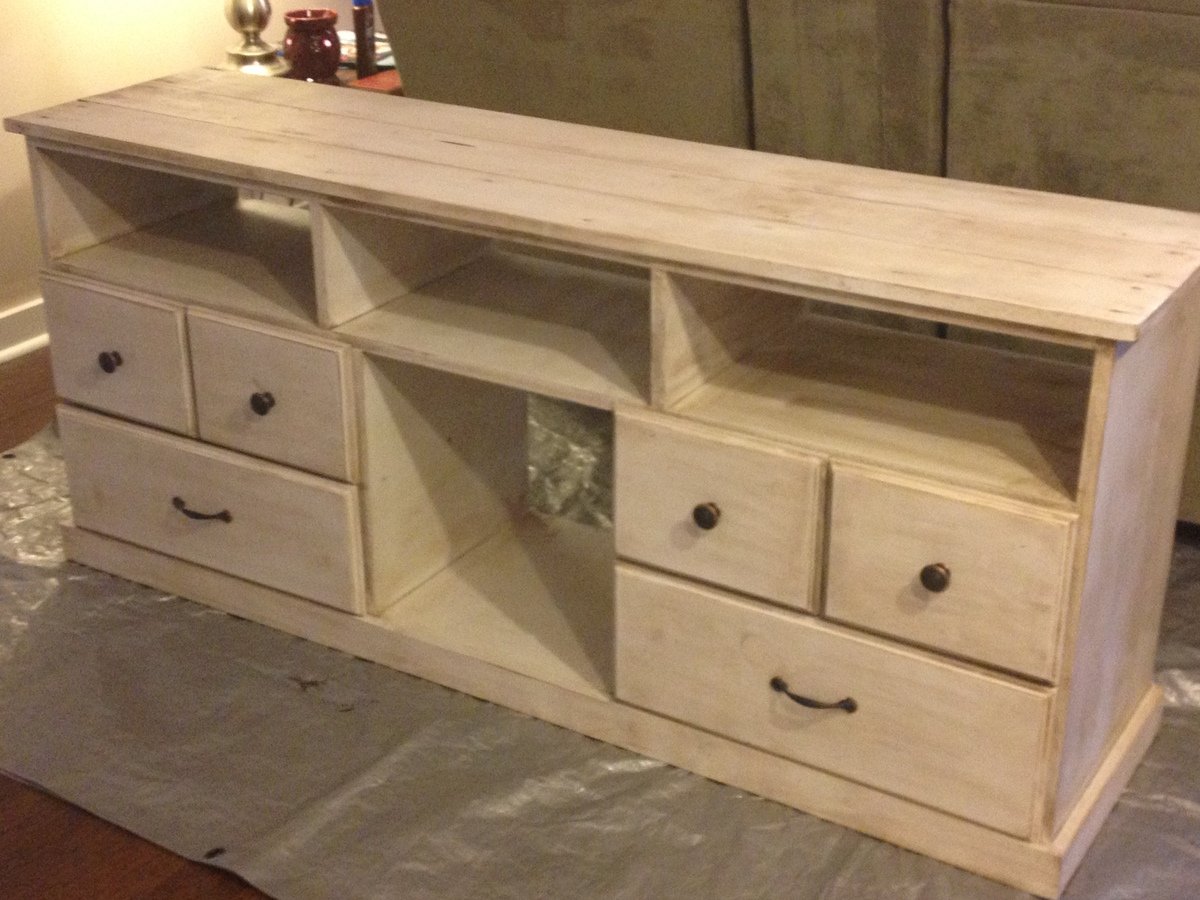
I really wanted a new entertainment center but could not find one in the stores that I liked and looked to be made of good quality. I liked the Apothecary Console but needed to make a few adjustments to the plan, which is why I marked my project at an intermediate level.
I built this about a year ago and love it as much today as I did the day I finished it. I have had a ton of compliments on it and many are impressed when I tell them I made it myself.


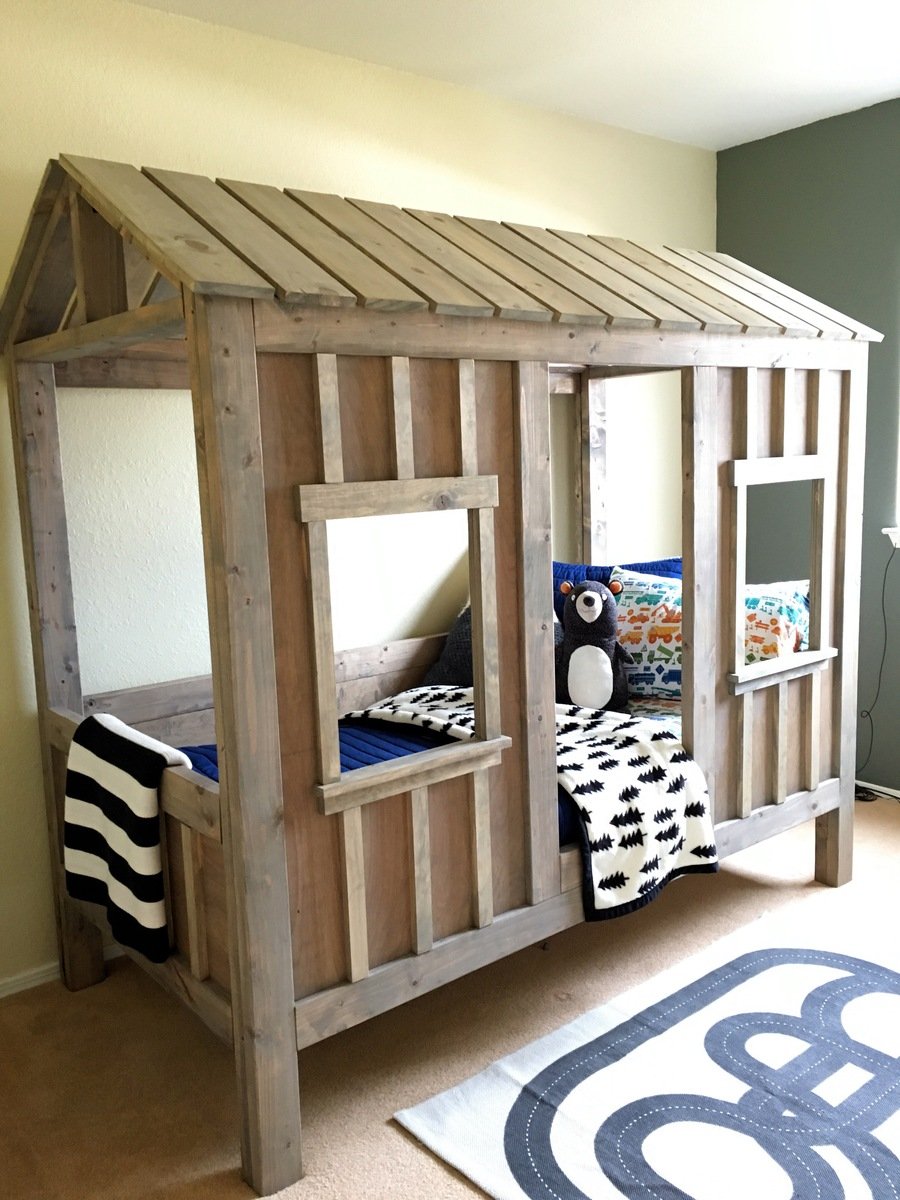
This is a fairly easy build. It did take some time with three little ones running around, but the finished product is well worth it! My three-year-old doesn't want to get out of bed in the morning (win!).

This was our first woodworking project. I was not that hard to put together.
I made a couple of changes to the design. I used 4x4 for the legs. I also change up the board that were used ontop. I have a step by step on my blog.
The almost the same as the table. Check out the changes and the cut list here: http://www.domesticated-engineer.com/1/post/2012/05/bench-for-farmhouse…
Tue, 02/28/2012 - 05:13
Can you post a link to your blog with the instructions? Did you make your table a little shorter than the original plans?
Tue, 02/28/2012 - 08:43
Yes, the table is a little shorter. I made mine 7 feet long to fit our space. The blog link is http://www.domesticated-engineer.com/1/post/2012/02/farmhouse-table-par…
Thanks!
Extremely easy with Ana's plans. Under $100.

Wed, 11/06/2019 - 10:52
Wow this turned out really great! I love the carpeted stairs, what a great idea!
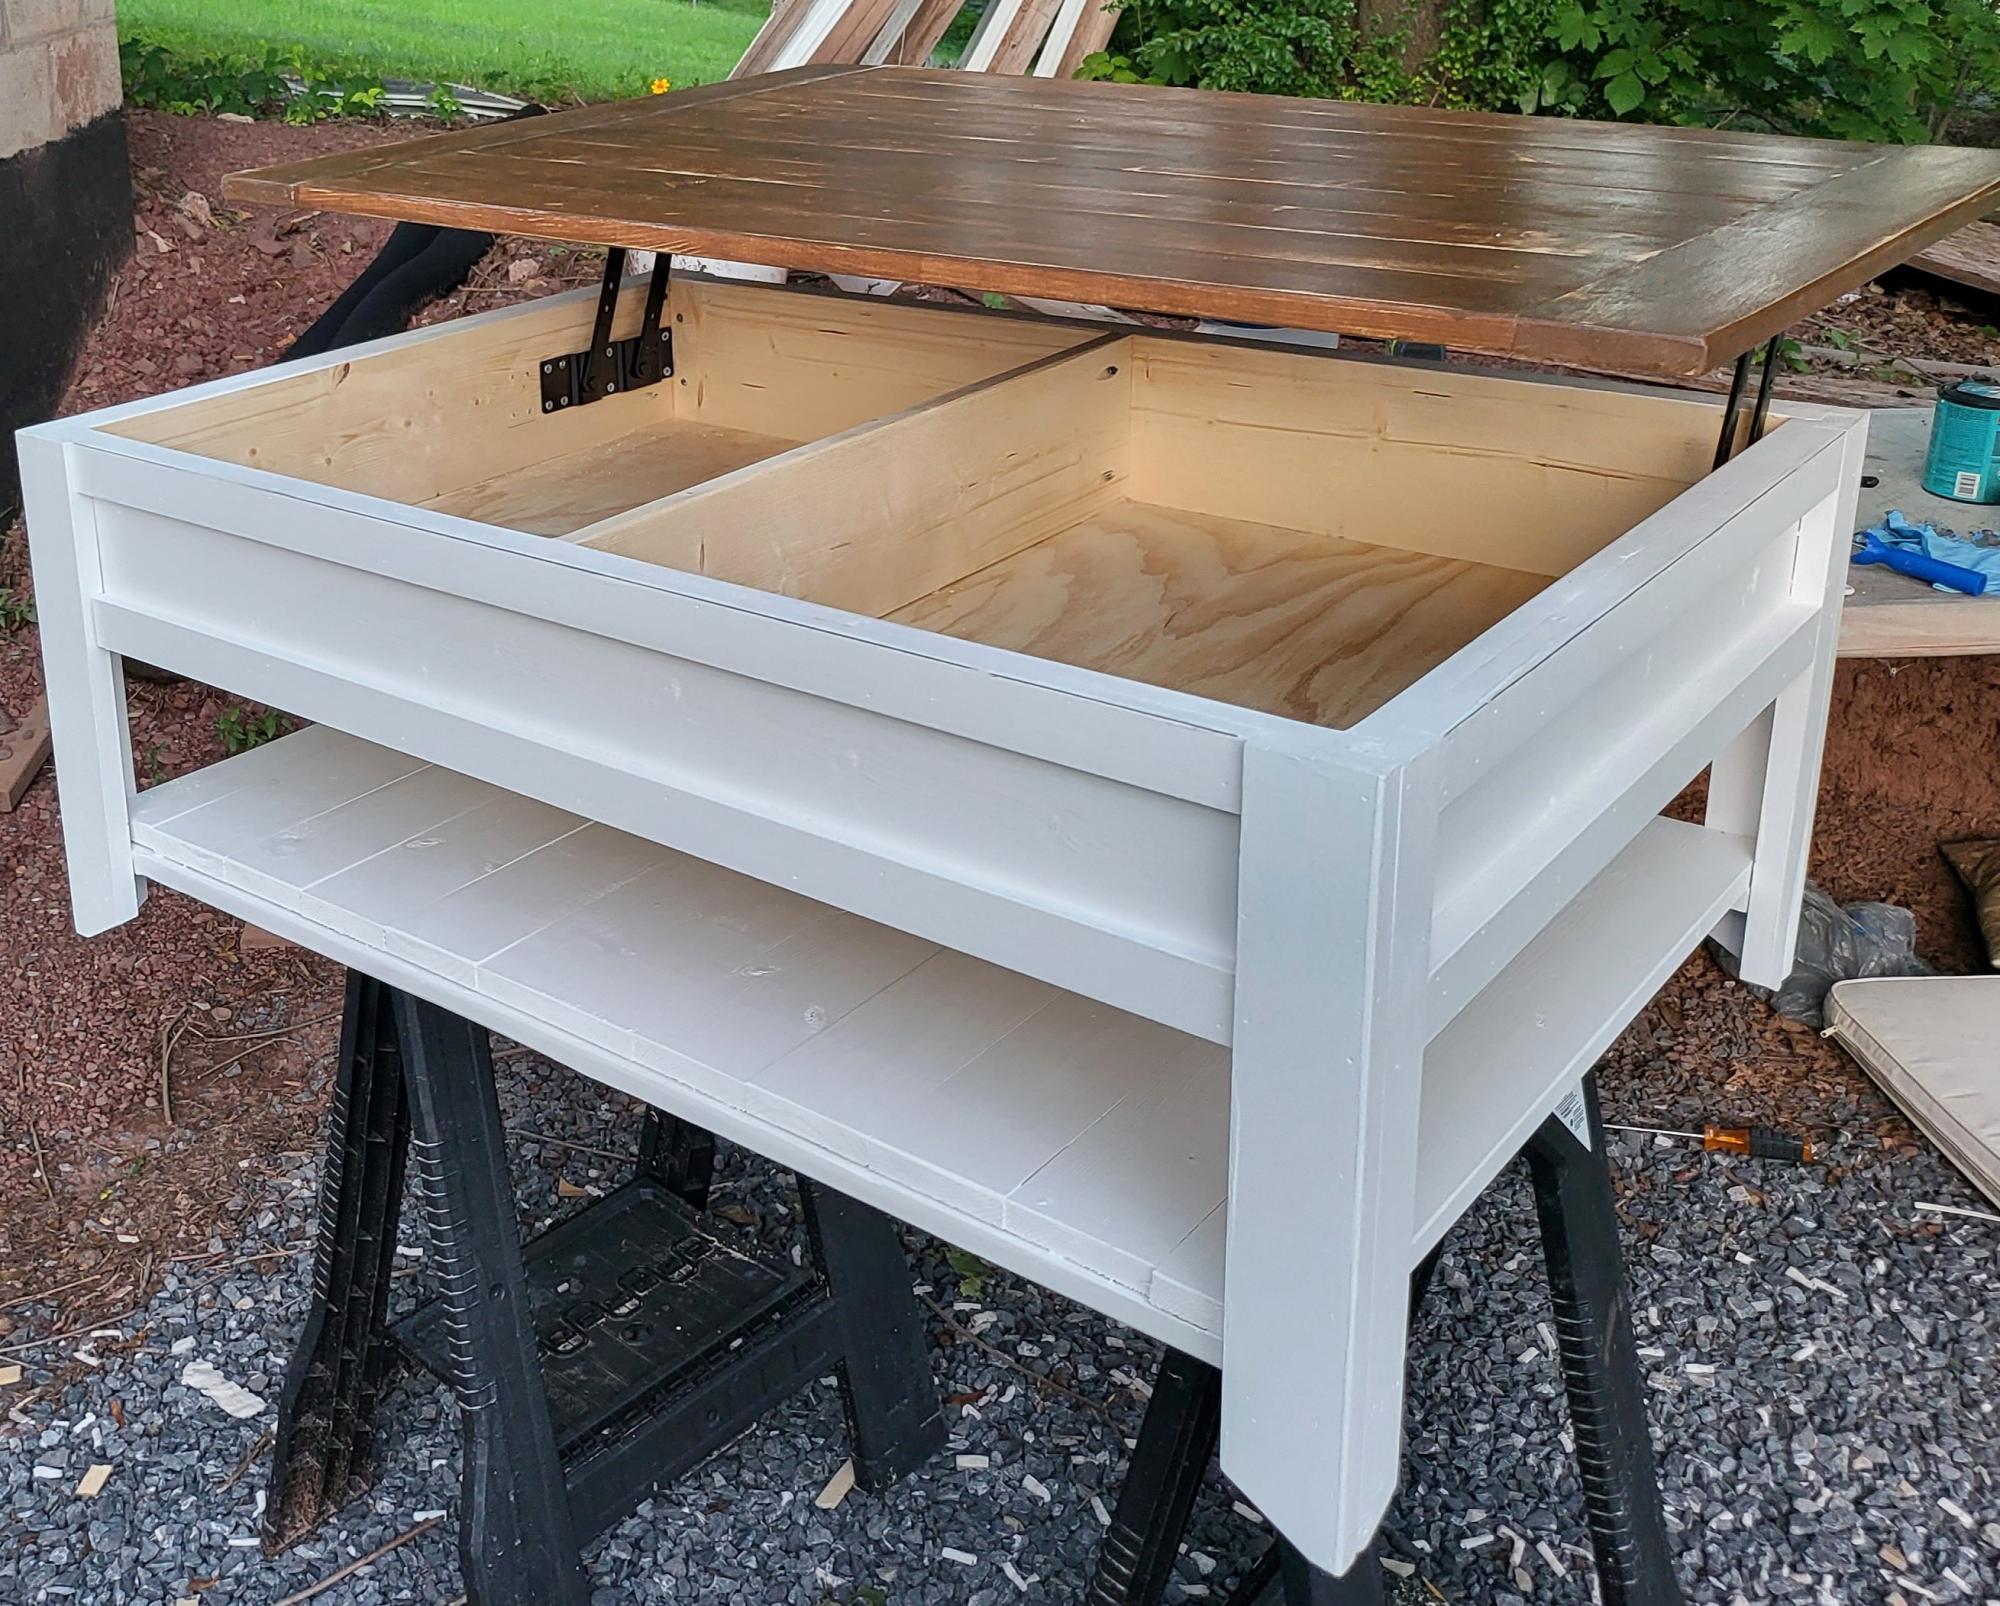
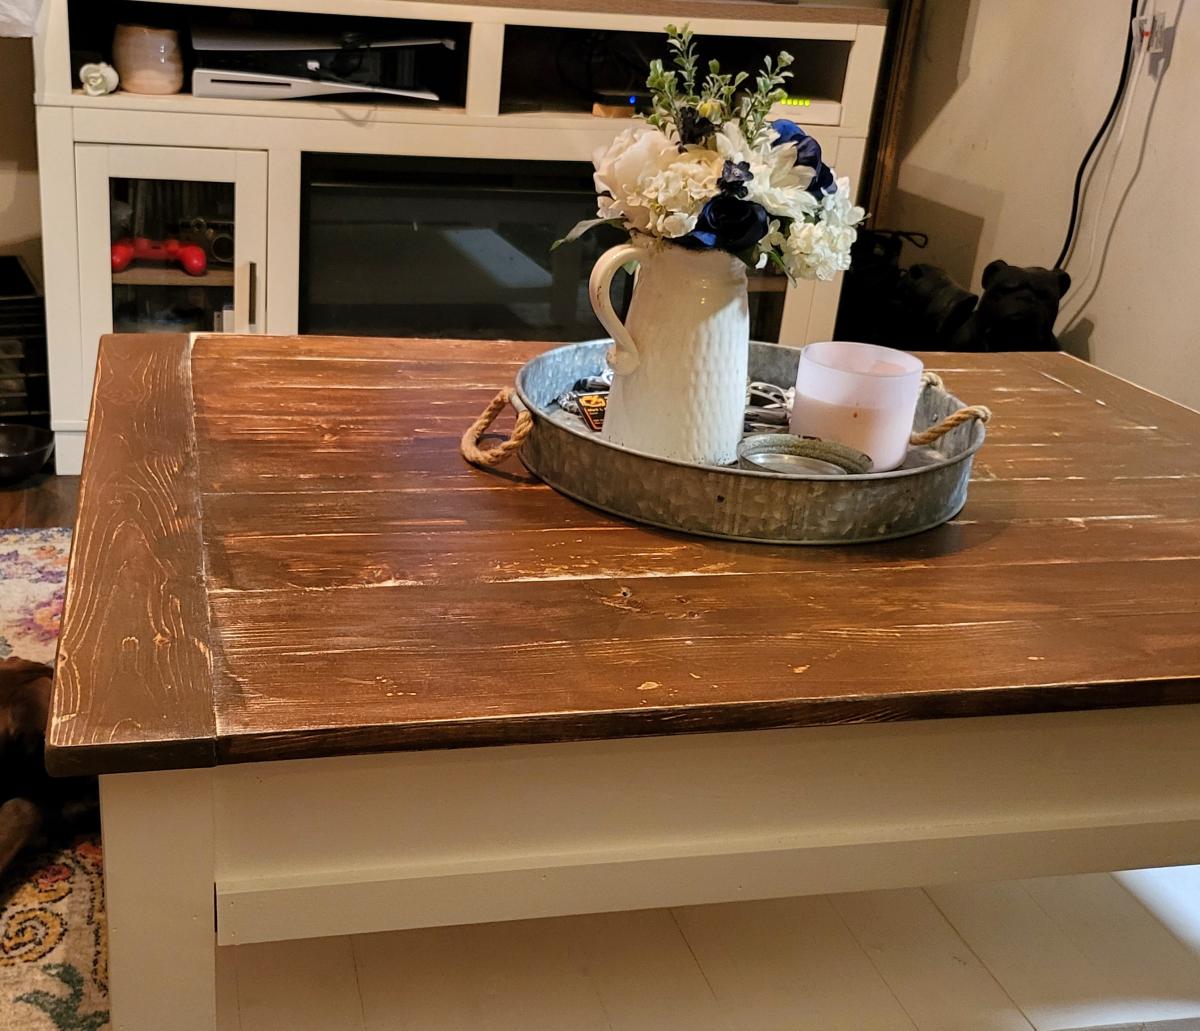
I wanted my top to be a lift top, so I used 1x3's adding breadboard ends. I ordered the lifts from Amazon. I applied a single coat of stain and then sanded it down to give it a more rustic look before applying a satin poly coat.
A. Henry

We just finished building this room and decided to finish it off with Ana's loft bed. It's mounted at height of 6 feet in order to accommodate our 18 year old.
Renae Gilford

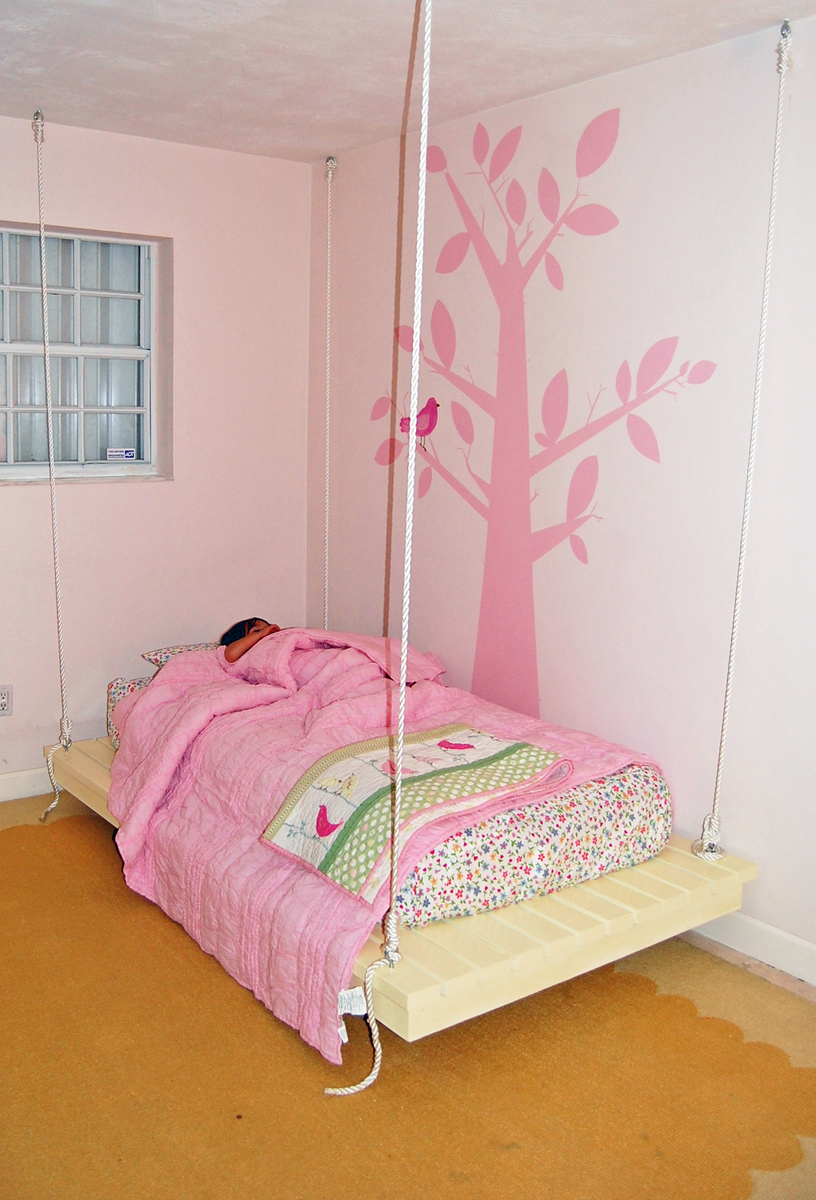
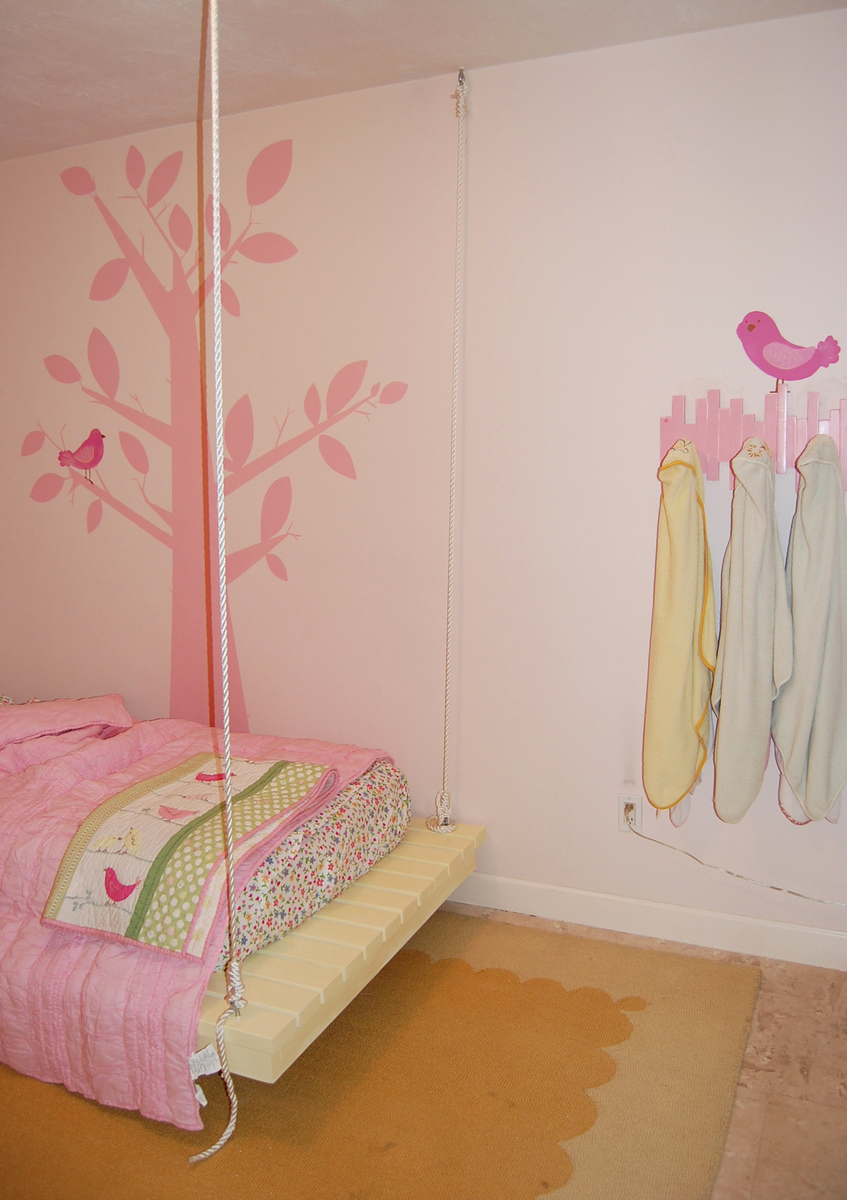
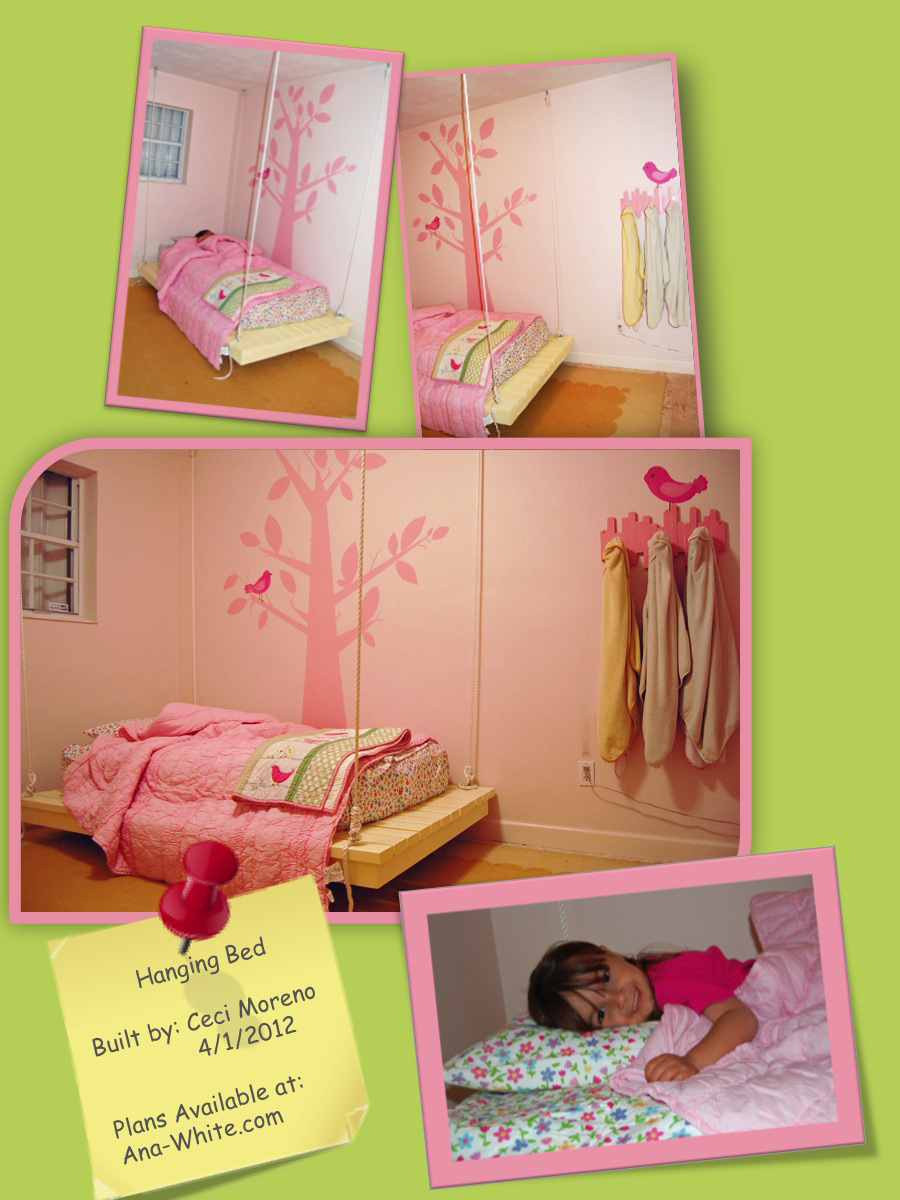
Hanging bed for my daughter built from the "Easiest Hanging Daybed Plans". Super easy to do and looks and feels great!


Sun, 04/01/2012 - 11:20
This is a cool idea of making a kid's bed. I'm sure your child always look forward to going to bed every night :)
Mon, 04/02/2012 - 07:54
A beautiful room! I love everything you did in this room! The hooks are so cute too! Thanks for sharing plans!
In reply to A beautiful room! I love by Ana White
Mon, 04/02/2012 - 08:37
Thanks Ana! Glad you like it....LOVE your site (I think Im addicted to it at this point), and thanks for sharing so many useful tips in addition to your plans!

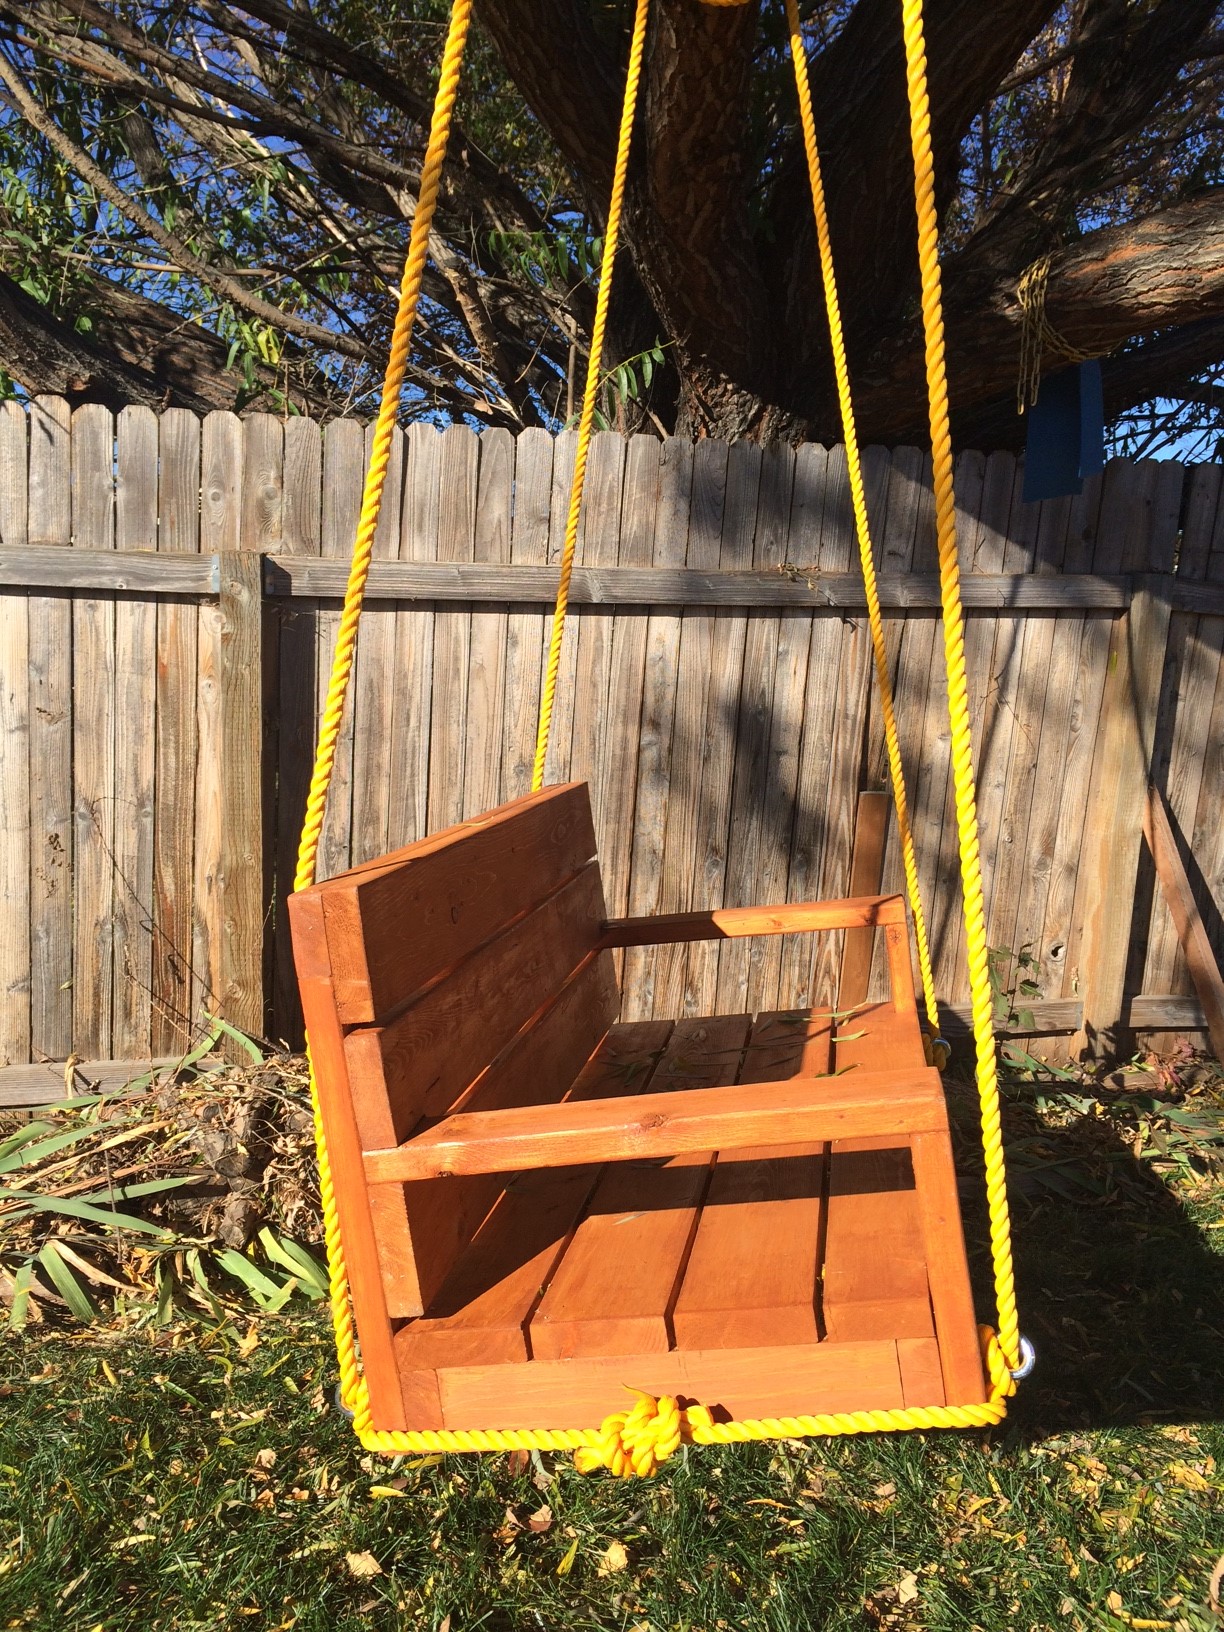
I work for a large manufacturing company that frequently has 'desirable trash'. Found 3 beautiful, heavy-duty pallets with beautiful wood on them. Took them home, took them apart, and got to work. The wife had been wanting a swing out near our children's playset so she could sit and watch them. Used Kreg pocket holes for everything that I could so as to hide as much hardware as possible.
*Side note regarding why I did the rope the way I did - the original post had mentions of it being a bit tipsy (particularly with little ones!). With this design, there's no flip front or back and the rope only gets tighter the more weight that is applied.
A lady that my husband works with just got her forever home through Habitat for Humanity. We wanted to do something special for her and her kids so we used Anna’s platform plans to build one queen and 3 full size bed frames. The plans were easy to follow and assembly was a snap on delivery.
To make the fulls we took the queen dimensions and modified the cuts for the full size mattress dimensions.
Thank you Anna for helping us to make 4 beautiful additions to our friends home.
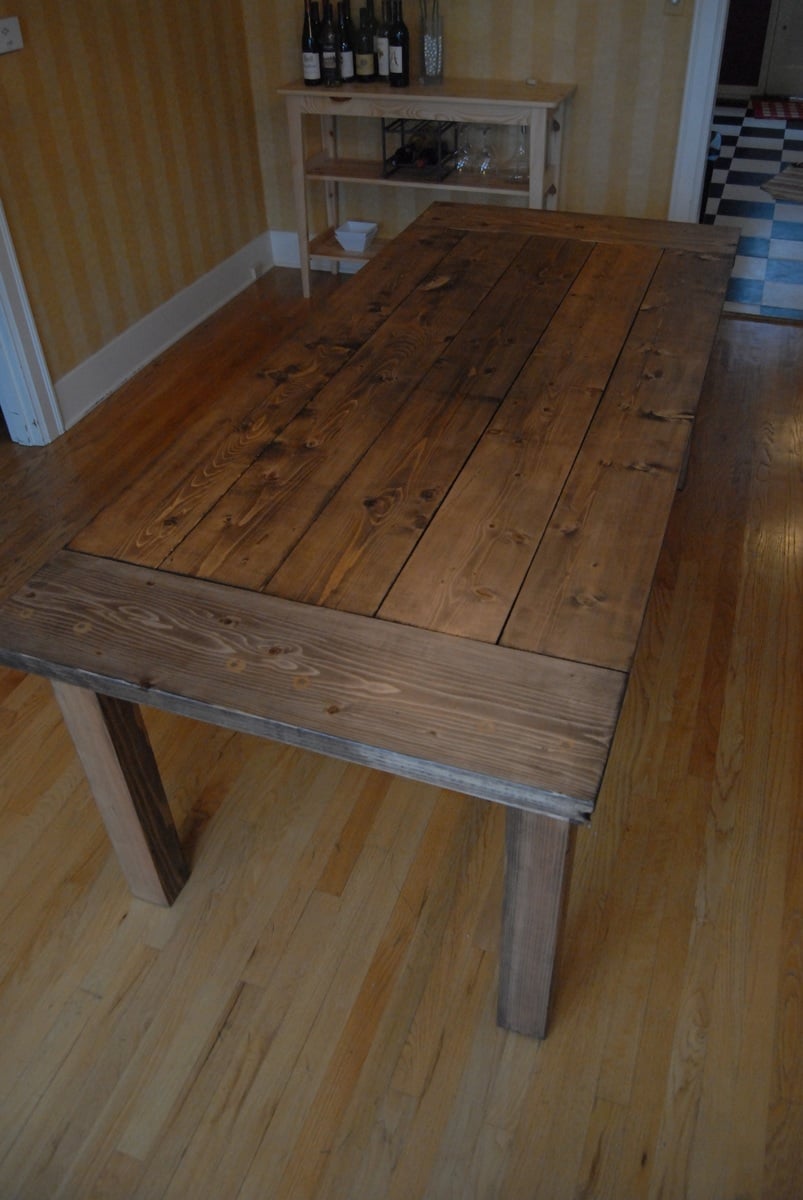
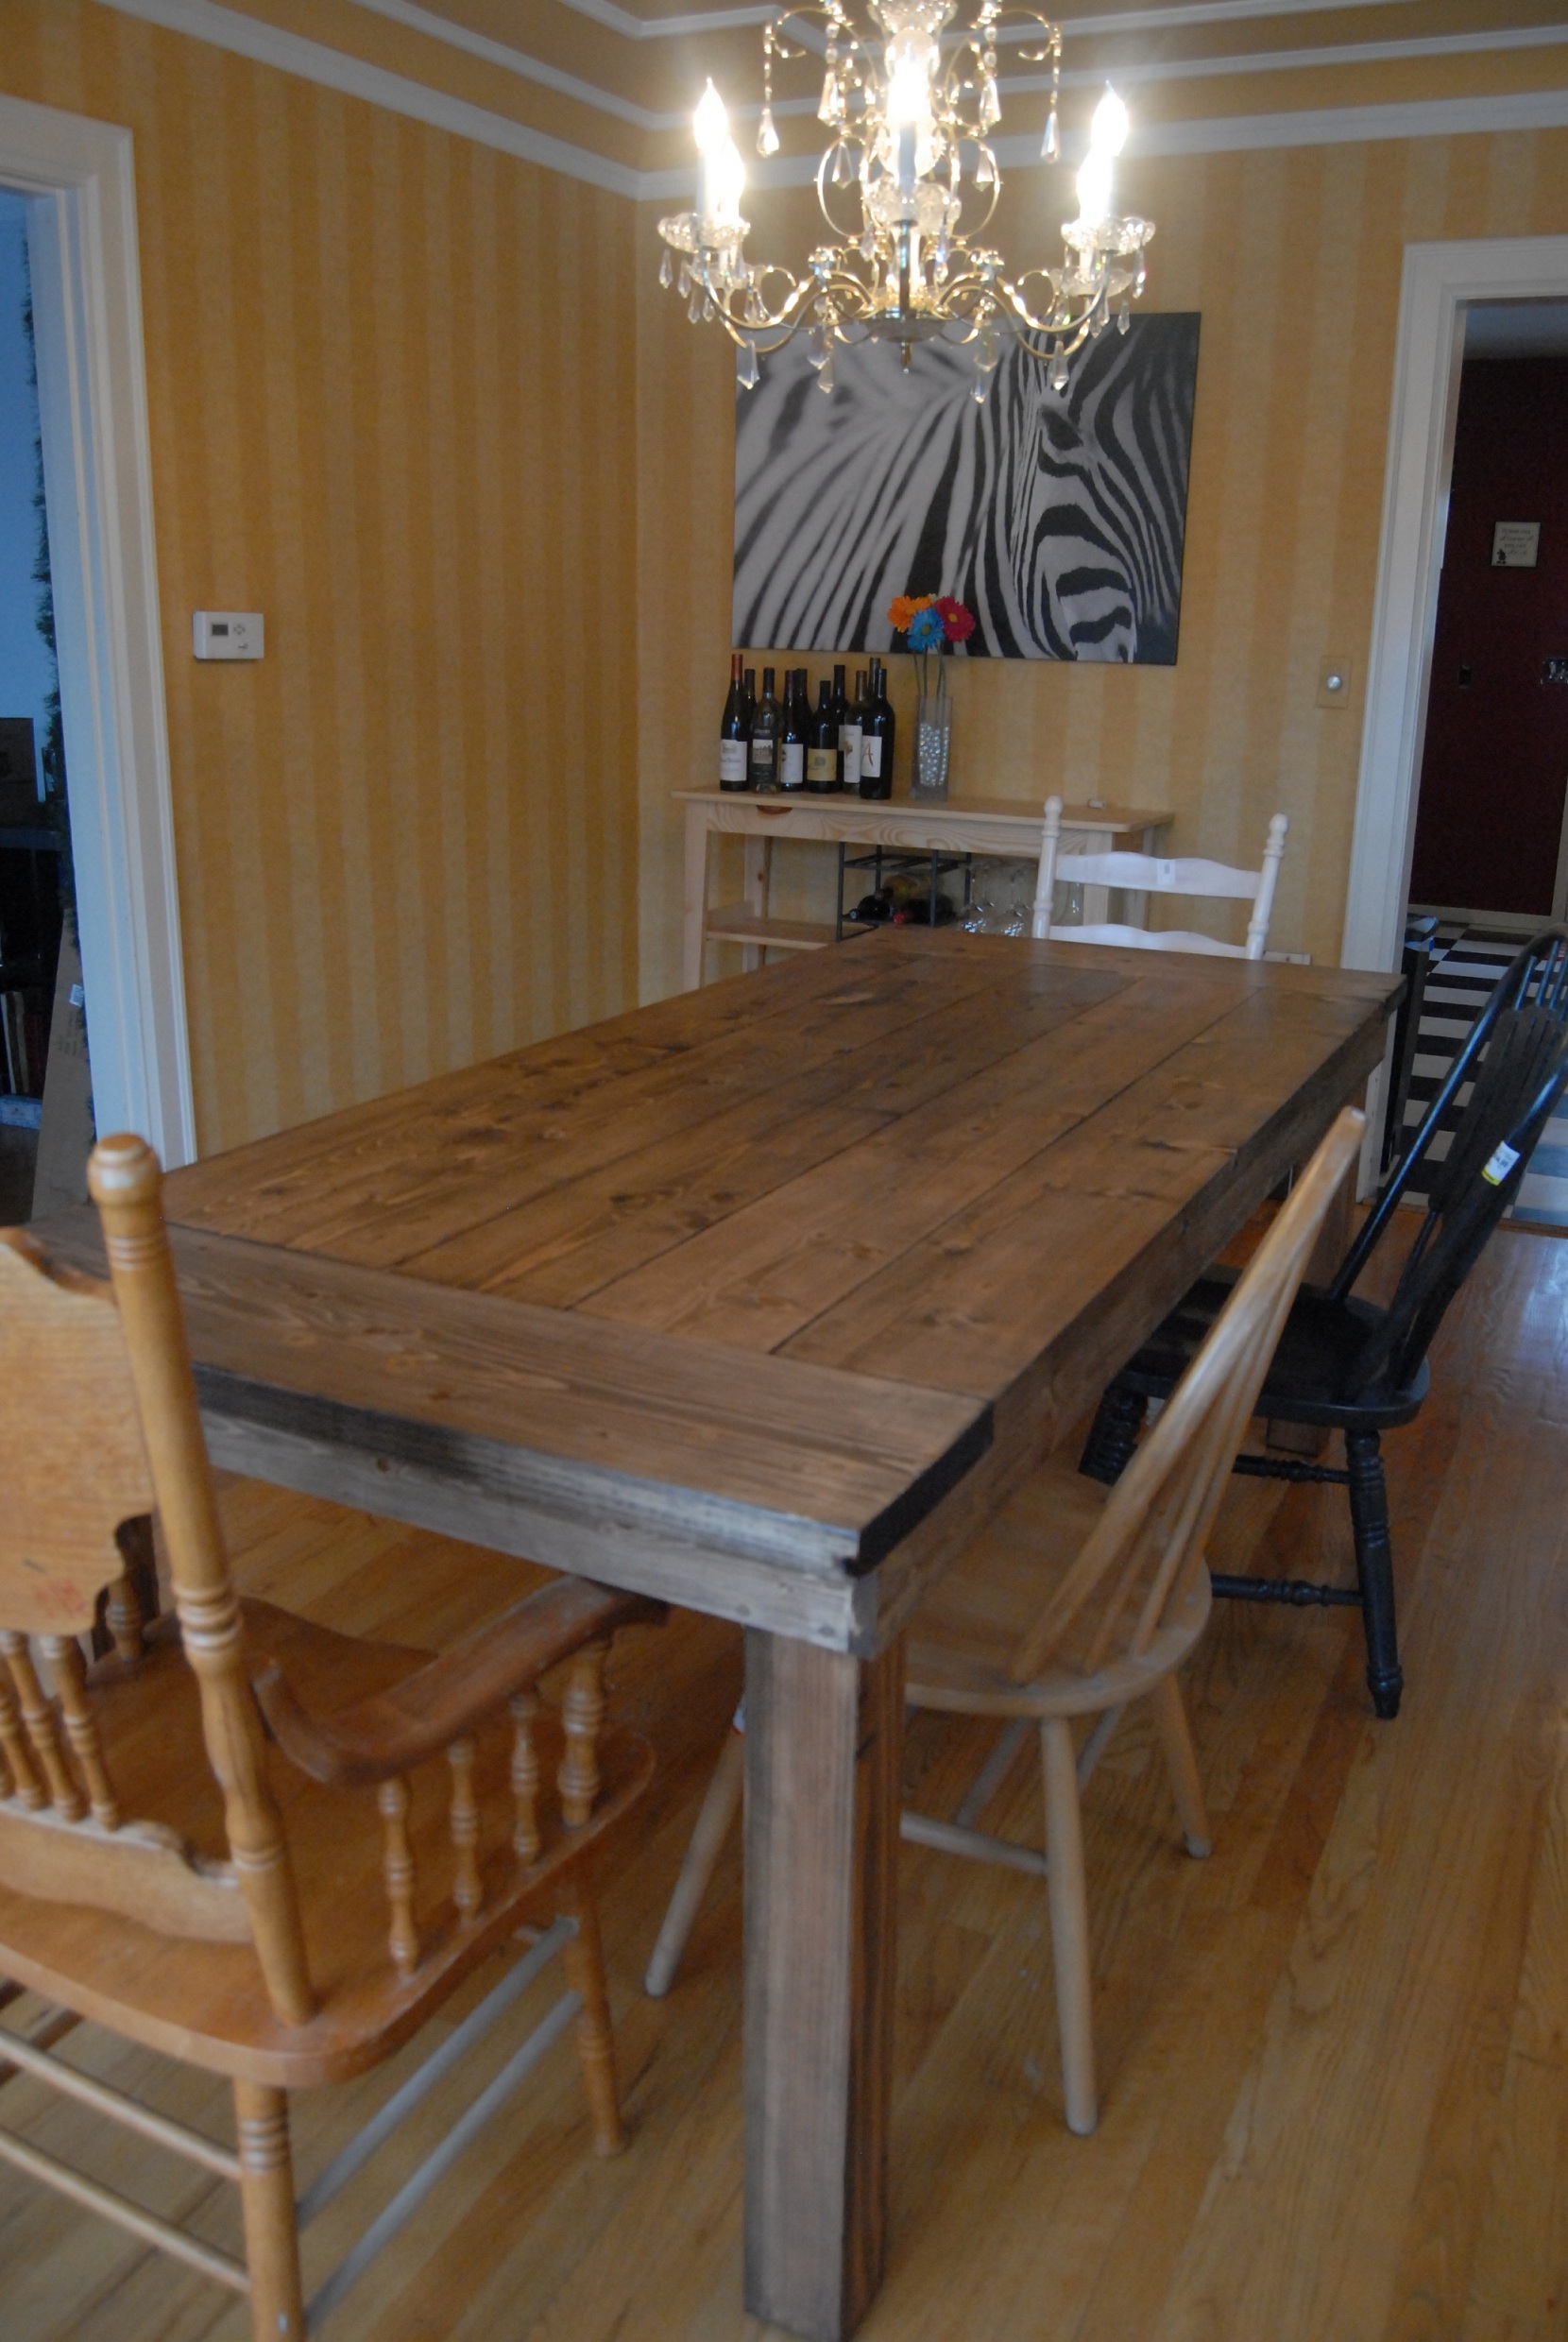
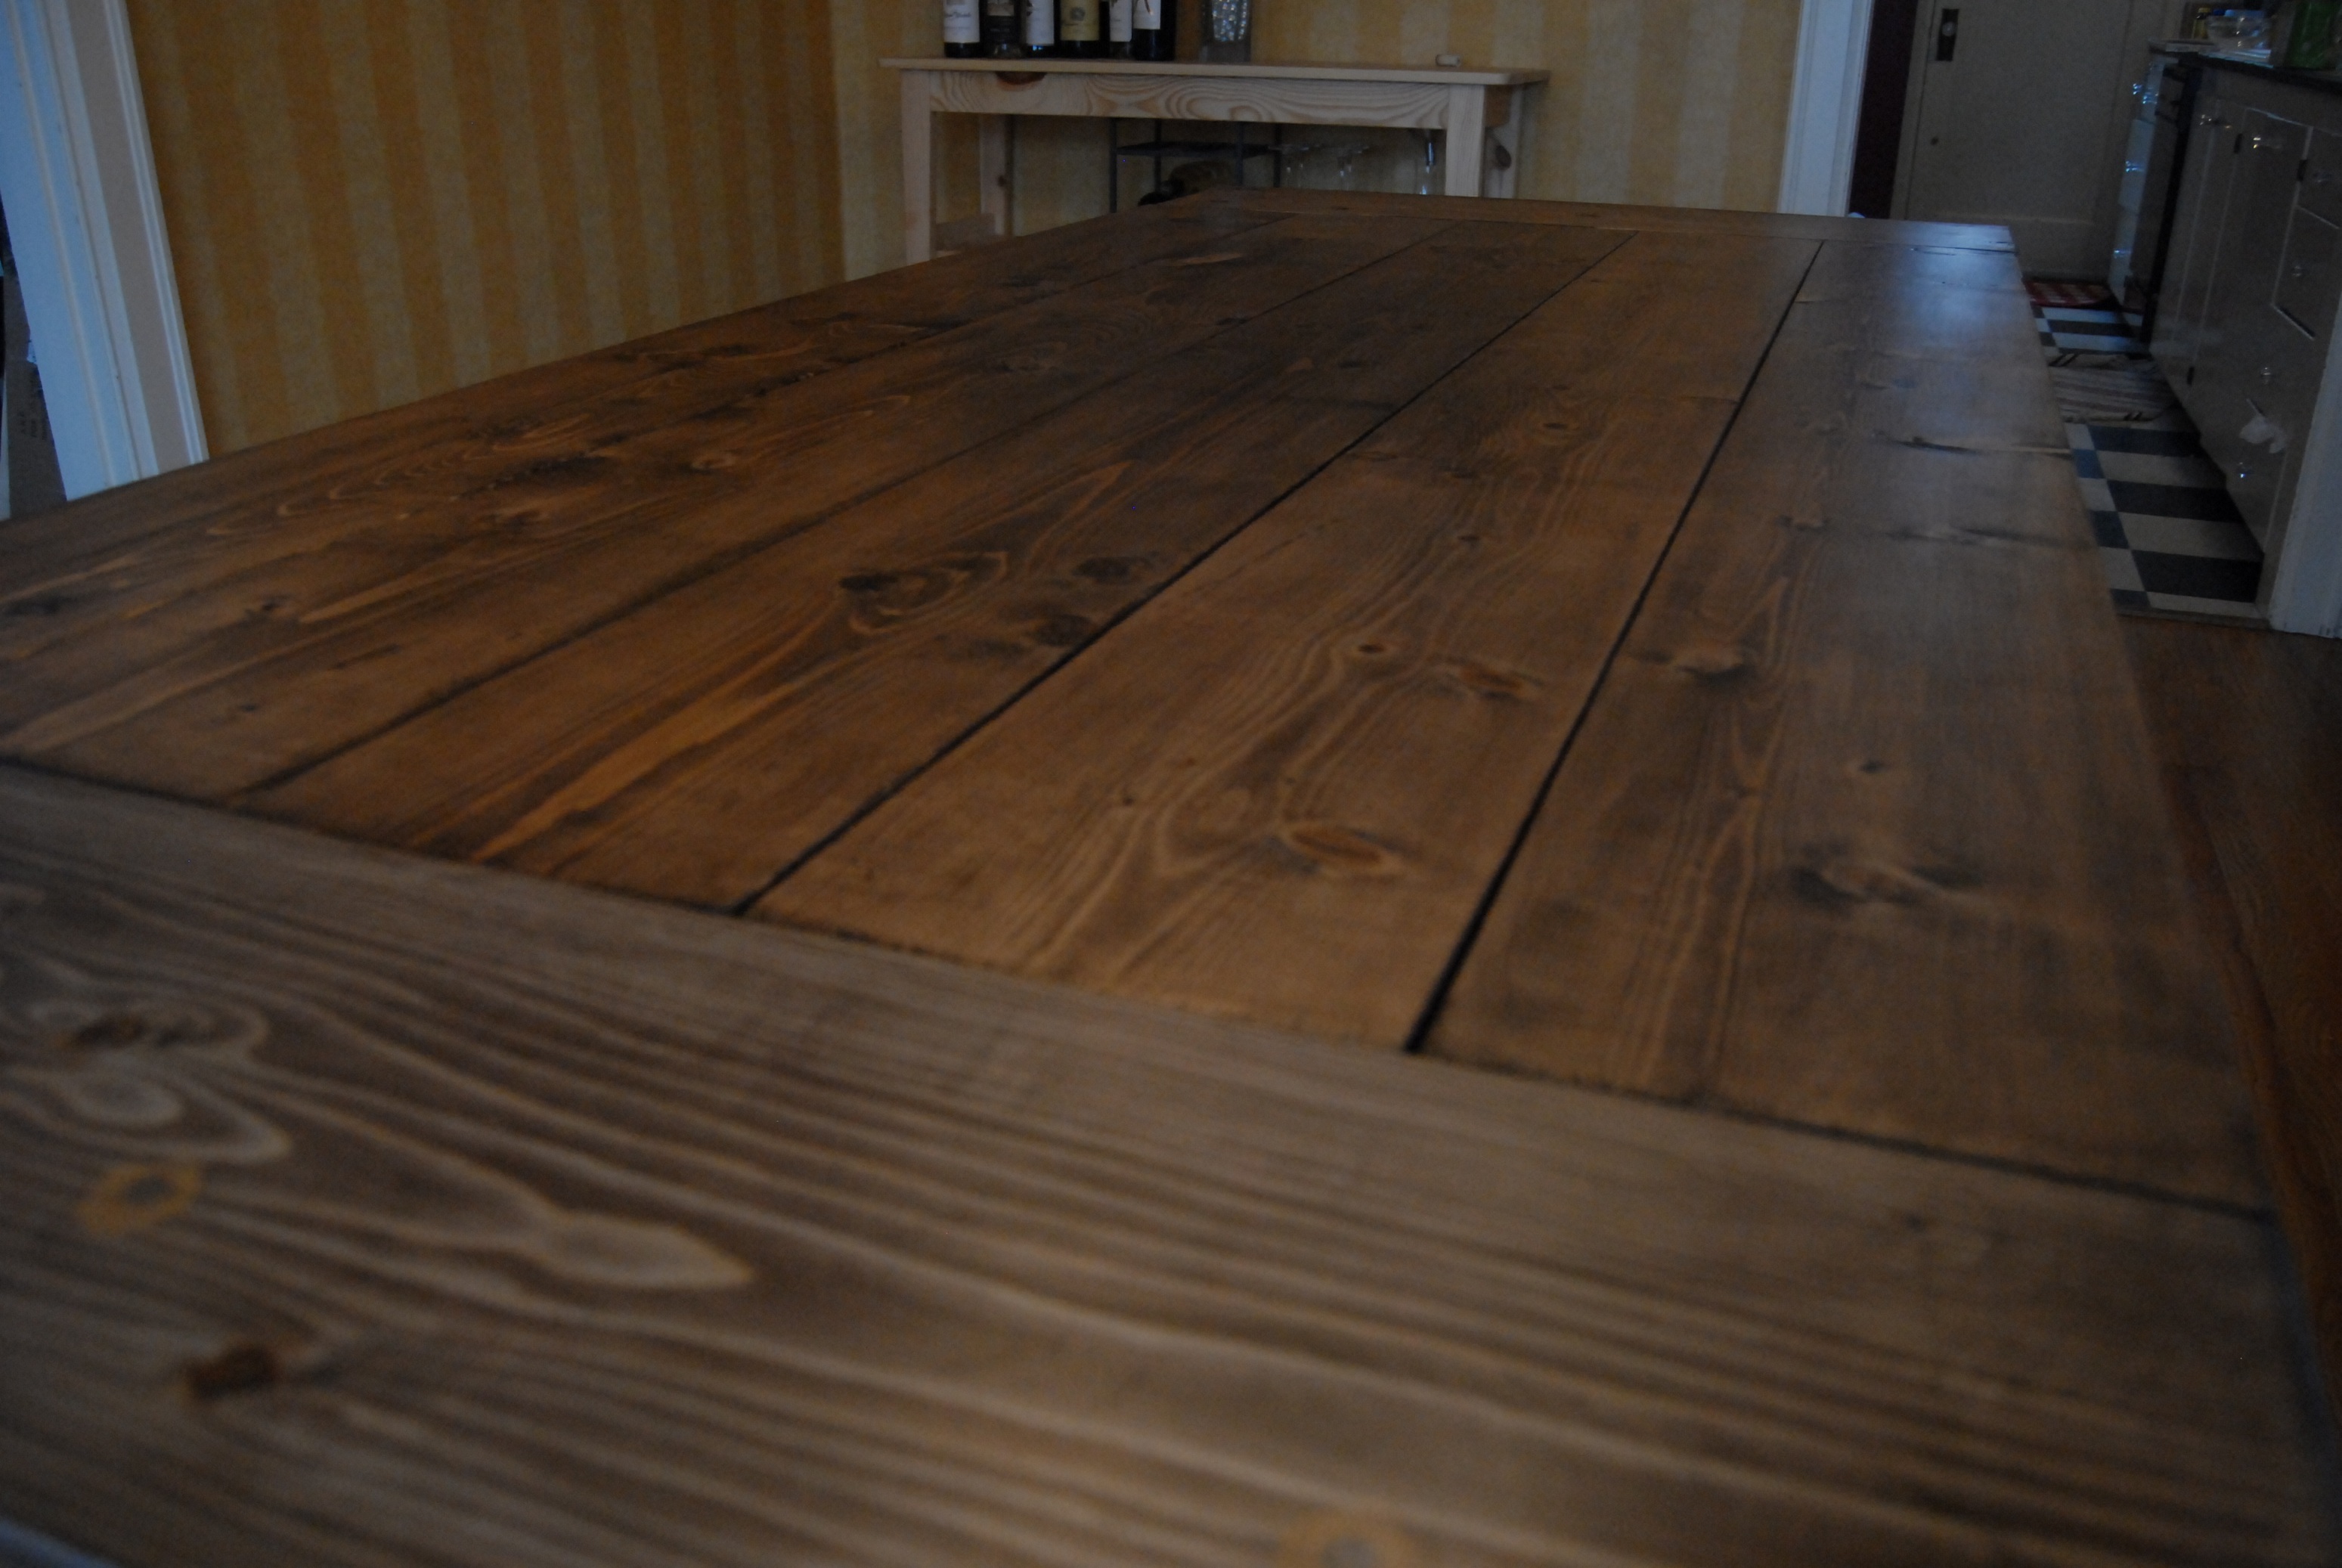
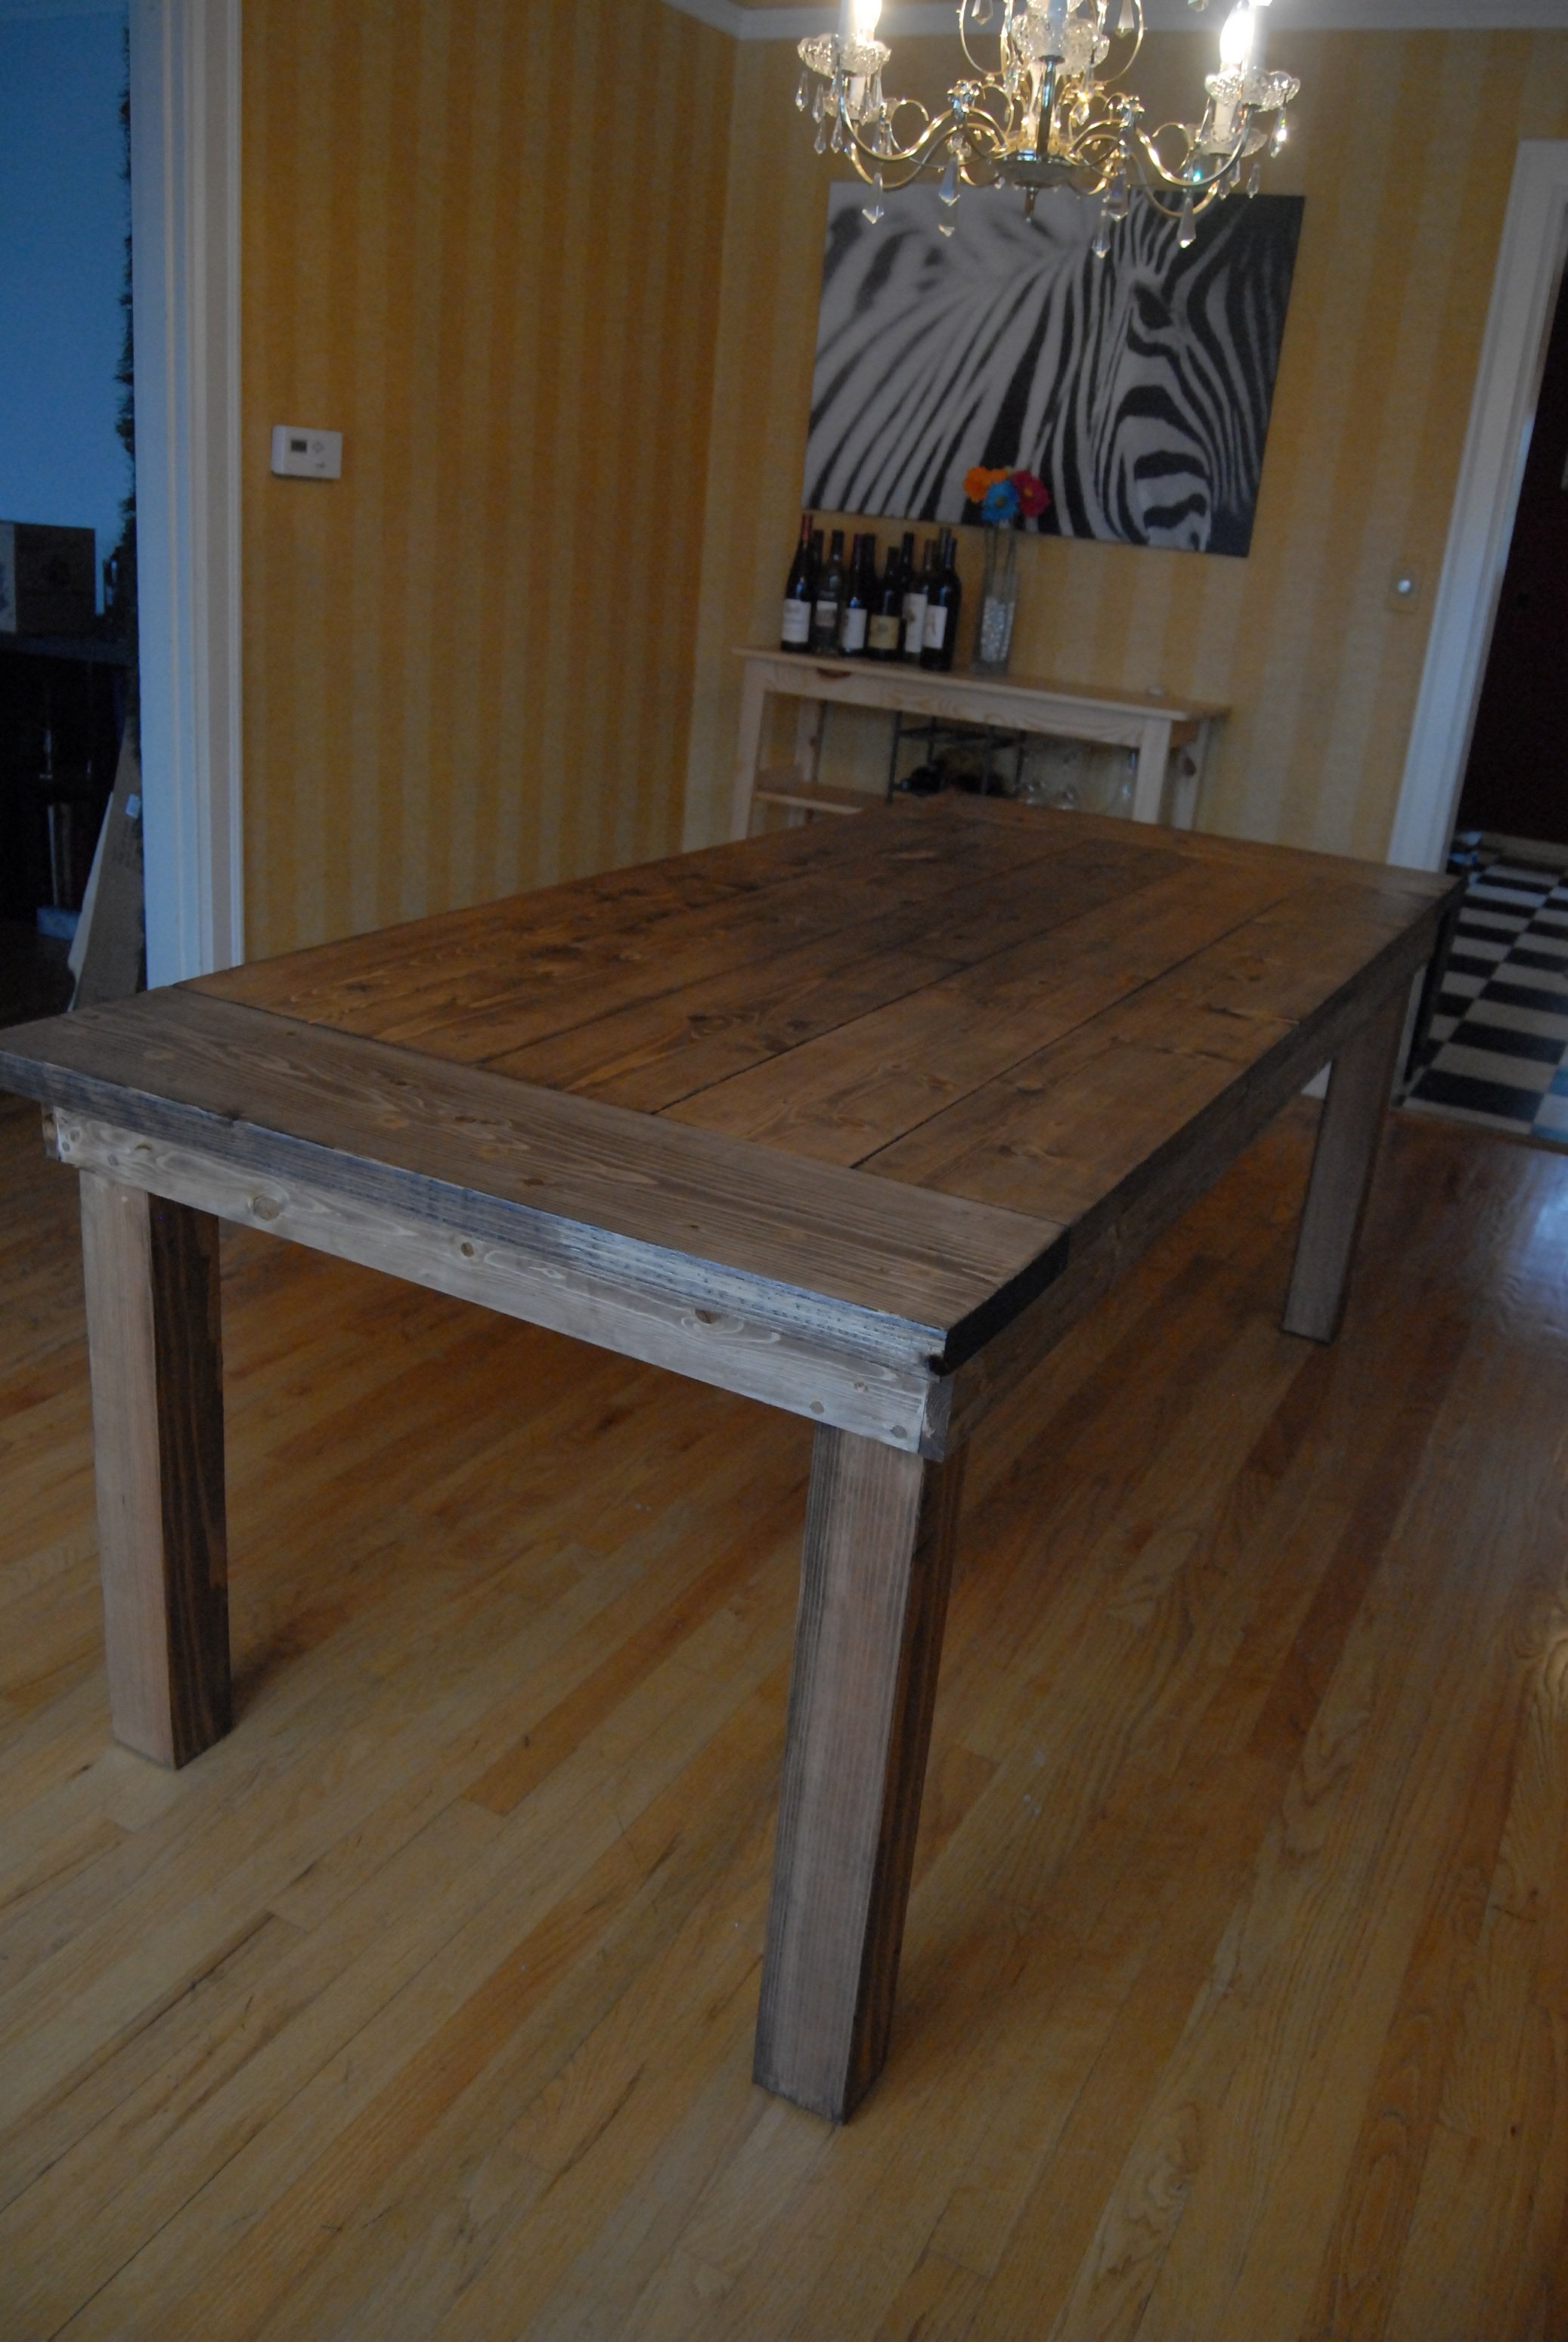
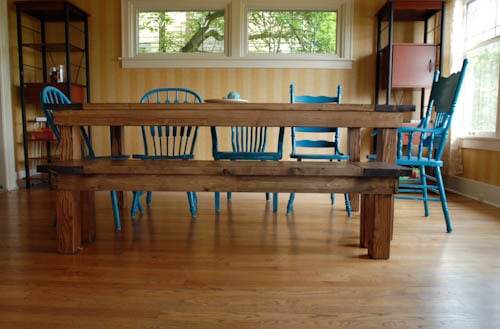
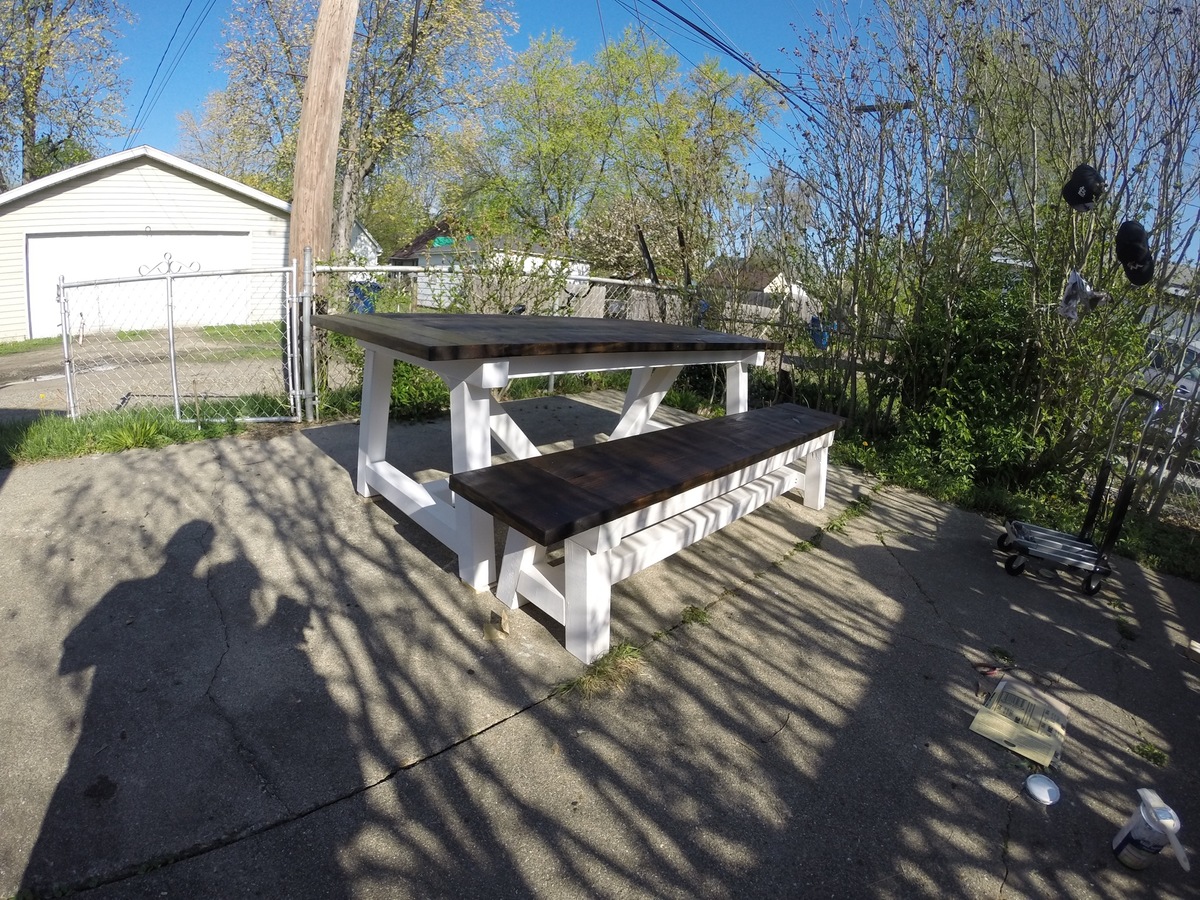
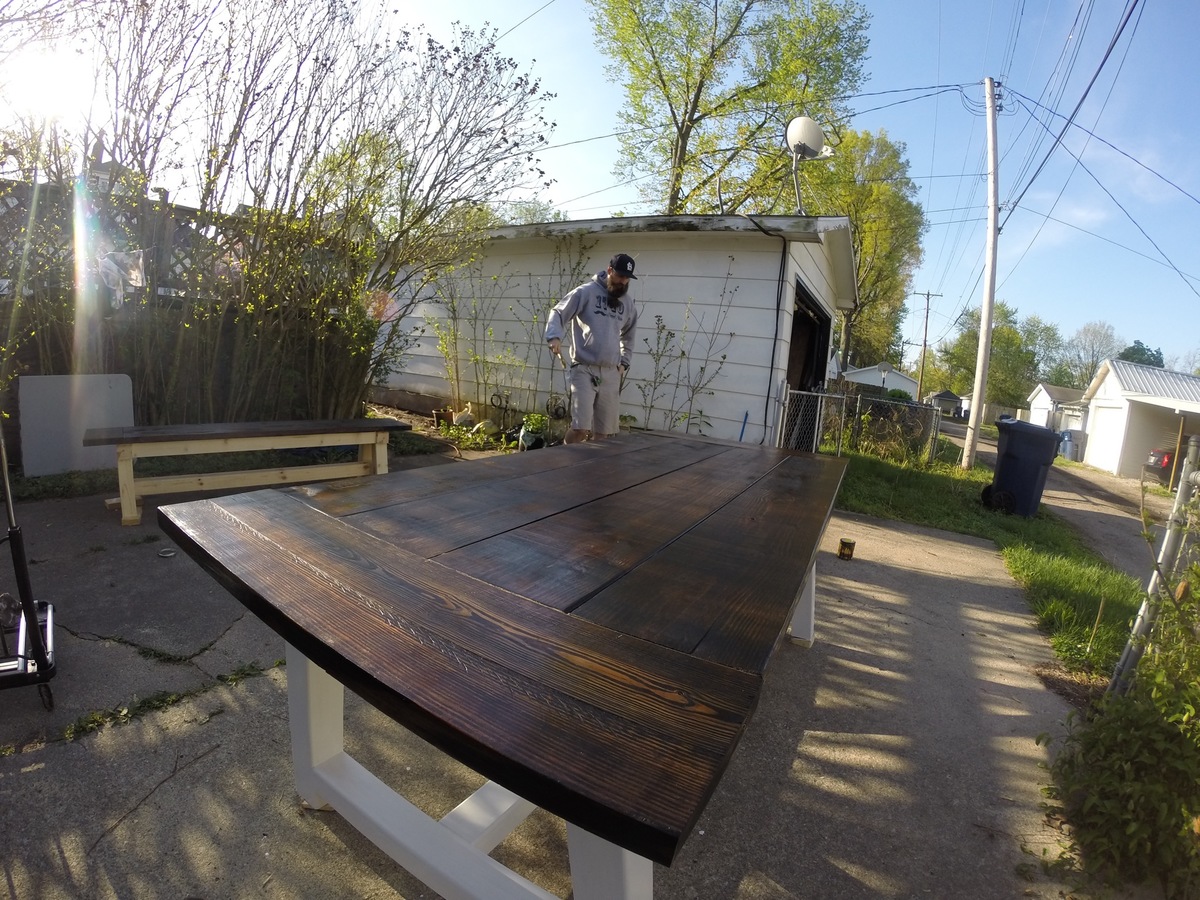
Built this for a friend of mine and his fiancé. They just bought a house and thought I would help them fill it. This is my 2nd farmhouse table. I really like the thickness of the table.


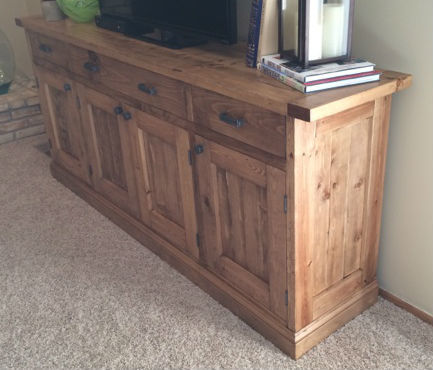
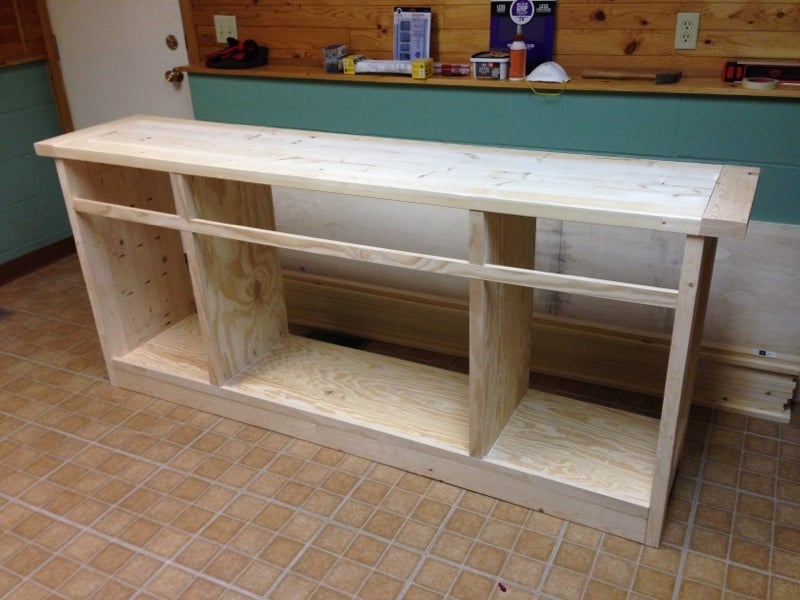
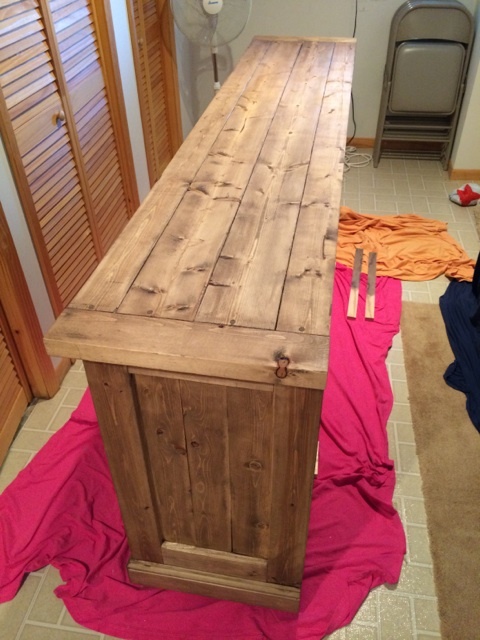
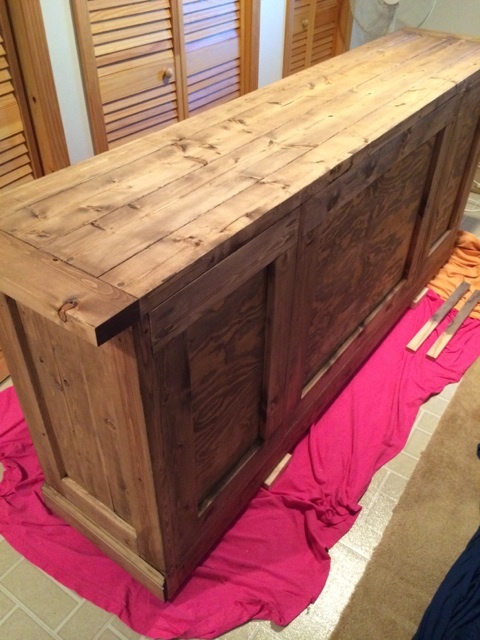
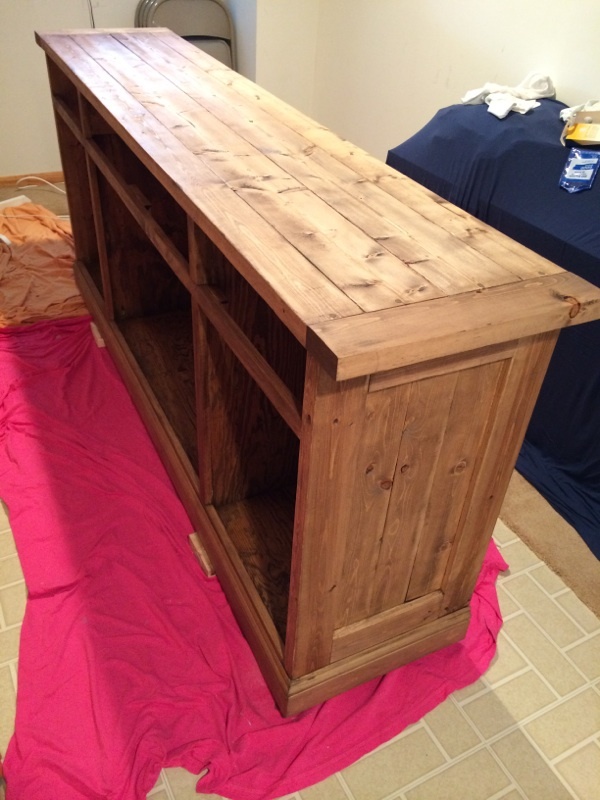
This was my first finished project using plans from Ana's site, and I am very pleased with the finished product. Every aspect of the finished sideboard is based on something from the site. I started with the plans for the Planked Wood Sideboard, and made no modifications as the dimensions were perfect for our basement family room. I decided to inset the back (http://www.friendly-home.net/2012/02/gigantic-rustic-sideboard.html) as Ana explained that Hillary had done, and love the final result. This will allow us to use this to potentially divide a room in an open concept space at some point in the future.
For the finishing process, I decided to follow the "Rustic Yet Refined" finish tutorial highlighted on both the Ana-White site (http://ana-white.com/2013/08/rustic-yet-refined-wood-finish) and Jen Woodhouse House of Wood (http://jenwoodhouse.com/blog/2013/06/07/diy-dining-table/). I fully intended to complete the 9 step process, but found that after we applied the Minwax pre-stain wood conditioner, followed by Minwax special walnut stain and wiped it off within 15-30 seconds, the finish mirrored the restoration hardware finish that we were going for. We decided not to proceed with layering on the weathered oak or applying the whitewash, and went straight to the spar urethane satin coats.
Overall, the project was a success, but was difficult to finish during the Minnesota winter as it was unbelievably cold and was forced to complete the finishing process in our basement/laundry room, which extended the length of the project. I am very excited to begin building other pieces from Ana's plans.

Mon, 03/03/2014 - 10:01
Absolutely beautiful! Thank you for all the details on how you did this!
In reply to Absolutely beautiful! Thank by moosmani
Thu, 03/13/2014 - 07:09
Thank you so much for your kind words. I am extremely impressed with your brag posts as well, and you may have been inspired to take on the picket storage shed project as soon as the snow melts.
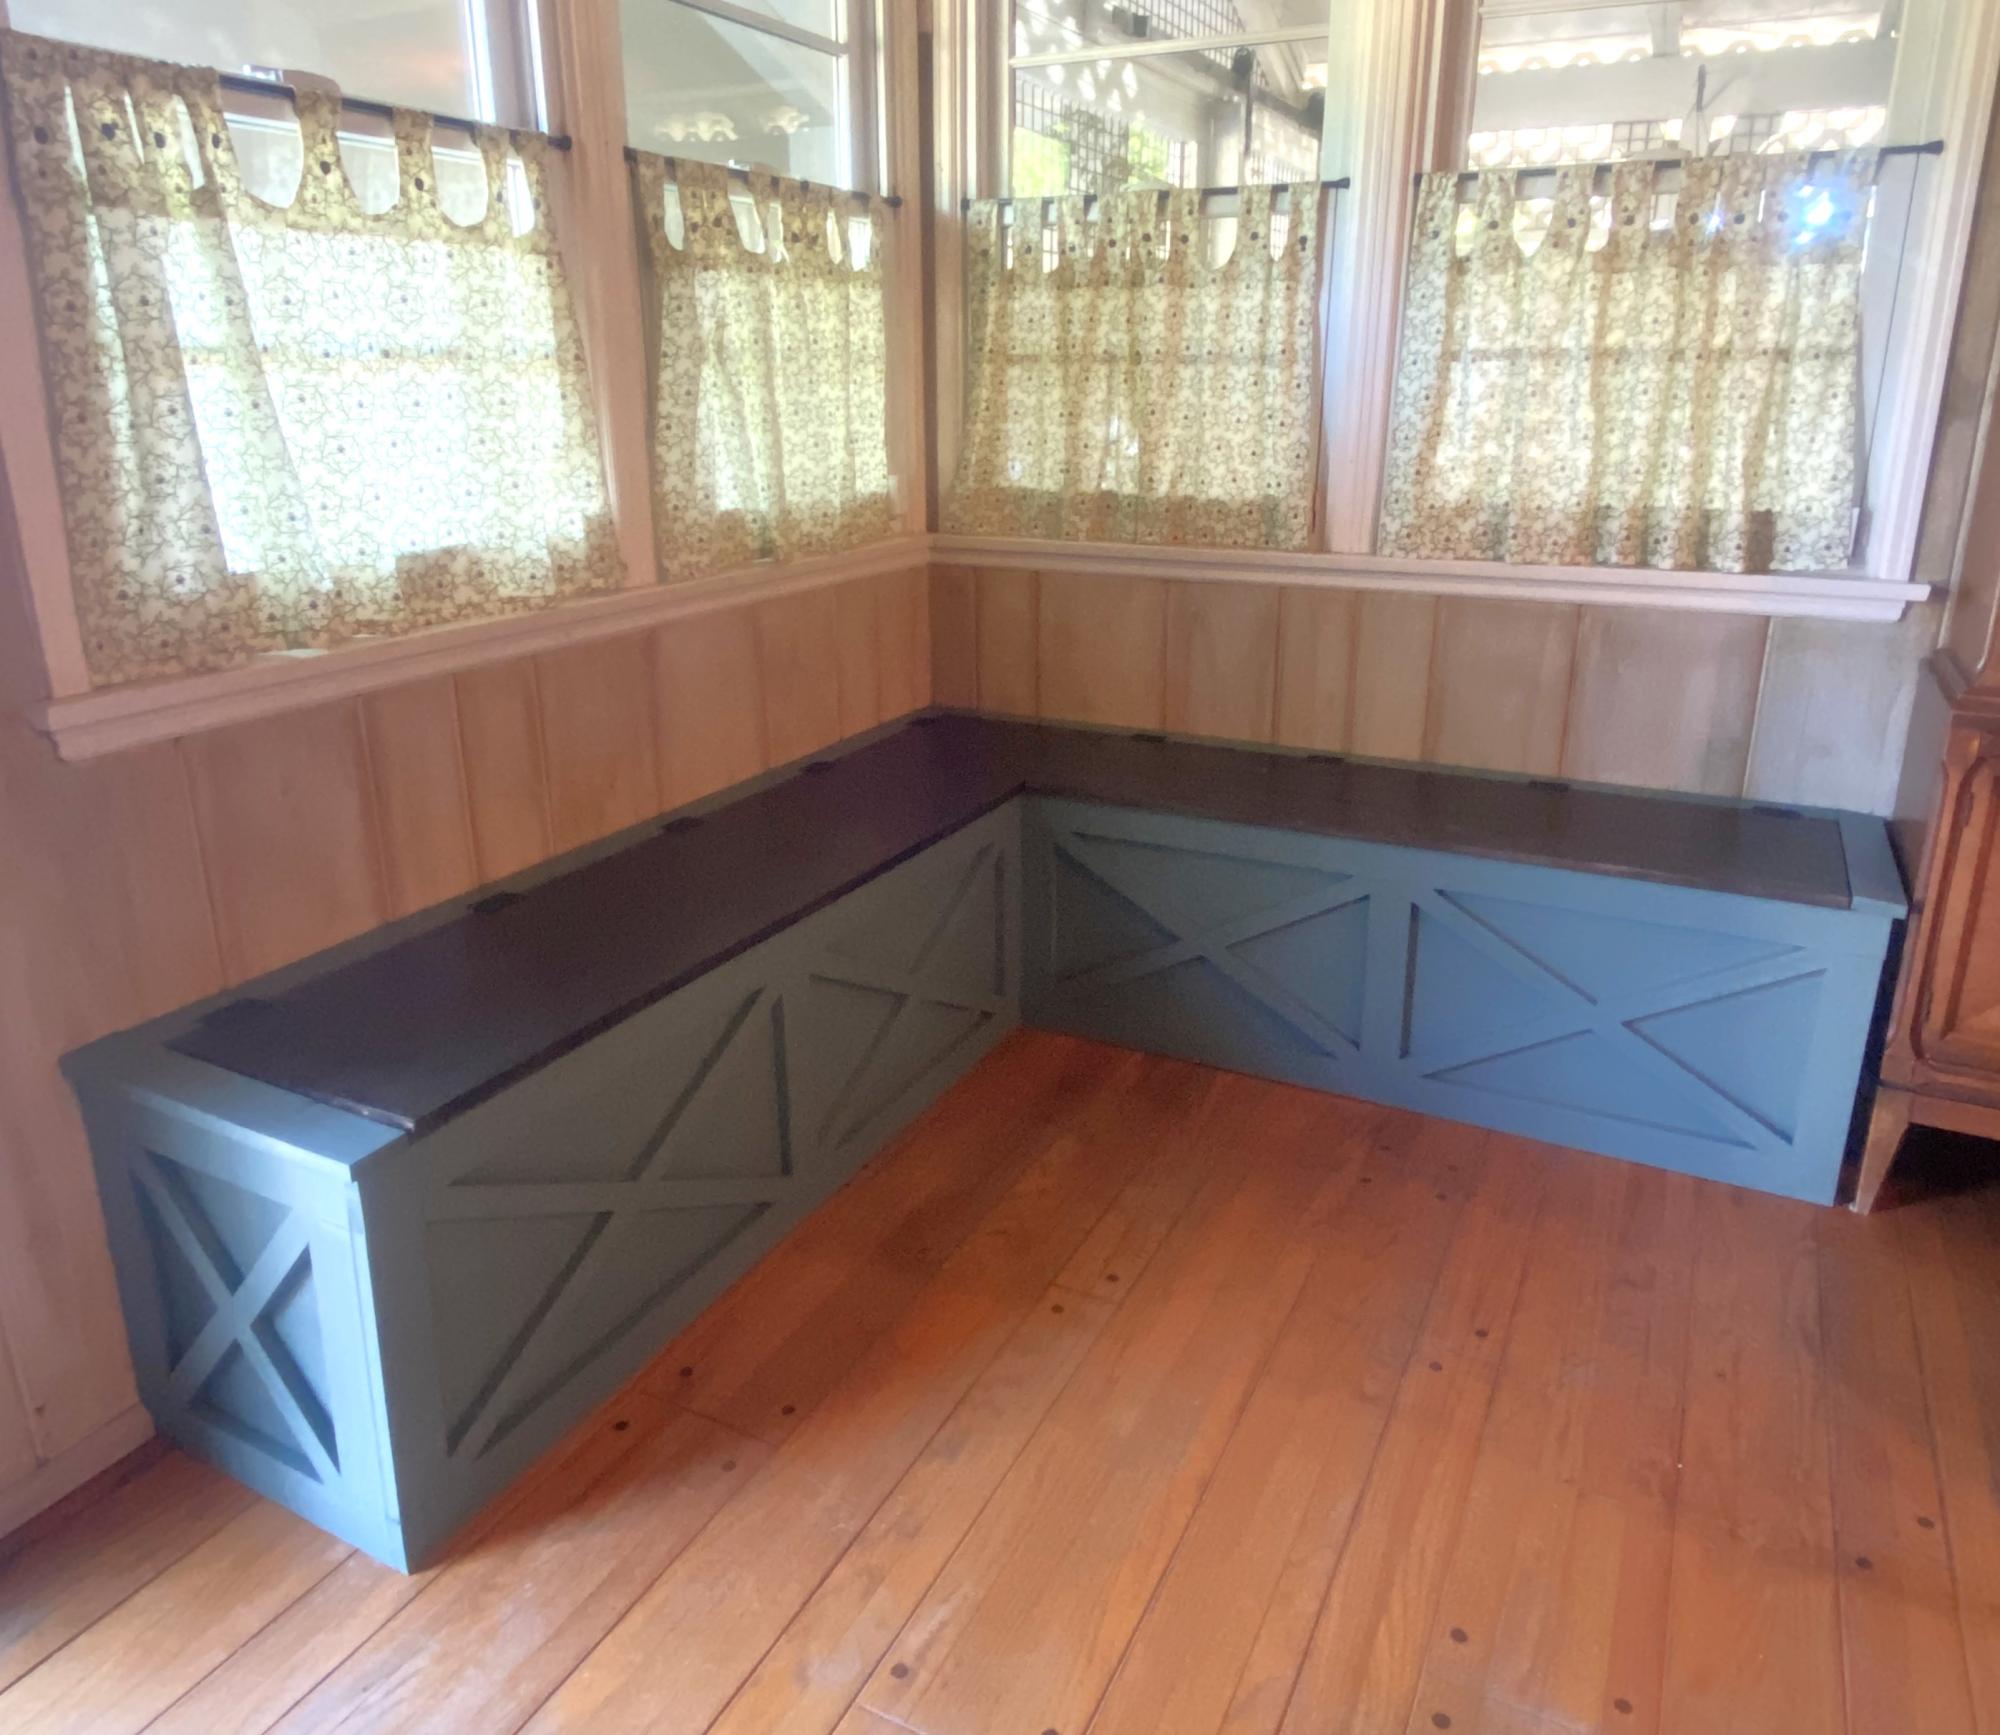
I needed some extra storage space and have always wanted a storage bench in this corner of my dining room. It took me a week to build from start to finish. I’ve never done any woodworking before, so this plan was good for me, as it was easy to follow with the color coding. The only thing that was “off plan” were the X’s on the face of the bench. I had some leftover 1x1 trim, from a handyman project a few years back, that I was happy to use up. It fit perfectly and I had just enough for all X’s. My biggest challenge with this project were the lids. They have a very minor bow, so one of the corners isn’t flush. But, it’s not enough to bother me or need to re-do the lid. All-in-all, I’m super happy with this banquette and may have caught the woodworking bug!
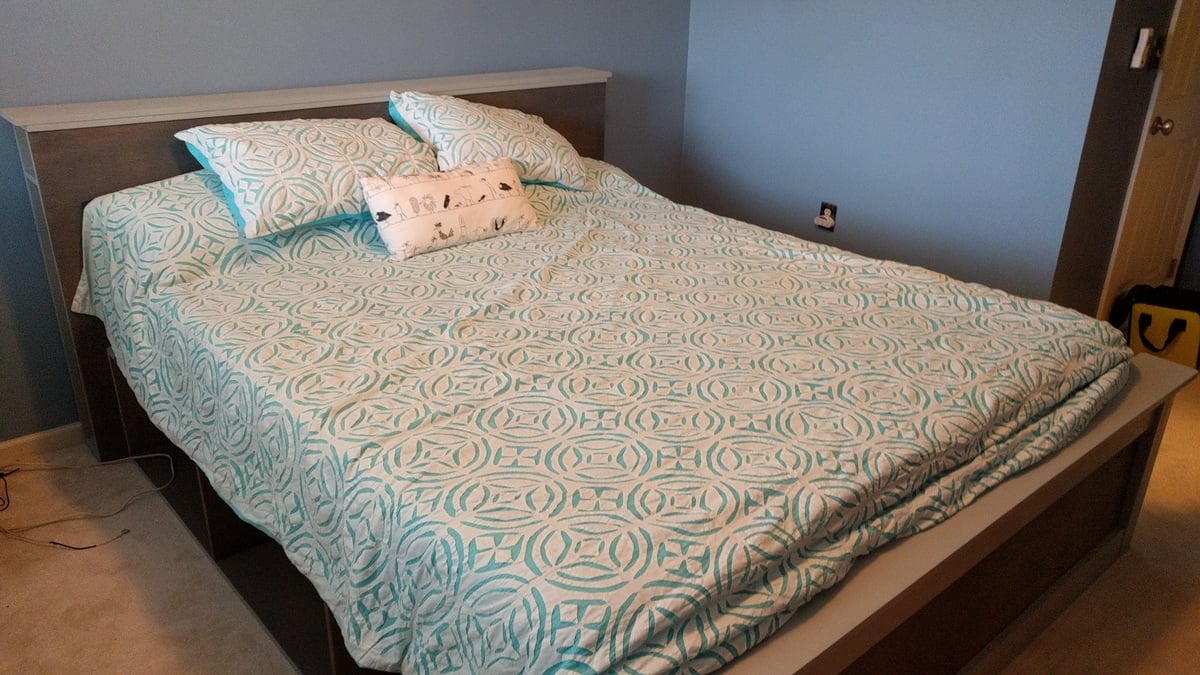
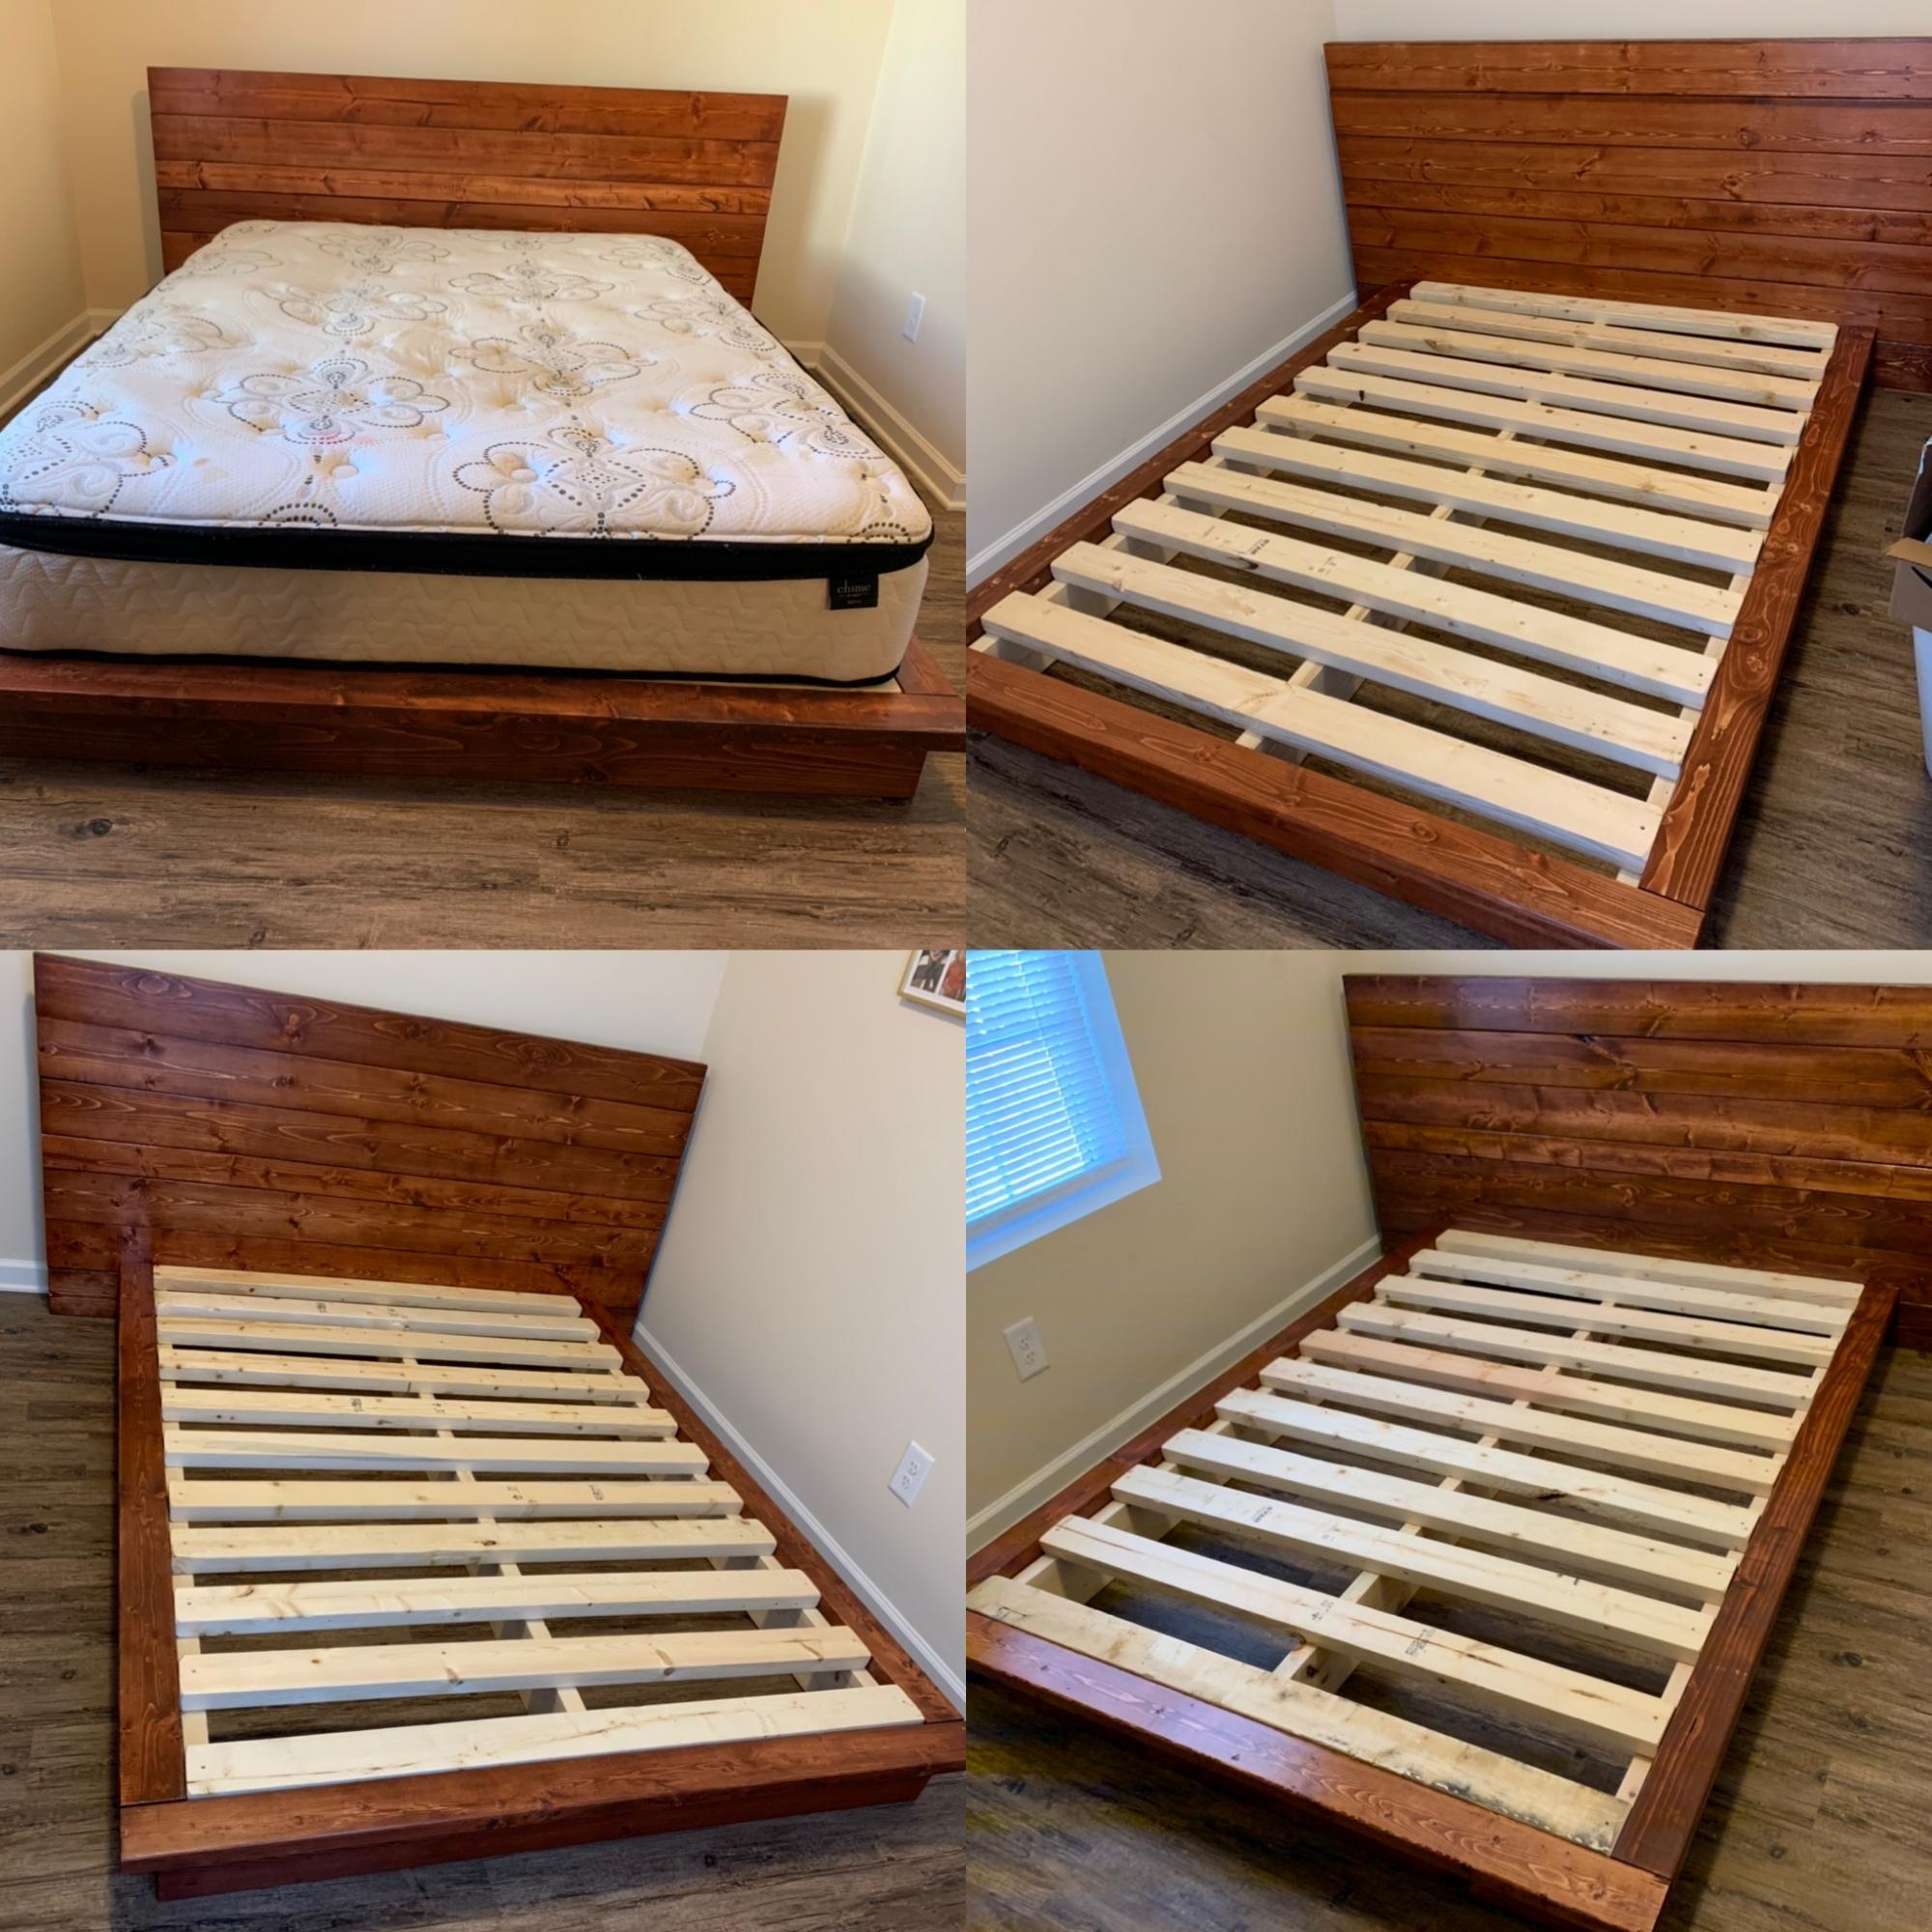
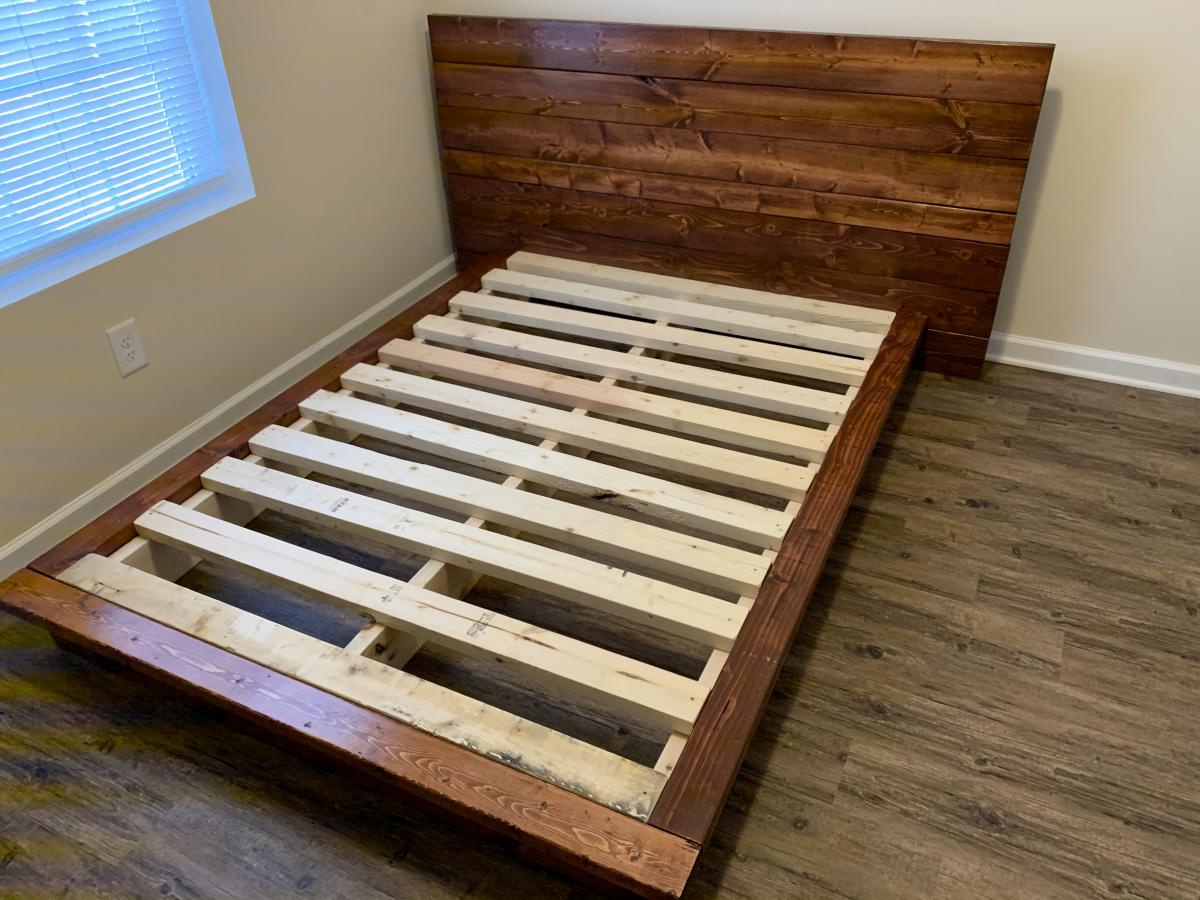
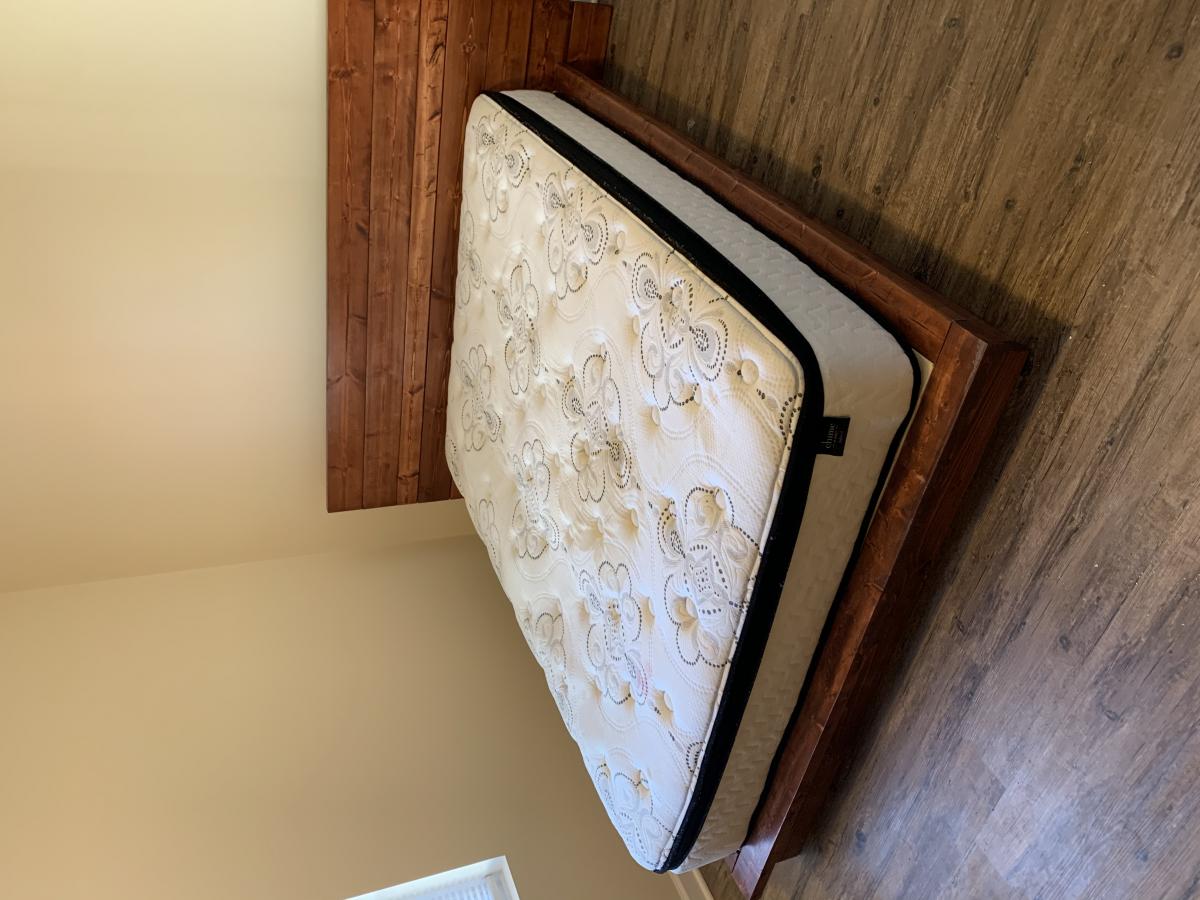
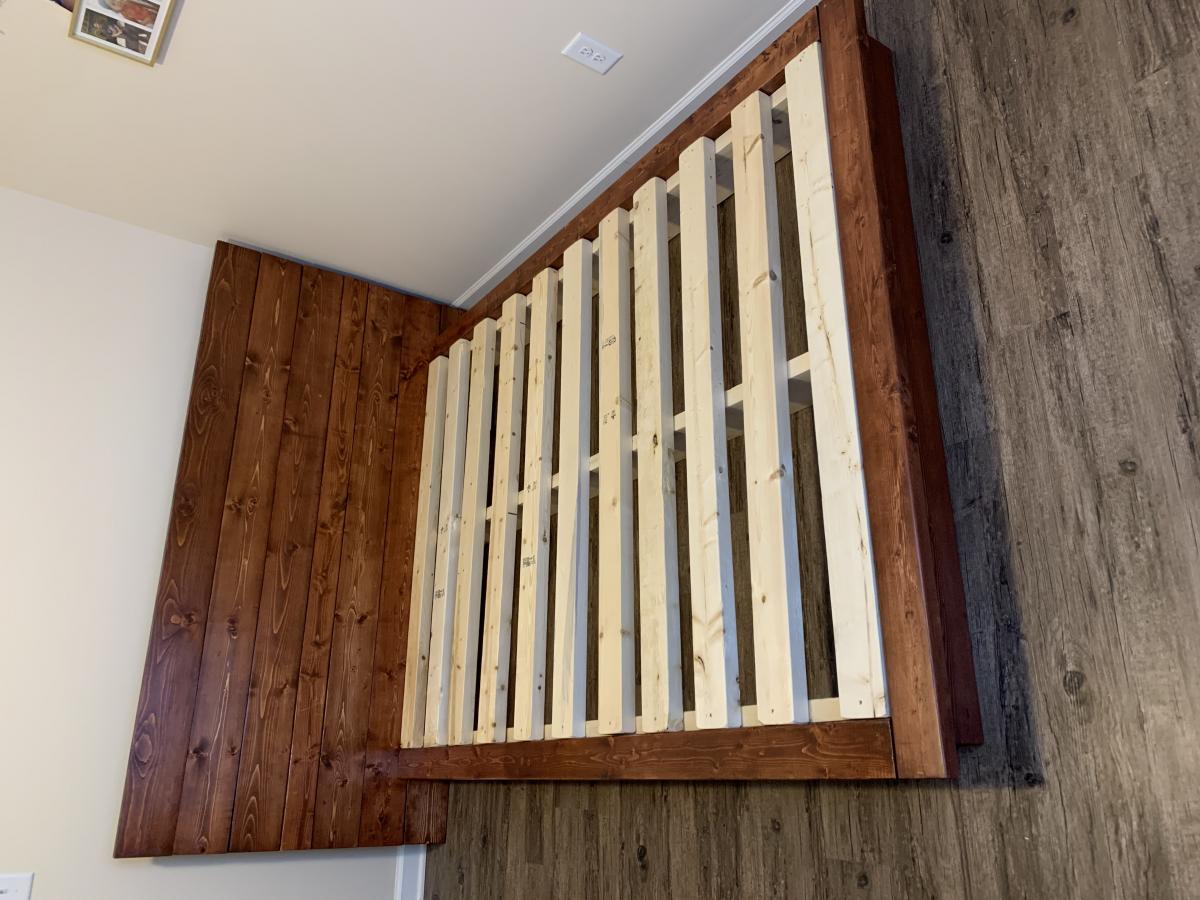
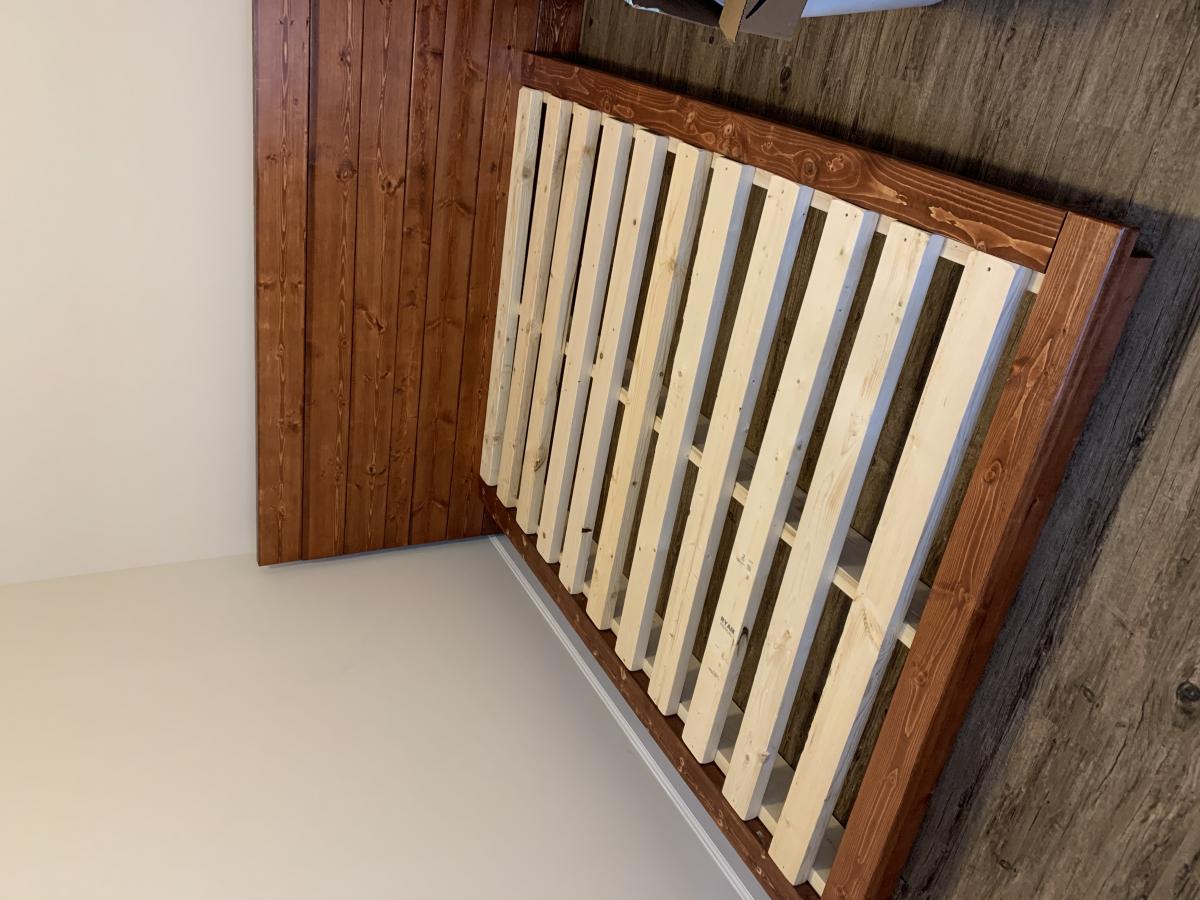
Modified the Farmhouse Storage Bed with Storage Drawers. Changed the design to california king and added booshelves to the headboard. Will eventually turn a shelf into a nightstand for water/light. I LOVE IT!! Thanks for the Design, Ana!
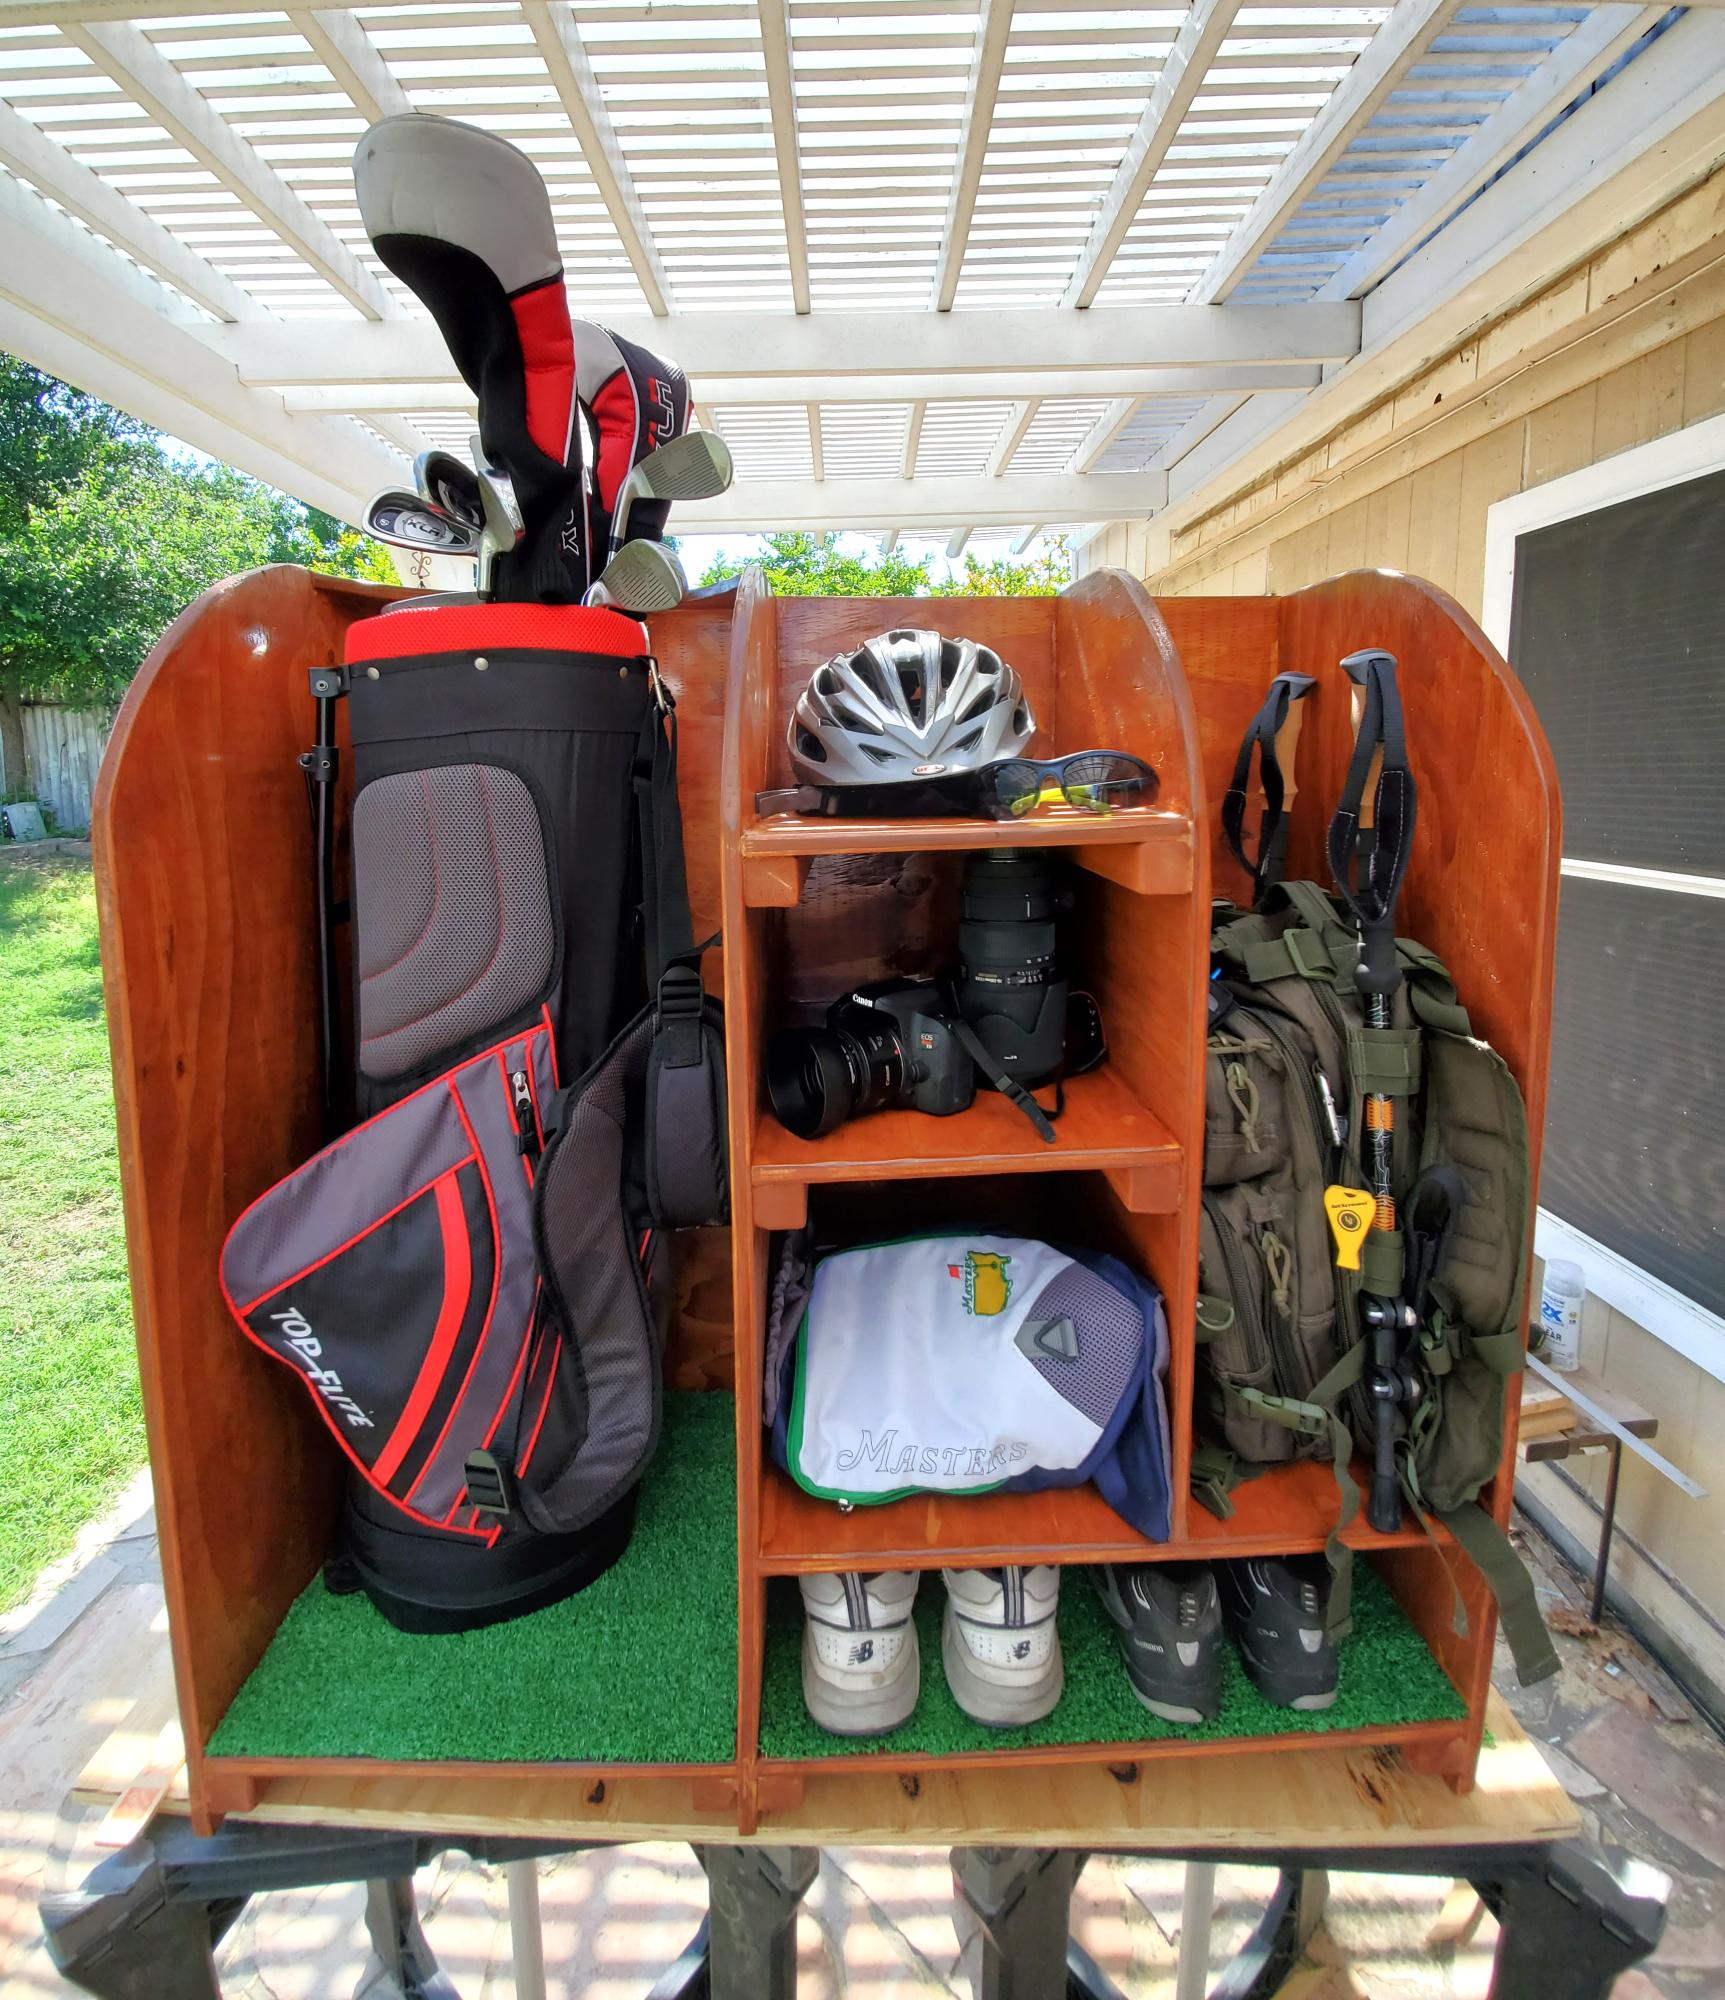
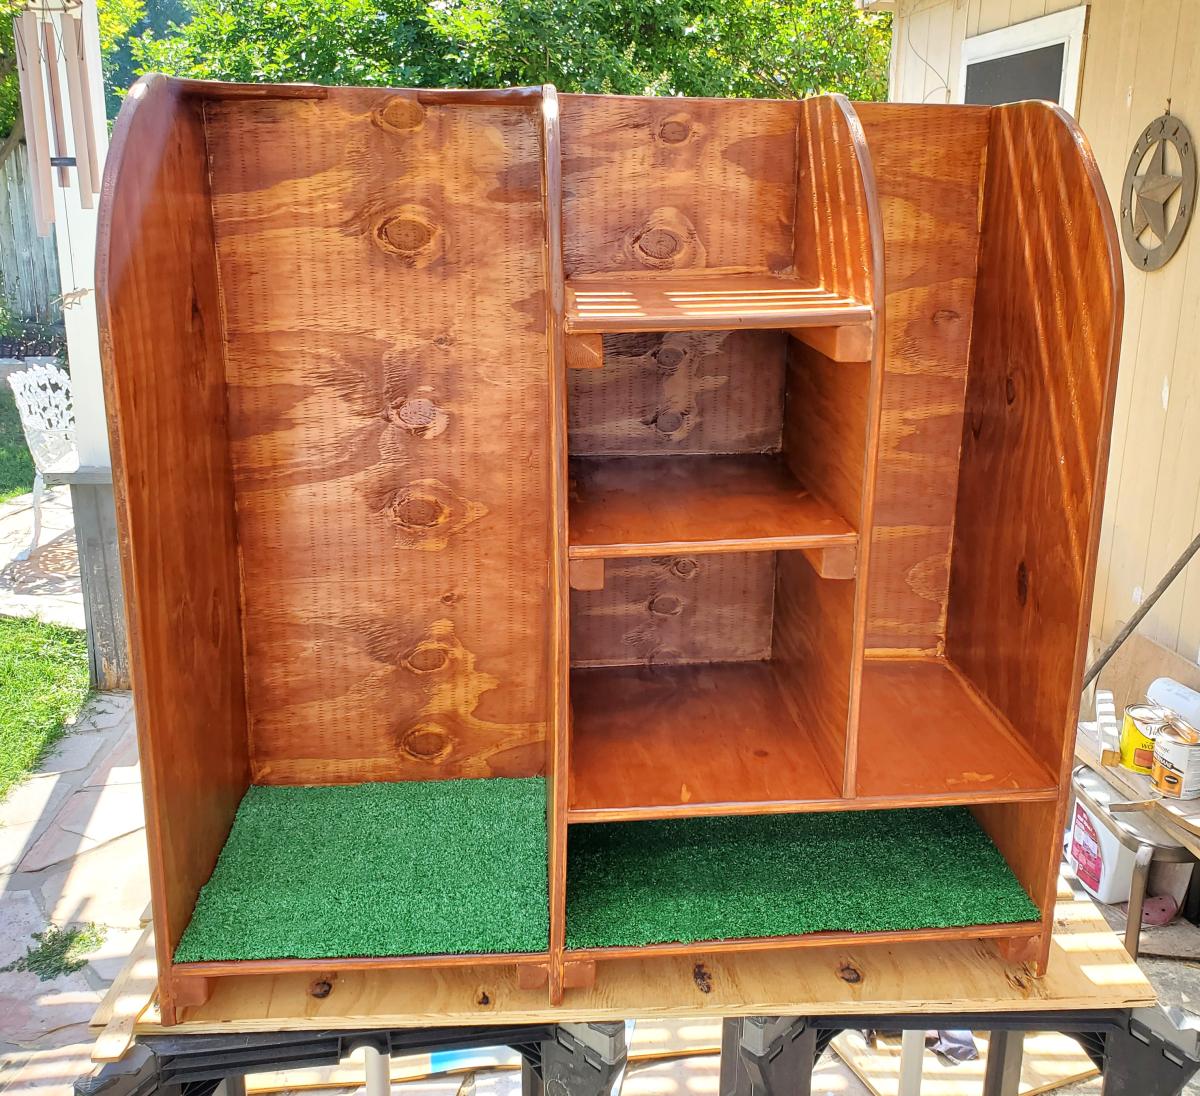
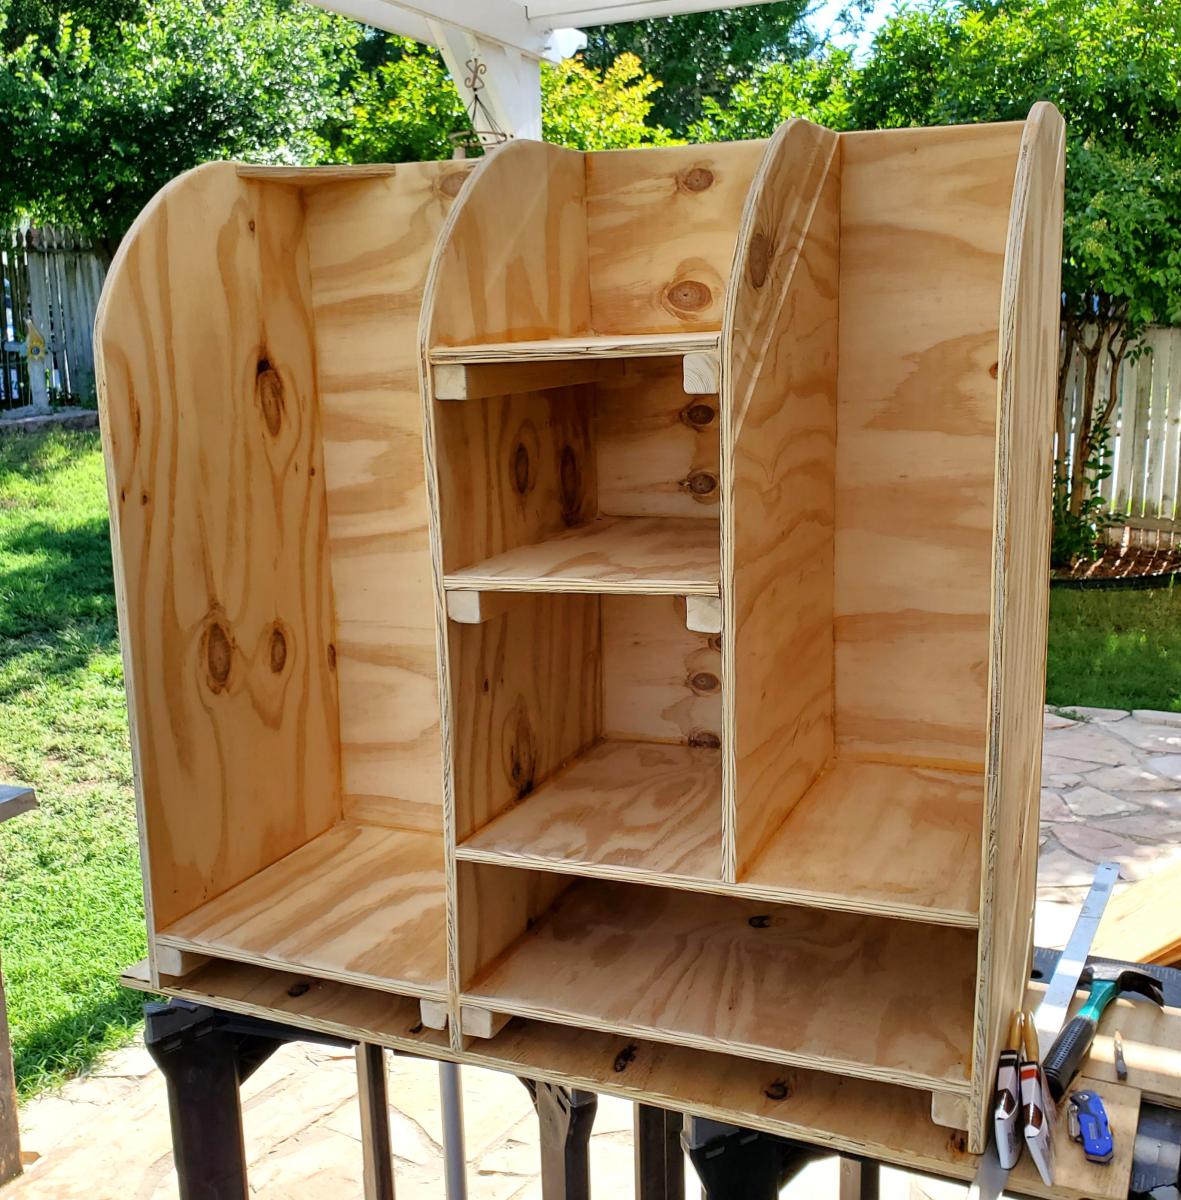
Golf bag stand
Can’t remember if found this plan here or not but get most my plans here. Fun and easy build.
My first project very simple plan to follow extremely proud of it


Comments
Ana White Admin
Fri, 05/05/2023 - 07:24
Nice Trash Bin!
So much better than a regular garbage can! Thanks for sharing your version, it looks fabulous.