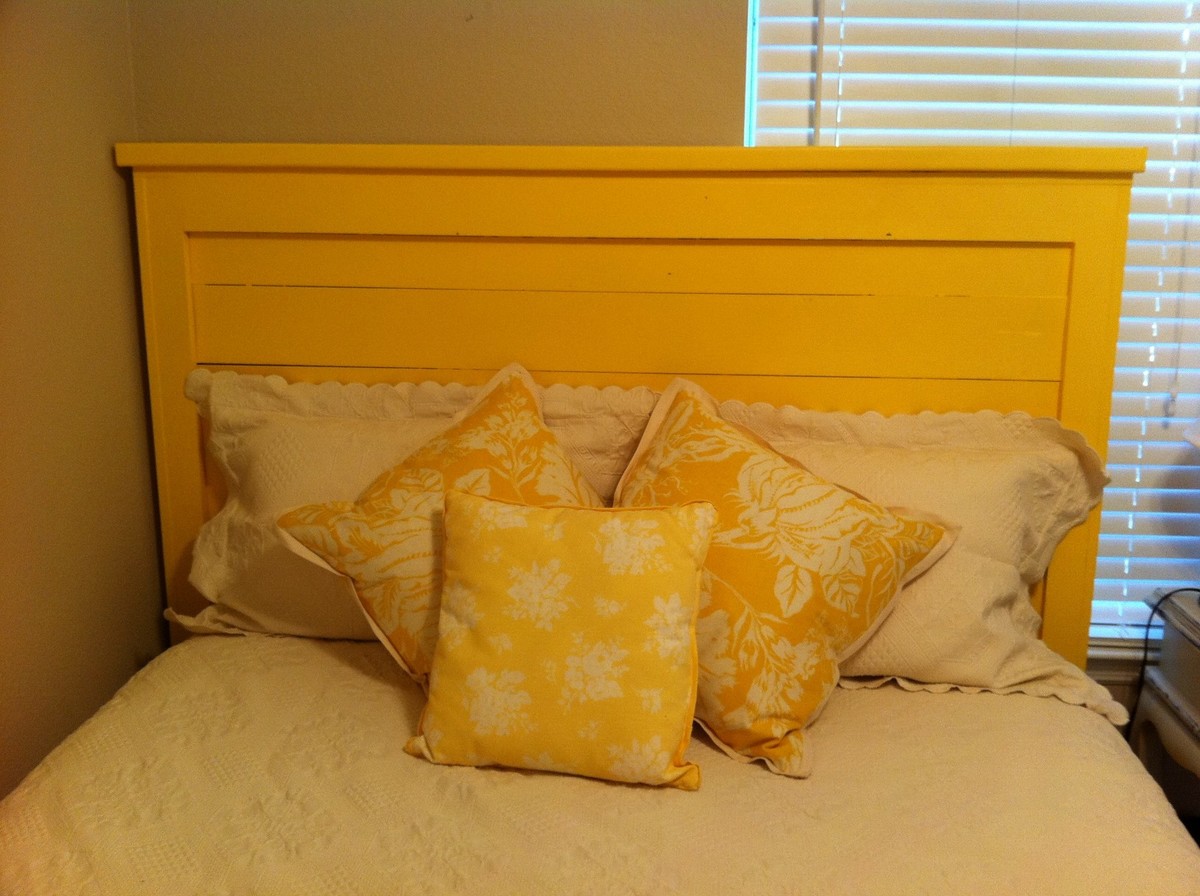
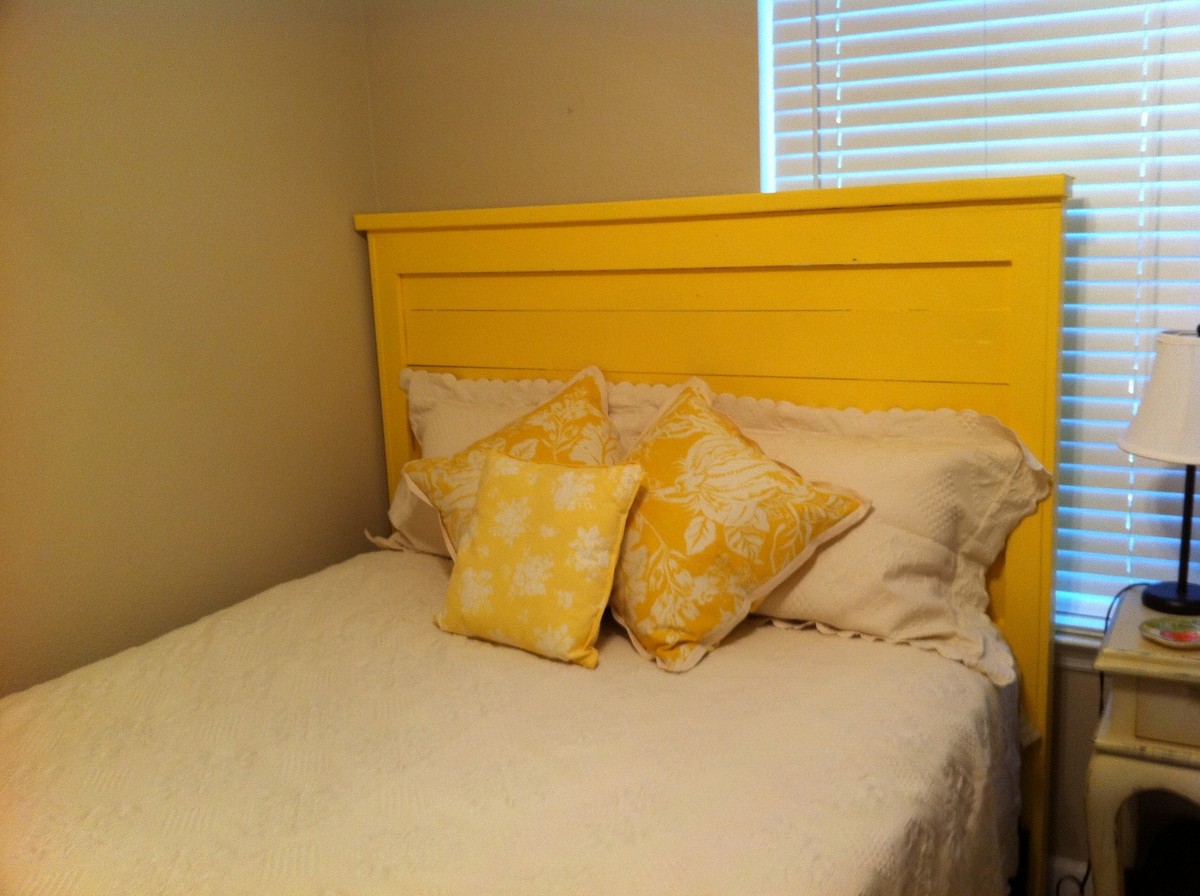
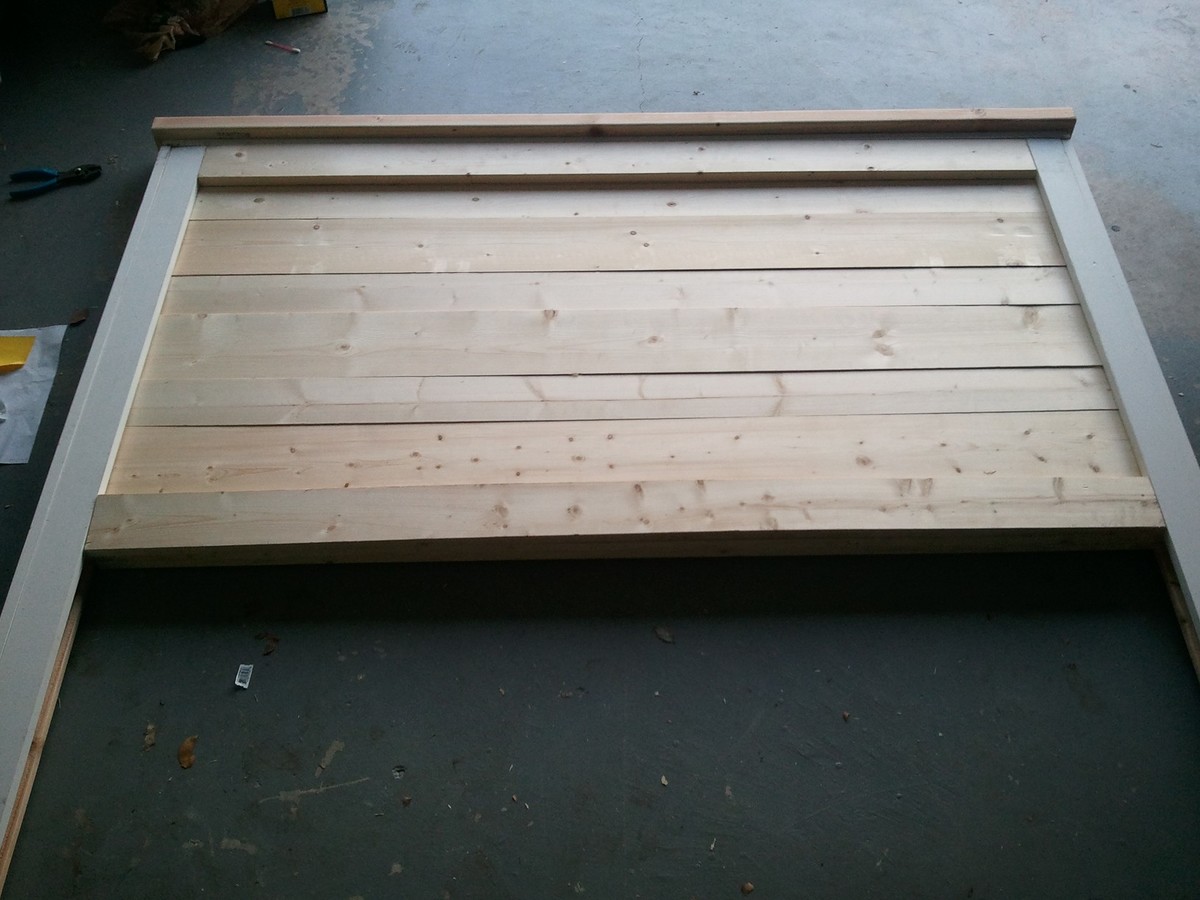
Mantel Headboard - Annie Sloan Chalk Paint and DIY Tufting

I love this headboard :)
We finally completed the tufting portion of the mantel headboard tonight and it looks great! Anna's design was easy to follow and the tufting part was easier than I thought...I followed http://www.cape27blog.com/2013/03/tufted-headboard-tutorial/ for the tufting portion.
Can't wait for the next project!
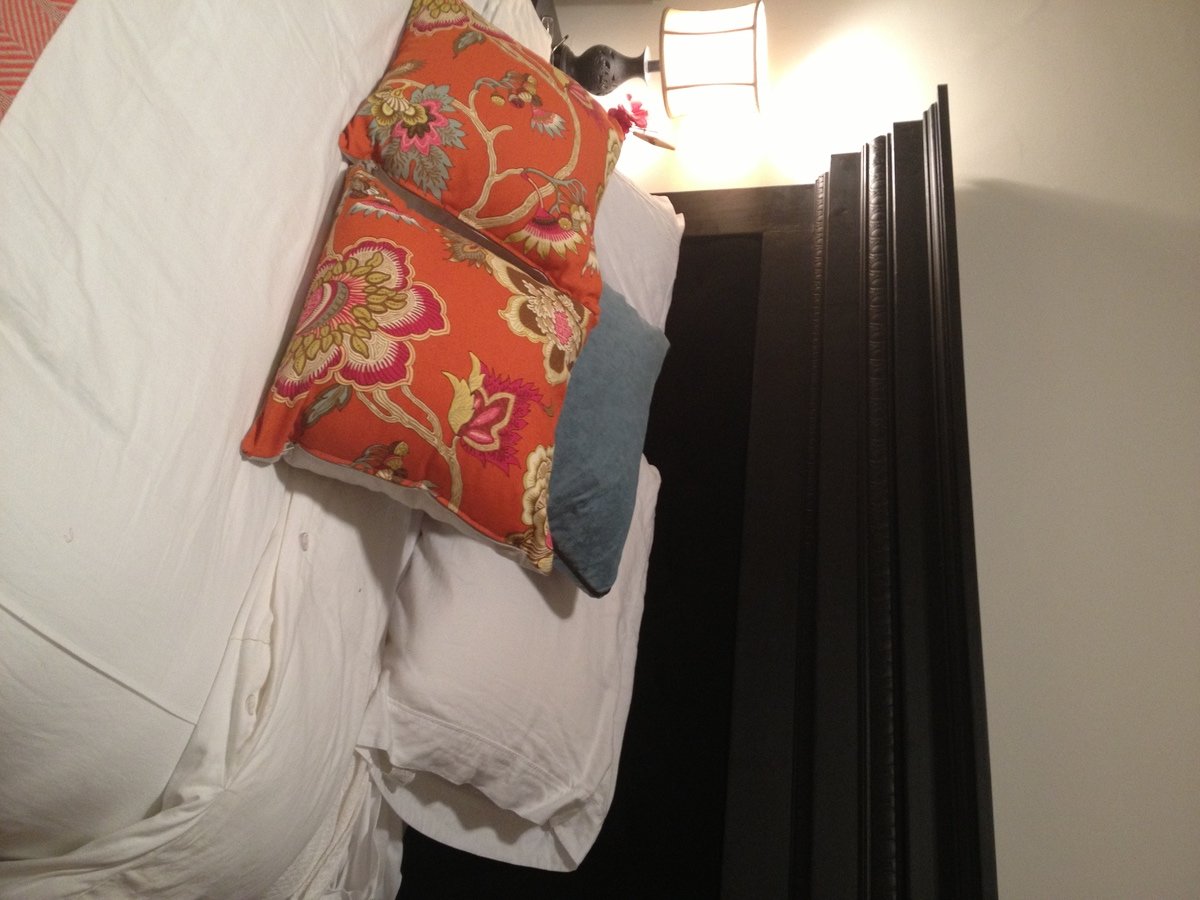
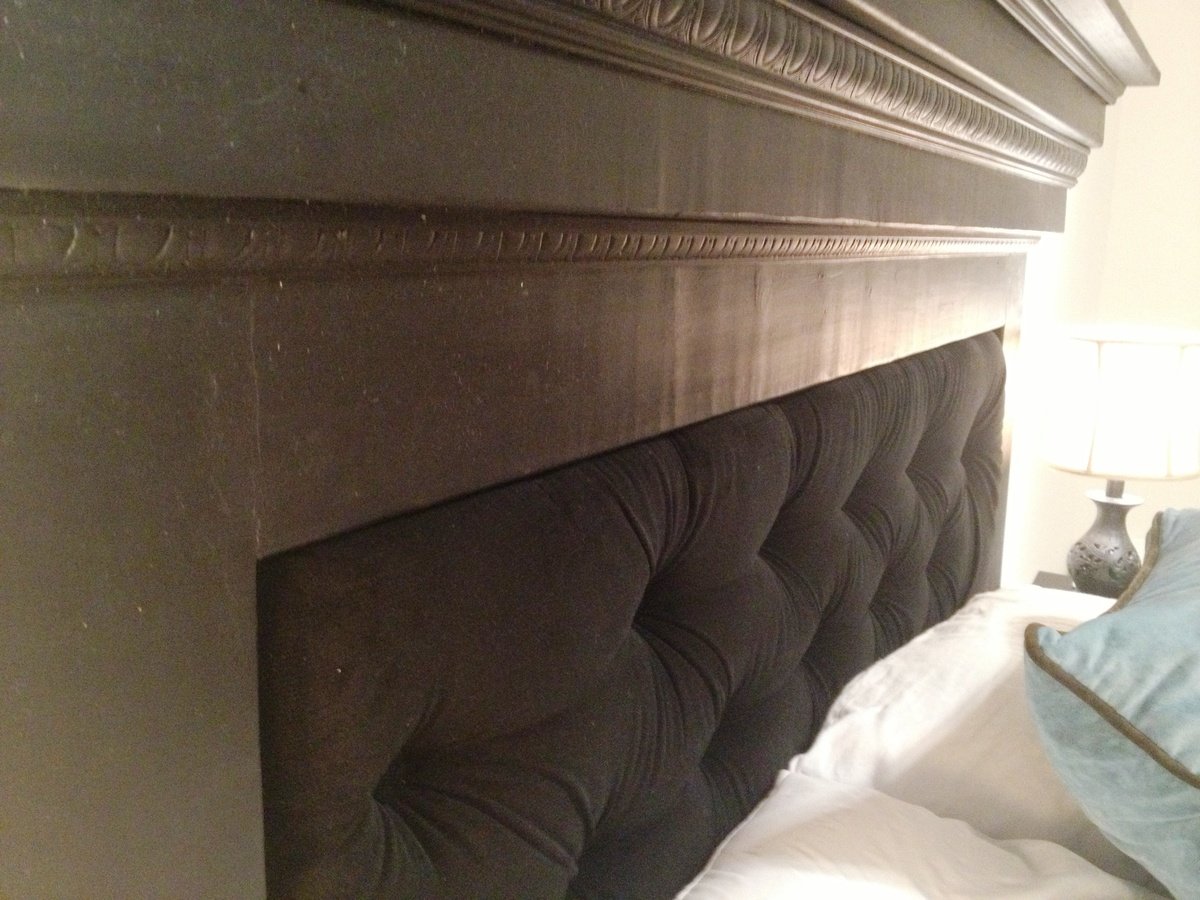
Finish Used
Annie Sloan Chalk Paint with Annie Sloan Dark Wax Finish
Recommended Skill Level
Beginner


Comments
DMax2010
Fri, 08/02/2013 - 07:02
Beautiful!
I love this headboard! Great job!