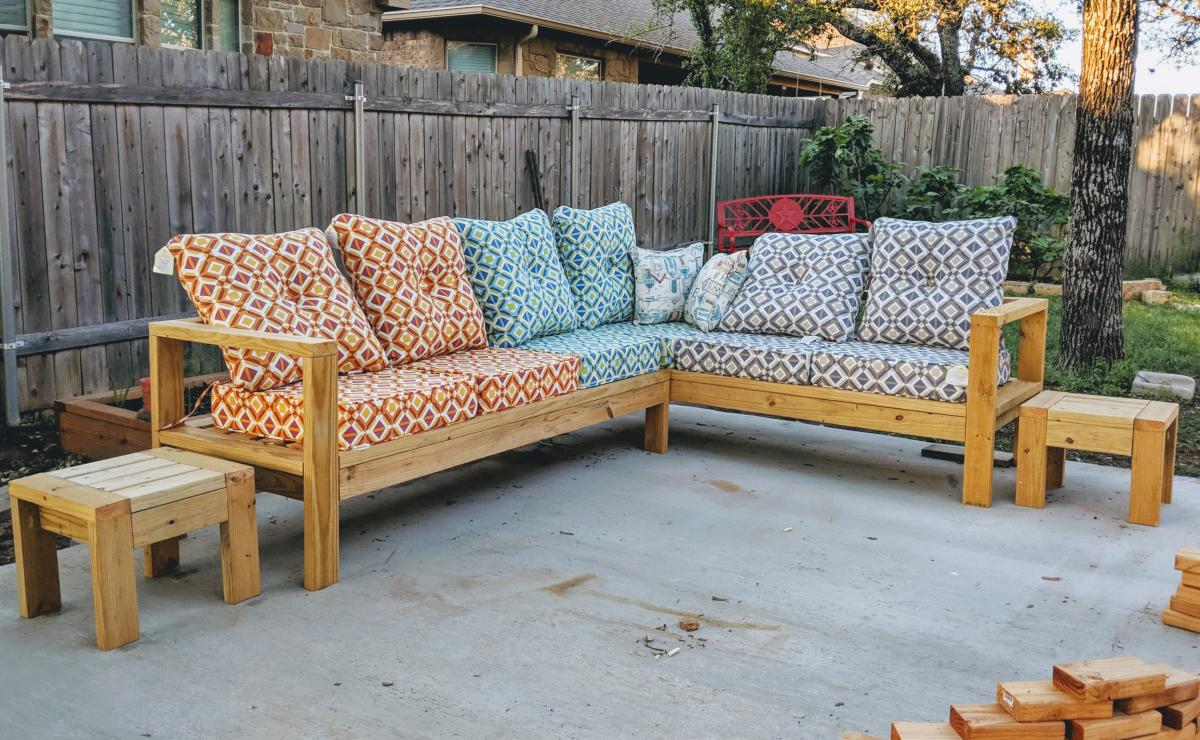
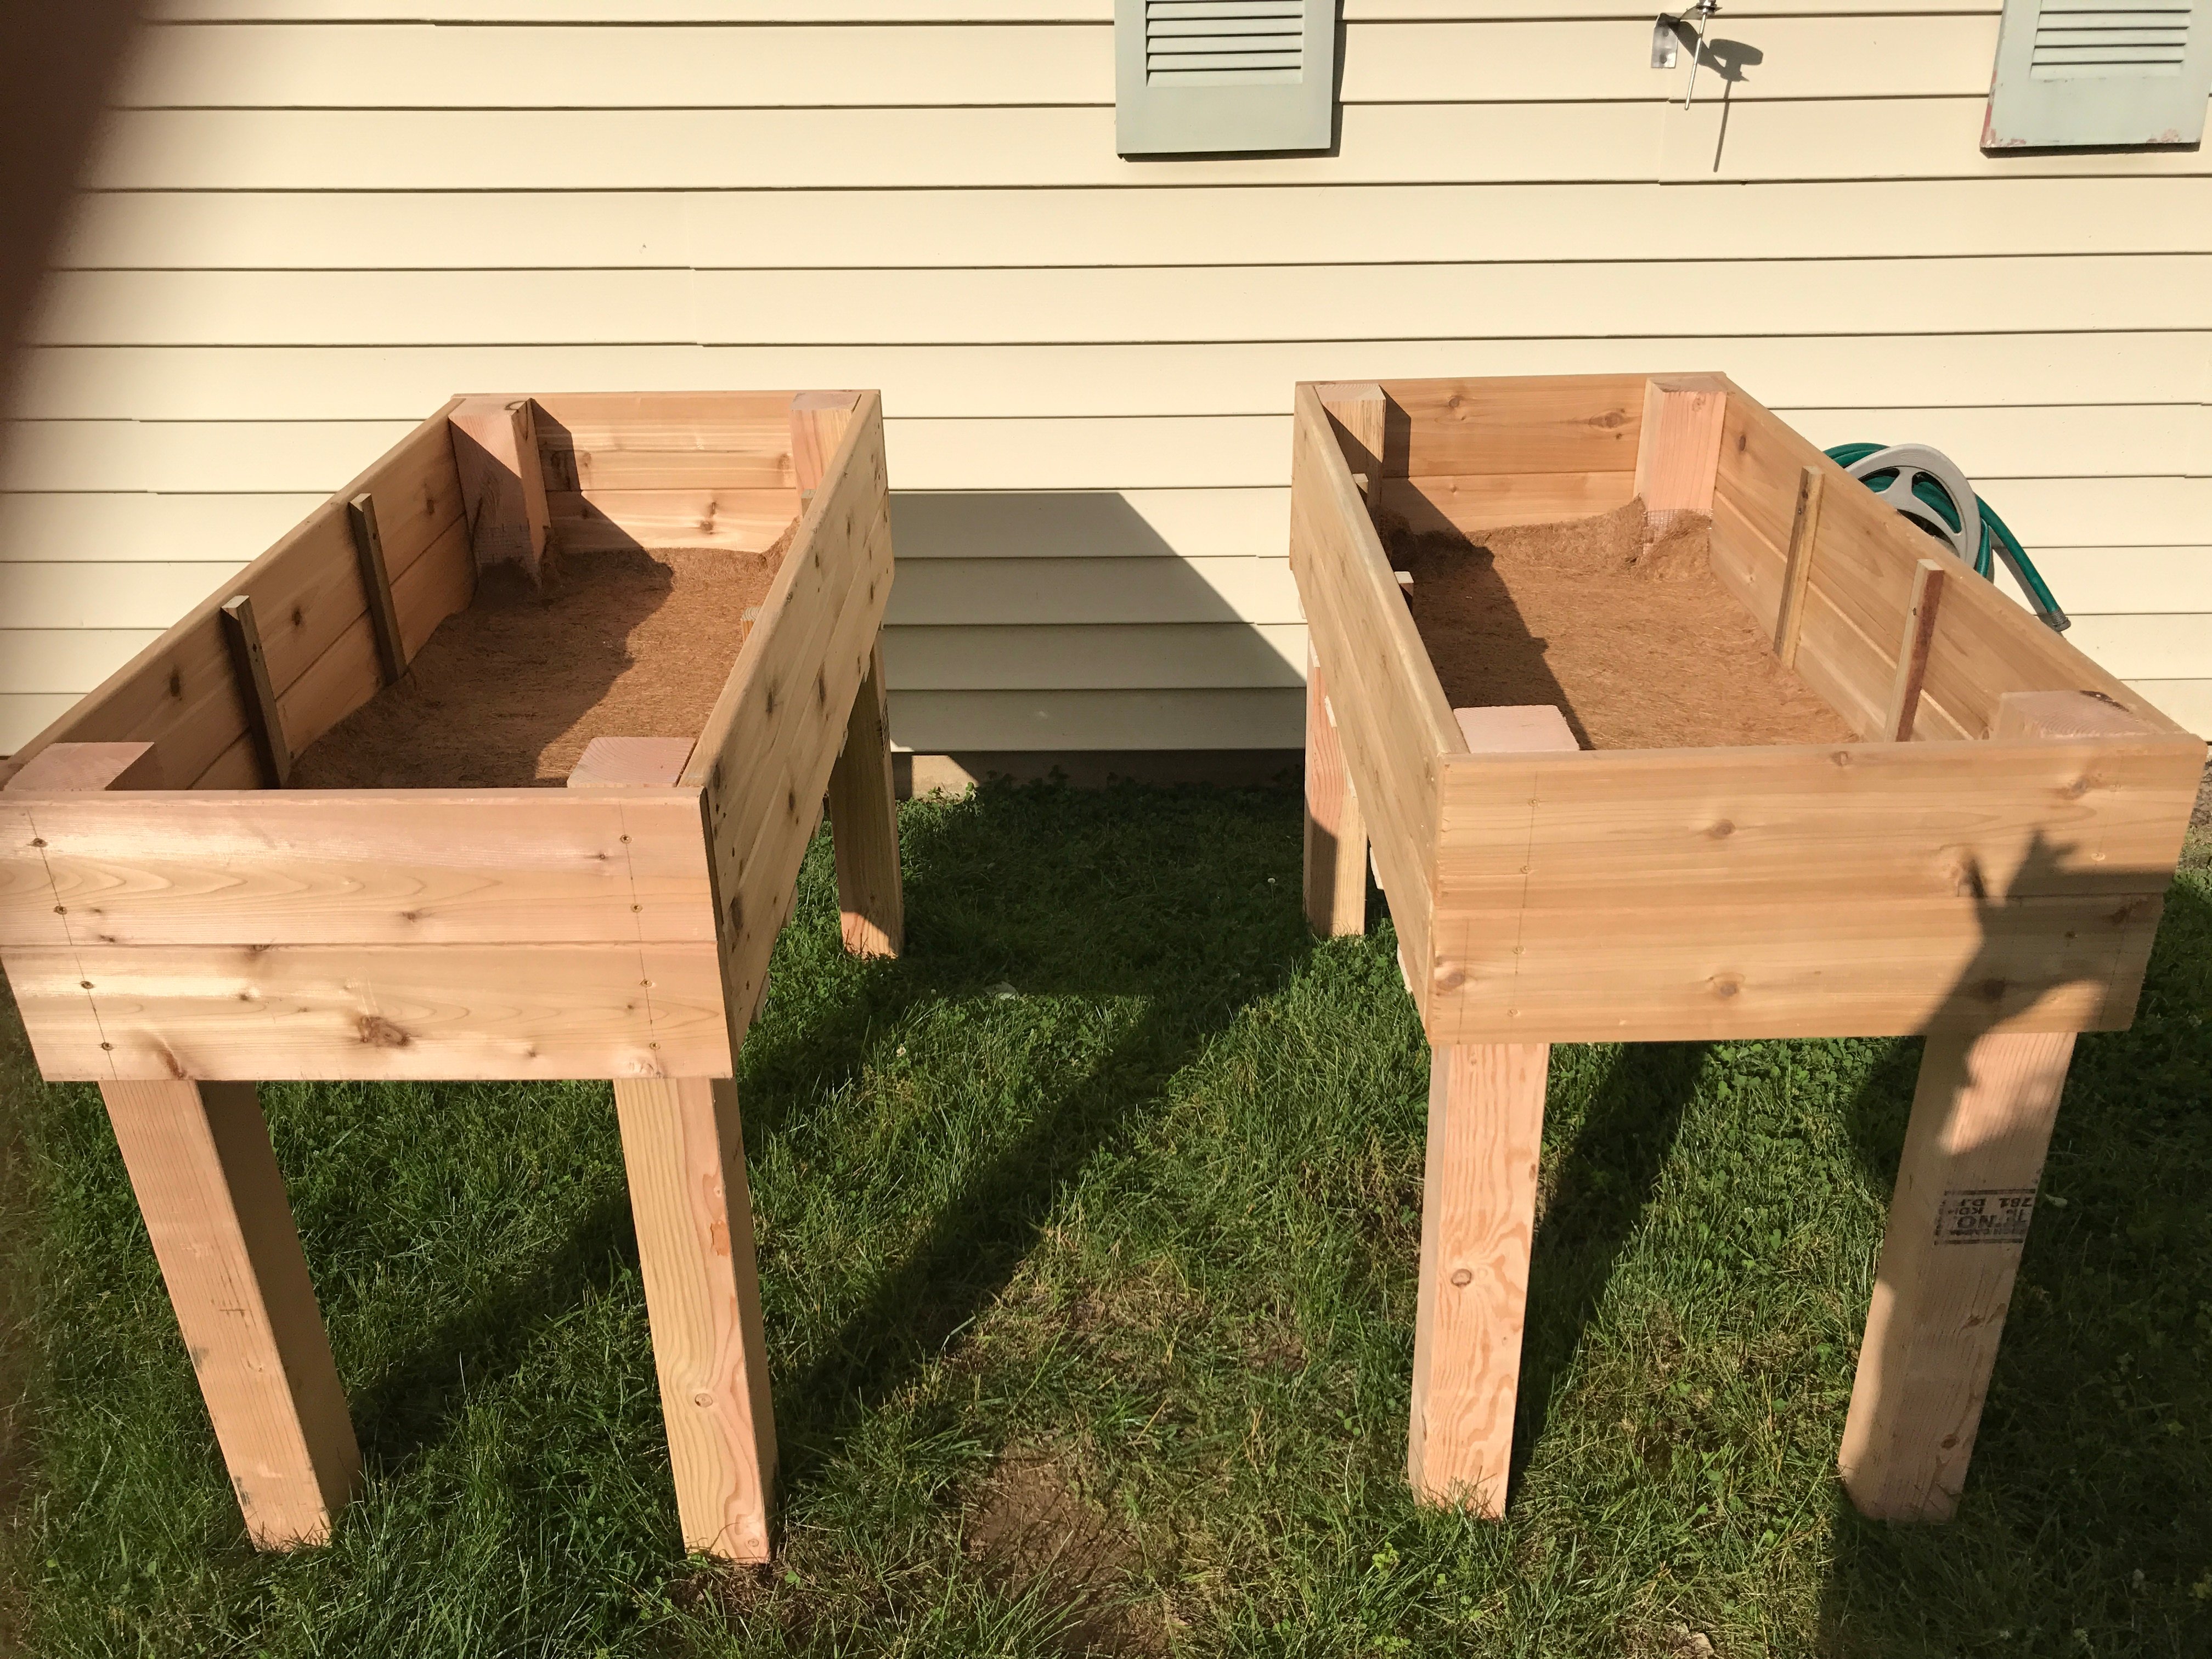
2x4 sectional + 2x4 end tables
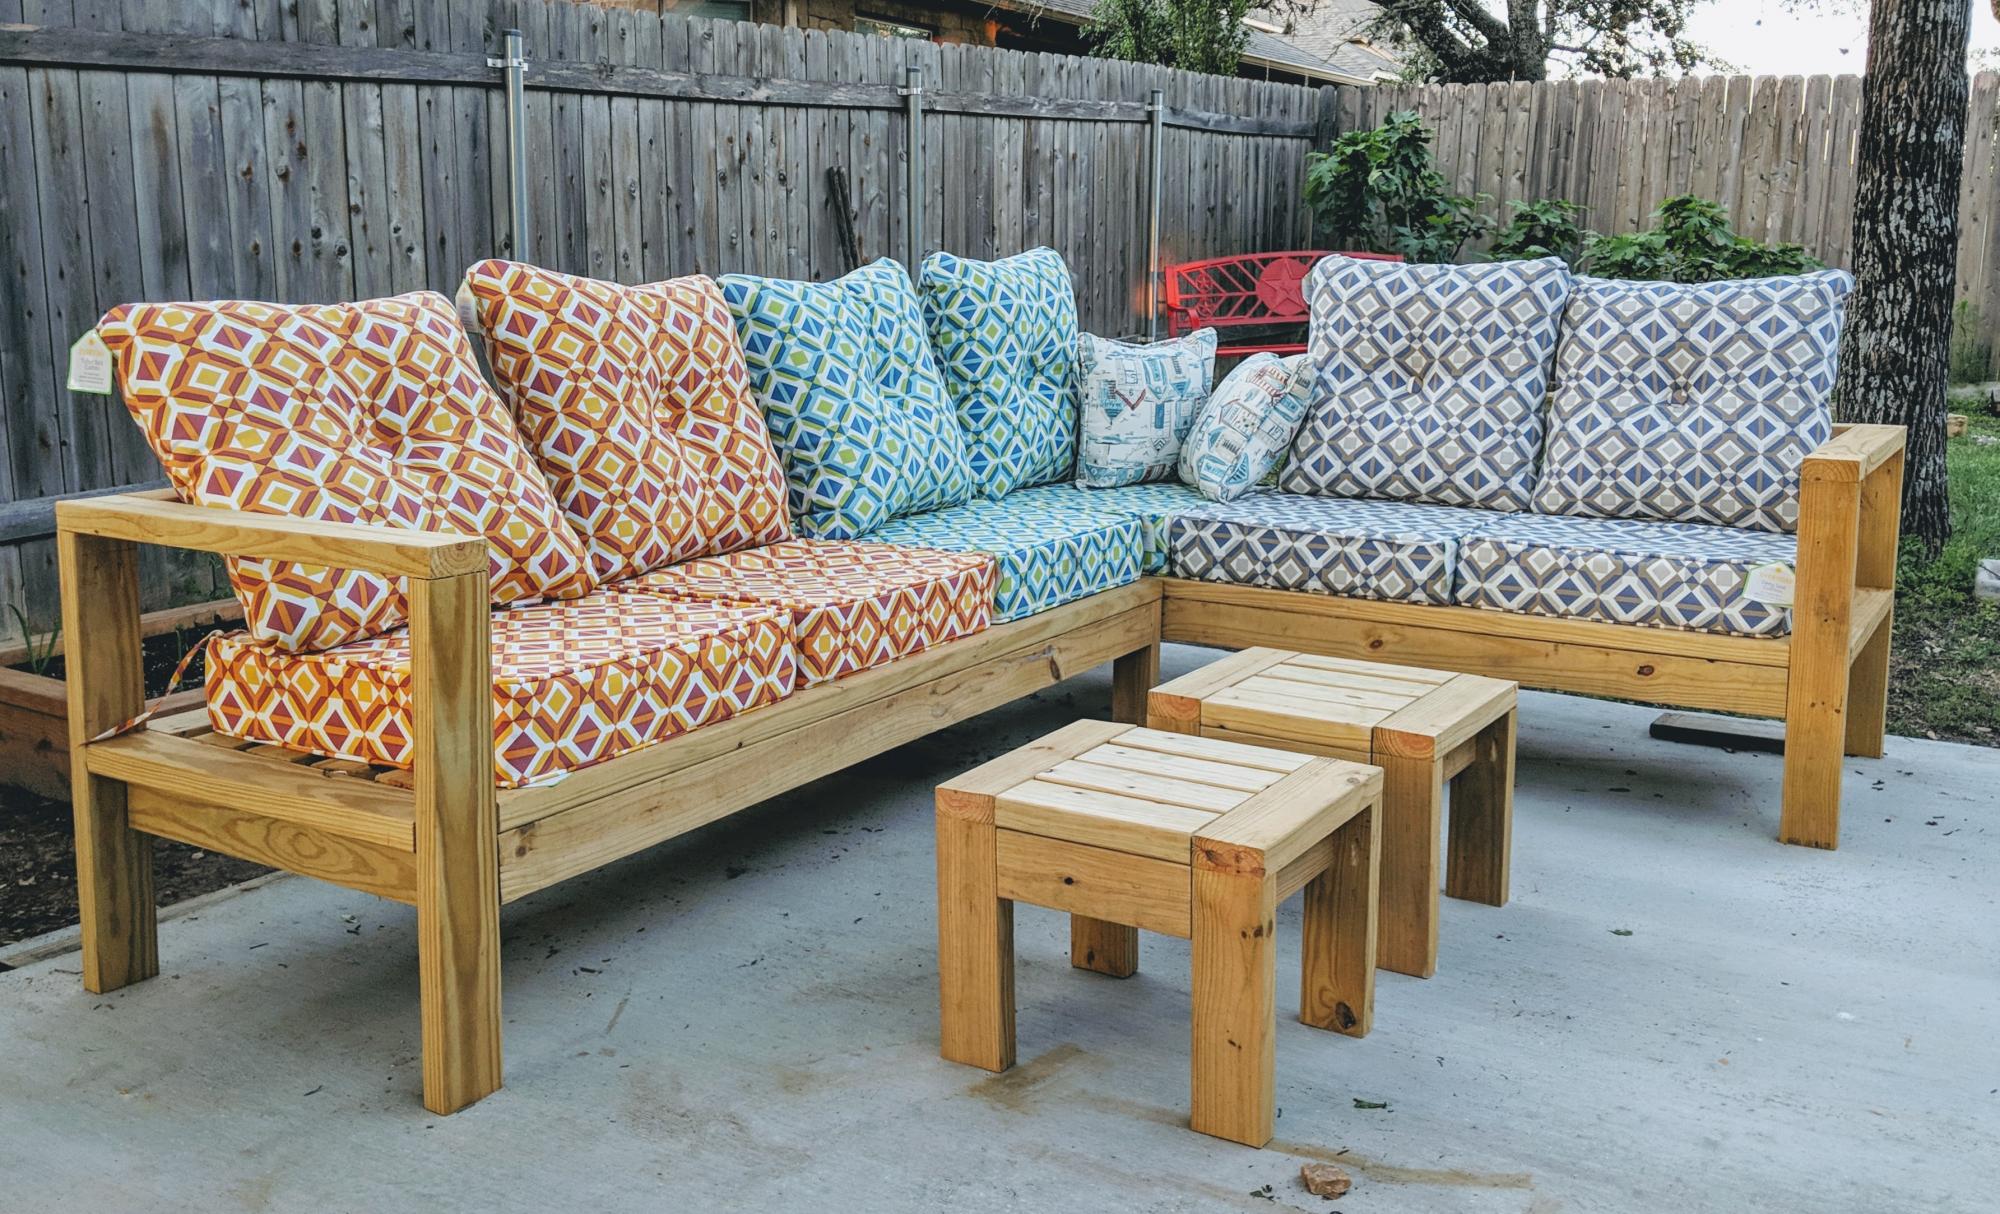
I reduced the size of the 2x4 coffee table to make 2 end tables. They can be used as additional seating when needed.
Built from Plan(s)
I reduced the size of the 2x4 coffee table to make 2 end tables. They can be used as additional seating when needed.
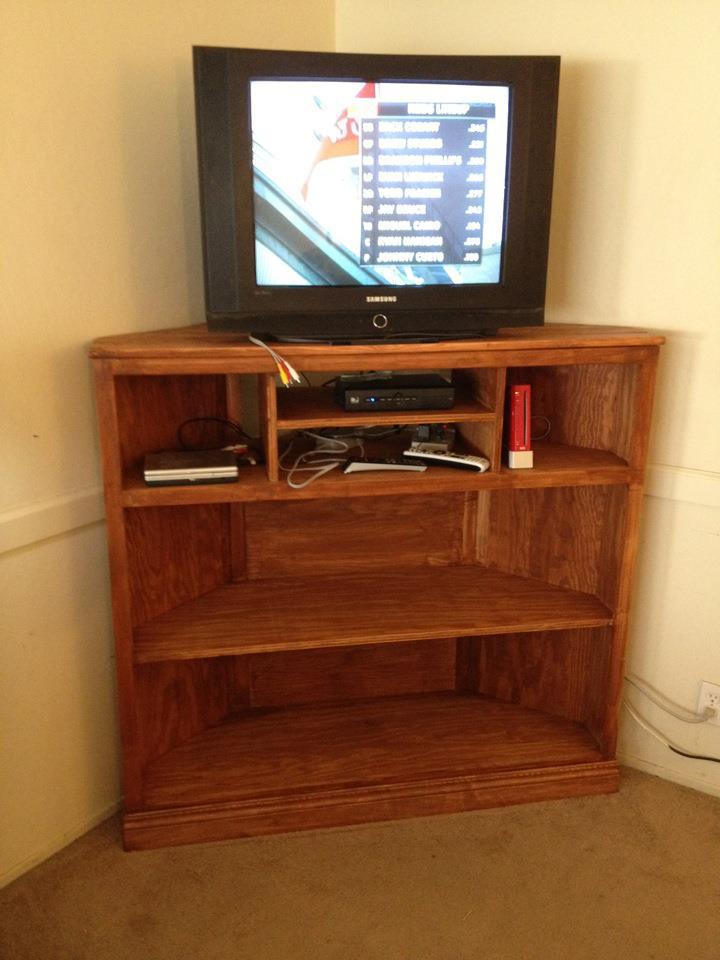
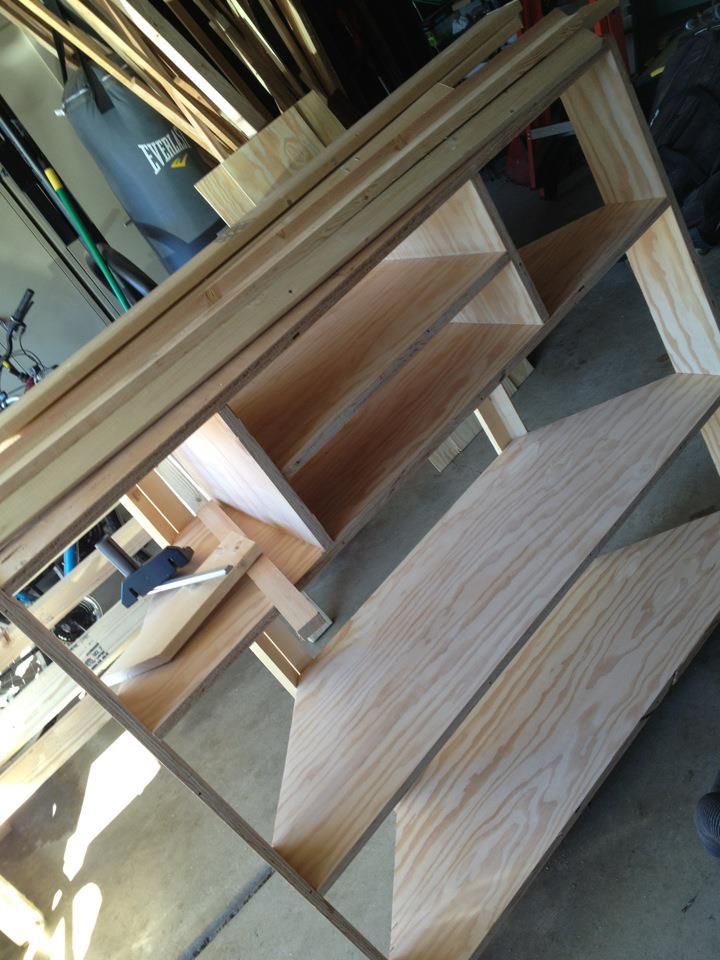
I absolutely fell in love with the Tall Corner Media Console the moment it was posted. We had a decent corner stand for our TV, but it was low and was hard to watch when kids and adults alike were constantly saying "I can't SEE!" or "You're in my WAY!". I've learned that explaining "you make a better door than a window" over an over to a 7yo and a 4yo only takes longer.
Two dilemmas faced us:
1 - Which comes first, the chicken or the egg? DH insisted that we needed a big screen tv before building the console. I insisted that we needed the console first, so that we would have a place for the tv. Since it was determined the that console was cheaper than a tv, I won :)
2- What to color it? Paint? Stain? I was the one building, so DH said he didn't care, but that he liked the idea of staining. Having never stained before I was a bit intimidated - paint was my safety net. DH got this one, but only after I made him choose the stain.
I have the doors built and they are in the garage. With other things in the living room we wouldn't be able to open them all the way anyway. That and my final build weekend topped out at 105+ deg - and I was DONE being outside :) All in all, i like the open look of it, although I reserve the right to install those doors if need be.

Thu, 08/30/2012 - 18:18
You did a fabulous job and I can definitely see it working without the doors too. The nice thing about stain is that can easily be covered with paint, if you change your mind down the road.

This is my first project and I am so happy with it! Thanks for the plans!
You can see my step by step process here:
http://ordinaryhappilyeverafter.com/blog/category/table/
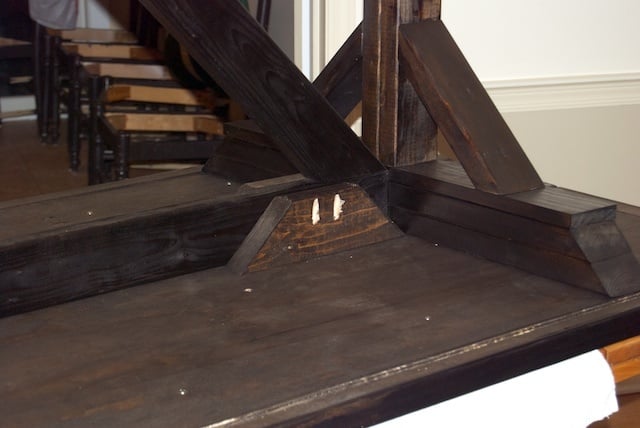
I'm especially happy with how I was able to attach the top to the bottom without drilling through the top. I describe that here:
http://ordinaryhappilyeverafter.com/blog/2012/08/my-table-is-done/
Thanks for the inspiration!
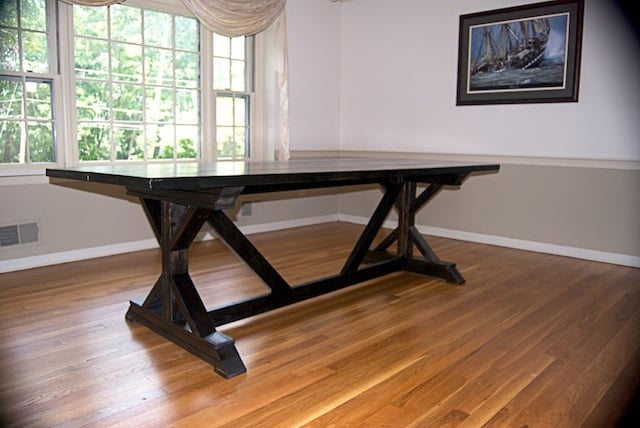

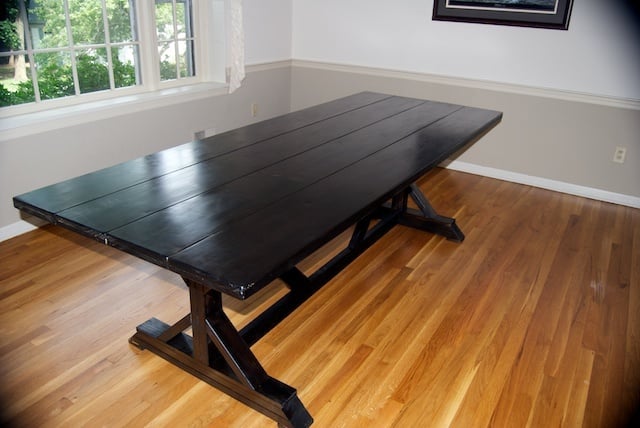
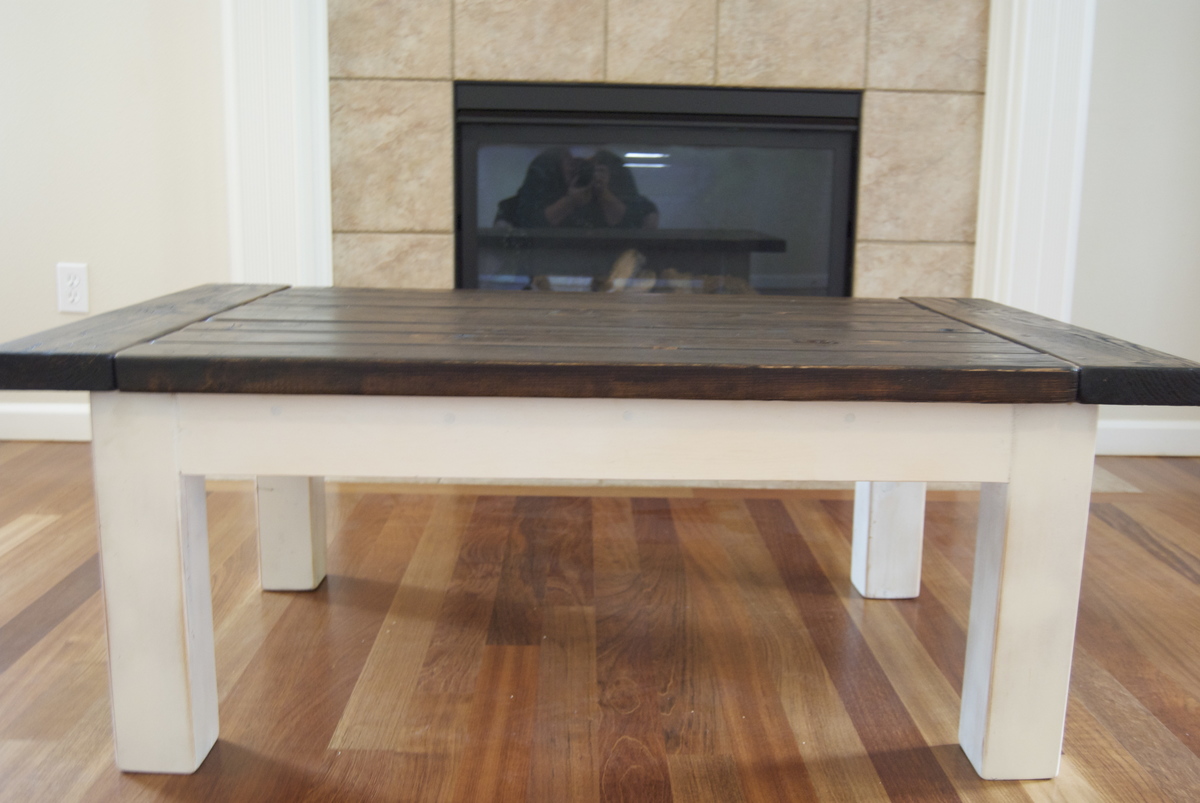
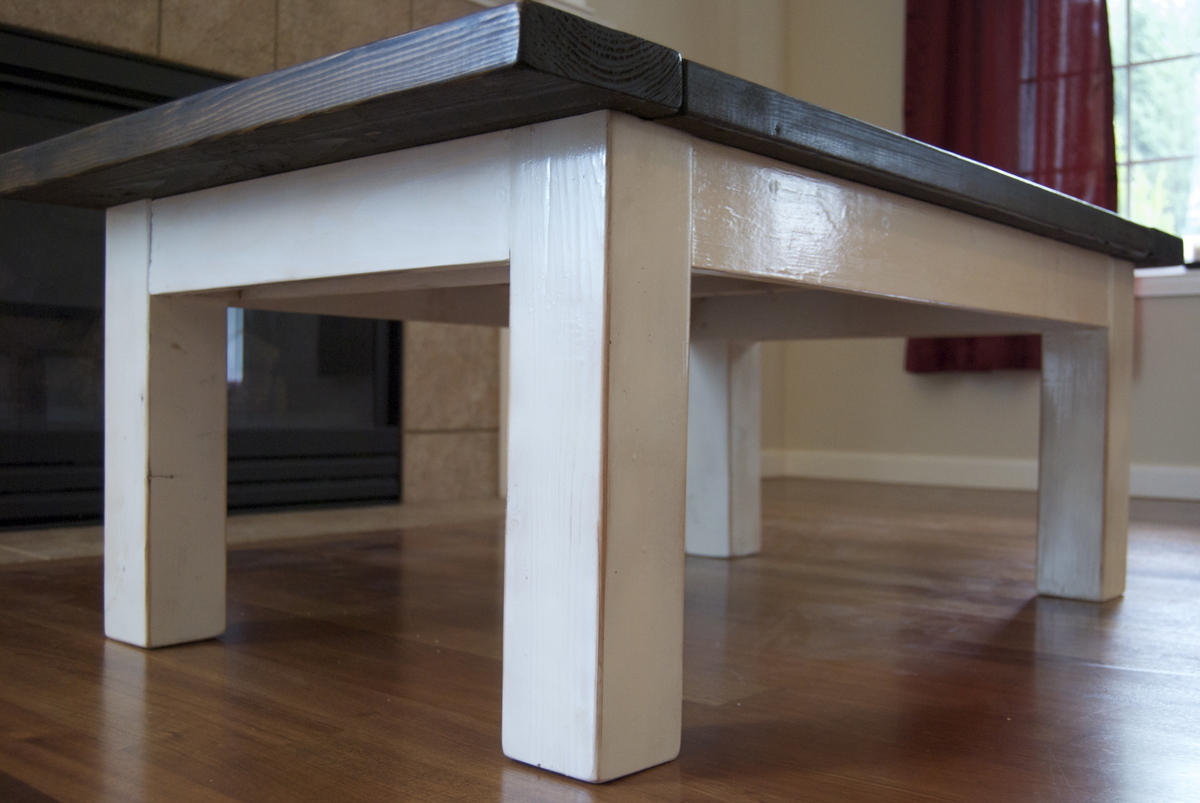
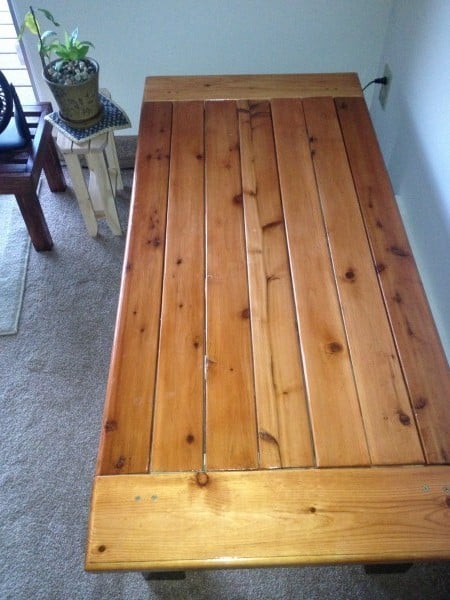
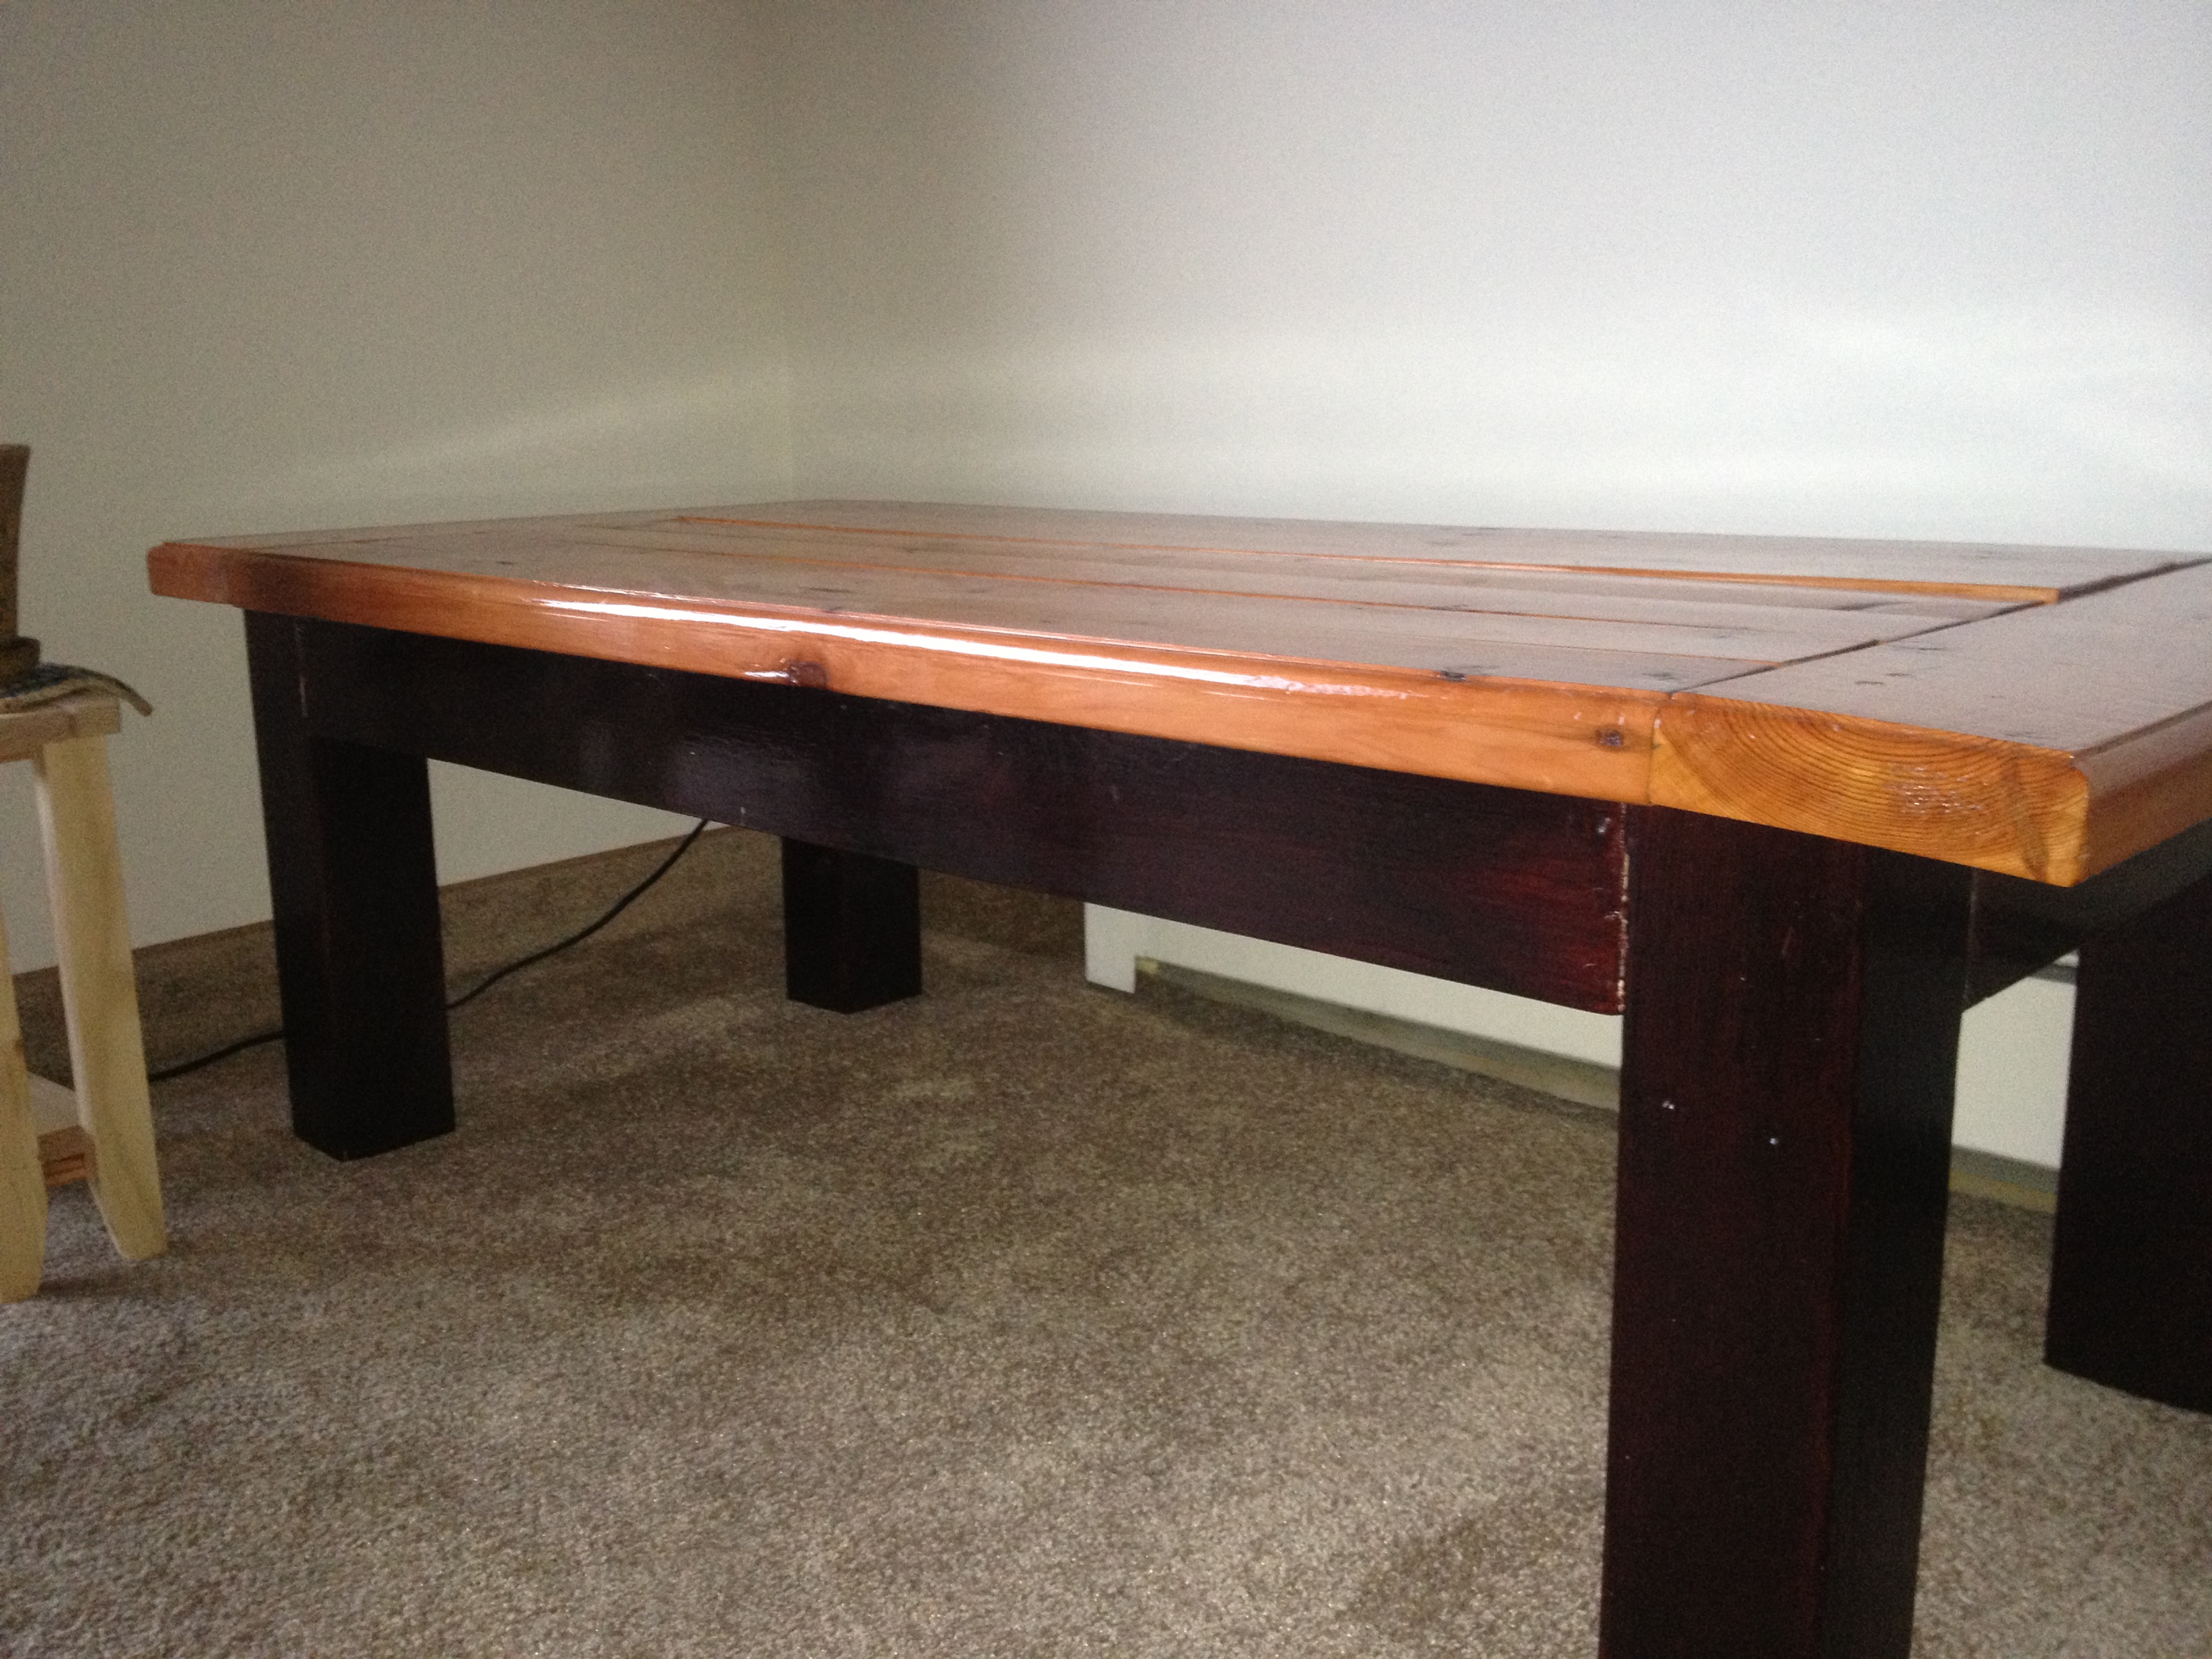
After the high of finishing my first build (http://ana-white.com/2012/08/farmhouse-table-rustic-table), I was quick to find my next fix. My mom was so impressed with the table, she trusted me to build her another piece of furniture for our very empty new home. She liked the look of this coffee table, so I adjusted the dimensions to meet her needs and away I went. It was pretty fun and not too difficult. It was a little more time consuming that I had anticipated, but that was mostly due to the two different finishes on the legs/apron and the top.
This project was fun! My kids help me! We still got to stain the table legs. Thank you Ana for everything! We got are cushions from home Depot $25 each 6x25x3
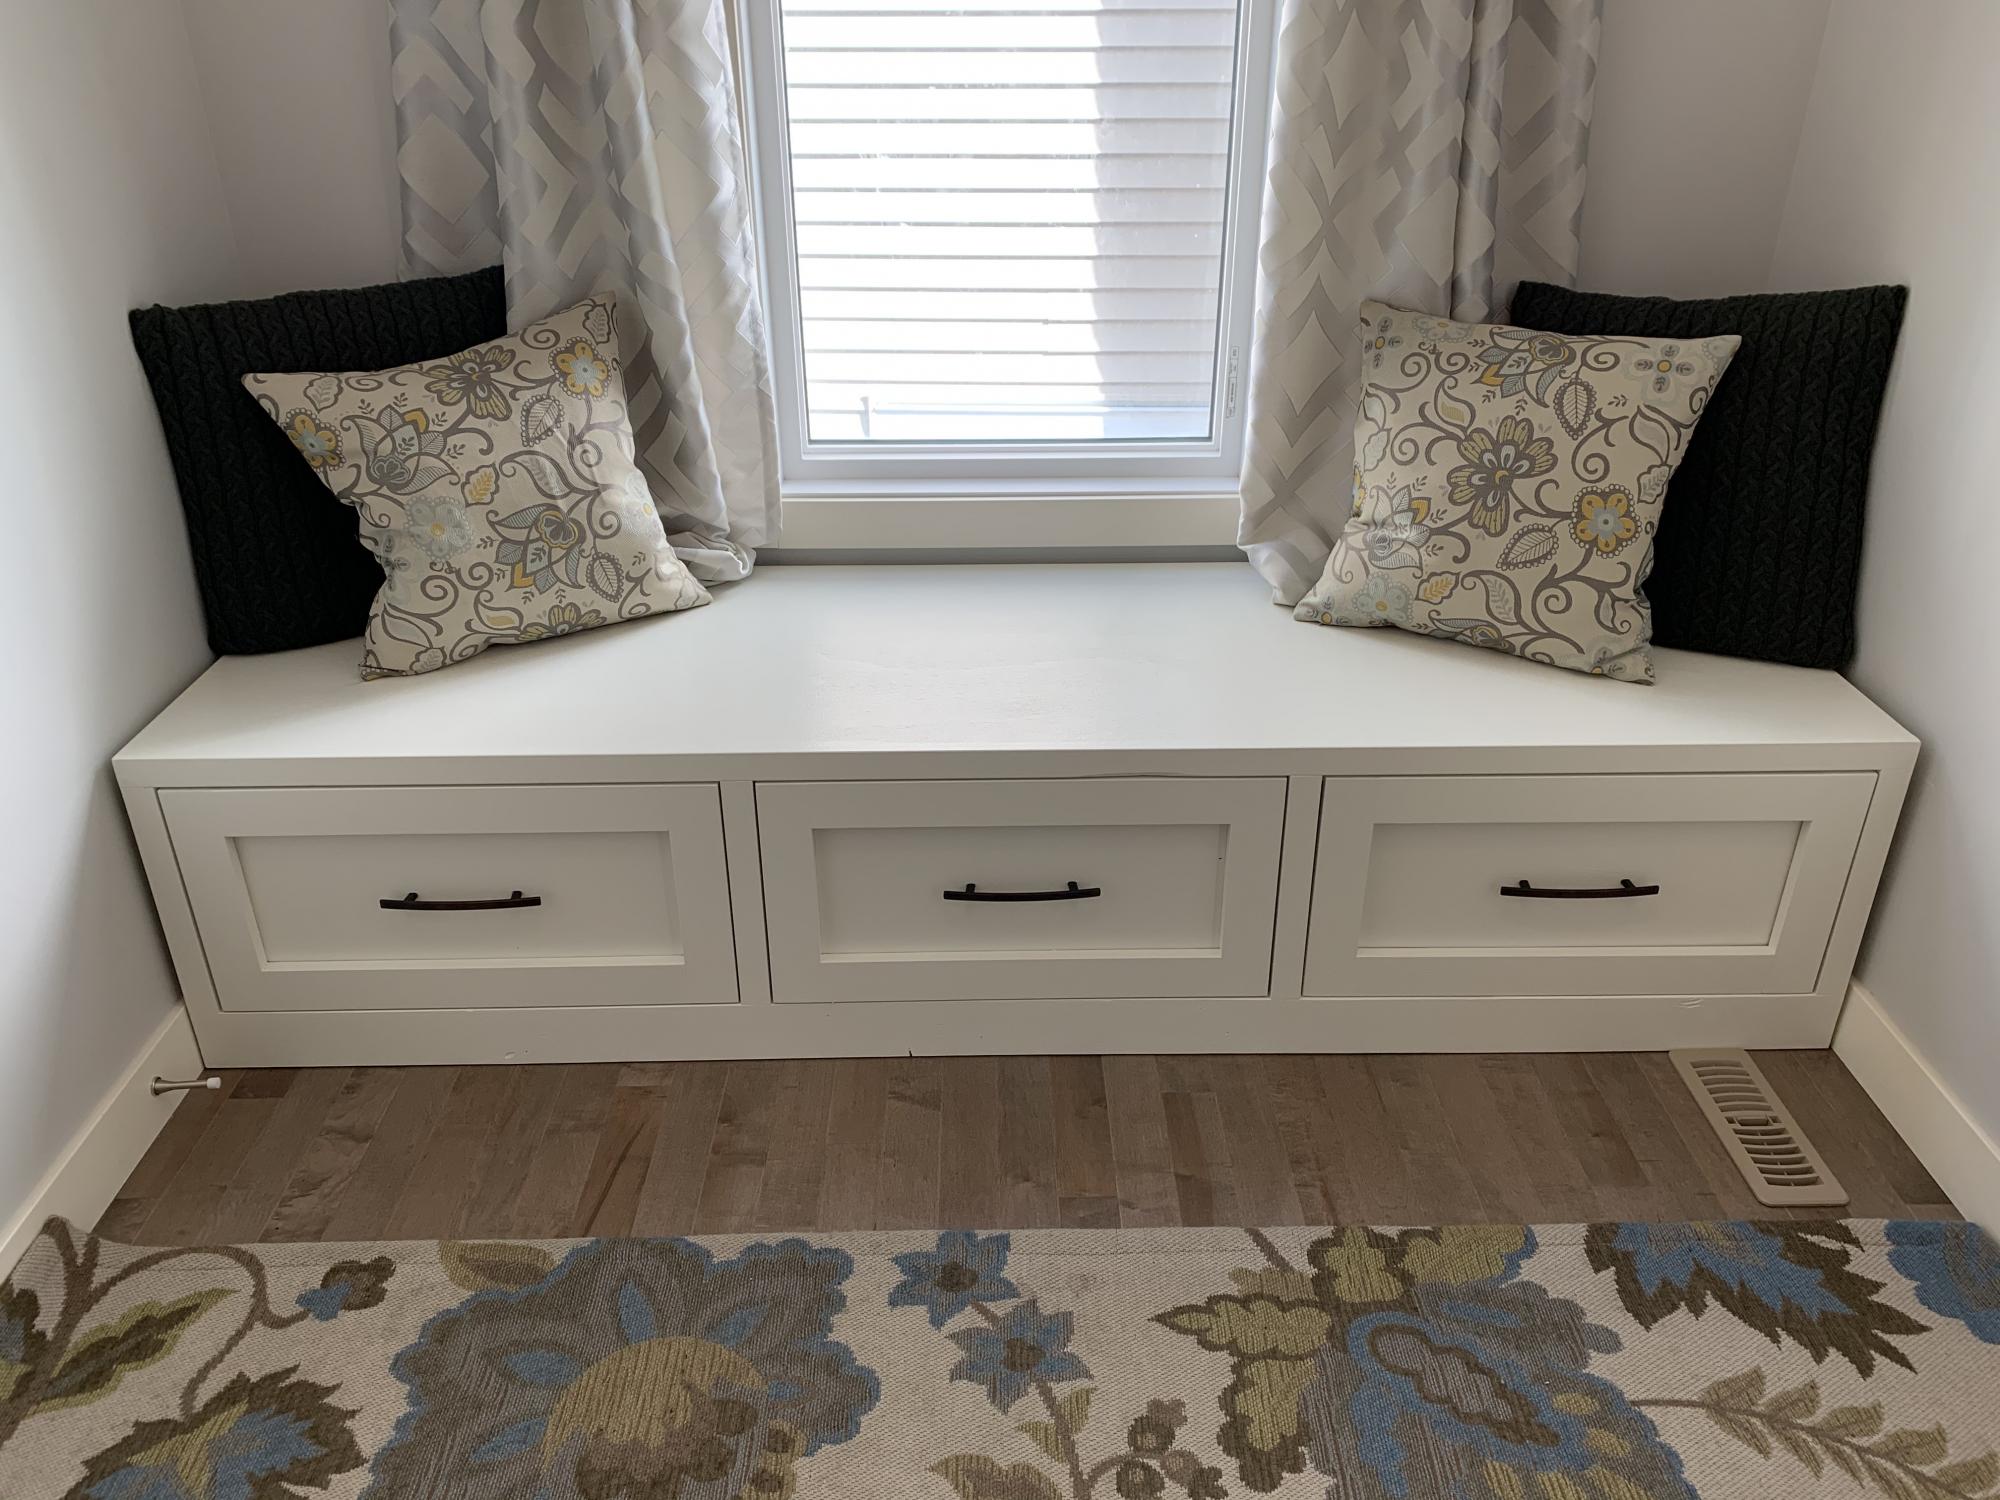
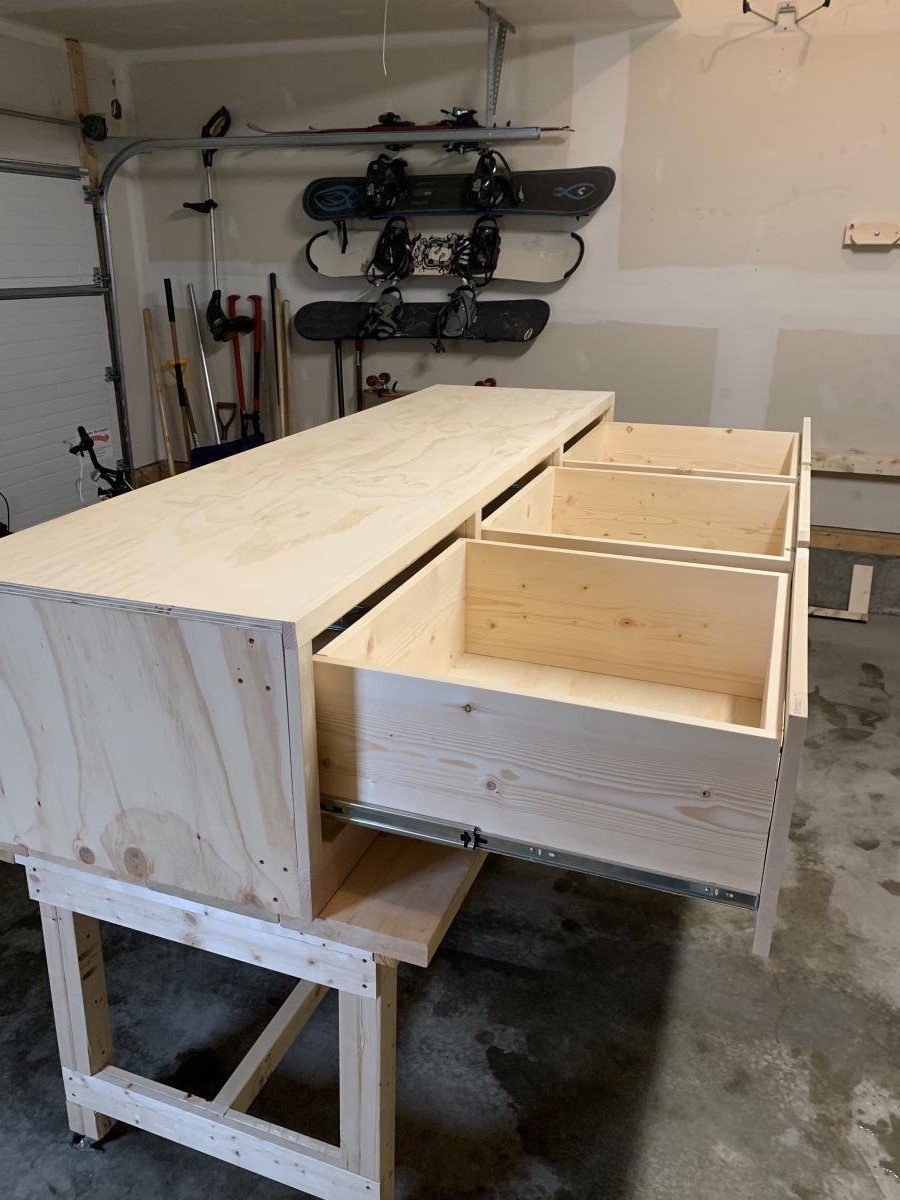
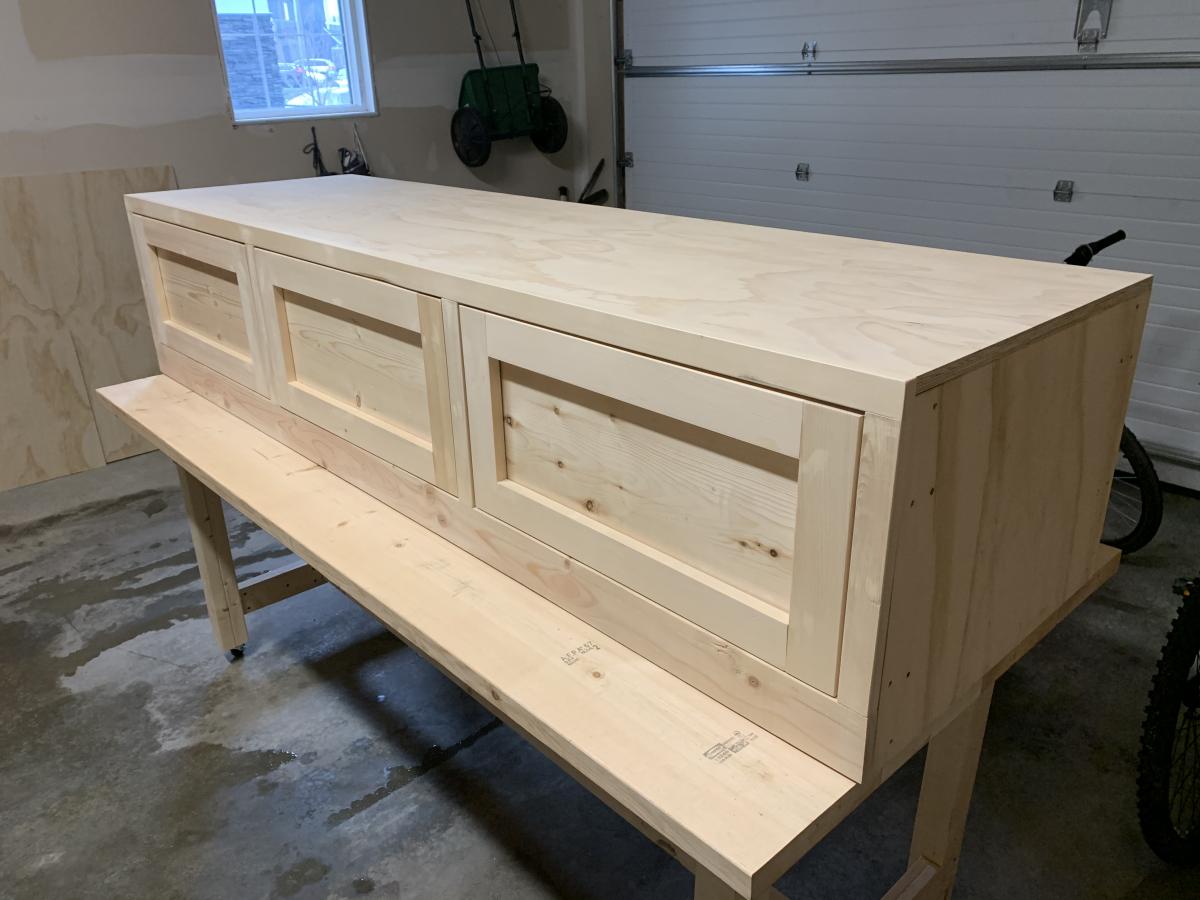
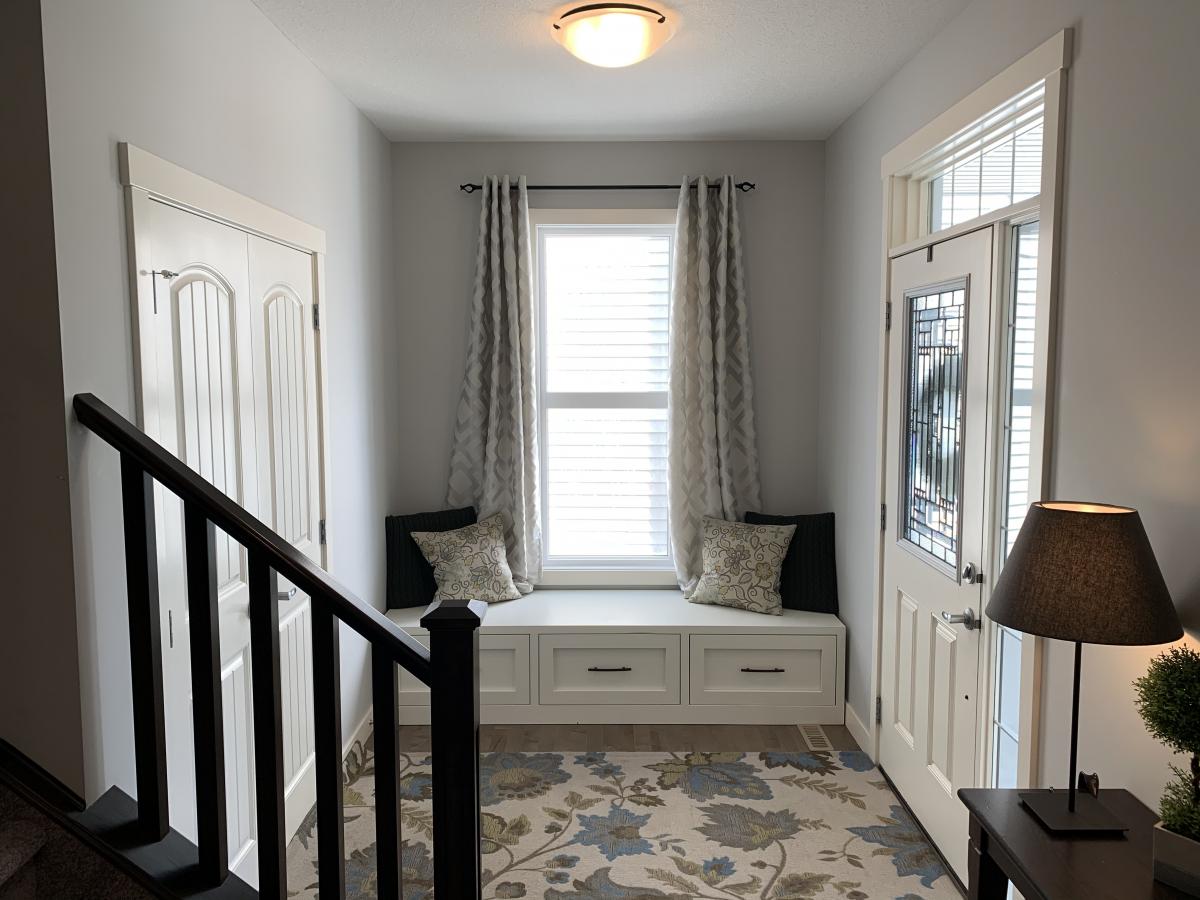
We needed a bench to fill the space in our front entry and provide some storage for seasonal gear. We couldn't find anything to buy that would work for us, so when my wife found these plans, I had to try it! Couldn't be happier with the results. We widened the bench by a foot to 84" to fill the space. Basically, it just made each drawer 4" wider. Everything else was built to plan. The most expensive thing was the soft-close 24" drawer slides (~$100). As soon as you go above that 24" depth, they get pricier! It was also tricky to get the drawers to catch properly on the soft-close mechanisms, but I made sure to take the time to get it right before closing it all in. Now I just open and close the drawers for the pure satisfaction of it! I used premium pine plywood for the top and I find it still doesn't give that smooth finish I like, even after sanding. I think I'll create a new top out of joined knotty pine planks later and just attach it to the top.

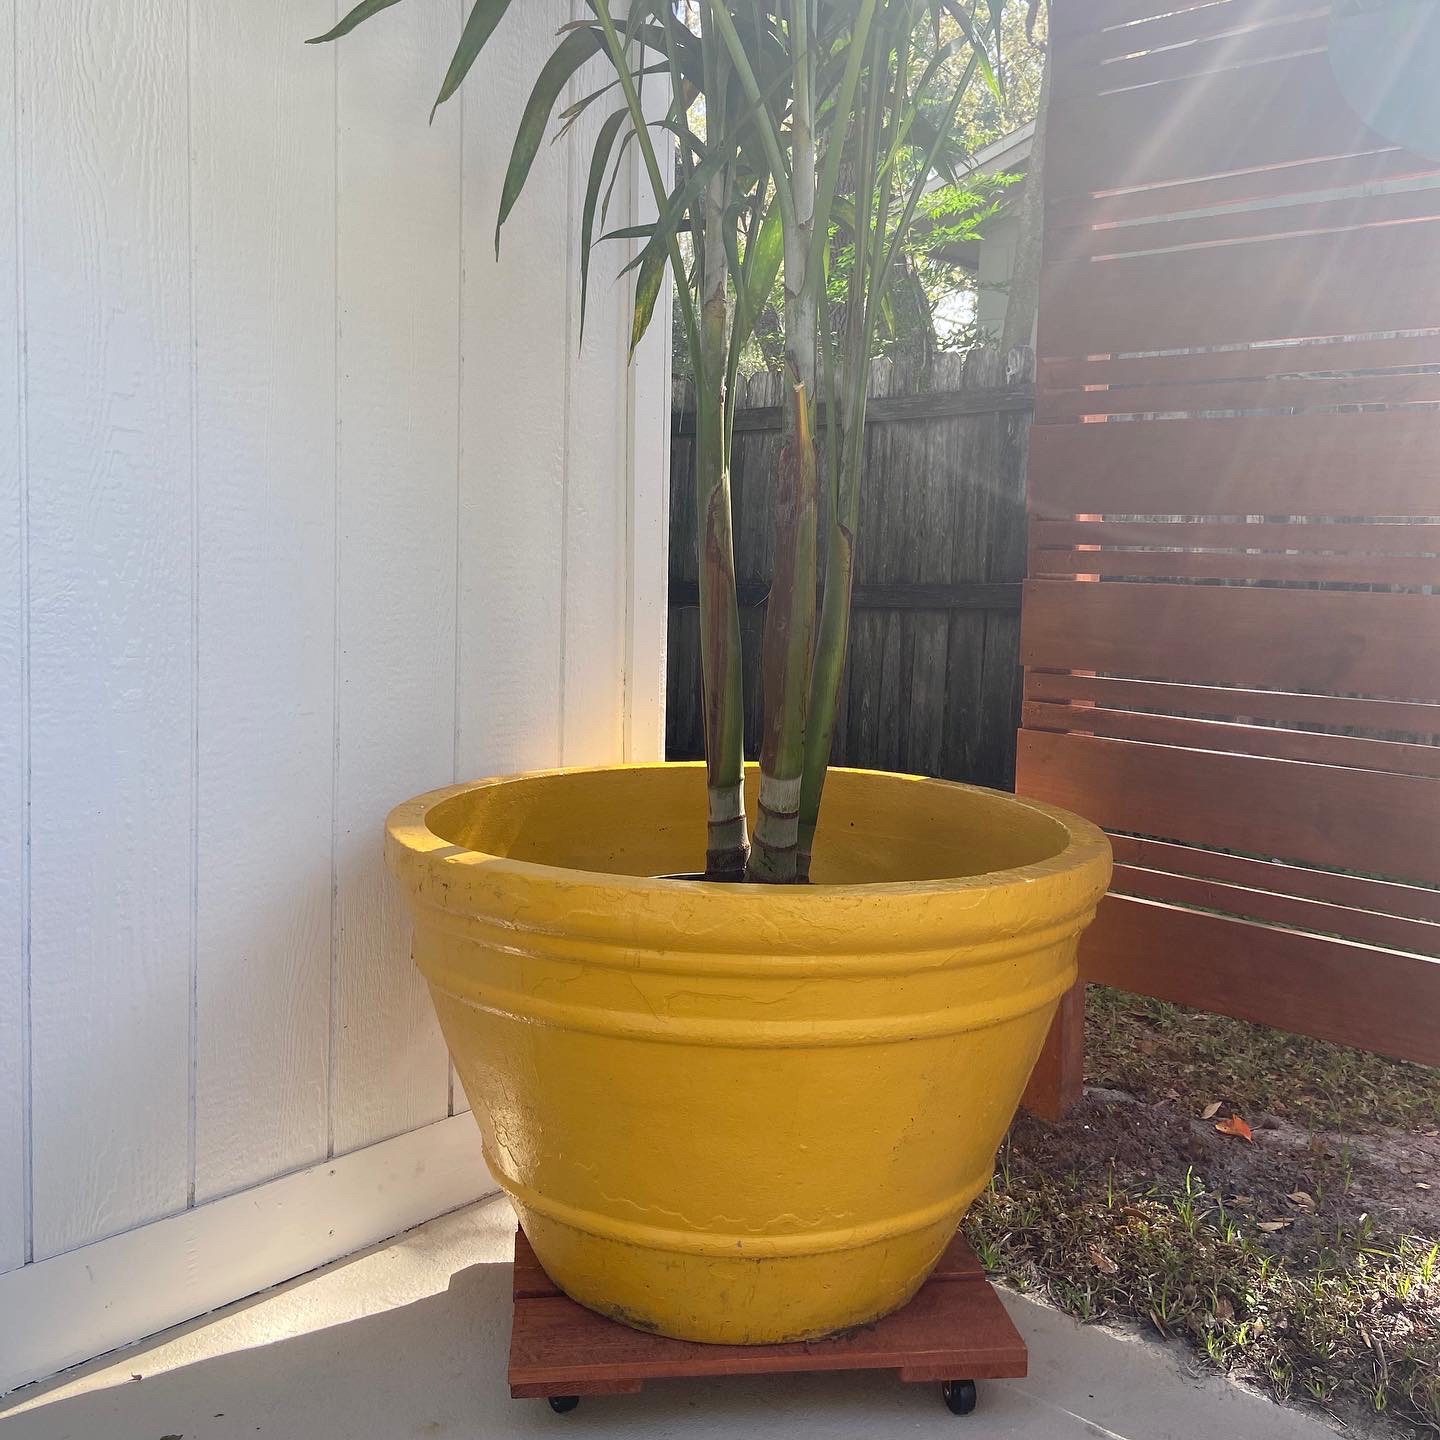
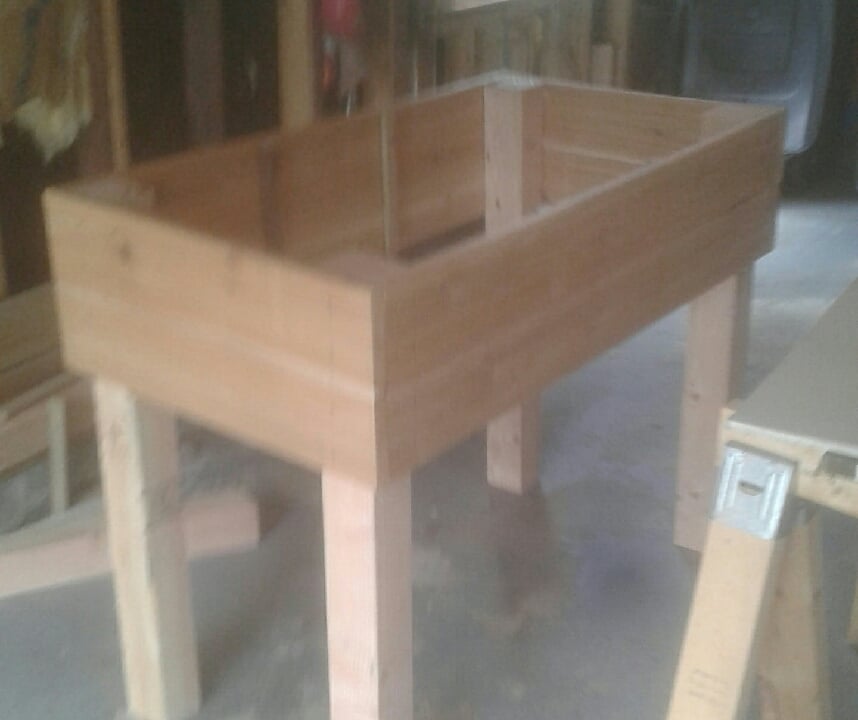
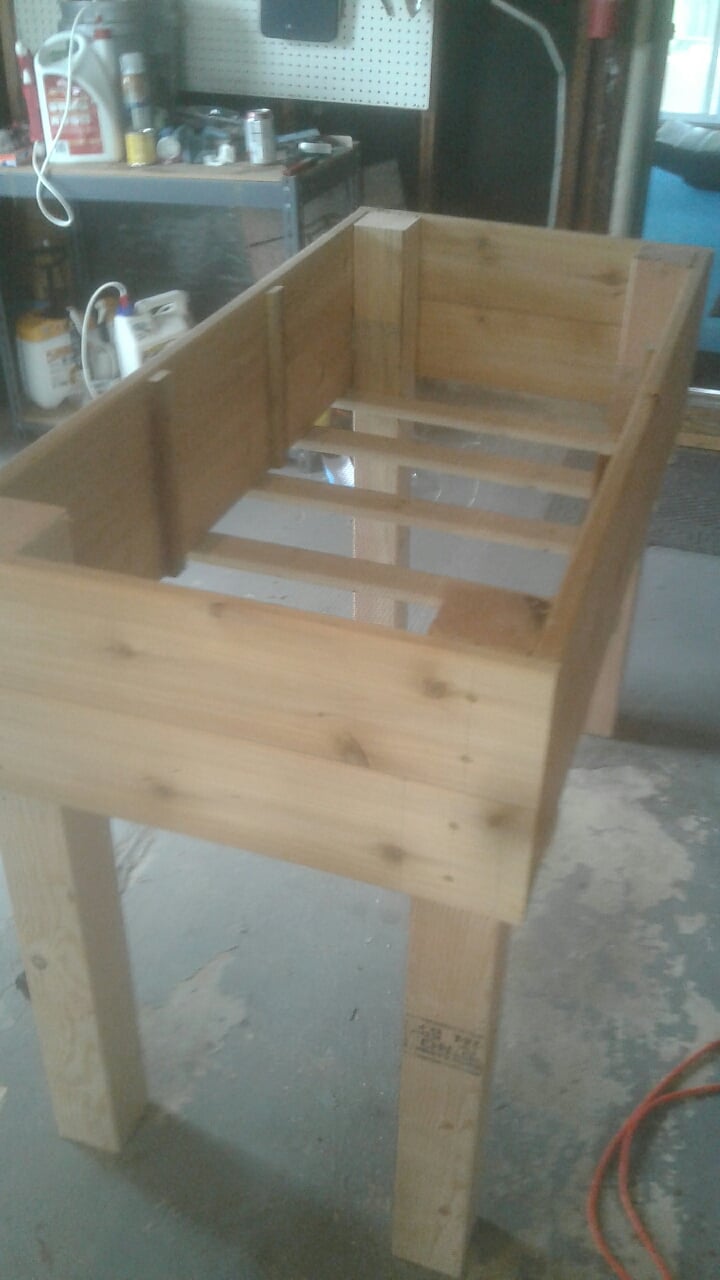
Used cedar fence planks. These were pretty cheap at Home Depot. My husband wanted to use them for another project, but ended up not needing them. So instead of returning, I used them! I needed a caddy to hold a planter well over 150lbs. My husband and I had to load on a dolly to move around. It was made out of 2 planks and I added copper wheels (each wheel holds about 80lbs) from Lowe’s. I had a few extra planks, and made an herb window planter...I’ll post on that too!!
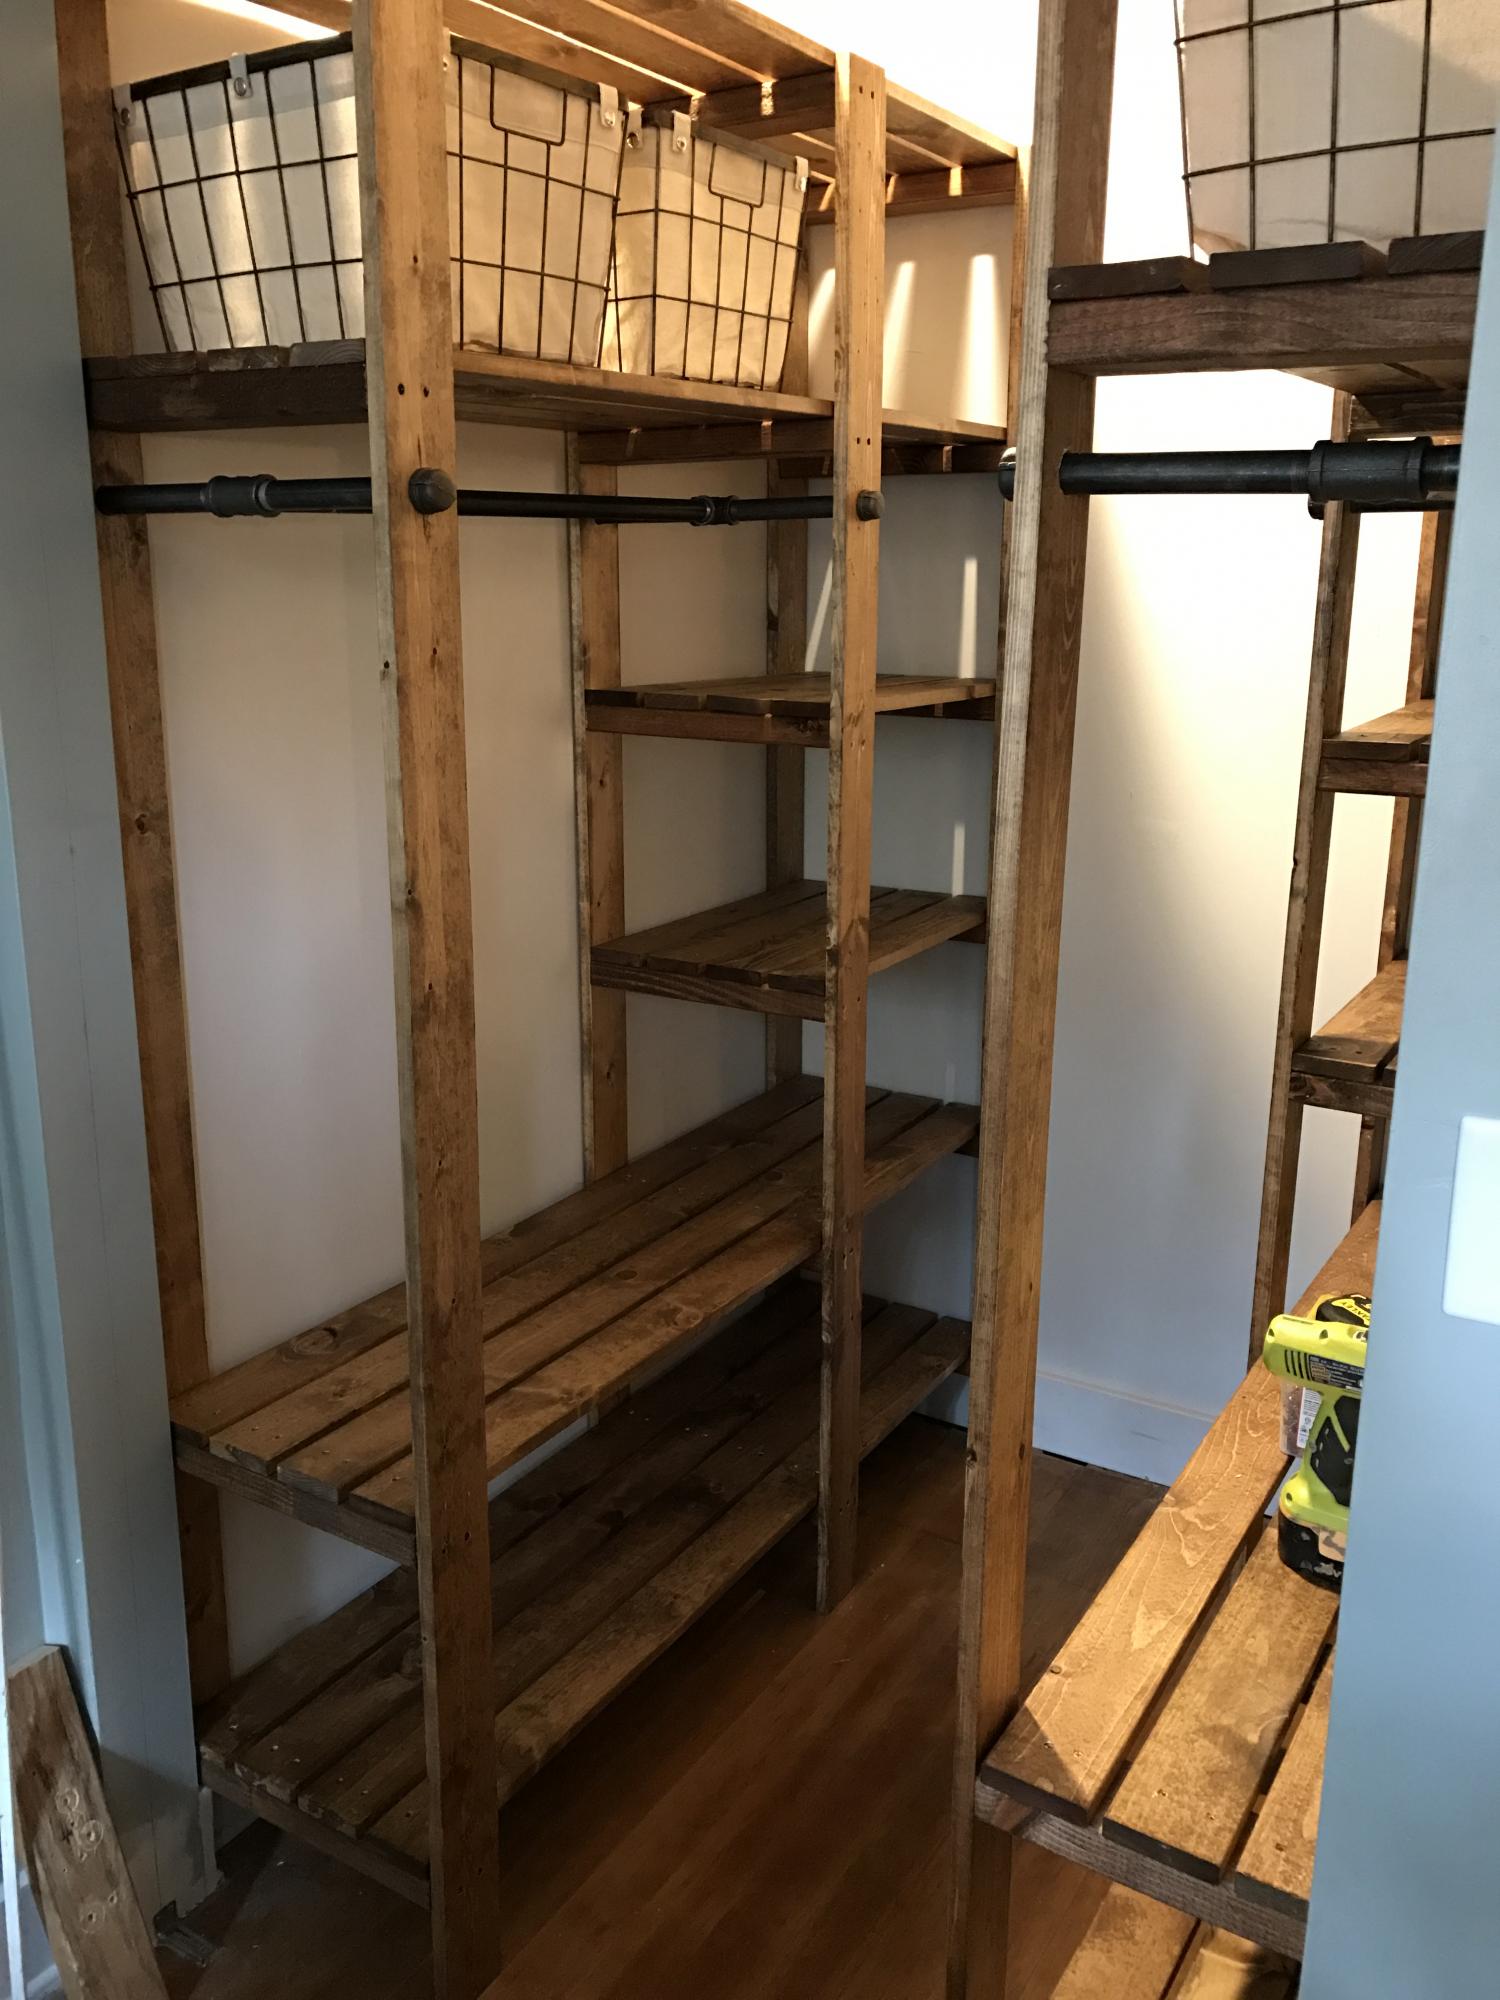
We made smaller ones for each side of the closet. Love it!
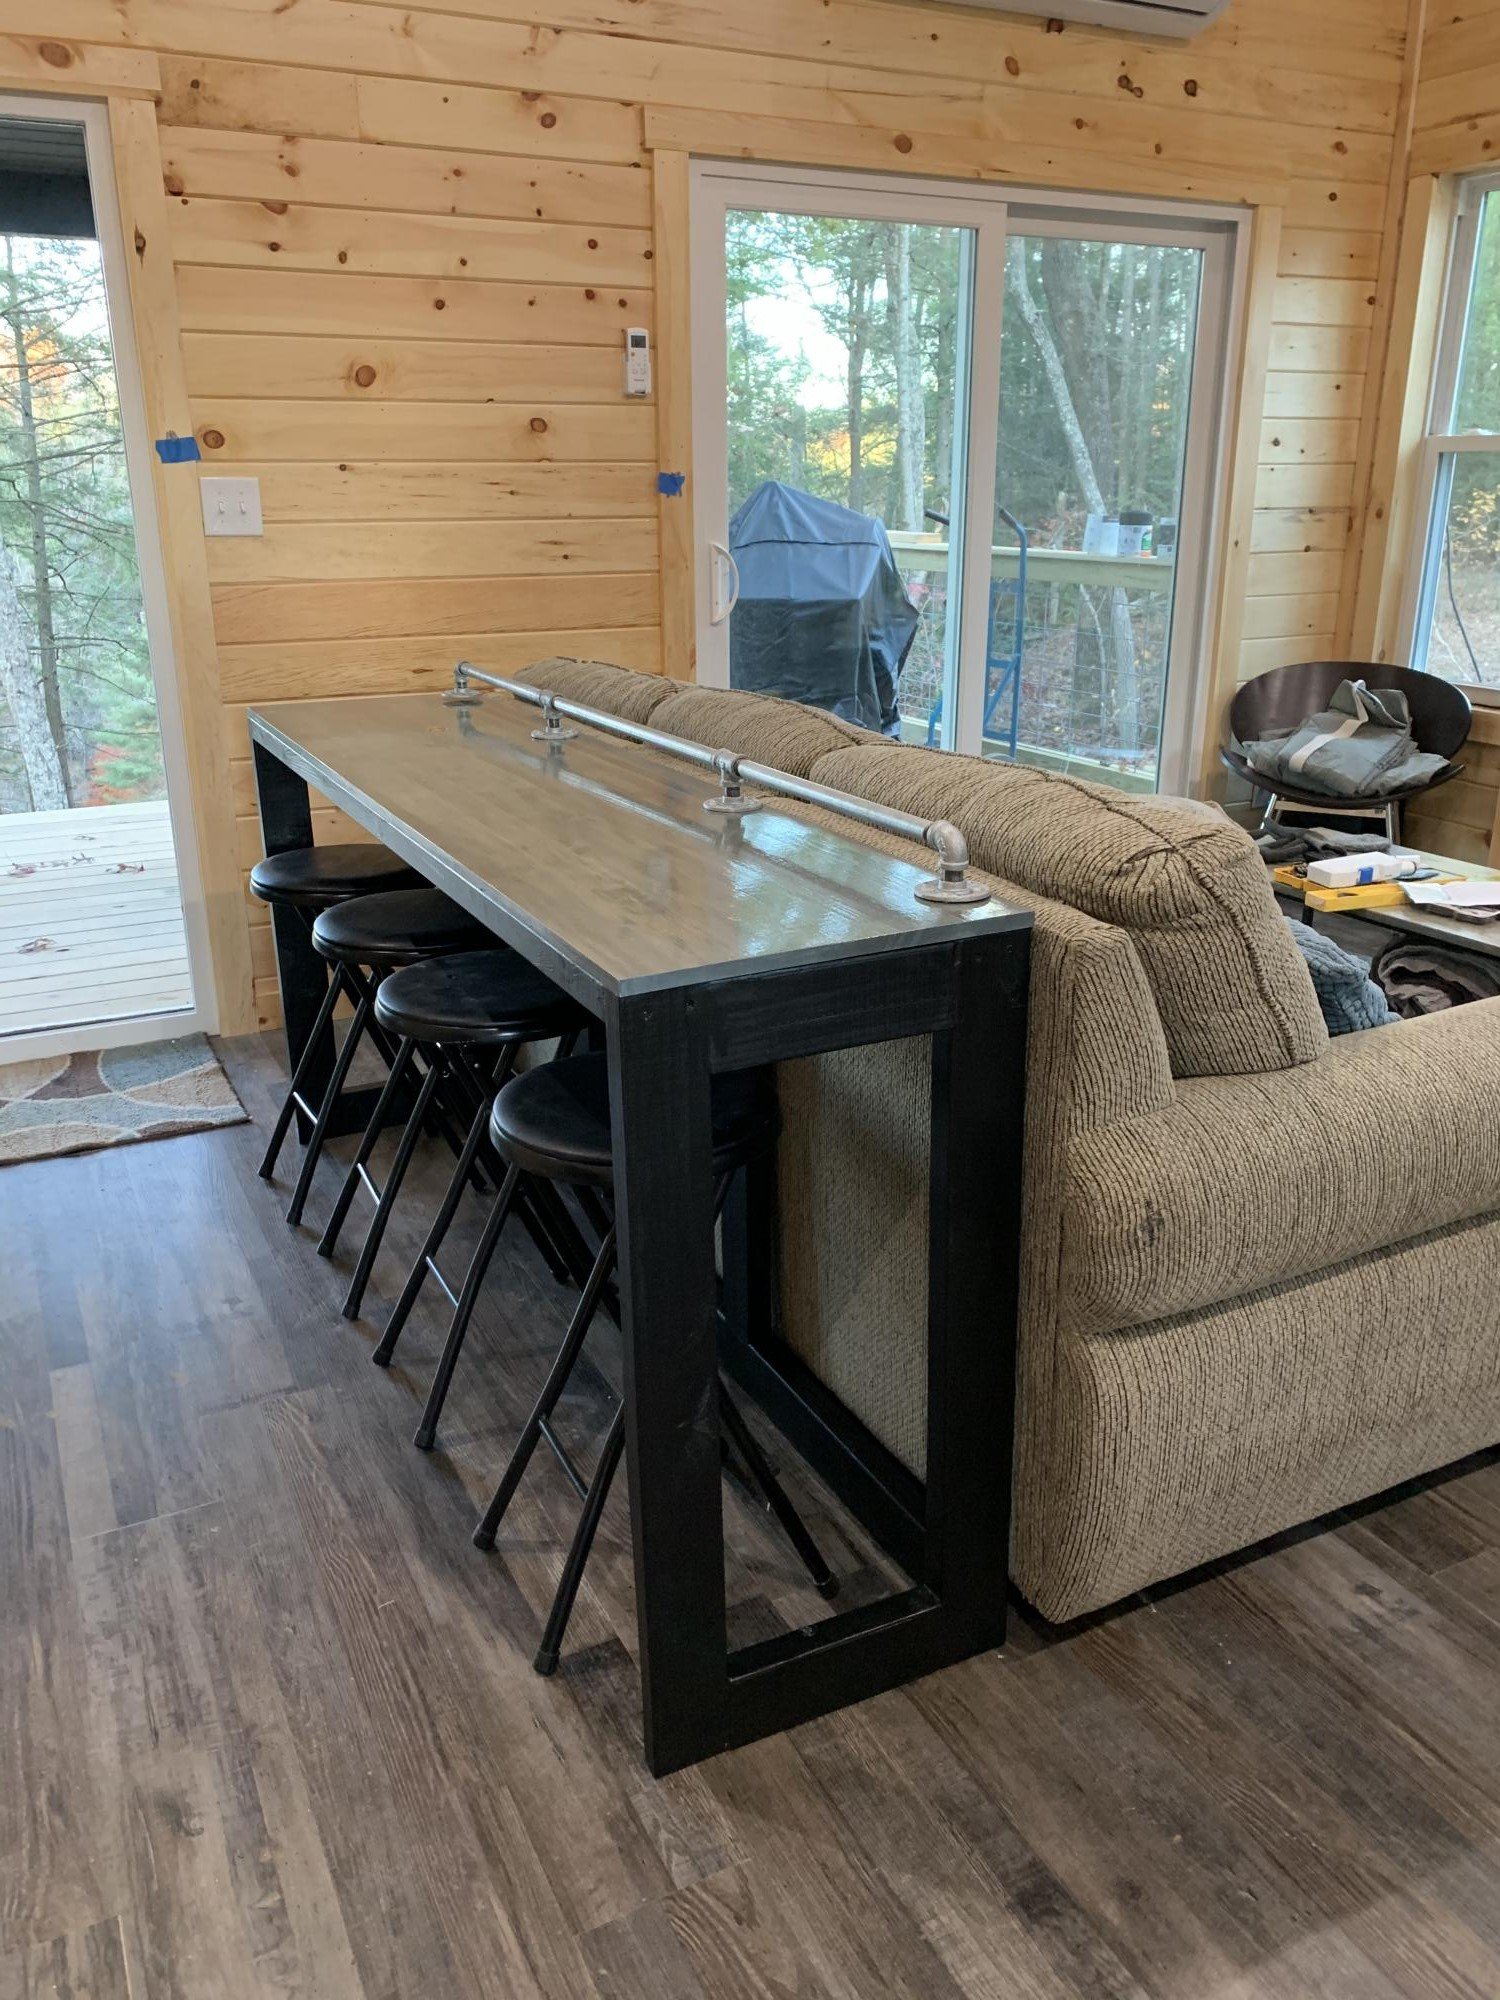
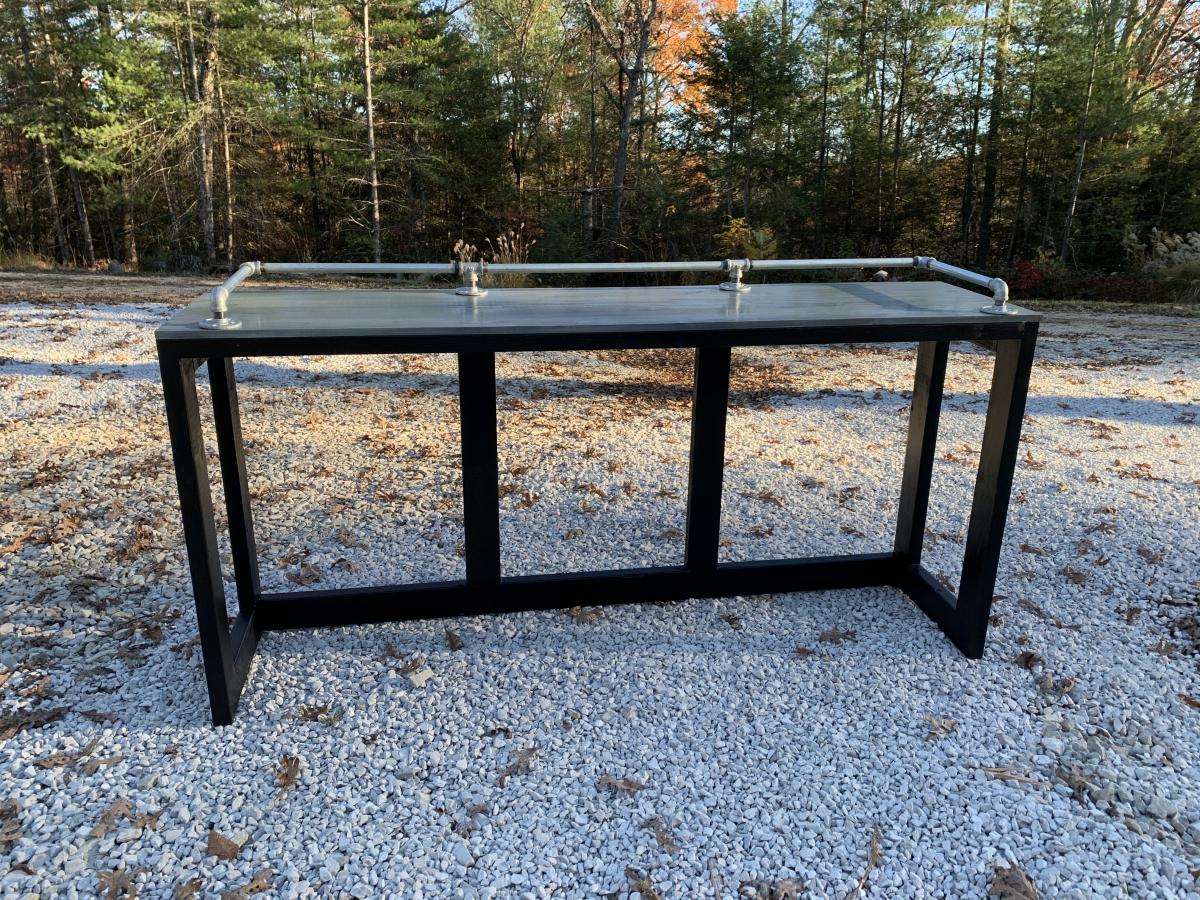
We are building a small rental cabin in the Red River Gorge and I needed a sofa table to do double duty. We needed a place for people to eat that would also be a useful sofa table when lounging. I modified this piece from the plan; very beginner friendly I’d say, lol. The bottom is painted glossy black and the top is stained a grayish blue. Galvanized hardware finished it off on top. I chose not to use the side arms once I brought it inside.
This was the first table we built.

Wed, 11/26/2014 - 12:20
All for only $35!! Thats a good deal and nice work too! I love the two tone color!
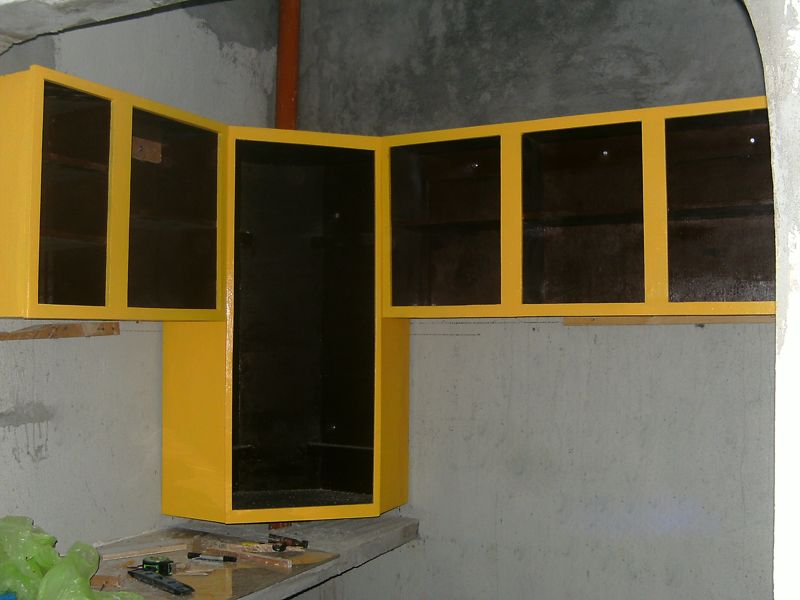
I saw http://www.ana-white.com/2013/02/plans/wall-kitchen-corner-cabinet and knew this was the project I wanted to do in our new home. The side cabients are from http://www.ana-white.com/2013/12/plans/36-wall-cabinet-double-door-momp… project, redesined to fit the wall-kitchen-corner-cabinet plans. This was my first cabient build. Still have to install doors. I am happy way it came out and so is wife.
Thanks Ana for your great site and plans. My next project is the storage sofa :D
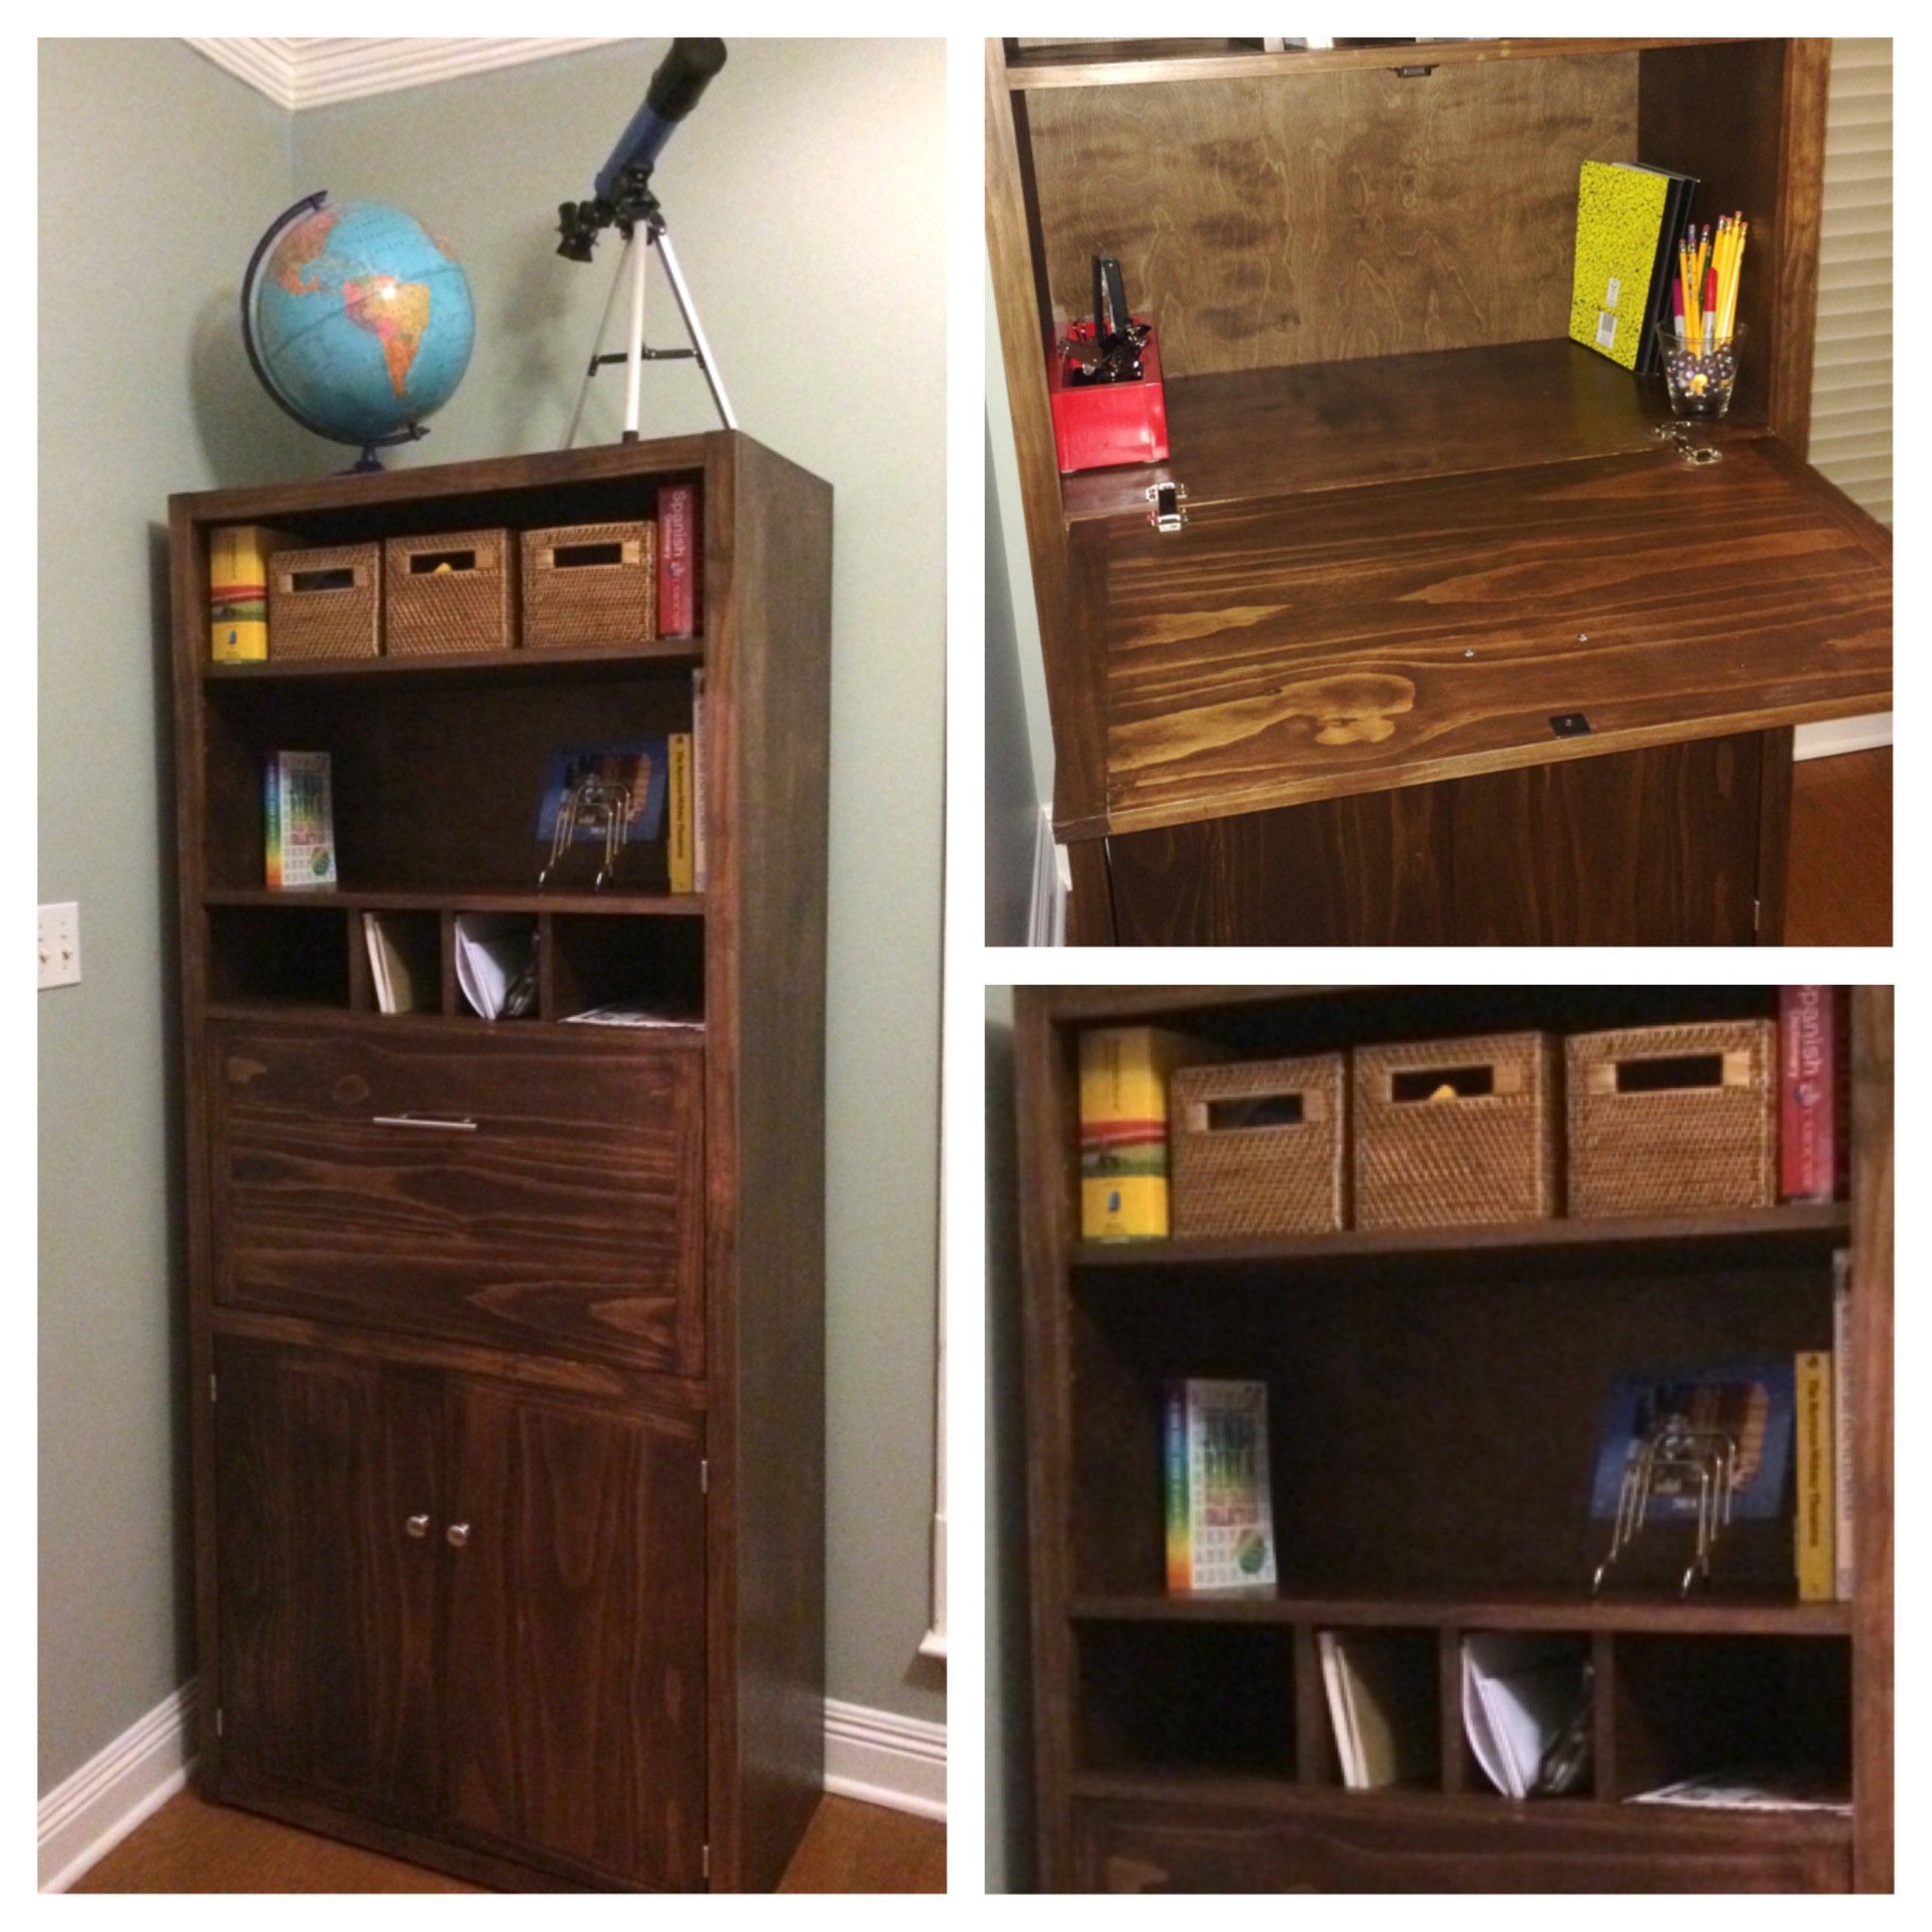
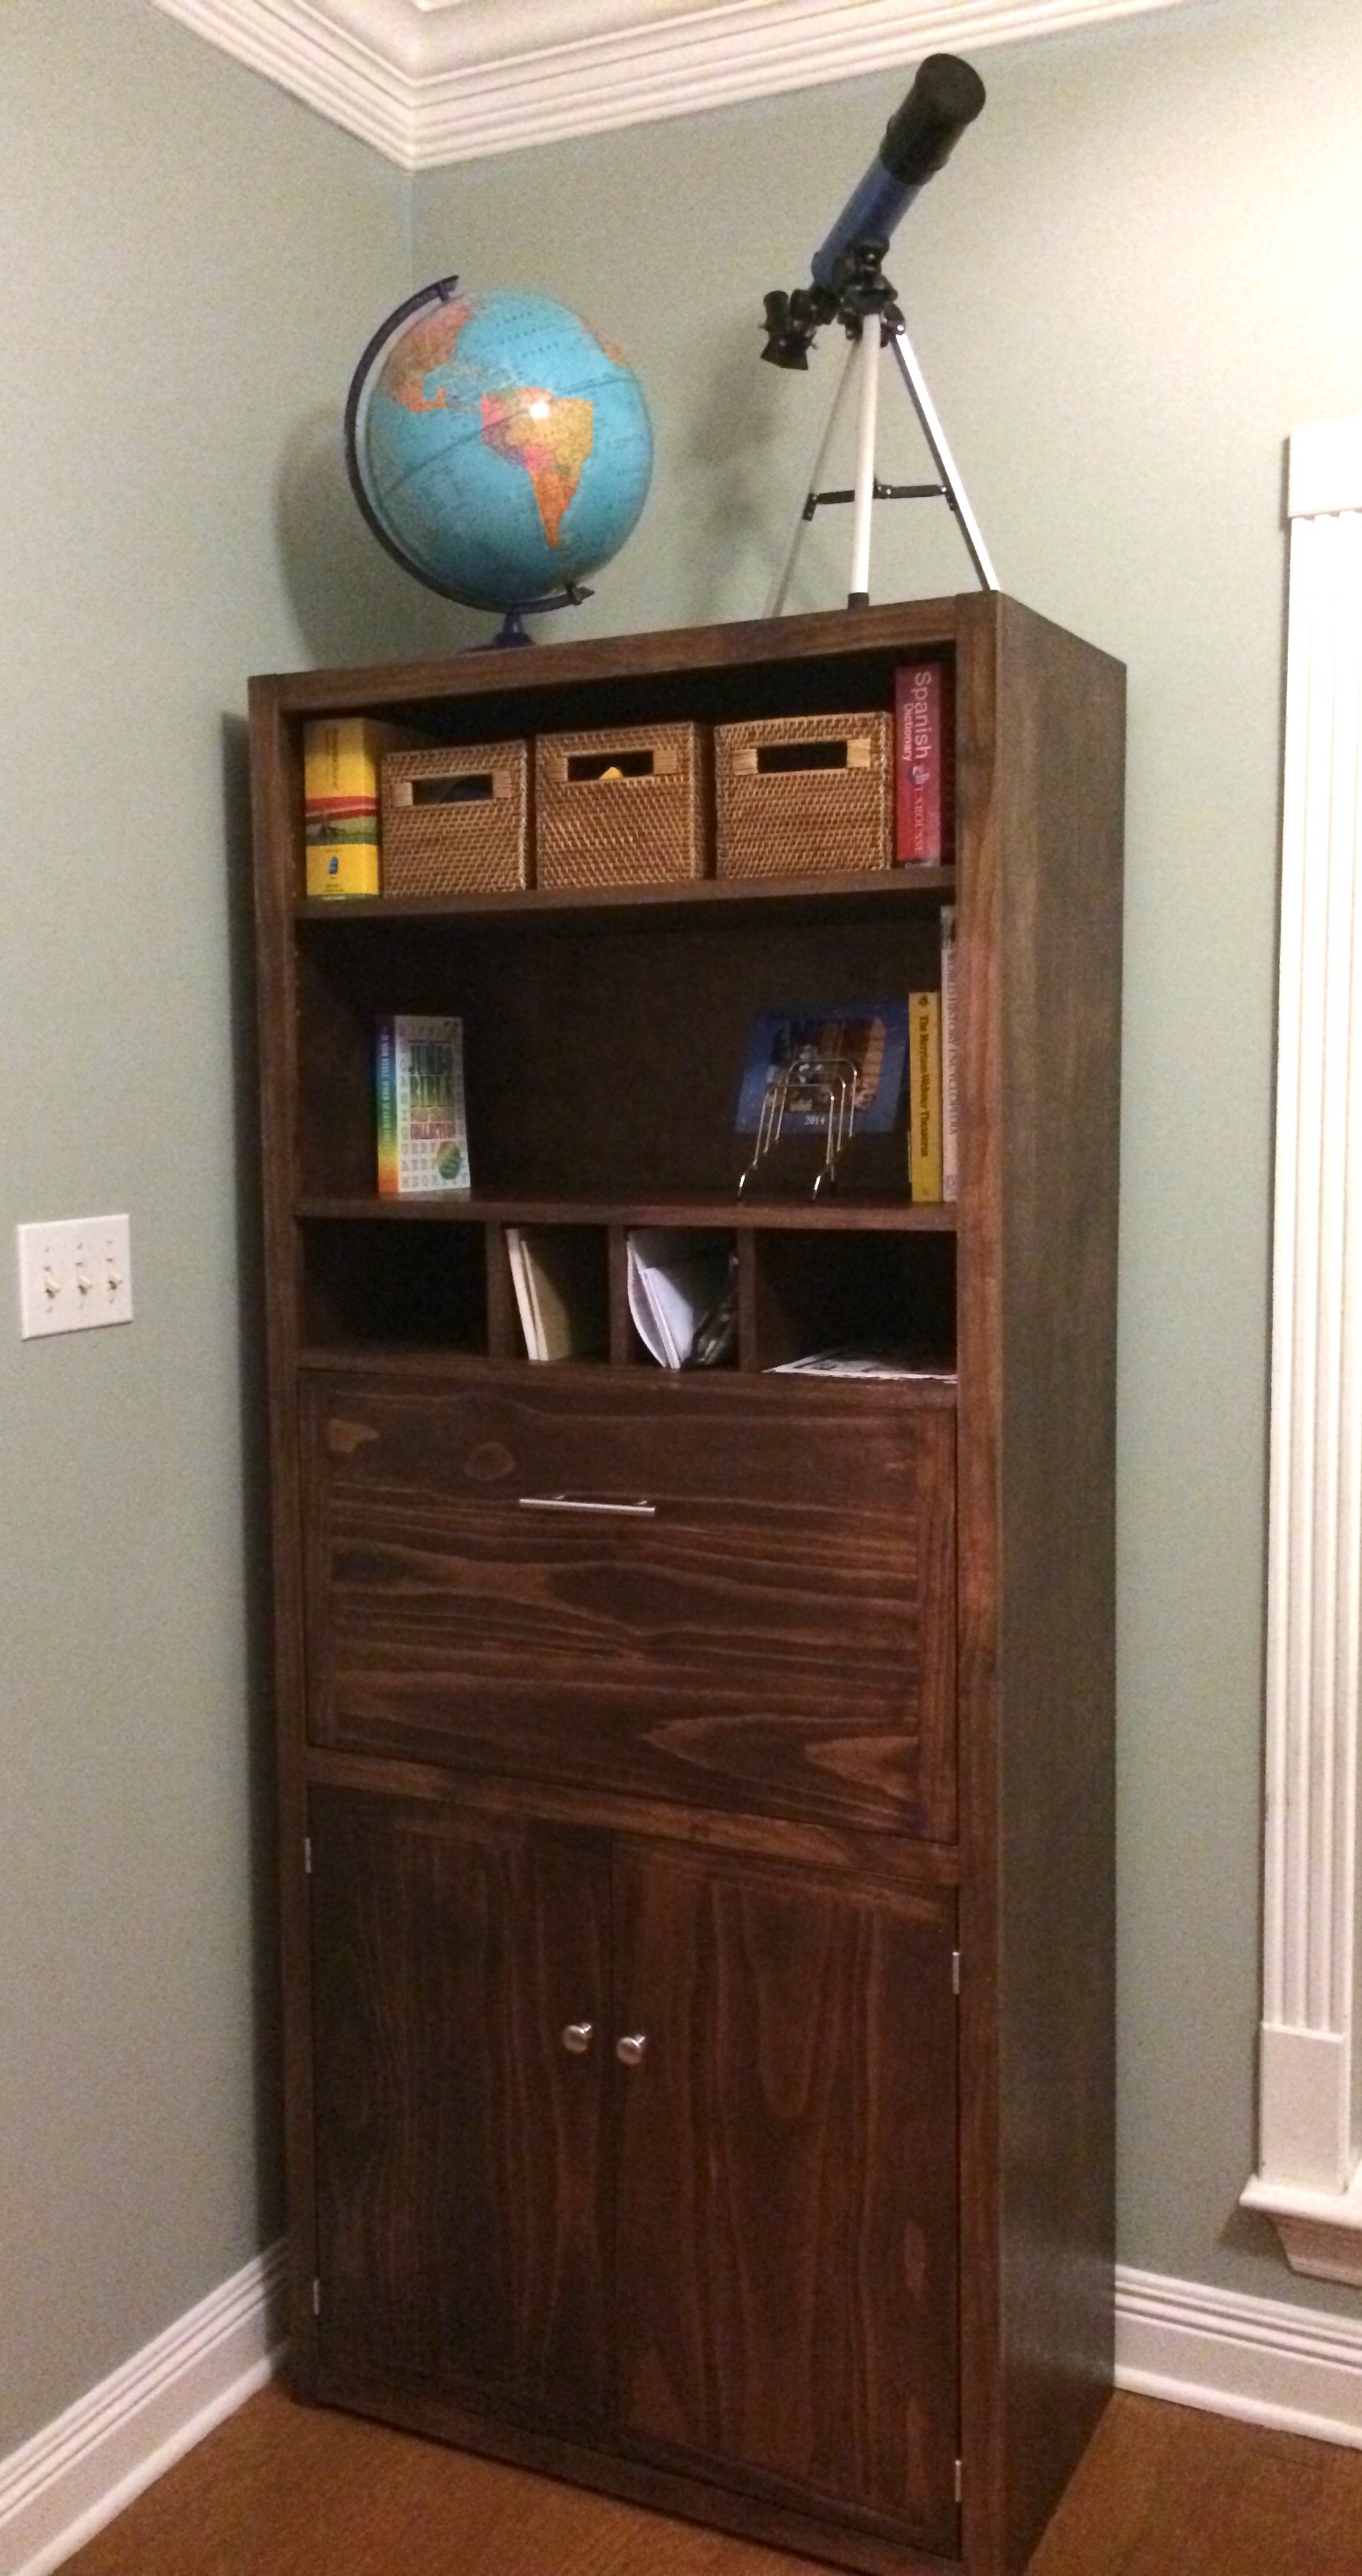
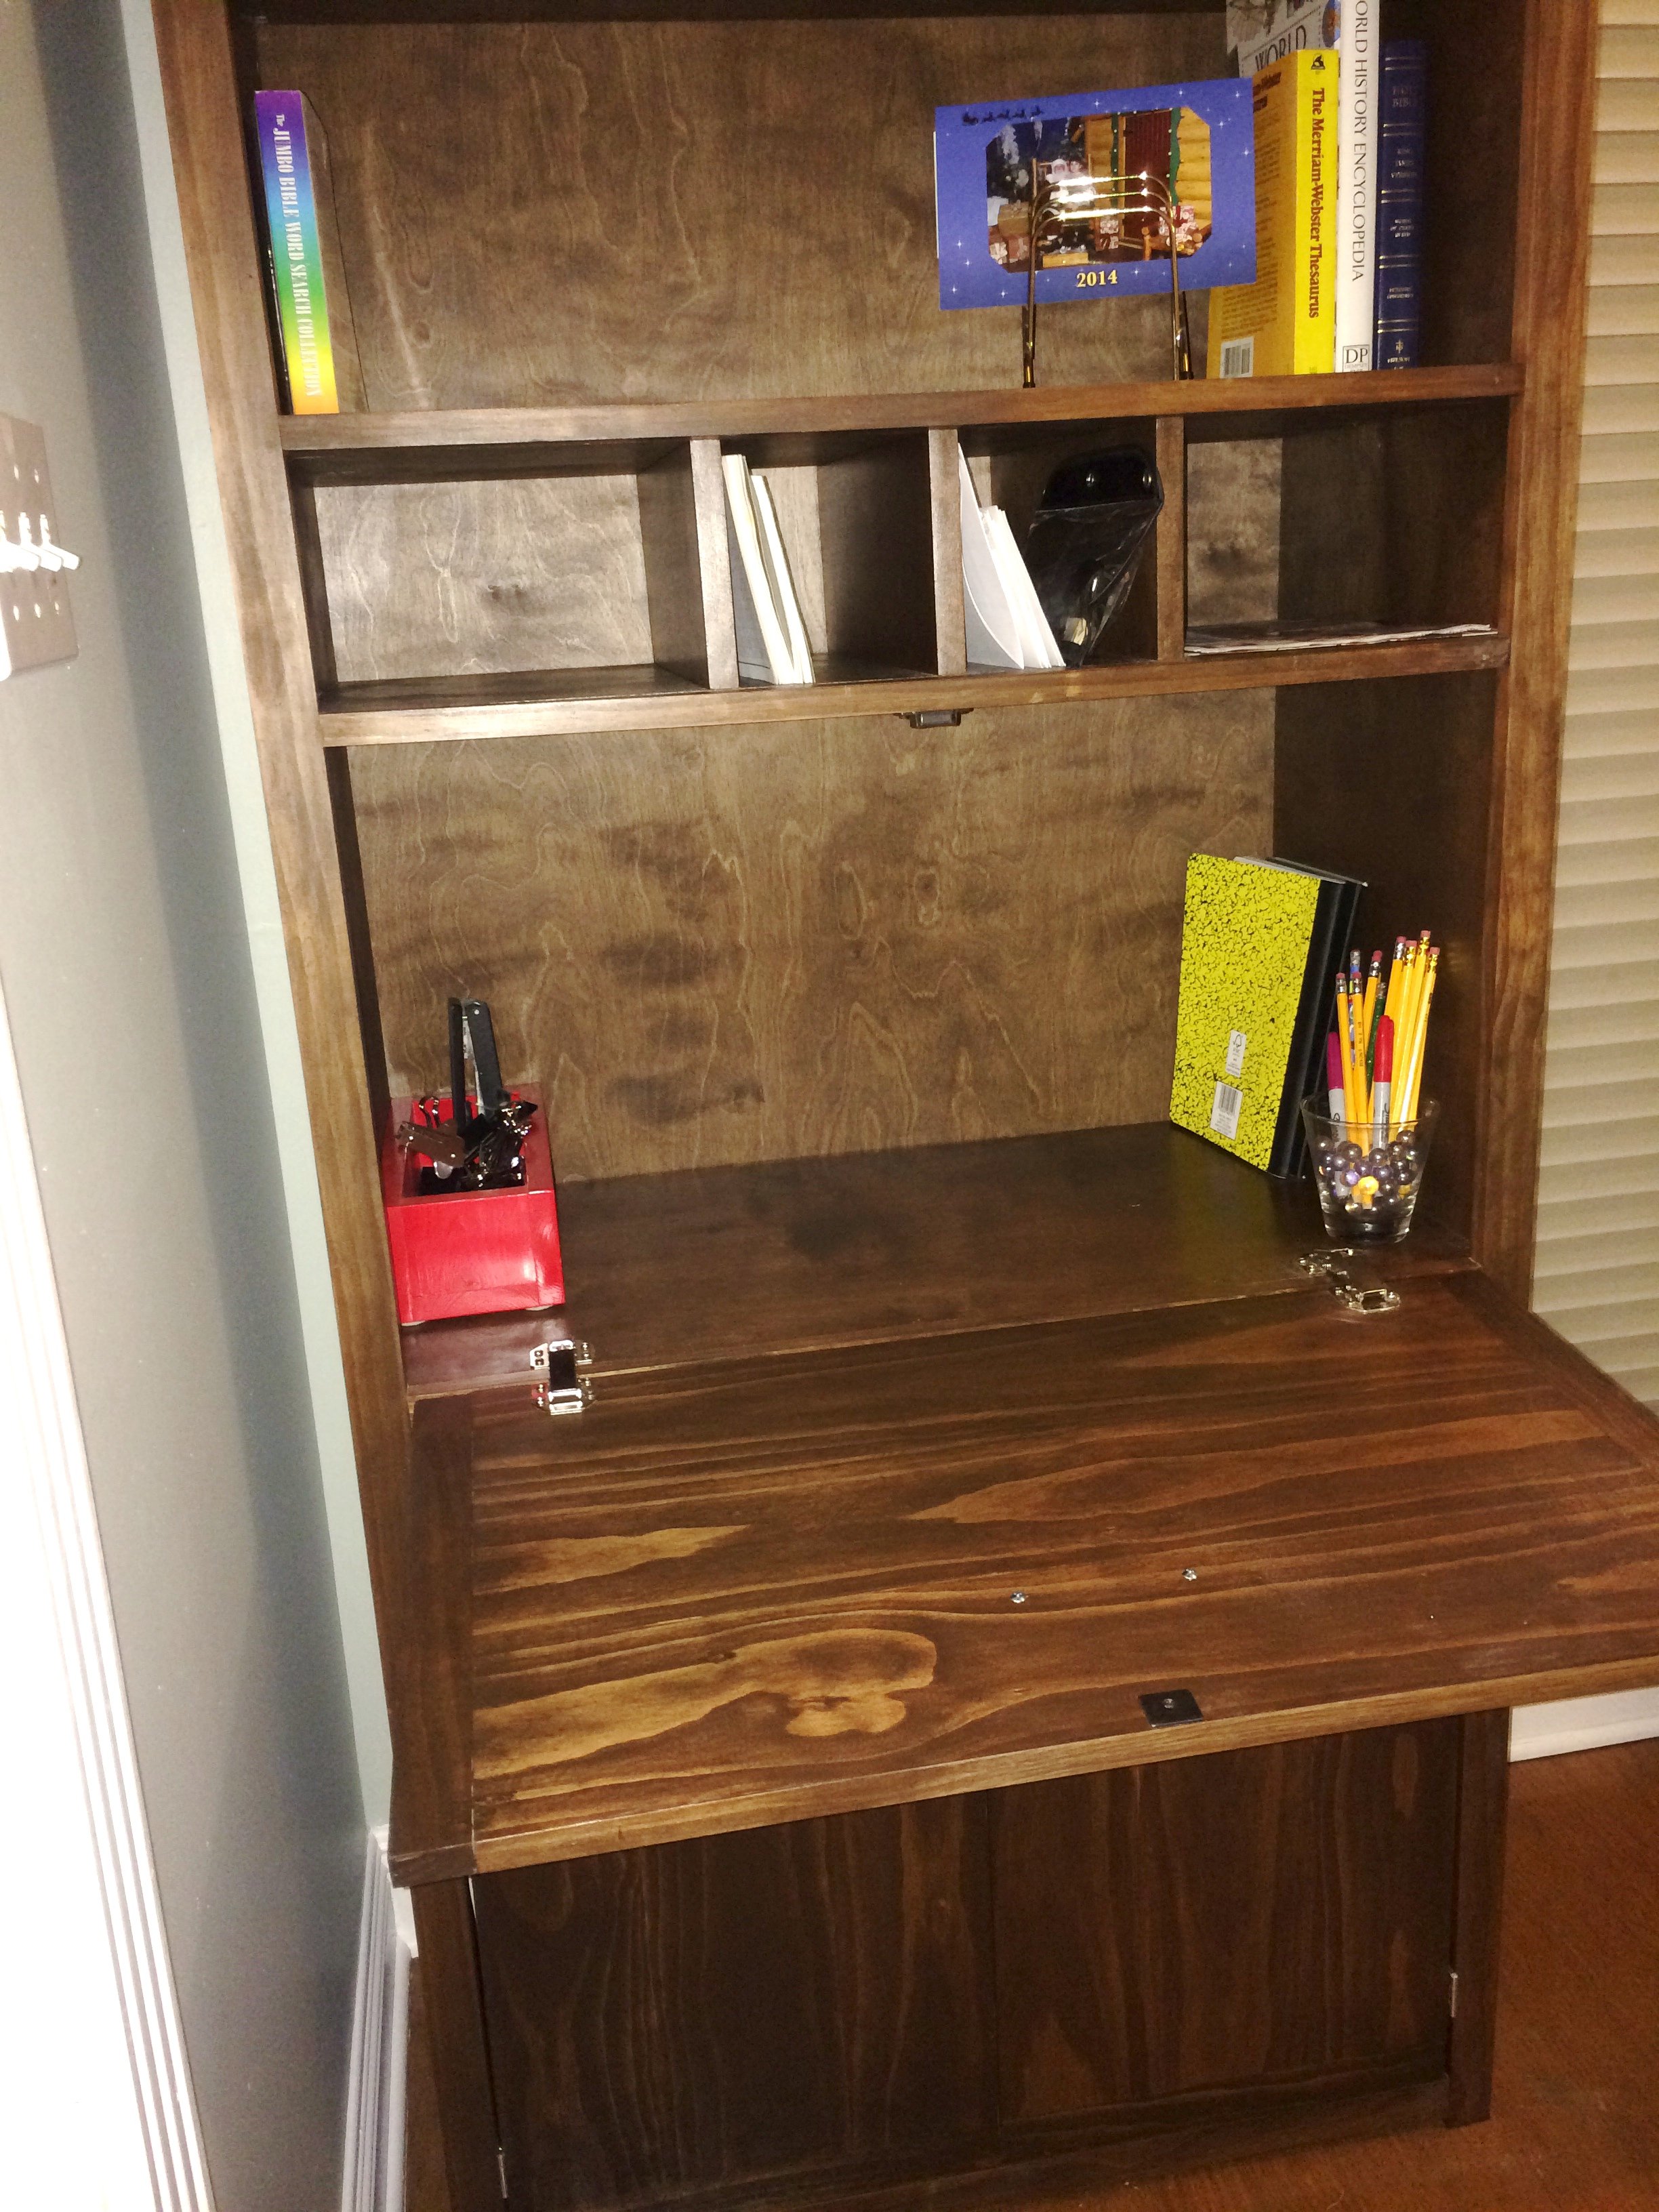
I built this desk as part of redesigning my homeschool room, and made a few customizations to better fit our needs. It's taller and deeper than the plans, which allowed for a larger work opening for a larger computer. It also gave me much needed extra storage space.
The cabinet is made from 3/4" and 1/4" PureBond birch plywood cut down to size using my Kreg Rip-Cut. The frame is built from pine 1x2s and 1x1s. The three cabinet doors are pine 1x6s and 1x2s joined together with biscuits, and trimmed to the correct size on the table saw. Because the secretary desk is deeper than the plan and the mail slots are small, I finished with stain and polyurethane prior to assembly. This saved a lot of frustration of trying to stain in tight spaces.
Thank you for the plans, Ana!
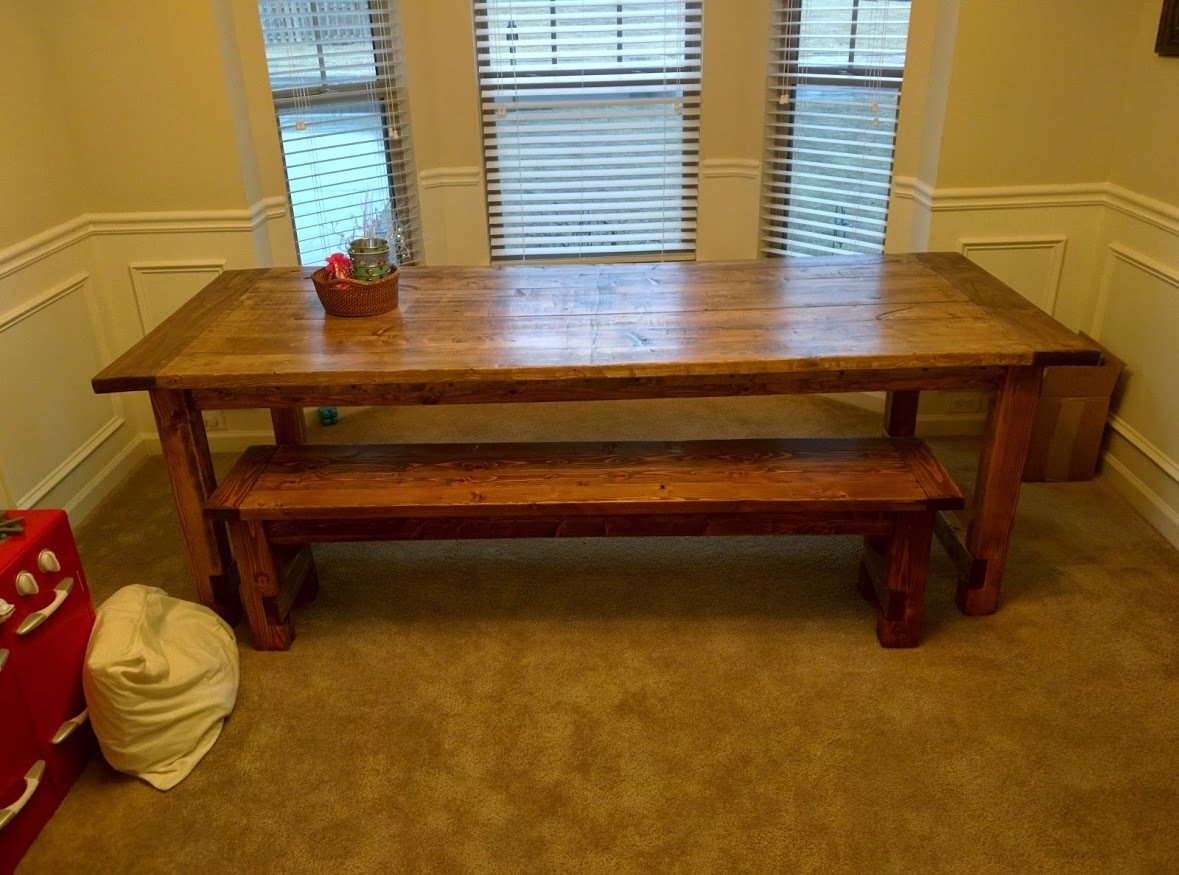
On a rainy morning in early January 2015, my wife and I were sipping our coffees and starting to get ready to take on the day. It was a Saturday morning, so we didn't have to go to work. We had moved into our house about a year ago so a few of our rooms were still a little bare and simply acted as play rooms for our daughter.
I walked out of my office, and looked over to the empty dining room which was immediately adjacent. Coming from a large Italian family, most of my childhood took place around a large dining room table at my grandmother's house outside of Philadelphia, PA. This empty room just didn't seem right. I decided to do something about it.
I remembered walking around Restoration Hardware seeing this amazing farmhouse table that was around $2000. Way out of our price range for a simple dinind room table. It also didn't come with any benches or chairs. It would have cost me around $2600 when all was said and it just gave me some severe heartburn.
I stumbled upon Ana's site here and decided to look around a little. Low and behold almost the exact same table was featured here. After getting over a short panic attack about building a piece of furniture that we would be using quite often I headed to Home Depot, got the materials, some new tools and got to work.
Not only do I think it turned out awesome, it was an amazing stress relief. Two weeks later and bought the Kreg Jig and built a matching bench. These pieces are so solid I could drive my car onto them. Thanks, Ana for the confidence to get this done the right way and save me about $2000.
Onto my next project, a jewelry armoire for my wife's valentine's present.
Burnt and stained with a semi transparent mahogany water sealer
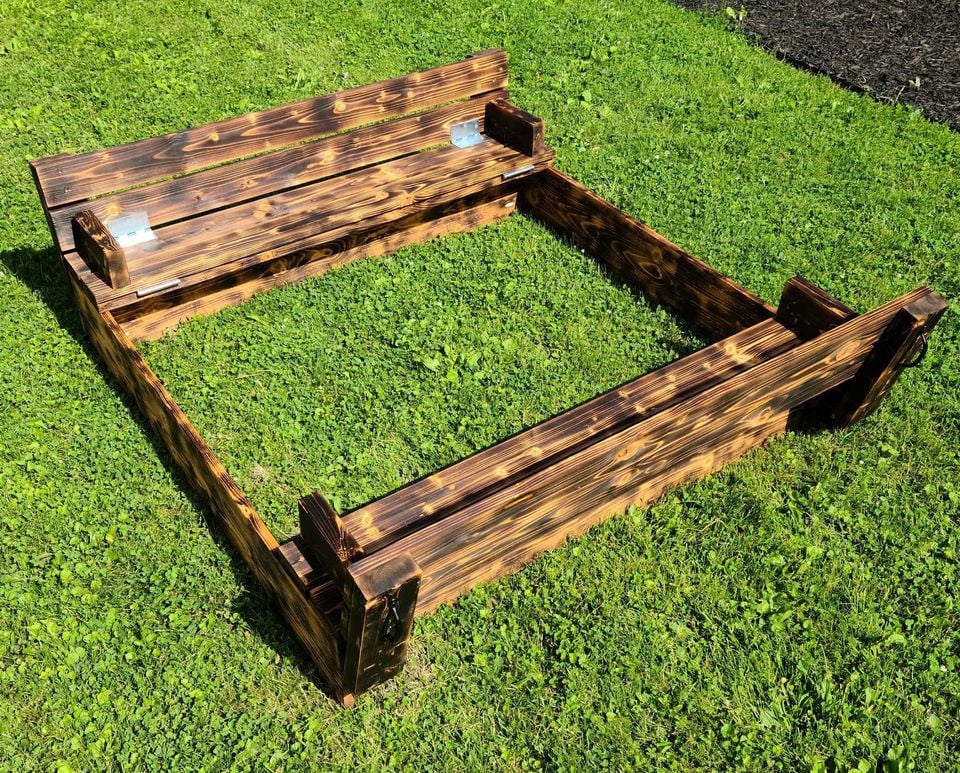
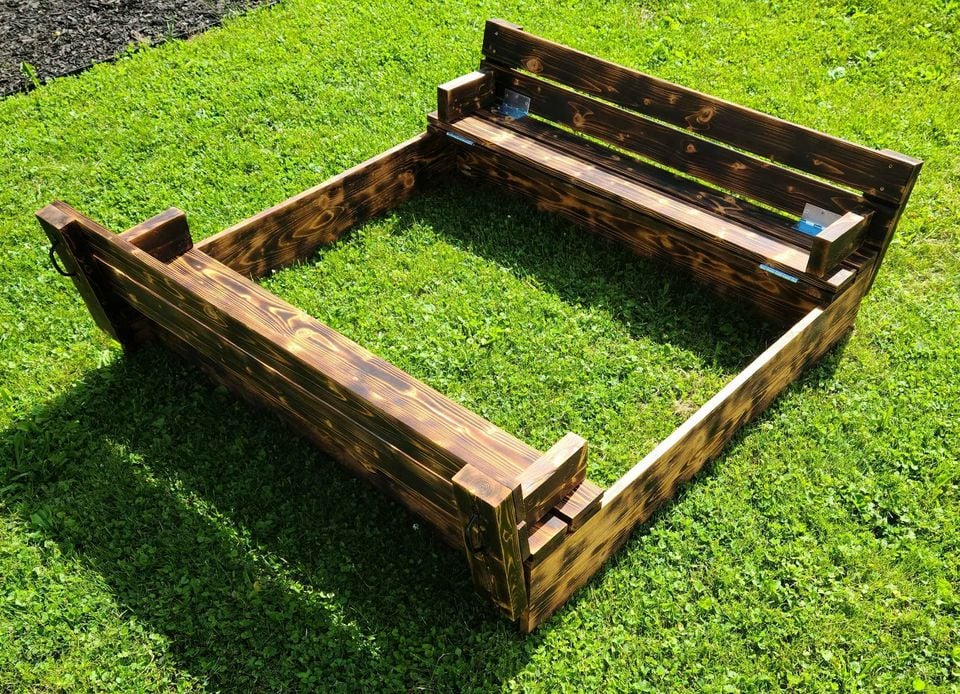
Used 36 inch legs instead of 32".
Also used two 6x1 inch boards for each side of the box.
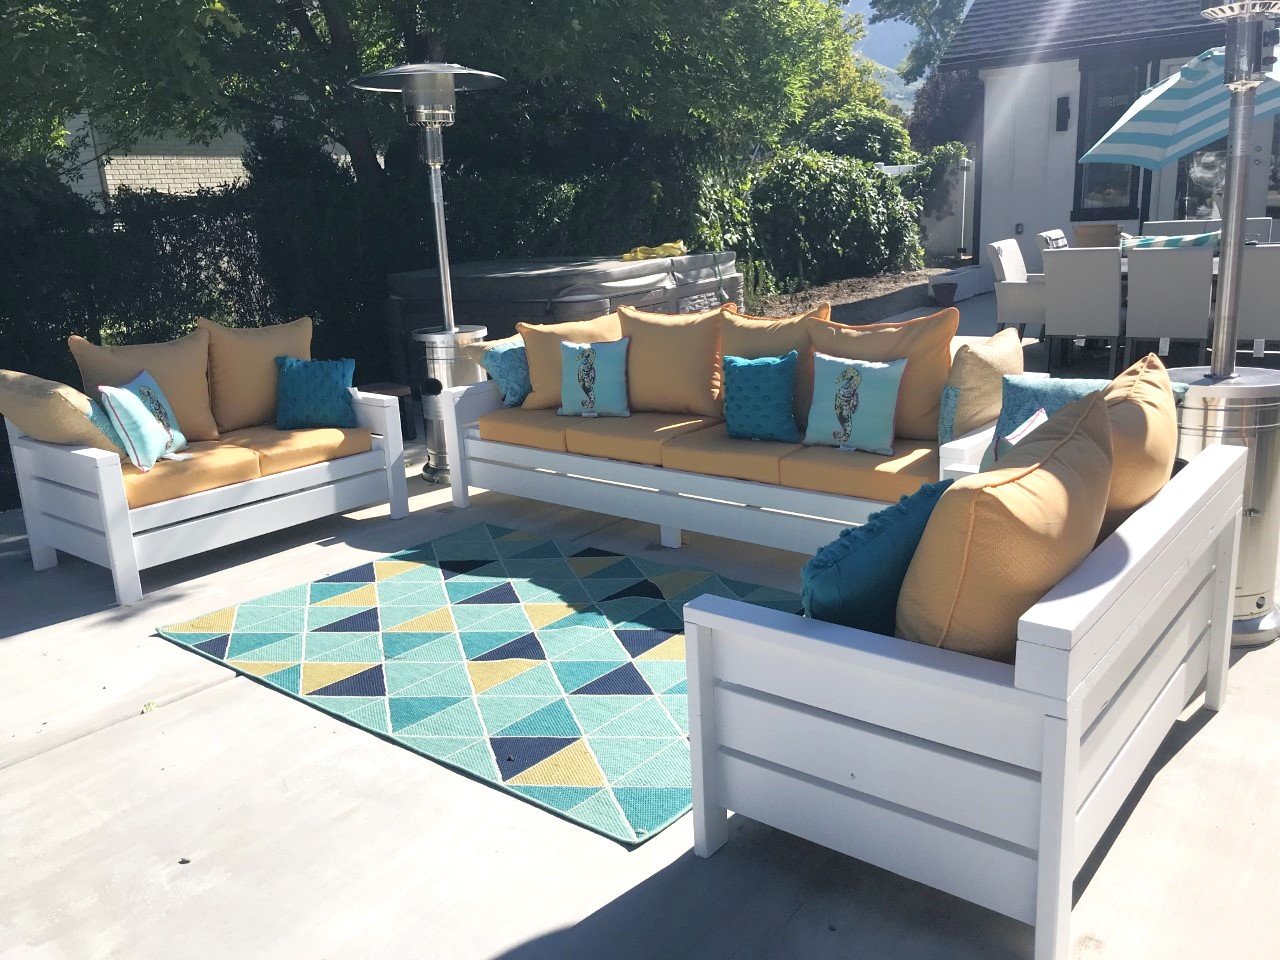
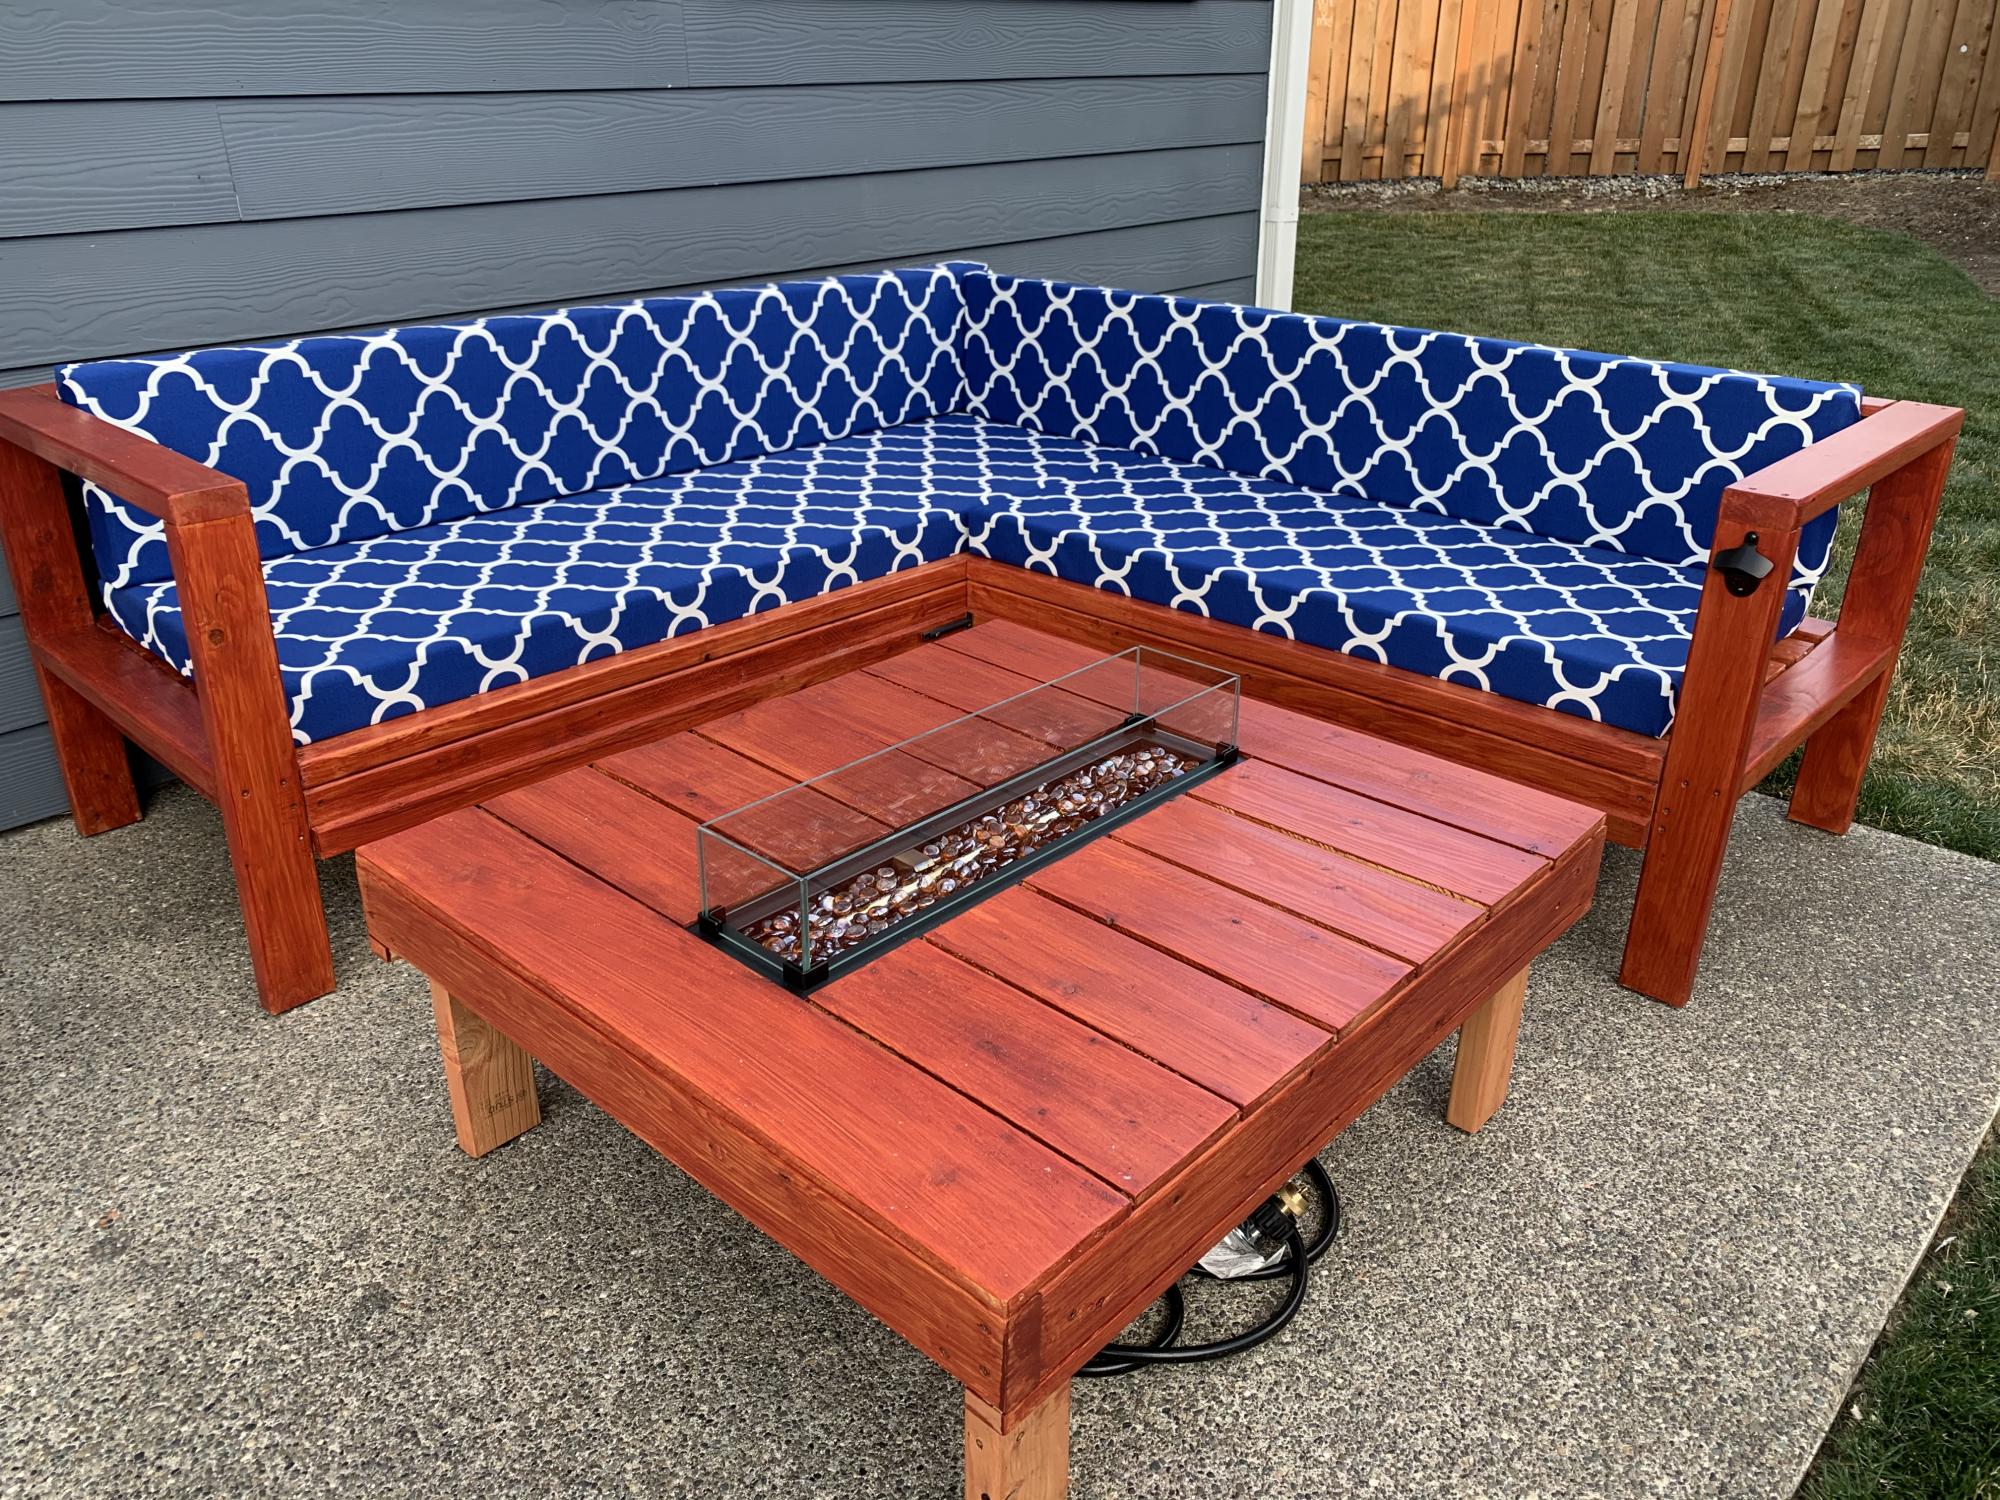
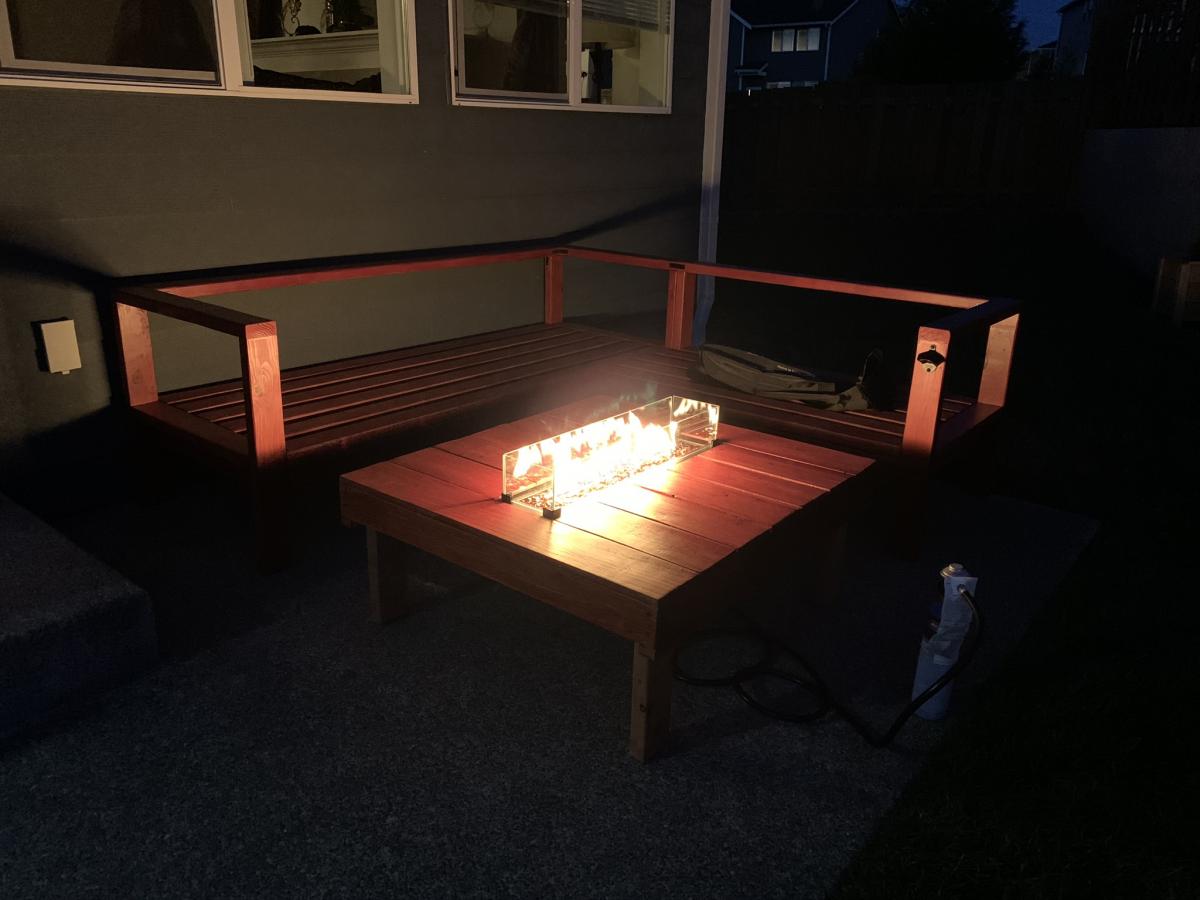
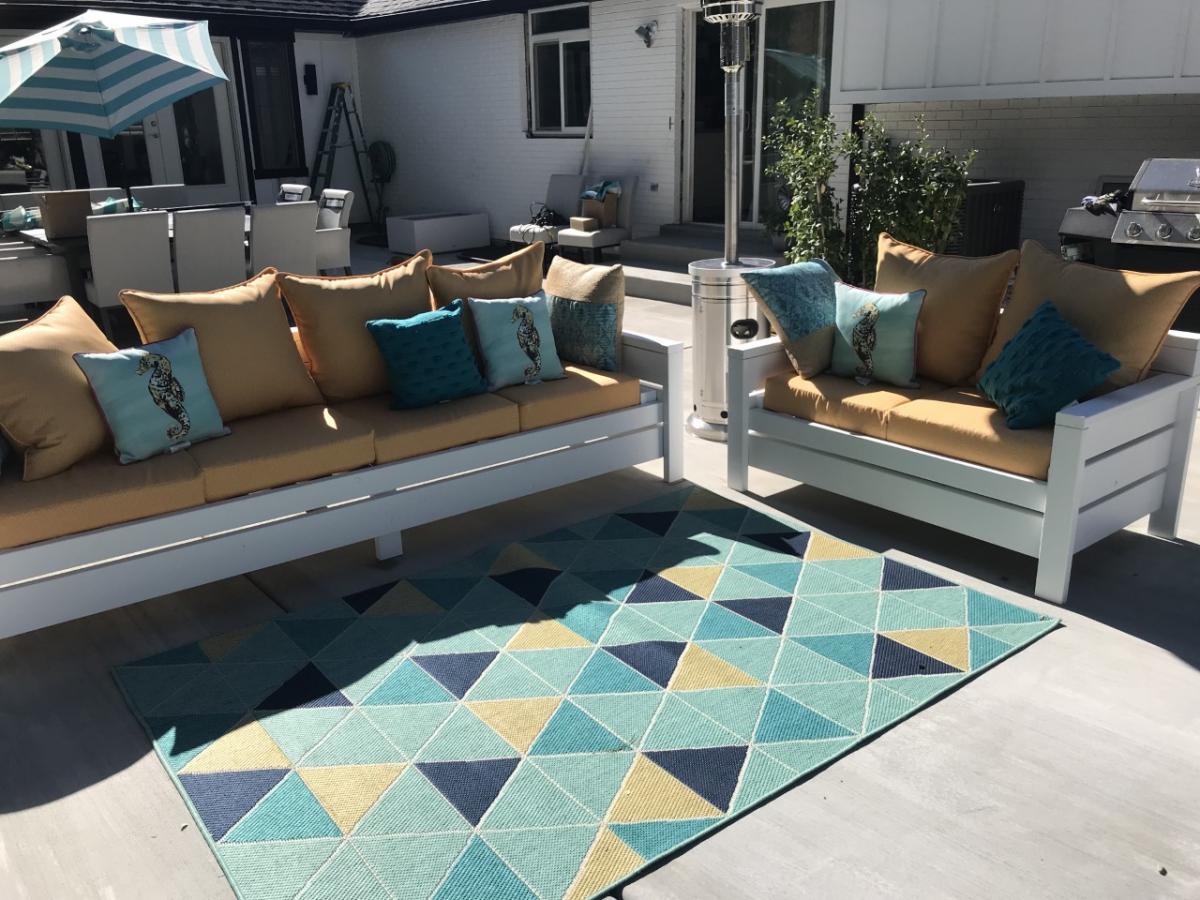
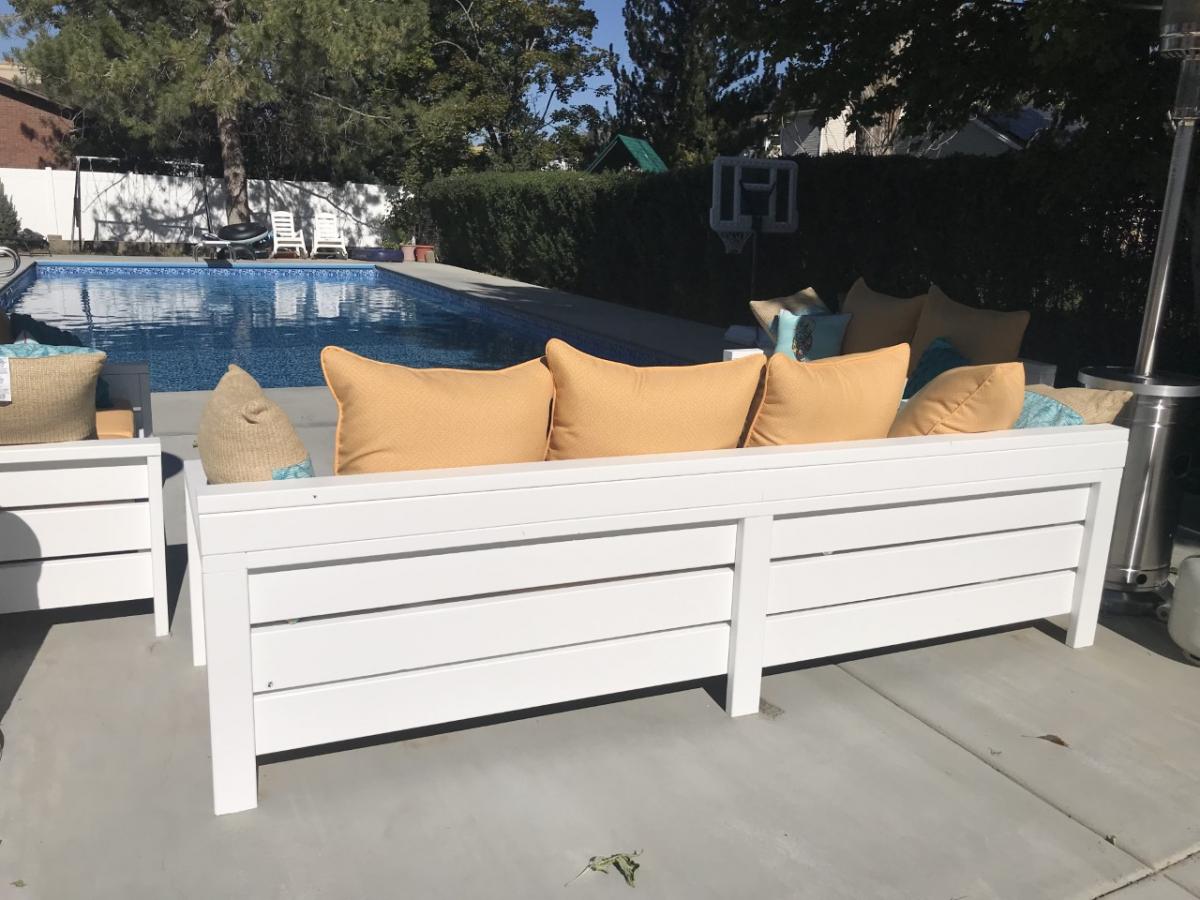
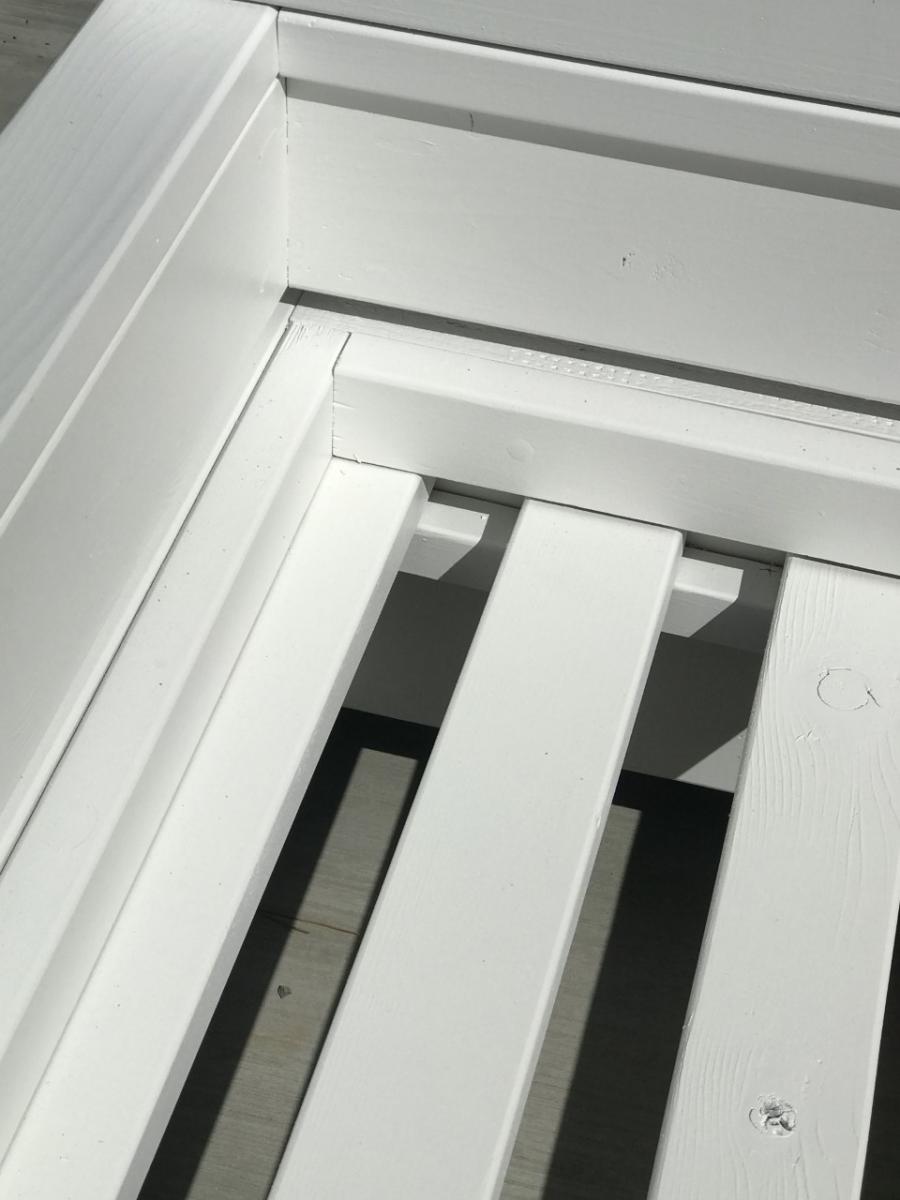
We were looking for outdoor furniture big enough for our whole family and friends but everything we looked at was over $5000 and really not well made. Ana to the rescue.
We built 2 loveseats and created a couch by doubling the dimensions.
We built the whole thing out of redwood so total wood was about $1000
The cushions were from Overstock and Lowes, approx $300.
There was a too much wiggle room with the cushions so we made a built-in frame to hold them in place. If we built another I would have cut the width down slightly.
We placed a 4X4 and another 2X4 on top of the back to provide more support.
All in all, love the way it turned out.
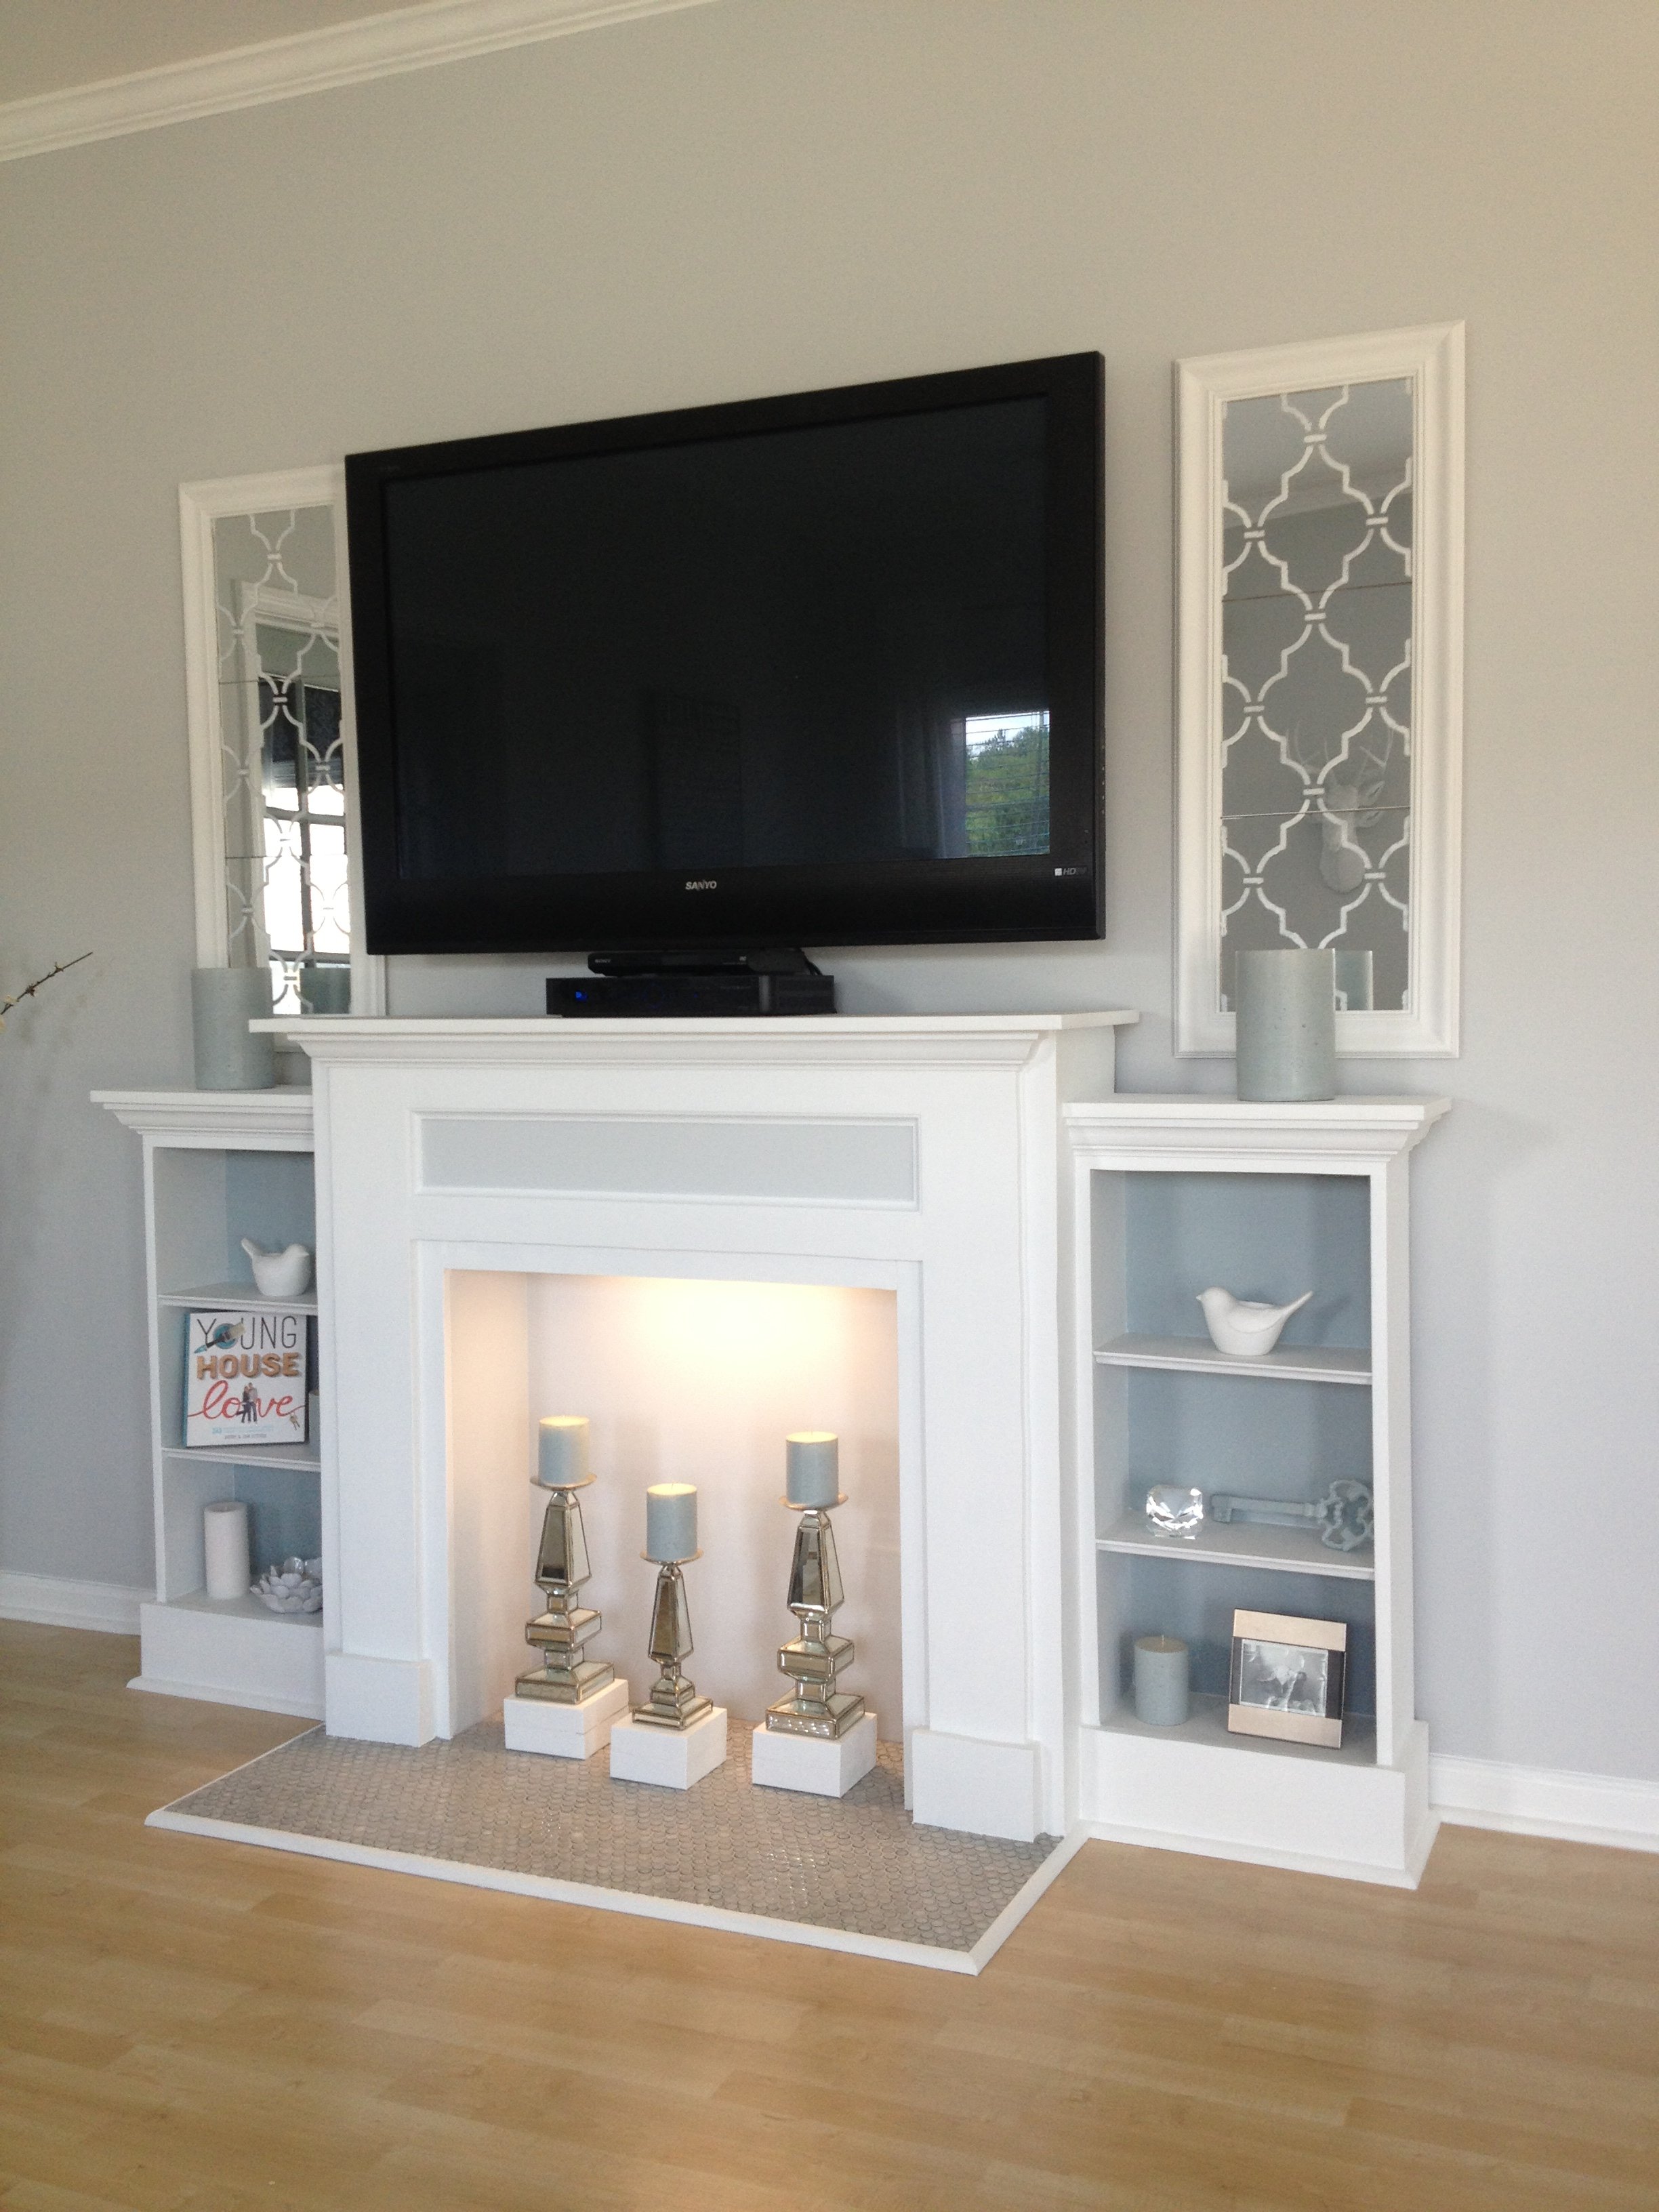
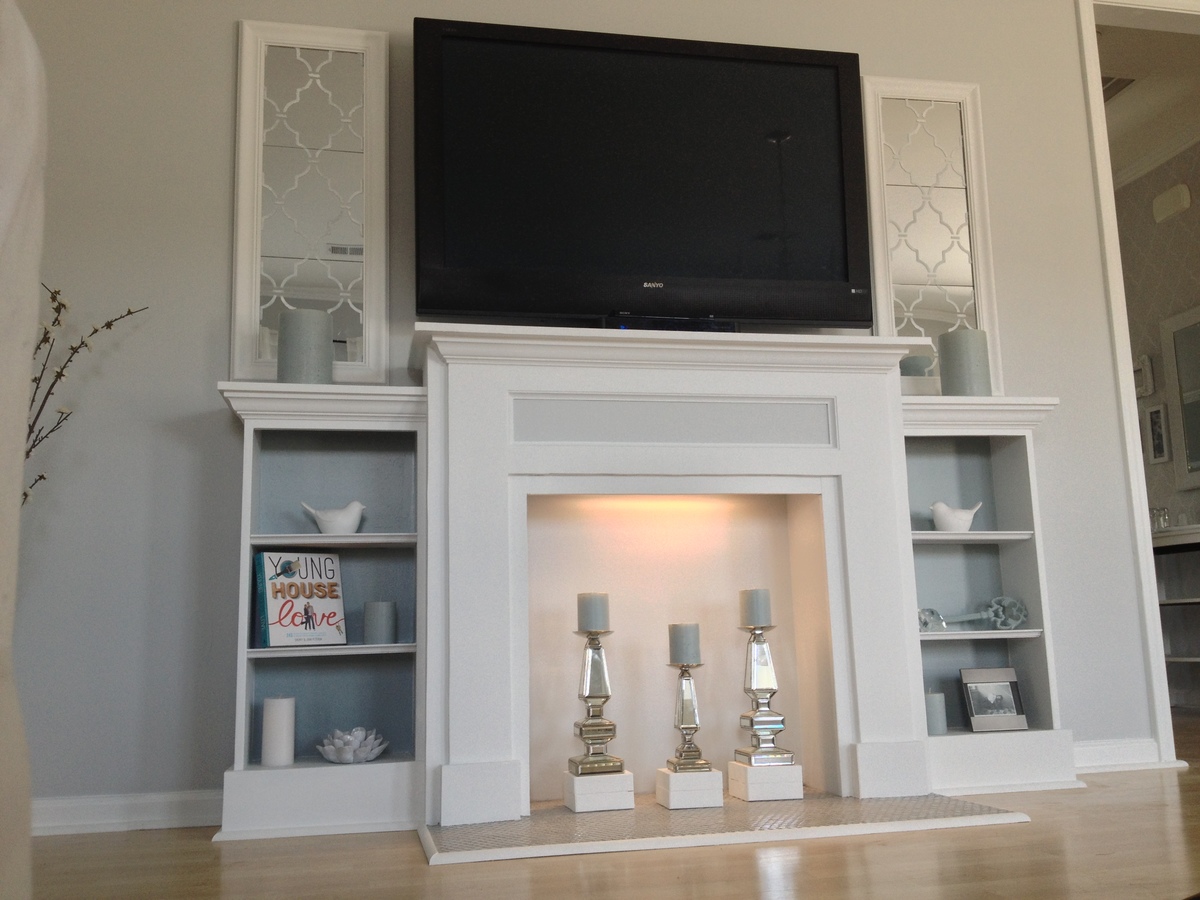
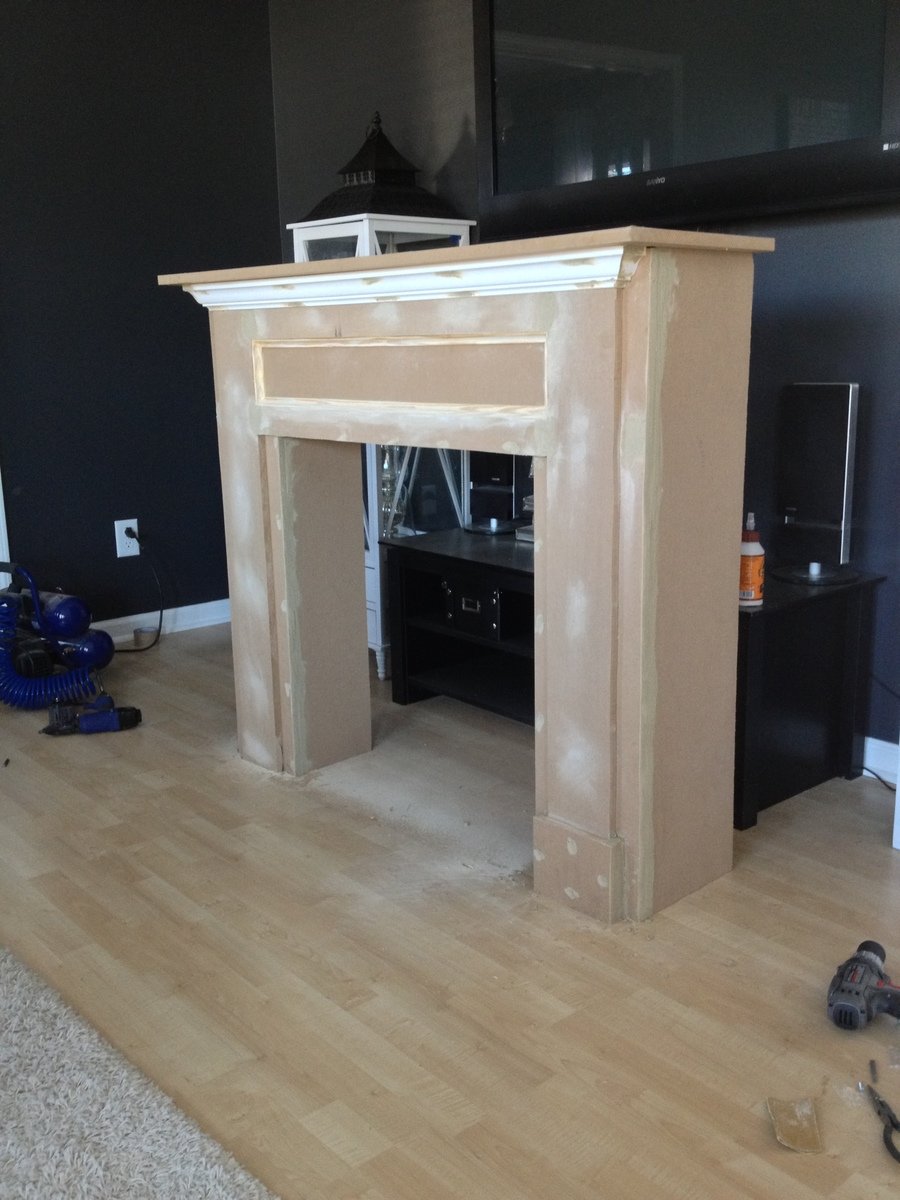
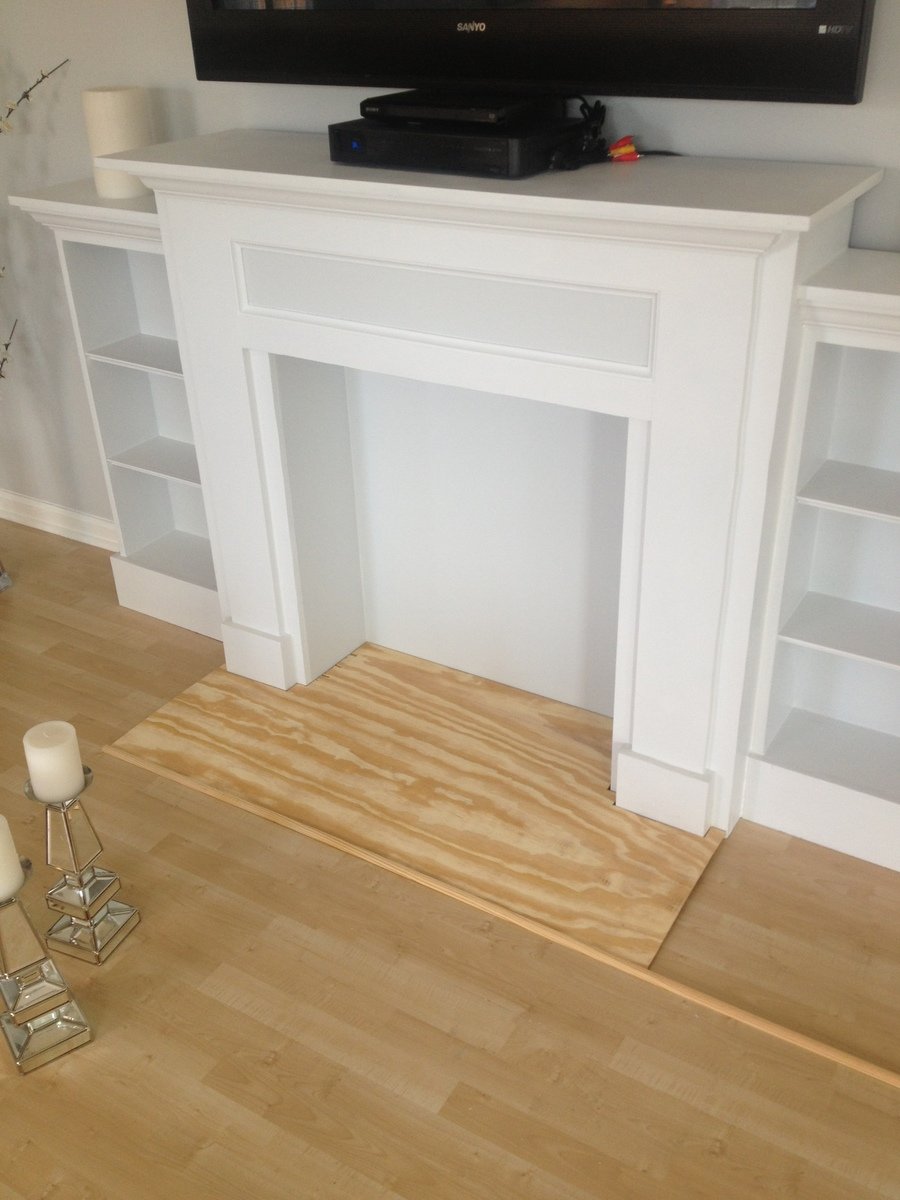
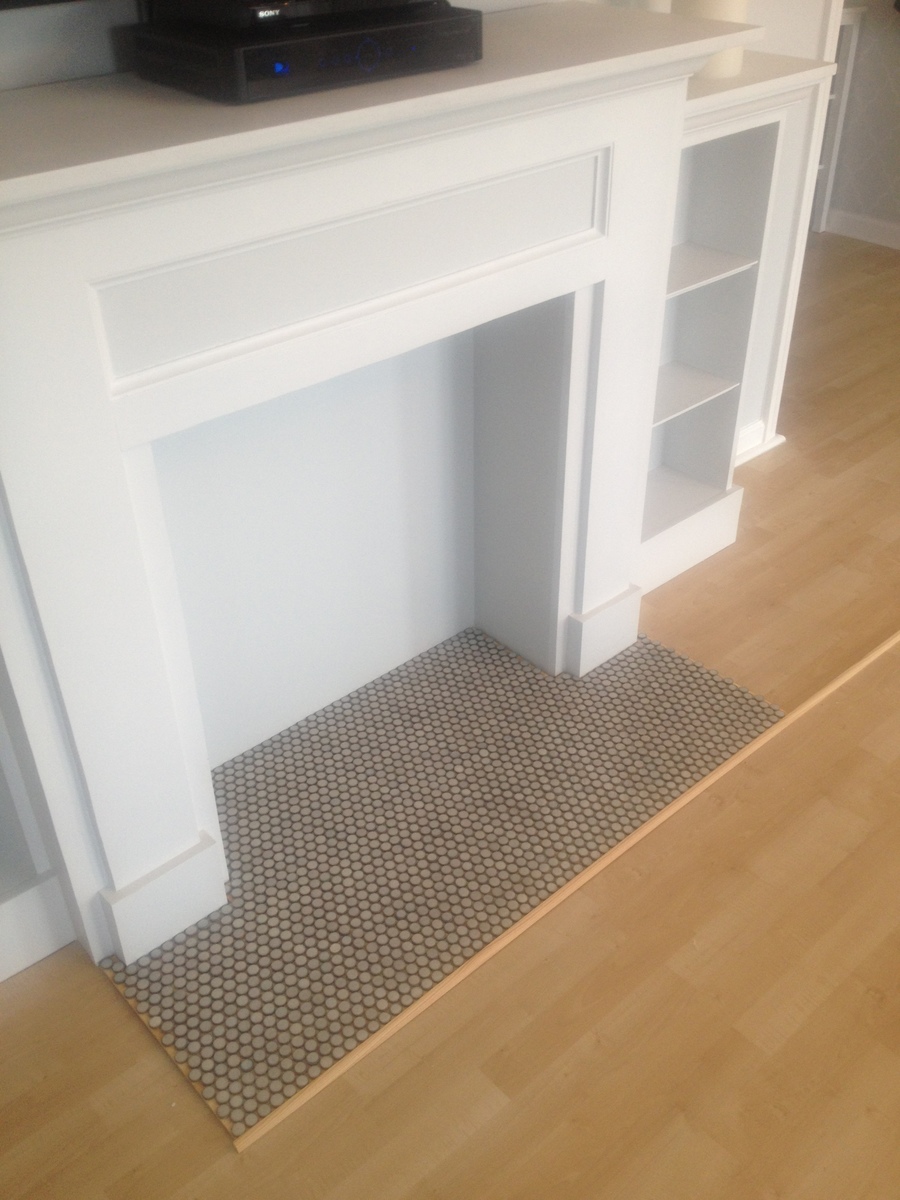
Finally Completed!!! Thank you rainy Saturday! So I wanted a new entertainment center of sorts... couldn't find one that was just what I wanted..... so why not just build what I want! Just DIY it. ;)
I used the faux fireplace plan and modified it to have attached shelves on the sides. I also added an extra strip at the top of the fireplace opening so I could mount an LED bar light.
I used 1/4 plywood to make a tile base, penny tile, and 1/2 quarter round to finish out around the entire bottom.
Total project cost was less than $200 including the tile and light!
Best part is the whole thing is movable!
Thanks Anna White for such an awesome plan to start with!

Wed, 07/03/2013 - 10:24
This whole unit is great. My wife LOVES it, which means I will be building it! Did you purchase the two shelf units or build them yourself? Did you use a pattern or plan? Thanks!
Sat, 08/03/2013 - 18:25
I did make the depth of the fireplace deeper so I could have room for the halves on the side. I just sketched out the dimensions I wanted the side shelves and built them along the same lines as the fireplace. Wasn't hard to figure out and just made it to fit the size I needed. The inset of the fireplace does not go all the way back to the wall either, that way the power strip can fit on the floor behind it. Glad you like it and thanks for the compliments!
Wed, 07/23/2014 - 14:54
Hi Celeste 808, What a wonderful faux fireplace WITH the bookcases, especially. I'm hoping I can try this in our space challenged bedroom. Did you by any change reply to the chap who asked if you had some kind of dimensions or plans you could pass along to us? I would love to see if we can make it work in the space we have available.
Thanks again for the inspiration,
e
Mon, 10/28/2013 - 18:25
I absolutely love what you did with this. I am going to have my fiance help me make this for our house. If you still have the dimensions and details of how you built the whole unit I would greatly appreciate it if you could post it.
Tue, 10/29/2013 - 05:36
Love it. I wasn't going to build the side shelving unit, but changed my mind. This is beautiful... I really love the base.
Sun, 04/13/2014 - 13:00
This is gorgeous & I can't believe it's your 1st project. I would love to build this too. Did you use any particular plans for the side units? If you have any tips or information to share, that would be great! I've actually been trying to make up my own plans using Sketch Up, but that's not working too good, lol. Again, great job & thank you.
Lynda

Sun, 02/08/2015 - 12:31
I'm dying to know the dimensions you added to the width. Also, the dimensions of the book shelf. I have been trying to draw up plans for the last week and I'm stuck with trying to figure it out by looking at your pictures.
PLEASE HELP!
Thanks!!
Mon, 07/27/2015 - 09:15
Do you have the blue print of how you built the mantel and side book shelves? I am wanting to go buy supplies to build this tonight!!!
Thank you!
Sun, 11/15/2015 - 13:19
im having a hard time with the site. LOVE this and want to build it. how do i get the plans for it?
Sun, 11/15/2015 - 13:19
im having a hard time with the site. LOVE this and want to build it. how do i get the plans for it?
Mon, 07/18/2016 - 12:19
Hello! I love the design! If you have the dimensions or blue print for the shelves please forward along!!
Sat, 12/31/2016 - 18:06
Hi there! Love this look! Just wondering where you found the mirrors shown on either side? Thanks!
Tue, 12/19/2017 - 21:55
How wide is this? From the end of one bookshelf to the other? Also, how deep is it?
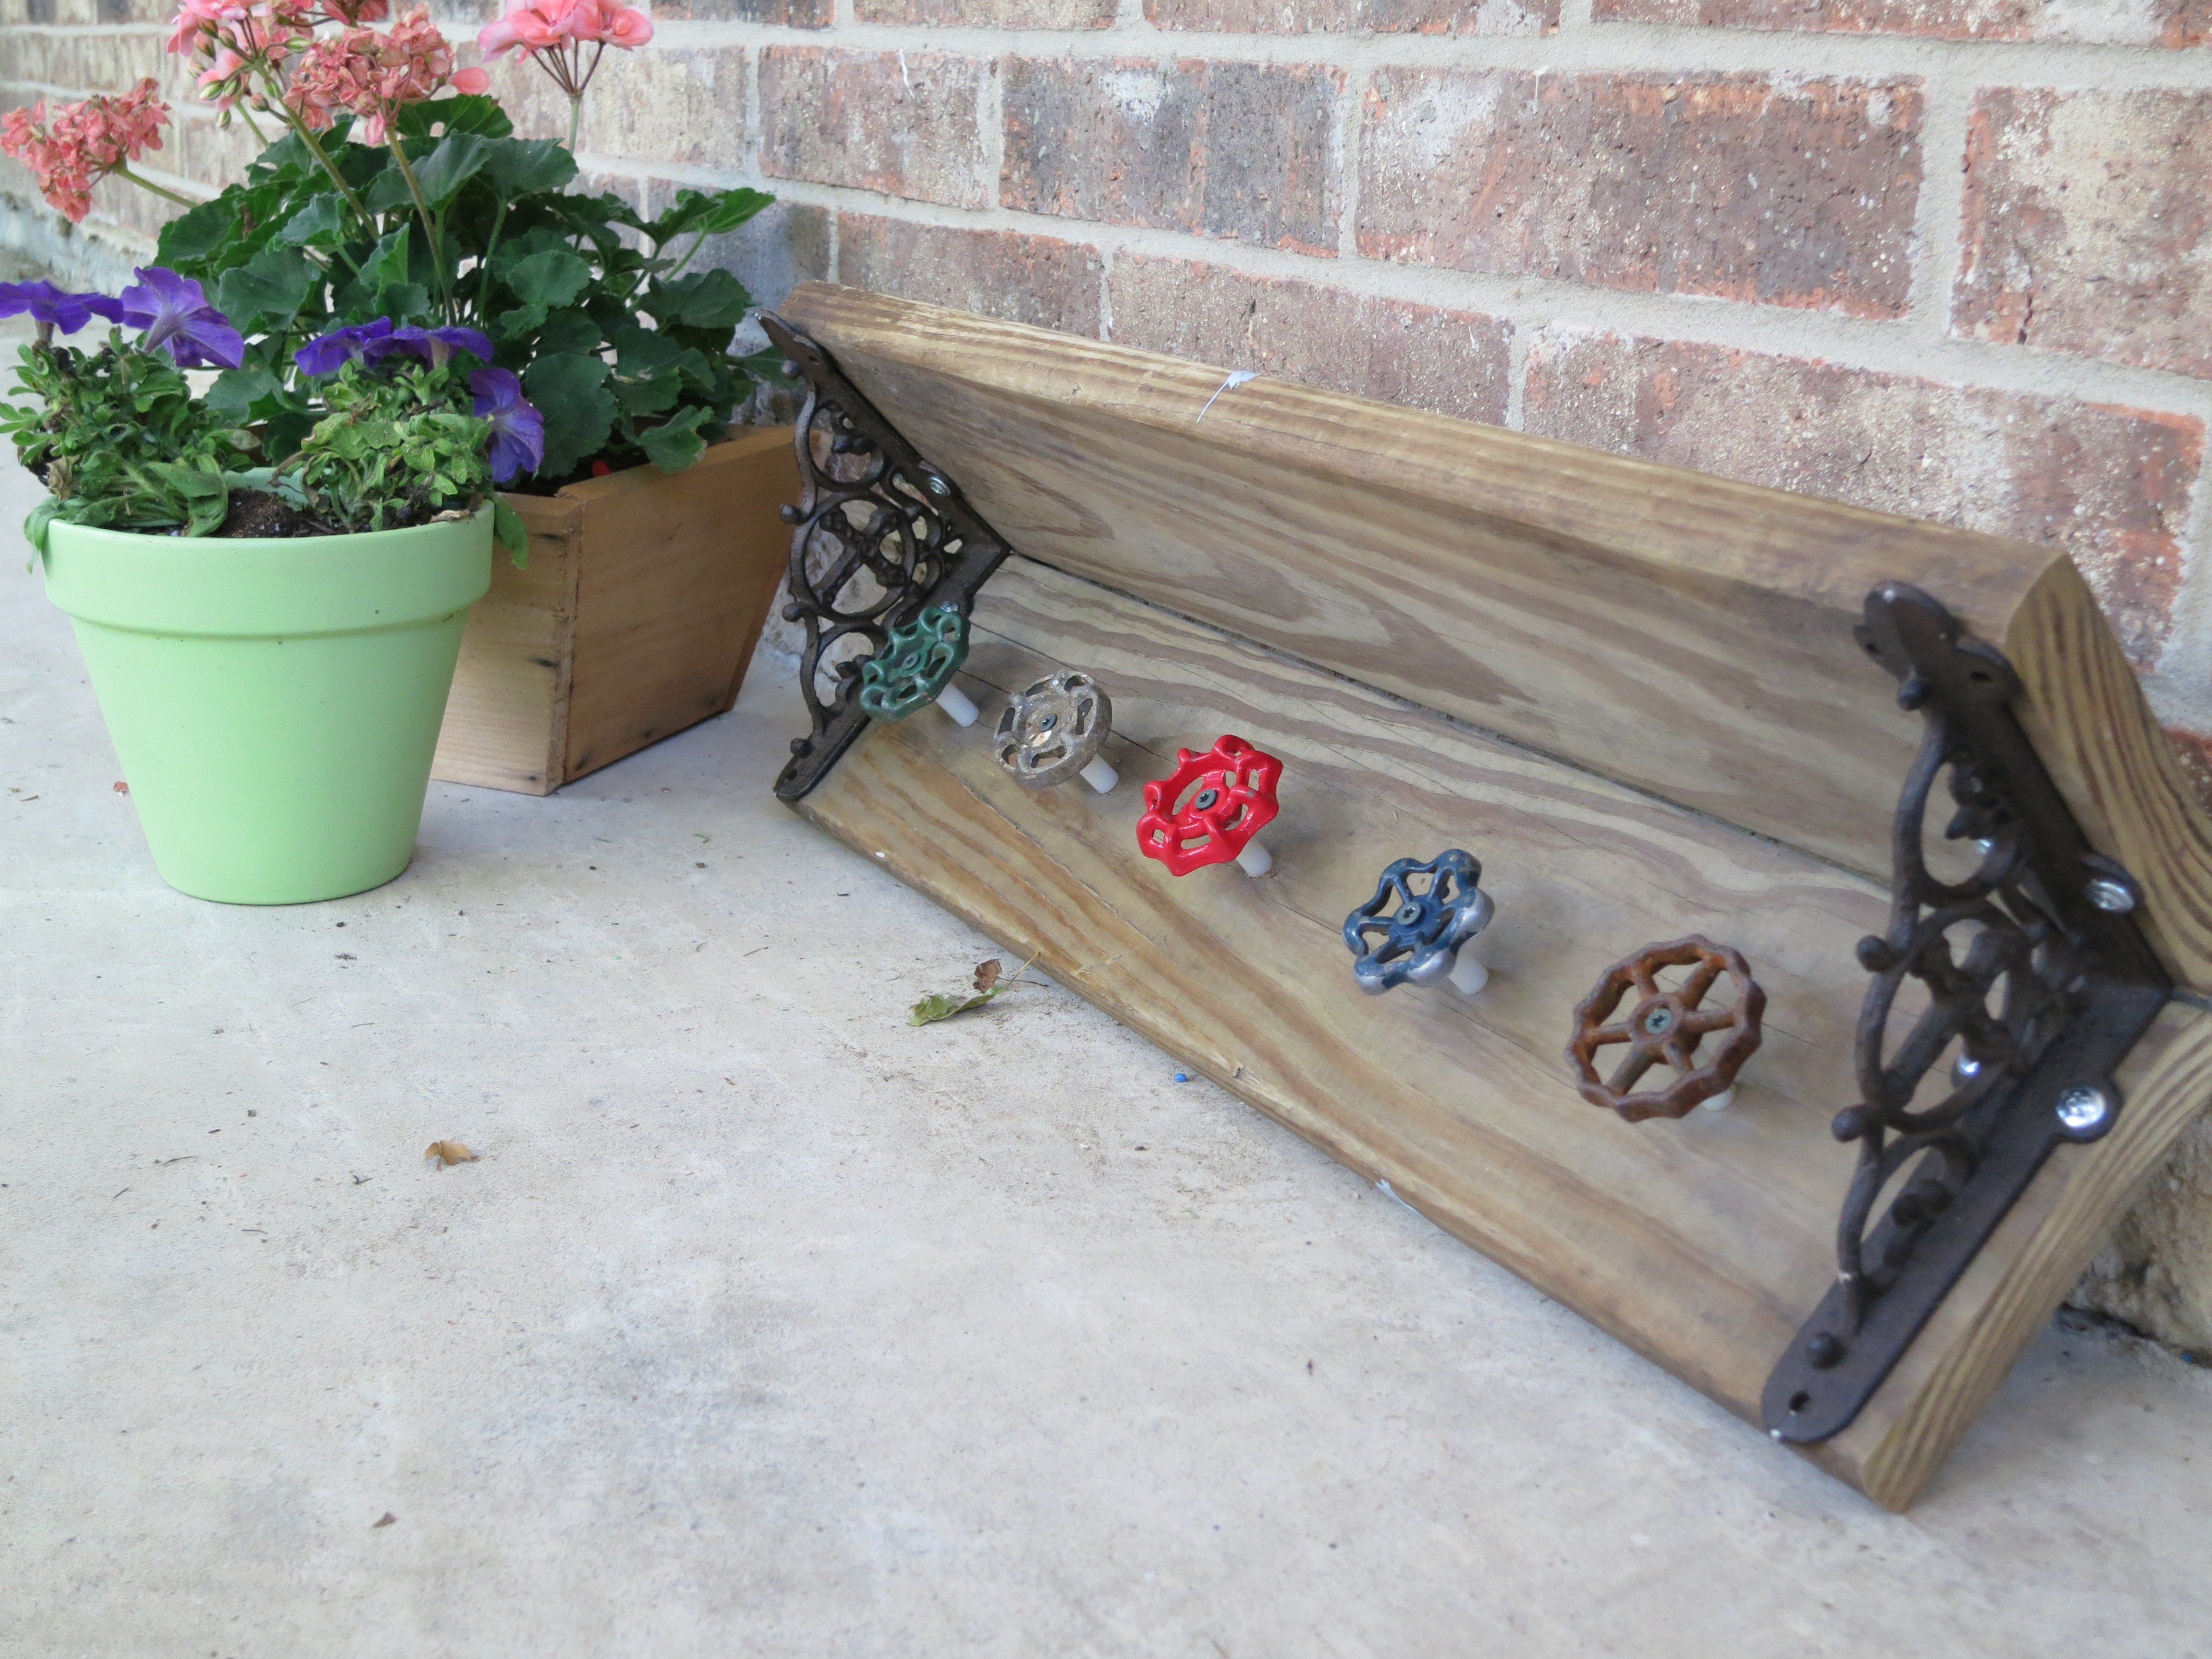
I wanted a gift for my mom. Something special and unique I think she would really like. Once on a guest post Ana posted a jewelry holder using a board, and some mismatched knobs.
My mom likes to garden. She works so hard on her back yard, and spends a lot of her time there. How could I make this outside proof? A few Pinterest finds later I found my answer: Water Spigots.
Voila! This is what we came up with.
** It's not going to hang by a string. It will be attached to her fence. This is just for picture purposes.
http://www.countryliving.com/homes/makeovers/fast-makeover-projects?src…

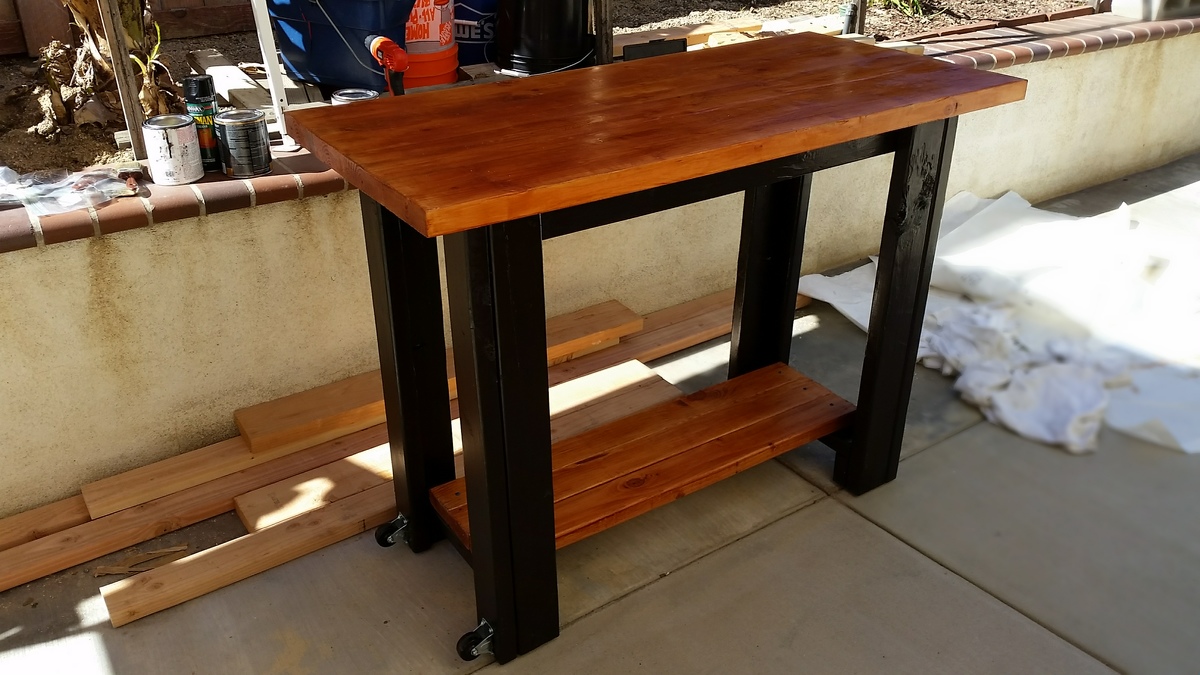
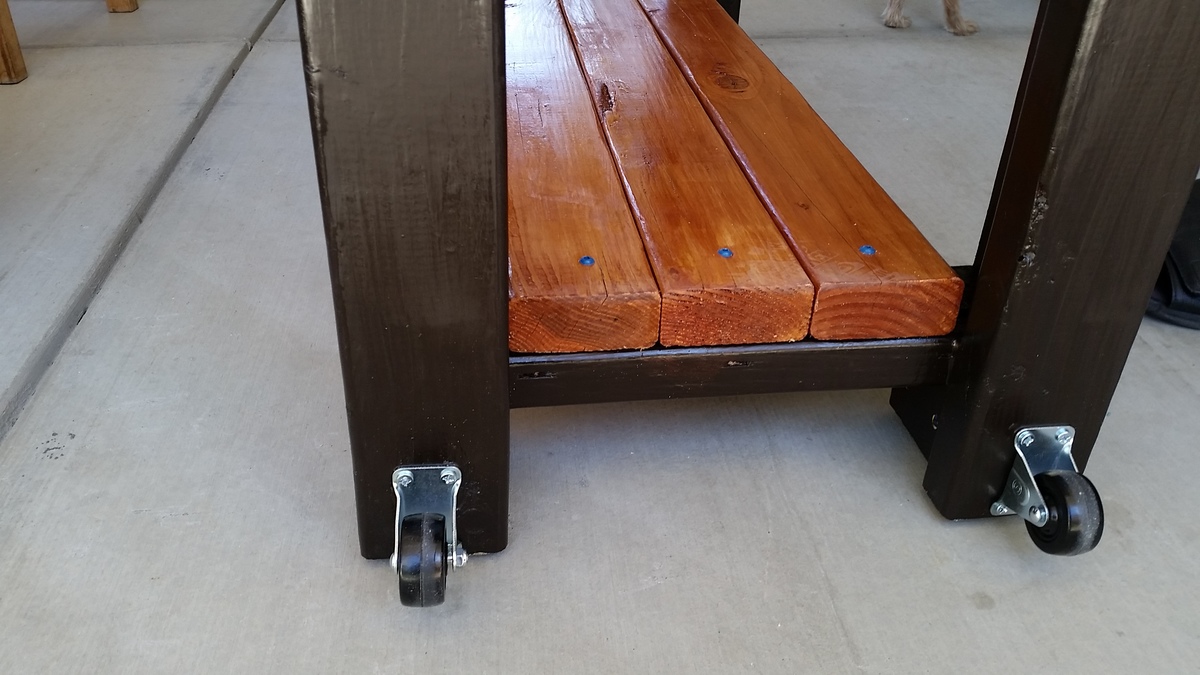
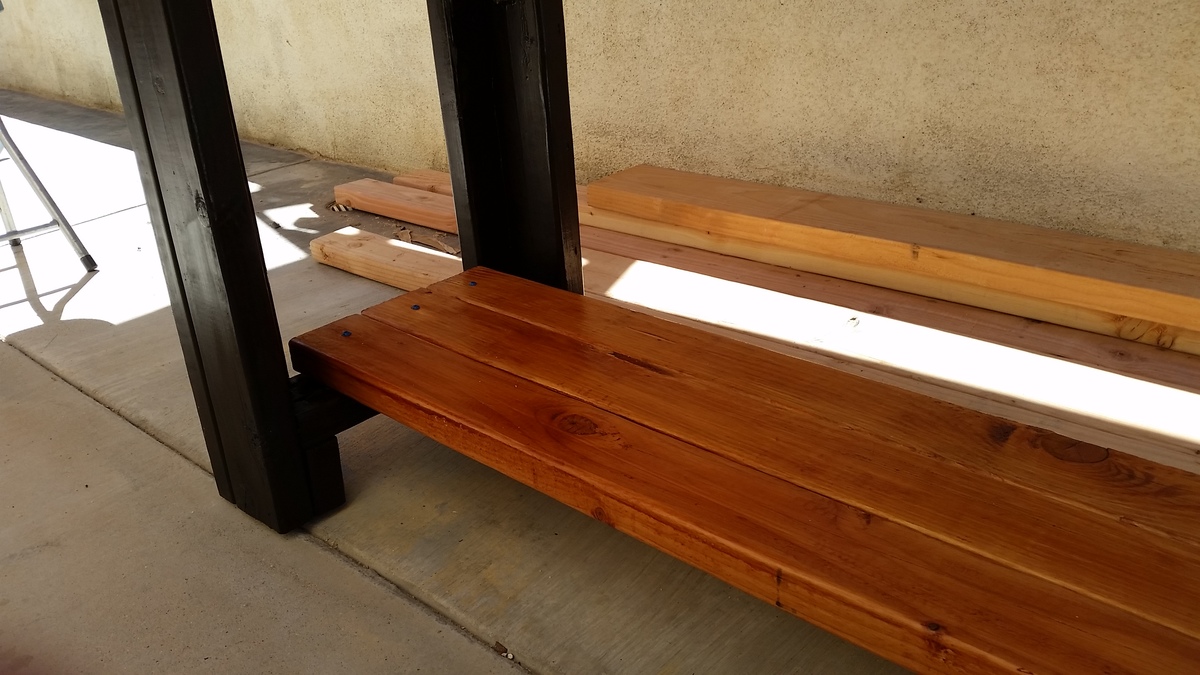
Built this over a week because the table top needed to dry and harden. I decided to paint the whole thing to make it look decent. I Kreg jigged four 2x6's together and added wood hardener to the table top. It was pretty weak because the wood was still wet so I had to dry it out for a few days. I also filled in the gaps with wood filler and then used a belt sander to smooth everything out. Everything else were just 2x4's. I knew it would be heavy so I added wheels to move it around and as a final touch I am adding 90 degree iron accent brackets to the table corners but I haven't got those delivered yet. I also added rubber screw-in feet so that the bottom doesn't chip when you move it around. Got those from Home Depot for $3
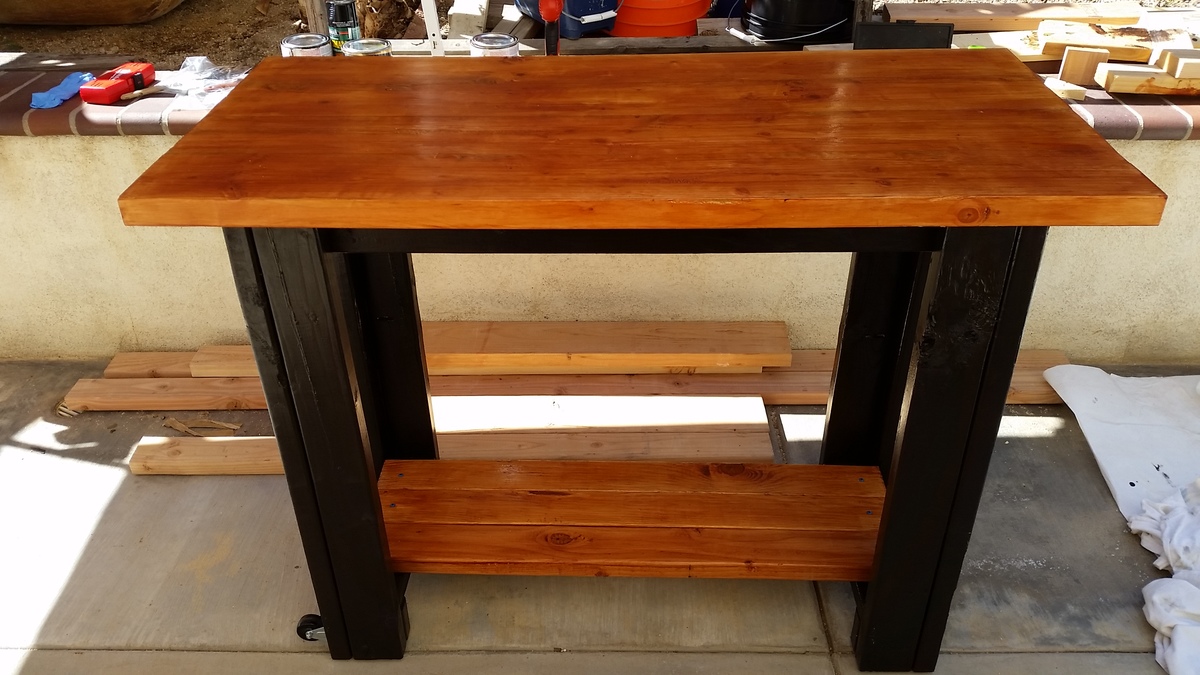
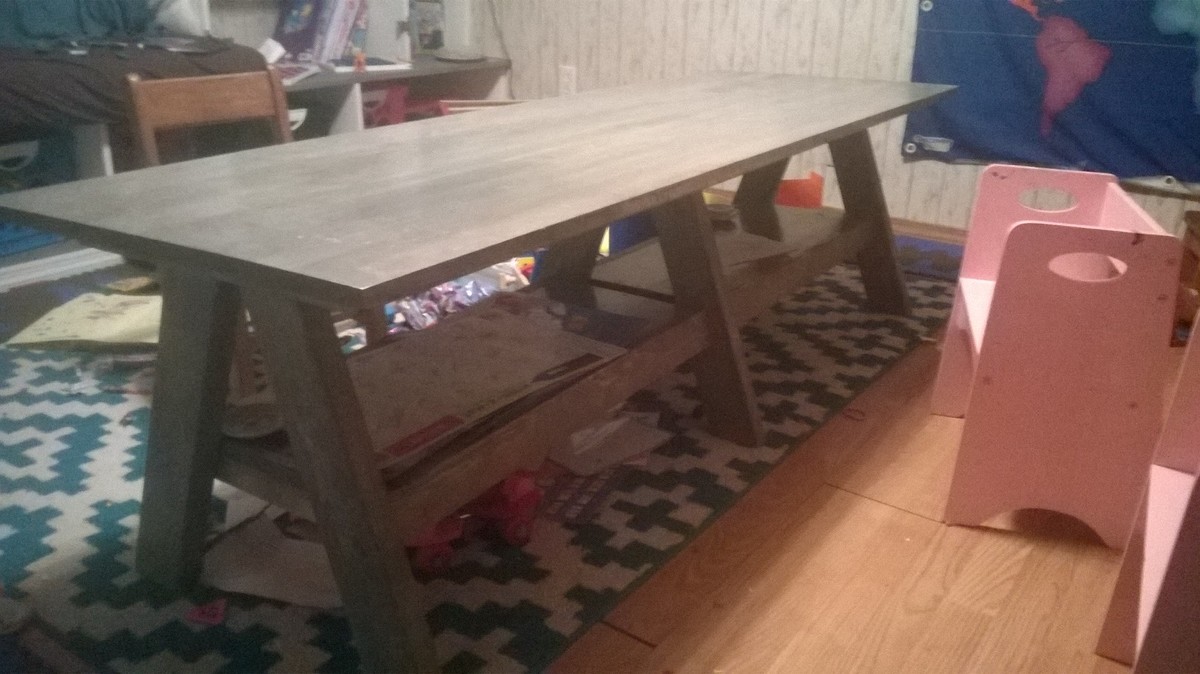
This one was fun to build. I feel in love with it when I saw it. I used weather grey stain from rustoleum and I love how it turned out.
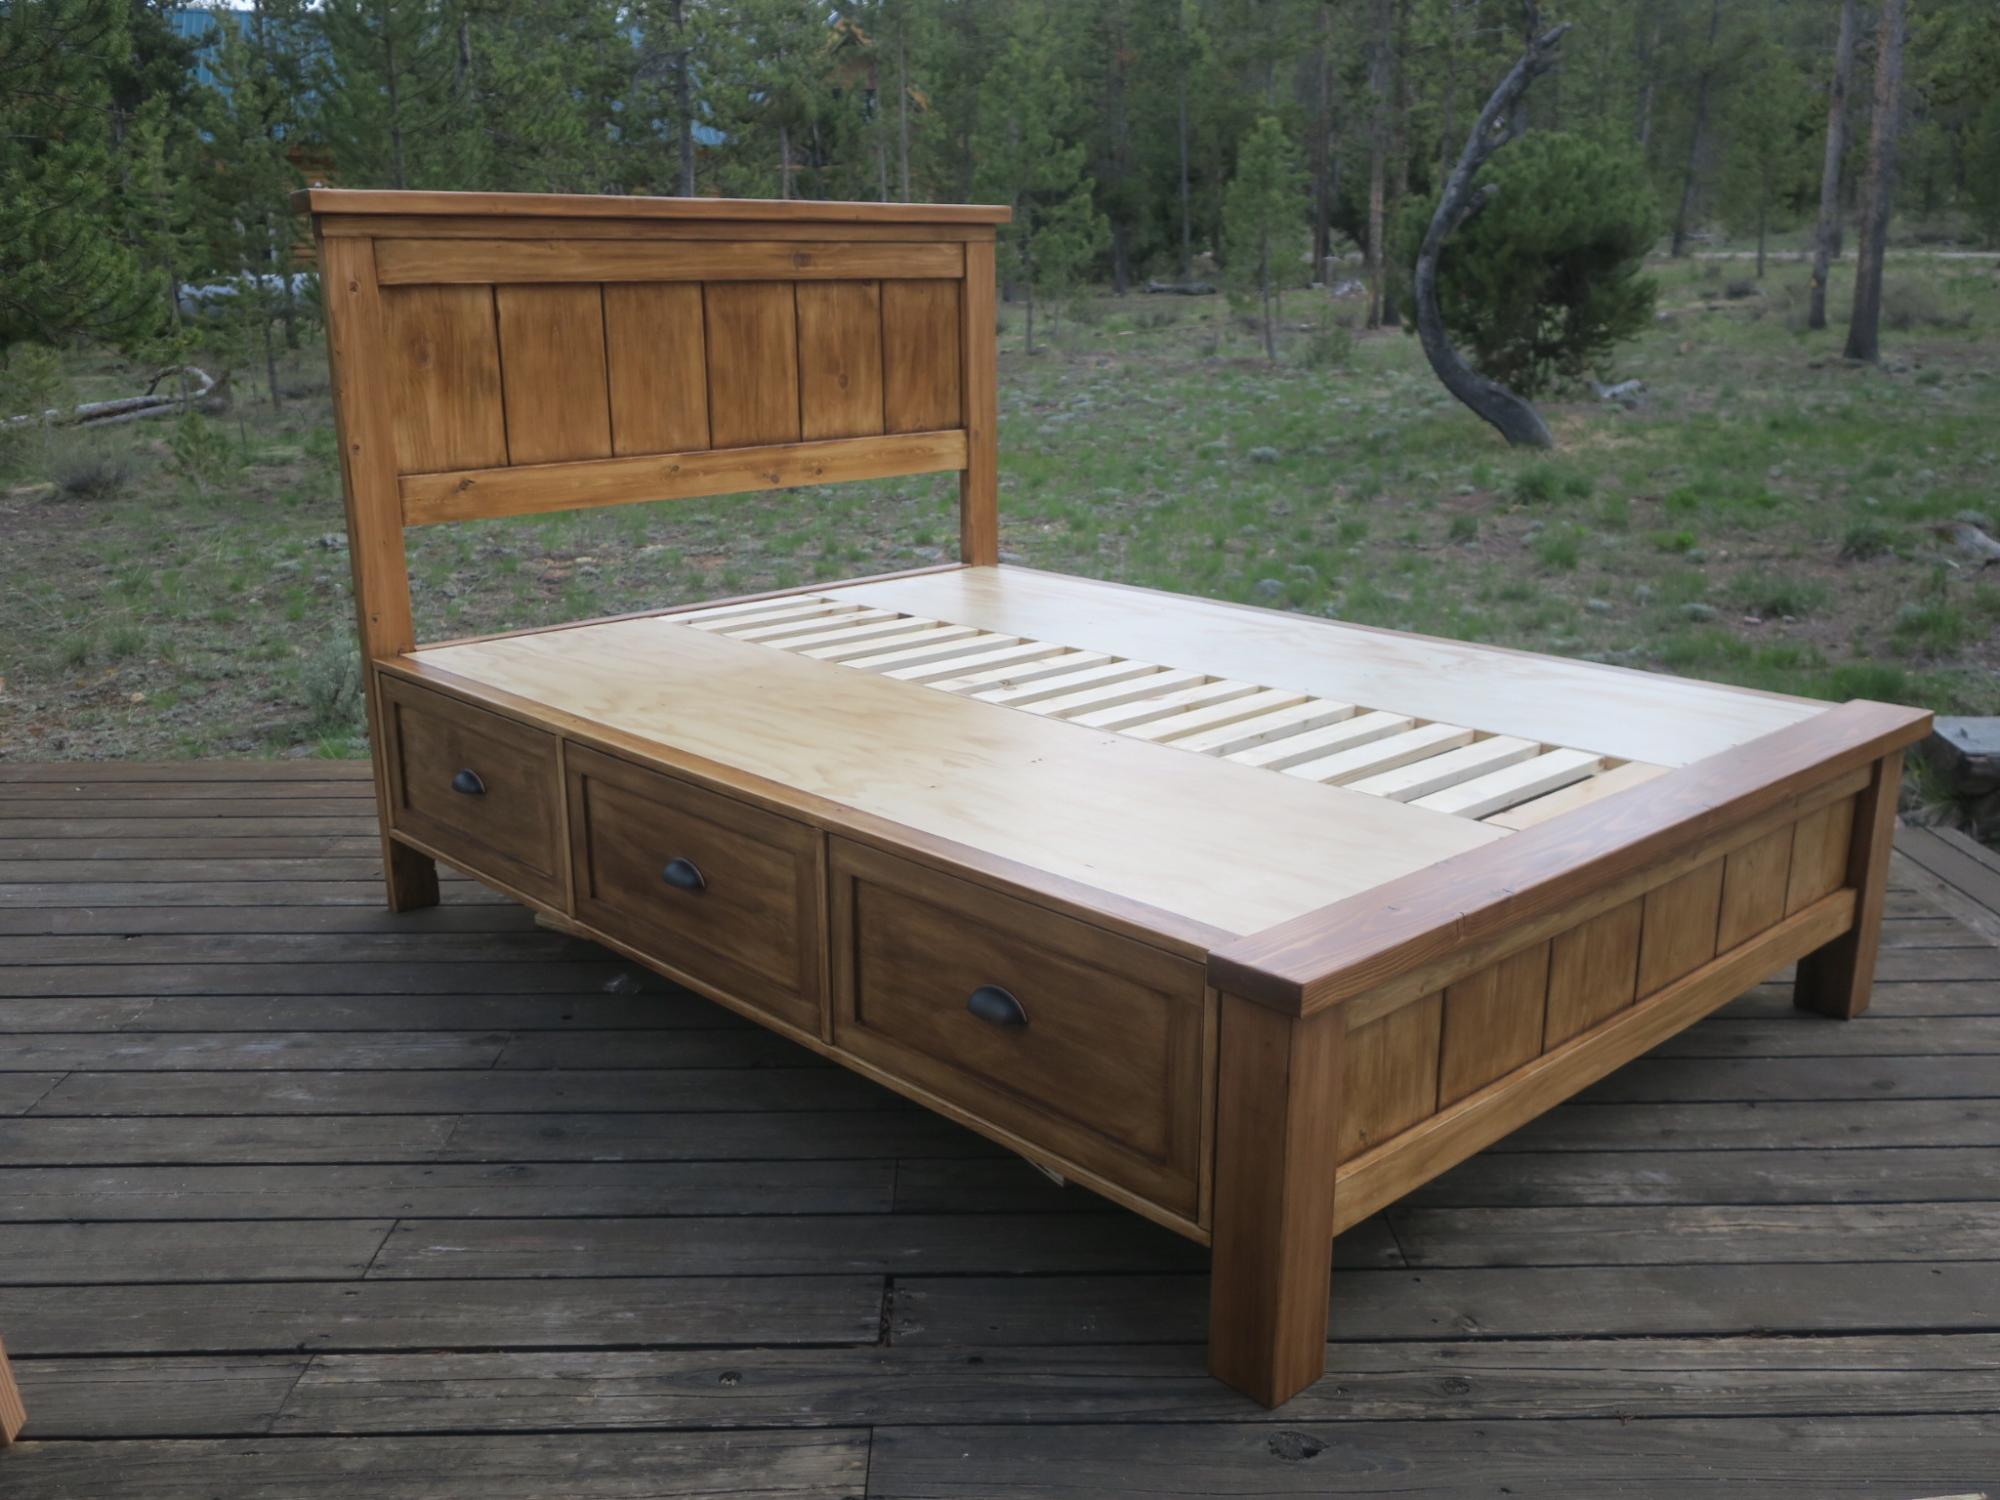
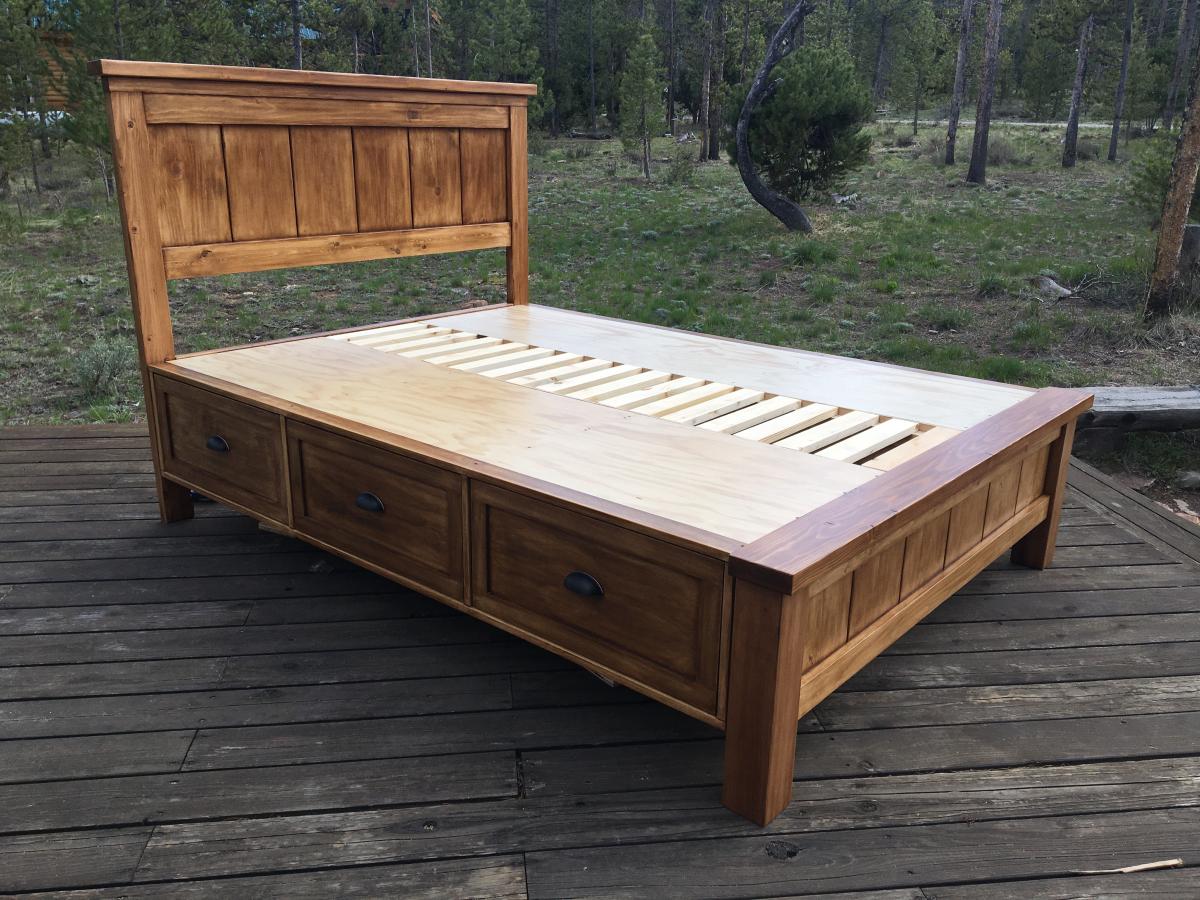
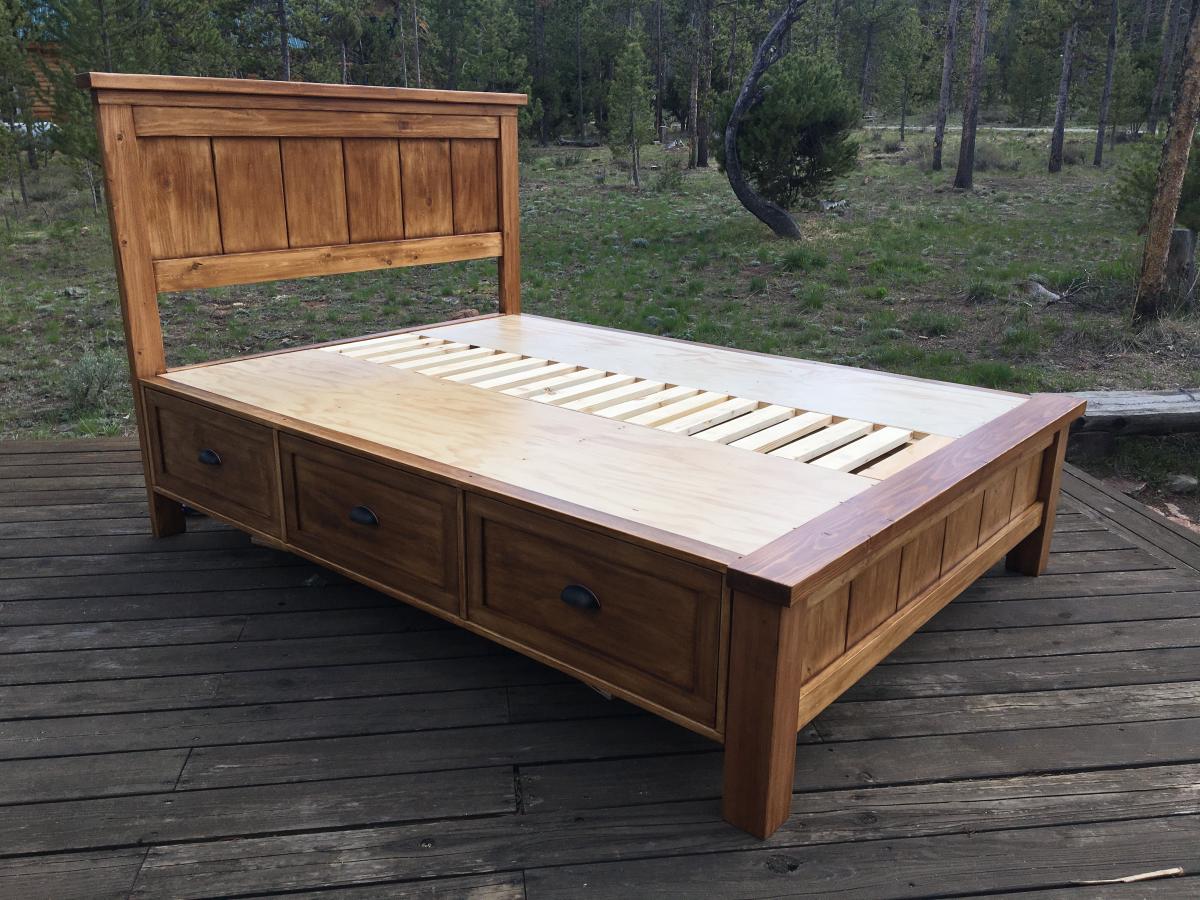
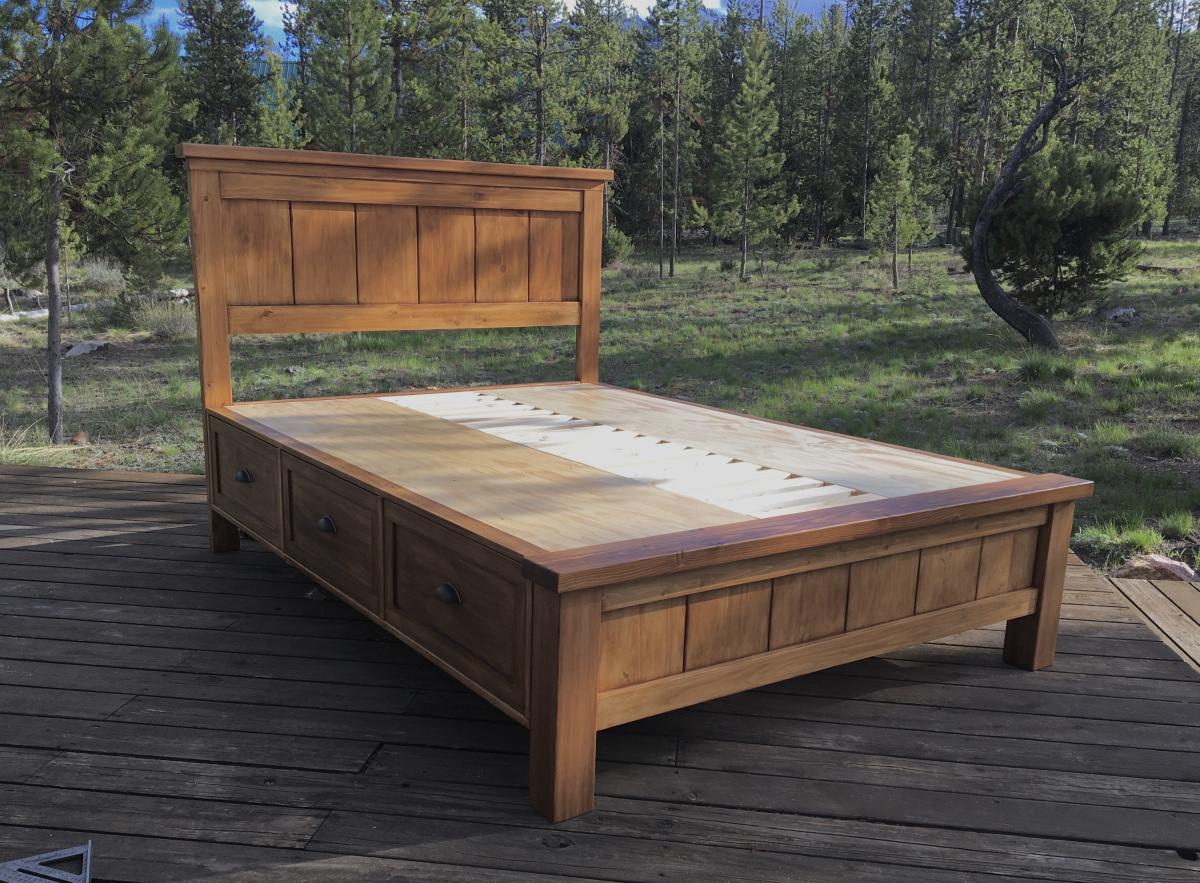
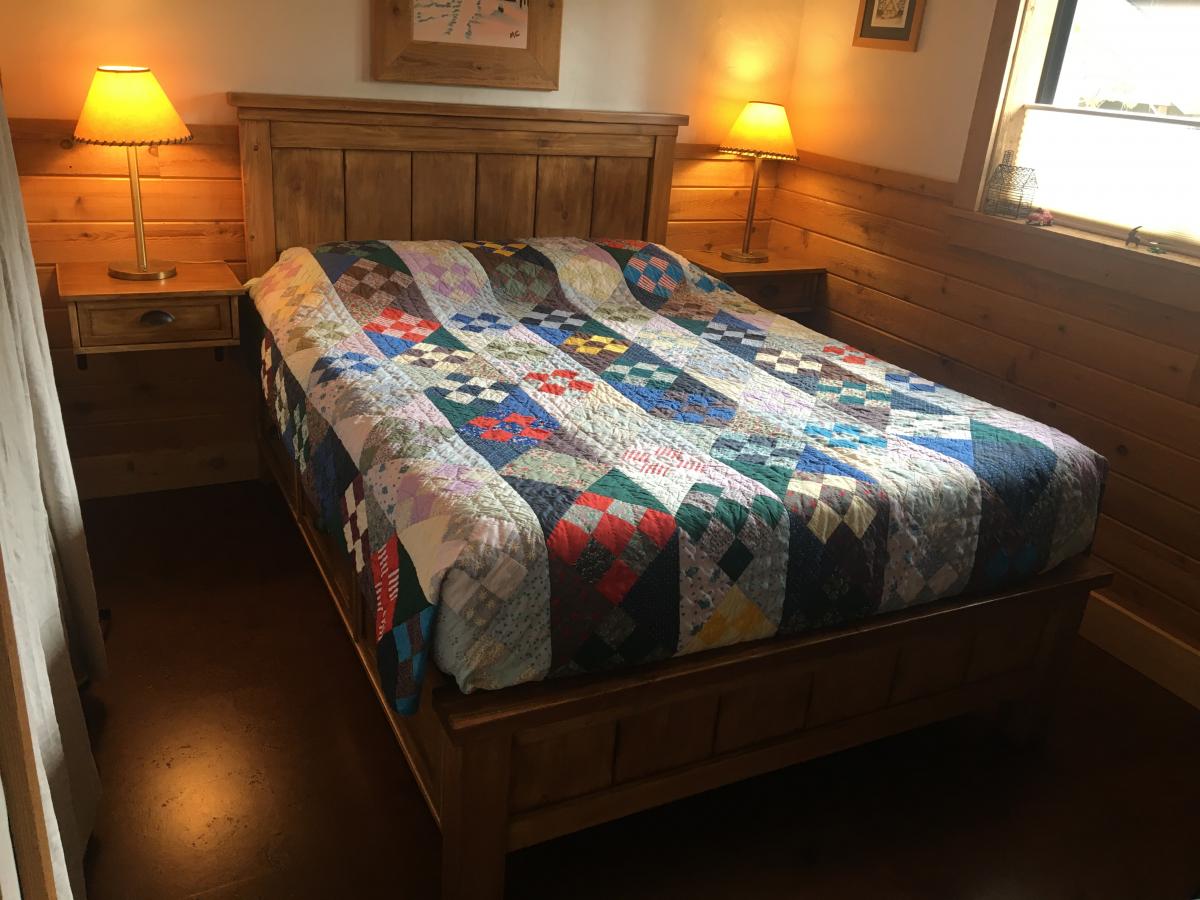
Hi, I’m Joe and love working on my cabin in Stanley Idaho. I needed a queen size bed on the ground floor but the room is small so I incorporated the footboard into into the platform to gain 6 inches of space in the room. It took a couple months working off and on but all fun. I also made the drawers deeper front to back to maximize storage. I did this at the peak of lumber prices and spent like $900 on lumber. It came out great, my Airbnb guests love it!

Wed, 10/06/2021 - 14:28
I could not get logged in to Ana-white.com on my phone where my pictures were, but now an logged in on my laptop. Is there any way to register this brag post on my account? This is Fitzanthony, [email protected]
Joe

