Community Brag Posts

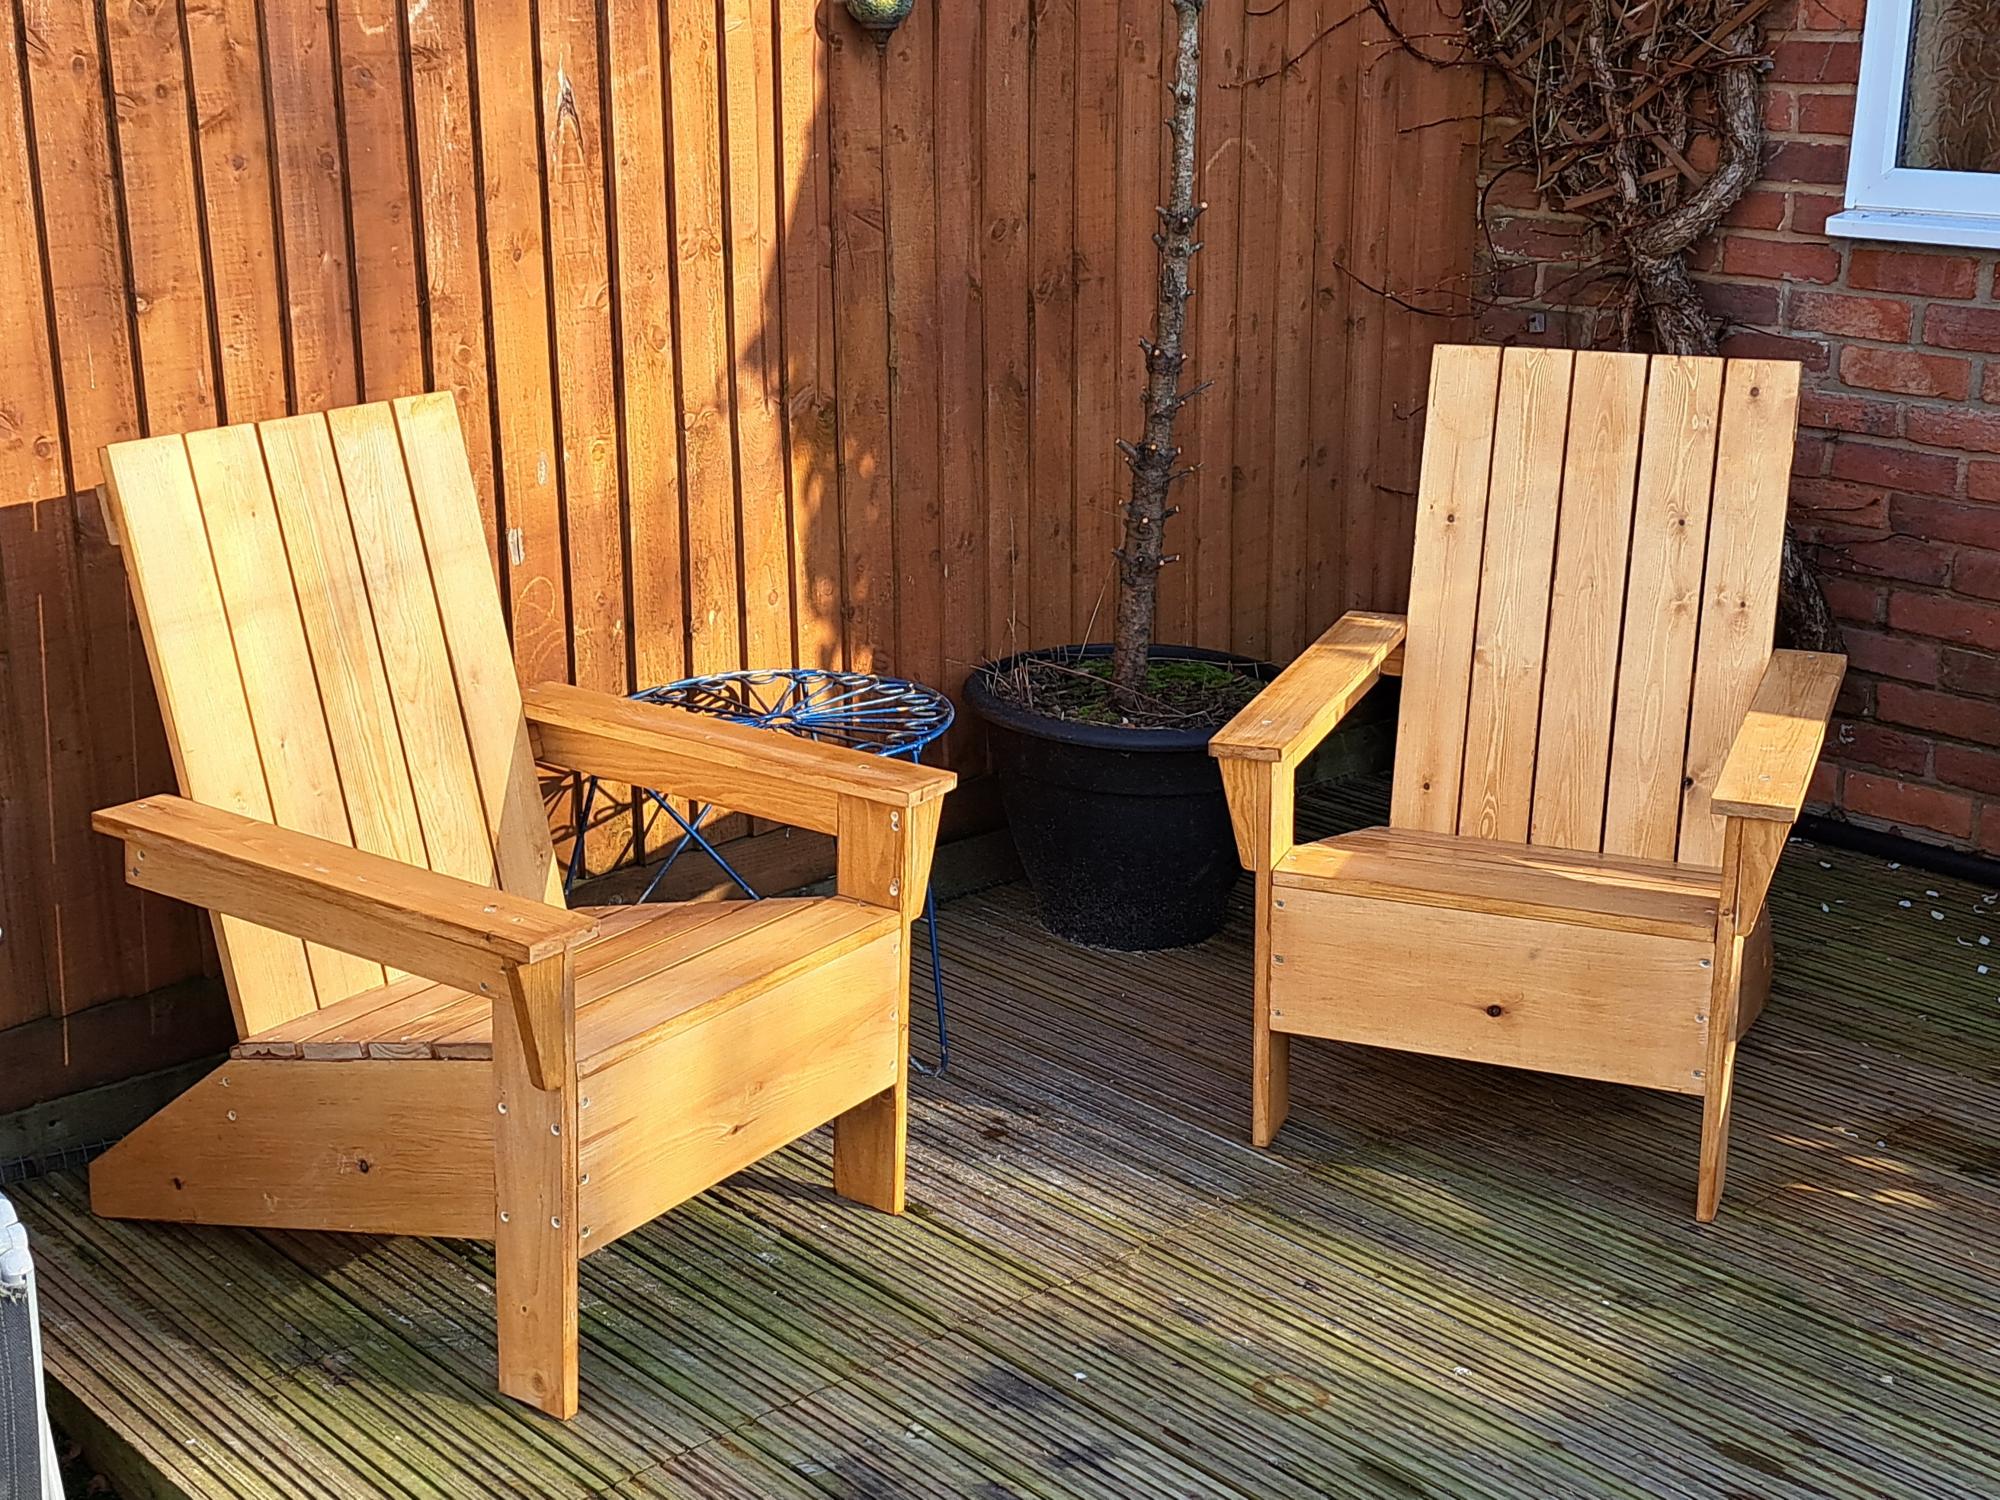
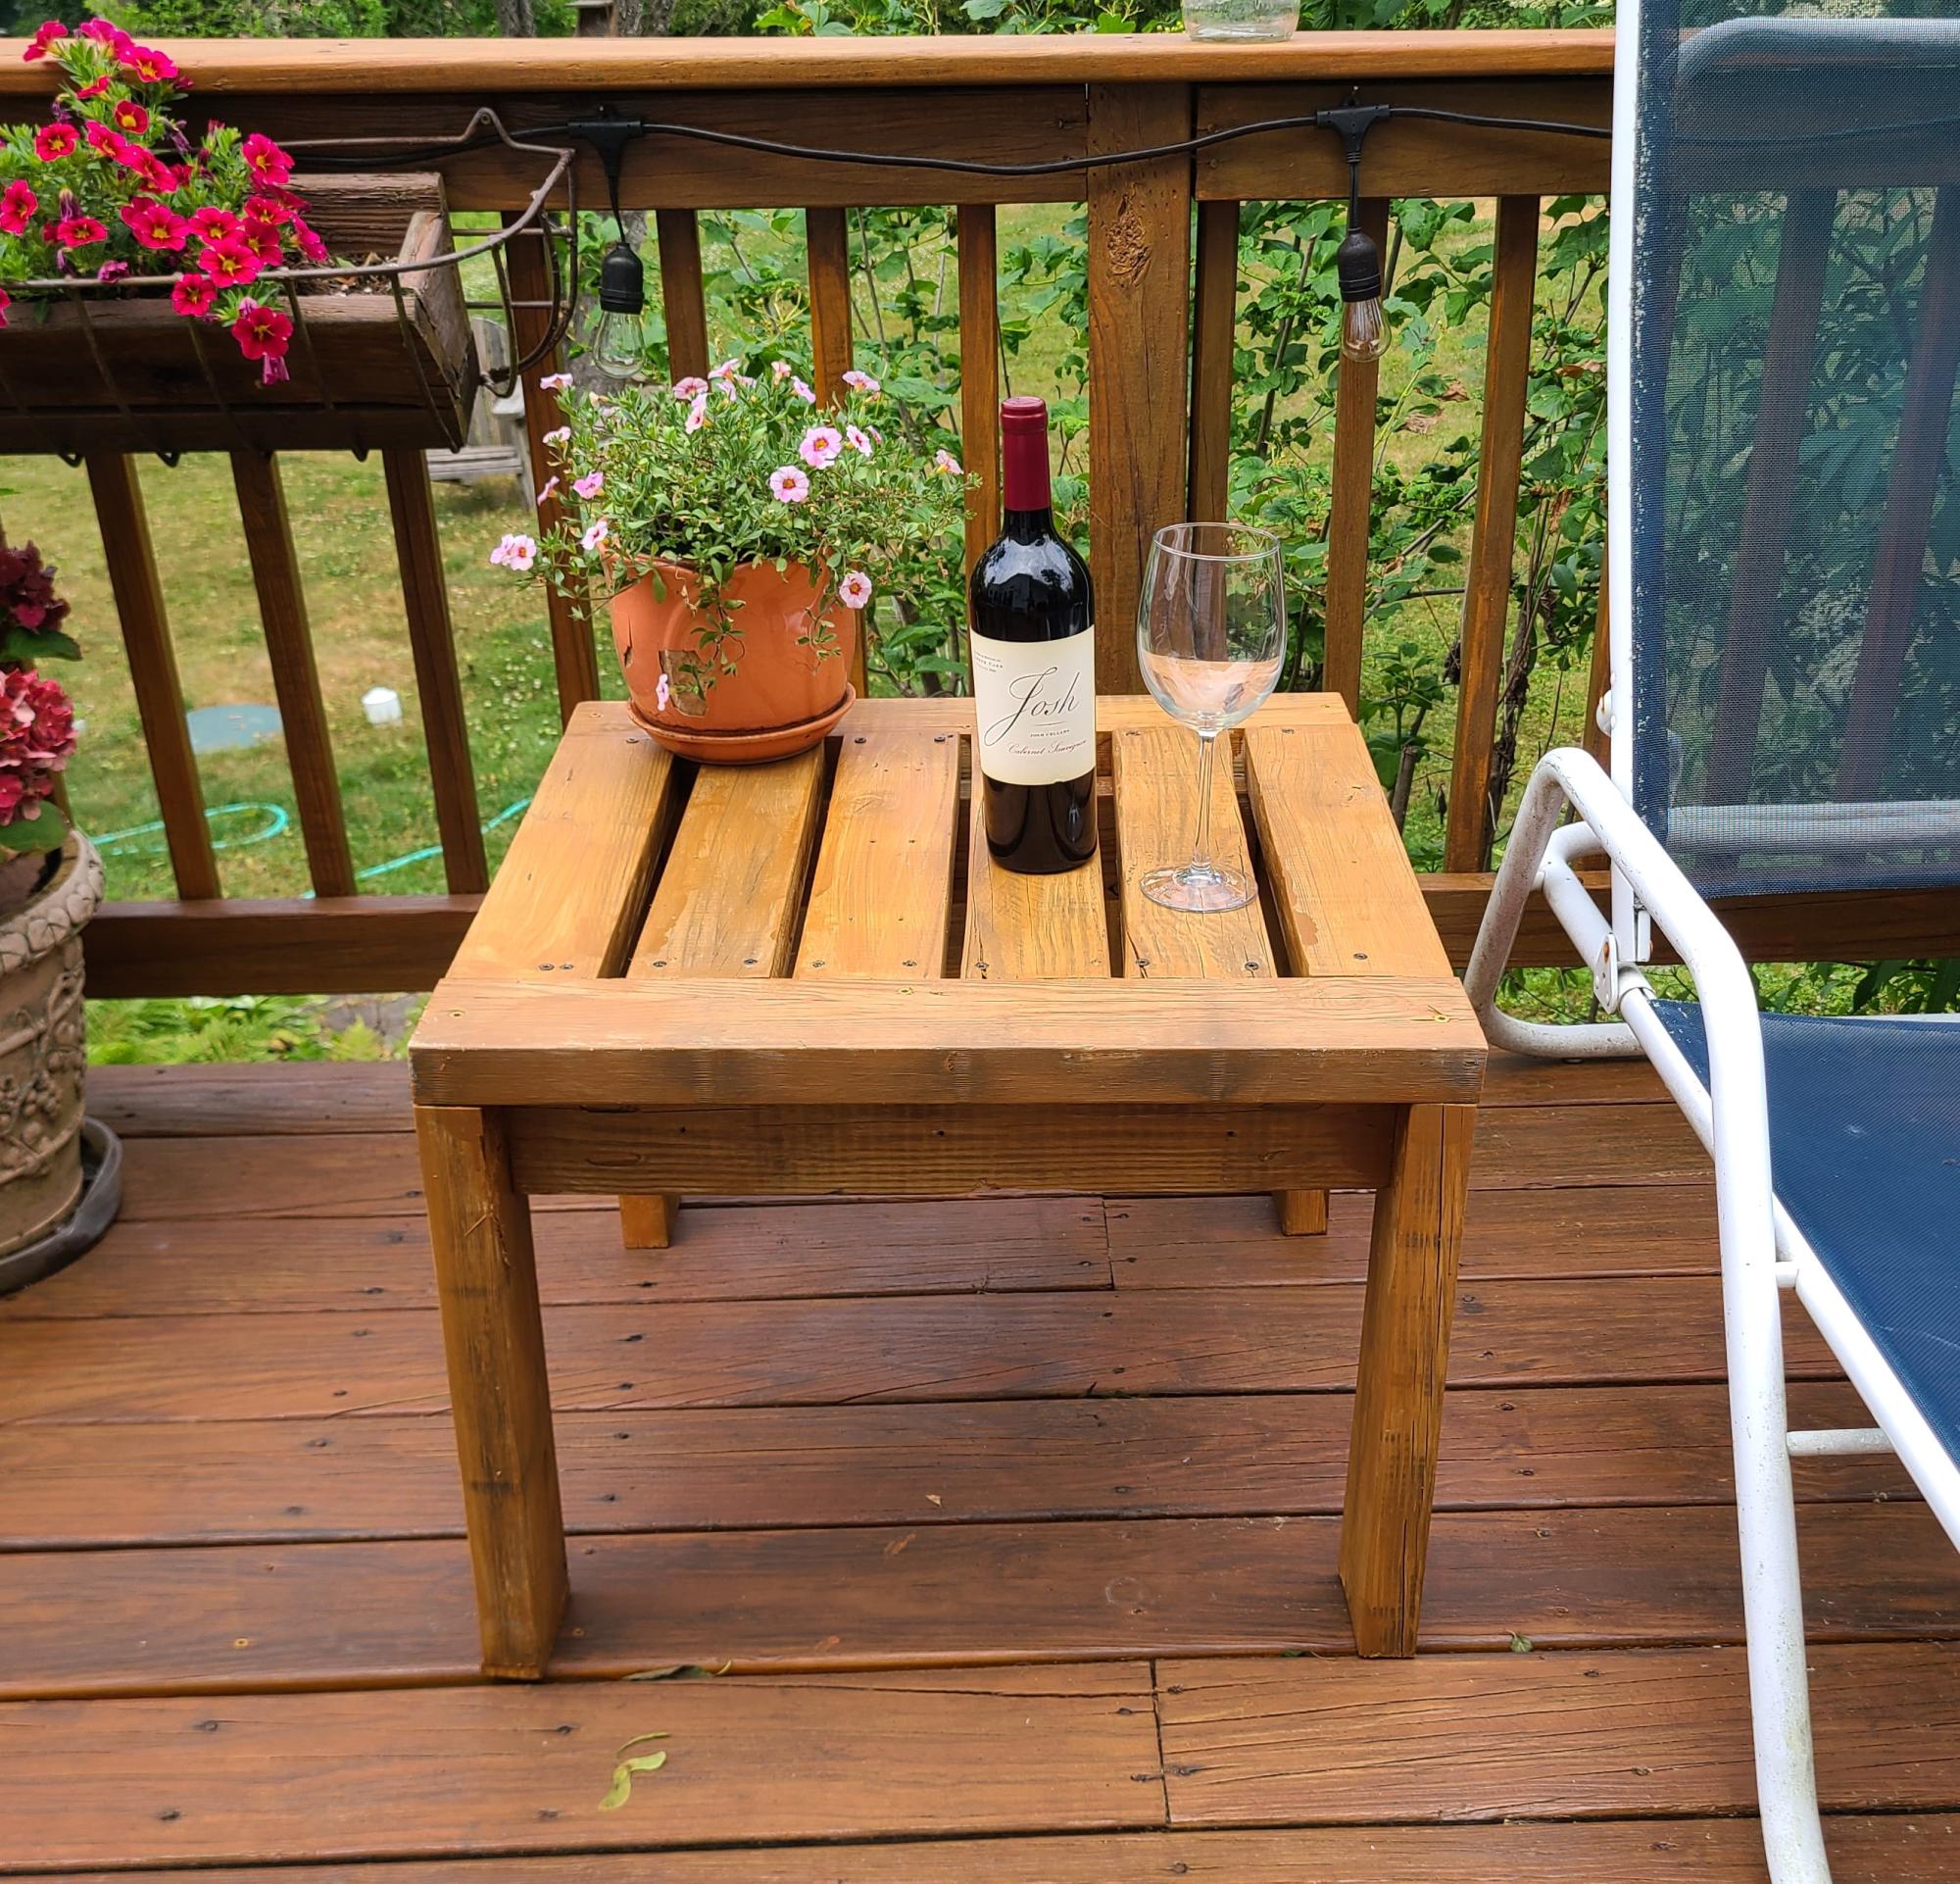
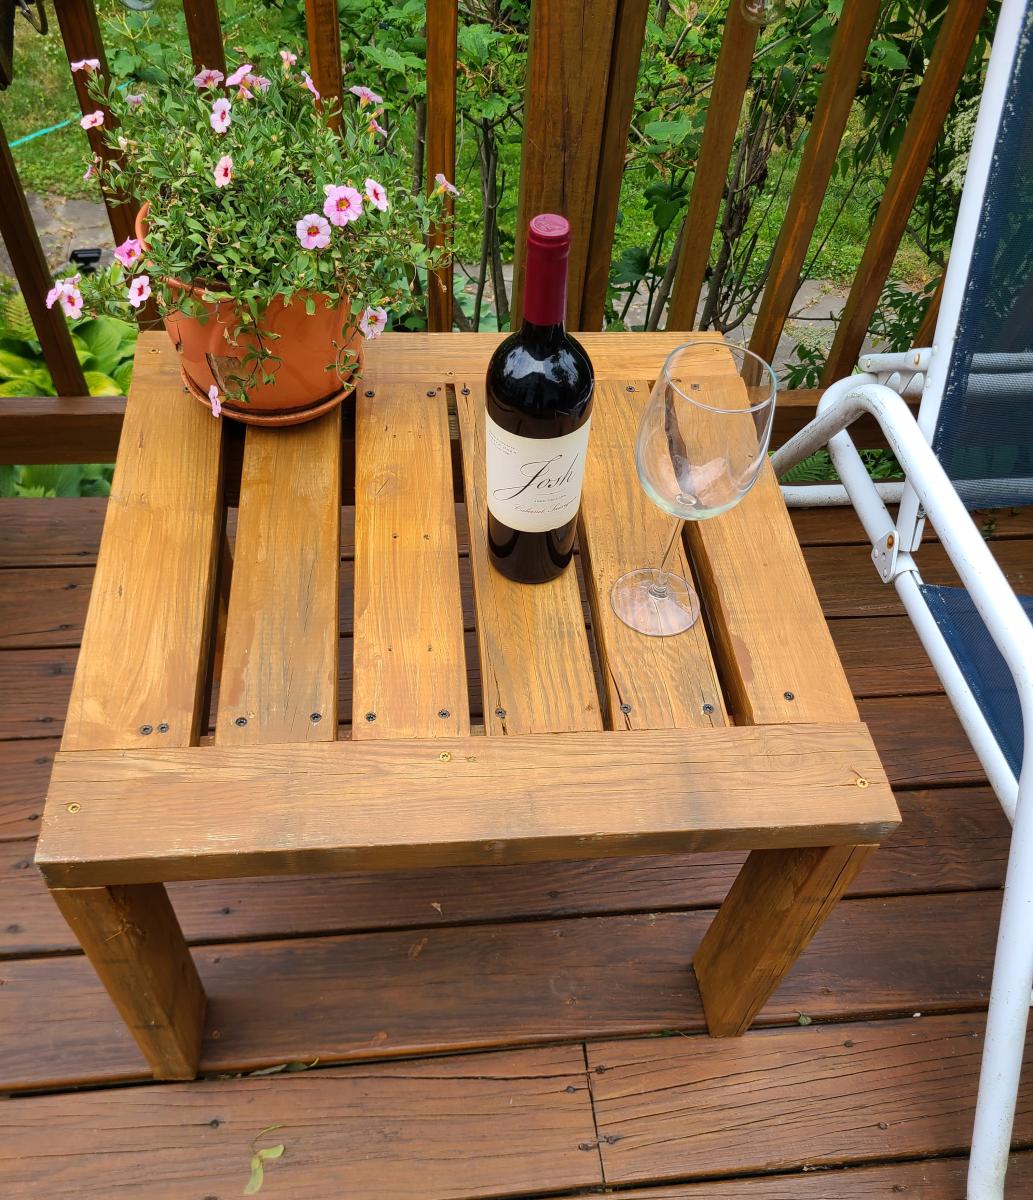
Modern Adirondack chair meets Shou Sugi Ban

Submitted by Anonymous (not verified) on Wed, 09/14/2022 - 15:17

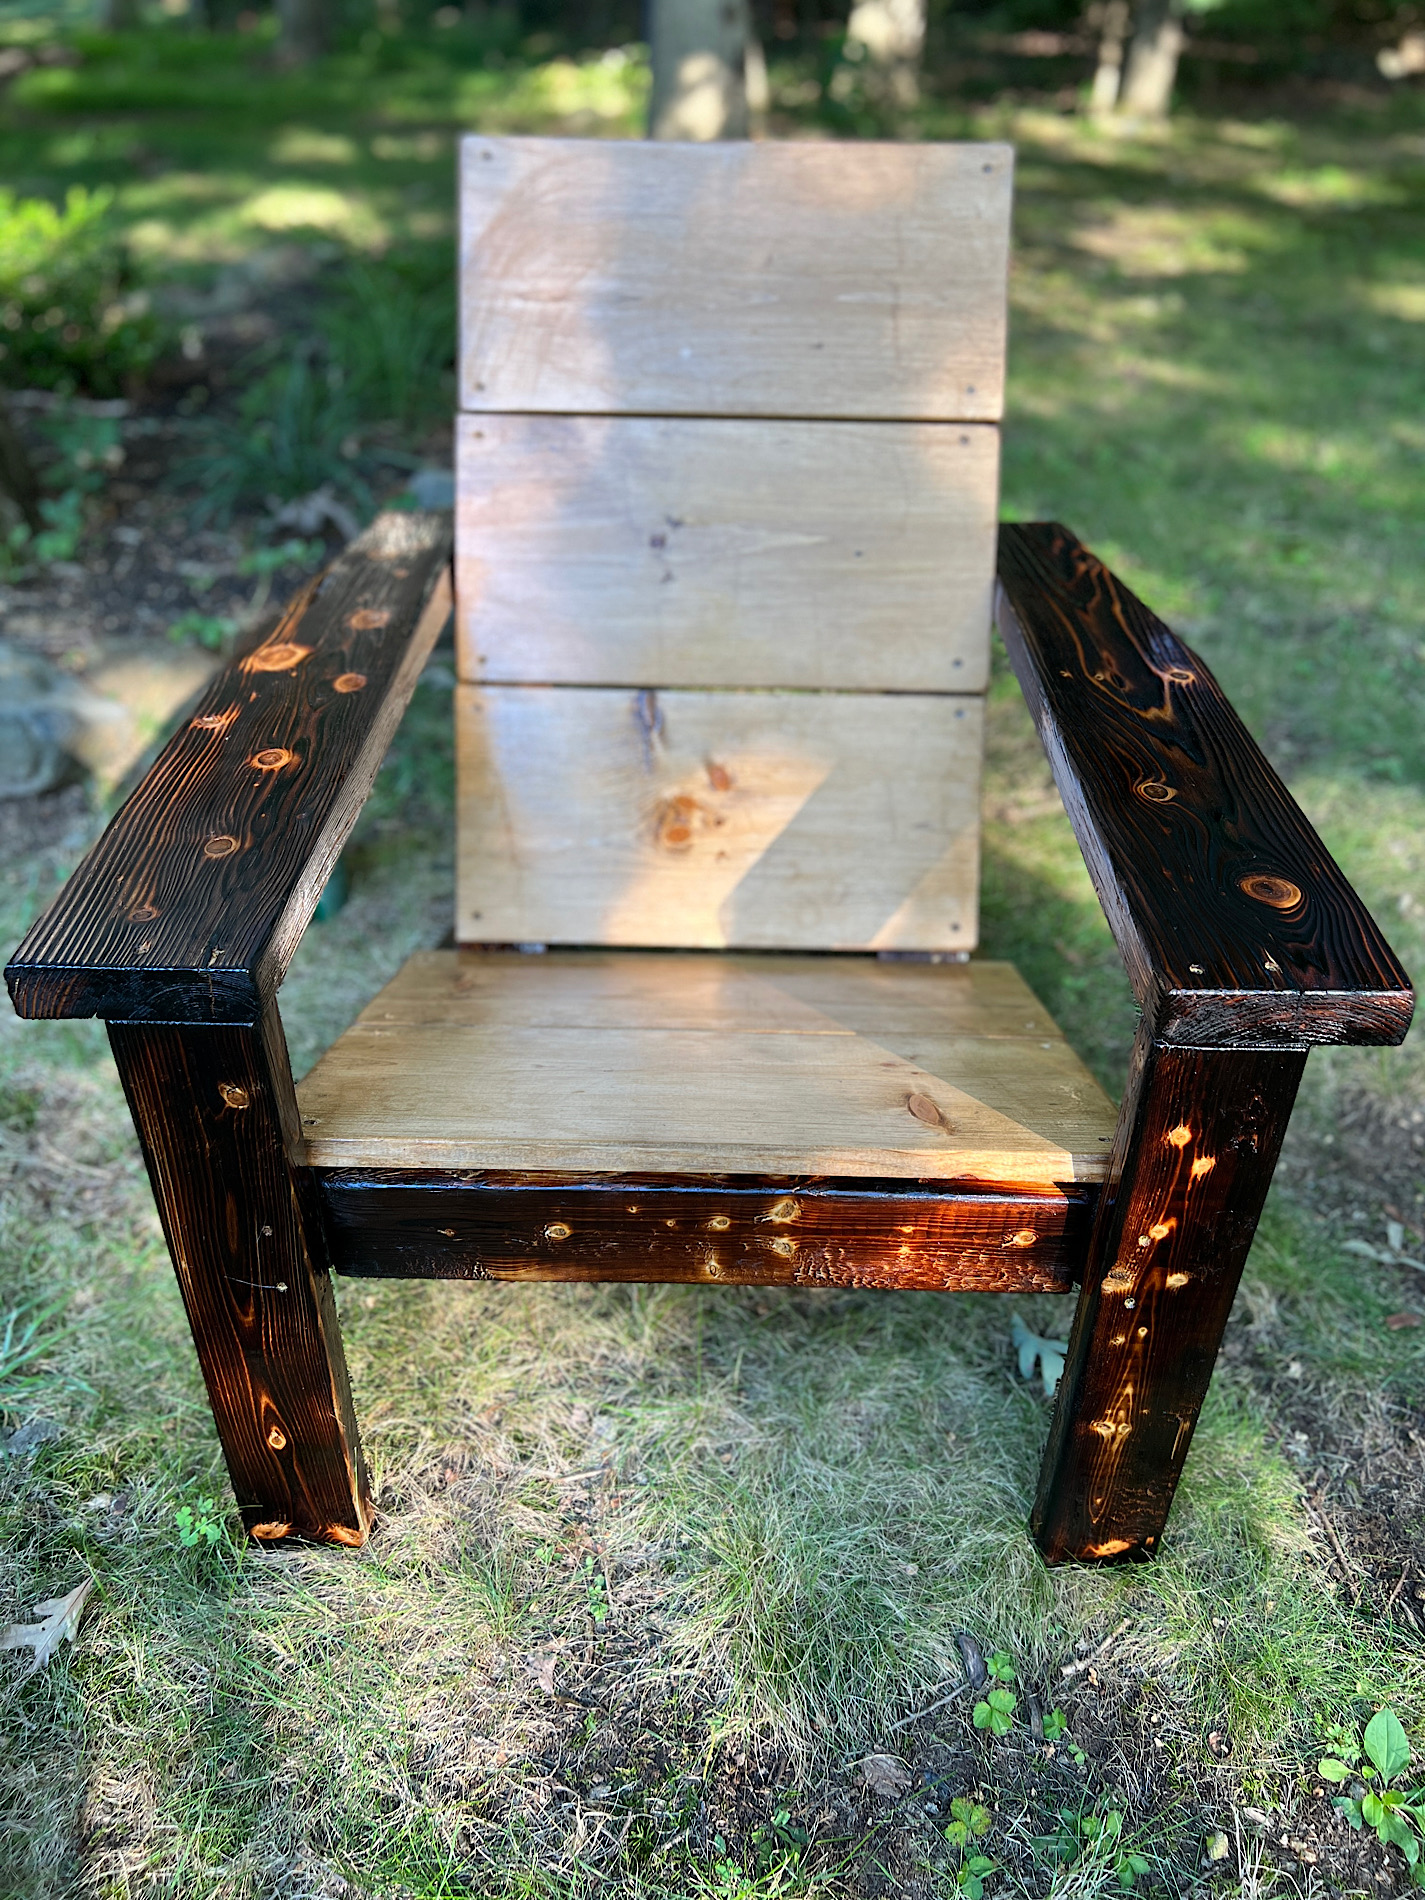
Made one change to plans. I used 2x6s for the arms. I used the Shou Sugi Ban burning technique to finish the 2x4s and 2x6s. I stained the back and set and the applied a couple coats of poly. Love the chairs! Building a couple more sets for around the fire pit. Thanks!

Comments

Small Cedar Woodshed

Spaced out the boards to allow airflow; did a sliding barn door and metal roof. Thanks for the plans!

Comments

Seasonal And Holiday

Modern Farmhouse Bed

Submitted by Anonymous (not verified) on Tue, 02/26/2019 - 08:33

I made this as part of a room makeover for my teenager. It was my second furniture project, the first being Ana’s original farmhouse bed. This was my first project with the Kreg jig and I watched a great YouTube video by shanty2chic to learn the basics of pocket holes. This was also my first staining project and I love the results. My daughter loved it so much she had me stain her closet doors to match! The lumber for the bed was only $120, I spent an additional $80 on wood and screws for the slats to support the mattress, my new kreg jig came with enough screws to make the bed frame. I spent another $80 on wood conditioner, stain and poly since she didn’t like the first stain (Briarsmoke, which I will definitely use on another project).

Built from Plan(s)
Estimated Cost
$200
Estimated Time Investment
Day Project (6-9 Hours)
Finish Used
I started with a wood conditioner and then used Varathane Early American stain applied with a rag and dry brushed on top of that with varathane Kona, again watching a shanty2chic video for technique. Poly is water based satin finish. I used the triple thick but still had to do 2 coats, partly for coverage but also because the water based poly raised the grain so I needed to do a light sand and a second coat of poly for a smooth finish.
Recommended Skill Level
Intermediate

Comments

okstout4

Mon, 10/19/2020 - 19:49

This is very nice. Love the color too. I used Special Walnut in Behr brand and it came out too dark. Wished I had looked at some of these builds before I did the Behr brand stain.

Adirondack chairs UK style

Submitted by Anonymous (not verified) on Sat, 02/25/2023 - 01:47

Used your original plans for these. I'm very pleased with the result. Carpentry is not really my thing, but I'm inspired to do more now.

Built from Plan(s)

Comments

Modern Farmhouse Bed

Submitted by DCecil43 on Mon, 07/08/2019 - 19:54

Just like my previous post on the nightstands, It was cheaper to build a bed that I envisioned instead of searching for something over priced.  I found the plans for this bed on the site but made the headboard a little over 6 feet tall.  This came out amazing and really compliments the nightstands.  I also built the sconces that are centered over the nightstands to keep the tops of the nightstands clean and not cluttered.  They also have touch pads for the lights mounted behind the bed to make them easy to turn on and off.

This is hands down the best transformation in any room in my house.  Ana, you saved me a ton of money with DIY.  I even picked up most of the Kreg jigs along the way which is an added bonus!

Estimated Cost
$275
Estimated Time Investment
Weekend Project (10-20 Hours)
Finish Used
Minwax Early American Stain and Minwax Satin Polyurethane
Recommended Skill Level
Intermediate

Comments

Growth Chart Ruler

This was a super easy project and I like the way it turned out. I just got a 1x6 board in pine (that cost about $3.50) sanded it, stained it and marked all the inches with a pencil. I then used a painter's pen in black along with my square to get all the lines straight. Then I used some stencils to do the numbers - also with the painter's pen. The whole project took probably an hour to do (besides waiting for the stain to dry).

Estimated Time Investment
An Hour or Two (0-2 Hours)
Finish Used
Minwax Golden Oak - 2 coats.
Recommended Skill Level
Beginner

Nathan's Montreal Canadians bed

Submitted by Corinne67 on Fri, 01/06/2012 - 16:04

Our nephew Nathan really wanted a captain's bed like his friend. We built him one even better for Christmas this year. I couldn't find one plan with everything we wanted to I used the plans for the Storage Daybed for the base, and used the plans for the Cozy Corner twin bed collection wide bookcase unit. We combined both the headboard and sideboard into one unit (by extending the top to the short end) giving him an L shaped headboard for all his hockey stuff :) The only thing we messed up on was the height of the bookcase. He wanted it higher so it's on blocks for now to raise it. My sister did all the final painting to match his room and it looks AWESOME!!!

Steve had everything cut at work and we put it together in one 12 hour day! Nathan LOVES his new bed. Thank you Ana!

Estimated Cost
about $125
Estimated Time Investment
Weekend Project (10-20 Hours)
Finish Used
Nathan is a HUGE Montreal Canadian's fan. He applied 2 coats of wood primer, then his mom, my sister did the finishing paint with the official Montreal Canadians colours to match his room. A couple of little touch ups to be done but it looks great.
Recommended Skill Level
Beginner

Comments

Lou-Anne (not verified)

Fri, 01/06/2012 - 21:24

The colors are the official Montreal Canadiens hockey team's colors, My son is a HUGE fan! Nathan LOVES his bed. and it is very solid.

Guest (not verified)

Fri, 01/06/2012 - 20:29

Ummm... The bookcases were too short because you didn't take the mattress height into account. Looks really good though.

DIY Brew Station

Submitted by Anonymous (not verified) on Sun, 07/30/2023 - 14:38

I used your workbench plan to build my Brew Bench. I changed the measurements to fit my space and used a butcher block for the countertop. Very sturdy and pretty easy project. Took one day to build.

Scott R

Comments

Bed made to order - Twin XL

Submitted by kjoslyn78 on Sun, 12/22/2019 - 10:40

My daughter has a twin XL bed, which we had been unable to find a frame for since getting it. After 2 years of her mattress and box springs on the floor, this plan came out and a plan was hatched to get it made. The biggest change we needed to do different from the twin plans was to make the side rails and the side rail cleats 5" longer to accommodate the XL length. We also added a middle support to keep the side from bowing out, and the cleats are at the bottom of the siderails, as we are using a boxpsring and mattress. 

Estimated Cost
$110
Estimated Time Investment
Weekend Project (10-20 Hours)
Finish Used
I dont remember what we finished with, but the kid spilled half the can in the grass :)Photo is after sanding, and before finish
Recommended Skill Level
Beginner

Comments

amymarie02

Mon, 03/28/2022 - 09:47

Hi do you have the measurements and what to buy for this bed frame? We also have a twin xl mattess and cannot find a frame anywhere

Tryde Media Center

Submitted by kendaves on Thu, 04/05/2012 - 21:24

I had just built the Tryde Side Table and it was so easy I gave a shot at this project. Took about 4 hours to build and is a really sturdy, good looking entertainment center. The only thing that I did not like that I would change is an overlap of the tabletop in the front. There is an overlap on both ends but not in the front. Other than that, I really like the outcome.

Estimated Cost
$75 - $100
Estimated Time Investment
Afternoon Project (3-6 Hours)
Finish Used
Natural Stain
Recommended Skill Level
Intermediate

Book Rack

Submitted by Anonymous (not verified) on Fri, 04/22/2016 - 11:08

I built this book rack using scrap wood and modified plans from the Full Length Plate Rack. It was a really straightforward build, and functions very well as vertical storage that takes up little space. I predrilled, screwed and glued all of the joints, vs. stapling.

Built from Plan(s)
Estimated Time Investment
Afternoon Project (3-6 Hours)
Finish Used
2 coats of "Simplicity" country chic chalk paint.
Recommended Skill Level
Beginner

Comments

Sandbox with built in seats/lid

6'x6' with 12'' Treated Sides, 1x4 and 1x6 SPF tops/seats and 2x4 Brace under Seats to accommodate the 6 foot span. Sanded and Painted.

Completed in 2 days, couple hours each day, sanded/painted all boards before assembly.

Built from Plan(s)
Estimated Time Investment
Day Project (6-9 Hours)
Finish Used
Exterior Grade Paint.
Recommended Skill Level
Beginner

Cedar planter for $20

Submitted by aimercruz on Tue, 03/17/2020 - 14:45

This was my first project using my circular saw and Kreg jig, so I wanted to try something that was not too difficult. It probably took me longer than most as I had to read all the directions on my saw and Kreg jig. Both are super fun to use.  Ana’s plans made it super easy! After assembly, I decided to paint it as it needed to be weather/waterproof. I used Behr waterproofing stain &sealer in slate. Love how it turned out! Thanks for the easy to follow plans. 

Estimated Cost
$20
Estimated Time Investment
An Hour or Two (0-2 Hours)
Finish Used
Behr Waterproof & Stain sealer. Color: Slate
Recommended Skill Level
Beginner

Cedar Planter Outdoor Speakers

Submitted by Hoosierdoc on Fri, 06/10/2016 - 10:53

We just put in a pool and I needed something to hide a pair of outdoor speakers. I used Klipsh AW-525 speakers.

Basically I raised the bottom of the planter enough to fit the speaker under and had to add a few framing pieces to secure the speaker mount to. The mount attaches to a vertical board and the weight rests on a horizontal board. The wiring comes up from below.

The front panel uses vinyl mesh from Sailrite.com to hide the speaker but allow sound out. Imm planning to hang it with magnets if it doesn't distort sound too much.

Built from Plan(s)
Estimated Time Investment
Afternoon Project (3-6 Hours)
Recommended Skill Level
Beginner

Comments

Dining Room Shelves

My shelves are about 2.5 ft long. I wanted a display area in my dining room to show off some plates I had made for my boyfriend a while back.

Built from Plan(s)
Estimated Cost
$30.00
Estimated Time Investment
Afternoon Project (3-6 Hours)
Finish Used
One coat Rustoleum Dark Walnut stain with one coat Miniwax Gunstock stain on top. Two coats of polyurethane.
Recommended Skill Level
Starter Project

Farm house entertainment center

Submitted by LPJunky on Sun, 05/24/2020 - 22:36

My one of my first projects. Followed the plans here, https://www.ana-white.com/woodworking-projects/grandy-barn-door-console

Doors are 1x4 frame on 1/2” plywood and got the hardware from amazon

WINSOON 8FT Antique Double Sliding Barn Door Hardware Roller Track Kit Black, 4-18FT for Choose https://www.amazon.com/dp/B014SMIWTQ/ref=cm_sw_r_cp_api_i_bH1YEb890KWDF

A little beefy but worked. Had to trim the track a little bit to fit the build.

Also added hdmi/coax ports for easy plug ins. And an hdmi splitter since our tv only had 2 inputs.

Overall very happy with the outcome on this one

Estimated Cost
300
Estimated Time Investment
Weekend Project (10-20 Hours)
Recommended Skill Level
Intermediate

Outdoor High Top Patio Set

I designed and built this "Caribbean Inspired" outdoor patio set based on the plans for the "Vintage Bar Stool". Once the stools were built, I designed the table to fit the height of the stools. The table top has stone mosaic tile and all surface are painted bright Caribbean colors. I do need to add the finishing touch of a cooler on the bottom shelf, but that's coming!

Built from Plan(s)
Estimated Cost
$225 for the material for the whole set (Not including the solar powered LED umbrella)
Estimated Time Investment
Weekend Project (10-20 Hours)
Finish Used
Behr exterior primer & paint, bright Caribbean Colors!
Rust Ole um clear lacquer spray finish (For sealing the paint & protection.)
Recommended Skill Level
Beginner

Turned Leg Coffee Table

Submitted by maryjacob on Mon, 08/20/2012 - 18:57

Okay, don't mind the husband and the pooch in the background there! I fell in love with the Pottery Barn version of this table (actually, I've fallen in love with everything from Pottery Barn, if we're being honest here), so I've been wanting to make this coffee table for quite awhile. I found the legs on ebay for a really low price, so I splurged and bought premium 5/4" thick pine planks for the table top to make it look more substantial. This table was so easy to assemble using pocket holes. My husband and I both love how it turned out!

Estimated Cost
About $130 for all wood and finishing supplies
Estimated Time Investment
Weekend Project (10-20 Hours)
Finish Used
Stained with a mix of Minwax English Chestnut and Minwax Dark Walnut, then finished with 3 coats of Minwax Clear Satin Polyurethane
Recommended Skill Level
Beginner

Garden Enclosure with Raised Beds

Submitted by Anonymous (not verified) on Sat, 04/20/2024 - 07:39

I finished my first project. Although there are some cosmetic errors, I think overall it’s amazing. We had a lot of wood left behind by the builder of our log home. So, I was able to use a lot of that. I made some adjustments to the height of the boxes to help the back!

Michelle M - Jefferson, NC

Built from Plan(s)
Seasonal And Holiday
Back