Community Brag Posts

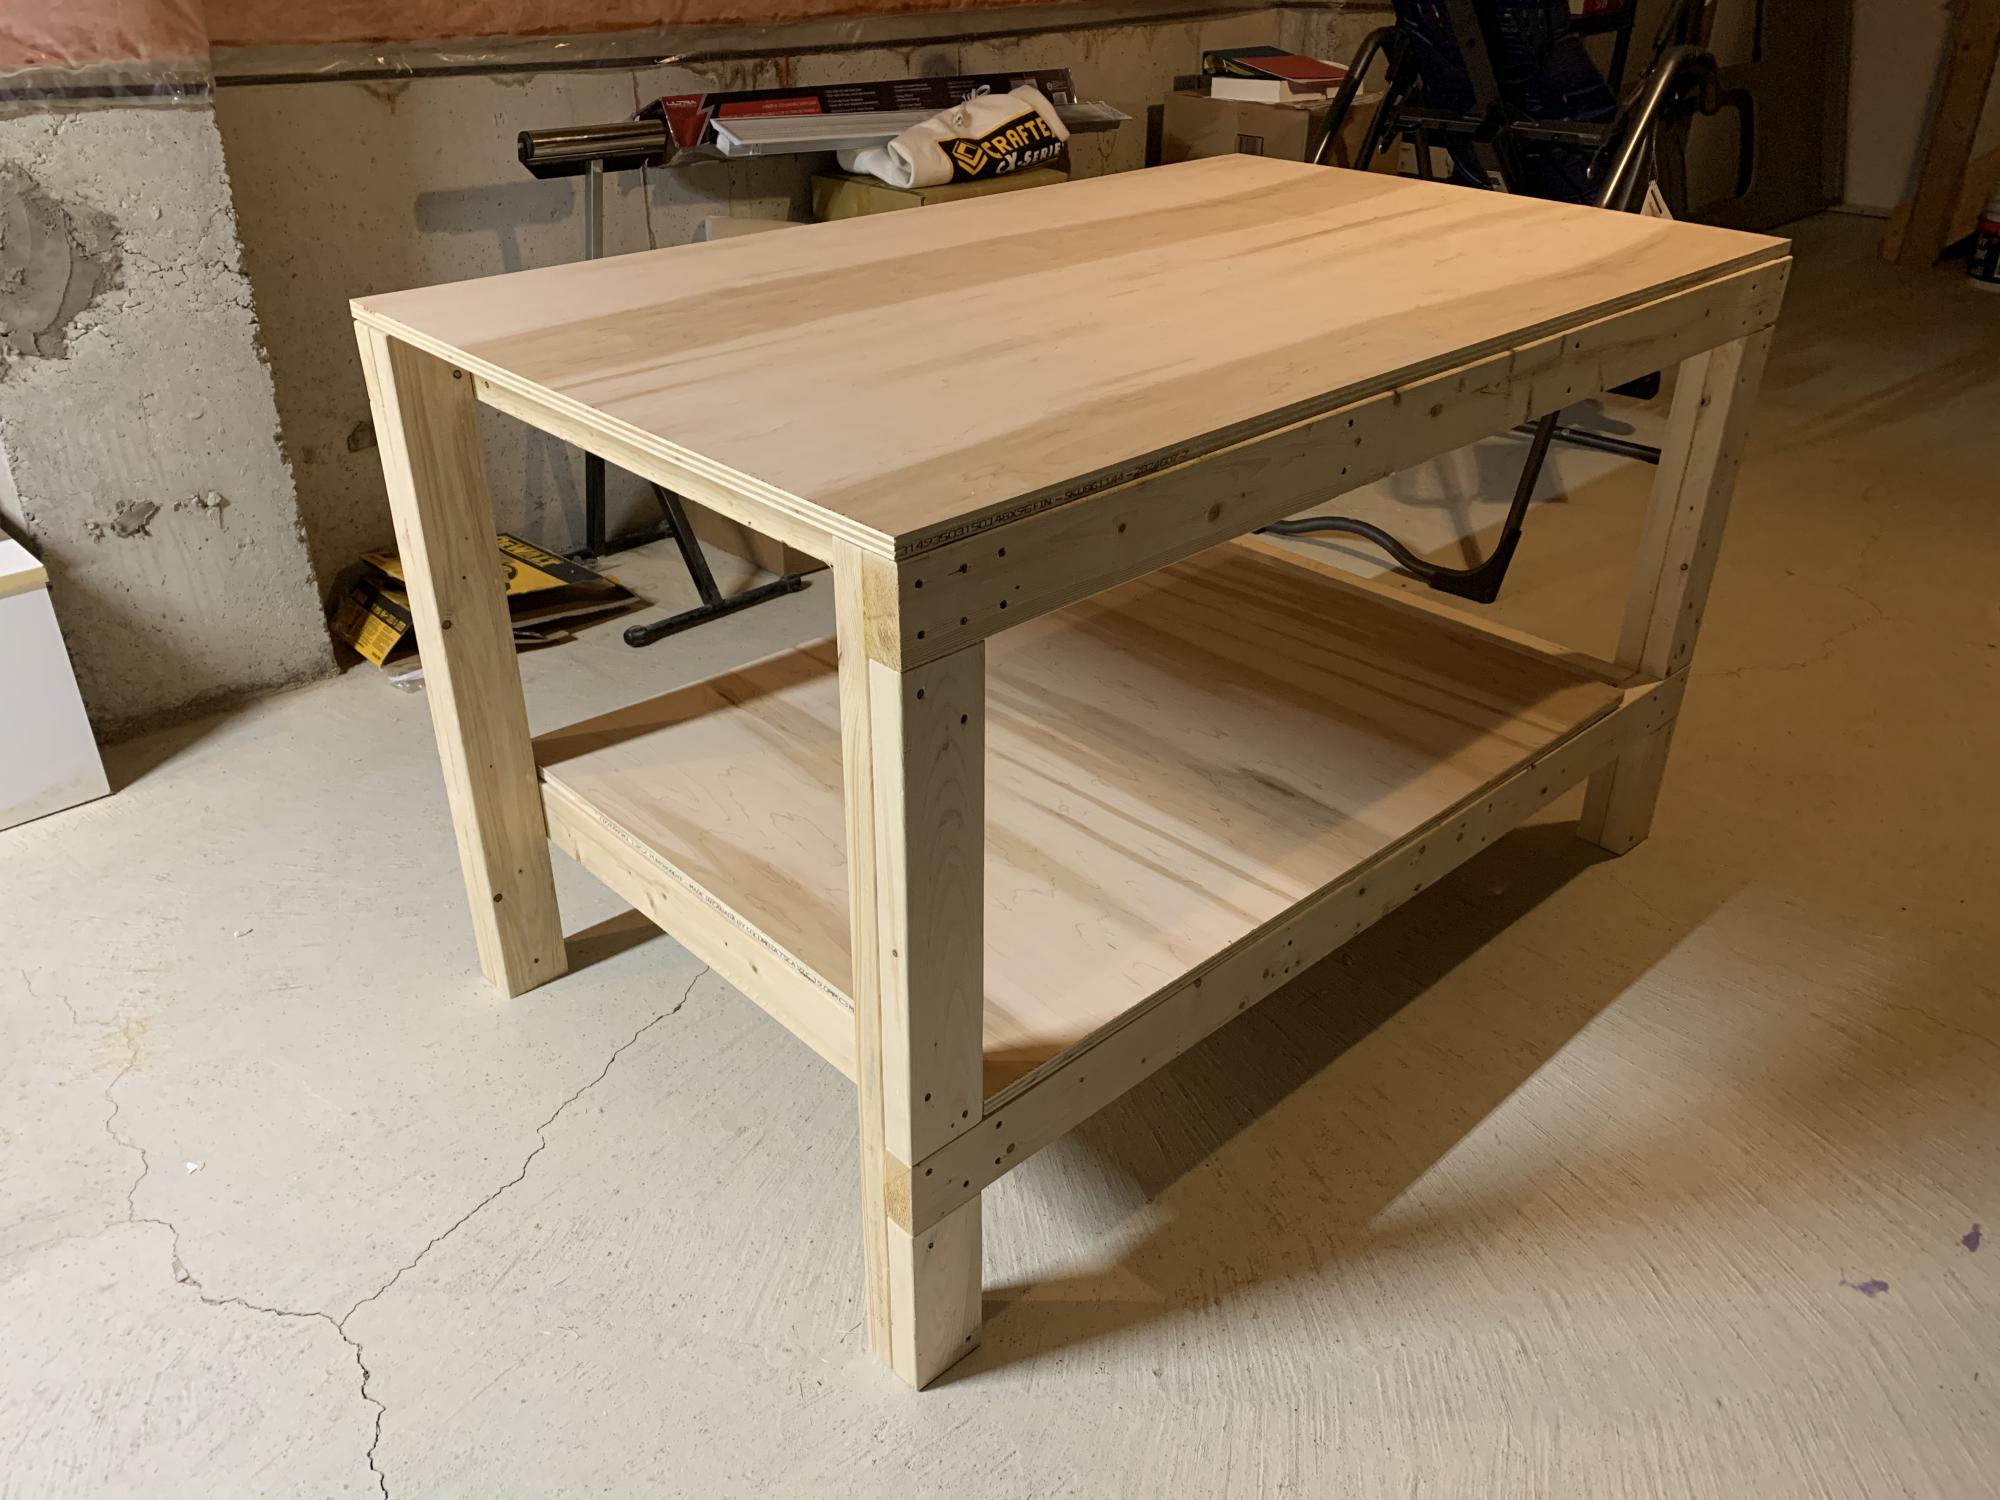
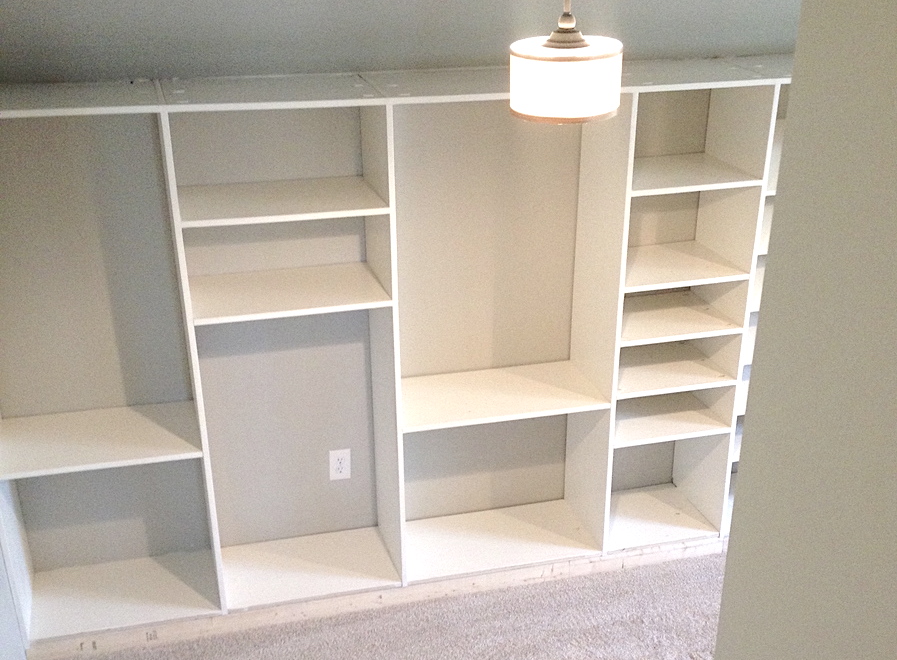
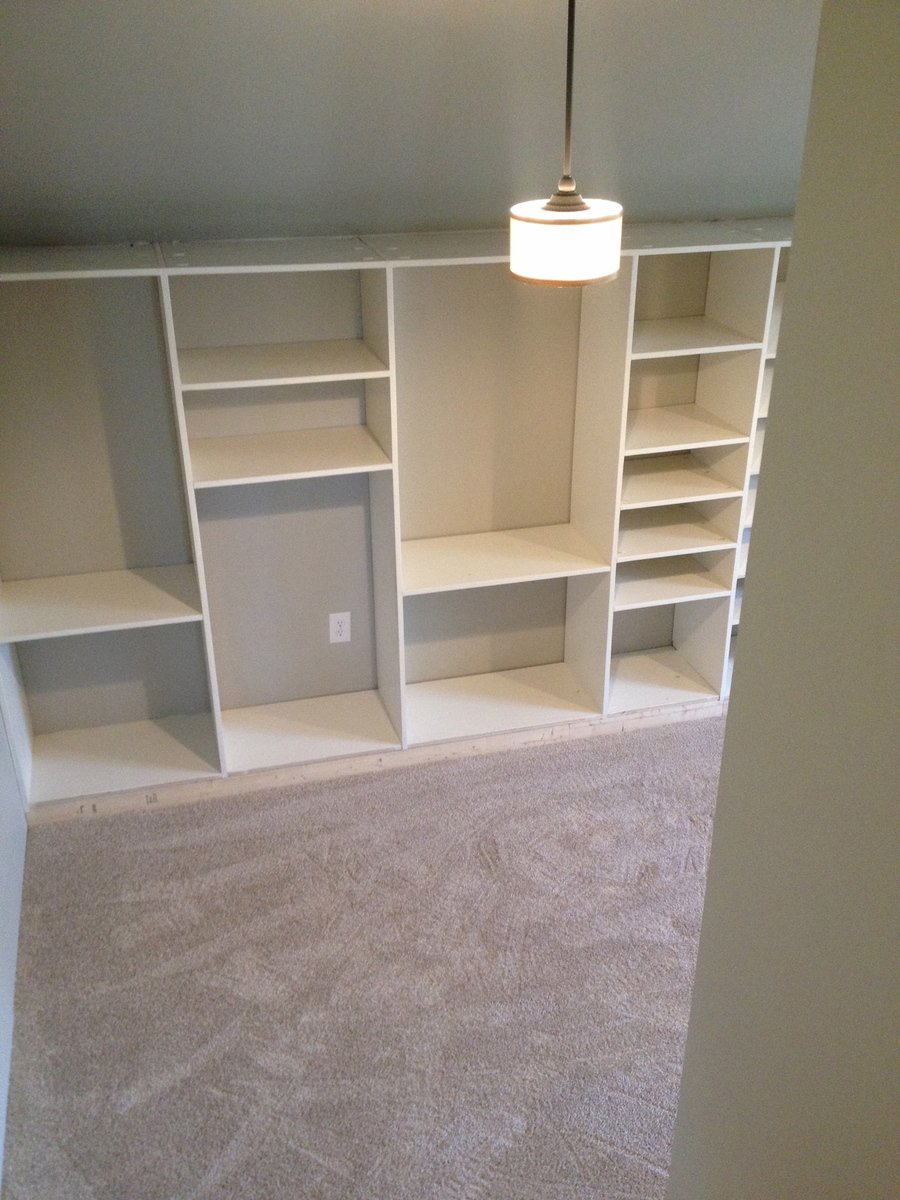
Wall Attached Storage Shelves

Submitted by Anonymous (not verified) on Sat, 08/29/2020 - 18:21

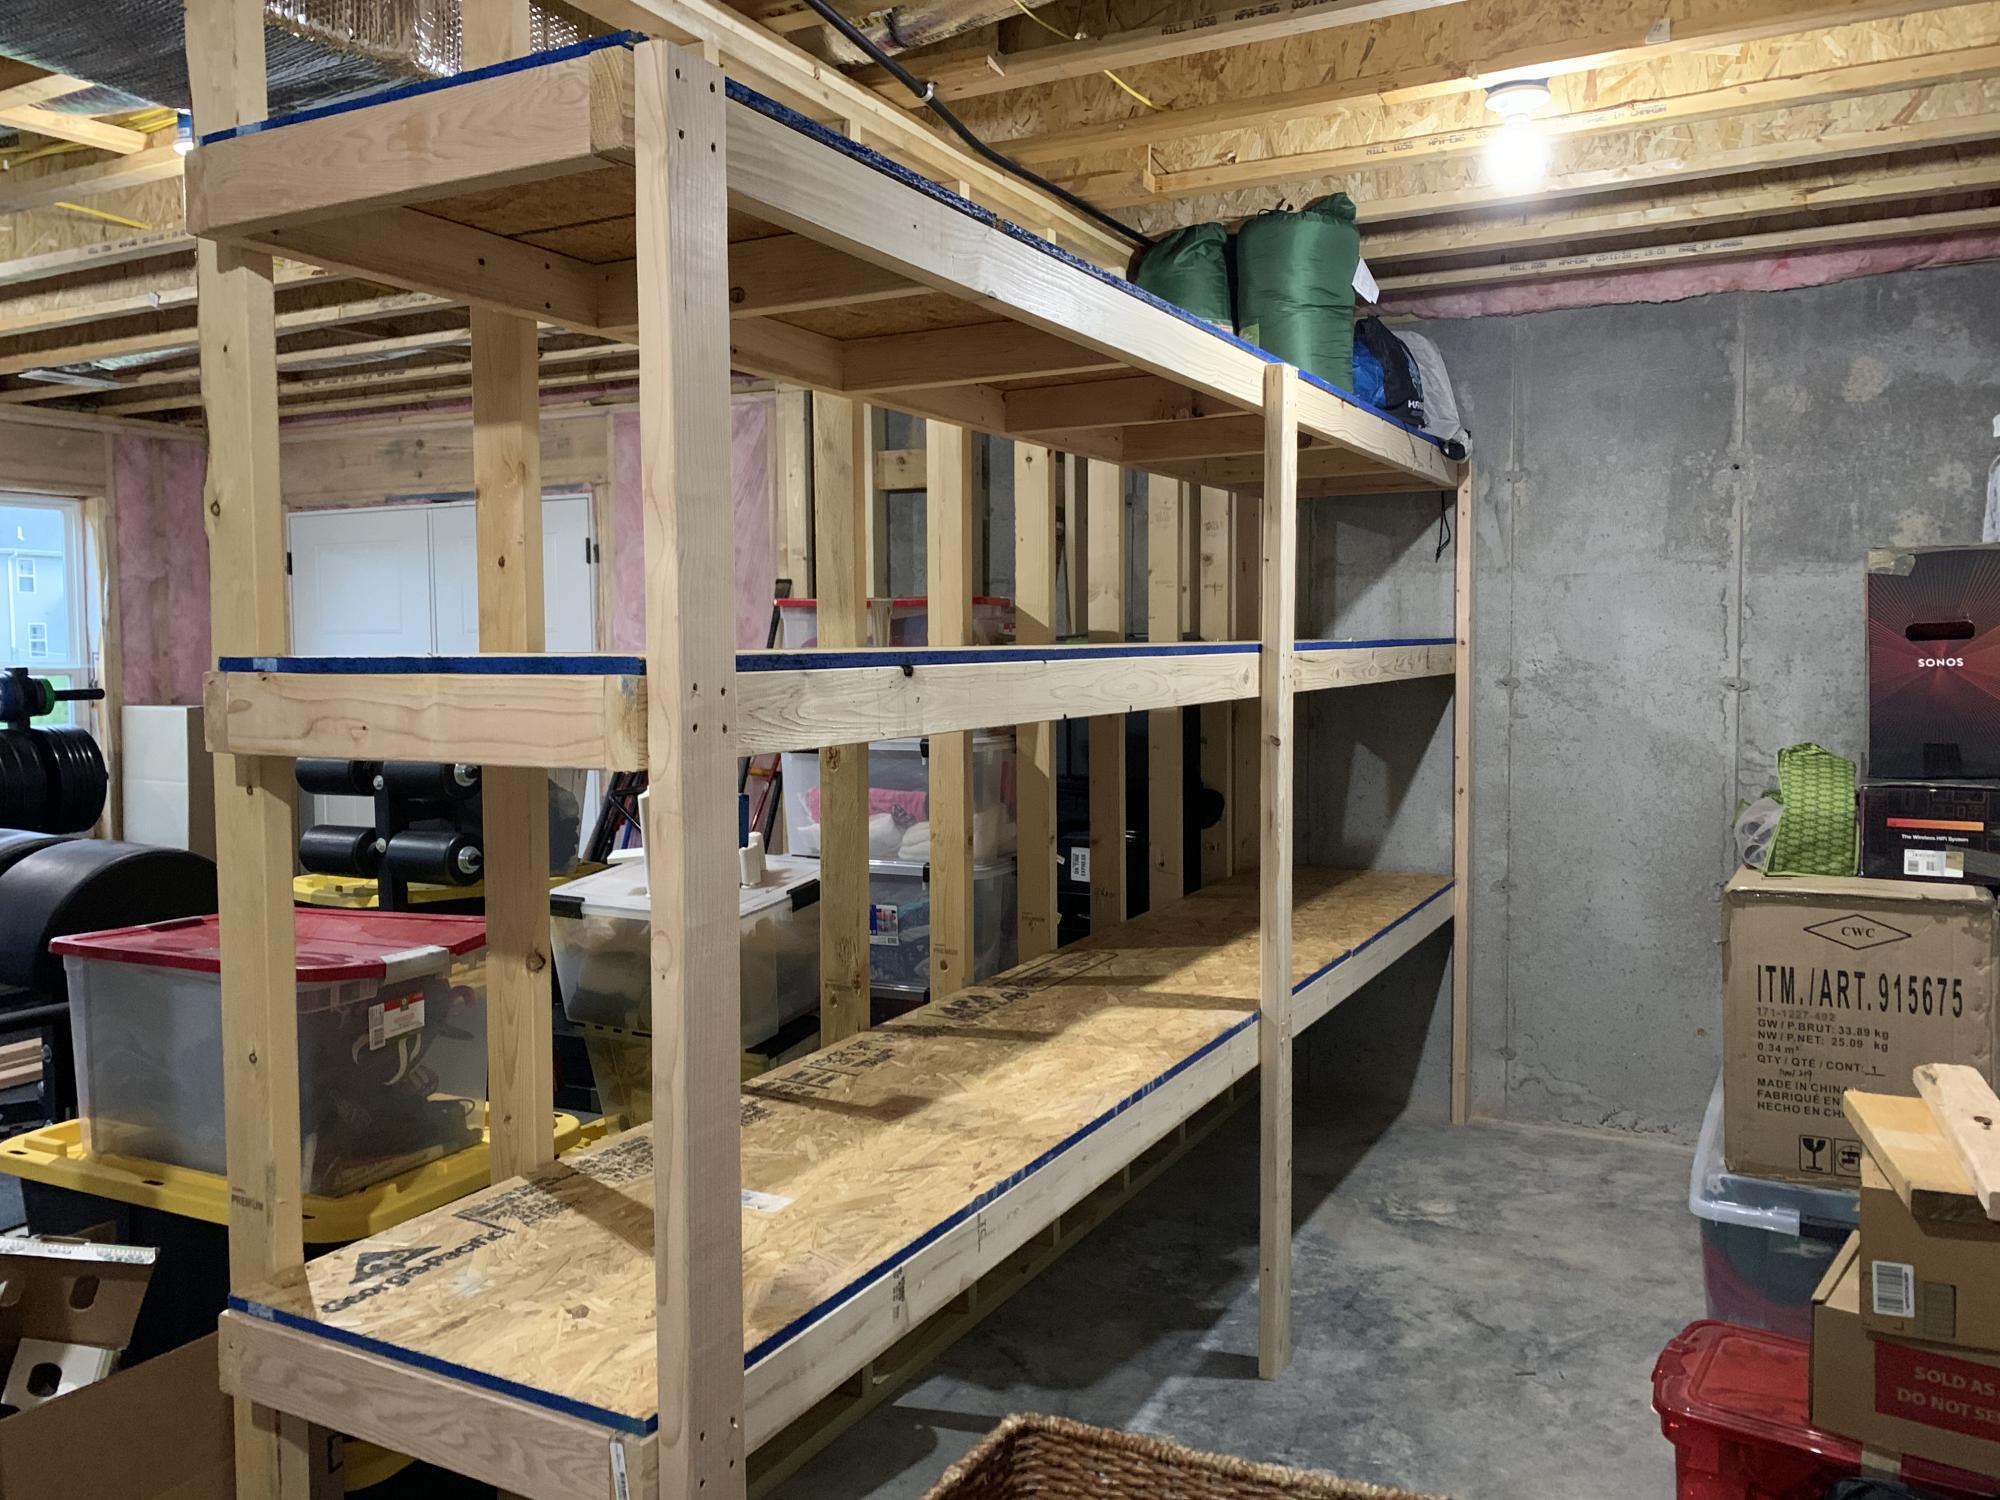
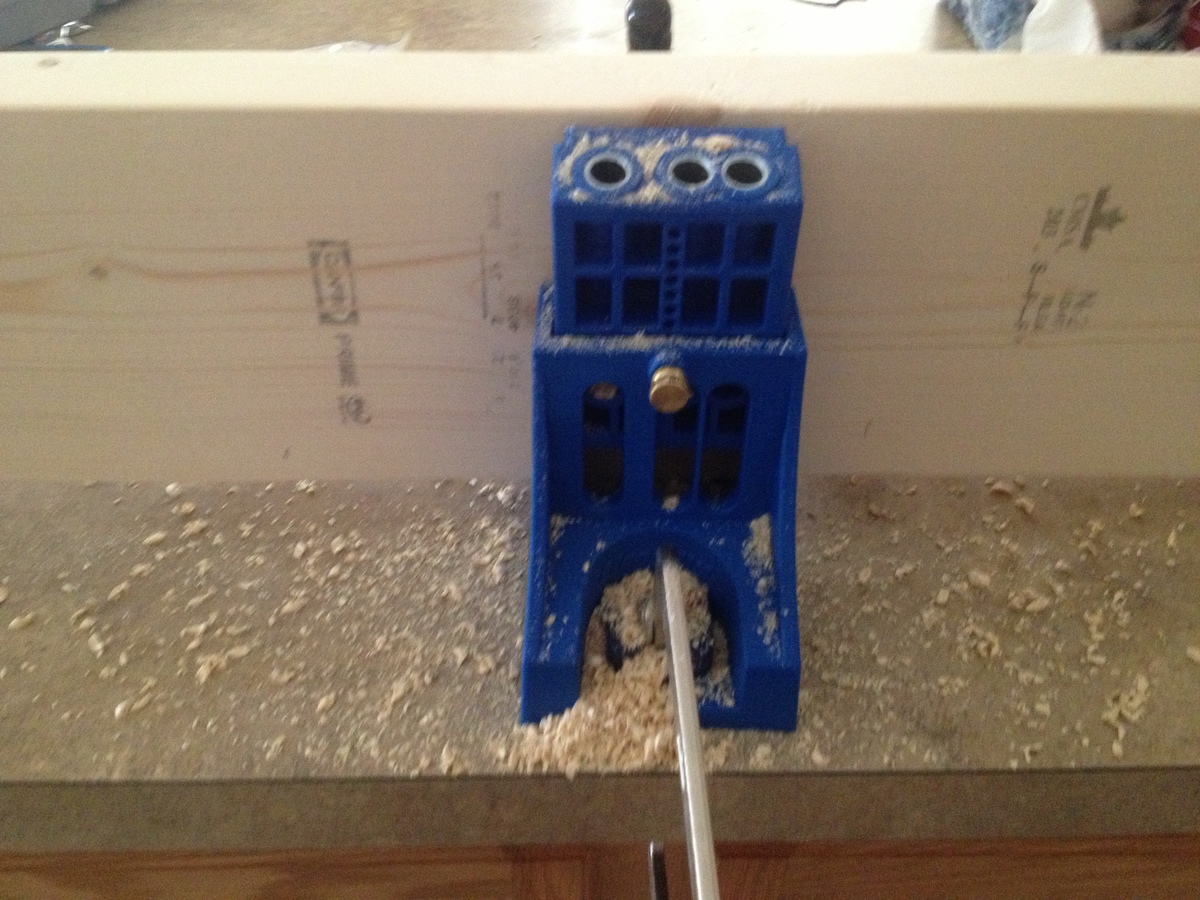
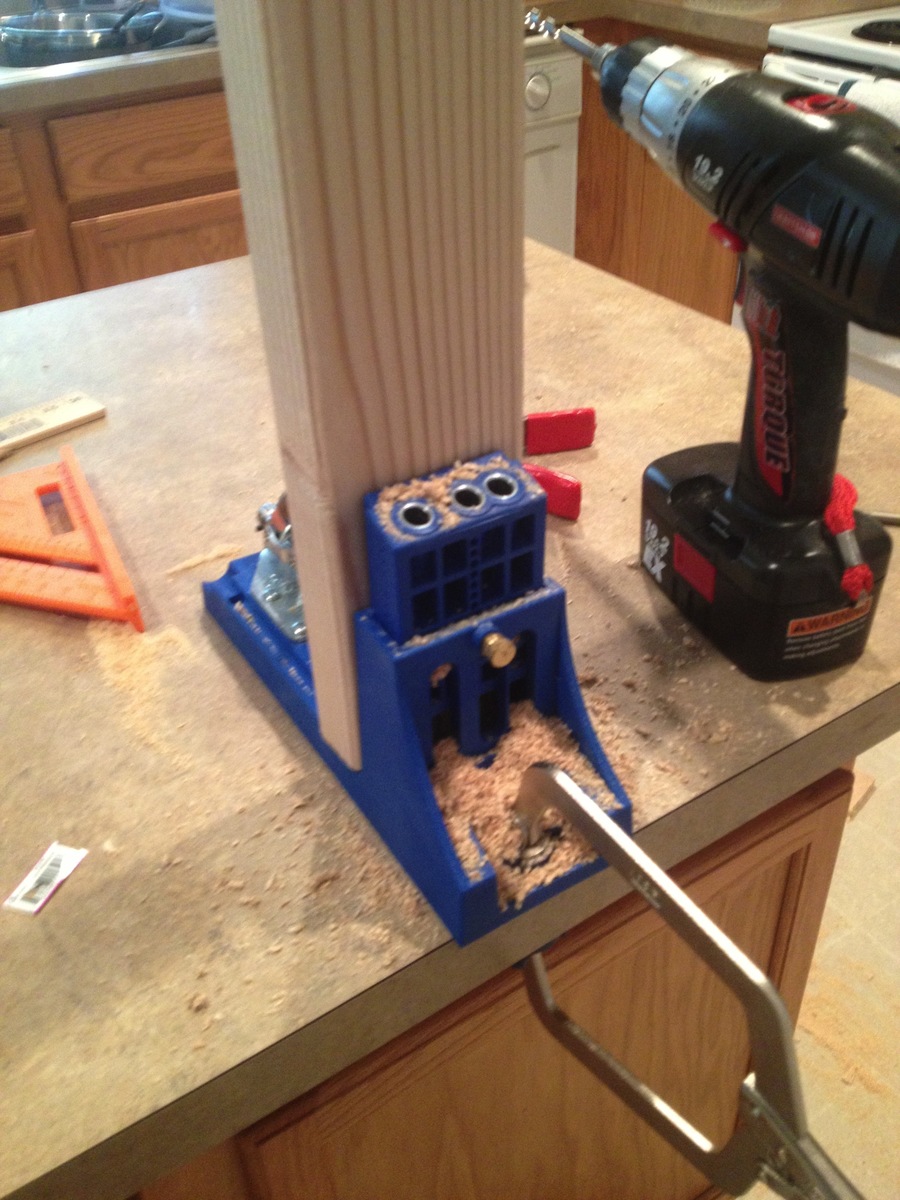
We just moved onto a new house with ample unused space I. The unfinished part of the basement so I decided to make a 12’ wall of storage shelves, altering Ana’s plans just a little bit. I did two 24” tall shelves on bottom and two 18” y’all shelves up top. It was a fun project and I got to use my Kreg HD Jig for the first time! These shelves are SOLID!

Estimated Cost
$150
Estimated Time Investment
Afternoon Project (3-6 Hours)
Recommended Skill Level
Beginner

Outdoor Storage Bin

I used Ana Whites plan and modified to fit my our space and outdoor pillows.

Estimated Cost
50
Estimated Time Investment
Weekend Project (10-20 Hours)
Finish Used
Minwax Gunstock 231
Recommended Skill Level
Beginner

Comments

Convertable Picnic Bench

Submitted by Yumde on Sun, 12/09/2012 - 16:48

A nice summer project that is good for relaxing and eating outside.

Built with
7 - 2x4x72"
1 - 2x6x8
galvanized hardware

Started with a light base paint and taped off diagonal sections.

Next time we would lessen the gap inbetween 2x4's.

Estimated Time Investment
Afternoon Project (3-6 Hours)
Finish Used
Exterior Paint
Recommended Skill Level
Beginner

Farmhouse table meets turned leg coffee table

Submitted by KathyV on Sat, 01/05/2013 - 16:47

This was my first project and I LOVE it. We desperately needed to get a new table for our kitchen, and thanks to Ana... here she is. I love it. I cannot wait until I build more things. The Handbuilt Home is ear marked for many projects. I am such a geek, I have not only the book, but the digital version as well. This is so helpful because the digital version is on my phone and I have it readily available when I go to the store. I cannot recommend this book enough. Ana exudes confidence and that helped me to pick up that circular saw. NO FEAR! Ok, I was petrified that first cut, and probably all of the other cuts too, but it didn't stop me.

This table was so time consuming because I have three children and those little stinkers take up at lot of time. I am positive if I could have dedicated a day or two just to this project, I would have been done sooner. I underestimated how much time needs to be dedicated to sanding and staining and sanding and sanding :) I also underestimated how heavy this table is. I needed help to turn this table right side up.

All in all, I could not be happier with the finished project.

Estimated Cost
approx. $100.00
Estimated Time Investment
Weekend Project (10-20 Hours)
Finish Used
I used minwax water based stain and water based poly on top (three coats).
Recommended Skill Level
Beginner

Fireplace Facelift Built-In Bookcases

One of the projects that I've wanted to tackle for a long time has been adding built-in bookshelves to the sides of my existing fireplace. This fireplace (and I'm assuming the mantel) was original to the house and I wanted to create an addition that would look seamless and tie into the existing woodwork. I began designing a piece above the mantel to give the fireplace some height and then I designed the flanking bookcases to match. All of the project details and free step-by-step instructions can be found on my website at: www.momthebuilder.net

Estimated Cost
$200
Estimated Time Investment
Week Long Project (20 Hours or More)
Finish Used
White interior semi-gloss paint.
Recommended Skill Level
Intermediate

Comments

Workbench

Submitted by Anonymous (not verified) on Sun, 11/22/2020 - 05:47

Thanks for the simple plans Anna, they worked out great!. I resized the table to make maximum use of the material, still within the same quantity you specified in your plans. I glued the legs along the lengths of the table, and kept the table top and shelf screwed in, for easy dismantling, if necessary.

Finally I added pop down heavy duty wheels allowing me to move the table (not shown in this pic) easily. When the wheels are not being used they pop up, making the table very stable. The height of the table is about 1/2” lower than the table saw, making it an ideal outfeed table as well.

Great design, and fun build.

Estimated Cost
Cn$148 (went with a finished 3/4” 4x8’ ply board)
Estimated Time Investment
Day Project (6-9 Hours)
Finish Used
None
Recommended Skill Level
Intermediate

Comments

Lawnmower Shed

Submitted by PipesTX on Wed, 01/07/2015 - 06:19

Modified the design to allow me to roll lawnmower directly in the end. Fun project.

Built from Plan(s)
Recommended Skill Level
Intermediate

Comments

Planter Boxes

Submitted by Doc54 on Tue, 03/09/2021 - 22:31

Hi,
I made these planter boxes from Ana's plans. The plans made it an easy project and we also decided to paint them white.

Cheap and very effective in the garden.

Thanks Ana...

Estimated Cost
Approx. AUD $40 per box
Estimated Time Investment
Afternoon Project (3-6 Hours)
Finish Used
We simply used an outddoor paint - low sheen - white and applied 3 coats to each box.
Recommended Skill Level
Beginner

Comments

Farmhouse Table

Fun and challenging build, be sure to square the edges of lumber before assembly to get a better fit

Built from Plan(s)
Estimated Time Investment
Week Long Project (20 Hours or More)
Recommended Skill Level
Intermediate

Comments

Triple Bunk Beds

Submitted by hughes3627 on Tue, 03/03/2015 - 07:22

We needed a space saving alternative to individual twin beds...these were very simple to make. Our boys love them! We kept the same deminsions as the original plans and ended up having a little extra room on each bed for storage as well as toy storage under the second bed. Worked out very nicely and left space for the next project...a study station :)

Built from Plan(s)
Estimated Cost
About $230
Estimated Time Investment
Weekend Project (10-20 Hours)
Finish Used
Natural
Recommended Skill Level
Beginner

Comments

Tall Corner entertainment Unit

Submitted by Anonymous (not verified) on Thu, 06/01/2017 - 13:06

Loving this tall entertainment center to fit under my wall-mounted television!

The dogs cant knock over my photos anymore!!!!

Added some fancy trim pieces in the middle to match the trim on the bottom.  So sturdy and hides all my junk!

http://www.ana-white.com/2012/06/plans/tall-corner-media-console

Built from Plan(s)
Estimated Time Investment
Weekend Project (10-20 Hours)
Finish Used
fruitwood minsax stain
Recommended Skill Level
Intermediate

Fancy Farmhouse Double Pedestal Table

Submitted by carrmatt02 on Wed, 05/01/2013 - 20:02

This is a combination and a scaled down version of a couple different farmhouse table plans. It is 60"x43" to fit our dining room. I integrated an inlay looking piece into the top with a 1x2 and mitered the corners of the outer two layers. The thickness at the edge of the table was accomplished with 1x4's with the middle layer inset by 1/2"... chairs to match are in the process of being built.

Estimated Cost
$175
Estimated Time Investment
Week Long Project (20 Hours or More)
Finish Used
Minwax Dark Walnut and Ebony for the inlay with six coats of Minwax Wipe-on Poly.
Recommended Skill Level
Intermediate

Comments

Mega work bench with miter station

Submitted by Anonymous (not verified) on Mon, 10/04/2021 - 16:51

When I was 8 months pregnant and going through my “nesting phase” I knew I needed to get my garage organized. Prior to building this, my tools were all over the place. To try to get it done before the baby came, I called my dad to help me out, and we built it together in just a couple days. It was a weekend I will never forget and I smile every time I walk into my shop knowing we did it together.

Comments

Master Walk In Closet with Bookshelf Door

Submitted by valpal5 on Thu, 04/16/2015 - 20:26

We used an unfinished attic space above our garage that was connected to our bedroom to make a walk-in closet with great shelving.  This project took a lot of time but we are so happy with the results!  There is a side for my husband and a side for me.  Although it is hard to see we also incorporated a small door/bookshelf into the room to allow us access to attic storage space.

closet shelving
 

Estimated Cost
$500
Estimated Time Investment
Week Long Project (20 Hours or More)
Finish Used
White painted finish.
Recommended Skill Level
Intermediate

Comments

Bookshelf Hidden Doors Over Closet

Submitted by Anonymous (not verified) on Mon, 10/23/2017 - 10:13

Hidden door bookshelves hide a furnace closet.  Built by Kraig Faulkner

Built from Plan(s)
Recommended Skill Level
Advanced

Comments

charkue

Thu, 09/17/2020 - 08:01

I'm currently working on a basement renovation project. I'm probably going to incorporate a feature like this for my mechanicals, too.

One important safety note for anyone who wants to do this: It's recommended that your furnace be a minimum of 30" away from any combustible materials. That includes walls and partitions. The image of this project displayed is right next to the furnace, which is not a good idea.

Fantastic Garden Beds

These garden beds are fantastic! They were so easy to build and look great in our backyard. We have always found ourselves with a garden covered in weeds or plants out of control. Our garden this year looks wonderful and we have hardly any weeds in the beds. Thanks for the great plans!

Estimated Cost
$15 each
Estimated Time Investment
An Hour or Two (0-2 Hours)
Finish Used
None
Recommended Skill Level
Starter Project

Comments

Seasonal And Holiday

Modern Slat Top Outdoor Wood Bench

Submitted by ckaye on Sun, 07/07/2013 - 18:38

We wanted an outdoor bench for our front entrance way, this one is just what we were looking for! Thank you for the plans.

Estimated Time Investment
Day Project (6-9 Hours)
Finish Used
2" x 6" Spruce Black Stain
Recommended Skill Level
Beginner

Comments

beardjulie

Wed, 05/04/2016 - 10:01

I am really a novice. The plans say that the 1x4's should be 18-1/2" high? But the measurement of the vertical legs are 14", and the horizontal piece is 4" high, which adds to 18". It all looks flush in the photo. Could you explain what I am missing? Thank you so much!

In reply to by beardjulie

Rudystawarek

Wed, 05/04/2016 - 11:30

So from what i see in the plans Each 1x4 board is to be cut at 18" and the 2x4 is to be cut at 14-1/2". Cutting the 2x4 at 14-1/2" will insure the 1x4 and 2x4 are fluish for the end product. It doesnt seem to add up given the demensional names of the lumber hahaha however the actual width of a 2x4 (the one the will be going horizontal) is acutally 3-1/2". so then you cut you 2x4 leg piece at 14-1/2" and then lay the horizontal 2x4 on top the total height will be 18" and should be flush with your 1x4 that is cut at 18"

beardjulie

Fri, 05/27/2016 - 14:04

That is too funny! That is a dead give away that I'm new at this! Thanks you!

beardjulie

Fri, 05/27/2016 - 14:04

That is too funny! That is a dead give away that I'm new at this! Thanks you!

Platform Outdoor Sectional

We made our sectional higher off of the ground than the original plan by replacing the single 2x4 base with stacked 2x6s, stained it black and used cushions from Target that we managed to get at 50% off. It fits beautifully in our screen porch and has made what was a waste of space into an outdoor living room. Thanks for the great plans!

Estimated Time Investment
Weekend Project (10-20 Hours)
Finish Used
Olympic Maximum Stain and Sealant
Recommended Skill Level
Beginner

Comments

lscrandall

Sun, 07/14/2013 - 08:21

I love what you did with the plan. When we do our Pergola on our patio - we are going to change to this type of furniture or a new farm house table. I love the paint color ideas and the adjustments all for such a great price! Great job!

DIY PLANTER BOXES WITH PALLET WOOD

We picked up a couple 14.9" square plastic garden planters from Home Depot and ended up creating some wood planter boxes from pallet wood for them to sit in. 

I didn't add up the cost of these boxes, because we had most of the wood and only needed a few pieces, but I'd say they were definitely less than $10 a box. 

We altered our dimensions to fit our HD planters so they would slip in for a snug fit and made the legs flush with the top of our sides. We build a simple frame for the top, which allowed the lip of our HD planters to sit firmly on top. 

Something I didn't do, but wish I did: fill in the cracks with wood filler.  There were a couple places that really could have used it, but I was in a rush and decided to skip it.  They turned out great, but could have been even better had I taken an extra 30 minutes.  On an off weekend, we are going to use wood filler in the seams, sand them down, and do a second coat of white paint. 

Can't wait to plant these with some mums for Fall! :)

Built from Plan(s)
Estimated Cost
$20 total for 2 boxes.
Estimated Time Investment
Day Project (6-9 Hours)
Finish Used
White Semi-Gloss outdoor paint
Recommended Skill Level
Beginner

www.ana-white.com/Hutch

Submitted by svtigrz on Sun, 10/28/2018 - 04:39

My wife wanted a hutch to store her canner and supplies in. We searched online for hutches and Hoosier cabinets and they were anywhere from $1200-$2000!!. That's when I said "I can build that". I sat down and custom designed on CAD and started my build. I was able to find the butcher block top at Lowes for $50!!.  It took me about 3 weeks to build it in my spare time. I had to special order some of the hardware because I could not find what I wanted locally. I had a lot of fun building it. On to my next project!!

Estimated Cost
$400
Estimated Time Investment
Week Long Project (20 Hours or More)
Finish Used
stain and poly
Recommended Skill Level
Advanced

Comments