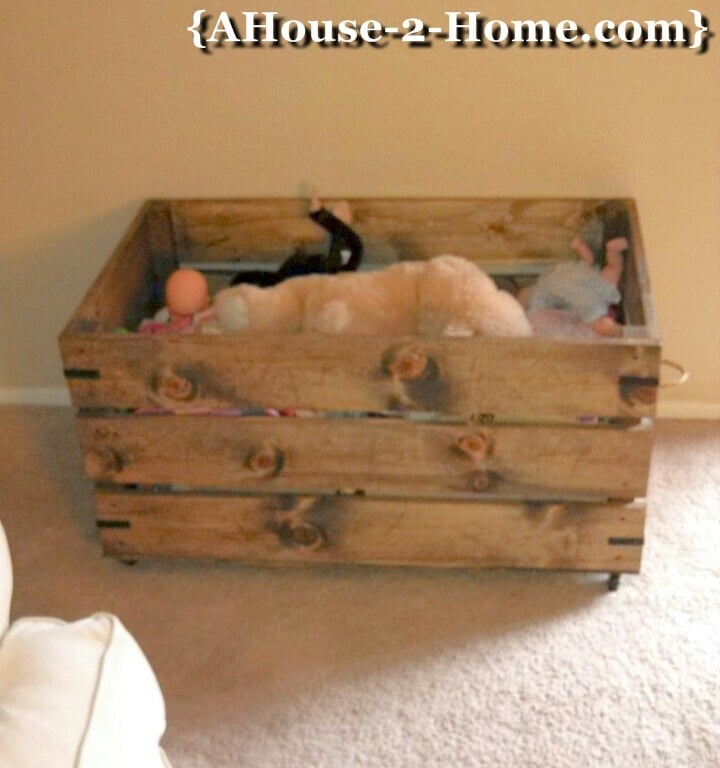
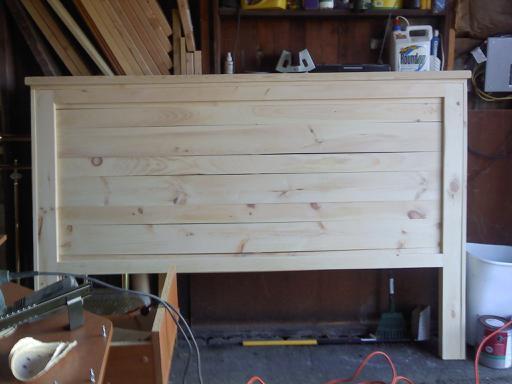
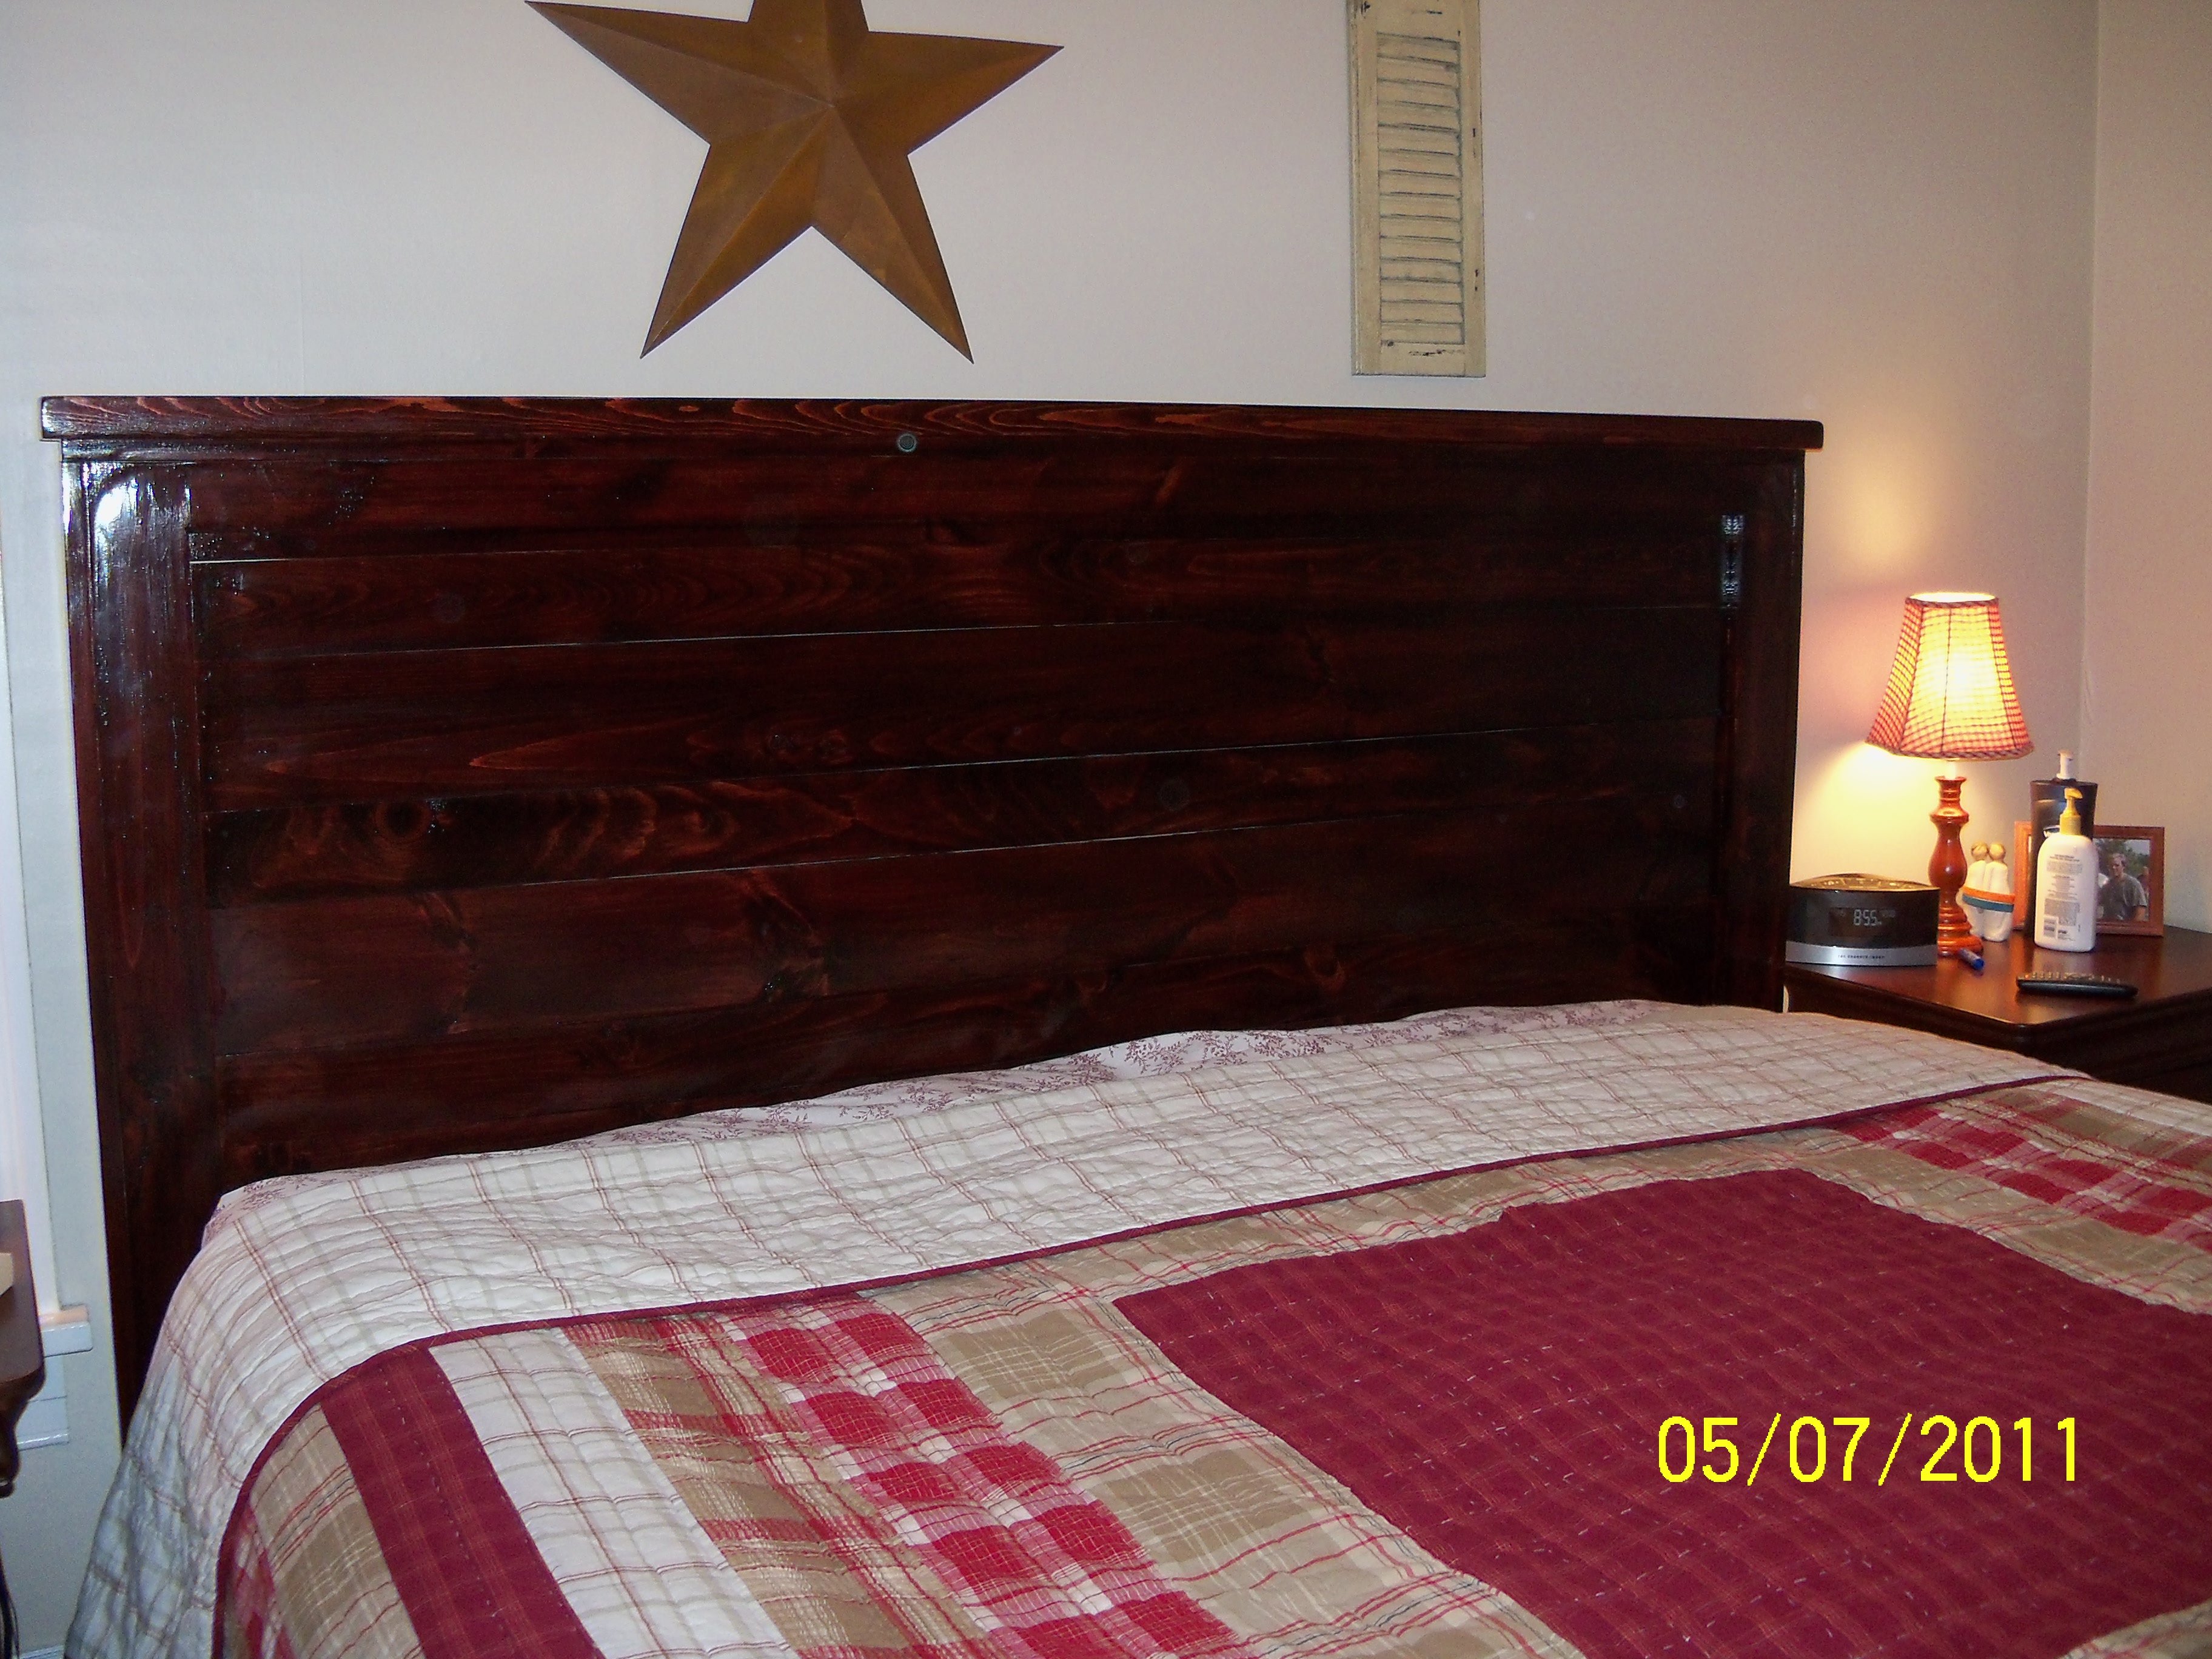
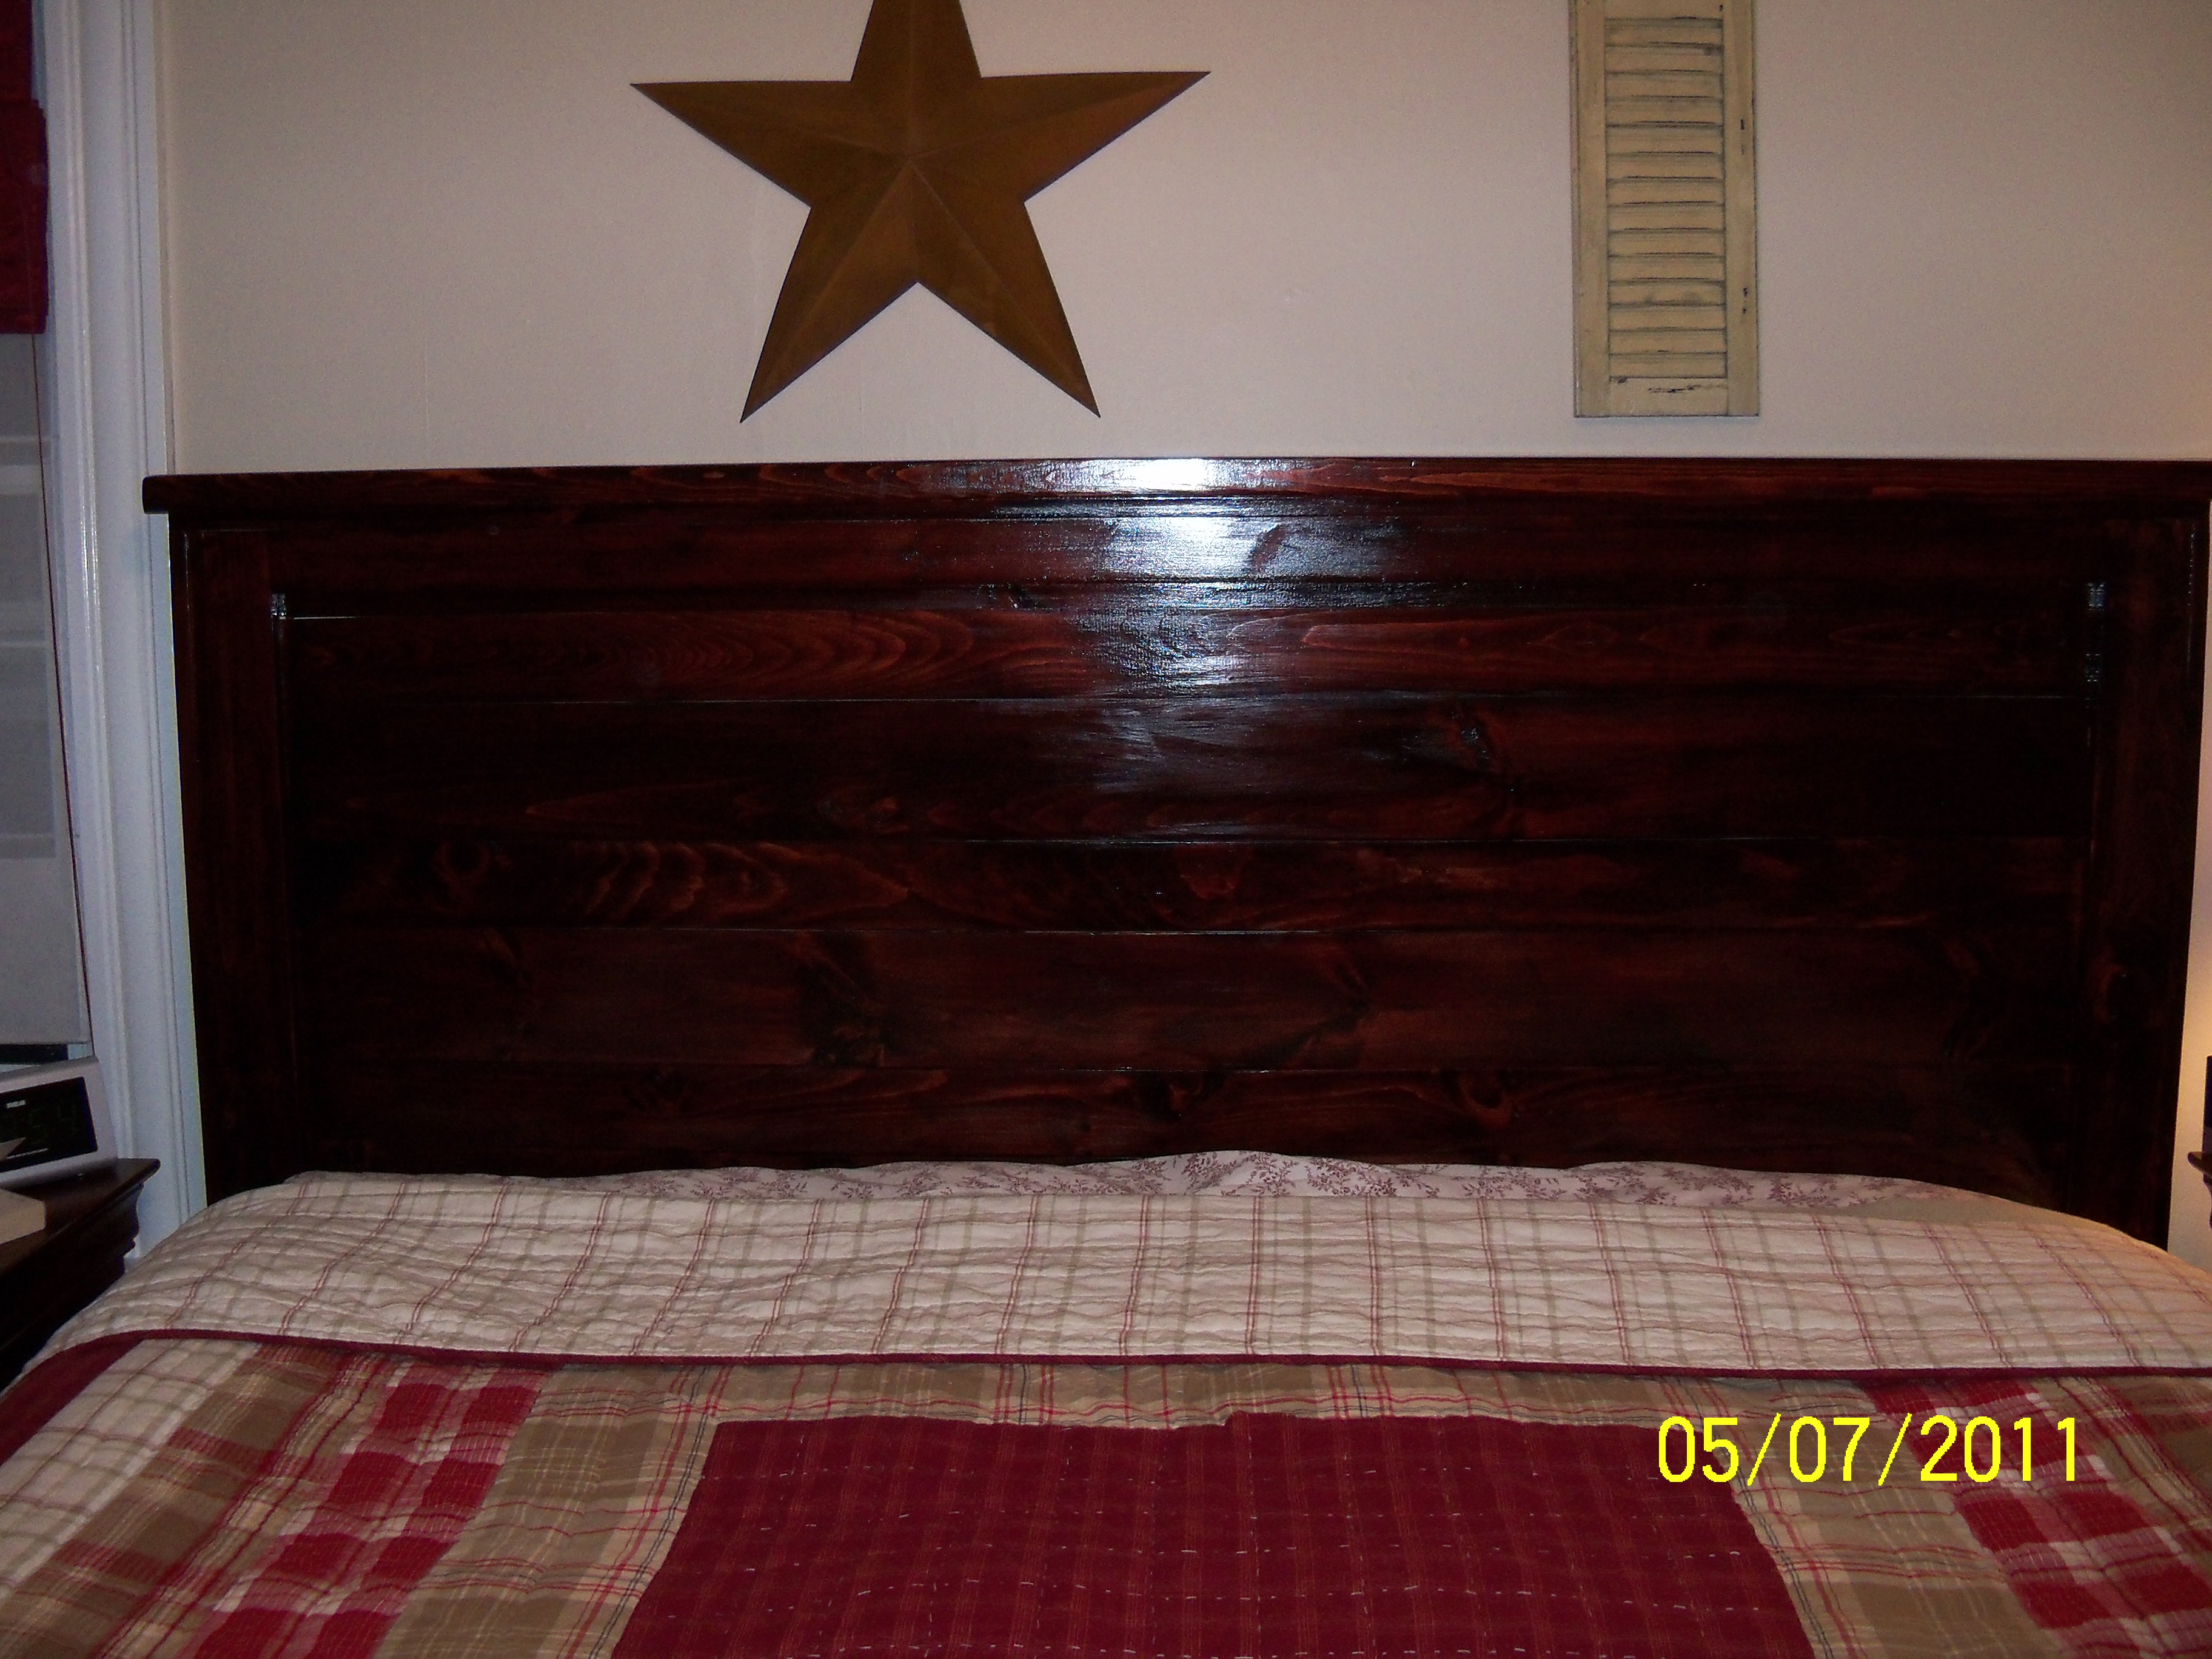
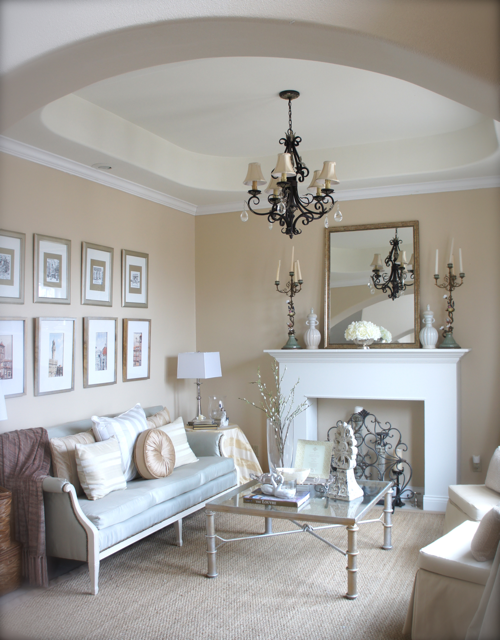
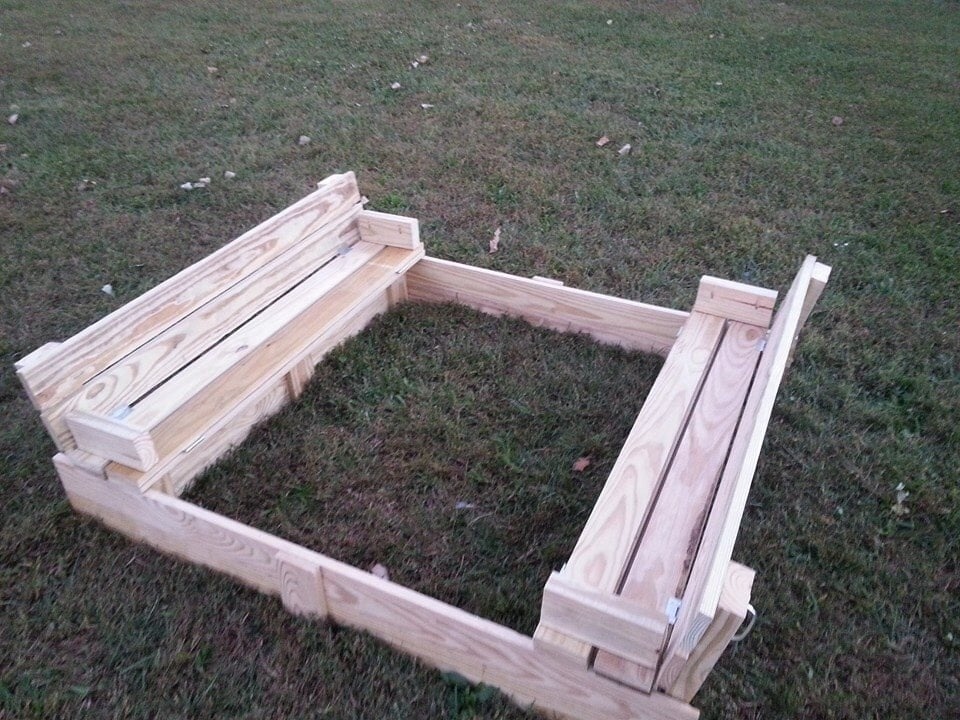
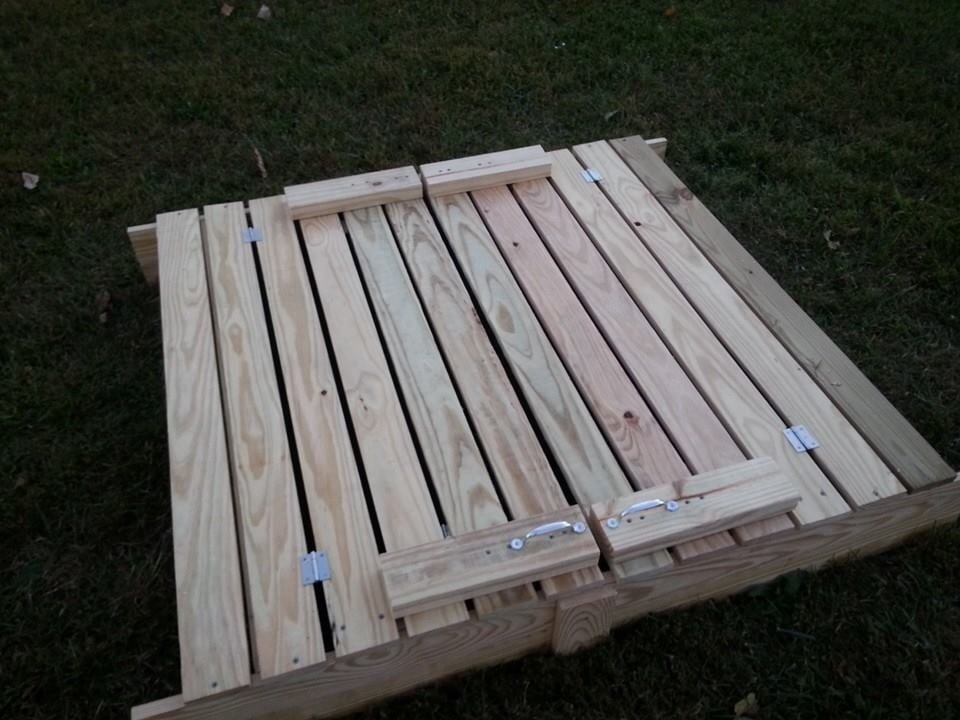
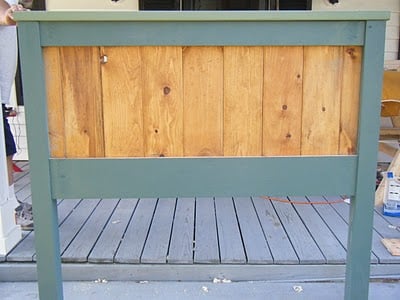
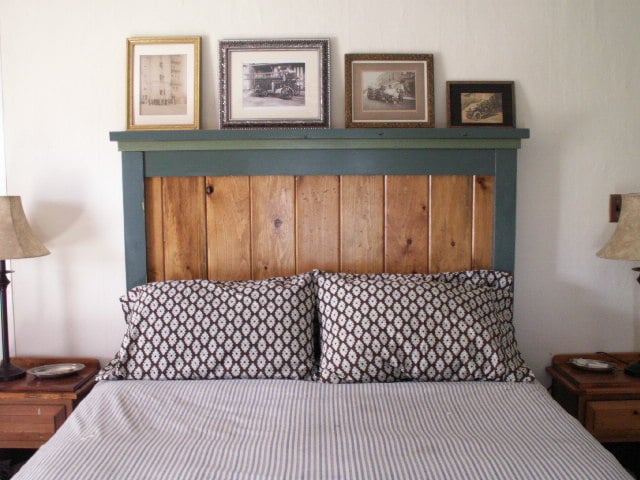
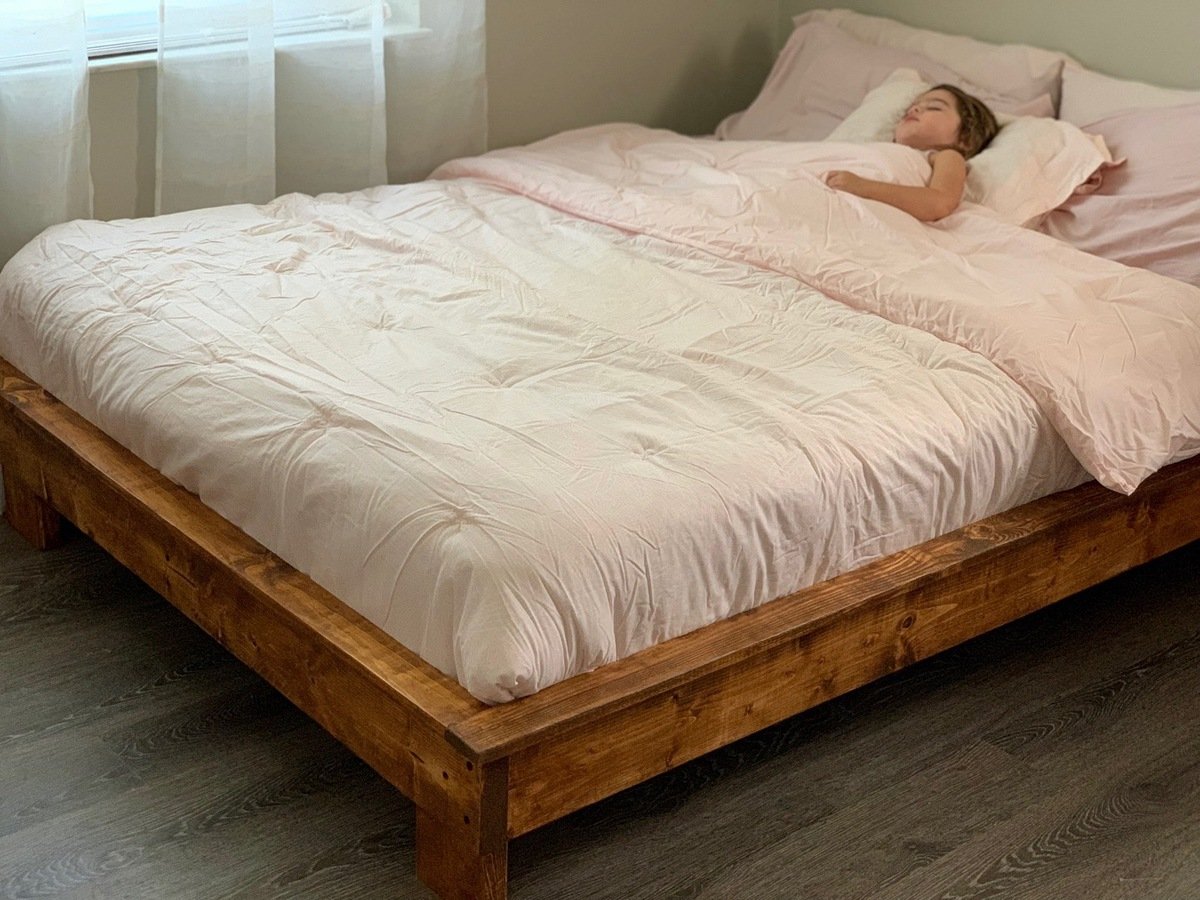
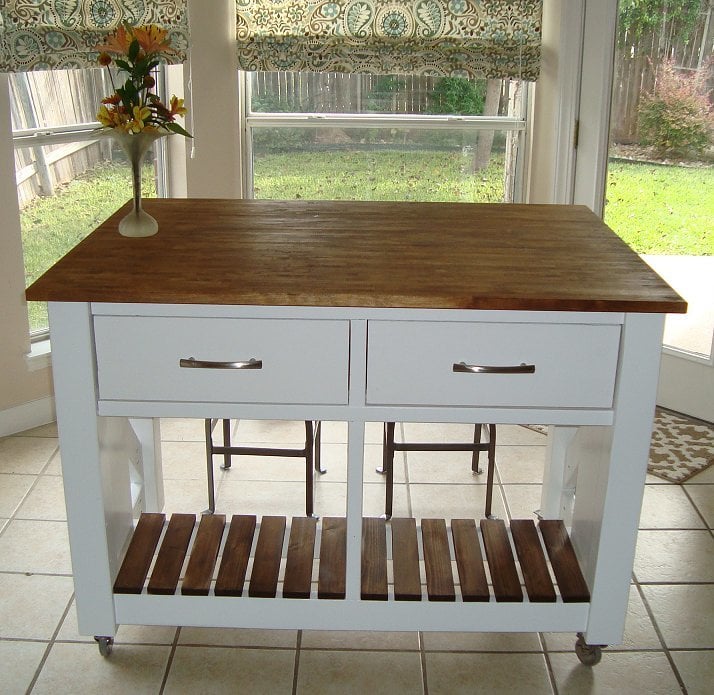
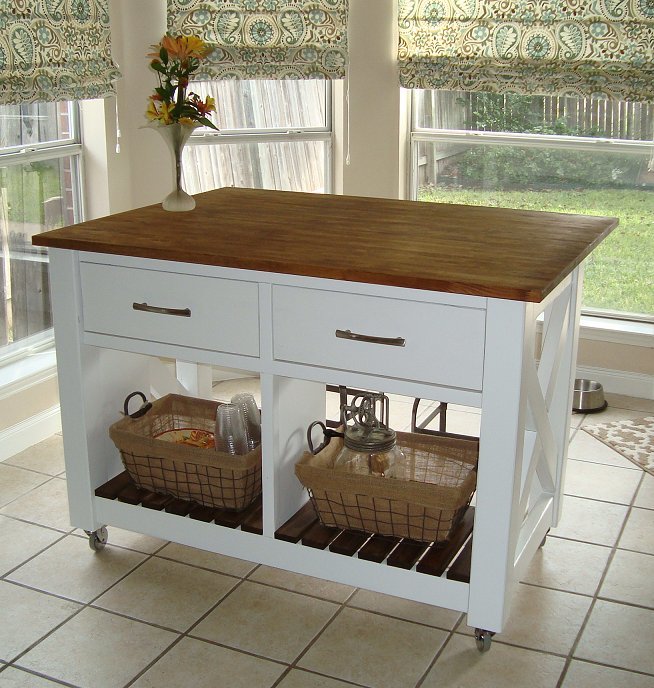
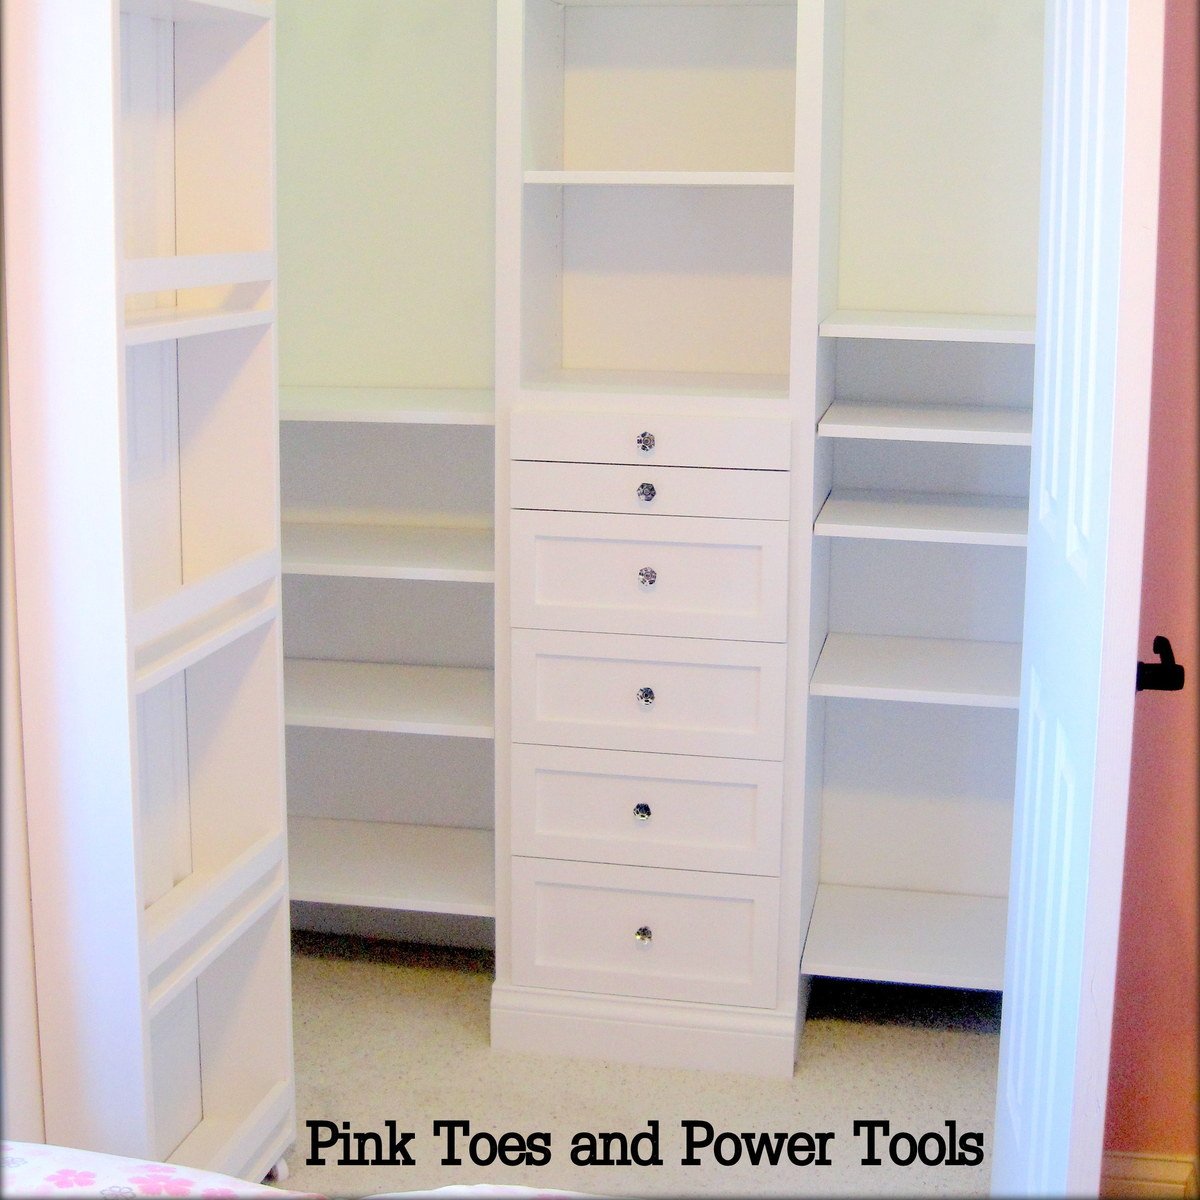
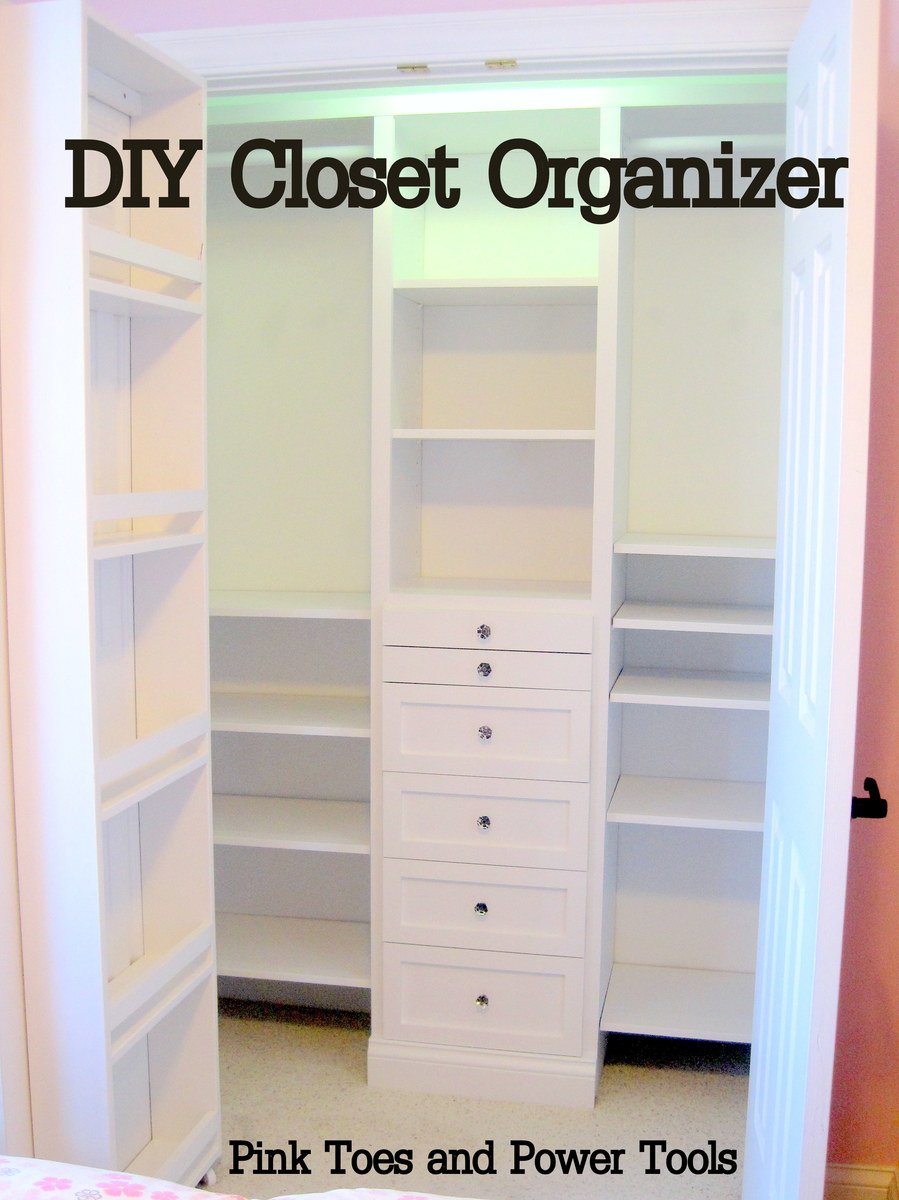
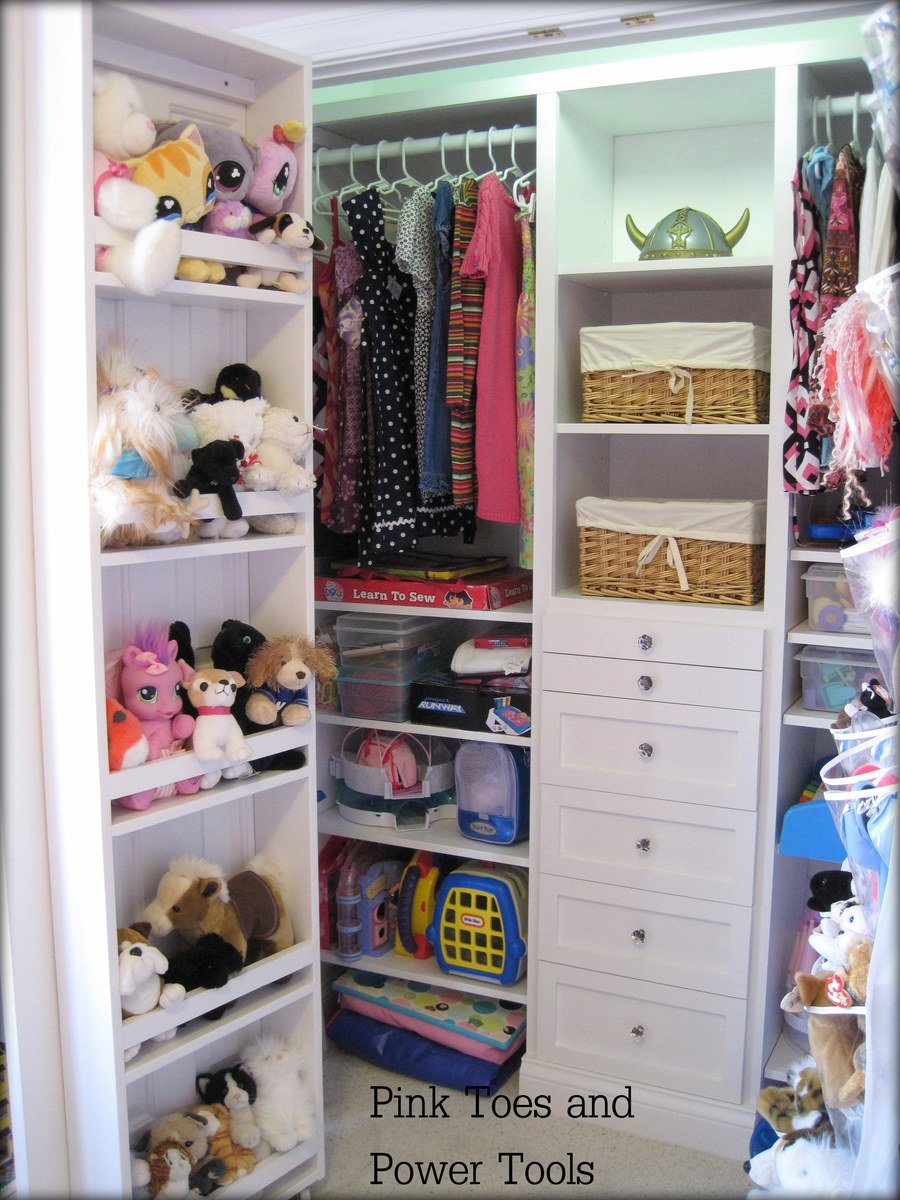
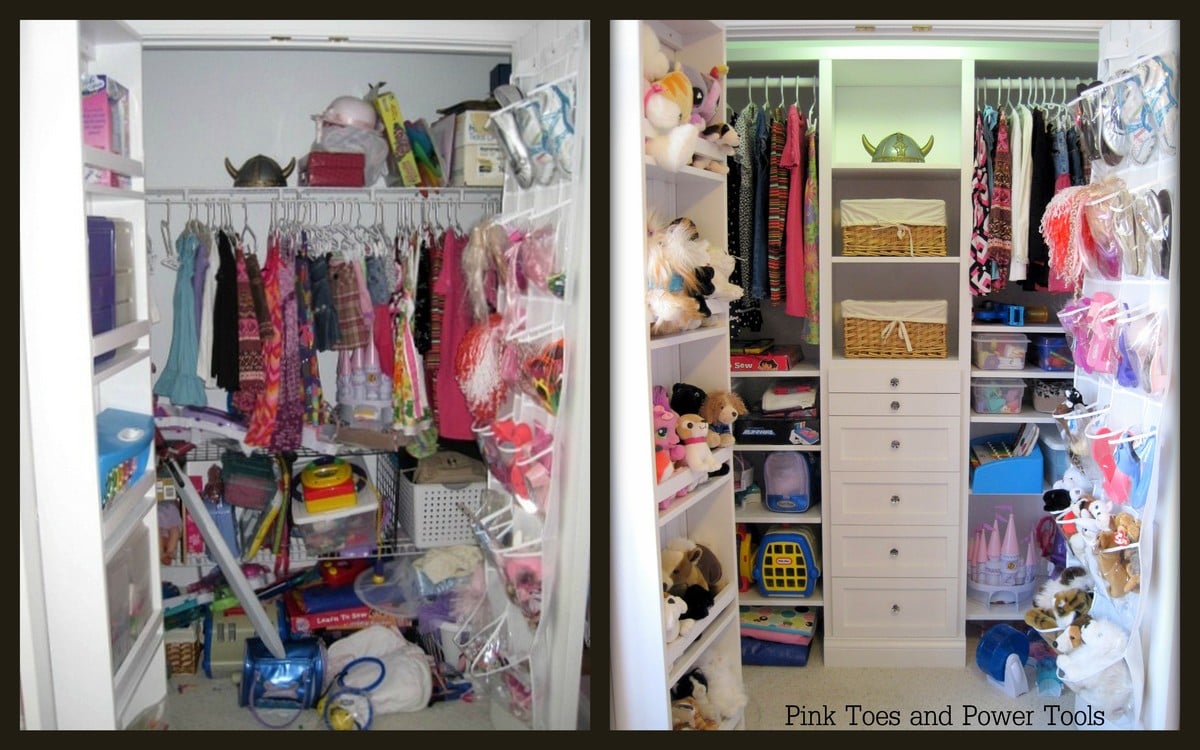
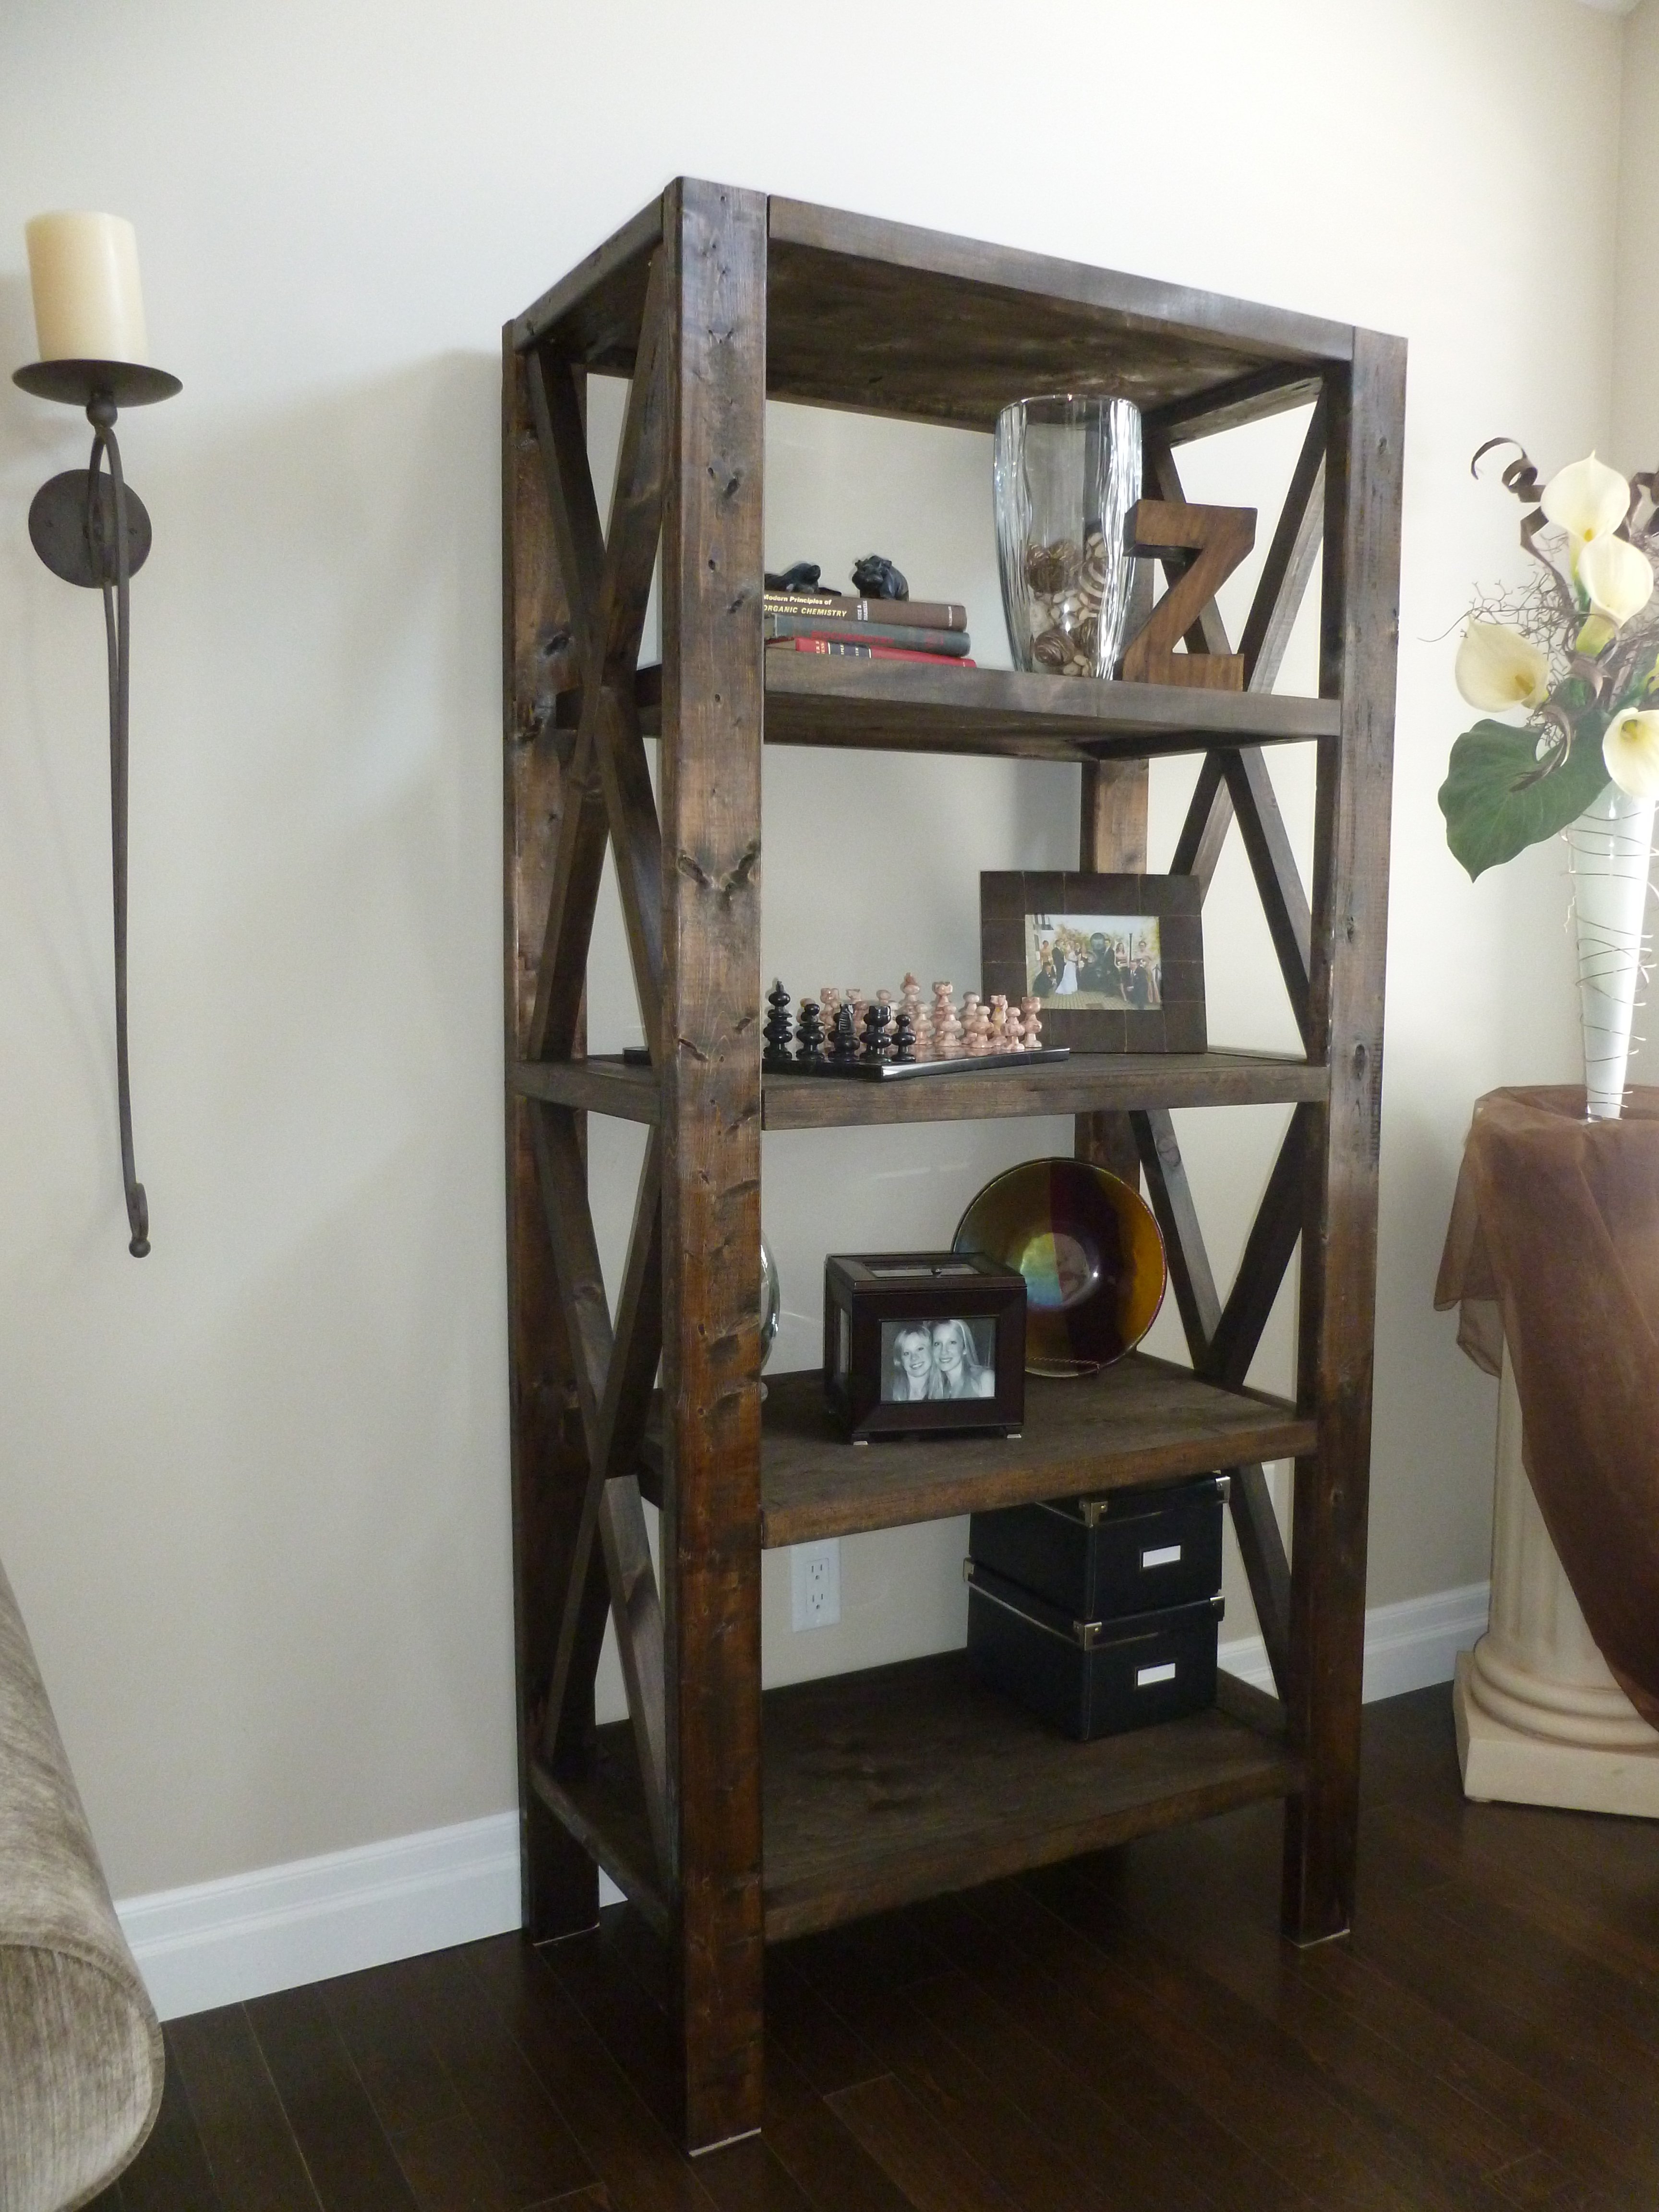
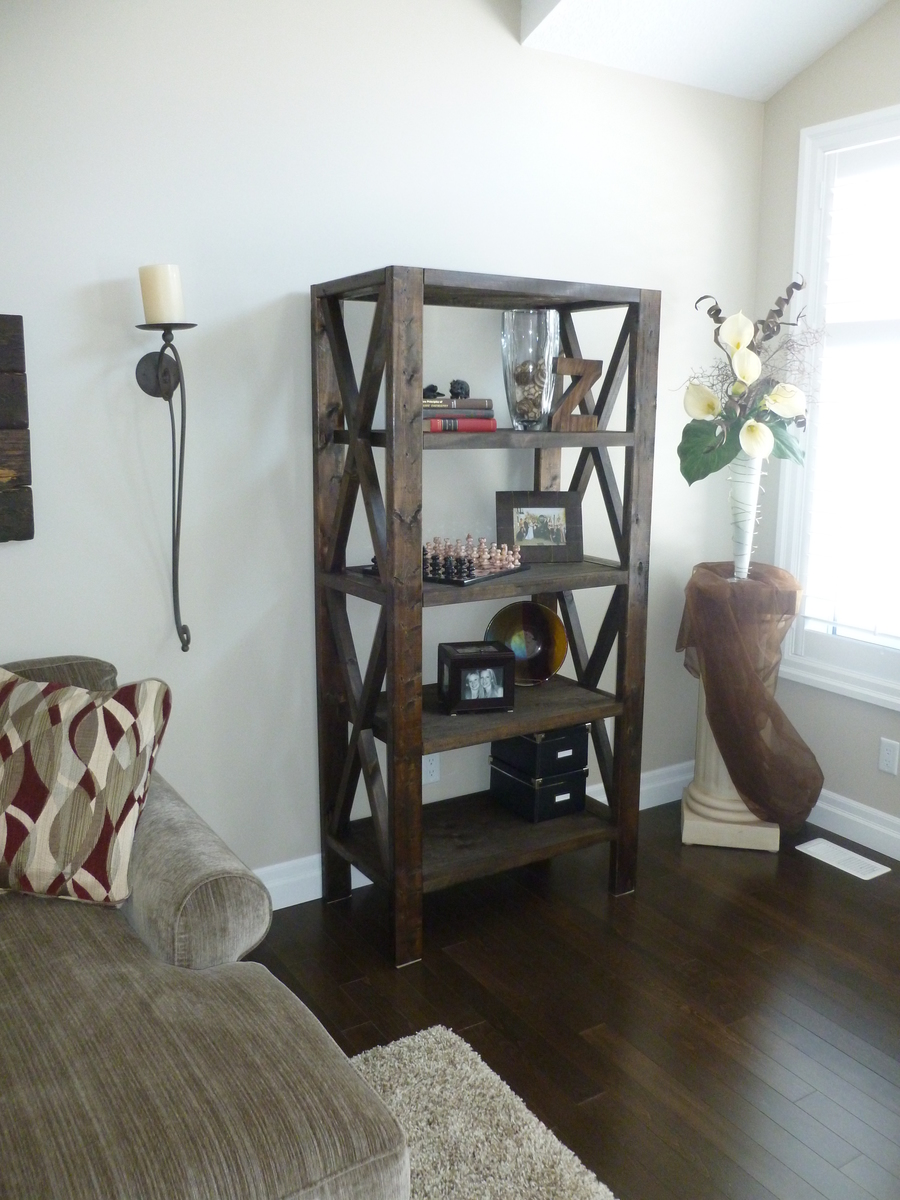
Community Brag Posts

Wood Toy Box

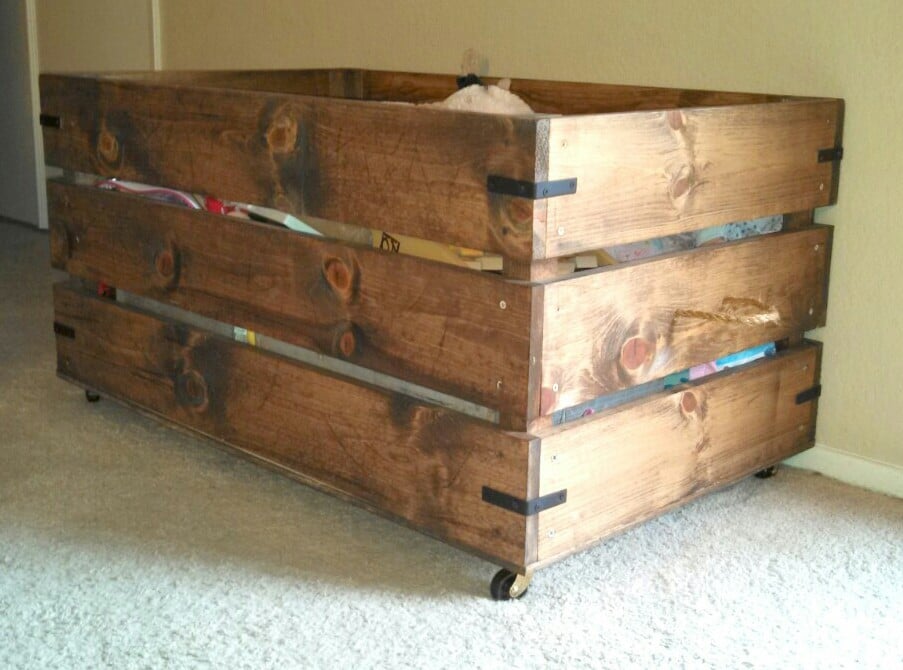
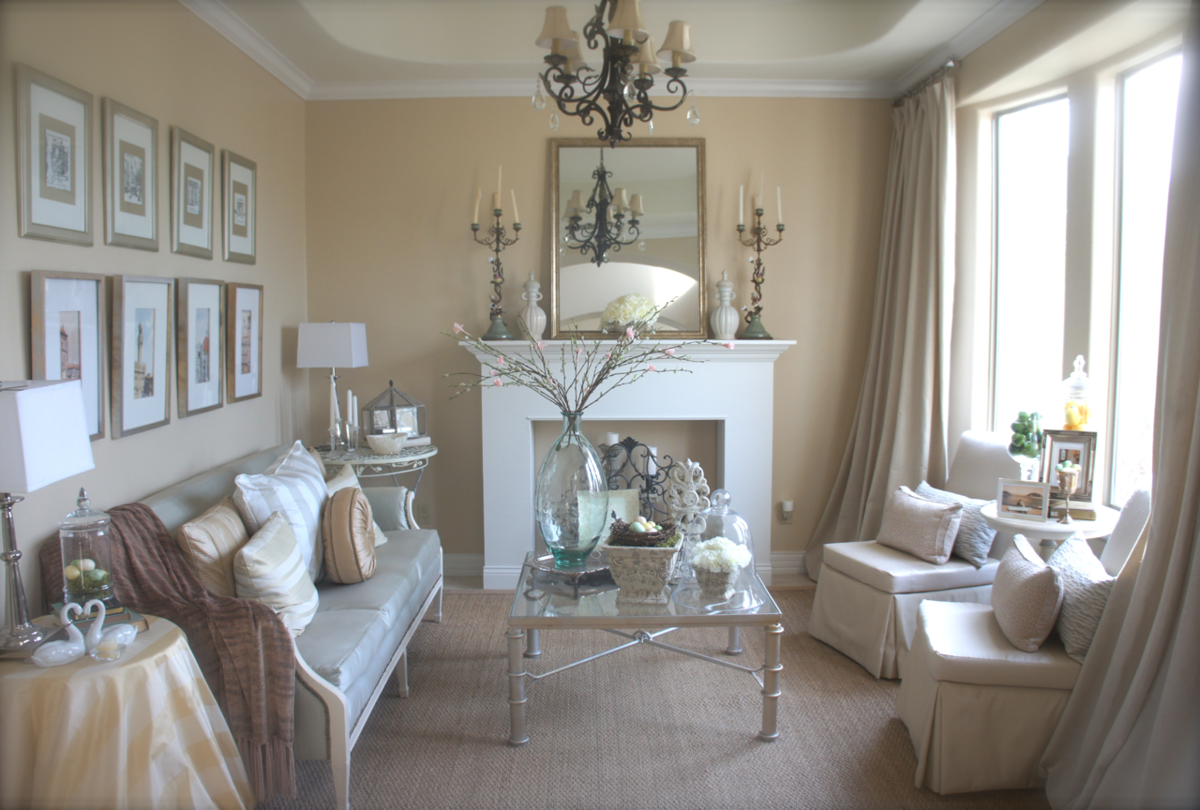
This is a great beginners project. I wanted something that would match my living room and still be functional for my daughter to get her toys out . We have a full tutorial at our blog.... www.Ahouse-2-Home.com Also , if you have any questions please feel free to leave us a comment! Thanks!

Built from Plan(s)
Estimated Time Investment
An Hour or Two (0-2 Hours)
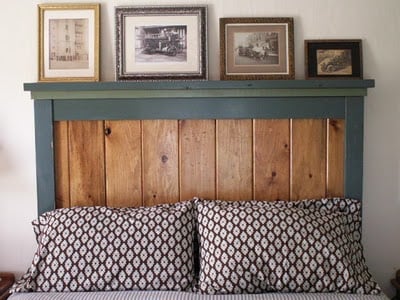
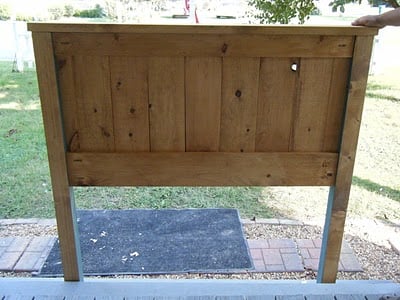
Finish Used
Chestnut stain
Recommended Skill Level
Beginner

Comments

ImTheNana

Sun, 01/25/2015 - 07:15

Is there another source for the plans? The linked site is down.

My take on the chicken coop design

Submitted by Anonymous (not verified) on Thu, 12/30/2021 - 13:01

When we became accidental chicken owners, we had to build a coop fast. I found the plans for Ana’s replica of the Williams Sonoma chicken coop and got to work. They were very easy to follow and easy to modify to fit our own needs and aesthetic. We decided to enlarge the coop and remove the planter in the original plans do we could accommodate more chickens while keeping the original footprint. Instead of plywood, we used cedar reclaimed from an old fence we had recently replaced. We also enlarged the rear door to make clean out as easy as possible. I cut pieces of corrugated plastic that fit inside the door and windows to winterize the coop when temps drop below freezing. The run is designed to follow the shape of the coop and is large enough to give our 5 chickens plenty of space. The planter box runs the length of the chicken run, providing some plants to munch on inside and shady vines that will eventually cover the outside. Thanks for the awesome plans!

Comments

My first Easy Build Headboard, King Size

Submitted by andreak on Thu, 05/12/2011 - 16:15

This was my first project and it come out beautifully. I did learn a valuable lesson - if you are going to build something in the basement, make sure it fits up the stairs. Not sure if you can tell from the picture but this ended up 6 inches shorter than the plans. Can wait to find my next project!

Estimated Cost
$150
Estimated Time Investment
Day Project (6-9 Hours)
Finish Used
MinWax Wood Finish Red Mahogany 25 - Minwax Polyurethane
Recommended Skill Level
Beginner

Home is Where the HEARTH is (Faux Fireplace)

Submitted by cbeach1717 on Fri, 07/08/2011 - 14:11

Only about a month before Ana published her Christmas plan for a faux fireplace, the hubby and I built one of our own out of a sheet of quality plywood, 1x12's, crown moulding, and a little trim. Originally we simply wanted a place to hang our stockings over the holiday season, but now our HUGE faux fireplace is the HEART(H) of our home.

Built from Plan(s)
Estimated Cost
$150
Estimated Time Investment
Weekend Project (10-20 Hours)
Finish Used
We just primed and painted white! So easy :o)
Recommended Skill Level
Intermediate

Comments

Pug Bug (not verified)

Fri, 07/08/2011 - 15:22

Wow...that's gorgeous! Nice attention to detail, too! Just a suggestion...have you considered painting the inset of the "fireplace" black? I painted the inset of my fireplace with a flat black paint and it made ALL the difference in the world. Just something to consider. Either way, job well done!

In reply to by Pug Bug (not verified)

cbeach1717

Mon, 07/11/2011 - 08:28

Thanks so much! Would you believe that I am not as brave as I would like to be when it comes to painting anything black? We are planning to have faux logs made and stacked in the faux fireplace! We think that will do the "trick"--pardon the pun :o) Thanks again!

jharm

Tue, 07/12/2011 - 13:06

Have you considered trying a faux marble paint treatment? Or, marble-look wallpaper might be a little more fail safe and could even be applied in squares like marble tiles.

I love the proportions you chose. I think a foundation would really sell it, and would increase the safety if using candles.

Allison Byles (not verified)

Thu, 10/27/2011 - 10:07

Do you have the plans for your fireplace? Love your design and clean lines, I am planning to make one!

Guest (not verified)

Fri, 11/25/2011 - 13:22

Love this fireplace, very beautiful but very disappointed that there isn't any plans and just pictures lol a little bit of a tease.

cbeach1717

Sun, 02/26/2012 - 04:44

Hello Everyone,

I am so sorry I have not responded sooner, but I wasn't even aware that there were any recent comments on this post :o)

Now that I do know, I just wanted to let you know that I will try to get something drawn up and post it here. I am not entirely well suited for design drawing software, but maybe you all wouldn't mind if I literally draw them out for you and post pictures of those drawings, yes?

Thanks for your kind comments, and I promise to have something soon! This project really is so simple, I just know you'll love the finished product :o)

In reply to by Wendy T (not verified)

cbeach1717

Mon, 06/25/2012 - 06:17

Hello Everyone,

I apologize for the delay, but we have been out of the country for six months and don't have any way of knowing the dimensions of the faux fireplace without measuring it personally. But we will be home within the next few weeks and I will try to measure and draw up some simple plans for those of you would like to see them.

Thanks :o)

srush (not verified)

Thu, 10/11/2012 - 10:35

Hi!
I love this room, do you know who makes the paint and what the color is called?

Thanks so much! Great job on the fireplace!

srush (not verified)

Thu, 10/11/2012 - 10:36

Hi!
I love this room, do you know who makes the paint and what the color is called?

Thanks so much! Great job on the fireplace!

Door Spice Rack from 2x4s

Submitted by newfern on Mon, 09/07/2015 - 19:59

Bought only two 2x4s to complete this project. Ripped and chopped and milled like crazy to get it down to the dimensions of the plans. The pine is a little flimsy, I wouldn't recommend it unless you're on an extreme budget, but it CAN be done! Just know that any of the cross-bars that have a knot-hole will probably snap sooner than later. (Luckily I milled extras!)

Another cost tip is to skip the backing. I used two supports from the main material instead of any plywood. Watch out for wracking when doing the glue up and it'll be just fine. Fully supported with less weight too!

Built from Plan(s)
Estimated Cost
$10
Estimated Time Investment
Afternoon Project (3-6 Hours)
Finish Used
cedar fence stain (Says mildew resistant... sounds great!)
Recommended Skill Level
Intermediate

Comments

Well loved outdoor sofa

Submitted by Anonymous (not verified) on Sat, 07/16/2022 - 17:51

This sofa has been in constant use for three years. Sturdy and comfortable, we have to compete with the cats for a nap or rest. Even on the winter, when we remove the cushoins, it gets used as a bench or a kitty hiding place while they wait to come in.

Built from Plan(s)

Comments

Sandbox with built-in seats

I modified this a tad from the original plans to suit my needs. I will eventually be adding a platform with attached slide and swing set.

Plans were easy to follow. My store didn't have 1x8's so I stacked 1x4's and used my Kreg jig to join them together and then I added extra bracing.

I had seen this on Pinterest a couple years ago and thought it was the coolest thing! Io excited I was able to build it myself!

Built from Plan(s)
Estimated Cost
About $40
Estimated Time Investment
Day Project (6-9 Hours)
Finish Used
None yet. I will stain and seal everything when I get the entire play set finished.
Recommended Skill Level
Beginner

Queen Farmhouse Headboard

Submitted by sharon-l on Sat, 10/22/2011 - 04:54

We eventually will build the rest of the bed, but for now we needed a headboard. Hubby helped me with this one, since it was large, I loved having an extra pair of hands. This headboard is reversible, so if our tastes change, we can unbolt it and flip it over to the side that is just stained and polyurethane. Pretty neat! This headboard is extra tall, because we have our bed frame up on risers, and we wanted a picture shelf but didn't want it interfering when we sat up in bed to read or what-not. Hubby used the router to make grooves in the top before we attached it, so our pictures wouldn't be crashing down on our head! Our metal bed frame comes just shy of the outer edge of the legs of the headboard, so when we build the rest of the bed, the side rails will meet the edge exactly. We placed the headboard behind the bed frame to mark where to drill the bolt holes and attached the headboard to the frame with 4 inch long, quarter inch wide bolts with washers and nuts. Two on each side.

Built from Plan(s)
Estimated Cost
$50-$60 just paint and lumber. We had some supplies left over from previous projects, including screws and the ship-lap boards.
Estimated Time Investment
Weekend Project (10-20 Hours)
Finish Used
We painted and distressed the boards, then applied stain to the distressed parts. We coated the entire thing with three coats of polyurethane.
Recommended Skill Level
Intermediate

Comments

My daughters platform bed

Submitted by Anonymous (not verified) on Sun, 03/24/2019 - 05:33

I’m in love with how well this bed turned out. Modified by using a 2x4 for middle support and 1x4’s for slats. It was less money and felt better for support. 

Built from Plan(s)
Estimated Cost
$150
Estimated Time Investment
Weekend Project (10-20 Hours)
Finish Used
Early American stain & matte poly
Recommended Skill Level
Beginner

Double Wide Cedar Fence Picket Storage Shed

Submitted by moosmani on Mon, 11/11/2013 - 03:12

I read and studied every comment and brag post about this shed. I must have read the plans a hundred times before I got up the courage to tackle it. It’s a very attractive and affordable shed design. I thought a double wide version would be perfect for our long, narrow side yard, and it is! I mostly stuck to the plans except for a few things. I made it 10” taller overall so there would be plenty of head clearance under the doorway. That was a very easy modification. I used 2x4s for the walls instead of 2x2s because we have high winds in our area. That modification was a little bit more challenging, but I planned it out and it worked! Also I used 2x6s for the headers instead of 2x4s. I also added 2x4s at the thresholds because I couldn’t image making it stay square without them. I basically made two sheds joined by a common wall in the center. I did not increase the depth, mostly because I was afraid to mess with the angles and how that would change the pitch of the roof. Joining two sheds together meant that I didn’t have to put the exterior pickets on the middle wall. But it also meant that I had to build 4 doors. Yuck. They were difficult to get lined up and level, but I was amazed it actually worked and that all the doors operate properly and smoothly. I was questioning the wisdom of my decision to do 4 doors while I was in the thick of it, but now that all the work is done, I love that I can open all 4 doors and have easy access to absolutely everything in the shed. Very convenient! I told my dad I was building a shed and he recommend that I add cross braces. It seemed sturdy enough without them but it certainly can’t hurt. My dad knows everything about building and I know nothing, so I took his recommendation. If I were to do this again, I would overlap the cedar pickets by 1” instead of ½”. My pickets were not quite wide enough. I could swear they shrunk after I applied the stain/uv protection. I used liquid nails along each lap but it didn’t hold. Where the glue DID hold tight, the wood split lengthwise. Anyway, for whatever reason, gaps appeared and I spent a fortune on clear silicon applied on the interior walls to make it water tight. I had to keep going back for “just one more tube.” So with hind sight I would have been better off just buying a few more pickets and increasing the overlap. Another thing I might do is make it deeper. I decided against it initially because I was worried that increasing the depth would make it flimsy. Now I don’t think that would be a problem. This shed is sturdy. I can’t say thank you enough. Great plans and a great website! I am completely hooked.

Built from Plan(s)
Estimated Time Investment
Week Long Project (20 Hours or More)
Recommended Skill Level
Intermediate

Comments

moosmani

Mon, 11/11/2013 - 14:56

I kept every receipt from caulking gun to stains and brushes. I just now added it up and it came to (cringe) just under $900. But I have lots of left overs for another shed and it's still a huge bargain. Other sheds that are similar to this plan are much smaller and start at $1,999 and up! I think it was well worth it to have a sturdy bargain shed that's also beautiful.

t0mpr1c3

Sat, 01/22/2022 - 23:01

It looks great with the stain. I think your Dad's advice was good. Also I like that the heavier timbers add rigidity to the frame.

Seasonal And Holiday

Rustic X Kitchen Island - DONE!

I had always wanted a kitchen island and saw this project. Seeing that the plans were well written I decided to tackle it. In addition I made a few small modifications to enhance the style of the island. These included using 4x4's on the corners and a IKEA butcher block top. The top allows for a larger surface area to work with and more space to sit under. The stools in the picture are from World Market and they were the perfect pair for the island. The island is great for family gatherings or just sitting with your morning coffee. I had family over for Thanksgiving and received lots of compliments. Thank you Ana!

Built from Plan(s)
Estimated Time Investment
Weekend Project (10-20 Hours)
Finish Used
Valspar white latex paint from Lowes on the bottom and Minwax Mission Oak stain on the top.
Recommended Skill Level
Intermediate

Comments

MaryMurray

Tue, 12/03/2013 - 17:43

I love how this looks. This is actually next on my list of projects, thanks for the inspiration!

Jcalloc

Thu, 03/05/2015 - 08:13

May I ask what kind of wood you used for this project?

Closet Organizer

Submitted by kristen on Sun, 02/05/2012 - 10:26

I needed a closet organizer for my daughter's room that could grow and change with her age. Right now it needed to have lots of shelves at her height to hold the massive amount of stuff an 8 year old can accumulate.

Once she transitions out of the toys, I plan on moving the shelves all to one side or the other for shoes, and adding another rod. Another possibility is shoes in the door organizer and 4 sections of hanging clothes...regardless, the end result has options that will grow with her!

I was able to keep the cost of this down because I used all scrap plywood to make the drawers. I did splurge in S4S pine lumber rather than trying to make rougher cuts nice.

On the left door is Ana's Behind Closet Door Storage plan as well :)

Estimated Time Investment
Week Long Project (20 Hours or More)
Finish Used
Kilz No VOC primer, Olympic No VOC paint in semi-gloss (white off-the-shelf tint)
Recommended Skill Level
Intermediate

Comments

Guest (not verified)

Sun, 02/05/2012 - 11:17

I love the idea of the stuffed animals on the door! Those things multiply so fast and get in the way of making the bed - great closet!

Cindy from Indiana (not verified)

Sun, 02/05/2012 - 18:58

Right now DD's room is a blank canvas. One of the first projects (after getting her window in) is to figure out the closet. I think this will be my inspiration!

Looks great!

kristen

Sun, 02/05/2012 - 19:25

Thank you! I am loving how organized her whole room is because of the closet being in good shape. And everything has a spot now, so it's easy for her to get it back where it needs to go!

Oh, those stuffed animals. I mentioned to her the idea of paring her collection down and she was horrified at the idea!

In reply to by kristen

claydowling

Mon, 02/06/2012 - 06:40

A shocking notion. I think there's a box in our storage area with my wife's stuffed animals somewhere. Keep in mind, my wife isn't a 20-something who just moved out of her parents' house. We have a grand-daughter. Stuffed animals are forever. In fact I think one of my nephews still has my teddy bear.

kristen

Mon, 02/06/2012 - 09:04

...at the bottom of the basket where her stuffed animals used to live, were two of mine from when I was little, lol!

But you bring up a good point about forever. I think I need to put a ban on any new ones joining her stuffed animal family from here on out. Pretty soon I'm going to need to add another closet to her room just for those!

Guest (not verified)

Thu, 02/23/2012 - 17:32

How did you build and incorporate the drawers?

In reply to by Guest (not verified)

kristen

Sat, 06/30/2012 - 20:46

claydowling

Thu, 02/23/2012 - 19:12

The easiest way to do a quick drawer, if you don't know how to do dovetails (and that's a simple skill totally worth learning), is to drill holes through the sides and into the front, and pin it with hardwood dowels. Use a domestic hardwood, you'll be a better dowel and a dimension that matches drills you own. The cheaper white imported dowels don't match any drill diameters that I can find.

hoffer5353

Thu, 06/28/2012 - 13:18

I am wanting to add shelves and drawers on a closet and am afraid it will be too big for the space. How wide is your closet?

In reply to by hoffer5353

kristen

Sat, 06/30/2012 - 20:53

Here is the post with the plan mock-up with dimensions:

http://pinktoesandpowertools.com/2012/01/24/how-to-build-a-closet-organ…

It says 65.5" wide on there, and I don't believe I made any changes, so that should be accurate. I think you could get away with having an approximately 46" wide closet. You could have the drawers in the middle and then 12" wide shelves on either side that would fit sweaters, jeans, shoes. If you made them adjustable like mine, then you could really maximize the space in there. Just make sure you give yourself plenty of room in front of the shelves if there is wall there--you want to be able to easily take things in and out.

Good luck!

mrs.T.La Forme

Mon, 02/04/2013 - 17:49

i just want to say I`m jealous i wish my closet looked like this. cant wait until I`m skilled enough to try it .

kristen

Tue, 02/05/2013 - 15:08

I'm looking forward to doing this to my closet too!! It's a good project to take on once you want to try out drawers for the first time--since it's behind doors, it doesn't have to be perfect. Good luck!

Pool supplies storage shed

Submitted by Anonymous (not verified) on Sun, 06/25/2023 - 18:50

I was looking for a shed to keep pool towels and other deck and pool items. This shed hit every feature I was looking
for. My husband loved the plans. He's always saying he can build anything with a measured drawing and a
cut list. The only thing we changed was the roofing material. we were given some metal roofing by a friend.

Built from Plan(s)

Comments

Swing set

Submitted by lazyLiz on Wed, 02/29/2012 - 10:21

I've finished my swing but my porch don't have enough clearance so I built A frame stand for it.

Built from Plan(s)
Estimated Time Investment
Day Project (6-9 Hours)
Finish Used
mahogany latex based exterior primer and paint in one
Recommended Skill Level
Intermediate

Comments

Ashley Doucakis

Fri, 04/19/2013 - 15:37

I love the idea of adding the A-frame considering that where i live there are no real trees to hang it on and building a porch where one doesn't already exist is a pain in the butt! Lol. How wide do you think we could go before it starts compromising the frames integrity? And how much weight can it hold?

Farmhouse King Bed Frame

Since developing a love for woodworking I’ve began building things for other people. This particular bed frame I built for a couple who are rebuilding their home after it unfortunately burned down. It’s a beautiful farmhouse home out in the country, and this bed frame fits perfectly in their new home.

Estimated Cost
$250
Estimated Time Investment
Weekend Project (10-20 Hours)
Finish Used
I used minwax pre-stain to prepare the wood. I then stained it using special walnut by Varathane (got it from The Home Depot). Finally, I finished it using a clear satin polyurethane by Minwax.
Recommended Skill Level
Beginner

Lego and Art Table

Submitted by ahicks6 on Fri, 12/27/2019 - 08:57

I looked everywhere for a Lego table that would fit my needs and not be super expensive, but I kept coming up with nothing. So I decided to make my own and to make it a place for my kids to do their art as well.

This was my first time using a Kreg Jig as I wanted it to be really stable. I found the drawers at The Container Store. They house all of the color coordinated Legos together.

It has been amazing so far and I'm so glad I didn't settle for any old Lego table on the market that didn't suit our needs. 

If you want more info regarding sizes, cut list, etc, let me know and I'll try to post them. 

Estimated Time Investment
Weekend Project (10-20 Hours)
Finish Used
Homemade chalk paint, Minwax Red Chestnut stain, Rustoleum Clear Enamel Spray
Recommended Skill Level
Intermediate

Greenhouse Build

Submitted by Chris Rose on Tue, 12/31/2019 - 18:43

A microburst storm destroyed my first green house (last pic). I wanted something that would be stronger, I found Ana's plan and built a replacement. Was able to recycle some of the metal channels and panels from the destroyed one to cover the end sections and the door.

Rustic Bookcase

Submitted by kristyzed on Sat, 02/15/2014 - 10:35

I wanted to build a piece for my living room that I could add onto later with other matching pieces. This was perfect since it has the matching coffee table, side table, and console table. It was my first time making angle cuts, and not tricky like I thought it would be. This is a very solid piece and fits in nicely with my decor.

Built from Plan(s)
Estimated Cost
$120
Estimated Time Investment
Day Project (6-9 Hours)
Finish Used
Stained with Minwax's Espresso stain.
Recommended Skill Level
Beginner

Comments

dbraa

Mon, 04/13/2015 - 18:24

Knotty Pine 2x boards aren't available here. Could you provide more specifics about what you used for each type of board?

Back