Benches that Convert to Picnic Tables

Simple benches that convert to picnic tables
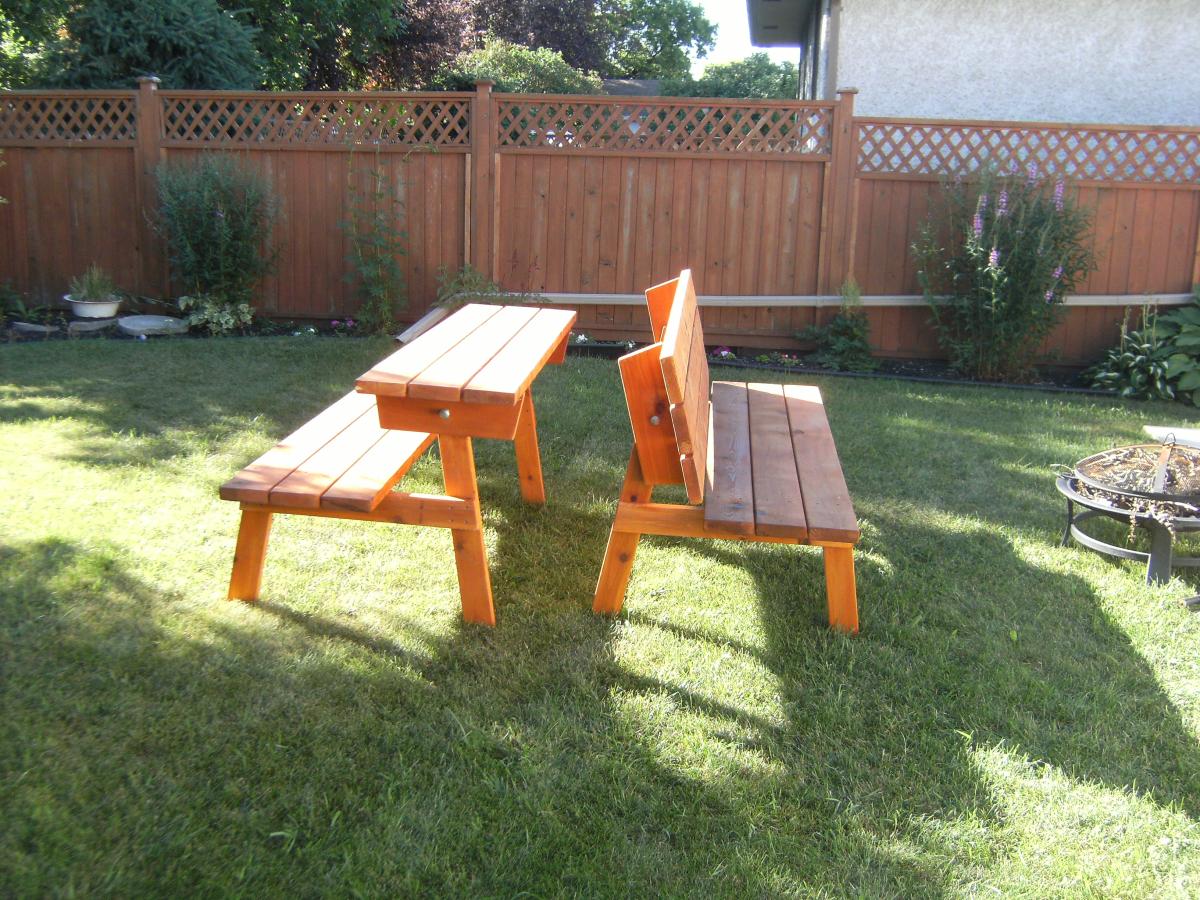
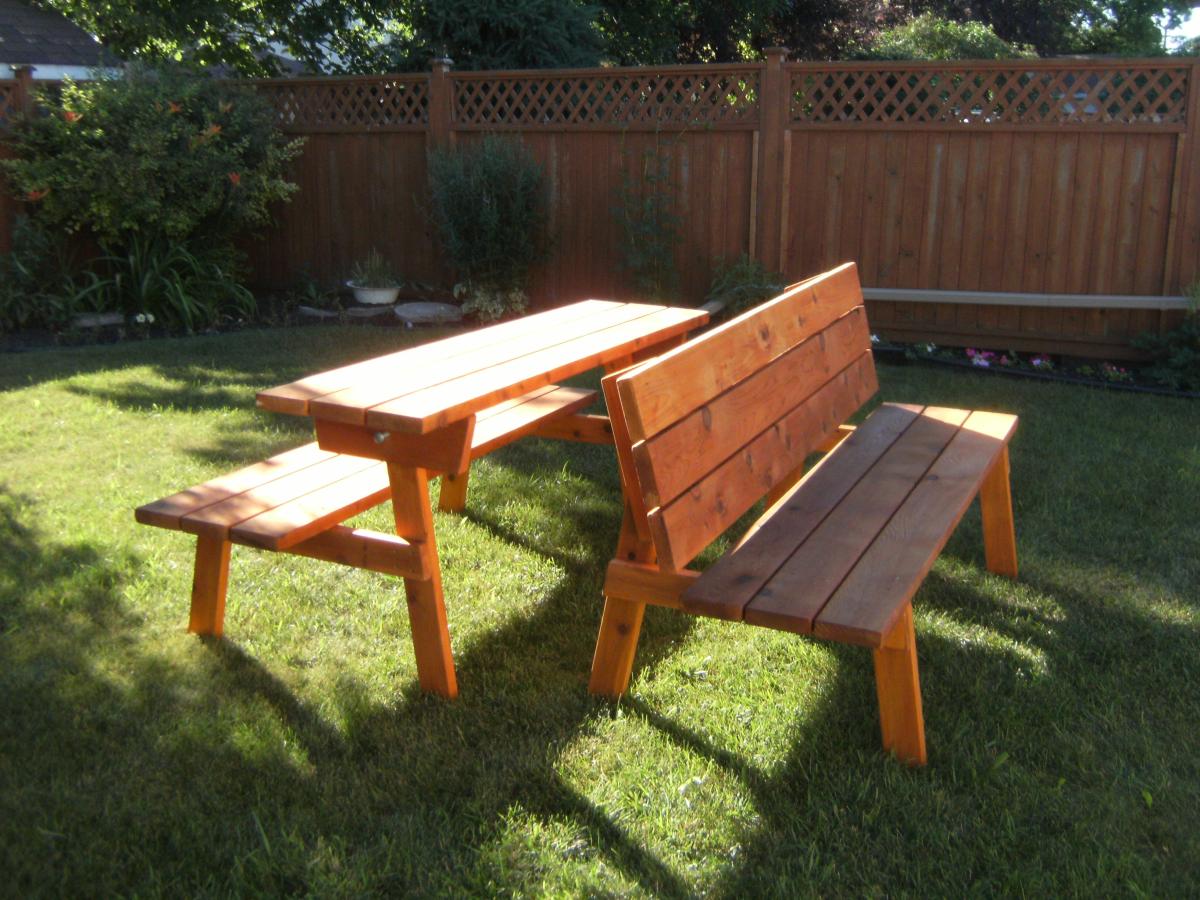
Built from Plan(s)
Simple benches that convert to picnic tables
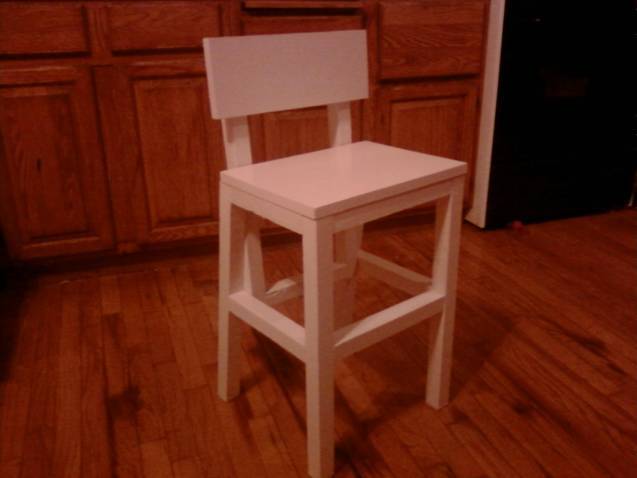
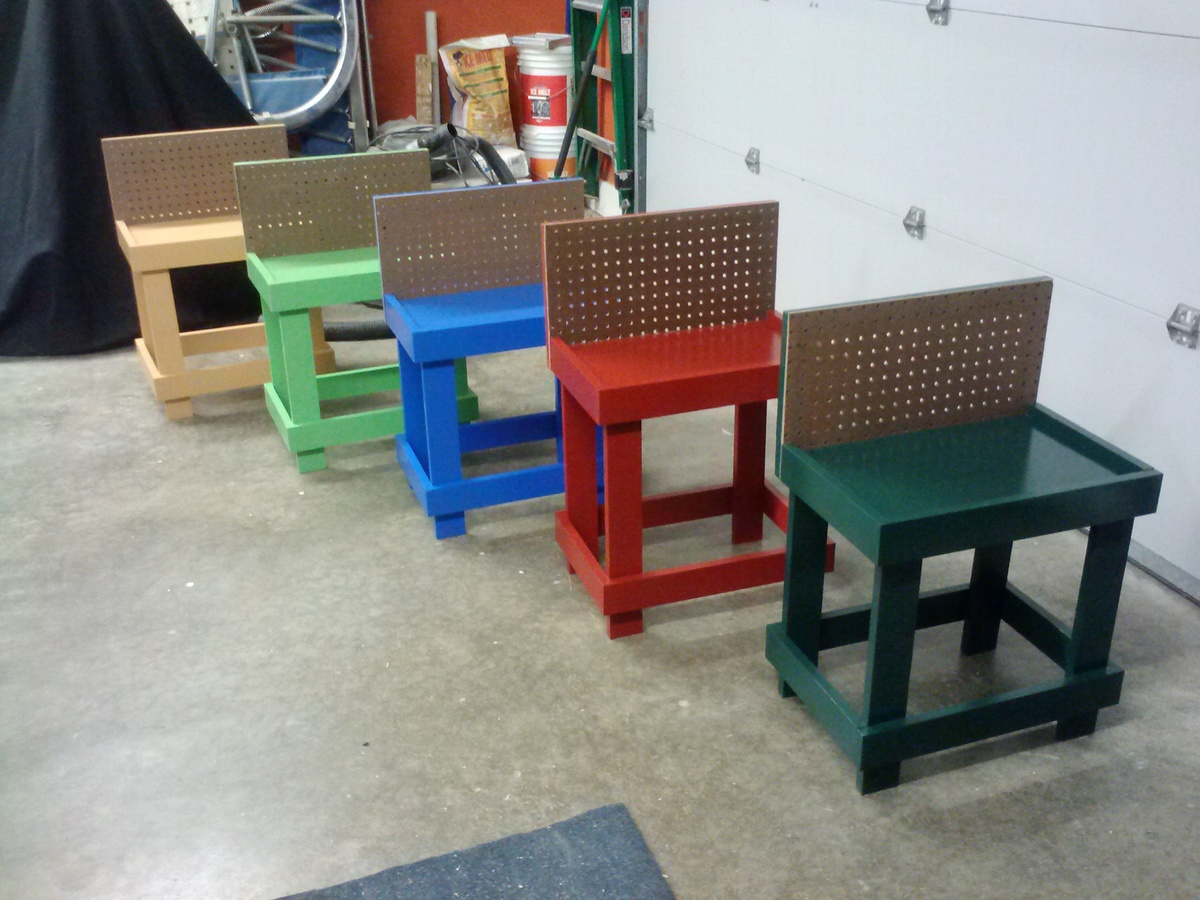
I made this chair for my two-year old niece so she can sit at the table like a big girl. We call it the "Share Chair" because she has to share it with her two sisters. It was fairly easy to make; I think I spent more time painting it.
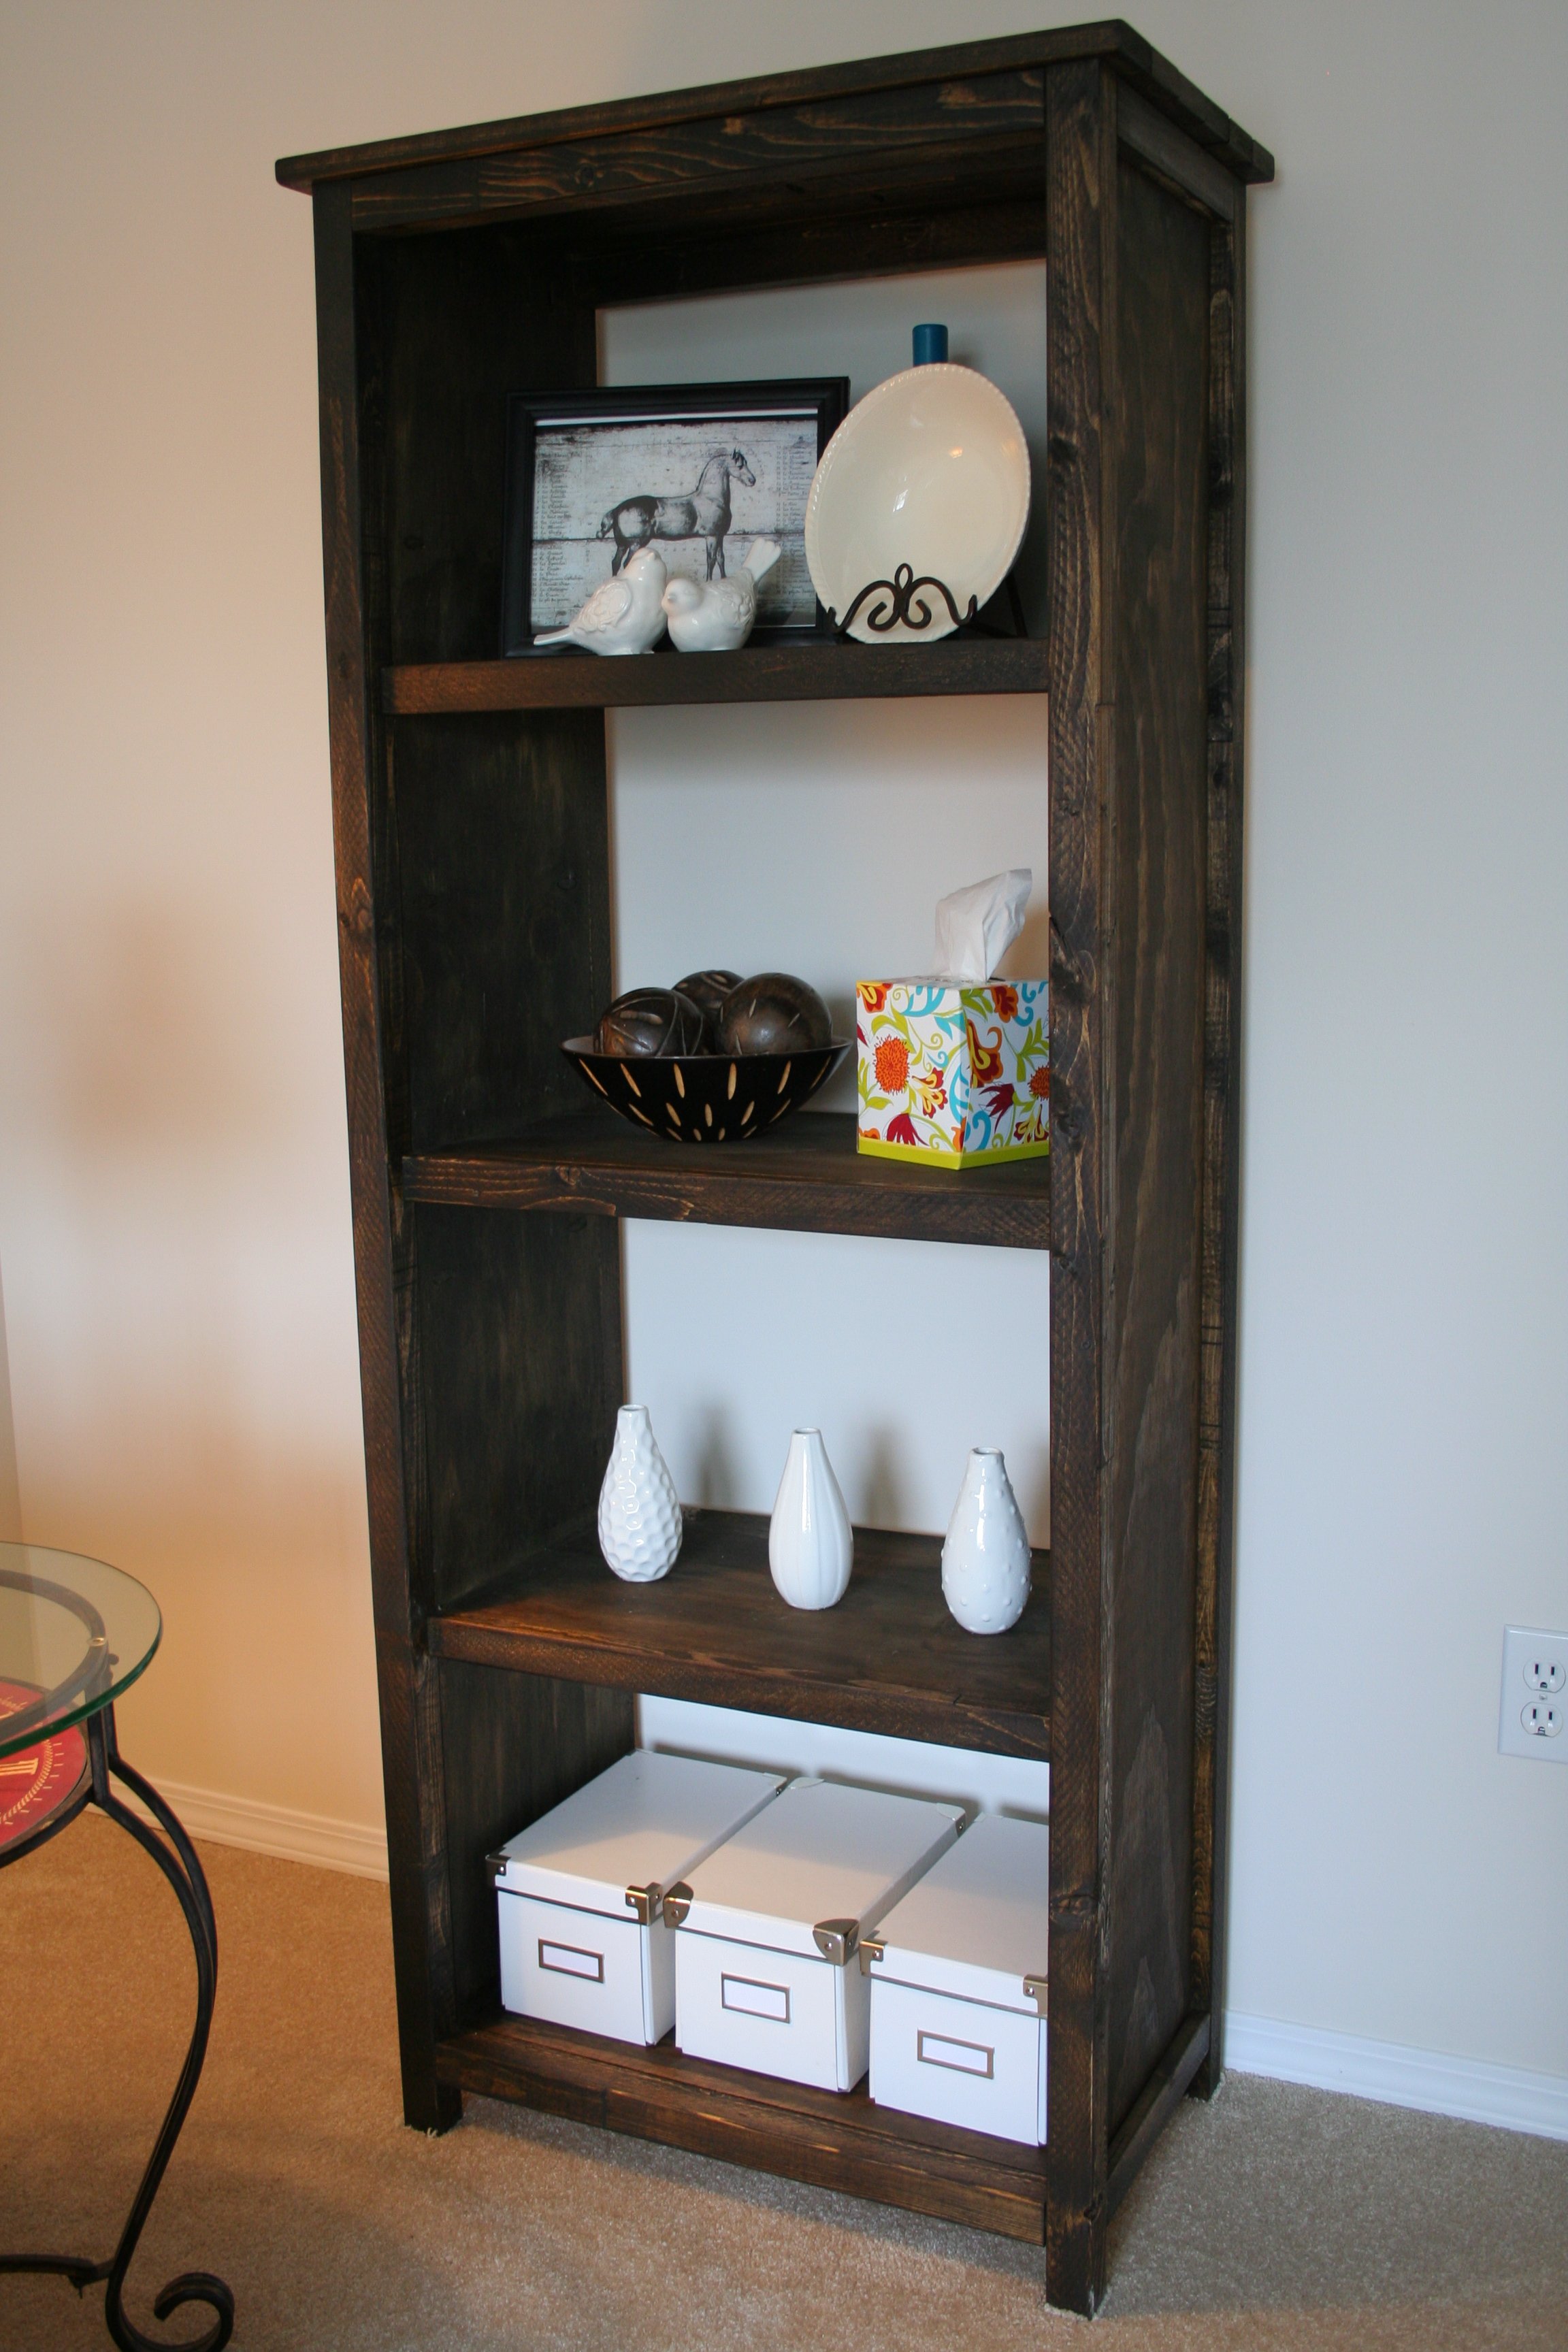
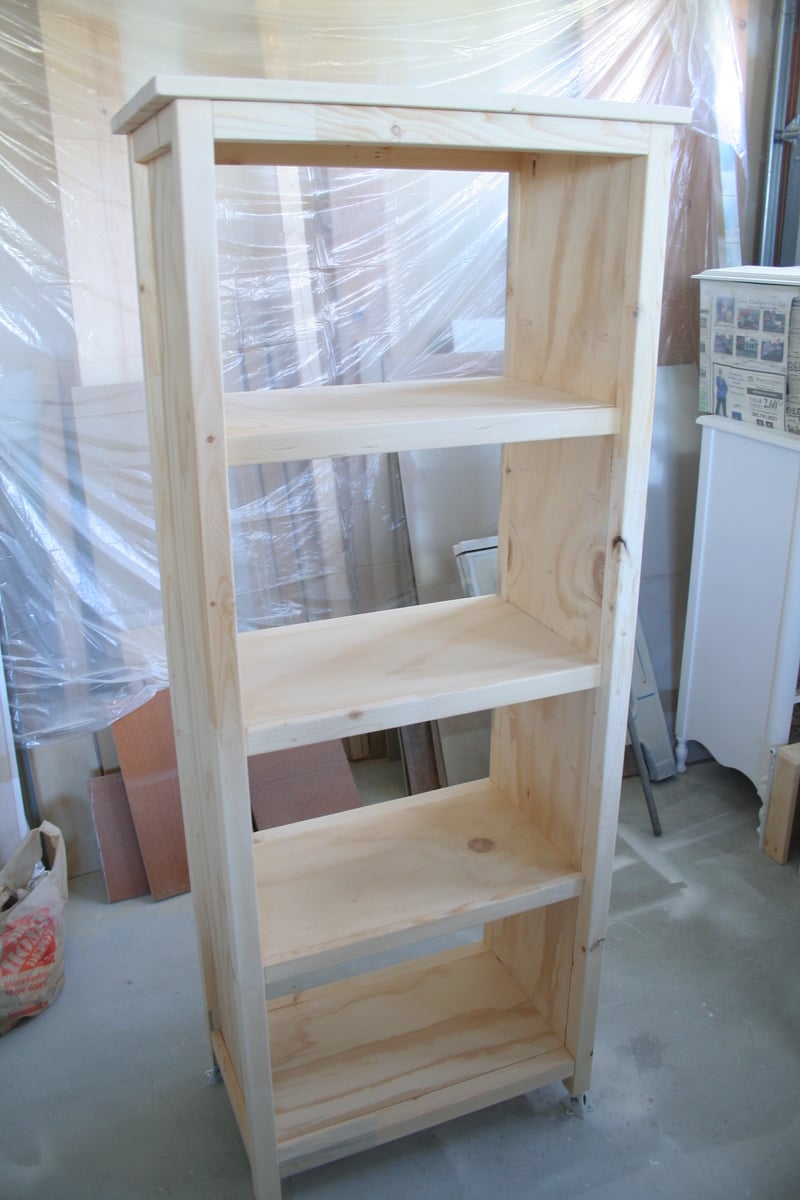
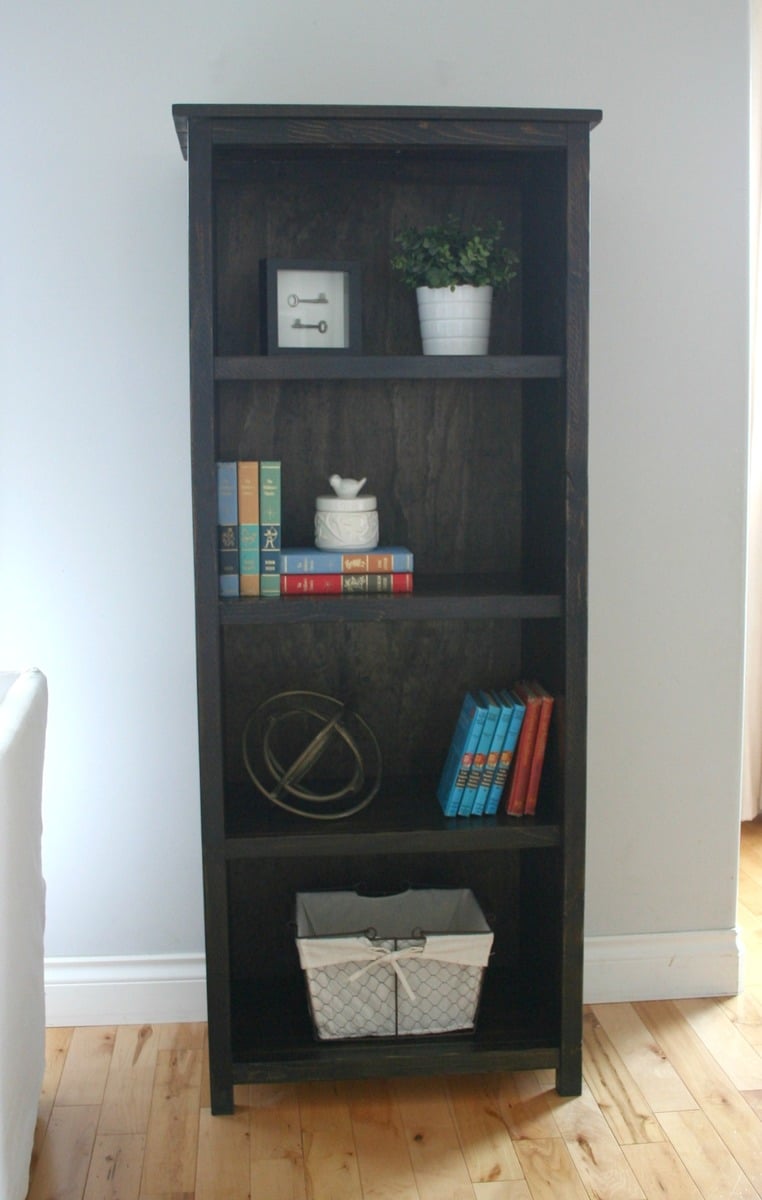
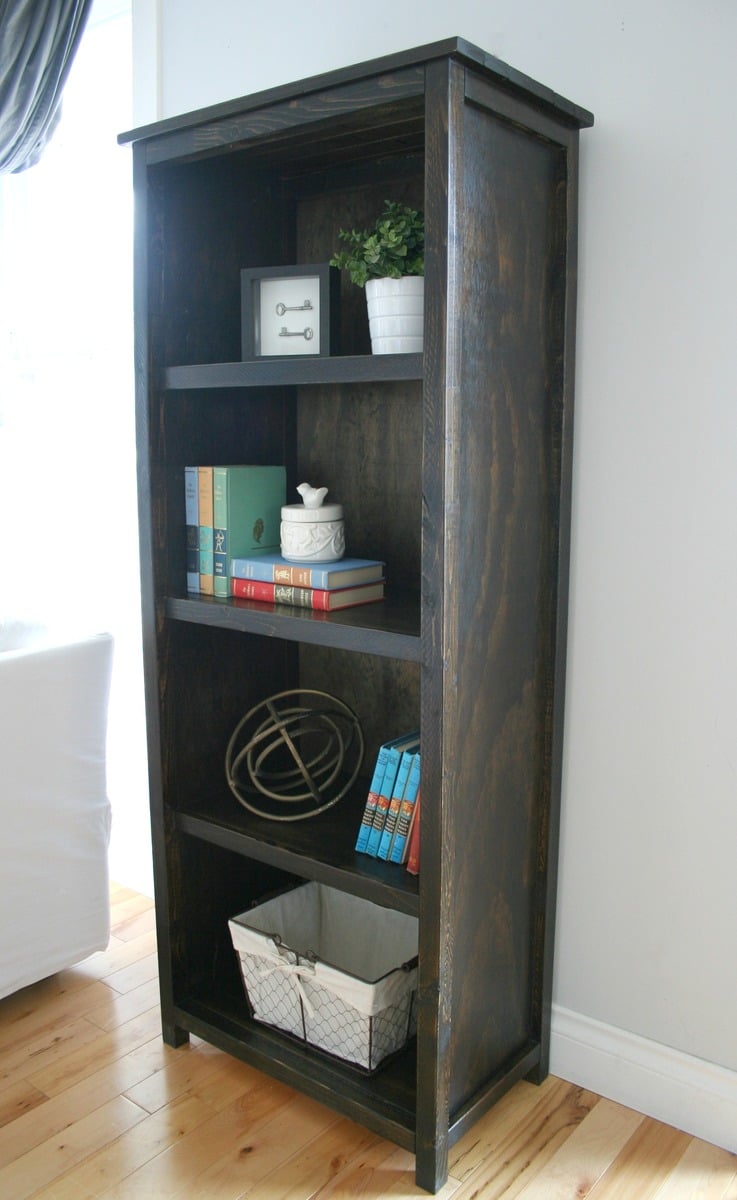
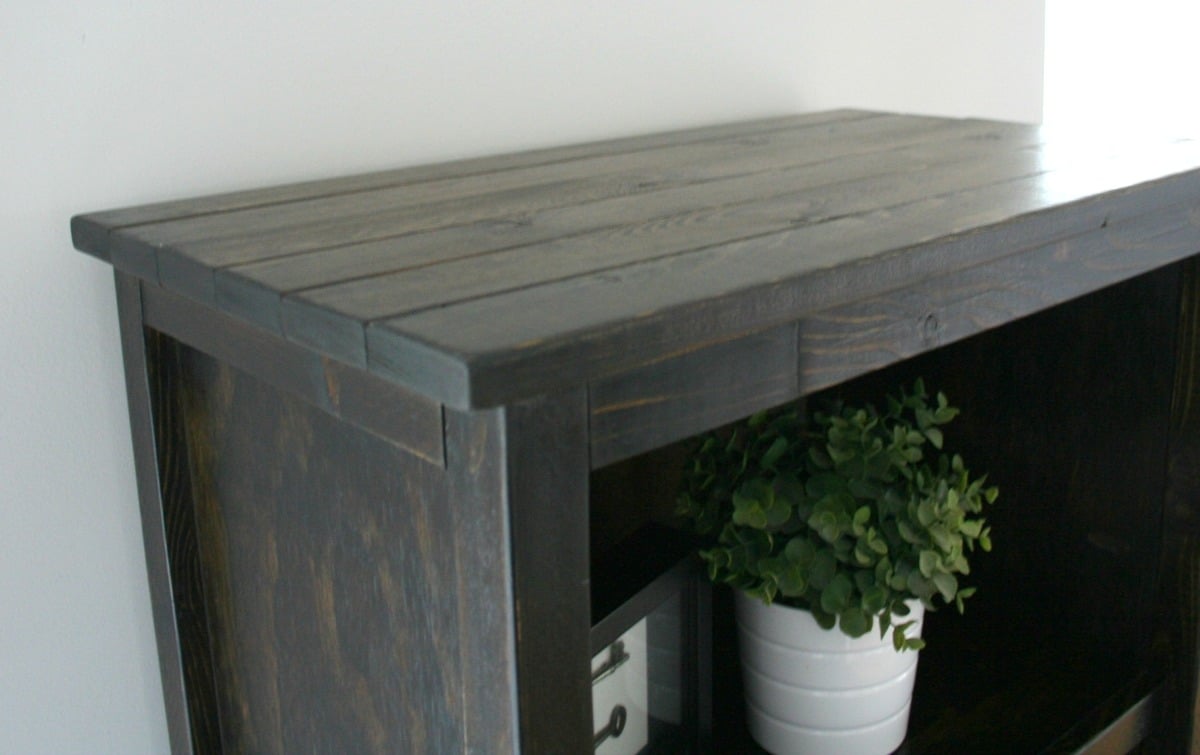
While staging my sister & brother-in-laws home so they could list it for sale, I ended up with an "empty wall" in their living room and nothing to fill it with, but knew a small bookshelf would work perfectly! I loved the look of the Kentwood bookshelf plan. I'm not the fastest builder, but after a couple hours, I had everything cut, all pocket holes drilled and everything fully assembled. I only applied one coat of stain and a single coat of poly and skipped adding a back...for now. I may go back and add a back later, but for now I'm thrilled with it (and so was my sister!)
Edit: I finally added a back to the shelf - just in time to sell it to a friend. ;)

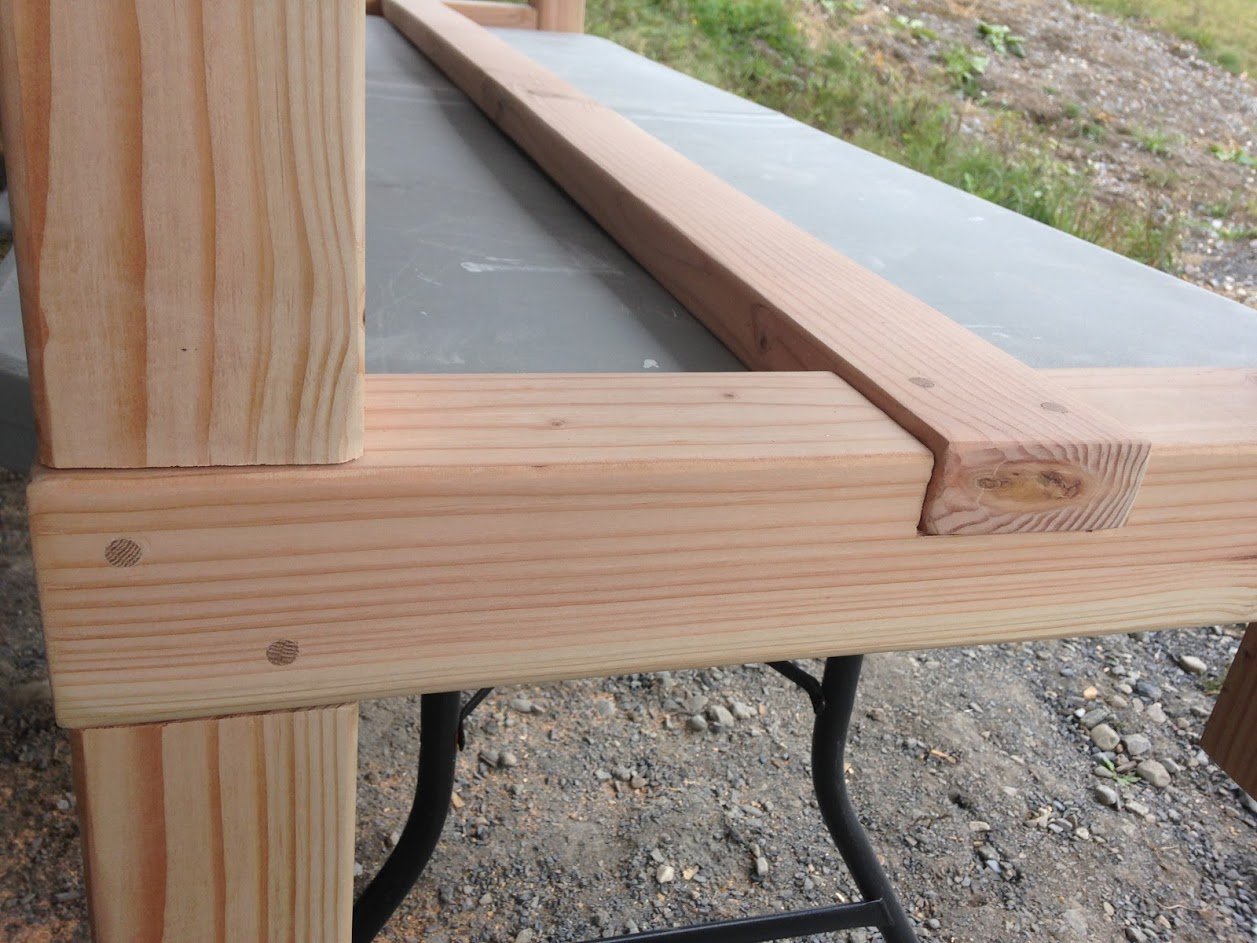
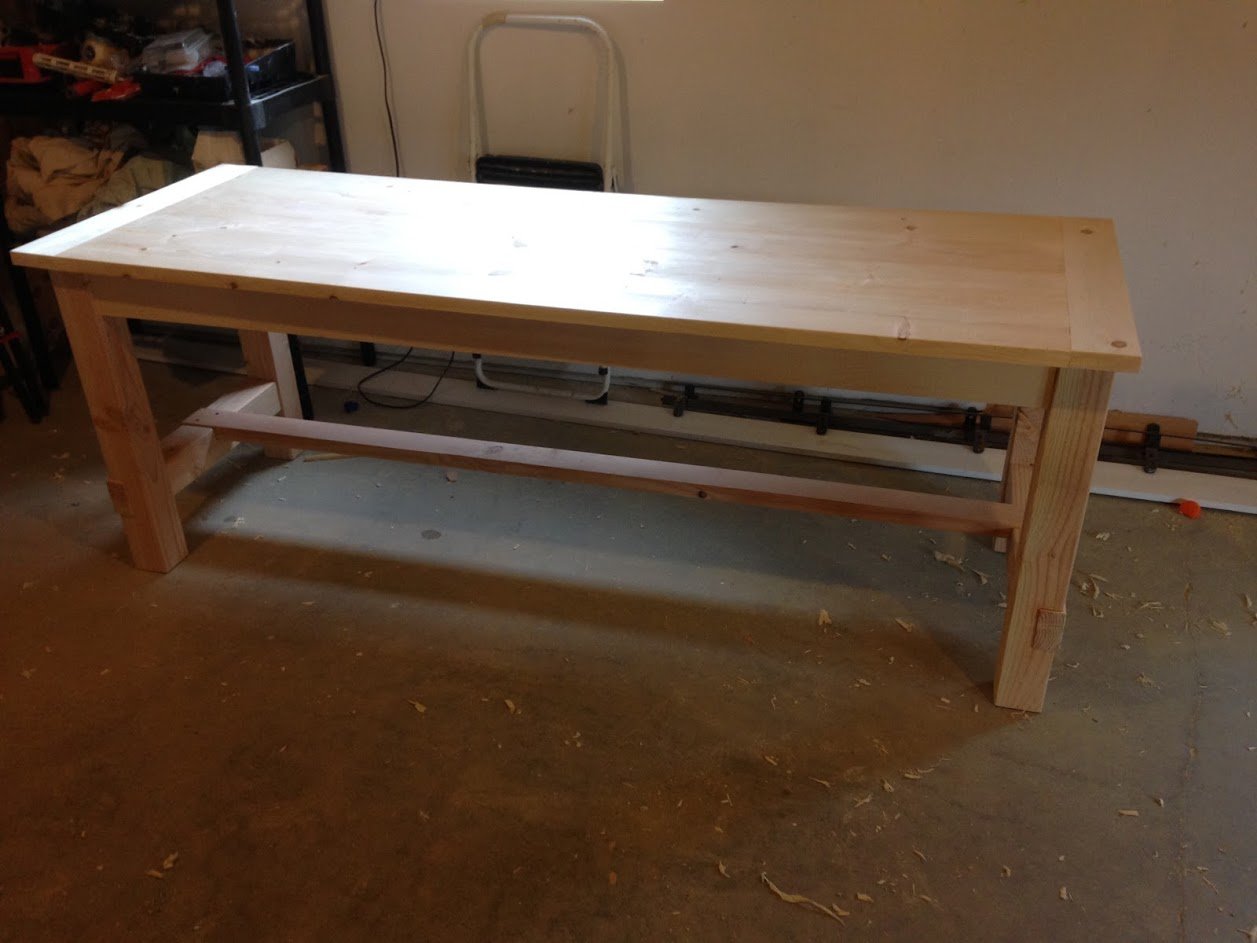
I made this work bench for my garage. Over a few weekends. It is 11' 6' long and is made of pine lumber. I used 2x10x12's on the top, mostly 2x4's are used for the farm with the exception of the center part of the legs. Those are rough cut 4x4's I had laying around. 1x6's for the bottom shelf. Getting the top seams to line up took a lot of sanding with 40 grit. They were to big for me to run through the table saw myself so I sanded and sanded. I did run skews threw the top and then filled with wood filler. I wanted strength. Plus the top boards are not glued so I can replace as needed (It's a work bench right?). This thing is big, heavy, and solid!


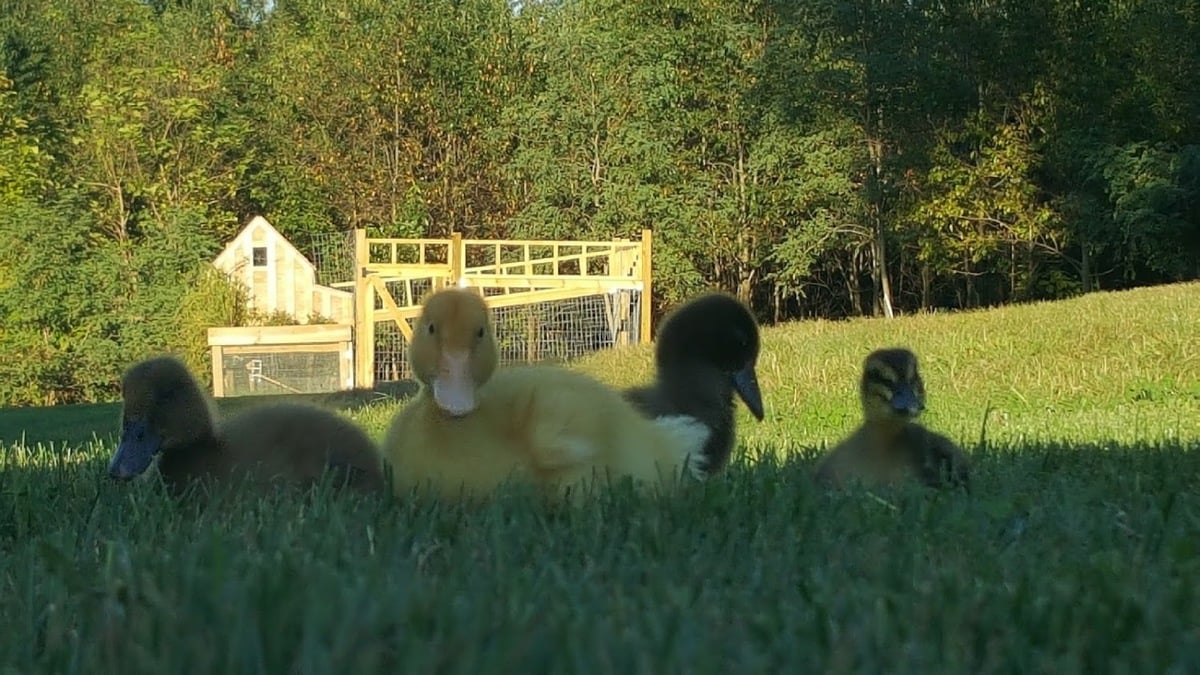
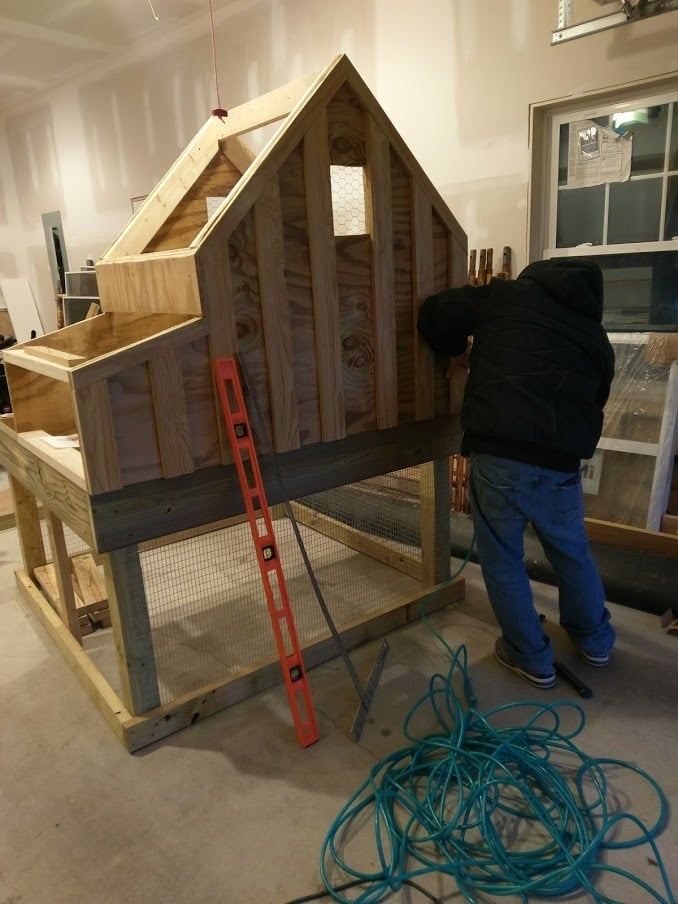
Built in 2017 for our ducks! They use the ramp just fine! I am now working on editing this coop plan to make a coop for 4 chickens we just brought home. I'm going to leave out the planting area, since it's going inside their open run.
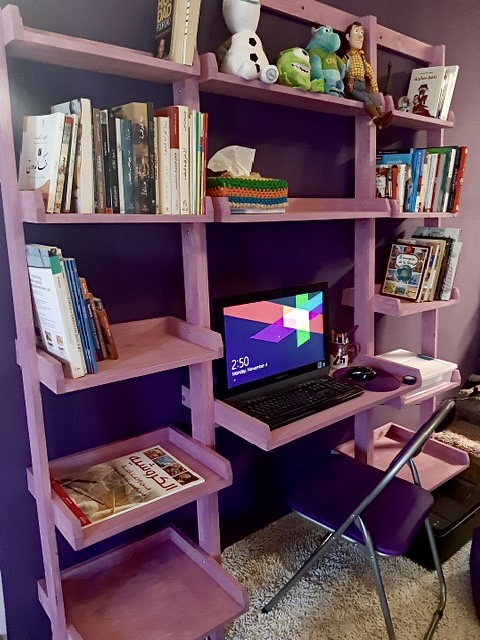
Leaning Desk System by Khalid Al-Bahi
This project was a lot of fun and didn't take very long. Already thinking of making another one with different color finish.
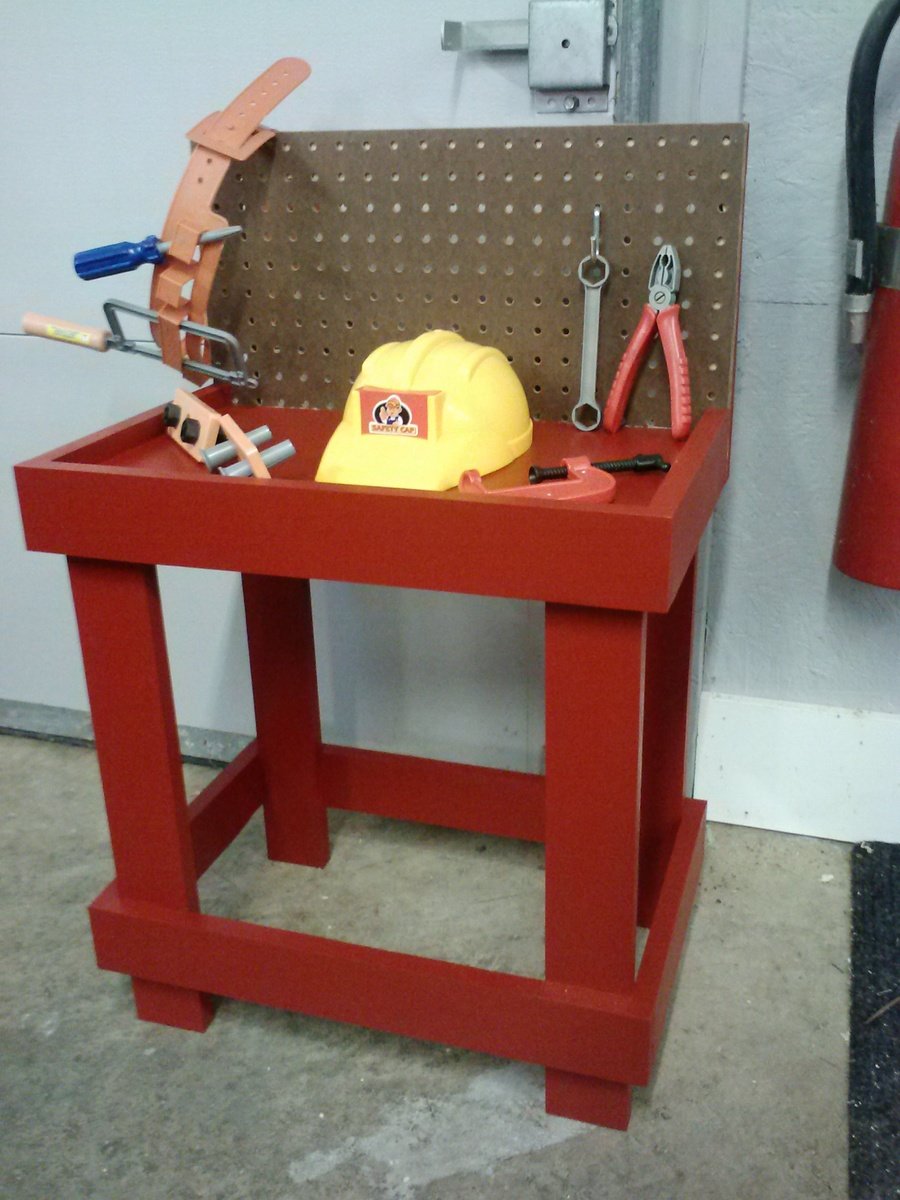
Second project for annual church craft show. Loved the idea of using pegboard, so I modified it accordingly. Guessed at cost as we bought 2X6s and 2X12s on clearance and ripped them down ourselves which brought the cost down.
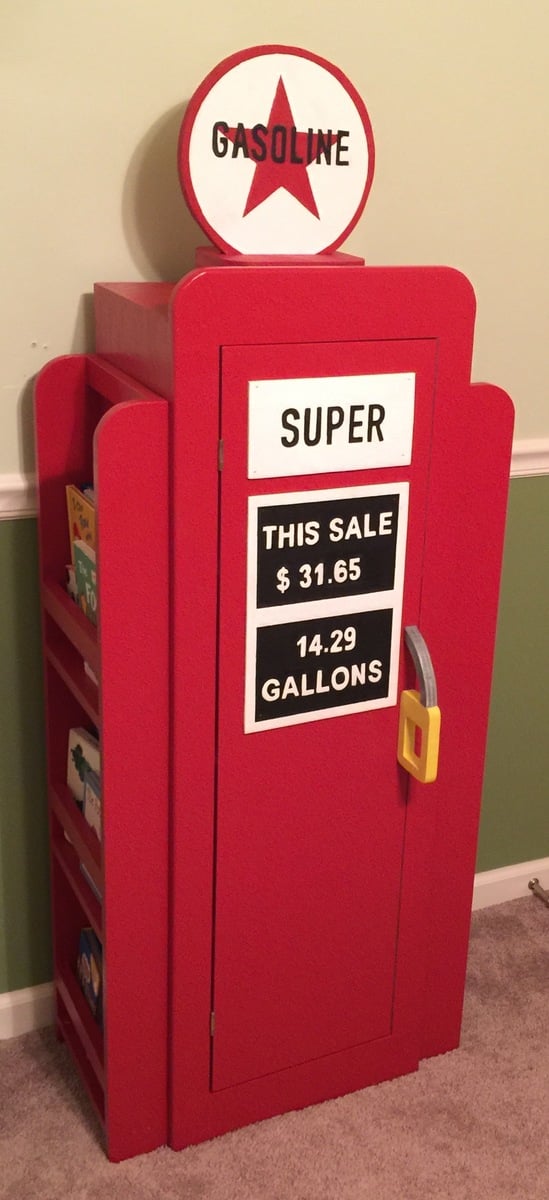
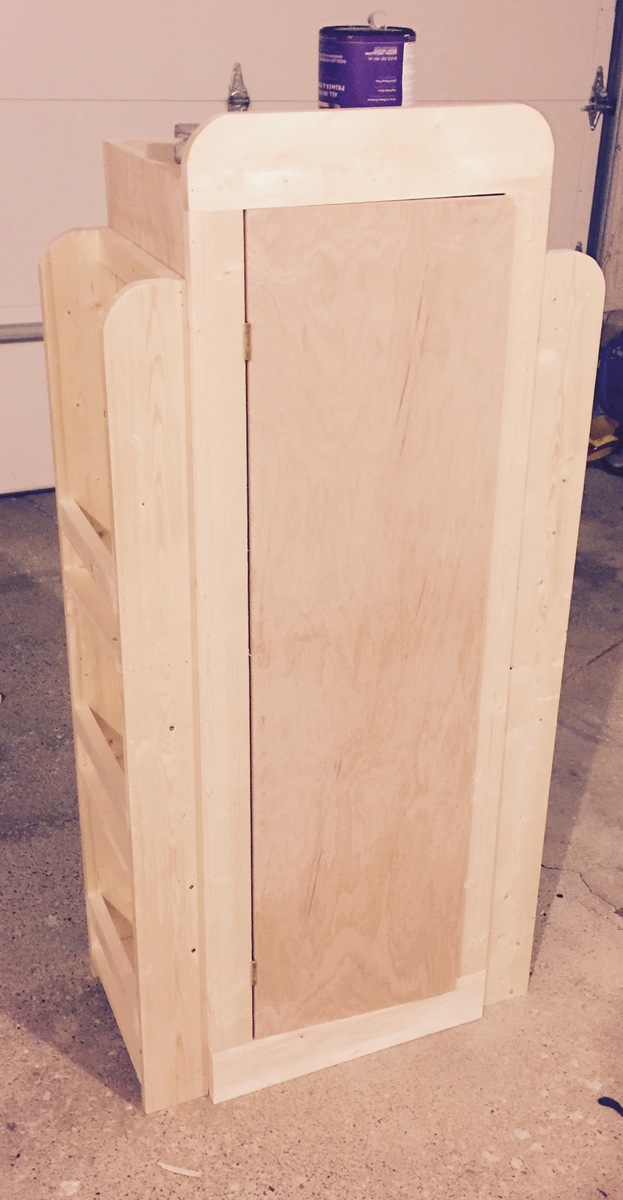
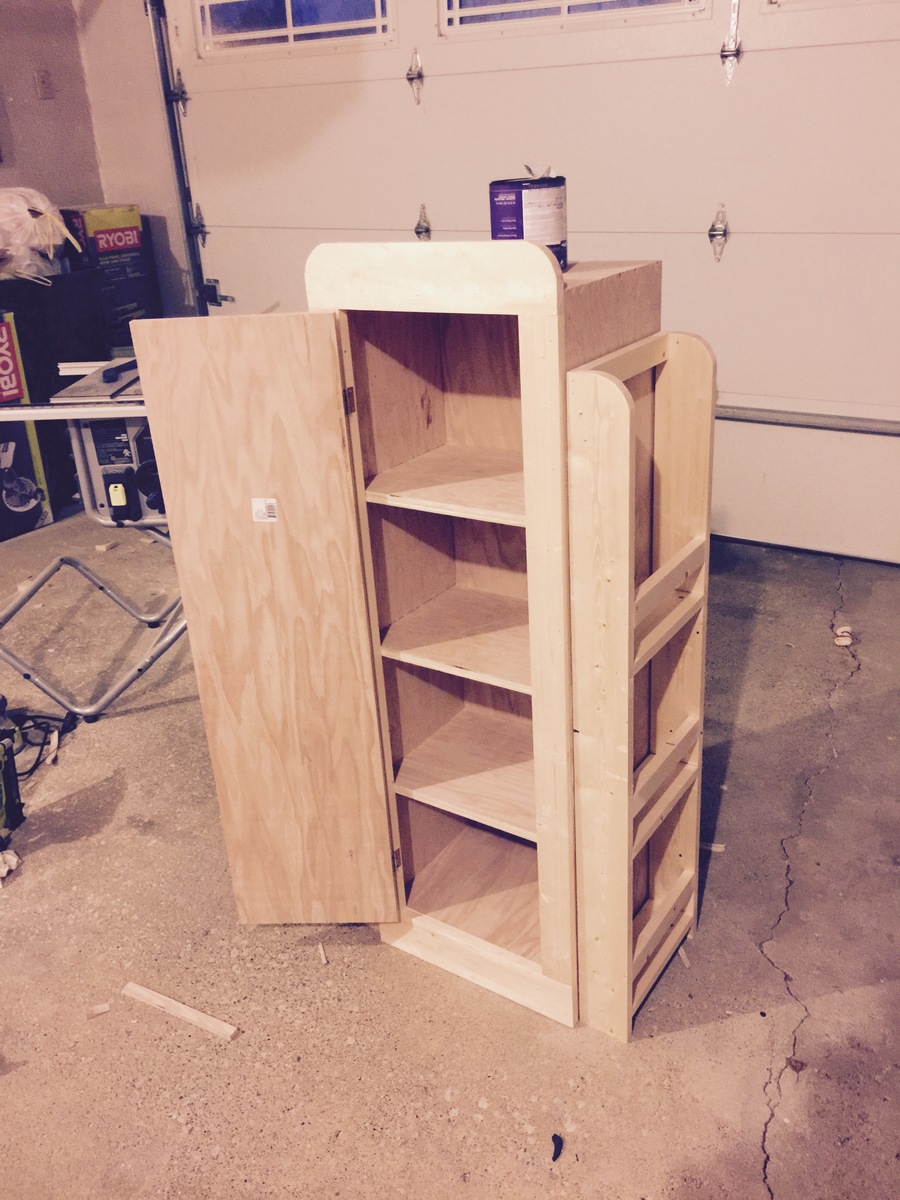
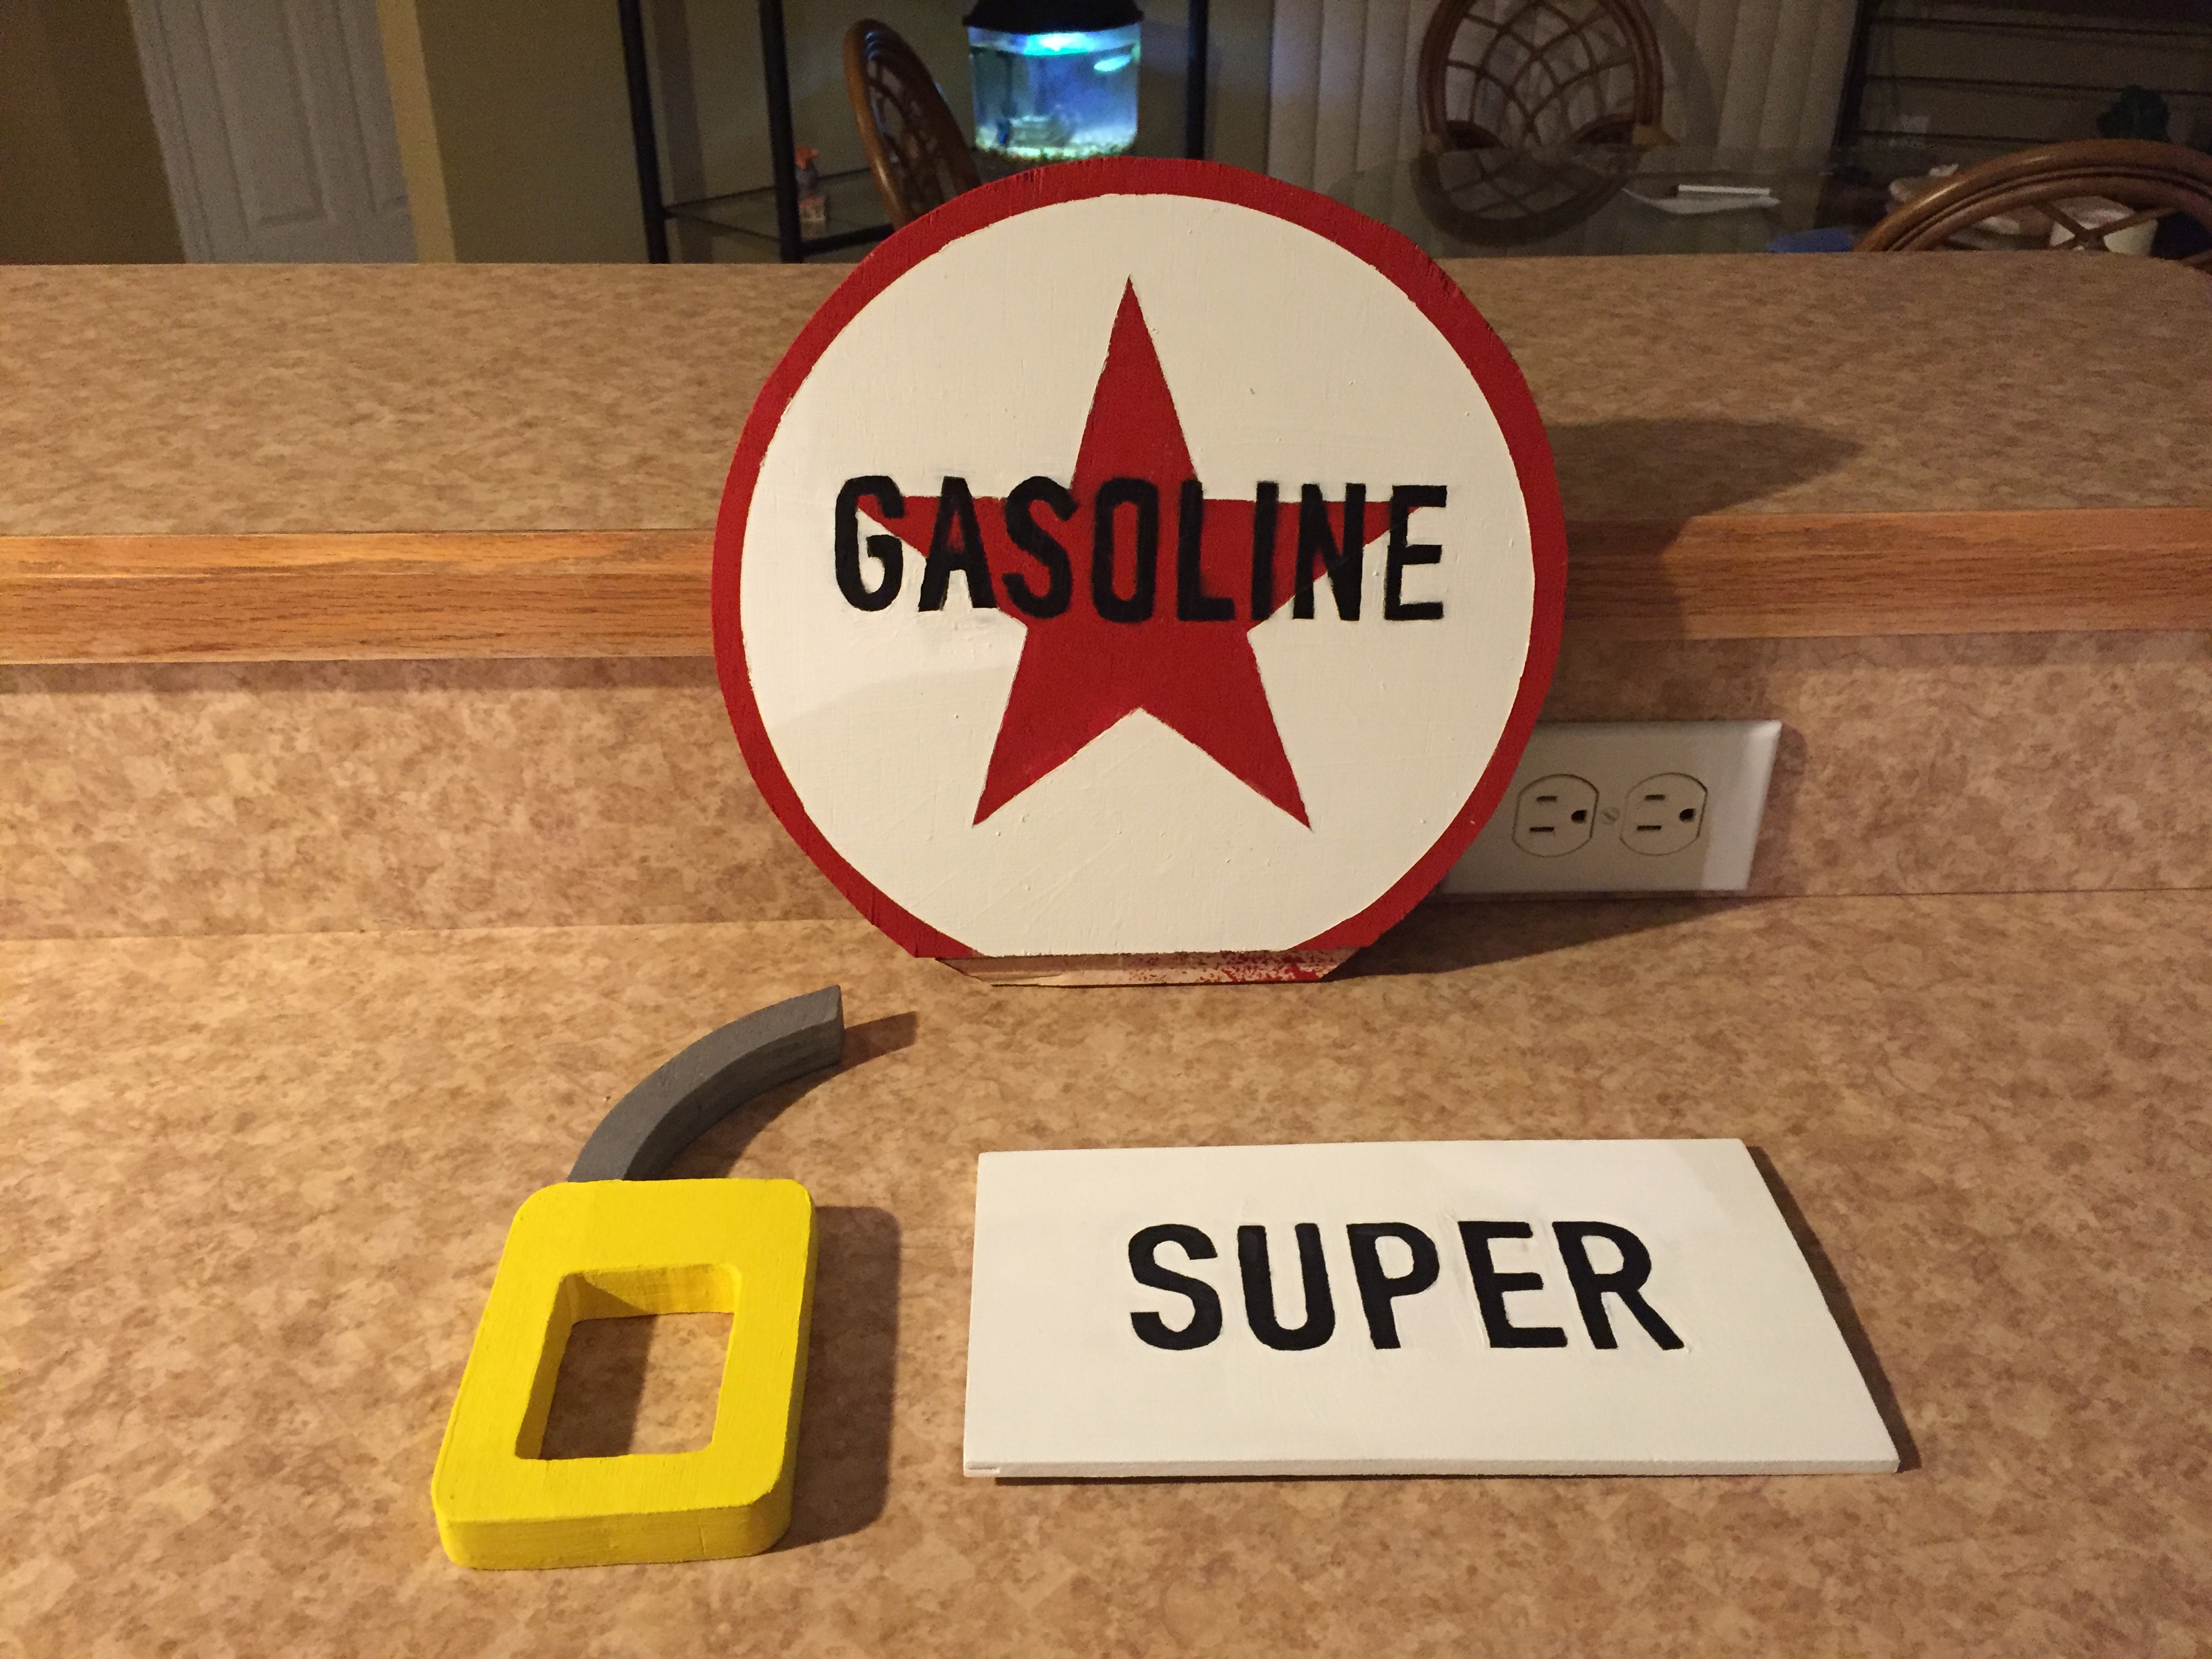
Gas pump cabinet with bookshelves.


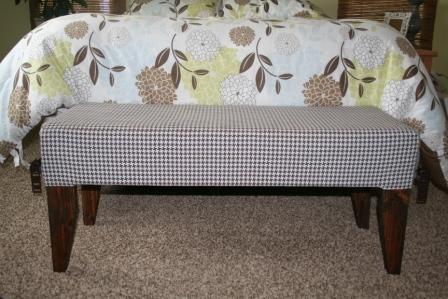
I loved working on this easy upholstered bench. It was so much fun and so simple. I followed the plan except I raised the bench to 20 inches, because my husband and I are quite tall. I also wrapped the fabric underneath about 1/2 inch and stapled it so it has a tighter look. Thanks for the plans Ana!

Wed, 10/26/2011 - 05:57
That is so cute, you picked a tricky fabric with the lines!
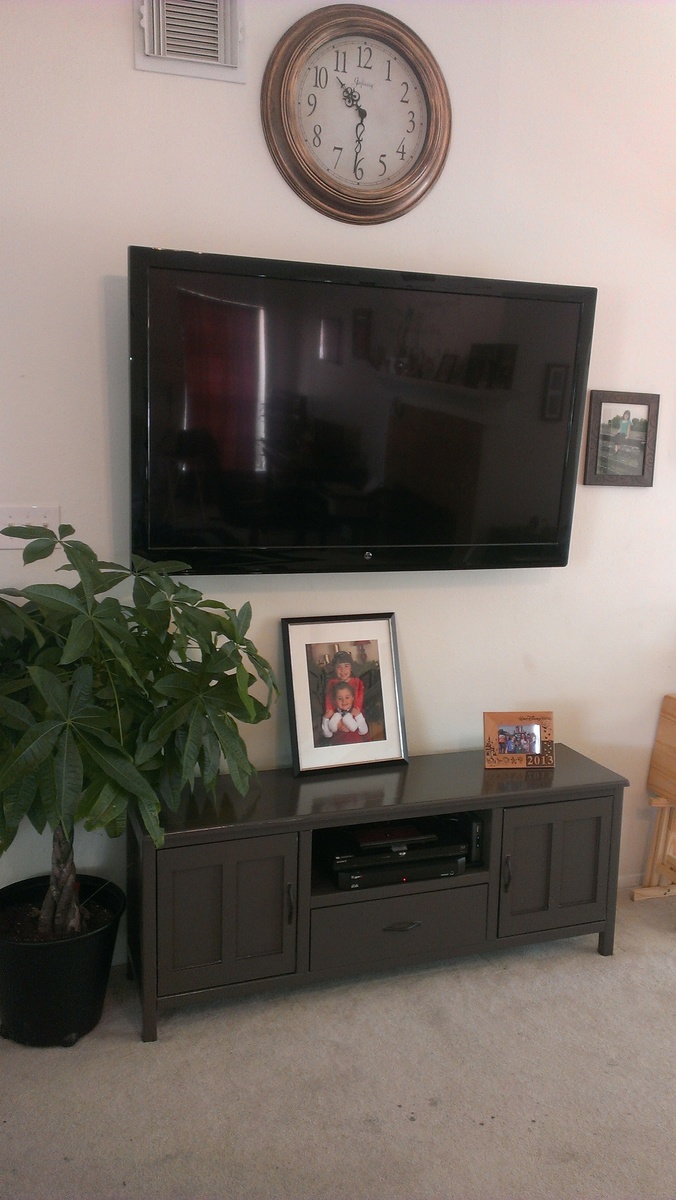
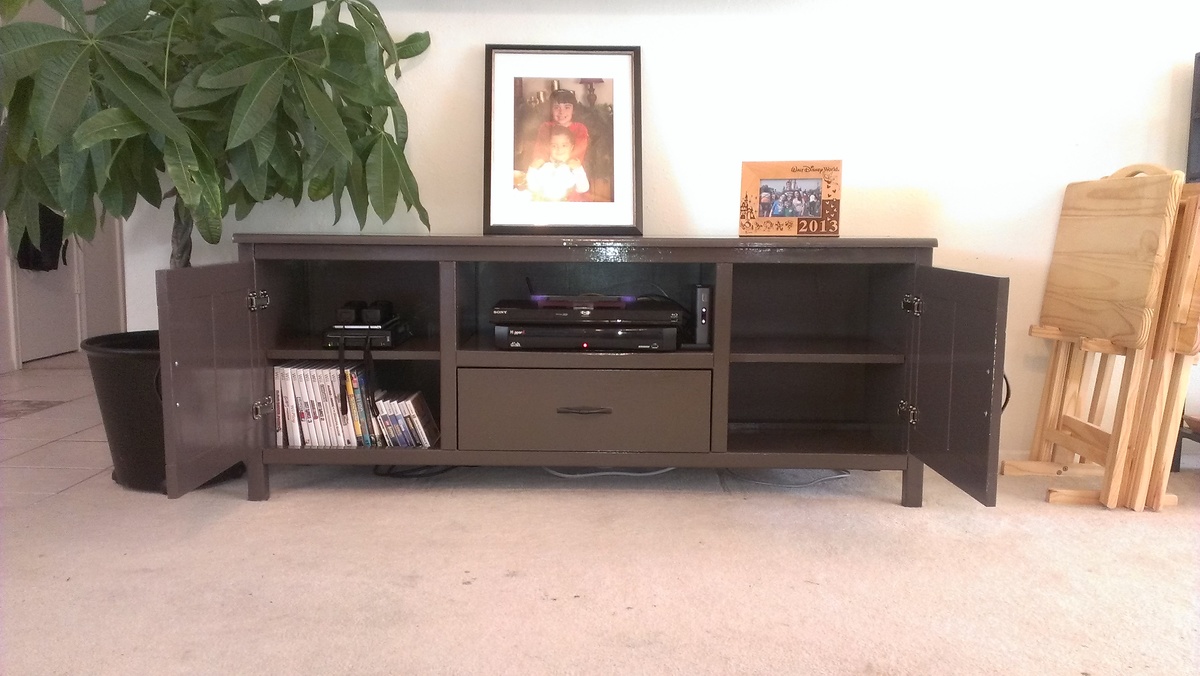
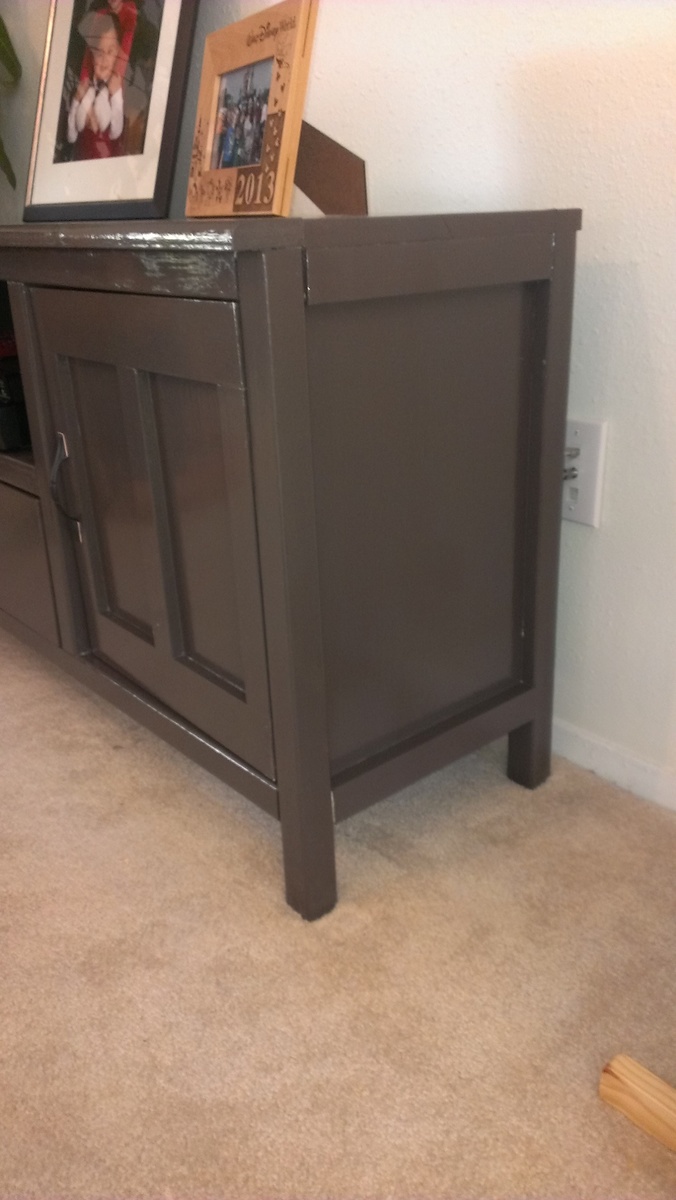
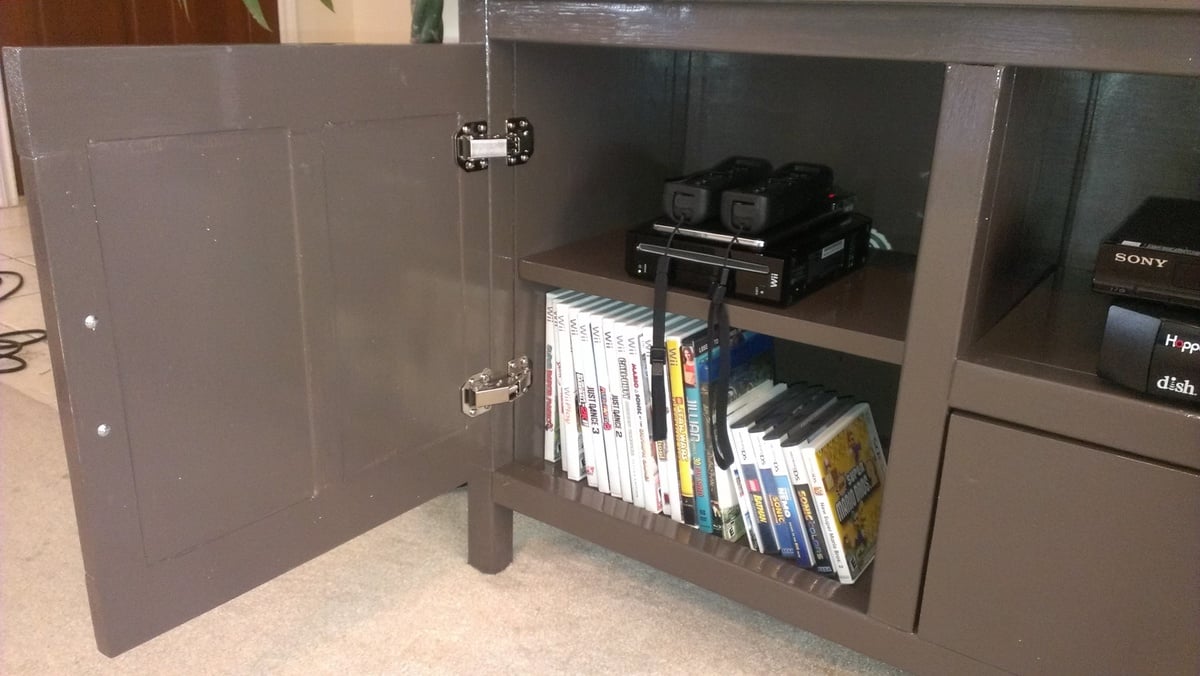
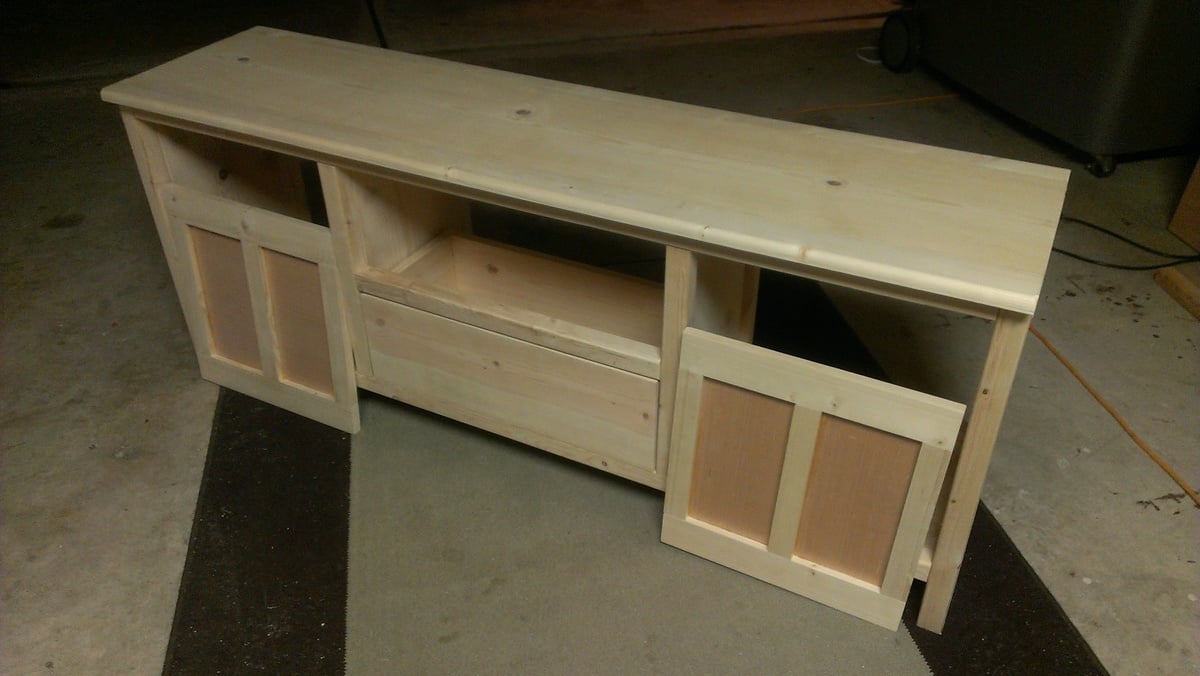
I had a ton of fun making this media console! It is my second big project, and I would still consider myself a beginner, but I paid very close attention to detail and I think it turned out great!
I stretched the console out by about 4 inches, so that if I ever decide to put my TV on it, it will fit.
Thanks Ana for your great website!


Thank you so much for the plans! Very excited for how it turned out!
Sat, 01/06/2018 - 18:52
I have built the cabinet part of the sliding barn door cabinet. I am trying to build the doors out of the 1/2” plywood for the back as suggested. The plywood is warping and I am not sure what options I have to salvage the plywood.
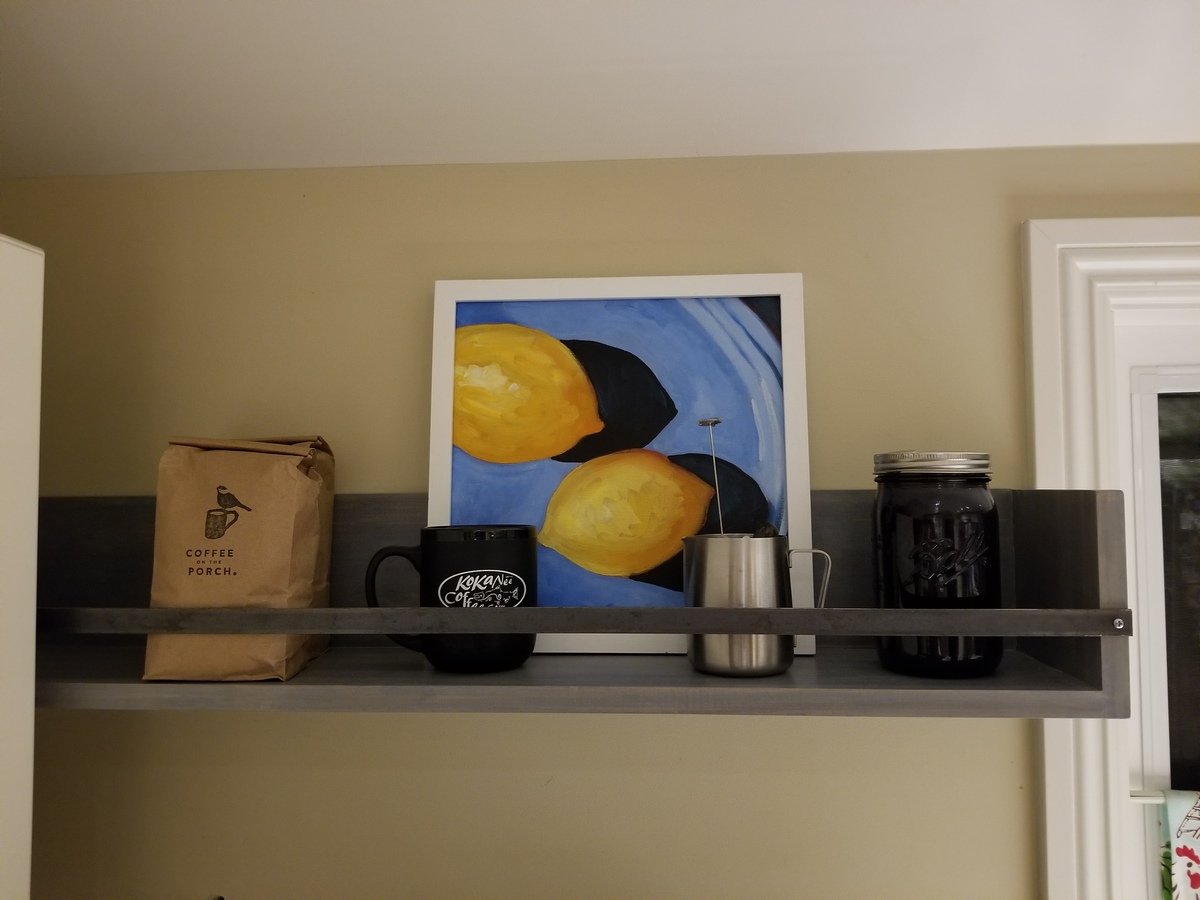
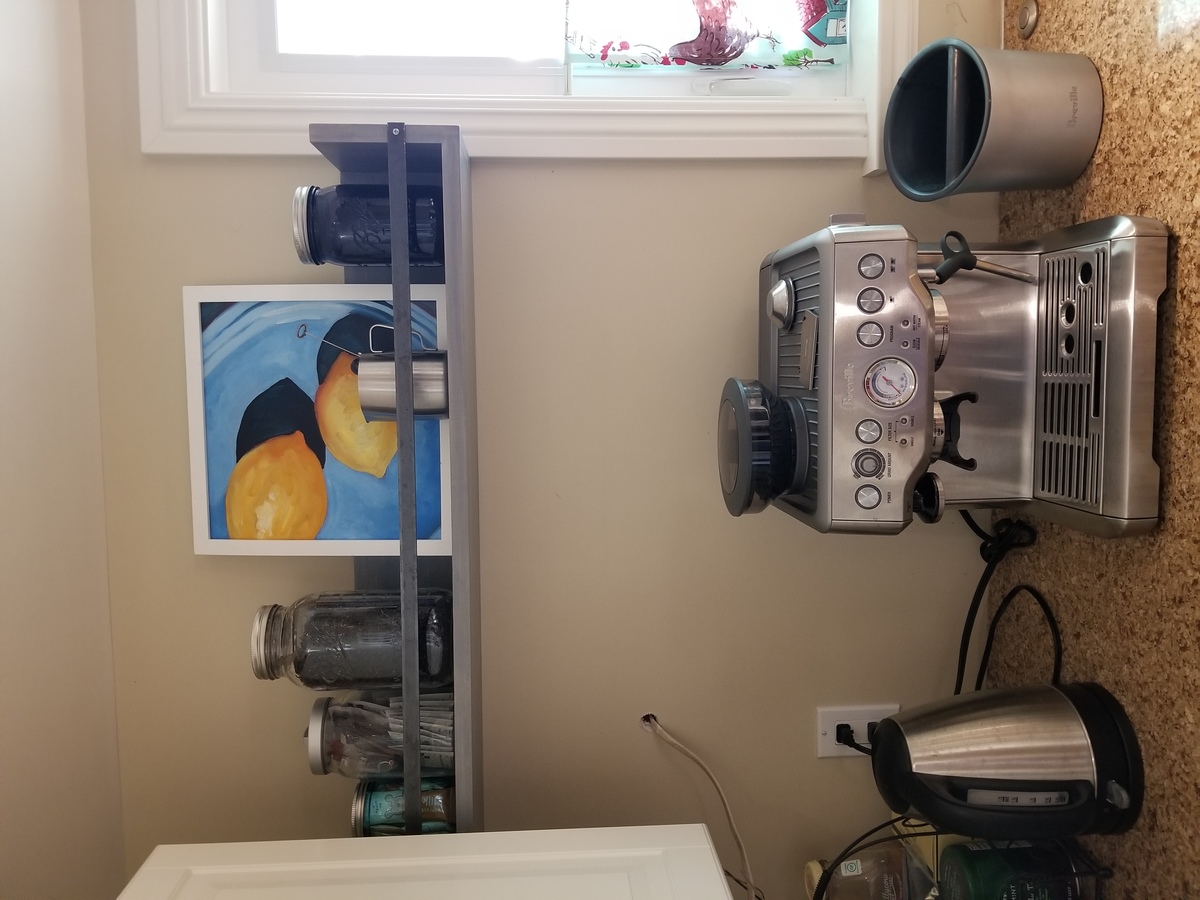
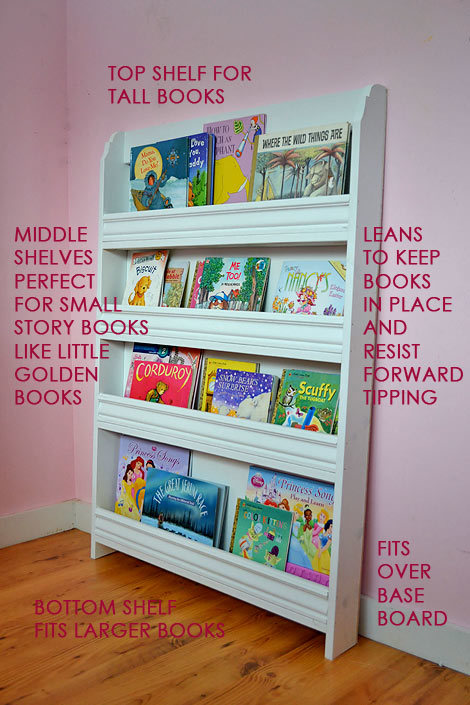
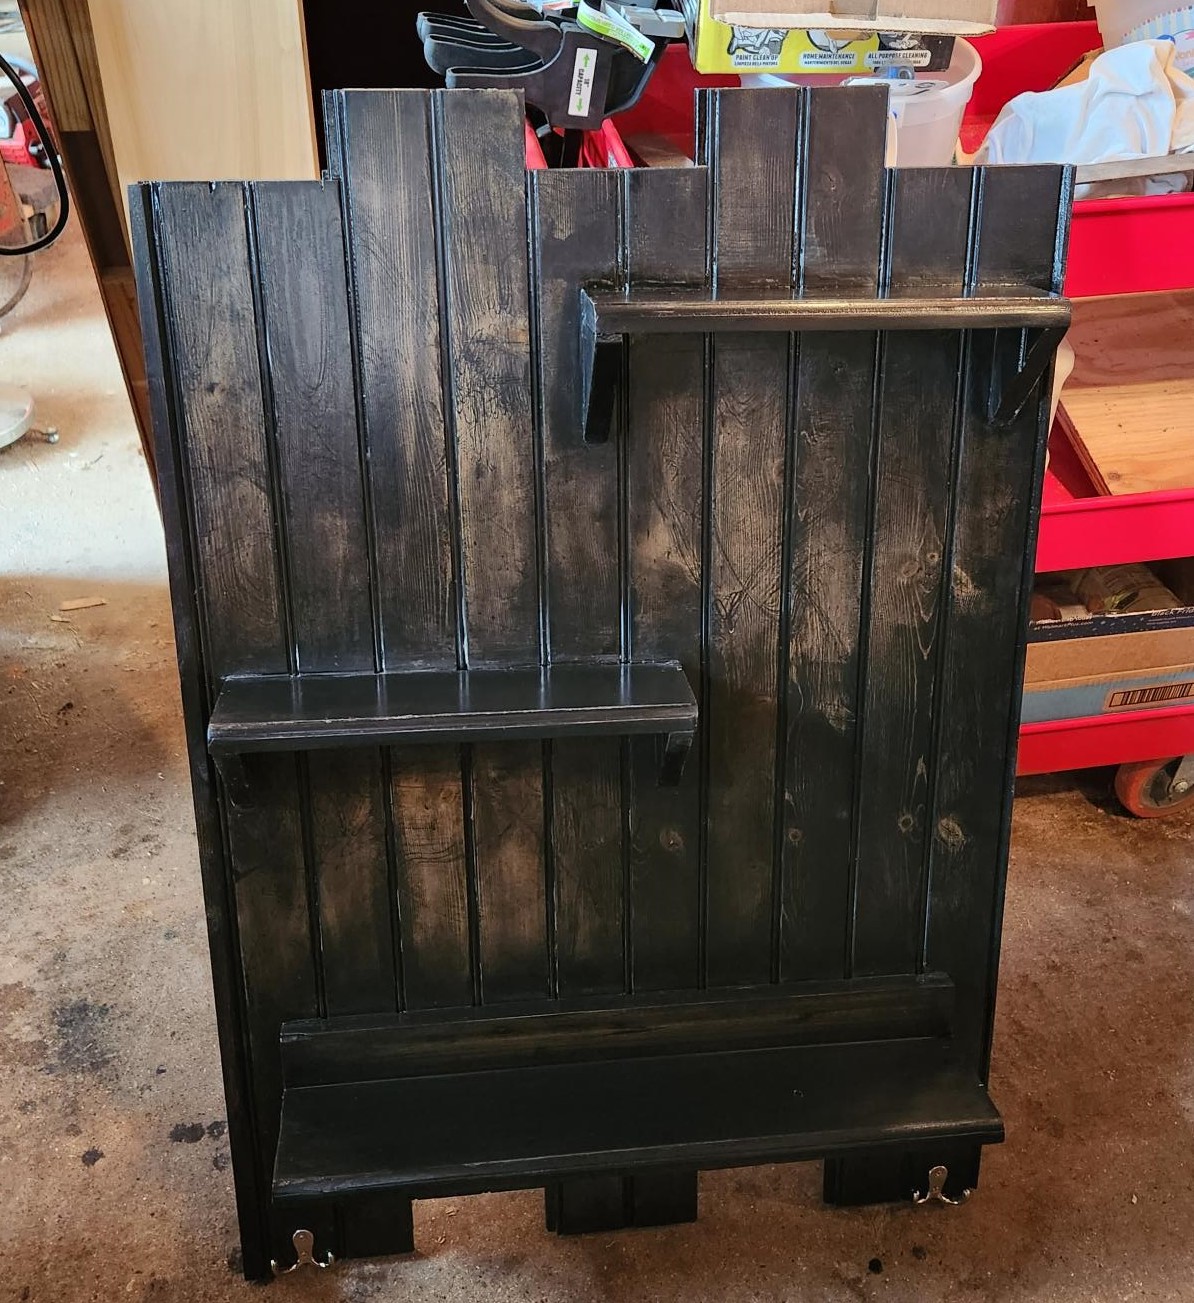
I love the look of these shelves. I needed something for the wall space to either side of the kitchen window and sink. The ceiling slopes down at least a foot on that wall so there's less space for cabinets and putting up cabinets that fit the space wasn't working. Shelves were the answer. The pictures show only the left side of the window/sink, but I did put up a matching shelf on the right side. I used a 1x8 for the shelf and 1x6 for the back.
Apologies if the photos are upside down - they were rightside up when I uploaded, but flipped on me ????
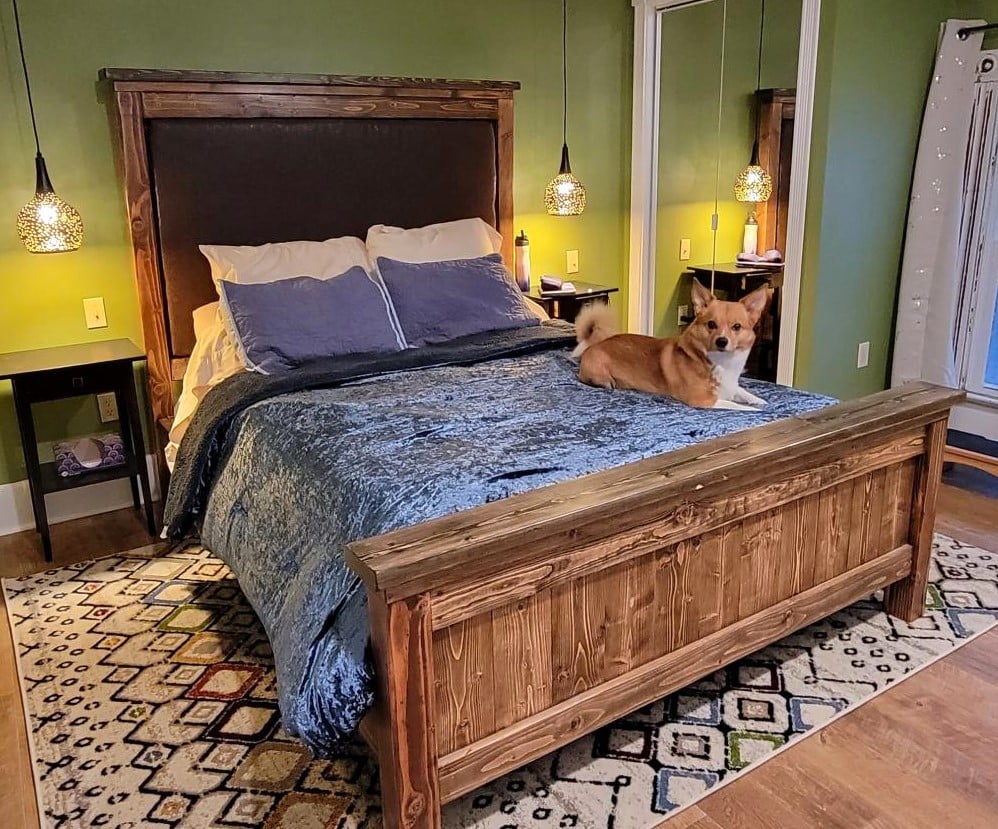
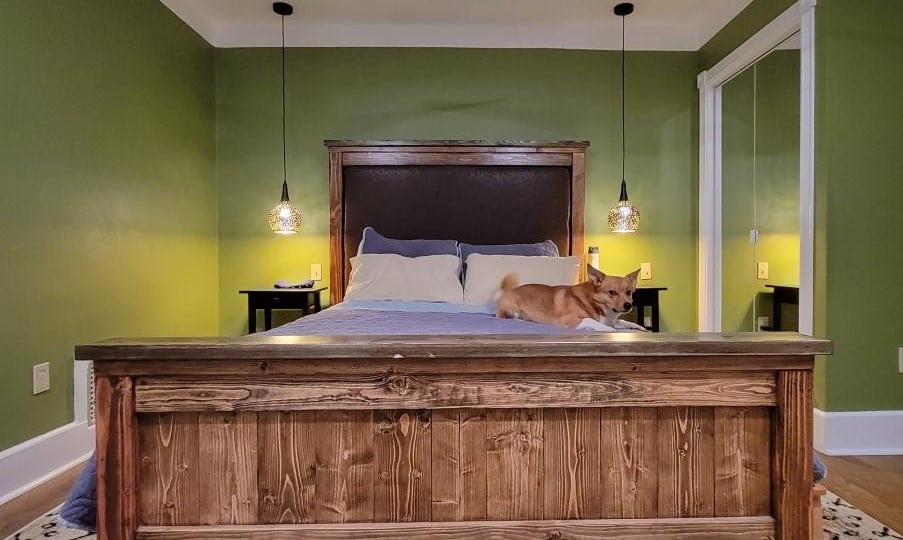
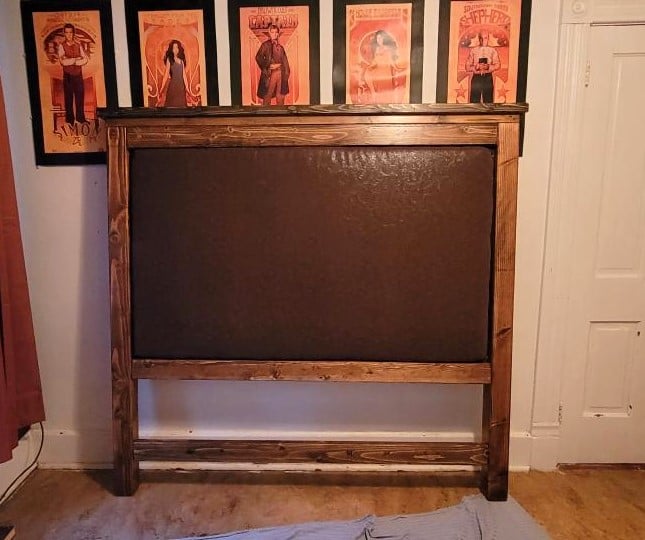
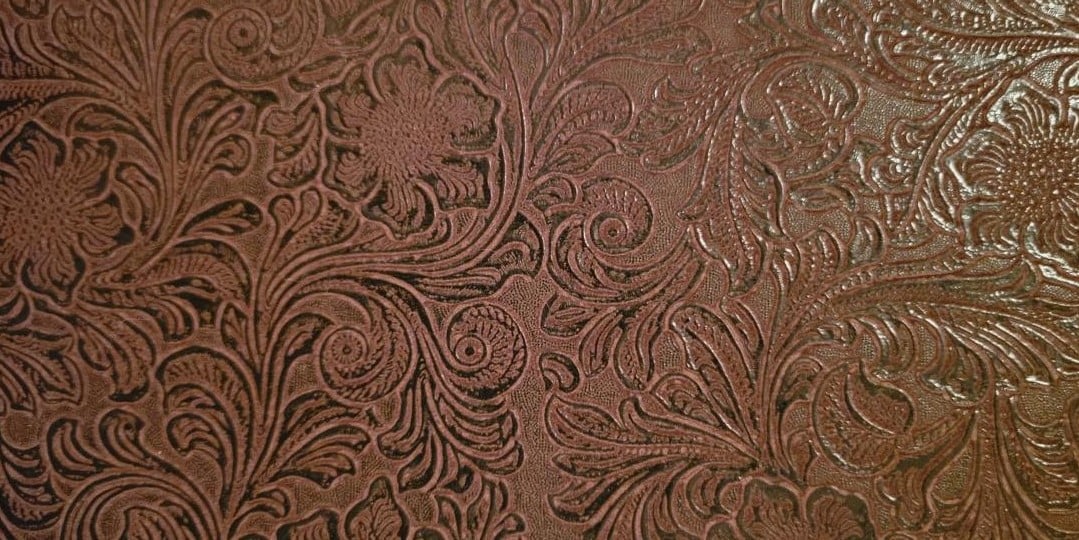
I wanted an upholstered headboard, and my house is 121 yrs old, so a farmhouse vibe fits.
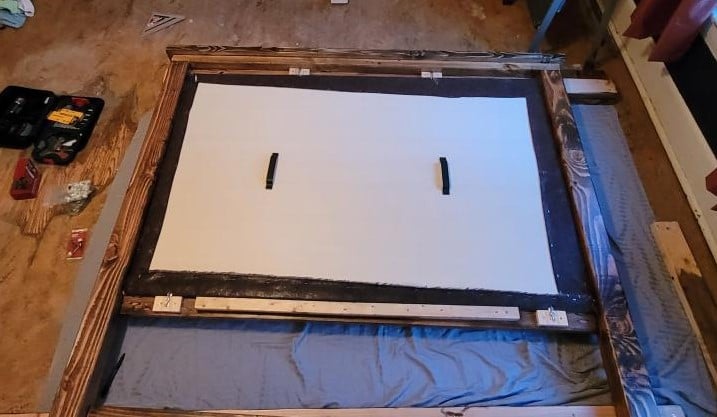
I modified Ana's Queen Farmhouse Bed Plan so that instead of mirroring the footboard design for the headboard, I created a foam-and-upholstery-covered plywood panel that inserts from the back, like a picture frame. It's held in place with storm door toggles, with a support cleat on the back, and and low-profile handles to make manhandling it easier. The insert comes out so it can be re-upholstered easily enough if ever desired. I made the entire unit 3" taller than Ana's plans so that when sitting up against the headboard, my skull is supported by foam instead of wood. It's also anchored to the wall with anti-tip hardware for safety.
The entire bed comes apart into 6 pieces for moving: Headboard frame, upholstered panel, footboard, center support, and the side pieces. The slats are screwed only to the side boards, and fit together like combs across the top of the center support beam. The sides are attached to headboard/footboard with standard bed frame hardware, and I had some joist-hangers from another project that I used as cleats for the center support beam to connect it to the head/footboard.
I designed the modifications in SketchUp, and my mum and I built it during our weekends over about a month using tools borrowed from other family members. Total cost, including the lumber, upholstery foam, fabric, hardware, etc, was about $350 in 2019.

Tue, 02/21/2023 - 08:52
Love this and the way you framed it out to easily change the look with the upholstery portion! Thank you for sharing, I got those photos fixed for you:)

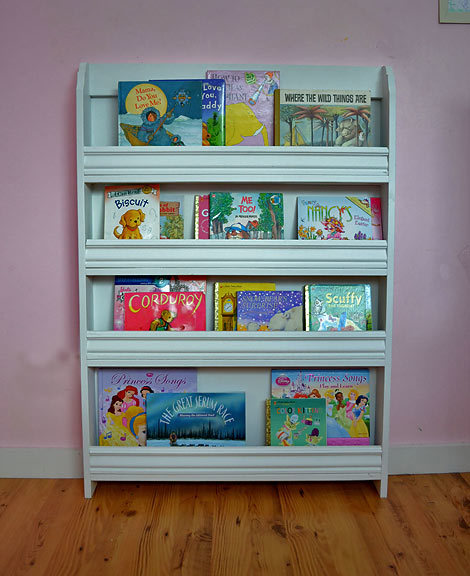
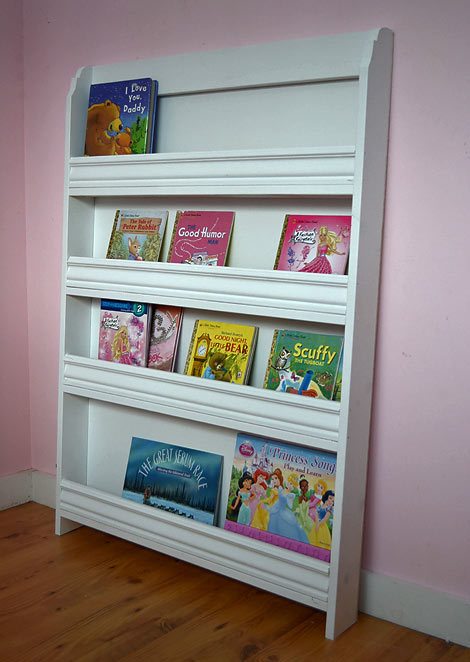
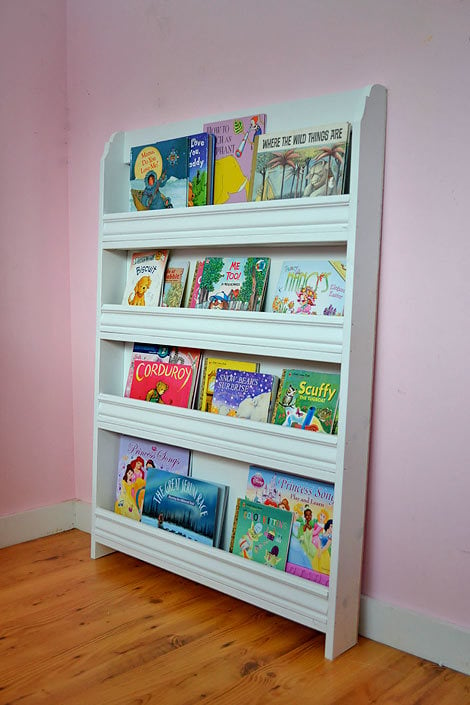
I pinned, I built and today I post!


Source: kidsrooms.co.uk via Ana on Pinterest
And then here is the plan I designed


If you've blogged or bragged, you can simply
Can't wait to see your projects!


Wed, 11/02/2011 - 08:47
Makes me wish I had more floor/wall space. I'll just have to drool over yours until I do!
Wed, 11/02/2011 - 20:20
No tools here, but I love the idea. Bookshelves are not working so well for us right now.

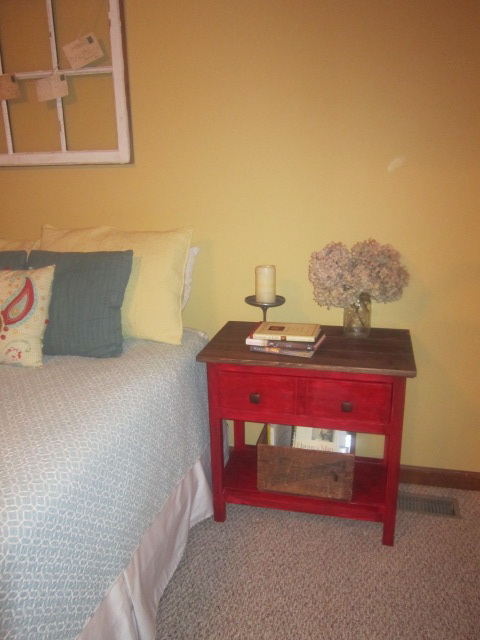
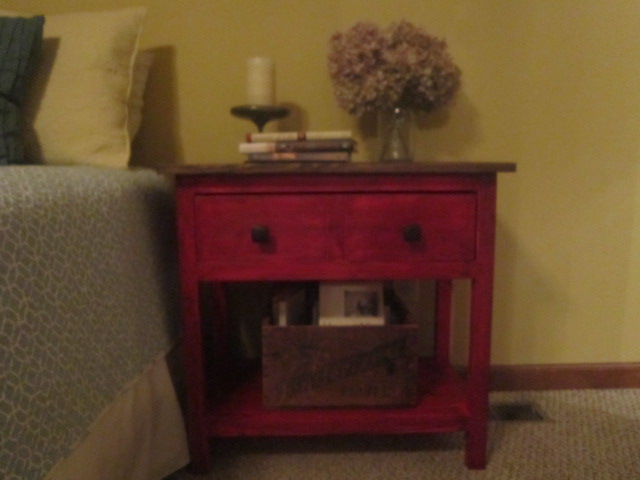
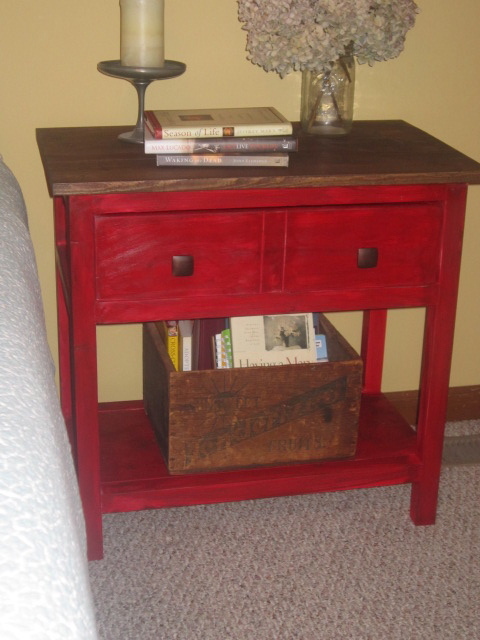
Love how this turned out! Great build, added a back to the table. It looks awesome in our living room.
Wed, 10/23/2013 - 17:48
Really nice finish. I am planning on building a table and I want the tabletop to look just like yours. I have never stained, but when you say rub stain and wipe immediately, what do you use to rub? Also what type of wood did you use for the top? Again, great job.
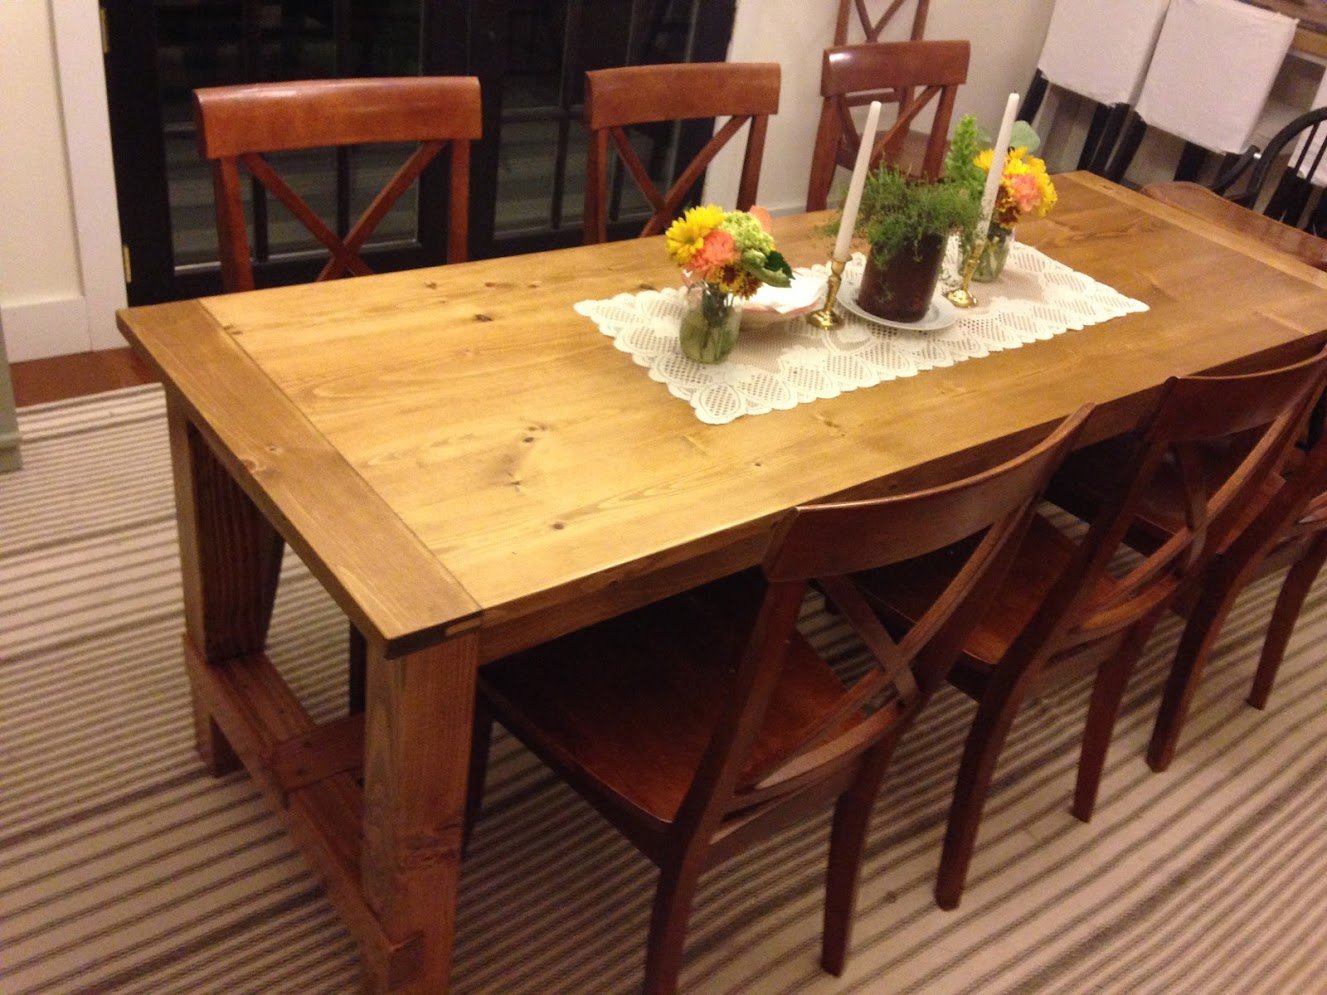
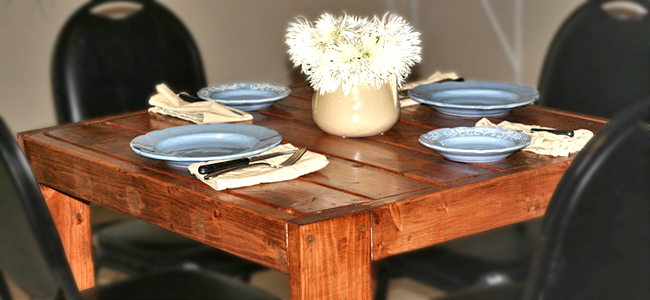
I built a narrower version of the farmhouse table with a few modifications to be used as a temporary dining table, and eventual home schooling desk. I used 5/4 boards for the top and for the apron in order to get a smooth top and have a beefier support. I used a 4x4 for the cross brace with a half-lap to give more support to the stretcher and to stabilize the legs.
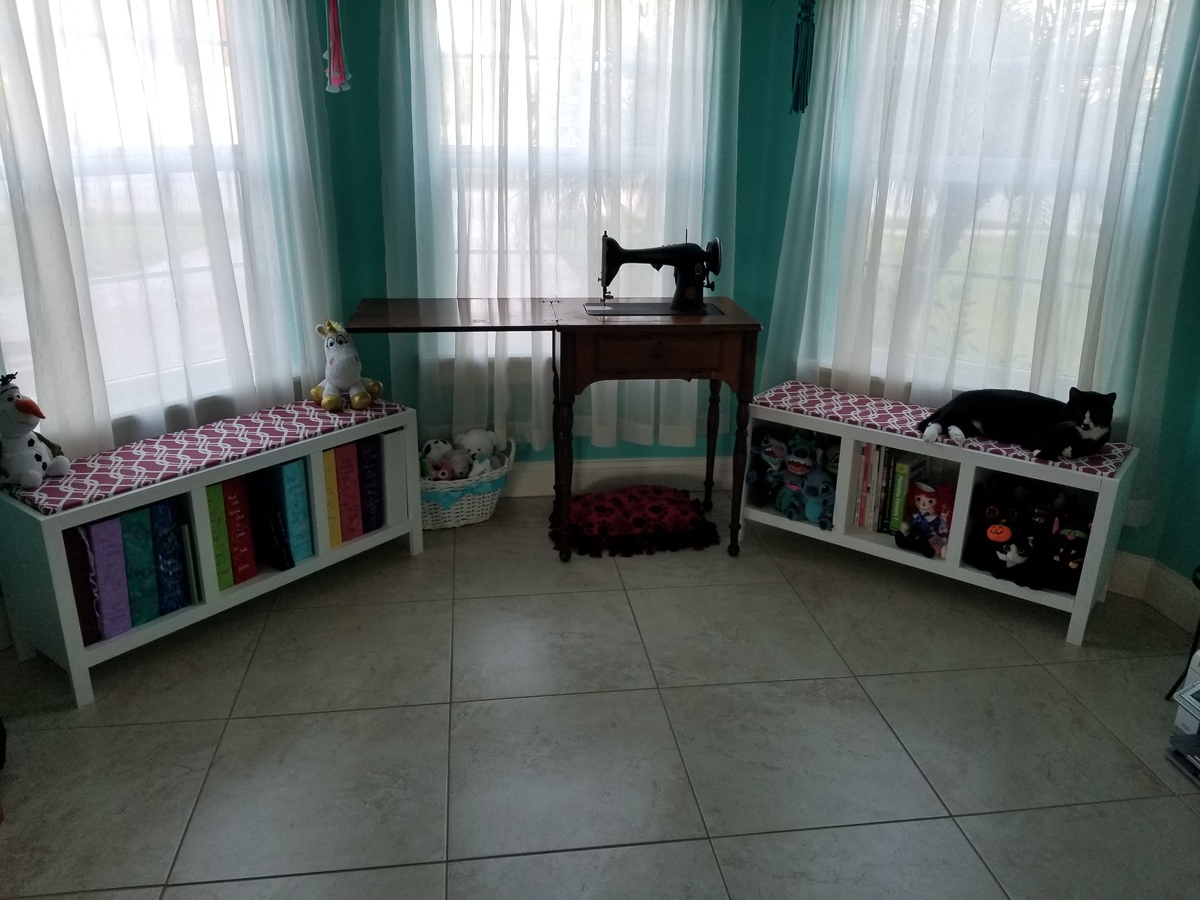
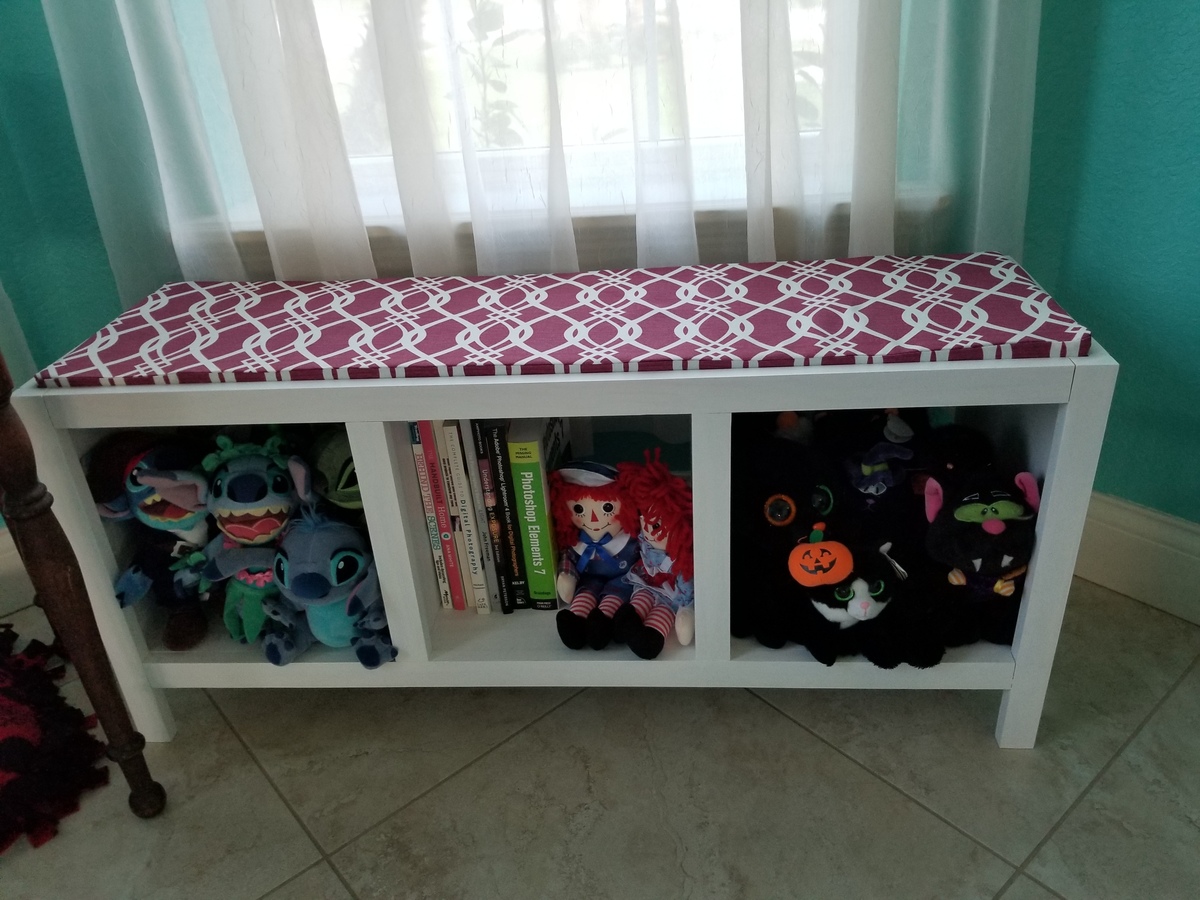
These Easy Three Cube Benches were my first project from Ana White's plans! I love how the plans are broken down, making them easy to read and understand and I learned so much from the concepts! The "build the box" concept is how I gained the confidence to build all of the furniture in my craft room myself! I started with these Three Cube Benches, then designed and built a printer stand using the concepts I learned and, after that, finally finished an corner office/crafting desk.
Used your original plans for these. I'm very pleased with the result. Carpentry is not really my thing, but I'm inspired to do more now.
Sat, 02/25/2023 - 11:59
These look fabulous, thank you for sharing! Can't wait to see your next project.


Comments
Ana White Admin
Thu, 02/02/2023 - 12:41
Beautiful work!
These look great, love the finish!