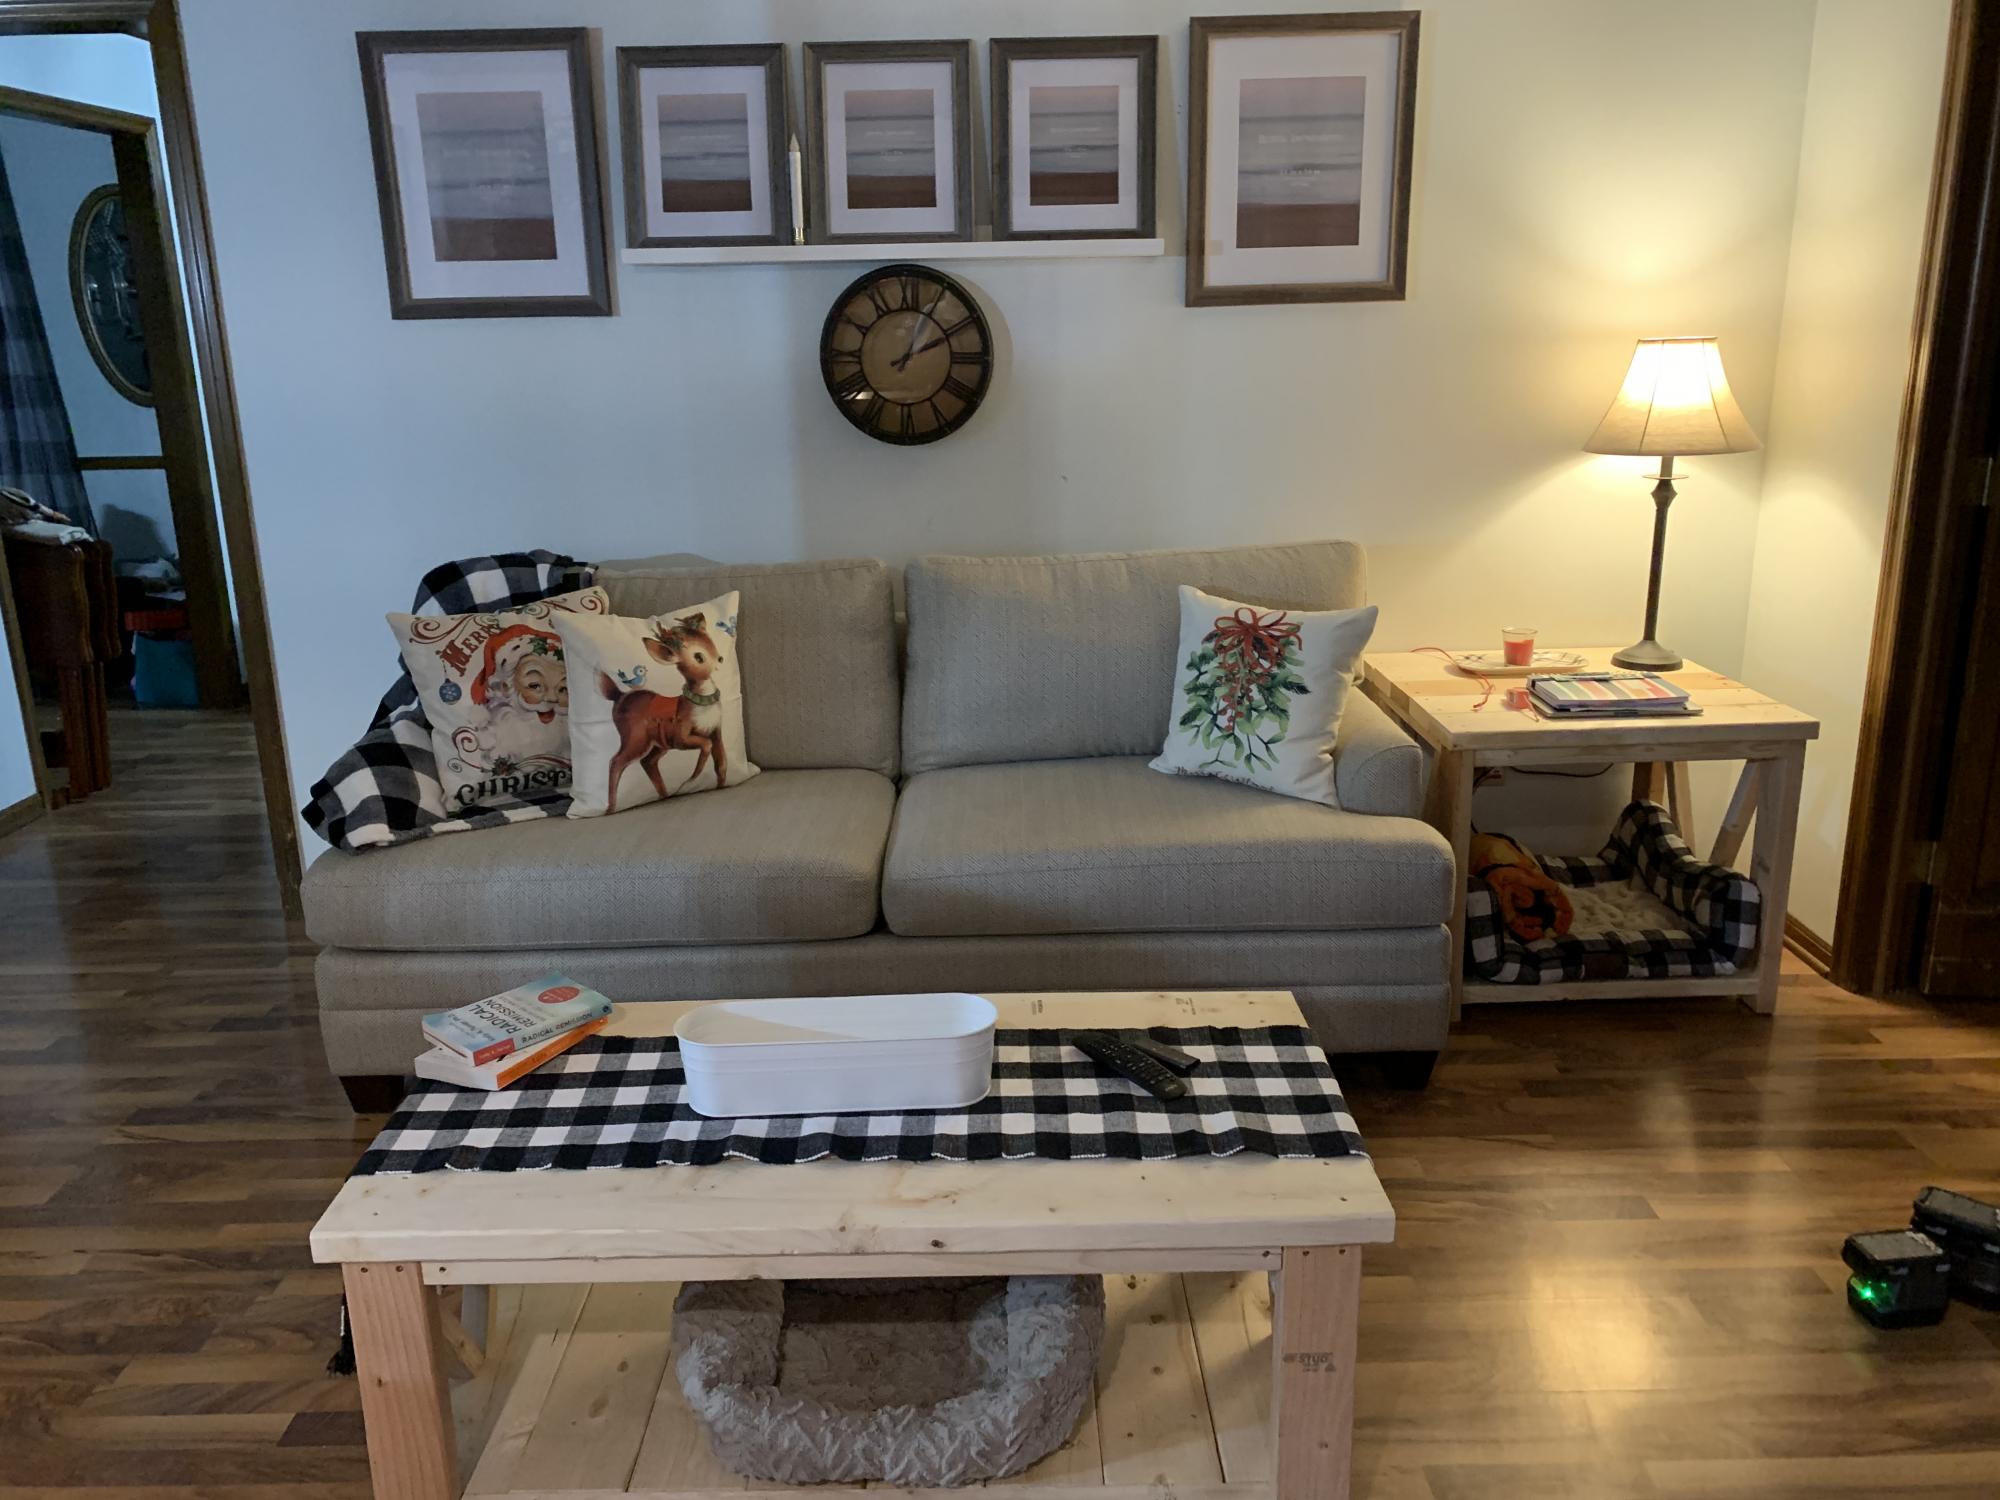
Farmhouse Bench
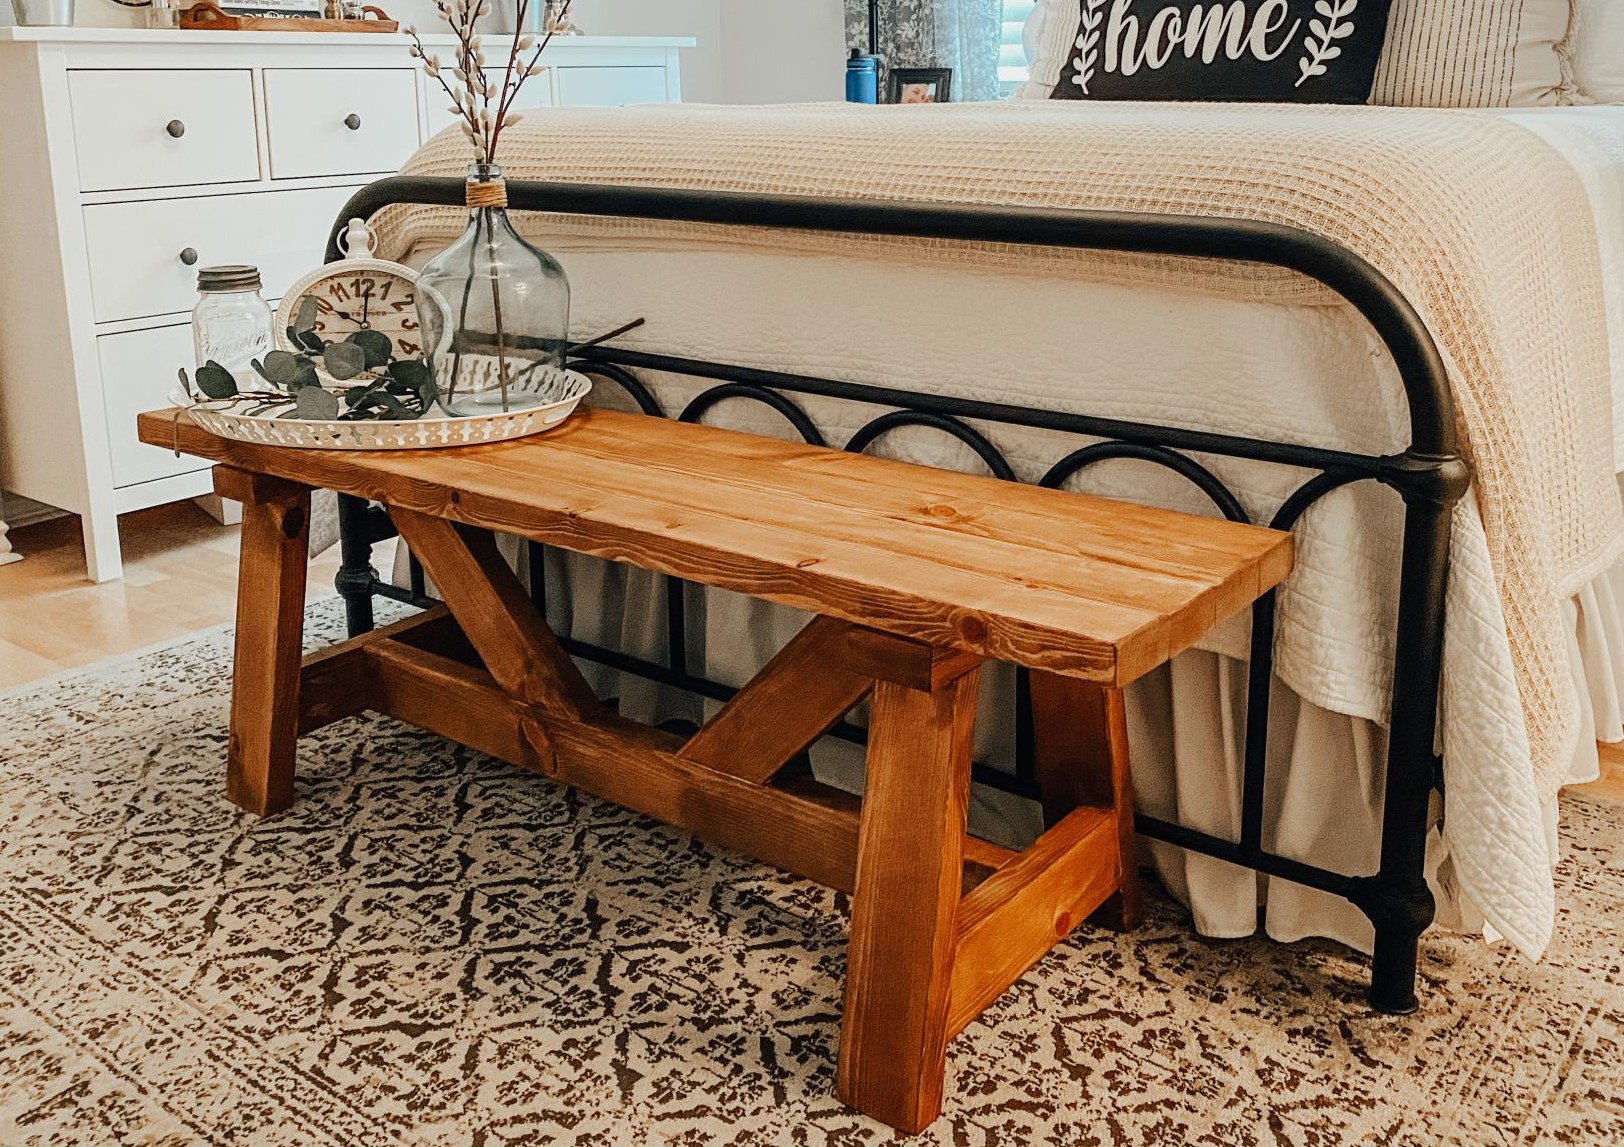
I used the plans from the site and it came out perfectly! Didn’t even make a wrong cut-pretty good for a super beginner.
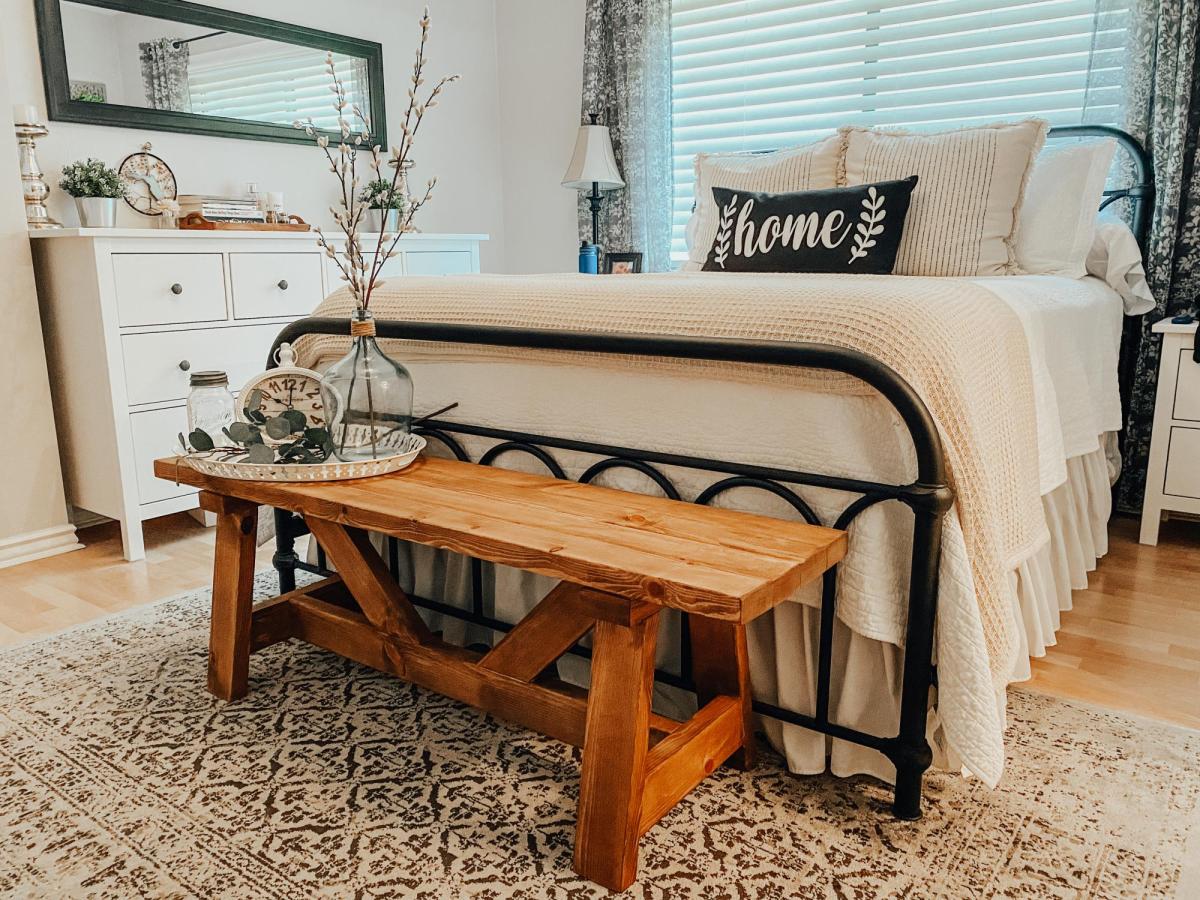
Built from Plan(s)
I used the plans from the site and it came out perfectly! Didn’t even make a wrong cut-pretty good for a super beginner.
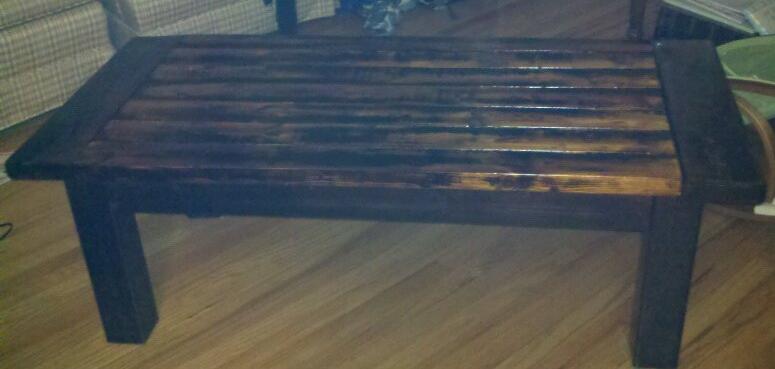
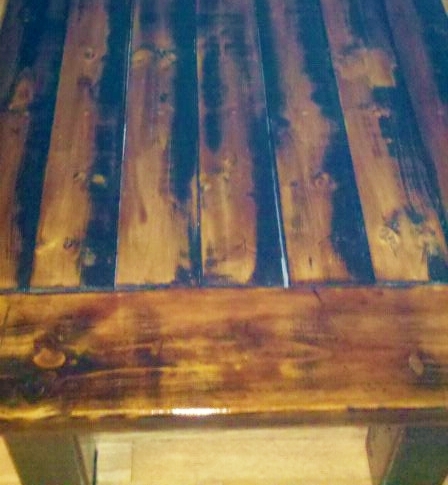
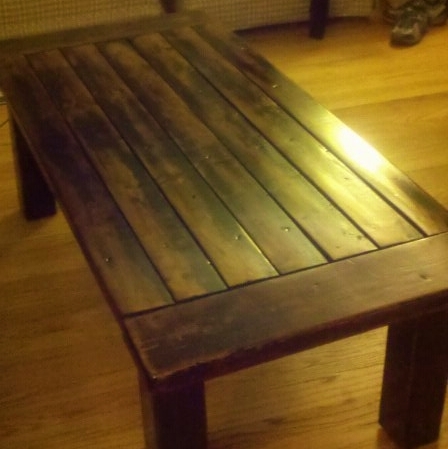
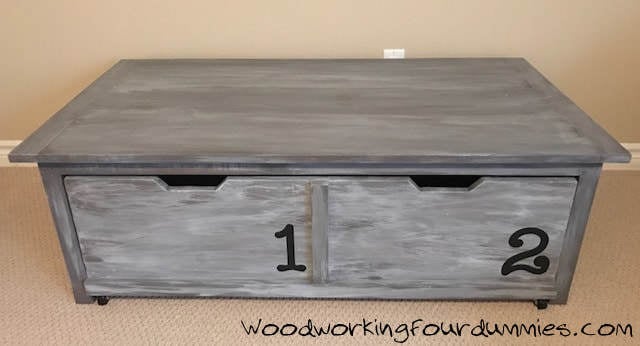
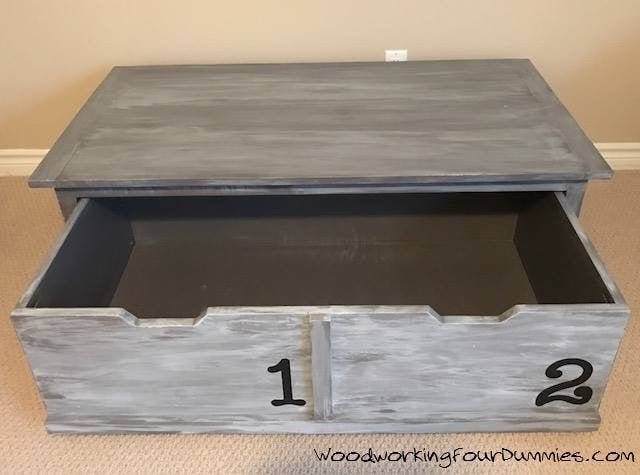
Farmhouse coffee table. My 1st project! Took me a year to finally get the finish just right. We love it.
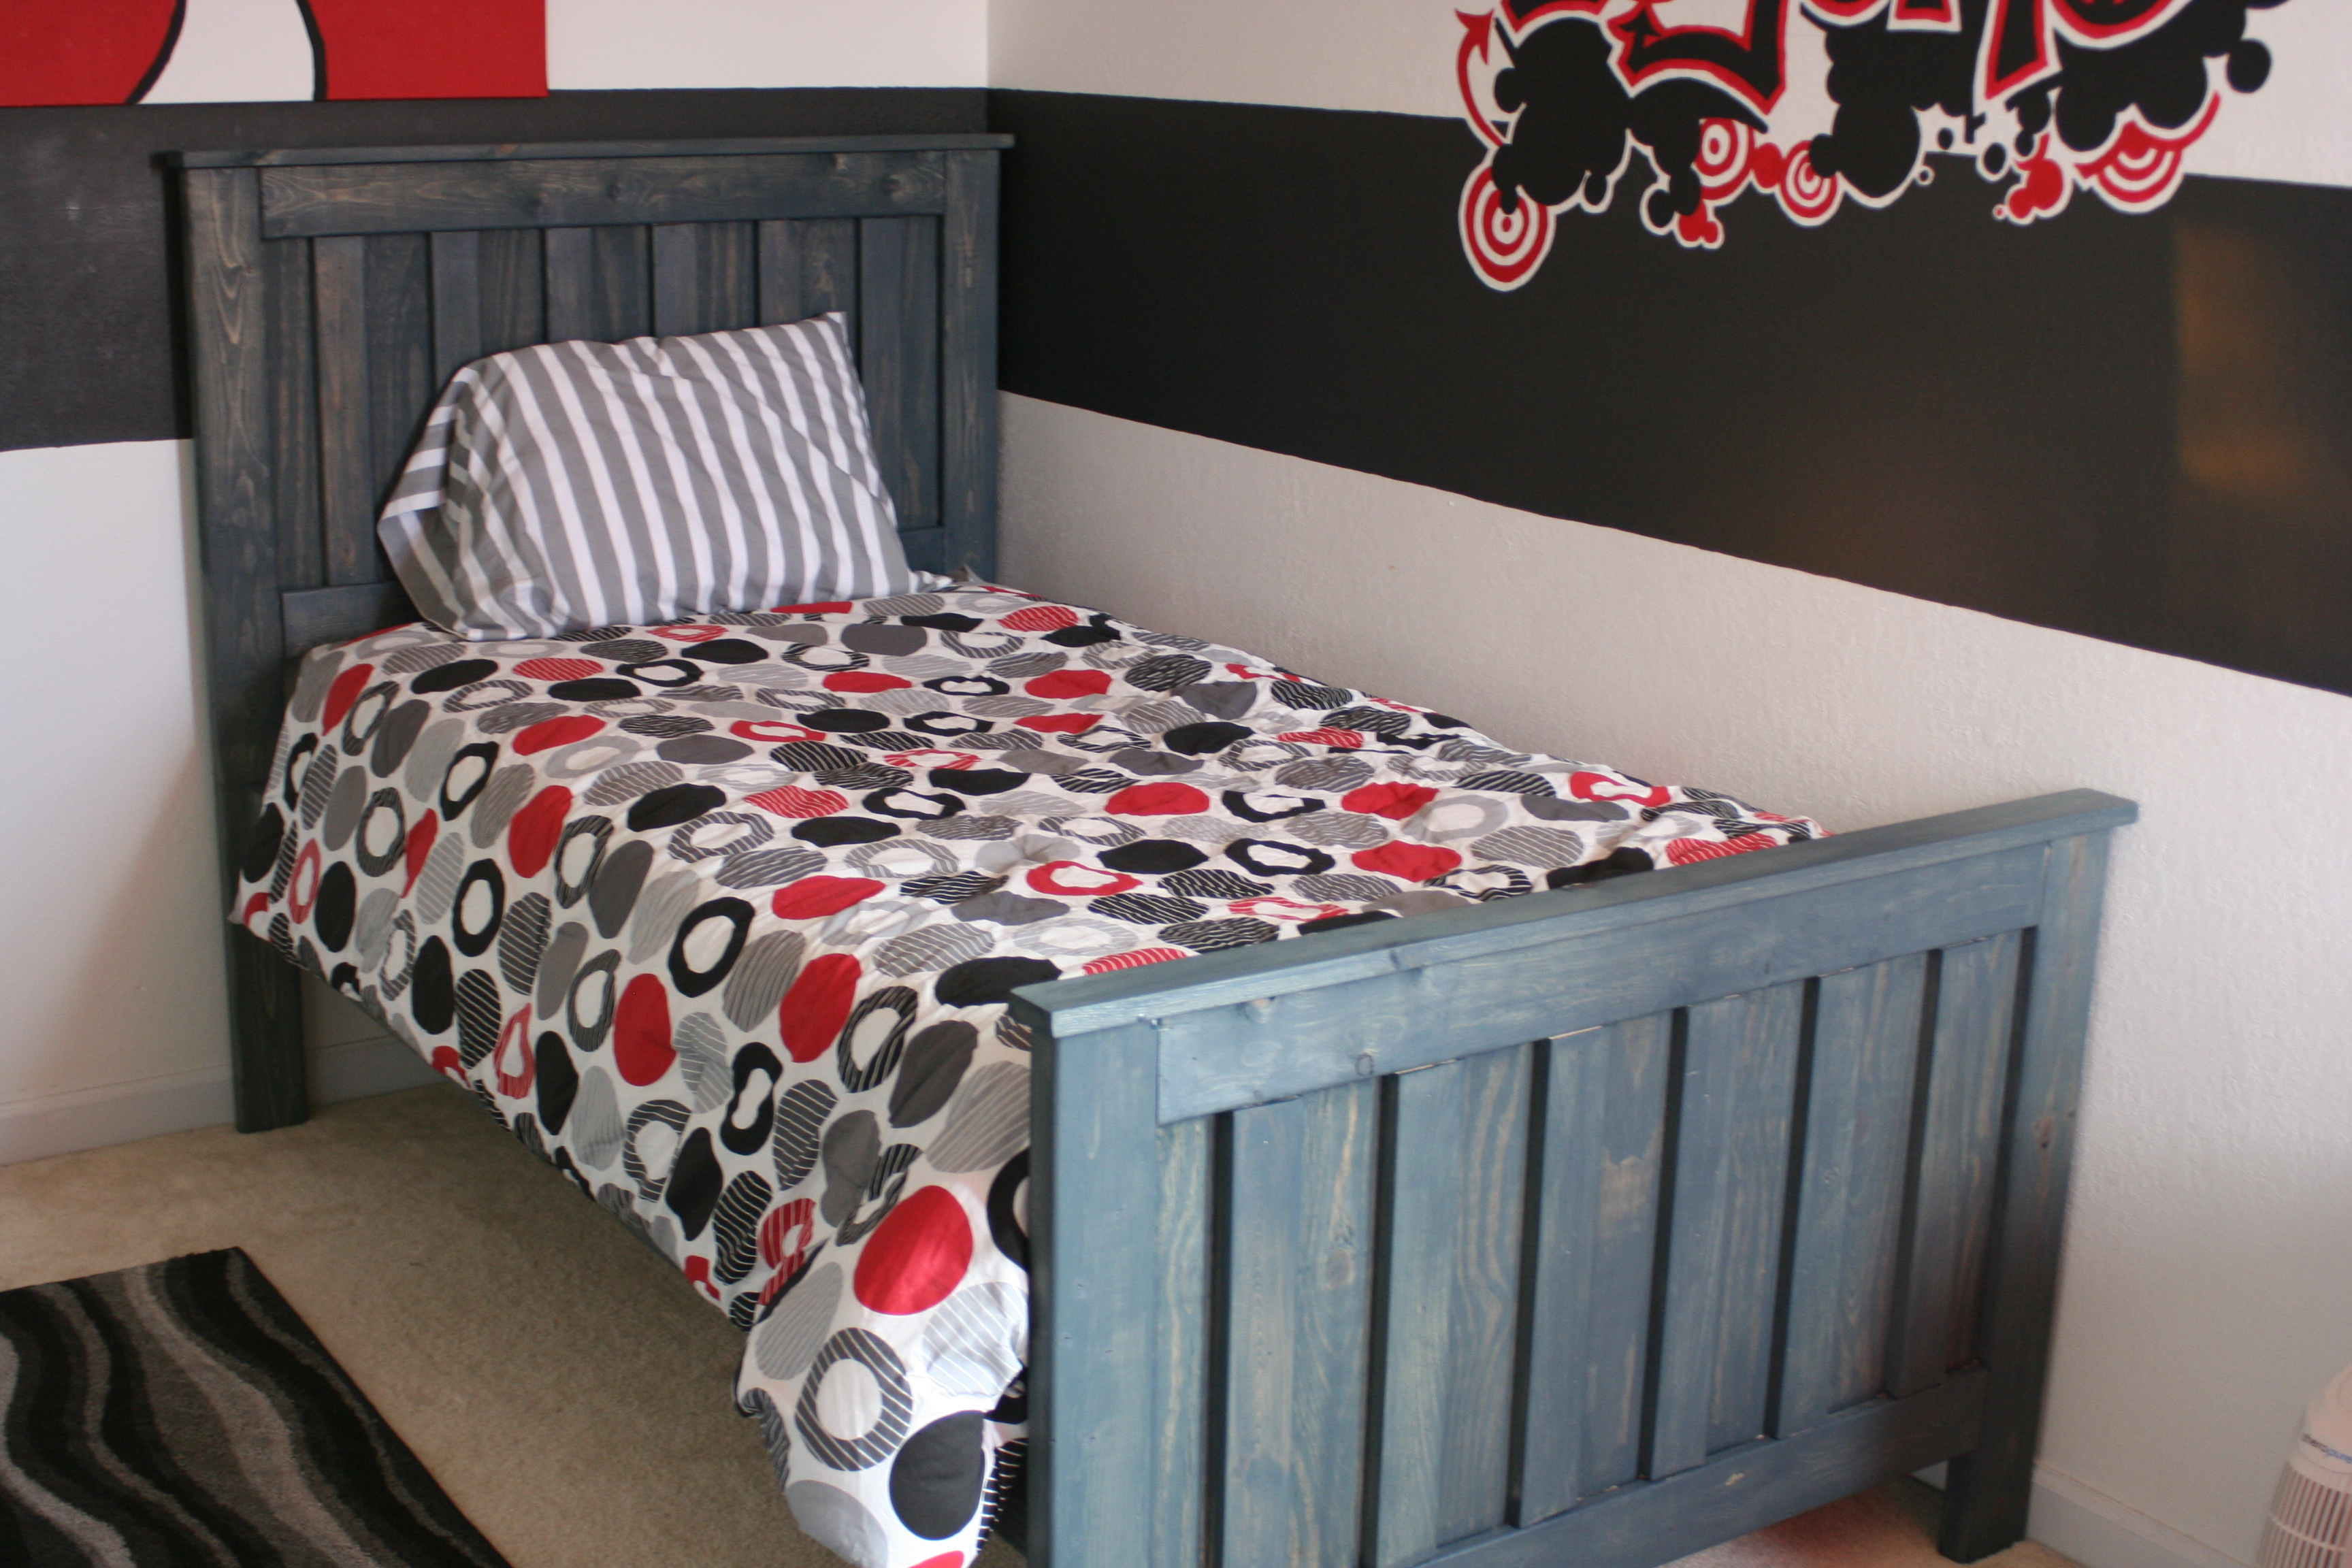
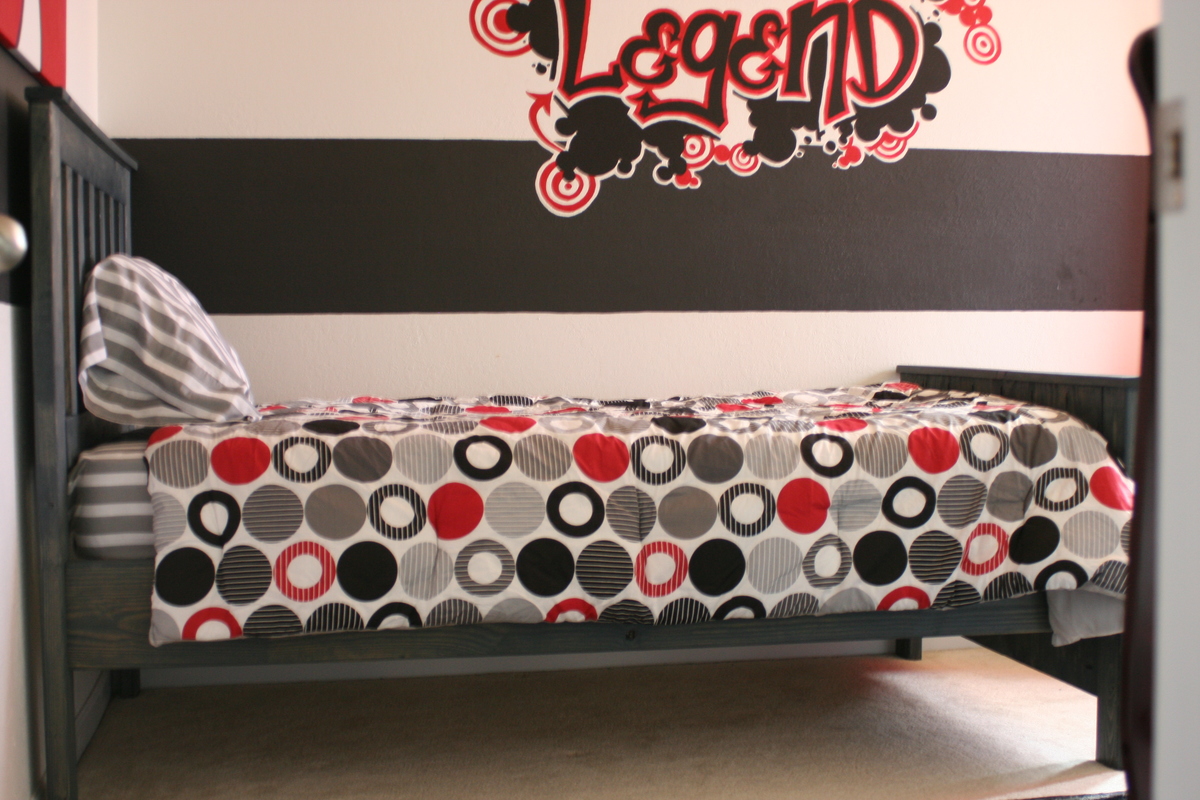
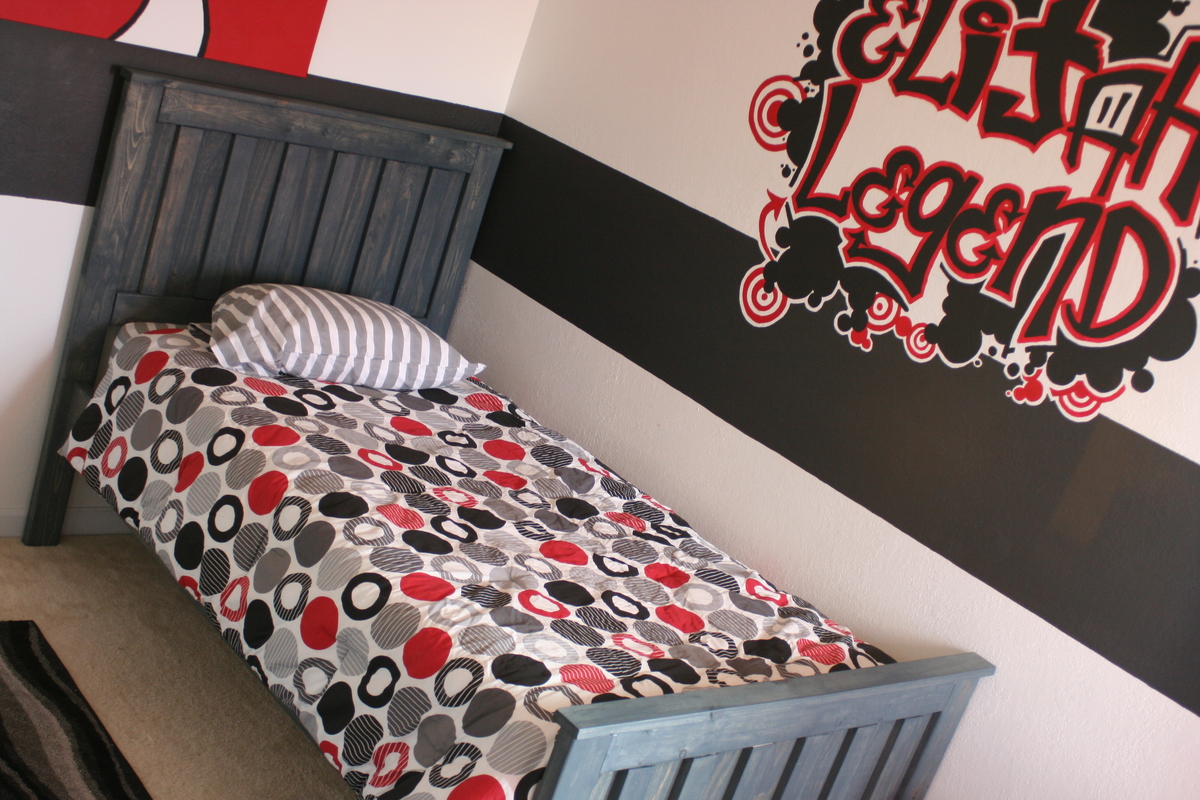
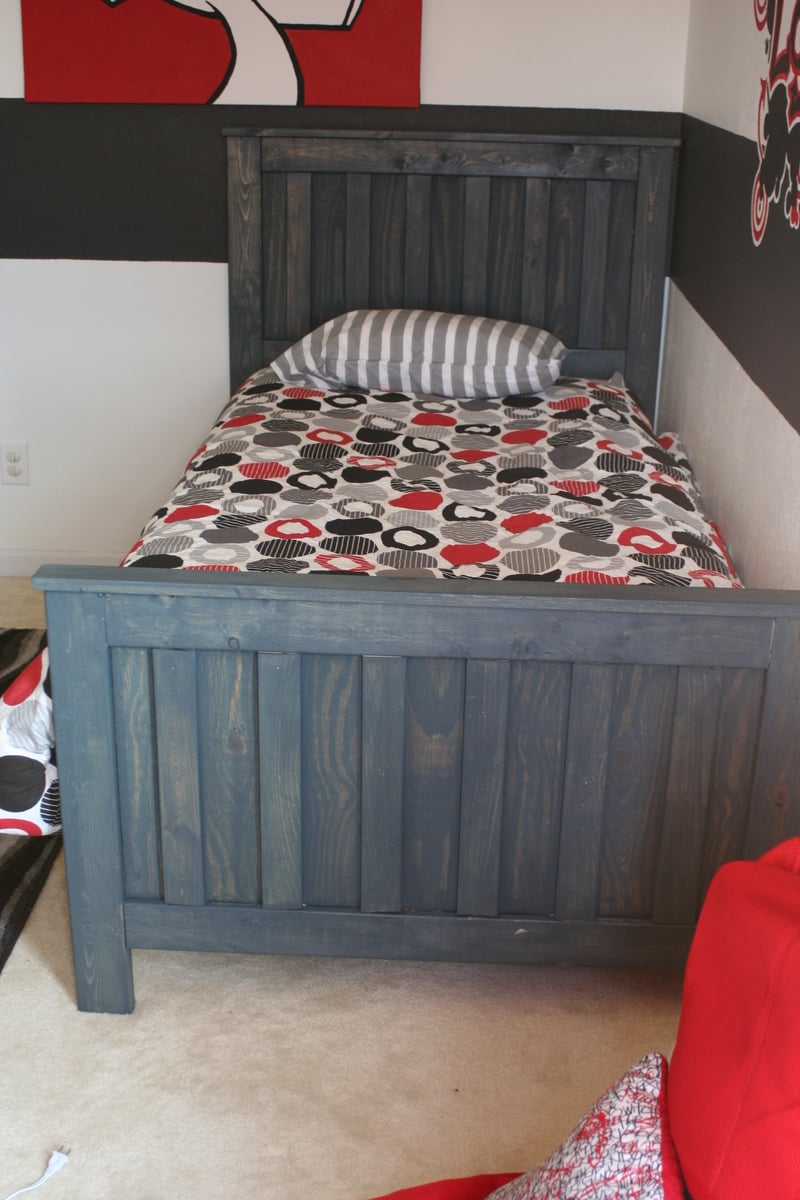
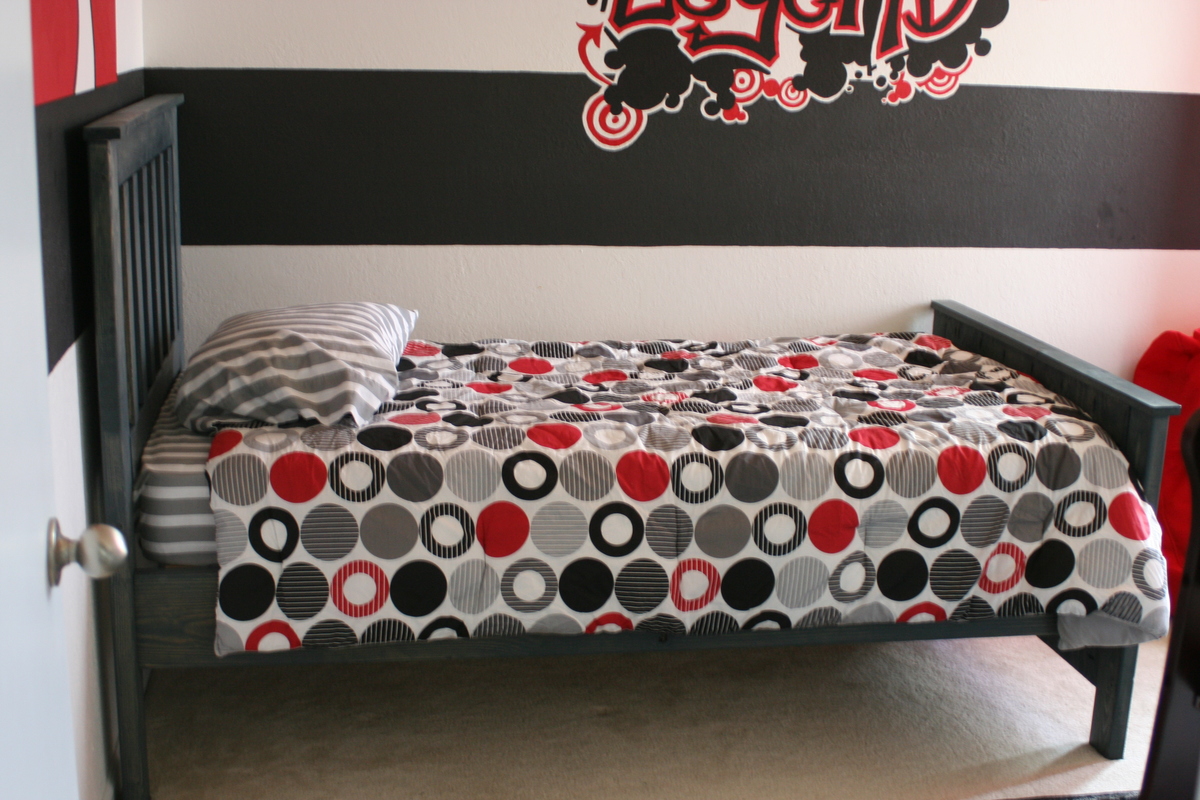
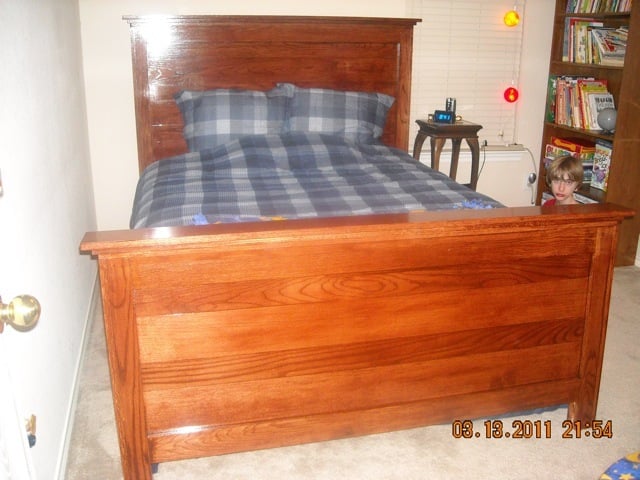
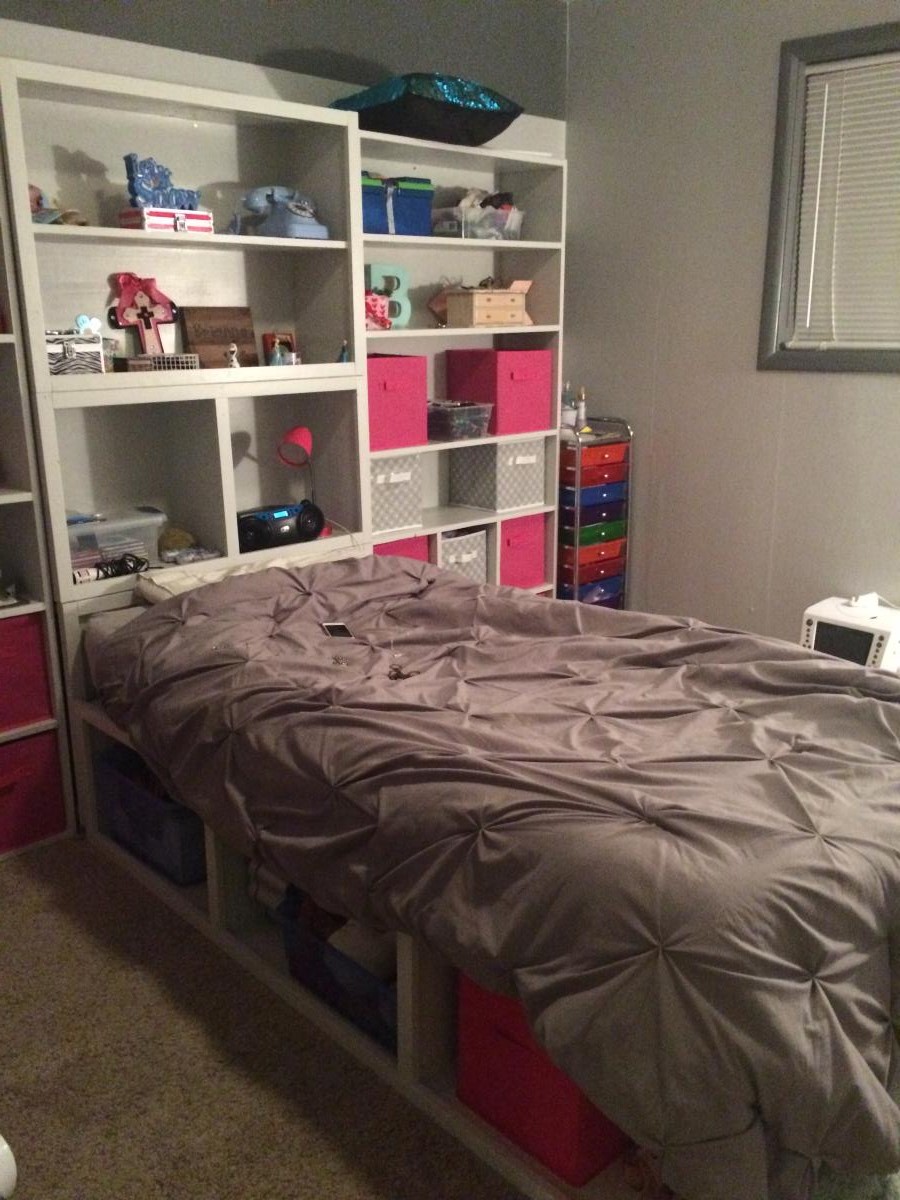
My first project using an Ana White plan and the first time using a Kreg jig (love that little blue thing!). The plan is pretty much straight forward. I had a great (but exhausitng) time building this bed for my 2 year old son. It was pretty easy and I did everything myself. Lowe's didn't cut my boards...I did! Bought a circular saw just for this project.
My only complaint is that 2'' wood screws are not on the posted "shopping list" and are needed for the side rails construction. It is listed in the step by step instructions, but if you are shopping for this don't forget to add this to your list of needed items. I got to the side rails and had to go back out for wood screws before I could add the cleats. Also, if I had to do this project over again, I would sand the plywood panels BEFORE constructing the head and foot boards. My reason being that I used wood stain. I've learned that plywood stains best when it is sanded to a smooth finish and pre-treated with wood conditioner. Once assembled, the slats on the head/foot boards make it impossible to sand the plywood with a power sander (too narrow). I had to manually sand between each slot...talk about tiring! No other glitches though! This was a fun project and the instructions were great and easy-to-follow.
I used Minwax water-based wood stain to finish my son's bed. I had it tinted at the paint desk to charcoal gray. In the store it looked very driftwoodish. However, it came out looking more blueish on the bed. I still like it though and my son loves it. I would wipe the stain on and keep it on no more than 20 seconds before wiping the excess off. I wanted the grain to show through really well and after many, many test pieces this seemed closest to what I was looking for.
In case anyone is interested, the striped fitted sheet, flat sheet and pillowcase are from Target (Target brand for $14.99 I think). The red, gray and black comforter are from Walmart.com (Style Lounge Reinforcements Grey/Multi comforter for $58). I had painted the room white with a fat black stripe shortly after moving into the house. I couple of years later we found out that we had my son on the way to we turned that room into the nursery. I primed part of the stripe and hand painted his first and middle name to overlap the stripe so that it all looked it was painted at the same time. The gray and black area rug was also from Walmart (we bought it in store about a year and a half ago...don't remember the style's name).
Thanks for looking!
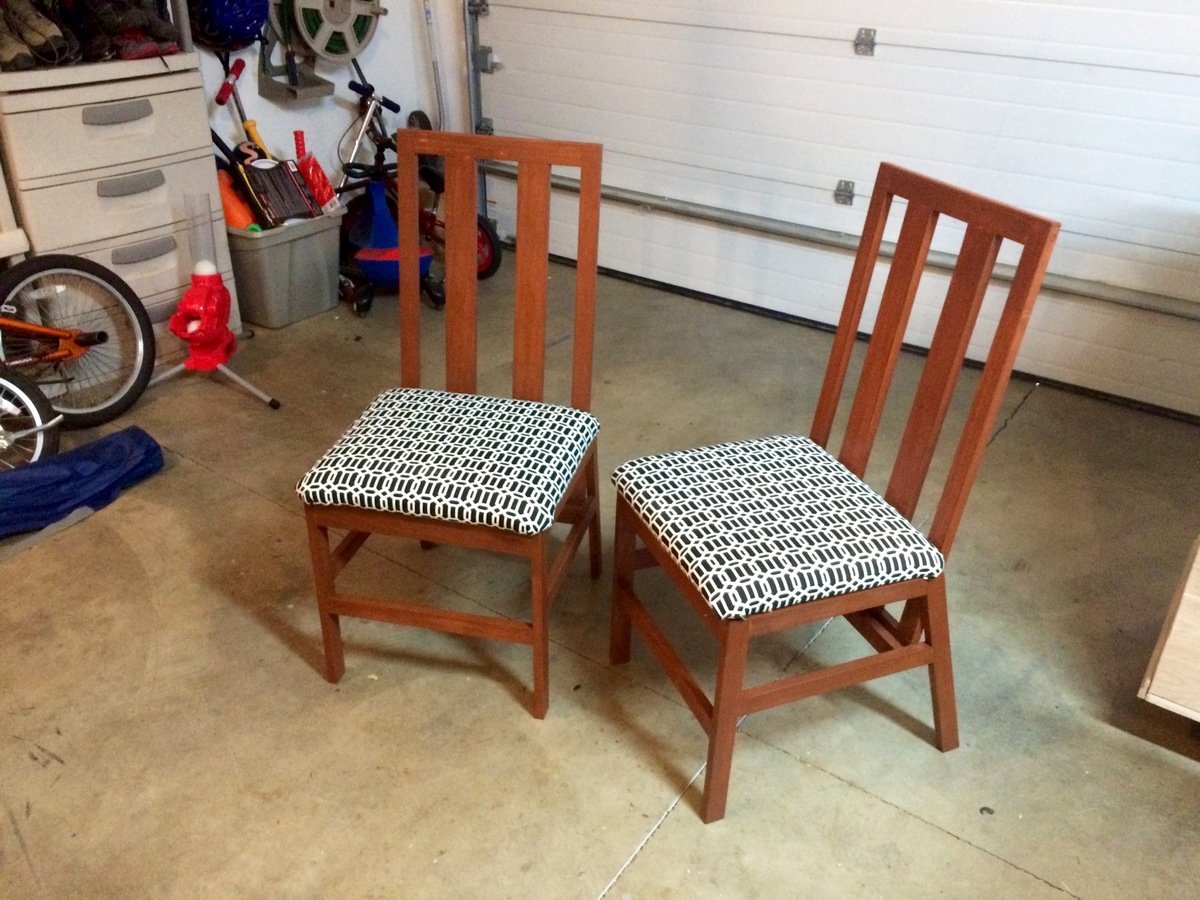
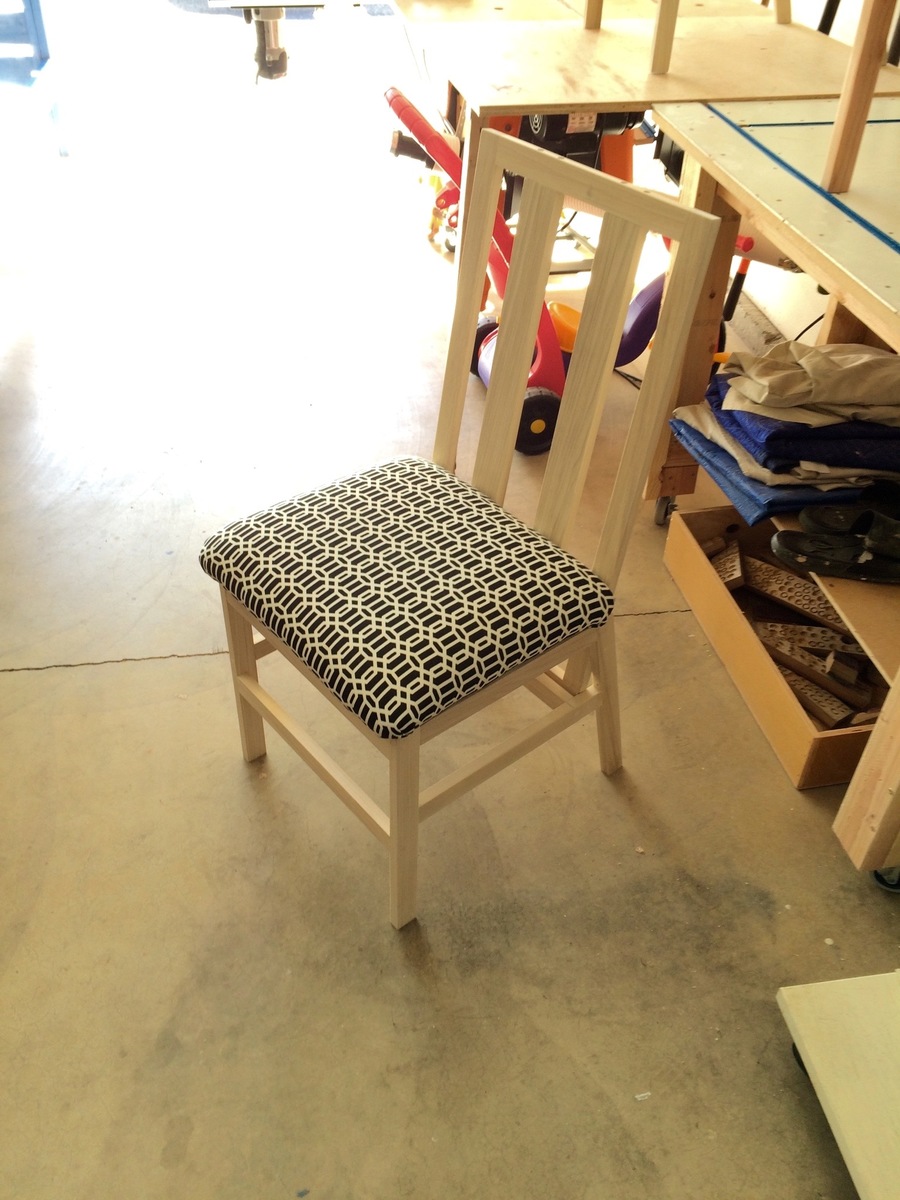
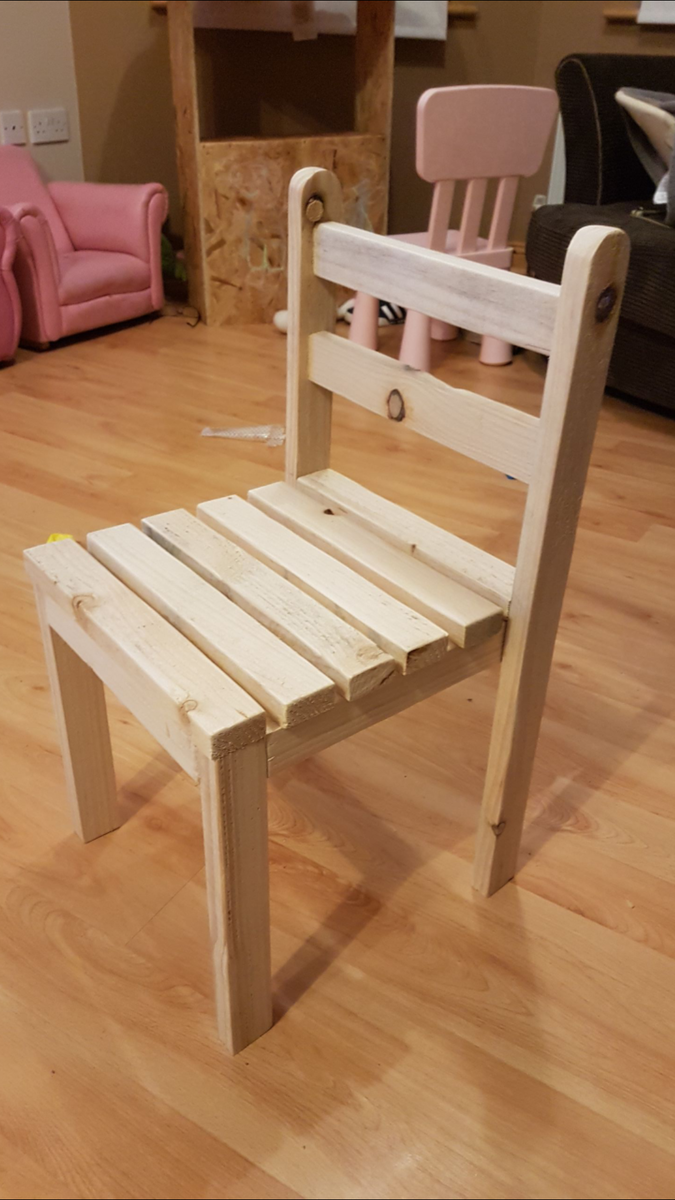
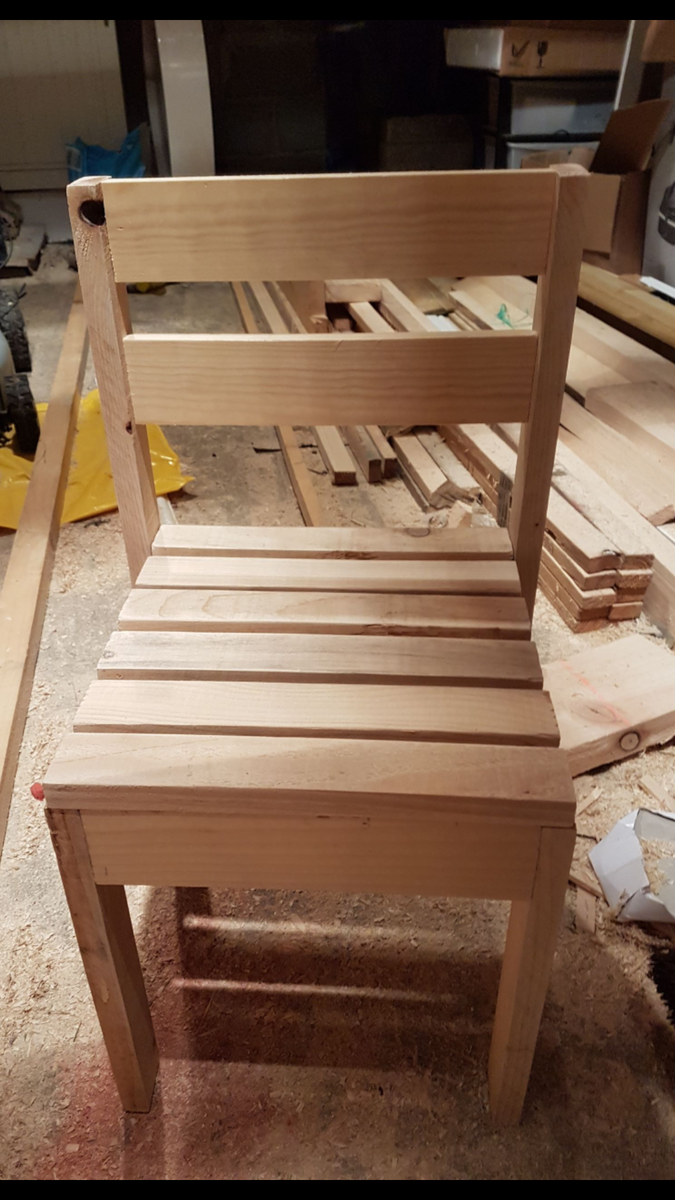
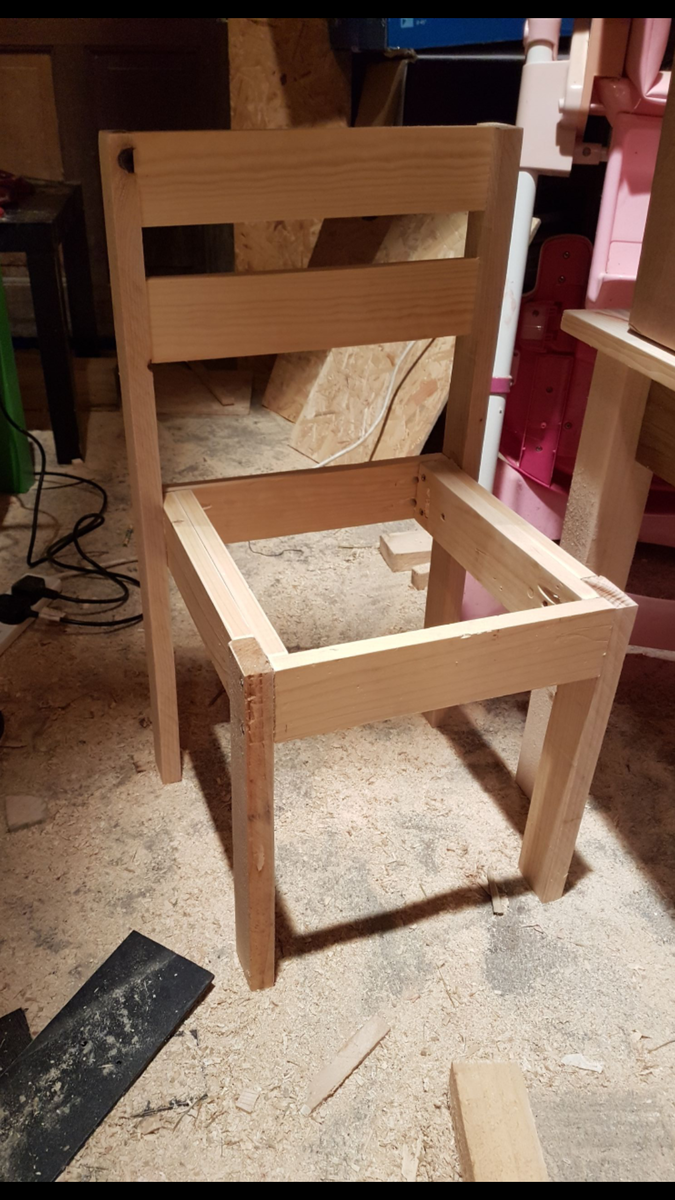
I'm pretty happy with the way these chairs turned out. It was a fun project as I did a few first, which included going to the fabric store (long waits) and got to tackle some upolstery for the first time! I did end up with a few glue drops that did not take the stain, so I'll be researching tips and tricks to prevant that in the future!
Also, I made these out of Popular, which pre stain was a must for cherry stain. Next time, I would use Cherry!
Thanks to Joanne S for the original post and consults regarding the upolserty!!

Fri, 05/01/2015 - 13:29
These are spectacular! Beautiful build! Love the finish and the upholstery. Also I'm super impressed that you can't see any of the filled screw holes. Would love to know the technique you used to hide them so well - I'm going to copy that! :)
JoanneS
Fri, 05/08/2015 - 12:48
Thank you both for the nice comments. I was please with the way these turned out too, despite some glue spots not taking up the stain. I plan on getting more disciplined in this area. For hiding the screws, I finally upgraded to a real countersink like this one: http://www.rockler.com/8-pro-tapered-countersink-bit at Rockler.
Instead of always forcing a dull one in and getting a crooked openings, this razor sharp one cuts beautiful holes with no effort! But watch out, I cut myself just adjusting the depth of the drill bit. I discovered these the last time I made some wine oak barrel chairs!
Fri, 05/08/2015 - 12:53
Since I use Kreg screws for almost everything, (even non-pocket hole stuff)because they are self tapping and won't crack the would I sure my countersink matched the head of the Kreg screws and than purchased a plug hole bit. Can be used on a drill, but better on a drill press. You have to keep the drill perfectly straight or the plug can break and get stuck in the bit!
Made two of these chairs for my little girls. The second one I managed to conceal all the screws too.
My dad and I built these amazing coffee and end tables during a Christmas last year. We modified the ends to for a “M” instead of the traditional farmhouse “X”. Our last name is Mayberry-so the M was fitting. Sadly, my father lost his battle to cancer and this was the last project we did-one that will forever hold precious memories! Thank you for the fabulous plans!
Fri, 10/08/2021 - 10:41
Thank you for sharing, a wonderful memory was made and to see this reminder everyday is very sweet. We are very sorry for your loss~
My friend asked me to build a "forever bed" for her son. So I pulled up some plans, and she LOVED this headboard. But wanted a footboard to hold the comforter on. So, I built the headboard, realized how easy it was, and invited her over to help build the footboard. She was so excited that she helped build her son's bed!
We were able to finish this table after work one afternoon and stain it the next day. (we have a 16 month old also, so you can do it! :) ) I wanted a similar style I had found at World Market that retailed for $700 we were able to complete this entire table for $100 including all hardware and stain. LOVE it so much and get SO many compliments on it. Thanks so much!
Shelby
The Dandy Lion
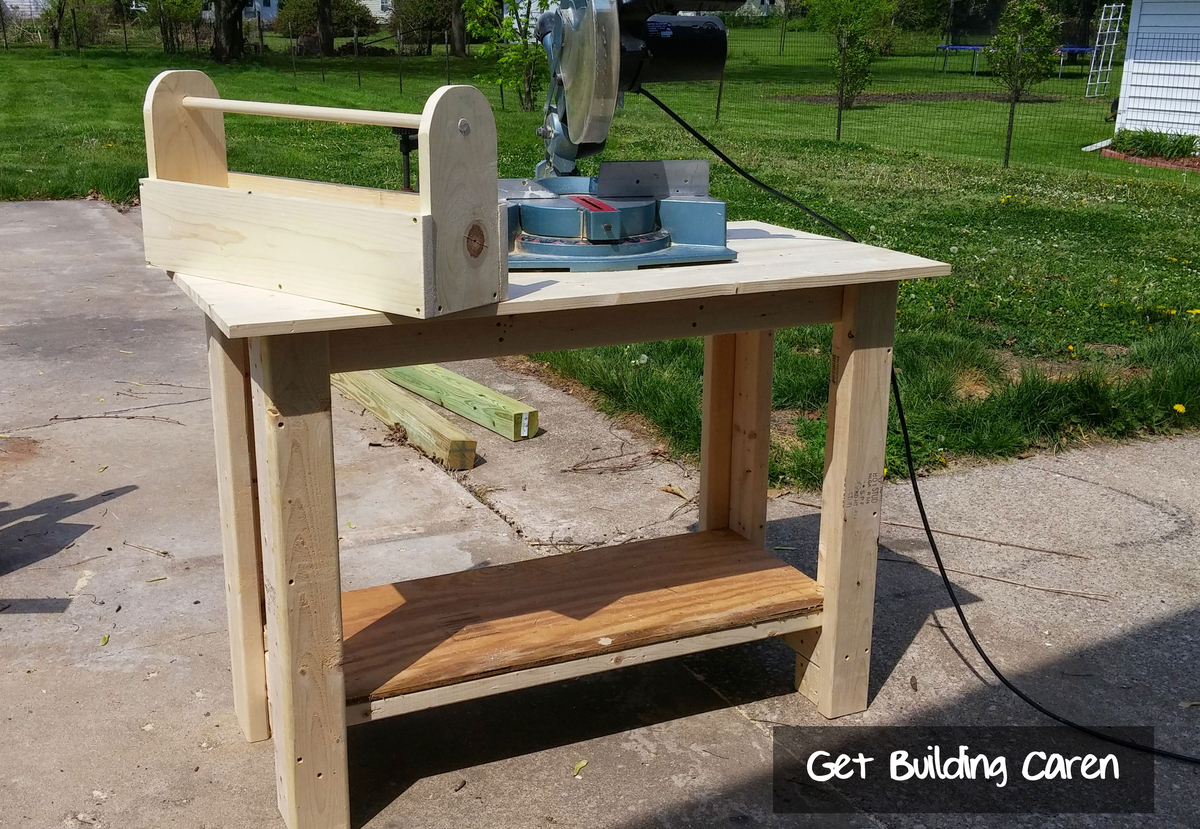
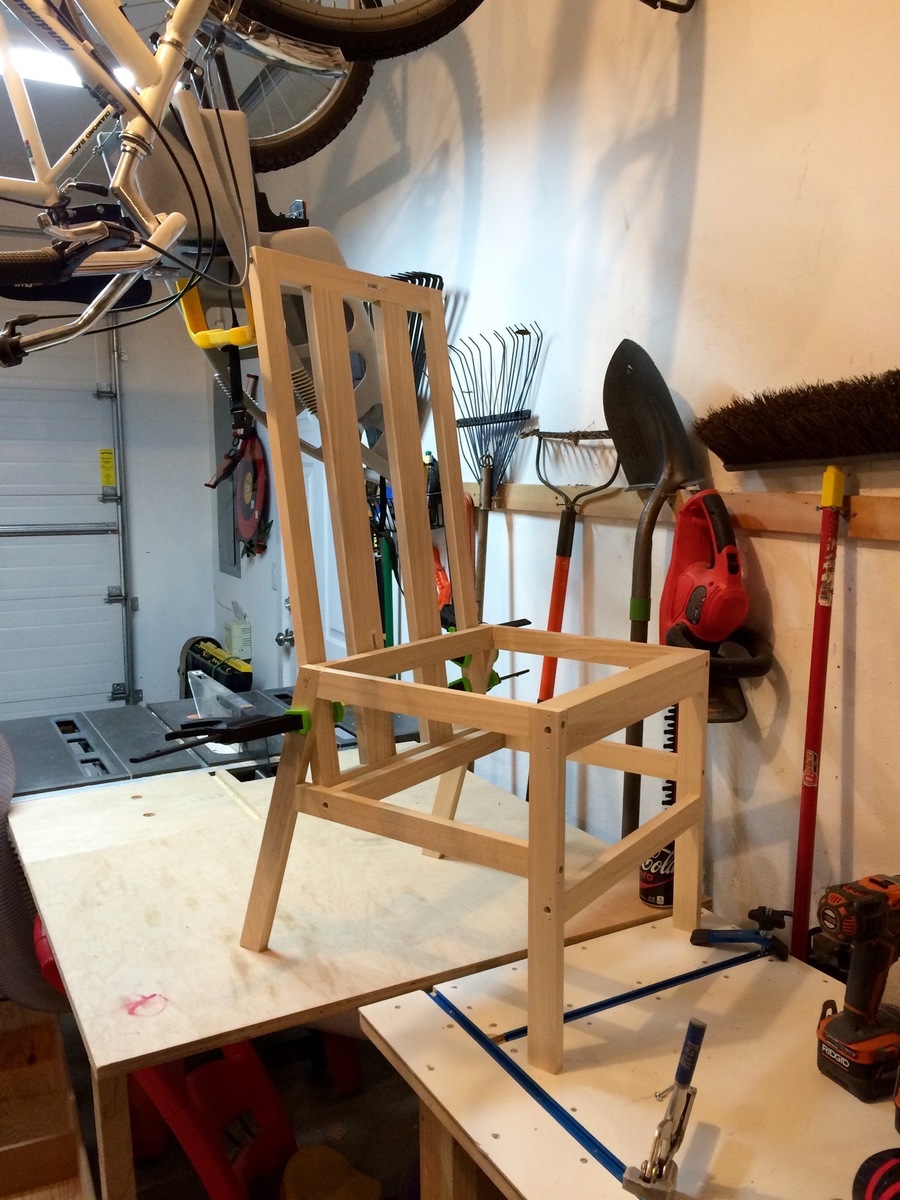
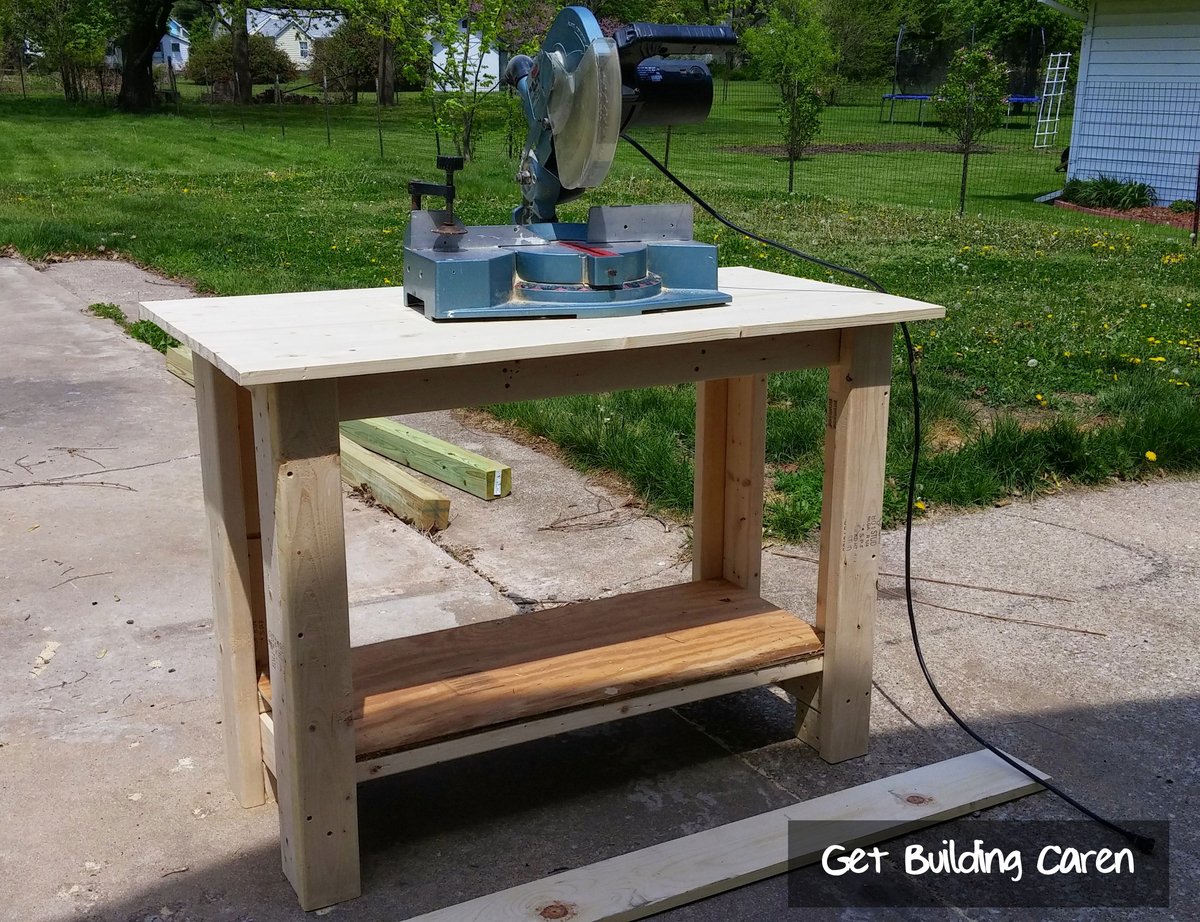
The first project I tackled from Ana White's wonderful plans was a building a sturdy work table for my miter saw that I bought at a garage sale for $25. I was using cinder blocks and plywood as a makeshift work table, and wanted an improvement on that as my first project. So, let the fun begin!
I started the project on Saturday after lunch, going to the lumber yard and picking up wood and screws for about $50. It's about the lumber limit I can haul in my Honda Civic, in the back seat, with the window open.
I followed the instructions, but found that the supports for the top were 13" not 12", and I had 3 2x4s left over (for future projects). I had some plywood in the shed, which I cut 16x40 to make a shelf. I only filled the screw holes on top with wood filler, so sawdust doesn't accumulate.
I finished the table before dinner time. The kids are getting me a bench vise for Mother's Day. Thanks kids!
On Sunday I started my second project, a tool box made out of a dowel and a 1x6 (see it on the ground in the second pic?). I cut the pieces first, then rounded the sides with the jig saw I bought at another garage sale for $3.
Everyone loves the toolbox! I plan on making one for my oldest son, and filling it with starter tools.
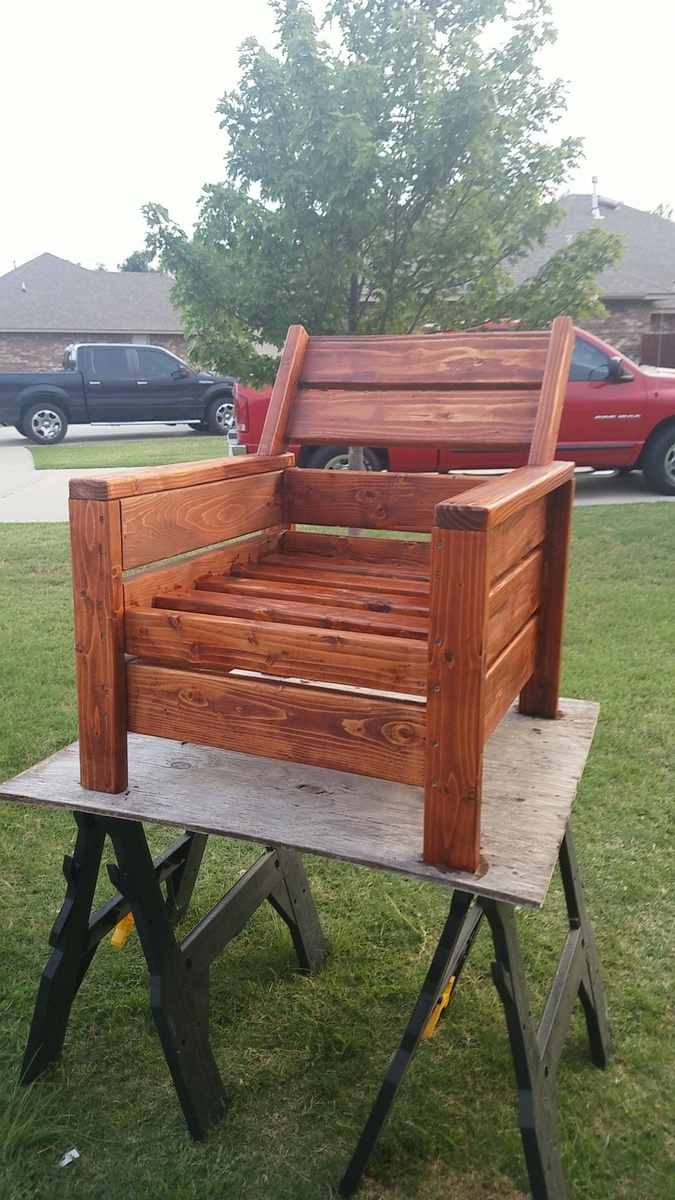
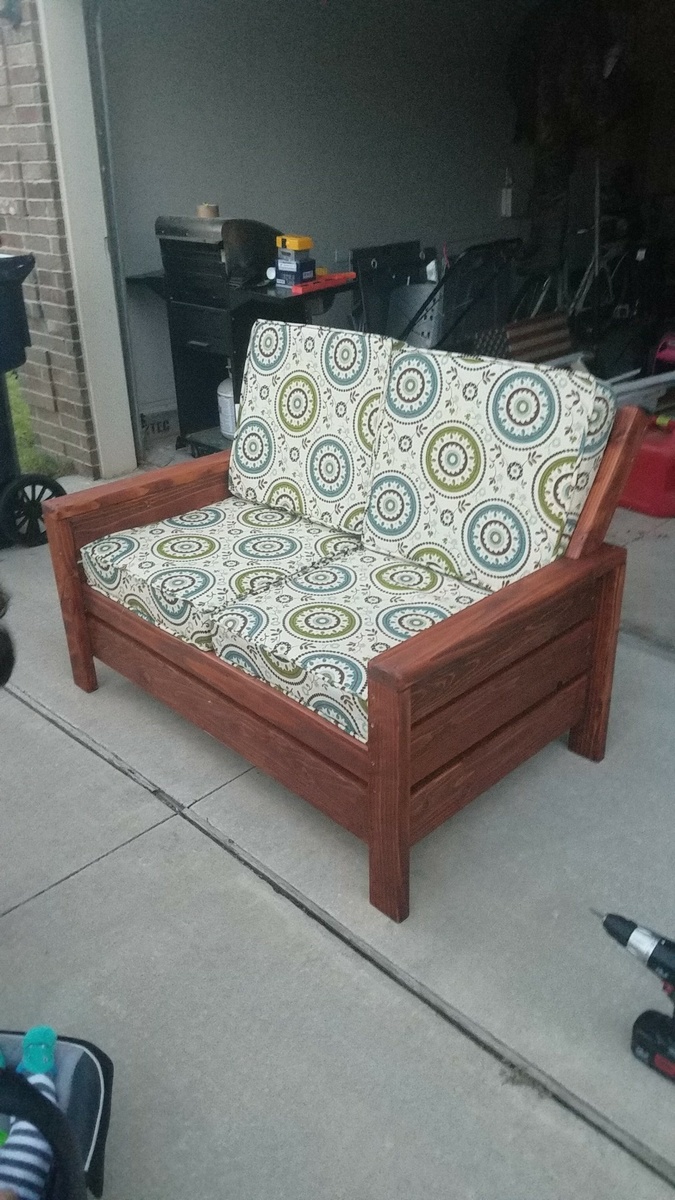
Added a little extra back rest. Made a double chair in the process of making a 3 cushion couch.
Mon, 06/10/2019 - 18:43
I really like the backrest. I built the chair as is from the plans but found it really needs the backrest. Can I ask how you attached the backrest screw-wise and what the angle is? It looks like the backrest might have been screwed on from underneath the armrests before the armrests were screwed to the body of the chair. Am I thinking in the right direction? Thanks in advance!
Fri, 07/03/2020 - 11:24
Can I please get the plans for the backrest?
Thanks!
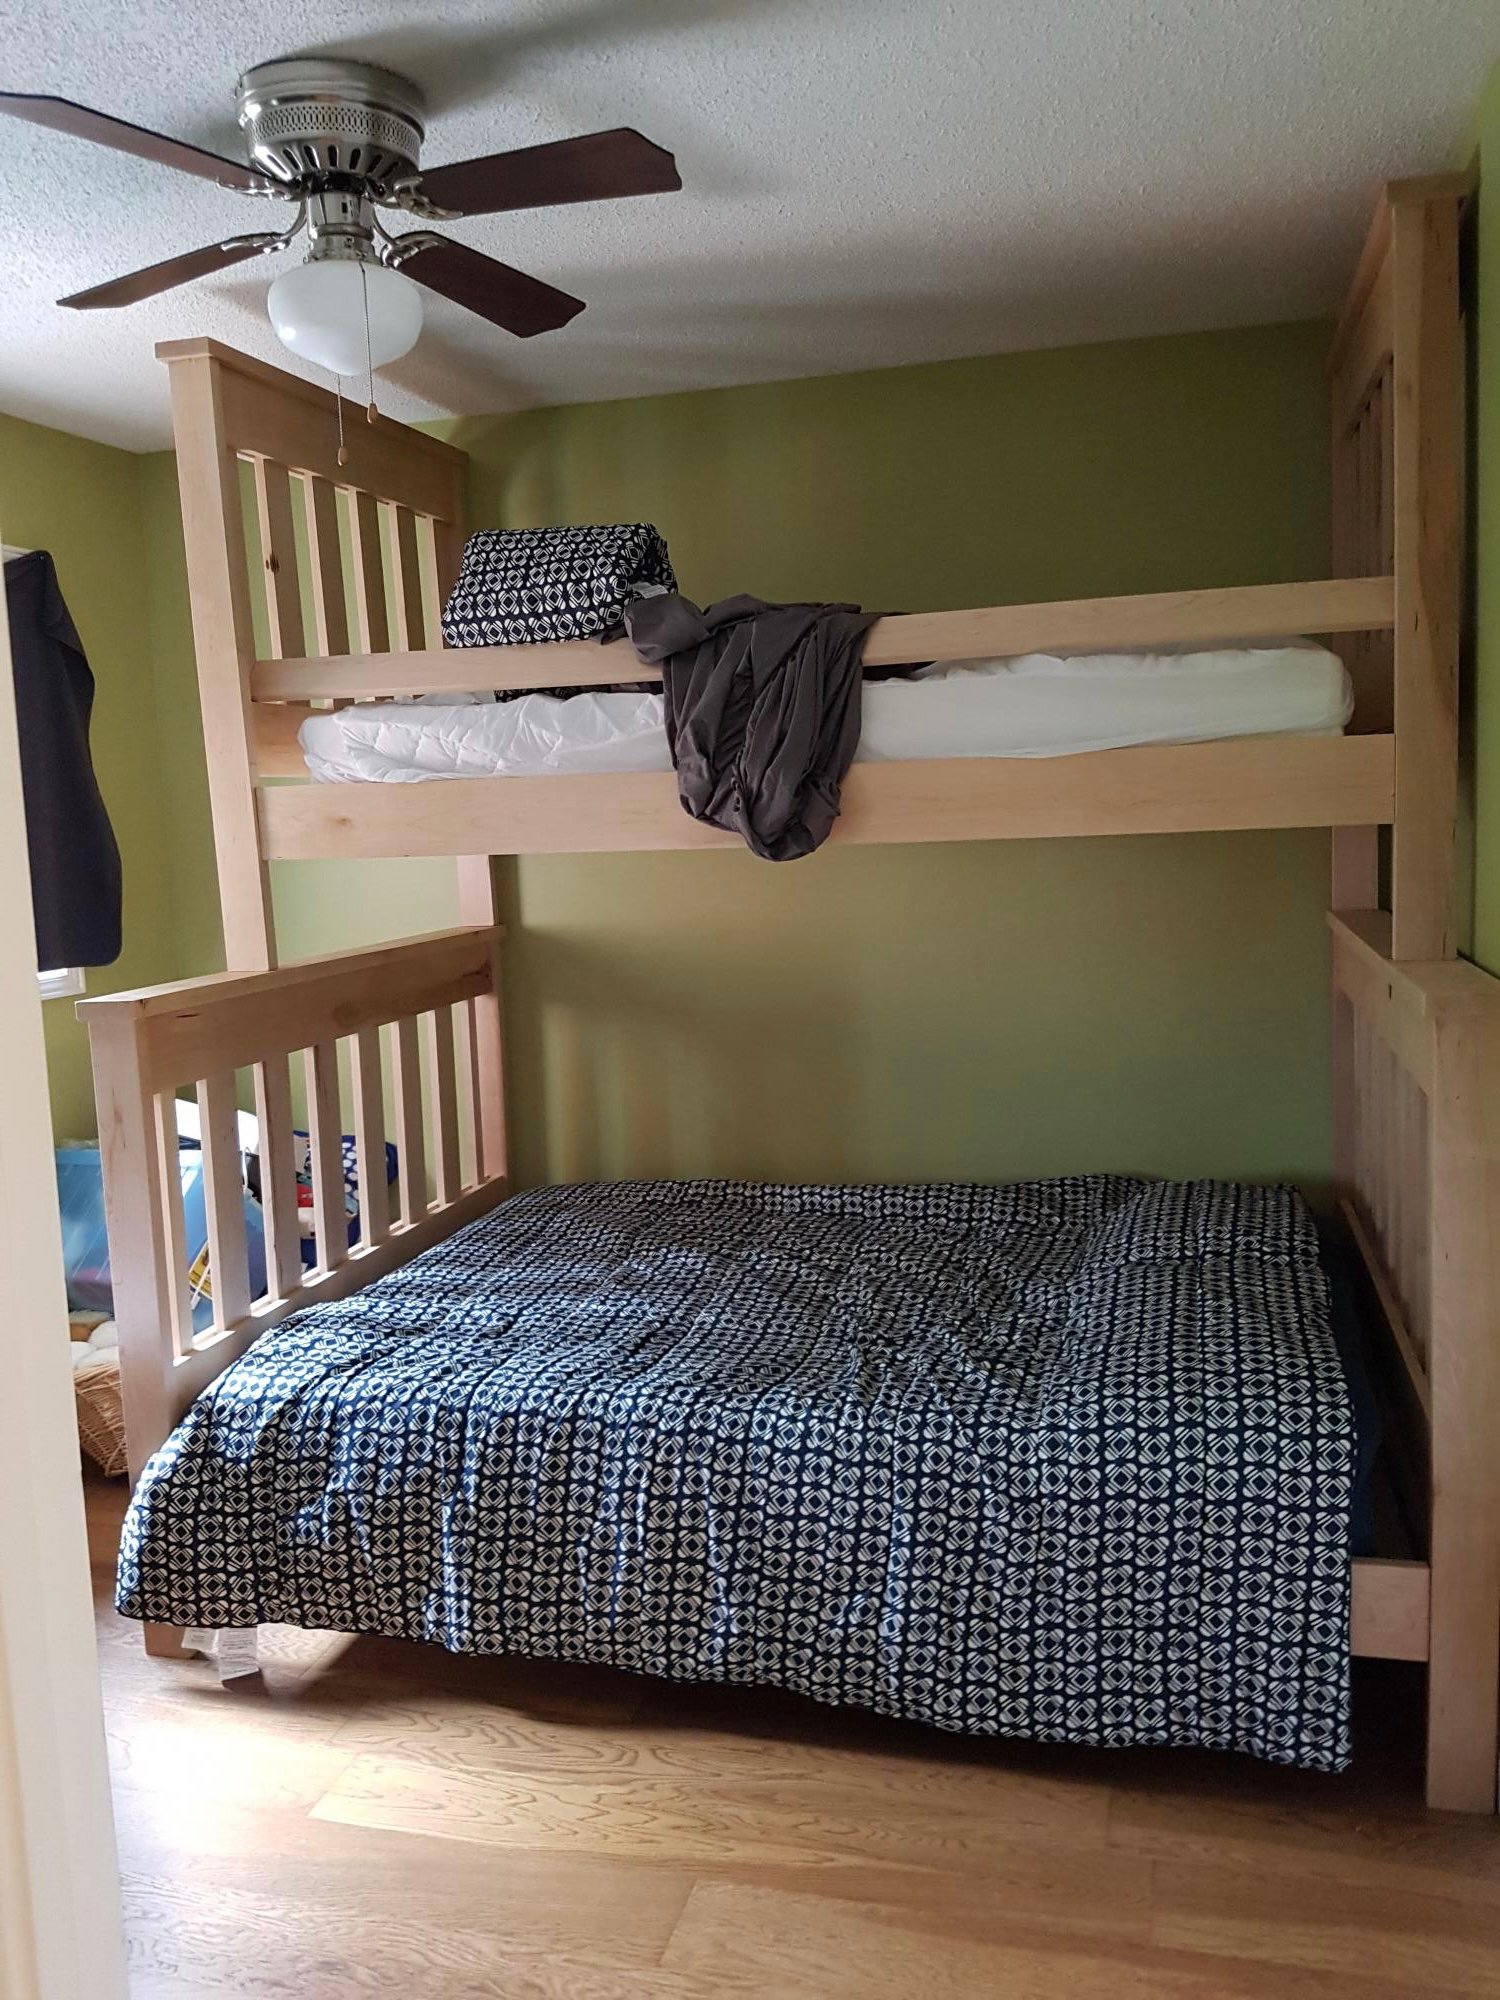
Double bed at bottom, twin at top, still have to make the ladder
With three little kids we needed some place to put the loads of toys that we have. The first time I saw this - I knew I had to build it!
This project was quite the task. For me building is a breeze - it's the painting that is the process!!!
I started working on this on Sunday last week - it was built in about 3-4 hours. Painting took forever, and three colors!
Love for you to check out my blog post with all the details, even my painting flub up.
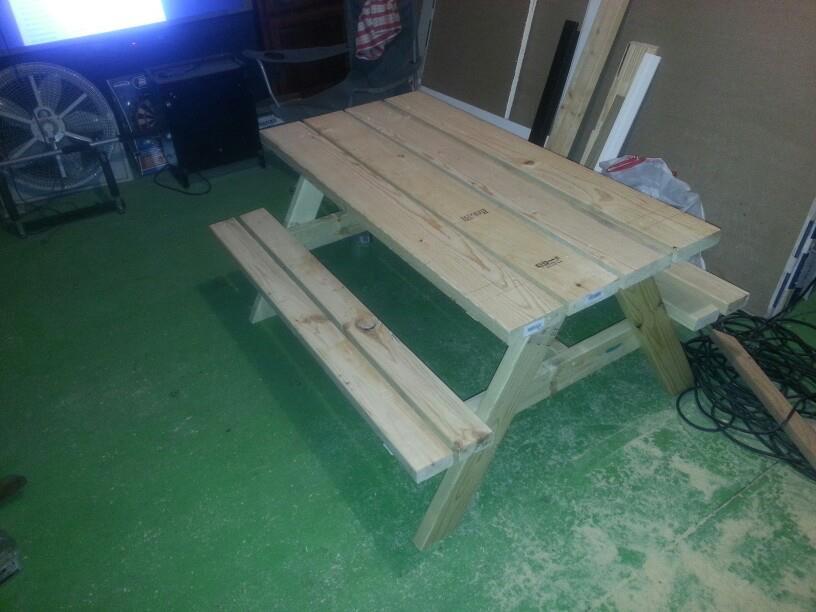
Big Kids Picnic table. Made this for my daughters and they absolutely love it. Just the right size for a 9 and 6 y/o.
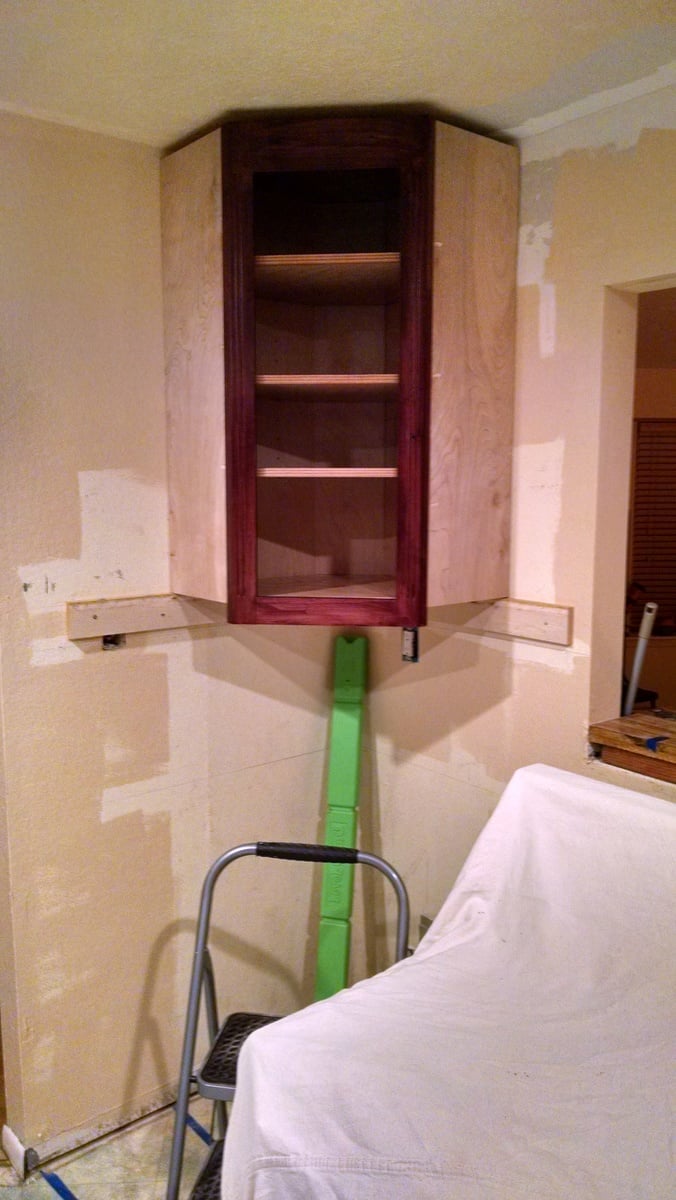
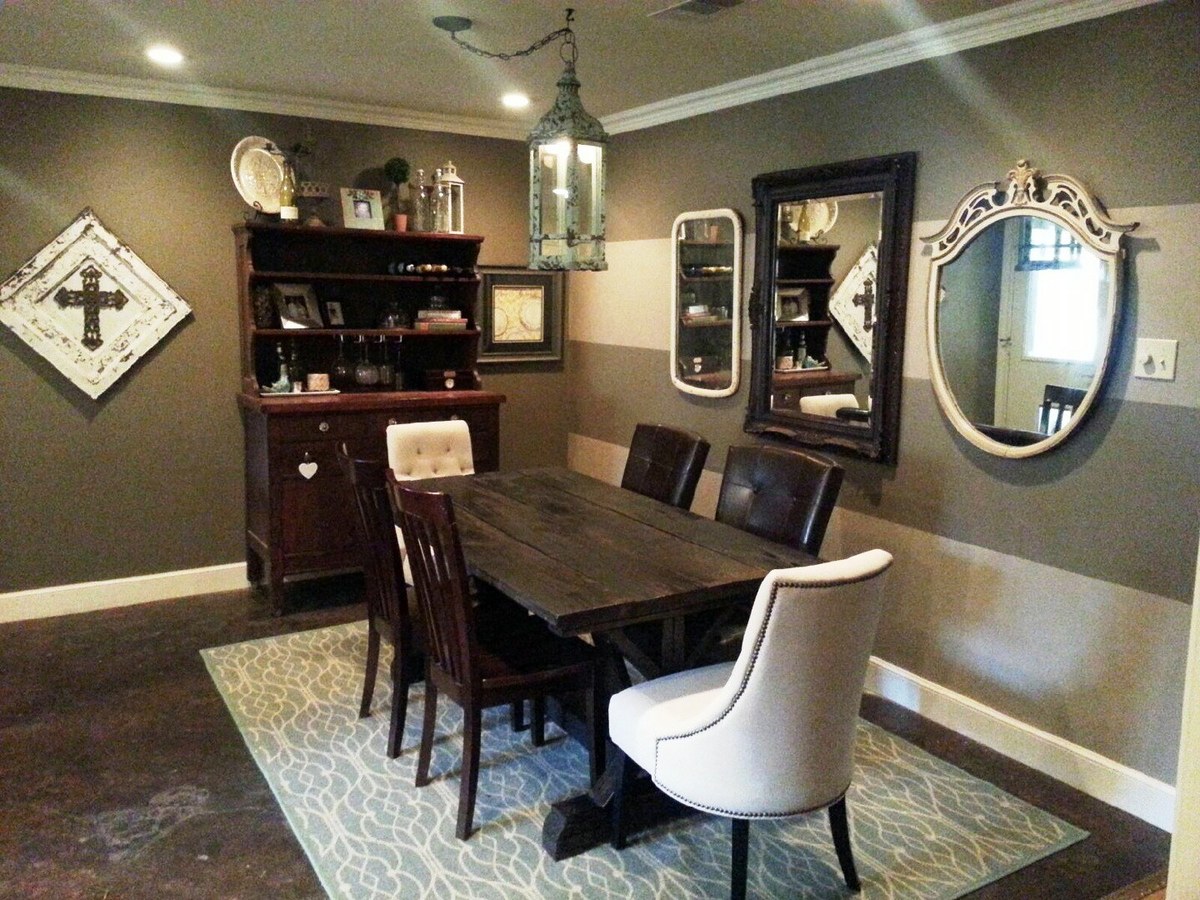
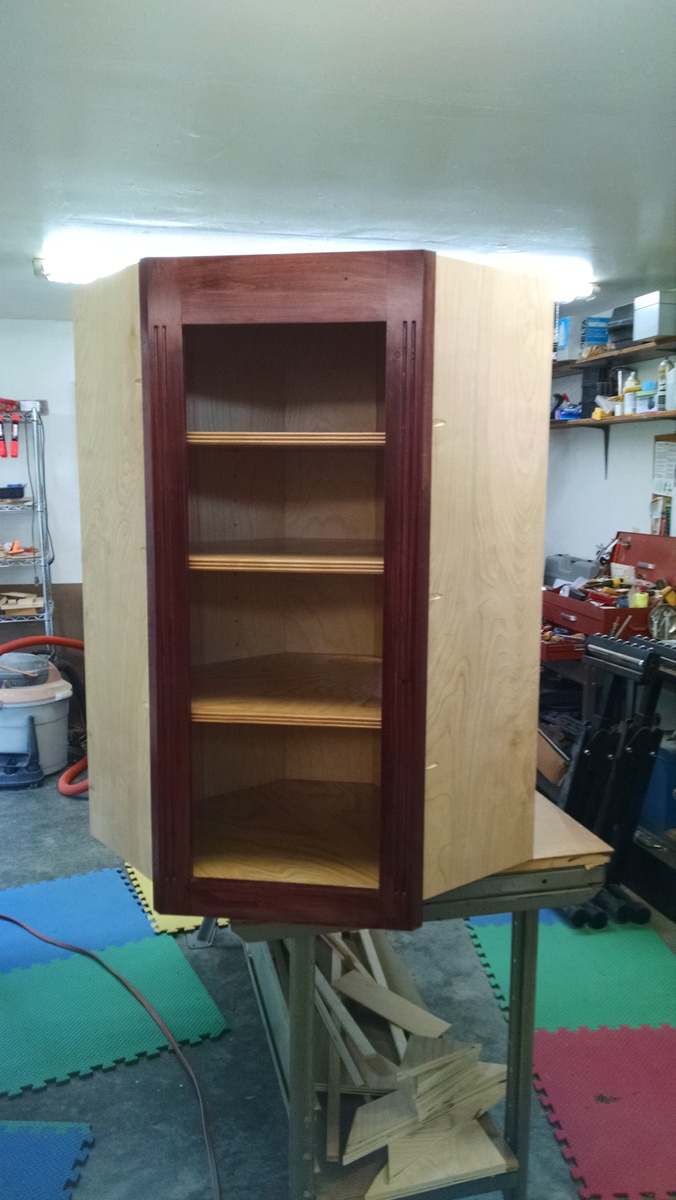
First cabinet in my kitchen remodel.
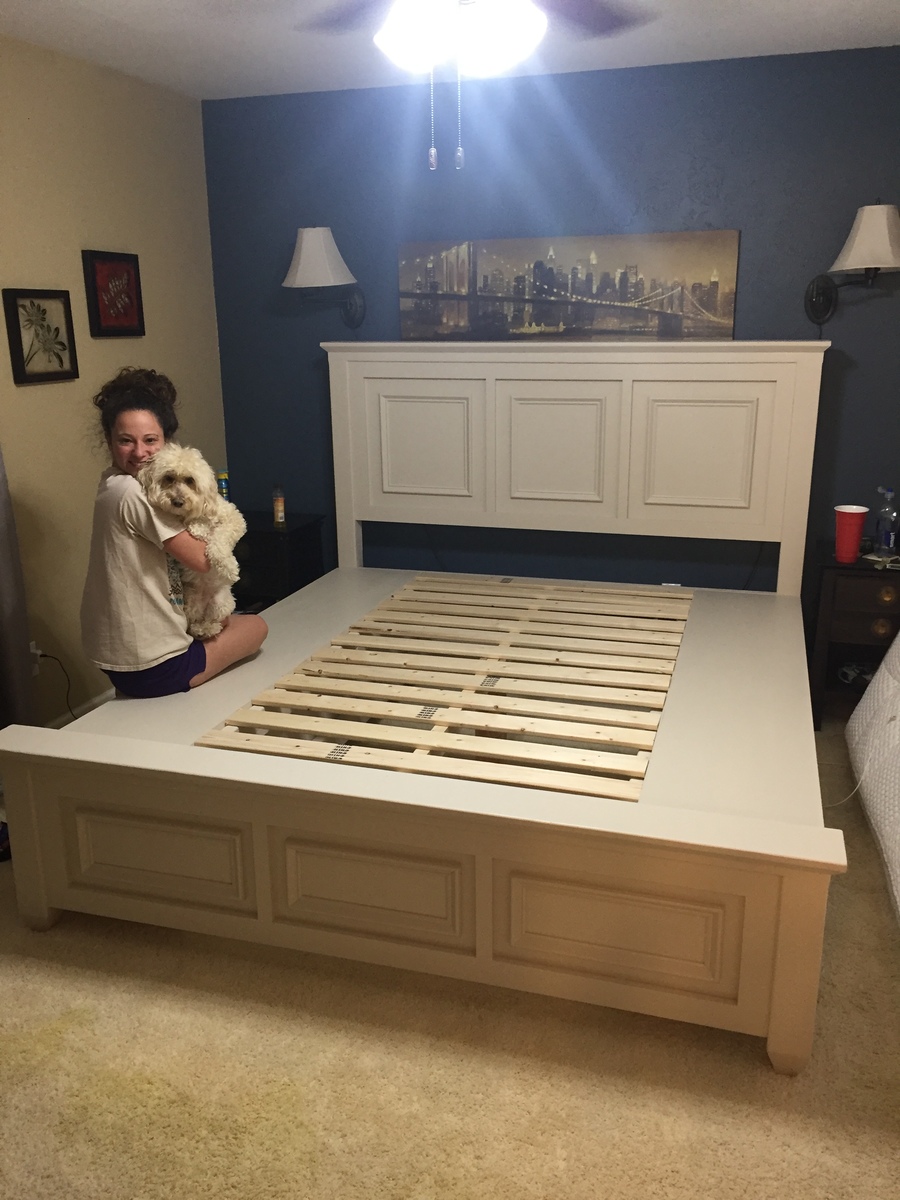
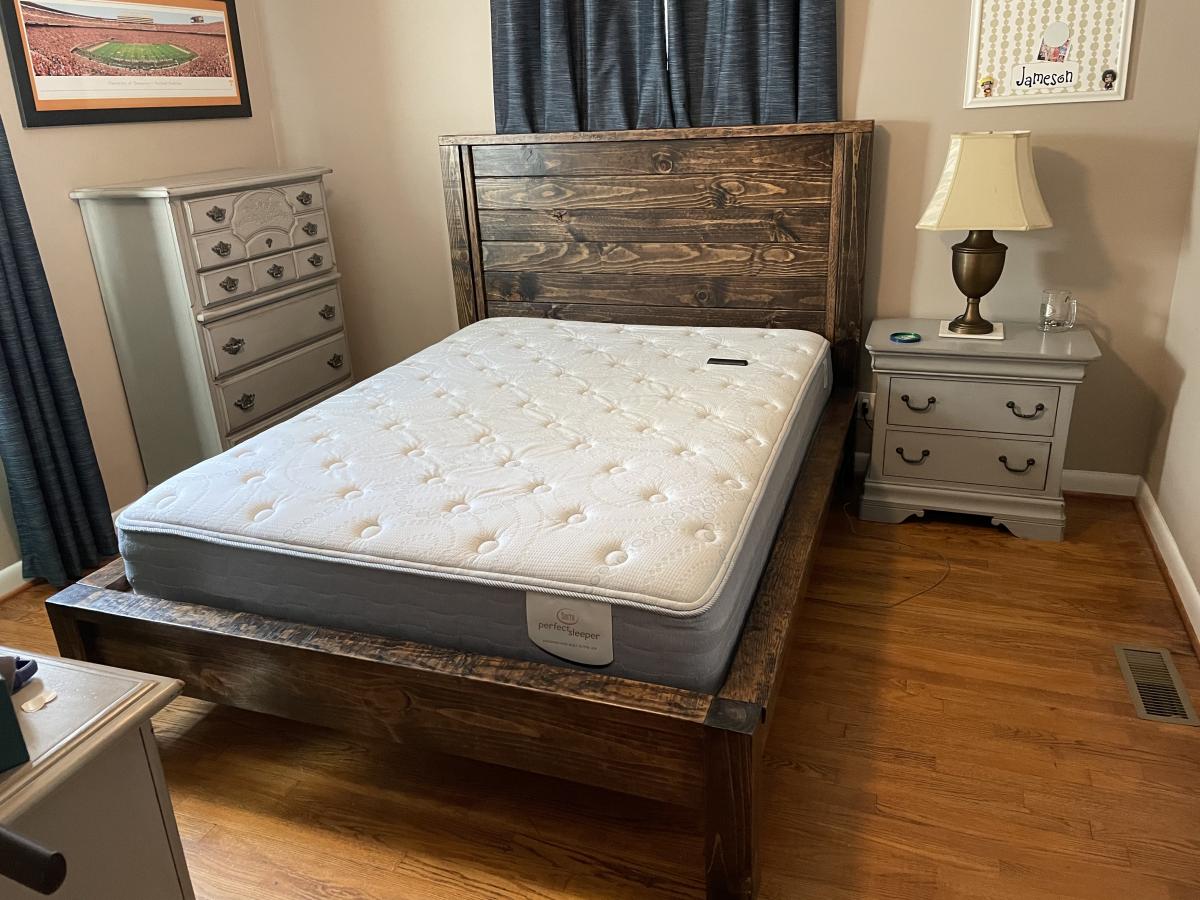
Farmhouse bed with storage sized up to a King

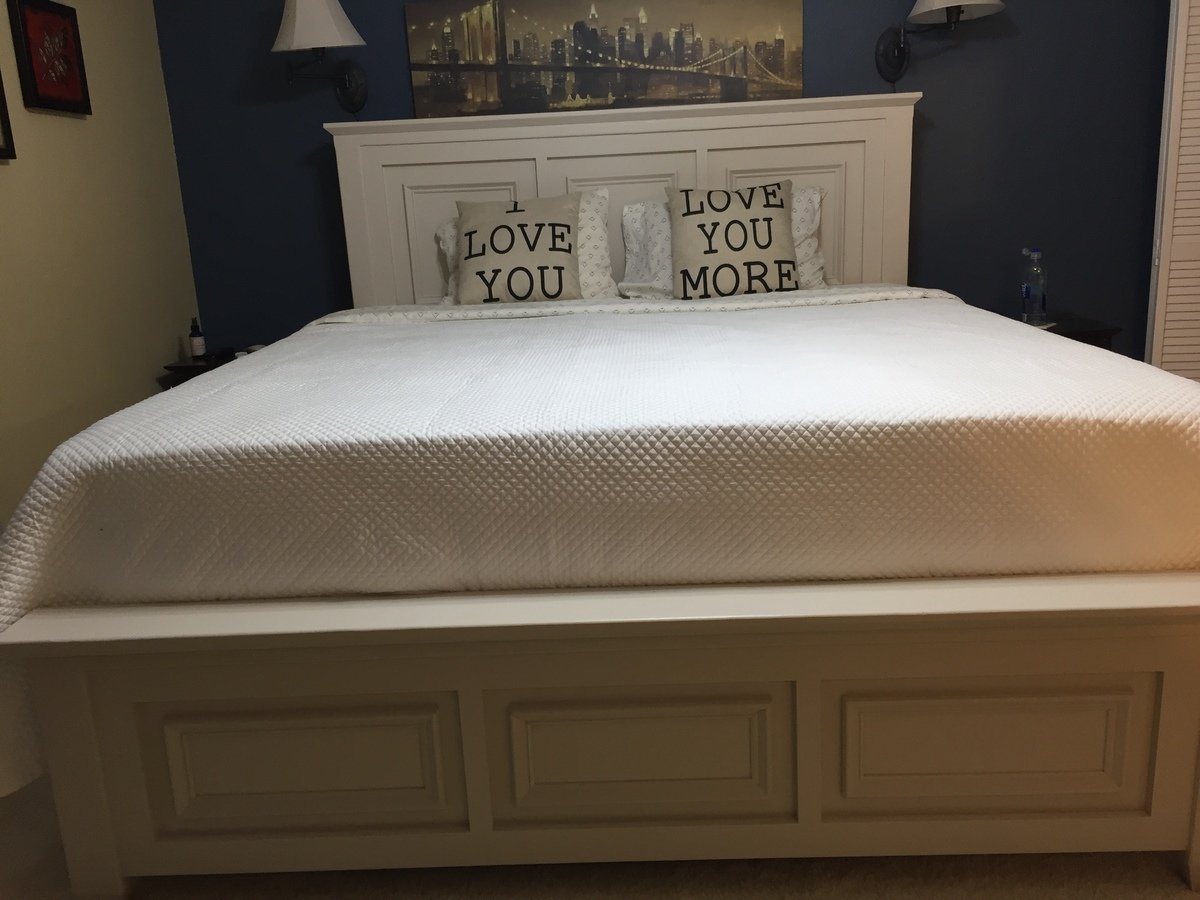

This was done almost true to plans. Instead of 2x6s, I used 2x8s, I raised the footboard and side rails up 2 inches, and bought bed rail brackets to make for easy disassembly when it needs to be moved. I did add a 1x2 strip on each side of head board to cover where the T&G meets the 4x4 (strictly personal preference). Solid and sturdy. My son is happy to get a more masculine bed. Just got it all in his room today.
Sun, 10/17/2021 - 18:21
That is very beautiful and masculine at the same time! Way to go, thanks for sharing:)

This is actually my second build. I made my dad some Hyde end tables for his deck at the cabin and they went up in the fall before I could get pictures.
For this, I sold an Ikea kids table to pay for it. Most of the wood I had from my dad's basement and went ahead and bought an MDF table top for $8. I want to save up for the big kreg jig kit. I could have actually gotten two table tops out of one sheet if I had altered some dimensions. But build the base first before I bought the top.
Project itself wouldn't take too long if I had more clamps, and no kids! :) And next time I will be spraying!!!

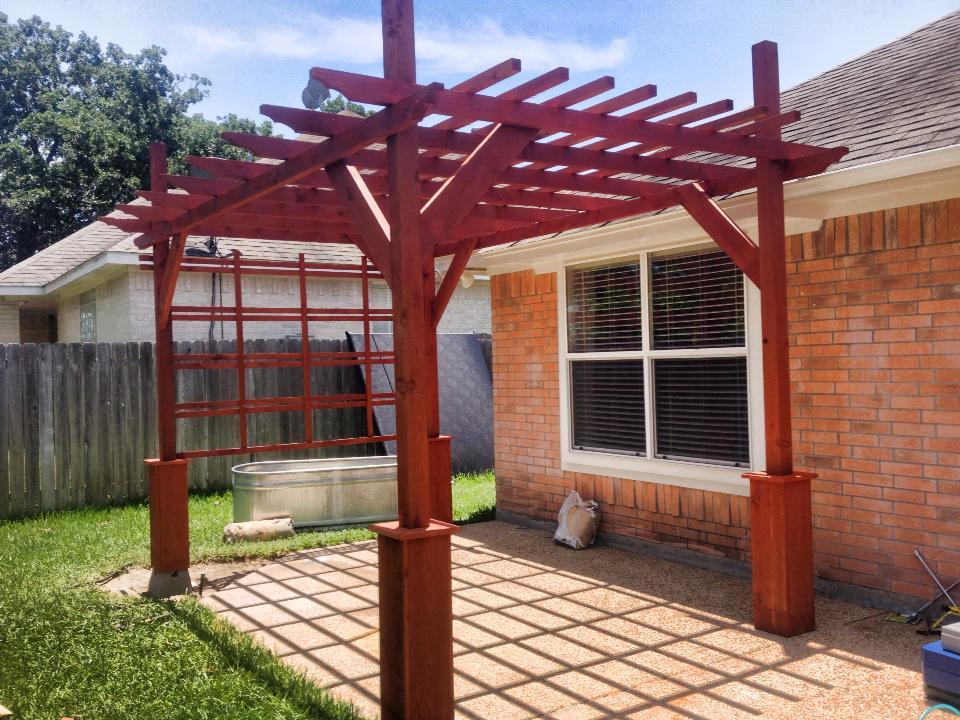
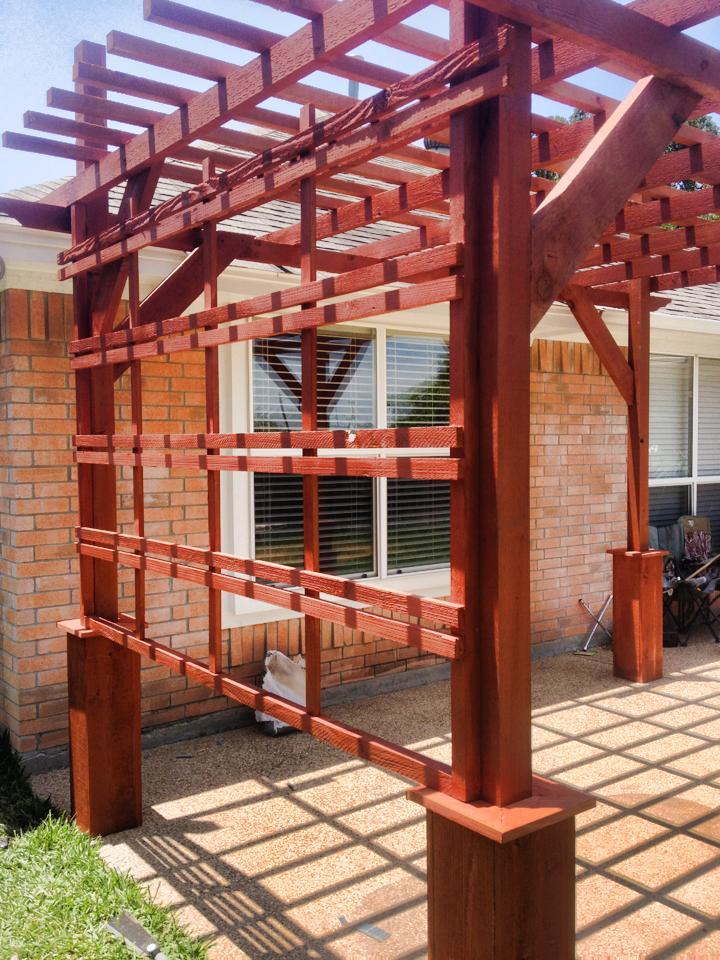
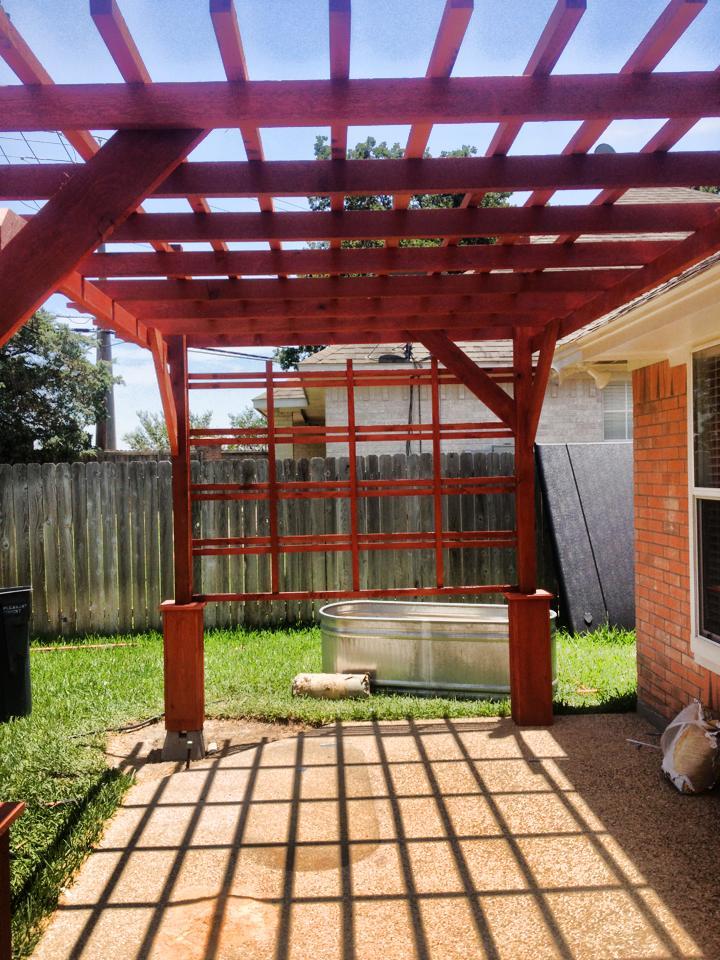
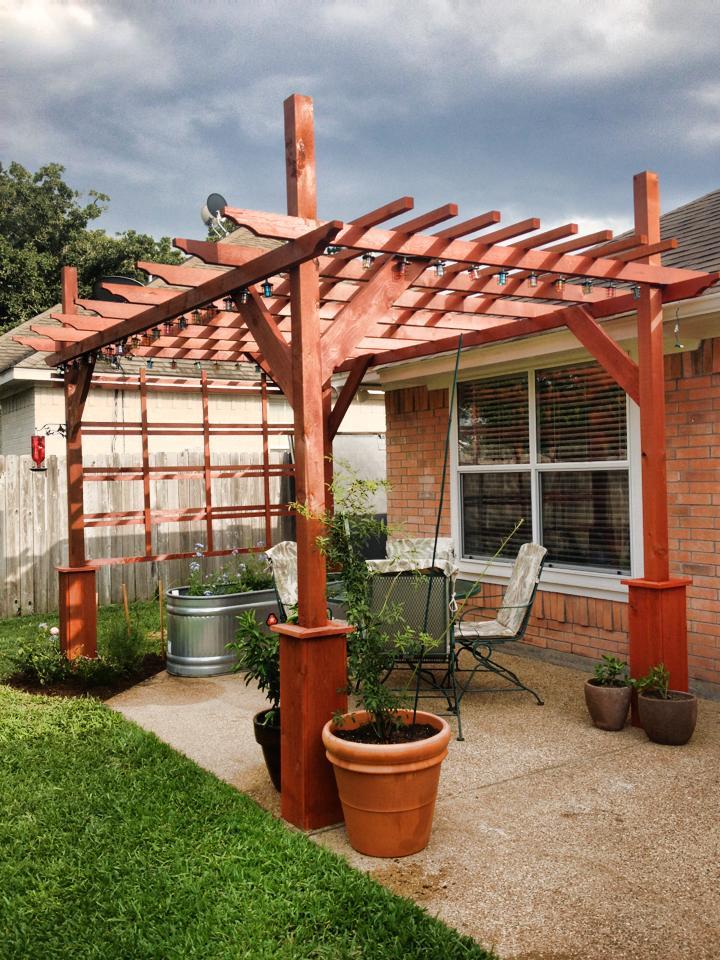
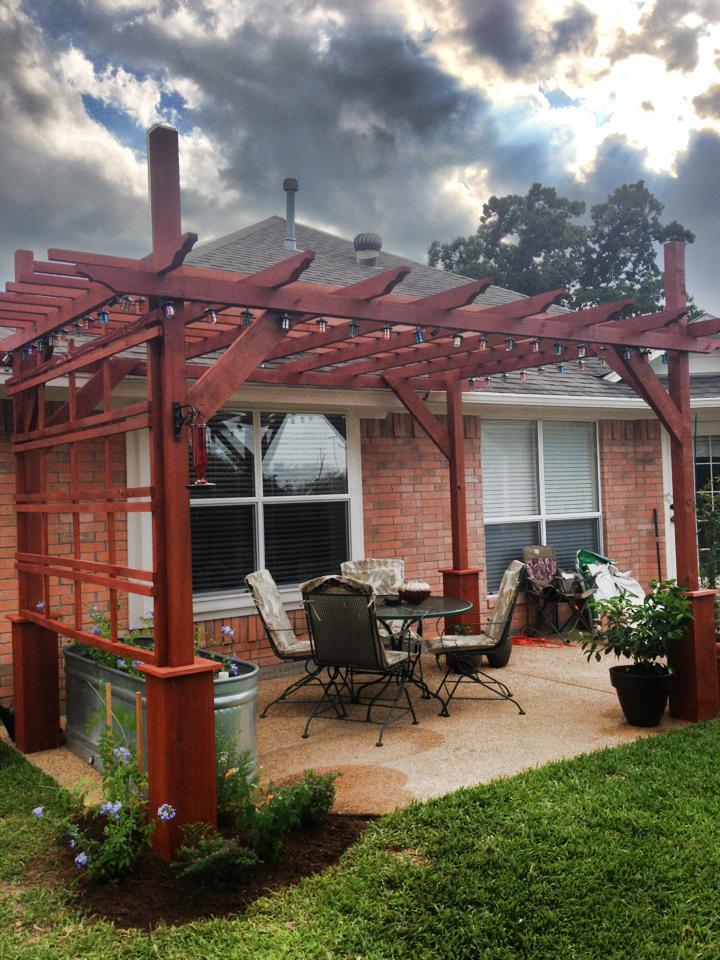
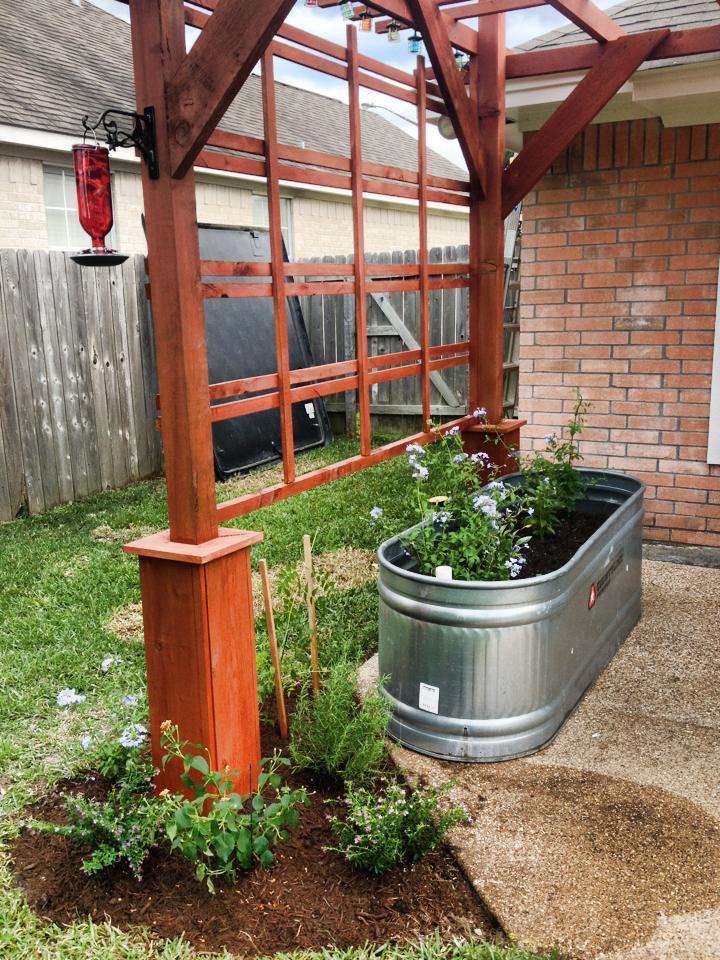
Built this great pergola from Anna's Weatherly Pergola Plan. I am very pleased on how it turned out. This was a fairly simple build and I added a few of my own touches to it. I used Red Cedar as my wood of choice. I also added a great Olympic Stain + Sealer to help keep it looking brandnew. I hope y'all enjoy the pictures.

Sun, 04/13/2014 - 11:17
I just wanted to say that 4th picture is so cool looking. Love the dark clouds and blue sky. Very nice pergola, by the way.
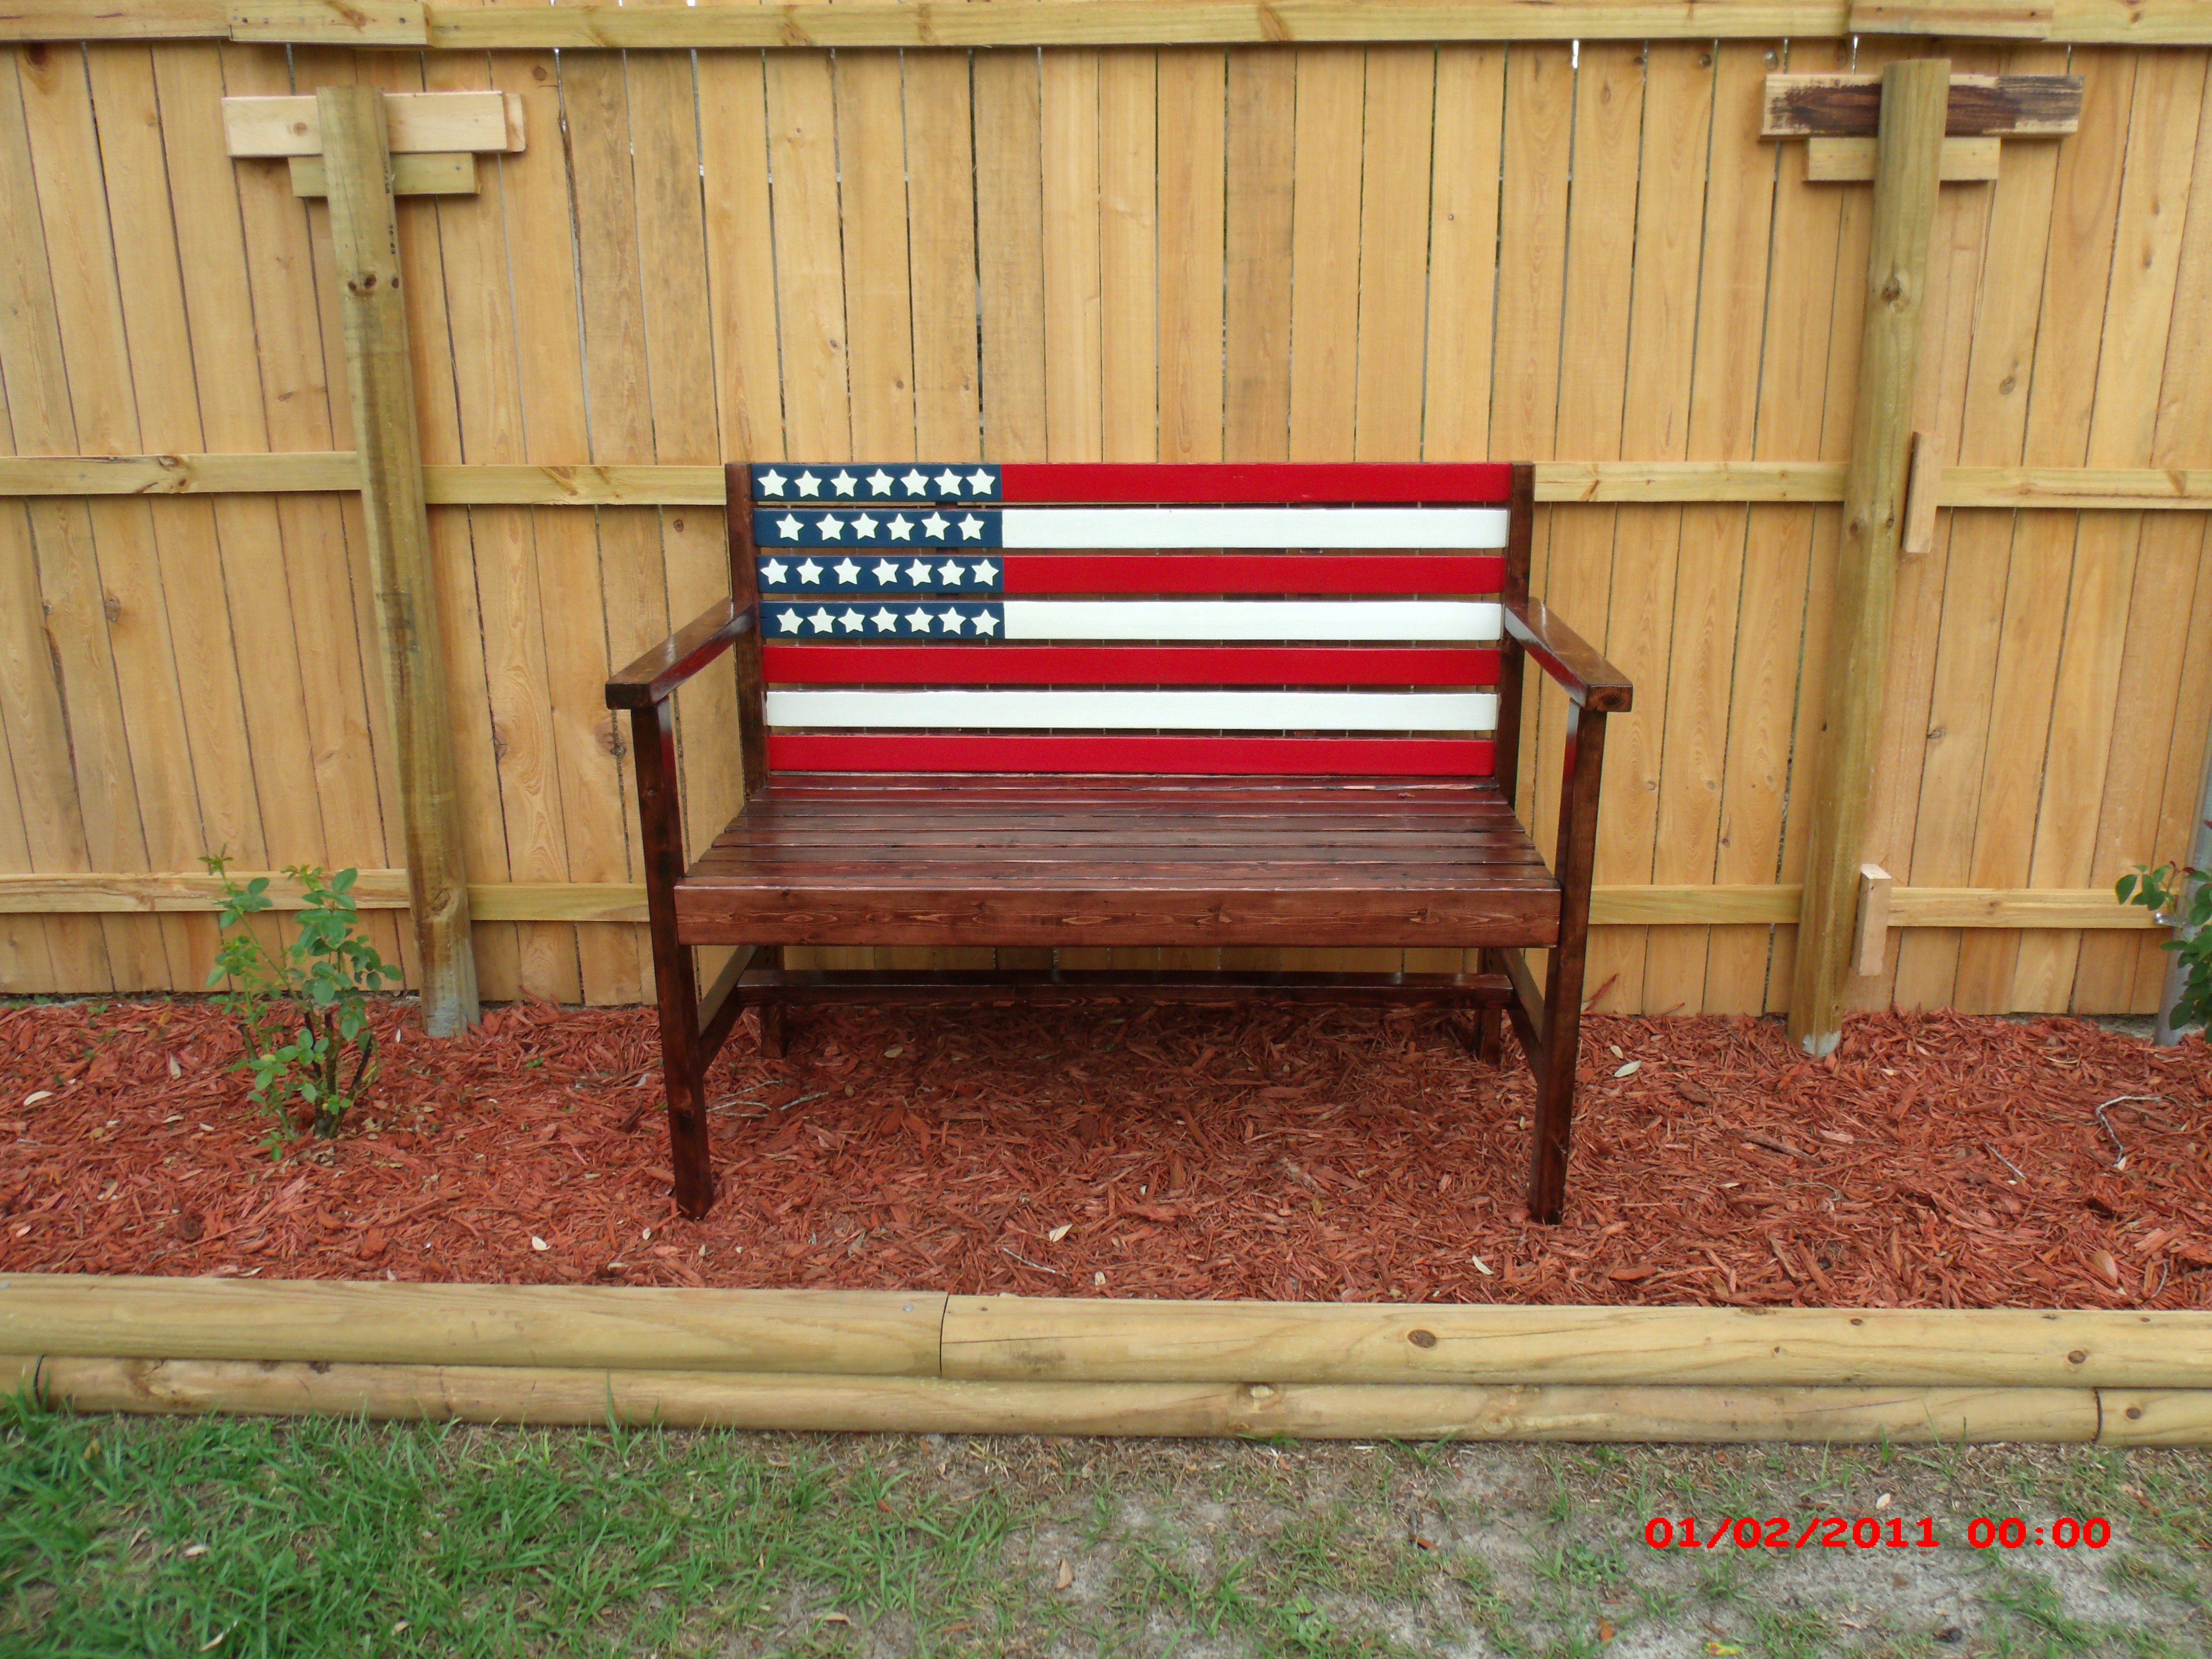
wife and I call this our memory garden bench. our son passed away last year he was a SFC in the us army. we sit upon to remember all the good times.
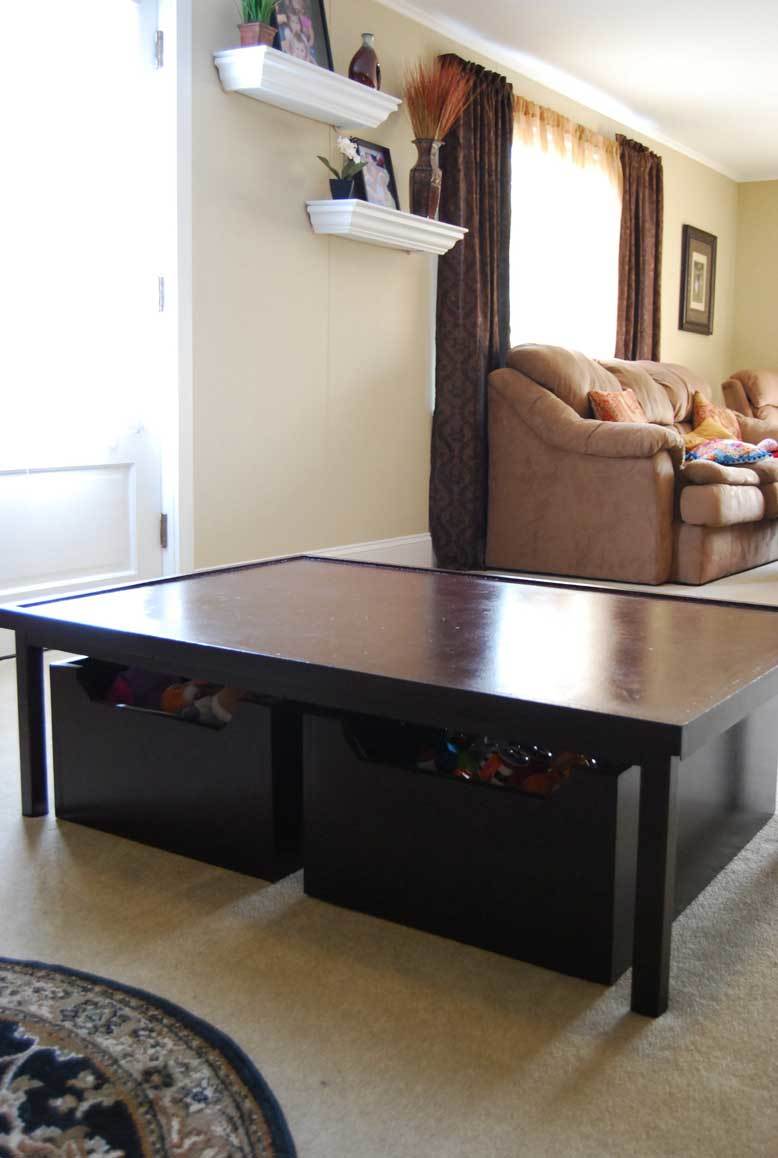
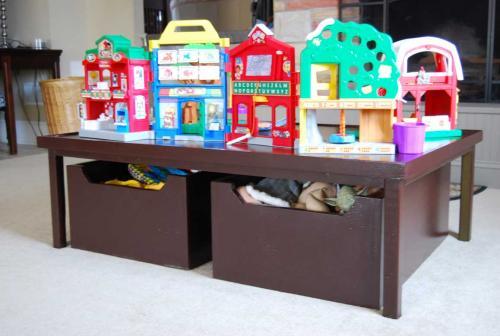
I made Ana's famous 20 sec tidy up coffee table. More details and photos on my blog if interested. Cheers Ian
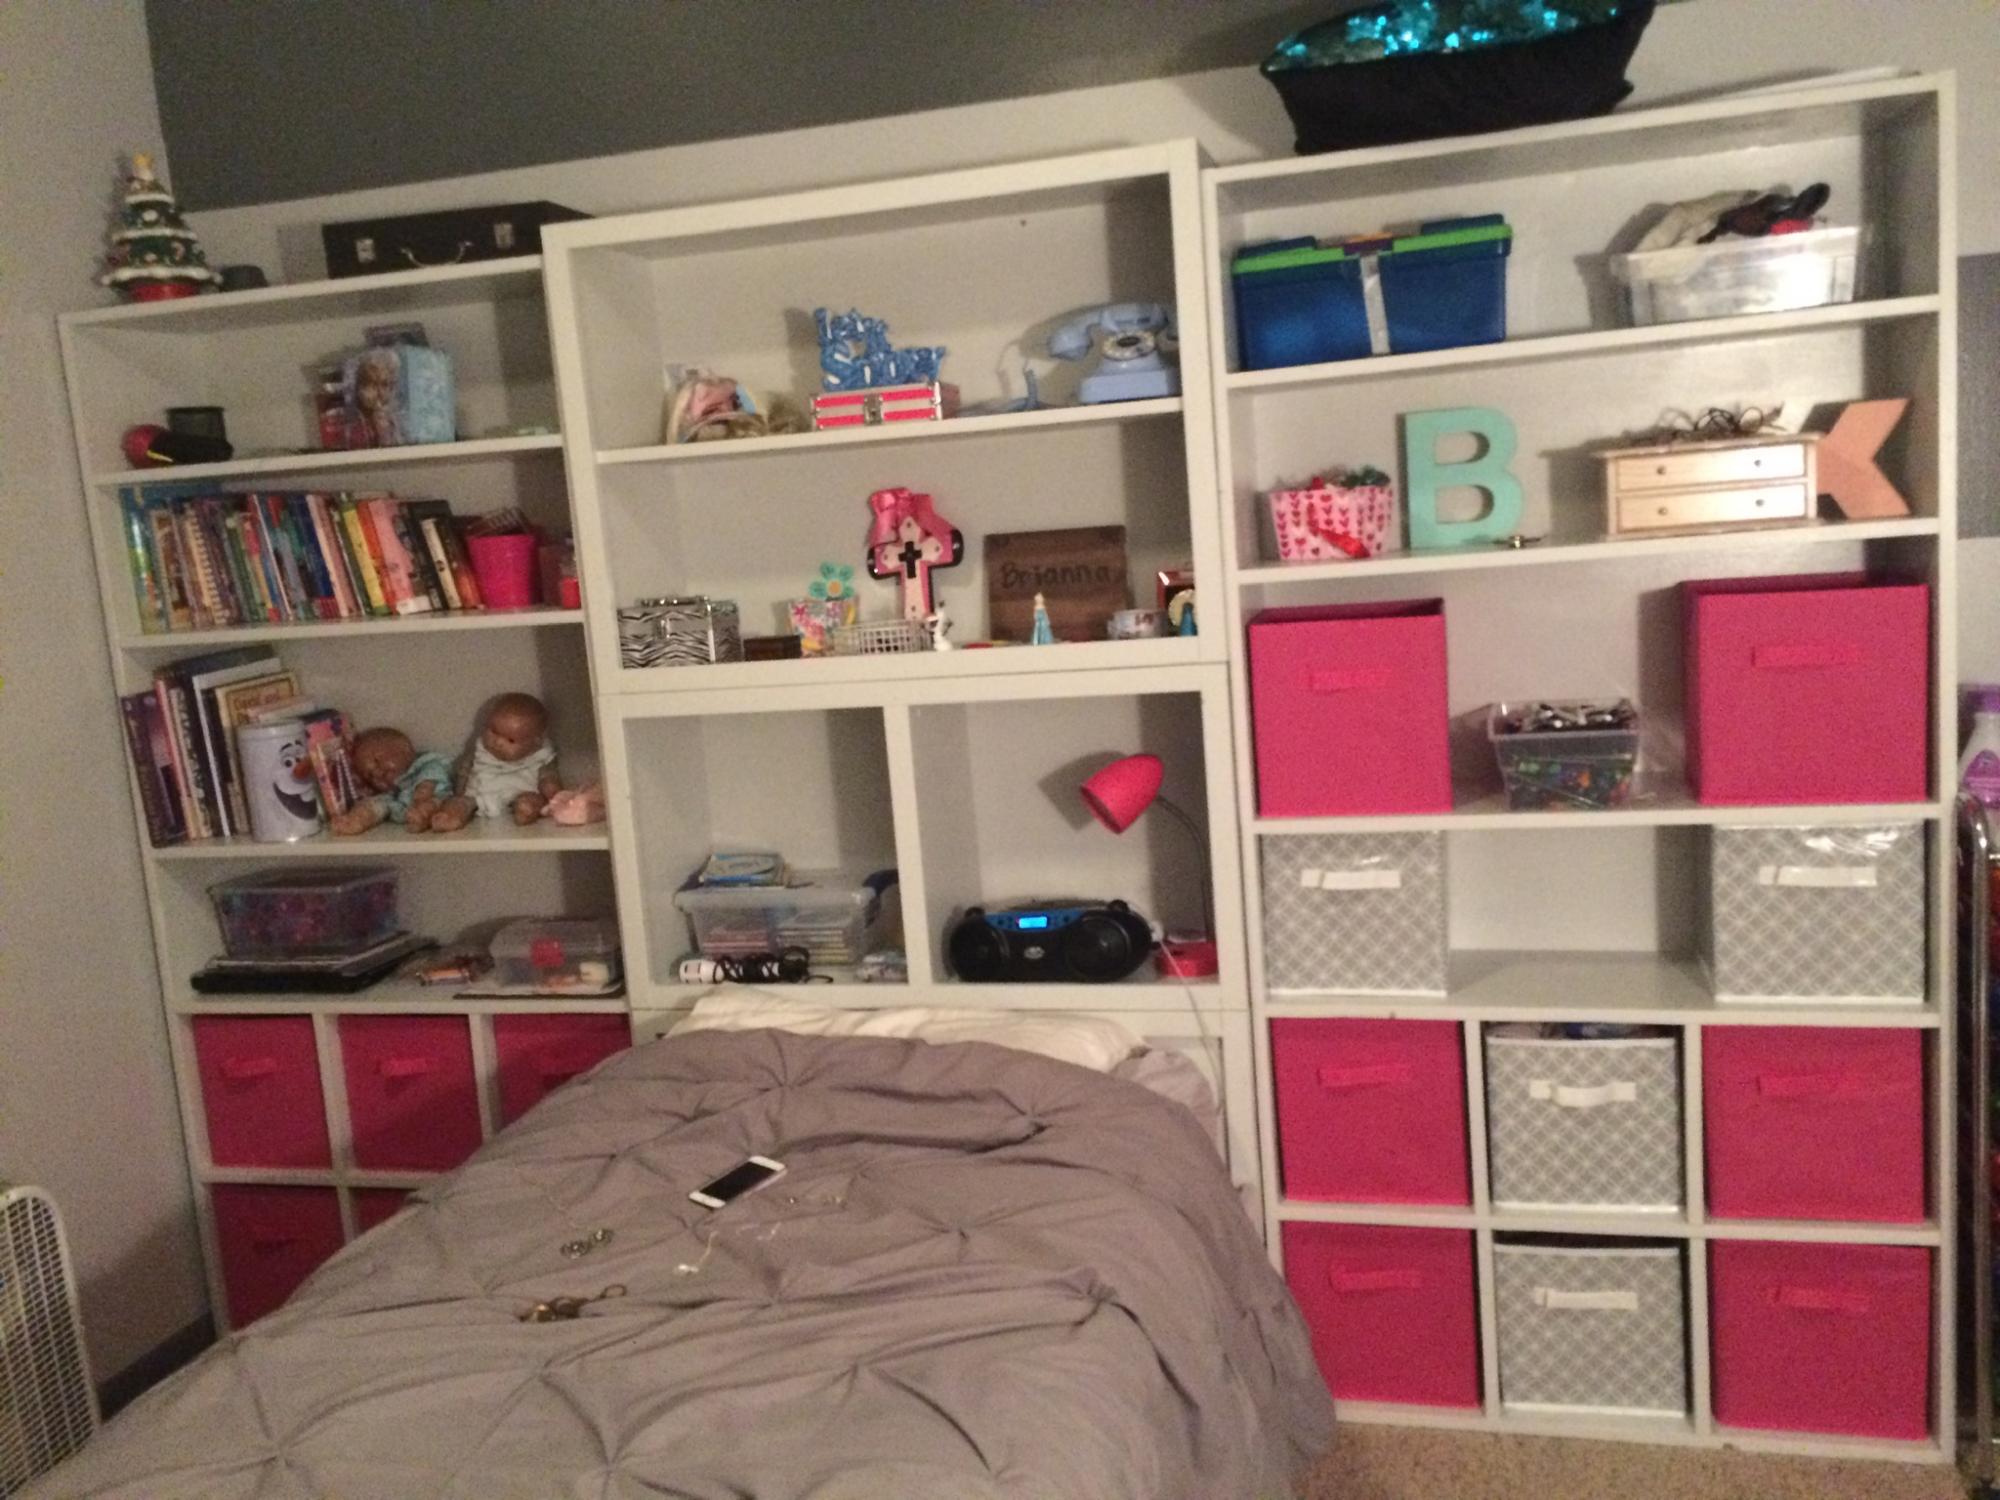
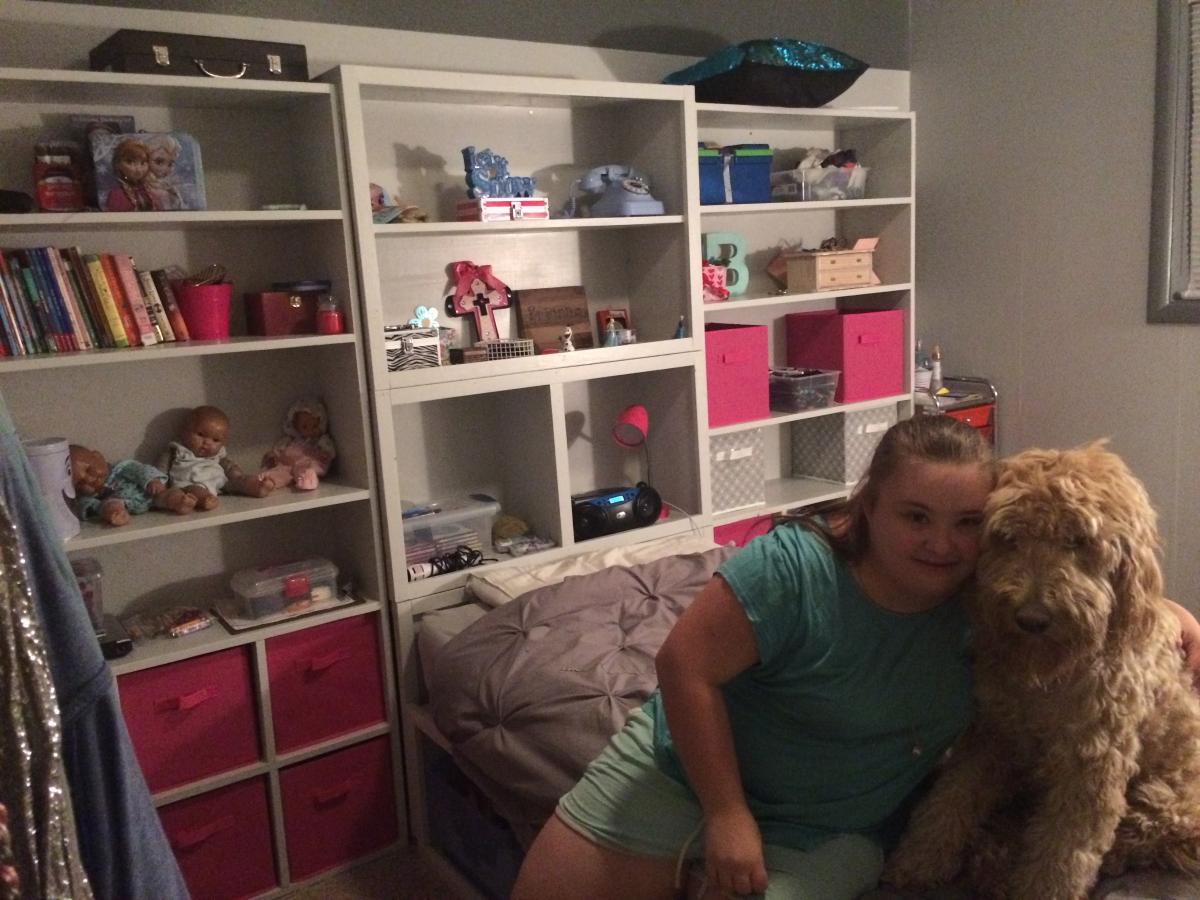
I built this for my daughter, she has a somewhat small room and this have her so much storage. It was so fun to make it too. We’ve never been able to afford nice furniture and I’d never made anything from wood before but with Ana White’s plans I was able to do it. I love wood working!! Thank you Ana!


Comments
Ana White Admin
Tue, 12/14/2021 - 14:48
Beginner?! WOW
WOW, that is just gorgeous, way to go!