Community Brag Posts

Nathan's Montreal Canadians bed

Submitted by Corinne67 on Fri, 01/06/2012 - 16:04

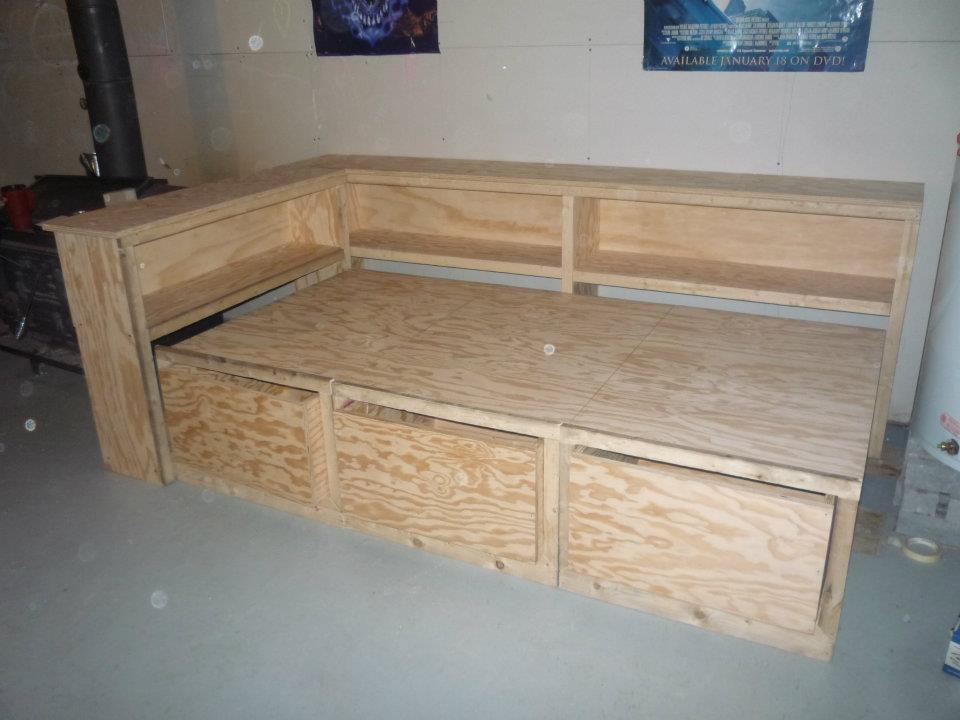
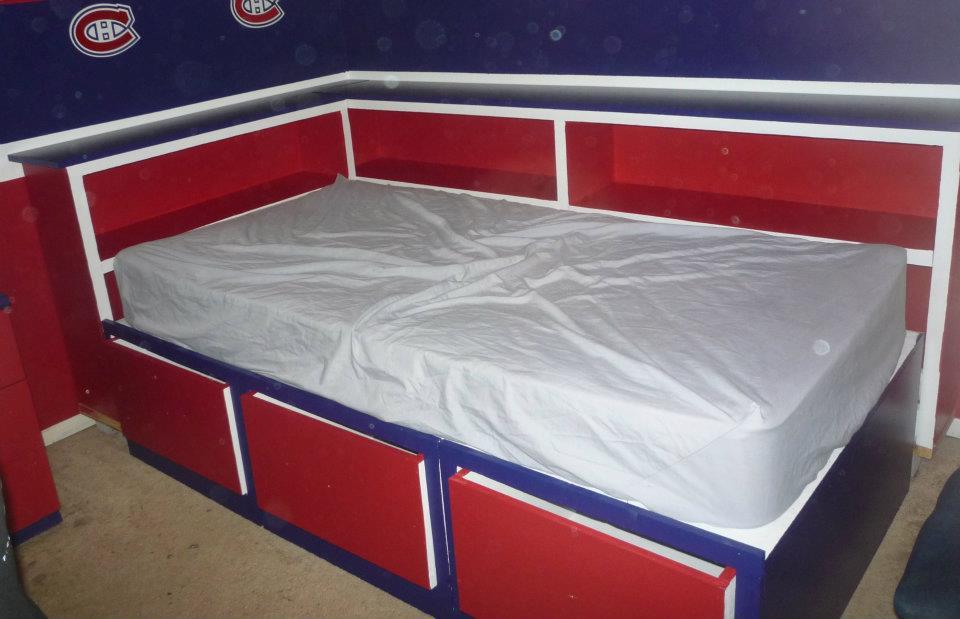
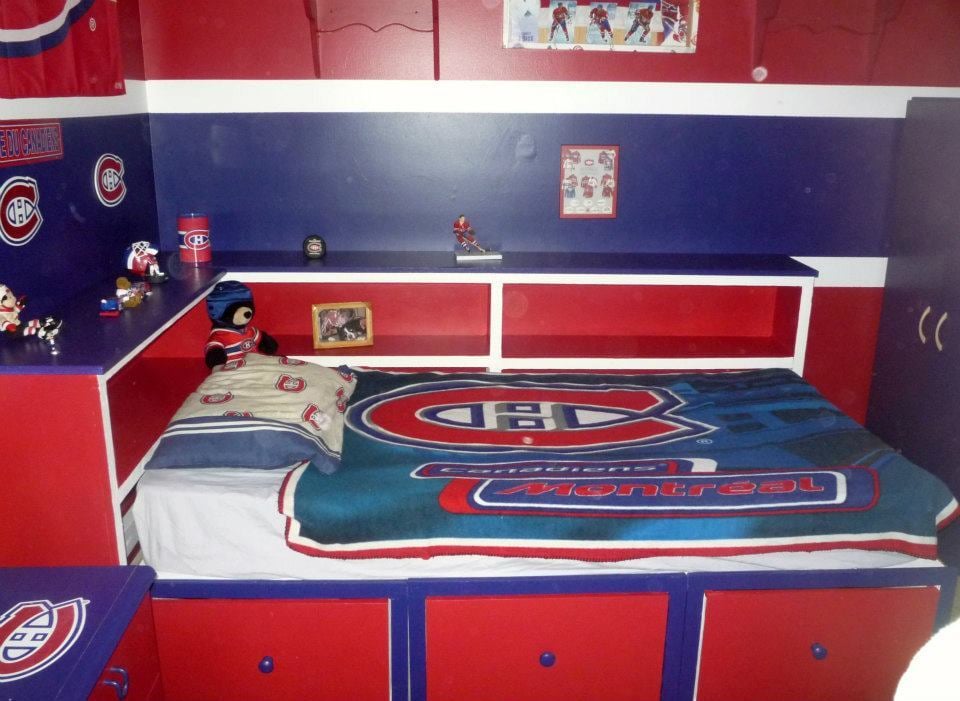
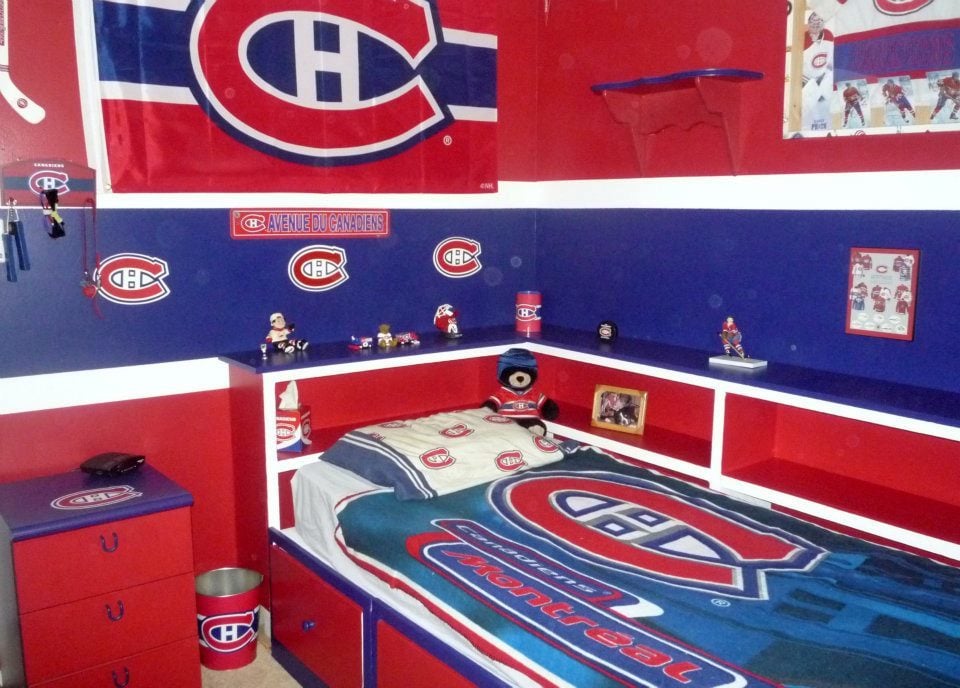
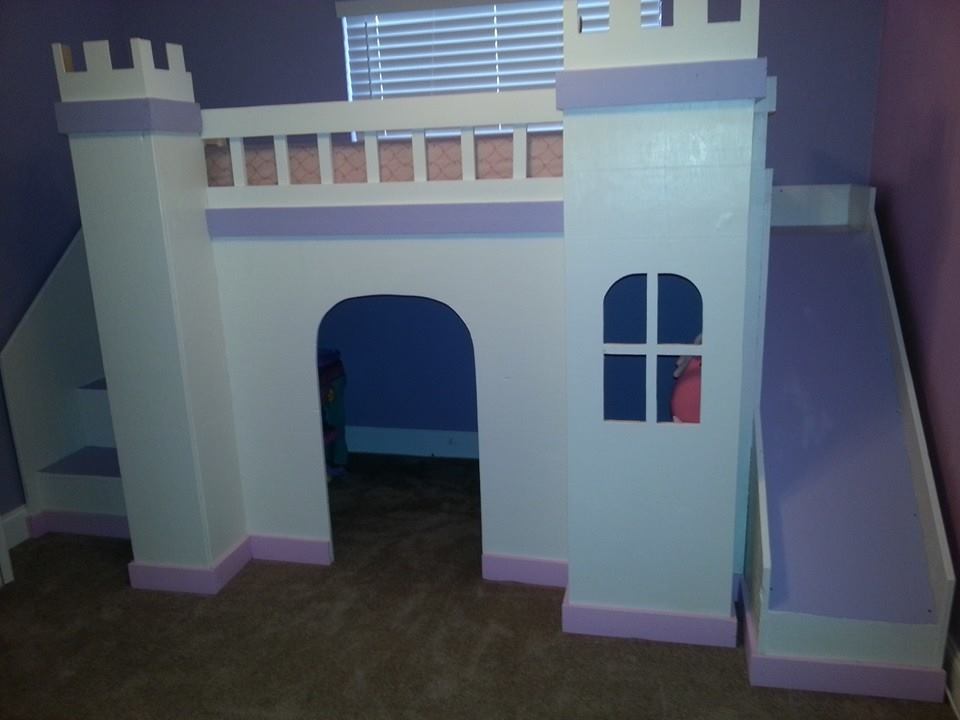
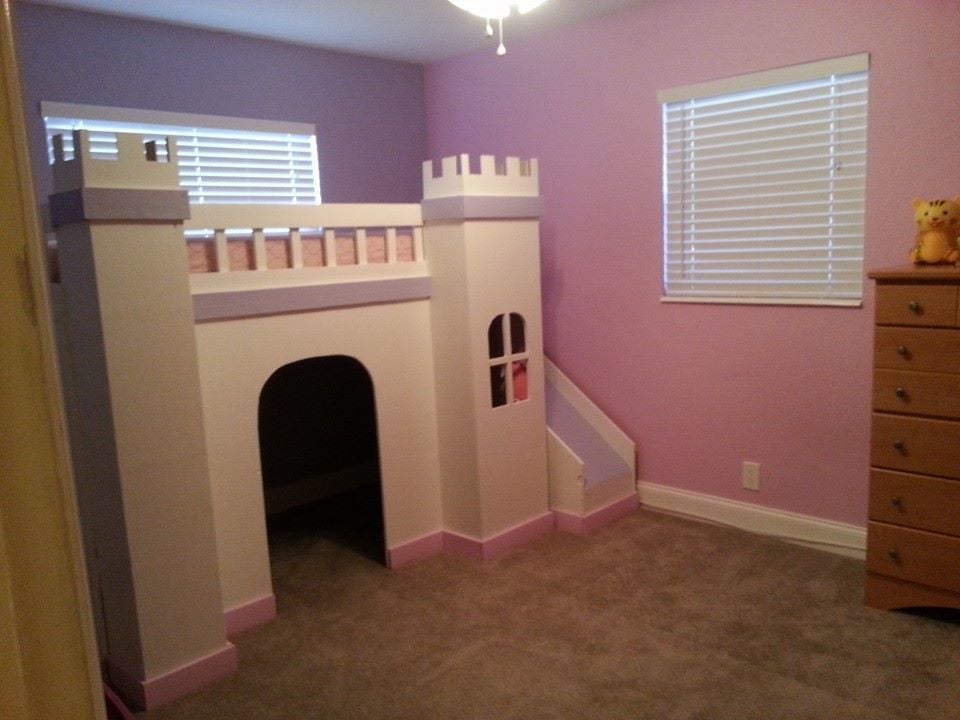
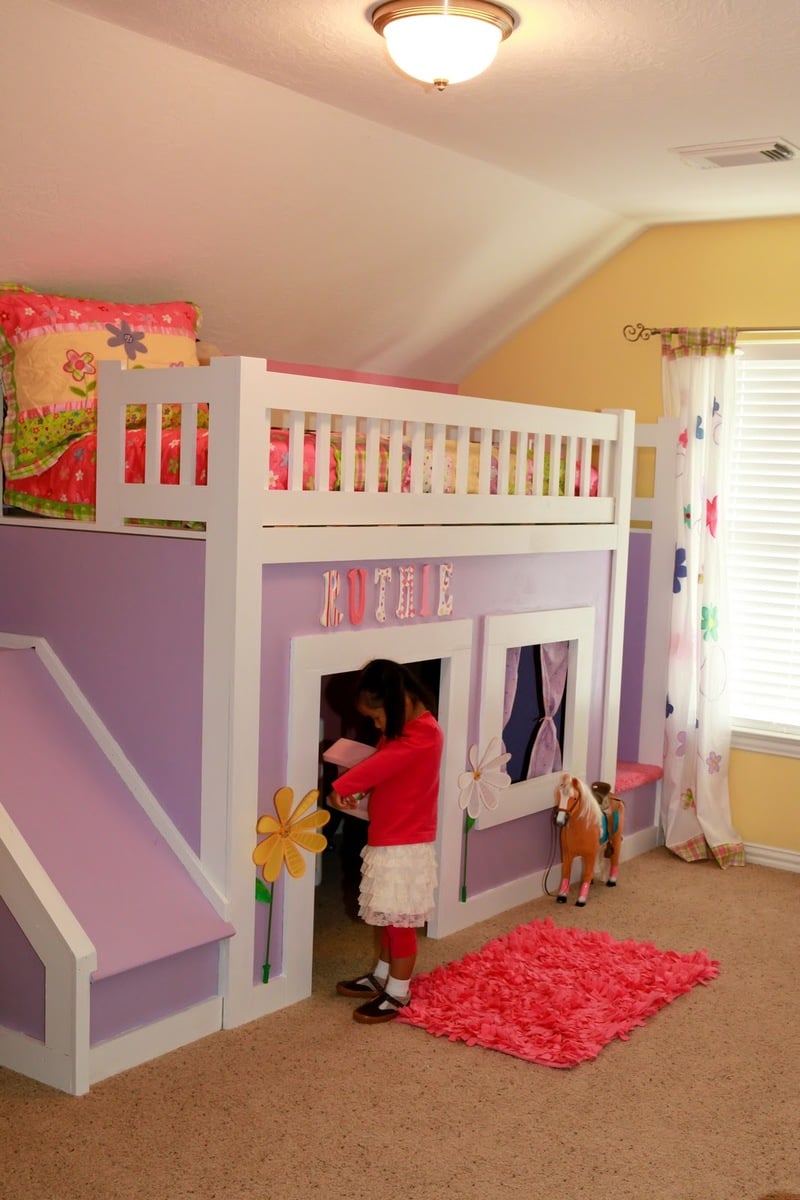
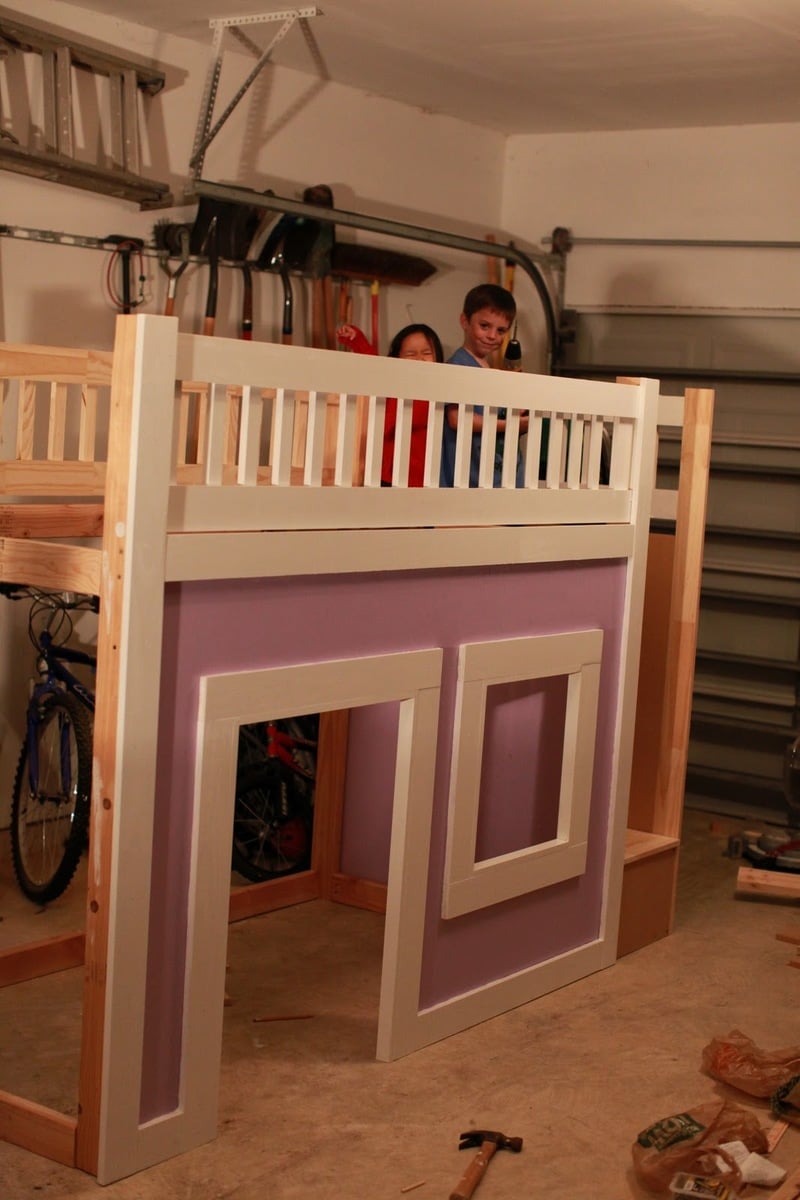
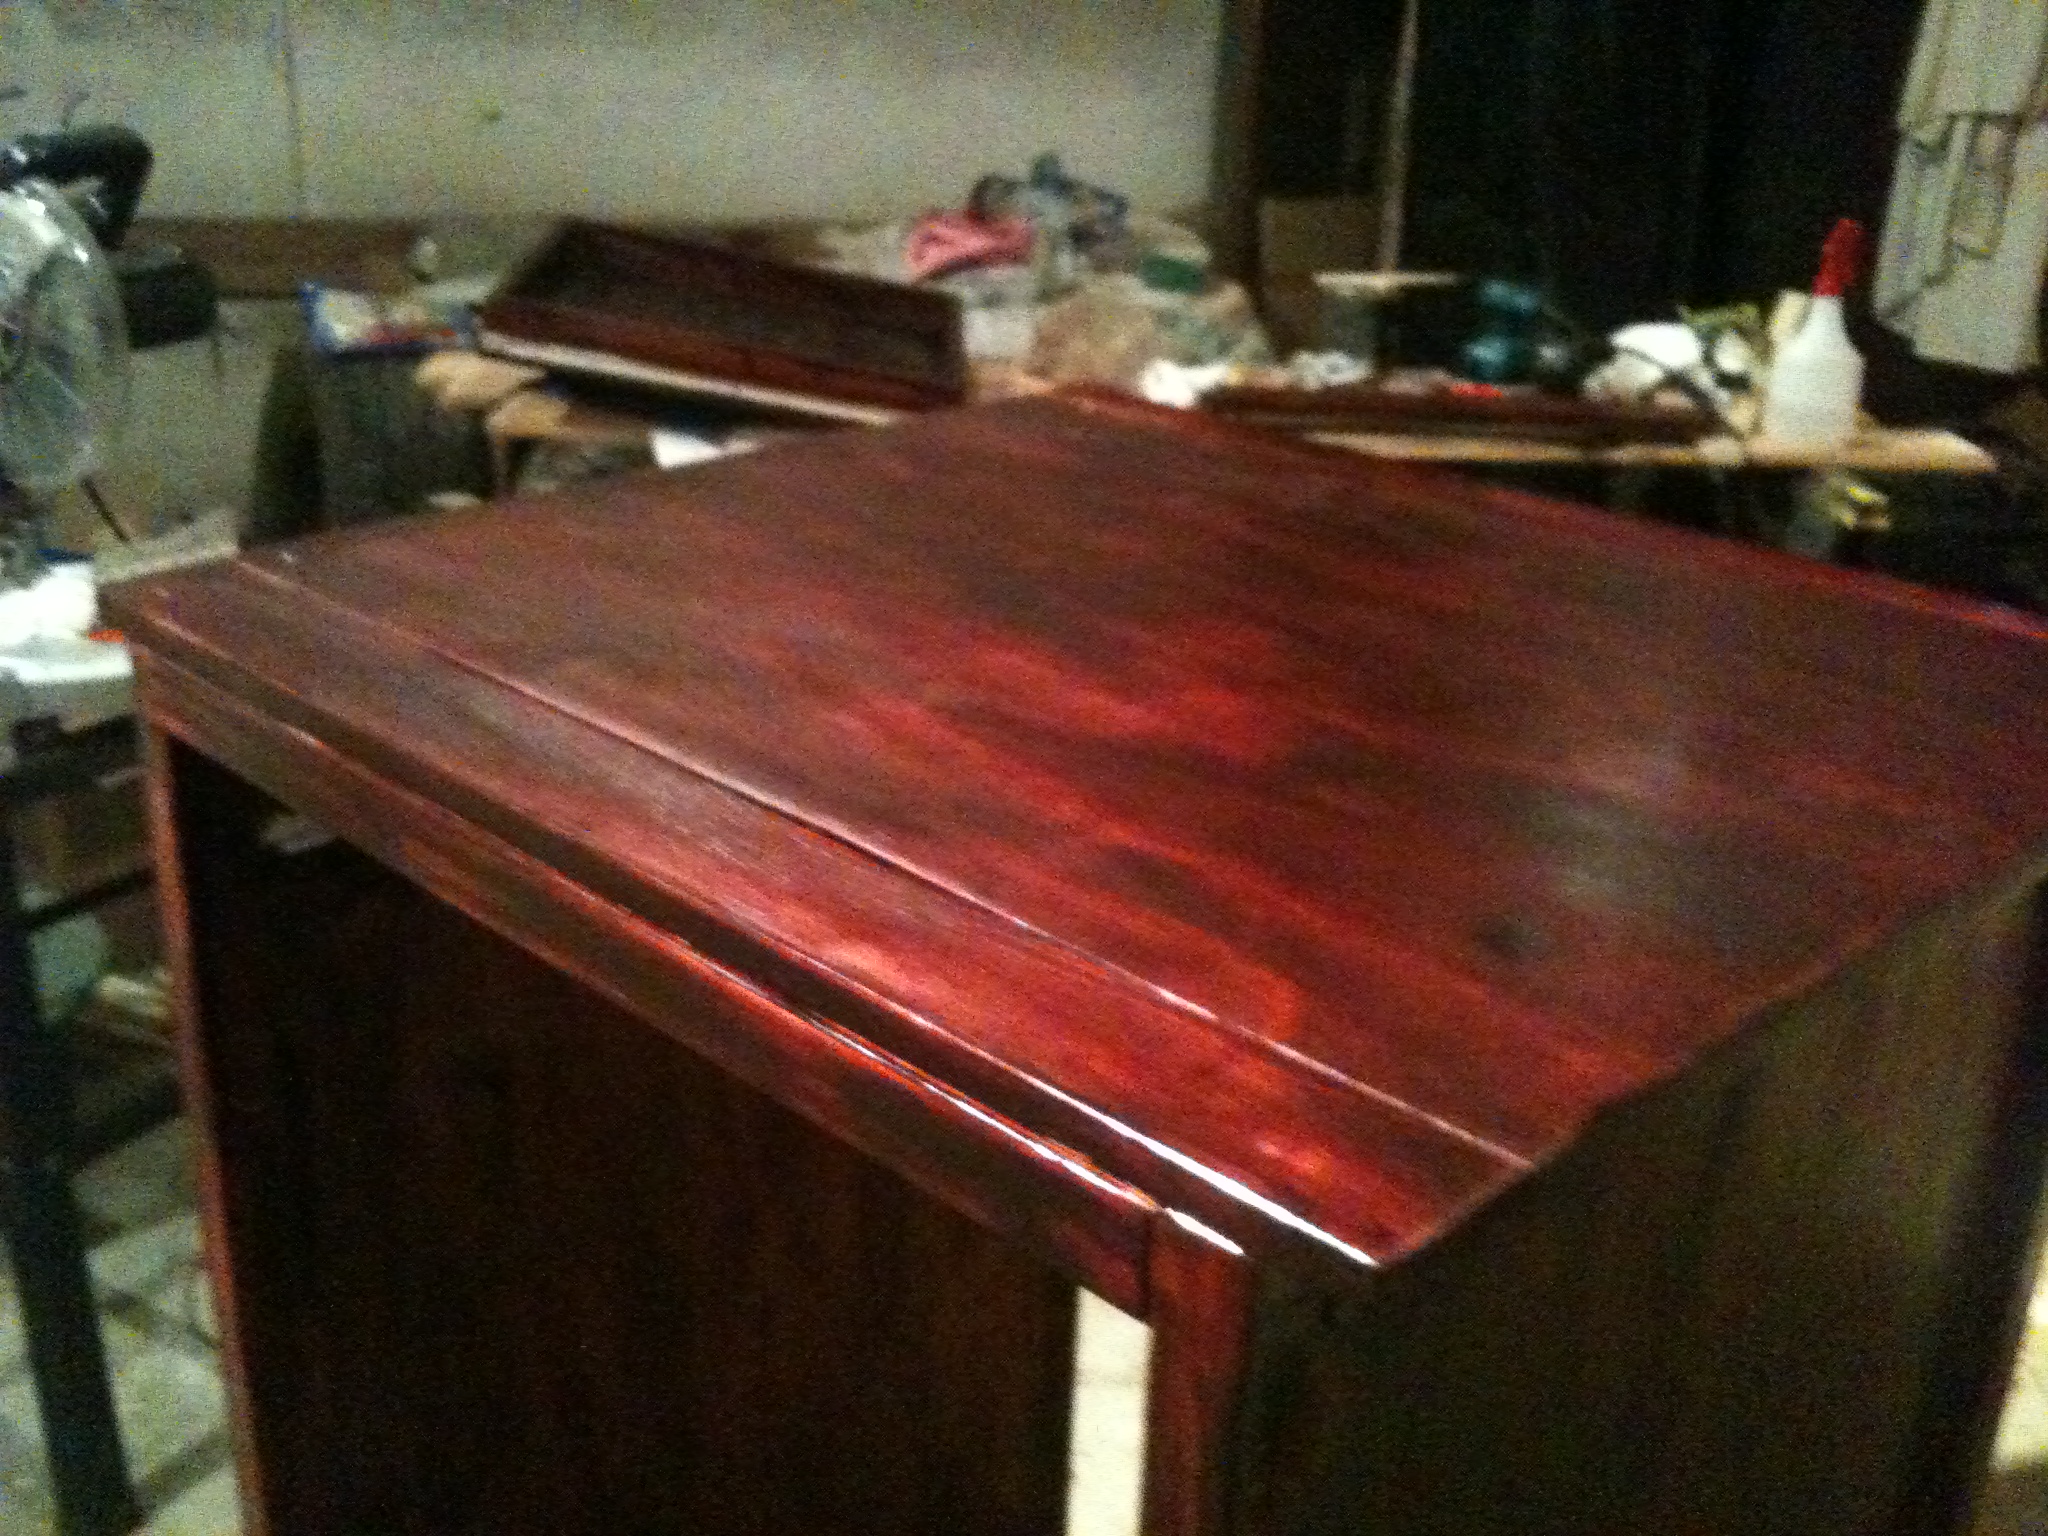
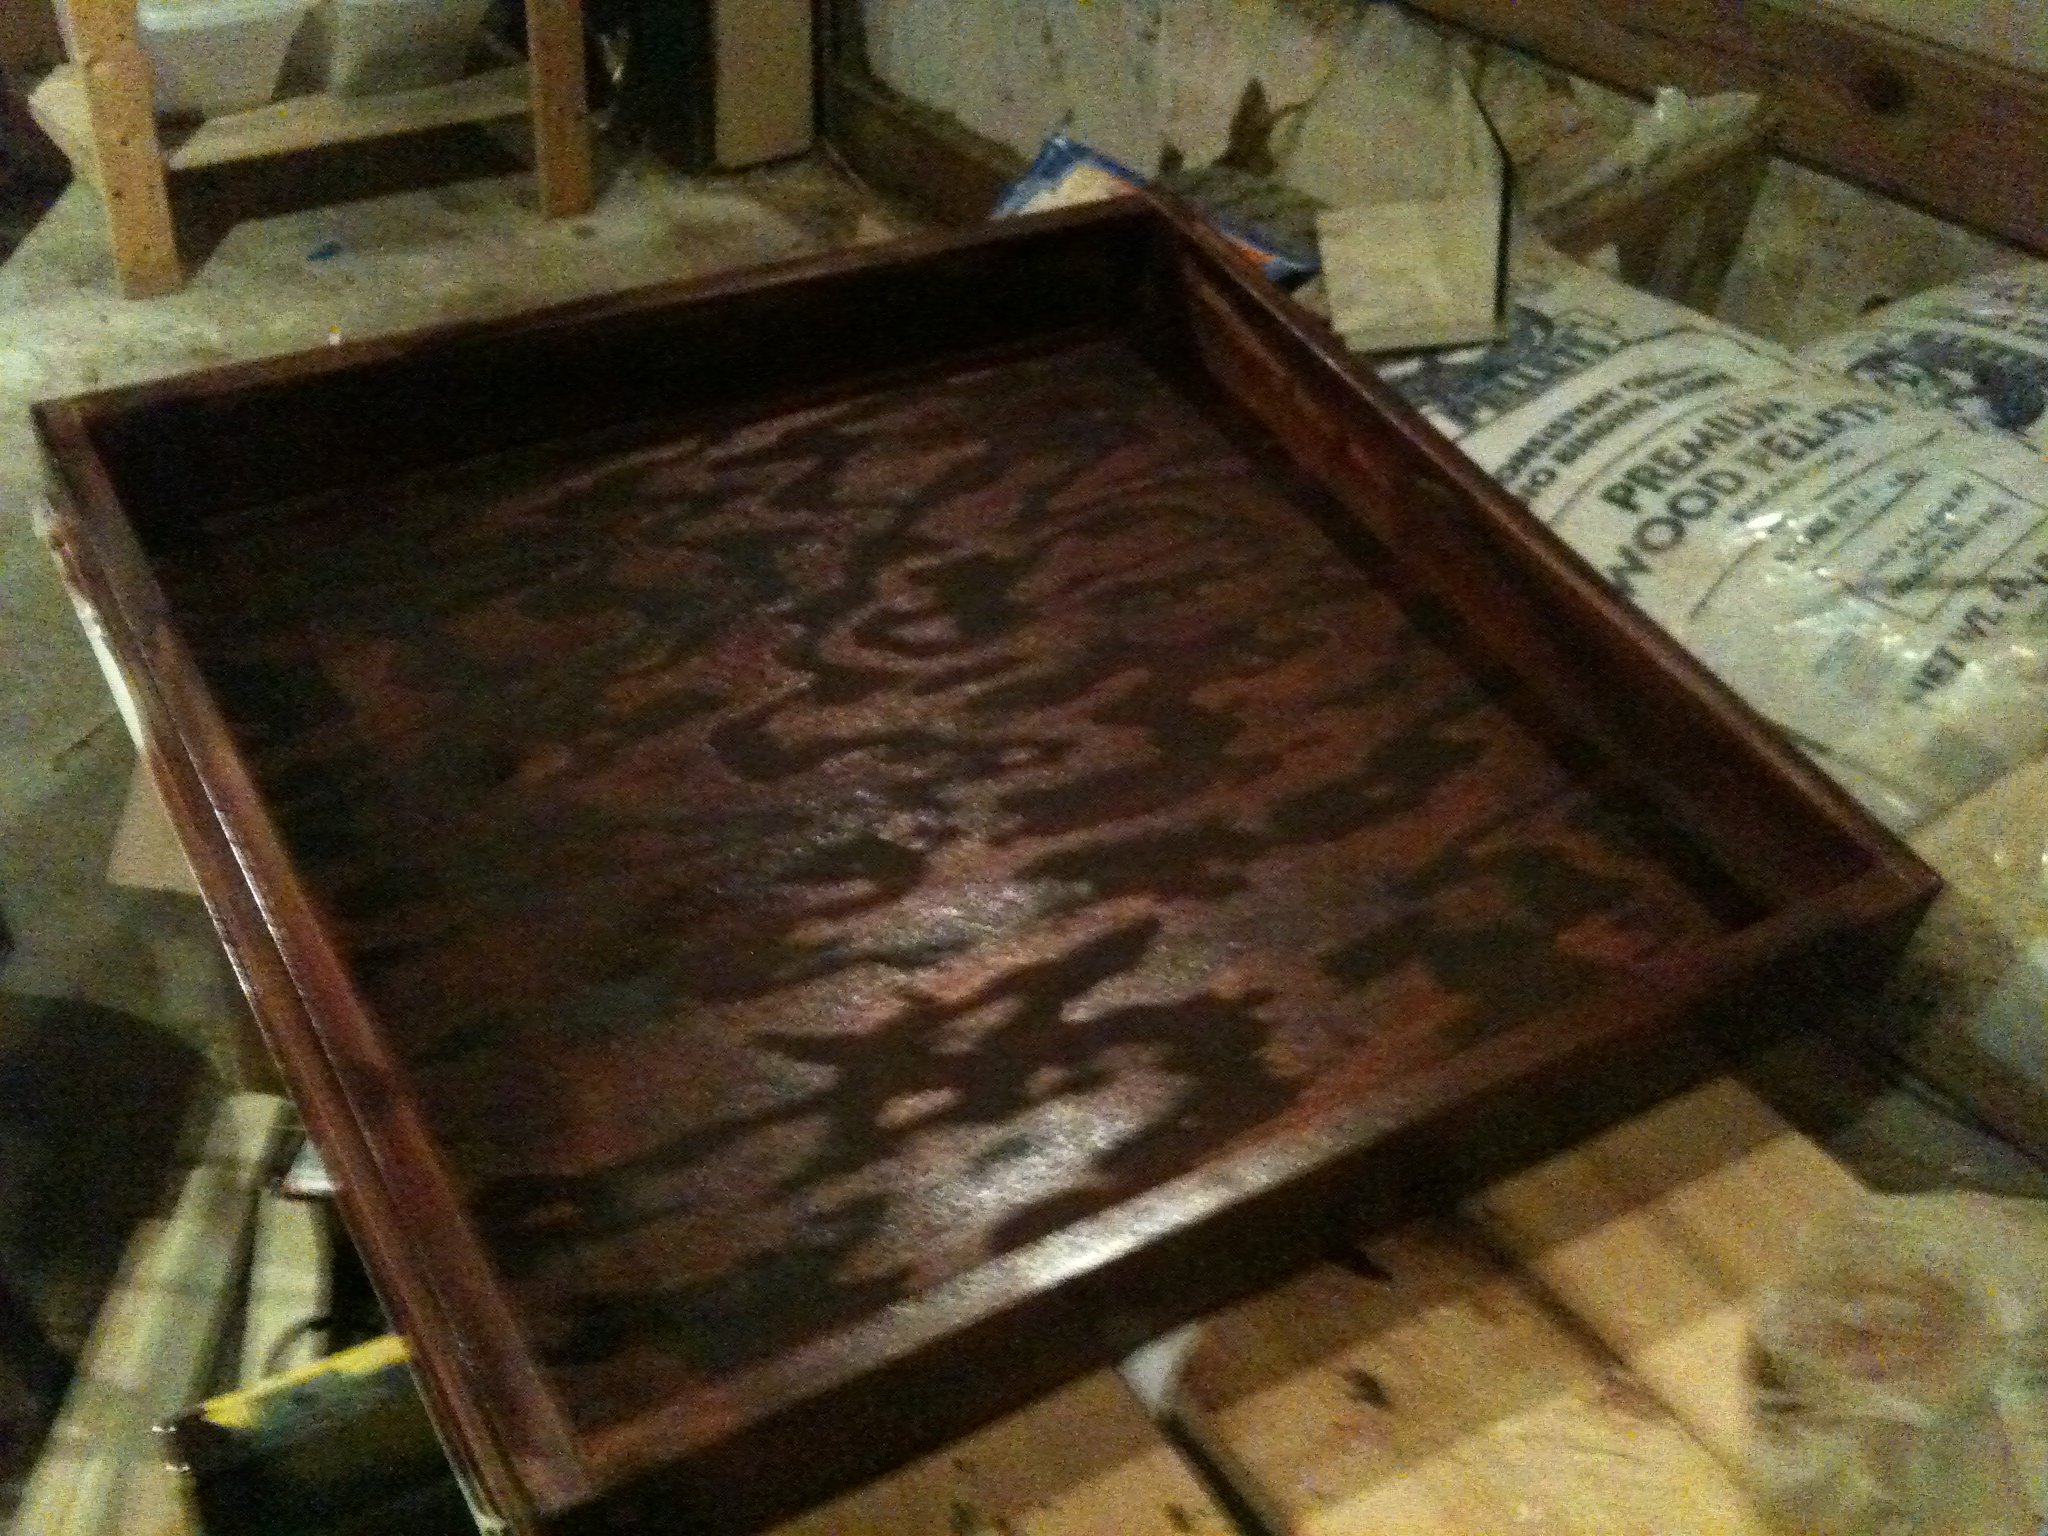
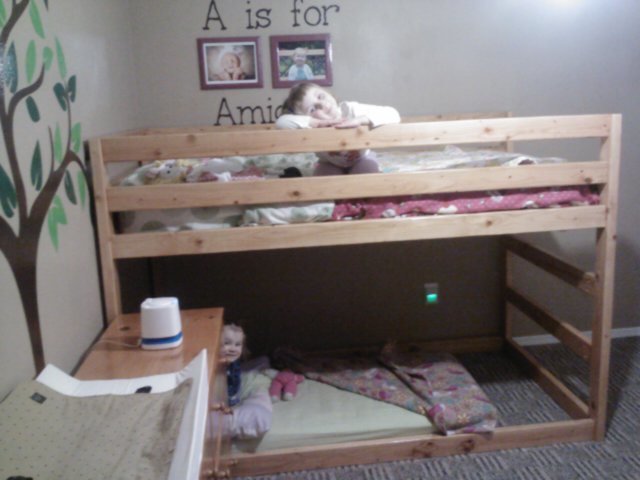
Our nephew Nathan really wanted a captain's bed like his friend. We built him one even better for Christmas this year. I couldn't find one plan with everything we wanted to I used the plans for the Storage Daybed for the base, and used the plans for the Cozy Corner twin bed collection wide bookcase unit. We combined both the headboard and sideboard into one unit (by extending the top to the short end) giving him an L shaped headboard for all his hockey stuff :) The only thing we messed up on was the height of the bookcase. He wanted it higher so it's on blocks for now to raise it. My sister did all the final painting to match his room and it looks AWESOME!!!

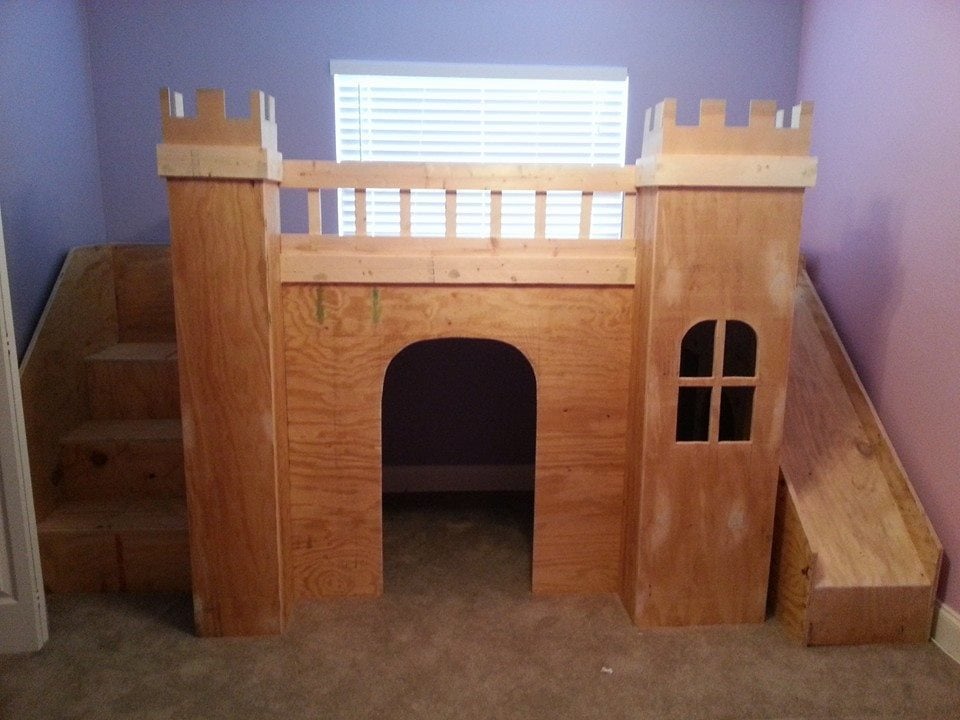
Steve had everything cut at work and we put it together in one 12 hour day! Nathan LOVES his new bed. Thank you Ana!

Estimated Cost
about $125
Estimated Time Investment
Weekend Project (10-20 Hours)
Finish Used
Nathan is a HUGE Montreal Canadian's fan. He applied 2 coats of wood primer, then his mom, my sister did the finishing paint with the official Montreal Canadians colours to match his room. A couple of little touch ups to be done but it looks great.
Recommended Skill Level
Beginner

Comments

Lou-Anne (not verified)

Fri, 01/06/2012 - 21:24

The colors are the official Montreal Canadiens hockey team's colors, My son is a HUGE fan! Nathan LOVES his bed. and it is very solid.

Guest (not verified)

Fri, 01/06/2012 - 20:29

Ummm... The bookcases were too short because you didn't take the mattress height into account. Looks really good though.

Princess Castle Loft Bed

We used the plans from this site to build this for our daughter. We did however make the bed part a bit more sturdy to ensure that no one would get hurt and to make sure it could support any weight. We added 4 2x4s across the bed like rafters and screwed the slats on top of them.

Estimated Cost
$350
Estimated Time Investment
Week Long Project (20 Hours or More)
Finish Used
Paint
Recommended Skill Level
Intermediate

Guest/All Purpose Room Closet Makeover

Submitted by JessMN on Wed, 02/10/2016 - 13:31

We are slowly remodeling our 1972 townhouse and it was time to do the guest bedroom closet so that we could get a bit more storage in the house. I contemplated getting a pre-made organizer but decided to make my own after perusing Ana's site. Its my first "from scratch" furiture-type of project and I chose the cheapest quality plywood, which was a mistake and cost me extra hours in trying to "pretty" up the wood. but overall I'm happy with how it turned out!

Built from Plan(s)
Estimated Cost
$30
Estimated Time Investment
Weekend Project (10-20 Hours)
Finish Used
enamel paint
Recommended Skill Level
Beginner

Potting bench

Submitted by Anonymous (not verified) on Sat, 09/21/2019 - 08:52

My good friend asked me to build her a potting bench for her garden wedding reception. She shouted me a photo of one from the internet. I used your plan and made a couple modifications. This is the color she requested and I used Cabot solid stain. I’m not a fan of solid stain and won’t use it again. She loved it.

Built from Plan(s)
Estimated Cost
$85
Estimated Time Investment
Weekend Project (10-20 Hours)
Finish Used
Cabot solid stain

Vanity Hutch

Submitted by billwentz on Thu, 05/18/2023 - 13:48

Bathroom had a huge mirror. Looked like it required 2 men and a small boy with proper tools to remove it. So a riff off the vanity plan covered 2/3 of the mirror and made for a much nicer look.

Comments

Princess Bed with Stairs and Slide

Made a princess bed for my little peanut. We adapted the idea of the stairs with storage and then added a slide. I hung LED Christmas lights underneath with a foot switch so she has light in her play area.

Estimated Cost
$350
Estimated Time Investment
Week Long Project (20 Hours or More)
Recommended Skill Level
Beginner

Comments

Guest (not verified)

Tue, 01/10/2012 - 19:20

Please tell me your roof pitch is 12:12 - we are building a house and I have already promised my children to build them both this kind of bed. But I'm fretting that I won't have enough head room - but seeing this picture gives me hope! Our roof pitch is going to be 12:12 and our house is 28 wide, witch will make the upstairs rooms about 20 foot wide I believe at the base of the wall....sorry for rambling....just excited to see your pic. Great job by the way:)

trenthenderson

Fri, 01/13/2012 - 07:17

I made another comment but forgot to hit reply. You can see it below this one. But the point at the ceiling-wall intersection you see in the picture is 72". Hope that helps on perspective.

Trent

trenthenderson

Wed, 01/11/2012 - 14:11

If our pitch isn't 12:12, it's dang close because it's steep on that side. The general layout can be found on Ana's site. I had to modify extensively on height and width to accommodate the room and the play kitchen and the slide. My dimensions are 67" high at the posts, 114" wide from outside slide to outside stairs, and 42" deep. With her mattress on there, she has 8" of railing to make sure she doesn't tumble out. Hope that helps.

If you have other questions, let me know.

Trent

Guest (not verified)

Sun, 01/22/2012 - 17:23

Can you post the plans and dimensions for the slide? I love this bed, and I'm planning to start on it for my daughter.

trenthenderson

Sun, 01/22/2012 - 18:24

I honestly don't know how to post plans here. My email is trent henderson at hotmail dot com. If you'll email me the request, I'll put it on a PDF or something and send it to you.

DIY Salvaged Mudroom setup inspired by the Fancy Hall Tree

I was inspired by the fancy hall tree project, but what I made is a total modification/inspired by with salvaged materials, I loved the idea of having wood backing for the mudroom bench and hooks. I had some leftover vintage door knobs from our interior refurbish, so kept them raw metal (sandblasted the metal and clear coated it with polyurethane to keep from rusting). I found some amazing old mahogany bleacher boards from a local high school and a great slab of fir for the bench. I've been building several of Ana's plans and using some of the projects for inspiration when working with salvaged materials ;)

Built from Plan(s)
Estimated Cost
$175
Estimated Time Investment
Weekend Project (10-20 Hours)
Finish Used
used dark walnut stain on the bench, and on the wall/bleacher boards, I stenciled on numbers to look like "seat" numbers, finished all of it with 3 coats of water based polycrylic in semi gloss
Recommended Skill Level
Beginner

Slatted Sofa Table

Submitted by raybwright on Sat, 02/13/2016 - 09:36

I based this design of the simple Sofa Table by Jenna Sue. Instead of a 2x8 across the top, I opted to use 1x4s side by side. This slatted look matched some of the other items in the house and to allowed me to create two hinged sections. These sections allow for easy access to wall plugs and include small notch for the cables to come through.

Estimated Cost
$35
Estimated Time Investment
Weekend Project (10-20 Hours)
Finish Used
Minwax Wodd Finish Dark Walnut Stain with Minwax Clear Satin Polyeurethane
Recommended Skill Level
Beginner

Barn door mirror shadow box

Submitted by Anonymous (not verified) on Tue, 10/01/2019 - 17:58

I built my wife a barn door wall mirror for our anniversary. But then got this crazy idea attach a shadow box to display wedding dress. Project get wedding dress out of closet!!

Estimated Cost
$200
Estimated Time Investment
Day Project (6-9 Hours)
Finish Used
Walnut
Recommended Skill Level
Beginner

Comments

Kids Picnic Table

Submitted by bkb on Thu, 05/25/2023 - 05:27

I made the picnic table for my grandchildren. The plans were great and so easy to follow. The cuts, measurement are perfect. Table is sturdy and came out balanced! I used water based paint. Thanks for the plans!

Built from Plan(s)
Seasonal And Holiday

XL Snack Cabinet

Submitted by Jarrah on Thu, 01/12/2012 - 18:13

I built the Channing Snack cabinet as a Christmas present for my husbands "man cave". It's bigger than the plans outline in order to accommadate the larger "mini-fridge" I bought from Target. He absolutly loves it and it looks like a piece you would get at a real furnature store and not something I built in my barn at night.

Built from Plan(s)
Estimated Cost
75
Estimated Time Investment
Weekend Project (10-20 Hours)
Finish Used
High Gloss Bombay Mahogany
Recommended Skill Level
Intermediate

Comments

lalapizzaparty (not verified)

Sat, 01/14/2012 - 19:12

I love this! So fun. I love that you built this in your barn for your hubs mancave.
That makes you sound pretty cool!

woodtop

Sat, 01/14/2012 - 19:34

Hey..that amazing. I have a brother who own a mini fridge in his room. This will look nice for him to put his mini fridge. It will also look nice if can add a door to it.

Modified Jr. Loft Bed

We loved the idea of the Jr. Loft Bed, but made some modifications to fit our needs.

Modifications:
-I didn't really feel the 2x6 railing was needed, so to cut costs, we used all 2x4s. On the end, I put two 2x4s one on top of the other to keep the mattress from sliding off the ladder side.

-Height was a concern for me as my kids are 4 & 2. So I lowered the overall height by about a foot. 54in is the height. Since we are putting my youngest on the bottom (on the floor) we made sure she had enough head room.

-We wanted this to be STURDY and reversible. So we added bottom supports on both long sides to ensure that the frame wasn't going to move. We also added six 2x4 supports under the mattress on the top. I can climb up there to tuck in sheets with no problem.

-We skipped the stairs & landing. I didn't want my kids to be playing on the bed. So we skipped the stairs and just built a ladder into the frame instead.

This was a fairly easy build. We previously built a HUGE Ana White Table. And I felt like I was kreg jigging for DAYS. This was only a few hours of cutting, sanding, kreg jigging, and a simple put together. Staining took the longest! It's a great bed and we're so excited it's finished!

Estimated Cost
$70
Estimated Time Investment
Day Project (6-9 Hours)
Finish Used
We used Minwax Polyshades. Classic Oak Gloss. 2 coats.
Recommended Skill Level
Beginner

Farmhouse Printers Cabinet

Submitted by Anonymous (not verified) on Tue, 02/16/2016 - 11:29

I've been seeing these gorgeous printer cabinet everywhere. I mean everywhere. I had wanted one for a long time but they looked complicated. I mean, they do, look complicated. 

Finally we bit the bullet and got to working on this. We started at 3:30 on saturday, worked until 6:30 and then worked on it 9 am - 12 pm on sunday. 6 hours and we made this. 

I know it might take some a lot longer, but we build furniture for a living so we might be a bit faster in the building department. 

Husband built, I sanded, stained & varnished.

It is stained in our custom beachwood mix. Head on over to our blog to read the full story.

Built from Plan(s)
Estimated Cost
374.00
Estimated Time Investment
Day Project (6-9 Hours)
Finish Used
We used our custom beachwood stain & matte Polyurethane.
Recommended Skill Level
Beginner

Herringbone Buffet

Submitted by Anonymous (not verified) on Tue, 10/01/2019 - 21:11

We wanted a large buffet for our hall and these plans were perfect. We modified the design to fit our needs, and painted the buffet a wonderful pop color that matched some accents throughout the house.

What really brought the project together was the herringbone top. We used 7 different species of wood sealed with poly and then finished with wax.

Built from Plan(s)
Estimated Cost
295
Estimated Time Investment
Weekend Project (10-20 Hours)
Finish Used
Sealed the painted sides with a clear polyacrylic. Since we used so many different types of wood on the top we decided to let their natural tones shined and just cleaned with mineral spirits and sealed with polyeurethane. We used steel wool and wax to get to the sheen we wanted.
Recommended Skill Level
Beginner

Comments

2 Drawer Nightstand

Submitted by Anonymous (not verified) on Wed, 05/31/2023 - 15:05

Thank you so much for your plan. I made some small changes. I used pine wood for the box sides and dividers, I moved the drawer faces to the outside and used 1/2 inch plywood for the drawer boxes to add some more space. The drawer faces have an inlaid to match my farmhouse bedroom I am currently building. The final product was stained with Minwax Golden Pecan and clear coated with warm semi-gloss.

Comments

Tryde Table

I took the Tryde coffee table plan and made it taller and wider to fit our dining room space! It turned out way better than expected!

Built from Plan(s)
Estimated Cost
$150 ish (CAD)
Estimated Time Investment
Week Long Project (20 Hours or More)
Finish Used
I mixed the meduim and dark brown water based General Stain colours (2 coats) and then used a satin finish poly.
Recommended Skill Level
Beginner

Comments

Mar_co (not verified)

Wed, 05/02/2012 - 15:37

This is beautiful ! how was your experience with spruce? im debating between spruce and pine, but spruce here is so much cheaper... did it split at all?

Crate Christmas Tree

Submitted by MaryMurray on Wed, 12/04/2013 - 11:11

I made all the crates and put them together to make this interesting 'christmas tree'.

Built from Plan(s)
Estimated Time Investment
Weekend Project (10-20 Hours)
Finish Used
golden oak from minwax
Recommended Skill Level
Starter Project

Comments

MaryMurray

Sun, 12/15/2013 - 07:03

I found the best app ever. "Tapeulator" If you are tape measure challenged like me you will love this app. For example: what is 8 3/8 - 6 1/2? It can be hard to figure out...just type it into the tapeulator and get your answer, it also shows the location of the answer on the measuring tape. I love it!
My husband gets so aggravated when I measure something and say it's 4 and 2 lines...lol. I really do know what the little lines are, it is just quicker for me. haha

Bed for my teen princess

Submitted by Anonymous (not verified) on Wed, 10/02/2019 - 10:27

I built this bed for my daughters new “teen” room!! She loves it and I loved the cost and look if it ;)...

Built from Plan(s)
Estimated Cost
$130
Estimated Time Investment
Day Project (6-9 Hours)
Finish Used
Stain
Recommended Skill Level
Intermediate

Comments

Little Girl's Take and Chairs

Submitted by rkmau on Tue, 06/06/2023 - 16:16

Made this table and chairs for my granddaughter's 3rd birthday. I used folding brackets on the legs of the table for easy storage. My granddaughter picked the colors and I can't wait for her to see it.

Comments

Solid maple IKEA inspired bookcase

Submitted by ccbuilder on Tue, 01/24/2012 - 08:38

I made this bookcase out of solid hard maple lumber. The project was more expensive because I chose to use this wood. It also took more time because I had to do a lot of sanding in order to finish it with shellac and paste wax, but I think it was worth it. I altered the plans and made the bookcase 5' tall instead of 6' as it would have been a little large for the room I put it in otherwise. I used a kreg jig to create pocket holes on the undersides of the shelves so that I did not have to drill and make holes on the sides of the bookcase. I also used L and T brackets on the back to hold the whole thing together.

Built from Plan(s)
Estimated Cost
$115
Estimated Time Investment
Week Long Project (20 Hours or More)
Finish Used
Shellac and paste wax. The key was to sand extensively before finishing, as the lumber I bought was very rough. I sanded to 400 grit which may have been excessive, but it did create a nice finish. In between coats of shellac I also sanded. I finished it all up by adding a coat of paste wax. I liked this finish as it was much more natural and less hazardous than many other finishes.
Recommended Skill Level
Beginner

Comments

claydowling

Tue, 01/24/2012 - 10:12

I really like this. I made a similar set a while back out of pine, because I needed a lot of book storage in a hurry, but nothing near this nice.

How is the side to side stability? I found a need to put bracing along the back, which also served to keep my books from falling off when the cats push up against them.

ccbuilder

Tue, 01/24/2012 - 10:46

The side to side stability is pretty good. It'll rock a little bit, but it's really quite sturdy. The L and T brackets in the back helped significantly with the stability.