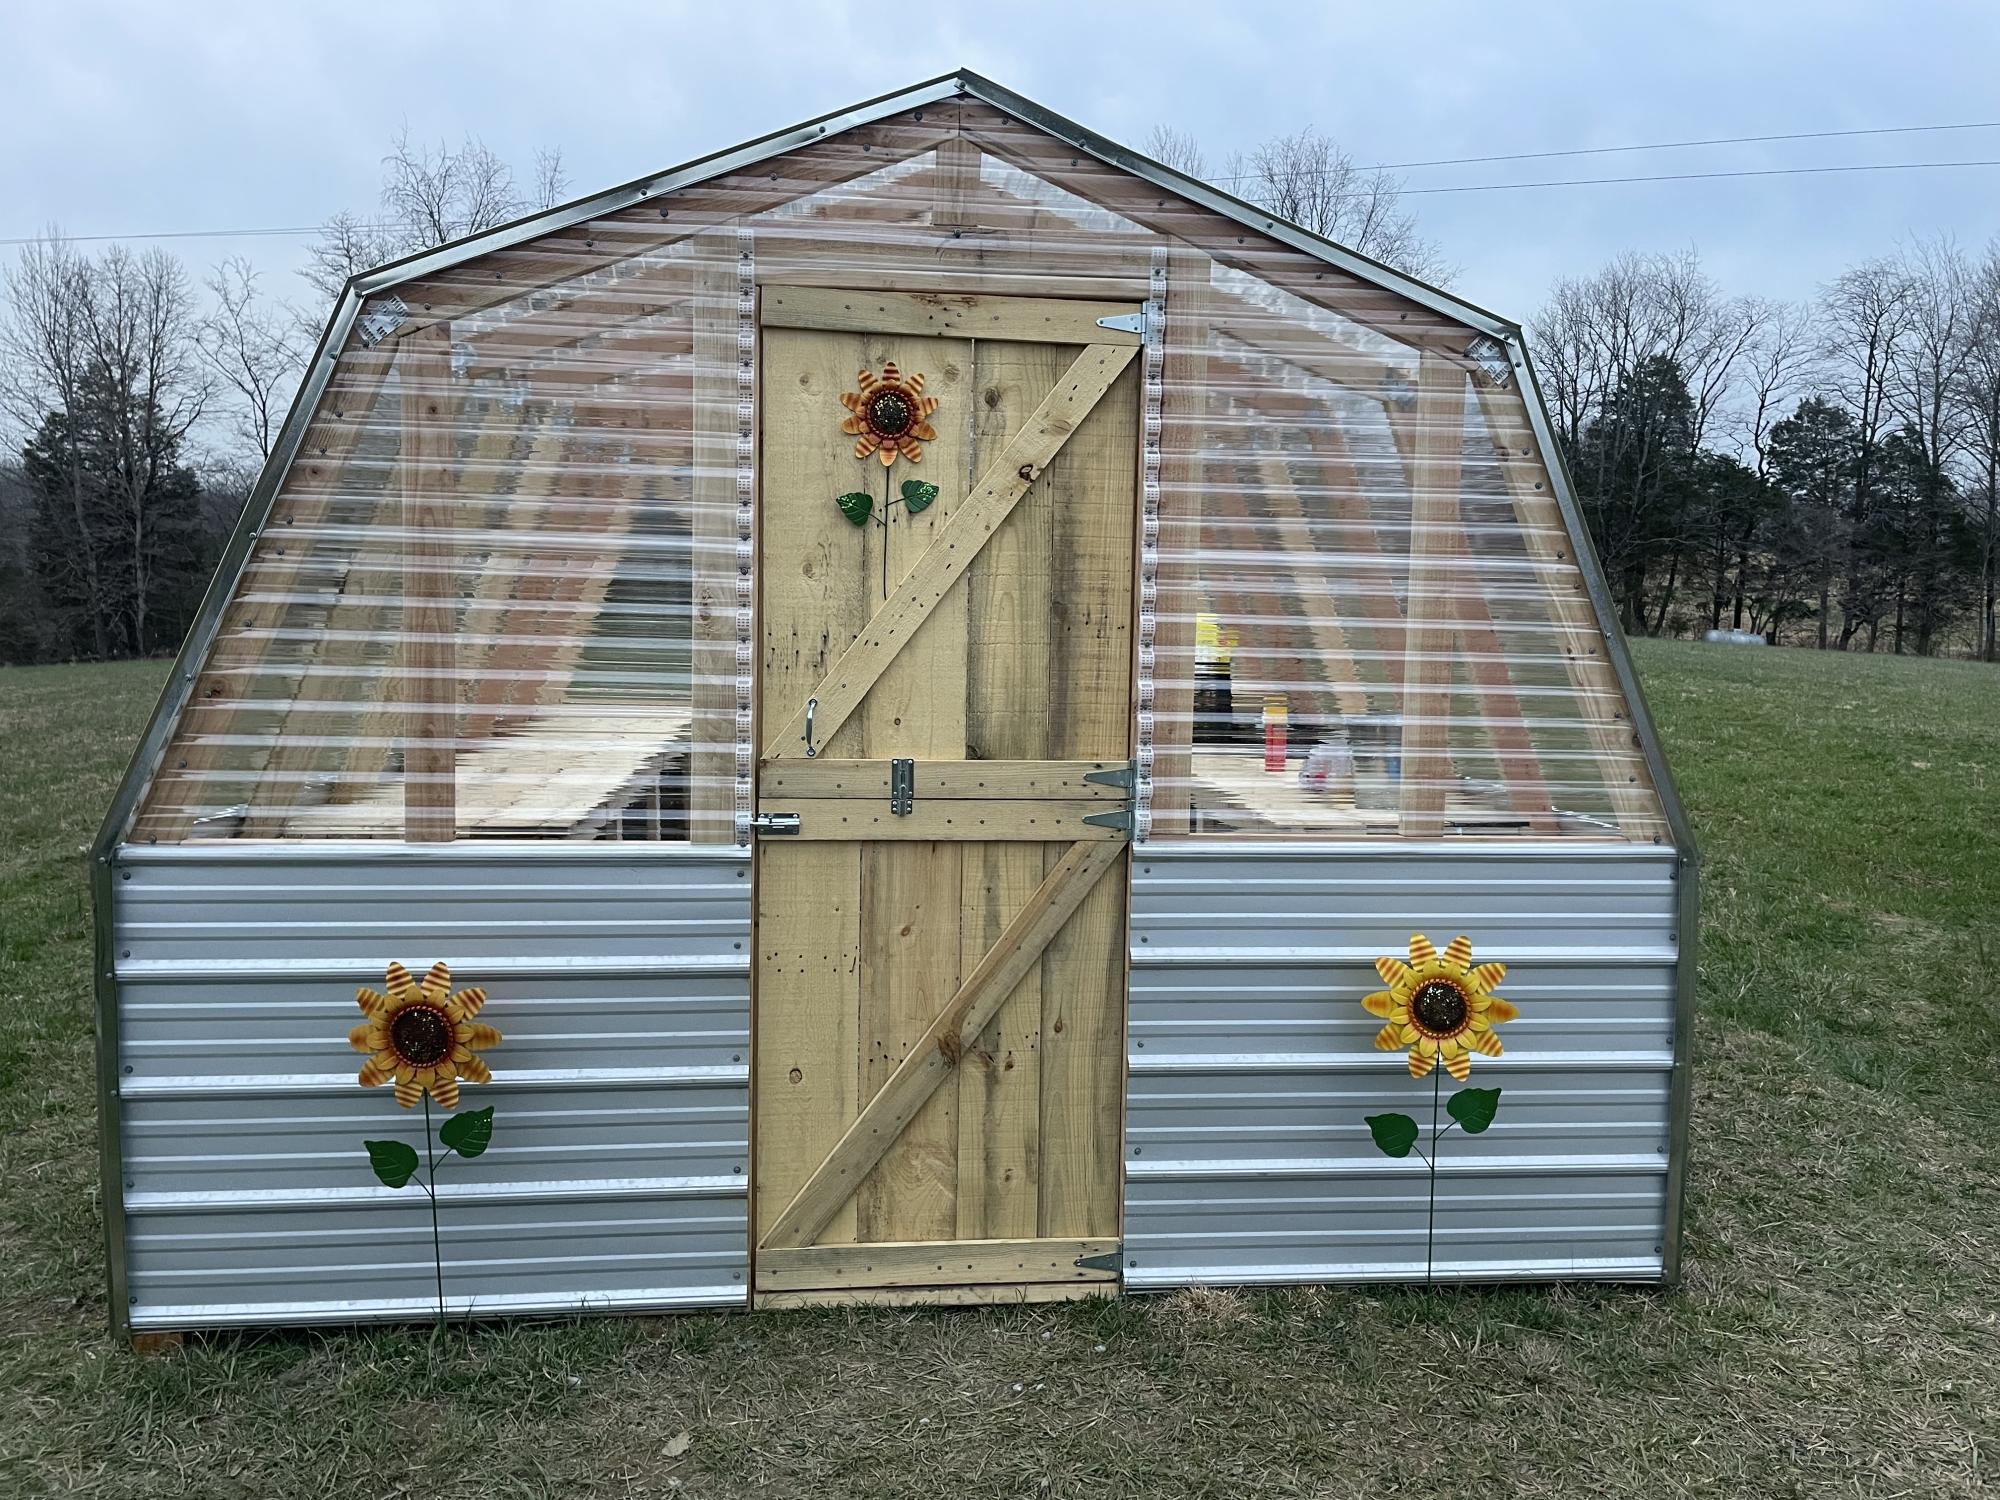
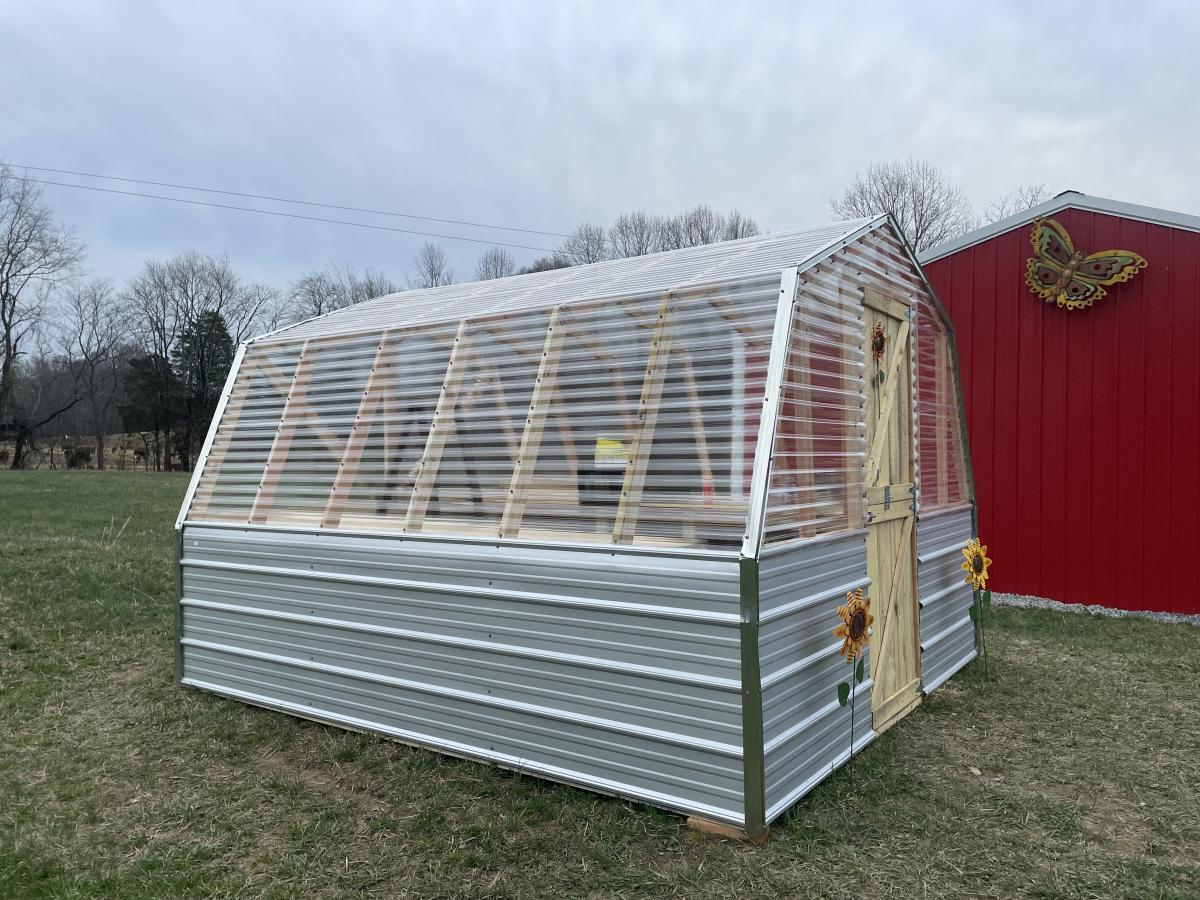
Community Brag Posts

Green House

Submitted by Anonymous (not verified) on Thu, 07/13/2017 - 08:31

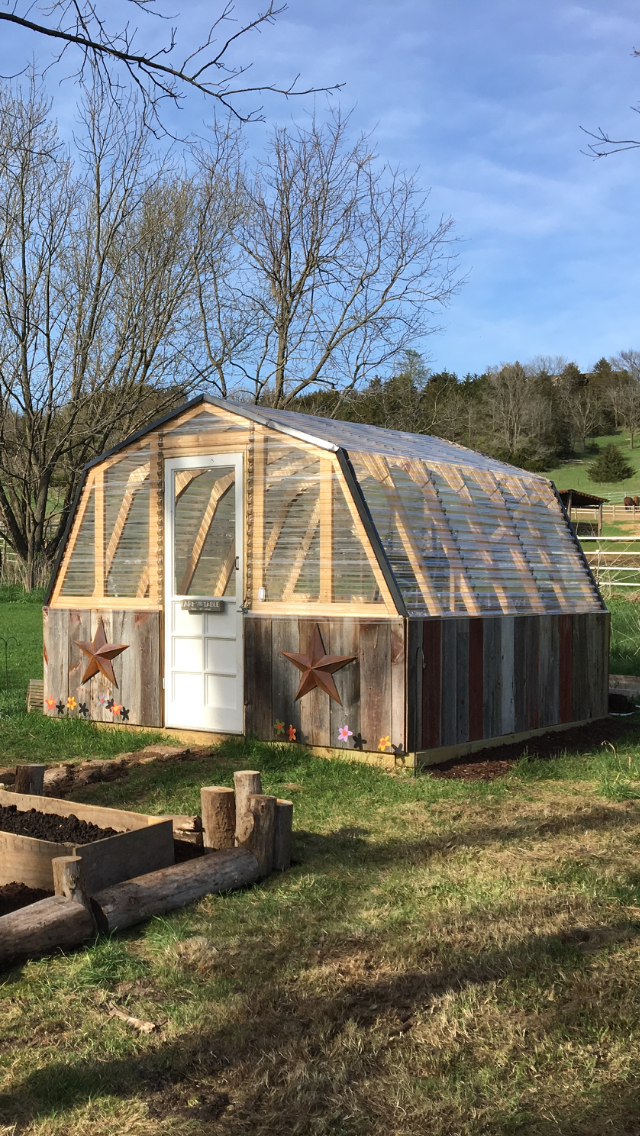
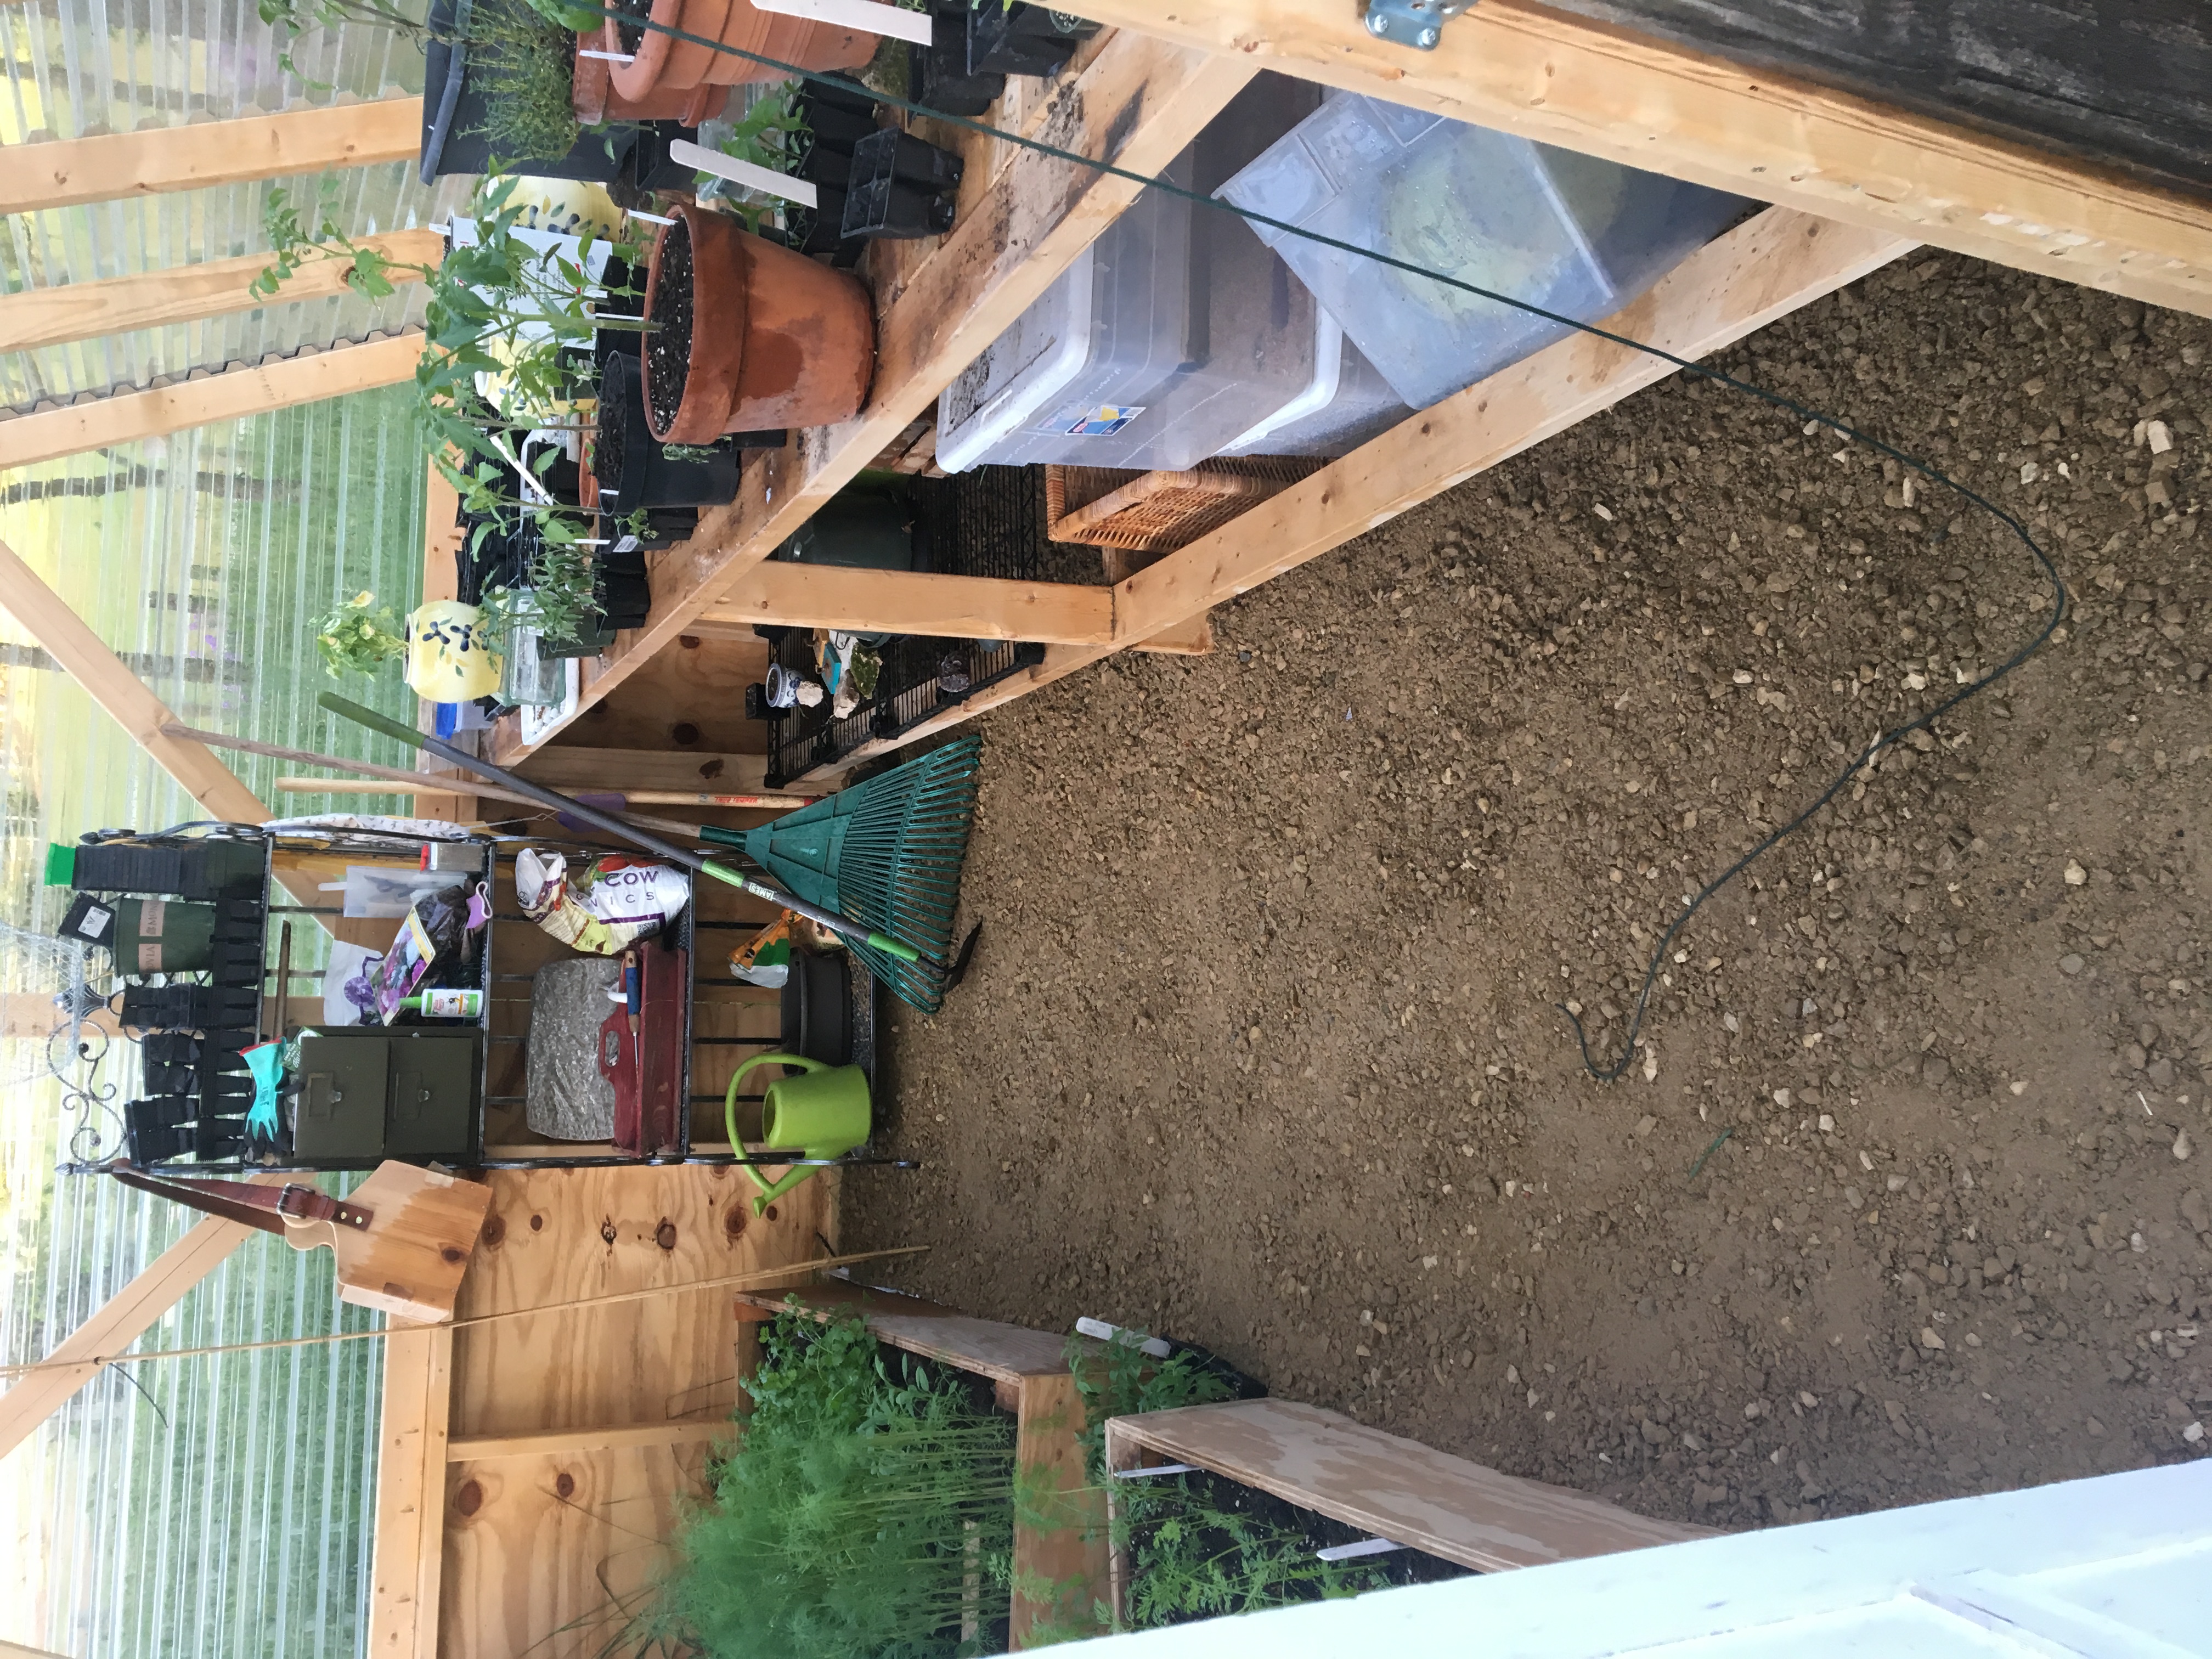
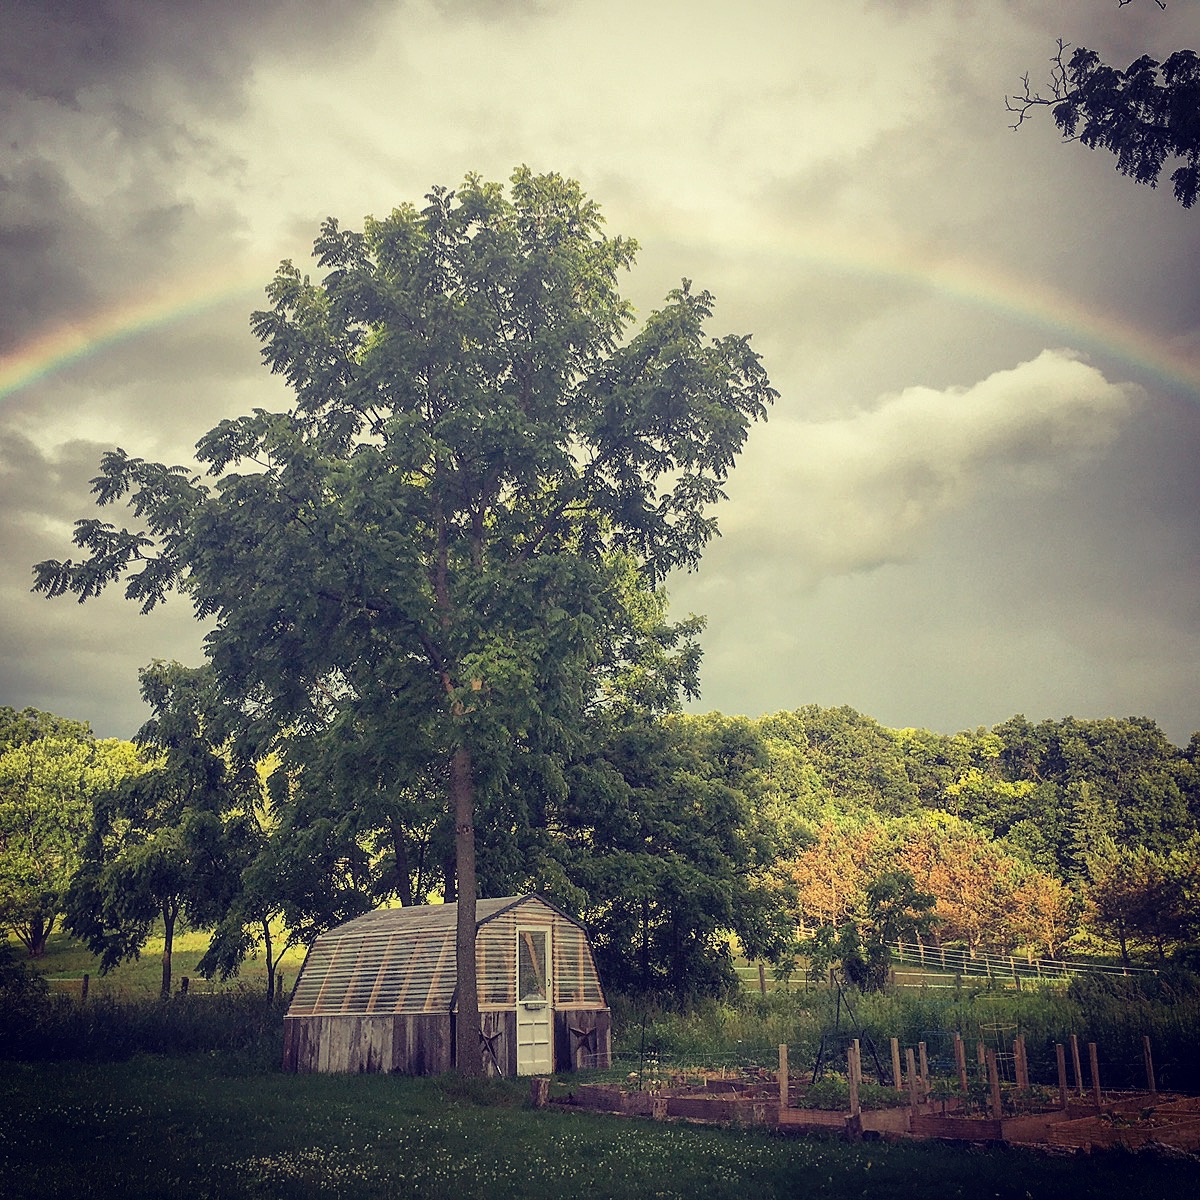
I built this amazing green house following your plans!  My wife and I moved our family from the city to an amazing 5 acre homestead out in the country here in Wisconsin. We are super happy that we will be able to keep our new garden going longer!  Thanks so much for the plans!

Built from Plan(s)
Estimated Cost
We spent about $800 for the frame and plastic panels. Then we spent another $250 for the reclaimed barnwood siding. We found the door at a reclamation site for $25.
Estimated Time Investment
Week Long Project (20 Hours or More)
Finish Used
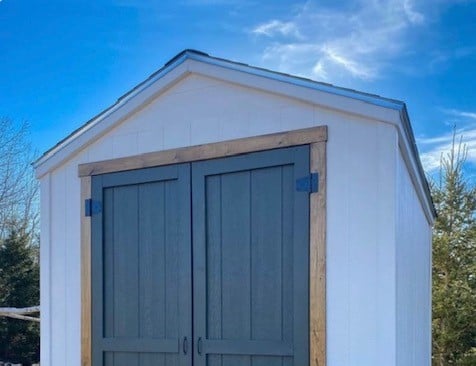
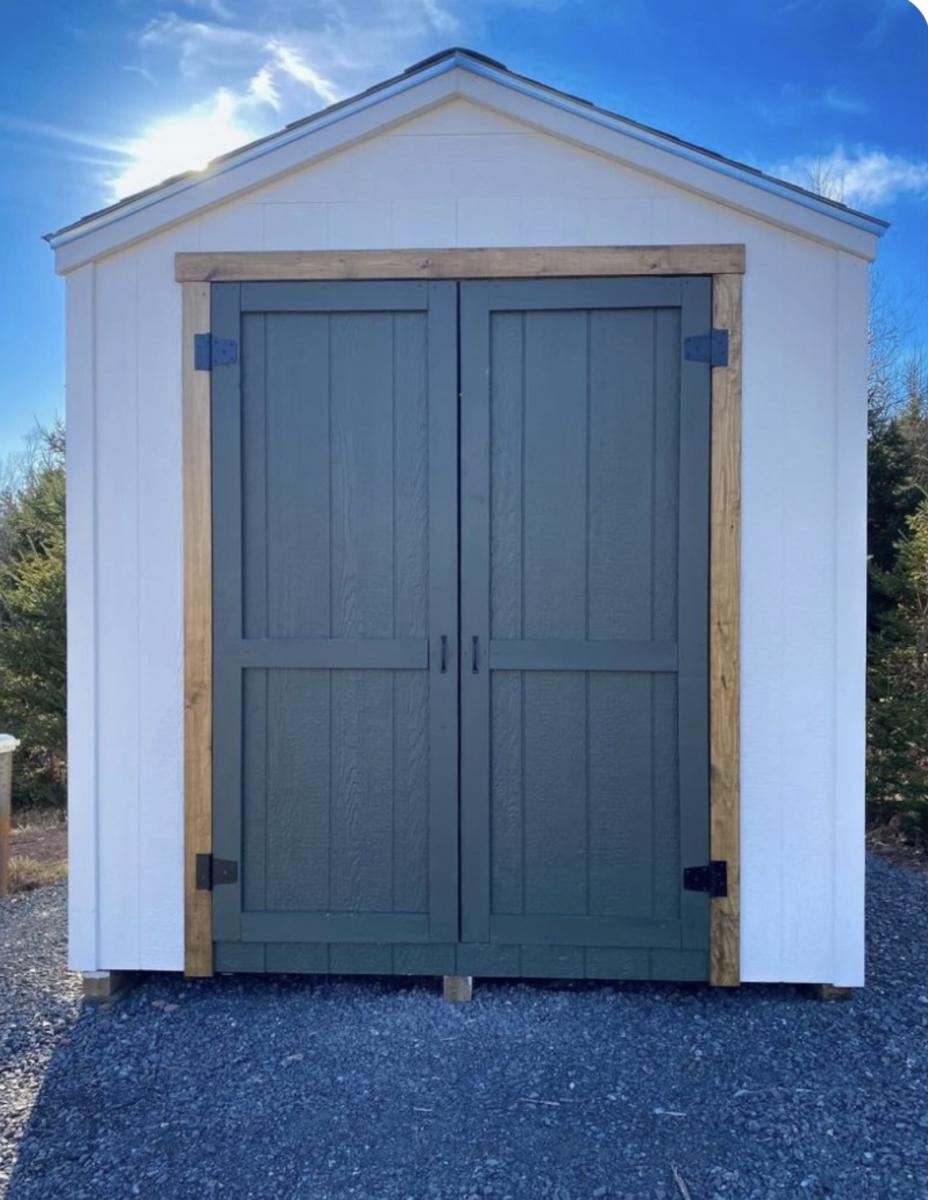
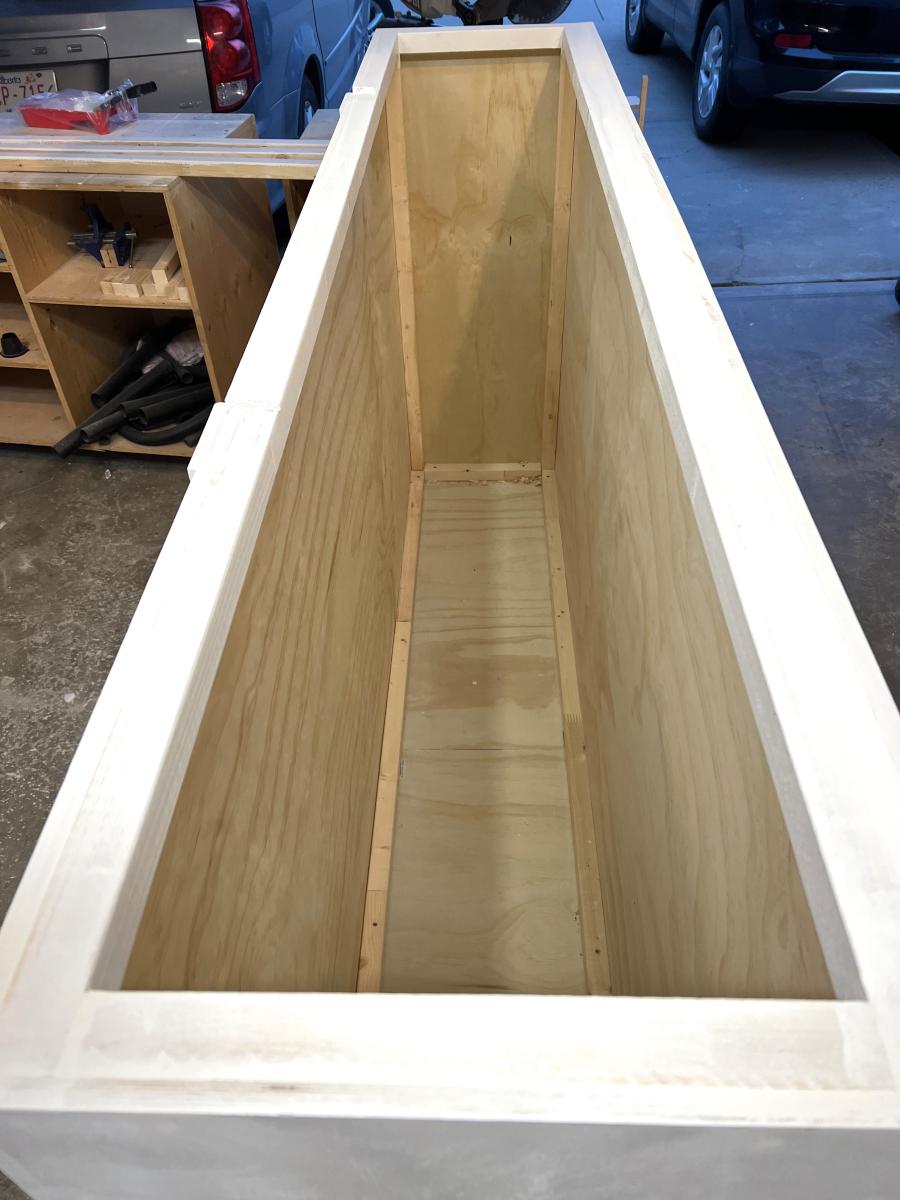
I followed Ana's plan pretty closely. This was the first building I ever built from scratch. It was a little difficult to get the foundation level. But I figured it out. I used pressure treated 6x6s on top of gravel. I was able to screw the actual walls down to the 6x6s.

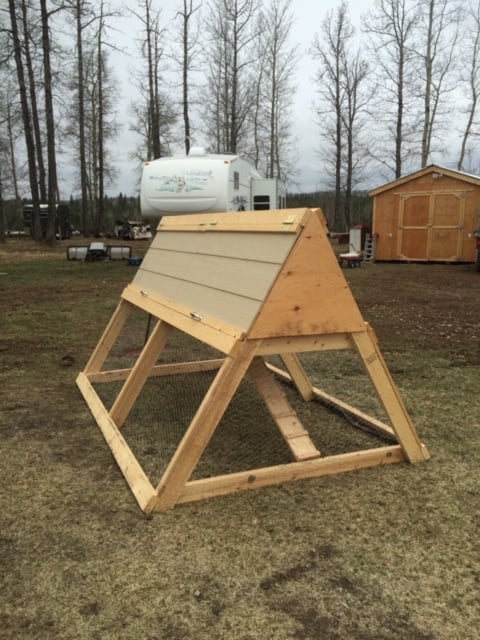
I'm actually building a second building from these plans to use as a chicken coop. Once it's done I will post photos.
Recommended Skill Level
Intermediate

Comments

Seasonal And Holiday

Farmhouse Toy Box

Submitted by frmoody on Thu, 08/18/2022 - 15:01

My second build from Ana's toy box plan. I had my son use his CNC machine to carve boy's name into the front. Depth of the letters is about 0.25". Looks really good.

Built from Plan(s)

Comments

8x10 Shed - Built by Julia Eliopoulos

I made your 8x10 shed! Turned out so well, thank you for the amazing plans.

Julia Eliopoulos

Built from Plan(s)

Comments

Small Cedar Fence Picket Storage Shed

Submitted by Pembat on Sun, 10/06/2013 - 20:37

Built this in a weekend, took about 1.5 days. I ended us using 2x4's instead of 2x2's, I think it resulted in a much stronger frame. I also built a base for it to sit on. I got pre-stained cedar fence boards, and overlapped them 1" instead of a 1/2". Pretty easy project, I ended up siding the back on the ground, installing it, and then adding the side walls without the siding (just the framing), and then sided them in place. The doors work perfectly. I took my total inside dimension between walls, made sure the opening was square, and then divided that by two to get the width of each door. I then took another 1/4" off that, so each door had an additional 1/8" gap, it worked perfectly. When I set the doors, I put them on a piece of roofing closed as I screwed in the hinges, and then opened them and removed the roofing. I opted to run the door siding horizontal to use up a bunch of waste wood. I'm happy with the outcome. I also found some 6" self starting lag bolts and lagged through the back of the shed into studs (through the siding) into the garage behind it.

Estimated Time Investment
Weekend Project (10-20 Hours)
Recommended Skill Level
Intermediate

DIY Greenhouse

Submitted by Anonymous (not verified) on Fri, 03/03/2023 - 16:02

Thank you so much for the plans. We enjoyed building it. We love it!!!

Built from Plan(s)

Comments

Storage Headboard

Submitted by Anonymous (not verified) on Thu, 07/20/2023 - 15:16

This project changed 3 times from the day i started.
It was supposed to be a simple vertical box to hide 2 twin mattresses
Then she decided to do a horizontal box (chest).
Then she decided to put it behind her be.
By the end it became a headboard storage and the design is Modern Geo Headboard

by Ana White

Built from Plan(s)

Garage Shelves + Work Bench

I used Ana’s plans for the garage shelves, but modified them to include a work bench. A lot of you tubers have done this, built a combination work bench and shelving, but I built nearly everything according to Ana’s plans. 12 feet long, 24 inches deep. I got some LED lights (two 1600 lumen strip lights) from menards that really brighten up my entire garage and make the work bench more useful. The one thing I really wanted was to not have a supporting pillar on the work bench to keep it open, and I loved how it turned out. I went for 3/4 plywood, mostly to have a stronger work surface, and I’m glad I did. I have since added a supporting 2x6 off of the study to support the top shelf above the bench and its strong enough to do pull-ups off of, and I have reinforced the support leg under the bench with a cross bar. Thanks for the great plans!!

Estimated Cost
~$200 (lumber prices have gone up recently due to supply issues with covid)
Estimated Time Investment
Weekend Project (10-20 Hours)
Recommended Skill Level
Starter Project

Comments

Rustic X beach beverage center

Submitted by one wolf on Tue, 09/08/2015 - 06:52

We used old dock wood for the surface of our X table for a nice beach house beverage center (sand bar!).  We adjusted the size to fit our space (a little longer and wider) and used additional studs for the shelves instead of 1" shelving, glued and PH/PS together.  To cut the X pieces I just held the 1x1 on the end of the table where it goes and marked the lines. Then I clamped a guide board at the correct angle on the table saw to make all the cuts, starting a bit long and shaving off until it just fit.  


With all the pocket holes and screws I wouldn't consider this a beginner project. Some additional steps and pictures in your description would help also.  End result is really nice.


Built from Plan(s)
Estimated Cost
$50
Estimated Time Investment
Weekend Project (10-20 Hours)
Finish Used
Patina wood from an old dock for the surface and the base is painted flat gray.
Recommended Skill Level
Intermediate

Comments

A Frame Chicken Coop

I built this chicken coop a few years ago for my cousin. I was happy with the plans, and the ease of the build, and she was happy at how easy it was to move. **This picture does not show the wheels installed.

Built from Plan(s)
Estimated Cost
$150 CAD
Estimated Time Investment
Day Project (6-9 Hours)
Recommended Skill Level
Intermediate

Doggie Daybed

Submitted by MurdaRae on Wed, 06/06/2012 - 10:16

I've thought for a while about building a bed for our dogs, but wasn't sure where to start. We had an extra crib mattress so I set out to find a toddler bed that would work. I decided the Lydia Toddler Bed plan would work best. It doesn't look anything like it, but it was a great starting point.

First, I got rid of the canopy and the decorative side pannels. I also raised the bed 12 inches. (The hope is to add a rug on the floor underneath as sort of a "bottom bunk") The lumber store didn't have 2x2s so I used 2x3s for the legs. I also only used two 1x6s at the head and foot of the bed. They are seperated by 1" because when I got home, I realized they were actually 1x5 (RUDE).

All in all, it turned out exactly as I had hoped and the dogs love it! GOODBYE stinky dogbeds!

**Photo 1: Just finished building--the slats weren't screwed down yet.
**Photo 2: Deacon is testing out his new digs! See the stinky dogbed underneath?YUK!
**Photo 3: Dog Bed Completed! Mac & Deacon love it!

Built from Plan(s)
Estimated Cost
$38
Estimated Time Investment
Day Project (6-9 Hours)
Recommended Skill Level
Beginner

Comments

King Size Farmhouse Bed with Dog Stairs and Storage

Submitted by jkjackson on Sun, 05/30/2021 - 15:21

We have a frosty faced blind girl and an aging tri-pawed that we wanted to be able to continue snuggling with us so we adapted the Farmhouse Bed with Storage to make it a king size. We made the drawer boxes deeper which allowed us to get rid of our dresser to create more space in our room. And we added a flight of stairs for the pups.

Estimated Time Investment
Weekend Project (10-20 Hours)
Finish Used
General Finishes White Wash with Arm R Seal Oil Based Satin Finish top coat. (If you want the white wash to be more white and less amber, use water based.)
Recommended Skill Level
Intermediate

Comments

Modern Farmhouse Bed Twin version

I built this bed for my (adult) son. The instructions were easy to follow. I left off the 2 x 2" cleats on the headboard to make it easier to attach the tongue and groove headboard pieces with pocket hole screws (I did lay two 2 x 2's underneath the tongue & groove pieces for spacing as I attached the boards). Since I made this as a platform bed I added a 6th tongue & groove headboard piece and the optional center cleat underneath. I used the suggested Varathane Weathered Wood Accelerator for the finish; mine came out much more grey than the bed pictured with the plans and my son liked the finish (I did too). Finding non-pressure treated 4x4's and semi-straight 2x4's was the hardest part. I used pine wood and bought all the lumber for about $175 (purchased at peak COVID lumber prices). This bed is definitely solid and I'm looking forward to making the matching nightstand! Thank you Ana for the bed plans!

Built from Plan(s)

Comments

Swing and arbor

Weekend swing project

Recommended Skill Level
Beginner

Comments

Ana White

Tue, 05/07/2019 - 10:42

We don't currently have this plan available, although I'd be happy to draw it with the author's permission.

I have linked a few plans above that could be used to create this plan.  Just make sure you bury the arbor uprights underground on concrete pier posts or similar (like building a fence)

Fireman's Dog Bed

Submitted by FireWolf13 on Sat, 07/06/2013 - 12:06

I needed a heavy duty dog bed for my puppy after he destroyed two regular dog beds. I used 4x4s, 2x4s and fire hose. He has not been able to destroy this one and he loves it.

Recommended Skill Level
Beginner

Comments

SoCaliforniaMel

Mon, 07/08/2013 - 15:48

I have a pit bull. Shes the sweetest thing but loves to chew up her own beds. She wont chew the shihtzus bed or the cats beds just her own. I'd like to see her try this one out.
;) Now if I could figure out a way to get my dad to give up one of his fire hoses. hehe
Great job, great idea
~Melody

dr2112

Sun, 02/01/2015 - 10:41

How would I go about getting a copy of the plans for this?

Laundry Dresser

Submitted by biffnderf on Sat, 07/02/2011 - 23:08

We had a very limited area for these to fit, so my hubby had to change the dimensions to fit these square baskets. We needed enough spots for our family of 10! I LOVE THEM, thanks; Ana!

Built from Plan(s)
Estimated Cost
$50 each
Estimated Time Investment
Afternoon Project (3-6 Hours)
Finish Used
Water based paint
Recommended Skill Level
Starter Project

Comments

Guest (not verified)

Wed, 01/11/2012 - 14:53

We are going to have to turn the baskets the same way due to the space in out laundry room. Do you happen to remember the dimensions of them? Thanks.

Guest (not verified)

Thu, 02/09/2012 - 07:08

Do you have the dimensions for the square baskets? These would work much better in my home.

Guest (not verified)

Tue, 02/14/2012 - 16:42

We did something similar when our family was 8 (6 foster children). We bought 4 baskets (2 people per room) and then just had them on regular shelves. I LOVE the look of these! Unfortunately baskets give out over time and I can't ever seem to find baskets that once again are the same size as previous baskets. Did you order the baskets on-line someplace that you can consistenly get the same size for when the baskets wear out?

Guest (not verified)

Wed, 02/22/2012 - 12:35

I have all the same laundry baskets that I bought at wal mart for like 3 or 4 bucks a piece. I would think that just meausring out the size according to the laundry baskets would work out fine! they have never stopped selling the ones that I buy, i find them at every wal mart I go to

Lindy Holcomb (not verified)

Fri, 03/02/2012 - 06:05

I would love the Dimensions for this shelf.

Lindy Holcomb (not verified)

Fri, 03/02/2012 - 06:19

I would love the Dimensions on this shelf.

Guest (not verified)

Thu, 03/08/2012 - 05:13

Seriously? $50 for these plans. Get real. Fine woodworking plans don't cost this much. Take some wood, make a box, and put slats in it to fit the baskets. The entire set wouldn't cost $50!

davidmac (not verified)

Thu, 03/08/2012 - 06:18

The plans are free. The build costs $50. See the plans on the link above the cost.

christine (not verified)

Sat, 03/17/2012 - 20:54

once again can anyone please give the measurements for this square basket design and the basket model number as well. i am very challenged when it comes to building things, but with the idea of home depot doing the cutting i think i could manage if i had the measurements. i need the square size to work for my space though. thanks in advance.

Guest (not verified)

Sun, 04/01/2012 - 09:18

I have tried clicking on the link above the cost to get the Plans...however it brings me back to the ORIGINAL Plan rather than YOUR plan (skinnier and taller)...Im sorry if I am being dense but I would really love to get the dimensions of YOUR plan but am having trouble accessing them?? Help please!!

Guest (not verified)

Fri, 04/13/2012 - 23:27

Where it says PS there is a link to the other dimensions.

Cari Downing (not verified)

Fri, 04/20/2012 - 14:05

If you use the large wire baskets made by elfa they would not break like the plastic. The initial investment would be more but would save money over time.

Sonya Chapin

Tue, 07/24/2012 - 04:34

Easy and awesome! My teenage children and I made these over the week-end! Super easy and great looking! Our first project was the laundry pedestal and these are a great compliment. We let Home Depot cut the wood due to time restraints and assembly was a snap! Thanks for the great family projects. My husband passed away in April and these projects have really helped us in the healing process (excellent for constructive bonding time).! Thanks again

sectional and chairs!

Submitted by Anonymous (not verified) on Mon, 04/03/2023 - 13:57

my husband and I used your plans for the sectional, end tables and chairs I made the pillows thanks so much for the designs we love them

Comments

Beginner Farm Table & Benches

This was my first time building anything! The plans were so easy to follow along! Once I master some things like this, I can work on fine tuning things a bit more so I can build some more intricate plans. Thanks so much for your website! My kids are loving the BBQ's outside at the table!

Estimated Time Investment
Afternoon Project (3-6 Hours)
Finish Used
I haven't added a finish yet but will be soon.
Recommended Skill Level
Starter Project

Comments

Beryl

Tue, 06/02/2020 - 15:09

re the farm table. your cut list calls for 8 2 x 4 at 28 1/2 inches but the plan actually only needs 4 of them. The pics do not show you doubling the 2 x 4s for legs. Am I missing something.

Mudroom Bench

Submitted by BeingHome on Sat, 02/23/2013 - 22:26

With much needed seating in the mudroom, an unused space (nook) was used to build a mudroom bench and shelf. No plans were used. I basically looked on-line and mentally drew up an idea of how I wanted the final product to look.  


There were some setbacks such as not like the knock down textured walls (after partially painting the bench). I ended up covering the textured walls with hardboard and repainted.


A bench cushion was made for added comfort and style.


Complete tutorial for the bench is here and the bench cushion tutorial is here.


Thank you.


Julie

Estimated Time Investment
Weekend Project (10-20 Hours)
Finish Used
Behr Ultra (paint and primer in one) in ultra white finish.
Recommended Skill Level
Beginner

Comments

Cleverly6

Thu, 05/16/2013 - 13:48

Thank you so much for the idea and plan. I used it to turn an extra laundry room that we have off of our garage into a much needed mudroom. The most challenging project I have ever done before is hanging blinds. But with your help and some from the Home Depot employees, I did it! Our family is more than happy with it. Thanks!!!

BeingHome

Sun, 08/25/2013 - 22:28

Thank YOU so much! I would love to see a picture of your new mudroom area. :) I am happy the plans helped and of course Home Depot. ;)

Sorry for my delayed response. :(

BeingHome

Sun, 08/25/2013 - 22:28

Thank YOU so much! I would love to see a picture of your new mudroom area. :) I am happy the plans helped and of course Home Depot. ;)

Sorry for my delayed response. :(

Back